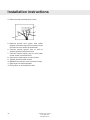
1
Dear Customer,
Thank you for choosing this quality product from ASKO. We hope it will meet your
expectations and fulfill your needs for many years to come. Scandinavian design
combines clean lines, everyday functionality, and high quality. These are key
characteristics of all our products and the reason they are greatly appreciated
throughout the world.
To ensure that you get the most out of your new machine, we recommend that
you read the operating instructions before using the machine. The operating
instructions also contain information on how to avoid damaging the environment.
Operating Instructions
Tumble dryer
ASKO T744C W
WARNING: Read the instructions before using the machine.
Contents
Before using your machine for the
first time 3
Important safety instructions Grounding instructions
Packing material
Disposal
4
5
5
5
Child safety General
Description of the tumble dryer Advice and tips before you tumble dry Materials that can be tumble dried
Materials that should not be tumble
dried
Static electricity
Operating instructions Sort your fabrics
Select the program
Selecting Options
Press the Start button
Drying program finished
Care and maintenance instructions Cleaning the lint filter
Cleaning the outside of the machine
Cleaning the condenser
Troubleshooting The machine will not start
The machine loses all power during
a program
Drying takes too long
Error messages
Technical information Technical data
Service and guarantee Before contacting the Customer Care
Center
2
6
6
Installation instructions Positioning the tumble dryer
Adjusting the feet
Built-in
Electrical installation
19
19
20
20
22
Quick guide 30
Reversing the door Follow these instructions:
7
8
8
8
8
9
9
10
12
12
12
13
13
13
14
15
15
15
15
15
16
16
17
18
Customer Care Center
1-800-898-1879
www.askona.com
25
26
Before using your machine for the first time
Do you need this Use&Care Guide in Spanish? Log on to www.askona.com/customer-care to download.
¿Necesita esta Instrucciones de uso y cuidado en español? Entre en www.askona.com/customer-care
y descárguesela.
Laundry labels
Certain materials are not suitable for tumble
drying. Always check and follow the instructions
on each item's laundry label. You can find more
information in the Advice and tips before you
tumble dry chapter.
NOTE!
When starting the tumble dryer for the first time
or after a long period without use, you may hear
a slight thumping noise. This noise is completely
normal and will disappear after a few loads.
Customer Care Center
1-800-898-1879
www.askona.com
3
Important safety instructions
SAVE THESE INSTRUCTIONS FOR
FUTURE REFERENCE
WARNING!
WARNING - To reduce the risk of fire, electric
shock, or injury to persons when using your
appliance, follow basic precautions, including
the following:
• Read all instructions before using the
appliance.
• Do not wash or dry articles that have been
previously cleaned in, washed in, soaked in, or
spotted with gasoline, dry-cleaning solvents,
cooking oils, other flammable or explosive
substances as they give off vapors that could
ignite or explode.
• Do not allow children to play on or in the
appliance. Children should be closely
supervised when near the appliance.
• Before the appliance is removed from service
or discarded, remove the door to the drying
compartment.
• Do not reach into the appliance if the drum is
moving.
• Do not install or store this appliance where it
will be exposed to the weather.
• Do not tamper with controls.
• Do not attempt to repair or replace any part of
the appliance or perform any servicing unless
specifically recommended in this guide.
• Do not use fabric softeners or dryer sheets
unless the manufacturer gives written
assurance that the product will not damage a
tumble dryer.
• Do not heat dry items containing vinyl, plastic,
foam rubber or similarly textured rubberlike
materials, fiberglass, or wool unless the label
specifies “washable”.
4
• Clean the lint filter before or after each load.
• Keep the area around the exhaust opening
and adjacent surrounding areas free from the
accumulation of lint, dust and dirt.
• The interior of the machine should be cleaned
periodically by an authorized ASKO service
agent.
• Do not place items exposed to cooking oils in
your dryer. Items contaminated with cooking
oils may contribute to a chemical reaction that
could cause a load to catch fire.
• Electrical installation, if required, must be
done by a licensed electrician.
• Do not operate appliance while away from
the home.
• Do not heat dry items that have been drycleaned.
• The dryer is made and marked to facilitate
recycling. When it is no longer useful, contact
your local refuse collection service for advice
on how to properly dispose of the dryer for
purposes of recycling.
• Damaged power cables should only be
replaced by a certified professional.
• Provide sufficient ventilation, otherwise smoke
from open fires or fumes from equipment
burning other fuels can be drawn into the
room.
CAUTION!
During the program, the back of the dryer will get
very hot. Let the machine cool completely before
touching the back.
WARNING!
This appliance must be properly grounded.
Customer Care Center
1-800-898-1879
www.askona.com
Important safety instructions
Grounding instructions
A) Grounding instructions for a
grounded, cord-connected appliance
In the event of malfunction or breakdown,
grounding will reduce the risk of electric shock
by providing a path of least resistance for electric
current. This appliance (Canadian market only)
is equipped with a cord having an equipmentgrounding conductor and a grounding plug.
The plug must be plugged into an appropriate
outlet that is properly installed and grounded in
accordance with all local codes and ordinances.
WARNING!
Improper connection of the equipmentgrounding conductor can result in a risk of
electric shock. Check with a qualified electrician
or service representative or personnel if you are
in doubt as to whether the appliance is properly
grounded. Do not modify the plug provided with
the appliance (Canadian market only). If it will not
fit the outlet, have a proper outlet installed by a
qualified electrician.
To reduce the risk of fire, this appliance must be
exhausted outdoors or the equivalent. Do not
exhaust into a chimney, wall, ceiling or concealed
space in a building.
B) Grounding instructions for a
permanently connected appliance:
This appliance must be connected to a
grounded metal, permanent wiring system, or
an equipment-grounding conductor must be run
with the circuit conductors and connected to the
equipment-grounding terminal or lead on the
appliance.
NOTE!
This manual does not cover every possible
condition and situation that may occur. Use
common sense and caution when installing,
operating, and maintaining any appliance.
Installation
See the section Installation instructions.
Packing material
Please sort waste materials in accordance with
local guidelines.
Disposal
This machine is manufactured and labeled for
recycling. In order to prevent personal injury, the
machine must be made inoperable after deciding
to take it out of service. Contact your municipality
for information about where and how your
machine can be recycled correctly.
Customer Care Center
1-800-898-1879
www.askona.com
5
Child safety
General
WARNING!
Do not allow children to play with
the tumble dryer.
• If the door is opened when a program is
running, the garments may be very hot, with a
risk of burn injuries.
• The tumble dryer does not start automatically
when the door is closed (if a child pulls the
door shut from the inside, for example).
6
Customer Care Center
1-800-898-1879
www.askona.com
Description of the tumble dryer
1
2
3
4
5
6
1.
2.
3.
Main power switch
Panel
Serial number tag and rating plate
4.
5.
6.
Customer Care Center
1-800-898-1879
www.askona.com
Lint filter
Outer door
Condenser
7
Advice and tips before you tumble dry
Here are some tips that may help you before you
begin tumble drying.
Static electricity
Items to be tumble dried should be spun at 1000
rpm or faster. Higher spin speeds save energy
and reduce drying time.
To reduce the risk of static electricity in the
laundry after tumble drying, you can:
• Use fabric softener when washing.
• Wait five minutes after the drying program
ends before opening the door and removing
the laundry from the dryer.
Materials that can be tumble dried
NOTE!
Have the clothes been spun?
This symbol means that the material is
suitable for tumble drying. Fabrics best suited
to tumble drying are cotton fabrics, terry cloth,
and synthetic fibers. Garments will be softer and
lighter when tumbled than when hung out to dry.
NOTE!
The tumble dryer does not cause any significant
wear on fabrics. The lint trapped in the lint filter
consists of dust and fiber residues formed when
the items are used.
You can stop the tumble dryer by pressing the
Stop button for three seconds or by opening the
door. In both cases the program is stopped and
starts from the beginning if restarted.
If you do not want to restart the program,
immediately remove all laundry and spread it out
to allow the heat to dissipate.
Materials that should not be
tumble dried
This symbol means that the material is not
suitable for tumble drying. Certain materials may
melt or become a fire hazard if exposed to heat
and others can lose their shape or shrink.
And do not tumble dry
• materials labeled "Do not dry near heat".
• garments that have been dry-cleaned at
home.
• plastic foam.
• fiberglass material.
• wool must not be tumble dried due to the risk
of piling.
8
Customer Care Center
1-800-898-1879
www.askona.com
Operating instructions
WARNING!
To reduce the risk of electric shock or injury to
persons, read the "Important Safety Instructions"
section before operating this appliance.
Below are step-by-step instructions to help you
achieve the best possible tumble drying results.
1
Sort your fabrics
You will achieve the most uniform drying
results if the items are made of the
same type of material. Close zippers and fasten
buttons or belts; sort the items and adjust load
and temperature.
2
3
Press the main power switch
until the display lights.
Open the door, load the
items, and then close the
door
Customer Care Center
1-800-898-1879
www.askona.com
9
Operating instructions
4
Select the program
Program selector
Options buttons
Start Stop
Main power switch
Select a program by turning the program selector. An LED lights next to the selected program. Use the
option buttons to select any options.
Guidelines as to what specific programs
can be used for:
Auto Heavy
Program with the maximum temperature. This
program is for items that are particularly difficult
to dry, such as jeans with very thick seams.
NOTE!
Auto Normal and Auto Delicate
These programs end automatically when the
load is dry. The Auto Normal program leaves the
laundry slightly more dry than Auto Delicate.
Auto Iron Dry
This program shuts off the heat once the load is
just damp enough for ironing or pressing.
Knitted fabrics in particular are prone to shrinkage.
Use the Auto Normal, Auto Delicate, or Auto Iron
Dry programs for these items. Stretch clothes
back into shape immediately after drying.
10
Customer Care Center
1-800-898-1879
www.askona.com
Operating instructions
Program chart
Here we present the energy and time consumption of a few different programs. The table shows the
effect of using different spin speeds when washing the load. Consumption can vary depending on room
temperature, humidity, load, variations in the power supply, and selected options.
For the consumption values given below, the requirements are as follows:
Temperature of intake air:
73 °F (23 °C)
Moisture content of intake air:
55 %
Drying temperature:
Normal
Heater output:
2500W
Program
Material
Load
Spin speed (rpm)
Auto Heavy
Cotton, linen
1/1
800 rpm
1000 rpm
1400 rpm
Auto Normal
Cotton, linen
1/1
1600 rpm
800 rpm
1000 rpm
1400 rpm
Auto Delicate
Auto Iron Dry
Wrinkle-resistant, polyester/
cotton
Cotton, linen
Wrinkle-resistant, polyester/
cotton
Cotton, linen
1/2
1/1
1/2
1/1
1600 rpm
1000 rpm
Energy consumption,
approx. (kWh)
Program time,
approx. (min)
4.2
1:50
4.5
3.7
3.5
4.3
3.9
3.4
3.2
2.0
2:00
1:40
1:35
1:50
1:45
1:30
1:25
1:00
800 rpm
4.2
1:50
1400 rpm
3.3
1:25
1000 rpm
1600 rpm
1000 rpm
3.92
2.8
1.41
1:40
1:15
0:40
800 rpm
4.1
2:05
1400 rpm
2.8
1:30
1000 rpm
1600 rpm
Customer Care Center
1-800-898-1879
www.askona.com
3.50
2.2
1:45
1:10
11
Operating instructions
5
Selecting Options
By selecting options, you can tailor a
drying program to suit your requirements.
The available options depend on the selected
program. Once you have started the program,
the options you selected are saved for the next
time you use the same program.
Temperature Low
• Select Temperature Low by pressing the
button next to the symbol.
• The lamp next to the button lights when
Temperature Low is selected.
Anti Wrinkle
This option means that the drum will rotate for
three seconds per minute for two hours after the
drying program has finished. If you are unable to
remove the items immediately after the program
has finished, this option prevents the garments
from remaining in the same position and
becoming wrinkled. Cannot be selected with the
Air Fluff program.
• Select Anti Wrinkle by pressing the button
next to the symbol.
• The lamp next to the button lights when Anti
Wrinkle is selected.
6
7
Once the program has finished, all six
LEDs around Start and Stop light up for 2
minutes. The machine then turns off.
NOTE!
• Clean the lint filter in the outer door after
each load. See the Care and maintenance
instructions chapter.
To install the automatic drain hose, please see
the section titled Installation
WARNING!
If the lint filter becomes clogged, the machine’s
automatic overheating cut-out may be triggered.
Clean the filter, wait until the machine has cooled,
then try starting it. If it still does not start: Call the
Customer Care Center.
Once drying has finished
Remove the clothes and close the door to prevent
small children from climbing into the machine.
Press the Start button
You can stop the tumble dryer by pressing
the Stop button or by opening the door.
In both cases the program is stopped and starts
from the beginning if restarted.
NOTE!
The program will not be affected if you change the
program selector after the program has started.
12
Drying program finished
Customer Care Center
1-800-898-1879
www.askona.com
Care and maintenance instructions
Cleaning the lint filter
The lint filter must be cleaned after each load.
1. Lift the filter from the holder in the door.
3. Use your hand or a soft cloth to remove the lint
from all sides of the filter. If necessary, use a
damp sponge and a small amount of washingup liquid dish soap to remove any deposits.
Dry the filter thoroughly with a towel.
4. Close the lint filter and put it back in the door.
Close the lint filter before closing the door.
2. Open the lint filter. Use your thumb to press on
the edge as illustrated and pull it out.
Cleaning the outside of the
machine
Clean the outside of the machine and the
program panel with a mild cleaner. Do not use
solvents, as these can damage the machine. Do
not hose down or spray the machine with water.
NOTE!
Do not allow dust to accumulate around the
machine. Keep the area around the tumble dryer
clean and cool; dust, heat, and moisture prolong
drying times.
Customer Care Center
1-800-898-1879
www.askona.com
13
Care and maintenance instructions
Cleaning the condenser
The condenser should be cleaned at least three
times a year. If you have pets, the condenser
must be cleaned more frequently.
1. Turn off the tumble dryer with the main power
switch and open the outer door.
2. Remove the Toe kick.
NOTE!
Do not clean the condenser in a dishwasher.
5.Wipe any lint from the channel in front of
the condenser and inside the condenser
compartment. Use a cotton rag to remove any
lint from the drain hole at the front edge of the
compartment.
3. Open the condenser panel by turning the two
knobs.
NOTE!
It is quite normal for water to collect in the channel
in front of the condenser.
6. Replace the condenser with the handle facing
down as illustrated.
4. Remove the condenser and rinse the ribs
clean with a sink spray nozzle or a garden
hose with attached spray nozzle. Do not poke
around in the rib gaps as you may damage the
condenser. Do not use pointed metal objects
when cleaning.
7. Reattach the toe kick.
14
Customer Care Center
1-800-898-1879
www.askona.com
Troubleshooting
The machine will not start
Drying takes too long
Check:
• that the door is properly closed.
• that the main power switch is on.
• that any plug is connected.
• that the house fuses or circuit breaker have
not been tripped.
• that the overheating cut-out has not been
triggered.
The machine loses all power
during a program
The overheating cut-off shuts off the tumble
dryer if the temperature is too high, caused by
lint clogging the lint filter, for instance.
• Clean the lint filter.
• Check that the condenser is clean. Clean it
if necessary. See the Care and maintenance
instructions chapter.
• Wait until the machine has cooled, then try
starting it. If it still does not start: Call the
Customer Care Center.
• Check that the lint filter is not blocked. See the
Care and maintenance instructions chapter.
• Check that the condenser is not blocked.
See the Care and maintenance instructions
chapter.
• Prolonged drying times may also be due to
the tumble dryer being located in a confined
area or in a room that is too small, causing the
air to become too hot.
• Make sure that the tumble dryer has access
to more cold air, open doors and/or windows,
for example.
Error messages
L1 flashes
The maximum program time has been reached.
Read Drying takes too long in this chapter to find
out what to do.
L1
L2
Start
Stop
L3
Customer Care Center
1-800-898-1879
www.askona.com
15
Technical information
Technical data
Height:
33 1/2'' (850 mm)
Width:
23 1/2'' (597 mm)
Depth:
23 7/8" (606 mm)
Weight (net):
97 lb (44 kg)
Cylinder volume:
29,6 gal (112 l)
Max. drying capacity:
15 lb (7 kg)
Speed:
50-55 rpm
Rated power:
See serial number tag and rating plate.
Drum material:
Stainless steel
Outer casing material:
Powder-coated and hot-galvanized sheet steel or stainless
steel.
Setup
Stacking or freestanding
16
Customer Care Center
1-800-898-1879
www.askona.com
Service and guarantee
Limited Warranty – Residential
Appliances
ASKO Distribution North America, LLC.
(hereinafter “ASKO”) warrants the original
purchaser (the “ASKO Customer”) of the ASKO
product (the “ASKO Product”), who purchased
the appliance from a distributor, dealer,
manufactures representative or other seller
who has been authorized by ASKO (“Authorized
ASKO Dealer”), that this ASKO Product is free
of defects in material and workmanship, subject
to the terms and conditions set forth herein. The
limited warranty covers parts and labor, except
as set forth in this Limited Warranty. Service must
be provided by an ASKO designated service
company. YOUR SOLE AND EXCLUSIVE
REMEDY UNDER THIS LIMITED WARRANTY
SHALL BE PRODUCT REPAIR AS PROVIDED
HEREIN. The limited warranty is valid only in the
United States or Canada and applies only when
the appliance is used in the country in which it
was purchased. Proof of original purchase date
is required to obtain service under this limited
warranty.
Residential ASKO Products
Used Exclusively for Household/
Personal Purposes:
Two (2) Years limited Warranty – Any warranty
service claims for residential ASKO Products
must be filed with ASKO within two (2) years from
date of purchase.
Residential ASKO Products Not
Used Exclusively for House Hold
Purposes, used Commercially
or Use in marine, Mobile or
Aeronautical Applications:
One (1) Year limited Warranty – Any warranty
service claims for ASKO Products not used
exclusively for household and personal use,
used commercially or used in marine, mobile, or
aeronautical application must be filed with ASKO
within One (1) year from date of purchase.
ITEMS EXCLUDED FROM
WARRANTY
This limited warranty does not cover:
1.Replacement parts or repair labor if this
appliance is used in a manner that is
inconsistent to published user or operator
instructions and or/or installation instructions.
2. Service calls to correct the installation of your
appliance, to instruct you on how to use your
appliance, to replace or repair house fuses, or
to correct house wiring or plumbing.
3. Consumable parts are excluded from warranty
coverage.
4.Damage resulting from accident, alteration,
misuse, abuse, fire, flood, acts of God,
improper installation, installation not in
accordance with electrical or plumbing codes,
or use of products not approved by ASKO.
5.
Cosmetic damage, including scratches,
dents, chips or other damage to the finish of
your appliance, unless such damage results
from defects in material or workmanship and
is reported to ASKO within 5 days from date of
purchase.
6. Pickup and delivery. This appliance is intended
to be repaired in your home.
7.Repairs to parts or systems resulting from
unauthorized modifications made to the
appliance.
8. Expenses for travel and transportation for
product service if your appliance is located in
a remote area where service by an authorized
ASKO servicer is not available.
9. The removal and reinstallation of your
appliance if it is installed in an inaccessible
location or is not installed in accordance with
ASKO’s published installation instructions.
10. Replacement parts or repair labor on
appliances with original model/serial numbers
that have been removed, altered or cannot be
easily determined.
Customer Care Center
1-800-898-1879
www.askona.com
17
Service and guarantee
1
DISLCAIMER OF IMPLIED
WARRANTIES
YOUR SOLE AND EXCLUSIVE REMEDY
UNDER THIS LIMITED WARRANTY SHALL
BE PRODUCT REPAIR AS PROVIDED
HEREIN. ASKO SHALL NOT BE LIABLE
FOR INCIDENTIAL OR CONSEQUENTIAL
DAMAGES. Some states and provinces do not
allow the exclusion or limitation of incidental or
consequential damages, so these limitations and
exclusion may not apply to you. This warranty
gives you specific legal rights, and you also may
have other rights that vary from state to state or
province to province.
If you think you need repair service, first see the
“Trouble Shooting” section of the Use & Care
Guide.
If you are unable to resolve after checking
“Trouble Shooting” additional help can be found
by calling ASKO Customer Care at 1-800-8981879
2
TYPE
Before contacting the Customer
Care Center
Before you contact the Customer Care Center,
make sure you know the model designation, type
designation, and serial number.
The model designation (1) can be found on the
first page of the operating instructions and on
the machine panel. The type designation (2) and
serial number (3) can be found on the type plate,
which is found on the front of the tumble dryer
inside the outer door.
18
3
Should you need further assistance, you can
write to ASKO Appliances with any questions or
concerns at the address below:
ASKO Distribution North America, LLC.
Customer Care Center
PO Box 44848
MADISON WI 53744
Customer Care Center
1-800-898-1879
www.askona.com
Installation instructions
WARNING!
How to assemble the stacking kit:
WARNING - Risk of fire.
Install the clothes dryer according to the
manufacturer's instructions and local codes.
To reduce the risk of of severe injury or death,
follow all installation instructions.
SAVE THESE INSTRUCTIONS FOR FUTURE
REFERENCE.
1. Remove the two tip guards from the back of
the tumble dryer. Replace the screws that
held the tip guards in place.
Positioning the tumble dryer
The tumble dryer can be freestanding or stacked.
Remember that the tumble dryer produces heat
and should therefore not be located in a room
that is too small. If the room is very small, drying
will take longer due to the limited quantity of air.
WARNING!
2. Remove the two screws indicated on the back
of the washing machine.
• Clothes dryer installation must be performed
by a qualified installer.
• For proper ventilation, the machine should not
be installed behind a door.
• The tumble dryer's toe kick ventilation must
not be blocked by a rug or the like.
NOTE!
3. Secure the anti-tip device using the screws as
shown in the picture.
If the unit must be installed behind a door, the
door should be louvered. (please see door
ventilation requirements in the Built-in chapter).
To improve ventilation, the door where the tumble
dryer is located should be left open when the
dryer is in use.
Freestanding
The tumble dryer can be positioned beside the
washing machine.
Stacking
The tumble dryer can be placed on top of an
ASKO washing machine. Use the two foot cups
found in the document bag included with the
machine and the two tip guards attached to the
bottom of the back of the machine.
4.Attach the plastic cups for mounting the
tumble dryer’s front feet to the washing
machine’s top cover. This is essential, as only
when the tumble dryer’s feet are resting in the
plastic cups can you be sure that the tumble
dryer is correctly positioned on the washing
machine. Break off tab A on the cup fitted on
the right side and tab B on the cup fitted on
Customer Care Center
1-800-898-1879
www.askona.com
19
Installation instructions
the left side. Then remove the paper from the
self-adhesive surface under the plastic cups.
A
B
5. Fit the plastic cups so that the "tags" marked
with arrows are against the front edge or side
edge of the cover and press them firmly onto
the cover. Then break off the remaining tabs.
6. Push out the knock-out hole on the back of
the tumble dryer (you don't have to completely
remove the knockout, just fold it up far enough
for the stacking bracket to fit inside the slot)
using a hammer and a screwdriver.
8. Lower the tumble dryer’s front feet into the
plastic cups and adjust the tumble dryer to
ensure it is level.
Adjusting the feet
Screw the feet in or out so that the tumble dryer is
both stable and level.
Built-in
7.Push the tumble dryer in under the metal
brackets. At the same time keep the front
edge raised by 7/16" (10mm) to 7/8" (20mm) .
20
Customer Care Center
1-800-898-1879
www.askona.com
Installation instructions
Install in a closet
NOTE!
Exhaust holes not required for condenser dryers.
ASKO dryers can be installed beneath a cabinet
or worktop with a minimum height of 34” (864
mm). There must be a gap of about 1/2” (12 mm)
all around the machine, including between the
rear edge of the machine top panel and the back
wall. The opening width must be at least 24-1/2”
(622 mm). The condensing models work best
when they have good air circulation. Install the
dryer so the condensed water will continuously
flow into a drain or sink, you will need a drain
outlet behind the unit. The maximum drain height
is 40” (1016 mm).
ASKO's front panel controls make it possible to
install the washers and dryers in a closet. Make
sure there is a ½” (12mm) minimum clearance
between units and cabinet or wall. To ensure
proper ventilation, we recommend louvered
doors, particularly for condenser dryers.
Otherwise there must be ventilation openings in
the door. See illustration for minimum ventilation
openings:
NOTE!
The height adjustment for the dryer is 33-1/2” to
34-1/2” (850 mm to 876 mm). Do not raise it higher
than 34-1/2” (876 mm). Hole measurements are
from center of hole.
Condensed water
Install the dryer so the condensed water will
continuously flow into a drain or sink. To do this,
follow the instructions below:
1.Connect the rubber hose supplied with the
dryer to the blue nipple.
2. Run the hose to a drain or sink, as illustrated.
NOTE!
The drain hose must not be more than 40” above
the floor.
Customer Care Center
1-800-898-1879
www.askona.com
21
Installation instructions
Electrical Connections
2
Maximum
height 40"
1
WARNING!
Electrical installation
The receptacle on the rear of the machine is
designed to accommodate ASKO washers
ONLY (rated 208–240 V.) To use this receptacle,
you must use the ready-fitted plug supplied with
the washing machine or an equivalent.
ASKO washers rated 208–240 V have two internal
fuses of 15 A each.
The machine should only be connected to a
grounded wall socket.
WARNING!
Read the Electrical requirements and grounding
instructions before connecting the tumble dryer.
2a
WARNING!
This appliance must be properly grounded.
Refer to the “Important Safety Instructions” for
grounding instructions.
The power supply cord must be grounded. If the
machine is to be used in a wet area, the supply
must be protected by a residual current device.
Connection to a permanently wired supply point
must be made only by a qualified electrician. As
supplied: Single-phase, 230 V, 60 Hz, 2500W
heater rating 30 A circuit required.
Electric models of the dryer are manufactured for
a 3-wire connection system. The dryer frame is
grounded by a link to the neutral conductor on the
dryer terminal block. If local codes do not permit
grounding through the neutral, the grounding link
from the terminal block must be removed and a
separate ground wire must be used.
Only a 4-conductor cord shall be used when
the appliance is installed in a location where
grounding through the neutral conductor is
prohibited. Grounding through the neutral
conductor is prohibited for new branch-circuit
installations, mobile homes, recreational
vehicles, and areas where local codes prohibit
grounding through the neutral conductors. The
grounding link on the dryer must be removed for
all 4-wire installations.
These Electrical Connection instructions provide
for installing the dryer in the following situations:
3-wire connection where local codes permit
grounding through the neutral. 3-wire connection
plus separate grounding connector where local
codes do not permit grounding through the
neutral.
4-wire connection.
Each of the above connections can be made
with an approved power supply cord or by direct
wiring. Each connection instruction identifies
the appropriate Power Supply Cord and covers
requirements for direct wiring.
NOTE!
Remove cover to
access terminal box.
(Requires a 20-Torx
screwdriver.)
22
In Canada, the dryer is delivered ready-fitted with
a four-prong plug intended for connection to a
single-phase supply.
Customer Care Center
1-800-898-1879
www.askona.com
Installation instructions
Connecting a 3-wire Power Cord
WARNING!
Before starting this procedure, be sure the power
is turned off at the breaker/fuse box.
5. Connect ground (center) wire of power supply
cord to the center, silver-colored terminal
screw. Tighten screw.
6. Connect the other wires to outer screws.
7. Tighten the strain relief screws.
8. Replace terminal box cover on back of dryer.
9. Plug dryer into wall receptacle.
10.Turn power on at breaker/fuse box.
Connecting a 4-wire Power Cord
WARNING!
Before starting this procedure, be sure the power
is turned off at the breaker/fuse box.
Ground
Ground
(center)
Power Supply Cord
You will need a 3-wire power supply cord with
three No. 10 copper wires and a matching 3-wire
receptacle of NEMA Type 10-30R, as illustrated
below:
To connect a 3-wire power cord to the dryer,
follow the steps below.
Power Supply Cord
NOTE!
The numbers in the illustration correlate to the
step numbers.
1. Turn the power off at the breaker or fuse box.
2. Remove terminal block cover.
3. Use the strain relief attached below the
terminal block opening.
4. Loosen or remove center terminal block screw.
4
6
5
You will need a 4-wire power supply cord with
four No. 10 copper wires and a matching 4-wire
receptacle of NEMA Type 14-30R, as illustrated
below.
The fourth wire must be identified with a white
cover and the ground conductor by a green cover.
To connect a 4-wire power cord to the dryer,
follow the steps below.
NOTE!
The numbers in the illustration correlate to the
step numbers.
1. Turn the power off at the breaker/fuse box.
2. Remove terminal block cover.
3. Use the strain relief attached below the
terminal block opening.
Customer Care Center
1-800-898-1879
www.askona.com
23
Installation instructions
4. Remove center terminal block screw.
4
7
8
6
5. Remove ground wire (green with yellow
stripes) from external ground connector screw
and remove from center terminal block.
6.Connect ground (green) wire of cord to
external ground conductor screw.
7.Connect neutral (white) wire of cord under
center screw of terminal block.
8. Connect the other wires to outer screws.
9. Tighten the strain relief screws.
10.Replace terminal box cover on back of dryer.
11.Plug dryer into wall receptacle.
12.Turn power on at breaker/fuse box.
24
Customer Care Center
1-800-898-1879
www.askona.com
Reversing the door
1
6
2
3
4
5
1. Hinge pins (top and bottom)
2. Cover plate
3. Plastic plugs (on the upper and lower edges)
4. Lock hook
5. Hinges (left + right side)
6. Toe kick
Customer Care Center
1-800-898-1879
www.askona.com
25
Reversing the door
You can choose whether the door is hung on the
right or the left.
Follow these instructions:
7. Refit the door by loosening the hinge screws
slightly, affixing the door, and closing it.
Tighten the hinges. Replace the Toe kick.
1. Remove the Toe kick.
2. Remove the hinge (two screws).
3. Lift the door up and remove it. Support the
door while doing this.
4. Remove both door pins (top and bottom).
Fit them on the other side of the machine.
Replace the hinge.
5. Loosen and remove the catch (lift up and pull
out) and the cover plate on the door and the
machine. Switch the catch and the cover plate.
1
2
6. Move the plastic plugs on the upper and lower
edges of the door. Use a flat screwdriver to
remove the plugs.
26
Customer Care Center
1-800-898-1879
www.askona.com
Notes
Customer Care Center
1-800-898-1879
www.askona.com
27
QUICK GUIDE
1.
2.
3.
4.
TURN ON THE MAIN POWER SWITCH
Load the garments. Close the door.
SELECT A PROGRAM AND ANY OPTIONS
Turn the program selector to the desired program.
PRESS THE START BUTTON
DRYING PROGRAM FINISHED
Once the program has finished, all six LEDs around Start and Stop light up for 2
minutes. The machine then turns off.
Clean the lint filter after each load.
Close the door.
We reserve the right to make changes.
www.askona.com
TD70.1
T744C W US/CA
en (01-14)