1
CD-SW250DVD
Service
Audio
E
Market
CD-SW250DVD
Manual 3. MECHANISM BLOCKS
CHAPTER
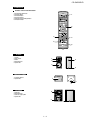
[1] Caution on diassembly
Caution on Disassembly
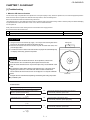
Follow the below-mentioned notes when disassembling the unit and reassembling it, to keep it safe and ensure excellent performance:
1. Take cassette tape and compact disc out of the unit.
2. Be sure to remove the power supply plug from the wall outlet before starting to disassemble the unit.
3. Take off nylon bands or wire holders where they need to be removed when disassembling the unit. After servicing the unit, be sure to rearrange
the leads where they were before disassembling.
CD-DV999W/CD-DV777W
CD-SW250DVD
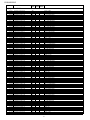
STEP
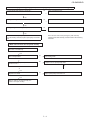
REMOVAL
PROCEDURE
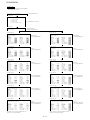
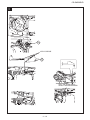
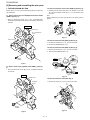
(C2)x3
1
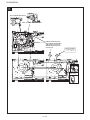
Top/Side Cabinet 1. Screw .................... (A1) x11
2
Changer Unit/
Rear Panel B
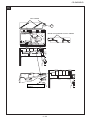
1. Screw ......................
2. Hook ........................
3. Flat Cable................
4. Socket .....................
(B1) x2
(B2) x2
(B3) x2
(B4) x1
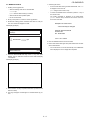
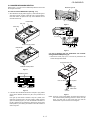
3
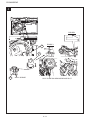
Rear Panel A/
1. Screw .................... (C1) x15
S-Video/Audio Out 2. Socket ..................... (C2) x4
PWB with
Fan motor
4
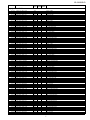
Main PWB
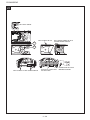
1. Screw ...................... (D1) x2
2. Flat Cable ............... (D2) x1
3. Socket ................... (D3) x11
4. Flat Wire .................. (D4) x1
5. Screw ...................... (D5) x5
5
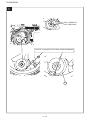
Front Panel
6
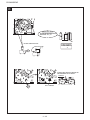
Tape Mechanism 1. Screw ....................... (F1) x6
2. Flat Cable ................ (F2) x1
7
Mic PWB
8
9
10
1. Screw ...................... (E1) x3
2. Hook ........................ (E2) x2
1. Knob .......................(G1) x1
2. Screw ..................... (G2) x1
Display PWB
1. Knob ........................ (H1) x1
2. Screw .....................(H2) x10
3. Hook ........................ (H3) x5
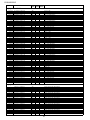
Game Input PWB 1. Screw ...................... (J1) x2
DVD Servo PWB 1. Screw ....................... (K1) x2
2. Flat Cable ................ (K2) x2
3. Socket ...................... (K3) x4
11
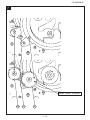
Changer
Mechanism Unit
12
DVD Mechanism 1. Screw .......................(M1) x4
2. Bracket .....................(M2) x1
Control PWB
1. Screw ...................... (J1) x2
13
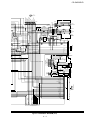
(B2)x1
S-VIDEO/ AUDIO
OUT PWB
DVD Servo (B3)x2
PWB
Pull
(B4)x1
Changer
Mechanism
Unit
Front Panel
Rear
Panel B
(B2)x1
(B1)x2
M3x10mm
Pull
(C2)x1
Rear
Panel A
Main PWB
Lug Wire
(D1)x1
M3x10mm
Main PWB
(C1)x15
M3x10mm
Fan Motor
(D1)x1
M3x18mm
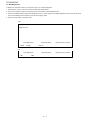
1. Screw ...................... (L1) x4
2. Changer Chassis .... (L2) x1
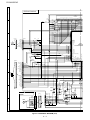
(D2)x1
Tuner
PWB
(D3)x2
(D3)x1
Top/Side Cabinet
Front Panel
(A1)x3
M3x10mm
Main
PWB
(D3)x2
(D3)x1
(D3)x2
Front Panel
Rear Panel B
(E2)x1
(D5)x4
M3x10mm
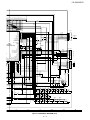
Power PWB
(D4)x1
(D3)x1
(D5)x1
M3x10mm
(E2)x1
Rear Panel A
(A1)x5
M3x10mm
(A1)x3
M3x10mm
(E1)x3
M3x8mm
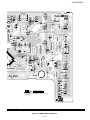
3–1
Main
PWB