1
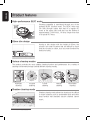
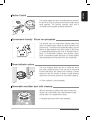
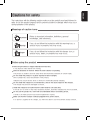
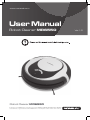
www.moneual.com
User Manual
Robot Cleaner MR6550
Robot Cleaner MR6550
Copyright ⓒ 2012 MONEUAL Inc. All rights reserved. The MONEUAL, MONCASO, MiNEW, RYDIS, SONAMU
are trademarks, or registered trademarks of MONEUAL Inc. in the Republic of Korea and/or other countries.
Ver 1.0
Robot Cleaner MR6550
User Manual
ENGLISH
Product features
High-performance BLDC motor
Cleaning capability is maximized through use of the
powerful BLDC (suction) motor. The BLDC motor has
20~30% stronger output than that of a regular DC
motor of the same class and also has the lifetime of
approximately 5,000 hours, 10 times longer than that
of a typical DC motor.
82mm slim design
Having a slim design with the height of 82mm, the
product can clean locations that are difficult to reach
and are not easy to clean, such as under furniture like
beds and sofas.
82mm
Various cleaning modes
The product provides the most suitable cleaning function and performance for a variety of
cleaning environments through several different cleaning modes.
Automatic
cleaning
Focused
cleaning
Corner
cleaning
Manual
cleaning
Reservation
cleaning
Shadow cleaning mode
Shadow cleaning mode allows the cleaning of the difficult
to reach locations such as underneath beds and other
large furniture that standard vacuum cleaners cannot
reach.
4 MR6550 User Manual
ENGLISH
Motion Control
The cleaner adopts a motion-controlled remote controller,
the first of its kind, to manuever the robot through minute
hand gestures. This function provides users with a
convenient and enjoyable cleaning experience.
Environment-friendly lithium iron phosphate
The product uses an environment-friendly battery that
does not contain heavy metals and acids harmful to the
human body. The lithium iron phosphate battery has the
lifetime of approximately three times longer (1,000 times
of charging/discharging) than that of standard lithiumfamily or nickel-family batteries and provides higher
levels of operational safety because it is strong against
high temperature and has almost no risk of explosion.
Room indicator system
The room indicator allows the user to divide the home
into various cleaning zones. It has, not only a virtual wall
function that blocks the cleaner from entering a certain
space, but also the function to divide a single cleaning
space into up to three sections for convenient cleaning.
※ Room indicator is sold separately.
Removable microfiber dust cloth cleaning
With the removable microfiber dust cloth mounted, the
cleaner can conveniently mop clean hardwood, tiled,
and all other non-carpeted floor areas.
※ Mopping guard and cloth is sold separately.
MR6550 User Manual 5
ENGLISH
Table of Contents
Cautions for safety
Product composition
Cautions before using the product
Name of each part of the product
Robot cleaner
Charger
Indicator
Installing the product
Descriptions for remote controller buttons
Basic cleaning (Automatic cleaning)
Using advanced cleaning functions
Focused cleaning
Corner cleaning
Shadow cleaning
Selecting a room for cleaning
Mop cleaning
Cleaning in manual control mode
Cleaning in manual control mode 2 (motion control)
Setup of time and reservation
Setting reservation mode
Using the indicator
Using the product in the room assortment mode
Using through setup of cleaning areas
Managing the product
Language selection
Cleaning the dust box
Replacing the filter
Cleaning the sensor
Cleaning wheels
Cleaning the dust inlet
Battery usage and management
Voice announcement list
System check list
Checkpoints before request for after-sales service
Product specifications
6 MR6550 User Manual
7
11
12
13
13
14
15
16
19
21
22
22
23
24
25
26
27
28
31
31
32
32
34
36
36
37
38
39
39
40
42
45
46
48
49
ENGLISH
Cautions for safety
The instructions with the following caution marks must be carefully read and followed in
order to use the product properly and to prevent accident or damage which may occur
during operation of the product.
Meanings of caution icons
Important
Refers to important information, definitions, general
knowledge, and references.
Warning
If you do not follow the instruction with this warning icon, a
serious injury or property loss may occur.
Danger
If you do not follow the instruction with this danger icon, a
serious injury, death, or property loss may occur.
Before using the product
Remove light clothes or fragile materials from the floor.
It may obstruct robot cleaner from moving.
Remove obstacles on the floor where the robot cleaner is operating.
The product is unable to travel to areas which are blocked by obstacles of certain height.
Do not install the product in a place exposed to direct sunlight.
Direct sunlight may cause discoloration of the product.
Adapters may cause electric shock or fire due to overheating during charging.
Do not install the charger on an inclined floor, and do not cause impact to the charger.
The charger may become damaged or broken.
Install the charger at a location that the robot cleaner can easily find.
If the site is in a corner or has many obstacles around it, automatic charging may not be possible.
Do not use the product in a room with an unattended child or an elderly person.
A child or an elderly person may become frightened or injured.
Make sure that the charger is always plugged into a power source.
If no power is supplied to the charger, you will not be able to use the automatic charge function.
MR6550 User Manual 7
ENGLISH
In using the product
Do not stand or sit on the product.
Movement of the product may cause an injury or the product can become damaged.
Do not use the product on a narrow and elevated space such as on a desk.
Robot cleaner can fall off and result in a person’s injury or damage to the product.
Make sure that no liquid enters or falls on the product.
The product may malfunction or become damaged.
If the product happens to vacuum plastic bags or other such things, they should be immediately
removed.
If the dust intake gets clogged and the product is used for a long time with the internal motor heating,
the product will be damaged.
Do not use the enclosed battery charger to charge any other product.
The charger or other products can be damaged.
Make sure that clothes, hair, fingers or other body parts are not caught in the wheels.
An injury may occur.
Do not press the bumper of the product severely or inflict excessive shock.
The bumper sensor can become damaged and work abnormally.
Do not keep or use the product at too low or too high a temperature.
Do not use the product at a temperature of - 5℃ or lower or 35℃ or higher.
Do not operate robot cleaner with the dust box full.
It can cause reduction in suction power.
Check if the filter is inserted into the dust box.
If the robot gets activated with no filter, it can cause product failure.
Prevent the main brush and the side brush from being clogged with hairs or other foreign
substances.
It can cause noise, reduction in suction power, or damage to the product.
Before using the product, clear away any obstruction from the floor.
Small dish towels, bath towels, pads, telephone lines, power cables, strings or belts can be entangled with the operating wheels or the brushes.
Make sure to remove things that can be easily broken (ceramic wares, glass cups, etc.).
Do not use robot cleaner on the wall or on a mirrored or glass floor.
Robot cleaner might not be able to recognize glass or mirror as an obstacle because it uses an
infra-red light sensor to detect an obstacle.
Avoid using the product in a utility room, in a room with a wet floor, on stairways, on a table, on
a shelf, in a storage room, in a commercial building, or outdoors.
If you have dropped the product or caused an impact to the product, contact the designated
service center immediately.
8 MR6550 User Manual
ENGLISH
Electrical cautions
Make sure to use only the specified voltage and current.
Power supplies outside the specification ranges may cause serious damage to the product.
If Robot cleaner is stored for long time without being used, the main battery can become
discharged.
When storing the device for a long period of time, make sure to turn off Power switch on the rear.
Do not use a damaged power cord or plug.
There is chance of shock and/or serious injury.
If the power cord of the charger is damaged, contact the service center immediately.
If the supply cord is damaged, it must be replaced by the manufacturer, its service agent or
similarly qualified persons in order to avoid a hazard.
Make sure that the power cord is not pulled or pressed down by doors.
The power cord can be pulled out or damaged.
When connecting / disconnecting the plug into / from the receptacle, make sure to do so by
holding the plug part, rather than pulling on the cord.
Do not touch the power cord with wet hands.
You can get shocked.
If water gets on the robot cleaner, unplug the power plug and dry completely before using
again.
An electric shock or a fire may occur. If water enters the product, contact the service center.
Use the enclosed charger only.
The product may be damaged due to overvoltage, or a fire or electric shock may occur.
Do not install the charger in a place which is damp or dusty, where water splashes or where
steam is emitted.
The product may malfunction, or shock or damage to the product may occur.
Do not contact any metal objects such as clips and pins with the charger terminal.
It can cause electric shock and/or fire.
For indicator power, use rated batteries and adapters only.
If not, the product can be damaged, set on fire, or it may malfunction.
In case of insufficient indicator battery, replace with a new one.
Without batteries, indicator functions may not work normally.
MR6550 User Manual 9
ENGLISH
In product management
Use the standard filter only.
No warranty service will apply to any error or failure of the product caused due to a substandard filter.
When cleaning the product, make sure power is off first.
If you happen to clean the product while it is in operation or while the power is still connected, injury may
occur.
Clean Main Brush, Side Brush, Dust Bin, Dust Bin Filter, and Dust Suction Inlet periodically.
If the product is used for a long time without cleaning, it can work malfunction and cause product failure.
Others
Do not operate the product in a site with flammable substances.
This includes alcohol, gasoline, distilled water, thinners, ashtrays with flames, candles, and stoves.
Any disassembling or repairing of the product must be performed by a designated service center or
authorized engineers only.
Tampering with the product can lead to damage or electric shock.
Do not discard the battery carelessly.
Putting old batteries near fire or direct sunlight for prolonged periods can cause fire and/or explosion.
Discard used-up batteries safely according to local regulations.
Danger
Do not place hot or flammable objects such as cigarettes, candles, heaters, matches or gasoline
near the product.
The product can become badly damaged or a fire may break out.
Do not use the product near an explosive object or in an explosive place.
This appliance is not intended for use by persons (including children) with reduced physical, sensory or
mental capabilities, or lack of experience and knowledge, unless they have been given supervision or
instruction concerning use of the appliance by a person responsible for their safety.
Children should be supervised to ensure that they do not play with the appliance.
Federal Communications Commission
This device complies with part 15 of the FCC Rules,
Operation is subject to the following two conditions:
(1) This device may not cause harmful interference, and
(2) this device must accept any interference received, including interference that may cause undesired
operation.
10 MR6550 User Manual
ENGLISH
Product composition
Basic components
Main body
(Battery built-in)
Charger
Side brush 1 set
Brush
Charger adapter
Screwdriver
Charger adapter
power cord
Remote control &
Battery(2x AAA)
User manual
Quick
User Guide
Optional components
Side brush 1 set
Large capacity battery
(built-in main body)
Mopping guard & 2x Dust cloth
Indicator
MR6550 models are listed as below along with optional components included in the box.
◆
◆
◆
◆
MR6550-****B/F/G/H/L/M/N/P : Side brush 1 set
MR6550-****C/F/I/J/L/M/O/P : Large capacity battery built-in main body
MR6550-****D/G/I/K/L/N/O/P : Mopping guard and cloth
MR6550-****E/H/J/K/M/N/O/P : Room indicator
The appearance and specifications are subject to change without prior notice for better product
functions or performance.
MR6550 User Manual 11
ENGLISH
Cautions before using the product
※ The appearance, specifications and other parts of the product are subject to change
without prior notice for product improvement.
01.
When opening the package, be careful that no shock is applied to the product and its
components.
See page 16 for product installation.
02. Be sure to check the mounting locations (L/R) for the side brushes before installing them.
See page 17 for the side brushes installation method.
03.
After removing product from the product packaging, charge manually before operating.
At initial opening, the battery may have become discharged and may not work. For manual charging
method, see page 18.
04.
Clear away all large debris from the floor to be cleaned.
Clear away objects, which might break or fall, from the floor. Carpets with decorative embroidery such as
long tassels, may hinder the product from moving normally. Fold the tassels under the carpet or clear
away the carpets.
05.
If the dust box of the robot cleaner gets filled, and is not emptied, cleaning performance will
deteriorate.
After each cleaning operation, check if the dust box is filled up.
See page 33 for how to clean the dust box.
06.
Remove foreign substances from the location-detecting sensors and wheels.
They may prevent the robot cleaner from moving or cause errors.
See page 35 for instruction on how to clean the location-detecting sensor and wheels.
07.
Children or the elderly may get frightened by the robot.
To prevent children or the elderly from being taken aback, make sure to explain details of the product
to them before operation.
08.
Be careful that the robot cleaner does not fall from high places.
If shoes or something similar are put side by side on the shoe shelf at the entrance of the living room,
the robot might see the shoes 0as part of the floor, falling from the living room. Do not use the robot
cleaner in a narrow site (e.g. desks, tables, etc.) where the robot cleaner can fall.
09.
The cleaner is not able to cross over a threshold higher than 1cm.
10.
When storing the robot cleaner that is completely charged, leave it docked to the charger or
turn off the power switch located on the rear part of the body.
12 MR6550 User Manual
Robot cleaner(Top)
①
②
③
④
Obstacle- and signal-detecting sensor
Bumper
Control buttons and operation lamps
Dust box cover
①
②
③
④
⑤
⑥
⑦
⑧
⑨
⑩
⑪
⑫
⑬
Start/Stop button
Mode setup button
Power On/Off button
Focused cleaning Indicator
Battery lamp
System error lamp
Charging mode Indicator
Room setup Indicator
Daily reservation Indicator
1-hour reservation setting indicator
Automatic cleaning mode Indicator
Suction input turbo indicator
Shadow cleaning mode Indicator
①
②
③
④
Dust box
Air outlet
Power switch
Signal receiver
Control buttons and operation lamps
8
9
7
10
6
11
5
12
4
13
1
3
2
Robot cleaner(Rear)
MR6550 User Manual 13
ENGLISH
Name of each part of the product
ENGLISH
Robot cleaner(Bottom)
①
②
③
④
⑤
⑥
⑦
Location-detecting sensor
Wheels
Charging terminal
Side brush mounting pin
Dust intake
Main brush
Dustcloth guard mounting hole
7
Charger(Front)
① Operation lamp
② Guide signal transmission sensor
③ Charging terminal
Charger(Rear)
① Adapter jack
② Adapter compartment
③ Sensor signal distance adjustment switch.
2
14 MR6550 User Manual
3
1
①
②
③
④
Signal transmission sensor
Mode switch button
Distance setup button
Indicator number setup button
Indicator(Bottom/Rear)
① Battery cover
② Power button
③ Adaptor jack
MR6550 User Manual 15
ENGLISH
Indicator(Top)
ENGLISH
Installing the Product
01. Plug the adapter power cord into the adapter and
connect to power outlet.
02. Connect the charger adapter with the charger.
Once the power is connected, the blue lamp will turn on at the front.
For appropriate charging of the product, the charger adapter should
be connected with the power at all times.
03. Arrange the position of the charger.
The charger should be placed in a location free of obstruction with at least 1m of space on all sides.
The wall facing the rear of the charger should not be made of glass or glossy materials.
Insert the adapter into the compartment of the charger, properly.
If the charger is installed in a site under direct sunlight, automatic charging may not occur or the product can become
discolored.
1m
1m
1m
Considering location of the charger and size of the house, set the Sensor Signal Distance
Adjustment switch as 5m to 8m to adjust the signal detecting distance of the robot cleaner.
If the robot cleaner fails to return to the charger, switch the distance setup located on the rear part
of the main body.
◆ If the charger is installed in a narrow space, select 5M. If installed in a large space, select 8M.
◆ If the charger is installed in a narrow space and 8M is selected, automatic charging may not work
properly.
◆ Do not place the indicator on the charger. Signal inference may occur and disrupt automatic charging.
16 MR6550 User Manual
Use the side brushes, screws and driver included in the box to install side brushes onto the underside
of the main body.
Install the L-side brush to the “L” position and R-side brush to the “R” position.
R
L
05. Attach the dust cloth guard onto the robot cleaner.
If you do not want to use the dust cloth function, skip this step and go to the next procedure.
Mopping guard and cloth (option) can be purchased separately by visiting a nearby distributor.
06. Turn on the power switch of the robot cleaner (at the left of the rear dust box).
MR6550 User Manual 17
ENGLISH
04. Install the side brushes.
ENGLISH
07. Place the robot cleaner in the charger with both hands to start charging.
Locate the robot cleaner and the charging terminal of the charger in contact.
When the robot cleaner is charged for the first time, it may take one (1) hour for the robot cleaner to
complete charging. (2 hours cleaning time with 2800mA battery pack)
After 1-hour charging, you can use the product for around one (1) hour with medium suction power.
(The operating hour may vary depending on the usage conditions).
Battery lamp
Charging
Blinks 1 time/sec
Charging completed
Charging Completed
Low battery
Blinks 4 times/sec
08. Insert batteries in the remote controller and the indicator.
Install batteries according to the correct polarity.
Room indicator (option) can be purchased separately by visiting a nearby distributor.
If the battery is inserted with the polarity reversed, the remote control and the indicator may
become damaged or cause a fire.
09. Install indicator in the desired position.
The product is fully capable of all cleaning, functions even without an indicator installed.
For detailed installation methods, see page 32.
It is possible to use a separate adaptor (5V). (If an adaptor is used, the cleaner does not use
the battery.)
If the adaptor whose output is more than 5V is connected, the indicator may become damaged.
18 MR6550 User Manual
Use various functions conveniently with the remote controller.
Functions available with the main body of the robot cleaner
Automatic cleaning, shadow cleaning, focused cleaning, charging
Functions available with the remote controller
Automatic cleaning, shadow cleaning, focused cleaning, corner cleaning, manual cleaning,
charging, suction control, reservation setting, room selection, mute, manual movement
① POWER button
MODE
START/STOP
Turns power on/off
If the product operation gets stopped due to errors, the button makes
the product go back to the operation mode
② MODE button
Select the cleaning mode
OK
③ START/STOP button
Starts selected operation
Stops current cleaning
CHARGE
VACUUM
INTENSIVE
AUTO
SHADOW
MANUAL
CORNER CL.
MUTE
ROOM SEL.
RESERVE
MS
④ OK button
Acts as the [OK] button for various setup modes
⑤ DIRECTION buttons
In manual cleaning, moves the product forward and backward and
make the product rotate to the left and right directions
Selects setting values in setup of time and reservation
⑥ CHARGE button
Moves the robot cleaner to the charger
⑬ MUTE button
Turns on/off operation
announcement tone
⑭ ROOM SEL. button
Makes the product select
a room and move there
(See the page 25.)
⑮ RESERVE button
Used to make reservation
setup (See the page 31.)
16
MS(motion control) button
Press this button to use
the remote controller as a
motion-controlling tool
(See the page 28).
⑦ VACUUM button
Adjusts the strength of dust inhalation
⑧ INTENSIVE button
Selects the focused cleaning mode
⑨ AUTO button
Selects the automatic cleaning or the basic cleaning mode
⑩ SHADOW button
Selects cleaning under the bed mode (See the page 24.)
⑪ MANUAL button
Used for manual cleaning operation (See the page 27.)
⑫ CORNER CL. button
Selects corner cleaning mode (See the page 23.)
MR6550 User Manual 19
ENGLISH
Descriptions for remote controller buttons
ENGLISH
How to set synchronization of the remote controller
You do not have to set synchronization for the remote controller supplied with the product.
If you need to buy a new remote controller due to loss of the existing remote controller or for other
reasons, you will need to synchronize the robot cleaner with the new remote controller.
1. Turn off the power switch located at the back side of the main body.
2. While pressing the power button on the top face of the main body, turn on the power
switch at the back side of the main body simultaneously.
The display of the main body will start blinking for synchronization.
Power Button
Power Switch
3. Pull out one battery from the remote controller.
4. While pressing the OK button from the remote
controller, re-insert the battery in.
The OK button of the remote controller will turn on and
then off in red and blue in turn.
Synchronization will only take a few seconds to be
completed.
If the main body is 3 meters or more away from the
remote controller, synchronization will fail.
MODE
START/STOP
+
OK
CHARGE
VACUUM
INTENSIVE
AUTO
SHADOW
MANUAL
CORNER CL.
MUTE
ROOM SEL.
RESERVE
MS
5. Pull out and then re-insert the battery of the remote controller.
This will complete synchronization.
20 MR6550 User Manual
■ Basic cleaning mode.
■ Without the indicator installed, the robot cleaner will just clean all open spaces by default.
With the indicator installed, the robot cleaner detects the signal from the indicator and will clean
only the room where the signal is detected. (See the pages 32 - 35.)
■ While cleaning, if charging is needed, the robot cleaner will automatically stop cleaning and move
to the charger.
■ After each cleaning, empty the dust box. If the dust box remains full, the suction power may become
deteriorated.
■ Cleaning efficiency and time may vary depending on the condition of obstacles such as carpets etc
on the floor.
01. Turn the power of the main body on.
Main body button
Remote controller button
MODE
START/STOP
OK
MODE
OK
02. Press the [START/STOP] button.
Main body button
CHARGE
Remote controller button
CHARGE
or
MODE
START/STOP
START/STOP INTENSIVE
MANUAL
VACUUM
AUTO
SHADOW
CORNER CL.
MUTE
VACUUM
INTENSIVE
AUTO
SHADOW
MANUAL
CORNER CL.
MUTE
ROOM SEL.
RESERVE
MS
If you press the [START/STOP] button after the product has already started working, it will stop cleaning.
OKpress the [START/STOP] button, the product will resume cleaning.
When the cleaning is stopped and you
ROOM SEL.
RESERVE
MS
At this time, the previous cleaning operation will be ignored and automatic cleaning will be newly
activated.
03. Automatic cleaning begins.
CHARGE
VACUUM
When automatic cleaning starts, the focused cleaning mode is also automatically on. If a certain period
INTENSIVE
AUTO
SHADOW
of time passes or an obstacle is detected, the focused cleaning mode will turn off and the robot
cleaner will start moving inMANUAL
straightCORNER
lines.
CL.
MUTE
The robot cleaner may occasionally move along the wall and perform focused cleaning.
ROOM SEL.
RESERVE
MS
When the dust cloth guard is installed to the bottom part of the robot cleaner, the robot cleaner will
automatically by switched
to the dust cloth cleaning mode. In this mode, the robot cleaner does not go onto the carpeted
areas, footholds or thresholds.
MR6550 User Manual 21
ENGLISH
Basic cleaning(Automatic Cleaning)
ENGLISH
Using advanced cleaning functions
It is possible to select and clean spaces that are not easy to clean through the default automatic
cleaning.
For corners and some spots where the robot cleaner cannot reach, the product will not be able to
clean completely.
Before using the advanced cleaning functions:
◆ You cannot select a different cleaning mode while the robot cleaner is cleaning or being
charged.
◆ In this case, you need to press the [START/STOP] button to stop current operation and then
select a cleaning mode.
Focused cleaning
From the current position, the robot cleaner performs
focused cleaning over a 1 m-radius area.
◆ If the site has many obstacles around it, the cleaning may
not be successful due to interference from them.
◆ When the focused cleaning mode is expanded and an
obstacle is detected, it is not switched to the downsized mode.
MODE
01. Select the focused cleaning mode.
OK
The main body shows the [Focused cleaning] indication.
Main body button
START/STOP
Remote controller button
CHARGE
INTENSIVE
VACUUM
AUTO
MODE
SHADOW
START/STOP
OK
MANUAL
CORNER CL.
MUTE
CHARGE
1
2 Press the [START/STOP]
button to start cleaning.
Press the mode
selection button
repeatedly.
ROOM SEL.
RESERVE
VACUUM
MS
INTENSIVE
AUTO
MANUAL
CORNER CL.
SHADOW
MUTE
ROOM SEL.
RESERVE
MS
02. Press the [START/STOP] button.
After cleaning is completed, the robot cleaner stops at its current place.
On the remote controller, press the focused cleaning button to start cleaning immediately.
22 MR6550 User Manual
ENGLISH
Corner cleaning
In this mode, the robot cleaner performs cleaning by
following the wall of a current room. When the robot
cleaner makes a full circle or detects the same signal
from the charger, it will stop cleaning.
MODE
START/STOP
01. Press the [CORNER CL.] button to start corner cleaning.
OK
After cleaning is completed, the robot cleaner will return to the charger.
Main body button
Remote controller button
CHARGE
INTENSIVE
VACUUM
1
AUTO
SHADOW
MODE
START/STOP
OK
(None)
MANUAL
CORNER CL.
MUTE
ROOM SEL.
RESERVE
MS
CHARGE
VACUUM
INTENSIVE
AUTO
SHADOW
MANUAL
CORNER CL.
MUTE
ROOM SEL.
RESERVE
MS
MR6550 User Manual 23
ENGLISH
Shadow cleaning
It is possible to clean spaces such as under a beds or other large furniture intensively.
Use the product in this mode with the room light turned on. In a dark room, the product will not
be able to distinguish the space under the bed from the rest of the room.
In a dark room, the product may see the entire space as space under the bed.
01. Place the robot cleaner under the bed.
Product may not perform shadow cleaning correctly under direct sunlight.
MODE
START/STOP
If the robot is not under a piece of furniture, it will move there before starting shadow cleaning.
To reduce the moving time, place the robot cleaner in front of desired furniture before it starts working.
OK
02. Select the mode for cleaning under the bed.
Main body button
Remote controller button
CHARGE
VACUUM
MODE
INTENSIVE
START/STOP
AUTO
SHADOW
CORNER CL.
MUTE
OK
MANUAL
CHARGE
1
2 Press the [START/STOP]
button to start cleaning.
Press the mode
selection button
repeatedly.
VACUUM
ROOM SEL.
INTENSIVE
AUTO
SHADOW
MANUAL
CORNER CL.
MUTE
RESERVE
ROOM SEL.
RESERVE
MS
MS
03. After cleaning is completed, the robot cleaner will return to the charger.
24 MR6550 User Manual
ENGLISH
Selecting a room for cleaning
In this mode, the cleaner moves to the room with the
indicator installed to clean it. It is possible to purchase
additional indicators and install up to 5 indicators.
The cleaner operates in this mode only if the indicators
are installed.
(See page 32-35).
1
Room indicator (option) can be purchased
separately by visiting a nearby distributor.
3
2
01. Select a room number.
MODE
The main body screen will indicate the room number.
START/STOP
If all room number lamps are turned off, it means no status has been selected (No selection status).
In the no selection status, the product will perform cleaning in the same method as automatic
cleaning.
OK
Though the Robot cleaner can detect up to three rooms, if rooms 4 and 5 are detected during cleaning,
they will be cleaned separately.
Main body button
Remote controller button
CHARGE
VACUUM
Every time you press the button, the number/status
INTENSIVE
AUTO
SHADOW
will changed among 1-2-3-no
selection.
MODE
(None)
START/STOP
MANUAL
CORNER CL.
MUTE
ROOM SEL.
RESERVE
MS
OK
CHARGE
VACUUM
INTENSIVE
AUTO
SHADOW
MANUAL
CORNER CL.
MUTE
ROOM SEL.
RESERVE
MS
02. Press the [START/STOP] button.
After the cleaning is completed, the product will move to the charger.
MR6550 User Manual 25
ENGLISH
Mop cleaning
Mopping guard and cloth (option) can be purchased separately by visiting a nearby
distributor.
With the dust cloth attached, the cleaner is able to mop clean the floor.
When the dust cloth guard is installed to the bottom part of the robot cleaner, it is automatically
switched to the dust cloth cleaning mode.
In this mode, the robot cleaner does not go onto carpeted areas or thresholds.
01. Put a mop made of superfine fibers onto the mop guard.
02. Install the mop guard to meet the mounting hole seen at the bottom of the main body.
03. Press the [START/STOP] button.
Main body button
Remote controller button
MODE
MODE
START/STOP
START/STOP
OK
CHARGE
VACUUM
INTENSIVE
AUTO
SHADOW
MANUAL
CORNER CL.
MUTE
ROOM SEL.
RESERVE
MS
OK
Press the [START/STOP]
button to start cleaning.
CHARGE
26 MR6550 User Manual
VACUUM
INTENSIVE
AUTO
SHADOW
MANUAL
CORNER CL.
MUTE
ROOM SEL.
RESERVE
MS
ENGLISH
Cleaning in manual control mode
MODE
START/STOP
You can choose to manually operate the robot cleaner.
MODE
START/STOP
1 START/STOP Button
OK
START/STOP
MODE
MODE
START/STOP
3 DIRECTION Keys
OK
OK
OK
CHARGE
CHARGE
INTENSIVE
VACUUM
VACUUM
AUTO
INTENSIVE
SHADOW
MANUAL
CORNER CL.
MUTE
ROOM SEL.
RESERVE
MS
CHARGE
INTENSIVE
INTENSIVE
MANUAL
AUTO
MANUAL
2
VACUUM
MANUAL
VACUUM
CHARGE
AUTO
AUTO
SHADOW
MANUAL Button
CORNER CL.
MUTE
SHADOW
SHADOW
ROOM
SEL.
CORNER CL.
MUTE
RESERVE
MS
CORNER
ROOM
SEL. CL.
RESERVEMUTE MS
01. Press the [START/STOP]
button
to stopMSthe robot cleaner if it is in operation.
ROOM SEL.
RESERVE
02. Press the [MANUAL] button on the remote controller.
For cleaning, the product starts vacuuming at the site.
When you press the [MANUAL] one more time, vacuuming will stop.
03. Operate the robot cleaner as you like with the direction keys of the remote controller.
Manual control is not available while charging.
This function is useful for when you only need a manual move without vacuuming.
MR6550 User Manual 27
ENGLISH
Cleaning in manual control mode 2 (motion control)
MODE
START/STOP
When you
use the motion control
function of the remote controller, you can manually
control the robot with hand gestures.
01. If the main power switch of the robot is turned off, turn it on.
02. Press the [START/STOP] button if the robot is in operation.
OK
03. Press the button seen below to change the remote controller operation mode for the motion control mode.
If no operations are detected for five (5) or longer seconds during
motion control, the motion control mode will be released.
MODE
START/STOP
CHARGE
OK
VACUUM
INTENSIVE
CHARGE
INTENSIVE
MANUAL
ROOM SEL.
AUTO
SHADOW
VACUUM
AUTO
SHADOWCORNER CL.
MANUAL
CORNER CL.
MUTE
MUTE
ROOM
RESERVE SEL.MS
RESERVE
28 MR6550 User Manual
MS
[Turning on/off the power ([POWER] button
from the remote controller)]
Quickly flick the front of the remote controller upward.
[Turning on/off cleaning mode ([MANUAL]
button from the remote controller)]
Slightly flick the remote controller toward left/right.
The inhalation motor will start/stop working.
[Adjusting the suction power ([VACUUM]
button from the remote controller)]
Slightly pull the remote controller following the arrow.
MR6550 User Manual 29
ENGLISH
04. Use the motion shown in the figure below to manually control the robot.
ENGLISH
[Moving the robot straight in a forwards/backwards direction ([UP/DOWN] button from the
remote controller)]
Bend the front part of the remote controller downward or pull it upward.
(Forward move)
(Stop)
(Backward move)
[Controlling the rotation ([LEFT/RIGHT] button from the remote controller)]
Turn the remote controller to the left/right.
(Turning counterclockwise)
(Stop the rotation)
(Turning clockwise)
05. To release the remote controller from the motion control mode, press the motion control
conversion key again.
30 MR6550 User Manual
ENGLISH
Setup of time and reservation
Setting reservation mode
Starts cleaning at a specific hour or at a certain time every day.
◆ Before making a reservation, be sure to install the charger.
◆ The reservation is available only with the remote controller.
MODE
START/STOP
◆ If the battery is being charged at a reserved time, the reservation cleaning will be
executed after the charging is completed.
◆ If robot cleaner is set to ‘1 hour’ reservation, it completes 1 cleaning cycle at the
reserved time.
OK cleaner is in operation, press the [START/STOP] button to stop it before
◆ If the robot
proceeding.
MODE
MODE
CHARGE
START/STOP
START/STOP
2
VACUUM
OK
INTENSIVE
AUTO
SHADOW
MANUAL
CORNER CL.
MUTE
1
ROOM SEL.
RESERVE
OK
CHARGE
VACUUM
INTENSIVE
AUTO
SHADOW
MANUAL
CORNER CL.
MUTE
ROOM SEL.
RESERVE
MS
MS
CHARGE
VACUUM
INTENSIVE
AUTO
SHADOW
MANUAL
CORNER CL.
MUTE
RESERVE
MS
01. Press the [Reservation] button. ROOM SEL.
Whenever the [Reservation] button is pressed, hour/daily lamps will turn on.
If all reservation-indicating lamps are turned off, it indicates that the user has selected nothing.
02. Press the [OK] button.
Select the reservation time and press the [OK] button to finish reservation.
03. When the reservation is made, the robot cleaner returns to the charger and
resumes automatic cleaning.
If every day is selected, cleaning will start at the same time every day.
MR6550 User Manual 31
ENGLISH
Using the indicator
The indicator enables you to separate spaces into different zones within your home.
Using the room assortment mode or setting a cleaning area enables you to make good use of
the indicators.
Room indicator (option) can be purchased separately by visiting a nearby distributor.
Check the indicator battery status.
Press any button to check if the lamp blinks; if so, it means the indicator is turned on.
If the battery becomes depleted, pressing the button will cause all the lamps to blink at the same time.
In this case, you will need to replace the battery.
If you do not want to use the indicator, turn off the power switch in the rear to conserve battery.
Using the product in room assortment mode
01. Place the indicator against a wall on the floor at the entrance of a room.
If the indicator is put at a place 10cm or higher than the floor, the robot cleaner may fail to identify it.
In general, you can install the indicator at the position marked with the symbol (
) seen in the figure
below.
Up to three (3) indicators can be installed.
If there is a door where the indicator is installed, leave the door open so the robot has access to the room.
02. Press the [MODE] button to set the product into [INDICATOR] mode.
When the lamp turns on, repeatedly press the button until the [INDICATOR] lamp gets turned on.
03. Press the [DISTANCE] button to set a door width.
Repeat pressing until the setup is made for the door width.
1m(●) - 3m(●●) - 5m(●●●)
For the average home, 1m setup is adequate.
If the distance is set too excessively, the robot cleaner may not function correctly.
32 MR6550 User Manual
Each time you press the button, the lamp turns on 1 -> 2 -> 3 -> 4 and -> 5.
The INDICATOR NO that allows robot cleaner to select the room for cleaning is “1 ~ 3”.
If two or more indicators are installed, INDICATOR NO should not be duplicated.
INDICATOR
NO.
5.
DISTANCE
4.
5M
CLEAN
AREA
3.
3M
INDICA
TOR
2.
1M
MODE
1.
05. Leave the door open.
Close the door only if you do not want to clean the room with the indicator installed.
MR6550 User Manual 33
ENGLISH
04. Press [INDICATOR NO.] on the indicator to set the room number.
ENGLISH
Using thorough setup of cleaning areas
■ You can make the robot cleaner work only within a specified space (gray area in the figure).
■ In addition to the example below, you can make other spaces in various forms.
■ Indicator signals are transmitted into three front/right/left directions.
Indicator
Transmission signal (up to 5m)
Robot cleaner
01. Press [MODE] on the indicator to change the mode to [CLEAN AREA].
When the lamp gets turned on, repeatedly press the button until the [CLEAN AREA] lamp is turned
on.
02. Press [DISTANCE] and then adjust the distance of the cleaning area setting signal.
Repeat the pressing of the button until the distance of signals to set cleaning areas is set at the desired
level. 1m(●) - 3m(●●) - 5m(●●●)
If the distance is set as too short or too long, the robot cleaner may not properly understand the area.
03. Calculate the signal distance to arrange the indicator in the appropriate position.
If the signal does not reach the wall, the robot cleaner may slip through the crack and clean outside
the desired area.
34 MR6550 User Manual
In this case, it will become as if no indicator were installed.
It is recommended that you not install indicators in a place with the charger in it.
The emitting signals of the charger (in the radius of 8 meters) may become overlapped with the
signals of indicators and negate the indicator signals.
Charger
Emitting signals of the charger
MR6550 User Manual 35
ENGLISH
If the emitting signals of each indicator get overlapped, no setup for cleaning area will be
made.
ENGLISH
Managing the product
Language Selection
Multi language voice guidance is available for [MR6550-***A*].
■ You can select the language for the voice announcements spoken by the robot.
■ If the robot cleaner is in operation, press the [Start/Stop] button and the [Power] button to turn it off
before proceeding.
01. Turn off the power switch located at the back side of the main body.
02. While pressing the mode button on the upper part of the main body, turn the
power switch at the rear part of the robot cleaner on to enter into the language
selection mode.
Mode Setting
button
Power Switch
03. Press [START/STOP] button to select the country number.
When each country is selected, the voice announcements
below are played in the selected language.
“Start automatic cleaning.”
“The cleaning is cancelled.”
04. Languages changed by [START/STOP]
button may differ depending on
the product and the region it is sold in.
No.
① Country
number
Language
1
English
2
Germany
3
French
4
Korean
5
Chinese
6
Japanese
05. Press the [POWER] button at the upper part of the main body to complete
language setting in the selected language.
36 MR6550 User Manual
ENGLISH
Cleaning the dust box
01. Press the lever to lift the cover of the dust box.
02. Pull out the dust box.
03. Remove the dust filter.
The dust filter can be water-cleaned. After cleaning the filter with water, let air dry.
When water-cleaning the filter, do not use any detergent.
04. Empty the dust box.
MR6550 User Manual 37
ENGLISH
05. Insert the filter back into the dust box.
If the filter is water-cleaned, wait until it is completely dry before inserting it in.
06. Insert the dust box.
Insert the dust box back into the robot cleaner.
07. Replace the dust box cover.
Press the dust box cover until it clicks into place.
Replacing the filter
To reuse the filter, you will need to water-clean it after removing it from the dust box.
Do not use any detergent; use only water to clean it.
For removal of the filter, refer to Step 3 in the “Cleaning the dust box” section.
The life span of the filter can decrease depending on usage environment.
Any end-of-life filter will show a decrease in performance
To purchase additional filters, please visit the online store.
38 MR6550 User Manual
Clean or dust the three (3) sensors as indicated in the figure with a brush or cotton
swab.
If contamination is severe, clean it with the wet swab.
Do not directly apply water, benzene or alcohol to the sensors.
Cleaning wheels
Clean the wheels with a brush.
Turn each wheel while cleaning to clean the entire wheel.
Remove hairs and other foreign substances, which can disturb operation of the wheels.
MR6550 User Manual 39
ENGLISH
Cleaning the sensor
ENGLISH
Cleaning the dust inlet
01. Remove the dust inlet cover.
02. Remove the main brush by holding and lifting it.
03. Clean the removed main brush with a cleaning brush.
04. Insert the main brush back.
Check the groove shape and insert it into the fixing hole of the rubber brush. Then, fix the wing of the
fixing pin to the robot.
40 MR6550 User Manual
Insert the protruding part first. Press the opposite side until the fixing pin is fully installed.
MR6550 User Manual 41
ENGLISH
05. Insert the dust inlet cover.
ENGLISH
Battery usage and management
Batteries are consumables. The longer they are used, the shorter the usage time becomes.
Life span of the battery
We guarantee twelve (12) months battery life in general usage environments.
For ideal battery use, make sure that it is always charged.
The life span of the battery can vary depending on the usage environments.
Usage time of the battery
Before you use the robot cleaner for the first time, manually charge it completely.
It may take one (1) hour for the robot cleaner to complete charging.
(Two (2) hours for the 2800mA battery which can be purchased separately)
After charging is complete, the robot cleaner can operate for around one (1) hour in medium suction
power. (One hour and 40 minutes for the 2800mA battery which can be purchased separately)
In more complex or dirtier environments, cleaning operation time on one charge may decrease.
If the robot cleaner is left with its power on and is not connected to the charger, its operating time can
decrease or battery can become fully discharged.
Replacing the battery
Once the cleaning operation time gets considerably shortened, you will need to replace the battery.
Make sure to use factory standard batteries.
To purchase an additional battery, contact the Customer Service Center.
42 MR6550 User Manual
If you feel it is too difficult to manually replace the battery, please contact to customer service
center.
01. Press the [POWER] button to turn off the robot cleaner.
02. Loosen the four screws of the battery cover and lift it off.
03. Pull out the battery pin and remove the battery.
Press the lock at the same time to pull out the battery pin.
04. Replace with the new battery and insert the battery pin.
MR6550 User Manual 43
ENGLISH
Replacing the battery
ENGLISH
05. Close the battery cover and tighten the screws.
How to extend battery life
If planning on not using the battery for a long time, charge it completely, then separate the battery
from the main body before storing it.
Clean the dust intake and the dust box frequently.
If you use the product while it is filled with foreign substances and dust, it can cause increase in
rotation of internal motors and shorten the life span of the battery.
Charge the battery between each use of the product.
In charging or long-term storage, keep the product away from direct sunlight or fire.
44 MR6550 User Manual
ENGLISH
Voice announcement list
The list below shows basic voice announcements, which is subject to change depending on user
specification.
Voice announcement functions
Start the automatic cleaning.
The automatic cleaning function is launched.
Start the corner cleaning.
The corner-cleaning operation is launched.
Start the focused cleaning.
The focused cleaning operation is launched.
Start reserved cleaning.
The reserved cleaning operation is launched.
Start the cleaning under the bed.
The cleaning under the bed operation is launched.
The cleaning is completed.
The cleaning operation is completed.
The cleaning is cancelled.
The Stop button is pressed during cleaning.
Move to the charger.
The [Charging] button of the remote controller is pressed or
the product is moving to charger for automatic charging.
Start the charging.
The charging has begun.
Move to the indicator No. X.
The product has started moving to clean a specified room.
Reservation is made
The reservation is made
Check the message function
The battery is discharged.
The battery is discharged.
There is no dust box inserted.
The dust box has been removed.
Put the product on the floor.
The robot cleaner is lifted from the floor.
Check the wheel.
The wheel is jammed.
Check the main brush.
The main brush is tangled or jammed in a foreign substance.
Check the side brush.
The side brush is tangled or jammed in a foreign substance.
Errors are generated.
Errors have occurred (See the error code chart).
MR6550 User Manual 45
ENGLISH
System check list
If the product stops working with error codes displayed, you can resume operation by pressing
the [POWER] button.
If the problem persists even after the following steps are taken, contact our customer service
center.
The audio announcement for faulty situations will be played only one time.
Cause
The battery is discharged and the robot cleaner cannot work.
Action
Manually charge the robot cleaner.
Cause
Either one or both wheels are overloaded.
Action
Relocate the robot cleaner.
Remove foreign substances from wheels.
Cause
The air intake pan is overloaded.
Action
Remove foreign substances from the dust intake and empty the dust box.
Cause
The main brush is overloaded.
Action
Remove foreign substances (hair, etc) from the main brush.
Cause
The robot cleaner is charged without the battery.
Action
Check if the battery is installed.
Cause
Battery failure
Action
Please contact our service center.
Cause
Attempt to run the robot cleaner without the dust box.
Action
Install the dust box.
Cause
Both wheels are lifted.
Action
Place the robot cleaner on the floor or lift it to another site.
46 MR6550 User Manual
ENGLISH
Cause
The escape vent has exceeded tolerance level.
Action
Remove foreign substances from the front caster and empty the dust box.
Cause
The bumper keeps impacting and disrupting cleaning.
Action
Remove foreign substances from the bumper. Check if the bumper is properly
installed.
Cause
The fall warning keeps activating and disrupting cleaning.
Action
If the floor is black, relocate the robot cleaner.
Cause
Others
Action
Please contact our service center for unknown other errors.
MR6550 User Manual 47
ENGLISH
Checkpoints before request for after-sales service
Error details
Checkpoints and actions to be taken
Q. The robot does not work.
(1) Turn on power switch at the rear of robot.
(2) Check if the battery is discharged.
-> Charge the robot with the charger.
Q. The robot cannot be charged.
(1) Clear away obstacles from the charger.
(2) Check if the charger is turned on.
(3) Turn on the power switch at the right bottom of the rear part.
-> If you force the robot to be charged, it may not work.
Q. The remote controller does not work.
(1) Try remote synchronization.
(2) Change the battery of the remote controller.
Q. The suction power is too weak.
(1) Empty the dust box.
(2) Clean the filter of the dust box.
(3) Check if there are foreign substances in the intake.
Q. The robot cannot be turned on.
(1) Turn on power switch on the rear of the robot.
(2) Check if the battery is discharged.
Q. The brush does not rotate.
(1) Check if there are any foreign substances around the brush.
(2) Check if the brush is properly inserted.
Q. The noise level is louder than before.
(1) Check if the filter of the dust box is properly inserted.
(2) Check if there are any foreign substances around the brush.
Q. The robot works abnormally during
cleaning.
(1) Check if the dust cloth is inserted (if purchased separately)
and then if it is properly inserted.
(2) Clean the sensor and the adjacent part with a soft cloth.
Q. Reserved cleaning mode won’t set.
Press the [OK] button when the reservation is made.
Q. The robot does not respond to any
button.
If the main body is directly connected with the adapter for charging,
no button input will work during manual charging.
Q. The operating time is short
(1) If the robot cleaner is left for a long time while it is not connected
to the charger properly or the rear adapter is not connected,
the battery can become discharged and operating time shortened.
(2) Even when the robot cleaner is fully charged, keep it connected
to the charger.
(3) If you want to store the robot cleaner for a long time, turn off
power switch at the rear before storing.
48 MR6550 User Manual
ENGLISH
Product specifications
Robot cleaner
Model
RYDIS MR6550
Dimension
Diameter 347 mm X Height 82 mm
Weight
2.674kg
Max. Speed
Cleaning Mode: 25cm/sec.; Moving Mode: 20cm/sec.
Operating Noise
Maximum 68dB (2800mA Battery, Maximum 70dB)
Power Consumption
Maximum 20W (2800mA Battery, Maximum 25W)
Battery
LiFePo4, 12.8V DC
Capacity of the Dust Box
600 ml
Charging Time
Around 60 min. (2800mA Battery, 120 min.)
Operating Time
Typical suction power: Normal: 60 min. and turbo: 40 min.
(2800mA Battery, Normal: 100 min. and turbo: 70 min)
Charger
Model
MRD6500
Dimension
Length 264 mm X Height 179 mm X Width 134 mm
Weight
606 g
Input voltage
100~240V
Output voltage
18V DC
Signal transmission
distance (IR)
5m / 8m
Indicator
Model
MRI6500
Dimension
Length 100 mm X Height 116 mm X Width 88 mm
Weight
247 g
Battery
2 X D type
Battery operation time
Approx. six (6) months (Standby mode)
Signal transmission
distance (IR)
1~5m
MR6550 User Manual 49
ENGLISH
Remote controller
Model
RC-750
Dimension
Length 133 mm X Height 23 mm X Width 47 mm
Weight
60 g
Power source
2 x AAA type
Battery life
6 months
Signal transmission distance (RF)
10m
50 MR6550 User Manual
Robot Cleaner MR6550
Copyright ⓒ 2012 MONEUAL Inc. All rights reserved. The MONEUAL, MONCASO, MiNEW, RYDIS, SONAMU
are trademarks, or registered trademarks of MONEUAL Inc. in the Republic of Korea and/or other countries.