1
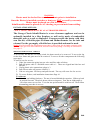
WARNING
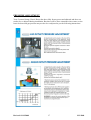
Heater must be checked for scratches or dents prior to installation.
Once the Heater is installed scratches or dents are NOT covered by warranty.
Heater must be placed on a flat level surface.
Inbuilt models must be placed on AC sheeting, to prevent unit from rattling.
INSTALLATION OPTIONS:
* ONLY TO BE CARRIED OUT BY AN AUTHORIZED PERSON!
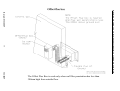
The Grange Classic Inbuilt Heater is a zero clearance appliance and can be
optionally installed in a false fireplace or wall cavity made of combustible
materials such as wood or chipboard. Coonara provide the heater with their
own flue kit, of flexible pipes of 60mm and 50mm diameter for the inlet and
exhaust. For the gas supply a flexible hose is provided and must be used.
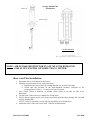
Notice: For Horizontal flue installations more than 1 meter long, the air intake restrictor plate,
located in the gas cowl inlet connection, must be removed by using a Tin-Snip or similar tool.
See page 13.
SERVICE INSTRUCTIONS - INBUILT
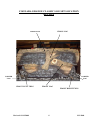
To access flue fan and the over temp switch, the heater needs to be removed. To access the log
set the door frame and glass need to be removed. To access all other components the following
steps apply:
To remove tray for service:
1. Undo gas connection going into gas valve and flow tube at firebox.
2. Pull out igniter cable x 2 and heat sensor cable x 1. These are clipped into blue box and
RH side.
3. Unclip plastic wire connections (plugs) x 3.
4. Pull silicone tubes off pressure switch x 2.
5. Udo two wing nuts. Lift fan up and pull forward. The tray will come free for service.
6. To access firebox, read installation instructions Page 10.
To refit tray
7. Undo hex nut holding fan down. The nut is located behind the capacitor. Slide tray back
in and pull forward. Then lock down with two wing nuts. Turn fan on slight angle so
LH corner enters cut out first. Twist fan into position and fix with hex nut. Then follow
dismantling procedure in reverse.
5
1
2
2
4
3
4
2
3
Revised: 03/12/2009
3
1
8
3/12/2009