1
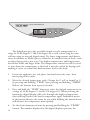
Victorio™ Digital Control
Food Dehydrator
Copyright © 2008 Victorio Kitchen Products. All Rights Reserved.
ii
Operating Instructions
WARNING!
Do not operate this appliance on a flammable such as a wood surface or
on any tablecloth. Do not operate this appliance on a non-heat-resistant
glass top or cutting board. It is imperative that an additional heat-resistant
cooking surface such as tile, Formica or any surface protected with a heat
resistant finish at least be placed beneath this unit. This will serve to protect
the surface beneath from heat that can generated by the food dehydrator.
SAVE THESE INSTRUCTIONS in a safe place.
Important Safeguards
When using electrical appliances, basic safety precautions should always be
followed, including the following:
•
READ ALL INSTRUCTIONS, PRODUCT LABELS AND WARNINGS BEFORE USING THE FOOD DEHYDRATOR.
•
To protect against electrical hazards, do not immerse the cord, the plug
or the base of the dehydrator in water or other liquid. Do not wash in
sink or dishwasher.
•
Close supervision is necessary when any appliance is used by or near
children.
•
Unplug from outlet when not in use and before cleaning.
•
Do not operate any appliance with a damaged cord or plug. If the appliance malfunctions, or if it has been damaged in any manner, return
the appliance to an authorized service facility for repair or replacement.
1
•
The use of accessory attachments other than those supplied or recommended by the manufacturer may cause hazards and can void your
warranty.
•
Arrange the cord so that it cannot be caught or tripped over. Do not
allow cord to hang over edge of table or counter. Keep cord away from
hot surfaces.
•
This appliance is for indoor, household use only. Do not use appliance
outdoors for other than household use as described in this manual.
•
This appliance is not for commercial purposes.
•
Do not place dehydrator, cord, shelved or any other parts on or near a
hot gas or electric burner, or in a heated oven.
•
To disconnect, turn the control to “OFF” before removing the plug
from the outlet
•
Operate the dehydrator only in a clean, dust free area. Dust and dirt
can be drawn into the dehydrator and can contaminate the food being
dried.
•
Do not place the dehydrator on a towel or carpet. This will reduce or
cut off the dehydrators airflow and could result in a damage to the appliance.
•
Always leave at least one inch of space around the dehydrator on all
sides for proper ventilation.
•
A short power cord has been provided to reduce the hazards from
becoming entangled in or tripping over a longer cord. An extension
cord may be used if care is exercised during its use. Use an extension
cord rated at 5 amps or more. The cord should be arranged so it will
not drape over the counter or table top. Do not use an extension cord
longer than is necessary.
•
Do no use more than 20 drying trays at one time.
•
Do not operate near combustible or pressurized spray cans.
•
This appliance has a polarized plug. One blade is wider than the other.
As a safety feature, this plug will fit in a polarized outlet only one way.
If the plug does not fit fully in the outlet, reverse the plug. If it is still
does not fit, contact a qualified electrician. Do not attempt to defeat
the safety feature.
2
•
To clean the heating base, unplug form wall outlet and wipe with damp
cloth or sponge and mild soap. Do not immerse base or cord in water.
Top lid and trays may be submerged in warm water and washed with
mild soap or washed in TOP rack of dishwasher only. Heat from the
drying cycle can warp trays, this is not covered by the warranty.
•
Before each time you operate your food dehydrator be sure to wash and
dry the trays and any other parts which will contact the food.
•
Do not operate this Food Dehydrator on a non-heat resistant glass or
wood cooking surface, or any tablecloth. IT IS IMPERATIVE THAT
A HEAT RESISTANT COOKING SURFACE BE PLACED BENEATH THIS UNIT!
•
The first time you turn on your food dehydrator you may notice an
aroma. This is normal. To avoid this smell from being transferred to the
food, place one tray and lid on the base, and follow the instructions. Allow the unit to run without food in place until the aroma is gone. This
is only necessary the first time you use the dehydrator and takes less
than one hour.
Congratulations on Choosing the Victorio™ Computer
Controlled Food Dehydrator
This quality appliance is designed to give you many years of use. For
best results and trouble-free service we urge you to read this entire manual.
Dehydrating—Preserving Food
Thousands of years ago, one of the few ways people had to preserve foods
was by laying them out to dry in the sun. Before such modern appliances
as refrigerators and before chemical preservatives, dehydration was and
easy way to safely store foods for use at a later time when food was scarce
or not in season. Your new food dehydrator applies modern science to this
ancient art to bring you a controlled, predictable, and safe way to preserve
foods at home.
Dehydrating food opens a new dimension in preserving fruits, vegetables and meats to you. Your new food dehydrator will be able to perfectly
capture the fresh-picked, in-season flavor and nutrition of almost any food
or out of season eating enjoyment. These dried foods can be stored more
easily because they are less likely to spoil and they take up less room as
well. They also weigh less making them perfect for camping or backpacking
meals. Dried fruit snacks are delicious and nutritious. Ingredients for your
3
favorite soup recipes can be dried and stored which also make a great last
minute meals, ready to cook.
Your Victorio™ Food Dehydrator keeps the temperature in the drying
chamber at a computer-controlled constant. Food is bathed in constant
warm, dry air which gently removes the moisture from the food. The result
is beautifully dried food every time.
You will find that drying food is practical and economical as well as
easy. It all starts with your state of the art food dehydrator.
What is Dehydration?
Dehydration refers to a process in which moisture is removed from food, allowing the dried food to be stored safely for later use. It’s main benefit over
such ancient methods (such as salting or smoking) is that it adds no flavors
and removes few nutrients from the food being dehydrated.
When done properly, few nutrients are lost during dehydration. According to the Food and Drug Administration (FDA), dehydrating retains
95-97% of the nutrients in the original food. In contrast, canning only
preserves 20-30% and freezing only retains 40-60% of the foods nutrition.
Dehydrated food tastes good too! Since natural flavors concentrate as
you remove moisture, the dried product is naturally delicious.
As you will soon learn, reconstitution is an integral part of dehydration. Reconstitution refers to the adding of water to the dried food. When
allowed to soak in water, dried food absorbs the water and swells back to the
original size, shape and texture while retaining nearly 100% of its original
flavor and nutrition.
Tools You Need To Get Started
•
Paring knife (stainless steel blade)
•
Cutting board
•
Storage containers
Additional tools that make the job easier and faster can include:
• A food processor or other similar appliance for faster and consistent
slicing.
4
•
A steamer and basket, or kettle and collapsible steamer for blanching.
•
Blender for making fruit puree for fruit leather.
•
A small notebook to keep track of times and recipes that work for
you as well as those that don’t.
Basic Food Preparation Tips
To Peel or Not to Peel
The peels of fruits and vegetable often contain much of the food’s nutritional value. It better not to peel if the dried food is to eaten as snacks or used in
cookies. On the other hand you will want to peel apples intended for pies or
tomatoes intended for soups. Generally, if you would normally peel the food
for a specific recipe, plan to peel the food before it is to be dehydrated.
Cutting Makes a Difference
One of the most important factors is successful dehydration is how the
foods are sliced. When drying fruits it helps to get all the slices about the
same thickness so they all dry to the same moisture level at the same time.
Thick slices dry more slowly than thin slices. The thickness you choose is up
to you, but slicing all the pieces to as close to the same size as is possible will
help ensure success and consistency.
The skin of may foods naturally protects the food, but it can hamper
the dehydration process. During dehydration moisture escapes best from a
cut or broken surface, not through the tough skin. Therefore, the larger the
cut area, the faster and better the food will dehydrate.
For this reason, thin stalked vegetables like green beans, asparagus, and
rhubarb should be cut in half the long way, or with an extreme diagonal cut
to expose as much of the inner parts as possible.
Fruit should be sliced across the core and not down through the core.
Try to always make thin, flat cuts.
Broccoli stems should have halved or quartered, depending upon diameter—small fruits like strawberries can be cut in half. Even smaller berries
should either be cut in half or blanched slightly to break the skin.
Filling the Drying Trays
When loading the food into the trays you can use all the trays top surface,
but some airflow must be maintained. Try to place the food in a single layer
where possible. This is particularly important with foods like banana slices
and pineapple rings and not quite as important with beans. If some of the
pieces come out with too much moisture when you are finished, one of the
reasons is that it might have been covered by other pieces of food.
5
Dehydration removes the moisture and will cause the foods to shrink as
it dries. This allows you to store the same amount of food in a smaller space,
but it also means that the food shrinks during the drying process, smaller
pieces can fall through the holes in the drying trays. To prevent this particularly when drying chopped or shredded foods, line the trays with mesh
tray inserts before laying out the food. Chopped food should not be spread
thicker the 3/8 inch. Use a fork to expose the mesh tray insert in several
places to provide proper air circulation.
If you do not have mesh tray inserts available, use nylon netting, needle
point canvas, cheesecloth or similarly, coarse woven fabric. When lining the
tray be sure to cut an opening for the tray’s center hole. The fabric should be
food safe, allow air to pass through it, and it must be laundered before being
used. Use care when choosing fabric as sticky foods may not be able to be
easily removed, and particles from the fabric may stick to the food pieces.
It may be necessary to stir the finely chopped food once or twice during
dehydration to ensure even drying of all the pieces. To do so, turn the machine off, unplug it, remove the trays, stir, then reassemble and restart the
machine according to the instructions.
Preventing Dripping
Some foods such as very ripe tomatoes and citrus or sugared fruits may drip.
If too much liquid drips into the bottom of the unit it can be damage necessitating service. Additionally, the dripping from a tray above can change
the flavor of different foods on lower trays. To help lessen the dripping after
placing food on drying trays and before placing them on the dehydrator
base, tap the tray firmly downward on a towel laid on the counter top a few
times to remove excess moisture.
To catch any remaining dripping during dehydration that may occur
with very moist foods. Use fruit leather sheets places on the bottom two
trays. Alternate the sheets on one half of the two trays. Example: the left
side of the first tray and the right side of the second tray. Then place these
two bottom trays on the dehydrator base before placing the remaining trays
with the food to be dried above them. When rotating trays, wipe the fruit
leather sheets, but leave the two trays at the bottom of the stack of trays.
When the food becomes dry enough so that it is no longer dripping, remove
the fruit leather sheets from the bottom trays to enhance air flow.
Do not use wax paper in place of the fruit leather sheets as the wax on
the paper will melt at dehydration temperatures which can taint the food or
damage the dehydrator. Always remember to leave the center hole of each
tray uncovered.
6
How long does it take to dehydrate food?
It is impossible to give exact drying times because there are so many factors
that effect drying time. These factors include:
• The moisture content of each food
•
The thickness or size of the prepared food
•
The humidity and temperature in the room where the dehydrator is
operating
•
The density of the food
The food you choose also plays a part. The age of the food, where and how
the food was grown, how it has been stored along its journey to you, and
other factors all affect how long it might take to dehydrate.
But don’t worry. With a little experience you will soon be able to tell
when you are slicing the foods just about how long it will take, and which
foods will dry soonest and which will take the longest.
Here is a good example: tomatoes are normally quite juicy. Their high
moisture content will make them take longer to dry than many other foods.
On the other hand cabbage, which has a relatively low moisture level will
take a much shorter time to dry. Citrus fruits like oranges will generally take
longer than apples for the same reason.
So how do you know how long to let the foods dry? After the dehydrator runs for a while remove the trays and examine the foods. Don’t be afraid
to “peek”! This will help you learn about the drying process and how long
it takes. For foods with higher moisture levels like fruits and meats, check
them periodically after about the first four hours of drying time. Foods with
a lower starting moisture content like herbs and leafy vegetables or chopped
and shredded foods may dry sooner so need to be checked after about two
or three hours and more often after that. You will soon get the “feel” for
how long foods take to dry.
Don’t worry, though. It is better to over dry the food then leave too
much moisture in it. Moist foods are more likely to spoil during storage.
If foods have been over dried and seem brittle or slightly browned they are
still usable for soups or most baked goods. They may take slightly longer
to reconstitute and require additional water, but their flavor and quality is
generally not impaired.
7
General Operating Tips
Setting up Your Food Dehydrator
Before operating your food dehydrator for the first time please be sure to
completely read and understand these instructions. Wash and dry the trays
and any other parts which will contact the food.
• The first time you turn on your dehydrator you may notice an aroma.
This is normal. To avoid this smell from being transferred to the food,
place one tray and the lid on the base and following the instructions,
allow the unit to run without the food in place until the aroma is gone.
This is only necessary the very first time you use the dehydrator, and
takes less then one hour.
•
Place the dehydrator on a flat, dry and stable (not carpeted) surface.
Make sure there is at least one inch of clearance around the dehydrator
to ensure proper air flow.
•
Prepare foods, according to the instructions given in this manual and
fill the drying trays. NEVER cover the center hole in the trays or the
vents on the top lid!!
•
Make sure the drying trays are securely nestled on top of each other and
on the unit’s base
•
Plug the power cord into any standard 110-120 volt household outlet.
•
Consult the various tables at the end of the manual to get an idea as to
when food is properly dehydrated and ready to be stored.
Tray Rotation
Inspect drying trays periodically. Rotate trays if the food you are drying
requires it. Remove all the trays on a unit, then remove the lid. Place the
top tray on the base, followed by the next uppermost tray, until all the trays
have been rotated.
Care and Maintenance
After each use, clean the drying trays and dehydrator lid with warm, soapy
water. Do not wash trays, lid or base in dishwasher. Stubborn particles may
be removed by soaking and/or using a plastic scrubber. Do not use abrasive
material or solvent to clean plastic!
To clean the dehydrator’s base (the bottom part with the motor and
heating element), unplug and wipe with a damp sponge or cloth. NEVER
8
immerse the base in water or allow liquid to flow into the area that contains
the electrical parts.
Storage
After the dehydrator is cleaned, dry all parts, stack drying trays on the
base, and store in a safe place.
Stacking the Trays
Before loading the trays with food it is a good idea to make sure that they
are all aligned right side up by stacking them up in one place near the preparation area. The narrow side of the tray always is the top. Trays have alignment arrows cast into the handle. The arrows (as seen below, bottom-right
of the page) should all be visible on the top of the tray handles. Improperly
stacked trays will negatively affect the drying process.
Once the trays are all right side up, you can stack them in two ways.
Depending on their orientation to each other they can be set for thick or
thin foods. To change the stacking height simply rotate a tray 180 degrees to
change whether it is tall or short stacked. Refer to the two photos below to
identify the difference between these two heights.
Any combination of stacking can be used to accommodate the foods
being dried. An example would be some low tray stacking for banana chips
and some tall stacking for large strawberry halves.
How to Operate your Food Dehydrator
Your food dehydrator is simple to use and is designed to make the dehydration process simple and accurate if the instructions are followed. Be sure
that you have read the safety tips at the beginning of this manual before
proceeding.
The first time you turn on your food dehydrator you notice an aroma.
This is a normal by-product of the manufacturing process. To avoid this
smell from being transferred to the food, place one tray and the lid on the
base, and following the instructions below, allow the unit to run without
food in place until the aroma is gone. This is only necessary the very first
time you use the dehydrator, and takes less then one hour.
Before you begin preparing your food, wash and dry the trays, lid, and
the tray liners if they are to be used. Locate the base where the dehydrator
will be left during the drying process and insure that the cord will reach an
outlet in a safe manner. In this way, as you prepare the food you can place it
right on the trays. As a tray is filled it can be placed on the dehydrator and
you will be ready to start the dehydrator in no time!
9
FOOD DEHYDRATOR
TEMP
TIMER
ON/OFF
The dehydrator gives the user full control over the temperature in a
range of 30-80 degrees C (86-248 degrees F) as well as how long the unit
will run using its integral digital timer. Use lower temperatures and shorter
times for thinner or smaller pieces of food or for smaller loads of food - such
as when drying only a few trays. Use higher temperatures and longer times
for thicker foods and larger loads. The temperature control can also be used
to turn down the temperature as the food is near the end of its drying cycle
making it easier to control the final moisture level in the food.
1. Locate the appliance in a safe place, load and insert the trays, then
insert plug in the outlet.
2. Select the desired temperature scale. Change the C to F or from F to C
by pressing and holding “TEMP” then pressing and holding “TIMER”.
Release the buttons then repeat as desired.
3. Press and hold the “TEMP” button to select the desired temperature in
a range of 30-80 degrees C (or 86-176 degrees F). When pressing the
button the digital display will cycle through the highest temperature,
then will loop back to the lowest temperature again. Individual presses
of the button advance the count by one while holding the button down
will advance the temperature more quickly.
4. Set the desired amount of time by pressing and holding the “TIMER”
button. The number displayed in the digital display represents the
10
number of hours the dehydrator will operate before automatically turning off. When pressing the button the digital display will cycle from 1
through 72, then restart at ‘1’ again. Individual presses of the button
advance the count by one hour. Holding the button down will advance
the time more quickly
5. Press the “ON/OFF” button to begin the programmed cycle. The colon
in the timer display will begin to flash indicating it is running. The
display shows the remaining time of operation in the format HH:MM.
You will also hear the fan operating.
6. The dehydrator will stop automatically when the time expires or you
can stop it any time using the “ON/OFF” button. Remove the plug
from outlet.
If you would like to add more time during the cycle or if you want to
change the set temperature, press “ON/OFF” once to stop the process.
Change the desired setting described above then restart by pressing the
“ON/OFF” switch again.
11
Dehydrator Troubleshooting Guide
Symptom
Possible Cause
Possible Remedies
No heat & No fan
No power to unit
1. Be sure unit is plugged in. 2. Be
sure power switch is on. 3. Check
that outlet is working.
No heat & Fan OK
Broken wire in unit
Not user repairable. Return for
service
Heat OK No fan
Motor stalled or fan
blocked (pieces of
dried product) jamming
1. Turn off immediately 2. Check
for foreign objects in fan. Turn base
assembly upside down and shake
vigorously. Turn unit on side and
shake particles out. If fan still does
not operate, return unit for service.
3. If liquid has been spilled into the
air vents or the fan housing, unplug
immediately and return the unit for
service.
Slow drying
Trays overfilled Fan
jammed or running
too slowly Air leaks
due to warped or
improperly stacked
trays
1. Air must flow freely around the
food for proper drying. Reduce
quantity in trays or rearrange food.
2. Check for foreign objects jamming fan (see “Heat ok. No fan”)
3. Fan motor running slow: Return
for service. 4. Replace warped trays.
Note: the heat during the drying
cycle on most dishwashers may
warp the drying trays. 5. Re-stack
trays properly.
Uneven
Variation in food
thickness and
ripeness. Trays not
rotated. Too much
material in drying
trays
1. Verify that foods are uniform in
Drying thickness. 2. rotate trays
once or twice during the dehydration process. 3. Verify that foods
on the trays does not block air flow
through the tray stack
12
Over heating
Temperature control 1. Temperature in lowest tray
not functioning at
should be approximately 140 deproper range
grees F with Insufficient or empty
trays in place. If temperature varies
significantly adjust or return for
service
Noisy Fan/ Motor
bearings worn
foreign matter in fan 1. check for foreign objects jamming fan (see “Heat OK, No Fan”)
2. Return for service.
Storing Dried Foods
Once food is properly dried it is important to store it properly for best
results. By following these storage techniques your food will stay fresh and
ready to use for the longest time possible.
General Food Storage Tips
•
Wait until food is cool before storing
•
Heat and light will cause food to deteriorate. Keep food in a dry, cool
and dark place.
•
Remove all the air you possible can from the storage container and
close tightly.
•
Ideal storage temperature is 60 degrees F or lower
•
Never store food directly in a metal container
•
Avoid containers that “breathe” or have weak seal.
•
Check the contents of your dehydrated food for moisture during the
weeks following dehydration. If there is moisture inside, you should
dehydrate the contents for a longer time.
•
For best quality, dried fruits and vegetables should not be kept for more
than 1 year.
•
Dehydrate your produce in the summer when it is at optimum freshness and replace it annually
•
Dried meats, game, poultry and fish should be stored for no more then
3 months if kept in refrigerator, no more than 1 year if kept in freezer.
13
•
Vacuum sealing can help to extend storage life by several months. If
food has been properly and thoroughly dried.
Containers
Any container which is clean, airtight and moisture proof is suitable for
storage. Heavy, zipper plastic bags or heat sealing cooking bags are excellent. Fill each bag as much as possible and squeeze out excess air. Filled
bags may be placed in metal cans with lids (shortening or coffee cans are
good) to keep out insects. Glass jars with tight fitting lids can be used with
or without plastic bags. Quality plastic containers with tight fitting lids are
good, but they must be airtight. Do not use paper or cloth bags, lightweight
plastic bags, bread wrappers or any container without a tight fitting lid.
Location
Cool, dark and dry are the keys to maintain the quality of dried foods.
Shelves near a window may need to be covered to keep out the light. Glass
jars or plastic containers should be placed in a paper bag or in a closed cabinet. Cement walls and floors are often damp and cold. Therefore, dried food
containers should not be placed directly on the floor or touching a basement
or cellar wall as this can cause condensation in the container. Do not store
dried food near items with a strong odor such as varnish, paint remover or
kerosene.
Length of Storage
Dried fruits and vegetables should not be stored longer than 1 year. Plan
to use all dried meats, fish, poultry, or jerky within a month or two. Label
dried foods, and rotate on a first dried, first to be used basis. Check dried
foods periodically. If the food seems more moist than when packed, moisture is getting into the container. Spread food on drying trays and re-dry.
Then pack in an airtight container. Mold indicates food was not properly
dried before stored. Destroy moldy food.
Reconstitution
Dehydration is the process of removing moisture from food. Reconstitution is the replacement of that moisture to bring the food back to its natural
state. Although some dried foods such as fruit are excellent in their dehydrated state, you will often want to reconstitute other dried foods before
eating them. Here are some tips on reconstitution.
14
Just Add Water
For chopped or shredded vegetables, and for fruits to be used in cookies, no
reconstitution is usually needed. If the pieces are quiet crisp and dry you can
try sprinkling with 1 Tablespoon water per 1/2 cup of dried food.
For vegetables and fruits to be used in soufflés, pies, quick breads,
dough or batters, use 2 parts water to 3 parts (by volume) dried food.
For vegetables and fruits which will be cooked in the liquid, such as
vegetable side dishes, fruit toppings and compotes, use 1 to 1 1/2 parts water to 1 part dried food. Extra liquid may be required for proper cooking.
Time for Reconstitution Hints
•
Chopped and shredded foods reconstitute quickly. Generally, 15 to 30
minutes is sufficient.
•
Larger vegetables or fruit slices and meat cubes can be reconstituted
overnight in water left in the refrigerator. If this is inconvenient, place
in boiling water, remove from stove and stand 2 to 3 hours.
•
Whole pieces of fruit take longest to reconstitute and are best left to
soak overnight.
Other Reconstitution Hints
•
If you drain reconstituted foods, save the liquid. This liquid has great
nutritional value. Freeze this liquid for later use in soups, leathers, pies
or compotes.
•
There is no need to reconstitute ahead of time when making soups.
Dried vegetables can be added directly to the soup about one hour
before serving.
•
Do not add spices, salt, bouillon cubes or tomato products until vegetables are reconstituted and cooked. These items considerably hinder
rehydration.
•
Some foods take longer to reconstitute than other. Carrots and beans
require more time than green peas and potatoes. A rule of thumb: those
that take the longest to dehydrate will take the longest to reconstitute.
•
Try not to use more liquid than necessary for reconstitution because
nutrients will be drained away with the excess water. Place dehydrated
food in a container and use just enough water to cover the food. Add
more water later as needed to replace what the food absorbs.
15
Fruit Dehydration Tips
Dried fruit is a superb food treat. Try it plain, as fruit leather or in ice
cream, cobblers and pies. It’s hard to imagine a better tasting, more nutritious snack than dried fruit. Dried fruit is naturally sweet, has no preservatives and is inexpensive. Your food dehydrator makes drying fruit easy.
With all fruits it is best to wash them before beginning. After that, most
fruits just need halving, coring, or pitting, and slicing before placing them
in the dehydrator.
Pre-Treatment of Fruits
You do not have to pre-treat fruits to get good results. Some fruits, such as
apples, pears, peaches, apricots and bananas tend to darken somewhat with
drying or storage beyond six to seven months. Although still edible when
darkened, they tend not appear as tempting to the palate. If you don’t mind
the change in color of your dried fruit, there is no need to pre-treat. Fruits
like bananas turn brown without pretreatment, but at the same time they
become very sweet and bursting with pure banana flavor by simply slicing
and placing directly into the dehydrator. For drying times of fruits, refer to
the “Fruit Timetable”
To avoid this darkening the fruit pieces can be dipped in solutions of
lemon, pineapple or orange juice or ascorbic acid prior to dehydration. Dip
the fruit in the solution for two minutes. Drain on paper towels and place
in drying trays.
Lemon, Pineapple or Orange Juice
Fresh or bottled lemon, pineapple or orange juices are the best because of
their natural sweetness. Pineapple and orange juice can be used full strength
or diluted to taste. If you use lemon juice it is best to dilute with 1 part juice
to 8 parts water and soak the fruit pieces for two minutes. Be aware that the
taste of these juices can overpower the taste of the fruit being dried and may
not always prevent discoloration of the food. Experiment with the dilution
and soaking times to suit your tastes.
Ascorbic Acid
Crystalline ascorbic acid products with ascorbic acid made for preserving
fruits for canning may be obtained from drug stores or from stores selling
canning supplies. Most grocery stores sell it with their canning supplies as
well. Mix 1 tablespoon in 4 cups of water and soak the fruit for about two
minutes. Like lemon juice, the taste can be quite overpowering, so experiment with concentrations and soaking times.
16
Fruit Leather Dehydration Tips
Sometimes referred to as Fruit Rolls, Fruit strips, or Fruit Jerky, fruit that is
pureed and dried in thin sheets becomes a tasty , chewy, candy-like snack we
will call fruit leather. You have probably sampled the commercial versions
from the market, but once you’ve tasted it made fresh at home with quality
fruit, you’ll never go back to the store bought. Fruit leather is a good way to
make use of leftover or overripe fruit that might otherwise be discarded.
Making fruit leather is very easy. Start by thoroughly washing the
fruit in cold water and remove any stems or leaves left on the fruit. Remove the peel, skin, pits, or seeds as necessary. Then just puree the fruit
or fruit combination of your choice and add just enough liquid to the
blender to make a smooth, thick puree. Honey, fruit juice or water can
be used, but don’t make the mixture too thin or it won’t stay put on the
dehydrator trays. With fruits that have a high moisture level, little or no
liquid needs to be added at all.
Since you are the cook, you get to taste the puree as you are making it.
It is not only your privilege but an important part of the process. Because if
the puree tastes good the fruit leather will taste even better! Remember that
the flavors and sweetness will concentrate when the leather is dry, so don’t
make it too sweet!
It is best to use a fruit leather sheet designed for the purpose, but if
not available you can line on half of each drying tray with plastic wrap.
To maintain adequate circulation only half of each tray should be covered.
As always, you must leave the drying tray’s center hole uncovered. If using more than one tray, place the plastic on alternate halves of the trays in
the stack. Remember that the trays only go in one way, so stack the trays
properly on the counter before lining them to assure proper placement of
the plastic wrap.
When drying sticky purees (bananas, for instance) spray a small amount
of vegetable oil based spray on the fruit leather sheet or plastic wrap. After
all fruit leather sheets are filled, stack the drying trays atop the base. Dehydrate until the fruit puree is the texture of leather. It should be easy to peel
off the fruit leather sheet. Wrap in plastic wrap and store at room temperature. Spices, chopped nuts or coconut may be added to the puree for extra
flavor. For further variation, puree several types of fruit together.
Feel free to experiment with your recipes. Single fruit flavors will work
just fine, but there are lots of various fruit combinations that combine to
make flavorful snacks. These include: Strawberry Banana, Pineapple Orange, Raspberry Banana Coconut, Strawberries Rhubarb, Pineapple Apricot,
Mixed Berry, Pineapple Peach, Raspberry Apple, Apple Blueberry, Apple
17
Cinnamon (use Cinnamon sparingly) and Honey Cranberry Orange (cranberries should be cooked)
Vegetable Dehydration Tips
Dried vegetables are every bit as flavorful and versatile as dried fruits.
With dried vegetable you can make delicious soups, stews, casseroles, and
more. Basically, anywhere you would use fresh vegetables you can use dehydrated vegetables.
Before preparing and dehydrating your chosen vegetable, always wash
them in cold water. A certain amount of coring, slicing, peeling or shredding is required. A food processor can be a handy tool when processing
vegetables, taking seconds to slice up a large batch, ready for the dehydrator.
Be creative when drying vegetables. Placing vegetables in diluted
lemon juice or similar flavorings for approximately 2 minutes will add a hint
of flavor to such vegetables as green beans and asparagus. For drying times
of vegetables, refer to “Vegetable Timetable”.
Pretreatment of Vegetables
For the most part, vegetables need little in the way of special treatment for
dehydration, although there are some exceptions. Here are some preparation
guidelines that will help you get the most from your dried vegetables.
A few vegetables, such as onions, garlic, peppers, tomatoes, and mushrooms can be dried and reconstituted successfully without pre-treatment. In
general, if vegetables must be steamed or blanched for freezing, they must
be treated for drying.
With the above named exceptions in mind, most remaining vegetables
will need to be steamed or blanched before, drying. Many vegetables have
enzymes that help the food ripen, and leaving these enzymes active in the
food will cause them to continue to bring about changes in flavor and
aroma which can be undesirable. Although untreated vegetables which are
dehydrated can still be good for as long as three to four months. Heated
treated vegetables reconstitute in less time, keep longer and generally retain
more flavor when reconstituted.
Steaming
Steaming is the best method of pretreatment. Place a single layer of chopped
or sliced vegetables in a colander or steam basket. Shredded vegetables can
be 1/2 inch deep in the colander or basket. Set vegetables in a pot above
a small amount of boiling water and cover. Water should not touch the
vegetables. Begin timing immediately. Refer to table for length of steaming.
When ready to remove, vegetables should be slightly tender. Spread steamed
vegetables on trays and dehydrate.
Blanching
Blanching is recommended for green beans, cauliflower, broccoli, asparagus,
potatoes and peas. Since these vegetables are often used in soups or stew,
blanching will ensure that they retain a desirable color. To blanch, place
prepared vegetables in a pot of boiling water for 3 to 5 minutes only. Strain
and pat dry and place vegetables in the dehydrator.
Blanching is faster than steaming, but many nutrients are lost in the
blanching water. It is not recommended for chipped or shredded vegetables,
which would easily overcook during blanching. To blanch sliced vegetables,
drop the prepared vegetables into a large pot of boiling water do not add
more than 1 cup food per quart of boiling water. Begin timing immediately.
For timing, follow standard freezing directions. Timing is approximate. For
timing, follow standard freezing directions. Timing is approximately one
third to one half that of steaming, or until vegetables are slightly tender.
Veggie Chips
Vegetable chips, with their crunchy texture and great taste, are so good
you’ll certainly want to plan for them. Select vegetables such as cucumber,
eggplant, zucchini, or parsnips. There is no need to peel. Cut very thin slices
about 1/8 inch thick. Steam about 3 or 4 minutes if chip will be stored longer than 5 months. Sprinkle with salt before drying or use seasoned salt for
a more interesting flavor. Dry until very brittle. These can be served plain or
with dips.
Vegetables Powders
Vegetables may be pureed, dried as leathers, and then powdered for making juices, soup bases, chip dips, salad dressings, cream soup, or baby foods.
Dehydrate the vegetable leather until very brittle, then immediately powder a small amount at a time in a dry electric blender. Sliced or chopped
vegetables, if dried to a bridle texture, can also be powdered. All vegetable
powders must be stored in airtight containers to avoid clumping.
Steam or blanch vegetables to be powdered if heat treatment is recommended in the tables at the back of this manual.
When using powders, remember that they are very concentrated in
flavor so add to your meals slowly to arrive at the desired flavor without
overpowering the dish.
19
Temperature Conversion Chart
Centigrade
C
40
45
50
55
60
65
70
75
80
Fahrenheit
F
104
113
122
131
140
149
158
167
176
Meats, Fish, and Poultry
Dried meats are best when made for upcoming camping and backpacking trips. When reconstituted, they yield a tasty meat, somewhat like fresh
cooked.
Use only very lean meats and cut away as much fat as possible. Meat
should be marinated before drying to add flavor and also to tenderize it. The
marinade should contain salt, which helps extract water from the meat and
also helps preserve it and should not have any oil. Most marinades contains
some sort of acid (like tomato sauce or vinegar) because the acid breaks
down the fibers making the meat more tender.
Slicing meat while partially frozen will be easier, especially if you want
very thin slices. A food processor or a specialized meat slicer can do a great
job. You can also tell your butcher that you are making dried meat or jerky
and they will be glad to thin slice it for you.
When drying meat or game for stews, soups, etc. Remember that these
types of meats must be cooked prior to drying. Cook, cut into small cubes
and place in the dehydrator. Dry until all moisture had been removed, approximately 2 to 8 hours.
When ready to use in your favorite stew, simply rehydrate by soaking
in water or broth for at least 1 1/2 hours or until tender and about the size
they were before dehydrating.
Beef
•
20
Choose lean cuts. Beef flank steak, round or rump are better than
chuck or rib.
Poultry
•
All poultry MUST be cooked before drying. Steaming or roasting are
the best methods. Chicken breast are leaner than dark meat.
Fish
•
A good idea is to steam the fish before dehydrating or if you chose to
bake it, preheat your conventional oven to 200 F and bake for 20 minutes or until fish is flaky. When drying fish, sole and flounder are good
choices.
Dehydration Tips
Dehydrating meat without prior cooking will produce the rigid,
chewy style of meat known as jerky. It is one of the oldest known forms of
meat preservation. Because “jerked meat” is made without cooking the meat
first, it is important to start with quality meat and to have clean and sanitary
work area. Also, be sure to thoroughly cleanse the work surfaces when finished. Remember that Jerky is the only meat to be placed uncooked in the
dehydrator.
Making Beef Jerky
As with nearly all foods, it is important to start with a quality cut of
meat. Select a lean flank or round steak about 1 to 1 1/2 inches thick. Trim
off all fat and connective tissue. Fat hampers the ability of the meat to dry
and connective tissue will make for a tough jerky to chew.
For easier cutting, place meat in the freezer for about 30 minutes to
partially freeze. Then turn it over and freeze for an additional 15 minutes.
Cut across the grain into strips about 1/8 inch thick.
Marinate the strips for at least 3 hours, or even overnight. This gives the
meat a unique flavor and at the same time tenderizes the meat. Increase the
marinating time for a stronger flavored jerky.
Meat may be seasoned with salt, pepper, garlic or onion powder, or
other spices. Because flavors intensify during dehydration, use salt sparingly!
There are lots of jerky recipes available. Try them, or create your own unique
flavor!
Drain marinated strips on paper towels. Then place then strips on
drying trays (remember to protect the dehydrator from dripping foods as
described earlier in this manual). Dehydrate until strips are quite dry and
stiff to bending, but can be bent without breaking. This will take from 6 to
21
16 hours. Unlike other dried meats, jerky should be slightly chewy but not
brittle.
Common Jerky Marinade
IMPORTANT NOTE: Except for jerky, cooking of all meats and fish
before drying is required to ensure safety. Do not store dried meats, fish or
poultry longer than two months.
Jerky
1/2 cup soy sauce
2 Tablespoons brown sugar
1/2 cup Worcestershire Sauce
1/2 teaspoon onion powder
Garlic clove, mashed
2 Tablespoons Ketchup
1 to 1 3/4 teaspoon salt
1/2 teaspoon pepper
Mix ingredients well.
IMPORTANT NOTE: Remember that keeping a sanitary work area is crucial. Be sure to wash all work surfaces and your hands before handling the
meat, and wash your hands after touching any other object or surface and
before handling meat again.
Drying Other Items
Flowers
The flowers should be picked after the dew has dried and before the evening
dampness. Flowers should be dried as quickly and as soon as possible after
picking. Discard any damaged or brown leaves. Place in trays without overlapping. Drying times will vary depending upon size and type of flower. Dry
for approximately 2 to 36 hours.
Herbs
Rinse and shake off excess water. Pat dry. Remove dead or discolored leaves.
If using seed, pick when pods have changed color. You should leave herbs on
the stem and remove when drying has been completed. Spread herbs loosely
on tray. Drying times will vary according to size and type. Dry for approximately 2 to 6 hours.
22
Nuts
Shell and rinse with hot water. Spread in a single layer onto trays. After
dehydrating, allow nuts to cool before storing. Nuts contain a lot of oil and
the oil could cause the nuts to become rancid, so you should freeze them
to guarantee freshness. When ready to use the nuts, bring them to room
temperature. Dry for approximately 18 to 26 hours.
23
Vegetable Preparation Table
Vegetable
Preparation
Artichokes
Cut into 1/3 inch strips. Boil
about 10 minutes.
Cut into 1 inch pieces. Tips yield
better product.
Cut and steam blanch until translucent.
Blanch, cool, remove tops and
roots. Slice.
Cut sprouts from stalk. Cut in half
lengthwise.
Trim and cut. Steam tender. About
3 to 5 minutes.
Trim and cut into 1/8 inch strips.
Cut core into 1/4 inch strips.
Steam until tender. Shred or cut
into slices.
Steam blanch until tender. Trim
and cut.
Cut stalks into 1/4 inch slices.
Chop
Pare and cut into 1/2 inch slices
Trim and slice 1/4 inch to 1/2
inch thick
Remove skin from clove and slice
Dry whole
Slice, chop, or dry whole
Slice thinly or chop
Shell and blanch for 3 to 5 minutes.
Cut into 1/4 inch strip or rings.
Remove seeds.
Asparagus
Beans
Beets
Brussels
Broccoli
Cabbage
Carrots
Cauliflower
Celery
Chives
Cucumber
Eggplant/
Squash
Garlic
Hot Peppers
Mushrooms
Onions
Peas
Peppers
24
Should Be Test Time
(hours)
Brittle
6 to 14
Brittle
6 to 14
Brittle
8 to 26
Brittle
8 to 26
Crispy
8 to 30
Brittle
6 to 20
Leathery
6 to 14
Leathery
6 to 12
Leathery
6 to 16
Brittle
Brittle
Leathery
Brittle
6 to 14
6 to 10
6 to 18
6 to 18
Brittle
Leathery
Leathery
Brittle
Brittle
6 to 16
8 to 14
6 to 14
8 to 14
8 to 14
Brittle
4 to 14
Potatoes
Rhubarb
Spinach
Tomatoes
Zucchini
Slice, dice or cut. Steam blanch 8
to 10 inch
Remove outer skin and cut into
1/8 inch lengths
Steam blanch until wilted, but not
soggy Kale etc.
Remove skin. Cut into halves or
slices
Slice into 1/4 inch pieces.
Brittle
6 to 18
No mois- 8 to 38
ture
6 to 16
Brittle
Leathery
8 to 24
brittle
6 to 18
Fruit Preparation Table
Fruit
Preparation
Pare, core and cut slices or rings
Cut into 1/8 inch strips
Clean, cut in halves or in slices
Peel and cut into 1/8 inch slices
Cut strawberries into 3/8 inch
slices, other berries whole
Cherries
Pitting is optional, or pit when
50% dry
Cranberries Chop or leave whole
Dates
Pit and slice
Figs
Slice
Grapes
Leave whole
Nectarines
Cut in half, dry with skin side
down. Pit when 50% dry.
Orange Rind Peel in long strips
Peaches
Pit when 50% dry. Halve or quarter with cut side up
Pears
Peel and slice
Apples
Artichokes
Apricots
Bananas
Berries
Should Be Test Time
(hours)
Pliable
5 to 6
Brittle
5 to 13
Pliable
12 to 38
Crisp
8 to 38
No mois- 8 to 26
ture
Leathery 8 to 34
Pliable
Leathery
Leathery
Pliable
Pliable
6 to 26
6 to 26
6 to 26
8 to 38
8 to 26
Brittle
Pliable
8 to 16
10 to 34
pliable
8 to 30
25
If Service Is Needed
If your dehydrator experiences a problem, first refer to the troubleshooting
Guide. On the page it contains numerous tips for diagnosing and solving
common problems. If the solution cannot be found there, contact the dealer
or distributor where you purchased the unit and request assistance or arrange for repair service.
When returning the unit for service DO NOT SEND DRYING
TRAYS unless they are defective or you were requested to do so.
The electrical parts in the base are not designed to be serviced by the
user. Opening the electrical portion of the base can void your warranty of
damage the dehydrator beyond repair. Any such work must only be preformed by an authorized service center.
FOOD DEHYDRATOR WARRANTY
Your Victorio Food Dehydrator is guaranteed for the period of one (1) year
from the date of purchase to be free from mechanical defects in material or
workmanship. The manufacturer’s obligation hereunder is limited to repairing or replacing such defects occurring during the guarantee period at no
charge, providing the product is sent pre-paid to: Victorio Kitchen Products, 1804 Sandhill Road, Orem, Utah 84058. Victorio Kitchen Products
will pay for the return postage. This guarantee does not cover damage from
misuse of the product.
For Parts and Warranty Service
CALL 866-257-4741
or
E-MAIL [email protected]