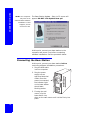
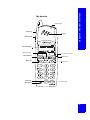
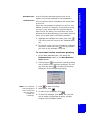
1
CG 2400
User Guide
For the Cygnion® CG 2400
Professional Cordless
Phone System
Irvine, California
i
CG 2400 User Guide for the Cygnion Professional Cordless Phone System
Part Number EN/LZTU 104 07 P2
© 1999, 2000 by Cygnion Corporation. All rights reserved.
Third printing August 2000
Printed in the United States of America
This document contains proprietary information that is protected by
copyright. No part of this document may be reproduced or transmitted in any
form or by any means, electronic or mechanical, including photocopying,
recording, or by any information storage and retrieval system, or translated
into another language, without prior written consent of Cygnion Corporation,
U.S.A.
NOTICE
The information in this document is subject to change without notice.
CYGNION MAKES NO WARRANTY OF ANY KIND WITH REGARD TO
THIS MATERIAL, INCLUDING, BUT NOT LIMITED TO, THE IMPLIED
WARRANTIES OF MERCHANTABILITY AND FITNESS FOR A
PARTICULAR PURPOSE. Cygnion shall not be held liable for errors
contained herein nor for incidental or consequential damages in connection
with the furnishing, performance or use of this material.
TRADEMARKS
Cygnion and CyberGenie are registered trademarks of Cygnion
Corporation.
The DG 200 Handset is produced and sold by Cygnion Corporation. The
Ericsson trademark is used under license by Cygnion.
Other brands and their products are trademarks or registered trademarks of
their respective holders and should be noted as such.
Published by Cygnion Corporation, 41 Discovery, Irvine, CA 92618
ii ii
Please follow the
installation
instructions for this
product
Cygnion Products
Year 2000 Compliant
Do not attach the base station to your PC until you
are instructed to do so during the software
installation process.
Because the drivers for your new hardware are not
preloaded into your Windows operating system,
connecting the base station to your PC before the
drivers are loaded by the installation procedure will
prevent the PC from recognizing the base station
hardware.
Cygnion mobile terminal products with date and/or
calendar functions are designed to handle the
century turn as a normal change of date and year. On
January 1, 2000, at 00.00, year denotations written
as 1999 will change to 2000, and denotations written
as 99 will change to 00. No drops of data,
presentation or irrelevant year denotations or any
other function disorder should be expected.
Terminals and software will function normally after
the turn of the century.
This information is valid for all Cygnion mobile
terminal products, regardless of system, including all
mobile phones, pagers, data products and software
that support date and/or calendar functions.
iii
The Base Station
Safety Information
a.
Safety Standards conformance: UL 1950 Third Edition
b.
CSA C22.2 No. 950-95 Third Edition
EMC Regulations:
a.
FCC, CFR Title 47, Subchapter 15, Subpart C
b.
Industry Canada (IC) RSS-210
a.
FCC, CFR Title 47, Subchapter 68
b.
IC CS 03 Parts I, II, V, VI, VII & VIII
Telecommunication Regulation:
Manufacturer’s Declaration of Conformity (DoC)
Cygnion Corporation
41 Discovery, Irvine, California 92618, U.S.A.
We declare under our sole responsibility that the CG 2400 system (Base
Station Model DA 202, Handset Model DG 200 and Handset Charger Model
XA 200) conforms to the following specifications:
The limits for Class B digital device, pursuant to Part 15 of FCC Rules and
IC RSS-210, operation is subject to the following two conditions:
(1)
This device may not cause harmful interference, and
(2) This device must accept any interference received, including
interference that may cause undesired operation.
FCC Part 68 and IC CS-03:
This equipment complies with FCC Rules Part 68 and Industry of Canada IC
CS-03. Located on the back of the base station is the FCC registration
number and ringer equivalence number (REN). You must provide this
information to the phone company if requested.
The REN is useful to determine the number of devices you may legally
connect to your telephone line and still have all of those devices ring when
your telephone number is called. In most areas, but not all areas, the sum of
the RENs of devices connected to one line should not exceed five (5). To be
certain of the number of devices you may have connected to your line, as
determined by the REN, you should contact your local telephone company
to determine the maximum RENs for your calling area.
Hearing-aid wearers: The CG 2400 system is compatible with inductively
coupled hearing aids.
UL/cUL:
This equipment is UL-listed and cUL-listed for use with UL-listed personal
computers and complies with UL 1950/CSA C22.2 No. 950-95 Third Edition.
Safety Precautions: To reduce the risk of fire, use only No. 26 AWG or
larger telecommunication line cord.
Danger of explosion if battery is incorrectly replaced. Replace only with the
same or equivalent type recommended by the manufacturer. Dispose of
used batteries according to the manufacturer's instructions.
The rechargeable nickel metal hydride (NiMH) battery pack must be
recycled or disposed of properly. Do not dispose of in municipal waste.
Check with your local solid waste offices for details in your area for recycling
options or proper disposal.
Do not open or mutilate the batteries. Released electrolytes may cause
damage to the eyes or skin. The electrolytes may be toxic if swallowed.
Avoid contact with water or fire. DO NOT dispose of batteries in a fire; the
cells may explode. Check with local codes for special disposal instructions.
iv
iv
The Handset
The Handset
Indicator light
Volume controls
Earpiece
Handset display
CyberGenie key
On / off / NO / on-hook
YES / off-hook
Headset jack
Menu / up
Menu / down
Flash hook
Clear / mute
Microphone
v
The Base Station
The Base Station
Indicator
light
Indicator light states
Green
Green blinking
Amber
Amber blinking
Red
Off
Base station is
successfully connected
to the PC and software
is running.
Firmware download is
in progress.
Base station is running
in stand-alone mode
(PC not on, software
not loaded, or USB
cable unplugged).
Hardware is
initializing.
™
IE
GEN
ER
CYB
If red for a few
seconds, base station
is initializing. If red
persists, indicates
base station failure.
Base station is not connected to power source.
Base station bottom connectors
Line 2 socket
Line 1 socket
USB connection
Optional fax/modem socket
vi
Power
socket
vi
Contents
Chapter 1: Introduction ....................................................................
1
Welcome .................................................................................... 1
About CyberGenie................................................................... 1
Interacting with the System ..................................................... 2
This Guide ............................................................................. 3
The User ............................................................................... 4
Key Words............................................................................. 4
System Overview ........................................................................ 7
Key Features .............................................................................. 8
Advanced Telephony ............................................................... 8
Unified Messaging................................................................... 8
Microsoft Outlook® and MAPI-compliant Integration.................... 9
Speech Recognition and Text-to-Speech .................................... 9
System Security ................................................................... 10
General Specifications ................................................................ 10
General Precautions .............................................................. 10
In the Event of Power Failure ................................................. 11
Chapter 2: Installation .................................................................... 13
Successful Installation................................................................
System Requirements ...........................................................
System Components ..................................................................
Preparing the DG 200 Handset ....................................................
Charging the Handset ...........................................................
Maintaining Battery Charge ....................................................
Setting up the Base Station ........................................................
Choosing the Best Location for your Base Station......................
Assembling the Base Station ..................................................
Installing the CyberGenie@Work Software ....................................
CyberGenie’s Call-by-name Feature and Microsoft Outlook .........
How the Programs Integrate ..................................................
Message Management Options ...............................................
Ensuring Microsoft Outlook Support ........................................
13
14
15
16
16
19
19
19
21
23
23
24
24
25
vii
Contents
Starting Software Installation .....................................................
Connecting the Base Station ..................................................
Finishing Software Installation ...............................................
Running the Installation Configuration Wizard ...............................
Defining External Phone Lines ................................................
Subscribing Handsets ...........................................................
Defining Users .....................................................................
Completing Initial Configuration .............................................
Registering the Product .........................................................
CyberGenie Console .............................................................
Other Hardware Installation Options ............................................
Subscribing Additional Handsets .............................................
Using Your Handset with Other DA 202 Base Stations................
Sharing a Base Station Line with Other Devices ........................
27
32
33
34
35
36
38
41
41
42
43
43
43
43
Chapter 3: The User Interfaces ....................................................... 45
The Three Interfaces .................................................................
Handset User Interface ..............................................................
Modes of Operation ..............................................................
Basic Handset Procedures......................................................
Handset Keys ......................................................................
The Handset Display .............................................................
Using the Handset Display Menu ............................................
Handset Display Menu Option Descriptions...............................
Speech User Interface ...............................................................
Accessing CyberGenie ...........................................................
Other CyberGenie Functions ..................................................
CyberGenie Quick Reference ..................................................
Graphical User Interface.............................................................
The Server ..........................................................................
The Rollup Menu ..................................................................
The CyberGenie@Work Console..............................................
Miniaturizing the Console Window...........................................
Areas on the Console Windows...............................................
Wizards Window...................................................................
Call Progress Window............................................................
Contacts Window .................................................................
Configuration Window ...........................................................
Call Log Window ..................................................................
Voicemail Window ................................................................
Online Help .........................................................................
45
46
46
46
48
50
51
52
57
57
58
58
61
61
61
62
64
64
67
68
69
70
71
72
73
Chapter 4: Full System Configuration ............................................. 75
The Wizards Window .................................................................
Line Wizard .........................................................................
User Wizard.........................................................................
Contact Wizard ....................................................................
viii
75
77
78
79
Contents
The Configuration Window .......................................................... 79
CyberGenie System Setup .......................................................... 80
Base Station Information ....................................................... 81
Overall Call Settings.............................................................. 82
Call Logging .............................................................................. 83
Call Log Setup ...................................................................... 83
Messaging ................................................................................ 84
Messaging Properties............................................................. 85
Voicemail Settings for System Inbox ....................................... 87
Rejection Message ................................................................ 88
External Line Setup.................................................................... 89
Dialing Properties ................................................................. 90
Adding and Deleting External Phone Lines ................................ 90
Setting General Properties ..................................................... 91
Setting Business Hours .......................................................... 93
Setting Call Routing .............................................................. 95
Setting Up Auto Attendant ..................................................... 97
Handset Setup ........................................................................ 100
Subscribing a Handset to the Base Station ............................. 100
Assigning a Handset to a User .............................................. 102
Unsubscribing a Handset...................................................... 104
User Setup ............................................................................. 105
Setting up a New User ......................................................... 105
Changing User Information .................................................. 110
Chapter 5: System Administration ................................................ 115
The CG 2400 System and Your PC..............................................
The Call Progress Window .........................................................
Miniaturizing the Call Progress Window ..................................
Call Progress Control ...........................................................
Viewing Calls in Progress .....................................................
Dialing an Additional Call .....................................................
Reconnecting a Call.............................................................
Transferring a Call in a Two-Party Scenario ............................
Transferring a Call in a Three-Party Scenario ..........................
Conferencing a Call .............................................................
Rejecting a Call ..................................................................
Redirecting an Incoming Call ................................................
Listening to Incoming Messages............................................
The Contacts Window ...............................................................
Adding and Updating Contacts ..............................................
Editing a Contact Directly.....................................................
Dialing a Contact from Your PC .............................................
Activating Speech Recognition ..............................................
Enabling Download to Handset .............................................
Changing the Sort Order of the Contacts List ..........................
115
115
117
117
119
119
120
121
122
123
124
125
126
126
128
131
131
132
132
133
ix
Contents
Changing Your Contacts View................................................
Searching For a Contact .......................................................
The Call Log Window ................................................................
Viewing the Call Log ............................................................
Filtering Call Records ...........................................................
Changing Sort Order from the Log .........................................
Viewing Details ...................................................................
Refreshing the Call Log ........................................................
Printing the Call Log ............................................................
Clearing the Call Log............................................................
The Voicemail Window ..............................................................
Reviewing Messages ............................................................
Changing Sort Order............................................................
Deleting Messages...............................................................
133
134
135
136
136
138
138
139
139
140
140
141
142
142
Chapter 6: Unified Messaging ....................................................... 143
What Unified Messaging Does ....................................................
Unified Messaging Features from the PC ......................................
Assigning Access to the System Inbox....................................
Setting up a User's Message Notification.................................
Reminder Messages..................................................................
Message Retrieval ....................................................................
Retrieving Messages from the Handset ...................................
Retrieving Messages Remotely ..............................................
CyberGenie Greeting Messages ..................................................
Call Routing and How It Affects Messages ...............................
Changing Welcome Greetings................................................
Changing Voicemail Greetings ...............................................
Changing the Rejection Message ...........................................
143
144
145
145
147
147
148
150
150
151
151
153
155
Chapter 7: Calls from the Handset ................................................ 157
Call Management .....................................................................
How Call Sessions Work .......................................................
Incoming and Outgoing Calls .....................................................
Receiving a Call ..................................................................
Placing an External Call........................................................
Placing an Internal Call ........................................................
Selecting Which Phone Line to Use ........................................
Parking a Call .....................................................................
Re-dialing Recently Dialed Numbers.......................................
Viewing Call Duration Information .........................................
Retrieving a Call..................................................................
Listening in on an Incoming Message from the Handset ............
Transferring a Call...............................................................
Rejecting a Call...................................................................
x
157
158
158
159
159
161
163
163
164
165
166
167
167
169
170
170
171
172
174
174
175
Contents
Multiple Calls...........................................................................
CyberGenie Call Waiting ......................................................
Putting a Call on Hold ..........................................................
Conferencing Calls ..............................................................
Calls from the Handset Phone Book ............................................
Downloading the Phone Book to Your Handset ........................
Placing a Call Using the Phone Book ......................................
Chapter 8: Handset Customization................................................ 177
What Can Be Customized ..........................................................
Navigating the Handset Menus..............................................
Sounds...................................................................................
Adjusting the Volume Levels ................................................
Changing the Ringer Sound ..................................................
Changing the Key Click ........................................................
Changing the Discreet Ring ..................................................
Turning Off the Ringer and Warning Sounds ...........................
Other Settings.........................................................................
Activating Message Notification with the Handset Indicator Light
Changing the Display Light and Contrast ................................
Changing the Language for the Handset Menus .......................
Changing Tone Length for Interactive Menus ..........................
Additional Handset Features ......................................................
Muting the Handset Microphone ............................................
Using the Optional Headset ..................................................
Automatic Answering with a Headset .....................................
Using the Handset as a Baby Monitor.....................................
Using Direct Call .................................................................
Changing Call Forwarding Destinations ..................................
Security Issues........................................................................
Changing the Key Lock Status ..............................................
Setting the Phone Lock ........................................................
Viewing the IPEI Code .........................................................
Changing the Handset PIN ...................................................
Unblocking the Handset .......................................................
Base Stations and Your Handset ................................................
Selecting a Base Station ......................................................
Renaming a Base Station .....................................................
Deleting a Base Station .......................................................
Subscribing a Handset to a Base Station ................................
Default Handset Settings ..........................................................
177
178
178
179
179
180
180
180
181
181
182
183
183
184
184
184
185
186
187
188
189
189
190
191
191
192
193
193
194
195
196
196
Appendices .................................................................................... 197
Tips for Using CyberGenie ......................................................... 197
PC Performance .................................................................. 197
CyberGenie Pronunciation .................................................... 197
xi
Contents
xii
Other Tips ..........................................................................
Pre-recorded Messages ........................................................
Creating Multiple Email Profiles in Microsoft Outlook......................
Configuring Your MAPI Application Correctly.................................
Importing Contacts into Microsoft Outlook or
Windows Messaging.............................................................
Entering Non-Numeric Symbols from the Handset Keypad .............
Tables ....................................................................................
DA 202 Base Station Indicator Light Status.............................
External Line Indicator Status ...............................................
Call Status Table .................................................................
Call Reason Table................................................................
Reinstalling the Software...........................................................
Troubleshooting .......................................................................
Hardware ...........................................................................
Software ............................................................................
Handset .............................................................................
Additional Help ........................................................................
Help from the Handset .........................................................
Other Technical Support Options ...........................................
Record Your PINs .....................................................................
Index .....................................................................................
198
201
203
204
205
206
207
207
207
208
208
210
212
212
213
214
216
216
216
219
221
Chapter
1 Introduct ion
Welcome
The Cygnion CG 2400 Professional Cordless Phone
System is a combination of hardware and software
that you can use to control and route incoming
communications (phone, fax, and email) and simplify
outgoing communications through such features as
speech-activated dialing. The main components are:
•
The base station, which connects your public
telephone service to your PC and interfaces
between the phone lines, the PC, and the
handset.
•
The CyberGenie@Work software application,
which provides an interface through the PC for
the entire system.
•
A handset that works like a cordless phone, from
which you can receive and originate calls.
The CG 2400 System uses 2.4 GHz Digital Spread
Spectrum technology, which means that the quality
of sound is as good as that of conventional phones,
and no one can eavesdrop on your calls.
About CyberGenie
Cygnion's CyberGenie technology provides a virtual
personal assistant, an interactive way to access and
control incoming and outgoing communications.
1
CG 2400 User Guide
CyberGenie can greet your callers, route calls based
on user-defined “rules” and caller voice response,
and store incoming messages.
CyberGenie also lets you interact with many system
features from the handset keypad, through the
handset menu display options or with voice
commands.
Interacting with the System
There are several ways you can interact with the
system:
Use CyberGenie from
the handset
When you press the
key on the handset, you are
accessing the speech user interface. CyberGenie will
ask Who would you like to call?
If you give CyberGenie the name of a contact or
another user that has been set up for speech
recognition, CyberGenie will dial the number for you.
If you answer with “CyberGenie,” you start at the
first level of speech menu options. CyberGenie walks
you through the options available. As you become
familiar with the options, you can use speech or
keypad shortcuts to quickly access functions.
Use the handset
keypad options
Many of the options available by speech interface are
also available by pressing a key on the handset
keypad.
Use the handset
display menu
From the handset, you can access various menu
options by pressing the
keys on the handset.
Menu options will display, and you can move through
the options with the
keys, select an option
with the
key, or move back up a level in the
menu with the
key.
Use the PC
2
From the PC, you can set up users and contact
information, set up other system information, track
and manage calls, review voicemails and more.
This guide gives you the information you need for the
full setup and use of your CG 2400 PC Phone System.
Use it as a learning tool by going through the entire
manual in sequence or for reference on specific
features and procedures.
Chapter 1:
Introduction
Chapter 2:
Installation
Chapter 3:
The User Interface
Chapter 4:
Full System
Configuration
Chapter 5:
System
Administration
Chapter 6:
Unified Messaging
Chapter 7:
Calls from the
Handset
Chapter 8:
Handset
Customization
Appendices
Provides a quick overview of the system's features
and capabilities, including a key word list that defines
basic terms used in this guide.
Chapter 1: Introduction
This Guide
Covers basic installation. To get started quickly, refer
to the Quick Installation sheet that came with your
CG 2400 system; use “Chapter 2: Installation” as
needed for more detailed information.
Shows the different ways you can interact with the
CG 2400 system.
Details how to further customize your system. It
covers procedures for recording outgoing messages
from the computer, adding users and handsets to the
system and other advanced features.
Provides procedures for using the system from the
PC, including monitoring calls and updating your
online phone book.
Provides procedures for message retrieval and for
changing outgoing messages when not at the PC.
Covers how to handle incoming and outgoing calls,
how to store numbers in your handset, and the ways
a call can be manipulated from the handset.
Provides procedures for customizing the handset,
and addresses additional handset features.
Contains additional information about your system
and a troubleshooting guide.
You can also use the Handset Quick Reference for
procedures specific to the handset.
3
CG 2400 User Guide
The User
This system is designed for the small office or home
office user, for the busy household where family
members rival for phone time, or for the user who
enjoys new technologies.
System
administrator
One person should be responsible for setting up and
maintaining the CG 2400 system and data on the
computer. This person would be the system
administrator in charge of:
•
Connecting the hardware and installing the
software
•
Configuring the system fully
•
Setting up new handsets and users
•
Managing the system from the PC
With this guide, anyone with a working knowledge of
their Microsoft® Windows® operating system can do
the system administrator job.
Handset user
Once the system is installed, anyone who can use a
cordless telephone can use a CyberGenie handset.
Basic handset procedures are described in the
Handset Quick Reference. Detailed procedural
information is also available in this guide.
Key Words
Take a few minutes to familiarize yourself with the
following terms:
4
Telephony
First used when telephones were invented to
describe the telephone industry, more recently this
term has been put to new use in reference to
technologies that integrate personal computers and
telephones. Telephony not only covers calls coming in
or out, but also such features as caller ID, integrated
messaging and automatic speech recognition.
Auto Attendant
A feature in an automated telephony system that
answers and directs incoming calls, usually with user
interaction.
CyberGenie
A technology that allows a computer to recognize
and respond to spoken commands.
Your virtual personal assistant. This is the voice the
user hears when checking messages or accessing a
speech-activated feature through the handset, or a
caller hears when phoning in if the Auto Attendant is
activated. CyberGenie combines Auto Attendant
features with other advanced speech recognition
command features that greet and direct incoming
calls and provide the CyberGenie user with an
interactive speech interface to many system
features. Unlike some earlier ASR technology, you do
not have to “train” CyberGenie to understand your
voice.
CyberGenie@Work
The software that drives your Cygnion telephony
system.
CyberGenie@Work
server
The application that runs CyberGenie@Work in the
background. It loads automatically when you start
your PC and must remain up and running for your CG
2400 system to operate fully.
CyberGenie@Work
application
The software user interface. This can be closed
without shutting down the server.
Base station
The hardware that receives and processes call
information, then passes it on to CyberGenie@Work.
The base station is physically connected between the
phone jack and your computer.
Handset
The device that serves as a cordless phone as well as
a link between you and CyberGenie.
Analog phone
An analog phone is a device which uses tip & ring (tip
& ring refers to the type of connection used when the
phone is plugged into a public telephone service
phone jack). It is also a non-digital, non-PBX
phone—the type of phone commonly found in a
home.
CG 2400 system
The complete Cygnion small office or home office PC
telephony system. The basic components of the
CG 2400 system are the base station, a handset, and
the CyberGenie@Work software.
Chapter 1: Introduction
Automatic speech
recognition (ASR)
5
CG 2400 User Guide
User
Anyone who is set up in CyberGenie@Work to receive
voicemail or use a handset.
External call
A call that comes in or goes out via your local phone
company.
Internal call
A call made from one handset to another.
Caller
CyberGenie session
The interaction between a user and CyberGenie
through a handset or remote phone.
Call session
Any call activity is referred to as a call session. It can
be a CyberGenie session, an external or internal call.
Air channels
A single call session uses one or two air channels,
depending on the nature of the call. For example, an
external call (incoming or outgoing) uses a single
channel. A call from a handset to CyberGenie also
uses a single air channel. Calls between two
handsets, however, use two air channels, one for
each handset.
Subscribe
Assign
MAPI
6
Someone calling in to the CG 2400 system from an
external phone line.
To register a handset to work with the CyberGenie
base station. The base station will interact only with
a handset that has been subscribed.
To provide a user with access to a specific handset.
Messaging Application Programming Interface, MAPI
is a Microsoft standard for messaging software that
allows different types of message information (email,
voicemail, contact lists, etc.) to be passed through a
common interface.
Unified messaging
A way of accessing your messages (voice or email)
from a single source. It includes such features as
text-to-speech, which converts email text into a
format that you can listen to when checking
messages by phone.
Full function mode
When your PC is on with CyberGenie@Work running,
the system is in full function mode.
Standalone mode
If the PC must be turned off, the system can still run
in standalone mode, which lets you place and receive
external calls, but without the additional features
provided by CyberGenie@Work.
The CG 2400 system turns your computer into a
multi-featured phone system. Not only does it
answer and route incoming calls, it also notifies you
when you have voicemail or email, or when a fax
comes in1.
A key system component is the DG 200 Handset.
When a call comes in, CyberGenie will notify you and
display the caller's ID2, if available, giving you the
option of taking the call or letting the call go to
voicemail.
Chapter 1: Introduction
System Overview
When an email comes in, CyberGenie's text-tospeech feature can also provide a way for you to
listen to your email on the spot without having to
return to your computer.
The CG 2400 system can support up to 10 handsets
and 20 mailbox users. You can use the handsets not
only to make external calls but also to place internal
calls from one handset user to another. And you can
use your handset to call your virtual personal
assistant, CyberGenie, to check messages, place
calls, or leave reminders for yourself.
With CyberGenie, you can also make use of an
advanced automatic speech recognition (ASR)
technology that allows you to perform many of the
telephony functions available through interactive
“conversations” with CyberGenie. CyberGenie follows
your verbal instructions for such tasks as placing a
call, retrieving your messages, or recording new
outgoing messages.
1.Fax notification will provide fax header information—who the
fax came from and when it was received. This feature is supported only in Windows 98. It is not supported by later versions
of Windows, such as Windows 2000 or WinME.
2.Requires Caller ID service from the phone company.
7
CG 2400 User Guide
Key Features
Advanced Telephony
•
CyberGenie answers calls and, using caller
interaction, determines where to route the call (to
which handset, user or mailbox).
•
CyberGenie also supports caller ID on the
handset for incoming external calls (if this service
is provided by your local phone company).
•
You can set up different caller greetings for
business and non-business hours (based on days
of the week and hours of the day). Each
supported phone line can have a different
greeting.
•
The CG 2400 system supports three-way
conference calling. It also supports “barge in,”
which lets you join in on an active call from
another handset or analog phone, or retrieve a
call that has been parked from your own or
another handset.
•
It can log all incoming and outgoing calls for
whatever period you designate.
•
You can view all active call information from the
PC.
•
You can retrieve messages from the handset or
view a log of messages and listen to them from
your PC.
•
Frequently used phone numbers can be
downloaded from your PC to your handset.
Unified Messaging
•
8
The CG 2400 system can notify you of waiting
messages at your handset or at a remote
number, such as your cell phone.
You can retrieve messages from a remote
location.
•
Voice and email messages, along with fax header
information, can be retrieved from a single
source.
Microsoft Outlook® and MAPIcompliant Integration
•
You can set up your phone book using the
CyberGenie@Work Contacts feature, or use it
with MAPI-compliant programs such as Microsoft
Outlook or Windows Messaging Service.
•
You can use the speech-activated dialing feature
to place a call by speaking the contact's name
into the handset.
•
When used with Microsoft Outlook, you can use
Microsoft Outlook rules to send inbound emails to
personal subfolders.
Chapter 1: Introduction
•
Speech Recognition and
Text-to-Speech
•
In addition to interacting with the system by
computer or the handset keypad, you can access
many features with CyberGenie speech
activation, either from your handset or by
phoning in from a remote location.
•
Many handset features are speech-menu driven,
which means you can start using CyberGenie and
your handset immediately. Once you are familiar
with the basic features, it's easy to learn the
speech or keypad shortcuts.
•
If you take advantage of CyberGenie’s unified
mail feature, you can use the text-to-speech
interface to listen to emails from your handset or
by calling in.
9
CG 2400 User Guide
System Security
•
User PINs (personal identification numbers) can
provide controlled access to a user’s mailbox from
both the handset and when checking messages
remotely.
•
You can also lock the keypad on the handset to
prevent accidental dialing, or lock the handset
itself to deter unauthorized use.
General Specifications
•
Maximized outdoor range is 900 feet. (Obstacles
such as walls or partitions can reduce the range,
so the average indoor range is about 150 feet.)
•
The DG 200 Handset provides 15 hours of talk
time or 100 hours of standby between charges.
•
A single base station can support up to two
analog phone lines.
•
The CG 2400 system supports up to 10 handsets
and 20 users.
•
Hands-free headset operation is also available
with an optional headset (not included).
•
CyberGenie allows up to six simultaneous active
handsets. This could be up to two external calls,
one internal call between two handsets, and two
CyberGenie sessions, or three internal calls (each
using two handsets).
General Precautions
10
•
To avoid interference, do not place the DA 202
Base Station or use the DG 200 Handset near
audio or video equipment or microwave devices.
•
Avoid exposing the handset to direct sunlight for
long periods. Keep the handset away from
excessive heat and moisture.
It is illegal to have the handset turned on when in
an aircraft.
•
Do not use the handset in the vicinity of refueling
points, fuel depots, or chemical plants, or when
blasting operations are in progress.
•
Medical electronic products (for example, hearing
aids and heart pacemakers) may not be
adequately shielded, and could be affected.
Please consult your doctor if in doubt.
Chapter 1: Introduction
•
In the Event of Power Failure
The CyberGenie equipment is not designed for
making emergency calls when the power fails.
Alternative arrangements should be made for
accessing emergency services.
NOTE: The handset
does not function with
discharged batteries.
If there is a power failure and no backup power
source is available, all functions through the PC, the
base station, and the handset are lost. However,
even without power, you can still use the external
phone line by disconnecting the CG 2400 system
phone line from the wall socket and reconnecting an
analog phone.
11
12
CG 2400 User Guide
Chapter
2 Install at ion
Successful Installation
To install the CG 2400 system successfully, you must
follow the installation instructions precisely. You must
also shut down all other applications prior to
installation, including any antivirus software, or other
programs that run in the background.
NOTE: Do not attach
the base station
to your PC until
you are instructed
to do so during the
installation process!
NOTE: If you plan to
use a fax/modem card
on the same line as
your CyberGenie
system, or if you have
a fax machine or analog
phone on the same
line, see “Other
Hardware Installation
Options” on page 43.
The base station driver is not preloaded into your
Microsoft Windows operating system, so connecting
the base station before the driver is loaded may
prevent the system from successfully recognizing the
hardware.
There are four basic steps to successful installation:
•
Preparing the DG 200 Handset
•
Setting up the base station
•
Installing the CyberGenie@Work software
•
Running the Configuration Wizard
If installation fails, follow the reinstallation
procedures described in “Reinstalling the Software”
on page 210.
13
CG 2400 User Guide
System Requirements
Minimum
software
Microsoft Windows 98 (pre-installed)
Minimum
hardware
233 MHz processor
64 MB RAM
60 MB free hard disk space
CD ROM drive
16-bit sound card
1 analog phone line
USB port
Recommended
hardware
300 MHz processor
140 MB free hard disk space
96 MB RAM or higher
2nd analog phone line
Optional
Fax/modem
Microsoft Outlook
14
The complete CyberGenie CG 2400 system includes:
2 standard
phone cords
DA 202
Base
Station
Chapter 2: Installation
System Components
USB cable
Base
station
desk
stand
ERG
CYB
ENIE
™
DG 200 Handset
with detachable clip
Base station
power supply
XA 200 Handset charger
with desk mount
Handset charger power supply
Not shown:
•
Base station wall mount
•
Handset charger wall mount
•
NiMH battery pack for the handset
•
CyberGenie@Work CD-ROM
•
Quick Installation sheet
•
CG 2400 User Guide
•
Handset Quick Reference
•
Pocket Reference
Verify that you have all of the components listed. If
components are missing, contact your dealer or place
of purchase.
15
CG 2400 User Guide
Preparing the DG 200
Handset
One pre-subscribed handset is included with the
system. Up to nine additional handsets can be
subscribed to a single base station.
If you have purchased additional handsets, you will
want to subscribe them after basic installation.
Handset subscription procedures are covered in
“Subscribing a Handset to the Base Station” on
page 100.
Charging the Handset
The components you will need:
•
Handset
•
Handset battery pack
•
Handset charger and charger support (desk or
wall mount)
•
Handset charger power supply
To install the
battery pack:
1. Press down with
your thumbs, then
pull in the direction
of the arrow to
open the handset.
16
Chapter 2: Installation
2. Plug the battery wire into the connector. The plug
and connector are keyed to fit in one direction
only, so if you have difficulty fitting the connector,
try reversing the direction.
3. Route the wire through the guide. Twisting the
wires together several times can aid in routing
them through the guide.
4. Place the battery securely inside the battery
compartment.
5. Replace the cover.
17
CG 2400 User Guide
To assemble the handset charger:
1. Insert the power
supply plug into the
socket on the back
center of the charger.
2. Align the bottom tabs
on the charger
support with the
bottom holes on the
back of the charger.
Rotate the mount
toward the charger
until it clicks in place.
3. Plug the power supply
into an approved
electrical outlet.
To charge the handset:
NOTE: Let the handset
charge for at least
three hours before
first use.
1. Insert the handset securely into the charger.
2. If the handset is on, press the
key for
approximately two seconds, or until the handset
turns off.
3. While charging, the green indicator light on the
charger will be on. If it does not come on within
10 to 20 seconds of putting the handset into the
charger, verify that the metal contacts on the
bottom of the handset align with the metal pins in
the charger.
When the handset is fully charged, the indicator light
will go off.
18
When not in use, leave the handset in the charger to
keep it charged.
When the batteries are fully charged, the battery
meter on the handset display shows
. When the
batteries are low, both the battery meter and the red
indicator light on the handset flash. An alarm sounds
from the handset when less than 15 minutes of
calling time are left.
Chapter 2: Installation
Maintaining Battery Charge
Fully charged batteries provide 15 hours of calling
time or 100 hours of standby time. The rechargeable
nickel metal hydride (NiMH) battery pack should last
for a year or longer under normal conditions.
Setting up the Base Station
Prepare the base station but DO NOT connect the
USB cable to the computer yet.
To set up the base station, you will need:
•
Base station
•
Desk stand or wall mount with screws
•
Base station power supply
•
USB cable
•
One or two phone cords (depending on how many
analog phone lines you plan to use)
Choosing the Best Location for
your Base Station
Before choosing a location for your base station,
consider the following:
•
The base station’s antenna is designed to
generate a spherical radiation pattern. The more
centrally located the base station is within desired
coverage area, the better.
19
CG 2400 User Guide
•
Although CyberGenie’s radio system is capable of
transmitting through most common line-of-site
obstructions (walls, floors, partitions, doors, and
furniture), the signal strength is slightly
diminished by obstructions. Position the base
station in a place that will reduce the number of
obstructions to high phone use areas.
•
In general, the higher the base station is from the
floor the better. This reduces the need for
transmission through furniture, counters, etc.
•
A metallic obstruction degrades the signal more
than a non-metallic one. If you have metal
heating/cooling ducts in your walls, mounting
your base station near the ceiling may also
interfere with transmission. In this case, placing
the base station between 3 feet above the floor
and 1.5 feet below the ceiling will give best
results.
•
Keep your base station clear of other electronic
devices, most specifically: microwave ovens,
television sets, stereos, fluorescent lighting and
other wireless devices (such as cordless
telephones, baby monitors, wireless LAN
hardware, CB radios, and video senders).
•
Although your base station must be connected to
your PC at all times to operate in full function
mode, keep the base station away from close
proximity with your PC and monitor. A 9-foot USB
cable is included for a broader range when
positioning your base station.
Other things to avoid:
20
•
Heat sources (radiators, air ducts, direct sunlight,
etc.)
•
Excessive moisture (rain, showers, sinks,
humidifiers, etc.)
•
Extremely high or low temperatures (the base
station’s operating temperature range is 0°–40°
Celsius, or 32°–104° Fahrenheit)
•
Mechanical vibration
You have two mounting options: desk mount or wall
mount. Before beginning assembly, decide which to
use:
•
With the desk mount, you can place the base
station on any flat surface and reposition it easily.
•
The wall mount requires permanent installation
but does not take up desk or counter space.
Chapter 2: Installation
Assembling the Base Station
To mount the base
station:
1. Read the warning
sticker on the bottom
of the base station,
then remove it so the
connection sockets are
visible.
2. Mount the base
station:
™
ENIE
ERG
CYB
Desktop mount
For desktop use, attach
the base station to the
base station stand as
shown.
21
CG 2400 User Guide
Wall mount
If using the wall
mount, ensure
that the power
supply cord
reaches from
the base station
to an outlet,
that the USB
cable reaches
the back of the
computer, and
that the phone
lines will reach
the phone
jacks.
™
IE
GEN
ER
CYB
Attach the mount to the wall with the provided
screws.
Plug in the cables before attaching the base
station to the wall mount (see next step for
procedure).
3. Connect the cables to the base station:
Line 1 socket
USB connection
Fax/modem socket
Line 2 socket
Power socket
Wire guides
22
4. If using the desk mount, run all cables through
the wire guides.
5. Plug each phone line into the corresponding wall
phone jack.
6. If using a fax/modem, plug the modem phone
line into the base station. (See “Setting General
Properties” on page 91.)
DO NOT plug the USB cable into the computer or the
power supply into an electrical outlet at this time.
During software installation, the installation
Configuration Wizard will let you know when it is time
to power up the base station and connect it to the
computer.
Chapter 2: Installation
NOTE: If you want
Internet access for
Line 1 on your base
station, see “Setting
General Properties” on
page 91. If your
computer has a
dedicated modem line,
you will not need the
base station fax/
modem socket.
Installing the
CyberGenie@Work Software
CyberGenie@Work is the software that drives the
CG 2400 system. It provides an interface between
your public phone service, the base station, your
computer and the handset users.
CyberGenie’s Call-by-name
Feature and Microsoft Outlook
The Messaging Application Programming Interface,
or MAPI, is a Microsoft standard for messaging
software that allows different types of message
information (email, voicemail, contacts lists, etc.) to
interact through a common interface.
NOTE: Microsoft
Outlook Express
is not MAPIcompliant.
The CG 2400 system is designed to work seamlessly
with Microsoft Outlook and other MAPI-compliant
software (such as Windows Messaging) by using the
contacts list to create a speech-activated dialer (callby-name). If you don’t have Microsoft Outlook, you
can create a contacts list in CyberGenie@Work.
23
CG 2400 User Guide
NOTE: The call-byname feature lets you
ask CyberGenie to dial
numbers from your
contacts list if they
have been activated for
speech recognition.
If you have names and numbers set up in Microsoft
Outlook, the CyberGenie@Work installation
Configuration Wizard lets you activate any name in
the book for speech recognition. A minimum of
contact data is required:
•
First or last name
•
At least one phone number
You can use CyberGenie to set up your contacts list,
or, if you use Microsoft Outlook, you can integrate
your contacts list in Microsoft Outlook with your
CyberGenie program.
How the Programs Integrate
CyberGenie alone lets you set up your contacts list
for call-by-name recognition or downloading to your
handset phone book. It also lets you listen to
voicemail messages from the PC, your handset or by
calling in from remote locations to check messages.
Listening to Your
Email Messages
If you want to also be able to listen to your email
messages, CyberGenie@Work requires a MAPIcompliant program like Microsoft Outlook.
If you are using Microsoft Outlook, you have the
option of telling CyberGenie to use your Microsoft
Outlook database instead of its own. It will add fields
for each contact record for speech activation or for
downloading contact information to your handset.
When you add a new contact record through
CyberGenie@Work, it will be added to your Microsoft
Outlook database.
When you install the CyberGenie@Work software, it
automatically detects whether MAPI is available, and
prompts you for what actions, if any, you need to
take.
Message Management Options
If neither MAPI nor
Microsoft Outlook is
installed
24
You will be able to listen to voicemail messages only.
If you want to be able to listen to both voicemail and
If Microsoft Outlook
is installed but
MAPI is not
You will be able to listen to voicemail messages only.
To be able to listen to both voicemail and email
messages, you will need to integrate Microsoft
Outlook with CyberGenie and make sure that
Microsoft Outlook is properly configured to support
MAPI. (See “Ensuring Microsoft Outlook Support” on
page 25.)
If you do not choose to integrate the two programs,
CyberGenie will still provide full voicemail and
contact support.
If both MAPI and
Microsoft Outlook
are installed
Chapter 2: Installation
email messages, you will need to install Microsoft
Outlook.
CyberGenie is able to access voicemail and email
via Microsoft Outlook’s folders, as well as support
call-by-name and phone book downloads from your
Microsoft Outlook contacts database.
Even if both MAPI and Microsoft Outlook are
installed, CyberGenie does not assume that you want
it to automatically configure your voicemail to
function through Microsoft Outlook. During setup,
you will have the option of determining whether you
want to integrate Microsoft Outlook with your
CyberGenie system.
Ensuring Microsoft Outlook
Support
If you use Microsoft Outlook, you will need to add the
MAPI components by installing Microsoft Outlook’s
Corporate or Workgroup E-mail Service component
(if not already installed) before installing
CyberGenie. This allows CyberGenie@Work to
implement the unified messaging functions that
make it possible for you to access your voicemail,
email, and faxes from one source.
NOTE: Procedures will
vary depending on the
version of Microsoft
Outlook you are using.
To add this component to Microsoft
Outlook 97:
The Microsoft Office 97 CD installs Microsoft Outlook
97. This version automatically supports Corporate/
Workgroup mode, and no changes are required.
25
CG 2400 User Guide
To add this component to Microsoft
Outlook 98:
1. Insert your Microsoft Outlook 98 CD into the CDROM drive. When the installation program
automatically activates, click Install Microsoft
Outlook, then Add New Components.
2. Click Install from the CD.
3. Select Corporate or Workgroup E-mail
Service.
4. Follow the instructions on the screen.
To add this component to Microsoft
Outlook 2000:
1. Open Microsoft Outlook 2000.
2. Go to Tools, then Options.
3. Click the Mail Delivery tab:
26
Chapter 2: Installation
4. Click Reconfigure Mail Support at the bottom
of the window. The following screen will appear:
5. Select Corporate or Workgroup and click Next.
The following dialog box will open:
6. Click Yes. Microsoft Outlook 2000 will now shut
down, and you will need to re-start Microsoft
Outlook 2000. You will be prompted to place your
Microsoft Outlook 2000 or Office 2000 CD into
your CD-ROM drive.
Microsoft Outlook 2000 will update your system
settings before opening.
Starting Software
Installation
When you put the CyberGenie@Work CD into your
CD-ROM drive, the setup program will automatically
launch.
27
CG 2400 User Guide
Once the software is installed, the installation
Configuration Wizard will automatically launch and
guide you through the basic configuration steps that
get your system up and running immediately.
NOTE: Do not attach
the base station
to your PC until
you are instructed
to do so during the
installation process!
To install CyberGenie@Work:
1. If not already closed, close any open software
programs, such as Microsoft Outlook, and any
applications that run in the background, such as
antivirus programs.
2. Insert the CyberGenie@Work CD into the CDROM drive. When the installation program loads,
the CyberGenie installation screen will appear:
NOTE: Reinstall or
Upgrade will appear on
the screen if you have a
previous version of
CyberGenie@Work
already installed.
Procedures will also
vary slightly.
28
3. Click Install. The Welcome screen will appear:
Chapter 2: Installation
NOTE: If CyberGenie
detects more than one
operating system on
your computer, it will
prompt you to select
the operating system
with which you want
CyberGenie@Work to
automatically load.
4. Click Next. The Software License Agreement
screen will appear:
29
CG 2400 User Guide
5. Read this agreement. If you agree with the
terms, click Yes. The Destination Folder screen
will appear:
6. Click Browse to select another location, or click
Next to confirm the default location.
If CyberGenie detects that both Microsoft Outlook
and MAPI are installed on your computer, you will
be prompted to decide whether you want to
integrate CyberGenie and Microsoft Outlook:
NOTE: If you do not
have Microsoft Outlook
or Windows Messaging
installed on your
computer, this screen
will not appear.
30
7. If you want to integrate Microsoft Outlook with
CyberGenie, select Yes. If you prefer that
CyberGenie manage its own voicemail and
contacts, select No.
Click Next. The software will load.
8. After the software has loaded, the Install
Electronic User Manuals screen will appear:
Chapter 2: Installation
NOTE: You can change
the CyberGenie/
Microsoft Outlook
integration properties
at any time. See
“Messaging Properties”
on page 85.
If you wish to copy the user manuals to your
computer, check the corresponding options. Click
Next.
31
CG 2400 User Guide
NOTE: Your computer
may need to be
rebooted after software
installation. If this
happens, do not
remove the CD.
The Base Station Update - Step 1 of 2 screen will
appear. DO NOT click Update Now yet!
At this point, connect your base station to the
computer and power it up before completing
software installation. See the procedure below.
Connecting the Base Station
At this point, connect your base station before
continuing software installation procedures.
1. Plug the USB cable
into the computer.
2. Plug the power
supply into an
approved electrical
outlet. Once the
power is connected,
the indicator light
on the base station
should start
blinking amber.
3. If using the wall
mount, slip the
base station into
place on the wall mount until it clicks firmly into
place.
32
Once the base station is successfully connected and
powered, you can complete software installation. The
Base Station Update screen will still appear:
Chapter 2: Installation
Finishing Software Installation
1. Click Update Now. The screen will show the
progress of the software installation. When
installation is complete, the Setup Complete
screen will appear:
2. To launch CyberGenie@Work, make sure the
corresponding box is checked and click Finish.
33
CG 2400 User Guide
A video will automatically launch that shows a brief
overview of your new CyberGenie system. After the
video plays, the installation Configuration Wizard will
launch.
Running the Installation
Configuration Wizard
The installation Configuration Wizard walks you
through the minimum requirements needed to get
the basic system up and running quickly.
At some point, you will want to do more configuration
as described in “Full System Configuration” starting
on page 75.
To start the installation Configuration
Wizard:
NOTE: If an error
message appears that
says Windows
Messaging Service or
Microsoft Outlook is not
configured properly,
see “Configuring Your
MAPI Application
Correctly” on page 204
for procedures.
After the base station is fully assembled and
connected, and you have clicked Finish on the Setup
Complete screen, the first wizard screen will appear:
Click Next to start the wizard.
34
The Phone Lines screen will appear:
Chapter 2: Installation
Defining External Phone Lines
Make sure that the external phone line(s) are
connected to the base station.
A Line Name is for description only and does not
affect a line’s function, except for two important
aspects:
•
You must enter some description for a line to be
activated. For example, you can enter a phone
number, a line number or a text description such
as “Main Line.” If no description is entered,
CyberGenie@Work will not recognize the line.
•
If you enter a description for Line 2 when you
only have one line physically connected,
CyberGenie@Work will attempt to access the
second line even though it isn’t there.
During the configuration process, you must enter a
description for Line 1 for your CG 2400 system to
work.
35
CG 2400 User Guide
NOTE: You can change
the description or add a
second line description
at any time. (See
“Adding and Deleting
External Phone Lines”
on page 90.)
To enter a line name:
1. Check the Use Phone Jack 1 box if you are using
just one external line. If you are using two
external lines, check also the Use Phone Jack 2
box.
2. In the Line Name field, type the appropriate line
description for each analog line connected to the
base station. The default line names are “Line 1”
and “Line 2.”
3. Click Next.
Subscribing Handsets
The Handset Subscription screen will appear:
The handset that came in your new CyberGenie box
is already subscribed to the base station. The system
supports up to ten handsets. If you want to subscribe
additional handsets, follow the steps below.
If you don’t want to subscribe additional handsets at
this time, click Next and skip to “Defining Users” on
page 38.
36
To Subscribe additional handsets:
1. Click Subscription Steps. The Add New Handset
screen will appear:
Chapter 2: Installation
NOTE: You can
subscribe additional
handsets at any time.
(See “Subscribing
Additional Handsets” on
page 43.)
2. Follow the steps on the screen and click Close
when finished. The Handset Subscription screen
will again appear.
3. Make sure that the new handset has been added
to the Subscribed handsets status box.
Repeat steps 1 through 3 for each additional
handset.
4. When you have finished subscribing all handsets,
click Next.
37
CG 2400 User Guide
Defining Users
The Create New User screen will appear:
A user is anyone who has an assigned handset or
who has a mailbox. The system supports up to 20
users.
You must set up at least one user.
To set up a user:
NOTE: You can add
new users or change
any of the user data at
any time. See “Setting
up a New User” on
page 105.
1. Enter a First Name and a Last Name, tabbing
from one field to the next.
2. Enter an extension number for this user, or
accept the default number displayed. The
extension number is unique to that user. It can be
any number from 10 to 98.
3. The user PIN (personal identification number)
controls user access to personal voicemail and
voice messages. Type the PIN in the User PIN
field. Make a note of the PIN assigned.
38
4. When finished, Click Next. The Users screen will
appear:
Chapter 2: Installation
NOTE: If you forget
the user PIN or lose it,
you will need to delete
that user record, then
re-enter it.
5. If you don’t want to add another user at this
time, click Next and skip to “Completing Initial
Configuration” on page 41.
To set up an additional user:
1. From the Users screen, click Add Another User.
The New User screen will appear:
2. Enter the appropriate information as explained in
steps 1 through 3 of the previous section.
3. Click the arrow in the right side of the Handset
Assignment field to see the pull-down menu.
39
CG 2400 User Guide
Choose one of the available handsets or select
the Voice Mail Only option. (This option allows the
user to receive voicemail without being assigned
to a handset.)
4. When finished, click OK. The updated Users
screen will again appear:
5. Make sure that the new user you just set up
appears in the Users status box. The
icon to
the left of the user’s name signifies that a
handset has been assigned to that user. The
icon signifies that the user has been assigned a
voice mailbox only.
6. To continue, click Next.
40
The Configuration Complete screen, which provides a
settings summary, will appear:
Chapter 2: Installation
Completing Initial
Configuration
To complete initial configuration:
1. Verify that the information displayed is correct.
2. Click Finish.
Registering the Product
The Registration screen will appear:
41
CG 2400 User Guide
Product registration ensures that you receive support
and notice of updates to the system.
You cannot launch the program unless you select one
of the registration options.
To register your product:
NOTE: Register your
product now to ensure
product support!
Click Registration Form to print and fax or mail
your registration, or
Click Register to complete registration online, or
Click OK to register at a later time.
CyberGenie Console
The CyberGenie@Work
monitor button will
appear on the Windows system tray while the
CyberGenie Console will open with the Wizards
window displayed:
NOTE: To further
customize your
system’s configuration,
see “Full System
Configuration” starting
on page 75.
42
Congratulations! You have now successfully installed
CyberGenie@Work on your computer.
You can expand your CG 2400 system by adding
handsets. You can also configure a base station to
share a phone line with your PC’s fax/modem card.
Subscribing Additional
Handsets
Chapter 2: Installation
Other Hardware Installation
Options
Your system comes with one handset, but additional
handsets can be purchased. The system will support
up to 10 handsets. (See “Subscribing a Handset to
the Base Station” on page 100 for procedures.)
Using Your Handset with Other
DA 202 Base Stations
The handset that comes with your system is presubscribed to the base station it came with. However,
if you use more than one base station, you can also
subscribe the handset to multiple base stations. For
example, you can use the same handset with your
base station at the office and the base station at
home. (See “Base Stations and Your Handset” on
page 193 for how to use additional base stations.)
Sharing a Base Station Line
with Other Devices
If you want to share your base station’s Line 1 with a
fax/modem, you need to configure both the
hardware and software to support it. This option is
available only for Line 1. (See “Setting General
Properties” on page 91.)
43
44
CG 2400 User Guide
Chapter
3
The User
Interfaces
The Three Interfaces
An interface is a way of interacting with a system. In
the CG 2400 system, you have three basic user
interfaces:
Handset User
Interface (HUI)
The interface you use when you access features and
functions by pressing keys on the handset keypad or
by using the menus on the handset display.
Speech User
Interface (SUI)
When you talk to CyberGenie to access your mail,
place calls or change your outgoing messages
(incoming call greetings and voicemail greetings),
you are using the speech user interface.
Graphical User
Interface (GUI)
The software application, CyberGenie@Work, from
which you can set up and configure your system, add
users and handsets, update your contacts list,
monitor calls, place calls, and more. The GUI
includes online help.
You cannot combine speech and handset commands
on the handset. If you start using speech commands
during a procedure then switch to the keypad, the
speech interface becomes inactive until the current
call activity is ended.
45
CG 2400 User Guide
Handset User Interface
The handset keypad includes keys that perform
specific functions. There are also menu options you
can view and select from on the handset display.
Modes of Operation
Handsets can be used with the system in either of
two modes:
Full function mode
Standalone mode
When CyberGenie@Work is running on your PC, the
handset is in full function mode.
If the PC is turned off or the USB cable is unplugged,
handsets can still be used in standalone mode as
long as the base station is powered. This lets you
place and receive external calls but does not provide
other CyberGenie functions.
Basic Handset Procedures
Once initial configuration is complete and the
handset is fully charged, you can use it to place
outgoing calls and receive incoming calls.
If you set up contacts for speech activation while
running the Setup program, you can also use
CyberGenie’s call-by-name feature.
To turn the handset on and off:
If the phone is off, press and hold the
the handset to turn it on.
If the phone is on, press and hold
To receive a call:
46
1. Press
to pick up a call.
2. Press
to end a call.
key on
to turn it off.
1. Pre-dial the number using the handset keypad.
2. Press
to place the call.
To place a call using CyberGenie:
1. Press
.
2. CyberGenie will ask Who would you like to call?
Say the contact name.
To set up your personal voicemail greeting:
1. Press
NOTE: For full
information on the
types of outgoing
messages you can use
and how to record
them, see “Unified
Messaging Features
from the PC” on
page 125.
.
2. CyberGenie will ask Who would you like to call?
Say CyberGenie, or press
on the handset.
Chapter 3: The User Interface
To place a call using the keypad:
3. Following CyberGenie's response, say Personal
Greetings, or press 8, then 1, then 1 again on
the handset.
4. Following CyberGenie’s response, say Main
Greeting, or press 1.
5. Next, say Record, or press 2.
6. CyberGenie will ask, Would you like to record
now? Say Yes (or press 1) or No (or press 2).
Record your message. When done, press
say Save, or press 1.
, then
47
CG 2400 User Guide
Handset Keys
Press to start a CyberGenie session.
Press to answer a call or place a pre-dialed call.
Press and hold to turn the phone on or off, or end a
call. While using the handset display menu, press to
return to previous menu option.
Press to activate and navigate the handset menus, or
to change case when entering text.
Press to clear the last character entered on the
display. When in a menu, press to return to idle
display. When a call is active, press to mute the
handset microphone.
Press to switch between call waiting calls on the
same line, or answer an incoming call while the
handset menu is active. Call waiting from the flash
key is only available if you have call waiting services
from your telephone company. (There is also a
CyberGenie call waiting feature described under
“CyberGenie Call Waiting” on page 170.)
Up and down
volume
control keys
48
Press to adjust the earpiece volume. While on the
handset menu >RingVolume option, press to adjust
the ring signal volume.
Indicator light
Volume up
Earpiece
Volume down
Chapter 3: The User Interface
The Handset
Handset display
CyberGenie key
On / off / NO / on-hook
YES / off-hook
Headset jack
Menu / up
Menu / down
Flash hook
Clear / mute
Microphone
49
CG 2400 User Guide
The Handset Display
The display consists
of two text lines and
a row of status
icons.
Display Icons
Shows signal strength. When you move too far away
from the base station, the signal will diminish. It
always appears.
Indicates that the handset ringer is turned off.
Indicates that the handset keylock is turned on.
(Keylock on does not stop incoming calls, it only
prevents outgoing calls from being placed.)
Indicates that the handset is off-hook. If a call is not
placed, the handset eventually returns to the onhook state and the icon disappears.
Indicates that messages are waiting in your personal
or system inbox.
Shows remaining battery charge, and is always
displayed.
Display Text
The text on the handset display varies depending on
the handset’s state.
50
Idle mode
The handset will display the assigned user’s name
and extension when the handset is idle (not in use).
Call in progress
The number dialed appears on the top row. When the
call connects, the number of the line used (L1 or L2)
appears, followed by the call’s duration.
Call ended
When you end a call, the duration will display for a
couple of seconds before the display returns to idle.
While accessing the
handset display
menu
While accessing the handset display menu (see
“Using the Handset Display Menu” on page 51), the
current menu option shows on the display.
Handset Menu Tree
In Idle Mode
>Retrieve
>IntCall
>PhoneBook
>CallName
>Status
>Download
>DeleteAll
>Settings
>Handset
>AutoKeyLock
>BabyPhone
>Activate
>Set PhoneNo
>InfoTone
>Alerts
>RingVolume
>RingType
>KeySound
>DiscreetRing
>MsgLight
>PhoneLock
>PowerOn
>ChangePIN
>DirectCall
>MasterReset
>Language
>Display
>Light
>Contrast
>AutoAnswer
>BaseStation
>Select
>Rename
>Delete
>Subscribe
>Information
>LastCall
>TotalCalls
>Show IPEI
>Version
>Redial
With the handset menu, you can control
advanced telephony functions and customize the
handset.
To navigate the menu options:
Press
to access the menu and move
through menu options.
Chapter 3: The User Interface
Using the Handset Display
Menu
The active option is indicated by a > to the left.
When more options are available, More displays
on the second text line.
Press
to select an option, then
move through the sub-menu options.
to
Press
at any time to move up one level of
menu options.
Press
display.
to return to idle mode on the handset
Handset Menu Tree
In Connected Mode
>Retrieve
>ParkCall
>IntCall
>Transfer
>DialMode
51
CG 2400 User Guide
Handset Display Menu Option
Descriptions
Menu Options for Connected Mode (Call in
Progress)
>Retrieve
>IntCall
Retrieve a parked call while another call is in
progress. Specify Line 1 or Line 2.
Place an internal call while another call is in progress.
>ParkCall
Park an external call.
>Transfer
Transfer an active call to another handset user.
>DialMode
Change the length of the tone sent when a handset
key is pressed. When set to DTMF-long, the tone
will transmit for as long as the key is pressed.
Menu Options for Idle Mode
>Redial
Scroll through and select from a list of up to ten
recently dialed numbers to dial again. For quick
access, press
twice.
If you turn off the handset, stored numbers will be
lost. The handset does not store the same number
multiple times.
>Retrieve
>IntCall
>PhoneBook
52
Retrieve a parked call from a specified line (Line 1 or
Line 2).
Place an internal call from the handset.
Access phone book information stored in the
handset:
Access and dial a contact stored in the handset
phonebook.
>PhoneBook
>Status
Display the date and time of the most recent
phonebook download.
>PhoneBook
>Download
Download flagged names and phone numbers from
the Contacts List on the computer.
>PhoneBook
>DeleteAll
Delete all phone book records from the handset.
>Settings
Access the Settings menu:
>Settings
>Handset
Access specialized handset options.
>Settings
>Handset
>AutoKeyLock
>Settings
>Handset
>BabyPhone
Lock the keys on the handset to prevent accidental
calling.
Use the handset as a baby monitor:
>Settings
>Handset
>BabyPhone
>Activate
Turn on the BabyPhone feature by placing a call from
the monitor phone to the speaker phone.
>Settings
>Handset
>BabyPhone
>SetPhoneNo
Set the handset number to be used as a speaker for
the BabyPhone monitor.
>Settings
>Handset
>BabyPhone
>InfoTone
Chapter 3: The User Interface
>PhoneBook
>CallName
Turn on or off an information tone that alerts you
that the BabyPhone monitor is working.
53
CG 2400 User Guide
>Settings
>Handset
>Alerts
>Settings
>Handset
>Alerts
>RingVolume
>Settings
>Handset
>Alerts
>RingType
Set the ring volume for incoming calls.
Set the type of ring for internal or external calls,
callbacks, message notification, or pages.
>Settings
>Handset
>Alerts
>KeySound
Set the handset keys to make a clicking sound when
you press a key, or to remain silent.
>Settings
>Handset
>Alerts
>DiscreetRng
Turn on or off a feature that starts a ring quietly and
gradually increases the volume.
>Settings
>Handset
>Alerts
>MsgLight
Turn on or off a feature that makes the red indicator
light on the handset act as a message waiting
notification. This feature, when on, follows the
icon on the handset display. The
function of the
default is off.
>Settings
>Handset
>PhoneLock
>Settings
>Handset
>PhoneLock
>PowerOn
>Settings
>Handset
>PhoneLock
>ChangePIN
54
Control the sound type and volume for different
types of handset alerts:
Control handset access:
Prevent a user from operating the phone without the
handset PIN.
Change the handset PIN. The default is 0000.
>Settings
>Handset
>MasterReset
>Settings
>Handset
>Language
Set the handset to dial a specific number regardless
of which key is pressed.
Reset all handset features to defaults.
Change the language that shows on the handset
display. Options are English, French and Spanish.
>Settings
>Handset
>Display
Change the display’s appearance:
>Settings
>Handset
>Display
>Light
Turn the backlight on or off.
>Settings
>Handset
>Display
>Contrast
Chapter 3: The User Interface
>Settings
>Handset
>DirectCall
Adjust the contrast.
>Settings
>Handset
>AutoAnswer
Set the phone to answer automatically when using
optional headset for full hands-free operation.
>Settings
>BaseStation
Subscribe or unsubscribe a handset to a base
station:
>Settings
>BaseStation
>Select
Select a specific base station for the handset or set
automatic subscription for the base station with
strongest signal.
>Settings
>BaseStation
>Rename
Enter a new name for the base station on the
handset.
55
CG 2400 User Guide
>Settings
>BaseStation
>Delete
Unsubscribe a handset from a base station.
>Settings
>BaseStation
>Subscribe
Subscribe a handset to a base station or to a second
base station.
>Settings
>Information
56
View information about calls recently placed from
this handset:
>Settings
>Information
>LastCall
View the most recent call’s duration.
>Settings
>Information
>TotalCalls
Total calling time from this handset.
>Settings
>Information
>ShowIPEI
View the handset IPEI (International Portable Part
Equipment Identity) code for the handset.
>Settings
>Information
>Version
View the current firmware version used in your
handset.
You can use the speech interface during a
CyberGenie session to place calls, control call
functions and access speech menu options.
NOTE: If you switch
from speech commands
to the handset keypad
during a call session,
you cannot use the
speech interface for the
duration of that
session.
CyberGenie can be used easily by both the new and
the experienced user. When you are not sure what to
do, CyberGenie will assist you. Once you learn to
navigate through the options, you can select them
quickly by speaking or by pressing a key on the
handset.
In some cases (such as a noisy environment), it will
be easier to interact with CyberGenie through the
keypad. CyberGenie will prompt you to press the
correct numeric keys to indicate your menu selection
when that option is available.
Chapter 3: The User Interface
Speech User Interface
Accessing CyberGenie
To access the speech interface, press the
key on
your handset. When CyberGenie asks Who would you
like to call? you have the following options:
Call-by-name
If you answer CyberGenie's Who would you like to
call? by giving a name in the contacts list that is
marked for speech recognition, CyberGenie will
attempt to match the spoken word with a name in
the contacts list. Once successful, CyberGenie will
place the call.
CyberGenie menu
If you answer CyberGenie's Who would you like to
call? by saying CyberGenie, you can begin to
navigate through other available options.
CyberGenie help
When using CyberGenie, if you are not sure what to
do or say, CyberGenie will assist.
Depending on the feature you are using, CyberGenie
will either repeat the question or provide more
detailed help or options.
If you have trouble answering a prompt, remain
silent and CyberGenie will repeat the prompt. If you
need more assistance, say Help Me and CyberGenie
57
CG 2400 User Guide
provides more detailed explanations and options. You
can also press 0 at any time while working with
CyberGenie to get help.
Once you are familiar with the system, you can
interrupt the prompts by speaking or pressing a key.
Other CyberGenie Functions
Other speech-activated features include:
Forward calls
Check messages
Lets you enable/disable call forwarding as well as
select a forwarding destination.
Lets you check voicemail, email, and fax header
messages.
Call parking
Places the most recently held external call into park
mode, which allows another handset user to pick up
the call.
Pick up calls
Lets you receive the call most recently parked to
your handset.
Record memos
Lets you record a memo to yourself.
Change voicemail
greetings
Gives you access to the voicemail greetings menu.
Change welcome
greetings
Gives you access to the welcome greetings menu.
For all CyberGenie options, follow CyberGenie's
instructions to complete the activity.
CyberGenie Quick Reference
Press
to answer an incoming call.
Press
to end a call.
Start all CyberGenie sessions by pressing
.
With all of the following commands, you cannot mix
speech and keypad commands. If you start in the
speech interface and press a key to access a
function, you will then be in the handset keypad
interface for the rest of that call session.
58
VOICE (SAY)
KEY
CYBERGENIE
OPTION DESCRIPTION
ACCESS THE CYBERGENIE SPEECH
INTERFACE MENU
START OVER
RETURN TO TOP LEVEL FROM ANYWHERE
IN THE MENU TREE
YES
1
YES (IN RESPONSE TO CYBERGENIE)
NO
2
NO (IN RESPONSE TO CYBERGENIE)
PHONE MENU
6
ACCESS CALL MANAGEMENT MENU (SEE
“CALL MANAGEMENT” ON PAGE 59)
MAIL MENU
7
ACCESS MAIL MENU
GREETINGS
8
ACCESS GREETINGS MENU
GOODBYE
9
END CYBERGENIE SESSION
I NEED HELP
0
GET HELP FROM CYBERGENIE FOR
MENU
Chapter 3: The User Interface
Basic commands
CURRENT ACTIVITY
Call management
VOICE (SAY)
KEY
OPTION DESCRIPTION
CALL BY NAME
61
START CALL-BY-NAME PROCEDURE
DIAL EXTERNAL
62
DIAL EXTERNAL NUMBER
DIAL EXTENSION
63
DIAL EXTENSION
SWITCH CALL
63
SWITCH BETWEEN TWO CALLS WHEN ONE
NUMBER
IS ON HOLD
RETRIEVE
64
RETRIEVE A PARKED CALL WHEN A
PARKED CALL IS WAITING (ONLY ALLOWED
WHEN HANDSET IS IDLE)
HANG UP
64
END AN ACTIVE CALL
SET UP A
65
SET UP A CONFERENCE CALL WHEN TWO
CONFERENCE
CALL
PARK THIS CALL
CALLS ARE ON THE LINE
65
PARK THE CALL ON HOLD WHEN ONLY
ONE CALL IS ON THE LINE
FORWARD MY
66
FORWARD ALL CALLS
67
STOP CALL FORWARDING
68
SEND CALL TO THE REJECTION MESSAGE
CALLS
STOP
FORWARDING
REJECT THIS
CALL
AND DISCONNECT
59
CG 2400 User Guide
Unified mail
management
Outgoing message
management
VOICE (SAY)
KEY
OPTION DESCRIPTION
READ NEW MAIL
71
READ NEW MAIL
READ SAVED MAIL
72
READ SAVED MAIL
RECORD A MEMO
73
RECORD A MEMO
VOICE (SAY)
KEY
OPTION DESCRIPTION
VOICEMAIL GREETINGS
(AND/OR)
PERSONAL GREETINGS
811
ACCESS PERSONAL GREETINGS
VOICEMAIL GREETINGS
(AND/OR)
SYSTEM GREETINGS
812
ACCESS SYSTEM GREETINGS
WELCOME GREETINGS
(THEN) BUSINESS
821
ACCESS BUSINESS HOURS
GREETING
HOURS GREETING
WELCOME GREETINGS
(THEN) NON-BUSINESS
822
ACCESS NON-BUSINESS HOURS
GREETING
HOURS GREETING
WELCOME GREETINGS
(THEN) TEMPORARY
823
ACCESS TEMPORARY WELCOME
GREETING
GREETING
REJECTION MESSAGE
60
83
ACCESS REJECTION MESSAGE
The Server
The CyberGenie@Work server is the background
program that runs CyberGenie@Work. It
automatically loads when you start your PC.
NOTE: If
is
yellow, check that the
USB cable is properly
connected and the base
station is powered.
The
CyberGenie icon on your Windows system
tray indicates that the software is loaded.
When
is green, the server is running. When
is
red, the server is shut down. When
is yellow, the
PC is not communicating with the base station.
Chapter 3: The User Interface
Graphical User Interface
The Rollup Menu
When you click
in the Windows system tray, the
CyberGenie rollup menu will open:
The rollup menu option are:
CyberGenie Console
Opens the CyberGenie console, from which you can
access the various CyberGenie windows (described
starting on page 67).
Shut Down
Shuts down the CyberGenie server. Note that the
console must be closed before you can successfully
use this option.
Help
Opens the CyberGenie online help directly. Help can
also be accessed from the console.
61
CG 2400 User Guide
Handset Subscription
About
Opens the CyberGenie online help procedures for
handset subscription.
Displays the version number of your software.
The CyberGenie@Work
Console
The CyberGenie@Work console is the main software
user interface. The server can run with the console
closed, but you must open the console to interact
with the program from the computer.
There are two ways to access the CyberGenie@Work
console from the Windows taskbar.
NOTE: Always shut
down the console and
the server before
shutting down your
computer to keep from
losing data.
To access the CyberGenie@Work console:
Double-click
in the Windows system tray. The
console will open directly and the Wizards window
will appear:
OR
1. Click
in the Windows taskbar. The CyberGenie
rollup menu will open:
62
Chapter 3: The User Interface
2. From this menu, click CyberGenie Console to
open the console.
To close the console:
Click
in the upper-right corner of any console
window.
To shut down the server and/or your
computer:
NOTE: With the server
closed, CyberGenie will
not log calls, but you
can still place external
calls from the handset
if the base station is
powered and the
handset charged.
1. If the console is open, close it.
2. Click
on the Windows taskbar to view the
CyberGenie rollup menu.
3. Click Shut Down.
4. A dialog box will open and ask if you really want
to shut down CyberGenie@Work. Before you click
Yes, check the backup data box if you wish to
back up your data files. A series of status
messages will appear indicating that the system
is closing down. Do not power down your
computer until the status messages no
longer display!
To restart the CyberGenie server:
CyberGenie@Work automatically starts up when you
turn on your computer. To restart it without rebooting
your whole system:
1. Click
on the Windows taskbar.
2. Click Start Up.
63
CG 2400 User Guide
Miniaturizing the Console
Window
You can “miniaturize” the
console window. This lets
you view some call activity
without obscuring other
applications you might
want open on your
monitor screen. When the
window is miniaturized, a
limited amount of information is displayed.
To miniaturize the console window:
Click
in the upper right corner of the application
window.
To move the miniaturized window:
Click anywhere on the window and drag it to the
desired position on the screen.
To maximize the miniaturized window:
Double-click on the border of the miniaturized
window.
Areas on the Console Windows
Panels
Panels are the separate inner areas of a console
window.
For example, the Wizards window has three panels.
The Call Progress and Configuration windows have
two panels—the left panel on each shows available
resources, while the right panel shows detailed
information.
Menu bars
Some windows in the CyberGenie console use menu
bars for quick navigation. If you place a cursor over a
64
Console buttons
Console buttons are on the bottom window border.
Clicking a console button opens the corresponding
window:
Clicking on the CyberGenie logo on the bottom left of
the window border will show the information for the
version you have installed. You can also access
registration from this window.
The Wizards button accesses the Wizards menu.
There are three configuration wizards available from
this menu. Click anywhere on the desired wizard
panel to access that wizard.
Chapter 3: The User Interface
menu bar icon, a brief description of the menu option
will open.
The Call Progress button accesses the Call Progress
window. From this window you can graphically track
calls in progress and perform various call functions.
The Contacts button accesses the Contacts window.
From this window you can view, add, edit, and delete
contact names and numbers.
The Configuration button accesses the Configuration
window, from which you can edit configuration
settings.
The Call Log button accesses the Call Log window,
which displays a list of all incoming and outgoing
calls.
The VoiceMail button accesses the Voicemail window,
which displays a list of all saved voicemails and their
statuses.
The CyberGenie@Work Help button accesses the
online help, which provides procedural information.
Click to close the console.
Click to miniaturize the console.
65
CG 2400 User Guide
Line indicators
The line indicators on the right side of the window
border show phone line status:
Green
Red
Indicates a line is in use.
Amber
Indicates that outbound calling has been turned off
for this line.
Amber broken
Indicates that the system cannot detect a dial tone
on the line.
Off (no light)
66
Indicates a line is available.
Indicates the line is not connected.
For complete procedures on using the Wizards
window, see “The Wizards Window” on page 75.
Click the graphic on a wizard panel to
access the window for that specific wizard
Chapter 3: The User Interface
Wizards Window
When the mouse is
positioned over a wizard
graphic, a wand will
appear
67
CG 2400 User Guide
Call Progress Window
For complete procedures on using the Call Progress
window, see “The Call Progress Window” starting on
page 115.
From any application window, you can click this button to
display a miniaturized view of the Call Progress window
The call detail summary
panel shows all current
call activity
The call resources view
buttons on the users/
contacts panel change
the information displayed
in the left panel. You can
display active handsets,
users with mailboxes or a
full list of contacts
The call details panel
graphically displays call
activity for the air channel
highlighted in the
summary panel at the top
68
Line indicators show which lines are in use
For complete procedures on using the Contacts
window, see “The Contacts Window” starting on
page 126.
You can use the buttons on the menu bar to quickly
access such features as adding a contact or activating a
contact for speech recognition
Chapter 3: The User Interface
Contacts Window
Use the search fields to
quickly find contact names
The
icon indicates
this contact’s name and
number can be downloaded
to your handset
The
icon indicates this
contact is activated for
speech recognition
69
CG 2400 User Guide
Configuration Window
For complete procedures on using the Configuration
window, see “The Configuration Window” starting on
page 79.
The menu bar provides
quick access to such
features as adding or
deleting a user record
The information displayed on the detail
panel on the right changes depending
on the option selected to the left
Click on a configuration
option in the resources
panel on the left to display
details for each option.
If you click a second
time on either Handsets
or Users, lists of available
handsets or active users
will also display in
the resources panel.
Click again to hide
the sub-options
This check box controls system-wide
barge-in, which is the ability to join in on
an active call for a three-way connection
70
For complete procedures on using the Call Log
window, see “The Call Log Window” starting on
page 135.
The menu bar provides
quick access to such
features as filtering or
printing the call log
information
Chapter 3: The User Interface
Call Log Window
You can view records of
calls made through your
CG 2400 System
You can also view
detailed information
for each call
71
CG 2400 User Guide
Voicemail Window
For complete procedures on using the Voicemail
window, see “The Voicemail Window”starting on
page 140.
Click and drag to adjust volume
Click to delete a
highlighted message
New messages
are bolded
New message status
72
Click to play voicemail
To access online help, click
on the application
menu, or access it through the CyberGenie@Work
rollup menu:
NOTE TO BETA
USERS: THIS WINDOW
WILL BE UPDATED
AFTER THIS
DOCUMENT HAS BEEN
PRINTED.
- The Writers
Chapter 3: The User Interface
Online Help
To get help for a specific window, press F1 while in
the window.
If you right-click while over specific fields, a What’s
This? pop-up appears. Click What’s This? for fieldspecific information.
73
74
CG 2400 User Guide
Chapter
4
Full System
Configuration
Once your CG 2400 system is installed, you can
configure it (set it up) more fully to fit your specific
needs. You can also modify features that you set up
during installation.
CyberGenie@Work provides two avenues to full
system configuration:
The Wizards Window
The Configuration
Window
Configuration wizards step you through the
sequences for adding, changing or deleting data for
your phone lines, users and contacts.
The options available from the configuration window
provide more control over the configuration options
(including some options not available from the
wizards) but require a better understanding of the
system.
You might want to start with the wizards, then later,
when more familiar with the system, return to the
Configuration window to refine your setup even
more.
The Wizards Window
After the Setup program has completed system
installation and initial setup, the Wizards window will
appear. You can also access the Wizards window at
any time by clicking the
button on the bottom of
the console.
75
CG 2400 User Guide
NOTE: All changes
made with the
CyberGenie wizards can
also be made through
the Configuration
window. (See “The
Configuration Window”
starting on page 79.)
When your mouse is positioned on a
wizard graphic, a wand will appear.
Click to open.
Wand
Each wizard uses similar navigation buttons:
Click Next to move to the next screen. You don’t
have to make changes to continue on to the next
screen.
Click Back to return to the previous screen and edit
any information previously entered.
Click Cancel at any time to exit a wizard without
saving changes.
Click Finish at any time to save changes and exit the
wizard.
Click View Setup at any time to see a graphical
overview of the changes made.
Click Help at any time to access online help.
76
76
The Line Wizard guides you through how to:
Change incoming call routing for either line
The wizard displays both the description you gave
to the line and the line number, 1 or 2).
NOTE: If you do not
have a built-in or
external microphone
for your PC, you can
use the handset to
record messages.
See“Voicemail Settings
for System Inbox” on
page 87.
Change the outgoing message for the
system voicemail CyberGenie comes with a
standard system voicemail message, but you can
customize this to better suit your needs.
From the Wizards window, click the Line Wizard
graphic. The Line Wizard screen will appear:
Chapter 4: Full System Configuration
Line Wizard
To change call routing for either line:
1. Select a line (Line 1 or Line 2), then click Next.
2. Follow the wizard instructions.
3. When done, click Finish to save your changes.
To change the system voicemail greeting:
1. Select Record system voicemail greeting,
then click Next.
2. Follow the wizard instructions.
3. When done, click Finish to save your changes.
77
CG 2400 User Guide
User Wizard
The User Wizard guides you through how to keep
your user information up to date, and how to assign
a handset to a user.
NOTE: If you purchase
additional handsets,
they must be
subscribed to your base
station before they can
be assigned to users.
See “Subscribing a
Handset to the Base
Station” on page 100.
From the Wizards window, click the User Wizard
graphic. The User Wizard screen will appear:
To add, edit or remove a user:
1. Select the appropriate option.
2. Click Next.
3. Follow the wizard instructions.
4. When done, click Finish to save your changes.
NOTE: To unassign a
handset, see “To
unassign a handset:”
on page 103.
To assign a handset to a user:
1. Select Assign a Handset to a User.
2. Click Next.
3. Follow the wizard instructions.
4. When done, click Finish to save your changes.
78
78
The Contact Wizard guides you through how to add,
change and delete contact information.
With this wizard, you can also import contact data
from other programs or export the contact data you
set up in CyberGenie to other programs.
From the Wizards window, click the Contact Wizard
graphic. The Contact Wizard screen will appear:
Chapter 4: Full System Configuration
Contact Wizard
To add, edit or remove a contact:
1. Select the appropriate option.
2. Click Next.
3. Follow the wizard instructions.
4. When done, click Finish to save your changes.
The Configuration Window
While configuration wizards quickly walk you through
basic configuration steps, the Configuration window
provides more in-depth control of the various
configuration options.
To access the Configuration window, click
.
79
CG 2400 User Guide
The Configuration window will appear:
The configuration options display in the window’s left
panel—the resources panel. They are:
System
External Line(s)
Handsets
Users
Customize the CyberGenie interface, including
system inbox voicemail greetings, rejection
message, base station information and call logging.
Add or delete a line and customize external line
functions such as welcome greetings, business
hours, and call routing.
Delete handsets and view handset properties.
Add or delete users, edit user records, and set up
personal voicemail greetings.
The corresponding property settings for each
configuration option appear in the properties panel
on the right.
CyberGenie System Setup
Click
System on the resources panel. The
Call
Logging and
Messaging options will appear
below and the system properties panel will appear to
the right:
80
80
Chapter 4: Full System Configuration
Base Station Information
The base station authorization code is used to
subscribe a new handset to the system.
NOTE: Changing the
authorization code does
not affect handsets
already subscribed to
the base station.
The authorization code is always eight digits. The
default code is 11111111. You can change this code
to prevent unauthorized handsets from subscribing
to your base station, or to control base station access
if you use more than one base station by assigning
different codes to different base stations.
The Base Station ID, below the authorization code, is
for information only.
To change the base station authorization
code:
NOTE: It is
recommended that you
change the base station
authorization code to a
unique code after initial
installation.
1. Access the Configuration window if not already
there.
2. Click
System.
3. On the properties panel, highlight the existing
authorization code at the top of the panel.
4. Type the new code over the existing code.
81
CG 2400 User Guide
Overall Call Settings
Call setting include:
CyberGenie’s voice CyberGenie uses a
synthesized human voice to assist callers and
interact with users. You have two options: male
or female. CyberGenie’s voice gender only affects
the voice that assists callers and interacts with
users. It does not affect recorded outgoing
messages.
Barge-in control The ability to retrieve or join in
on an active call on another handset or analog
phone can be turned on or off. (See “Retrieving a
Call” on page 166.)
NOTE: CyberGenie
comes with a default
.wav file called
musichld.wav, but any
.wav file can be used.
On-hold music CyberGenie comes with a prerecorded musical loop that plays when the caller
is on hold. You can change what the user hears to
another music file or a message file. If you have a
sound recording application on your PC, you can
use this feature to record your own promotions,
special messages or music for on-hold listening.
To change the CyberGenie voice:
1. Click the down arrow on CyberGenie Voice to
view a drop-down list.
2. Click the desired gender.
To set barge-in control:
Click to check the Allow retrieve line function to
barge in on active calls option if you want users to
be able to barge in on active calls.
Uncheck it to prevent this from occuring.
To change the existing on-hold music:
1. To hear the existing on-hold music, click
on
the On-Hold Music file description. A media
window will open and play the music.
82
82
2. To change the music, click
to browse through
your directories. Unless you have set up the
software in a different directory from the
recommended default, the default directory is
Program Files\CG@Work\Data.
3. Click the desired .wav file. To hear the file
selected, repeat step 1.
Call Logging
Click
Call Logging on the resources panel. (If the
Call Logging option is hidden, click
System
on the resources panel.) The corresponding
properties panel will appear:
Chapter 4: Full System Configuration
NOTE: If you want no
music or sound while
the caller is on hold,
select the silent.wav
file in the default
directory.
Call Log Setup
The call log is a running record of calls coming in
and/or out of the system.
You can configure the call log to capture call data for
specific time periods, and for specific types of calls.
83
CG 2400 User Guide
To configure the call log:
NOTE: For more
information, see “The
Call Log Window” on
page 135.
1. Access the Configuration window if not already
there.
2. Click
System on the resources panel.
3. Click
Call Logging to access the Call Logging
properties panel.
4. Set the duration for the Keep call log
information option. This option determines
whether you want to keep the call records for
days or months, and the quantity of either.
Click Days or Months.
Type in the number of days or months you want
the call log information to remain in the system.
5. Select the type of calls you want to log: incoming
calls, outgoing calls, and/or calls from one
handset to another. You can select any or all of
the three options.
Messaging
Messaging configuration lets you:
•
Turn unified messaging on and off
•
Select whether to use main or temporary system
voicemail greetings
•
Change the recordings for each
•
Set the maximum limit for an incoming voice
message
•
Change the rejection message
Click
Messaging on the resources panel. (If the
Messaging option is hidden, click
System on
the resources panel.) The corresponding properties
panel will appear:
84
84
Chapter 4: Full System Configuration
Messaging Properties
During installation, you can select whether you want
to integrate CyberGenie with Microsoft Outlook or
have CyberGenie manage its own voicemail and
contacts. (See “How the Programs Integrate” on
page 24 for more information on using Microsoft
Outlook with CyberGenie.)
From this Messaging configuration window, you can
change this setting.
To switch from unified messaging to
CyberGenie messaging:
1. If CyberGenie is integrated with Microsoft Outlook
messaging, the following button will appear:
85
CG 2400 User Guide
Click this button. A dialog box will open:
2. Click Yes to have CyberGenie manage its own
voicemail and contacts. CyberGenie will shut
down and then restart.
To switch from CyberGenie messaging to
unified messaging:
1. If CyberGenie is not integrated with Microsoft
Outlook, and Microsoft Outlook is loaded on your
computer, the following button will appear:
NOTE: To ensure that
Microsoft Outlook is set
up properly to work
with CyberGenie, see
“Ensuring Microsoft
Outlook Support” on
page 25.
Click this button. A dialog box will open:
2. Click Yes to have CyberGenie integrate voicemail
and contacts with Microsoft Outlook. CyberGenie
will shut down and then restart.
86
86
The system voicemail greeting is what a caller hears
when the call is routed to system inbox voicemail.
It is not the same as what the caller hears if routed
to a personal mailbox (see “Changing User
Information” on page 110, and “Setting Call Routing”
on page 95.)
A caller will be routed to system voicemail if:
•
The system is set to “ring all handsets” and no
users pick up within the specified time,
•
The caller fails to identify a specific user, or
•
The caller fails after three tries to successfully
identify a system user.
Chapter 4: Full System Configuration
Voicemail Settings for
System Inbox
You have two options for system voicemail greetings:
Main
Temporary
The main system voicemail greeting that should
rarely, if ever, change.
A temporary greeting that can be changed without
overwriting the main greeting. This is typically used
to record a special message for holidays.
CyberGenie’s default greeting for both the main and
the temporary greetings is the same.
Recording a new greeting will overwrite the existing
one.
NOTE: System
voicemail greetings can
be recorded at your
computer if you have a
microphone. They can
also be recorded using
the handset, as
described in “Changing
Voicemail Greetings” on
page 153.
To record and review a system greeting:
1. Click
on the properties panel for the greeting
you want to record. A dialog box will open:
2. Click
to start recording.
87
CG 2400 User Guide
3. When done, click
.
4. To listen to the message, click
.
5. To save the message, click Save. The .wav file
will be saved in the default directory (usually
Program Files\CG@Work\Data).
To change the maximum voicemail length:
Click the up or down arrow on
on the
properties panel to adjust the maximum length of
incoming messages.
Rejection Message
If an unwanted call comes in, you can reject the call
by sending it to the rejection message. After this
message plays, the caller will be disconnected. Calls
can be rejected either from the handset (see
“Rejecting a Call” on page 169) or from the computer
(see “Rejecting a Call” on page 124).
The rejection message is what a caller hears when
the call is rejected. You can use the default message,
or record your own customized message. The default
rejection message is:
“I am sorry but we do not accept calls of this
nature. Please remove this number from your
database. Thank you.”
NOTE: Messages can
also be recorded from
the handset. See
“Changing the
Rejection Message” on
page 155.
To record a rejection message:
1. Click the lower
on the properties panel. A
dialog box will open:
2. Click
to start recording.
3. When done, click
88
.
88
.
5. To save the message, click Save. The .wav file
will be saved in the default directory (usually
Program Files\CG@Work\Data) as junkcall.wav.)
External Line Setup
Click External Line(s) on the resources panel.
The available external lines will appear below and the
corresponding properties panel will appear to the
right:
NOTE: Each external
line must be set up
individually.
Chapter 4: Full System Configuration
4. To listen to the message, click
The External Line Summary on the properties panel
shows which analog line sockets on the base station
are used and the names assigned to each. (If you
have only one phone line connected to your CG 2400
system, only one line will appear.)
From this panel, you can add or delete a line or
change a line’s name. You can also configure a line’s
settings by accessing that line’s property tabs:
General
•
Setting a line’s general properties.
Business Hours
•
Defining business hours and non-business hours.
Routing
•
Setting how calls on a specific line are routed
during business or non-business hours.
89
CG 2400 User Guide
Auto Attendant
•
Setting which outgoing messages play for
business and non-business hours. Recording the
outgoing messages. Defining which message a
caller receives.
Dialing Properties
NOTE: The dialing
properties should
already be set up in
Windows. This option is
available from this
window for convenience
should you need to
change them.
Dialing properties are the “rules” you can set or
change that affect how outgoing calls are
automatically handled.
Dialing properties address how the system treats all
outgoing calls. Unlike all other line configuration in
CyberGenie@Work, it is system-specific, not linespecific.
The Dialing Properties button on the External Line
Summary panel takes you directly to the Dialing
Properties window used in Microsoft Windows.
To access the Dialing Properties window:
NOTE: Refer to your
Microsoft Windows help
for specific questions
on dialing properties.
1. Access the Configuration window if not already
there.
2. Click
External Line(s) on the resources panel.
3. On the properties panel, click the Dialing
Properties button.
Adding and Deleting External
Phone Lines
The system supports two analog phone lines. From
this properties panel, you can add or delete a line, or
change a line description.
90
90
To set general
properties, business
hours, routing, and
auto attendant features
for the new line, see
the following section—
”Setting General
Properties”.
1. Access the Configuration
window if not already
there.
2. From the CyberGenie@
Work menu bar, click
A dialog box will open.
.
3. Type a line description,
then click OK.
To delete an external line:
1. Highlight the phone line to be deleted.
2. From the CyberGenie@Work menu bar, click
.
3. Click Yes to confirm the deletion.
You can also remove a line by right-clicking Line 1
or Line 2 from either the Configuration window’s
resources panel or the External Line Summary on the
properties panel, then selecting the Delete option.
Chapter 4: Full System Configuration
To add an external line:
Setting General Properties
From the General Properties tab, you can change the
description of an existing line, disable outgoing calls
for a particular line, and, for Line 1 only, configure
the line for voice calls, fax calls, or both.
To set general properties:
1. Access the Configuration window if not already
there.
2. Click External Line(s) if the installed lines are
hidden.
3. Click Line 1 or Line 2 on the resources
panel, or double click the line number or
description in the External Line Summary on the
properties panel. The property tabs will appear on
the properties panel:
91
CG 2400 User Guide
4. If the General Properties tab is not on top, click
the General tab, then select the desired settings:
NOTE: If you want to
share a line between
CyberGenie and your
PC’s fax/modem, you
must use Line 1.
•
To change the line description, type over the
existing line name.
•
To disable outgoing calls, click the Disable
outgoing calls on this line checkbox. This lets
you disable outgoing calls for a single line without
disabling incoming calls, which allows a dedicated
incoming call line.
•
To configure your system to support a fax/
modem on Line 1:
First, connect one end of a phone cable (not
included) to the fax/modem socket on the bottom
of your base station, and the other end to the
Line or Telco socket of the fax/modem card on
your computer.
92
92
Line 1 base
station socket
Line or Telco
socket on fax/
modem card
Chapter 4: Full System Configuration
Line 1
phone jack
Fax/modem base
station socket
On the properties panel, click Share this line
with modem, then click Fax only or Voice and
Fax if you also want to receive voice calls on the
line. (The default is Voice only.)
Setting Business Hours
Depending on how you set up call routing (see
“Setting Call Routing” on page 95), your incoming
calls can ring through to one or more handsets, or
they can ring through to the CyberGenie welcome
greeting.
If they ring through to CyberGenie, you can set
different greeting messages based on the time of day
and day of week.
These options are set by defining business hours and
non-business hours. Default business hours are
Monday through Friday, 8:00 A.M. to 6:00 P.M.
Hours settings can be specified for each line (Line 1
or Line 2) if you have two external phone lines
connected to your base station.
93
CG 2400 User Guide
To change business hours:
1. Access the Configuration window if not already
there, then click External Line(s) if the
installed lines are hidden.
2. Click Line 1 or Line 2 on the resources
panel, or double click the line number or
description in the External Line Summary on the
properties panel.
3. Click the Business Hours tab:
The blue bars on the graph represent business
hours. The grey bars represent non-business
hours.
Click and drag across a single day, then, to set
the same office hours for additional or all days,
drag downward or upward. If you want to set
each day individually, click and drag the
corresponding bar without dragging upward or
downward. The actual hours you are selecting will
display under the weekly grid.
4. When done, click Business Hours to set the
office hours for that day. Repeat for each day.
5. To set non-business hours, click Non-Business
Hours and repeat the previous step.
94
94
Call routing determines how a call is received and
forwarded. The following diagram gives an overview
of how incoming calls are routed:
Incoming Call
Specific
User
User
mailbox
All
Users
User
answers
No user
answers
Auto
Attendant
No user
requested
or
user not
recognized
System
voicemail
NOTE: You may want
to verify call routing
choices after you have
added users and
handsets.
Specific
Mailbox
Chapter 4: Full System Configuration
Setting Call Routing
Specific
user
requested
User
answers
User
mailbox
All call routing configuration is line specific, meaning
you can set different routings for each line if you
have two external phone lines connected to your
base station.
You can also set up different call routings for each
line based on business and non-business hours.
For each set of hours, you can further specify how
you want calls handled by directing the calls to
specified users, to specified mailboxes, or to
CyberGenie.
You can also set the number of seconds before an
incoming call rolls over to the system inbox voicemail
if no user answers from a handset.
95
CG 2400 User Guide
To set call routing:
1. Access the Configuration window if not already
there.
2. Click External Line(s) if the installed lines are
hidden.
3. Click Line 1 or Line 2 on the resources
panel, or double click the line number or
description in the External Line Summary on the
properties panel.
4. Click the Routing tab.
5. Determine which routing to use for business
hours. The options are:
Ring all users Rings all active (on and able to
accept incoming calls) handsets when a call
comes in. If the call remains unanswered, you
can select to forward it either to the Auto
Attendant or the System voicemail. (To set the
length of time before a call is routed to the
system inbox, see “External Line Setup” on
page 89.)
96
96
Route to this mailbox Routes incoming calls to
a personal or system mailbox from a drop-down
list of users with mailboxes set up. (For more
information on how to set up users and user
mailboxes see “User Setup” on page 105).
Route to this user’s handset Routes incoming
calls to a specific handset, selected from a dropdown list of users with assigned handsets. (To
subscribe additional handsets and assign users to
them, see “Handset Setup” on page 100).
Route to Auto Attendant Routes all incoming
calls to the Auto Attendant (see “Setting Up Auto
Attendant” on page 97).
6. Repeat steps 3 through 5 for Non-Business
Hours.
7. On the bottom of the properties panel, you must
also select where to route a call if it is not
answered by a user. You can choose either to
route the call to the Auto Attendant or to the
System voicemail.
Chapter 4: Full System Configuration
NOTE: If the user to
whom the calls will be
forwarded does not
answer the call and has
selected Do not
forward my calls, the
call will go unanswered.
To set the ring-all-users-handsets timer:
Click the down arrow on
a drop-down list.
to select from
The minimum you can select is 10 seconds, the
maximum is 90 seconds.
Setting Up Auto Attendant
All incoming calls will be routed to the Auto Attendant
if that option is selected on the routing tab described
in the previous section.
Auto Attendant configuration controls which users
can receive calls and where a caller who needs help
will be routed.
You can also record the welcome greeting from this
window.
The welcome greeting is the message a caller first
hears if you have set up incoming calls to go directly
97
CG 2400 User Guide
to CyberGenie. There are three possible welcome
greetings:
•
Business Hours
•
Non-business Hours
•
Temporary (for special instances such as
holidays) that does not overwrite the other two
messages
All Auto Attendant configuration is line-specific (Line
1 or Line 2), meaning that you can have different
settings for each line.
To select users for call acceptance:
NOTE: Auto Attendant
will only ring users
during business hours.
During non-business
hours, auto attendant
routes the call to the
system inbox.
1. Access the Configuration window if not already
there.
2. Click External Line(s) if the installed lines are
hidden.
3. Click Line 1 or Line 2 on the resources
panel, or double-click the line number or
description in the External Line Summary on the
properties panel.
4. Click the Auto Attendant tab.
Two lists of users will appear under the Only Accept
Calls for Selected Users option on the properties
panel:
98
98
Selected users
A list of all users that have been set up on the
system, but not yet selected for call acceptance.
A list of users for which CyberGenie will accept calls
on this line.
Since user call acceptance selection is per line, this
feature is useful, for example, if you want to set up
one line in your home office for business and the
other line for the family. You could then set up the
business line to take calls only to your name, and the
family line to take calls for all family members.
5. Highlight the available user name, then click
.
The user’s name will move to the Selected Users
list.
6. To remove a user from call acceptance, highlight
that user’s name and click
. The user’s name
will move to the Available User’s list.
Chapter 4: Full System Configuration
Available users
To record and review a welcome greeting:
1. On the Auto Attendant tab, click either the
Business Hours button or the Non-Business
Hours button.
2. Click the upper
to access the recording dialog
box for either of the welcome greetings. You can
also click the lower
to access the recording
dialog box for the temporary greeting.
NOTE: Your computer
must be equipped
with a sound card
and microphone
to make any
recordings.
3. Click
to start recording.
4. When done, click
.
5. To listen to the message, click
.
6. To save the message, click Save. The .wav file
will be saved in the default directory (usually
Program Files\CG@Work\Data).
99
CG 2400 User Guide
To use the temporary greeting:
Check the Always Use Temporary Greeting for
Auto Attendant Routing check box. This option will
override any business hours or non-business hours
greetings.
To route a call if a caller needs help:
If a caller doesn’t know a specific user’s name or
extension, or if CyberGenie cannot understand the
caller’s request, the call may require further routing.
You have two routing options:
Ring all users The call will ring through to every
active handset.
Send the call to You can select from a dropdown list of users with active handsets.
Handset Setup
The CG 2400 system comes with one pre-subscribed
handset, but can support up to nine additional
handsets.
Additional handsets must be subscribed to your base
station before they can be used.
Subscribing a Handset to the
Base Station
Handset subscription establishes a wireless
connection between the handset and the base
station. When a fully charged handset is not
subscribed, the handset goes directly to the
subscribe menu when turned on.
Once a handset is subscribed, it can be assigned to a
user, as described on page 102.
You can also use your handset with multiple base
stations. For example, if you have a base station in
the office and another one at home, your handset
100
100
To subscribe a new handset to the base
station:
1. Press and hold
to turn the handset on.
2. Ensure that your new handset is fully charged.
The
on the handset display indicates a fully
charged handset.
3. Subscribe should display. Press
. (If
Subscribe does not display, see the next
procedure.)
4. The display will prompt for the system’s
authorization code with Enter AC.
NOTE: If you are not
sure of the base
station’s authorization
code, see “Base Station
Information” on
page 81.
5. Enter the authorization code and press
.
Chapter 4: Full System Configuration
can travel with you between home and office and
work in each location.
6. The handset displays Subscribing while it
attempts to communicate with your base station.
7. If the subscription process is successful, the
handset displays Subscription Ready. After a
moment the handset will display AVAILABLE ##
(the symbol ## is the assigned handset
number).
If subscription is unsuccessful, the display reads
Subscription Failed. Try again, or refer to
“Troubleshooting” on page 212.
To subscribe a handset to a second base
station:
1. Press
to access the handset menu and
scroll through the options.
2. Scroll to >Settings and press
, then scroll to
>BaseStation and press
, then scroll to
>Subscribe and press
.
3. Enter AC appears. Enter the authorization code
and press
.
4. The handset displays Subscribing while
establishing a connection to the base station.
101
CG 2400 User Guide
5. If the subscription process is successful, the
handset displays Subscription Ready. After a
moment the handset displays AVAILABLE ##
(## is the assigned handset number).
Assigning a Handset to a User
Once a handset has been subscribed and users set
up, the handset can be assigned to a user.
NOTE: Handset
assignment does not
affect a user’s
extension number.
Users can be unassigned from handsets and
reassigned easily. For example, if the handsets are
being used in a small office environment where
different users work different hours, you can change
handset assignment to match whoever is in the office
at a given time with any available handset.
To assign a handset to a user:
1. Access the Configuration window if not already
there.
2. Click Handsets on the resources panel. The
subscribed handsets will appear below:
Handsets which have been assigned to a user
have a
icon beside the handset number.
Handsets that have not been assigned to a user
have a
icon beside the handset number.
102
102
3. Right-click the handset number of an unassigned
handset on either the resources panel or the
Handset List in the properties panel.
The Handset Properties for the selected handset
will appear on the properties panel and the
following menu will open below the handset
number:
4. Position the mouse pointer over the Assign to
User option and a list of users who do not have
handsets available will appear.
Chapter 4: Full System Configuration
The Handset List on the properties panel shows
which handsets have been subscribed to the base
station, and any notes that may have been
entered for each handset.
5. Click the user name to whom the handset will be
assigned.
6. If desired, type in any notes regarding the
handset, such as the day or time the handset was
assigned.
To unassign a handset:
1. Right-click the handset number of an assigned
handset on either the resources panel or the
Handset List in the properties panel. The Handset
Properties for the selected handset will appear on
the properties panel and the following menu will
open below the handset number:
2. Position the mouse pointer over the Unassign
User option and click to unassign that user from
the handset. Notes entered for this handset will
remain unless manually removed.
103
CG 2400 User Guide
Unsubscribing a Handset
If you no longer want to use a specific handset with
your base station, you should unsubscribe it.
Unsubscribing requires procedures for both the
computer and the handset:
NOTE: Before unsubscribing a handset
from the application,
unassign the user
assigned to the
handset.
From the PC:
•
Unassign the handset user (done from the PC)
•
Unsubscribe the handset from the base station
(done from the PC)
•
Unsubscribe the base station from the handset
(done from the handset)
To unsubscribe a handset:
1. From the PC, unassign the handset user if one is
currently assigned. (See “To unassign a handset:”
on page 103.)
2. Access the Configuration window if not already
there, then click Handsets in the resources
panel.
3. Right-click the handset to be unsubscribed, then
click Unsubscribe Handset.
4. Click OK to confirm.
From the handset:
1. Ensure the handset is switched on. Press and
hold
to turn it on.
2. When the idle display appears, press
scroll through the menu.
to
3. Select >Settings >BaseStation >Delete.
The handset will display a list of base stations. In
most cases, there will be only one base station.
However, there may be situations where the
handset is subscribed to multiple base stations. If
needed, scroll to the desired base station, then
press
.
4. Confirm deletion when prompted.
104
104
The system supports up to 20 users. Users can be
assigned to an available handset or assigned a
mailbox only.
Setting up a New User
CyberGenie@Work uses four tabs for information
when setting up a new user:
General
General user data such as name and extension.
External number
The user’s contact information.
Call forwarding
How to route unanswered calls.
Messaging
How and where to notify the user when messages
arrive.
Chapter 4: Full System Configuration
User Setup
To set up a new user:
1. Access the Configuration window if not already
there.
2. From the CyberGenie@Work menu bar, click
.
The New User, Step 1 of 4: General screen will
appear:
Enter the following:
User Extension The system defaults to the next
available extension number. Change it by typing
105
CG 2400 User Guide
over the existing number with any two digits
between 10 and 98.
First Name
Last Name
Display Name The user name to display on the
handset. You are limited to eight characters,
including spaces. If you leave this field blank, the
handset display will default to the user’s name,
first and last, using as many characters as will fit
in the eight-character limit.
User PIN You must enter a user PIN (or accept
the default of 1111).
NOTE: Handsets can
also be assigned from
the Handset resource.
See “Assigning a
Handset to a User” on
page 102.
Voicemail Only or Handset with Voicemail
Handset with Voicemail is only available if there
are unassigned handsets subscribed to the
system. To assign a handset from this panel, click
the down arrow to view and select from a list of
available handsets. All users entered are assigned
a mailbox whether or not a handset is available.
3. Click Next. The New User, Step 2 of 4: External
Number screen will appear:
Enter the contact numbers for this user.
Contact numbers are not required. However, if
you want CyberGenie@Work to be able to forward
message notices to this user on a remote phone,
106
106
4. Click Next. The New User, Step 3 of 4: Call
Forwarding screen will appear:
Chapter 4: Full System Configuration
you must enter a number to which notices can be
forwarded.
Call forwarding determines how unanswered calls
to this user are routed. Select the user’s call
forwarding settings from the following options:
Do not forward my calls Unanswered calls will
not be forwarded to voicemail. (This option is
only available to users with assigned handsets.)
Always forward All calls are forwarded
according to the Call Forward Destination
selection below.
Forward if not answered within __ seconds
Use the up and down arrow keys to select the
number of seconds, from 5 to 60, before an
unanswered call is forwarded. This also applies to
incoming second calls.
107
CG 2400 User Guide
NOTE: CyberGenie callwaiting notifies you
when a call is waiting
on a second line. This
feature differs from
your public phone
service, which notifies
you when a call is
waiting on the same
line.
Forward if busy Check this box if you want the
user’s call forwarded if the handset is in use. If
unchecked, the user will hear a call-waiting tone
on the handset when a second call comes in.
If you select Do not forward my calls, Call
Forward Destination options are not available. If
you select one of the other options, you must
then select a destination for forwarded calls:
My mailbox Routes the call to the user’s
mailbox.
To user Routes the call to another user’s handset
or voicemail. Click from the list of displayed users
to select.
5. Click Next. The New User, Step 4 of 4: Messaging
screen will appear:
Message notification determines whether the user
will be notified when new messages arrive in the
user’s mailbox, and where notification will be
routed.
Select from the following options:
Do not call me If the user has an assigned
handset, this option will not affect the message
notification icon on the handset. It will, however,
prevent any other form of message notification.
Call me on my handset This option is only
available if the user has a handset assigned.
108
108
Call attempts (1 to 3) The number of times
CyberGenie will place a notification call to the
user. Use the up and down arrow keys to adjust
the number of tries.
Attempt interval (2 to 60 minutes) The
frequency with which notification attempts will be
placed by CyberGenie.
A personal voicemail greeting is the greeting a
caller hears when a call is routed to the user’s
mailbox. The user has two options: a main
message, which serves as the default, and a
temporary message that can be recorded without
overwriting the main message.
Chapter 4: Full System Configuration
Call me at my ________ number Only
available if at least one phone number is entered
for this user. Click the down arrow to view and
select from a list of available numbers.
To record a message at the computer, select
Main or Temporary, then click
. A recording
dialog box will appear:
NOTE: You can also
record personal
voicemail greetings
from the handset. See
“Changing Voicemail
Greetings” on page 153
Click
to start recording.
When done, click
.
To listen to the message, click
.
If you check the Give me access to the System
Inbox option, the user will be able to access
messages left in the system inbox. Leaving it
blank will restrict the user to accessing messages
from his or her own personal mailbox only.
109
CG 2400 User Guide
6. Click Next. The User Summary screen will
appear:
7. Review the summary and click Finish to
complete user setup.
Changing User Information
You can edit or delete user records once a user has
been set up.
User record edit procedures are very similar to the
procedures for adding a new user, with one
exception: the General tab lets you add information
that is not available during new user setup.
To edit user information:
1. Access the CyberGenie Configuration window.
2. Click
Users on the resources panel. The
users that have been set up will appear below
and a User List will appear on the resources
panel. (Users with
icon beside their names
110
110
Chapter 4: Full System Configuration
are assigned to a handset, users with
beside
their names are assigned to a mailbox only.)
3. On the resources panel, click the specific user
record to be edited. The record for that user will
appear on the properties panel. (You can also
double-click the specific user on the properties
panel to view the record.)
4. Edit or add the following information:
Title (optional) Enter a title for this user if
desired.
First Name
111
CG 2400 User Guide
Last Name
NOTE: For tips on how
to improve
CyberGenie’s
pronunciation and
understanding of
contact names, see
“CyberGenie
Pronunciation” on
page 197.
Pronunciation (optional) You can control
CyberGenie’s understanding and pronunciation of
a user name from these fields. Once a name is
entered, click
beside the Last Name field to
test CyberGenie’s pronunciation. If the name is
not pronounced correctly, enter the name
phonetically (as it sounds) under Pronunciation.
For example, you could enter the name “Kaellagh
Reilley” as KAYla RYElee.
Alias (optional) Any nickname you might use
for this contact. For example, Uncle George. If
you enter an alias, CyberGenie will hear either
the alias or the user’s proper name.
Display Name The user name to display on the
handset. You are limited to eight characters,
including spaces. If you leave this field blank, the
handset display will default to the user’s name,
first and last, using as many characters as will fit
in the eight-character limit.
Handset ID This field is for information only and
cannot be edited from this screen. If no handset
is assigned to this user, the field will be empty.
User Extension Change the extension number
by typing over the existing number with any two
digits between 10 and 98.
NOTE: Handsets
cannot be assigned
from this tab. To assign
a handset to this user,
or to change handset
assignment, see
“Assigning a Handset to
a User” on page 102.
Change the User PIN by typing over the existing
number.
Line Privileges for Outgoing Calls You can
restrict outgoing calls for this user, if desired. If
you have more than one external phone line
connected to your base station and set up in
CyberGenie@Work, you can control access to
which lines the user can call from. For example,
you can prevent a family member from using
your business line if you have a home office.
If you have more than one line, you can also
select the preferred order in which the handset
will access a line for outgoing calls.
112
112
The remaining tabs contain the same information as
the New User setup screens. For specific procedures
or descriptions refer to the following screens and
their descriptions:
•
“New User, Step 2 of 4: External Number” screen
on page 106.
•
“New User, Step 3 of 4: Call Forwarding” screen
on page 107.
•
“New User, Step 4 of 4: Messaging” screen on
page 108.
To delete a user record:
NOTE: Deleting a user
record will also delete
any personal messages
stored on the system
for that user.
1. Access the CyberGenie Configuration window.
2. Click
Users on the resources panel.
Chapter 4: Full System Configuration
To edit other user information:
3. Click the specific user.
4. From the CyberGenie@Work menu bar, click
.
5. Click Yes to confirm.
113
114
114
CG 2400 User Guide
Chapter
5
System
Administration
The CG 2400 System and
Your PC
Three basic areas of CG 2400 system administration
are performed primarily from the PC:
•
Monitoring and controlling calls from the Call
Progress window.
•
Using the Call Log window to view call histories.
•
Maintaining the contacts database on the
Contacts window.
The Call Progress Window
From the Call Progress window, you can view or
monitor all current call activity as well as control
various call functions, including:
•
Placing a call
•
Transferring a call
•
Making a conference call
•
Rejecting a call
•
Cancelling any call operation
•
Listening to someone leaving a voicemail
message
115
CG 2400 User Guide
There are three possible call session combinations:
•
External line to handset
•
Handset to external line
•
Handset to handset
To access the Call Progress window, click
.
System call activities panel
User/Contact
panel
Call details
panel
The Call Progress window is divided into three
distinct areas:
System call activities
Call details
Displays a graphical view of any system call
activities. Each pair of boxes shows a single call
session. A call session displays the source of a call
and the call destination.
Displays call details for whichever call session is
highlighted in the System Call Activities panel. It is
also the area from which you can control calls.
If you click
on the bottom right corner of this
panel while calls are in progress, the panel will split,
and a text description of the current call activity will
appear in the bottom panel.
User/Contact
116
Displays three different views of call resource
information, depending on which icon is active:
Displays all mailboxes, whether or not the user has
an active handset, and lets you transfer an active call
to any user mailbox displayed.
Displays the contacts list, and lets you place a call to
any contact displayed. (See “Adding and Updating
Contacts” on page 128.)
Miniaturizing the Call Progress
Window
You can view the Call Progress window in full-screen
view or miniaturized view.
Chapter 5: System Administration
Displays all users with handsets assigned and lets
you redirect or transfer an active call to any user
displayed.
To miniaturize or maximize the Call
Progress window:
1. Click
in the upper right-hand corner. The
image will miniaturize:
2. Click and drag from anywhere on the image to
reposition it on the screen.
3. Double-click anywhere on the image border to
maximize the console window.
Call Progress Control
There are three basic types of calls you can control
from the Call Progress window:
117
CG 2400 User Guide
Two-party calls
Two-party calls involve two parties: a call received
from an external line, a call placed from a handset to
an external line, or an internal call from one handset
to another. For two-party calls, you can:
Dial a call by putting the first call on hold and dialing
a second number while the first call waits. When you
use this feature, it turns your two-party call into a
three-party call.
Transfer an existing call to another handset, to
voicemail, or to an external line.
Reject a call by sending the call to the rejection
message, after which the caller is disconnected.
Cancel any current call operation.
Three-party calls
Three-party calls involve three parties: conference
calls, or calls that have one party on hold while the
handset user places or receives another call. For
three-party calls in progress, you can:
Transfer the conference call to the non-originating
party, which will remove the call originator without
disconnecting the call.
Conference a call by dialing a third party while you
have an existing call on hold, then conference all
three parties into the call session.
Reconnect the call to the original call configuration,
disconnecting the third party from the call.
Cancel any current call operation.
Incoming calls
Incoming calls originate either from an external line
or from one handset to another. For incoming calls,
you can:
Redirect Redirect the incoming call to another
handset or voicemail.
Listen Listen to an incoming message when a call
goes to voicemail. The listen feature is only available
for external calls.
118
Call functions are available depending on whether
the call is a two or three-party call or an incoming
call. All functions assume that you have a call in
progress displayed on the Call Progress window:
Call in progress
Chapter 5: System Administration
Viewing Calls in Progress
Click to display a text description of the call
Dialing an Additional Call
When an active call is displayed in the Call Progress
window, you can place a call to a third party without
disconnecting the parties currently engaged in the
call session.
NOTE: To originate a
call from the computer,
see “Dialing a Contact
from Your PC” on
page 131.
While the current call is placed on hold, the
additional call can be placed to either an internal or
external number.
To place an additional call:
1. Access the Call Progress window.
2. If more than one call session appears, click the
desired session on the system call activities panel
to display the call session in the call details panel.
119
CG 2400 User Guide
NOTE: The first party
remains on hold until
the new call is
terminated or until you
conference all parties in
on the call. (See
“Conferencing a Call”
on page 123.)
3. If the new call will be to an internal number, click
in the user/contact panel to display the active
handset users. If it is to an external number, click
to display the contacts list.
4. Place the mouse cursor over the Handset icon on
the call details panel. A menu box will open:
5. Click DIAL, then double-click the user or contact
to which the new call will be placed. The new call
will appear on the call details panel:
Reconnecting a Call
If you have two calls active from the same originator,
but the calls are not conferenced, you can quickly
disconnect the second call and return to the original
call.
120
NOTE: This option
works only with a
three-party call that is
not a conference call.
1. Place the mouse cursor over the handset icon on
the call details panel. A menu box will open:
Chapter 5: System Administration
To reconnect a call:
2. Click RECONNECT. The third party will be
disconnected and the second party will return to
active call.
Transferring a Call in a
Two-Party Scenario
You can transfer a call to another handset, to
voicemail, or to an external number.
To transfer a call:
NOTE: You can
transfer the call to an
external number only if
the call is from another
handset. You cannot
transfer an external call
to another external
number.
1. Access the Call Progress window.
2. If more than one call session appears, click the
desired session on the system call activities panel
to display the call session in the call details panel.
3. If the call will be transferred to an internal
number, click
in the user/contact panel to
display the active handset users. If it is to be
transferred to voicemail, click
to display the
mailbox list. If the call is an internal call to be
transferred to an external number, click
to
display the contacts list.
121
CG 2400 User Guide
4. Place the mouse cursor over the handset icon on
the call details panel. A menu box will open:
5. Click TRANSFER, then double-click the user or
contact to which the new call will be placed.
The call will terminate from the original handset
when the transfer to the new handset or
voicemail is made.
Transferring a Call in a
Three-Party Scenario
When you have dialed an additional number (see
“Dialing an Additional Call” on page 119), you have
the option of transferring the new call to the second
party, which will remove the call originator from the
call session without disconnecting the remaining two
parties.
To transfer a call in a three-party scenario:
1. With the first party connected, dial the additional
number as described in “Dialing an Additional
Call” on page 119.
2. When the third party answers, place the mouse
cursor over the handset icon on the call details
panel. A menu box will open.
3. Click TRANSFER. The call will be transferred and
the originating caller disconnected.
122
A conference call is where three parties can talk
simultaneously during a single call session. Once you
initiate a conference call, no other actions can be
taken with that call other than disconnecting one or
all lines.
To make a conference call:
1. Access the Call Progress window.
2. If more than one call session displays, click the
desired session on the system call activities panel
to display the call session in the call details panel.
3. If the third party in the conference call will be an
internal number, click
in the user/contact
panel to display the active handset users. If it is
to be an external number, click
to display the
contacts list.
NOTE: If the call
originator hangs up
first from the handset,
the remaining parties
can continue to talk.
Chapter 5: System Administration
Conferencing a Call
4. Place the mouse cursor over the Handset icon on
the Call Details panel. A menu box will open:
5. Click DIAL, then double-click the user or contact
to which the new call will be placed.
123
CG 2400 User Guide
6. When the third party answers, place the mouse
cursor over the Handset icon on the call details
panel. A menu box will open:
7. Click CONFERENCE. The system will
automatically connect all parties.
Rejecting a Call
You can send an active call to the rejection message
while it is displayed on the Call Progress window.
(See “Rejection Message” on page 88.)
To reject a call:
NOTE: You can only
reject an incoming
external call. You
cannot reject an
internal call.
124
1. Access the Call Progress window.
2. If more than one call session appears, click the
desired session on the system call activities panel
to display the call session in the call details panel.
3. Place the mouse cursor over the handset icon on
the Call Details panel. A menu box will open:
Redirecting an Incoming Call
When a call comes in, you can redirect it to another
handset or to voicemail from the Call Progress
window.
To redirect a call:
1. Access the Call Progress window.
2. Click the incoming call icon. A menu box will
open:
Chapter 5: System Administration
4. Click REJECT. The caller will be routed to the
rejection message. When the message finishes
playing, the call will be terminated.
3. Click REDIRECT.
4. Click the handset or mailbox to which the call will
be redirected.
125
CG 2400 User Guide
Listening to Incoming
Messages
With CyberGenie@Work, you can screen incoming
messages.
To listen to an incoming message:
NOTE: You can only
screen an incoming
external call. You
cannot screen a
message left internally.
1. Access the Call Progress window.
2. Wait until the call routes to a mailbox.
3. Place the mouse cursor over the mailbox. A menu
box will open:
4. Click LISTEN. You will hear the message on your
PC speakers.
5. If you want to take the call, click REDIRECT,
then click on your handset. The call will ring
through to you.
The Contacts Window
You can use CyberGenie@Work to maintain a list of
contacts. This information can then be used to place
calls from the Call Progress application window or
from your handset.
If you use Microsoft Outlook or another
MAPI-compliant email software package,
CyberGenie@Work can read the entries in your
existing phone book, and you can add names and
addresses from the Contacts window. If you don’t
use another application, you can create a contacts
list directly in CyberGenie@Work.
126
Speech recognition
Lets you flag an entry in your contacts list so that a
user can ask CyberGenie to dial a number, and
CyberGenie will recognize the name and dial it based
on your spoken command.
Pronunciation
You can enter the name phonetically to ensure that
CyberGenie understands the name and pronounces it
correctly.
Download to handset
Lets you flag a contact record for downloading to
your handset directory. The handset can store up to
100 names and phone numbers. (See “Downloading
the Phone Book to Your Handset” on page 174.)
Alias
Display name
Chapter 5: System Administration
Whether your contacts list is created in Microsoft
Outlook or CyberGenie@Work, several fields are
added to the database that provide special features
only available with CyberGenie:
A nickname for this contact (for example, Uncle
George) that CyberGenie will recognize for speech
access.
The name that shows on the handset display when
this contact is called.
Indicates that a contact is activated for speech
recognition.
Indicates that a contact has been flagged for handset
download.
To access the Contacts window, click
.
127
CG 2400 User Guide
Adding and Updating Contacts
New contacts can be added at any time. A contact
record requires a minimum of first or last name, and
one phone number.
To add a new contact—general data:
1. Access the CyberGenie Contacts window.
2. On the menu bar, click
. The New Contact
window will open, with the General tab on top:
3. Enter the following data:
Title (optional)
First Name and/or Last Name At least one must
be entered.
NOTE: For tips on how
to improve
CyberGenie’s
pronunciation and
understanding of
contact names, see
“CyberGenie
Pronunciation” on
page 197.
128
Pronunciation (optional) If you plan to use this
contact name with the speech recognition
feature, click
to test CyberGenie’s
pronunciation. If the name is not pronounced
correctly, enter the name phonetically (as it
sounds) under Pronunciation. For example, you
could enter the name “Kaellagh Reilley” as KAYla
RYElee.
Alias (optional) A nickname for this contact. For
example, Uncle George. If you enter an alias,
CyberGenie will hear either the alias or the
contact’s proper name. click
to test
Display Name (optional) The name entered
here will display on the user’s handset when a
handset is assigned to that user. Note that if you
leave this field blank, the user’s name will be the
default display.
Default Phone Number to Dial Out Used as
the default destination number when a handset
user uses speech recognition to dial a contact
without specifying a different call destination.
This defaults to the first phone number entered,
but can be changed at any time.
Chapter 5: System Administration
CyberGenie’s pronunciation. If you have duplicate
names in the contact list, this is a way around
getting the wrong contact when using the
CyberGenie speech recognition feature.
Allow Speech Recognition Click to activate the
speech recognition feature for this contact.
Allow Download to Handset Click to allow this
contact name and number to be downloaded to a
handset.
To use special characters in numbers:
Enter phone numbers into the system using the
digits 0-9. Letters are not allowed. You can use
dashes “-” and parentheses “()” to make your phone
numbers more legible (for example, 800-555-1212
or (800) 555-1212) but the system will ignore these
characters. To include an extension with a phone
number, use a comma “,” to separate the phone
number from the extension number (for example,
800-555-1212, 321). Depending on the configuration
of the system you are dialing, you may need to
include extra commas “,” to allow more time between
when the phone is first answered and the prompt for
the extension number. Each comma represents a 3
second pause. For example, if you enter (800) 5551212,,,321 you will have a 9-second pause before
the extension number is dialed.
129
CG 2400 User Guide
The following dial modifiers are also available to
access special telephony features:
Code for star
#
Code for pound
To add a new contact—phone numbers:
NOTE: You may need
to insert a pause for
some phone numbers.
For example, some
phone systems require
you to dial an extension
after a short greeting.
A comma signals the
system to pause for 3
seconds. The pause
character is only
available when the
system is online.
1. Click the Work tab to open the next window,
then enter the contact’s work information. All
fields on this window are optional.
2. Click the Home tab to open the next window,
then enter the contact’s home information. All
fields on this window are optional.
3. Click the Mobile tab to open the final window,
then enter the contact’s mobile phone and pager
information. All fields on this window are
optional.
4. If desired, return to the General tab and select
the Default Phone Number to Dial Out.
5. When done, click OK to save the record.
To edit a contact:
1. Access the CyberGenie Contacts window.
2. Click to highlight the contact record to be edited.
3. Click
on the menu bar or right-click on the
contact name, then click Open.
4. Type over existing data. Refer to the procedures
on adding a contact above as needed.
5. When done, click OK.
To remove a contact:
1. Access the CyberGenie Contacts window.
2. Click to highlight the contact record to be
removed.
3. Click
or right-click the contact record, then
click Remove.
4. Click Yes to confirm deletion.
130
You can use the standard Windows interface rules for
copy, cut, and paste on a single field while in the
Contacts window.
To cut, copy, or paste a field:
NOTE: Refer to your
Windows help for more
information on cut,
copy, and paste
procedures.
1. To highlight a single field, click the field, then
click a second time. Note that this is two clicks,
not a double-click.
2. Right-click to open a menu, or use the Windows
keyboard shortcuts.
3. Move the cursor to the field where you want to
paste or copy. Repeat step 2.
Chapter 5: System Administration
Editing a Contact Directly
Dialing a Contact from Your PC
While the Call Progress window provides ways of
manipulating calls already in progress, you can
originate a new call from the Contacts window.
To dial a contact:
1. Access the CyberGenie Contacts window.
2. Click to highlight the name of the contact to be
dialed.
3. On the menu bar, click
, or right-click the
contact name, then click Dial. A dialog box will
open:
Verify or change the following data:
131
CG 2400 User Guide
Dial phone number The number to be dialed. If
incorrect, click the down arrow to view and select
from a drop-down list of numbers for this contact.
On behalf of The handset user to whom the call
will be routed. If incorrect, click the down arrow
to view and select from a drop-down list of
handset users.
Using line The line on which the call will be
placed. The default is Auto Select. If you have
only one analog line connected to the base
station, your only option will be Line 1.
4. When done, click OK to initiate the call. It will be
directed to the selected handset.
Activating Speech Recognition
When a contact name is flagged for speech
recognition, a handset user can ask CyberGenie to
dial a number, and CyberGenie will recognize the
name and dial it based on the spoken command.
There are three ways you can activate or deactivate
speech recognition for a contact:
•
From the Add Contact or Edit Contact panels,
under the General tab (described starting on
page 128).
•
By clicking the contact name to highlight, then
clicking
(activate) or
(deactivate) on the
menu bar.
•
By right-clicking the contact name, then clicking
either Activate Speech Recognition or
Deactivate Speech Recognition.
Enabling Download to Handset
When a contact name is enabled for downloading to a
handset directory, a handset user can download the
contact and default number to the handset for quick
reference. A handset can store up to 100 names and
132
There are three ways you can enable or disable a
record for downloading to a handset:
•
From the Add Contact or Edit Contact panels,
under the General tab (described starting on
page 128).
•
By clicking the contact name to highlight, then
clicking
(activate) or
(deactivate) on the
menu bar.
•
By right-clicking the contact name, then clicking
either Enable Download to Handset or
Disable Download to Handset.
Chapter 5: System Administration
numbers. (See “Downloading the Phone Book to Your
Handset” on page 174.)
Changing the Sort Order of the
Contacts List
You can change the sort order of the contacts list to
more quickly find specific contact information.
To change the sort order:
1. Access the Contacts window.
2. Place your mouse cursor over the column heading
by which you want to sort.
3. Click the column heading. The data will re-sort
based on that heading. For example, if you sort
by Company, all contacts with no company will
appear first, then contacts will be grouped by
company, in alphabetical order. Click the column
heading again to reverse the sort order.
Changing Your Contacts View
CyberGenie@Work provides two different views for
your contacts list:
133
CG 2400 User Guide
Spreadsheet
Business card
The default view, where each record appears on a
single line. This view allows you to easily browse
through your contacts.
A second panel opens over the spreadsheet, and
displays a single record at a time in a business card
layout. This view allows you to see more information
about selected contacts:
To change your contacts view:
1. Access the CyberGenie Contacts window.
2. Right-click on a contact record, then click Show
Business Card. The view will change.
3. To return to spreadsheet layout, right-click on the
contact record, then click Show Business Card
again.
Searching For a Contact
You can find a contact either by scrolling through the
contacts list or using the search option.
To find a contact using the search option:
1. Access the Contacts window.
2. In the By field on the menu bar, select which
category to search by.
134
The Call Log Window
The Call Log window displays a detailed history of all
calls made through the system. The summary data
displayed includes:
Date
Date the call was placed.
Time
Time the call was placed.
Duration
Caller
Destination
How long the call lasted.
Chapter 5: System Administration
3. Enter the corresponding information in the Find
field. With every letter you enter, the list will
adjust until the contact you are searching for is
highlighted.
Who originated the call.
Who received the call.
You can also view detail data for each call:
Status
The call’s current state. For a full list of possible
statuses, see the “Call Status Table” on page 208.
Reason
The reason for the status. For a full list of possible
reasons, see the “Call Reason Table” on page 208.
The actual data captured to the call log can be
selected through system configuration. For more
information on configuring the call log data, see “Call
Log Setup” on page 83.
The data in the call log can be sorted in various ways,
as well as filtered and/or printed, but all data
displayed is for information only and cannot be
changed from this window.
The handset icon on the log indicates the type of call:
Indicates an incoming call from an external source.
Indicates an outgoing call to an external destination.
Indicates an internal call between two handsets.
135
CG 2400 User Guide
Viewing the Call Log
To access the Call Log window, click
.
When the Call Log application window is open, the
CyberGenie@Work menu bar provides the following
options:
Lets you filter call information.
Opens a second panel that displays call detail
information for a highlighted call record.
Refreshes the display with any new call records since
you have accessed the Call Log window.
Prints the call log.
If no log entries are selected, clears all log entries. If
log entries are selected (using CTRL or SHIFT keys),
clears only the selected entries.
Filtering Call Records
The default display is for all call records. You can
restrict the records displayed by using the filter.
To filter call records:
1. Access the Call Log window.
136
. The Filter dialog box
3. To filter records, ensure that the Do not use
filter checkbox is not checked.
Chapter 5: System Administration
2. On the menu bar, click
will open:
4. Select from some or all of the filter options:
Under Call Type, click the down arrow to select
from a list of options. The default is All.
Enter hours, minutes and seconds as desired to
view all calls with a Duration greater than the
time you enter. For example, to view all calls that
are more than 30 minutes long, enter 00:30:00.
Enter a Date From and Date To range, or click
the down arrow on each date to view and select
from a calendar.
Under Caller, click the down arrow to view and
select from a list of originating callers. Note that
the source of the call is always either a user with
an assigned handset for internally originated
calls, or an external line number for incoming
calls.
Under Destination, click the down arrow to view
and select from a list of call destinations.
To choose a Sort order, click on the down arrow.
You can also select Ascending or Descending
order.
5. When done, click OK. Only the data selected with
the filter will display.
137
CG 2400 User Guide
To turn off the filter:
1. Click
again.
2. Check Do not use filter.
3. Click OK.
Changing Sort Order from
the Log
You can also change the sort order of the call records
directly from the Call Log window.
To change the sort order:
1. Access the Call Log window.
2. Place your mouse cursor over the column heading
by which you want to sort.
3. Click the column heading. The data will re-sort
based on that heading. For example, if you sort
by Duration, calls with the longest duration will
appear at the top of the log, with the shortest
calls at the bottom. Click the column heading
again to reverse the sort order.
Viewing Details
The View Detail function displays additional
information about each specific call.
To view call details:
1. Access the Call Log window.
138
Details panel
Chapter 5: System Administration
2. On the menu bar, click
. The details panel will
open in the bottom of the main Call Log window:
3. Scroll through the panel using the scroll bar on
the right if needed.
4. Click and drag the top of the details panel to
resize.
5. When done, click
again to close.
Refreshing the Call Log
You can refresh the display with records of any new
call since you’ve accessed the Call Log window.
To refresh the call log:
On the menu bar, click
any new call records.
. The log will update with
Printing the Call Log
To print the call log:
1. Access the Call Log window.
2. On the menu bar, click
open.
. A print dialog box will
139
CG 2400 User Guide
3. Select the report parameters, then click OK to
print the report.
Clearing the Call Log
As is necessary for system maintenance, a system
administrator may need to clear individual records or
the entire log.
CAUTION: Once
deleted, you will not be
able to recover the call
log information.
To clear the call log:
1. Access the Call Log window.
2. To clear a single record entry, highlight that
record. To clear all entries, do not highlight any
records.
3. On the menu bar, click
.
4. Click Yes to confirm deletion.
The Voicemail Window
The Voicemail window displays a detailed log of all
voicemail messages in both the system inbox and
personal voice mailboxes. The summary data
includes:
Mailbox
From
Received
Personal or system mailbox in which a message was
left.
External line or handset from which the call was
placed.
Date and time the message was received.
New messages are bolded, reviewed messages are
not.
The data in the Voicemail window can be sorted in
various ways, but all data displayed is for information
only and cannot be changed, only deleted.
140
To access the Voicemail window, click
.
Chapter 5: System Administration
NOTE: A voicemail
message can be
reviewed from either
the Voicemail window
or the user’s handset.
(See “Listening to
Incoming Messages” on
page 126.)
Reviewing Messages
Both new and previously heard messages can be
reviewed from the Voicemail window.
To review messages:
1. Access the Voicemail window.
2. Highlight the message you want to review.
Click
in the upper right corner to play a
message.
Click
to pause.
Click
to stop.
To adjust the volume, click and
drag the volume control bar.
To replay part of a
message, click and
drag the message
control bar.
141
CG 2400 User Guide
Changing Sort Order
Messages are sorted by mailbox, sender or recipient.
To change the sort order:
1. Access the Voicemail window.
2. Click the column heading by which you want to
sort. Click again to reverse the sort order.
Deleting Messages
NOTE: Once deleted,
you will not be able to
recover the voicemail
message.
As is necessary for system maintenance, a system
administrator may need to delete voicemail
messages after they have been reviewed.
To delete messages:
1. Access the Voicemail window.
NOTE: When there are
no messages in the
voicemail log, the
icon will not appear.
2. Highlight the message to be deleted and either
press the Delete key on your keyboard or click
the
icon.
3. Click Yes to confirm deletion.
Messages are automatically saved unless manually
deleted.
142
Chapter
6
Uni fied
Messaging
What Unified Messaging
Does
Unified messaging provides a way of accessing your
voice or email messages from a single source.
The CG 2400 system streamlines message retrieval
so you can receive all of your voicemail, reminders
and email from a single location. Working with your
PC, the CG 2400 system provides the following
unified messaging features:
•
Remote message retrieval.
•
Message notification when you have messages
waiting in your personal mailbox.
•
Voicemail service for multiple users.
•
Message notification, either at the handset or at a
remote external number, for incoming messages,
including voicemail and email.
•
Text-to-speech email conversion, which allows
you to “listen” to emails from your handset or
remotely.
•
Notification of fax arrival, and remote retrieval of
fax header information (who sent the fax and
when it came in). This feature is supported by
Windows 98 only.
•
Customizable welcome greetings and voicemail
greetings (for both system and personal
mailboxes), based on time of day, day of week,
and other factors.
143
CG 2400 User Guide
Some of the unified features are set up from the PC;
others are set up and used from the handset.
While this chapter addresses the actions needed from
the PC to utilize unified messaging on an overview
level, the focus is primarily on how to use the unified
messaging features available from the handset.
Unified Messaging Features
from the PC
CyberGenie@Work uses one of two destinations for
routing incoming messages:
System inbox The general mailbox. Users with
rights to the system inbox can retrieve these
messages.
Personal mailboxes A user for whom a personal
mailbox has been set up can retrieve messages
from that mailbox.
Two types of incoming messages can be managed:
Voicemails
Emails
144
Incoming calls can be routed to a specific user's
mailbox. (Reminder messages, or memos, are
treated as voicemails.) Calls that are not sent to a
personal mailbox are sent to the system inbox.
If you're using Microsoft Outlook, you can set it up to
route email to specific user mailboxes as well.
Microsoft Outlook uses a series of user-created rules
that control how incoming email messages are
received, and how they are routed once received. For
more information on using Microsoft Outlook's rules
feature, refer to your Microsoft Outlook manual or
online help. If you don't use Microsoft Outlook, all
emails are routed to the system inbox by default.
Only users who have been assigned access to the
system inbox will be able to receive message
notification for and retrieve messages from the
system inbox.
To assign a user access to the system
inbox:
NOTE: To set up a new
user or change user
information, see “User
Setup” on page 105.
1. Access the Configuration window.
2. Click
Users, then click the specific user to
whom you want to assign access.
Chapter 6: Unified Messaging
Assigning Access to the
System Inbox
3. Click the Messaging tab.
4. Click the Give me access to the system inbox
checkbox.
Setting up a User's Message
Notification
You can set up the system to notify a user when
messages are waiting in the user's personal mailbox.
If you carry your handset with you, you can receive
message notification while you are away from your
desk or outside your home. If you designate an
external number, the system will call that number
with a notification message. A good external number
to consider would be your cell phone.
If the user has rights to the system inbox, you can
also set up for that user to be notified for system
messages.
This feature will also notify the user who has
recorded a reminder message. (See “Reminder
Messages” on page 147.)
When the user has a message, a
appears on the user's handset.
notification icon
145
CG 2400 User Guide
To set up message notification:
NOTE: You can set up
personal voicemail
greetings from this
window, or from the
handset. (See
“Changing Voicemail
Greetings” on
page 153.)
1. Access the CyberGenie Configuration window.
2. Click
Users, then click the specific user for
whom you want to set up message notification.
3. Click the Messaging tab.
4. Select from the following options:
Do not call me If the user has an assigned
handset, this option will not affect the message
notification icon on the handset. It will, however,
prevent any other form of message notification.
Call me on my handset This option is only
available if the user has a handset assigned. (See
“Assigning a Handset to a User” on page 102.)
Call me at my ________ number This option
is only available if at least one phone number has
been set up for this user on the External Number
tab. If this option is available, click the down
arrow to view, and select from a list of available
numbers. Message notification will be forwarded
to the number selected, and the user can call in
to CyberGenie to retrieve messages. (See
“Message Retrieval” on page 147.)
Call attempts (1 to 3) The number of times
CyberGenie will place a notification call to the
user when an external notification number is
selected, or if the option Notify me on my
handset is selected. Use the up and down arrow
keys to adjust the number of tries.
Attempt interval (2 to 60 minutes) The
frequency with which notification attempts will be
placed by CyberGenie. Note that the first
notification will occur at the defined interval
rather than at the time the message is left.
146
Reminder messages are self-recorded voice
messages you store in your personal voice mailbox
for later retrieval.
To record a reminder message from the
handset:
1. Access CyberGenie by pressing
on the
handset. CyberGenie responds: Who would you
like to call?
VOICE (SAY)
KEY
CYBERGENIE
OPTION DESCRIPTION
Chapter 6: Unified Messaging
Reminder Messages
ACCESS CYBERGENIE
2. When CyberGenie responds:
VOICE (SAY)
KEY
RECORD A MEMO 7 3
NOTE: You can exit the
reminder message
function anytime before
beginning the recording
by hanging up. If you
hang up mid-recording,
the memo is saved.
OPTION DESCRIPTION
SELECT THE RECORD OPTION
3. When you have finished recording your memo,
press
again, then do one of the following:
VOICE (SAY)
KEY
OPTION DESCRIPTION
SAVE
1
SAVE THE RECORDING
LISTEN
2
LISTEN TO THE RECORDING
RE-RECORD
3
RECORD THE MEMO AGAIN
GOODBYE
9
CANCEL THE RECORDING AND EXIT
Message Retrieval
A message can be a voice message, a reminder
message, an email, or a fax header (the external
number from which the fax originated).
If you give a user access to the system inbox (see
“Assigning Access to the System Inbox” on
page 145), the user will be notified for system
messages as well as messages for that user's
personal mailbox.
147
CG 2400 User Guide
Without system inbox access, the user can still
receive notification and retrieve messages from his
or her personal mailbox. If Microsoft Outlook has
been set up to distribute emails to personal
mailboxes in CyberGenie@Work, the user will also be
able to retrieve emails.
Retrieving Messages from the
Handset
Messages are stored and retrieved in reverse order
from how they were received, with the most recent
message first.
To access messages from a handset:
1. Access CyberGenie by pressing
on the
handset. CyberGenie responds: Who would you
like to call?
VOICE (SAY)
KEY
CYBERGENIE
OPTION DESCRIPTION
ACCESS CYBERGENIE
2. When CyberGenie responds do one of the
following:
VOICE (SAY)
KEY
OPTION DESCRIPTION
MAIL MENU
7
ACCESS THE MAIL MENU
READ NEW MAIL
71
BYPASS THE NEXT MENU LEVEL AND
GO DIRECTLY TO NEW MAIL
3. CyberGenie will tell you how many messages are
waiting and the message type for the first
message, then play the message. At any time
during the message, you can tell CyberGenie to
do one of the following:
VOICE (SAY)
KEY
OPTION DESCRIPTION
LISTEN
3
REPEAT THE MESSAGE JUST HEARD
DELETE
4
DELETE THE MESSAGE
RESTORE
5
RESTORE A MESSAGE JUST DELETED
4. You can move forward or backward through the
available messages at any time. Selecting Next
148
VOICE (SAY)
KEY
OPTION DESCRIPTION
NEXT
1
MOVE TO THE NEXT MESSAGE
PREVIOUS
2
RETURN TO THE PREVIOUS MESSAGE
CyberGenie will not play the next message until you
say Next or press 1 on the handset.
All messages are automatically saved unless deleted.
To listen to saved messages:
1. Access CyberGenie by pressing
on the
handset. CyberGenie responds: Who would you
like to call?
VOICE (SAY)
KEY
CYBERGENIE
Chapter 6: Unified Messaging
will mark the message as read and automatically
save it:
OPTION DESCRIPTION
ACCESS CYBERGENIE
2. When CyberGenie responds do one of the
following:
VOICE (SAY)
KEY
OPTION DESCRIPTION
MAIL MENU
7
ACCESS THE MAIL MENU
READ SAVED
72
BYPASS THE NEXT MENU LEVEL AND
MAIL
GO DIRECTLY TO SAVED MAIL
3. CyberGenie will tell you how many saved
messages are waiting and the message type for
the first message, then play the message. At any
time during the message, you can tell CyberGenie
to do one of the following:
VOICE (SAY)
KEY
OPTION DESCRIPTION
LISTEN
3
REPEAT THE MESSAGE JUST HEARD
DELETE
4
DELETE THE MESSAGE
RESTORE
5
RESTORE A MESSAGE JUST DELETED
4. You can move forward or backward through the
saved messages at any time. Saved messages
remain saved until deleted by the user:
VOICE (SAY)
KEY
OPTION DESCRIPTION
149
CG 2400 User Guide
NEXT
1
MOVE TO THE NEXT MESSAGE
PREVIOUS
2
RETURN TO THE PREVIOUS MESSAGE
CyberGenie will not play the next message until you
say Next or press 1 on the handset.
Messages are automatically saved unless deleted.
Retrieving Messages Remotely
You can access CyberGenie from any external
telephone if the system is configured to route
incoming calls to the Auto Attendant.
NOTE: If the system is
configured to route
calls to a specific caller
or to ring all handsets,
you must wait until you
are listening to a
voicemail message,
then perform the steps
below before the
message finishes.
To access messages remotely:
1. Call CyberGenie from an outside line.
2. When the Welcome greeting finishes playing, say
CyberGenie or I want to log in or press the *
key.
3. When prompted, say your name.
4. CyberGenie will ask for your PIN. Say the number
or enter it from your keypad.
5. CyberGenie responds with: Yes, [your name]?
6. Say Mail menu or press 7. See mail menu
commands above.
CyberGenie Greeting
Messages
CyberGenie@Work provides different outgoing
messages that you can change or modify from the
handset:
150
Welcome greetings
If an external phone line is configured to route calls
directly to CyberGenie, this is the main greeting a
caller hears when a call comes in. The greeting can
be set differently for business hours and
non-business hours.
Voicemail greetings
When a caller cannot reach the desired party, the call
is usually routed to voicemail: either the system
Rejection message
You can direct unwanted calls to a rejection message.
The rejection message will play, then the caller will
be disconnected. (See “Rejecting a Call” on
page 124.)
NOTE: You can
configure one line for
business use and the
other for personal use,
and have a different
welcome greeting for
each.
All greeting messages can be recorded at your
computer if you have a microphone connected.
Otherwise, greeting messages can be recorded from
a handset or an external line.
Chapter 6: Unified Messaging
inbox, or a personal mailbox. Different greeting
messages can be recorded for each. System inbox
greeting messages can be recorded by any user with
access to the system inbox. Personal mailbox
greetings are specific to each user and are accessible
by user name (and user PIN code if a PIN has been
set up for that user).
For any welcome or mailbox greeting, you can create
a main message as the default message, and a
temporary message, such as for holidays, that can
be set without overwriting the main message.
To view the default messages that come prerecorded with the CG 2400 system, see “Prerecorded Messages” on page 201.
Call Routing and How It
Affects Messages
As described in “Setting Call Routing” on page 95,
you can configure CyberGenie@Work to route
incoming calls to all handsets, a single handset, to
the general system greeting (from which the caller
can select a user or user mailbox to be further routed
to), or to a specific user's mailbox. You can also set
different routings based on the office hours.
Changing Welcome Greetings
If the external phone lines are configured to direct
calls to the Auto Attendant, the CyberGenie@Work
software determines which recording the caller is
greeted with based on defined business and non-
151
CG 2400 User Guide
business hours. These hours can be changed as
described in “Setting Business Hours” on page 93.
The other option for a welcome greeting is the
temporary greeting, which provides a welcome
message for greeting callers with a special recording
that is used to temporarily take the place of the main
system greeting, such as The office is currently
closed for the holiday.
To Change Welcome Greetings:
1. Access CyberGenie by pressing
on the
handset. CyberGenie responds: Who would you
like to call?
VOICE (SAY)
KEY
CYBERGENIE
OPTION DESCRIPTION
ACCESS CYBERGENIE HANDSET
MENU
When CyberGenie responds do one of the following:
VOICE (SAY)
KEY
OPTION DESCRIPTION
GREETINGS
8
ACCESS GREETING MENU
WELCOME
82
BYPASS THE NEXT MENU LEVEL AND
GREETINGS
GO DIRECTLY TO WELCOME
GREETINGS
2. Following CyberGenie's response, select one of
the following options:
VOICE (SAY)
KEY
OPTION DESCRIPTION
BUSINESS
1
GO TO THE BUSINESS HOURS
HOURS
GREETING
NON-BUSINESS
GREETING OPTION
2
HOURS
GREETING
TEMPORARY
GO TO THE NON-BUSINESS HOURS
GREETING OPTION
3
GREETING
GO TO THE TEMPORARY GREETING
OPTION
3. Select one of the following options:
152
VOICE (SAY)
KEY
OPTION DESCRIPTION
LISTEN
1
LISTEN TO THE CURRENT GREETING
RECORD
2
RECORD A NEW GREETING
ACTIVATE
3
USE THE EXISTING GREETING
VOICE (SAY)
KEY
OPTION DESCRIPTION
SAVE
1
SAVE THE NEW MESSAGE
LISTEN
2
LISTEN TO THE MESSAGE JUST
RE-RECORD
3
RECORD AGAIN
GOODBYE
9
QUIT WITHOUT SAVING
RECORDED
NOTE: You can cancel
your recording at any
time by hanging up.
At any time during the welcome greetings process,
you can switch back and forth from business hours,
non-business hours, and temporary greetings by:
VOICE (SAY)
KEY
OPTION DESCRIPTION
SWITCH TO BUSINESS
4
SWITCH TO ANOTHER
HOURS GREETING
Chapter 6: Unified Messaging
4. If you record a new message, press the
CyberGenie button when done, then select one of
the following when prompted:
RECORDING OPTION
SWITCH TO
NON-BUSINESS HOURS
5
SWITCH TO ANOTHER
RECORDING OPTION
GREETING
SWITCH TO TEMPORARY
6
GREETING
SWITCH TO ANOTHER
RECORDING OPTION
Changing Voicemail Greetings
The personal greeting is the greeting a caller hears
when routed to a user’s voice mailbox. The system
greeting is the greeting a caller hears when
connected to the system inbox. For each type of
voicemail greeting, you can set a main message and
a temporary message.
To change voicemail greetings:
1. Access CyberGenie by pressing
on the
handset. CyberGenie responds: Who would you
like to call?
VOICE (SAY)
CYBERGENIE
KEY
OPTION DESCRIPTION
ACCESS CYBERGENIE HANDSET
MENU
153
CG 2400 User Guide
2. When CyberGenie responds do one of the
following:
VOICE (SAY)
KEY
OPTION DESCRIPTION
GREETINGS
8
ACCESS GREETING MENU
VOICEMAIL
81
BYPASS THE NEXT MENU LEVEL AND
GREETINGS
GO DIRECTLY TO VOICEMAIL
GREETINGS
3. Following CyberGenie's response, select one of
the following options:
VOICE (SAY)
KEY
OPTION DESCRIPTION
PERSONAL
1
GO TO THE PERSONAL GREETINGS
GREETINGS
SYSTEM
OPTION
2
GREETINGS
GO TO THE SYSTEM INBOX
GREETINGS OPTION
4. Following CyberGenie's response, select one of
the following options:
VOICE (SAY)
KEY
OPTION DESCRIPTION
MAIN GREETING
1
GO TO THE MAIN GREETING OPTION
TEMPORARY
2
GO TO THE TEMPORARY GREETING
GREETING
OPTION
5. Select one of the following options:
VOICE (SAY)
KEY
OPTION DESCRIPTION
LISTEN
1
LISTEN TO THE CURRENT GREETING
RECORD
2
RECORD A NEW GREETING
ACTIVATE
3
USE THE EXISTING GREETING
6. If you record a new message, press the
CyberGenie button when done, then select one of
the following when prompted:
VOICE (SAY)
KEY
OPTION DESCRIPTION
SAVE
1
SAVE THE NEW MESSAGE
LISTEN
2
LISTEN TO THE MESSAGE JUST
RECORDED
154
RE-RECORD
3
RECORD AGAIN
GOODBYE
9
QUIT WITHOUT SAVING
The rejection message provides the user with the
option of transferring unwanted callers to a special
recording that plays, then disconnects the caller. The
software installs with a default recording, but you
have the option of recording a new rejection
message.
To Change the Rejection Message:
1. Access CyberGenie by pressing
on the
handset. CyberGenie responds: Who would you
like to call?
VOICE (SAY)
KEY
CYBERGENIE
Chapter 6: Unified Messaging
Changing the Rejection
Message
OPTION DESCRIPTION
ACCESS CYBERGENIE HANDSET MENU
2. When CyberGenie responds, do one of the
following:
VOICE (SAY)
KEY
OPTION DESCRIPTION
GREETINGS
8
ACCESS GREETING MENU
REJECTION
83
BYPASS THE NEXT MENU LEVEL AND
MESSAGE
GO DIRECTLY TO REJECTION
MESSAGE
3. Following CyberGenie's response, select one of
the following options:
NOTE: You can
cancel your recording
at any time by hanging
up.
VOICE (SAY)
KEY
OPTION DESCRIPTION
LISTEN
1
LISTEN TO THE CURRENT MESSAGE
RECORD
2
RECORD A NEW MESSAGE
4. If you record a new message, press the
CyberGenie button when done, then select one of
the following when prompted:
VOICE (SAY)
KEY
OPTION DESCRIPTION
SAVE
1
SAVE THE NEW MESSAGE
LISTEN
2
LISTEN TO THE MESSAGE JUST
RECORDED
RE-RECORD
3
RECORD AGAIN
GOODBYE
9
QUIT WITHOUT SAVING
155
156
CG 2400 User Guide
Chapter
7
Calls from
the Handset
Call Management
Your CG 2400 system and handset provide the
following call management features:
NOTE: You can place
and receive calls when
the handset is in
standalone mode (base
station powered up but
software not running).
All other features
require that the system
be in full function mode
to work.
•
Receive incoming calls from an external line or
another handset.
•
Call an external number, another handset or
CyberGenie.
•
Select which phone line to use for outgoing calls.
•
Re-dial up to 10 recently dialed numbers.
•
View call duration information.
•
Park a call (put it on hold in a way that another
user can pick up the call).
•
Retrieve a parked call.
•
Transfer a call to another user.
•
Send an unwanted call to a rejection message
and automatic disconnection.
•
Use CyberGenie’s call-waiting feature that acts
independently of your phone service call waiting.
•
Put a call on temporary hold while you dial
another number.
•
Conference with two external calls, an external
call and another handset, or two more handsets.
•
Download frequently used phone numbers from
the PC to your handset for quick reference.
•
Place calls using the handset phone book.
157
CG 2400 User Guide
How Call Sessions Work
Any call activity is referred to as a call session. Call
sessions can be tracked on the Call Progress window.
(See “Call Progress Control” on page 117.)
Call sessions are also recorded in the call log. (See
“The Call Log Window” on page 135.)
Each handset operation involves one air channel. A
single call session uses one or two air channels,
depending on the nature of the call:
•
An external call (incoming or outgoing) uses a
single channel.
•
A call from a handset to CyberGenie also uses a
single air channel.
•
Calls between two handsets, however, use two air
channels, one for each handset.
Your CG 2400 system supports up to six
simultaneous air channels for a maximum of three
handset-to-handset sessions if there are no handsetto-CyberGenie calls or external calls at the same
time.
The system also supports a maximum of two
simultaneous handset-to-CyberGenie calls.
Incoming and Outgoing Calls
All calls that you receive or place with the handset
are either external (involving an outside line) or
internal (handset to handset, or handset to
CyberGenie).
You can park a call (put it on hold so another user
can retrieve it), retrieve a parked call, or transfer a
call to another user.
You can also send an unwanted call to a rejection
message.
158
When a call comes in, the handset display identifies
the source of the call.
With external calls, the handset shows available
caller ID information if you have caller ID service
available from your public telephone service. If the
caller has ID blocking, the handset will show
Blocked.
NOTE: You can set up
custom rings to
distinguish between call
types. (See “Changing
the Ringer Sound” on
page 179.)
If the line does not have caller ID, the handset shows
which line the call is coming in on (Line 1 or Line 2).
NOTE: You can control
how CyberGenie routes
incoming calls. (See
“Setting Call Routing”
on page 95.)
To receive a call:
With internal calls (calls from other handset users),
the handset shows the user’s name and extension
number.
Chapter 7: Calls from the Handset
Receiving a Call
The user is notified of incoming calls either through a
ring, by a flashing indicator light on the handset and
with a blinking
icon on the handset display.
1. When a call comes in, press
to receive the
call. If you do not take the call, it will be routed to
either the system inbox, your personal voicemail,
or back to the Auto Attendant, based on the
system’s call routing configuration.
2. When finished with the call, press
.
Placing an External Call
There are four ways to place calls from the handset:
Dial from the keypad
Dial a number with the handset keypad (either predial or dial after dial tone is heard).
Use speech
commands
Use CyberGenie to place your call by using a spoken
command (the call-by-name feature).
Select from the
handset phone book
If you download the phone book from CyberGenie to
your handset you can select numbers to call from the
phone book. (See “Downloading the Phone Book to
Your Handset” on page 174.)
159
CG 2400 User Guide
Re-dial recently
dialed numbers
You can re-dial up to 10 of the most recently called
numbers from that handset. (See “Re-dialing
Recently Dialed Numbers” on page 164.)
To pre-dial an external call with the
keypad:
1. Enter the number on the handset. The number
will appear in the handset display.
If you enter the number incorrectly, press
remove the number to the left, one digit at a
time.
Use
numbers.
to
to move through the string of
2. Press
to send the call. You will hear a dial
tone, then hear the number dialing.
3. Press
to end the call. The call’s duration will
show for a few seconds before the handset
display returns to idle mode.
To dial an external call as you would from
an analog phone:
1. Press
to get a dial tone.
2. Dial the number.
3. Press
to end the call. The call’s duration will
show for a few seconds before the handset
display returns to idle mode.
NOTE: To use call-byname, the contact must
already be set up in
CyberGenie’s contacts
list, and the speech
recognition feature
must be activated. (See
“The Contacts Window”
on page 126.)
160
To place an external call with CyberGenie:
1. Access CyberGenie by pressing
on the
handset. CyberGenie responds: Who would you
like to call?
VOICE (SAY) KEY OPTION DESCRIPTION
[CONTACT NAME]
CYBERGENIE LOOKS TO THE
CONTACTS DATABASE
2. If CyberGenie is unsure whether it has made an
exact match, it will repeat the name and ask for
confirmation. (If CyberGenie is confident in the
match, this step will be skipped.) If CyberGenie
asks for a confirmation:
VOICE (SAY) KEY OPTION DESCRIPTION
YES
1
CYBERGENIE WILL DIAL THE NUMBER
NO
2
CYBERGENIE WILL TRY AGAIN
3. Press
to end the call. The call’s duration will
show briefly before the handset display returns to
idle.
To specify a number other than the contact
list default:
NOTE: When you ask
CyberGenie to dial a
name from the contacts
list, CyberGenie will dial
whichever number you
have listed as the
default unless you
specify otherwise. (See
“Adding and Updating
Contacts” on
page 128.)
1. Access CyberGenie by pressing
on the
handset. CyberGenie responds: Who would you
like to call?
VOICE (SAY) KEY OPTION DESCRIPTION
Chapter 7: Calls from the Handset
NOTE: You can set up
nicknames for users to
avoid having to use the
entire name for call-byname dialing. (See
“Alias” on page 112.)
CYBERGENIE LOOKS TO THE
CONTACTS DATABASE FOR THE
CONTACT’S WORK, HOME, OR CELL
NUMBER BASED ON YOUR REQUEST
[CONTACT NAME]
AT [LOCATION]
2. If CyberGenie is unsure whether it has made an
exact match, it will repeat the name and ask for
confirmation. (If CyberGenie is confident in the
match, this step will be skipped.) If CyberGenie
asks for a confirmation:
VOICE (SAY) KEY OPTION DESCRIPTION
YES
1
CYBERGENIE WILL DIAL THE NUMBER
NO
2
CYBERGENIE WILL TRY AGAIN
3. Press
to end the call. The call’s duration will
show briefly before the handset display returns to
idle.
Placing an Internal Call
The CG 2400 system supports up to 10 handsets. If
additional handsets are subscribed to the base
station and assigned to users, a user can dial another
user with a handset directly.
When a user is set up, an extension number is
assigned. (See “Setting up a New User” on
page 105.)
161
CG 2400 User Guide
The user’s name and extension number appear on
the assigned handset display when the handset is
idle.
NOTE: Handsets are
easily assigned or
unassigned to different
users from the PC. (See
“Assigning a Handset to
a User” on page 102.)
To place an internal call with the keypad:
Pre-dial the extension and press
OR
1. Press
to send the call,
to activate the menu.
2. Select >IntCall.
3. Enter the user’s extension number. The extension
will be dialed.
4. Press
to end the call.
To place an internal call using CyberGenie:
1. Access CyberGenie by pressing
on the
handset. CyberGenie responds: Who would you
like to call?
VOICE (SAY) KEY OPTION DESCRIPTION
[USER NAME]
CYBERGENIE LOOKS TO THE USER
DATABASE
NOTE: You can set up
nicknames for users to
avoid having to use the
entire name for call-byname dialing. (See
“Alias” on page 112.)
2. If CyberGenie is unsure whether it has made an
exact match, it will repeat the name and ask for
confirmation. (If CyberGenie is confident in the
match, this step will be skipped.) If CyberGenie
asks for a confirmation:
VOICE (SAY) KEY OPTION DESCRIPTION
YES
1
CYBERGENIE WILL DIAL THE
EXTENSION
NO
3. Press
162
2
CYBERGENIE WILL TRY AGAIN
to end the call.
If you have two external phone lines connected to
your base station, you can select a specific line for
outgoing calls when your handset is idle (no call in
progress).
To select a specific phone line:
1. Press
to activate the handset menu.
2. Select >Retrieve, then select Line1 or Line2.
One of the following will happen:
If...
Then...
The line selected is
idle (no active call)
You will hear a dial tone
The line is in use by
another CyberGenie
handset
You will hear two beeps and
the handset display will show
Not Allowed
A call is parked on
the line selected
The parked call will be
connected to your handset
A call is in progress
on that line
You will be connected to the
call without disconnecting
the current user
Chapter 7: Calls from the Handset
Selecting Which Phone
Line to Use
Parking a Call
Call parking allows you to place a call on “hold” in
such a way that another user may pick it up.
If the call remains parked for more than two
minutes, CyberGenie pages the handset that parked
the call.
If the call continues to remain parked, or if the
handset the call was parked from does not answer or
is turned off, CyberGenie will route the call to the
user’s forwarding destination. (See “Setting Call
Routing” on page 95.)
163
CG 2400 User Guide
To park an external call using the handset
menu:
1. While the call is active, press
the menu.
to activate
2. Select >ParkCall.
3. The call will be parked and the caller will hear the
on-hold music or message while waiting. You can
then retrieve the call or call another handset user
and request that he or she retrieve the parked
call.
To park an external call using CyberGenie:
NOTE: Internal calls
cannot be parked.
1. While the call is active, press
. CyberGenie
responds: Who would you like to call?
VOICE (SAY) KEY OPTION DESCRIPTION
CYBERGENIE
ACCESS CYBERGENIE
2. CyberGenie responds: Yes, <your name>?
VOICE (SAY) KEY OPTION DESCRIPTION
PARK THIS CALL
65
CYBERGENIE PARKS THE CALL AND
CONFIRMS THAT IT IS PARKED
Re-dialing Recently Dialed
Numbers
The handset stores information on up to 10 calls
placed from that handset. Only pre-dialed call
information is stored. Calls made with CyberGenie’s
call-by-name or by pressing
for dial tone then
dialing the number are not stored.
To re-dial a recently dialed number:
1. Press and hold
to access a list of the most
recently called phone numbers.
2. Use
numbers.
to scroll through the list of recent
3. When the desired number appears, press
dial the number.
164
to
1. Press
twice to access the handset menu and
the >Redial option.
2. Press
3. Use
numbers.
to select >Redial.
to scroll through the list of recent
4. When the desired number appears, press
dial the number.
to
Viewing Call Duration
Information
From the handset, you can see how much call time
has been used for that handset.
Chapter 7: Calls from the Handset
OR
You have two views available:
•
The duration of the last call made (this data is
lost if the handset is turned off).
•
The duration of all calls made since this handset
was assigned to this user.
To view the most recent call’s duration:
1. Press
to access the menu.
2. Select >Settings >Information >LastCall and
press
.
3. The last call’s duration will display in HH:MM:SS
format.
To view total call duration:
1. Press
to access the menu.
2. Select >Settings >Information >TotalCalls
and press
.
3. The total call duration will display.
165
CG 2400 User Guide
Retrieving a Call
When a call is parked, any user can retrieve it.
You can also use the retrieve feature to barge in on a
current call, whether the call is on another
CyberGenie handset or an analog phone connected
to the same line.
NOTE: If the user
configuration for that
handset has been set to
block outgoing calls on
the requested line, the
line cannot be picked
up from that handset.
If you retrieve a call that is active on another phone
or handset, you will automatically conference
yourself in on the call without disconnecting the
other user.
Call retrieval results vary based on the current
activities of both the handset and the caller:
WHILE HANDSET IS IN CONNECTED MODE
IF YOU ARE ON ANOTHER CALL
USE THE HANDSET MENU
>RETRIEVE OPTION TO PUT THE
CURRENT CALL ON HOLD AND
ACCEPT THE NEW CALL.
WHILE HANDSET IS IN IDLE MODE
IF THE CALLER IS LEAVING A
VOICEMAIL MESSAGE
BARGE IN WITH >RETRIEVE AND
IF THE CALLER IS LISTENING
USE >RETRIEVE TO HAVE THE CALL
ROUTED TO YOUR HANDSET.
TO THE GREETING MESSAGE,
OR THE CALL IS RINGING A
HANDSET OTHER THAN THE
USER ’S
IF A CALL IS PARKED
166
LISTEN TO THE OUTGOING
MESSAGE OR THE CALLER ’S
INCOMING MESSAGE (YOUR VOICE
IS MUTED). TO TAKE THE CALL,
PRESS #.
USE >RETRIEVE TO ROUTE THE
CALL TO YOUR HANDSET.
1. While the call is active, press
the menu.
to activate
2. Select >Retrieve, then specify the line from
which you want to retrieve the call (Line 1 or
Line 2).
If the call is parked, it will be directed to your
handset. If the call is active with another user, you
will be conferenced in.
Listening in on an Incoming
Message from the Handset
Chapter 7: Calls from the Handset
To retrieve an external call using the
handset menu:
You can use CyberGenie to listen in while a caller is
leaving a voicemail. If you decide you want to take
the call, you can retrieve it to your handset.
To listen in:
1. While the caller is leaving a message, press
to activate the menu.
2. Select >Retrieve, then specify the line on which
the call has come in (Line 1 or Line 2).
3. Listen to the caller’s message (your voice will be
muted).
4. If you want to take the call, press # before the
caller disconnects.
Transferring a Call
You also have the option of transferring an active
call.
There are three types of call transfers possible:
Internal to internal Transfer an internal call
from one handset to another.
Internal to external Transfer an internal call to
an external number.
167
CG 2400 User Guide
External to internal Transfer an external call to
another handset.
You cannot transfer an external call to another
external number.
Attended transfers
Blind transfers
For an attended transfer, stay on the line until the
user answers, announce the caller, then press
>Transfer to disconnect.
For a blind transfer, select >Transfer while the other
party is still ringing. If the user at the other end of
the transfer does not answer, the caller will be routed
to the user’s voicemail.
To transfer a call to another handset using
CyberGenie:
1. While the call is active, press
. CyberGenie
responds: Who would you like to call?
2. State the name of the user to whom the call will
be transferred.
3. At any time after the call begins to ring through,
press
to activate the menu, then select
>Transfer.
To transfer a call to another handset using
the handset menu:
1. While the call is active, press
the menu.
to activate
2. Select >IntCall. When you hear the internal dial
tone (a solid, continuous tone) enter the user’s
extension number.
3. At any time after the call begins to ring through,
press
to activate the menu, then select
>Transfer.
168
NOTE: You cannot
transfer an
external call to
another external
number.
1. With the internal call on the line, press
.
CyberGenie responds: Who would you like to call?
2. State the name of the user to whom the call will
be transferred.
3. At any time after the call begins to ring through,
press
to activate the menu, then select
>Transfer.
To transfer a call to an external number
using the handset menu:
1. With the internal call on the line, press
to activate the menu.
Chapter 7: Calls from the Handset
To transfer a call to an external number
using CyberGenie:
2. Select >Retrieve, then specify the line you want
to transfer the call on (Line 1 or Line 2).
3. At any time after the call begins to ring through,
press
to activate the menu, then select
>Transfer.
When you hear a dial tone, dial the number to which
you want to connect the call.
Rejecting a Call
Call rejection lets you disconnect an unsolicited
external call. When a caller is routed to call rejection,
CyberGenie plays a message before disconnecting
the call.
NOTE: Calls can also
be rejected from the
Call Progress window.
(See “Rejecting a Call”
on page 124.)
For information on recording a rejection message,
see “Rejection Message” on page 88 or “Changing
the Rejection Message” on page 155.
To reject a call:
1. Press
. CyberGenie responds: Who would you
like to call?
VOICE (SAY) KEY OPTION DESCRIPTION
CYBERGENIE
ACCESS CYBERGENIE
169
CG 2400 User Guide
2. When CyberGenie responds:
VOICE (SAY) KEY OPTION DESCRIPTION
REJECT THIS
CALL
68
CYBERGENIE ROUTES THE CALL TO
THE REJECTION MESSAGE. AFTER THE
MESSAGE PLAYS, CYBERGENIE
DISCONNECTS THE CALL
Multiple Calls
With the CG 2400 system, you can handle multiple
calls:
•
CyberGenie has its own call waiting feature that
acts independently of your phone service call
waiting.
•
You can put a call on temporary hold while you
dial another number.
•
You can conference a call between yourself and
two external calls, an external call and another
handset, or two more handsets.
CyberGenie Call Waiting
Phone Service
Call Waiting
If you have call waiting on your public telephone
service, it alerts you when a call comes in on the
same line. You can take the call by pressing
.
CyberGenie
Call Waiting
With CyberGenie, if you have two lines connected to
your base station, CyberGenie alerts you when a call
comes in for you on the other line by playing a
distinctive tone and displaying a message on the
handset. You can take the call by pressing
.
NOTE: If a user is set
up for Forward if
busy, CyberGenie Call
Waiting will not be
available. (See “To set
up a new user:” on
page 105.)
With CyberGenie call waiting, you have the option of
taking the call or allowing it to ring through to your
voicemail or other call forwarding setting, depending
on how your call routing is set up. (See “Setting Call
Routing” on page 95.)
To accept a waiting call:
1. When CyberGenie signals that a call is waiting,
press the
key.
170
Press
again to switch between calls. Press
to
hang up the active call and revert to the call on hold.
Putting a Call on Hold
When you press
while connected with a caller, the
caller is placed on temporary hold until you tell
CyberGenie what you want to do with the call. You
can place a call on hold while you speak with another
caller or give a command to CyberGenie.
Putting a call on hold is different from call parking.
(See “Parking a Call” on page 163.) Call parking lets
another user take the call. Placing a call on hold is a
temporary activity; the call automatically returns to
active if no actions are taken within two minutes.
Chapter 7: Calls from the Handset
2. CyberGenie connects the new call and places the
active call on hold.
There are several things you can do with a call on
hold:
Switch between a call on hold and another active
call.
Disconnect an active call and return to the call
on hold.
NOTE: You cannot
transfer an external
caller to another
external number.
Transfer the call on hold to another handset
user. (See “Transferring a Call” on page 167.)
When you have two simultaneous calls, the handset
displays the caller information (number, name, or
caller ID). The top line displays the current caller.
The flashing text on the bottom line displays the
caller on hold.
To place a call on hold:
Place the current call on hold by pressing
.
CyberGenie responds: Who would you like to call?
VOICE (SAY) KEY OPTION DESCRIPTION
[NAME TO CALL]
CYBERGENIE WILL PLACE THE
SECOND CALL
171
CG 2400 User Guide
To switch between calls:
To switch between the active call and the call on
hold, press
, then:
VOICE (SAY) KEY OPTION DESCRIPTION
SWITCH CALLS
63
CYBERGENIE WILL SWITCH YOU TO
THE CALL ON HOLD
To disconnect active call and return to the
call on hold:
To disconnect the active call, press
, then:
VOICE (SAY) KEY OPTION DESCRIPTION
HANG UP
64
CYBERGENIE WILL DISCONNECT THE
ACTIVE CALL, AND THE SECOND CALL
WILL BECOME ACTIVE
Conferencing Calls
With conference calling, you can connect three
parties. Three-way calls can be established:
NOTE: If you are on
hold or in a conference
call, and wish to pick up
a parked call, you must
end any current call
activity first. For
procedures on
retrieving a parked call,
see “Retrieving a Call”
on page 166.
172
•
Between three internal users
•
Between a single handset user and two external
parties
•
Between two handset users and a single external
party
There are three ways to set up a conference call from
the handset:
•
Barge in on an active call. (See “Retrieving a Call”
on page 166.)
•
Use CyberGenie. (Both conference parties must
be set up in the contacts list and activated for
speech recognition. See “Adding and Updating
Contacts” on page 128.)
You can also set up a conference call from the Call
Progress window. (See “Conferencing a Call” on
page 123.)
To make a conference call using
CyberGenie:
1. Press
. CyberGenie responds: Who would you
like to call?
VOICE (SAY) KEY OPTION DESCRIPTION
CYBERGENIE
ACCESS CYBERGENIE
2. When CyberGenie responds:
VOICE (SAY) KEY OPTION DESCRIPTION
SET UP A
65
START CONFERENCE PROCEDURE
CONFERENCE
NOTE: If you press
while setting up a
conference call, the
conference call is
disconnected.
3. CyberGenie will ask: Who is the first party you
would like me to call?
If all internal callers
hang up, external
callers are
disconnected.
4. Once you are connected, tell the party that you
are setting up a conference call, and press
to
place the first party on hold and access
CyberGenie again.
As long as one internal
caller is on the line,
external parties will
remain in the
conference.
Chapter 7: Calls from the Handset
NOTE: If all internal
callers in a conference
call hang up, then all
external callers
involved in the
conference call are
disconnected.
VOICE (SAY) KEY OPTION DESCRIPTION
[FIRST PARTY’S
NAME]
CYBERGENIE WILL DIAL THE NUMBER
5. CyberGenie responds: Who is the second party
you would like me to call?
VOICE (SAY) KEY OPTION DESCRIPTION
[SECOND
PARTY’S NAME]
CYBERGENIE WILL DIAL THE NUMBER
6. Once connected, tell the second party that you
are setting up a conference call, then press
again. CyberGenie will ask you if you want to
establish the conference.
VOICE (SAY) KEY OPTION DESCRIPTION
YES
CYBERGENIE WILL CONFERENCE ALL
LINES
173
CG 2400 User Guide
Calls from the Handset
Phone Book
The CG 2400 system provides a way for you to
download your most frequently referenced numbers
from CyberGenie into your handset.
NOTE: While
downloading the phone
book, you cannot use
the handset unless you
interrupt the download
by pressing
.
Downloaded information can contain up to 100
names with one number—the default number—for
each name. The downloaded information cannot be
edited from the handset; it can only be viewed or
deleted. Deleting the phone book from the handset
does not affect the contact records on the PC.
Downloading the Phone Book
to Your Handset
Only contacts that have been flagged for
downloading will be downloaded when the process is
initiated. (See “Adding and Updating Contacts” on
page 128.)
NOTE: When you
download the phone
book, pre-existing data
is erased. If the
download is interrupted
by pressing
, by
the handset going out
of range, or by low
batteries, you must
download again.
To download the phone book to your
handset:
1. Press
to access the menu.
2. Select >PhoneBook >Download. The download
process will run automatically.
3. To stop the download at any time, press
.
To check the handset phone book status:
1. Press
to access the menu.
2. Select >PhoneBook >Status. One of two
messages will appear:
Empty, meaning there is currently no phone
book downloaded.
Completed [Month Day Time], shows whether
the download was completed successfully, and
the date and time of the most recent download.
174
1. Press
to access the menu.
2. Select >PhoneBook >DeleteAll.
3. Press
to confirm the deletion.
Placing a Call Using the
Phone Book
Numbers that have been downloaded can be dialed
from the handset by entering the contact name.
To place a call from the phone book:
1. Press
to access the menu.
Chapter 7: Calls from the Handset
To remove the phone book from your
handset:
2. Select >Phonebook >CallName.
3. There are two ways you can access the name of
the person to call:
•
Enter the first letter of the contact name.
Press
to display the first name in your phone
book beginning with that letter.
Use
names.
to scroll through the list of available
When the name appears for the person you want
to call, press
to place the call.
OR
•
Press the corresponding key on the keypad for
each letter. Press once for the first letter on the
key, twice for the second, and three times for the
third. (See “Entering Non-Numeric Symbols from
the Handset Keypad” on page 206 for a full table
of symbols available from the keypad.)
When the desired contact name appears, press
to place the call.
175
176
CG 2400 User Guide
Chapter
8
Ha ndset
Customization
What Can Be Customized
You can uniquely configure your handset for a variety
of customized settings and functions, as well as view
information using the handset keys. Customization
options include:
•
Setting the volume level.
•
Changing ringer sounds.
•
Turning the key click on and off.
•
Setting a “discreet” ring.
•
Activating the indicator light on the handset for
message notification.
•
Turning all sounds off.
•
Changing the display light and contrast.
•
Changing the menu language.
•
Setting long tones (for interactive menus).
•
Muting the microphone on the handset.
•
Using an optional headset.
•
Using the handsets as a baby monitor.
•
Limiting calls out (direct call).
•
Controlling call forwarding.
•
Locking the handset to prevent calls and other
security issues.
•
Using your handset with multiple base stations.
177
CG 2400 User Guide
NOTE: All handset
customization is
specific to that
handset, regardless of
which user is assigned.
Some handset information and settings are available
using a series of menus from the handset. Other
settings can be optionally made using the handset
keys directly.
Navigating the Handset Menus
The handset display menu and menu options are
keys.
accessed and navigated with the
The active menu option is indicated by a > to the
left. Press
to select an option, then
to
move through the sub-menu options.
When more menu options are available, More will
appear on the second text line.
Press
options.
at any time to move up one level of menu
Once an option is selected, it remains stored in the
handset memory even when the handset is switched
off.
If a call comes in while you are changing a setting,
you can answer the call with the
key. (This also
closes the menu and returns the handset to idle
mode if no call is coming in.)
For an overview of the handset menu structure, see
“Handset Display Menu Option Descriptions” on
page 52.
Sounds
You can adjust the handset volume to vary the sound
level of an incoming call. You can also change the
ringer melodies that distinguish the different call
types: internal, external, call back, message, and
page.
178
178
Seven volume levels (0-6) can be set for the handset
ring.
You can set a different volume level for each ring
type: internal, external, call back, or message. When
the volume reaches its lowest level (0), the ring off
icon ( ) shows on the handset display.
The ring volume can be adjusted both while the
handset is ringing and when it is idle, but not while a
call is in progress.
To adjust the ring volume level:
1. Press
menu.
to access and move through the
Chapter 8: Handset Customization
Adjusting the Volume Levels
2. Select >Settings >Handset >Alerts
>RingVolume and press
.
3. Use
to adjust the volume silently or the
volume control keys on the handset to adjust it
audibly. Either method will show the changes on
the handset display. Press
to confirm your
selection.
Changing the Ringer Sound
For each call type you can select from one of 10
distinct ring sounds.
To change a ringer sound:
1. Press
menu.
to access and move through the
2. Select >Settings >Handset >Alerts
>RingType.
3. Select the call type: Internal, External,
CallBack, Message, or Page.
4. Use
to select between Low, Medium,
High, Mixed, or Melody 1 through 6. As you
move through the options, you will hear each
play. Press
to confirm your selection.
179
CG 2400 User Guide
Repeat this process until all call types are set to the
preferred melodies.
Changing the Key Click
Key click is the sound you hear when a key is
pressed on the handset. You can turn the sound
on and off.
To enable/disable the key click:
1. Press
menu.
to access and move through the
2. Select >Settings >Handset >Alerts
>KeySound >Click and press
.
3. Select On or Off.
4. Press
to confirm selection.
Changing the Discreet Ring
A discreet ring is a ring that starts low and gradually
increases. You can turn the discreet ring function on
and off. The default is set to off.
To set the discreet ring:
1. Press
menu.
to access and move through the
2. Select >Settings >Handset >Alerts
>DiscreetRng and press
.
3. Select On or Off.
4. Press
to confirm selection.
Turning Off the Ringer and
Warning Sounds
If your handset rings or sounds a warning at an
inconvenient moment, such as an alarm signal
indicating the batteries are low, you can turn off the
sound.
180
180
When sounds are turned off, you can still place and
receive calls. The warning light and
icon will flash
to notify you of an incoming call.
To turn off sounds temporarily (while
handset is ringing):
1. Quickly press
2. The ring-off icon
display.
.
will show on the handset
To turn off sounds permanently:
1. Press and hold
for at least one second.
2. The ring-off icon
display.
will show on the handset
Chapter 8: Handset Customization
NOTE: Turning off the
sound does not effect
key click.
To turn sounds back on:
1. Press and hold
for at least one second.
2. The ring-off icon
display.
will disappear on the handset
Other Settings
Activating Message
Notification with the
Handset Indicator Light
The
icon on the handset display indicates when a
message is waiting. You can also configure
CyberGenie to ring your handset when you have
messages. (See “To set up a new user:” on
page 105.)
A third type of message notification is also available
by setting the indicator light on the handset to blink
when messages are waiting. The default is set to off.
181
CG 2400 User Guide
NOTE: Turning this
message notification
feature on or off does
not affect the other
methods of message
notification.
To set the indicator light to notify for
messages:
1. Press
menu.
to access and move through the
2. Select >Settings >Handset >Alerts
>MsgLight and press
.
3. Select On or Off.
4. Press
to confirm selection.
Changing the Display Light
and Contrast
A back light illuminates the handset display when a
key is pressed, during an incoming call, or when the
handset is placed into its charger.
The display light automatically shuts down after 15
seconds if the handset is not in use.
You can adjust the display light to one of eight levels
of contrast for easier viewing. You can also turn the
display light off.
To turn the display light on or off:
1. Press
to access the menu.
2. Select >Settings >Handset >Display >Light
and press
.
3. Select Automatic or Off.
4. Press
to confirm selection.
To set the display contrast:
1. Press
to access the menu.
2. Select >Settings >Handset >Display
>Contrast and press
.
3. The current setting displays.
4. Use
to adjust the contrast. Changes
will show on the handset display.
5. Press
182
to confirm selection.
182
The default handset menu language is English, but
two other language options, Spanish and French, are
also available.
NOTE: Use caution
when changing the
handset menu
language. An accidental
choice could lead to
difficulty understanding
the prompts. If this
happens, reset the
default settings. (See
“Default Handset
Settings” on page 196.)
Changing languages applies only to the handset
menu and does not effect software operation on your
PC.
To change the menu language:
1. Press
to access the menu.
2. Select >Settings >Handset >Language and
press
.
Chapter 8: Handset Customization
Changing the Language for the
Handset Menus
3. Use
to scroll through the list of
languages until the preference is displayed.
4. Press
5. Press
to confirm the choice.
to exit.
Changing Tone Length for
Interactive Menus
The tones transmitted by the handset when you
press a key may be too short for some interactive
information services. For example, if you are in a
voicemail menu and are prompted to enter a number
to access an option and cannot successfully do so, it
may be because the tones transmitted from your
handset are too short to be recognized.
Should this happen, you can increase the length of
the transmitted tones for the duration of the current
call. When this feature is activated, a tone will
transmit for as long as you press the key.
NOTE: This feature can
only be used when a
the handset is
connected to a call.
To switch tone length during a call:
1. Press
to access the handset menu.
2. Select DialMode >DTMF-Long and press
.
183
CG 2400 User Guide
To turn off long tones during a call:
1. Press
to access the handset menu.
2. Select DialMode >DTMF-Short and press
.
Additional Handset Features
Muting the Handset
Microphone
During a call, you may want to speak with a person
within range of the handset without the caller
hearing the conversation.
To mute the handset microphone:
Press and hold
. Short beeps indicate that the
microphone is turned off. The microphone
remains so until
is released.
OR
Press
quickly. Short beeps indicate that the
microphone is turned off. To switch the
microphone on again, press
once more.
Using the Optional Headset
NOTE: A Cygnion
headset provides
optimum results with
your handset because it
has a noise-cancelling
microphone.
An optional headset is available for your handset.
Cygnion recommends that you use a Cygnion
headset for maximum results. A headset can be
purchased from the dealer where you purchased your
CG 2400 system.
When you first plug the headset in, a message will
appear on the display: AudioDevice Connected.
This message disappears after a couple of seconds.
To discontinue headset use, unplug the headset from
the handset.
184
184
1. Connect the headset to your handset by plugging
it into the jack on the right side of the handset.
The handset will automatically detect the headset
presence and adjust performance accordingly.
2. Use the volume control keys on the handset to
adjust the volume to a comfortable level. A
warning tone will indicate when maximum or
minimum volume has been reached.
The inline button on the headset cord provides the
following features:
•
Press the button to connect to an incoming call.
•
Press the button to disconnect an active call.
•
Press the button to transfer from an active call to
a call on hold.
•
Press to start a CyberGenie session when there
are no active calls.
•
Press to end a CyberGenie session.
Chapter 8: Handset Customization
To use the headset:
Automatic Answering with
a Headset
When a headset is attached to your handset, you can
set your handset to answer incoming calls
automatically. This allows full hands-free operation.
With automatic answering, when a call comes in, you
will hear a one-second beep in your headset
accessory, and the phone will also ring, then the call
will connect. The headset speaker and microphone
levels automatically adjust when attached.
To turn automatic answering on or off:
1. Press
menu.
to access and move through the
2. Select >Settings >Handset >AutoAnswer and
press
.
3. Select On or Off.
4. Press
to confirm selection.
185
CG 2400 User Guide
Using the Handset as a Baby
Monitor
With two handsets, you can use your CG 2400
system as a baby monitor.
Listening handset
This is the handset you keep with you to listen in on
the baby’s room from a distance.
Monitoring handset
This handset is placed in the baby’s room to monitor
and transmit sounds in the room to a speaker
handset. The monitor handset places a call to the
speaker handset. From the monitor handset, you can
change the BabyPhone call number—the number of
the handset you use to listen to the monitor.
When the BabyPhone feature is activated, the
monitor handset automatically calls the speaker
handset. The monitor handset mutes the ringer and
earpiece so the baby is not disturbed. All keys on the
monitor handset are blocked except for the
key,
which you can use to end the BabyPhone call.
NOTE: If the battery in
the monitor handset is
low, the handset beeps
at the speaker handset
to warn the user.
If the BabyPhone call is interrupted, the speaker
handset will display BabyCallLost Reactivate?, and
the warning light stays on continuously. You can
press
to re-establish the call. When the call is
re-established, you hear a confirmation beep every
half minute from the speaker handset. The beep can
be turned off.
When you use the handset as a baby monitor, locate
it in the room where it will easily pick up sounds but
be out of reach of the baby or small child.
To set the monitor handset (in baby’s
room) to the extension of the speaker
handset (in adult’s hearing):
1. Press
menu.
to access and move through the
2. Select >Settings >Handset >BabyPhone
>SetPhoneNo and press
. Displays the
current extension if one was previously set.
186
186
3. Press
to confirm.
To activate the monitor handset (in baby’s
room):
1. Press
menu.
to access and move through the
2. Select >Settings >Handset >BabyPhone
>Activate and press
.
3. If BabyPhoneFailed displays, either the handset
number entered is incorrect or the phone is out of
range. If BabyPhone displays, the monitor has
been successfully activated.
End the BabyPhone function by pressing
Chapter 8: Handset Customization
To change the speaker extension number, press
to clear the old number, then type the new
number.
.
To turn the information tone on or off:
1. Press
menu.
to access and move through the
2. Select >Settings >Handset >BabyPhone
>InfoTone and press
. The current setting
displays.
3. Select On or Off.
4. Press
to confirm selection.
Using Direct Call
Direct call is a feature that lets you program the
handset to dial a set number regardless of which key
is pressed. Direct call can be activated with any key
on the keypad.
This feature is useful if there is a number that you
call repeatedly, or if you want to program the phone
for a child to contact you easily while you are out.
Pressing any key again will end the call.
187
CG 2400 User Guide
NOTE: Only one direct
call number can be
stored at a time. When
this feature is on, no
other outgoing calls can
be made, though calls
can still be received.
When turning off the direct call feature, perform the
steps quickly to prevent the direct call number from
dialing.
To store a direct call:
1. Press
to access the menu.
2. Select >Settings >Handset >DirectCall and
press
. Enable Direct Call? will appear.
3. Press
to confirm. DirectC.No is displayed.
4. Enter the number to be called.
5. If a direct call number has been set before, it will
show on the display. To change the displayed
number, press
until the old number is
removed, then enter the new number.
6. Press
to confirm the direct call function.
To take an incoming call when direct call is
on:
1. When the phone rings, press
call.
to answer the
2. Press any key to end the call.
NOTE: Do these
procedures quickly. If
you do not do each
keystroke within 2
seconds of the previous
one, the direct call
number will be dialed.
To switch the direct call off:
1. Press
to access the menu.
2. Select >DirectCall and press
Direct Call? will appear.
3. Press
now off.
. Disable
to confirm. The direct call function is
Changing Call Forwarding
Destinations
Call forwarding allows a user to route all calls to
another user or mailbox on the system. You can
change your call forwarding destination from the PC
or from the handset. (See “Setting Call Routing” on
page 95.)
188
188
To change your call forwarding destination:
1. Press
on the handset. CyberGenie responds:
Who would you like to call?
VOICE (SAY)
KEY
CYBERGENIE
OPTION DESCRIPTION
ACCESS CYBERGENIE
2. When CyberGenie responds:
VOICE (SAY)
KEY
OPTION DESCRIPTION
FORWARD MY
66
CYBERGENIE ASKS FOR THE
CALLS
FORWARDING DESTINATION
3. State the destination (my mailbox or a user’s
name), then confirm.
Chapter 8: Handset Customization
You can also turn off call forwarding from the
handset.
To turn off call forwarding:
1. Press
. CyberGenie responds: Who would you
like to call?
VOICE (SAY)
KEY
CYBERGENIE
OPTION DESCRIPTION
ACCESS CYBERGENIE
2. When CyberGenie responds:
VOICE (SAY)
KEY
OPTION DESCRIPTION
STOP
67
CYBERGENIE CONFIRMS THE
FORWARDING
CANCELLATION
Security Issues
Changing the Key Lock Status
You can use the key lock feature to prevent
accidentally pressing a key or making an unintended
call.
189
CG 2400 User Guide
NOTE: Locking the
handset keys does not
affect your ability to
receive calls.
To turn the key lock on or off:
1. Press
menu.
to access and move through the
2. Select >Handset >AutoKeyLock and press
.
3. Select On or Off, then press
to confirm.
After 60 seconds, if no handset keys are pressed,
the handset will lock.
To temporarily unlock the keys:
1. If the keypad is locked, when you try to use it,
Press
TO UNLOCK appears. To temporarily
unlock the keys, press
then
to confirm.
2. The handset keys will lock again after 60 seconds
of no use.
Setting the Phone Lock
To prevent unauthorized use, you can set a handset
to require a PIN code when the handset is first
turned on. (The phone lock option is off by default.)
You can also change the handset PIN from the
handset.
To set the phone lock for PowerOn:
1. Press
menu.
to access and move through the
2. Select >Settings >Handset >PhoneLock
>PowerOn and press
. Enter PIN will
appear.
3. Enter the PIN code for the handset (default is
0000) and press
.
4. Select On or Off. Press
to confirm.
To change the handset PIN:
1. Press
menu.
190
to access and move through the
190
3. Enter the PIN code for the handset (default is
0000) and press
. EnterNewPIN will
appear. Enter the new PIN, then confirm it.
Viewing the IPEI Code
The International Portable Part Equipment Identity
(IPEI) code is a unique code assigned to the handset
during manufacturing. It is also known as the S/N
(serial number).
There are three ways to locate the IPEI code:
•
By looking at the label on the original packaging.
•
By opening the battery case on the handset and
looking at the label under the battery. It will be
labeled as S/N (serial number).
•
From the handset menu.
Chapter 8: Handset Customization
2. Select >Settings >Handset >PhoneLock
>ChangePIN and press
. EnterOldPIN will
appear.
To view the IPEI code from the handset
menu:
1. Press
to access the menu.
2. Select >Settings >Information >ShowIPEI
and press
.
Changing the Handset PIN
The handset PIN code prevents unauthorized use of
the handset or alteration of its settings. You can
change the handset PIN code as needed to maintain
handset security.
191
CG 2400 User Guide
To change the handset PIN code:
NOTE: The handset
PIN controls handset
access only. The
system also uses
personal PINs and
system PINs to control
access to the
application.
NOTE: If you enter the
wrong PIN three
consecutive times, the
handset blocks. To
unblock the handset,
see below.
1. Press
menu.
to access and move through the
2. Select >Settings >Handset >PhoneLock
>ChangePIN and press
.
3. EnterOldPIN displays. Enter the current PIN
code for the handset and press
.
If the PIN entered does not match the current
code, then WrongPIN appears. Try again.
If the PIN entered does match the current code,
then EnterNewPIN appears.
4. Enter the four digits of the new PIN and press
. RepeatNewPIN appears.
5. Enter the PIN code again and press
.
Unblocking the Handset
An additional level of security is the automatic
locking feature. If you enter an incorrect PIN code
three consecutive times, the handset will lock up and
PIN Blocked, Unblock? will show on the handset
display. Should this happen, you will need the IPEI
code to unlock the handset. (See “Viewing the IPEI
Code” on page 191.)
The default handset PIN code is 0000 but can be
changed. (See “Changing the Handset PIN” on
page 191.)
To unblock the handset:
1. Press
. Backdoor appears. (Backdoor is a
way of bypassing normal controls to get into a
system.)
2. Enter the IPEI code and press
EnterNewPin appears.
NOTE: The IPEI code is
located inside the
handset battery cavity.
192
.
3. Enter a new four-digit PIN Code and press
.
Once the new PIN is accepted, your handset will
again be active.
192
You can view or change base station information
through the handset menu. Options include:
•
Selecting a different base station for handset
subscription.
•
Prioritizing which base station to search for first if
more than one base station is used.
•
Renaming a base station.
•
Deleting (unsubscribing) a handset from a base
station.
•
Subscribing a new handset, or subscribing a
handset to a new base station.
Chapter 8: Handset Customization
Base Stations and Your
Handset
The handset that comes with your CG 2400 system is
pre-subscribed to the base station it came with. If
your handset loses the base station connection, you
will need to re-establish it.
If you buy additional handsets, these will also need
to be subscribed to the base station.
You can also subscribe your handset to multiple base
stations. (See “Subscribing a Handset to a Base
Station” on page 196, or contact Cygnion technical
support.)
Selecting a Base Station
When the handset is turned on, it will automatically
try to connect to the last base station used. However,
if you have multiple base stations within handset
range, you have other options:
•
If the handset cannot connect to the previously
used base station and the Automatic option is
selected, the handset will automatically attempt
to connect to the base station that has the
strongest signal.
193
CG 2400 User Guide
NOTE: A base station
name change shows up
only on the handset in
which it is entered. It
does not affect other
handsets or the
application.
•
If the handset is subscribed to multiple base
stations, you can search for a particular one and
select it. Selecting one particular base station
locks the handset to look for that specific base
station only. (You will not need this option if you
have only one base station.)
To select a base station:
1. Press
menu.
to access and move through the
2. Select >Settings >BaseStation >Select and
press
.
3. Select one of the following:
Automatic Links the handset automatically to
the base station with the strongest signal.
[A specific base station] Select a specific base
station from the displayed list of available base
stations.
4. Press
to confirm selection.
Renaming a Base Station
A base station is “named” on the handset for easy
identification. This name displays briefly when you
first turn on the handset, or when you exit the
handset menus using
or
.
The default base station name is Home, but if you
have multiple base stations, you may want to
rename them.
The base station name is a maximum of 10
characters.
To rename a base station:
1. Press
menu.
to access and move through the
2. Select >Settings >BaseStation >Rename and
press
.
194
194
4. Edit the name:
•
Press
to delete the old name, one
character at a time.
•
To enter a new name, press the corresponding
key on the keypad for each letter. Press once
for the first letter on the key, twice for the
second, and three times for the third.
•
Press the
key to shift between upper and
lower case. (See “Entering Non-Numeric
Symbols from the Handset Keypad” on
page 206 for a full table of symbols available
from the keypad.)
5. When done, press
to save edits and exit.
Chapter 8: Handset Customization
3. A list of base stations will appear. Select the base
station name to be edited, then press
.
Deleting a Base Station
You can delete a base station to which a handset is
subscribed. After deletion, the handset can no longer
access that base station unless it is re-subscribed.
Deleting a base station deletes the name of the base
station and removes the subscription.
To delete a base station:
1. Press
to access the menu.
2. Select >Settings >BaseStation >Delete and
press
.
3. If the handset is subscribed to more than one
base station use
to scroll through the
list of base stations until the desired base station
appears.
4. Press
to confirm the deletion of selected
base station.
195
CG 2400 User Guide
Subscribing a Handset to a
Base Station
NOTE: If using more
than one base station,
give each a unique
authorization code to
prevent unauthorized
handset subscription.
A CyberGenie network is an area in which handsets
can make and receive calls using radio connections.
A handset can be subscribed (radio connection
established) to a maximum of eight base stations
(telephone networks).
To subscribe to multiple base stations:
1. Press
NOTE: Multiple base
stations may overlap
coverage. When the
handset is within range
of one or more
telephone networks,
the base station ID of
the first one found
displays.
to access the menu.
2. Select >Settings >BaseStation >Subscribe
and press
.
3. Enter the base station authorization code. The
code appears as
for security purposes when
you enter it.
4. Press
to confirm.
Default Handset Settings
If you return the handset to default settings, you will
clear:
•
All customized handset settings (such as custom
melody rings)
•
Most recently dialed numbers
•
Call statistics
To return to default handset settings:
1. Press
menu.
to access and move through the
2. Select >Settings >Handset >MasterReset and
press
.
3. Reset All Settings? will appear. Press
confirm.
196
to
196
Appendices
Tips for Using CyberGenie
PC Performance
The CG 2400 system shares resources with other
software on your PC. Applications that require large
amounts of memory and processor time impact
CyberGenie’s ability to recognize speech commands.
If you experience delays of more than one or two
seconds during a speech command, try closing any
open software applications to see if
CyberGenie@Work will speed up.
CyberGenie Pronunciation
When setting up a user or contact name, you can
correct CyberGenie’s pronunciation and
understanding of the name by entering it
phonetically in the pronunciation fields. There are a
few rules that make this easy:
•
Replace vowels and/or consonants with similar
sounding vowels and/or consonants.
•
Capitalize or duplicate vowels.
•
Insert a dash to silence or lengthen vowels by
breaking up the name.
•
Alter the intonation of a name by re-writing it.
197
CG 2400 User Guide
For example:
Sample name
How to enter
Pronounce a as aa
Stefaanie
Celine
Pronounce i as e
Ce-lene
Greta
Dash breaks up syllable
Gre-ta
Stephanie
Other Tips
Practice speaking
While CyberGenie does not learn how to listen to
each specific user, you may need to adjust your
speech when communicating to CyberGenie.
Background noise
CyberGenie rejects most levels of continuous
background noise, but short, loud noises can
interfere with successful speech recognition.
The following can negatively affect system
performance:
•
Jewelry rubbing on the plastic of the phone.
•
Surrounding noises (such as loud television, dog
barking, sneezing, and so on).
•
Proximity to transmitting devices operating at 2.4
GHz such as wireless LANs, cordless phones and
video sending units.
•
Proximity to interfering devices such as
microwave ovens.
In environments where background noise poses a
continuous problem, use the keypad commands
when working with CyberGenie. (Once you start
using keypad commands, speech commands are no
longer available for the rest of the CyberGenie
session.)
More is better
198
The more information you give, the easier it is for
CyberGenie to understand what you say. For
example, say Read the Previous One instead of
Previous to move to an earlier message in the mail
system.
Statements,
not questions
Pronounce words clearly as you would during
everyday conversation. Whispering or shouting
makes it difficult for CyberGenie to understand you.
Phrase your commands as statements, not
questions. For example, if you want to record a
memo, you should say Record a memo!, not
Record a memo?
Yes and no
When CyberGenie asks you a question, most often
your response will be Yes or No. If CyberGenie has
trouble understanding, try saying Yes, please; Yep;
No, thanks or Nope, or pressing 1 on the handset
for Yes or 2 for No.
Asking for help
You can ask for help at any time by saying something
like I need help, or Help me, and CyberGenie will
guide you. You can also press 0 at any time when
using the handset to get CyberGenie’s help.
Calling by name
You can use phrases similar to the examples below to
call someone at home, the office, a mobile phone, or
a pager number: John Smith or John Smith on his
pager or John Smith at work or John Smith on
his cell phone number.
Appendices
Speak normally
Sometimes CyberGenie is not sure of the name and
will ask you to confirm it. You can cancel the call by
saying No, Don’t; or Stop when CyberGenie
announces that the call is about to be placed.
Setting up your
voicemail greeting
CyberGenie
One of the first things you can do is set up your
voicemail greeting.
1. To access CyberGenie, press
then say CyberGenie.
on the handset,
2. Try one of the following phrases or a similar
phrase: Personal greetings or Personal
voicemail announcement or I want to
change my personal greetings.
Keypad
Listening to
messages
CyberGenie
Press
811
When
appears on the handset, you have new
unread messages. To access messages:
1. Press
on the handset and say CyberGenie to
access the main menu.
199
CG 2400 User Guide
2. Say a phrase like: Check my new mail or I
want to read my new messages or Play new
mail.
Press
Keypad
71
At the end of a message you have the option of
repeating it, going to the next or previous one or
deleting. Following are descriptions of actions you
can take.
•
Repeat it or Repeat message
CyberGenie
Press 3
Keypad
•
Press 1
Keypad
•
Press 2
Keypad
•
Setting up a
conference
CyberGenie
To move to the previous message:
Read the previous one or Back up one
CyberGenie
Keypad
To move to the next message:
Next or Next message or Go to the next one
CyberGenie
CyberGenie
To repeat a message:
To delete a message:
Delete it or Delete message
Press 4
You can use the following phrases to set up a
conference call when you have no calls or when you
have two calls on hold:
Conference
Set up a conference
I’d like to start a conference
Keypad
To set up a new conference call press
6 5.
To start a conference with two calls on hold press
6 2.
You cannot set up a CyberGenie conference with two
calls on the same line. (This is often referred to as
network call waiting.)
Returning to the
main menu
200
You can return to the main menu at any time by
saying a phrase such as: Start over or Could you
start again? or CyberGenie.
NOTE: To record the
greetings, you will
either need to use your
handset, or a
microphone attached to
your computer.
Below is the text for the pre-recorded greetings and
other messages that come with your CyberGenie
system. You can use the existing recordings, rerecord these greetings using your own voice, or
create your own.
Appendices
Pre-recorded Messages
Business hours greeting
File names: bhline1.wav and bhline2.wav
Hello. This is an Automated Attendant, part of the
CyberGenie phone system. When you hear a tone
simply say the name of the person you wish to speak
to and your call will be connected. Thank you.
Non-business hours greeting
File names: nbhline1.wav and nbhline2.wav
Hello. This is an Automated Attendant, part of the
CyberGenie phone system. The office is now closed
but I can still connect your call. When you hear a
tone simply say the name of the person you wish to
speak to and your call will be connected. Thank you.
Temporary welcome greeting
File names: tmpline1.wav and tmpline2.wav
Hello. This is an Automated Attendant, part of the
CyberGenie phone system. When you hear a tone
simply say the name of the person you wish to speak
to and your call will be connected. Thank you.
System voicemail (main and temporary)
File names: sysvmg.wav and systmvmg.wav
You have reached the system voicemail. To ring all
available extensions, press 0. To try a different
extension press the star key. If you would like to
leave a message wait for the tone and leave your
message. When you have finished press the pound
key or simply hang up.
201
CG 2400 User Guide
Personal voicemail greetings (main and
temporary)
File names: vmgusr.wav and vmgtusr.wav
NOTE: When you
record your own
voicemail greeting, a
new set of .wav files
are created. The format
for these are:
vmg_##.wav and
vmgt_##.wav, where
## is the user’s twodigit extension.
The person you are trying to reach is not available.
Please leave a message after the tone.
Rejection message
File names: noanspmt.wav and junkcall.wav
I am sorry but we do not accept calls of this nature.
Please remove this number from your database.
Thank you.
Good bye message
File name: goodbye.wav
Thank you. Good bye.
202
NOTE: If you have
more than one email
account that should
interface with your
CyberGenie system,
you will need to set
up a “profile” for
each account.
Appendices
Creating Multiple Email
Profiles in Microsoft Outlook
To create multiple profiles on a single PC:
1. From the Start menu, open Control Panel and
double-click on the Mail icon.
2. On the Services tab, click Show Profiles.
3. On the General tab, click Add.
4. In the Inbox Setup Wizard, click Manually
configure information services, then click
Next.
5. Type the name of this new profile (for example:
My Profile #1) then click Next.
6. On the Services tab in the Properties dialog, click
Add.
7. In the Add Service to Profile dialog, select
Internet E-mail and click OK.
8. In the Mail Account Properties dialog, type in your
email account information and click OK.
9. Back on the Properties dialog, click Add.
10. On the Add Service to Profile dialog, select
Personal Folders and click OK.
11. On the Create/Open Personal Folders dialog,
select the name of your existing folder file and
click Open.
12. On the Personal Folders dialog, click OK.
13. Back on the Properties dialog, you should see
Internet E-mail and Personal Folders in the
Services tab. Click OK.
14. Back in the Inbox Setup Wizard, click Next, and/
or click Finish.
15. Repeat steps 3 through 14 to create additional
profiles.
203
CG 2400 User Guide
Configuring Your MAPI
Application Correctly
Once you have installed the CyberGenie@Work
software, if an error message displays saying that
Windows Messaging Service (WMS) or Microsoft
Outlook is not configured properly, you will need to
check the Mail options set in the Windows Control
Panel:
NOTE: This section is
applicable only if you
choose to integrate
Microsoft Outlook with
CyberGenie.
1. Go to Control Panel, then double-click the Mail
icon (in some cases it might be Mail and Fax). A
dialog box with three tabs—Services, Delivery
and Addressing—will appear.
2. For CyberGenie@Work to function fully, Personal
Folders should be available in the Services list
box. If not, click the Add button and select
Personal Folders.
Windows will ask for the location of a .pst file. It
is recommended that you use the default location
(C:\Windows in Windows 98 and C:\WINNT in
Windows 2000) and save the file as uwastore.pst
as this will ensure that the .pst file will be backed
up and saved during uninstall. Otherwise, if this
file is damaged or lost, you will have to reenter
your contact information.
3. After Personal Folders is added to the Services
list, set the Delivery option in the Delivery tab
to Personal Folders. CyberGenie@Work uses
the Delivery setting to determine where your
incoming email is stored, and where to save your
incoming voicemail and reminders.
Make sure you set the delivery option on the
Delivery tab to a Personal Folder, not an Exchange
Server. CyberGenie does not support Exchange
Server as the mail delivery location.
Personal Folders should be set up as above. WMS for
Windows NT has a Configuration Wizard which guides
you through setup. If you are running the Inbox
setup wizard, select the Manually Configure
204
Microsoft Outlook can be installed on a system which
has only WMS. However, you should not try to install
WMS on a system that already has Microsoft Outlook
setup since there might be a conflict with some of the
files. When Microsoft Outlook is installed on top of
WMS, verify the Mail settings either in Control
Panel or by selecting Tools>Services in Microsoft
Outlook.
Appendices
Information Services option to make the above
changes, as otherwise the Wizard installs Exchange
Server and MS Mail PostOffice, which then interferes
with CyberGenie@Work’s functions.
Importing Contacts
into Microsoft Outlook
or Windows
Messaging
In Microsoft Outlook, contacts can be imported from
another .pst file. The Import option is available in the
File menu.
In WMS, though the Import option is available, it
allows import of only .mmf or .pab (Personal Address
Book) files. To be able to get the contact information
from another .pst file (the source file), you will need
to copy the source file into the directory where your
own local .pst file is located (most probably called
uwastore.pst), delete the local file and rename the
source .pst file to replace the local .pst file. Care
must be taken while doing this since you could lose
messages in the user accounts that were created by
CyberGenie@Work in the local .pst file.
205
CG 2400 User Guide
Entering Non-Numeric
Symbols from the Handset
Keypad
You can use the keypad to enter letters and symbols
from the handset.
This feature is used when selecting a name to dial
from the handset phone book (see “Placing a Call
Using the Phone Book” on page 175) or when
renaming the base station. (See “Renaming a Base
Station” on page 194.)
Each numeric key represents several letters, symbols
or numbers. To enter a character other than the first
character for that key, quickly press the key to rotate
through available characters.
For example, to enter the letter N, you would rapidly
press the 6 key twice.
Use the
Uppercase
Lowercase
1
Space - ? ! , . : “ ‘ ( ) 1
Space - ? ! , . : “ ‘ ( ) 1
2
ABCÅÄÆÀÇ2
abcåäæáç2
3
DEFÈÉ3
defèé3
4
GHIÌ4
ghiì4
5
JKL5
jkl5
6
MNOÑÖØÒ6
mnoñöøò6
7
PQRSß7
pqrsß7
8
TUVÜÙ8
tuvüù8
9
WXYZ9
wxyz9
0
0+&@/$%£
0+&@/$%£
#
#*
#*
Key
206
key to switch from upper to lower case:
DA 202 Base Station
Indicator Light Status
Appendices
Tables
The base station indicator light is located on the base
station.
Indicator
Green
Green blinking
Amber
Amber blinking
Red
Off
State
Base station is successfully connected to the PC and
CyberGenie@Work is running.
Firmware is being downloaded from the PC to the
base station.
Base station running in standalone mode (PC is not
on, software is not loaded or USB cable is
disconnected).
Hardware is initializing and is in diagnostic mode.
If red for a few seconds, base station is initializing. If
red persists, indicates base station failure—contact
technical support.
Base station is not connected to power source.
External Line Indicator Status
The external line indicator lights are located on the
application window.
Indicator
Green
Red
State
The line is available.
The line is in use.
Amber steady
Outgoing calls are disabled on this line.
Amber broken
CyberGenie did not detect a dial tone on this line
during the last call attempt.
Off
The line is not configured.
207
CG 2400 User Guide
Call Status Table
Following is a table of possible states for an active
call. These statuses are viewed from the Call Log
window. For information on how they are reported by
the system, see “The Call Log Window” on page 135.
Status
Call being set up
Description
The system is preparing to make a call.
Calling
The call is being placed.
Talking
A call has been successfully placed.
Consulting
Conference
Talking to a second party while first party is on hold.
A call has been conferenced.
Parked by (user name)
A call has been parked, with the name of the handset
user who parked it.
Recalling
A second call was terminated with a first call on hold
and the first call automatically rings back to the
handset.
Connected to
(user name)
The call has been forwarded to another handset, with
the name of the handset user receiving the call.
Connected to voicemail
The call has been forwarded to voicemail.
Call Reason Table
Below is a table of possible reasons for an active call
state. These reasons are viewed from the Call Log
window. For more information on how these states
are reported by the system, see “The Call Log
Window” on page 135.
Reason
Unpark
A parked call has been retrieved by a handset.
CyberGenie
The handset caller has called CyberGenie.
Manual Dial
A call is being dialed manually from the handset
using the keypad.
Predial
External
208
Description
A call has been pre-dialed on a handset but has not
yet engaged.
An external call has been placed.
A call has been automatically routed to handset or
voicemail by system.
Redirect
A call is being redirected.
Forward
A call is being forwarded.
Swap
Transfer
Blind transfer
Disconnects
Retrieve
Park
Conference
User has switched between active call and call on
hold.
A call is being transferred.
User has transferred call and hung up before call was
answered.
A call has been disconnected.
A parked call has been retrieved.
A call has been parked.
A call has been conferenced in.
Message Notification
A message notification has been sent by CyberGenie
to a user.
Auto-Attendant
Timeout
A call has been re-routed after three failed attempts
by CyberGenie to understand caller request.
Paging
No Handset
System is ringing all handsets.
User does not have handset assigned.
Busy Forward
A call was forwarded from handset because of busy
signal.
Call Rejected
A call has been sent to the call rejection message.
Call Waiting Accepted
Appendices
System Routing
A handset user has taken a call that came in on call
waiting.
209
CG 2400 User Guide
Reinstalling the Software
There may be instances where you will want to
uninstall the CyberGenie@Work software.
You will also need to reinstall the software if you get
an upgraded version of the program.
Data backup
When un-installing the software, you have the option
of backing up the CyberGenie@Work data files.
These files store such data as saved voicemail
messages, user data (including call routing and other
preferences), and so on. It also includes the system
PIN information.
To uninstall the software:
1. Right-click
on the Windows taskbar.
2. Select Shut Down. A dialog box opens:
3. Click the Backup data files check box, then click
Yes to back up your data and shut down
CyberGenie@Work.
4. Click Start on the Windows taskbar, then select
Programs>CyberGenie>Uninstall.
5. A message appears: Are you sure you want to
completely remove CyberGenie and all of its
components? Click Yes to confirm.
6. Another message displays: Select a folder for
saving the CyberGenie@Work data files. Click
Use default folder, then click Save.
210
8. When prompted whether you want to Remove
Shared File? click No to All.
Appendices
7. When the backup procedure is complete, click
OK.
9. The screen displays the progress of the uninstall
procedure.
10. When uninstall is complete, click OK. (Uninstall
may need to reboot your PC at the end of the
procedure.)
To install the software again:
NOTE: Leave the CD in
the drive when you
restart the computer.
You will need the CD in
the drive to complete
installation and run the
installation
Configuration Wizard.
1. Ensure that the CyberGenie@Work server is
closed. Refer to the procedure in “To close the
console:” on page 63 as needed.
2. Insert the CyberGenie@Work CD-ROM into the
drive. When the Install window automatically
opens, click Re-install.
3. Follow the directions on the screen.
To restore backed-up data after a new
install:
1. Copy the following files from the CGbackup000X
folder into the CyberGenie@Work\Data folder:
NOTE: It is also
recommended that you
make a copy of these
files on a floppy disk.
UWAconfig.dat
UWAconfigback.dat
UWAcallLogDB.mdb
Also copy all needed .wav files.
2. Reboot your PC.
211
CG 2400 User Guide
Troubleshooting
This section describes common situations that may
come up during installation and operation.
Hardware
Situation
Base station light
is off
Description
Cause Base station not properly connected to
electrical outlet.
Action Verify that power cable is properly connected
to base station.
Base station light
stays red
Cause Base station is damaged.
Base station light
is amber
Cause Indicates that the base station is in
standalone mode.
Action Call technical support.
Actions Verify that PC is up and the
CyberGenie@Work is running.
Verify that USB cable is connected properly.
Internal calls work
but cannot make or
get external calls
Actions Verify that external phone lines are
connected to the base station.
Verify that phone lines have been assigned external
numbers. (See “External Line Setup” on page 89.)
Try connecting an analog line to the fax/modem
socket (you should hear a dial tone).
Verify that the base station power is correctly
connected.
Ensure that outgoing calls have not been disabled for
that line.
212
Situation
Incorrect
on-hold music
is played
Description
Cause Incorrect configuration
Action Verify the filename on the Configuration
window’s System properties panel. The default file
is musichld.wav.
CyberGenie
doesn’t use correct
voice (male/female)
Cause Incorrect configuration.
An incorrect
announcement or
no announcement
is being played
Cause Incorrect configuration.
Calls are
being routed to
an incorrect
destination
Appendices
Software
Action Verify that the correct voice is selected on the
Configuration window’s System properties panel.
Actions Verify that the announcement files have not
been deleted, damaged, or replaced. Do this by
playing back the announcement on the Configuration
window’s
Messaging properties panel. If the file
does not play, re-record the announcement. If the
problem persists, reinstall software to replace the
default files.
Cause Incorrect or incomplete configuration.
Actions Verify routing information under the
Configuration Window’s
Line 1 or
Line 2
properties panel for both business and non-business
hours. Also, check the
Users properties panel to
ensure calls are routed to handsets.
Verify that handsets are subscribed and assigned to
users.
Check the call forwarding properties for the handset
users.
There is an error
in call forwarding or
message notification
Cause Incorrect or incomplete configuration.
The call log is empty
Cause Incorrect or incomplete configuration.
Action Check the Call Forwarding and Messaging
tabs on the Configuration window’s
Users
properties panel.
Action Check call log configuration on the
Configuration window’s
Call Log properties panel.
213
CG 2400 User Guide
I cannot make a call
by saying a
caller’s name
Line lock out
Cause Speech recognition disabled in Contacts.
Action Make sure that contact entry has speech
recognition enabled.
Cause Software is unable to detect remote on-hook
message.
Action Wait for 20 seconds or reset the base station.
PC displays
an unknown device
message
Cause Driver was not copied from CD (during
installation process) before plugging in the base
station’s USB cable to PC.
Action Un-install software. Disconnect base station
from power outlet. Reinstall software, making sure
you do not reconnect base station to power supply
until prompted by system to connect base station.
Handset
Situation
My handset
is not working
Description
Actions Reset the handset.
Reset the base station power.
Replace the handset battery.
Refer to the handset manual for additional
information.
My handset
gives a busy tone or
constant dial tone
Cause Attempting to make internal call while system
is in standalone mode, or inconsistent state of base
station, handset, or software.
Actions Ensure that handset is subscribed to base
station.
Verify that handset is fully charged.
I do not hear
a dial tone after
pressing
Cause Handset is subscribed but not assigned yet, or
inconsistent state of base station, handset, or
software.
Actions Make sure the handset is assigned to a user.
Reset the handset power.
Make sure the base station light is amber or green.
Make sure that at least one phone line cable is
plugged in and Line 1 is defined in the configuration.
214
I cannot subscribe a
new handset
The handsets do not
ring on an incoming call
Action Make sure that the handset is first
unsubscribed while PC software is running. (See
“Unsubscribing a Handset” on page 104 for full
procedures.)
Appendices
Refer to the handset manual for additional
information.
Actions Ensure that the external line’s incoming
routing option under system configuration indicates
that you want incoming calls to ring through to the
handsets.
Try to re-power the handset.
Make sure that the current time is correct, and that
business hours/non-business hours are set correctly.
215
CG 2400 User Guide
Additional Help
In addition to the printed documentation and the
online help, your Cygnion CG 2400 System provides
other levels of help.
Help from the Handset
Obtain general help on how to perform system
operations using the handset by pressing 0 or by
saying I Need Help during a CyberGenie session at
the main menu level. CyberGenie will provide a list of
help options from which to select. Select an option by
either pressing the corresponding handset key or by
the number associated with the option.
Other Technical Support
Options
Have a question?
The CyberGenie
Customer Support
Center has answers
Register your
product!
Occasionally, we all need help with products
purchased for use in our office or home, and the
CyberGenie Customer Support Center is there to
provide just that—help when you need it. Our goal is
to provide you fast, easy and reliable ways for
getting answers to questions regarding the use of
CyberGenie. We offer four convenient support
methods that allow you to request assistance
anytime, anywhere. Telephone, web, email or fax—
choose the one that works best for you!
In order to obtain support, you must first register
your CyberGenie system. This can be done in three
ways:
1. Access the help button from the CyberGenie
window and choose the registration option that
allows you to complete and submit the
registration directly on the Internet.
2. Mail or fax in your product registration card or
print out the product registration form that can
be accessed from the help button of CyberGenie
window.
216
Phone support:
Hi, I have a
question regarding…
Having a problem and need someone to answer your
question directly? You can get one-on-one personal
assistance by speaking to a CyberGenie Customer
Support Professional. Toll-free telephone support is
available between 5:30 A.M. to 9:30 P.M. (Pacific
Time), Monday through Saturday, at 1-877-MY
GENIE (694-3643).
Appendices
3. Call the CyberGenie Support Center and register
with one of our support representatives.
To expedite the handling of your call, please give the
Customer Support Professional the telephone
number that you registered your CyberGenie system
with, and, if possible, your base station ID number.
While accessibility may vary based on the number of
callers, we promise to assist you in a prompt,
courteous, friendly and helpful way.
Website support:
Report a Problem or
Search for a Solution
Access our technical support page via the Internet at
www.cygnion.com.
•
Report a Problem:
Use the Report a Problem option to enter your
question or problem directly into our Problem
Management System. You may submit your
support problem or question 24 hours a day,
seven days a week. Once your problem or
suggestion is received, the turn around time for a
response is one business day or less. You may
receive either an email or a call from one of our
support professionals.
•
Search for an Answer:
Use the Search for a Solution option to search
for solutions to previous problems that may
match yours or access our list of Frequently
Asked Questions (FAQs) for solutions to the top
ranking questions that have been asked by
customers.
Email support:
Dear CyberGenie,
can you help
me with…
The CyberGenie email system allows you to request
information from a qualified support professional via
email. You may submit your support question via
email 24 hours a day, seven days a week. Once your
email is received, the turn around time for an answer
217
CG 2400 User Guide
218
is one business day or less. Contact us at
[email protected].
Fax support:
help is just a
fax away
If you have access to a fax machine, you can send
your questions to our highly skilled support
professionals and they will answer your questions
with easy-to-read answers. The toll-free fax line is
1-877-561-1425.
You may submit your support question via fax at any
hour, but be advised that support professionals are
only available to answer your requests during normal
phone support hours. To expedite processing your
request, please provide the telephone number that
you registered your CyberGenie system with, and, if
possible, your base station ID number. Once your fax
is received, the turn around time for an answer is
one business day or less.
Record your PINs in the spaces below for safekeeping
and easy reference:
Systems:
Handset PINs:
User PINs:
Base Station Name
Authorization Code
_____________________
___________________
_____________________
___________________
#
Handset PIN
#
Handset PIN
____ ___________
____
___________
____ ___________
____
___________
____ ___________
____
___________
____ ___________
____
___________
____ ___________
____
___________
User Name
Appendices
Record Your PINs
User PIN
______________________________ ___________
______________________________ ___________
______________________________ ___________
______________________________ ___________
______________________________ ___________
______________________________ ___________
______________________________ ___________
______________________________ ___________
______________________________ ___________
______________________________ ___________
______________________________ ___________
______________________________ ___________
______________________________ ___________
______________________________ ___________
______________________________ ___________
______________________________ ___________
______________________________ ___________
219
220
CG 2400 User Guide
Index
Index
Handset Menu Options
>Activate 53
>Alerts 54
>AutoAnswer 55
>AutoKeyLock 53
>BabyPhone 53
>BaseStation 55
>CallName 53
>ChangePIN 54
>Contrast 55
>Delete 56
>DeleteAll 53
>DialMode 52
>DirectCall 55
>DiscreetRng 54
>Display 55
>Download 53
>Handset 53
>Information 56
>InfoTone 53
>IntCall 52
>KeySound 54
>Language 55
>LastCall 56
>Light 55
>MasterReset 55
>MsgLight 54
>ParkCall 52
>PhoneBook 52
>PhoneLock 54
>PowerOn 54
>Redial 52
>Rename 55
>Retrieve 52
>RingType 54
>RingVolume 54
>Select 55
>SetPhoneNo 53
>Settings 53
>ShowIPEI 56
>Status 53
>Subscribe 56
>TotalCalls 56
>Transfer 52
>Version 56
Numerics
2.4 GHz Digital Spread Spectrum
technology 1
A
access to handsets, controlling 54
accessing
configuration wizards 67
contacts from the handset 53
CyberGenie 57
CyberGenie@Work 62
handset menu 2
messages from handset 148
online help 65
system inbox 145
activating a contact for speech
recognition 69
active call states 208
adding
contact phone numbers 130
contacts from Contact Wizard 79
contacts, general data 128
external lines 91
users 78
users from the User Wizard 78
adjusting
discreet ring 180
handset display light 182
ringer sound 179
ringer volume 179
volume level 179
advanced telephony features 8
air channels 158
defined 6
221
Index
alerts on handset 54
aliases
for contacts 128
for users 112
analog phone, definition of 5
application buttons 64
application software 5
areas on a window 64
ASR 5, 7
assembling
base station 21
handset charger 18
assigning a handset 102
defined 6
authorization code for base station 81
auto answer for calls when using optional
headset 55
Auto Attendant 5
definition of 4
features 97
record greeting 99
temporary greeting 100
automatic locking, handset 192
automatic speech recognition 5, 7
B
baby monitor, using a handset as 53,
186
backdoor 191
background noises 198
backlight on display 55
barge in
setting system-wide controls for 82
barge in to join an active call 8
base station
assembly 21
authorization code, changing 81
changing the base station name on the
handset 193
choosing a location 21
definition of 5
deleting a base station from the
handset memory 195
function 1
indicator light status 207
222
loading the driver 13
number of phone lines supported 10
renaming on a handset 194
selecting which base station your
handset will access 193
setting up 19
subscribing a handset to 16
when to attach to computer during
setup 28
basic commands for CyberGenie and
keypad 59
battery charge 19
battery charge indicator 50
battery pack, installing 16
battery, type used in handset 19
blocked handset, how to unblock 192
business hours
setting 94
business hours and non-business hours
8
greetings 150
buttons on a console 65
C
call
duration 50
external, defined 6
forwarding 58
holding 171
information 56
information, viewing 8, 164, 165
internal, defined 6
notification 159
parking 163
reason table 208
retrieval 58
routing, effect on messaging 151
session, definition of 6
sessions 158
sessions, maximum number 10
settings 82
status table 208
call activity, viewing from the PC 68
call details panel 68, 116
call forwarding 107
calls
checking messages from the handset
58
conferencing from a handset 172
conferencing from the PC 123
external 158
in the event of power failure 11
incoming, on the PC 118
internal 161
internal and external 158
multiple 170
parked versus on hold 171
pickup 58
place using keypad 47
placing 157
placing additional calls from the PC
119
placing with CyberGenie 47, 160
placing with the keypad 160
receiving 159
reconnecting from PC 121
redirecting from the PC 125
rejecting from the handset 169
rejecting from the PC 124
retrieving parked calls 166
retrieving, system-wide control of 82
routing 95
setting barge-in control 82
setting call log parameters 83
three-party, from the PC 118
transferring 167
transferring, from PC 121
two-party, from PC 118
viewing on screen 119
viewing recently placed 165
calls in progress, miniaturized view 68
CG 2400
installation 13
system defined 5
system overview 7
changing
base station information 193
call forward destination 188
discreet ring 180
display light and contrast 182
greetings 77
Index
changing destination 188
call in progress
menu options on the handset 52
what you see on the handset 50
call log 8
filtering and printing information 71
printing 139
refreshing 139
setting parameters 83
viewing call information 71
Call Log button 65
Call Log window 71
accessing 136
data displayed in 135
call management 157
call parking 8, 58
versus call on hold 171
Call Progress button 65
Call Progress window 68
accessing 116
dialing an additional call 119
miniaturized view 117
screen buttons 117
screen panels 116
viewing calls in progress 119
call records
deleting 140
deleting all 140
filtering 136
sorting 138
viewing details 138
call resources 68
call retrieval 8
call routing 8, 77
changing from Line Wizard 77
setting 96
setting business hours 94
when caller needs help 100
call summary panel 68
call time 19
call waiting 48
using with CyberGenie 170
call-by-name 2, 23, 24, 46, 57, 160
caller defined 6
caller ID 7, 159
223
Index
224
handset menu language 183
handset PIN 54
handset PINs 191
key click 180
pronunciation of names in CyberGenie
197
rejection message 155
ringer sound 179
voicemail greeting 58
volume level 179
welcome greeting 58, 151
channels
air 158
defined 6
charger 16
charging the handset 18
battery pack 16
charging time for handset 18
checking messages 58
choosing a location for your base station
21
CLEAR key 48
clearing numbers from the handset 187,
196
close console 65
codes
base station authorization code 81
commands, basic 59
components 15
conference calls 8
from a handset 172
from the PC 118, 123
configuration
full 75, 79
options from Configuration window 80
Configuration button 65
Configuration window 70
accessing 79
call log parameters 83
messaging features 84
properties panel 80
resources panel 80
system setup 80
configuration wizards 34, 65, 67, 75
connected mode 52
console
call activity, viewing 68
call log button 65
Call Log window 71
Call Progress button 65
Call Progress window 68, 69
closing 65
Configuration button 65
Configuration window 70
Contacts button 65
CyberGenie@Work 62
delete voicemail 72
help button 65
line indicators, meaning of colors 66
listen to messages 72
miniaturizing 64, 65
user/contact information 68
VoiceMail button 65
Voicemail window 72
Wizards button 65
Wizards window 67
console buttons 65
console, CyberGenie 61
Contact Wizard
adding, editing and removing contact
79
features 79
contacts
activating for handset download 69
activating for speech recognition 69
adding general data 128
adding phone numbers 130
adding, editing and removing, from
Contact Wizard 79
adding, editing or removing 79
alias 127, 128
data 24
default phone number 129
deleting 130
dialing from the handset 53
display name 127, 129
editing data 130, 131
enabling download to handset 127,
129, 132
names, finding 69
pronunciation of names 127, 128
D
default phone number
of contacts 129, 130
default setting for handset 55
default settings for handset 196
defining users 38
definitions of terms 4
deleting
base station 195
contacst 79
contacts 130
contacts from Contact Wizard 79
entire call log 140
external lines 91
messages, from PC 142
single call record 140
users 78, 113
users from User Wizard 78
deleting a voicemail from the computer
72
describing a phone line 35
desk mount
base station 21
for handset charger 16
DG 200 Handset 7
dialing
from PC 119
Dialing Properties window 90
dialing, controlled 55
digital technology 1
direct call feature 187
discreet ring
changing 180
on handset 54
display
contrast 182
contrast on handset 55
handset 50
icons 50
light 182
text 50
display name
of user, on handset 112
display, appearance on handset 55
downloading phone numbers to your
handset 8
duration of call 50
Index
searching for 134
setting default phone number 130
setting up phonetically 197
sorting 133
speech recognition of 127
using special characters 129
Contacts button 65
contacts list 23, 161
Contacts window 69
accessing 127
business card view 134
changing view 133, 134
spreadsheet view 134
context-sensitive help 73
controlling access to handset 54
controlling volume 48
customizing handsets 177
CyberGenie
acessing via speech interface 57
basic commands 59
button colors and their meanings 61
button in system tray 61
changing voice gender 82
close application 63
console 61
definition of 5
placing calls using 47
restart application 63
rollup menu 61
shut down application 61
CyberGenie key on handset 48
CyberGenie logo 65
CyberGenie session
defined 6
how to start 48
maximum number 10
CyberGenie@Work 61
console 62
defined 5
installing 23
software 1, 28
225
Index
226
E
editing
contacts 130, 131
contacts from Contact Wizard 79
users 78, 110
users from User Wizard 78
electronic devices, using the system near
20
email 25
accessing 144
listening to 7, 9
retrieving 148
using multiple profiles 203
using with multiple accounts 203
extensions, user 112
external calls 160
defined 6
placing when CyberGenie is off 63
external lines
adding 91
changing call routing, from Line
Wizard 77
changing line names 92
deleting 91
disabling outgoing calls 92
property options 89
restricting use 112
setting general properties 91
setup 89
external phone line
defined 35
indicator status 207
forwarding message notification 146
full function mode 157
defined 46
full function mode, definition of 6
full system configuration 79
G
gender, changing CyberGenie’s voice 82
graphical user interface 45, 61
greeting messages
for different lines 8
provide a welcome message for
greeting callers 152
types 150
greetings
business hours and non-business
hours 150
changing, from Line Wizard 77
main as default 151
main message as default 153
message 150
record 99
recording 47, 109
recording and reviewing 87
rejection 151, 155
rejection message 88
system’s main 87
system’s temporary 87
temporary 100, 151, 153
voicemail 58, 153
welcome 58, 150, 151
GUI, definiiton of 45
F
H
F1 key 73
fax header information 143
fax headers 9
fax/modem cards 13
fax/modem,connecting 92
faxes 7
receiving 143
features 1, 7
filtering call records 71, 136
FLASH key 48
forwarding calls 58
handset 53
accessing messages 148
accessing the handset display menu
50
activating contacts for download from
PC 69
alerts 51
alerts, setting 54
assigning defined 6
assigning from User Wizard 78
assigning to a user 78, 102
indicator light 18
information, viewing handset 56
internal calls while call in progress 52
key sound, changing 54
keylock 50, 53
keypad 46
keys 2, 48
languages 51
languages, changing 55, 183
locking 192
locking to control access 54
mail icon 50
master reset 51
maximum number of active 10
maximum number supported 7, 10
memos, recording 58
menu keys 48
menus 51, 178
message light 54
messages, checking 58
muting 184
NO key 48
noise 57
off-hook indicator 50
operating mode 46
parking a call 52, 58
phone book 52, 174
download status 53
phone lock 51
PIN 54
PINs 191
placing an internal call 52
problems 214
range 10
redialing a number 52
renaming a base station from 55
resetting defaults 55
retrieving calls 52, 58
retrieving messages 148
ring all users timer 97
ring type, controlling 54
ring volume, controlling 54
ringer off 50
S/N 191
serial number 191
setting tone length 183
Index
auto answer with headset in use 51,
55
auto key lock 51
baby monitor, using as 53, 186
baby phone 51
backlight on display 55
base station access 193
battery charge 50
blocked 192
call duration displayed 50
call forwarding 58
call in progress 50
call information 56
call time 19
calls, retrieving 58
changing the tone length 52
charging 16, 18
charging time 18
CLEAR key 48
connected mode, menu options 52
contact display name 127, 129
contrast on display 55
controlling access to 54
customizing 177
default settings 55, 196
defined 5
deleting a base station from 56
deleting a phone book from 53
direct call 51, 55, 187
discreet ring, changing 54
display 50, 51, 159
display icons 50
display light 182
display menu 2
display text 50
display, changing appearance 55
downloading phone numbers to 8
downloading the phone book to 53,
174
entering non-numeric symbols 206
FLASH key 48
forwarding calls 58
functions 1
headset used with 55
help 57
idle mode 50
idle mode, menu options 52
227
Index
228
setting volume control 48
settings 53
signal strength 50
sounds 178
speech commands from handset 59
storing recently dialed numbers 52
storing your phone book 52
subscribing 100
subscribing additional 36
subscribing to base station 16, 55
subscription, accessing procedures for
62
talk time 10
transferring a call 52
turning on and off 46
unassigning 103
unblocking 192
unified messaging 144
unsubscribing from the PC 104
user interface 45, 46
user’s display name 112
using when CyberGenie is off 63
version number 56
viewing call information 56
with callouts 49
YES key 48
handset charger, assembling 18
handset commands vs. speech
commands 45
handset user 4
header information in faxes 7
headset
automatic answering 185
using 184
heat, effect on system 20
help
context-sersitive 73
CyberGenie 57
field-specific 73
from console 65
from the handset 57, 216
online 73
online help 61
What’s This? 73
Help button 65
hold
different from parking 171
picking up calls 58
placing calls on 58
holding calls 163, 171
HUI defined 45
I
icons on the handset display 50
idle mode 50, 52
inbox
assigning 145
system 144
incoming calls 157
internal 158
on PC 118
routing 95
voicemail 144
incoming messages 144
indicator light status 207
indicators, line 66
information
last call 51
last dialed 51
show IPEI 51
total calls 51
version 51
information tone, turning on and off 187
installation 27
system requirements 14
installing
battery pack 16
CG 2400 system 13
CyberGenie@Work software 23
integrated messaging
removing 85
switching to 86
integrating Microsoft Outlook with
CyberGenie 9
interaction with CyberGenie 1
interface
graphical 45, 61
handset 45
speech 45, 57
interference, avoiding 10
internal calls 52, 161
K
key click, changing 180
key sound on handset 54
keylock 50, 189
keypad 46
commands from handset 59
placing calls using 47
keys, handset 48, 49, 160
L
languages on handset 55, 183
launching installation 27
light, message waiting indicator 181
line indicators 66, 68
Line Wizard
changing greeting 77
chaning call routing 77
features 77
lines in use, how to tell 66
list of contacts 126
listening to emails 9
listening to messages
from PC 126, 141
listening to saved messages 149
listening to your emails 7
logging calls 8
M
mail icon on handset 50
mailboxes 144
maximum number supported 7
users with 68
maintaining battery charge 19
maintaining the system 4
making calls 47
managing incoming/outgoing calls 157
MAPI 9, 23, 25
configuring 204
defined 6
memos, recording 58
menu bars
Call Log window 71
Configuration window 70
console 65
menu for handset 50, 51, 178
menu keys on handset 48
menu options on the handset 2, 52
message
See also pre-recorded messages
message notification 50
forwarding 146
frequency 146
on handset 54
system inbox 147
message waiting indicator light 181
messages
accessing from the handset 148
checking 58
deleting, from PC 142
greeting 151
listening to from the PC 72
listening to, from PC 126, 141
notification 145
outgoing 150
recording from the PC 151
recording greetings 109
recording rejection message 88
redirecting from the PC 126
rejection 151, 155
reminder 147
retrieving 147
retrieving remotely 150
saved 149
setting maximum length 88
sorting 142
system voicemail 77
types of outgoing 150
welcome 87
messaging
features 84
integrating with MicrosoftOutlook 86
properties 85
switching to CyberGenie messaging
85
unified 143
Index
defined 6
maximum number 10
IPEI code 56, 191
229
Index
unified, defined 6
user options 108
Messaging Application Programming
Interface 6
Microsoft Outlook 9, 14, 34
adding MAPI components 25
configuring Outlook 2000 26
configuring Outlook 97 25
configuring Outlook 98 26
inporting data 205
installing components for 25
message retrieval and 148
retrieving email 147
routing emails using CyberGenie 144
rules for emails 9
speech-activated dialer and 23
support 25
Microsoft Outlook Express 23
miniaturizing view of calls in progress
64, 68, 117
modems 13
modes
defined 6
full function 157
standalone 157
modifying the system to your specific
needs 75
moisture, effect on system 20
mounting your base station 21
multiple calls, managing 170
multiple phone lines and business hours
8
music, on hold 82
muting the handset 48, 184
N
naming a phone line 35
navigating the wizards 76
NiMH battery 19
NO key 48
noise 57
non-business hours 8, 150
non-numeric symbols, entering on the
handset 206
notification of messages 54
230
notification options 145
O
off-hook 50
one-key dialing 55
on-hold music 82
online 61
online help
accessing 73
operating modes 46
outgoing calls 157, 158
outgoing calls, restricting 112
outgoing messages 150
main message as the default 151
Outlooksee Microsoft Outlook
P
panels defined 64
parked calls, retrieving 166
parking a call 8, 52, 58, 163
different from putting a call on hold
171
PC
improving performance 197
using unified messaging with 143
personal identification numbers 10
personal mailboxes 144
personal voicemail greeting 47
phone book 174
call name 51
delete all 51
download 51
downloading to handset 174
handset 8, 52
placing calls with 175
status 51
phone book, recent downloads 53
phone line, defining 35
phone lock 54
setting 190
phonetic spelling rules 197
picking up calls 58
PINs 10
base station authorization code 81
Q
quick reference 59
R
range 10
receiving calls 159
recently dialed numbers, storing in the
handset 52
reconnecting calls from the PC 121
recording
memos 58, 147
messages 151
personal greetings 47
PINs 219
rejection messages 88
reminder messages 147
redialing a number 52
redirecting calls from the PC 125
redirecting messages from the PC 126
refreshing the call log 139
registering your product 41, 42
rejecting calls
from the handset 169
from the PC 124
rejection message 88, 151, 155
reminder messages, recording 147
remote message retrieval 150
removing a contact 79
renaming base station 194
requirements, system 14
resources panel 80
restart CyberGenie 63
retrieving calls 8, 52, 58
retrieving emails 148
retrieving messages 147, 150
from the handset 148
system control 82
reviewing messages from the PC 141
ring
discreet 180
sound 179
turning off 180
volume 179
ring type on handset 54
ring volume on handset 54
ringer off 50
rollup menu 61
routing calls 8, 77
how it affects messages 151
Index
handset 54, 191
recording 219
resetting for handset 191
user 38, 112
placing calls 47, 160, 161, 174
with phone book 175
power failures, how to make calls during
11
powering down your system 63
precautions 10
pre-recorded messages
business hours 201
goodbye 201
non-business hours 201
personal voicemail 201
rejection 201
system voicemail 201
temporary 201
pre-subscribed handsets 16
printing call logs 71, 139
problem-solving 212
product registration 41
Product registration during installation
42
product support and registration 42
profile, setting up multiple 203
pronunciation 197
of contact names 127, 128
of user names 112
S
S/N
defined 191
viewing 191
safety information iv
screen buttons
Business Hours 94
Call Log window 136
231
Index
232
Call Progress window 117
Dialing Properties 90
Non-Business Hours 94
screen panels
Call Details 116
Contact Wizard 79
Line Wizard 77
System Call Activities 116
User Wizard 78
User/Contact 116
searching for contacts 134
security 10
keylock 189
phone lock 190
serial number, viewing 191
server
defined 5
overview 61
sessions 158
defined 6
setting 112
setting the volume control on the
handset 48
setting up
base station 19
general user data 105
handset tone length 183
reminder messages 147
user external numbers 106
user message notification 145
user messaging options 108
users call forwarding options 107
voicemail greetings 47
setting up and maintaining the system 4
shut down CyberGenie 61, 63
signal strength 50
software 61
CyberGenie@Work 1, 28
installing 23
reinstalling 210
restoring 211
uninstalling 210
software user interface 5
sorting
call records 138
contacts list 133
messages 142
special characters, using 129
specifications 10
speech activation 9
speech commands vs. handset
commands 45
speech recognition 5, 7, 24, 198, 199
activating 129
activating a contact for 69
alias 127, 128
of contacts 127
pronunciation 127, 128
speech user interface 2, 45, 57
standalone mode 157
defined 6, 46
standby time on a handset 10, 19
subscribing handsets 16, 36, 62, 100,
196
subscription defined 6
SUI defined 45
support 216
support and registration 42
switching between calls 48
system administration 4
system administrator 4
system call activities panel 116
system components 15
system configuration 75
system greeting
main 87
recording 87
temporary 87
system inbox 144
message notification 147
rejection message 88
system installation 13
system maintenance 4
system requirements 14
system security 10
system setup
connecting an fax/modem to your
base station 92
from Configuration window 80
T
talk time 10
technical support 216
technology used for radio
communications 1
telephone network 196
telephony
advanced features 8
defined 4
tempurature operating range 20
terms, definitions of 4
text-to-speech 7, 9
three-party calls from the PC 118
timer for ringing all users handsets 97
tone length from handset 52
tones, handset 183
transferring an active call to another
handset user 52
transferring calls 167
from PC 121
troubleshooting 212
turning the handset on and off 46
two-party calls 118
U
unassigning handsets 103
unified messaging 8, 144
defined 6
destinations 144
functions of 143
unsubscribing handsets
from PC 104
UP and DOWN keys on handset to select
a handset display menu option 48
USB cable 19, 20
user interface 5
graphical 61
handset 45
speech 57
types of 45
user names, pronunciation 112
User Wizard
adding, editing and removing user 78
assigning handset 78
features 78
user/contact panel 68, 116
users 4
adding, editing and removing from
User Wizard 78
adding, editing or deleting 78
alias 112
assigning a handset 78
assigning handsets to 102
call forwarding options 107
defined 38
definition of 6
deleting 113
display name on handset 112
editing information 110
external numbers 106
general data 105
maximum number supported 10
message notification 145
messaging options 108
PINs 10, 38, 112
profiles 4
restricting outgoing calls 112
set up during installation 38
setting extensions 112
setting up 105
setup information 105
unassigning handsets 103
with mailboxes, viewing 68
using the system near other electronic
devices 20
Index
system tray 42, 61, 62
system voicemail, changing the message
77
V
version number, software 62, 65
viewing
base station information 193
call duration 165
call information 8, 164, 165
call information from handset 56
call log information 71
call record details 138
calls placed 165
233
Index
IPEI code 191
most recent call 165
virtual personal assistant 1, 5, 7
voice recognition 112
voice, changing CyberGenie’s 82
voicemail 144
greeting, what a caller hears when
routed to a voice mailbox 153
greetings 58
greetings, changing from Line Wizard
77
main system greeting 87
maximum number of users 10
outgoing messages, changing 77
recording greetings from the handset
47
recording messages 109
recording system greeting 87
rejection message 88
setting maximum length 88
temporary system greeting 87
VoiceMail button 65
Voicemail window 72
accessing 141
features 140
volume levels
adjusting on the handset 48, 179
adjusting while listening to messages
from the PC 72
W
wall mount
for a base station 21
for a handset charger 16
warning sounds, turning on/off 180
welcome greetings 87, 150
changing 58, 151
provide a welcome message for
greeting callers 152
What’s This? help 73
Who would you like to call? 57
window
application buttons 64
areas on 64
line indicators 66
234
panels 64
Windows Messaging 23, 34
wizards
configuration 34
navigating 76
Wizards button 65
Wizards window 62, 67
accessing 75
Contact Wizard 79
Line Wizard 77
navigation buttons 76
User Wizard 78
workgroup email service 25
Y
YES key 48