1
IMPORTANT SAFETY INSTRUCTIONS
READ ENTIRE MANUAL BEFORE INSTALLING SPA.
PLEASE SAVE THIS MANUAL.
OWNER’S MANUAL
L-60 Controller & Pack
These instructions apply to:
S & SE PACKS
DM INDUSTRIES, LTD.
2320 N.W. 147th Street Miami, Florida 33054
h e a l t h
a n d
r e l a x a t i o n
f o r
l i f e
NOTE: For best results, read each step carefully and
entirely before proceeding to the next.
FILLING YOUR SPA
Wipe the interior of the spa with a damp, soft cloth
to remove any residue that may be on the surface.
Fill with a garden hose by inserting the nozzle of the
hose in the filter inlet. (After filling is complete,
remember to put the filter cartridge in place prior
to starting the spa.) As the spa is filling, check in the
equipment access area for any leaks. On occasion, it
may be necessary to hand tighten a union fitting
that may have come loose during transit. Continue
to fill to the water line.
INITIAL START UP
Your spa has been programmed for your
convenience. Once properly connected, the pump
and heater will automatically come on, heat the spa
to 102 F. Initial temperature, day, and time can be set
and changed by following these instructions. The
Integrated Control System (I.C.S.) has a time clock,
with battery backup that is good for months. This
allows a log of spa operations over several days to
be kept in flash memory.
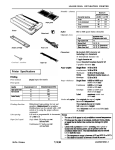
The L60 Control Panel controls each function
directly with a dedicated button. A brief
description of each button is as follows:
"UP" - Increases the value on display
WATER LINE
"DOWN" - Decreases the value on display
NOTE: If your water is extremely hard, it is preferable
to fill the spa halfway with hard water and the rest
with softened water. Never fill the spa entirely with
softened water.
TESTING THE GFCI
If your spa is a 120v, it should have been provided
with a GFCI.
The GFCI is a very important safety device and the
National Electric Code requires that all spas are
GFCI protected.
The GFCI shuts off the electricity in a fraction of a
second if there is a short anywhere in the system.
It is recommended that the GFCI be tested prior to
each use.Test as follows:
1. Push the TEST button on the GFCI. The RESET
button will trip out, the top side digital control LED
display will go out. If this does not happen, DO NOT
USE spa. CALL your dealer FOR ASSISTANCE.
"JET1" - Press once for low speed, again for high
speed, again for off
"JET2" - Press once for low speed, again for high
speed, again for off
"LIGHT" - Turns light on. If your spa has the Spectra
Glow or Aquabrite option, press once for Spectra
Glow and a second time for Aquabrite. Use
UP/DOWN arrows within 10 seconds of having
pressed the button to sequence through color
changes.
"AUX1" - Press once to turn on blower if so
equipped. Press again for off
"PROG" - Use to enter and process programming
functions
Important:
When your spa is activated or adjustment to
temperature is made the spa calibrates itself. The
spa will balance the temperature between the
sensors for 2:30 minutes. During the calibration
process you will notice the heater LED flashing.
2. If the GFCI tests properly, firmly push the RESET
button back into place. The top side digital control
LED display will come back on. If this does not
happen, DO NOT USE spa. CALL your dealer FOR
ASSISTANCE.
3. If the GFCI trips by itself at any time, firmly press the
RESET button back into place and perform the above
tests. If this happens more than once, DO NOT USE
spa. CALL your dealer FOR ASSISTANCE.
PAGE S-1
OPERATING INSTRUCTIONS
A. DISPLAYING TIME OR TEMPERATURE
Pressing the "PROG" button will switch the display
between current time and current water
temperature.
B. SETTING TEMPERATURE FOR A DAY.
1. Press the "PROG" button to display water
temperature.
2. Press the "UP" or "DOWN" arrow to select the
desired temperature.
NOTE: this setting is only valid for the rest of the
day. Go to section SETTING PERMANENT
TEMPERATURE below to make permanent
changes.
C. PROGRAMMING MENU
Press and hold for five seconds to enter the
programming menu.
Note that at any point in the sequence; press any
other button to exit programming. Alternately, the
display will return to normal if no button is pressed
within 10 seconds.
D. SELF - DIAGNOSTIC TOOL
Your spa controller offers the latest state-of-the-art
diagnostic tool. To start the test, press and hold
"PROG" for 5 seconds. The display will show
"dISC". Initiate the self-diagnostic test by pressing
the "UP" button. This test will run the equipment
sequentially for 2.5 minutes. Use the "DOWN"
button to cancel the self-test at any time. Once the
test is completed, the message "GOOD" will be
displayed if your spa operates properly. If a problem
is found, the malfunction code will be displayed.
Please contact your dealer for corrective action.
D. AUTO HEAT AND ECONOMY MODE
(Spas with 2 speed filtration pump and no
circulation pump).
Spas with 2-speed filtration pump have been
designed to operate in two heater control modes:
AUTO HEAT ("AH") and ECONOMY ("ECO"). In
the AUTO HEAT mode, the pump and heater will
turn on whenever the water temperature falls 1
degree below the chosen temperature.Your spa has
been preset to start upon activation in the AUTO
HEAT mode. The spa water will be automatically
heated to the temperature you choose or to the
preset temperature of 102 F. Your selected water
temperature and filtration will be maintained
automatically 24 hours a day. The spa water will
heat about 1 to 3 degrees F per hour for 110 Volt
system and 3 to 5 degrees F for 220 Volt systems.
The maximum temperature is set at 104 F. The
pump hi-speed therapy mode can be activated
during those cycles. The heater will stay on if
needed to bring up the water temperature.
Note: that for 110 Volt spas, the heater will turn off
when you turn on any therapy pump or blower.
In the ECONOMY mode, the pump and heater will
only come on during programmed hours.This mode
is used for energy conservation, the same way you
would control your heat or air conditioning in your
house.
To switch to the ECONOMY mode:
1. Press and hold the "PROG" button for 5
seconds until "dISC" is displayed.
2. Press the "PROG" to display "AH" or "ECO".
3. Use "DOWN" arrow to select the "ECO" setting
if necessary or the “UP” arrow to select “AH”.
4. Press the "DOWN" button one more time to
"-" display the hour and the cycle showing either
"-" for off or "F" for on.
5. Press the "UP" arrow to cycle through the
selected hours of the day.
6. Press the "DOWN" arrow to select the cycle
showing either "-" for off or "F" for on.That
will represent the filtration cycle desired
for that hour.
7. Press the "PROG" button to continue the
programming mode or any other button to
exit.
PAGE S-2
OPERATING INSTRUCTIONS
The heater will come on as needed during filtration
hours to maintain the water temperature. Note
that filtration will also be provided during the
heating cycles.
E. HEAT DAYS
If your spa is located in a weekend home, or if your
schedule allows utilization of the spa only on
certain days of the week, you may decide for energy
conservation reasons to lower the water
temperature on the days you will not use the spa.
Your spa is pre-programmed from factory and set
to "All" days "hd=A". To choose different
temperatures for different days of the week, follow
the following steps:
Example: Let's assume that you have selected 100
degrees F as your desired temperature in the
"Setting Permanent Temperature" procedure and
Sunday as "1." You would now like to lower the
water temperature to 80 degrees F on Mondays,
Tuesdays, and Wednesdays.
1. Hold down "PROG" for 5 seconds, "dISC" will
appear.
2. Press "PROG" to sequence to "hd=A" on the
display.
4. Press "UP/DOWN" buttons to select the desired
heat day. ( "hd=2" (Monday)
5. Press "PROG" to display temperature. Hold down
"DOWN" button to lower temperature to 80
degrees F.
Repeat steps 2, 3, & 4 to do the same for Tuesday
and Wednesday. Normal display will resume after
10 seconds.
SETTING PERMANET TEMPERATURE:
1. While in the programming menu, press "PROG"
to sequence to the display temperature.
2. Press UP/Down to select desired temperature.
NOTE: See procedure above if you would like to
choose different temperatures for different days of
the week.
F."F" FAHRENHEIT OR "C" CELSIUS DEGREES
Your spa has been preset to show the temperature
in Fahrenheit "F" degrees. If you desire, you can
change to Celsius "C" degrees (while in the
programming menu) by pressing the UP/DOWN
button to switch back and forth between "F" and
"C" mode.
G. HOUR AND CALENDAR SETTING.
While in the programming menu ("PROG" pressed
for 5 seconds), press "PROG" to sequence through
the following displays to set the hour and calendar.
Hour Display- "H=24". Allows you to cycle between
12 and 24 hour time features. Use UP button to
select 24 hour display, "H=24" or the Down button
to display "H=12"
Hour - "12:00" notice hour flashing. - Use UP/DOWN
buttons to change the hour to the current time
"12:00".This should not be necessary unless the spa
has not been powered up for several weeks.
Minutes - "12:00" notice the minutes flashing.
Use UP/DOWN buttons to change the minutes to
the current time
Month - "1 1" notice the month flashing.
Use UP/DOWN buttons to change the month.
Date - "1 1" notice the day flashing.
Use UP/DOWN buttons to change the day.
Year - "2007" notice the year flashing.
Use UP/DOWN buttons to change the year
INVERTING DISPLAY
The topside display can be inverted to allow easier
reading from inside the spa. To do so, while in the
programming menu ("PROG" pressed for 5
seconds), press "PROG' to sequence to "FLIP" on
the display. Use the UP or DOWN buttons to
invert the display back and forth.
PAGE S-3
OPERATING INSTRUCTIONS
ADVANCED FEATURES SETUP
Note that at any point in the sequence, press any
other button to exit programming. Alternately, the
display will return to normal if no button is pressed
within 10 seconds.
SETUP ("SU")
Enter programming menu by holding "PROG"
button for 5 seconds. Then press "PROG" to
sequence to "SU" on the display. To access the
advances features menu, while in the "SU" display,
hold the "PROG" button for 10 seconds.
PUMP SETUP
Your spa is factory programmed in accordance with
the spa model for the number of pumps it offers.To
ensure that pump setting is correct or to change it
if needed, press "PROG" to sequence to "P= XX.
Use UP/DOWN buttons to select the number of
pumps installed. (Note: that the "C" following each
number designates the inclusion of a circulation
pump).
P=3C or 2C or 1C - (3, or 2 or 1 therapy pump plus
circulation pump)
P=3 or 2 or 1 - (3, or 2, or 1 therapy pump)
BLOWER AND JET PURGE
For the self-test function to work properly, the
blower setting must be set correctly: "b=b" if there
is a blower & "b= -" if there is no blower. If the
blower setting is incorrect, while in "SU"
programming mode, press "PROG" to sequence to
"b=b" or "b=-". Use UP/DOWN buttons to select
the correct setting.
Each day, at 10am and 6pm, the blower and jet
pump(s) will automatically run for one minute to
circulate potential stale water in the piping.This is a
normal function of the spa. "BJ2P" will be displayed
while this takes place.
Note: Spa will skip sequence if any other function is
operating.
PRIMING
Normal setting is "Pr=P" This indicates that all
pumps will turn on for 2 minutes to insure proper
priming when the spa is powered up, initially or
after power interruption.This setting should remain
in that mode.
SETTING THE SERVICE AMPERAGE DRAW
While in "SU" programming menu, press "PROG" to
sequence to S=3 on the display.
S=3" is the factory default. Use the "UP" or
"DOWN" arrows to change the pump setting:
S=3 Indicates that the heater will shut off if four
pumps are on high speed. (The blower-air pump is
included in the count.
S=2 Indicates that the heater will shut off if three
pumps are on high speed at the same time.
S=1 Indicates that the heater will shut off if two
pumps are turned on high speed at the same time.
S=0 Indicates that the heater will shut off if one pump
is turned on high speed.
Service level S=0 is only setting for 120v 60Hz and
230V 3 phase 50Hz spas.
Once the service level has been set, it does not
have to be set each time. It will be entered into the
system memory.
PAGE S-4
PROGRAMMING CHART
DM INDUSTRIES
I.C.S. PROGRAMMING CHART
PROG
PROG
3s
8s
Press hold button AUX For Blower option
for 8 seconds
LIGHT
Underwater LEDs
Self Test (2 min.)
PROG
Auto Heat (AH) or Economy (ECO)
PROG
Heating Days: 1 / 2 / 3 / 4 / 5 / 6 / 7 / A
PROG
Temp shows: ___°F or ___°C
PROG
F/C
PROG
Clock Hours Show: 12 / 24
PROG
Clock Hours Set
PROG
Clock Minutes Set
PROG
Calendar: Month setting (1 - 12)
PROG
Calendar: Day setting (1 - 31)
PROG
Calendar: Year Set
PROG
Display Flip:
or
DISCLAIMER: ADVANCED SETTING
DO NOT ENTER SECTION UNLESS ASKED BY A QUALIFIED TECHNICIAN
Setup Menu
PROG
8s
PROG
Pumps: 1 / 1C / 2 / 2C / 3 / 3C
PROG
Service Level: Number of pumps allowed at High
Speed with the heater “On”
PROG
Country (Stereo)
PROG
Blower: b = Activate, - = Deactivate
PROG
Prime Cycle: P = Yes - = No
PAGE S-5
U=US, E=Europe
J=Japan
MAINTENANCE LOG
Use this section to keep a record of when you perform any maintenance on your spa.
PAGE S-6
MIAMI FLORIDA
DM Industries, Ltd.,
2320 Northwest 147th Street, Miami, Florida 33054
Email: [email protected] and [email protected]
REV. 070815
0463501-L600202
© 2007 DM INDUSTRIES • ALL RIGHTS RESERVED