1
INSTALLATION
STANDARD
FLUSH DOOR
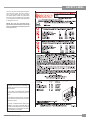
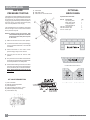
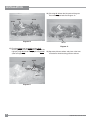
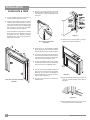
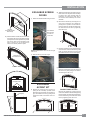
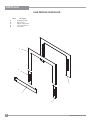
The standard flush door comes with a black
frame. To install the frame, simply hook the top
door flange onto the top of the unit and swing
the door towards the unit, (Diagram 1 and 2).
Be careful that the glass gasket does not roll up;
there must be a gap between the gasket and
the door lip to ensure that the door sits securely
on the unit. Refer to Diagram 3.
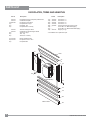
FLUSH LOUVERS
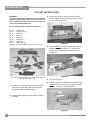
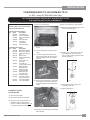
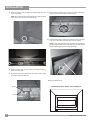
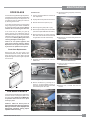
1) The top louver is held in place by friction fit.
Refer to Diagram 1
2) Lift the unit up slightly and push down on
the corners of the Bottom Trim Bracket and
slide under unit.
Diagram 1
Diagram 1
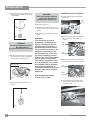
2) Install the Spring Hinges on the left and right
side of the bottom of the Firebox using 2
screws per hinge.
Screws
Push in Corners
Bottom Trim
Bracket
3) Place the Bottom Louver near the hinge. Flip
hinge over the Bottom Louver and secure
using 3 screws.
Diagram 2
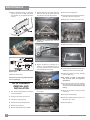
3) Completely secure faceplate to the unit by
securing 4 screws to the Left and Right Side
Trim.
Hinge
Location
Bottom Louver
FULL SCREEN DOORS
Diagram 3
Secure door by fastening with two screws located
at bottom of glass frame (refer to Diagram 1).
To remove the flush door, reverse the above
steps.
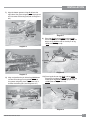
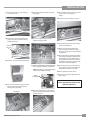
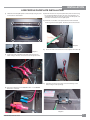
1) Hold the full screen faceplate up against
the unit in order to make the following wire
connections.
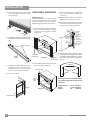
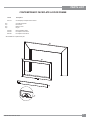
4) Install the Top Frame by hooking it onto the
two screws at the top of the full screen door.
It is held in place by magnets.
Pull the ON/OFF connector wires thru the
box and connect them to the switch.
Connect the fan switch wires with the wire
connectors from the fan speed control. Place
clips over wires and tuck into side trim.
Screw
Top Frame
E33 FPI Direct Vent Gas Insert
25