1
Trailer & Rail Refrigeration
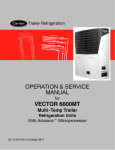
EVAPORATOR
CONDENSER
EVXV
RECEIVER
OPERATION & SERVICE
MANUAL
for
VECTOR 6500
Single--Temp Trailer and Rail
Refrigeration Units
With Advancet Microprocessor
62--11389 Rev A Change 09/11
OPERATION & SERVICE
MANUAL
for
VECTOR 6500
Single−Temp Trailer and Rail
Refrigeration Units
With Advance Microprocessor
TABLE OF CONTENTS
PARAGRAPH NUMBER
Page
SAFETY PRECAUTIONS . . . . . . . . . . . . . . . . . . . . . . . . . . . . . . . . . . . . . . . . . . . . . . . . . . . . . . . . . . . . . . . . . . . . .
1−1
1.1
SAFETY PRECAUTIONS . . . . . . . . . . . . . . . . . . . . . . . . . . . . . . . . . . . . . . . . . . . . . . . . . . . . . . . . . . . . . .
1−1
1.2
SPECIFIC WARNING AND CAUTION STATEMENTS . . . . . . . . . . . . . . . . . . . . . . . . . . . . . . . . . . . . .
1−2
1.3
SAFETY DECALS . . . . . . . . . . . . . . . . . . . . . . . . . . . . . . . . . . . . . . . . . . . . . . . . . . . . . . . . . . . . . . . . . . . .
1−6
UNIT DESCRIPTION . . . . . . . . . . . . . . . . . . . . . . . . . . . . . . . . . . . . . . . . . . . . . . . . . . . . . . . . . . . . . . . . . . . . . . . . . .
2−1
2.1
INTRODUCTION . . . . . . . . . . . . . . . . . . . . . . . . . . . . . . . . . . . . . . . . . . . . . . . . . . . . . . . . . . . . . . . . . . . . .
2−1
2.2
GENERAL DESCRIPTION . . . . . . . . . . . . . . . . . . . . . . . . . . . . . . . . . . . . . . . . . . . . . . . . . . . . . . . . . . . . .
2−1
2.3
CONDENSING SECTION . . . . . . . . . . . . . . . . . . . . . . . . . . . . . . . . . . . . . . . . . . . . . . . . . . . . . . . . . . . . .
2−7
2.4
2.3.1
Engine . . . . . . . . . . . . . . . . . . . . . . . . . . . . . . . . . . . . . . . . . . . . . . . . . . . . . . . . . . . . . . . . . . . . . . . . . . .
2−7
2.3.2
Engine Air System . . . . . . . . . . . . . . . . . . . . . . . . . . . . . . . . . . . . . . . . . . . . . . . . . . . . . . . . . . . . . . . .
2−7
2.3.3
Engine Controls: . . . . . . . . . . . . . . . . . . . . . . . . . . . . . . . . . . . . . . . . . . . . . . . . . . . . . . . . . . . . . . . . . .
a. Engine Speed Control Unit (ENSCU) . . . . . . . . . . . . . . . . . . . . . . . . . . . . . . . . . . . . . . . . . . . . . .
b. Fuel/Speed Actuator (FSA) . . . . . . . . . . . . . . . . . . . . . . . . . . . . . . . . . . . . . . . . . . . . . . . . . . . . . . .
c. Engine Speed Sensor (ENSSN) . . . . . . . . . . . . . . . . . . . . . . . . . . . . . . . . . . . . . . . . . . . . . . . . . . .
d. Engine Oil Pressure Switch (ENOPS) . . . . . . . . . . . . . . . . . . . . . . . . . . . . . . . . . . . . . . . . . . . . . .
e. Engine Coolant Temperature Sensor (ENCT) . . . . . . . . . . . . . . . . . . . . . . . . . . . . . . . . . . . . . . .
f. Engine Oil Level Switch (ENOLS) . . . . . . . . . . . . . . . . . . . . . . . . . . . . . . . . . . . . . . . . . . . . . . . . .
2−7
2−7
2−7
2−7
2−7
2−7
2−7
2.3.4
Generator (GEN) . . . . . . . . . . . . . . . . . . . . . . . . . . . . . . . . . . . . . . . . . . . . . . . . . . . . . . . . . . . . . . . . . .
2−7
2.3.5
Compressor . . . . . . . . . . . . . . . . . . . . . . . . . . . . . . . . . . . . . . . . . . . . . . . . . . . . . . . . . . . . . . . . . . . . . .
2−7
2.3.6
Unloaders . . . . . . . . . . . . . . . . . . . . . . . . . . . . . . . . . . . . . . . . . . . . . . . . . . . . . . . . . . . . . . . . . . . . . . .
a. Major Working Parts . . . . . . . . . . . . . . . . . . . . . . . . . . . . . . . . . . . . . . . . . . . . . . . . . . . . . . . . . . . . .
b. Unloaded Operation . . . . . . . . . . . . . . . . . . . . . . . . . . . . . . . . . . . . . . . . . . . . . . . . . . . . . . . . . . . . .
c. Loaded Operation . . . . . . . . . . . . . . . . . . . . . . . . . . . . . . . . . . . . . . . . . . . . . . . . . . . . . . . . . . . . . . .
2−7
2−7
2−8
2−9
2.3.7
Compressor Switches, Transducers and Sensors . . . . . . . . . . . . . . . . . . . . . . . . . . . . . . . . . . . . . .
a. Compressor Discharge Pressure Transducer (CDP) . . . . . . . . . . . . . . . . . . . . . . . . . . . . . . . . .
b. Compressor Suction Pressure Transducer (CSP) . . . . . . . . . . . . . . . . . . . . . . . . . . . . . . . . . . . .
c. Compressor Discharge Temperature Sensor (CDT) . . . . . . . . . . . . . . . . . . . . . . . . . . . . . . . . . .
d. Compressor Suction Temperature Sensor (CST) . . . . . . . . . . . . . . . . . . . . . . . . . . . . . . . . . . . .
e. High Pressure Switch (HP1) . . . . . . . . . . . . . . . . . . . . . . . . . . . . . . . . . . . . . . . . . . . . . . . . . . . . . .
2−9
2−9
2−9
2−9
2−10
2−10
2.3.8
Condenser Coil . . . . . . . . . . . . . . . . . . . . . . . . . . . . . . . . . . . . . . . . . . . . . . . . . . . . . . . . . . . . . . . . . . .
2−10
2.3.9
Ambient Air Temperature Sensor (AAT) . . . . . . . . . . . . . . . . . . . . . . . . . . . . . . . . . . . . . . . . . . . . . .
2−10
2.3.10 Filter-Drier . . . . . . . . . . . . . . . . . . . . . . . . . . . . . . . . . . . . . . . . . . . . . . . . . . . . . . . . . . . . . . . . . . . . . . .
2−10
2.3.11 Receiver . . . . . . . . . . . . . . . . . . . . . . . . . . . . . . . . . . . . . . . . . . . . . . . . . . . . . . . . . . . . . . . . . . . . . . . . .
2−10
EVAPORATOR SECTION . . . . . . . . . . . . . . . . . . . . . . . . . . . . . . . . . . . . . . . . . . . . . . . . . . . . . . . . . . . . .
2−10
2.4.1
Evaporator Coil . . . . . . . . . . . . . . . . . . . . . . . . . . . . . . . . . . . . . . . . . . . . . . . . . . . . . . . . . . . . . . . . . . .
2−10
2.4.2
Electronic Expansion Valve (EVXV) . . . . . . . . . . . . . . . . . . . . . . . . . . . . . . . . . . . . . . . . . . . . . . . . . .
2−10
2.4.3
Heat Exchanger . . . . . . . . . . . . . . . . . . . . . . . . . . . . . . . . . . . . . . . . . . . . . . . . . . . . . . . . . . . . . . . . . . .
2−10
2.4.4
Compressor Suction Modulation Valve (CSMV) . . . . . . . . . . . . . . . . . . . . . . . . . . . . . . . . . . . . . . . .
2−10
2.4.5
Evaporator Switches, Transducers and Sensors . . . . . . . . . . . . . . . . . . . . . . . . . . . . . . . . . . . . . . .
a. Evaporator Outlet Pressure Transducer (EVOP) . . . . . . . . . . . . . . . . . . . . . . . . . . . . . . . . . . . . .
b. Evaporator High Temperature Switch (1EVHTS) . . . . . . . . . . . . . . . . . . . . . . . . . . . . . . . . . . . . .
c. Evaporator Outlet Temperature Sensor (EVOT) . . . . . . . . . . . . . . . . . . . . . . . . . . . . . . . . . . . . .
d. Defrost Termination Temperature Sensor (1DTT) . . . . . . . . . . . . . . . . . . . . . . . . . . . . . . . . . . . .
e. Return Air Temperature Sensor (1RAT) . . . . . . . . . . . . . . . . . . . . . . . . . . . . . . . . . . . . . . . . . . . .
f. Supply Air Temperature Sensor (1SAT) . . . . . . . . . . . . . . . . . . . . . . . . . . . . . . . . . . . . . . . . . . . .
2−10
2−10
2−10
2−10
2−10
2−10
2−11
i
62−11389
TABLE OF CONTENTS − Continued
PARAGRAPH NUMBER
2.5
Page
SYSTEM OPERATING CONTROLS AND COMPONENTS . . . . . . . . . . . . . . . . . . . . . . . . . . . . . . . . .
2−11
2.5.1
Multiple Languages . . . . . . . . . . . . . . . . . . . . . . . . . . . . . . . . . . . . . . . . . . . . . . . . . . . . . . . . . . . . . . . .
2−11
2.5.2
Automatic Start-Stop . . . . . . . . . . . . . . . . . . . . . . . . . . . . . . . . . . . . . . . . . . . . . . . . . . . . . . . . . . . . . .
2−11
2.5.3
Special Features . . . . . . . . . . . . . . . . . . . . . . . . . . . . . . . . . . . . . . . . . . . . . . . . . . . . . . . . . . . . . . . . . .
2−11
2.5.4
Component Description And Location . . . . . . . . . . . . . . . . . . . . . . . . . . . . . . . . . . . . . . . . . . . . . . . .
a. Control Module . . . . . . . . . . . . . . . . . . . . . . . . . . . . . . . . . . . . . . . . . . . . . . . . . . . . . . . . . . . . . . . . .
b. Main Display, MessageCenter & Indicator Lights . . . . . . . . . . . . . . . . . . . . . . . . . . . . . . . . . . . .
c. Switch Board . . . . . . . . . . . . . . . . . . . . . . . . . . . . . . . . . . . . . . . . . . . . . . . . . . . . . . . . . . . . . . . . . . .
d. Keypad . . . . . . . . . . . . . . . . . . . . . . . . . . . . . . . . . . . . . . . . . . . . . . . . . . . . . . . . . . . . . . . . . . . . . . . .
2−11
2−11
2−13
2−14
2−14
ELECTRONIC MODULES . . . . . . . . . . . . . . . . . . . . . . . . . . . . . . . . . . . . . . . . . . . . . . . . . . . . . . . . . . . . .
2−15
2.6
2.6.1
Overload Ground Fault Module (OGF) . . . . . . . . . . . . . . . . . . . . . . . . . . . . . . . . . . . . . . . . . . . . . . .
2−15
2.6.2
Phase Reversal Module (PRM) . . . . . . . . . . . . . . . . . . . . . . . . . . . . . . . . . . . . . . . . . . . . . . . . . . . . .
2−15
OPTIONS . . . . . . . . . . . . . . . . . . . . . . . . . . . . . . . . . . . . . . . . . . . . . . . . . . . . . . . . . . . . . . . . . . . . . . . . . . .
2−15
2.7
2.7.1
Light Bar . . . . . . . . . . . . . . . . . . . . . . . . . . . . . . . . . . . . . . . . . . . . . . . . . . . . . . . . . . . . . . . . . . . . . . . . .
2−15
2.7.2
Remote Switch(es) . . . . . . . . . . . . . . . . . . . . . . . . . . . . . . . . . . . . . . . . . . . . . . . . . . . . . . . . . . . . . . . .
2−15
2.7.3
Remote Temperature Sensors . . . . . . . . . . . . . . . . . . . . . . . . . . . . . . . . . . . . . . . . . . . . . . . . . . . . . .
2−16
2.7.4
Remote Control Panel . . . . . . . . . . . . . . . . . . . . . . . . . . . . . . . . . . . . . . . . . . . . . . . . . . . . . . . . . . . . .
2−16
2.8
ENGINE DATA . . . . . . . . . . . . . . . . . . . . . . . . . . . . . . . . . . . . . . . . . . . . . . . . . . . . . . . . . . . . . . . . . . . . . . .
2−16
2.9
COMPRESSOR DATA . . . . . . . . . . . . . . . . . . . . . . . . . . . . . . . . . . . . . . . . . . . . . . . . . . . . . . . . . . . . . . . .
2−17
2.10 REFRIGERATION SYSTEM DATA . . . . . . . . . . . . . . . . . . . . . . . . . . . . . . . . . . . . . . . . . . . . . . . . . . . . . .
2−17
2.11
ELECTRICAL DATA . . . . . . . . . . . . . . . . . . . . . . . . . . . . . . . . . . . . . . . . . . . . . . . . . . . . . . . . . . . . . . . . . . .
2−17
2.12 COMPONENT RESISTANCE & CURRENT DRAW DATA . . . . . . . . . . . . . . . . . . . . . . . . . . . . . . . . . .
2−18
2.13 SAFETY DEVICES . . . . . . . . . . . . . . . . . . . . . . . . . . . . . . . . . . . . . . . . . . . . . . . . . . . . . . . . . . . . . . . . . . .
2−19
2.14 REFRIGERANT CIRCUIT DURING COOLING . . . . . . . . . . . . . . . . . . . . . . . . . . . . . . . . . . . . . . . . . . .
2−20
2.15 REFRIGERANT CIRCUIT - HEATING AND DEFROSTING . . . . . . . . . . . . . . . . . . . . . . . . . . . . . . . .
2−20
OPERATION . . . . . . . . . . . . . . . . . . . . . . . . . . . . . . . . . . . . . . . . . . . . . . . . . . . . . . . . . . . . . . . . . . . . . . . . . . . . . . . . .
3−1
3.1
STARTING - ENGINE OPERATION . . . . . . . . . . . . . . . . . . . . . . . . . . . . . . . . . . . . . . . . . . . . . . . . . . . . .
3−1
3.2
STARTING - STANDBY OPERATION . . . . . . . . . . . . . . . . . . . . . . . . . . . . . . . . . . . . . . . . . . . . . . . . . . .
3−2
3.3
SELF TEST . . . . . . . . . . . . . . . . . . . . . . . . . . . . . . . . . . . . . . . . . . . . . . . . . . . . . . . . . . . . . . . . . . . . . . . . . .
3−4
3.4
PRETRIP . . . . . . . . . . . . . . . . . . . . . . . . . . . . . . . . . . . . . . . . . . . . . . . . . . . . . . . . . . . . . . . . . . . . . . . . . . . .
3−5
3.5
CHANGING SET POINT . . . . . . . . . . . . . . . . . . . . . . . . . . . . . . . . . . . . . . . . . . . . . . . . . . . . . . . . . . . . . .
3−8
3.6
START-STOP OPERATION . . . . . . . . . . . . . . . . . . . . . . . . . . . . . . . . . . . . . . . . . . . . . . . . . . . . . . . . . . . .
3−9
3.7
CONTINUOUS OPERATION . . . . . . . . . . . . . . . . . . . . . . . . . . . . . . . . . . . . . . . . . . . . . . . . . . . . . . . . . . .
3−10
3.8
SLEEP MODE . . . . . . . . . . . . . . . . . . . . . . . . . . . . . . . . . . . . . . . . . . . . . . . . . . . . . . . . . . . . . . . . . . . . . . .
3−11
3.9
MANUAL DEFROST . . . . . . . . . . . . . . . . . . . . . . . . . . . . . . . . . . . . . . . . . . . . . . . . . . . . . . . . . . . . . . . . . .
3−13
3.10 TRIP START . . . . . . . . . . . . . . . . . . . . . . . . . . . . . . . . . . . . . . . . . . . . . . . . . . . . . . . . . . . . . . . . . . . . . . . . .
3−14
3.11
VIEW ACTIVE ALARMS . . . . . . . . . . . . . . . . . . . . . . . . . . . . . . . . . . . . . . . . . . . . . . . . . . . . . . . . . . . . . . .
3−15
3.12 VIEW INACTIVE ALARMS . . . . . . . . . . . . . . . . . . . . . . . . . . . . . . . . . . . . . . . . . . . . . . . . . . . . . . . . . . . . .
3−16
3.13 UNIT DATA . . . . . . . . . . . . . . . . . . . . . . . . . . . . . . . . . . . . . . . . . . . . . . . . . . . . . . . . . . . . . . . . . . . . . . . . . .
3−17
3.14 VIEW HOUR METERS . . . . . . . . . . . . . . . . . . . . . . . . . . . . . . . . . . . . . . . . . . . . . . . . . . . . . . . . . . . . . . . .
3−20
3.15 FUNCTIONAL PARAMETERS . . . . . . . . . . . . . . . . . . . . . . . . . . . . . . . . . . . . . . . . . . . . . . . . . . . . . . . . .
3−21
3.16 LANGUAGE SELECTION . . . . . . . . . . . . . . . . . . . . . . . . . . . . . . . . . . . . . . . . . . . . . . . . . . . . . . . . . . . . .
3−25
3.17 INTELLISET . . . . . . . . . . . . . . . . . . . . . . . . . . . . . . . . . . . . . . . . . . . . . . . . . . . . . . . . . . . . . . . . . . . . . . . . .
3−26
62−11389
ii
TABLE OF CONTENTS − Continued
PARAGRAPH NUMBER
Page
3.18 STOPPING UNIT . . . . . . . . . . . . . . . . . . . . . . . . . . . . . . . . . . . . . . . . . . . . . . . . . . . . . . . . . . . . . . . . . . . . .
3.19 DataLink DATA RECORDER . . . . . . . . . . . . . . . . . . . . . . . . . . . . . . . . . . . . . . . . . . . . . . . . . . . . . . . . . . .
3−29
3−30
3.19.1 Microprocessor Information . . . . . . . . . . . . . . . . . . . . . . . . . . . . . . . . . . . . . . . . . . . . . . . . . . . . . . . . .
3.19.2 Data Recording . . . . . . . . . . . . . . . . . . . . . . . . . . . . . . . . . . . . . . . . . . . . . . . . . . . . . . . . . . . . . . . . . . .
3−30
3−30
3.19.3 Data Downloading . . . . . . . . . . . . . . . . . . . . . . . . . . . . . . . . . . . . . . . . . . . . . . . . . . . . . . . . . . . . . . . . .
3−30
3.19.4 DataLink Data Recorder Power-Up . . . . . . . . . . . . . . . . . . . . . . . . . . . . . . . . . . . . . . . . . . . . . . . . . .
3.20 OPTIONS . . . . . . . . . . . . . . . . . . . . . . . . . . . . . . . . . . . . . . . . . . . . . . . . . . . . . . . . . . . . . . . . . . . . . . . . . . .
3−30
3−31
3.20.1 DataTrak . . . . . . . . . . . . . . . . . . . . . . . . . . . . . . . . . . . . . . . . . . . . . . . . . . . . . . . . . . . . . . . . . . . . . . . . .
3.20.2 Remote Control Panel . . . . . . . . . . . . . . . . . . . . . . . . . . . . . . . . . . . . . . . . . . . . . . . . . . . . . . . . . . . . . .
a.Starting Unit with Remote Control Panel . . . . . . . . . . . . . . . . . . . . . . . . . . . . . . . . . . . . . . . . . . . . .
b. Changing Set Point With Remote Control Panel . . . . . . . . . . . . . . . . . . . . . . . . . . . . . . . . . . . . . .
c.Lock / Unlock the Remote Control Panel . . . . . . . . . . . . . . . . . . . . . . . . . . . . . . . . . . . . . . . . . . . . .
d. Pre-setting Set Point With Remote Control Panel . . . . . . . . . . . . . . . . . . . . . . . . . . . . . . . . . . . .
e. Removing Pre-Set Set Points With Remote Control Panel . . . . . . . . . . . . . . . . . . . . . . . . . . . . .
ENGINE/STANDBY/TEMPERATURE CONTROL . . . . . . . . . . . . . . . . . . . . . . . . . . . . . . . . . . . . . . . . . . . . . . . . .
3−31
3−32
3−33
3−33
3−34
3−34
3−35
4−1
4.1
4.2
INTRODUCTION . . . . . . . . . . . . . . . . . . . . . . . . . . . . . . . . . . . . . . . . . . . . . . . . . . . . . . . . . . . . . . . . . . . . .
ENGINE/STANDBY OPERATION . . . . . . . . . . . . . . . . . . . . . . . . . . . . . . . . . . . . . . . . . . . . . . . . . . . . . . .
4.2.1
4.2.2
4−1
4−1
Standby Start-Up . . . . . . . . . . . . . . . . . . . . . . . . . . . . . . . . . . . . . . . . . . . . . . . . . . . . . . . . . . . . . . . . . .
Engine Start-Up . . . . . . . . . . . . . . . . . . . . . . . . . . . . . . . . . . . . . . . . . . . . . . . . . . . . . . . . . . . . . . . . . . .
4−1
4−1
4.2.3 Transition To High Speed . . . . . . . . . . . . . . . . . . . . . . . . . . . . . . . . . . . . . . . . . . . . . . . . . . . . . . . . . . .
4.3 TEMPERATURE CONTROL . . . . . . . . . . . . . . . . . . . . . . . . . . . . . . . . . . . . . . . . . . . . . . . . . . . . . . . . . . .
4−2
4−2
4.3.1
4.3.2
Temperature Determination . . . . . . . . . . . . . . . . . . . . . . . . . . . . . . . . . . . . . . . . . . . . . . . . . . . . . . . . .
Perishable And Frozen Set Point Ranges. . . . . . . . . . . . . . . . . . . . . . . . . . . . . . . . . . . . . . . . . . . . .
4−2
4−3
4.3.3 Pull Down/Pull-Up . . . . . . . . . . . . . . . . . . . . . . . . . . . . . . . . . . . . . . . . . . . . . . . . . . . . . . . . . . . . . . . . .
4.3.4. Defrost . . . . . . . . . . . . . . . . . . . . . . . . . . . . . . . . . . . . . . . . . . . . . . . . . . . . . . . . . . . . . . . . . . . . . . . . . .
4−3
4−3
4.3.5. Overrides . . . . . . . . . . . . . . . . . . . . . . . . . . . . . . . . . . . . . . . . . . . . . . . . . . . . . . . . . . . . . . . . . . . . . . . .
4.4 START-STOP OPERATION . . . . . . . . . . . . . . . . . . . . . . . . . . . . . . . . . . . . . . . . . . . . . . . . . . . . . . . . . . . .
4−3
4−3
4.4.1
4.4.2
Start-Stop Configuration . . . . . . . . . . . . . . . . . . . . . . . . . . . . . . . . . . . . . . . . . . . . . . . . . . . . . . . . . . . .
Stop Parameters . . . . . . . . . . . . . . . . . . . . . . . . . . . . . . . . . . . . . . . . . . . . . . . . . . . . . . . . . . . . . . . . . .
1. It has run for the selected Minimum Run Time . . . . . . . . . . . . . . . . . . . . . . . . . . . . . . . . . . . . . .
2. The engine coolant temperature has warmed . . . . . . . . . . . . . . . . . . . . . . . . . . . . . . . . . . . . . . .
3. The battery is fully charged - Voltage . . . . . . . . . . . . . . . . . . . . . . . . . . . . . . . . . . . . . . . . . . . . . .
4. The battery is fully charged - Amperage . . . . . . . . . . . . . . . . . . . . . . . . . . . . . . . . . . . . . . . . . . . .
5. The compartment temperature requirement is satisfied . . . . . . . . . . . . . . . . . . . . . . . . . . . . . . .
4.4.3 Re-Start Parameters . . . . . . . . . . . . . . . . . . . . . . . . . . . . . . . . . . . . . . . . . . . . . . . . . . . . . . . . . . . . . . .
1. Engine coolant temperature drops below selected microprocessor Configuration value . . .
2. Battery voltage falls below selected microprocessor Configuration value . . . . . . . . . . . . . . . .
3. The Maximum Off Time has expired . . . . . . . . . . . . . . . . . . . . . . . . . . . . . . . . . . . . . . . . . . . . . . .
4. The Minimum Off Time has expired . . . . . . . . . . . . . . . . . . . . . . . . . . . . . . . . . . . . . . . . . . . . . . . .
5. Compartment temperature has exceeded the Override Functional Parameter value . . . . . .
4.5 CONTINUOUS OPERATION . . . . . . . . . . . . . . . . . . . . . . . . . . . . . . . . . . . . . . . . . . . . . . . . . . . . . . . . . . .
4−3
4−4
4−4
4−4
4−4
4−4
4−4
4−5
4−5
4−5
4−5
4−5
4−5
4−5
4.5.1. Introduction . . . . . . . . . . . . . . . . . . . . . . . . . . . . . . . . . . . . . . . . . . . . . . . . . . . . . . . . . . . . . . . . . . . . . .
4.5.2. Continuous Operation . . . . . . . . . . . . . . . . . . . . . . . . . . . . . . . . . . . . . . . . . . . . . . . . . . . . . . . . . . . . . .
4−5
4−5
iii
62−11389
TABLE OF CONTENTS − Continued
PARAGRAPH NUMBER
Page
4.6 DEFROST . . . . . . . . . . . . . . . . . . . . . . . . . . . . . . . . . . . . . . . . . . . . . . . . . . . . . . . . . . . . . . . . . . . . . . . . . . .
4−8
4.6.1 Defrost Initiation And Start . . . . . . . . . . . . . . . . . . . . . . . . . . . . . . . . . . . . . . . . . . . . . . . . . . . . . . . . . . .
4−8
a. Defrost based on coil condition . . . . . . . . . . . . . . . . . . . . . . . . . . . . . . . . . . . . . . . . . . . . . . . . . . . .
4−8
b. Defrost based on time: . . . . . . . . . . . . . . . . . . . . . . . . . . . . . . . . . . . . . . . . . . . . . . . . . . . . . . . . . . .
4−8
4.6.2 Defrost Modes . . . . . . . . . . . . . . . . . . . . . . . . . . . . . . . . . . . . . . . . . . . . . . . . . . . . . . . . . . . . . . . . . . . . .
a. Normal Defrost Mode . . . . . . . . . . . . . . . . . . . . . . . . . . . . . . . . . . . . . . . . . . . . . . . . . . . . . . . . . . . .
b. Natural Defrost Mode . . . . . . . . . . . . . . . . . . . . . . . . . . . . . . . . . . . . . . . . . . . . . . . . . . . . . . . . . . . .
4−8
4−8
4−8
4.6.3 Defrost Termination . . . . . . . . . . . . . . . . . . . . . . . . . . . . . . . . . . . . . . . . . . . . . . . . . . . . . . . . . . . . . . . . .
4.7. USER SELECTED OVERRIDE OPERATION . . . . . . . . . . . . . . . . . . . . . . . . . . . . . . . . . . . . . . . . . . . . .
4.7.1 Supply Air Limit Control . . . . . . . . . . . . . . . . . . . . . . . . . . . . . . . . . . . . . . . . . . . . . . . . . . . . . . . . . . . .
4−8
4−9
4−9
4.7.2 Temperature Range Lock 1 & 2 . . . . . . . . . . . . . . . . . . . . . . . . . . . . . . . . . . . . . . . . . . . . . . . . . . . . .
4.7.3 ProductShield . . . . . . . . . . . . . . . . . . . . . . . . . . . . . . . . . . . . . . . . . . . . . . . . . . . . . . . . . . . . . . . . . . . . .
4.8. PREPROGRAMMED SOFTWARE OVERRIDES. . . . . . . . . . . . . . . . . . . . . . . . . . . . . . . . . . . . . . . . . .
4.8.1 Cargo Protect Mode. . . . . . . . . . . . . . . . . . . . . . . . . . . . . . . . . . . . . . . . . . . . . . . . . . . . . . . . . . . . . . .
4−10
4−11
4−13
4−13
4.8.2
4.8.3
4.8.4
Compressor Minimum Operating Time . . . . . . . . . . . . . . . . . . . . . . . . . . . . . . . . . . . . . . . . . . . . . . .
Engine Speed Overrides . . . . . . . . . . . . . . . . . . . . . . . . . . . . . . . . . . . . . . . . . . . . . . . . . . . . . . . . . . .
Unloader Control Overrides . . . . . . . . . . . . . . . . . . . . . . . . . . . . . . . . . . . . . . . . . . . . . . . . . . . . . . . . .
4−13
4−13
4−14
4.8.5 Defrost Safety Override . . . . . . . . . . . . . . . . . . . . . . . . . . . . . . . . . . . . . . . . . . . . . . . . . . . . . . . . . . . .
MICROPROCESSOR INTERFACE . . . . . . . . . . . . . . . . . . . . . . . . . . . . . . . . . . . . . . . . . . . . . . . . . . . . . . . . . . . . . .
5.1 INTERFACE METHODS . . . . . . . . . . . . . . . . . . . . . . . . . . . . . . . . . . . . . . . . . . . . . . . . . . . . . . . . . . . . . . .
4−16
5−1
5−1
5.2
TECHNICIAN INTERFACE . . . . . . . . . . . . . . . . . . . . . . . . . . . . . . . . . . . . . . . . . . . . . . . . . . . . . . . . . . . .
5.2.1 Configuration Mode . . . . . . . . . . . . . . . . . . . . . . . . . . . . . . . . . . . . . . . . . . . . . . . . . . . . . . . . . . . . . . . .
5.2.2 Component Test Mode . . . . . . . . . . . . . . . . . . . . . . . . . . . . . . . . . . . . . . . . . . . . . . . . . . . . . . . . . . . . .
5.2.3 Service Mode . . . . . . . . . . . . . . . . . . . . . . . . . . . . . . . . . . . . . . . . . . . . . . . . . . . . . . . . . . . . . . . . . . . . .
5−1
5−2
5−2
5−3
5.3
5.4
PC MODE . . . . . . . . . . . . . . . . . . . . . . . . . . . . . . . . . . . . . . . . . . . . . . . . . . . . . . . . . . . . . . . . . . . . . . . . . . .
PC CARDS . . . . . . . . . . . . . . . . . . . . . . . . . . . . . . . . . . . . . . . . . . . . . . . . . . . . . . . . . . . . . . . . . . . . . . . . . .
5.4.1 Handling PC Cards . . . . . . . . . . . . . . . . . . . . . . . . . . . . . . . . . . . . . . . . . . . . . . . . . . . . . . . . . . . . . . . .
5−3
5−4
5−4
5.4.2
5.4.3
5.4.4
Program PC Card . . . . . . . . . . . . . . . . . . . . . . . . . . . . . . . . . . . . . . . . . . . . . . . . . . . . . . . . . . . . . . . . .
Configuration PC Card . . . . . . . . . . . . . . . . . . . . . . . . . . . . . . . . . . . . . . . . . . . . . . . . . . . . . . . . . . . . .
Option PC Card . . . . . . . . . . . . . . . . . . . . . . . . . . . . . . . . . . . . . . . . . . . . . . . . . . . . . . . . . . . . . . . . . . .
5−5
5−6
5−6
5.4.5 Download PC Card . . . . . . . . . . . . . . . . . . . . . . . . . . . . . . . . . . . . . . . . . . . . . . . . . . . . . . . . . . . . . . . .
REEFERMANAGER & REPORTS . . . . . . . . . . . . . . . . . . . . . . . . . . . . . . . . . . . . . . . . . . . . . . . . . . . . . .
5.5.1 Introduction . . . . . . . . . . . . . . . . . . . . . . . . . . . . . . . . . . . . . . . . . . . . . . . . . . . . . . . . . . . . . . . . . . . . . .
a. ReeferManager . . . . . . . . . . . . . . . . . . . . . . . . . . . . . . . . . . . . . . . . . . . . . . . . . . . . . . . . . . . . . . . . .
b. Reports . . . . . . . . . . . . . . . . . . . . . . . . . . . . . . . . . . . . . . . . . . . . . . . . . . . . . . . . . . . . . . . . . . . . . . . .
c. Connecting Computer and Microprocessor: . . . . . . . . . . . . . . . . . . . . . . . . . . . . . . . . . . . . . . . . .
5−6
5−6
5−6
5−7
5−7
5−7
MICROPROCESSOR DISPLAY DIAGNOSTICS . . . . . . . . . . . . . . . . . . . . . . . . . . . . . . . . . . . . . . . . . .
MICROPROCESSOR REPLACEMENT & SETUP . . . . . . . . . . . . . . . . . . . . . . . . . . . . . . . . . . . . . . . .
5.7.1 Pre-Replacement Steps . . . . . . . . . . . . . . . . . . . . . . . . . . . . . . . . . . . . . . . . . . . . . . . . . . . . . . . . . . . .
5−8
5−8
5−9
5.5
5.6
5.7
5.7.2
5.7.3
5.7.4
Microprocessor Replacement . . . . . . . . . . . . . . . . . . . . . . . . . . . . . . . . . . . . . . . . . . . . . . . . . . . . . . .
Microprocessor Setup . . . . . . . . . . . . . . . . . . . . . . . . . . . . . . . . . . . . . . . . . . . . . . . . . . . . . . . . . . . . . .
Configurations Via Keypad . . . . . . . . . . . . . . . . . . . . . . . . . . . . . . . . . . . . . . . . . . . . . . . . . . . . . . . . .
5−9
5−10
5−11
5.7.5
5.7.6
5.7.7
Functional Parameters Via Keypad . . . . . . . . . . . . . . . . . . . . . . . . . . . . . . . . . . . . . . . . . . . . . . . . . .
DataLink Data Recorder Via ReeferManager . . . . . . . . . . . . . . . . . . . . . . . . . . . . . . . . . . . . . . . . . .
Microprocessor Final Checkout . . . . . . . . . . . . . . . . . . . . . . . . . . . . . . . . . . . . . . . . . . . . . . . . . . . . .
5−11
5−11
5−11
62−11389
iv
TABLE OF CONTENTS − Continued
PARAGRAPH NUMBER
Page
MESSAGECENTER . . . . . . . . . . . . . . . . . . . . . . . . . . . . . . . . . . . . . . . . . . . . . . . . . . . . . . . . . . . . . . . . . . . . . . . . . . .
6.1 MESSAGECENTER MESSAGES . . . . . . . . . . . . . . . . . . . . . . . . . . . . . . . . . . . . . . . . . . . . . . . . . . . . . . .
6−1
6−1
ALARM TROUBLESHOOTING . . . . . . . . . . . . . . . . . . . . . . . . . . . . . . . . . . . . . . . . . . . . . . . . . . . . . . . . . . . . . . . . .
7.1 INTRODUCTION . . . . . . . . . . . . . . . . . . . . . . . . . . . . . . . . . . . . . . . . . . . . . . . . . . . . . . . . . . . . . . . . . . . . .
7−1
7−1
7.2
NOTES . . . . . . . . . . . . . . . . . . . . . . . . . . . . . . . . . . . . . . . . . . . . . . . . . . . . . . . . . . . . . . . . . . . . . . . . . . . . . .
7−2
7.3 DRIVER / OPERATOR ALARMS . . . . . . . . . . . . . . . . . . . . . . . . . . . . . . . . . . . . . . . . . . . . . . . . . . . . . . . . . .
1
LOW FUEL LEVEL WARNING . . . . . . . . . . . . . . . . . . . . . . . . . . . . . . . . . . . . . . . . . . . . . . . . . . . . .
7−3
7−3
2
LOW ENGINE OIL LEVEL WARNING . . . . . . . . . . . . . . . . . . . . . . . . . . . . . . . . . . . . . . . . . . . . . . .
7.4 SHUTDOWN ALARMS . . . . . . . . . . . . . . . . . . . . . . . . . . . . . . . . . . . . . . . . . . . . . . . . . . . . . . . . . . . . . . . . . .
7−3
7−4
11
12
LOW ENGINE OIL PRESSURE . . . . . . . . . . . . . . . . . . . . . . . . . . . . . . . . . . . . . . . . . . . . . . . . . . . .
HIGH COOLANT TEMPERATURE . . . . . . . . . . . . . . . . . . . . . . . . . . . . . . . . . . . . . . . . . . . . . . . . .
7−4
7−5
13
14
HIGH DISCHARGE PRESSURE (ALARM 75 WILL ALSO ACTIVATE) . . . . . . . . . . . . . . . . . .
HIGH A/C AMPS . . . . . . . . . . . . . . . . . . . . . . . . . . . . . . . . . . . . . . . . . . . . . . . . . . . . . . . . . . . . . . . . .
7−7
7−8
15
16
BATTERY VOLTAGE TOO HIGH . . . . . . . . . . . . . . . . . . . . . . . . . . . . . . . . . . . . . . . . . . . . . . . . . . .
BATTERY VOLTAGE TOO LOW . . . . . . . . . . . . . . . . . . . . . . . . . . . . . . . . . . . . . . . . . . . . . . . . . . .
7−9
7−10
17
18
HIGH COMP DISCHARGE TEMP . . . . . . . . . . . . . . . . . . . . . . . . . . . . . . . . . . . . . . . . . . . . . . . . . .
LOW REFRIGERANT PRESSURE . . . . . . . . . . . . . . . . . . . . . . . . . . . . . . . . . . . . . . . . . . . . . . . . .
7−11
7−12
19
20
LOW FUEL SHUTDOWN . . . . . . . . . . . . . . . . . . . . . . . . . . . . . . . . . . . . . . . . . . . . . . . . . . . . . . . . . .
MAXIMUM COMPRESSOR ALARMS . . . . . . . . . . . . . . . . . . . . . . . . . . . . . . . . . . . . . . . . . . . . . . .
7−14
7−15
21
22
TECHNICIAN RESET REQUIRED . . . . . . . . . . . . . . . . . . . . . . . . . . . . . . . . . . . . . . . . . . . . . . . . . .
LOW SUCTION SUPERHEAT . . . . . . . . . . . . . . . . . . . . . . . . . . . . . . . . . . . . . . . . . . . . . . . . . . . . .
7−15
7−16
23
27
A/C CURRENT OVER LIMIT . . . . . . . . . . . . . . . . . . . . . . . . . . . . . . . . . . . . . . . . . . . . . . . . . . . . . . .
HIGH SUCTION PRESSURE . . . . . . . . . . . . . . . . . . . . . . . . . . . . . . . . . . . . . . . . . . . . . . . . . . . . . .
7−18
7−20
28
CHECK REFRIGERATION SYSTEM . . . . . . . . . . . . . . . . . . . . . . . . . . . . . . . . . . . . . . . . . . . . . . .
7.5 START UP / ENGINE ALARMS . . . . . . . . . . . . . . . . . . . . . . . . . . . . . . . . . . . . . . . . . . . . . . . . . . . . . . . . . . .
7−21
7−22
30
31
FAILED TO RUN MINIMUM TIME . . . . . . . . . . . . . . . . . . . . . . . . . . . . . . . . . . . . . . . . . . . . . . . . . .
FAILED TO START - AUTO MODE . . . . . . . . . . . . . . . . . . . . . . . . . . . . . . . . . . . . . . . . . . . . . . . . .
7−22
7−23
34
35
ENGINE FAILED TO STOP . . . . . . . . . . . . . . . . . . . . . . . . . . . . . . . . . . . . . . . . . . . . . . . . . . . . . . . .
CHECK STARTER CIRCUIT . . . . . . . . . . . . . . . . . . . . . . . . . . . . . . . . . . . . . . . . . . . . . . . . . . . . . . .
7−25
7−26
36
37
CHECK COOLANT TEMPERATURE . . . . . . . . . . . . . . . . . . . . . . . . . . . . . . . . . . . . . . . . . . . . . . .
CHECK LOW SPEED RPM . . . . . . . . . . . . . . . . . . . . . . . . . . . . . . . . . . . . . . . . . . . . . . . . . . . . . . . .
7−27
7−28
38
39
CHECK HIGH SPEED RPM . . . . . . . . . . . . . . . . . . . . . . . . . . . . . . . . . . . . . . . . . . . . . . . . . . . . . . .
CHECK ENGINE RPM . . . . . . . . . . . . . . . . . . . . . . . . . . . . . . . . . . . . . . . . . . . . . . . . . . . . . . . . . . . .
7−29
7−31
40
41
CHECK GLOW PLUGS (This alarm applies to the Intake Air Heater) . . . . . . . . . . . . . . . . . . . .
ENGINE STALLED . . . . . . . . . . . . . . . . . . . . . . . . . . . . . . . . . . . . . . . . . . . . . . . . . . . . . . . . . . . . . . .
7−33
7−34
7.6 WARNING / STATUS ALARMS . . . . . . . . . . . . . . . . . . . . . . . . . . . . . . . . . . . . . . . . . . . . . . . . . . . . . . . . . . .
51
ALTERNATOR NOT CHARGING (This alarm applies to the Battery Charger) . . . . . . . . . . . . .
7−36
7−36
53
54
BOX TEMP OUT OF RANGE . . . . . . . . . . . . . . . . . . . . . . . . . . . . . . . . . . . . . . . . . . . . . . . . . . . . . .
DEFROST NOT COMPLETE . . . . . . . . . . . . . . . . . . . . . . . . . . . . . . . . . . . . . . . . . . . . . . . . . . . . . .
7−37
7−39
55
57
CHECK DEFROST AIR SWITCH . . . . . . . . . . . . . . . . . . . . . . . . . . . . . . . . . . . . . . . . . . . . . . . . . . .
CHECK REMOTE SWITCH 1 (REMS1) . . . . . . . . . . . . . . . . . . . . . . . . . . . . . . . . . . . . . . . . . . . . .
7−40
7−41
v
62−11389
TABLE OF CONTENTS − Continued
PARAGRAPH NUMBER
Page
58
59
CHECK REMOTE SWITCH 2 (REMS2) . . . . . . . . . . . . . . . . . . . . . . . . . . . . . . . . . . . . . . . . . . . . .
DATALOGGER (DataLink data recorder) NOT RECORDING . . . . . . . . . . . . . . . . . . . . . . . . . . .
7−42
7−43
60
61
DATALOGGER (DataLink data recorder) TIME WRONG . . . . . . . . . . . . . . . . . . . . . . . . . . . . . . .
DOOR OPEN (DS1) . . . . . . . . . . . . . . . . . . . . . . . . . . . . . . . . . . . . . . . . . . . . . . . . . . . . . . . . . . . . . .
7−44
7−45
7.7 ELECTRICAL ALARMS . . . . . . . . . . . . . . . . . . . . . . . . . . . . . . . . . . . . . . . . . . . . . . . . . . . . . . . . . . . . . . . . . .
7−46
71
73
BAD F2 OR F3 FUSE . . . . . . . . . . . . . . . . . . . . . . . . . . . . . . . . . . . . . . . . . . . . . . . . . . . . . . . . . . . . .
NO A/C POWER-CHECK POWER CORD . . . . . . . . . . . . . . . . . . . . . . . . . . . . . . . . . . . . . . . . . . .
7−46
7−47
75
76
COMP MOTOR OVERLOAD . . . . . . . . . . . . . . . . . . . . . . . . . . . . . . . . . . . . . . . . . . . . . . . . . . . . . .
CONDENSER MOTOR OVERHEATED . . . . . . . . . . . . . . . . . . . . . . . . . . . . . . . . . . . . . . . . . . . . .
7−48
7−49
77
84
EVAP MOTOR OVERHEATED . . . . . . . . . . . . . . . . . . . . . . . . . . . . . . . . . . . . . . . . . . . . . . . . . . . . .
CHECK REMOTE ALARM LIGHT . . . . . . . . . . . . . . . . . . . . . . . . . . . . . . . . . . . . . . . . . . . . . . . . . .
7−51
7−53
85
86
CHECK UL1 CIRCUIT . . . . . . . . . . . . . . . . . . . . . . . . . . . . . . . . . . . . . . . . . . . . . . . . . . . . . . . . . . . .
CHECK UL2 CIRCUIT . . . . . . . . . . . . . . . . . . . . . . . . . . . . . . . . . . . . . . . . . . . . . . . . . . . . . . . . . . . .
7−54
7−55
89
91
CHECK REMOTE AUTO LIGHT (Light Bar) . . . . . . . . . . . . . . . . . . . . . . . . . . . . . . . . . . . . . . . . . .
CHECK 1HTCON1 RELAY COIL . . . . . . . . . . . . . . . . . . . . . . . . . . . . . . . . . . . . . . . . . . . . . . . . . . .
7−56
7−56
92
93
CHECK 1HTCON2 RELAY COIL . . . . . . . . . . . . . . . . . . . . . . . . . . . . . . . . . . . . . . . . . . . . . . . . . . .
CHECK START UP BUZZER . . . . . . . . . . . . . . . . . . . . . . . . . . . . . . . . . . . . . . . . . . . . . . . . . . . . . .
7−57
7−58
94
95
CHECK COMP CONTACTOR 1 . . . . . . . . . . . . . . . . . . . . . . . . . . . . . . . . . . . . . . . . . . . . . . . . . . . .
CHECK CDCON RELAY COIL . . . . . . . . . . . . . . . . . . . . . . . . . . . . . . . . . . . . . . . . . . . . . . . . . . . . .
7−58
7−59
96
98
CHECK GENCONR RELAY COIL . . . . . . . . . . . . . . . . . . . . . . . . . . . . . . . . . . . . . . . . . . . . . . . . . .
CHECK HIGH TEMP THERMOSTAT . . . . . . . . . . . . . . . . . . . . . . . . . . . . . . . . . . . . . . . . . . . . . . .
7−60
7−61
99
100
CHECK STANDBY CONTACTOR . . . . . . . . . . . . . . . . . . . . . . . . . . . . . . . . . . . . . . . . . . . . . . . . . .
OVERLOAD/GROUND FAULT . . . . . . . . . . . . . . . . . . . . . . . . . . . . . . . . . . . . . . . . . . . . . . . . . . . . .
7−62
7−63
109 CHECK 1EVCON RELAY COIL . . . . . . . . . . . . . . . . . . . . . . . . . . . . . . . . . . . . . . . . . . . . . . . . . . . .
7.8 SENSOR ALARMS . . . . . . . . . . . . . . . . . . . . . . . . . . . . . . . . . . . . . . . . . . . . . . . . . . . . . . . . . . . . . . . . . . . . . .
7−64
7−65
121
122
CHECK AMBIENT AIR SENSOR . . . . . . . . . . . . . . . . . . . . . . . . . . . . . . . . . . . . . . . . . . . . . . . . . . .
CHECK RETURN AIR SENSOR . . . . . . . . . . . . . . . . . . . . . . . . . . . . . . . . . . . . . . . . . . . . . . . . . . .
7−65
7−66
123
124
CHECK SUPPLY AIR SENSOR . . . . . . . . . . . . . . . . . . . . . . . . . . . . . . . . . . . . . . . . . . . . . . . . . . . .
CHECK DEFROST TERM 1 SENSOR . . . . . . . . . . . . . . . . . . . . . . . . . . . . . . . . . . . . . . . . . . . . . .
7−67
7−68
125
126
CHECK COMP DISCHARGE SENSOR . . . . . . . . . . . . . . . . . . . . . . . . . . . . . . . . . . . . . . . . . . . . .
CHECK FUEL SENSOR CIRCUIT . . . . . . . . . . . . . . . . . . . . . . . . . . . . . . . . . . . . . . . . . . . . . . . . . .
7−69
7−69
127
128
CHECK SUCTION TEMP SENSOR . . . . . . . . . . . . . . . . . . . . . . . . . . . . . . . . . . . . . . . . . . . . . . . .
LOW/UNBALANCED A/C AMPS . . . . . . . . . . . . . . . . . . . . . . . . . . . . . . . . . . . . . . . . . . . . . . . . . . .
7−70
7−70
129
130
CHECK ENG COOLANT SENSOR . . . . . . . . . . . . . . . . . . . . . . . . . . . . . . . . . . . . . . . . . . . . . . . . .
CHECK ENGINE RPM SENSOR . . . . . . . . . . . . . . . . . . . . . . . . . . . . . . . . . . . . . . . . . . . . . . . . . . .
7−71
7−72
131
133
CHECK EVAP TEMP SENSOR . . . . . . . . . . . . . . . . . . . . . . . . . . . . . . . . . . . . . . . . . . . . . . . . . . . .
CHECK REMOTE TEMP SENSOR 1 . . . . . . . . . . . . . . . . . . . . . . . . . . . . . . . . . . . . . . . . . . . . . . .
7−73
7−74
134
135
CHECK REMOTE TEMP SENSOR 2 . . . . . . . . . . . . . . . . . . . . . . . . . . . . . . . . . . . . . . . . . . . . . . .
CHECK REMOTE TEMP SENSOR 3 . . . . . . . . . . . . . . . . . . . . . . . . . . . . . . . . . . . . . . . . . . . . . . .
7−74
7−74
62−11389
vi
TABLE OF CONTENTS − Continued
PARAGRAPH NUMBER
Page
7.9 PRETRIP ALARMS . . . . . . . . . . . . . . . . . . . . . . . . . . . . . . . . . . . . . . . . . . . . . . . . . . . . . . . . . . . . . . . . . . . . .
P141 PRETRIP STOPPED BY USER . . . . . . . . . . . . . . . . . . . . . . . . . . . . . . . . . . . . . . . . . . . . . . . . . . . .
7−75
7−75
P144 CHECK UL1 CIRCUIT . . . . . . . . . . . . . . . . . . . . . . . . . . . . . . . . . . . . . . . . . . . . . . . . . . . . . . . . . . . .
P145 CHECK SPEED SOL CIRCUIT . . . . . . . . . . . . . . . . . . . . . . . . . . . . . . . . . . . . . . . . . . . . . . . . . . . . .
7−75
7−76
P151 CHECK GLOW PLUG CIRCUIT (This applies to the Intake Air Heater) . . . . . . . . . . . . . . . . . .
7−77
P152 CHECK FUEL SOLENOID CIRC . . . . . . . . . . . . . . . . . . . . . . . . . . . . . . . . . . . . . . . . . . . . . . . . . . .
P153 CHECK RETURN AIR SENSOR . . . . . . . . . . . . . . . . . . . . . . . . . . . . . . . . . . . . . . . . . . . . . . . . . . .
7−77
7−78
P154 CHECK SUPPLY AIR SENSOR . . . . . . . . . . . . . . . . . . . . . . . . . . . . . . . . . . . . . . . . . . . . . . . . . . . .
P155 CHECK COOLANT TEMP SENSOR . . . . . . . . . . . . . . . . . . . . . . . . . . . . . . . . . . . . . . . . . . . . . . . .
7−78
7−78
P156 CHECK BATTERY VOLTS . . . . . . . . . . . . . . . . . . . . . . . . . . . . . . . . . . . . . . . . . . . . . . . . . . . . . . . . .
P157 CHECK BATTERY CURRENT . . . . . . . . . . . . . . . . . . . . . . . . . . . . . . . . . . . . . . . . . . . . . . . . . . . . .
7−78
7−79
P158 CHECK AMBIENT AIR SENSOR . . . . . . . . . . . . . . . . . . . . . . . . . . . . . . . . . . . . . . . . . . . . . . . . . . .
P159 CHECK DEFROST TERM 1 SENSOR . . . . . . . . . . . . . . . . . . . . . . . . . . . . . . . . . . . . . . . . . . . . . .
7−79
7−80
P160 CHECK DISCHARGE TEMP SENSOR . . . . . . . . . . . . . . . . . . . . . . . . . . . . . . . . . . . . . . . . . . . . . .
P161 CHECK SUCTION TEMP SENSOR (CST) . . . . . . . . . . . . . . . . . . . . . . . . . . . . . . . . . . . . . . . . . . .
7−80
7−80
P164 CHECK UL2 CIRCUIT . . . . . . . . . . . . . . . . . . . . . . . . . . . . . . . . . . . . . . . . . . . . . . . . . . . . . . . . . . . .
P174 CHECK LOW SPEED RPM . . . . . . . . . . . . . . . . . . . . . . . . . . . . . . . . . . . . . . . . . . . . . . . . . . . . . . .
7−80
7−81
P175 CHECK HIGH SPEED RPM . . . . . . . . . . . . . . . . . . . . . . . . . . . . . . . . . . . . . . . . . . . . . . . . . . . . . . .
P177 CHECK EVAP SUPERHEAT . . . . . . . . . . . . . . . . . . . . . . . . . . . . . . . . . . . . . . . . . . . . . . . . . . . . . . .
7−82
7−84
P178 CHECK UL1 . . . . . . . . . . . . . . . . . . . . . . . . . . . . . . . . . . . . . . . . . . . . . . . . . . . . . . . . . . . . . . . . . . . . .
P180 CHECK SUCTION MOD VALVE . . . . . . . . . . . . . . . . . . . . . . . . . . . . . . . . . . . . . . . . . . . . . . . . . . . .
7−85
7−86
P186 CHECK EVAP OUTLET TEMP . . . . . . . . . . . . . . . . . . . . . . . . . . . . . . . . . . . . . . . . . . . . . . . . . . . . .
P187 CHECK HEATER 1 CIRCUIT . . . . . . . . . . . . . . . . . . . . . . . . . . . . . . . . . . . . . . . . . . . . . . . . . . . . . .
7−87
7−87
P188 CHECK HEATER 2 CIRCUIT . . . . . . . . . . . . . . . . . . . . . . . . . . . . . . . . . . . . . . . . . . . . . . . . . . . . . .
P189 CHECK EVAPORATOR FAN MOTOR . . . . . . . . . . . . . . . . . . . . . . . . . . . . . . . . . . . . . . . . . . . . . . .
7−89
7−91
P190 CHECK CONDENSER FAN MOTOR . . . . . . . . . . . . . . . . . . . . . . . . . . . . . . . . . . . . . . . . . . . . . . .
P191 CHECK UL2 . . . . . . . . . . . . . . . . . . . . . . . . . . . . . . . . . . . . . . . . . . . . . . . . . . . . . . . . . . . . . . . . . . . . .
7−93
7−94
P206 CHECK CONDENSER FAN CIRCUIT . . . . . . . . . . . . . . . . . . . . . . . . . . . . . . . . . . . . . . . . . . . . . . .
P207 CHECK COMPRESSOR CONTACT CIRC . . . . . . . . . . . . . . . . . . . . . . . . . . . . . . . . . . . . . . . . . . .
7−95
7−95
P208 CHECK GENERATOR CONT CIRC . . . . . . . . . . . . . . . . . . . . . . . . . . . . . . . . . . . . . . . . . . . . . . . .
P209 CHECK STANDBY CONT CIRCUIT . . . . . . . . . . . . . . . . . . . . . . . . . . . . . . . . . . . . . . . . . . . . . . . .
7−96
7−97
7.10 MAINTENANCE ALARMS . . . . . . . . . . . . . . . . . . . . . . . . . . . . . . . . . . . . . . . . . . . . . . . . . . . . . . . . . . . . . .
223 ENGINE MAINTENANCE DUE . . . . . . . . . . . . . . . . . . . . . . . . . . . . . . . . . . . . . . . . . . . . . . . . . . . . .
7−98
7−98
224
225
STANDBY MAINTENANCE DUE . . . . . . . . . . . . . . . . . . . . . . . . . . . . . . . . . . . . . . . . . . . . . . . . . . .
GENERAL MAINTENANCE DUE . . . . . . . . . . . . . . . . . . . . . . . . . . . . . . . . . . . . . . . . . . . . . . . . . . .
226
227
SERVICE SOON-PM #1 DUE . . . . . . . . . . . . . . . . . . . . . . . . . . . . . . . . . . . . . . . . . . . . . . . . . . . . . . 7−99
SERVICE SOON-PM #2 DUE . . . . . . . . . . . . . . . . . . . . . . . . . . . . . . . . . . . . . . . . . . . . . . . . . . . . . . 7−100
228
229
SERVICE SOON-PM #3 DUE . . . . . . . . . . . . . . . . . . . . . . . . . . . . . . . . . . . . . . . . . . . . . . . . . . . . . . 7−100
SERVICE SOON-PM #4 DUE . . . . . . . . . . . . . . . . . . . . . . . . . . . . . . . . . . . . . . . . . . . . . . . . . . . . . . 7−101
230
SERVICE SOON-PM #5 DUE . . . . . . . . . . . . . . . . . . . . . . . . . . . . . . . . . . . . . . . . . . . . . . . . . . . . . . 7−101
vii
7−98
7−99
62−11389
TABLE OF CONTENTS − Continued
PARAGRAPH NUMBER
Page
7.11 MICROPROCESSOR ALARMS . . . . . . . . . . . . . . . . . . . . . . . . . . . . . . . . . . . . . . . . . . . . . . . . . . . . . . . . . . 7−102
232
SETPOINT ERROR . . . . . . . . . . . . . . . . . . . . . . . . . . . . . . . . . . . . . . . . . . . . . . . . . . . . . . . . . . . . . . 7−102
233
MODEL # ERROR . . . . . . . . . . . . . . . . . . . . . . . . . . . . . . . . . . . . . . . . . . . . . . . . . . . . . . . . . . . . . . . . 7−102
237
FUNCTION PARAMETERS ERROR . . . . . . . . . . . . . . . . . . . . . . . . . . . . . . . . . . . . . . . . . . . . . . . . 7−103
238
CONFIGURATIONS 1 ERROR . . . . . . . . . . . . . . . . . . . . . . . . . . . . . . . . . . . . . . . . . . . . . . . . . . . . . 7−104
242
DIS PRESS CALIBRATE ERROR . . . . . . . . . . . . . . . . . . . . . . . . . . . . . . . . . . . . . . . . . . . . . . . . . . 7−105
243
SUCTION/EVAP CALIBRATE ERROR . . . . . . . . . . . . . . . . . . . . . . . . . . . . . . . . . . . . . . . . . . . . . . 7−106
245
CANNOT SAVE SETTING . . . . . . . . . . . . . . . . . . . . . . . . . . . . . . . . . . . . . . . . . . . . . . . . . . . . . . . . . 7−107
246
EEPROM WRITE FAILURE . . . . . . . . . . . . . . . . . . . . . . . . . . . . . . . . . . . . . . . . . . . . . . . . . . . . . . . . 7−107
248
CONFIGURATION MODE / HP2 ERROR . . . . . . . . . . . . . . . . . . . . . . . . . . . . . . . . . . . . . . . . . . . . 7−108
249
MICROPROCESSOR ERROR . . . . . . . . . . . . . . . . . . . . . . . . . . . . . . . . . . . . . . . . . . . . . . . . . . . . . 7−109
SERVICE . . . . . . . . . . . . . . . . . . . . . . . . . . . . . . . . . . . . . . . . . . . . . . . . . . . . . . . . . . . . . . . . . . . . . . . . . . . . . . . . . . . .
8−1
8.1
SECTION LAYOUT . . . . . . . . . . . . . . . . . . . . . . . . . . . . . . . . . . . . . . . . . . . . . . . . . . . . . . . . . . . . . . . . . . .
8−1
8.2
SCHEDULED MAINTENANCE . . . . . . . . . . . . . . . . . . . . . . . . . . . . . . . . . . . . . . . . . . . . . . . . . . . . . . . . .
8−1
8.3
PRE TRIP INSPECTION . . . . . . . . . . . . . . . . . . . . . . . . . . . . . . . . . . . . . . . . . . . . . . . . . . . . . . . . . . . . . .
8−1
8.4
EXTERNAL SURFACE SERVICE . . . . . . . . . . . . . . . . . . . . . . . . . . . . . . . . . . . . . . . . . . . . . . . . . . . . . . .
8−5
8.5
8.4.1
Grille Insert Removal . . . . . . . . . . . . . . . . . . . . . . . . . . . . . . . . . . . . . . . . . . . . . . . . . . . . . . . . . . . . . .
8−5
8.4.2
Surround Removal . . . . . . . . . . . . . . . . . . . . . . . . . . . . . . . . . . . . . . . . . . . . . . . . . . . . . . . . . . . . . . . .
8−5
8.4.3
Door Latch Maintenance And Replacement . . . . . . . . . . . . . . . . . . . . . . . . . . . . . . . . . . . . . . . . . . .
a. Door Latch Maintenance . . . . . . . . . . . . . . . . . . . . . . . . . . . . . . . . . . . . . . . . . . . . . . . . . . . . . . . . .
b. Cable Replacement . . . . . . . . . . . . . . . . . . . . . . . . . . . . . . . . . . . . . . . . . . . . . . . . . . . . . . . . . . . . .
8−6
8−6
8−6
8.4.4
Display & Keypad Assembly . . . . . . . . . . . . . . . . . . . . . . . . . . . . . . . . . . . . . . . . . . . . . . . . . . . . . . . .
a. Disassembly . . . . . . . . . . . . . . . . . . . . . . . . . . . . . . . . . . . . . . . . . . . . . . . . . . . . . . . . . . . . . . . . . . .
b. Reassembly . . . . . . . . . . . . . . . . . . . . . . . . . . . . . . . . . . . . . . . . . . . . . . . . . . . . . . . . . . . . . . . . . . . .
8−6
8−6
8−7
ENGINE AND ENGINE RELATED SYSTEMS SERVICE . . . . . . . . . . . . . . . . . . . . . . . . . . . . . . . . . . .
8−7
8.5.1
Fuel System . . . . . . . . . . . . . . . . . . . . . . . . . . . . . . . . . . . . . . . . . . . . . . . . . . . . . . . . . . . . . . . . . . . . . .
8−7
8.5.2
Priming The Fuel System . . . . . . . . . . . . . . . . . . . . . . . . . . . . . . . . . . . . . . . . . . . . . . . . . . . . . . . . . .
8−8
8.5.3
Mechanical Fuel Pump Screen . . . . . . . . . . . . . . . . . . . . . . . . . . . . . . . . . . . . . . . . . . . . . . . . . . . . . .
8−8
8.5.4
Electric Fuel Pump Screen . . . . . . . . . . . . . . . . . . . . . . . . . . . . . . . . . . . . . . . . . . . . . . . . . . . . . . . . .
8−9
8.5.5
Fuel Filter . . . . . . . . . . . . . . . . . . . . . . . . . . . . . . . . . . . . . . . . . . . . . . . . . . . . . . . . . . . . . . . . . . . . . . . .
8−9
8.5.6
Fuel Level Sensor (FLS) . . . . . . . . . . . . . . . . . . . . . . . . . . . . . . . . . . . . . . . . . . . . . . . . . . . . . . . . . . .
8−9
8.5.7
Fuel Heater . . . . . . . . . . . . . . . . . . . . . . . . . . . . . . . . . . . . . . . . . . . . . . . . . . . . . . . . . . . . . . . . . . . . . .
8−10
8.5.8
Engine Oil And Oil Filter . . . . . . . . . . . . . . . . . . . . . . . . . . . . . . . . . . . . . . . . . . . . . . . . . . . . . . . . . . . .
a. To Check The Engine Oil Level: . . . . . . . . . . . . . . . . . . . . . . . . . . . . . . . . . . . . . . . . . . . . . . . . . . .
b. To Change Engine Oil: . . . . . . . . . . . . . . . . . . . . . . . . . . . . . . . . . . . . . . . . . . . . . . . . . . . . . . . . . . .
c. To Change Engine Oil Filter: . . . . . . . . . . . . . . . . . . . . . . . . . . . . . . . . . . . . . . . . . . . . . . . . . . . . . .
8−10
8−10
8−11
8−11
8.5.9
Air Cleaner . . . . . . . . . . . . . . . . . . . . . . . . . . . . . . . . . . . . . . . . . . . . . . . . . . . . . . . . . . . . . . . . . . . . . . .
8−11
8.5.10 Intake Air Heater . . . . . . . . . . . . . . . . . . . . . . . . . . . . . . . . . . . . . . . . . . . . . . . . . . . . . . . . . . . . . . . . . .
a. Troubleshooting The Intake Air Heater (IAH) . . . . . . . . . . . . . . . . . . . . . . . . . . . . . . . . . . . . . . . .
b. Replacing The Intake Air Heater . . . . . . . . . . . . . . . . . . . . . . . . . . . . . . . . . . . . . . . . . . . . . . . . . .
8−12
8−12
8−12
8.5.11 Speed Control System . . . . . . . . . . . . . . . . . . . . . . . . . . . . . . . . . . . . . . . . . . . . . . . . . . . . . . . . . . . . .
8−12
8.5.12 Cooling System . . . . . . . . . . . . . . . . . . . . . . . . . . . . . . . . . . . . . . . . . . . . . . . . . . . . . . . . . . . . . . . . . . .
a. Cleaning and Flushing . . . . . . . . . . . . . . . . . . . . . . . . . . . . . . . . . . . . . . . . . . . . . . . . . . . . . . . . . . .
b. Radiator Replacement . . . . . . . . . . . . . . . . . . . . . . . . . . . . . . . . . . . . . . . . . . . . . . . . . . . . . . . . . . .
8−13
8−13
8−13
62−11389
viii
TABLE OF CONTENTS − Continued
PARAGRAPH NUMBER
8.6
8.7
8.8
Page
8.5.13 Water Pump V-Belt . . . . . . . . . . . . . . . . . . . . . . . . . . . . . . . . . . . . . . . . . . . . . . . . . . . . . . . . . . . . . . . .
8−14
8.5.14 Crankcase Breather . . . . . . . . . . . . . . . . . . . . . . . . . . . . . . . . . . . . . . . . . . . . . . . . . . . . . . . . . . . . . . .
8−14
REFRIGERANT SYSTEM SERVICE . . . . . . . . . . . . . . . . . . . . . . . . . . . . . . . . . . . . . . . . . . . . . . . . . . . .
8−14
8.6.1
Refrigerant System Service Connections . . . . . . . . . . . . . . . . . . . . . . . . . . . . . . . . . . . . . . . . . . . . .
8−14
8.6.2
Servicing The Refrigerant Charge . . . . . . . . . . . . . . . . . . . . . . . . . . . . . . . . . . . . . . . . . . . . . . . . . . .
a. Checking Charge Level . . . . . . . . . . . . . . . . . . . . . . . . . . . . . . . . . . . . . . . . . . . . . . . . . . . . . . . . . .
b. Checking For Noncondensibles . . . . . . . . . . . . . . . . . . . . . . . . . . . . . . . . . . . . . . . . . . . . . . . . . . .
c. Removing Charge . . . . . . . . . . . . . . . . . . . . . . . . . . . . . . . . . . . . . . . . . . . . . . . . . . . . . . . . . . . . . . .
d. Pumping Down The Low Side . . . . . . . . . . . . . . . . . . . . . . . . . . . . . . . . . . . . . . . . . . . . . . . . . . . . .
e. Pumping Down The Compressor . . . . . . . . . . . . . . . . . . . . . . . . . . . . . . . . . . . . . . . . . . . . . . . . . .
f. Adjusting The Charge Level . . . . . . . . . . . . . . . . . . . . . . . . . . . . . . . . . . . . . . . . . . . . . . . . . . . . . .
g. Adding a Complete Charge . . . . . . . . . . . . . . . . . . . . . . . . . . . . . . . . . . . . . . . . . . . . . . . . . . . . . . .
8−15
8−15
8−15
8−15
8−16
8−16
8−16
8−17
8.6.3
Leak Checking . . . . . . . . . . . . . . . . . . . . . . . . . . . . . . . . . . . . . . . . . . . . . . . . . . . . . . . . . . . . . . . . . . . .
a. Leak Checking a Charged System . . . . . . . . . . . . . . . . . . . . . . . . . . . . . . . . . . . . . . . . . . . . . . . . .
b. Leak Checking a System Without Charge . . . . . . . . . . . . . . . . . . . . . . . . . . . . . . . . . . . . . . . . . .
c. Leak Checking With Low Side Pumped Down . . . . . . . . . . . . . . . . . . . . . . . . . . . . . . . . . . . . . . .
d. Leak Checking Compressor . . . . . . . . . . . . . . . . . . . . . . . . . . . . . . . . . . . . . . . . . . . . . . . . . . . . . .
8−17
8−17
8−17
8−18
8−18
8.6.4
Evacuation And Dehydration . . . . . . . . . . . . . . . . . . . . . . . . . . . . . . . . . . . . . . . . . . . . . . . . . . . . . . . .
a. Evacuation of the Complete System . . . . . . . . . . . . . . . . . . . . . . . . . . . . . . . . . . . . . . . . . . . . . . .
b. Evacuation of the Low Side . . . . . . . . . . . . . . . . . . . . . . . . . . . . . . . . . . . . . . . . . . . . . . . . . . . . . . .
c. Evacuation of the Compressor . . . . . . . . . . . . . . . . . . . . . . . . . . . . . . . . . . . . . . . . . . . . . . . . . . . .
8−19
8−19
8−20
8−20
COMPRESSOR AND UNLOADER SERVICE . . . . . . . . . . . . . . . . . . . . . . . . . . . . . . . . . . . . . . . . . . . .
8−20
8.7.1
Repair or Replacement Determination . . . . . . . . . . . . . . . . . . . . . . . . . . . . . . . . . . . . . . . . . . . . . . . .
8−20
8.7.2
Removal and Replacement of Compressor . . . . . . . . . . . . . . . . . . . . . . . . . . . . . . . . . . . . . . . . . . .
8−21
8.7.3
Cylinder Head and Valve Plate Service . . . . . . . . . . . . . . . . . . . . . . . . . . . . . . . . . . . . . . . . . . . . . . .
8−22
8.7.4
Oil Pump And Bearing Head . . . . . . . . . . . . . . . . . . . . . . . . . . . . . . . . . . . . . . . . . . . . . . . . . . . . . . . .
8−23
8.7.5
Compressor Oil Level . . . . . . . . . . . . . . . . . . . . . . . . . . . . . . . . . . . . . . . . . . . . . . . . . . . . . . . . . . . . . .
a. Checking Compressor Oil Level . . . . . . . . . . . . . . . . . . . . . . . . . . . . . . . . . . . . . . . . . . . . . . . . . . .
b. Adding Oil With Compressor In System . . . . . . . . . . . . . . . . . . . . . . . . . . . . . . . . . . . . . . . . . . . .
c. Removing Oil From The Compressor . . . . . . . . . . . . . . . . . . . . . . . . . . . . . . . . . . . . . . . . . . . . . .
8−24
8−24
8−24
8−25
8.7.6
Unloaders . . . . . . . . . . . . . . . . . . . . . . . . . . . . . . . . . . . . . . . . . . . . . . . . . . . . . . . . . . . . . . . . . . . . . . . .
a. Unloader Checkout procedure . . . . . . . . . . . . . . . . . . . . . . . . . . . . . . . . . . . . . . . . . . . . . . . . . . . .
b. Unloader Coil Replacement . . . . . . . . . . . . . . . . . . . . . . . . . . . . . . . . . . . . . . . . . . . . . . . . . . . . . . .
c. Replacing Unloader Valve Internal Parts . . . . . . . . . . . . . . . . . . . . . . . . . . . . . . . . . . . . . . . . . . . .
d. Unloader Valve Replacement . . . . . . . . . . . . . . . . . . . . . . . . . . . . . . . . . . . . . . . . . . . . . . . . . . . . .
8−25
8−25
8−25
8−26
8−26
REFRIGERANT SYSTEM COMPONENT SERVICE . . . . . . . . . . . . . . . . . . . . . . . . . . . . . . . . . . . . . .
8−26
8.8.1
Evaporator Coil . . . . . . . . . . . . . . . . . . . . . . . . . . . . . . . . . . . . . . . . . . . . . . . . . . . . . . . . . . . . . . . . . . .
8−26
8.8.2
Condenser Coil . . . . . . . . . . . . . . . . . . . . . . . . . . . . . . . . . . . . . . . . . . . . . . . . . . . . . . . . . . . . . . . . . . .
a. Cleaning . . . . . . . . . . . . . . . . . . . . . . . . . . . . . . . . . . . . . . . . . . . . . . . . . . . . . . . . . . . . . . . . . . . . . . .
b. Condenser Coil Replacement . . . . . . . . . . . . . . . . . . . . . . . . . . . . . . . . . . . . . . . . . . . . . . . . . . . . .
8−27
8−27
8−27
8.8.3
Filter-Drier . . . . . . . . . . . . . . . . . . . . . . . . . . . . . . . . . . . . . . . . . . . . . . . . . . . . . . . . . . . . . . . . . . . . . . .
a. Check Filter-Drier . . . . . . . . . . . . . . . . . . . . . . . . . . . . . . . . . . . . . . . . . . . . . . . . . . . . . . . . . . . . . . .
b. Replace Filter-Drier . . . . . . . . . . . . . . . . . . . . . . . . . . . . . . . . . . . . . . . . . . . . . . . . . . . . . . . . . . . . . .
8−28
8−28
8−28
8.8.4
Replacing Receiver Sight Glass Or Fusible Plug . . . . . . . . . . . . . . . . . . . . . . . . . . . . . . . . . . . . . . .
8−28
8.8.5
Compressor Suction Modulation Valve (CSMV) . . . . . . . . . . . . . . . . . . . . . . . . . . . . . . . . . . . . . . . .
8−28
8.8.6
Electronic Expansion Valve . . . . . . . . . . . . . . . . . . . . . . . . . . . . . . . . . . . . . . . . . . . . . . . . . . . . . . . . .
8−29
ix
62−11389
TABLE OF CONTENTS − Continued
PARAGRAPH NUMBER
8.8.7
8.8.8
Page
High Pressure Switch . . . . . . . . . . . . . . . . . . . . . . . . . . . . . . . . . . . . . . . . . . . . . . . . . . . . . . . . . . . . . .
Pressure Transducers . . . . . . . . . . . . . . . . . . . . . . . . . . . . . . . . . . . . . . . . . . . . . . . . . . . . . . . . . . . . .
8−31
8−31
8.8.9 Defrost Air Switch . . . . . . . . . . . . . . . . . . . . . . . . . . . . . . . . . . . . . . . . . . . . . . . . . . . . . . . . . . . . . . . . .
8.9 ELECTRICAL SYSTEM COMPONENT SERVICE . . . . . . . . . . . . . . . . . . . . . . . . . . . . . . . . . . . . . . . .
8−31
8−32
8.9.1
Megohmmeter Test Procedure . . . . . . . . . . . . . . . . . . . . . . . . . . . . . . . . . . . . . . . . . . . . . . . . . . . . . .
8−32
8.9.2
8.9.3
Phase Reversal Module (PRM) . . . . . . . . . . . . . . . . . . . . . . . . . . . . . . . . . . . . . . . . . . . . . . . . . . . . .
Light Bar . . . . . . . . . . . . . . . . . . . . . . . . . . . . . . . . . . . . . . . . . . . . . . . . . . . . . . . . . . . . . . . . . . . . . . . . .
8−33
8−34
Overload Ground Fault (OGF) . . . . . . . . . . . . . . . . . . . . . . . . . . . . . . . . . . . . . . . . . . . . . . . . . . . . . .
a. Operation . . . . . . . . . . . . . . . . . . . . . . . . . . . . . . . . . . . . . . . . . . . . . . . . . . . . . . . . . . . . . . . . . . . . . .
b. OGF Checkout Procedure . . . . . . . . . . . . . . . . . . . . . . . . . . . . . . . . . . . . . . . . . . . . . . . . . . . . . . . .
8.9.5 Evaporator Heaters . . . . . . . . . . . . . . . . . . . . . . . . . . . . . . . . . . . . . . . . . . . . . . . . . . . . . . . . . . . . . . . .
8−34
8−34
8−34
8−34
8.9.6
8.9.7
Evaporator Blower & Motor . . . . . . . . . . . . . . . . . . . . . . . . . . . . . . . . . . . . . . . . . . . . . . . . . . . . . . . . .
Condenser Fan Assemblies . . . . . . . . . . . . . . . . . . . . . . . . . . . . . . . . . . . . . . . . . . . . . . . . . . . . . . . .
8−35
8−36
Battery Charger (BTYC) . . . . . . . . . . . . . . . . . . . . . . . . . . . . . . . . . . . . . . . . . . . . . . . . . . . . . . . . . . . .
Generator (GEN) . . . . . . . . . . . . . . . . . . . . . . . . . . . . . . . . . . . . . . . . . . . . . . . . . . . . . . . . . . . . . . . . . .
a. Preventive Maintenance and Operating Precautions . . . . . . . . . . . . . . . . . . . . . . . . . . . . . . . . .
b. Generator Removal . . . . . . . . . . . . . . . . . . . . . . . . . . . . . . . . . . . . . . . . . . . . . . . . . . . . . . . . . . . . .
c. Generator Assembly Procedure . . . . . . . . . . . . . . . . . . . . . . . . . . . . . . . . . . . . . . . . . . . . . . . . . . .
8.9.10 Sensor Checkout . . . . . . . . . . . . . . . . . . . . . . . . . . . . . . . . . . . . . . . . . . . . . . . . . . . . . . . . . . . . . . . . . .
8−37
8−37
8−37
8−38
8−40
8−41
UNIT TROUBLESHOOTING . . . . . . . . . . . . . . . . . . . . . . . . . . . . . . . . . . . . . . . . . . . . . . . . . . . . . . . . . . . . . . . . . . .
9.1 ENGINE . . . . . . . . . . . . . . . . . . . . . . . . . . . . . . . . . . . . . . . . . . . . . . . . . . . . . . . . . . . . . . . . . . . . . . . . . . . . .
9−1
9−1
8.9.4
8.9.8
8.9.9
9.1.1
9.1.2
Engine Will Not Start . . . . . . . . . . . . . . . . . . . . . . . . . . . . . . . . . . . . . . . . . . . . . . . . . . . . . . . . . . . . . .
Engine Starts Then Stops . . . . . . . . . . . . . . . . . . . . . . . . . . . . . . . . . . . . . . . . . . . . . . . . . . . . . . . . . .
9−1
9−2
9.1.3
9.1.4
Engine Will Not Shut Off . . . . . . . . . . . . . . . . . . . . . . . . . . . . . . . . . . . . . . . . . . . . . . . . . . . . . . . . . . .
Starter Motor Malfunction . . . . . . . . . . . . . . . . . . . . . . . . . . . . . . . . . . . . . . . . . . . . . . . . . . . . . . . . . .
9−2
9−2
9.1.5
9.1.6
Malfunction In The Engine Starting Circuit . . . . . . . . . . . . . . . . . . . . . . . . . . . . . . . . . . . . . . . . . . . .
Miscellaneous Engine Troubleshooting . . . . . . . . . . . . . . . . . . . . . . . . . . . . . . . . . . . . . . . . . . . . . . .
9−2
9−3
9.2
9.3
BATTERY CHARGER . . . . . . . . . . . . . . . . . . . . . . . . . . . . . . . . . . . . . . . . . . . . . . . . . . . . . . . . . . . . . . . . .
GENERATOR . . . . . . . . . . . . . . . . . . . . . . . . . . . . . . . . . . . . . . . . . . . . . . . . . . . . . . . . . . . . . . . . . . . . . . . .
9−3
9−4
9.4
REFRIGERATION / TEMPERATURE CONTROL . . . . . . . . . . . . . . . . . . . . . . . . . . . . . . . . . . . . . . . . .
9.4.1 Unit Will Not Cool . . . . . . . . . . . . . . . . . . . . . . . . . . . . . . . . . . . . . . . . . . . . . . . . . . . . . . . . . . . . . . . . .
9−4
9−4
9.4.3
9.4.4
Unit Operates Long Or Continuously In Cooling . . . . . . . . . . . . . . . . . . . . . . . . . . . . . . . . . . . . . . .
Unit Will Not Terminate Cooling . . . . . . . . . . . . . . . . . . . . . . . . . . . . . . . . . . . . . . . . . . . . . . . . . . . . .
9−4
9−5
9.4.6
9.4.7
Unit Will Not Terminate Heating . . . . . . . . . . . . . . . . . . . . . . . . . . . . . . . . . . . . . . . . . . . . . . . . . . . . .
Defrost Cycle Malfunction . . . . . . . . . . . . . . . . . . . . . . . . . . . . . . . . . . . . . . . . . . . . . . . . . . . . . . . . . .
9−5
9−5
9.4.8
9.4.9
Abnormal Pressure . . . . . . . . . . . . . . . . . . . . . . . . . . . . . . . . . . . . . . . . . . . . . . . . . . . . . . . . . . . . . . . .
Abnormal Noise . . . . . . . . . . . . . . . . . . . . . . . . . . . . . . . . . . . . . . . . . . . . . . . . . . . . . . . . . . . . . . . . . . .
9−6
9−6
9.4.10 No Evaporator Air Flow Or Restricted Air Flow . . . . . . . . . . . . . . . . . . . . . . . . . . . . . . . . . . . . . . . .
9.4.11 Evaporator Expansion Valve (EVXV) Malfunction . . . . . . . . . . . . . . . . . . . . . . . . . . . . . . . . . . . . . .
9−6
9−7
9.4.12 Compressor Suction Modulation Valve (CSMV) Malfunction . . . . . . . . . . . . . . . . . . . . . . . . . . . . .
9.5 Speed Control System Diagnostics . . . . . . . . . . . . . . . . . . . . . . . . . . . . . . . . . . . . . . . . . . . . . . . . . . . . . .
9−7
9−8
9.6
Microprocessor Diagnostics . . . . . . . . . . . . . . . . . . . . . . . . . . . . . . . . . . . . . . . . . . . . . . . . . . . . . . . . . . . .
62−11389
x
9−13
TABLE OF CONTENTS − Continued
PARAGRAPH NUMBER
Page
WIRING . . . . . . . . . . . . . . . . . . . . . . . . . . . . . . . . . . . . . . . . . . . . . . . . . . . . . . . . . . . . . . . . . . . . . . . . . . . . . . . . . . . . . .
10.1 HARNESS PLUG WIRING FOR UNITS WITH A MAIN POWER SWITCH LABELED
ENGINE/OFF/STANDBY . . . . . . . . . . . . . . . . . . . . . . . . . . . . . . . . . . . . . . . . . . . . . . . . . . . . . . . . . . . . . .
10.2 HARNESS PLUG WIRING FOR UNITS WITH A MAIN POWER SWITCH LABELED
START/RUN-OFF . . . . . . . . . . . . . . . . . . . . . . . . . . . . . . . . . . . . . . . . . . . . . . . . . . . . . . . . . . . . . . . . . . . .
10−1
10−1
10−6
10.3 CONTROL BOX INTERIOR SPLICE POINTS FOR UNITS WITH A MAIN POWER SWITCH
LABELED ENGINE/OFF/STANDBY . . . . . . . . . . . . . . . . . . . . . . . . . . . . . . . . . . . . . . . . . . . . . . . . . . . . . 10−11
10.4 CONTROL BOX INTERIOR SPLICE POINTS FOR UNITS WITH A MAIN POWER SWITCH
LABELED START/RUN-OFF . . . . . . . . . . . . . . . . . . . . . . . . . . . . . . . . . . . . . . . . . . . . . . . . . . . . . . . . . . . 10−12
10.5 DISPLAY TEST POINTS . . . . . . . . . . . . . . . . . . . . . . . . . . . . . . . . . . . . . . . . . . . . . . . . . . . . . . . . . . . . . . 10−13
10.6 WIRING SCHEMATICS . . . . . . . . . . . . . . . . . . . . . . . . . . . . . . . . . . . . . . . . . . . . . . . . . . . . . . . . . . . . . . . 10−13
xi
62−11389
LIST OF ILLUSTRATIONS
FIGURE NUMBER
Page
Figure 1−1 Lockout/Tagout . . . . . . . . . . . . . . . . . . . . . . . . . . . . . . . . . . . . . . . . . . . . . . . . . . . . . . . . . . . . . . . . . . . .
1−1
Figure 2−1 Front View - Refrigeration System Components . . . . . . . . . . . . . . . . . . . . . . . . . . . . . . . . . . . . . . . .
2−2
Figure 2−2 Road Side/Rear Compressor View - Refrigeration System Components . . . . . . . . . . . . . . . . . . .
2−3
Figure 2−3 Front View - Engine Components . . . . . . . . . . . . . . . . . . . . . . . . . . . . . . . . . . . . . . . . . . . . . . . . . . . . .
2−4
Figure 2−4 Evaporator Section - Grille Removed . . . . . . . . . . . . . . . . . . . . . . . . . . . . . . . . . . . . . . . . . . . . . . . . . .
2−5
Figure 2−5 Control Box . . . . . . . . . . . . . . . . . . . . . . . . . . . . . . . . . . . . . . . . . . . . . . . . . . . . . . . . . . . . . . . . . . . . . . . .
2−6
Figure 2−6 Engine Speed Control Unit . . . . . . . . . . . . . . . . . . . . . . . . . . . . . . . . . . . . . . . . . . . . . . . . . . . . . . . . . .
2−7
Figure 2−7 Compressor Cylinder Head Unloaded . . . . . . . . . . . . . . . . . . . . . . . . . . . . . . . . . . . . . . . . . . . . . . . . .
2−8
Figure 2−8 Compressor Cylinder Head Loaded . . . . . . . . . . . . . . . . . . . . . . . . . . . . . . . . . . . . . . . . . . . . . . . . . . .
2−9
Figure 2−9 Control Module . . . . . . . . . . . . . . . . . . . . . . . . . . . . . . . . . . . . . . . . . . . . . . . . . . . . . . . . . . . . . . . . . . . . .
2−12
Figure 2−10 Display And Keypad Assembly . . . . . . . . . . . . . . . . . . . . . . . . . . . . . . . . . . . . . . . . . . . . . . . . . . . . . .
2−13
Figure 2−11 OGF Module . . . . . . . . . . . . . . . . . . . . . . . . . . . . . . . . . . . . . . . . . . . . . . . . . . . . . . . . . . . . . . . . . . . . . .
2−15
Figure 2−12 PRM Module . . . . . . . . . . . . . . . . . . . . . . . . . . . . . . . . . . . . . . . . . . . . . . . . . . . . . . . . . . . . . . . . . . . . .
2−15
Figure 2−13 Light Bar . . . . . . . . . . . . . . . . . . . . . . . . . . . . . . . . . . . . . . . . . . . . . . . . . . . . . . . . . . . . . . . . . . . . . . . . .
2−15
Figure 2−14 Refrigerant Circuit . . . . . . . . . . . . . . . . . . . . . . . . . . . . . . . . . . . . . . . . . . . . . . . . . . . . . . . . . . . . . . . . .
2−21
Figure 4−1 Auto Start Sequence . . . . . . . . . . . . . . . . . . . . . . . . . . . . . . . . . . . . . . . . . . . . . . . . . . . . . . . . . . . . . . . .
4−1
Figure 4−2 Continuous Operation Switch Points with Eco Mode set to NO . . . . . . . . . . . . . . . . . . . . . . . . . . .
4−6
Figure 4−3 Continuous Operation Switch Points with Eco Mode set to YES . . . . . . . . . . . . . . . . . . . . . . . . . .
4−7
Figure 4−4 Range Lock Settings - Non Overlapping . . . . . . . . . . . . . . . . . . . . . . . . . . . . . . . . . . . . . . . . . . . . . . .
4−10
Figure 4−5 Range Lock Settings - Overlapping . . . . . . . . . . . . . . . . . . . . . . . . . . . . . . . . . . . . . . . . . . . . . . . . . . .
4−11
Figure 4−6 Evaporator Pressure Chart . . . . . . . . . . . . . . . . . . . . . . . . . . . . . . . . . . . . . . . . . . . . . . . . . . . . . . . . . .
4−15
Figure 5−1 Technicians Interface Connection . . . . . . . . . . . . . . . . . . . . . . . . . . . . . . . . . . . . . . . . . . . . . . . . . . . . .
5−1
Figure 5−2 PC Mode Connection . . . . . . . . . . . . . . . . . . . . . . . . . . . . . . . . . . . . . . . . . . . . . . . . . . . . . . . . . . . . . . .
5−4
Figure 5−3 PC Card Interaction . . . . . . . . . . . . . . . . . . . . . . . . . . . . . . . . . . . . . . . . . . . . . . . . . . . . . . . . . . . . . . . .
5−5
Figure 5−4 ReeferManager & Reports Connection . . . . . . . . . . . . . . . . . . . . . . . . . . . . . . . . . . . . . . . . . . . . . . . .
5−7
Figure 5−5 Connector 6MP Connections . . . . . . . . . . . . . . . . . . . . . . . . . . . . . . . . . . . . . . . . . . . . . . . . . . . . . . . . .
5−8
Figure 5−6 Display Test Points . . . . . . . . . . . . . . . . . . . . . . . . . . . . . . . . . . . . . . . . . . . . . . . . . . . . . . . . . . . . . . . . .
5−8
Figure 8−1 Grille Insert Removal And Door Latch Maintenance . . . . . . . . . . . . . . . . . . . . . . . . . . . . . . . . . . . . .
8−5
Figure 8−2 Surround Removal . . . . . . . . . . . . . . . . . . . . . . . . . . . . . . . . . . . . . . . . . . . . . . . . . . . . . . . . . . . . . . . . .
8−6
Figure 8−3 Door Latch Cable Removal . . . . . . . . . . . . . . . . . . . . . . . . . . . . . . . . . . . . . . . . . . . . . . . . . . . . . . . . . .
8−6
Figure 8−4 Display and Keypad Assembly . . . . . . . . . . . . . . . . . . . . . . . . . . . . . . . . . . . . . . . . . . . . . . . . . . . . . . .
8−7
Figure 8−5 Fuel System Diagram . . . . . . . . . . . . . . . . . . . . . . . . . . . . . . . . . . . . . . . . . . . . . . . . . . . . . . . . . . . . . . .
8−8
Figure 8−6 Fuel Bleed Components . . . . . . . . . . . . . . . . . . . . . . . . . . . . . . . . . . . . . . . . . . . . . . . . . . . . . . . . . . . . .
8−8
Figure 8−7 Mechanical Fuel Pump . . . . . . . . . . . . . . . . . . . . . . . . . . . . . . . . . . . . . . . . . . . . . . . . . . . . . . . . . . . . . .
8−9
Figure 8−8 Electric Fuel Pump . . . . . . . . . . . . . . . . . . . . . . . . . . . . . . . . . . . . . . . . . . . . . . . . . . . . . . . . . . . . . . . . .
8−9
Figure 8−9 Fuel Level Sensor . . . . . . . . . . . . . . . . . . . . . . . . . . . . . . . . . . . . . . . . . . . . . . . . . . . . . . . . . . . . . . . . . .
8−10
Figure 8−10 Engine Oil Level . . . . . . . . . . . . . . . . . . . . . . . . . . . . . . . . . . . . . . . . . . . . . . . . . . . . . . . . . . . . . . . . . .
8−11
Figure 8−11 Engine Oil Flow Diagram . . . . . . . . . . . . . . . . . . . . . . . . . . . . . . . . . . . . . . . . . . . . . . . . . . . . . . . . . . .
8−11
Figure 8−12 Oil Drain Tool . . . . . . . . . . . . . . . . . . . . . . . . . . . . . . . . . . . . . . . . . . . . . . . . . . . . . . . . . . . . . . . . . . . . .
8−11
Figure 8−13 Intake Air Heater . . . . . . . . . . . . . . . . . . . . . . . . . . . . . . . . . . . . . . . . . . . . . . . . . . . . . . . . . . . . . . . . . .
8−12
Figure 8−14 Electronic Speed Control Components . . . . . . . . . . . . . . . . . . . . . . . . . . . . . . . . . . . . . . . . . . . . . . .
8−12
Figure 8−15 Condenser And Radiator Assemblies . . . . . . . . . . . . . . . . . . . . . . . . . . . . . . . . . . . . . . . . . . . . . . . .
8−13
Figure 8−16 Water Pump V-Belt . . . . . . . . . . . . . . . . . . . . . . . . . . . . . . . . . . . . . . . . . . . . . . . . . . . . . . . . . . . . . . . .
8−14
62−11389
xii
LIST OF ILLUSTRATIONS − Continued
FIGURE NUMBER
Page
Figure 8−17 Engine Crankcase Breather . . . . . . . . . . . . . . . . . . . . . . . . . . . . . . . . . . . . . . . . . . . . . . . . . . . . . . . .
Figure 8−18 Refrigerant System Service Equipment . . . . . . . . . . . . . . . . . . . . . . . . . . . . . . . . . . . . . . . . . . . . . . .
8−14
8−15
Figure 8−19 Compressor - model 06D . . . . . . . . . . . . . . . . . . . . . . . . . . . . . . . . . . . . . . . . . . . . . . . . . . . . . . . . . . .
Figure 8−20 Cylinder Head & Valve Plate . . . . . . . . . . . . . . . . . . . . . . . . . . . . . . . . . . . . . . . . . . . . . . . . . . . . . . . .
8−21
8−22
Figure 8−21 Checking Suction Valve . . . . . . . . . . . . . . . . . . . . . . . . . . . . . . . . . . . . . . . . . . . . . . . . . . . . . . . . . . . .
8−23
Figure 8−22 Oil Pump and Bearing Head Assembly . . . . . . . . . . . . . . . . . . . . . . . . . . . . . . . . . . . . . . . . . . . . . . .
Figure 8−23 Oil Pump . . . . . . . . . . . . . . . . . . . . . . . . . . . . . . . . . . . . . . . . . . . . . . . . . . . . . . . . . . . . . . . . . . . . . . . . .
8−23
8−24
Figure 8−24 Unloader Coil . . . . . . . . . . . . . . . . . . . . . . . . . . . . . . . . . . . . . . . . . . . . . . . . . . . . . . . . . . . . . . . . . . . . .
Figure 8−25 Condenser/Radiator Assembly . . . . . . . . . . . . . . . . . . . . . . . . . . . . . . . . . . . . . . . . . . . . . . . . . . . . . .
8−25
8−27
Figure 8−26 Suction modulation valve (CSMV) . . . . . . . . . . . . . . . . . . . . . . . . . . . . . . . . . . . . . . . . . . . . . . . . . . .
Figure 8−27 CSMV Coil . . . . . . . . . . . . . . . . . . . . . . . . . . . . . . . . . . . . . . . . . . . . . . . . . . . . . . . . . . . . . . . . . . . . . . .
8−28
8−29
Figure 8−28 Electronic expansion valve . . . . . . . . . . . . . . . . . . . . . . . . . . . . . . . . . . . . . . . . . . . . . . . . . . . . . . . . .
Figure 8−29 Electronic Expansion Valve . . . . . . . . . . . . . . . . . . . . . . . . . . . . . . . . . . . . . . . . . . . . . . . . . . . . . . . . .
8−30
8−30
Figure 8−30 Typical Setup for Testing High Pressure Switch . . . . . . . . . . . . . . . . . . . . . . . . . . . . . . . . . . . . . . . .
Figure 8−31 Defrost Air Switch Test Setup . . . . . . . . . . . . . . . . . . . . . . . . . . . . . . . . . . . . . . . . . . . . . . . . . . . . . . .
8−31
8−32
Figure 8−32 Megohmmeter Connection to Ground Plate . . . . . . . . . . . . . . . . . . . . . . . . . . . . . . . . . . . . . . . . . . .
Figure 8−33 High Voltage Contactors . . . . . . . . . . . . . . . . . . . . . . . . . . . . . . . . . . . . . . . . . . . . . . . . . . . . . . . . . . .
8−33
8−33
Figure 8−34 Light Bar Connections . . . . . . . . . . . . . . . . . . . . . . . . . . . . . . . . . . . . . . . . . . . . . . . . . . . . . . . . . . . . .
Figure 8−35 Overload Ground Fault Connections . . . . . . . . . . . . . . . . . . . . . . . . . . . . . . . . . . . . . . . . . . . . . . . . .
8−34
8−34
Figure 8−36 Evaporator Blower Assembly . . . . . . . . . . . . . . . . . . . . . . . . . . . . . . . . . . . . . . . . . . . . . . . . . . . . . . .
Figure 8−37 Condenser Fan Assembly . . . . . . . . . . . . . . . . . . . . . . . . . . . . . . . . . . . . . . . . . . . . . . . . . . . . . . . . . .
8−35
8−36
Figure 8−38 Generator Assembly . . . . . . . . . . . . . . . . . . . . . . . . . . . . . . . . . . . . . . . . . . . . . . . . . . . . . . . . . . . . . . .
Figure 8−39 Bolt Hole Pattern For Bell Housing and Crankshaft . . . . . . . . . . . . . . . . . . . . . . . . . . . . . . . . . . . . .
8−40
8−40
Figure 9−1 ENSCU Diagnostic Tree - 1 Long, 1 Short LED Code . . . . . . . . . . . . . . . . . . . . . . . . . . . . . . . . . . .
Figure 9−2 ENSCU Diagnostic Tree - 2 Long, 1 Short LED Code . . . . . . . . . . . . . . . . . . . . . . . . . . . . . . . . . . .
9−9
9−10
Figure 9−3 ENSCU Diagnostic Tree - 2 Long, 3 Short LED Code . . . . . . . . . . . . . . . . . . . . . . . . . . . . . . . . . . .
Figure 9−4 ENSCU Diagnostic Tree - 2 Long, 7 Short LED Code . . . . . . . . . . . . . . . . . . . . . . . . . . . . . . . . . . .
9−11
9−12
Figure 9−5 Micro Diagnostic Tree - Condition 1 - Main Power Switch On - Unit Does Not Operate . . . . . . .
Figure 9−6 Micro Diagnostic Tree - Condition 2 - Main Power Switch On - Unit Operates But Not Properly
9−14
9−15
Figure 9−7 Micro Diagnostic Tree - Condition 3 - Main Power Switch Off - Unit Fails To Stop . . . . . . . . . . . .
Figure 9−8 Micro Diagnostic Tree - Condition 4 - Unit Will Not Run In High Speed . . . . . . . . . . . . . . . . . . . . .
9−16
9−17
Figure 9−9 Micro Diagnostic Tree - Condition 5 - Unit Will Not Run In Low Speed . . . . . . . . . . . . . . . . . . . . .
Figure 9−10 Micro Diagnostic Tree - Condition 6 - DataLink Data Recorder Data Download
Problems When Using ReeferManager and a Download Cable. Data File Analysis
Problems Using Reports . . . . . . . . . . . . . . . . . . . . . . . . . . . . . . . . . . . . . . . . . . . . . . . . . . . . . . . . . .
9−18
Figure 9−11 Microprocessor Diagnostic Tree - Condition 7 - PC Card Problems . . . . . . . . . . . . . . . . . . . . . . .
Figure 9−12 Micro Diagnostic Tree - Condition 8 - Programming Problems With PC Cards . . . . . . . . . . . . .
9−20
9−21
xiii
9−19
62−11389
LIST OF TABLES
TABLE NUMBER
Page
Table 2-1 Model Chart . . . . . . . . . . . . . . . . . . . . . . . . . . . . . . . . . . . . . . . . . . . . . . . . . . . . . . . . . . . . . . . . . . . . . . . . .
Table 2-2 Additional Support Manuals . . . . . . . . . . . . . . . . . . . . . . . . . . . . . . . . . . . . . . . . . . . . . . . . . . . . . . . . . . . .
2−1
2−1
Table 3-1 Unit Data . . . . . . . . . . . . . . . . . . . . . . . . . . . . . . . . . . . . . . . . . . . . . . . . . . . . . . . . . . . . . . . . . . . . . . . . . . . .
Table 3-2 Functional Parameters . . . . . . . . . . . . . . . . . . . . . . . . . . . . . . . . . . . . . . . . . . . . . . . . . . . . . . . . . . . . . . . .
3−17
3−22
Table 4−1 Intake Air Heat Time . . . . . . . . . . . . . . . . . . . . . . . . . . . . . . . . . . . . . . . . . . . . . . . . . . . . . . . . . . . . . . . . . .
4−2
Table 5−1 Component Test . . . . . . . . . . . . . . . . . . . . . . . . . . . . . . . . . . . . . . . . . . . . . . . . . . . . . . . . . . . . . . . . . . . . .
Table 5−2 Microprocessor Configurations . . . . . . . . . . . . . . . . . . . . . . . . . . . . . . . . . . . . . . . . . . . . . . . . . . . . . . . . .
5−3
5−12
Table 8−1 Maintenance Schedule . . . . . . . . . . . . . . . . . . . . . . . . . . . . . . . . . . . . . . . . . . . . . . . . . . . . . . . . . . . . . . . .
Table 8−2 Pre Trip Inspection . . . . . . . . . . . . . . . . . . . . . . . . . . . . . . . . . . . . . . . . . . . . . . . . . . . . . . . . . . . . . . . . . . .
8−2
8−4
Table 8−3 CSMV Connections . . . . . . . . . . . . . . . . . . . . . . . . . . . . . . . . . . . . . . . . . . . . . . . . . . . . . . . . . . . . . . . . . . .
Table 8−4 EVXV Connections . . . . . . . . . . . . . . . . . . . . . . . . . . . . . . . . . . . . . . . . . . . . . . . . . . . . . . . . . . . . . . . . . . .
8−28
8−30
Table 8−5 Sensor Resistance . . . . . . . . . . . . . . . . . . . . . . . . . . . . . . . . . . . . . . . . . . . . . . . . . . . . . . . . . . . . . . . . . . .
Table 8−6 Sensor Resistance (CDT) . . . . . . . . . . . . . . . . . . . . . . . . . . . . . . . . . . . . . . . . . . . . . . . . . . . . . . . . . . . . .
8−42
8−43
Table 8−7 Temperature Pressure Chart . . . . . . . . . . . . . . . . . . . . . . . . . . . . . . . . . . . . . . . . . . . . . . . . . . . . . . . . . . .
Table 9−1 ENSCU LED Fault Chart . . . . . . . . . . . . . . . . . . . . . . . . . . . . . . . . . . . . . . . . . . . . . . . . . . . . . . . . . . . . . .
8−44
9−8
Table 9−2 Microprocessor Diagnostics . . . . . . . . . . . . . . . . . . . . . . . . . . . . . . . . . . . . . . . . . . . . . . . . . . . . . . . . . . .
9−13
62−11389
xiv
SECTION 1 − SAFETY PRECAUTIONS
1
1.2
1.3
SPECIFIC WARNING AND CAUTION STATEMENTS . . . . . . . . . . . . . . . . . . . . . . . . . . . . . . . . . 1−2
SAFETY DECALS . . . . . . . . . . . . . . . . . . . . . . . . . . . . . . . . . . . . . . . . . . . . . . . . . . . . . . . . . . . . . . . . 1−6
62−11389
1
PARAGRAPH NUMBER
Page
1.1 SAFETY PRECAUTIONS . . . . . . . . . . . . . . . . . . . . . . . . . . . . . . . . . . . . . . . . . . . . . . . . . . . . . . . . . 1−1
SECTION 1
SAFETY PRECAUTIONS
Refrigerants
1.1 SAFETY PRECAUTIONS
Your Carrier Transicold refrigeration unit has been
designed with the safety of the operator in mind. During
normal operation, all moving parts are fully enclosed to
help prevent injury. During all pre-trip inspections, daily
inspections, and problem troubleshooting, you may be
exposed to moving parts. Please stay clear of all moving
parts when the unit is in operation and when the Main
Power Switch is not in the OFF position.
The refrigerant contained in the refrigeration system of
this unit can cause frostbite, severe burns, or blindness
when in direct contact with the skin or eyes. For this
reason (and because of legislation regarding the
handling of refrigerants) we recommend that you
contact your nearest Carrier Transicold authorized
repair facility whenever service of the refrigerant system
is required.
CAUTION
Battery
Under no circumstances should a technician electrically probe the microprocessor
at any point, other than the connector terminals where the harness attaches. Microprocessor components operate at different
voltage levels and at extremely low current
levels. Improper use of voltmeters, jumper
wires, continuity testers, etc. could permanently damage the microprocessor.
This unit is equipped with a lead-acid type battery. The
battery normally vents small amounts of flammable
hydrogen gas. Do not smoke when checking the battery.
A battery explosion can cause serious physical harm
and/or blindness.
Standby Power
Be aware of HIGH VOLTAGE supplied at the power
plug. Even with the unit off, power is present from the
plug to the inside of the control box. Whenever practical,
disconnect the high voltage source when performing
service or maintenance procedures and lockout/tagout
the receptacle in accordance with your companies
procedures. The recommended lockout device (Carrier
part number 07−60129−00) is shown in Figure 1−1.
CAUTION
Most electronic components are susceptible to damage caused by electrical static
discharge (ESD). In certain cases, the human body can have enough static electricity to cause resultant damage to the components by touch. This is especially true of the
integrated circuits found on the microprocessor.
Automatic Start-Stop
Your refrigeration unit is equipped with auto-start in both
Start-Stop and Continuous Operation. The unit may
start at any time the Main Power Switch is not in the OFF
position. A buzzer will sound for 5 seconds before the
unit is started. When performing any check of the
refrigeration unit (e.g., checking the belt, checking the
oil), make certain that the Main Power Switch is in the
OFF position.
Engine Coolant
The engine is equipped with a pressurized cooling
system including a pressurized coolant bottle. Under
normal operating conditions, the coolant in the engine
and radiator is under high pressure and is very hot.
Contact with hot coolant can cause severe burns. Do
not remove the cap from a hot radiator or bottle. If the
cap must be removed, cover it with a rag and remove
very slowly in order to release the pressure without
spray.
Figure 1−1 Lockout/Tagout
1−1
62-11389
1.2 SPECIFIC WARNING AND CAUTION
STATEMENTS
WARNING
Ensure the power plug is clean and dry
before connecting to any electrical outlet /
receptacle.
To help identify the label hazards on the unit and explain
the level of awareness each one carries, an explanation
is given with the appropriate consequences:
DANGER - warns against an immediate hazard which
WILL result in severe personal injury or death.
WARNING
Do not connect power plug to any electrical outlet without checking that it meets
the 460/3/ 60 and 30 Amp electrical
requirements of the unit.
WARNING - warns against hazards or unsafe conditions which COULD result in severe personal injury or
death.
CAUTION - warns against potential hazard or unsafe
practice which could result in minor personal injury, or
product or property damage.
WARNING
Always place the Main Power switch in
the OFF position and turn off the high
voltage power supply before disconnecting the high voltage power plug from the
unit.
The following statements are specifically applicable to
this refrigeration unit and appear elsewhere in this
manual. These recommended precautions must be understood and applied during operation and maintenance
of the equipment covered herein.
WARNING
WARNING
If the unit is in Standby Operation and
powered, voltage will be applied to high
voltage components (i.e. the fan motor contactor) and those components will operate
(i.e. the fan blades will turn) when those
components are energized using Component Test Mode.
Advance microprocessor equipped units
may start automatically at any time the Main
Power switch is not in the OFF position.
Also, the unit may be fitted with two way
communication equipment that will allow
starting of the unit from a remote location
even though the switch is in the OFF position.
WARNING
Do not toggle the Main Power switch out of
the OFF position when in PC Mode or the
unit will start.
WARNING
WARNING
Be aware of HIGH VOLTAGE supplied at the
power plug or from the generator. When
performing service or maintenance procedures: ensure any two way communication is
disabled in accordance with the manufacturer’s instruction, ensure the Main Power
Switch is in the OFF position and, whenever
practical, disconnect the high voltage
source, lockout/tagout the receptacle and
disconnect the negative battery connection. NEVER dis-assemble the generator:
HIGH MAGNETIC FIELD INSIDE! This field
can interfere with cardiac implants such as
pacemakers and defibrillators.
Do not remove the cap from a hot radiator or
bottle; if the cap must be removed, do so
very slowly in order to release the pressure
without spray.
WARNING
Caution and good electrical practices must
be used when working around and with
high voltage circuits.
WARNING
WARNING
Disconnect batteries before doing any electrical welding on unit or chassis to which
unit is attached (trailer, container, rail car,
metal building, etc).
Under no circumstances should ether or
any other starting aids be used to start
engine.
62-11389
1−2
WARNING
WARNING
Do not direct water or steam into the generator openings. Do not allow any soap and
water solutions to enter the generator.
Use the required protective eye wear and
clothing when working with solvents.
WARNING
WARNING
Beware of moving poly V-belt and belt driven components.
Generators of this type should not be
“flashed.” Operation with external voltage
source or momentary shorting of leads will
damage the generator and may cause injury.
WARNING
When working with belts, beware of pinch
points.
CAUTION
Under no circumstances should anyone attempt to repair the keypad, display or internal control module components. Should
a problem develop with these components,
contact your nearest Carrier Transicold
dealer for replacement.
WARNING
Do not use a nitrogen cylinder without a
pressure regulator. Cylinder pressure is
approximately 2350 psig (159.9 bar). Do not
use oxygen in or near a refrigerant system
as an explosion may occur. (See
Figure 8−30)
CAUTION
Use only ethylene glycol anti-freeze (with
inhibitors) in system as glycol by itself will
damage the cooling system. Always add
pre-mixed 50/50 anti-freeze and water to radiator / engine. Never exceed more than a
60% concentration of anti-freeze. Use a low
silicate anti-freeze meeting GM specifications GM 6038M for standard life coolant or
use Texaco Havoline extended life coolant
or any other extended life coolant which is
Dexcool approved and has 5/150 (5 years /
150,000 miles) on the label.
WARNING
Do not unscrew replacement compressor
lifting eyelet/blankoff plate mounting
capscrews all the way before breaking seal.
Entrapped pressure could result in injury.
WARNING
Do not unscrew cylinder head mounting
capscrews all the way before breaking seal.
Entrapped pressure could result in injury.
CAUTION
Service Mode MUST be used whenever removing refrigerant charge, refrigerant leak
checking or evacuating.
WARNING
Do not unscrew unloader enclosing tube
nut all the way before breaking seal.
Entrapped pressure could result in injury.
CAUTION
The display and MessageCenter may behave differently during the software loading
process, depending on the version of software currently in the microprocessor. DO
NOT INTERRUPT THE SOFTWARE INSTALLATION PROCESS ONCE IT HAS STARTED.
Also, do not place the Main Power switch in
the OFF position during the initial power up
following a software upgrade.
WARNING
Do not unscrew unloader valve body
mounting bolts all the way before breaking
seal. Entrapped pressure could result in
injury.
1−3
62-11389
CAUTION
CAUTION
Do not over torque display & keypad pan
head screws. Torque all screws to 60 inlbs
(6.8 Nm).
Most electronic components are susceptible to damage caused by electrical static
discharge (ESD). In certain cases, the human body can have enough static electricity to cause resultant damage to the components by touch. This is especially true of the
integrated circuits found in the Advance microprocessor.
CAUTION
Running the engine for an extended period
of time with the manual plunger up can
cause a priming pump failure
CAUTION
CAUTION
Torque fuel level sensor mounting screws
to 15 to 18 inch/pounds. DO NOT over tighten, as little as 20 inch/pounds will damage
the sensor.
Under no circumstances should a technician electrically probe the microprocessor
at any point, other than the connector terminals where the harness attaches. Microprocessor components operate at different
voltage levels and at extremely low current
levels. Improper use of voltmeters, jumper
wires, continuity testers, etc. could permanently damage the microprocessor.
CAUTION
When changing oil filters, the new filters
should be primed (partially filled) with clean
oil if possible. If the filters are not primed,
the engine may operate for a period with no
oil supplied to the bearings.
CAUTION
CAUTION
When setting the microprocessor time,
ensure that the clock you are using is accurate. Also, some customers are located in
different time zones from the repair location. If you know the owners desired location time, enter that time. If you don’t, enter
the current time at your location.
NEVER POUR COLD WATER INTO A HOT
ENGINE, however hot water can always be
added to a cold engine.
CAUTION
Only a refrigerant cylinder that has previously been used with R404A should be connected to this refrigeration unit.
CAUTION
CAUTION
DO NOT leave the circuit energized for the
full 5 minutes if full amperage is shown, as
the intake air heater element life will be
greatly shortened.
Only a refrigerant cylinder containing
R404A should be connected to this refrigeration unit in order to pressurize the system.
However, dry nitrogen may be used to increase pressure. Any other gas or vapor will
contaminate the system and require additional removal and evacuation.
CAUTION
Unit uses R404A and POE oil. The use of inert gas brazing procedures is mandatory for
all Carrier Transicold refrigeration units;
otherwise compressor failure will occur.
For more information Refer to Technical
Procedure 98-50553-00 Inert Gas Brazing
62-11389
CAUTION
Do not vapor charge R404A. Only liquid
charging through the liquid line service
valve is acceptable.
1−4
CAUTION
CAUTION
Ensure that thrust washer does not fall off
dowel pins while installing oil pump.
Do not bend the copper tubing on the condenser coil when installing the new condenser. Bend the unit tubing if tubes do not
align correctly.
CAUTION
CAUTION
An overcharge of oil will reduce system capacity and possibly cause internal compressor damage.
Before connecting a megohmmeter, place
the Main Power switch in the OFF position.
Disconnect the high voltage source, lockout/tagout the receptacle and disconnect
the negative battery connection. Isolate the
microprocessor by disconnecting all connectors and wires going to it. Observe National Electric Manufacturer’s Association
(NEMA) rules and test equipment manufacturers instructions.
CAUTION
Use only Carrier Transicold approved Polyol Ester Oil (POE). Buy quantities of one gallon or less. When using this hygroscopic
oil, immediately reseal. Do not leave container of oil open or contamination will occur.
CAUTION
CAUTION
A mica shim (Carrier Transicold part number 54-00630-25) must be installed before
removal of the generator. The generator is
to be removed as one piece, with the shim in
place. DO NOT attempt to remove the rotor
from the stator.
Extreme care must be taken to ensure the
hose is immersed in the oil at all times.
Otherwise air and moisture will be drawn
into the compressor.
1−5
62-11389
1.3 SAFETY DECALS
THE RECEIVER KING VALVE
(LIQUID LINE SERVICE VALVE)
AND DISCHARGE SERVICE
VALVES MUST BE OPENED
BEFORE STARTING ENGINE
62-03953-01
( NOTE: This tag is attached to the liquid line service valve and discharge service valve at assembly)
62-11389
1−6
CONTAINS HOT SURFACES THAT WILL IGNITE COMBUSTIBLES
AND FLAMMABLE MATERIALS SUCH AS BIRD NESTS, LEAVES,
TREE LIMBS OR MAINTENANCE MATERIALS SUCH AS SHOP
RAGS. DO NOT OPERATE WITHOUT INSPECTION. FIRES AND
SERIOUS INJURIES MAY RESULT.
SAFETY INSTRUCTIONS
INSPECT UNIT DAILY PRIOR TO OPERATION. REMOVE ANY
COMBUSTIBLE FOREIGN MATERIAL. ENSURE FACTORY
INSTALLED ENCLOSURES AND PROTECTIVE EQUIPMENT ARE
IN PLACE AND IN WORKING CONDITION
62-11282-00 REV - & 62-11283-00 REV B
62-03957-00 & -01 High Voltage
62-03958-00 Heat Warning
SEPARATION OF GENERATOR
ROTOR AND STATOR WILL
CREATE A STRONG MAGNETIC
FIELD THAT CAN INTERFERE
WITH CARDIAC IMPLANTS
SUCH AS PACEMAKERS
AND DEFIBRILLATORS
62-10358-00 REV A
NOTE:
The unit may be equipped with a
DIESEL/OFF/STANDBY switch (DOES)
or a START/RUN-OFF switch (SROS).
The unit may start if the applicable
switch is not in the OFF position.
1−7
62-11389
62-11389
1−8
THIS UNIT CHARGED WITH
R-404A
CAUTION !
COMPRESSOR MUST BE CHARGED WITH
P.O.E. OIL ONLY: CTD P/N: 07-00317-00
MOBIL ARCTIC P.N: EAL63
CTD P.N: 62-03797-11
1−9
62-11389
SECTION 2 −UNIT DESCRIPTION
1
PARAGRAPH NUMBER
Page
2.1 INTRODUCTION . . . . . . . . . . . . . . . . . . . . . . . . . . . . . . . . . . . . . . . . . . . . . . . . . . . . . . . . . . . . . . . . . 2−1
GENERAL DESCRIPTION . . . . . . . . . . . . . . . . . . . . . . . . . . . . . . . . . . . . . . . . . . . . . . . . . . . . . . . . . 2−1
CONDENSING SECTION . . . . . . . . . . . . . . . . . . . . . . . . . . . . . . . . . . . . . . . . . . . . . . . . . . . . . . . . . 2−7
2.3.1
2.3.2
Engine . . . . . . . . . . . . . . . . . . . . . . . . . . . . . . . . . . . . . . . . . . . . . . . . . . . . . . . . . . . . . . . . . . . . . .
Engine Air System . . . . . . . . . . . . . . . . . . . . . . . . . . . . . . . . . . . . . . . . . . . . . . . . . . . . . . . . . . . .
2−7
2−7
2.3.3
2.3.4
Engine Controls: . . . . . . . . . . . . . . . . . . . . . . . . . . . . . . . . . . . . . . . . . . . . . . . . . . . . . . . . . . . . .
Generator (GEN) . . . . . . . . . . . . . . . . . . . . . . . . . . . . . . . . . . . . . . . . . . . . . . . . . . . . . . . . . . . . .
2−7
2−7
2.3.5
2.3.6
Compressor . . . . . . . . . . . . . . . . . . . . . . . . . . . . . . . . . . . . . . . . . . . . . . . . . . . . . . . . . . . . . . . . .
Unloaders . . . . . . . . . . . . . . . . . . . . . . . . . . . . . . . . . . . . . . . . . . . . . . . . . . . . . . . . . . . . . . . . . . .
2−7
2−7
2.3.7
2.3.8
Compressor Switches, Transducers and Sensors . . . . . . . . . . . . . . . . . . . . . . . . . . . . . . . . .
Condenser Coil . . . . . . . . . . . . . . . . . . . . . . . . . . . . . . . . . . . . . . . . . . . . . . . . . . . . . . . . . . . . . . .
2−9
2−10
2.3.9 Ambient Air Temperature Sensor (AAT) . . . . . . . . . . . . . . . . . . . . . . . . . . . . . . . . . . . . . . . . . .
2.3.10 Filter-Drier . . . . . . . . . . . . . . . . . . . . . . . . . . . . . . . . . . . . . . . . . . . . . . . . . . . . . . . . . . . . . . . . . . .
2−10
2−10
2.3.11 Receiver . . . . . . . . . . . . . . . . . . . . . . . . . . . . . . . . . . . . . . . . . . . . . . . . . . . . . . . . . . . . . . . . . . . . 2−10
2.4 EVAPORATOR SECTION . . . . . . . . . . . . . . . . . . . . . . . . . . . . . . . . . . . . . . . . . . . . . . . . . . . . . . . . . 2−10
2.4.1
2.4.2
Evaporator Coil . . . . . . . . . . . . . . . . . . . . . . . . . . . . . . . . . . . . . . . . . . . . . . . . . . . . . . . . . . . . . .
Electronic Expansion Valve (EVXV) . . . . . . . . . . . . . . . . . . . . . . . . . . . . . . . . . . . . . . . . . . . . .
2−10
2−10
2.4.3
2.4.4
Heat Exchanger . . . . . . . . . . . . . . . . . . . . . . . . . . . . . . . . . . . . . . . . . . . . . . . . . . . . . . . . . . . . . .
Compressor Suction Modulation Valve (CSMV) . . . . . . . . . . . . . . . . . . . . . . . . . . . . . . . . . . .
2−10
2−10
2.4.5 Evaporator Switches, Transducers and Sensors . . . . . . . . . . . . . . . . . . . . . . . . . . . . . . . . . . 2−10
2.5 SYSTEM OPERATING CONTROLS AND COMPONENTS . . . . . . . . . . . . . . . . . . . . . . . . . . . . 2−11
2.5.1
2.5.2
Multiple Languages . . . . . . . . . . . . . . . . . . . . . . . . . . . . . . . . . . . . . . . . . . . . . . . . . . . . . . . . . . .
Automatic Start-Stop . . . . . . . . . . . . . . . . . . . . . . . . . . . . . . . . . . . . . . . . . . . . . . . . . . . . . . . . . .
2−11
2−11
2.5.3
2.5.4
Special Features . . . . . . . . . . . . . . . . . . . . . . . . . . . . . . . . . . . . . . . . . . . . . . . . . . . . . . . . . . . . .
Component Description And Location . . . . . . . . . . . . . . . . . . . . . . . . . . . . . . . . . . . . . . . . . . .
2−11
2−11
2.6 ELECTRONIC MODULES . . . . . . . . . . . . . . . . . . . . . . . . . . . . . . . . . . . . . . . . . . . . . . . . . . . . . . . . . 2−15
2.6.1 Overload Ground Fault Module (OGF) . . . . . . . . . . . . . . . . . . . . . . . . . . . . . . . . . . . . . . . . . . . 2−15
2.6.2 Phase Reversal Module (PRM) . . . . . . . . . . . . . . . . . . . . . . . . . . . . . . . . . . . . . . . . . . . . . . . . . 2−15
2.7 OPTIONS . . . . . . . . . . . . . . . . . . . . . . . . . . . . . . . . . . . . . . . . . . . . . . . . . . . . . . . . . . . . . . . . . . . . . . . 2−15
2.7.1
2.7.2
Light Bar . . . . . . . . . . . . . . . . . . . . . . . . . . . . . . . . . . . . . . . . . . . . . . . . . . . . . . . . . . . . . . . . . . . .
Remote Switch(es) . . . . . . . . . . . . . . . . . . . . . . . . . . . . . . . . . . . . . . . . . . . . . . . . . . . . . . . . . . .
2−15
2−15
2.7.3
2.7.4
Remote Temperature Sensors . . . . . . . . . . . . . . . . . . . . . . . . . . . . . . . . . . . . . . . . . . . . . . . . . .
Remote Control Panel . . . . . . . . . . . . . . . . . . . . . . . . . . . . . . . . . . . . . . . . . . . . . . . . . . . . . . . . .
2−16
2−16
2.8
2.9
ENGINE DATA . . . . . . . . . . . . . . . . . . . . . . . . . . . . . . . . . . . . . . . . . . . . . . . . . . . . . . . . . . . . . . . . . . . 2−16
COMPRESSOR DATA . . . . . . . . . . . . . . . . . . . . . . . . . . . . . . . . . . . . . . . . . . . . . . . . . . . . . . . . . . . . 2−17
2.10 REFRIGERATION SYSTEM DATA . . . . . . . . . . . . . . . . . . . . . . . . . . . . . . . . . . . . . . . . . . . . . . . . . . 2−17
2.11 ELECTRICAL DATA . . . . . . . . . . . . . . . . . . . . . . . . . . . . . . . . . . . . . . . . . . . . . . . . . . . . . . . . . . . . . . 2−17
2.12 COMPONENT RESISTANCE & CURRENT DRAW DATA . . . . . . . . . . . . . . . . . . . . . . . . . . . . . . 2−18
2.13 SAFETY DEVICES . . . . . . . . . . . . . . . . . . . . . . . . . . . . . . . . . . . . . . . . . . . . . . . . . . . . . . . . . . . . . . . 2−19
2.14 REFRIGERANT CIRCUIT DURING COOLING . . . . . . . . . . . . . . . . . . . . . . . . . . . . . . . . . . . . . . . 2−20
2.15 REFRIGERANT CIRCUIT - HEATING AND DEFROSTING . . . . . . . . . . . . . . . . . . . . . . . . . . . . 2−20
62−11389
2
2.2
2.3
9
SECTION 2
UNIT DESCRIPTION
2.1 INTRODUCTION
unit. The unit is used on insulated refrigerated compartments to maintain cargo temperatures within very close
limits.
WARNING
Advance microprocessor equipped units
may start automatically at any time the Main
Power switch is not in the OFF position.
Also, the unit may be fitted with two way
communication equipment that will allow
starting of the unit from a remote location
even though the switch is in the OFF position.
Electrical power is supplied to the unit from a power plug
or by the A-C generator which is driven by the engine.
The generator provides nominal 480V/3Ø/60Hz power
when the engine is in high speed and nominal
350V/3Ø/45Hz power in low speed.
The control box includes manual switches, microprocessor, fuses, and associated wiring. The unit can be
equipped with an optional remote light bar which mounts
separately on the front roadside corner of the trailer.
WARNING
Temperature control is provided by the Carrier
Transicold Advance microprocessor (Refer to Section
2.5). Once the microprocessor is set at the desired temperature, the unit will operate automatically to maintain
the desired temperature within very close limits. The
control system automatically selects high and low
speed cooling or high and low speed heating as necessary to maintain the desired temperature within the refrigerated compartment.
Be aware of HIGH VOLTAGE supplied at the
power plug or from the generator. When
performing service or maintenance procedures: ensure any two way communication is
disabled in accordance with the manufacturer’s instruction, ensure the Main Power
Switch is in the OFF position and, whenever
practical, disconnect the high voltage
source, lockout/tagout the receptacle and
disconnect the negative battery connection. NEVER dis-assemble the generator:
HIGH MAGNETIC FIELD INSIDE! This field
can interfere with cardiac implants such as
pacemakers and defibrillators.
The auto Start-Stop operation provides automatic cycling of the diesel engine, which in turn offers an energy
efficient alternative to continuous operation of the engine with control of temperature by alternate cooling and
heating of the supply air (evaporator outlet air). The auto
Start-Stop feature is standard equipment.
This manual contains operating data, electrical data and
service instructions for the Vector 6500 refrigeration
system. Refer to Table 2-1 for model information.
The unit can be described as having three major sections:
Additional support manuals are listed in Table 2-2.
The unit model/serial number plate is located inside the
unit on the frame as shown in Figure 2−1.
the condensing section (Figure 2−1 & Figure 2−2),
which includes the engine generator drive package
(Figure 2−3).
2.2 GENERAL DESCRIPTION
the evaporator section (Figure 2−4).
The Vector 6500 unit is a hybrid diesel/electric, fully
the controls (Items 11 through 14, Figure 2−3:
charged, pre-wired, refrigeration/heating “nosemount”
Figure 2−5 & Figure 2−9).
Table 2-1 Model Chart
Model
NDP532*6JB0
R-404A
LB
KG
14
6.4
Compressor
Engine
06D 41cfm
V2203-L-DI-E3B-CTD-5
Engine Speed
High
Low
1800
1350
Table 2-2 Additional Support Manuals
Manual Number
62-11369
62-11405
62-11406
Type of Manual
Parts Look Up System (PLUS disc)
Operator’s Manual
Easy To Run
2−1
62-11389
1
2
10
9
8
7
6
5
3
4
1.
2.
3.
4.
Condenser & Radiator
Ambient Air Temperature Sensor
(ATT - behind grille)
Model/Serial Number Nameplate
Power Supply Receptacle
(PSR - Under Unit)
5.
6.
7.
8.
9.
10.
Compressor Sight Glass
Compressor (C)
Front Unloader Valve (UL1)
Compressor Suction Temperature Sensor (CST)
Compressor Suction Modulation Valve (CSMV)
Condenser Fans and Motors (CDM1 & CDM2)
Figure 2−1 Front View - Refrigeration System Components
62-11389
2−2
9
1
2
3
4
5
9
10
8
7
6
11
1.
2.
3.
4.
5.
6.
7.
12 Note: Junction box may be located on front or rear of compressor
Defrost Air Switch (DAS)
Receiver & Sight Glasses
Filter-Drier
Liquid Line Service Valve
Compressor Suction Service Valve
Compressor Discharge Service Valve
Compressor Discharge Temperature
Sensor (CDT)
8.
9.
10.
11.
12.
Compressor Discharge Pressure
Transducer (CDP)
High Pressure Switch (HP1)
Compressor Suction Pressure
Transducer (CSP)
Rear Unloader Solenoid Valve (UL2)
Compressor Junction Box (IPC location)
Figure 2−2 Road Side/Rear Compressor View - Refrigeration System Components
2−3
62-11389
1
2
3
4
5
6
7
24
8
23
9
10
11
22
12
13
21
1.
2.
3.
4
5.
6.
7.
8.
9.
10.
11.
12.
20
18
19
Exhaust (Location)
Coolant Bottle (Location)
Air Cleaner & Air Cleaner Service Indicator
(Behind bracket)
Engine Speed Control Unit (ENSCU)
Engine Coolant Temperature Sensor (ENCT)
Intake Air Heater (IAH)
Fuel/Speed Actuator (FSA)
Control Box (Refer to Figure 2−5)
Engine Speed Sensor (ENSSN)
Engine Oil Pressure Switch (ENOPS)
Display
Switch Board
13.
14.
15.
16.
17.
18.
19.
20.
21.
22.
23.
24.
17
16
2−4
14
Keypad Door
Serial Download Port (SLP)
Lube Oil Filter
Engine Oil Level Switch (ENOLS)
Lube Oil Fill & Dipstick
Lube Oil Drain
Starter Motor (SM)
Generator (GEN)
Battery Tray
Battery Charger (BTYC) and Second Battery
Charger (BTYC2) Mounting
Fuel Heater (FH - Location)
Fuel Filter
Figure 2−3 Front View - Engine Components
62-11389
15
9
5
6
4
7
8
9
10
2
12
11
1
3
13
EVXV IS LOCATED CLOSER
TO THE CENTER OF THE COIL
ON EARLY UNITS
1.
2.
3.
4.
5.
6.
7.
Defrost Termination Temperature Sensor
(DTT - Located on curbside tube sheet)
Evaporator Air Nozzle
Evaporator Fan/Motor Assembly (EVM)
Evaporator Fan/Motor Wiring
Supply Air Temperature Sensor (1SAT)
Electronic Expansion Valve (EVXV)
Evaporator Outlet Pressure Transducer (EVOP)
8.
9.
10.
11.
12.
13.
Evaporator Outlet Temperature Sensor (EVOT
- On suction line under insulation)
Evaporator High Temperature Switch (1EVHTS
- Located on roadside tube sheet)
Evaporator Coil
Return Air Temperature Sensor (1RAT)
Heat Exchanger
Electric Heaters (HTR1, HTR2)
Figure 2−4 Evaporator Section - Grille Removed
2−5
62-11389
1
30
3
2
31
4
32
5
33
6
7
8
29
9
10
28
11
27
12
26
13
25
14
15
24
17
23
16
18
19
CONTROL BOX
22
21
20
34
1.
2.
3.
4.
5.
6.
7.
8.
9.
10.
11.
12.
13.
14.
15.
16.
17.
18.
Heat Contactor 1 (1HTCON1)
19.
Fuse (F28)
20.
Fuse (F27)
21.
Fuse (F26)
22.
Fuse (F12)
23.
Fuse (F11)
24.
Fuse (F10)
25.
Fuse (F8)
26.
Fuse (F7)
27.
Fuse (F29)
28.
AC Current Sensor (CT2,3,4)
29.
Phase Reversal Module (PRM)
30.
Fuel Heater Relay (FHR)
31.
Power Supply Contactor Relay (PSCONR)
32.
Generator Contactor Relay (GENCONR)
33.
Compressor Contactor Relay (CCONR)
34.
Main Fuse (F5)
Air Heater Relay (IAHR or GPR)
Figure 2−5 Control
62-11389
2−6
Starter Solenoid Relay (SSR)
Buzzer (B)
Fuse (F19)
Display
Microprocessor (MP)
Fuse - Standby Contactor Power (F9)
Microprocessor Power Fuse (F6)
Power Supply Contactor (PSCON)
Power Supply Contactor 2 (PSCON2)
Generator Contactor (GENCON)
Overload Ground Fault (OGF)
Condenser Motor Contactor (CDCON)
Evaporator Motor Contactor (1EVCON)
Heat Contactor 2 (1HTCON2)
Compressor Contactor (CCON)
Run Control Relay (RCR - Used With
Remote Control Panel Only)
Box
9
2.3 CONDENSING SECTION
b. Fuel/Speed Actuator (FSA)
The FSA combines the fuel shutoff solenoid and speed
control solenoid into one component. Fuel supply to the
injectors and engine speed is controlled by varying rod
position in accordance with the signal from the ENSCU.
The FSA is located on the front of the injection pump.
c. Engine Speed Sensor (ENSSN)
The ENSSN provides the ENSCU with information on
the speed at which the engine is running. The ENSSN is
located in the gear case cover above the oil filter.
The condensing section (see Figure 2−1 & Figure 2−2)
consists of an engine-generator drive package,
compressor, condenser fans, condenser coil, radiator,
refrigerant controls, defrost air switch, piping, wiring,
and associated components.
The engine-generator drive package (see Figure 2−3)
includes the engine, generator, air cleaner, muffler,
coolant system, fuel system, oil filter system and engine
sensors.
d. Engine Oil Pressure Switch (ENOPS)
The ENOPS is normally open and closes on pressure
rise to signal to the microprocessor the engine has
sufficient oil pressure for operation. There is a 15
second delay after the engine starts to allow the oil
pressure to build up before the microprocessor looks at
the input from this switch. The switch is located in the oil
filter mounting assembly.
e. Engine Coolant Temperature Sensor (ENCT)
The ENCT provides the microprocessor with engine
coolant temperature information to be displayed,
recorded in the DataLink data recorder and used to
control the refrigeration system. The sensor is located
on the starter side of the engine near the #4 Injector.
2.3.1 Engine
The engine is a four cylinder diesel which gives excellent
fuel economy and has easy starting characteristics. It is
equipped with spin-on lube oil and fuel oil filters for
easier filter changes. The fuel filter may also be
equipped with a thermostatically controlled fuel heater.
The engine cooling system consists of the radiator (which
is mounted with the condenser coil) and coolant overflow
bottle. The system is also fitted with an electronic battery
charger which converts generator or standby alternating
current to direct current for battery charging. Refer to
Section 2.8 for engine data.
2.3.2 Engine Air System
The air cleaner prolongs the life and performance of the
engine by preventing dirt and grit from getting into the
engine and causing excessive wear on all operating parts.
It is the responsibility of the operator to give the air cleaner
equipment regular and constant attention in accordance
with the instructions. An optional air cleaner service
indicator may be connected to the intake manifold. Its
function is to indicate when the air cleaner requires
replacement. (Refer to section 8.5.9.)
f. Engine Oil Level Switch (ENOLS)
The ENOLS provides the microprocessor with engine
oil level information to be displayed, recorded in the
DataLink data recorder and used to control the
refrigeration system. The switch is located in the oil pan,
just to the right of the lube oil fill & dipstick.
2.3.4 Generator (GEN)
The generator is directly bolted to the engine and supplies nominal 460V/3Ø/60Hz power when the engine is
in high speed and nominal 300V/3Ø/45Hz power in low
speed.
2.3.5 Compressor
2.3.3 Engine Controls:
a. Engine Speed Control Unit (ENSCU)
The ENSCU (see Figure 2−6) is a microprocessor
based unit which controls the fuel supply to, and speed
of, the engine in accordance with the position of the
Main Power Switch and speed relay.
The unit has an LED which may be used to diagnose
failures within the electronic speed control system.
Refer to Section 9.5 for information on diagnostic
failures.
The ENSCU sends engine speed information to the
microprocessor to be displayed in the Unit Data and
recorded in the DataLink data recorder. The ENSCU is
mounted on the air cleaner bracket.
The compressor assembly includes the refrigerant compressor, suction and discharge service valves, high
pressure switch, compressor discharge temperature
sensor and the suction and discharge pressure transducers. The compressor draws refrigerant gas from the
evaporator and delivers it to the condenser at an increased temperature and pressure. The pressure is
such that refrigerant heat can be absorbed by the surrounding air at ambient temperatures.
2.3.6 Unloaders
The compressor is equipped with unloaders as standard
equipment. Unloaders are used as a compressor capacity control to unload the cylinder banks during periods of reduced cooling loads. This provides closer temperature control and reduces the power required to
operate the compressor; thus reducing fuel consumption.
a. Major Working Parts
Solenoid and valve system.
LED
Spring loaded piston type bypass valve.
Spring loaded discharge check valve (located on the
valve plate).
Figure 2−6 Engine Speed Control Unit
2−7
62-11389
2
1
3
4
5
7
6
8
11
9
15
10
14
12
13
1.
2.
3.
4.
5.
6.
7.
8.
Solenoid Valve
Valve Stem
Gas Bypass Port
Spring Guide
Spring
Piston
Bypass Valve
Bleed Orifice
9.
10.
11.
12.
13.
14.
15.
Strainer
Suction Manifold
Cylinder Discharge Valve
Valve Plate
Cylinder Suction Valve
Discharge Check Valve Assembly
Discharge Manifold
Figure 2−7 Compressor Cylinder Head Unloaded
b. Unloaded Operation
When the pressure behind the piston has been reduced
sufficiently, the valve spring will force the piston back,
opening the gas bypass from the discharge manifold to
the suction manifold.
Pressure from the discharge manifold (item 15,
Figure 2−7) passes through the strainer (9) and bleed
orifice (8) to the back of the bypass valve piston (6). Unless bled away, this pressure would tend to close the piston against the spring (5) pressure and load the cylinders in that head.
Discharge pressure in the discharge manifold will close
the discharge piston check valve assembly (14) isolating the compressor discharge manifold from the individual cylinder bank manifold.
With the solenoid valve (1) energized the solenoid valve
stem (2) will open the gas bypass port (3).
Discharge pressure will be bled to the suction manifold
(10) through the opened gas bypass port . A reduction in
pressure on the bypass piston valve will take place because the rate of bleed through the gas bypass port is
greater than the rate of bleed through the bleed orifice (8).
62-11389
The unloaded cylinder bank will continue to operate fully
unloaded until the solenoid valve is de-energized and
the gas bypass port is closed.
2−8
9
2
1
3
4
5
7
6
8
9
11
15
10
14
12
13
1.
2.
3.
4.
5.
6.
7.
8.
Solenoid Valve
Valve Stem
Gas Bypass Port
Spring Guide
Spring
Piston
Bypass Valve
Bleed Orifice
9.
10.
11.
12.
13.
14.
15.
Strainer
Suction Manifold
Cylinder Discharge Valve
Valve Plate
Cylinder Suction Valve
Discharge Check Valve Assembly
Discharge Manifold
Figure 2−8 Compressor Cylinder Head Loaded
2.3.7 Compressor Switches, Transducers and
c. Loaded Operation
Sensors
a. Compressor Discharge Pressure Transducer
(CDP)
With the solenoid valve (1, Figure 2−8) de-energized
The CDP provides a signal to the microprocessor
the solenoid valve stem will close the gas bypass port
equivalent to pressure leaving the compressor. The
(3).
reading is displayed, recorded in the DataLink data
recorder and used to control the refrigeration system. It
Pressure from the discharge manifold (item 15) through
is located on the compressor center head.
the strainer (9) and bleed orifice (8) will build behind the
b. Compressor Suction Pressure Transducer
piston (6).
(CSP)
The CSP provides a signal to the microprocessor
This increased pressure will overcome the bypass valve
equivalent to pressure entering the compressor
spring (5) tension and force the piston (6) forward closcylinders. The reading is displayed, recorded in the
ing the gas bypass from the discharge manifold to the
DataLink data recorder and used to control the
suction manifold (10).
refrigeration system. It is located on the front of the
compressor.
Cylinder discharge pressure will force the discharge
c. Compressor Discharge Temperature Sensor
check valve assembly (14) open. Refrigerant gas will
(CDT)
then flow into the compressor discharge manifold.
The CDT provides a signal to the microprocessor
equivalent to the temperature of the gas leaving the
The loaded cylinder bank will continue to operate fully
compressor. The reading is displayed, recorded in the
loaded until the solenoid valve is energized and the gas
DataLink data recorder and used to control the
bypass port is opened.
refrigeration system. It is located on the compressor
center head.
2−9
62-11389
2.4.1 Evaporator Coil
The evaporator is a tube in fin type. The operation of the
compressor maintains a reduced pressure within the
coil. At this reduced pressure, the liquid refrigerant
evaporates at a temperature sufficiently low enough to
absorb heat from the air. The electric heaters (HTR1 &
HTR2) are mounted on the inlet side of the coil.
d. Compressor Suction Temperature Sensor (CST)
The CST provides a signal to the microprocessor
equivalent to to the temperature of the gas entering the
compressor suction service valve. It is located on the
line entering the valve.
e. High Pressure Switch (HP1)
The HP1 is normally closed and opens on pressure rise
to signal to the microprocessor to shutdown the engine,
or shutdown the system if operating on standby power. It
is located on the compressor center head.
2.4.2 Electronic Expansion Valve (EVXV)
The EVXV is an electronic device which controls the
flow of liquid to the evaporator according to changes in
superheat of the refrigerant leaving the evaporator. The
expansion valve maintains a relatively constant degree
of superheat in the gas leaving the evaporator regardless of suction pressure. The valve has a dual function automatic expansion control and prevention of liquid
return to the compressor.
2.3.8 Condenser Coil
The condenser coil is a microchannel type and acts as a
heat exchanger in which the compressed refrigerant
gas is lowered in temperature and condensed into a liquid. Air movement over the condenser is provided by
two electric motor driven fans mounted in the condensing section.
2.4.3 Heat Exchanger
The heat exchanger is the tube in tube type and is installed in the main suction line and liquid line. The suction gas is used to cool the warm liquid refrigerant within
the heat exchanger. This results in greater system efficiency.
2.3.9 Ambient Air Temperature Sensor (AAT)
The AAT provides microprocessor with condenser
entering air temperature information to be displayed,
recorded in the DataLink data recorder and used to
control the refrigeration system. The sensor is located
behind the front grill.
2.4.4 Compressor Suction Modulation Valve
(CSMV)
The CSMV opens and closes as required for capacity
control of the refrigeration system cooling cycle. It is
located in the suction line at the exit of the evaporator
assembly.
2.3.10 Filter-Drier
The filter-drier is a cylindrical shell containing a drying
agent and filter screen. It is installed in the liquid line and
functions to keep the system clean and remove moisture from the refrigerant.
2.4.5 Evaporator Switches, Transducers and Sensors
2.3.11 Receiver
a. Evaporator Outlet Pressure Transducer (EVOP)
The EVOP provides the microprocessor with
evaporator outlet pressure information to be displayed,
recorded in the DataLink data recorder and used to
control the refrigeration system. It is located in the
suction line near the electronic expansion valve.
Liquid refrigerant from the condenser flows into the receiver. The receiver serves as a liquid reservoir when
there are surges due to load changes in the system; as a
storage space when pumping down the system and as a
liquid seal against the entrance of refrigerant gas into
the liquid line.
The receiver is provided with two bull’s-eye sight
glasses, for the observation of liquid level & moisture
content, and a fusible plug.
b. Evaporator High Temperature Switch (1EVHTS)
1EVHTS is a safety switch which opens on a temperature rise to de-energize the electric heaters if the temperature reaches the cut-out point. It is located on the roadside tube sheet of the evaporator coil
2.4 EVAPORATOR SECTION
c. Evaporator Outlet Temperature Sensor (EVOT)
The evaporator (See Figure 2−4) fits into a rectangular
opening in the upper portion of the front wall of the refrigerated compartment. When installed, the evaporator
section is located inside the compartment, and the condensing section is outside.
The EVOT provides the microprocessor with
evaporator outlet temperature information to be
displayed, recorded in the DataLink data recorder and
used to control the refrigeration system. It is located on
the suction line near the electronic expansion valve.
The evaporator assembly consists of an evaporator coil,
evaporator fan motor, electronic expansion valve, coil
heaters, heat exchanger, defrost termination temperature sensor the supply and return air sensors and a high
temperature switch.
d. Defrost Termination Temperature Sensor (1DTT)
The 1DTT is located on the curbside tube sheet of the
evaporator coil. It provides the microprocessor with
evaporator temperature information to be displayed, recorded in the DataLink data recorder and used to determine termination of defrost.
Heating and defrost is accomplished by electric heaters
mounted on the coil.
e. Return Air Temperature Sensor (1RAT)
Automatic evaporator coil defrosting is initiated by either
a differential air switch (which senses the pressure drop
across the coil) or by the defrost timer in the microprocessor.
62-11389
The 1RAT is a temperature control probe which provides the microprocessor with information on the temperature of the air entering the evaporator section. The
2−10
9
reading is displayed, recorded in the DataLink data recorder and used to control the refrigeration system. It is
located on on a bracket behind the center of the return
air grille.
Automatic Engine Starting.
Functional Parameter locks.
Alarms are stored in microprocessor memory for future reference.
f. Supply Air Temperature Sensor (1SAT)
2.5.4 Component Description And Location
The 1SAT is a temperature control probe which provides
the microprocessor with information on the temperature
of the air leaving the evaporator section. The reading is
displayed, recorded in the DataLink data recorder and
used to control the refrigeration system. It is located in
the roadside of the supply air outlet housing.
The hardware associated with the Advance
microprocessor includes the control module, display,
keypad and switch board. The hardware is housed, for
driver access, in the control box on the lower roadside
corner of the unit.
2.5 SYSTEM OPERATING CONTROLS AND
COMPONENTS
CAUTION
Temperature control is provided by the Carrier
Transicold Advance microprocessor. Once the
microprocessor is set at the desired temperature, the
unit will operate automatically to maintain the desired
temperature within very close limits.
Under no circumstances should anyone attempt to repair the keypad, display or internal control module components. Should
a problem develop with these components,
contact your nearest Carrier Transicold
dealer for replacement.
2.5.1 Multiple Languages
Messages in the MessageCenter can be displayed in
English, French, Spanish or Portuguese.
a. Control Module
The control module (see Figure 2−9) consists of the
microprocessor (with status LEDs), 3 fuses (F1, F2, &
F3), a DC current sensor (CT1), 2 relays (RR & SR), 2
status LED’s (LED30 & LED31), 6 input/output
connectors (QC), 6 digital input/output connectors
(MP), a programming card slot (with status LED’s) and
twenty three FET indicating LEDs.
The microprocessor is totally self contained and does
not
contain
any
serviceable
components.
Microprocessor activity can be determined by observing
the LED’s and FET’s (see Figure 2−9 and Table 5−1). If
the microprocessor is calling for a circuit to be
energized, the indicator is illuminated.
Press and hold the Select Key for 6 seconds to view or
change the current language selection. Refer to Section
3.15 for more information on language selection.
2.5.2 Automatic Start-Stop
Standard equipment includes an auto start-stop feature.
This feature provides automatic cycling of the diesel
engine, which in turn offers an energy efficient
alternative to continuous operation of the engine with
control of temperature by alternate cooling and heating
of the supply air (evaporator outlet air).
2.5.3 Special Features
The following additional special features are
incorporated into the Carrier Transicold Advance
Microprocessor:
The PC card slot allows programming of the
microprocessor using Carrier Transicold PC Cards. The
microprocessor automatically detects the presence and
type of PC Card inserted and responds accordingly. The
different types of PC Cards are:
An LCD display MessageCenter which clearly displays all information in dot matrix form.
Unit Operation & Alarms are displayed in text (not in
codes).
Download Card for copying unit data from DataLink
Unit Data and Functional Parameters.
Options PC Card for installing optional software
data recorder.
programs such as DataTrak or IntelliSet.
Programmable Maintenance Hour Meters (resettable
from the Keypad).
Configuration PC Card for setting the Microprocessor
Functions, Configurations, IntelliSets and DataLink
data recorder Configurations.
Bright LED Alarm & Indicator Lights.
Fully Automated Pretrip.
Program PC Card for upgrading the microprocessor
Automated Micro Self-test.
software.
DataLink data recorder (date & time can be set from
the Keypad).
There are three LEDs associated with the function of the
PC card slot. These are:
Trip Start to record date/time of trip in DataLink data
recorder memory.
• A green Micro Status LED which will blink steadily
once per second indicating that the microprocessor is
operating and will blink every 0.5 seconds if there is no
software or if it is loading software.
PC card functionality for downloading data, upgrading operational software, and Configuration set up.
• A green (PC) Card Status LED which comes on when
FET (Field Effect Transistor) indicating LEDs that are
illuminated when a circuit is energized.
there is a PC card inserted in the slot. This LED will:
2−11
62-11389
1. Blink once per second when data is being transferred to, or from, the PC Card. Will be on steady
when the operation is complete indicating the PC
Card may be removed.
the Micro Status LED will continue at the 1/2 second
rate and the Card Status LED will come on solid and
remain on solid until the card is removed from the
slot.
2. During Download, after Card is read and identified,
card status LED blinks 2 seconds on and 2 seconds
off until the = key is pressed to start the programming
from the card to the micro. Once the data transfer to
the micro begins, the Card Status LED and the Micro
Status LED will blink together 1/2 second on and 1/2
second off until the data transfer is complete, then
RUN RELAY (RR - Board
Relay K2) & LED28
PC CARD FAULT LED
(RED)
• A red (PC) Card Fault LED blinks if there is a problem
transferring data from the PC card that has been
plugged into the PC card slot. The red LED will
continue to blink until the PC card is removed. The
LED will also blink if there is an error reading the card.
Check the MessageCenter for description of error.
QC4 (+12V
OUTPUT TO RR)
F3
(7.5A)
SPEED RELAY (SR - Board
Relay K1) & LED 27
QC3 (+12V OUTPUT TO SR)
F2 (10A)
RELAY POWER
QC8 (12+ VDC)
1MP (WHITE)
IN/OUTPUT
CONNECTOR
DC CURRENT
SENSOR (CT1)
PC
CARD SLOT
LED30 (GPR/IAHR)
2MP (BLACK)
IN/OUTPUT
CONNECTOR
LED31 (SSR)
6MP, IN/OUTPUT
CONNECTOR
PC CARD STATUS
LED (GREEN)
MICROPROCESSOR
STATUS LED (GREEN)
5MP, IN/OUTPUT
CONNECTOR
MICROPROCESSOR
4MP, IN/OUTPUT
CONNECTOR
QC9 (FET ARC
SUPPRESSION)
QC2 (GROUND
FROM BATTERY)
3MP (GREY)
IN/OUTPUT
CONNECTOR
QC1 (12+VDC FROM
BATTERY)
FET LEDs
Refer to Table 5−1
F1 (7.5A)
Figure 2−9 Control Module
62-11389
2−12
9
1
ALTERNATE
CONFIGURATION
2
12
-20.0 +34.5 F
3
4
STANDBY
5
15
ENGINE
6
ENGINE
MANUAL
DEFROST
7
ALARM LIST
START‐STOP/
CONTINUOUS
SELECT
13
1.
2.
3.
4.
5.
6.
7.
8.
9.
10.
9
10
O
OFF
MAIN POWER
SWITCHES
11
Indicator lights
Keypad Door
Main Display
MessageCenter
Keypad
Up and Down Arrow Keys
Enter Key
Manual Defrost Key
Alarm List Key
Start/Stop-Continuous Key
14
OFF
STANDBY
8
I START/RUN
11.
12.
13.
14.
15.
Select Key
Switch Board
MAIN POWER SWITCHES
Diesel/Off/Engine Standby Switch (DOES)
(Note: switch is labeled
ENGINE/OFF/STANDBY)
START/RUN - OFF Switch (SROS)
Diesel Electric Switch (DES)
(Note: switch is labeled STANDBY/ENGINE)
Figure 2−10 Display And Keypad Assembly
NOTE
b. Main Display, MessageCenter & Indicator Lights
(see figure Figure 2−10)
When the unit is in Null mode (fan only), the
mode indicators (cool, heat and defrost) are all
off.
Indicator Lights
The display has six LEDs across the top to indicate
operational status. These indicators are:
Heat Indicator (Amber) - Illuminated when the unit is in
NOTE
Heat Mode.
There is an opening between the Alarm and
Start-Stop LEDs that is not used at this time.
Cool Indicator (Green) - Illuminated when the unit is in
Cool Mode.
Main Display
Defrost Indicator (Amber) - Illuminated when the unit is
in Defrost Mode.
The microprocessor will display the refrigerated
compartment set point to the left and compartment
temperature to the right. Temperatures will be displayed
as signed (+ or -). The microprocessor may be
configured to display the set point in either whole
numbers or with tenths of a degree. The compartment
temperature will be followed by a letter indicating the
information is in degrees Fahrenheit (F) or degrees
Centigrade (C).
Alarm Indicator (Red) - Off or Flashes at a rate of 0.5
seconds.
Start-Stop Indicator (Green) - Illuminated when
Start-Stop Operation has been selected.
Continuous Indicator (Green) - Illuminated when
Continuous Operation has been selected.
2−13
62-11389
Functional Parameter, clearing alarms, and
locking the data menu.
Message Center
Messages generated by the microprocessor are
displayed in the MessageCenter. As the main display
scrolls every 5 to 10 seconds from one active
compartment to another, the applicable message for
that particular compartment will also be displayed.
Details of the messages are described in Section 6.1
MessageCenter.
MANUAL
DEFROST
ALARM LIST
OFF
STANDBY
When placed in the ENGINE or
STANDBY position, this switch provides
power to the microprocessor. The
microprocessor performs a self-test (all
segments of display are illuminated). Then
setpoint and compartment temperatures
are displayed and the unit is started in
Engine Operation or Standby Operation.
To stop the unit place the DOES switch
in the OFF position.
START‐STOP/
CONTINUOUS
SELECT
START-STOP/CONTINUOUS Key
Pressing this key toggles between
Start-Stop and Continuous Run operation.
SELECT Key
Press the SELECT key to scroll through the
menu selections. One of the five standard
menu selections will appear in the
MessageCenter when the SELECT key is
pressed. Repeated pressing of the SELECT
key will sequence the menu through these
selections. The menu wraps around. Press
the SELECT key until the desired menu
selection appears in the MessageCenter.
Diesel/Electric Switch (DES) - Alternate
Configuration
This switch is used to select either
Engine Operation or Standby Operation.
When this switch is placed in standby
position, the microprocessor will not
energize the power source contactors
until the engine oil pressure switch
(ENOPS) opens.
The selections are:
wPRESS =O TO VIEW HOUR METERS- Displays the
hours for individual hour meters. Refer to Section 3.14.
START/RUN-OFF Switch (SROS) - Alternate
Configuration
wPRESS =O TO START PRETRIP - Used to initiate a
When placed in the START/RUN position,
this switch provides power to the
microprocessor.
The
microprocessor
performs a self-test (all segments of
display are illuminated). Then setpoint and
compartment temperatures are displayed.
To stop the unit or remove power from
the microprocessor, place the SROS in
the OFF position.
pretrip. Refer to Section 3.4.
wPRESS =O TO VIEW DATA - Displays Unit Data. Refer
to Section 3.13.
wPRESS =O TO VIEW (AND CHANGE) SETTINGS Displays unit Functional Parameter settings. Refer to
Section 3.15.
wPRESS =O TO MARK TRIP START - This menu
selection is used to record a Trip Start event which is
logged in the DataLink data recorder. This records the
time and date of the beginning of the trip. Data can then
be downloaded and reviewed by trip, making data
review much easier. Refer to Section 3.10.
d. Keypad
UP ARROW and DOWN ARROW Keys
These keys allow changing of the setpoints
or other displayed data of the system. They
also allow scrolling through the Unit Data,
Function Parameters List, Alarm List, etc.
wPRESS =O TO VIEW PRINT MENU - Configures the
microprocessor for use with the hand-held Strip Print II
printer kit P/N 12-50150-10. Refer to manual 62-90476
(Strip Print) or 62-11338 (Strip Print II).
EQUAL Key (ENTER)
wPRESS =O TO VIEW (AND CHANGE) INTELLISET Refer to Section 3.17.
The EQUAL key is used for many things
including entering a setpoint, changing a
62-11389
ALARM LIST Key
The ALARM LIST key allows viewing of the
alarms stored in the microprocessor. The
alarm
list
is
displayed
in
the
MessageCenter. Pressing the ALARM LIST
key once displays the active alarm list. Each
successive press advances through the list
to the end. To view the inactive alarm list,
Refer to Section 3.12.
c. Switch Board
Diesel/Off/Engine Standby Switch (DOES)
ENGINE
MANUAL DEFROST Key
The MANUAL DEFROST key may be used
to initiate a defrost cycle when the required
conditions are met.
2−14
9
amber LED indicates “CHECK UNIT”. The amber light is
illuminated when the microprocessor illuminates the
fault light. Alarms can be read on the microprocessor
display.
2.6 ELECTRONIC MODULES
2.6.1 Overload Ground Fault Module (OGF)
LED
AMBER
GREEN
Figure 2−11 OGF Module
The OGF, see Figure 2−11, is located in the control box
(see Figure 2−5). The module has two electrical safety
features which are active in both Engine and Standby
Operation:
Figure 2−13 Light Bar
1. Overload protection.
2.7.2 Remote Switch(es)
2. Ground Fault (Leakage).
The unit is provisioned to connect remote switches (DS
or REMS) directly to the microprocessor.
In each case, an “A100 - “OVERLOAD GROUND
FAULT” alarm is activated and the unit shuts down.
Two types of switches may be used:
1. A switch with contacts that are open when the
switch is activated.
2. A switch with contacts that are closed when the
switch is activated.
When ground leakage is detected, the red LED on the
OGF module will be on continuously.
2.6.2 Phase Reversal Module (PRM)
Four Configurations are available for each switch.
1. Activate an alarm only while the switch is activated.
2. Activate an alarm and shut the unit down while the
switch is activated. The unit will remain shut down for
a minimum of 3 minutes under this setting.
3. Activate the alarm and bring the engine into low
speed while the switch is activated.
4. Record the switch activation in the DataLink data
recorder.
If configured to shut the unit down or bring the engine
to low speed an additional choice will be available.
The additional choice allows the unit to be set so that
the configured action will always take place OR the
configured action will only take place when the ambient temperature is below a certain temperature. For
example, if the shutdown/low speed temperature
choice is set to 77°F (25°C) the unit will only shutdown/go to low speed if the ambient temperature is
below 77°F (25°C).
Figure 2−12 PRM Module
The PRM, Figure 2−12, is located in the control box (see
Figure 2−5). In Standby Operation, the phase reversal
module checks the electrical phase and reverses if
necessary.
Additionally a Functional Parameter “override” setting will be available for each switch configured to
shut the unit down. The Functional Parameter may be
set to “YES” or “NO”. If the Parameter is set to “NO”
the configured action will not be overridden. If the
Parameter is set to “YES”, the alarm will be activated
but the unit will not shutdown.
2.7 OPTIONS
2.7.1 Light Bar
The Light Bar is an external indicator light which can be
seen in the driver’s rear view mirror from the cab of the
tractor. The green LED indicates “STATUS OK”. The
2−15
62-11389
2.7.3 Remote Temperature Sensors
The unit is provisioned to connect up to three remote
temperature sensors directly to the microprocessor.
2.7.4 Remote Control Panel
The unit may be fitted with, and the remote switch/door
switch configurations set for, an optional remote control
panel. The panel displays refrigerated compartment set
point, compartment temperature and operating mode
(heat, cool or defrost). The set point may be set and the
unit may be started and stopped using the remote panel.
This compact panel can be mounted to suit the
individual operator’s preferences - for example, flush
mounted inside the trailer near the rear door. Refer to
Section 3.20.2 for more information on the remote
control panel.
The microprocessor may be configured to display the
sensor reading in the Unit Data and to record the sensor
reading in the DataLink data recorder. A user specified
name may be configured for each sensor. This name will
be displayed, rather than the default Remote Sensor #1,
Remote Sensor #2 or Remote Sensor #3 name, in the
unit data list.
NOTE
The remote switch/door switch configurations
may be set for use as individual switches or for
use with a remote panel, not both.
2.8 ENGINE DATA
Engine Model
Displacement
No. Cylinders
Rated Power
Weight
V2203L-DI-E3B-CTD-5 (26-00128-15)
135 in3 (2.2 liters)
4
32 hp (24 KW) @1800 rpm
NOTE: Refer to Table 2-1 for engine speed settings
440 lbs (199.6 kg)
2 U.S. gallons (7.6 liters) - 50/50 mix ethylene glycol antifreeze (with inhibitors) never to exceed 60/40
CAUTION
Coolant Capacity
Thermostat
Fuel
Fuel Heater
Temperature Switch
Use only ethylene glycol anti-freeze (with inhibitors) in system as glycol by
itself will damage the cooling system. Always add pre-mixed 50/50 antifreeze and water to radiator / engine. Never exceed more than a 60% concentration of anti-freeze. Use a low silicate anti-freeze meeting GM specifications GM 6038M for standard life coolant or use Texaco Havoline extended life coolant or any other extended life coolant which is Dexcool approved and has 5/150 (5 years / 150,000 miles) on the label.
Starts to open 177 to 182F (81 to 83C). Fully open at 203F (95C).
Fuel System
Winter: Diesel No. 1 Summer: Diesel No. 2(Maximum 5% Bio-Diesel is also allowed)
Close on a temperature fall @ 45F (7.2°C)
Open on a temperature rise @ 75F (24°C)
Firing Order
Intake Air Heater
Amperage
Oil Pressure
Oil Pressure Switch
(ENOPS)
1-3-4-2
42 amps at 12 VDC
Lubrication System
40 to 62 psig (2.8 To 4.2 Bar) - Engine in high speed
Closes, on pressure rise, at 18 psig (1.22 Bar)
Opens, on pressure fall, at 12 psig (0.82 Bar)
Oil Capacity with Filter
Lube Oil Viscosity:
API CG or better
OR
Mobil Delvac 1
Oil Change Intervals
62-11389
15 quarts (14.2 liters)
Outdoor Temperature
Below 32F (0°C)
Above 32F (0C)
Grade (SAE)
10W30 or Mobil Delvac 1 (5W 40)
10W30 or Mobil Delvac 1 (5W 40)
or 15W 40
Refer to Section 8.2 for information on service intervals.
2−16
9
2.9 COMPRESSOR DATA
Compressor Model
Number of Cylinders
Type
Weight
Oil Charge
Approved OIl
06D
6
Semi-hermetic Reciprocating
325 lbs (1478 kg)
7.6 pints (3.6 liters)
Mobil Arctic EAL 68
2.10 REFRIGERATION SYSTEM DATA
Defrost Air Switch (DAS)
Defrost Timer (micro controlled)
Evaporator High Temperature Switch
(EVHTS)
Fusible Plug Melting Point
High Pressure Switch (HP1)
Unit Dry Weight, Less Battery
Battery
Initiates Defrost: 1.40 .07 inch (35 1.8 mm) WG
1.5h, 3h, 6h, or 12 hours
Opens, on temperature rise, at: 130° 5°F (55° 2.8°C)
Closes, on temperature fall, at: 100° 7°F (37.8° 3.9°C)
430F (221C)
Opens, on pressure rise, at : 465 10 psig (34 0.7 bar)
Closes, on pressure fall, at: 350 10 psig (24 0.7 bar)
2045 pounds (928 KG.)
50 pounds (23 KG.)
2.11 ELECTRICAL DATA
Compressor Motor
Condenser Fan
Motors (Each)
Heaters
Full Load Amps (FLA)
Locked Rotor Amps
Winding Resistance
Full Load Amps (FLA)
Horsepower
Speed
Bearing lubrication
Rotation
Resistance
17.5 amps @ 460 VAC
99.0 amps @ 460 VAC
Approximately 2 ohms, phase to phase
1.9 amps @ 460 vac, 60 hz
1.1 hp (820 watts) at 60 hz
1700 rpm @ 60 Hz
Factory lubricated, additional grease not required
Clockwise when viewed from shaft end
20 to 21 ohms
Heater 1
Three elements (1 assembly)
196 ohms $10 ohms per phase
2.6 amps nominal
3.4 amps nominal
Heater 2
Four elements (1 assembly)
196 ohms $10 ohms per phase
2.6 amps nominal
3.4 amps nominal
Number of heaters
Resistance
Current, Low Speed
Current, High Speed
Number of heaters
Resistance
Current, Low Speed
Current, High Speed
2−17
62-11389
2.11 ELECTRICAL DATA - Continued
Evaporator Fan Motor
Generator
Battery Charger
20 Amp
Battery Charger
40 Amp
OGF Module
Battery
Standby Power
Requirements
Standby Extension Cord
Full Load Amps (FLA)
Horsepower
Speed
Voltage and Frequency
Bearing Lubrication
Rotation
Resistance
Nominal voltage & frequency at High Speed
Nominal voltage & frequency at Low Speed
Resistance
1.9 amps @ 460 vac, 60 hz
1.35 hp (1007 watts) @ 60hz
3500 rpm @ 60 hz
310 to 660 VAC 45 to 65 Hz
Factory lubricated, additional grease not required
Clockwise when viewed from shaft end
34.2 to 41.8 ohms
460 VAC, 60 hz, 3 phase
Output
Input
Output amps
Output voltage
Input
Output amps
Output voltage
Trips - On High Current
Trips - on Ground Fault
Voltage
20.7 KVA @ 0.84 p.f @ 1800 rpm
360 - 460 VAC, Single Phase
20A (Maximum)
14.8 VDC @ 77°F (25°C)
360 - 460 VAC, Three Phase
40A
14.8 VDC @ 77°F (25°C)
40 Amps (Maximum)
150mA
12 volt nominal - 90 amp hour capacity
Cold cranking amps = 425 DIN, 500 IEC, 725 BCI
Voltage
Current
Gauge
Length
460/3/60 with a 30A Circuit Breaker required.
(Full Load Draw = 25A, Locked Rotor Draw = 99A)
345 VAC 45 hz, 3 phase
0.73 to 0.778 ohms phase to ground
1.476 to 1.556 phase to phase
SOOW, 600V, 90°C, 10/4 (3ph + G)
50’ minimum length, 75’ Maximum length.
2.12 COMPONENT RESISTANCE & CURRENT DRAW DATA
Component
Ohms
Amps
Unloader Solenoid Valve
9.6 ±0.8 Ohms
1.0 - 2.0 Amps
12VDC Relay (IAHR/GPR, SSR, FHR)
72 Ohms ±10%
0.14 - 0.18 Amps
12VDC Relay (PSCONR, GENCONR, CCONR,
RCR)
80 Ohms ±15%
0.12 - 0.17 Amps
12VDC Relay (HTCON1, HTCON2, CDCON,
1EVCON)
48 Ohms ±10%
0.25 Amps ±10%
12VDC Relay (PSCON1, PSCON2, GENCON,
CCON)
15.5 Ohms ±10%
0.77 Amps ±10%
Fuel/Speed Actuator (FSA)
2.8 Ohms ±10% @ 68°F (20°C)
4 Amps Max
Intake Air Heater Circuit
0.3 to 0.5 Ohms
38 - 46 Amps
Starter Motor
Less than 1 Ohm but more than 0
270 - 380 amps
Fuel Heater
1.4 Ohms ±10%
10.7 amps ±10%
62-11389
2−18
9
2.13 SAFETY DEVICES
The system is protected from high pressure conditions which may occur when exposed to very high temperatures
(such as a fire) by a fusible plug mounted in the receiver. Under very high temperature conditions (refer to Section
2.10) the plug will melt, releasing the refrigerant pressure.
System components are protected from damage caused by unsafe operating conditions by automatic shut-down of
the unit when such conditions occur. This is accomplished by the safety devices listed in the following table.
Unsafe Conditions
Safety Device
Device Setting
Excessive operating pressure
High Pressure Switch Refer to Section 2.10
(HPS)
Excessive current draw by microprocessor
Excessive current draw by speed relay
Excessive current draw by run relay
Excessive current draw by battery output
Excessive current draw by control circuit
Excessive current draw by battery charger input - 20 amp charger.
Fuse
Fuse
Fuse
Fuse
Fuse
Fuse
(F1)
(F2)
(F3)
(F5)
(F6)
(F7, F8)
Excessive current draw by battery charger input - 40 amp charger(s).
Fuse (F7, F8, F29)
Opens at 7.5 amps
Opens at 10 amps
Opens at 7.5 amps
Opens at 80 amps
Opens at 15 amps
Opens at 3 amps (single charger) OR
opens at 6amps (dual chargers)
See note.
Opens at 5 amps (timed)
Excessive current draw by generator/power
supply contactors
Fuse (F9)
Opens at 10 amps
Excessive current draw by evaporator heaters
Excessive current draw by fuel heater circuit
Excessive current draw by fuel level sensor
circuit
Fuse (F10/F11/12)
Fuse (F19)
Fuse (FLS)
Opens at 12 amps
Opens at 20 amps
Opens at 3 amps
Excessive current draw by evaporator or condenser fan motor
Fuse (F26/F27/F28)
Opens at 12 amps
Excessive condenser fan motor winding
temperature
Internal protector
Auto reset
Excessive compressor motor winding
temperature
Internal protector
Auto reset
Excessive evaporator motor winding
temperature
Internal protector
Auto reset
NOTE: When a second 20 amp rated charger is used to charge a lift gate battery, the higher rated fuse is installed
2−19
62-11389
flow of liquid refrigerant to the evaporator to obtain maximum use of the evaporator heat transfer surface.
2.14 REFRIGERANT CIRCUIT DURING COOLING
When cooling, (See Figure 2−14) the unit operates as a
vapor compression refrigeration system. The main
components of the system are: the (1) reciprocating
compressor, (2) air-cooled condenser, (3) expansion
valves, and (4) direct expansion evaporator.
The refrigerant pressure drop caused by the expansion
valve is accompanied by a drop in temperature so the
low pressure, low temperature fluid that flows into the
evaporator tubes is colder than the air that is circulated
over the tubes by the evaporator fan. The evaporator
tubes have aluminum fins to increase heat transfer;
therefore heat is removed from the air circulated over
the evaporator. This cold air is circulated throughout the
refrigerated compartment to maintain the cargo at the
desired temperature.
The compressor raises the pressure and the temperature of the refrigerant and forces it into the condenser
channels. The condenser fans circulate surrounding air
over the outside of the channels. The channels have fins
designed to improve the transfer of heat from the refrigerant gas to the air. This removal of heat causes the refrigerant to liquify. Liquid refrigerant leaves the condenser and flows to the receiver.
The transfer of heat from the air to the low temperature
liquid refrigerant causes the liquid to vaporize.
This low temperature, low pressure vapor passes
through the evaporator outlet. The vapor then passes
through the heat exchanger where it absorbs more heat
from the high pressure / high temperature liquid and
then returns to the compressor through the compressor
suction modulation valve (CSMV). The CSMV controls
the compressor suction pressure thereby matching the
compressor capacity to the load.
The receiver stores the additional charge necessary for
low ambient operation. The receiver is equipped with a
fusible plug which melts on occurrence of very high temperature to relieve the refrigerant pressure.
The refrigerant leaves the receiver and flows through
the liquid line service valve to the subcooler. The subcooler occupies a portion of the main condensing coil
surface and gives off further heat to the passing air.
2.15 REFRIGERANT CIRCUIT - HEATING AND DEFROSTING
The compressor is turned off for all heating and defrost
cycles. In heat, the coil mounted heaters and evaporator
fan(s) are energized. Air flowing over the warm heater
elements is circulated through the compartment to
maintain the cargo at the desired temperature. Defrost
may be accomplished using either electric heaters or return air (refer to Section 4.6).
The refrigerant then flows through a filter-drier where an
absorbent keeps the refrigerant clean and dry.
The refrigerant flows to the suction line heat exchanger.
Here the liquid is further reduced in temperature by giving off some of its heat to the suction gas.
The liquid then flows to an electronic expansion valve
which reduces the pressure of the liquid and meters the
62-11389
2−20
9
ÂÂÂÂÂÂ
ÂÂÂÂÂÂ
ÂÂÂÂÂÂÂÂ
ÂÂÂÂÂÂÂÂ
ÂÂÂÂÂÂÂÂ
ÂÂÂÂÂÂÂÂ
MICROPROCESSOR
EVOP
EVOT
EVXV
EVAPORATOR
HEAT
EXCHANGER
RECEIVER
ÂÂÂ
ÂÂÂ
ÂÂÂ
ÂÂÂ
ÂÂÂ
FUSIBLE
PLUG
CSMV
HP1
CDP
DISCHARGE
SERVICE
VALVE
Â
Â
FILTERDRIER
LIQUID LINE
SERVICE
VALVE
CDT
CST
ÂÂÂÂÂÂÂÂ
ÂÂÂÂÂÂÂÂ
ÂÂÂÂÂÂÂÂ
ÂÂÂÂÂÂÂÂ
ÂÂÂÂÂÂÂÂ
ÂÂÂÂÂÂÂÂ
ÂÂÂÂÂÂÂÂ
ÂÂÂÂÂÂÂÂ
SUCTION
SERVICE
VALVE
SUBCOOLER
CSP
COMPRESSOR
CONDENSER
DISCHARGE LINE
LIQUID LINE
SUCTION LINE
Figure 2−14 Refrigerant Circuit
2−21
62-11389
SECTION 3 − OPERATION
1
3.2
3.3
STARTING - STANDBY OPERATION . . . . . . . . . . . . . . . . . . . . . . . . . . . . . . . . . . . . . . . . . . . . . . . 3−2
SELF TEST . . . . . . . . . . . . . . . . . . . . . . . . . . . . . . . . . . . . . . . . . . . . . . . . . . . . . . . . . . . . . . . . . . . . . . 3−4
3.4
3.5
PRETRIP . . . . . . . . . . . . . . . . . . . . . . . . . . . . . . . . . . . . . . . . . . . . . . . . . . . . . . . . . . . . . . . . . . . . . . . . 3−5
CHANGING SET POINT . . . . . . . . . . . . . . . . . . . . . . . . . . . . . . . . . . . . . . . . . . . . . . . . . . . . . . . . . . 3−8
3.6
3.7
START-STOP OPERATION . . . . . . . . . . . . . . . . . . . . . . . . . . . . . . . . . . . . . . . . . . . . . . . . . . . . . . . . 3−9
CONTINUOUS OPERATION . . . . . . . . . . . . . . . . . . . . . . . . . . . . . . . . . . . . . . . . . . . . . . . . . . . . . . . 3−10
3.8
3.9
SLEEP MODE . . . . . . . . . . . . . . . . . . . . . . . . . . . . . . . . . . . . . . . . . . . . . . . . . . . . . . . . . . . . . . . . . . . 3−11
MANUAL DEFROST . . . . . . . . . . . . . . . . . . . . . . . . . . . . . . . . . . . . . . . . . . . . . . . . . . . . . . . . . . . . . . 3−13
3.10 TRIP START . . . . . . . . . . . . . . . . . . . . . . . . . . . . . . . . . . . . . . . . . . . . . . . . . . . . . . . . . . . . . . . . . . . . . 3−14
3.11 VIEW ACTIVE ALARMS . . . . . . . . . . . . . . . . . . . . . . . . . . . . . . . . . . . . . . . . . . . . . . . . . . . . . . . . . . . 3−15
3.12 VIEW INACTIVE ALARMS . . . . . . . . . . . . . . . . . . . . . . . . . . . . . . . . . . . . . . . . . . . . . . . . . . . . . . . . . 3−16
3.13 UNIT DATA . . . . . . . . . . . . . . . . . . . . . . . . . . . . . . . . . . . . . . . . . . . . . . . . . . . . . . . . . . . . . . . . . . . . . . 3−17
3.14 VIEW HOUR METERS . . . . . . . . . . . . . . . . . . . . . . . . . . . . . . . . . . . . . . . . . . . . . . . . . . . . . . . . . . . . 3−20
3.15 FUNCTIONAL PARAMETERS . . . . . . . . . . . . . . . . . . . . . . . . . . . . . . . . . . . . . . . . . . . . . . . . . . . . . 3−21
3.16 LANGUAGE SELECTION . . . . . . . . . . . . . . . . . . . . . . . . . . . . . . . . . . . . . . . . . . . . . . . . . . . . . . . . . 3−25
3.17 INTELLISET . . . . . . . . . . . . . . . . . . . . . . . . . . . . . . . . . . . . . . . . . . . . . . . . . . . . . . . . . . . . . . . . . . . . . 3−26
3.18 STOPPING UNIT . . . . . . . . . . . . . . . . . . . . . . . . . . . . . . . . . . . . . . . . . . . . . . . . . . . . . . . . . . . . . . . . . 3−29
3.19 DataLink DATA RECORDER . . . . . . . . . . . . . . . . . . . . . . . . . . . . . . . . . . . . . . . . . . . . . . . . . . . . . . . 3−30
3.19.1 Microprocessor Information . . . . . . . . . . . . . . . . . . . . . . . . . . . . . . . . . . . . . . . . . . . . . . . . . . . .
3.19.2 Data Recording . . . . . . . . . . . . . . . . . . . . . . . . . . . . . . . . . . . . . . . . . . . . . . . . . . . . . . . . . . . . . .
3−30
3−30
3.19.3 Data Downloading . . . . . . . . . . . . . . . . . . . . . . . . . . . . . . . . . . . . . . . . . . . . . . . . . . . . . . . . . . . .
3.19.4 DataLink Data Recorder Power-Up . . . . . . . . . . . . . . . . . . . . . . . . . . . . . . . . . . . . . . . . . . . . .
3−30
3−30
3.20 OPTIONS . . . . . . . . . . . . . . . . . . . . . . . . . . . . . . . . . . . . . . . . . . . . . . . . . . . . . . . . . . . . . . . . . . . . . . . 3−31
3.20.1 DataTrak . . . . . . . . . . . . . . . . . . . . . . . . . . . . . . . . . . . . . . . . . . . . . . . . . . . . . . . . . . . . . . . . . . . . 3−31
3.20.2 Remote Control Panel . . . . . . . . . . . . . . . . . . . . . . . . . . . . . . . . . . . . . . . . . . . . . . . . . . . . . . . . .
3−32
62−11389
3
PARAGRAPH NUMBER
Page
3.1 STARTING - ENGINE OPERATION . . . . . . . . . . . . . . . . . . . . . . . . . . . . . . . . . . . . . . . . . . . . . . . . . 3−1
SECTION 3
OPERATION
3.1 STARTING - ENGINE OPERATION
WARNING
Advance microprocessor equipped units may start automatically at any time the Main Power switch
is not in the OFF position. Also, the unit may be fitted with two way communication equipment that
will allow starting of the unit from a remote location even though the switch is in the OFF position.
WARNING
Be aware of HIGH VOLTAGE supplied at the power plug or from the generator. When performing service or maintenance procedures: ensure any two way communication is disabled in accordance with
the manufacturer’s instruction, ensure the Main Power Switch is in the OFF position and, whenever
practical, disconnect the high voltage source, lockout/tagout the receptacle and disconnect the negative battery connection. NEVER dis-assemble the generator: HIGH MAGNETIC FIELD INSIDE! This
field can interfere with cardiac implants such as pacemakers and defibrillators.
WARNING
Under no circumstances should ether or any other starting aids be used to start engine.
MODE LIGHTS
MAIN DISPLAY
SWITCH BOARD
ALTERNATE
CONFIGURATION
-20.0 +34.5 F
STANDBY
ENGINE
ENGINE
I START/RUN
OFF
STANDBY
KEYPAD DOOR
MessageCenter
O
OFF
Main Power
Switches
UNITS WITH A MAIN POWER SWITCH LABELED
ENGINE/OFF-STANDBY
UNITS WITH A MAIN POWER SWITCH LABELED
START/RUN-OFF
1. Place the Main Power switch in the ENGINE position.
1. Place the Main Power switch in the ENGINE position. Then place the switch labeled START/
RUN-OFF in the START/RUN position.
2. The microprocessor will perform a Self Test
2. The microprocessor will perform a Self Test
(refer to Section 3.3) and then start the unit
automatically.
(refer to Section 3.3) and then start the unit
automatically.
3−1
62-11389
3.2 STARTING - STANDBY OPERATION
WARNING
Be aware of HIGH VOLTAGE supplied at the power plug or from the generator. When performing service or maintenance procedures: ensure any two way communication is disabled in accordance with
the manufacturer’s instruction, ensure the Main Power Switch is in the OFF position and, whenever
practical, disconnect the high voltage source, lockout/tagout the receptacle and disconnect the negative battery connection. NEVER dis-assemble the generator: HIGH MAGNETIC FIELD INSIDE! This
field can interfere with cardiac implants such as pacemakers and defibrillators.
WARNING
Ensure the power plug is clean and dry before connecting to any electrical outlet / receptacle.
WARNING
Do not connect power plug to any electrical outlet without checking that it meets the 460/3/ 60
and 30 Amp electrical requirements of the unit.
Starting units with a Main Power switch labeled ENGINE/OFF/STANDBY.
1. Ensure the switch labeled ENGINE/OFF/
STANDBY is in the OFF position.
2. Ensure the external power circuit breaker is off,
connect standby cable to unit and then turn the external power circuit breaker on.
-20.0 +34.5 F
ENGINE
OFF
STANDBY
3. Place the switch labeled ENGINE/
OFF/STANDBY in the STANDBY position.
ENGINE
4. The unit will then perform a Self Test (refer to section
3.3) and start the unit automatically.
STANDBY
62-11389
3−2
Starting units with a Main Power switch labeled START/RUN-OFF.
1. Ensure the switch labeled ENGINE/STANDBY
is in the STANDBY position and the switch
labeled START/RUN-OFF is in the OFF position
2. Ensure the external power circuit breaker is off,
connect standby cable to unit and then turn the external power circuit breaker on.
-20.0 +34.5 F
STANDBY
ENGINE
I START/RUN
O
3. Place the switch labeled START / RUN OFF in the START/RUN position.
I
START/RUN
0
OFF
4. The unit will then perform a Self Test (refer to
section 3.3) and start the unit automatically.
OFF
• The power supply cable and circuit breaker must
NOTE
The unit is equipped with automatic phase reversal which ensures that the electric motors
will run in the correct direction.
comply with local electrical code and unit specifications. Refer to section 2.11.
• The power supply cable must be equipped with a
For safe, reliable operation in Standby Operation, it
is important to consider the following guidelines:
ground connection.
• NEVER connect the unit to a high voltage power
• Repairs or maintenance to the supply voltage circuit
source unless the Main Power Switch is in the OFF
position.
should only be performed by licensed / authorized
personnel.
3−3
62-11389
3.3 SELF TEST
MODE LIGHTS
MAIN DISPLAY
MessageCenter
DOOR
ENGINE
OFF
STANDBY
SELF TEST
•. If the IntelliSet option has been installed the name of
When first powered up, the microprocessor will run a
self test consisting of the following steps:
the current IntelliSet or “INTELLISET OFF” will be
displayed. Refer to Section 3.17 for IntelliSet information.
• All of the mode lights will illuminate.
• All of the segments on the main display will turn on.
• If the microprocessor has been configured to display
• All of the liquid crystal diodes (LCDs) of the Messa-
the hour meters, the Total Engine Hours, Standby
Run Hours and/or Total Switch On Hours will be
displayed.
• The main display will then display the set point tem-
• If there are one or more active alarms, the Mes-
geCenter will turn on to verify their operation.
sageCenter will display “UNIT SHUTDOWN - SEE
ALARM LIST”. Any active alarms must be corrected
and cleared before the unit can start. Refer to Section 3.11 for information on active alarms.
perature in the left characters and a compartment
(BOX) temperature in the right characters. The character just to the right of the box temperature indicates the temperature units as “C” Centigrade or “F”
Fahrenheit.
• The microprocessor will then display “SMV CLOS-
ING” while the CSMV and the EVXV are brought to
unit starting positions.
• The MessageCenter will then display “MICRO SELF
TEST IN PROGRESS” for several seconds.
• In engine operation, the intake air heater will ener-
• If one or more Inactive alarms are stored, “INAC-
gize (as required), the buzzer will sound, and the engine will start.
TIVE ALARMS IN MEMORY” will be displayed and
the Alarm LED will flash for 5 seconds, then turn off.
Refer to Section 3.12 for information on viewing inactive alarms.
62-11389
• In standby operation, the buzzer will sound then
the fans and compressor will start.
3−4
3.4 PRETRIP
1. Place the switch labeled ENGINE/OFF/STANDBY in the desired position
OR place the switch labeled START/RUN-OFF in the START/RUN position.
HEAT
COOL
DEFROST
ALARM
START‐STOP CONTINUOUS
+34.5 F
-20.0
SETPOINT
BOX TEMPERATURE
TEST #1
XX% COMPLETE
KEYPAD
MANUAL
DEFROST
ALARM LIST
START‐STOP/
CONTINUOUS
SELECT
2. Press the SELECT key until the MessageCenter
displays “PRESS THE = KEY TO START PRETRIP” .
3. Press the = key to start Pretrip
4. Verify that during TEST#1 the complete display is turned on and that all lights on the Light Bar come
on. Verify during Test #2 that the that the buzzer comes on for the first five seconds.
5. The remainder of Pretrip will take 7 to 15 minutes, and will run itself automatically.
Pretrip is a set of tests run by the microprocessor to
check unit operation. It is recommended that a Pretrip
be run prior to loading the trailer. It will indicate a failure
when one is detected.
During the Pretrip test, the MessageCenter displays the
current test number and description and the % of the
test that has been completed. When Pretrip is complete
the MessageCenter will display one of three different
messages:
TIP
A Pretrip can be started at any box temperature. If Pretrip is started while the unit is in a
Start-Stop off cycle the unit will start during the
course of the test. If the unit is running when
Pretrip is started, it will shutdown for the first
three tests.
• “PRETRIP PASS” OR
• “PRETRIP FAIL IN TEST X” OR
• “PRETRIP FAILED & COMPLETE”. Alarm light
will be on.
Press the ALARM LIST key to review the alarms
triggered by the Pretrip tests.
TIP
The Pretrip test “PASS” of “FAIL” results message will stay displayed until any key is
pressed, or until the Main Power Switch is
placed in the OFF position.
TIP
It is always a good idea to clear all alarms from
both Alarm Lists before starting Pretrip. The
technician will then know that any alarms present following Pretrip occurred during Pretrip,
and are not old alarms that had not been
cleared.
Once Pretrip is started, the control panel keys are disabled until Pretrip is completed.
3−5
62-11389
Test 1 - Display Test
The microprocessor activates the display, and both
lights on the Light Bar. This test will last 5 seconds. All
segments of the display, all LEDs on the microprocessor, both lights of the Light Bar will be on during this test.
This portion of the Pretrip requires that the operator determines PASS or FAIL. A defective display is indicated
if: any LCD/LED segments are not visible or any LEDs
or lights do not illuminate. Anything that fails during this
test should be repaired at the conclusion of the Pretrip
cycle. Pretrip will continue regardless of the outcome of
this test. A faulty display or light bar will not affect the operation of the unit, but will affect what is displayed during
unit operation.
PRETRIP (Continued)
TIP
If “CAN NOT START PRETRIP” is displayed in
the MessageCenter, check to see if the unit is in
PC Mode (Refer to Section 5.3) or Defrost
mode, or check the alarm list (Section 3.11) for
active shutdown alarms.
NOTE
Pretrip will run until completed, unless an alarm
occurs that causes Pretrip to be aborted. Only
alarms that will result in other erroneous alarms
or will affect future Pretrip tests will abort Pretrip.
Test 2 - Sound and 12VDC Electrical Component
Amperage Check
TIP
Pretrip may be stopped by the user by either
turning the unit off then back on again, or by
pressing and holding the = key for 5 seconds.
“PRETRIP STOPPED BY USER” will display in
the MessageCenter.
At the beginning of this test the microprocessor activates the buzzer for 5 seconds, the operator is to determine if the sound test is PASS or FAIL. If the sound test
fails it should be repaired at the conclusion of the Pretrip
cycle. Pretrip will continue regardless of the outcome of
the sound test. A faulty buzzer will not affect the operation of the unit, but will lead to operation without proper
audible warning on start up.
Once Pretrip is started: If the unit is running, the microprocessor will shut the unit down.
Test 2 will continue with a check of the amperage (current) draw of the following components:
• Battery DC Current (All Components Turned Off).
NOTE
Before completing Pretrip, the microprocessor
looks at the status of alarms and if certain
alarms are active (for example: Low Fuel Warning, Check Engine Oil Level, Check Coolant
Level, Check Coolant Temperature, Pretrip will
display “FAILED”, indicating that the unit is not
ready to be sent out for a load, but that the alarm
list should be checked and all present alarm situations corrected.
•
•
•
•
•
•
•
•
•
•
•
TIP
It is always a good idea to clear all alarms from
both Alarm Lists before starting Pretrip. The
technician will then know that any alarms present following Pretrip occurred during Pretrip,
and are not old alarms that had not been
cleared.
Rear Unloader Solenoid (UL2) .
Intake Air Heater (IAH).
Engine Speed Control Unit (ENSCU).
Condenser Motor Contactor (CDCON).
Compressor Motor Contactor (CCON).
Generator Contactor (GENCON).
Standby Contactor (PSCON).
Heater Contactor (1HTCON1).
Heater Contactor (1HTCON2).
Evaporator Motor Contactor (1EVCON).
Each component will be individually checked for proper
current draw. An alarm will be activated for any component not drawing amperage in the expected range.
NOTE
The operator MUST be present and validate
Test 1 by watching the microprocessor display.
The microprocessor will illuminate all the Mode
Lights and all segments of the Main Display.
Following Test 1, the operator MUST verify that,
during the first 5 seconds of Test 2, the buzzer is
energized.
62-11389
Front Unloader Solenoid (UL1).
Test 3 - Refrigeration System Equalization Check
With the engine and the unit off, the CSMV will open to
50% and the EVXV will open to 100% so that the pressure in the refrigeration system can equalize.
Test 4 will last approximately 5 seconds. If a problem is
detected with any of the sensors, the corresponding
alarm will be activated.
3−6
PRETRIP (Continued)
Test 4 - Temperature Sensor Check
Test 10 - Condenser Fan Motors Amperage Check
The condenser fan motor contactor will be energized
and checked for proper current draw. An alarm will be
activated if the condenser fan motors are not drawing
amperage in the expected range.
Check the condition of all of the system temperature
sensors.
NOTE
Tests 5, 6 an 7 are only performed when unit is
in Engine Operation. When in Standby Operation, pretrip will skip to Test 8.
Test 11 - Check Compressor Suction Modulation
Valve (CSMV)
This test ensures that the CSMV is opening and closing
properly. If suction pressure doesn’t change as
expected with CSMV closed then the P180 - “CHECK
SUCTION MOD VALVE” alarm will be activated. This
test may take several minutes.
Test 5 - Engine Low Speed
The engine starts up in low speed with condenser fans
on. The microprocessor verifies that engine speed is in
low speed range. If the engine is not operating within the
low speed range, the P174 -“CHECK LOW SPEED
RPM” alarm will be activated.
Test 12 - Electronic Expansion Valve (EVXV)
This test checks the operation of the EVXV. If valve
doesn’t test properly the P177 - “CHECK EVAP SUPERHEAT” alarm will be activated.
Test 6 - Engine High Speed
The engine switches to high speed and energizes
HTCON1 and HTCON2. The microprocessor verifies
that engine speed is in high speed range. If the engine is
not operating within the high speed range, the P175 “CHECK HIGH SPEED RPM” alarm will be activated.
Test 13 - Unloaders
This test checks the operation of the unloaders. If suction and discharge pressures do not change when UL1
and UL2 are energized and de-energized, the P178 “CHECK UL1” or P191 - “CHECK UL2” alarm will be activated.
Test 7 - Engine Low Speed 2
Test 15 - Check For Other Alarms
The engine switches back to low speed and heaters turn
off. The microprocessor verifies that engine speed is in
low speed range. If the engine is not operating within the
low speed range, the P174 - “CHECK LOW SPEED
RPM” alarm will be activated.
The alarm list is checked for any non-pretrip alarms that
may have occurred during the Pretrip test. If any
operational alarms occurred, Pretrip will display FAIL,
and the technician will need to review the Alarm List and
take necessary and appropriate action to clear them.
Test 15 will last about five seconds.
Test 8 - Electric Heater Amperage Check
Each heater will be energized individually and checked
for proper current draw. An alarm will be activated for
any heater not drawing amperage in the expected
range.
Pretrip Termination
When the Pretrip cycle is completed, the unit will return
to normal temperature control operation. “PRETRIP
PASS” will be displayed until the operator presses any
key. In the event that the Pretrip test triggered an
alarm(s), either “PRETRIP FAIL & COMPLETE” (if the
entire Pretrip cycle was completed), or “PRETRIP FAIL
IN TEST XX”, (if the Pretrip cycle was aborted by an
alarm before it was completed) will be displayed.
Test 9 - Evaporator Fan Motor Amperage Check
The evaporator motor contactor will be energized and
checked for proper current draw. An alarm will be activated if the evaporator fan motor is not drawing amperage in the expected range.
3−7
62-11389
3.5 CHANGING SET POINT
HEAT
COOL
DEFROST
ALARM
START‐STOP CONTINUOUS
+34.5 F
-20.0
SETPOINT
BOX TEMPERATURE
SETPOINT CHANGED
MANUAL
DEFROST
ALARM LIST
START‐STOP/
CONTINUOUS
SELECT
1. Press the UP ARROW or DOWN ARROW key to change the set point to
the desired value. The MessageCenter will display “↑↓ TO SCROLL,
THEN = TO SAVE”.
2. Press the = key to save the new set point.
• When the unit is in Pretrip OR
By default, set points of -22°F to +89°F (-30°C to +32°C)
may be entered via the keypad. The microprocessor always retains the last entered set points in memory. The
set points will change 1° (one full degree) OR 0.1° (one
tenth of a degree - if configured to do so) for each press
and release of the UP ARROW or DOWN ARROW key.
NOTES
The microprocessor may be configured with a
minimum and/or maximum set point other than
the default values listed above. “MAX SETPOINT HAS BEEN REACHED” or “MIN SETPOINT HAS BEEN REACHED” will display in
the MessageCenter when either of these conditions is reached.
• When the unit is in Sleep Mode.
Pressing the = key will cause the new displayed set
point value to become active and “SETPOINT
CHANGED” will be displayed. If the new value is not entered, after 5 seconds of no keypad activity, the entire
display and Light Bar will flash and the buzzer will be energized for 15 seconds (with “SETPOINT NOT
CHANGED” displayed) and then revert back to the last
entered set point. All other keys are active at this time
and if pressed while the display is flashing, will stop the
flashing, and perform the requested function.
Set point may be changed any time the Main Power
switch is not in the OFF position, or when the unit is in
PC Mode EXCEPT when:
TIP
The set point may be changed quickly by pressing and holding the UP ARROW or DOWN ARROW key. The longer the key is held, the faster
the setting will change.
• Viewing the Alarm List, Data List or Functional Parameters OR
62-11389
3−8
3.6 START-STOP OPERATION
START-STOP
LIGHT
HEAT
COOL
DEFROST
ALARM
START‐STOP CONTINUOUS
+34.5 F
-20.0
SETPOINT
BOX TEMPERATURE
START-STOP MODE SELECTED
MANUAL
DEFROST
ALARM LIST
START‐STOP/
CONTINUOUS
SELECT
1. Press the START-STOP/CONTINUOUS key until the
START-STOP Light on the microprocessor illuminates.
2. Verify that “START-STOP MODE SELECTED” is displayed on the MessageCenter and that the STARTSTOP light is illuminated. The unit is now in Start-Stop operation.
Start-Stop is provided to reduce fuel or power consumption. This feature allows full automatic control of the unit
shutdown and restart by monitoring refrigerated compartment temperature, battery charging amps and engine coolant temperature (Engine Operation only). The
main function of Start-Stop Operation is to turn off the
refrigeration system near setpoint to provide an efficient
temperature control system and to initiate a restart sequence after certain conditions are met. The Start-Stop/
Continuous key is pressed to select between Continuous Run and Start-Stop Operation. The corresponding
LED will be iluminated.
The microprocessor may be configured with Start-Stop
operation tied to the set point ranges for frozen and perishable loads. The Start-Stop/Continuous key is locked
out if “START-STOP LOCKED” displays in the MessageCenter when the key is pressed and the unit is in
Start-Stop Operation or “CONTINUOUS LOCKED” displays in the MessageCenter when the key is pressed
and the unit is in Continuous Run Operation. Refer to
Section 5.2.1 for Configuration information.
If the unit fails to start after three start attempts, the A31
- “FAILED TO START-AUTO” alarm will be activated.
While running, if the unit shuts down, an internal counter
keeps track of the shutdowns. Should the unit shutdown
three consecutive times without running a minimum of
15 minutes between shutdowns, the A30 - “FAILED TO
RUN MINIMUM TIME” alarm will be activated. The shutdown counter is cleared when the unit has run for 15 minutes.
NOTE
In Standby Operation, the unit will stop for a
minimum of 5 minutes instead of 15 minutes.
Refer to Section 4.4 for more detailed information on
Start-Stop Operation.
3−9
62-11389
3.7 CONTINUOUS OPERATION
HEAT
COOL
DEFROST
ALARM
START‐STOP CONTINUOUS
CONTINUOUS
OPERATION
LIGHT
+34.5 F
-20.0
SETPOINT
BOX TEMPERATURE
CONTINUOUS RUN MODE SELECTED
MANUAL
DEFROST
1. Press the START-STOP/CONTINUOUS key until the CONTINUOUS
OPERATION Light on the microprocessor illuminates.
ALARM LIST
SELECT
2. Verify that “CONTINUOUS RUN MODE SELECTED” is displayed on the MessageCenter and that the CONTINUOUS
OPERATION light is illuminated. The unit is now in Continuous Operation.
In Continuous Operation, the unit will not shutdown except in response to a shutdown alarm. Refer to Section
4.5 for more detailed information on Continuous Operation.
The microprocessor may be configured with Start-Stop
operation tied to the set point ranges for frozen and perishable loads. The START-STOP/CONTINUOUS key is
locked out if “START-STOP LOCKED” displays in the
MessageCenter when the key is pressed and the unit is
in Start-Stop Operation or “CONTINUOUS LOCKED”
displays in the MessageCenter when the key is pressed
and the unit is in Continuous Operation. Refer to
Table 5−2 for more information on Configurations.
62-11389
START‐STOP/
CONTINUOUS
If the unit fails to start after three start attempts the A 31 “FAILED TO START-AUTO” alarm will be activated.
While running, if the unit shuts down, an internal counter
keeps track of the shutdowns. Should the unit shutdown
three consecutive times without running a minimum of
15 minutes between shutdowns the A30 - “FAILED TO
RUN MINIMUM TIME” alarm will be activated. The shutdown counter is cleared when the unit has run for 15 minutes.
3−10
3.8 SLEEP MODE
HEAT
COOL
SETPOINT
DEFROST
ALARM
START‐STOP CONTINUOUS
BOX TEMPERATURE
SLEEP MODE SETTINGS
MANUAL
DEFROST
ALARM LIST
START‐STOP/
CONTINUOUS
SELECT
Entering using Functional Parameter settings:
1. Press the SELECT key until the MessageCenter displays “PRESS ↑↓ TO VIEW SETTINGS”.
2. Press the UP ARROW key until the Functional Parameter “SLEEP MODE SETTINGS” is displayed.
Press the = key. The MessageCenter will then display “↑↓ TO SCROLL, THEN = TO SAVE”.
3. Press either the UP or DOWN ARROW key until “SLEEP MODE: YES” is displayed. The MessageCenter
will flash, indicating that this change has not been entered into memory. Press the = key to save the setting
ti memory - the MessageCenter will stop flashing, the unit is now in sleep mode.
4. Additional Functional Parameter sub menu selections for “wake up time” and “run pretrip at wake” will now be
available and may be saved to memory following the key stroke sequence in the preceding step. Refer to the
following paragraphs for information on these settings.
TO EXIT SLEEP MODE
Place the Main Power switch in the OFF position, then back to the desired position.
Sleep Mode is generally used in cold ambients when the
unit will be off for an extended period of time with no
product inside the refrigerated compartment. Many
times units are difficult to start due to a discharged battery, thickened engine oil, etc. after time in cold ambient.
In Sleep and Standby Mode if the unit is connected to
standby power, the battery charger is energized and will
keep the battery charged. The engine will not run with
the switch in the STANDBY position.
ADDITIONAL SUB MENUS
1. “WAKE UP TIME”
There is NO TEMPERATURE CONTROL in Sleep
Mode and it should never be used if the compartment
contains perishable or frozen products.
a. When “WAKE UP TIME” is set to NO the unit will
remain in Sleep Mode until it is taken out manually
(refer to “TO EXIT SLEEP MODE” instruction
above).
In Sleep Mode and Engine Operation the unit will “Wake
Up” periodically and start the engine to keep the battery
charged and the engine warm.
b. When “WAKE UP TIME” is set to YES the “SET
WAKEUP TIME” menu will become available.
3−11
62-11389
If the unit is already running when Sleep Mode is selected, it will continue to run until the conditions described above are met.
Pressing the = key will allow the user to select the date
and time the unit is to automatically wake up. The wake
up time must be at least 1 hour and no more than 8 days
from the time the clock is set. The following information
can be entered:
Month (1 to 12).
Day (1 to 31).
Year (1998 to 2037).
Hour (0 to 23).
Minute (0 to 59).
While the unit is cycled off in Sleep Mode, “SLEEP
MODE, OFF/ON TO WAKE” will be displayed in the
MessageCenter. The display backlight will turn off after
5 minutes.
While in Sleep Mode, Unit Data and Alarm Lists may be
viewed, and Functional Parameters may be viewed and
changed as necessary. However, Start-Stop/Continuous Run selections and set point can not be changed.
Manual Defrost and Pretrip can be initiated.
NOTE
The clock is a 24 hour clock. Hours 1 thru 12 are
AM and hours 13 thru 24 are PM.
The unit will restart when engine coolant temperature
drops below the configured restart temperature value or
if the battery voltage drops below the configured battery
restart value. (refer to Table 5−2)
2.“RUN PRETRIP TEST AT WAKE”
a. When “PRETRIP TEST AT WAKE” is set to NO
the unit will wake up at the designated time and control to set point.
b. When “PRETRIP TEST AT WAKE” is set to YES.
the unit will wake up at the designated time, automatically run Pretrip and then control to set point. “PRETRIP PASS/FAIL” will remain in the MessageCenter
until it is manually cleared.
NOTE (FOR ENGINE OPERATION ONLY)
In the event that the Engine Coolant Temperature sensor fails, Sleep Mode will operate as follows:
If Sleep Mode is selected with the switch in the ENGINE
position, when the unit is not running during a Start-Stop
Off Cycle, any remaining Minimum Off Time will be ignored, and the engine will start. It will run for 4 minutes
(minimum), until the engine coolant temperature is
above 50°C (122°F), and the battery is fully charged
(O.K. displays in the Data List voltage line, and charging
amps are less than the configured setting). While the
unit is running in Sleep Mode, “SLEEP WARNING: NO
TEMP CONTROL” will flash in the MessageCenter, and
the main display (set point and compartment temperatures) will be off.
62-11389
In ambients above 32°F (0°C), the unit will run
as above, and will monitor battery voltage and
charging amps only (according to the Configuration setting).
In ambients below 32°F (0°C), the unit will run
for 20 minutes minimum run time, then restart
every 60 minutes (maximum off time). Battery
voltage and amperage will be monitored normally.
3−12
3.9 MANUAL DEFROST
DEFROST LIGHT
HEAT
COOL
DEFROST
ALARM
START‐STOP CONTINUOUS
dF
+34
SETPOINT
BOX TEMPERATURE
DEFROST CYCLE STARTED
MANUAL
DEFROST
ALARM LIST
START‐STOP/
CONTINUOUS
SELECT
Press the MANUAL DEFROST key. The DEFROST light will come on and the MessageCenter will display “DEFROST CYCLE STARTED” for 5 seconds, or flash “CANNOT
START DEFROST CYCLE” for five seconds.
TIP
When defrost mode cannot be manually initiated “CANNOT START DEFROST CYCLE” is displayed in the
MessageCenter. This will occur when:
• DTT is above 40°F (4°C). Defrost may be entered
The Manual Defrost Key can be used at any
time to start a Defrost Cycle as long as the preceding conditions are met.
•
•
•
•
NOTE
Refer to Section 4.6 for more detailed information on DEFROST.
any time the DTT is below 40°F (4°C) OR
The engine has not run 15 seconds after starting OR
The unit is in PC Mode OR
The unit is in Pretrip OR
There is an active shutdown Alarm.
3−13
62-11389
3.10 TRIP START
HEAT
COOL
DEFROST
-20.0
ALARM
START‐STOP CONTINUOUS
+34.5 F
SETPOINT
BOX TEMPERATURE
TRIP START ENTERED
MANUAL
DEFROST
ALARM LIST
START‐STOP/
CONTINUOUS
SELECT
1. To mark the start of a trip in the DataLink data recorder, press the SELECT key until
the MessageCenter displays “PRESS = TO MARK TRIP START”.
2. Press the = key.
3. If trip start is acknowledged by the DataLink data recorder, “TRIP START ENTERED” will be displayed
for five seconds and then the display will revert back to the normal display. Otherwise “CANNOT ENTER TRIP START” will flash and then the display will revert back to the normal display.
Trip Start places the present time and date as a stamp in the DataLink data recorder memory to allow easy review of
the data from the last trip, and to allow downloading data from a specific trip. A trip begins at a Trip Start and ends at the
next Trip Start.
62-11389
3−14
3.11 VIEW ACTIVE ALARMS
ALARM LIGHT
HEAT
COOL
DEFROST
ALARM
START‐STOP CONTINUOUS
+34.5 F
-20.0
SETPOINT
BOX TEMPERATURE
NO ACTIVE ALARMS
MANUAL
DEFROST
ALARM LIST
START‐STOP/
CONTINUOUS
SELECT
1. Press the ALARM LIST key. If there are no active alarms, “NO ACTIVE
ALARMS” will display for 5 seconds.
2. If there are active alarms, the alarm number will be displayed with the letter “A” in front and the
alarm message following. The last alarm that occurred will be the first alarm displayed and so on.
3. Press the ALARM LIST or UP ARROW key to scroll through the list of alarms.
4. When you reach the end of the alarm list, “LIST END, = TO CLEAR ALARMS” is displayed
for five seconds.
5. To clear the alarm list, press the = key while “LIST END, = TO CLEAR ALARMS” is being displayed.
“ACTIVE ALARMS LIST CLEAR” is displayed. This will move all Alarms to the Inactive Alarm list.
Alarms are stored in the Alarm List in the microprocessor. Stored alarms may be viewed in the MessageCenter.
TIP
Another way to clear active alarms is to turn the
microprocessor OFF and then back on using
the Main Power switch
For a complete list of alarms, their meanings, and troubleshooting refer to Section 7.
TIP
“CHK WIRES FROM MICRO TO KEYPAD” indicates there is a wiring problem between the
microprocessor and the display module.
3−15
62-11389
3.12 VIEW INACTIVE ALARMS
HEAT
COOL
DEFROST
-20.0
ALARM
START‐STOP CONTINUOUS
+34.5 F
SETPOINT
BOX TEMPERATURE
NO INACTIVE ALARMS
MANUAL
DEFROST
ALARM LIST
START‐STOP/
CONTINUOUS
SELECT
1. Press and hold both the ALARM LIST key and the UP ARROW key for six seconds.
If there are no inactive alarms, the display will read “NO INACTIVE ALARMS” for
five seconds.
2. If there are inactive alarms, the display will be ‘I’ in front of the alarm number and message.
3. Press the ALARM LIST or UP or DOWN key to scroll through the list of alarms.
4. When you reach the end of the alarm list, “LIST END, = TO CLEAR ALARMS” is displayed
for 5 seconds.
5. To clear the active and inactive alarm list, press the = key while “LIST END, = TO CLEAR ALARMS”
is being displayed. “ALL ALARMS CLEAR” is displayed.
The microprocessor can hold up to 16 alarms in the
combined Active and Inactive Alarm lists. The lists can
be read via the MessageCenter or using the ReeferManager PC Program. There are two sections in the
Alarm list, an Active Alarm Section and Inactive Alarm
Section. Alarms in these sections are in the order in
which the alarms activate and inactivate, respectively.
On startup, all alarms are marked as inactive in the entire list. If an inactive alarm becomes active, the alarm is
moved from the Inactive Alarm list to the Active Alarm
list.
For a complete list of Alarms and troubleshooting information Refer to Section 7.
TIP
When alarms are cleared from the Inactive
Alarm List, both active and inactive alarm lists
are cleared.
If there is a safety shutdown “UNIT SHUTDOWN - SEE
ALARM LIST” will be displayed. Pressing the Alarm List
key will bring any Active Alarms into the MessageCenter. Refer to Section 7 for a complete list of
Alarms and their descriptions.
As additional alarms occur, they will be placed first in the
Active Alarm list. Each alarm can only be present in either the Active or Inactive Alarm List at any given time.
As conditions change, alarms may be moved from the
Active Alarm list to the Inactive alarm list and back.
NOTE
The Inactive Alarm List is also called the Technician’s List. Only qualified refrigeration technicians should access the inactive list. It is not intended for the use of drivers or operators.
Alarms are also recorded in the DataLink data recorder.
They are recorded at the time they occur (become active), and the time they become inactive.
62-11389
3−16
3.13 UNIT DATA
HEAT
COOL
DEFROST
ALARM
START‐STOP CONTINUOUS
+34.5 F
-20.0
SETPOINT
BOX TEMPERATURE
PRESS ↑ ↓ TO VIEW DATA
MANUAL
DEFROST
ALARM LIST
START‐STOP/
CONTINUOUS
SELECT
1. Press the SELECT key until the MessageCenter displays
“PRESS ↑↓ TO VIEW DATA.”
2. Press the green UP ARROW key. The MessageCenter will display “PRESS
↑↓ TO VIEW DATA, THEN = TO LOCK” . Continue to press the green UP
ARROW key to move down the Data List, or press the DOWN ARROW key
to move up the Data List. (Refer to Table 3-1.)
3. The selected Data Item will remain in the MessageCenter for ten seconds, then the default message (“STATUS OK” or other customer specified message) will display.
4. To lock an item in the MessageCenter for continuous viewing, press the = key. The Data
item will flash continuously to indicate it is locked.
5. Pressing the UP or DOWN ARROW key will unlock that item and move to the next
data item. Pressing the = key will unlock the item and, after ten seconds, the default message will be displayed.
Table 3-1 Unit Data
* Displays information or setting entered in the microprocessor Configurations
+ May or may not be displayed depending on Parameter/Configuration settings
Data readings are presented starting with “SUCTION PRESSURE” and progressing down the list using the green UP ARROW key.
DATA
DEFINITION
SUCTION PRESSURE
Compressor suction pressure
DISCHARGE PRESSURE
Compressor discharge pressure
EVAPORATOR PRESSURE
Leaving evaporator pressure
ENGINE COOLANT TEMP
Engine coolant temperature
RETURN AIR TEMP
Return (air entering evaporator) temperature
3−17
62-11389
Table 3-1. Unit Data - Continued
* Displays information or setting entered in the microprocessor Configurations
+ May or may not be displayed depending on Parameter/Configuration settings
SUPPLY AIR TEMP
Supply (air leaving evaporator) temperature
DELTA-T
Supply air temperature minus return air temperature
AMBIENT AIR TEMP
Ambient (air entering condenser) air temperature
DEFROST TERM TEMP 1
Defrost termination temperature
SUCTION LINE TEMP
Suction line temperature at the compressor
EVAP OUTLET TEMP
Suction line temperature leaving the evaporator outlet
COMP DISCHARGE TEMP
Compressor discharge temperature
BATTERY
Battery voltage
CURRENT DRAW (DC)
Battery charging or discharging amps
ENGINE RPM
Engine speed
UNIT AC CURRENT #1
High voltage current draw on circuit #1.
UNIT AC CURRENT #2
High voltage current draw on circuit #2.
FUEL LEVEL
This is only displayed when the sensor is configured ON. % of fuel in
tank.
SUCTION MOD VALVE
% open of CSMV
EXPANSION VALVE
% open of EVXV
START MODE
SOFTWARE REVISION
AUTO if the engine will start automatically
MANUAL if the engine must be started manually
This is only displayed when one or more options is configured ON. Lists
installed options. Press “=” to access the list.
Revision of the software that is operating the microprocessor
DISPLAY SOFTWARE REV
Revision of the software that is operating the display
CONTROL SERIAL #
Serial Number of the microprocessor
*
*
*
TRAILER ID #
ID (as configured by the user)
UNIT SERIAL #
Unit serial number
UNIT MODEL #
Unit model number
+
HOURS TO ENGINE
MAINTENANCE
HOURS TO S/B MOTOR
MAINTENANCE
This is only displayed when the meter is configured ON. Number of engine hours until the next programmed engine maintenance
This is only displayed when the meter is configured ON.
Number of hours until the next programmed electric standby motor maintenance.
This is only displayed when the meter is configured ON. Number of
switch-on hours until the next programmed general unit maintenance.
This is only displayed when one or more of the meters is configured ON.
Number of hours until the next programmed maintenance. (May display
user programmed identification.)
+
+
+
+
+
INSTALLED OPTIONS
HOURS TO UNIT
MAINTENANCE
TIME LEFT TO PM (1-5)
62-11389
3−18
*
+
*
Table 3-1. Unit Data - Continued
* Displays information or setting entered in the microprocessor Configurations
+ May or may not be displayed depending on Parameter/Configuration settings
PRODUCTSHIELD SETUP: Press “=” to access the list.
PRODUCTSHIELD
ECONO:
ECONO MIN
TEMP - XX°
ECONO MAX
TEMP - XX°
ECONO
DELTA-T - XX°
PRODUCTSHIELD
HIGH AIR:
HIGH AIR MIN
TEMP - XX°
HIGH AIR MAX
TEMP - XX°
HIGH AIR
DELTA-T - XX°
PRODUCTSHIELD:
WINTER - XX°
RANGE 1 LOCK
+
*
RANGE 1 MINIMUM TEMP
+
*
Displays maximum temperature setting for Range 1. (Will only be displayed if Range Lock 1 is ON)
RANGE 2 LOCK
This is only displayed when Range Lock 1 is configured ON.
Displays Range Lock 1 setting:
OFF = Temperature Range 2 Lock is turned off.
CONTINUOUS = When the set point is set between Range 2 Minimum
& Maximum Temperatures, the unit is set to operate only in Continuous
Run.
START-STOP = When the set point is set between Range 2 Minimum &
Maximum Temperatures, the unit is set to operate only in Start-Stop.
Displays minimum temperature setting for Range 2. (Will only be displayed if Range Lock 2 is ON)
+
*
RANGE 2 MIN. TEMP
+
*
+
*
+
*
Displays minimum temperature setting for activation of ProductShield
High Air. (Will only be displayed if Econo is NOT OFF)
Displays maximum temperature setting for activation of ProductShield
High Air. (Will only be displayed if Econo is NOT OFF)
Displays Delta-T setting for activation of ProductShield High Air. (Will
only be displayed if Econo is NOT OFF)
Indicates ProductShield Winter is OFF or the ambient temperature below
which ProductShield Winter will be active.
This is only displayed when Range Lock 1 is configured ON.
Displays Range Lock 1 setting:
OFF = Temperature Range 1 Lock is turned off.
CONTINUOUS = When the set point is set between Range 1 Minimum
& Maximum Temperatures, the unit is set to operate only in Continuous.
START-STOP - When the set point is set between Range 1 Minimum &
Maximum Temperatures, the unit is set to operate only in Start-Stop.
Displays minimum temperature setting for Range 1. (Will only be displayed if Range Lock 1 is ON)
RANGE 1 MAXIMUM TEMP
+
*
Indicates if ProductShield Econo is OFF OR Go To Start-Stop OR Go
To Continuous Run
Displays minimum temperature setting for activation of ProductShield
Econo. (Will only be displayed if Econo is NOT OFF)
Displays maximum temperature setting for activation of ProductShield
Econo. (Will only be displayed if Econo is NOT OFF)
Displays Delta-T setting for activation of ProductShield Econo. (Will only
be displayed if Econo is NOT OFF)
Indicates if ProductShield High Air is OFF OR ON
RANGE 2 MAX. TEMP
Displays maximum temperature setting for Range 2. (Will only be displayed if Range Lock 2 is ON)
TEMPERATURE (REMOTE) Will only display when one or more of the optional sensors are conSENSOR (1, 2 or 3)
figured ON. Displays temperate reading of remote Temperature Sensor 1
(2, or 3).
DATALOGGER (DataLink
Displays the current Date and Time that the DataLink data recorder is
data recorder)
using. This may be different than local time, depending on the Time
Zone and Daylight Savings.
3−19
62-11389
3.14 VIEW HOUR METERS
HEAT
COOL
DEFROST
-20.0
ALARM
START‐STOP CONTINUOUS
+34.5 F
SETPOINT
BOX TEMPERATURE
TOTAL ENGINE HOURS: 0 HRS
MANUAL
DEFROST
ALARM LIST
START‐STOP/
CONTINUOUS
SELECT
1. Press the SELECT key until the MessageCenter displays “PRESS ↑↓ TO VIEW HOURMETERS”.
2. Press the green UP ARROW key. The MessageCenter will display “PRESS ↑↓ TO
SCROLL, THEN = TO LOCK” . Continue to press the green UP ARROW key to move
down the hour meter list, or press the DOWN ARROW key to move up the list.
3. Displayed hour meters will depend on microprocessor configurations (refer to Table 5−2). Typical
displayed meters are: “TOTAL ENGINE HOURS”, “STANDBY RUN HOURS” and “TOTAL SWITCH
ON HOURS”.
4. Pressing the = key will access all other meters and display “OTHER
METERS AND COUNTERS”.
5. The selected hour meter will remain in the MessageCenter for 10 seconds, then the
default message (“STATUS OK” or other customer specified message) will display.
6. To lock an hour meter in the MessageCenter for continuous viewing, press the = key.
The Data item will flash continuously to indicate it is locked.
7. Pressing any key on the keypad will unlock the item. Pressing the UP or
DOWN ARROW key will move to the next hour meter.
Hour meters available when “OTHER METERS AND COUNTERS” is chosen are:
Meters listed in Step 3 above and, up to 5 User
Configurable meters including:
Engine Sleep Hours.
Switch On Sleep Hours.
Switch On Standby Hours
Compressor Run Hours
Engine Protect Hours.
High Speed Hours.
Switch On Protect Hours.
Start cycles.
62-11389
3−20
3.15 FUNCTIONAL PARAMETERS
HEAT
COOL
DEFROST
-20.0
ALARM
START‐STOP CONTINUOUS
+34.5 F
SETPOINT
BOX TEMPERATURE
PRESS ↑ ↓ TO VIEW SETTINGS
MANUAL
DEFROST
ALARM LIST
START‐STOP/
CONTINUOUS
SELECT
1. Press the SELECT key until the MessageCenter displays
“PRESS ↑↓ TO VIEW SETTINGS”.
2. By pressing the UP ARROW key, you will move through the Functional
Parameter list beginning at the top or by pressing the DOWN ARROW key,
you will move through the list beginning at the bottom.
3. To change one of the Parameters, bring the Parameter you wish to change into the MessageCenter, and
press = key. “↑ ↓ TO SCROLL, THEN = TO SAVE” will display in the MessageCenter. Pressing either UP or
DOWN ARROW key will display the Parameter selections available for that Function. The MessageCenter
will flash, indicating that a change to the displayed parameter selection has not been entered into memory.
4. Continue pressing UP or DOWN ARROW key until the desired Parameter selection is displayed, then press
the = key. The MessageCenter will stop flashing. The new Parameter selection is now in memory. If the = key
is not pressed within 10 seconds, the MessageCenter will display “FUNCTION NOT CHANGED”. This will
display for 5 seconds, then return to the last Functional Parameter displayed. If no further keys are pressed,
the default display will return in another 10 seconds.
NOTE
The microprocessor may be configured with all of
the Parameters locked or some individual Parameters locked. Any Parameter that is displayed
with a padlock symbol cannot be changed from the
keypad.
3−21
62-11389
Table 3-2 Functional Parameters
FUNCTION
PARAMETER
SELECTIONS
DESCRIPTION
NOTES: Selections in BOLD are the default settings. Also, Functional Parameter marked with an asterisk (*) may
not display in the list for this unit, depending on how the microprocessor has been configured.
SILENT MODE
ON
OFF
DEFROST INTERVAL TIMER
SET FOR
1.5HRS
3HRS
6HRS
12HRS
OFF - Normal engine speed operation.
On - Forced low engine speed operation. Used to disable high speed.
The defrost timer will automatically put the unit into the defrost cycle at
the interval selected if DTT is below 40°F (4.4°C).
Shorter times are generally used for warm, humid products like produce.
Longer times can be used for dry and frozen products.
NOTE: the the timer increments time toward the next defrost only
when the DTT is below 40°F and the unit is running.
Set Start-Stop Parameters
Time and Temperature values that control Start-Stop Operation are set in this section.
The microprocessor may be configured so that: 1. the same settings apply to any set point = “Together”, or 2. the settings are different, depending on whether the set point is in the perishable range or in the frozen range = “Separate”.
If “together” is configured, there will be five settings with only the fifth applicable to just frozen range.
If “Separate” is configured there will be nine settings four labeled perishable and five labeled frozen.
MIN RUN
TIME:
MIN OFF
TIME:
4MINS
TO
60MINS
(in 1 minute increments)
10MINS
TO
90MINS
This determines the minimum length of time the unit will run every time
the unit starts in Start-Stop Operation.
This determines the minimum length of time the unit will remain off
whenever the unit cycles off in Auto Start-Stop Operation.
20MINS
(in 1 minute increments)
RESTART
TEMPERATURE
0.5°F (2°C)
TO
18°F (10°C)
Following the Minimum Off Time, should the compartment temperature
drift this far above or below set point in the Perishable Range or above
set point in the Frozen Range, the unit will restart.
5.5°F (3°C)
(in 0.5°F or C increments)
OVERRIDE
TEMP:
3.6°F (2°C)
TO
18°F (10°C)
11°F (6°C)
(in 0.5°F or C increments)
MAX OFF
TIME:
OFF
10MINS
TO
255MINS
(in 1 minute increments)
FROZEN
SHUTDOWN
OFFSET
05C (0°F)
TO
2°C (3.6°F)
(in 0.5°F or C increments)
62-11389
This selects the override temperature for the Minimum Off Time portion of the Auto Start-Stop Off Cycle. During the Minimum Off Time,
should the compartment temperature drift this far above or below set
point in the Perishable Range, or above set point in the Frozen Range,
the microprocessor will override the Minimum Off Time, and restart.
OFF = There is no maximum off time.
When a minute value is selected, this is the longest amount of time the
unit will remain off during a (Perishable or Frozen or both) Auto
Start-Stop Off Cycle. When this time expires, the unit will restart and
run for the Minimum Run Time, regardless of any temperature change
inside the compartment.
This only applies to Frozen set points in Start-Stop operation.
The system generally will allow an off cycle when the RAT is 0.5°F
(0.3°C) above set point. This offset is the number of degrees below
the 0.5°F (0.3°C) value that the unit will run before cycling off. This will
allow for a lower average compartment temperature when considering
temperature rises during off cycles.
3−22
Table 3-2 Functional Parameters - Continued
FUNCTION
PARAMETER
SELECTIONS
DESCRIPTION
OFF = Supply air temperature will be limited to the colder temperature
of 32°F (0°C) or set point less the Supply Air Limit Configuration value.
PERISHABLE
SENSITIVE
PRODUCT
ON
OFF
TEMP
CONTROL
RETURN AIR
SUPPLY AIR
DISPLAY
TEMPS
IN ...
FAHRENHEIT
CELCIUS
DISPLAY PRESSURES IN ...
PSIG
BAR
Pressures will display in either English (psig) or Metric (bar).
ECO MODE
NO
YES
NO = When in Continuous Operation, control for maximum temperature protection.
ON = Supply air temperature will be limited to set point less the Supply
Air Limit Configuration value.
Refer to Section 4.7.1 for complete information on Perishable Sensitive Product and Supply Air Configuration interaction.
The evaporator has both a Return Air Sensor and a Supply Air Sensor.
RETURN AIR = only the return air sensor reading will be used for calculating control actions. “Return Air” is generally selected for most
products.
SUPPLY AIR = the microprocessor will switch to the supply air sensor
when operating with a perishable set point (10.4°F [-12°C] or above).
“Supply Air” will control within a narrower temperature band.
The compartment temperature will display in either English (°F) using
a decimal point to display tenths of a degree OR or Metric (°C ) using
a comma to display tenths of a degree.
NOTE: Temperature setting values displayed in the MessageCenter
will continue to use a decimal for both °F and °C.
YES = When in Continuous Operation, control for maximum fuel economy.
RESET PM
HOURMETERS
This Functional Parameter allows resetting of the PM maintenance
alarm when an hour meter has timed out, or when over 95% of the
time out value has expired. If a maintenance interval has not been
configured for the alarm, this parameter will not display.
STANDBY
RUN HOURS
RESET
TOTAL
ENGINE
HOURS
RESET
TOTAL
SWITCH ON
HOURS
RESET
PM 1 Thru 5
RESET
OUT OF RANGE Metric
OFF
ALARM
2°C
3°C
4°C
English
OFF
4°F
5°F
7°F
Selecting RESET and pressing the = key will de-activate the alarm,
and reset the hour meter for the next maintenance interval. The
amount of time added back into the meter before the next alarm trigger is determined by the maintenance interval entered in the meter
Configuration.
If there are active maintenance hour meters and none have expired
and turned the alarm on, or none are within 95% of the time out value,
the MessageCenter will display “NO METERS TO RESET.”
NOTE: If a reset is required for a meter that has not timed out, the
meter must be configured with a “0” reset value (to turn it off) and then
reconfigured with the desired reset interval. Refer to Section 5 for
Configuration instructions.
The value entered here is the number of degrees away from set point
the compartment temperature may drift before the compartment is
considered “Out Of Range” and the configured alarm or alarm and
shutdown action will be activated. Refer to Alarm A53 - “BOX TEMPERATURE OUT OF RANGE” (Section 7) for more information.
3−23
62-11389
Table 3-2 Functional Parameters - Continued
FUNCTION
PARAMETER
SELECTIONS
DESCRIPTION
Low Speed Startup Minutes
Allows user to set the number of minutes the unit will run in low speed every time the engine starts.
Press “=” to access menu.
CONTINUOUS
OFF
Allows user to set the number of minutes the unit will run in low speed
1 TO 255MINS
every time the engine starts in Continuous operation.
1 MINUTE
START-STOP
OFF
Allows user to set the number of minutes the unit will run in low speed
1 TO 255MINS
every time the engine starts in Start-Stop Operation.
10 MINUTES
SLEEP MODE
For complete instructions on entering and setting parameters for Sleep Mode refer to Section
3.8. Press “=” to access menu.
SETTINGS
* NO S/B POWER
OVERRIDE
REMOTE
SWITCH 1
SHUTDOWN
(REMS1)*
AND
OVERRIDE
REMOTE
SWITCH 2
SHUTDOWN
(REMS2)*
AND
OVERRIDE
DOOR SWITCH
SHUTDOWN
(DS)*
LANGUAGE:
IDIOMAS:
LANGUE:
LINGUAGEM:
62-11389
SWITCH TO
DIESEL
SHUT UNIT DOWN
NO
YES
*If the NO AC POWER Configuration is set to “Alarm & Shutdown” this
parameter will not display
SWITCH TO DIESEL = If the NO AC POWER Configuration is set to
the “Switch To Engine” (on power loss), setting this parameter to
“SWITCH TO DIESEL” will confirm the Configuration and the switch
will be allowed.
SHUT UNIT DOWN = If the NO AC POWER Configuration is set to
the “Switch To Engine”, setting this parameter to SHUT UNIT DOWN
will override the Configuration setting and shut the unit down when
power is lost. The purpose of this setting is to temporarily override the
Configuration setting in situations where switching to engine power is
not desired.
*If the Switch is configured “Switch Not Installed”, this parameter will
not display
NO = the microprocessor will respond to the switch as configured
YES = the configured action on activation of the switch will be overridden and the action will be alarm only. The purpose of this setting is to
temporarily override the Configuration setting in situations where shutdown or speed change is not desired.
ENGLISH
ENGLISH- All information displayed in the MessageCenter will be displayed in English.
ESPAÑOL
FRANÇAIS- All information displayed in the MessageCenter will be
displayed in French.
FRANÇAIS
ESPAÑOL- All information displayed in the MessageCenter will be displayed in Spanish.
PORTUGUÊS
PORTUGUÊS - All information displayed in the MessageCenter will be
displayed in Portuguese.
NOTE 1: This parameter can be quickly accessed by pressing and holding the Select Key for
6 seconds.
NOTE 2: If the padlock is visible when accessing language from the Functional Parameter
List, the language cannot be changed. However, when accessing the language by pressing
and holding the Select Key for 6 seconds the language can be changed even if the padlock is
displayed.
3−24
3.16 LANGUAGE SELECTION
HEAT
COOL
DEFROST
-20.0
ALARM
START‐STOP CONTINUOUS
+34.5 F
SETPOINT
BOX TEMPERATURE
ESPAÑOL
MANUAL
DEFROST
ALARM LIST
START‐STOP/
CONTINUOUS
SELECT
1. Press and hold the SELECT key for 6 seconds until MessageCenter displays the current language (ENGLISH,
ESPAÑOL, FRANÇAIS or PORTUGUÊS).
2. Press the UP or DOWN ARROW key until the MessageCenter indicates the desired language. Press the = key. The new language will now be active.
If the = key is not pressed within 10 seconds, the MessageCenter will change to
“FUNCTION NOT CHANGED”. This will flash for 5 seconds, then return to the
current language. If no further keys are pressed, the default display will return in
another 10 seconds.
TIP
If the language is set to one that the user
does not understand, press and hold the
“SELECT” key for 6 seconds to bring up
the Language Parameter so that it can be
changed.
3−25
62-11389
3.17 INTELLISET
HEAT
COOL
DEFROST
+34.0
SETPOINT
ALARM
START‐STOP CONTINUOUS
+36.5 F
BOX TEMPERATURE
APPLES
ACTIVE
MANUAL
DEFROST
ALARM LIST
START‐STOP/
CONTINUOUS
SELECT
DURING START UP
Observe the MessageCenter during the power up process. If an IntelliSet is running, the name of the IntelliSet
will be displayed for approximately 10 seconds before the unit starts.
DURING OPERATION
Press the SELECT key to view current IntelliSet. You will be prompted to press either the “=” key or the UP or
DOWN ARROW Key to scroll through list of IntelliSets. The current IntelliSet will have either the word ACTIVE or
MODIFIED after it. MODIFIED indicates that one or more of the IntelliSet settings (other than set point) have been
changed. To change MODIFIED to ACTIVE, press = key while the IntelliSet is displayed in the MessageCenter.
The Advance Microprocessor offers up to 31 parameters that may be set depending on the product being carried. IntelliSet allows the owner to pre-program specific
product settings into the microprocessor and give the
settings a name. The operator may then call up these
settings by simply selecting the IntelliSet name.
CREAM” is selected. With each selection, the microprocessor automatically re-programs the settings to provide the best temperature control, fuel economy, and
performance for that particular product.
NOTE
The above settings are examples of possible
settings. Factory IntelliSets are available from
your authorized Carrier Transicold Truck/Trailer
dealer.
For example: A load of apples may require continuous
operation at 35°F (1.7°C) with a defrost every 3 hours
while a load of cheese may require the same operation
with set points ranging from 35°F to 42°F (1.7°C to
5.6°C) and a load of ice cream requires Start-Stop operation at -22°F (-30°C) with defrost at 12 hour intervals.
The settings required for each product may be entered
into the microprocessor and then locked so they cannot
be changed. In the case of the cheese, the range of set
points may be locked, leaving the operator the ability to
change the set point within the locked range.
NOTE
IntelliSet #32 is Range Protect, it is designed to
prevent freezing or overheating of non-sensitive cargo by locking the unit is Start-Stop Operation when the compartment temperature is in
the pre-set range (default range is 32 to 72°F, 0
to 32°C). Range Protect offers increased power
savings over normal Start-Stop Operation.
The ONLY way to exit from Range Protect is to
select a different IntelliSet.
When a load of apples is going to be picked up, the operator simply selects “APPLES” from the IntelliSet menu;
for cheese, “CHEESE” is selected ; for ice cream, “ICE
62-11389
3−26
3.17.1 Changing IntelliSets - With the = Key Enabled.
NOTE: If pressing the = key does not
bring up the IntelliSet message the microprocessor is not configured with this
feature. To view IntelliSets, refer to the
following section.
HEAT
COOL
DEFROST
+34.0
SETPOINT
ALARM
START‐STOP CONTINUOUS
+36.5 F
BOX TEMPERATURE
APPLES
ACTIVE
MANUAL
DEFROST
ALARM LIST
START‐STOP/
CONTINUOUS
SELECT
1. PRESS the = Key to display current IntelliSet.
2. Press the UP or DOWN ARROW key, to move through the IntelliSet List. The current IntelliSet will have either ACTIVE or MODIFIED to the right of the name.
3. To use a different IntelliSet, bring the desired IntelliSet into the MessageCenter and
press the = Key.
3−27
62-11389
3.17.2 Changing IntelliSets - Without the = Key Enabled.
HEAT
COOL
DEFROST
ALARM
START‐STOP CONTINUOUS
+34.0
+36.5 F
SETPOINT
BOX TEMPERATURE
PRESS ↑ ↓ TO VIEW INTELLISETS
MANUAL
DEFROST
ALARM LIST
START‐STOP/
CONTINUOUS
1. Press the SELECT key until MessageCenter displays
“PRESS ↑↓ TO VIEW INTELLISETS”.
2. When the UP ARROW key is pressed, the IntelliSet List
will scroll up, beginning at the bottom. When the DOWN
ARROW key is pressed, the IntelliSet List will scroll
down, beginning at the top. The current IntelliSet will
have either “ACTIVE” or “MODIFIED” to the right of the
name.
3. Bring the IntelliSet you wish to use into the MessageCenter
and then press the = key. The selected IntelliSet will now become active.
62-11389
3−28
SELECT
3.18 STOPPING UNIT
WARNING
Always place the Main Power switch in the OFF position and turn off the high voltage power supply before disconnecting the high voltage power plug from the unit.
unit off
ENGINE
OFF
STANDBY
To stop the unit, place the Main Power switch in the OFF
position.
The diesel engine or compressor will stop and the microprocessor will display “MICRO WILL STOP IN ##
SECONDS”. At the end of the countdown time the Microprocessor Main Display, MessageCenter, and all indicator LEDs will then turn off.
NOTE
The microprocessor will close the Electronic
Expansion Valve (EVXV) and the CSMV to
0% open before turning off.
NOTE
Due to internal processing within the microprocessor, turning the Main Power switch off
then back on will result in a 4 to 50 second
delay between the display going off and coming back on again.
3−29
62-11389
b. Sensor Data
3.19 DataLink DATA RECORDER
This information is recorded at pre-determined intervals
as a snapshot of the sensor at the time of the recording,
or an averaged reading of the sensor readings since the
last recording. The user can determine which sensor(s)
will be recorded, at what intervals, and whether snapshot or averaged readings are preferred. (Snapshot
readings of sensors are also taken at the time of a shutdown alarm.)
The Advance microprocessor contains a built-in
DataLink data recorder with 512K of memory. The recorded data can be downloaded from the DataLink data
recorder using either ReeferManager or a Download PC
card.
The DataLink data recorder reads the same input information as the microprocessor (Functional Parameters,
Configurations, and Unit Data) at all times. The
DataLink data recorder records events as they occur,
such as set point changes and defrost initiation and termination, and also records all data values including temperature sensors and pressure transducers in either averaged or snapshot format.
All of the sensors and transducers that may be read under Unit Data (refer to Table 3-1) may be included or excluded form the recordings.
c. Event Occurrences
This information is any additional data that is recorded
on a “when it occurs” basis. Events are recorded by the
recorder as they occur. An Event is defined as something that happens and may include:
The following intervals are available for sensor recording:
2 Minutes
30 Minutes
5 Minutes
1 Hour
10 Minutes
2 Hours
15 Minutes
4 Hours
Set point change
Defrost cycle start
Main power on
Pretrip start
3.19.1 Microprocessor Information
Pretrip end
The microprocessor information that may be recorded is
as follows:
Unit mode (Start-Stop or Continuous Operation)
DataLink data recorder setup (Logging Intervals,
Events and Sensors)
Door and Remote switch activations.
Control mode (Heat, Cool, High/Low speed, etc)
Hour Meter readings (Hour meters are recorded at
midnight or the first time of day the Main Power switch
is toggled out of the OFF position.
DataLink data recorder time clock date / time
d. User Area Data
Set points
The User or service technician may enter a Comment
into the DataLink data recorder using the ReeferManager program.
ID Number
Unit Serial Number
3.19.3 Data Downloading
The data within the DataLink data recorder can be
downloaded using either the ReeferManager program
with a download cable connected to the download port
or with a Download PC card (refer to Section 5.3). If a
PC card is used, the ReeferManager program is then
used to extract the data from the PC card, and place it on
the computer hard disk.
Unit Model Number
Trailer ID
Current System Mode
Functional Parameters
3.19.4 DataLink Data Recorder Power-Up
The DataLink data recorder records data the entire time
the Main Power switch is not in the OFF position. A Configuration exists which allows the user to select either an
additional 8 hours of sensor data be recorded after the
switch is placed in the OFF position, or to stop recording
at the same time the switch is placed in the OFF position. The factory setting is to stop recording at the same
time the switch is placed in the OFF position. (Refer to
Section 5.2.1.)
Microprocessor Configurations
3.19.2 Data Recording
The DataLink data recorder data comes from four general categories of information:
a. Microprocessor Information as described in Section
3.19.1 above.
62-11389
3−30
The DataTrak Option installation can be confirmed by
scrolling through the Unit Data (refer to Section 3.13).
DataTrak will be listed under the Installed Options heading if it is installed.
3.20 OPTIONS
3.20.1 DataTrak
DataTrak allows remote communication with the Advance microprocessor (cellular, satellite, etc).
Once DataTrak is installed, the Advance Microprocessor must be properly configured for the provider that
will be connecting to it (refer to section 5.2.1). The Satellite Com configuration can be set for “Qualcomm” or
“Other”.
One way Communication providers can request data
from the Advance microprocessor and transmit it via
their equipment to another location. This is typically
done via the Internet to any destination in the world.
If the provider is Qualcomm T2 (Trailer Tracs 2) or any
other provider then the “Other” setting is used. If the provider is Qualcomm Trailer Tracs then the “Qualcomm”
setting is used.
WARNING
Advance microprocessor equipped units
may start automatically at any time the Main
Power switch is not in the OFF position.
Also, the unit may be fitted with two way
communication equipment that will allow
starting of the unit from a remote location
even though the switch is in the OFF position.
Carrier Transicold has worked with approved communication providers with recommended installation locations, and wiring connections to Carrier units. Instructions for installing this equipment is supplied by each
individual provider, and not by Carrier Transicold. Communications electrical harnesses and serial port splitters are available from Carrier Transicold Performance
Parts Group (PPG).
Two Way Communication providers can also send commands via their equipment to the Advance microprocessor to start or stop the unit, change settings and the
way the microprocessor is operating the unit.
DataTrak is an optional feature. The DataTrak option is
installed by inserting a DataTrak PC Card into the PC
Card slot of the microprocessor and following the
on-screen instructions on the keypad.
Communication Providers will connect into the wiring
harness at the SATCOM port. Testing the SATCOM port
may be done using a serial port to PC cable
(22-01690-00) and the ReeferManager program. If ReeferManager can communicate with the microprocessor the unit wiring and microprocessor are performing normally and any communication problem is with the
provider’s equipment.
3−31
62-11389
3.20.2 Remote Control Panel
10
9
8
1 Control panel power on LED
2 System ON/OFF key
3 Reset Button
4 Manual defrost key
5 Control panel lock LED
6 HEAT mode LED
7 COOL mode LED
8 Set point display
9 Up and down arrow keys
10 Temperature display
7
6
1
2
TEMP.
DISPLAY
3
4
5
SET POINT
DISPLAY
WAITING FOR COMMUNICATION WITH MICROPROCESSOR
UNIT WAS TURNED OFF VIA REMOTE CONTROL
UNIT IN DEFROST MODE
TEMPERATURE SENSOR MALFUNCTION
P1
DISPLAYED WHEN SETTING PRE-SET SETPOINTS
NOTE:
1. TEMPERATURE DISPLAY (5C OR 5F) IS DEPENDENT ON MICROPROCESSOR CONFIGURATION
2. ENGINE LIGHT WILL NOT ILLUMINATE IN THIS APPLICATION.
The unit may be fitted with an optional remote control
panel. The panel displays compartment set point,
compartment temperature and operating modes (heat,
cool or defrost). The set point may be set and the unit
may be started and stopped using the remote panel.
The remote control panel can be used to :
Turn the unit on or off:
Check compartment temperature
Check and change set point
This compact panels can be mounted to suit the
individual operator’s preferences - in the cab, on the
front bulkhead, or in the compartment (including in the
wall itself).
62-11389
Initiate manual defrost
Check mode of operation
3−32
a.Starting Unit with Remote Control Panel
NOTES
1. The unit can be shutdown using either the remote panel or the unit switch panel mounted Main Power
switch. The remote panel cannot operate if the unit switch panel mounted Main Power switch is in the OFF
position.
2. In order to prevent a constant drain on the battery, the remote panel will de-energize after two hours. If the
panel is equipped with a RESET button, press the button to re-energize the panel. If the panel is not
equipped with a RESET button, the panel may be re-energized by placing the unit switch panel mounted
Main Power switch in the OFF position and then back in the desired position.
1. Place the unit switch panel
mounted Main Power switch
in the desired position.
2. Press The SYSTEM ON/OFF
Key. The POWER Light will illuminate.
b. Changing Set Point With Remote Control Panel
Press the UP or DOWN ARROW key
to increase or decrease set point.
3−33
62-11389
c.Lock / Unlock the Remote Control Panel
LOCKING THE PANEL:
Press and hold the Carrier Logo for
approximately one second and then
release.
The lock indicator light will illuminate.
UNLOCKING THE PANEL:
Press the Carrier Logo for 10 seconds
The lock indicator light will de-energize.
CARRIER LOGO
LOCK INDICATOR LIGHT
d. Pre-setting Set Point With Remote Control Panel
The control panel allows the user to pre-set 5 different temperatures.
NOTE
Once preset set points have been chosen, only those 5 designated set points can be used.
1. Place the unit switch panel mounted Main
Power switch in the desired position.
3. Press UP ARROW for 10 seconds. P1 will be displayed.
4. Set lowest set point required.
5. Press Carrier logo and P2 will
be displayed. Set next highest
temperature required.
6. Follow same procedure for the
next three temperatures.
2. Press Carrier logo and the lock light will illuminate.
62-11389
3−34
e. Removing Pre-Set Set Points With Remote
Control Panel
1. Place the unit switch panel mounted Main Power switch in the
desired position.
3. Press UP ARROW for 10 seconds. P1 will be displayed.
4. Set temperature to lowest pre-set set
point and OFF will be displayed
2. Press Carrier logo and the lock light will illuminate.
3−35
62-11389
SECTION 4 − ENGINE/STANDBY/TEMPERATURE CONTROL
1
PARAGRAPH NUMBER
Page
4.1 INTRODUCTION . . . . . . . . . . . . . . . . . . . . . . . . . . . . . . . . . . . . . . . . . . . . . . . . . . . . . . . . . . . . . . . . . 4−1
4.2 ENGINE/STANDBY OPERATION . . . . . . . . . . . . . . . . . . . . . . . . . . . . . . . . . . . . . . . . . . . . . . . . . . . 4−1
4.2.1 Standby Start-Up . . . . . . . . . . . . . . . . . . . . . . . . . . . . . . . . . . . . . . . . . . . . . . . . . . . . . . . . . . . . .
4−1
4.2.2
4.2.3
Engine Start-Up . . . . . . . . . . . . . . . . . . . . . . . . . . . . . . . . . . . . . . . . . . . . . . . . . . . . . . . . . . . . . .
Transition To High Speed . . . . . . . . . . . . . . . . . . . . . . . . . . . . . . . . . . . . . . . . . . . . . . . . . . . . . .
4−1
4−2
4.3 TEMPERATURE CONTROL . . . . . . . . . . . . . . . . . . . . . . . . . . . . . . . . . . . . . . . . . . . . . . . . . . . . . . . 4−2
4.3.1 Temperature Determination . . . . . . . . . . . . . . . . . . . . . . . . . . . . . . . . . . . . . . . . . . . . . . . . . . . .
4−2
4.3.2
4.3.3
Perishable And Frozen Set Point Ranges. . . . . . . . . . . . . . . . . . . . . . . . . . . . . . . . . . . . . . . .
Pull Down/Pull-Up . . . . . . . . . . . . . . . . . . . . . . . . . . . . . . . . . . . . . . . . . . . . . . . . . . . . . . . . . . . .
4−3
4−3
4.3.4. Defrost . . . . . . . . . . . . . . . . . . . . . . . . . . . . . . . . . . . . . . . . . . . . . . . . . . . . . . . . . . . . . . . . . . . . . .
4.3.5. Overrides . . . . . . . . . . . . . . . . . . . . . . . . . . . . . . . . . . . . . . . . . . . . . . . . . . . . . . . . . . . . . . . . . . . .
4−3
4−3
4.4 START-STOP OPERATION . . . . . . . . . . . . . . . . . . . . . . . . . . . . . . . . . . . . . . . . . . . . . . . . . . . . . . . . 4−3
4.4.1 Start-Stop Configuration . . . . . . . . . . . . . . . . . . . . . . . . . . . . . . . . . . . . . . . . . . . . . . . . . . . . . . .
4−3
Stop Parameters . . . . . . . . . . . . . . . . . . . . . . . . . . . . . . . . . . . . . . . . . . . . . . . . . . . . . . . . . . . . .
Re-Start Parameters . . . . . . . . . . . . . . . . . . . . . . . . . . . . . . . . . . . . . . . . . . . . . . . . . . . . . . . . . .
4−4
4−5
4.5 CONTINUOUS OPERATION . . . . . . . . . . . . . . . . . . . . . . . . . . . . . . . . . . . . . . . . . . . . . . . . . . . . . . . 4−5
4.5.1. Introduction . . . . . . . . . . . . . . . . . . . . . . . . . . . . . . . . . . . . . . . . . . . . . . . . . . . . . . . . . . . . . . . . . .
4−5
4.5.2. Continuous Operation . . . . . . . . . . . . . . . . . . . . . . . . . . . . . . . . . . . . . . . . . . . . . . . . . . . . . . . . .
4−5
4.6 DEFROST . . . . . . . . . . . . . . . . . . . . . . . . . . . . . . . . . . . . . . . . . . . . . . . . . . . . . . . . . . . . . . . . . . . . . . . 4−8
4.6.1 Defrost Initiation And Start . . . . . . . . . . . . . . . . . . . . . . . . . . . . . . . . . . . . . . . . . . . . . . . . . . . . . .
4.6.2 Defrost Modes . . . . . . . . . . . . . . . . . . . . . . . . . . . . . . . . . . . . . . . . . . . . . . . . . . . . . . . . . . . . . . . . .
4−8
4−8
4.6.3 Defrost Termination . . . . . . . . . . . . . . . . . . . . . . . . . . . . . . . . . . . . . . . . . . . . . . . . . . . . . . . . . . . .
4−8
4.7. USER SELECTED OVERRIDE OPERATION . . . . . . . . . . . . . . . . . . . . . . . . . . . . . . . . . . . . . . . . 4−9
4.7.1
4.7.2
Supply Air Limit Control . . . . . . . . . . . . . . . . . . . . . . . . . . . . . . . . . . . . . . . . . . . . . . . . . . . . . . .
Temperature Range Lock 1 & 2 . . . . . . . . . . . . . . . . . . . . . . . . . . . . . . . . . . . . . . . . . . . . . . . . .
4−9
4−10
4.7.3 ProductShield . . . . . . . . . . . . . . . . . . . . . . . . . . . . . . . . . . . . . . . . . . . . . . . . . . . . . . . . . . . . . . . . 4−11
4.8. PREPROGRAMMED SOFTWARE OVERRIDES. . . . . . . . . . . . . . . . . . . . . . . . . . . . . . . . . . . . . . 4−13
4.8.1
4.8.2
Cargo Protect Mode. . . . . . . . . . . . . . . . . . . . . . . . . . . . . . . . . . . . . . . . . . . . . . . . . . . . . . . . . . .
Compressor Minimum Operating Time . . . . . . . . . . . . . . . . . . . . . . . . . . . . . . . . . . . . . . . . . . .
4−13
4−13
4.8.3
4.8.4
Engine Speed Overrides . . . . . . . . . . . . . . . . . . . . . . . . . . . . . . . . . . . . . . . . . . . . . . . . . . . . . . .
Unloader Control Overrides . . . . . . . . . . . . . . . . . . . . . . . . . . . . . . . . . . . . . . . . . . . . . . . . . . . .
4−13
4−14
4.8.5
Defrost Safety Override . . . . . . . . . . . . . . . . . . . . . . . . . . . . . . . . . . . . . . . . . . . . . . . . . . . . . . .
4−16
62−11389
4
4.4.2
4.4.3
SECTION 4
ENGINE/STANDBY/TEMPERATURE CONTROL
NOTES
1. If the unit is in an alarm condition, the microprocessor alarm response may override the operation
described herein. If an alarm is displayed in the MessageCenter, refer to the specific alarm description in
Section 7 for “Unit Control” descriptions.
2. With the complex control systems in use with the Advance microprocessor there are many user selected
and preprogrammed software overrides which may change the operation of the unit. Refer to Sections 4.7
& 4.8 for complete descriptions of these features.
4.1 INTRODUCTION
4.2.2 Engine Start-Up
This section describes operation of the unit when power
is supplied from an external source - Standby Operation
and when power is supplied by the internal generator Engine Operation. The section also describes two
additional sub-categories of operation; Start-Stop
Operation (with standby or engine power) and
Continuous Operation (with standby or engine power).
On command to perform a Start-up in Engine Operation
the microprocessor will enter the engine start sequence
to start the engine and direct connected generator.
Following start, the refrigeration system or heaters will
then operate in the mode(s) required for temperature
control.
At the beginning of the start sequence the
microprocessor will close the run relay (RR) contacts to
signal the engine speed control unit (ENSCU) that
engine operation is required and to provide power to the
optional electric fuel pump (FP - if supplied). During the
start sequence the engine speed control unit (ENSCU)
will hold the engine in low speed.
For descriptions of refrigerant system component
interaction when cooling, with flow diagram, refer to
section 2.14.
4.2 ENGINE/STANDBY OPERATION
Engine or Standby Operation is chosen by positioning of
the switch labeled ENGINE/OFF/STANDBY (DOES)
OR
positioning
of
the
switch
labeled
STANDBY/ENGINE (DES).
ENGINE
RUNNING
HEAT
With the switch in the STANDBY position the power
supply contactor relay (PSCONR - see wiring
schematic, Section 10) is energized. Energizing
PSCONR reverses its contacts to allow power from the
power plug while the engine is shutdown and power
from the generator is locked out.
3 to 10
Seconds
0 - 180
Seconds
following start
HEAT & CRANK
SECOND
AND
THIRD
ATTEMPTS
5 SEC. BUZZER
With the switch in the ENGINE position the generator
contactor relay (GENCONR) is energized. Energizing
GENCONR reverses its contacts to allow the engine
and generator to operate while power from the power
plug is locked out.
0 to 30
Seconds
PRE
CRANK
HEAT
ÉÉÉÉÉÉ
ÉÉÉÉÉÉ
ÉÉÉÉÉÉ
15 Seconds
STOP
Once the Main Power switch is toggled from the OFF
position, the compressor suction modulating valve
(CSMV) and evaporator expansion valve (EVXV) will
both open to a predetermined position, to equalize
system pressure, and then close (0% open) before the
unit starts.
ENGINE
RUNNING
HEAT
3 to 10
Seconds
NOTE
The unit will not restart for at least 30 seconds
following a shutdown.
HEAT & CRANK
5 SEC. BUZZER
0 to 30
Seconds
4.2.1 Standby Start-Up
On command to perform a Start-Up in Standby
Operation the microprocessor will energize the buzzer
for five seconds. The refrigeration system or heaters will
then operate in the mode(s) required for temperature
control.
0 - 180
Seconds
following start
PRE
CRANK
HEAT
FIRST
ATTEMPT
Figure 4−1 Auto Start Sequence
4−1
62-11389
The engine start sequence consists of periods of time
with the intake air heater relay (IAHR) or glow heater
relay (GPR) and starter solenoid relay (SSR) energized
and de-energized for up to three start attempts. See
Figure 4−1.
If the unit is equipped with a fuel heater, the
microprocessor will monitor ambient temperature. If
ambient is below 77°F (25°C) power will be supplied to
the fuel heater relay (FHR). Energizing FHR closes its
normally open contacts to supply power through the fuel
heater temperature switch (FHTS) to the heater. Refer
to Section 2.8 for FHTS settings.
Energizing the heater relay closes its contacts to energize
the intake air heater (IAH), the heating time will vary in
duration based on engine coolant temperature (refer to
Table 4−1).
4.2.3 Transition To High Speed
After a successful start, the microprocessor may call for
the engine to transition to high speed. Three factors
control this transition.
Table 4−1 Intake Air Heat Time
Engine Coolant
Temperature
Heat Time
in Seconds
Preheat
30
20
Post Heat
180
120
51F to 78F (11C to
26C)
10
60
Greater than 78F (26C)
0
0
Less than 33F (1.0C)
33F to 51F (1.0C to
11C)
• First, transition may be delayed if a time value is
entered in either the START-STOP HIGH SPEED
DELAY or CONTINUOUS HIGH SPEED DELAY
Configuration. The delay may be set to OFF or from 0
to 255 minutes. The factory default setting for
Start-Stop Operation is 10 minutes while the factory
default setting for Continuous Operation is OFF. If the
entered value for the present mode of operation is
OFF, high speed operation is not allowed for two
minutes following start.
• Second, the engine cannot transition if the SILENT
MODE functional parameter is set to YES. The value
may be set to YES or NO. The factory default setting
is NO. (Refer to Table 3-2).
If the A129 - “CHECK ENGINE COOLANT SENSOR”
alarm is active, the microprocessor assumes a
temperature of less than 32F (0C) for the heat timing.
During the last five seconds of Preheat OR for 5
seconds before a start attempt, if no Preheat is required,
the buzzer (B) is energized; then the starter solenoid
relay (SSR) will be energized for a maximum of ten
seconds while the engine condition is checked each two
seconds during the cranking period. The engine is
considered to be running, and the start sequence will be
stopped, when engine speed is greater than 1000 rpm.
During the second and third attempts,
microprocessor will monitor additional inputs.
• Third, transition will be based on the need for temperature control. Generally, the engine will operate in
high speed when the unit is in Pulldown or Pull-Up
Mode (full capacity required) and in low speed when
the unit is in most less than full capacity required operating states.
4.3 TEMPERATURE CONTROL
the
4.3.1 Temperature Determination
When engine speed reading is less that 1000 rpm,
ambient temperature is above 32°F (0°C) and the
ENOPS is closed the A130 - “CHECK ENGINE RPM
SENSOR” alarm will be activated and the engine will be
considered running.
The microprocessor monitors the temperature readings
from the supply and return temperature sensors to
determine the mode of operation required to maintain
compartment temperature in accordance with the set
point.
When engine speed reading is less that 1000 rpm,
ambient temperature is below 32°F (0°C), the ENOPS is
closed and DC current is more than 2 amps the A130 “CHECK ENGINE RPM SENSOR” alarm will be
activated and the engine will be considered running.
The sensor used for temperature control is dependent
on the selection made in the “TEMP CONTROL”
functional parameter.
Once the engine is considered running, the
microprocessor will keep the intake air heater energized
for an additional 0 to 180 seconds of Post Heat,
depending on engine coolant temperature (refer to
Table 4−1).
During the start sequence the microprocessor monitors
engine speed while cranking. If engine speed drops
below 50 rpm for three seconds the starter solenoid
contactor will be de-energized and the A35 - “CHECK
STARTER CIRCUIT” alarm will be activated.
If the unit fails to start after three start attempts, the A31
- “FAILED TO START-AUTO” alarm will be activated.
62-11389
If the selection is “RETURN AIR” the return
air sensor (RAT) will be used, for any set
point.
If the selection is “SUPPLY AIR” the
microprocessor will switch to the supply air
sensor (SAT) when operating with a
perishable set point (refer to Section 4.3.2
for more information on frozen and
perishable set points) and the return air
sensor will continue to be used for frozen
set points.
The modes of operation include Pulldown, Pull-Up,
Cooling, Heating and Null.
4−2
perature is equal to or less than 0.36F (0.2C) above
set point.
NOTES
1. The compressor is always started with both
unloaders energized (unloaded). After 10
seconds of operation (for UL1) or 1 minute
of operation (for UL2) they are allowed to
transition to the unloader state required for
the present mode of operation.
4.3.4. Defrost
Refer to Section 4.6 for a description of defrost.
4.3.5. Overrides
With the complex control systems in use with the
Advance microprocessor there are many user selected
and preprogrammed software overrides and
Configuration settings which may change the operation
of the unit. Refer to Sections 4.7 & 4.8 for complete
descriptions of these features.
2. The condenser fan will operate any time the
engine or compressor is operating.
3. If suction pressure is below 100 psig (6.8
bar) the evaporator fan will start 10
seconds after compressor start. If suction
pressure is above 100 psig (6.8 bar) the fan
start will be delayed until suction pressure
is below 100 psig (6.8 bar) or until 20
seconds has elapsed.
4.4 START-STOP OPERATION
Start-Stop is provided to reduce fuel or power
consumption. This feature allows full automatic control
of the unit by monitoring compartment temperature,
battery condition and (when in Engine Operation)
engine coolant temperature.
4.3.2 Perishable And Frozen Set Point Ranges.
There are two ranges defined for set point.
The main function of Start-Stop Operation is to
shutdown the engine or compressor after certain
conditions are met (to provide an efficient temperature
control system) and to initiate a restart sequence after
certain conditions are met. The Start-Stop/Continuous
key is pressed to select between Continuous and
Start-Stop Operation. The corresponding LED will be
illuminated.
a. Perishable Range = set points above +10.4°F
(-12°C).
b. Frozen Range = set points of or below +10.4°F
(-12°C).
4.3.3 Pull Down/Pull-Up
When in Pulldown, the refrigeration system will operate
with the compressor loaded (six cylinders), the EVXV
controlling superheat to allow maximum flow, and (in
Engine Operation) in high speed.
NOTE
The microprocessor may be locked so that the
unit will always operate in Start-Stop whenever
the set point is within a specific range. Refer to
Range Lock (Section 4.7.2) for additional information.
When in Pull-Up, and Engine Operation, the engine will
operate in high speed.
Pulldown/Pull-Up will be entered:
• following a Start-Up.
4.4.1 Start-Stop Configuration
• following a set point change.
Microprocessor control of Start-Stop Operation is
dependent on both Configuration and Functional
Parameter settings. The first setting to be considered is
the START-STOP PARAMETERS Configuration. This
setting determines control actions when in the Perishable
Range or Frozen Range. The available settings are
TOGETHER and SEPARATE.
• following an operational change (Start-Stop Operation vs Continuous Operation or Engine Operation vs
Standby Operation).
• following a defrost termination.
• when in a Start-Stop ON Cycle and all other Stop
Parameters have been met except the compartment
temperature Stop Parameter.
• When SEPARATE is chosen the control action will be
different, depending on whether the set point is in the
Perishable Range or in the Frozen Range (refer to
Section 4.3.2).
Pulldown/Pull-Up will end when one of the following
occurs:
• When TOGETHER is chosen, the same settings apply to any set point.
• when in Engine Operation and the microprocessor is
calling for low speed due to an override or Configuration Setting.
If TOGETHER is selected, then the following Functional
Parameter values will be available for use:
• when in Start-Stop Operation and the compartment
temperature Stop Parameter has been satisfied while
one or more of the other Stop Parameters has not.
• MINIMUM RUN TIME
• MINIMUM OFF TIME
• If in Continuous Operation - perishable and the High
Speed Pulldown Configuration is OFF and the temperature is in the required range Pulldown Mode
ends.
• RESTART TEMPERATURE
• OVERRIDE TEMP
• MAXIMUM OFF TIME
• If in Continuous Operation - perishable and the High
Speed Pulldown Configuration is ON: when the tem-
• FROZEN SHUTDOWN OFFSET
4−3
62-11389
If SEPARATE is selected, then the following Functional
Parameter values will be available for use:
and shutdown will be allowed when battery voltage is at
or above the calculated value.
• PERISHABLE MINIMUM RUN TIME
TIP
When the microprocessor is powered up, the
status of the unit battery can be readily checked
by reading the Battery Voltage in the Data List.
If “OK.” appears after the voltage reading, battery voltage is sufficient to allow the unit to cycle
off.
• PERISHABLE MINIMUM OFF TIME
• PERISHABLE RESTART TEMPERATURE
• PERISHABLE OVERRIDE TEMP
• PERISHABLE MAXIMUM OFF TIME
• FROZEN MINIMUM RUN TIME
If in Engine Operation and all Start-Stop parameters
required to enter a Start-Stop Off cycle have been met
except this parameter, the unit will operate with the
compressor and heaters off and the evaporator fan
running until voltage is greater than 13.4 VDC or for 20
minutes.
• FROZEN MINIMUM OFF TIME
• FROZEN RESTART TEMPERATURE
• FROZEN OVERRIDE TEMP
• FROZEN MAXIMUM OFF TIME
If in Standby Operation and the compressor has cycled
off a PSCON relay will energize (to supply power to the
battery charger) until battery voltage is 13.4 volts or 20
minutes has elapsed.
• FROZEN SHUTDOWN OFFSET
NOTE
In the event that this Configuration was set to
SEPARATE and the ten Functional Parameters
for Perishable and Frozen have been set and
then the Configuration is changed from SEPARATE to TOGETHER. The values from the Perishable settings will be the ones that will be
used.
4. The battery is fully charged - Amperage
The microprocessor monitors the charging current.
Once the charging current drops below the selected
value, shutdown will be allowed. The CURRENT FOR
START-STOP SHUTOFF is selected in the
microprocessor Configurations The value may be set
from 1 to 10 amps in 0.5 amp intervals. The factory
default setting is 7 amps.
4.4.2 Stop Parameters
If in Engine Operation and all Start-Stop parameters
required to enter a Start-Stop Off cycle have been met
except this parameter, the unit will operate with the
compressor and heaters off and the evaporator fan
running until the charging current drops below the
selected value.
Whenever the unit starts in Start-Stop Operation, it will
remain in the Start-Stop ON cycle until all five of the
following criteria have been satisfied:
1. It has run for the selected Minimum Run Time
The MINIMUM RUN TIME is selected in the
microprocessor Functional Parameters. The purpose of
this is to force the unit to run long enough to completely
circulate the air inside the compartment, and to ensure
that the product temperature is at set point. This value
may be set from 4 to 60 minutes in 1 minute intervals.
The factory default setting is 4 minutes.
If in Standby Operation and all Start-Stop parameters
required to enter a Start-Stop Off cycle have been met
except this parameter, the unit will enter the Off cycle. In
the Off cycle, the PSCON relay remains energized,
supplying power to the battery charger. The battery
charger will continue to charge the battery if required.
If all Start-Stop parameters required to enter a
Start-Stop Off cycle have been met except this
parameter, the unit will operate with the compressor and
heaters off and the evaporator fan running until this
parameter has also been met.
5. The compartment temperature requirement is
satisfied
In Start-Stop Operation the refrigeration system will
operate in Pulldown or Pull-Up Mode in order to reach
the shutdown condition as quickly as possible.
2. The engine coolant temperature has warmed
Shutdown will be allowed when the compartment
temperature is within 0.5F (0.3C) of set point, for
operation in the Perishable Range. In the Frozen Range,
shutdown will be allowed when the compartment
temperature is calculated to be within 0.5F (0.3C)
minus the FROZEN shutdown OFFSET of set point.
Each time the unit is started in Engine Operation it must
continue to run until the coolant temperature rises to
122F (50C) to ensure it has fully warmed up before
shutdown is allowed.
If all Start-Stop parameters required to enter a
Start-Stop Off cycle have been met except this
parameter, the unit will operate with the compressor and
heaters off and the evaporator fan running until this
parameter has also been met.
The FROZEN shutdown OFFSET Functional
Parameter may be set from 0 to 3.6F (0 to 2C) in
0.5(C or F) increments. The factory default setting is
0F (0C).
If the temperature requirement has been satisfied while
one of the other shutdown requirements has not been
met, the unit will remain in operation with the
compressor and heaters off and the evaporator fan
running until that Parameter has also been met.
3. The battery is fully charged - Voltage
A good battery is defined as having 13.4 VDC at 77F
(25C). The microprocessor will calculate the
equivalent voltage based on the ambient temperature
62-11389
4−4
The MINUMUM OFF TIME parameter value may be set
from 10 to 90 minutes in 1 minute intervals. The factory
default setting is 20 minutes. The RESTART
TEMPERATURE value may be set from 0.5 to 18F (2 to
10C) in 0.5 (F or C) increments. The factory default is
5.5F (3C).
4.4.3 Re-Start Parameters
While the unit is in a Start-Stop OFF Cycle, restart will
be initiated when one of the following conditions occurs:
1. Engine coolant temperature drops below selected microprocessor Configuration value
5. Compartment temperature has exceeded the
Override Functional Parameter value
If in Engine Operation, the microprocessor will monitor
coolant temperature. If coolant temperature drops
below the ENGINE TEMPERATURE FOR RESTART
Configuration value the engine will be started. The
Configuration value may be set from 10 to 32F (-12.2 to
0C) in 0.5(C or F) increments. The factory default
setting is 32F (0C).
During MINIMUM OFF TIME the microprocessor
continually monitors the refrigerated compartment
temperature. If the temperature should drift outside the
START-STOP
OVERRIDE
TEMPERATURE
Functional Parameter value the unit will be restarted.
The value may be set from 3.6 to 18F (2 to 10C) in
0.5° increments. The factory default setting is 11F
(6C).
2. Battery voltage falls below selected microprocessor Configuration value
The microprocessor will monitor battery voltage. If
battery voltage is at or below the VOLTAGE FOR
START-STOP RESTART Configuration value the
engine will be started or, when in a Standby Operation
OFF Cycle, a PSCON relay will energize (to supply
power to the battery charger) . The value may be set
from 12.0 to 12.8 volts. The factory default setting is
12.2 volts.
Whenever the unit restarts, temperature control will be
in the PullDown or Pull-Up mode (refer to Section 4.3.3).
4.5 CONTINUOUS OPERATION
4.5.1. Introduction
In Continuous Operation, the unit will not shutdown except
in response to a shutdown alarm. Temperature control in
the compartment will operate under Pulldown, Pull-Up,
Cooling, Heating or Null.
TIP
When the microprocessor is powered up, the
status of the unit battery can be readily checked
by reading the Battery Voltage in the Data List.
If “OK.” appears after the voltage reading, battery voltage is sufficient to allow the unit to cycle
off.
Continuous Operation is normally used for fresh produce
and
other
sensitive
product
loads.
The
Start-Stop/Continuous key is pressed to switch between
Continuous Operation and Start-Stop Operation. The
corresponding LED will be illuminated.
NOTE
The microprocessor may be locked so that the
unit will always operate in Start-Stop or in Continuous whenever the set point is within a specific range. Refer to Range Lock (Section 4.7.2)
for additional information.
3. The Maximum Off Time has expired
In some ambient conditions there are times when the unit
may remain in a Start-Stop Off cycle for extended periods
of time. To ensure that the entire load stays within the
normal restart temperature range, the MAXIMUM OFF
TIME Functional Parameter may be used to force the
unit to restart - in low speed) with the evaporator fans
operating to ensure there are no hot spots and the
temperature sensor is accurately reflecting the
temperature of the product. The parameter value may
be set to OFF or from 10 to 225 minutes in 1 minute
intervals.
4.5.2. Continuous Operation
Refer to Figure 4−2 and Figure 4−3 for the Switch Point
temperatures at which speed changes, unloading
changes, heater operation and change to Null Mode
occur while operating in Continuous Operation.
The switch points will differ depending on the setting of
the microprocessor ECO MODE Functional Parameter.
This value may be set to YES or NO. The factory default
setting is NO. With ECO MODE set to NO, the
microprocessor will control temperature closer to set
point, yielding maximum product protection. With ECO
MODE set to YES, the microprocessor uses the Start
Stop Override Functional Parameter setting (even
though the unit is in Continuous Operation) and will
control temperature within a wider band, yielding
improved fuel economy.
If the MAXIMUM OFF TIME is OFF, there is no
maximum off time for Start-Stop and the unit will remain
off. The factory default setting is OFF.
4. The Minimum Off Time has expired
The MINIMUM OFF TIME Functional Parameter setting
allows the unit to remain off for extended periods of time,
maximizing fuel/power economy. The unit may not be
restarted until the MINIMUM OFF TIME has expired
and the compartment temperature is greater than the
PERISHABLE RESTART value selected in the
Functional Parameters away from set point. In the
Frozen Range, restart is allowed when the compartment
temperature is greater than the FROZEN RESTART
value above set point.
When neither heating or cooling is required the unit will
enter Null Mode. In Null Mode, the electronic expansion
valve (EEXV) is closed to 0% while the evaporator
fan(s) continue to run.
4−5
62-11389
When Null Mode is required and the system is operating
in:
while the engine, condenser fan and evaporator fan
will continue to operate.
• Engine Operation, the compressor will shutdown
• Standby Operation, the compressor will shutdown
while the evaporator fan will continue to operate.
FALLING
REFRIGERATED
COMPARTMENT
TEMPERATURE
SWITCH POINT
Pulldown = High Speed
6 Cylinder COOL*
+3.2F (+1.8C )
+1.6F (+0.9C )
+0.9F (+0.5C )
Set point
-0.4_F (-0.2_C)
+3.6F ( +2.0C )
Low Speed
6 Cylinder
COOL
+1.8F (+1.0C )
Low Speed
4 Cylinder COOL
Low Speed
2 Cylinder COOL
+1.1F (+0.6C )
+0.4F (+0.2C)
Set point
NULL
-0.4F (-0.2C)
-0.5F (-0.3C)
Low Speed HEAT
HTCON1
-3.6F (-2.0C )
-3.2F (-1.8C )
Pull-Up = HEAT
HTCON1 & HTCON2
RISING
REFRIGERATED
COMPARTMENT
TEMPERATURE
SWITCH POINT
Switch Point = Controlling Temperature - Set Point
+ results are above set point, - results are below set point
Switch points are the same for Perishable Range and Frozen Range except
in Frozen Range heating is not allowed.
* If the HIGH SPEED PULLDOWN Configuration is set to YES, transition
from pulldown is delayed from the indicated +3.2F (+1.8C ) transition
temperature until the temperature is +0.36 F (+0.2C) above set point.
Figure 4−2 Continuous Operation Switch Points with Eco Mode set to NO
62-11389
4−6
FALLING
REFRIGERATED
COMPARTMENT
TEMPERATURE
SWITCH POINTS
Transition to low speed at
Start-Stop Override
Functional Parameter
Value + 1
(+5.4 to 19.85F = +3 to 115C)
Pulldown = High Speed
6 Cylinder COOL
Low Speed
6 Cylinder
COOL
Enter high speed at
Start-Stop Override Functional
Parameter Value + 2
(+7.2 to 23.45F = +4 to 125C)
Enter cool at Start-Stop
Override Functional
Parameter Value
(+3.6 to 185F = +2 to 105C)
Set point
Set point
NULL
-1.3F (-0.7C)
-1.4F (-0.8C)
Low Speed HEAT
HTCON1
-3.2F (-1.8C )
-3.6F (-2.0C )
Pull-Up = HEAT
HTCON1 & HTCON2
RISING
REFRIGERATED
COMPARTMENT
TEMPERATURE
SWITCH POINTS
Switch Point = Controlling Temperature - Set Point
+ results are above set point, - results are below set point
Switch points are the same for Perishable Range and Frozen Range except
in Frozen Range heating is not allowed.
Figure 4−3 Continuous Operation Switch Points with Eco Mode set to YES
4−7
62-11389
4.6 DEFROST
the engine will operate in low speed when
the heaters are de-energized.
Defrost is an independent cycle overriding cooling and
heating functions in order to de-ice the evaporator. When
the unit is in defrost, the DEFROST LED will be on, the
MessageCenter will display DEFROST CYCLE
STARTED for 5 seconds. The center of the Main Display
will show “dF”. However, defrost will not be allowed when
the 1DDT is above 40.0F (4.4C).
Normal Defrost Mode will be entered if RAT is less than
39.2F (4.0C) and SAT is less than 45.0F (7.2C).
Defrost will be accomplished by shutting down the
refrigeration system (which includes the evaporator fan)
while the heaters are energized.
4.6.1 Defrost Initiation And Start
b. Natural Defrost Mode
Defrost can be initiated by pressing the MANUAL
DEFROST key or automatically by the microprocessor.
Microprocessor initiation is based on coil condition or
expiration of the defrost timer.
Natural Defrost Mode uses a combination of the heat
from the product and the electric heaters to melt any ice.
a. Normal Defrost Mode
Natural defrost is available when:
the Natural Defrost microprocessor
Configuration is set to YES and
Defrost based on coil condition will be initiated when:
S
• blockage is sufficient to cause an air pressure differential across the coil great enough to close the contacts of the defrost air switch (DAS).
defrost is initiated by closing of the DAS
contacts with RAT greater than or equal to
39.2F (4.0C) and
at least one normal defrost has been
performed since power up.
a. Defrost based on coil condition
OR
When a natural defrost is initiated, the unit will operate
for the first five minutes with the evaporator fan and
HTCON2 de-energized and only HTCON1 energized.
After 5 minutes the evaporator fan is energized while
both HTCON1 & HTCON2 are de-energized.
• when the RAT - 1DTT temperature is greater than
36°F (20°C) for 15 continuous minutes. This method
of defrost initiation will only be used for 3 consecutive
defrosts. After three consecutive defrost initiations by
this method the counter will be reset to allow this defrost initiation again only after a defrost cycle is initiated by another method (timer, air switch or manual).
Only 3 consecutive natural defrosts cycles are allowed.
After there have been 3 consecutive natural defrost
cycles, the next defrost will be a normal deforst.
TIP
Ice is not the only thing that will cause the air differential to increase across the evaporator coil.
Shrink wrap, paper, plastic bags, and other
such items when caught in the return air stream
and pulled up against the evaporator coil or the
return air grille can also cause the DAS contacts
to close.
4.6.3 Defrost Termination
When in normal defrost mode, defrost will terminate
when the 1DTT rises to 55F (12.8C).
When operating in natural defrost, defrost will continue
for a minimum of 5 minutes, a maximum of 10 minutes,
or until the SAT is equal to or higher than the RAT.
When the unit exits defrost, the engine will go to low
speed. “dF” will continue to be displayed in place of
compartment temperature, and the COOL LED will
come on when the compressor starts.
b. Defrost based on time:
Time interval between defrosts is selected in the
microprocessor Functional Parameters. The parameter
value may be set to 1.5, 3, 6, or 12 hours. The factory
default setting is 6 hours.
The EVXV will open, and the evaporator coil will begin to
cool down. The evaporator fan will not come on right
away, so that warm air is not blown into the refrigerated
compartment, but will wait for the evaporator to cool
down, up to a maximum of 8 minutes. Once the
evaporator fan has started, “dF” will no longer be
displayed, and refrigerated compartment temperature
will again be shown in the main display.
NOTE
The defrost timer will not count when the unit is
in defrost, the unit is in a Start/Stop off cycle or
the 1DTT is greater than 40.0F (4.4C).
4.6.2 Defrost Modes
If a 1DTT sensor alarm has been activated, defrost will
terminate after 10 minutes.
There are two defrost modes available, Normal Defrost
and Natural Defrost:
NOTE
Defrost uses a Defrost Duration Timer that allows for a maximum of 45 minutes in defrost. If
defrost is not terminated during the 45 minutes,
the microprocessor will end the defrost cycle,
and activate the A54 - “DEFROST NOT COMPLETE” alarm. When this occurs, the Defrost
Interval Timer is set for 1.5 hours, at which time
the unit will go into defrost again.
NOTE
When the unit is in defrost and in Engine operation:
the condenser fan will operate to supply air
for the radiator.
the engine will operate in high speed when
the heaters are energized (to supply power
for the heaters).
62-11389
4−8
Configuration (each of which can be set from 0 to
-21.6F [0 to -12C]).
4.7. USER SELECTED OVERRIDE OPERATION
Three optional software override programs are available to the user. These programs include: Supply Air
Limit Control, Temperature Range Lock and ProductShield. Information on how the unit operates under
these programs is provided in the following sub-paragraphs.
NOTE
These values are all negative (except for 0),
therefore, when the value is added to the set
point, the result will be a temperature that is less
than the set point.
4.7.1 Supply Air Limit Control
When the PERISHABLE SENSITIVE PRODUCT
Functional Parameter is set to OFF, the supply air
temperature will be the coldest temperature of 32F
(0C) OR the calculated value of Set Point minus the
configured Supply Air Limit value.
Supply Air Limit Control is available when the set point is
at or between 32 to 65F (0 to 18.4C) and the unit is
operating in cool.
Supply Air Limit is NOT a positive temperature control,
drift above and below the Supply Air Limit will be seen as
the system balances out.
When the PERISHABLE SENSITIVE PRODUCT
Functional Parameter is set to ON, the supply air
temperature will be the calculated value of set point
minus the configured Supply Air Limit value.
Supply Air Temperature control will be accomplished by
varying the position of the CSMV.
Supply Air Limit Configuration values can be set to allow
for a different limit for Start-Stop than used in
Continuous Run.
Supply Air Limit controls the temperature of the supply
air as it leaves the evaporator so that it does not go
colder than the configured Supply Air Limit value below
set point.
Supply Air Limit Control is set using the PERISHABLE
SENSITIVE PRODUCT Functional Parameter (which
can be set to OFF or ON), and the SUPPLY AIR LIMIT
FOR START-STOP Operation Configuration or
SUPPLY AIR LIMIT FOR CONTINUOUS Operation
NOTE
The 9F value used in the following examples is
not necessarily a recommend setting, but is
only used to show how the Supply Air Temperature Limit is calculated.
EXAMPLE 1: Perishable Sensitive Product Functional Parameter = OFF
Supply Air coldest temperature limit is the colder temperature of:
+32F OR
Set point minus configuration value for Supply Air Limit
Sample Calculations:
Set point
Supply Air Limit Configuration Value
Set point minus Supply Air Limit
Coldest Supply Air Temperature allowed
50F
-9F
41F
45F
-9F
36F
40F
-9F
31F
33F
-9F
24F
32F
32F
31F
24F
EXAMPLE 2: Perish Sensitive Product Functional Parameter = ON
Supply Air will be limited to Set point minus configuration value for Supply Air Limit.
Sample Calculations:
Set point
Supply Air Limit Configuration Value
Set point minus Supply Air Limit
50F
-9F
41F
40F
-9F
31F
33F
-9F
24F
Coldest Supply Air Temperature allowed
41F
31F
24F
4−9
62-11389
each IntelliSet is generally programmed for a specific
product, only Range Lock 1 is used to hold the unit in
either the Start/Stop or Continuous Operation, and
Range Lock 2 is left off.
4.7.2 Temperature Range Lock 1 & 2
Range Lock is a group of Configurations which may be
set to lock the unit into Start-Stop or Continuous
Operation for various set point ranges.
For example (see Figure 4−4), if Continuous Operation
is ALWAYS required whenever the set point is between
28°F and 55°F (-2.2°C and +12.8°C), Range 1 will be set
for Continuous, with a Minimum Temperature of 28°F
(-2.2°C) and a Maximum Temperature of 55°F
(-12.8°C).
Two ranges are available for selection Range Lock 1
and Range lock 2. Each Range can be independently
set to lock it’s set point temperatures into either
Start-Stop or Continuous operation.
Each Range has it’s own selectable minimum and
maximum temperature, which define the span of the
range. If some set point temperatures are contained in
both ranges due to range overlap, Range 1 will always
have priority over Range 2.
Should Continuous Operation ALWAYS also be
required with set points between -22 and 0°F (-30 and
-17.8°C), then Range 2 will be set for Continuous, with a
Minimum Temperature of -22°F (-30°C) and a Maximum
Temperature of 0°F (-17.8°C). Any set point outside of
Range 1 or 2 will allow changes between Start-Stop and
Continuous.
Typically, both Range Lock 1 and Range Lock 2 are
used to control different set point ranges when IntelliSet
is not active. For units with IntelliSet active, because
Range Lock 1 & 2
Range 1 is set for
285 to 555F
(-2.25 to +12.85C)
Range 2 is set for
05 to -225F
(-17.85 to -305C)
Range 2
5F
-22
-10
5C
-30
-23.3
Range 1
0
-17.8
10
-12.2
20
-6.7
30
-1.1
40
50
60
70
80
4.4
10.0
15.6
21.1
26.7
Figure 4−4 Range Lock Settings - Non Overlapping
The primary time that it is important to determine which
range is to be Range 1 and which is to be Range 2 is
when the ranges overlap each other.
1 Minimum Temperature has been set for +32°F (0°C),
and Maximum Temperature of +42°F (5.6°C). Range 2
has been set for a Minimum Temperature of -22°F
(-30°C) and a Maximum Temperature of +89.6°F
(32°C). The unit will switch to Continuous when the
temperature is between +32° and +42°F (0° and 5.6°C)
because, when the ranges overlap each other the
Range 1 settings will take priority.
In example 2 (see Figure 4−5), the ranges have been
set to lock all set points into Start-Stop, except for a
small range between +32° and +42°F (0° and 5.6°C)
where the unit will always operate in Continuous. Range
62-11389
4−10
Range 1 always has priority
when Range 1 & 2 overlap
Range 1 is set for 325 to 425F
(05 to 5.65C)
Set for Continuous
Range 2 is set for -225 to
89.65F (-305 to 325C)
Set for Start-Stop
Range 2
Range
1
5F
-22
-10
5C
-30
-23.3
0
10
-17.8
-12.2
20
-6.7
30
-1.1
40
50
60
70
80
4.4
10.0
15.6
21.1
26.7
Figure 4−5 Range Lock Settings - Overlapping
• The unit is not already running in ProductShield Winter. (See Section c.)
4.7.3 ProductShield
ProductShield is a group of Configurations that work together to allow improved operating efficiency while providing customized product protection.
The operator can also pre-program a maximum
evaporator coil temperature differential (delta-t)
between the return air and supply air temperatures as
an additional criteria for switching to Start/Stop
Operation. The unit must bring the delta-t below this
setting before going to Start/Stop Operation if this option
is chosen.
Each ProductShield setting allows the user to select an
ambient temperature range in which to operate. The
Minimum and Maximum range values can be set to
OFF, or the allowed value range.
NOTE
In ProductShield Econo: Go to Start/Stop, the
delta-t must be lower than the value selected in
order to enter Start/Stop.
a. ProductShield: Econo
ProductShield Econo allows the microprocessor to
automatically switch from Start/Stop Operation to
Continuous Operation or vice versa. This allows
maximum product protection while providing for power
savings when ambient temperature is in the preset
range.
Once the microprocessor detects that the above criteria
have been met, the unit will switch from Continuous
Operation to a Start/Stop Off Cycle for the MINIMUM
OFF TIME Functional Parameter setting. During the
Minimum Off Time, the RESTART OVERRIDE
TEMPERATURE Functional Parameter setting can
cause the unit to restart to protect the load. After the
Minimum Off Time has expired the unit will return to
Continuous Operation once, or if, the return air temperature is more than the configured perishable restart temperature away from setpoint in the perishable range, or
the configured frozen restart temperature above set
point in the frozen range.
ProductShield Econo - Go to Start-Stop Operation.
When the unit is set to Continuous Operation,
ProductShield Econo allows the unit to run in Start/Stop
Operation when:
• The ProductShield Econo Configuration is set to GO
TO S/S AND
• The unit has run in Continuous Operation for a minimum of either 15 minutes, or the Minimum Run Time
Functional Parameter setting (whichever time is longer) AND
When the unit restarts, it will return to Continuous
Operation for a minimum of 15 minutes or the Minimum
Run Time Functional Parameter setting, whichever time
is longer. The original activation conditions must then be
• The ambient temperature falls within the pre-programmed temperature range AND
4−11
62-11389
met in order for the unit to return to ProductShield
Econo: Start/Stop.
Example 4 If both the Minimum and Maximum are set
to OFF, ProductShield Econo: Go To Continuous can
not operate as there is no range for the ambient to fall
outside of.
ProductShield Econo: Go To Start/Stop Examples:
The following examples apply in situations where all
other Start/Stop conditions have been met.
Example 1 If the Minimum is set to 30°F (-1.1°C) and
the Maximum is set to 40°F (4.4°C) and the ambient air
temperature falls between these temperatures, the unit
operation can change to Econo Start/Stop.
Example 2 If the Minimum is set to 30°F (-1.1°C) and
the Maximum is set to OFF and the ambient air
temperature is above 30°F (-1.1°C), the unit operation
can change to Econo Start/Stop.
Example 3 If the Minimum is set to OFF and the
Maximum is set to 40°F (4.4°C) and the ambient air
temperature falls below 40°F (1.7°C), the unit operation
can change to Econo Start/Stop.
Example 4 If both the Min and the Max are set to OFF,
unit operation can change to Econo Start/Stop at any
ambient temperature.
ProductShield
Operation.
Econo
-
Go
to
b. ProductShield: High Air
ProductShield High Air allows the microprocessor to
automatically switch the engine from normal to forced
high speed, and thereby provide high evaporator air
flow. This allows maximum product protection when
certain conditions are met while providing for power
savings when High Air is not required.
Operation in High Air is controlled by four
Configurations; ProductShield High Air, High air
Minimum Temperature, High Air Maximum Temperature
and High Air Delta-T.
• The Product Shield High Air Configuration may be
set to OFF or ON. ProductShield High Air is only active
when the Configuration is set to ON.
• The High Air ambient air temperature range is
defined by the High Air Maximum Temperature
Configuration setting and the High Air Minimum
Temperature Configuration setting. When a value is
entered for both of these configurations, the unit will
enter High Air when ambient temperature is above the
high setting or below the low setting.
Continuous
When the unit is set for Start/Stop, ProductShield Econo
allows the unit to run in Continuous Operation when:
• ProductShield Econo configuration is set to GO TO
CONTINUOUS AND
• The unit has run in Start/Stop Operation for a minimum of 15 minutes OR the Minimum Run Time, Functional Parameter setting (whichever time is longer)
AND
• When the High Air Maximum Temperature
Configuration is set for a value and High Air Minimum
Temperature Configuration is set to OFF, the
microprocessor will switch to high speed operation
when the ambient temperature is above the setting.
• The ambient temperature falls outside the pre-programmed temperature range AND
• When the High Air Minimum Temperature
Configuration is set for a value and High Air Maximum
Temperature Configuration is set to OFF, the
microprocessor will switch to high speed operation
when the ambient temperature is below the setting.
• The unit is not already running in ProductShield Winter. (See Section c.)
Once the microprocessor detects that the above criteria
have been met, the unit will switch from Start/Stop to
Continuous Operation for a minimum of 30 minutes.
After 30 minutes the unit will return to Start/Stop if the
ambient temperature enters the pre-programmed
temperature range.
• When both the High Air Minimum Temperature
Configuration and the High Air Maximum Temperature
Configuration are set to OFF, ProductShield is not
active.
NOTE
Delta-t logic is not used or available when ProductShield Econo - Go To Continuous is active.
ProductShield
Examples
Econo:
Go
To
• If a value is entered in the High Air Delta-T
Configuration, the delta-t must be above the value
before the microprocessor may switch to High Speed
Continuous
Once the microprocessor determines that the
pre-programmed criteria have been met, the unit will
switch to High Air. The unit will continue to operate in
High Air for a minimum of 30 minutes. After 30 minutes
the unit will return to normal operation if the ambient
temperature falls inside the pre-programmed
temperature range by ±3.6° F ( ±2° C).
Example 1 If the Minimum is set to 0°F (-17.8°C) and
the Maximum is set to 90°F (32.2°C) and the ambient air
temperature falls outside these temperatures, the unit
operation can change to Econo Continuous Operation.
Example 2 If the Minimum is set to 0°F (-17.8°C) and
the Maximum is set to OFF and the ambient air
temperature falls below 0°F (-17.8°C), the unit
operation can change to Econo Continuous Operation.
If the unit shuts down in Auto Start/Stop during High Air,
it will not be in High Air when it restarts and will return to
normal operation for a minimum of 15 minutes. The
original activation conditions must then be met in order
for the unit to return to high air.
Example 3 If the Minimum is set to OFF and the
Maximum is set to 90°F (32.2°C) and the ambient air
temperature falls above 90°F (32.2°C), the unit
operation can change to Econo Continuous Operation.
62-11389
4−12
ProductShield High Air Examples
4.8.2 Compressor Minimum Operating Time
Example 1 If the Minimum is set to 0°F (-17.8°C) and
the Maximum is set to 90°F (32.2°C) and the ambient air
temperature falls outside these temperatures, the unit
operation can change to High Air Operation.
Each time the compressor is started it must operate for
a minimum of 3 minutes before it can be de-energized.
If, during the 3 minutes, the unit is operating in the
Frozen Range (refer to Section 4.3.2), it will continue to
operate in cooling. If the unit is operating in the
Perishable Range the unit will continue to cool with the
heaters energized as required to maintain setpoint.
Example 2 If the Minimum is set to 0°F (-17.8°C) and
the Maximum is set to OFF and the ambient air
temperature falls below 0°F (-17.8°C), the unit
operation can change to High Air Operation.
Example 3 If the Minimum is set to OFF and the
Maximum is set to 90°F (32.2°C) and the ambient air
temperature falls above 90°F (32.2°C), the unit
operation can change to High Air Operation.
4.8.3 Engine Speed Overrides
This section lists the different factors that determine
engine speed (high or low) in addition to the speed
controls used in temperature control.
Example 4 If both the Minimum and Maximum are set
to OFF, ProductShield High Air can not operate as there
is no range for the ambient to fall outside of.
Speed Control Overrides in priority order are:
c. ProductShield: Winter
1. Forced Low Speed.
When the unit is set for Start/Stop operation,
ProductShield Winter allows it to switch to Continuous
Operation when the ambient temperature falls below
the pre-programmed temperature. This helps protect
the unit from the possibility of cold weather issues.
The microprocessor will force the unit to run in low
speed when:
When the ambient temperature is less than 0° F
(-17.7° C) AND the unit is running in low speed heat
with the AC current less than 8 Amps for 10 minutes
the unit will remain in low speed until the ambient temperature is above 0° F (-17.7° C) OR the AC current is
more than 8 amps for 10 minutes.
Once the microprocessor detects that the ambient
temperature has dropped below the pre-programmed
temperature, the unit will switch into ProductShield
Winter which will force the unit to operate in Continuous
Operation. The unit will continue to operate in
Continuous Operation for a minimum of 30 minutes.
After 30 minutes, the unit will return to auto Start/Stop if
the ambient temperature has risen above the
pre-programmed ProductShield Winter temperature.
When the ambient temperature is less than 0.°F
(-17.7°C) AND the unit is running in either cool, null,
or defrost AND AC current is less than 12 Amps for10
seconds, the engine will be forced to low speed. The
unit will remain in low speed until the ambient temperature is above 0.°F (-17.7°C) OR the AC current is
more than 10 Amps for 10 minutes.
When the ambient temperature is less than 77°F
(25°C) AND the unit is running in defrost AND the engine has been running less than 30 minutes since the
Main Power switch was toggled from the OFF position, the unit will remain in low speed until the ambient
temperature is above 77°F (25°C) OR the engine has
run for a minimum of 32 minutes since the switch was
toggled.
NOTE
All of the ProductShield settings may be viewed
in the Data List (Refer to Section 3.13). For
units with IntelliSets, the Data List will reflect the
ProductShield settings for the IntelliSet that is
currently active.
When the engine is forced to low speed under these
conditions, the Message Center will display “FORCED
LOW ENGINE SPEED”.
4.8. PREPROGRAMMED SOFTWARE
OVERRIDES.
2. RAT & SAT Alarms.
When both the A122 “CHECK RETURN AIR SENSOR”
and A122 “CHECK SUPPLY AIR SENSOR” alarms
activate microprocessor control may enter Cargo
Protect Mode. Refer to Section 4.8.1.
4.8.1 Cargo Protect Mode.
The microprocessor will activate Cargo Protect Mode
when both the A122 “CHECK RETURN AIR SENSOR”
and A122 “CHECK SUPPLY AIR SENSOR” alarms
activate.
If the set point is in the Frozen Range and the unit is in
Engine Operation, the compressor will operate fully
loaded and the engine will go to low speed.
3. High Speed To Low Speed Delay.
When the engine is operating in high speed, and the
microprocessor calls for low speed, the engine will
remain in high speed for 40 seconds OR until the actual
AC current is less than the configured Diesel or Standby
Maximum Generator Amps value less the Diesel or
Standby Offset Maximum Amps value.
If the set point is in the Frozen Range and the unit is in
Standby Operation, the compressor will operate unloaded.
4. Silent Mode.
When the Silent Mode Functional Parameter is set to
ON, the unit will operate in low speed only.
The MessageCenter will display “WARNING: NO
TEMPERATURE CONTROL” when the unit is
operating in Cargo Protect Mode.
5. Engine Coolant Warm-Up.
The engine will run in low speed until the coolant is
above 79°F (26°C).
If the set point is in the perishable range (refer to Section 4.3.2), the unit will shutdown.
4−13
62-11389
6. Defrost.
NOTE
Generally, the unit will go into an off cycle from
high speed when this condition occurs. However, if one of the required conditions for shutdown
is no longer met during this time, (for example,
the battery voltage drops below the configured
value, or the charging amps increase above the
configured value, or the engine coolant temperature drops below 122°F (50°C), the engine
may return to low speed operation until the
shutdown condition is satisfied, then shutdown
from low speed.
When the unit is in defrost:
the engine will operate in high speed when heaters
are energized (to supply power for the heaters).
the engine will operate in low speed when the heaters are de-energized.
7. Door/Remote Switch Configuration.
If the Door/Remote Switch Configuration is set for low
speed, the engine will run in low speed when the
door/remote switch is open/active.
14.High Speed Pulldown.
If in Continuous Operation with a set point in the
perishable range (above +10.4°F [-12°C]) and the High
Speed Pulldown Configuration is set to YES, the engine
will operate in high speed until the refrigerated
compartment temperature is 0.36°F (0.2°C) above set
point.
8. Start-Stop Restart.
If the engine is restarted from a Start-Stop off cycle for
any reason except a Start-Stop Parameter Override
Temperature the engine will operate in low speed until all
conditions are met for another off cycle OR for the
Minimum Run Time Functional Parameter value.
4.8.4 Unloader Control Overrides
This section lists the different factors that determine the
operation (de-energizing / loading and energizing / unloading) of the unloaders in addition to the unloader control used in temperature control.
9. Low Speed To High Speed Delay.
The compressor must operate for 2 minutes before
transition to high speed is allowed.
Unloaders operate in priority order for cooling ONLY
(For example: Override 1 supersedes 2 and all lower
overrides.):
The time value entered in the High Speed Delay Configuration must be expired before transition to high
speed is allowed.
The overrides will be allowed in Cargo Protect Mode
only if the override does not use the return or supply
temperature.
There is a minimum delay of 20 seconds between
LOADING and UNLOADING cylinders under all operating conditions except when the engine is starting.
10.Low Speed Startup.
The time value entered in the Low Speed Startup
Minutes Functional Parameter (for Start-Stop or
Continuous) must be expired before transition to high
speed is allowed.
When the Compressor is Off the Unloaders are always
de-energized.
NOTE
In all of the following instances UL1 refers to the
Front Unloader and UL2 refers to the Rear Unloader.
11. Frozen Set Point/Frozen Set Point Override.
If the set point is a frozen set point (below +10.4°F
[-12°C]) and the temperature is below set point, the
engine will operate in low speed.
1. Low Generator Amp Draw.
When the A128 - “LOW/UNBALANCED A/C AMPS”
alarm is activated the compressor will only operate on 2
or 4 cylinders.
12.Low Suction Pressure.
2. High Discharge Pressure Or High Generator Amp
Draw.
The microprocessor monitors the signal provided by the
Suction Pressure Transducer. If the suction pressure
falls below -2psig (-0.14 bar) for more than 20 seconds,
the engine will operate in low speed for a minimum of 5
minutes, then remain in low speed until the suction
pressure is greater than -2psig (-0.14 bar).
The microprocessor will not allow additional cylinders to
load whenever the compressor discharge pressure is
above 415 psig (28.3 bar) OR when the compressor
amp draw is within 1 Amp of the maximum allowable
generator current (Maximum Allowable Generator Current is a Configuration Setting - Refer to 5.2.1.)
13.Operation With A Perishable Set Point.
However, if the CDT is above 284°F (140°C) for more
than 30 seconds at the same conditions, loading of one
cylinder bank is allowed.
If in Start-Stop Operation with a set point in the
perishable range (above +10.4°F [-12°C]) and all
conditions for an OFF Cycle have been met except for
set point, the engine will operate in high speed to pull
down to set point and cycle off quicker.
62-11389
3. Compressor Restart.
The microprocessor will force the compressor to run in 2
cylinders for 10 minutes when the compressor restarts
4−14
unless the compressor is restarting following a defrost
cycle. If the compressor discharge temperature (CDT)
becomes greater than 284°F (140°C) or the system returns to Pulldown mode 10 minute will be overridden and
the unloaders will de-energize (load) as required.
9. High Discharge Pressure.
If the compressor discharge pressure reaches 435
psig (29.6 bar) at some point soon after engine start
up for more than 1 minute, UL2 will energize (unload)
and remain energized until the compressor discharge
pressure drops below 415 psig (29.6 bar).
4. Fan Motor Delay.
Whenever any fan motor has been energized, there will
be a 3 second delay before either unloader is allowed to
de-energize (load).
If both unloaders are energized (unloaded), and the
discharge pressure drops below 430 psig (29.3 bar),
UL1 will be de-energized (loaded)
5. Four Cylinder Delay.
10.Low Suction Pressure.
When the compressor suction pressure (CSP) is greater than 22 psig (1.5 bar) AND the compressor is fully unloaded (operating on 2 cylinders), AND the conditions
call for UL2 to be de-energized (loaded), there will be a
20 second delay while the CSMV closes down by 20%
from the current setting. After UL2 loads the CSMV will
go back to normal control.
If suction pressure falls below -2 psig or 4 inHg (0.14
bar) for more than 20 seconds, UL2 will be energized
(unloaded)
After 20 seconds: if suction pressure is still less than
-2 psig or 4 inHg (0.14 bar), UL1 will be energized (unloaded), OR
6. Two-Minute Delay.
When an unloader is energized (unloaded) due to a refrigeration system pressure override (overrides #6, 7, 8
or 9), the unloader remains energized for a minimum of
2 minutes.
Once the suction pressure rises above 5 psig (0.3
bar), UL2 will be de-energized (loaded) (after the
2-Minute Delay mentioned above)
7. Compressor Startup.
If both unloaders are energized (unloaded), AND 20
seconds has elapsed since energizing (unloading)
UL1 AND the suction pressure rises above 5 psig (0.3
bar), UL1 will be de-energized (loaded)
UL1 remains energized (unloaded) for a minimum of
10 seconds when the ambient is above 100°F
(37.8°C) or 5 seconds when the ambient is at or below
100°F (37.8°C) after the compressor motor contactor
is energized
11. High CDT.
If the compressor is operating with both unloaders
energized (unloaded), and the CDT rises to 284°F
(140°C), UL1 will be de-energized (loaded), and will
remain de-energized (loaded) until the CDT drops
below 266°F (130°C) for at least 2 minutes.
UL2 remains energized (unloaded) for a minimum of
60 seconds when the ambient is above 100°F
(37.8°C) or 30 seconds when the ambient is at or below 100°F (37.8°C) after the compressor motor contactor is energized
12.Cargo Protect Mode.
8. High Evaporator Pressure.
Refer to Section 4.8.1
UL2 will always be energized (unloaded) when the
suction pressure is above the value shown Figure 4−6
for 1 minute, according to the current ambient
temperature. For example, at an ambient temperature
of 100°F (37.8 °C), UL2 will be energized when the
suction pressure rises to approximately 75 psig (5 bar).
UL2 can load as soon as the pressure is 5 psig (0.3 bar)
less than the value in the chart.
13.Start-Stop Operation.
If the Off Cycle conditions have been met in Start-Stop
Mode (Refer to Section 4.4) and the minimum run time
has expired, BUT compartment temperature is not at
set point, both unloaders will be de-energized (loaded)
and the compressor will operate on 6-cylinders until the
unit cycles off.
100
80
PSIG
60
40
20
0
90
100
110
120
130
140
Ambient Temperature (5F)
Figure 4−6 Evaporator Pressure Chart
4−15
62-11389
14.High Speed Pulldown.
DTT, the unit will go into low speed and all electric
heaters will be de-energized. The unit will remain in
defrost with the heaters de-energized until the return
air temperature is less than 90°F (32°C).
When the set point is in the perishable range, and the
unit is operating in Continuous Run, and the High Speed
Pulldown configuration is set for YES, then the compressor will operate with both unloaders de-energized
(6-cylinder loaded operation) until the refrigerated container temperature is 0.36°F (0.2°C) above set point.
4.8.5 Defrost Safety Override
In addition, when in defrost and the supply air temperature rises above 135°F (45°C) regardless of the temperature of the DTT, the unit will go into low speed and
all electric heaters will be de-energized. The unit will
remain in defrost with the heaters de-energized until
the supply air temperature is less than 108°F (42°C).
When in defrost and the return air temperature rises
to 95°F (35°C) regardless of the temperature of the
62-11389
4−16
SECTION 5 − MICROPROCESSOR INTERFACE
1
PARAGRAPH NUMBER
Page
5.1 INTERFACE METHODS . . . . . . . . . . . . . . . . . . . . . . . . . . . . . . . . . . . . . . . . . . . . . . . . . . . . . . . . . . 5−1
5.2 TECHNICIAN INTERFACE . . . . . . . . . . . . . . . . . . . . . . . . . . . . . . . . . . . . . . . . . . . . . . . . . . . . . . . . 5−1
5.2.1 Configuration Mode . . . . . . . . . . . . . . . . . . . . . . . . . . . . . . . . . . . . . . . . . . . . . . . . . . . . . . . . . . .
5−2
5.2.2
5.2.3
5.3
5.4
Component Test Mode . . . . . . . . . . . . . . . . . . . . . . . . . . . . . . . . . . . . . . . . . . . . . . . . . . . . . . . .
Service Mode . . . . . . . . . . . . . . . . . . . . . . . . . . . . . . . . . . . . . . . . . . . . . . . . . . . . . . . . . . . . . . . .
5−2
5−3
PC MODE . . . . . . . . . . . . . . . . . . . . . . . . . . . . . . . . . . . . . . . . . . . . . . . . . . . . . . . . . . . . . . . . . . . . . . . 5−3
PC CARDS . . . . . . . . . . . . . . . . . . . . . . . . . . . . . . . . . . . . . . . . . . . . . . . . . . . . . . . . . . . . . . . . . . . . . . 5−4
5.4.1
5.4.2
Handling PC Cards . . . . . . . . . . . . . . . . . . . . . . . . . . . . . . . . . . . . . . . . . . . . . . . . . . . . . . . . . . .
Program PC Card . . . . . . . . . . . . . . . . . . . . . . . . . . . . . . . . . . . . . . . . . . . . . . . . . . . . . . . . . . . .
5−4
5−5
5.4.3
5.4.4
Configuration PC Card . . . . . . . . . . . . . . . . . . . . . . . . . . . . . . . . . . . . . . . . . . . . . . . . . . . . . . . .
Option PC Card . . . . . . . . . . . . . . . . . . . . . . . . . . . . . . . . . . . . . . . . . . . . . . . . . . . . . . . . . . . . . .
5−6
5−6
5.4.5 Download PC Card . . . . . . . . . . . . . . . . . . . . . . . . . . . . . . . . . . . . . . . . . . . . . . . . . . . . . . . . . . .
5−6
5.5 REEFERMANAGER & REPORTS . . . . . . . . . . . . . . . . . . . . . . . . . . . . . . . . . . . . . . . . . . . . . . . . . . 5−6
5.5.1 Introduction . . . . . . . . . . . . . . . . . . . . . . . . . . . . . . . . . . . . . . . . . . . . . . . . . . . . . . . . . . . . . . . . . .
5−6
5.6 MICROPROCESSOR DISPLAY DIAGNOSTICS . . . . . . . . . . . . . . . . . . . . . . . . . . . . . . . . . . . . . . 5−8
5.7.2
5.7.3
Microprocessor Replacement . . . . . . . . . . . . . . . . . . . . . . . . . . . . . . . . . . . . . . . . . . . . . . . . . .
Microprocessor Setup . . . . . . . . . . . . . . . . . . . . . . . . . . . . . . . . . . . . . . . . . . . . . . . . . . . . . . . . .
5−9
5−10
5.7.4
5.7.5
Configurations Via Keypad . . . . . . . . . . . . . . . . . . . . . . . . . . . . . . . . . . . . . . . . . . . . . . . . . . . . .
Functional Parameters Via Keypad . . . . . . . . . . . . . . . . . . . . . . . . . . . . . . . . . . . . . . . . . . . . .
5−11
5−11
5.7.6
5.7.7
DataLink Data Recorder Via ReeferManager . . . . . . . . . . . . . . . . . . . . . . . . . . . . . . . . . . . . .
Microprocessor Final Checkout . . . . . . . . . . . . . . . . . . . . . . . . . . . . . . . . . . . . . . . . . . . . . . . . .
5−11
5−11
62−11389
5
5.7 MICROPROCESSOR REPLACEMENT & SETUP . . . . . . . . . . . . . . . . . . . . . . . . . . . . . . . . . . . . 5−8
5.7.1 Pre-Replacement Steps . . . . . . . . . . . . . . . . . . . . . . . . . . . . . . . . . . . . . . . . . . . . . . . . . . . . . . .
5−9
SECTION 5
MICROPROCESSOR INTERFACE
service the refrigeration system. To place the
microprocessor in the Technicians Interface Mode:
5.1 INTERFACE METHODS
There are five methods for interfacing with the Advance
microprocessor;
a. Place the Main Power switch in the OFF position.
b. Locate the serial download port (item 14, Figure 2−3)
remove the protective plug to gain access to the wire
terminals.
1. Operator Interface - using the keypad.
2. Technician Interface - using the configuration jumper.
c. Plug in a Configuration Jumper or install an insulated
jumper (see Figure 5−1).
3. PC Mode - using the PC Mode jumper.
4. PC Card - Transferring data using a PC Card
NOTE
For units equipped with a switch labeled
ENGINE/OFF/STANDBY (DOES):
5. ReeferManager & Reports - Access using a computer
Operator Interface such as start, stop, Pretrip, reading
alarms, reading data and changing Functional
Parameters may all be performed using the Keypad
(refer to Section 3).
The DOES may be placed in either the ENGINE
or STANDBY position to enter the technician interface mode. If actual operation of the high
voltage components (i. e. the evaporator fan
motor) is desired, the power plug is to be connected and then the DOES is to be placed in the
STANDBY position when entering the technician interface mode.
Technician Interface and PC Mode require the use of an
additional connector before any actions may be
performed and each allows increased interaction,
including operations that may be performed with the
microprocessor powered while the unit is shutdown.
C
For units equipped with a switch labeled
START/RUN-OFF (SROS):
The switch labeled STANDBY/ENGINE (DES)
may be placed in either the ENGINE or
STANDBY position to enter the technician interface mode. If actual operation of the high
voltage components (i. e. the evaporator fan
motor) is desired, the power plug is to be connected, the DES is to be placed in the
STANDBY position and then the SROS is to be
placed in the START/RUN position when entering the technician interface mode.
B
A
D
Insulated
Jumper
E
Download Port
WHITE WIRE
d. Place the Main Power switch in the desired position.
The alarm LED will come on, the setpoint will display,
but the refrigerated compartment temperature will
not, and “REMOVE JUMPER” will display for 10
seconds. Remove the Configuration Jumper or insulated jumper at this time. The MessageCenter will
then display “ ↑ ↓ TO SCROLL, THEN = TO SELECT”
for 10 seconds.
e. Press the UP ARROW Key to scroll through the Menu
beginning at the top.
Press the DOWN ARROW Key to scroll through the
Menu beginning at the bottom.
CONFIGURATION JUMPER
P/N 22-50180-00
f. Select the Mode you wish to access,
Configuration Mode
Figure 5−1 Technicians Interface Connection
Component Test Mode
5.2 TECHNICIAN INTERFACE
(REMOVE JUMPER MODE)
Service Mode
The Technician Interface Mode allows the technician to
change Configurations, test the unit components and/or
and press the “=” key. Information on these test
modes is provided in the following sub-paragraphs:
5−1
62-11389
a. Enter the Technician Interface - Component Test
Mode as described in Section 5.2.
5.2.1 Configuration Mode
a. Enter the Technician Interface - Configuration Mode
as described in Section 5.2.
b. To read through the Component Test list, press either
the UP or DOWN ARROW keys. The list is circular,
meaning that once the end is reached, it is repeated
from the beginning. Refer to Table 5−1 for a list of
component tests available.
b. To read through the Configuration list, press either the
UP or DOWN ARROW keys. The list is circular,
meaning that once the end is reached, it is repeated
from the beginning. Refer to Table 5−2 for information
on the settings and resultant microprocessor actions.
c. Once the desired test is displayed in the MessageCenter, press the ”=” key to select that test. For
example, if Buzzer is selected, the buzzer will come
on, and “BUZZER OFF IN 5 MINUTES” will display in
the MessageCenter. The minutes will count down to 0
at which time the buzzer circuit will be de-energized,
and the MessageCenter will display the last component tested.
c. To change one of the Configurations, bring the desired Configuration into the MessageCenter, and
press the “=” key. The MessageCenter will then display “↑ ↓ TO SCROLL, THEN = TO SAVE” for 10
seconds. Then the selected Configuration will flash,
displaying the current selection. Press the UP or
DOWN ARROW Key to scroll through the list of available selections for this Configuration.
Should you need more than 5 minutes, the timer may
be reset for another 5 minutes anytime during the test
by pressing the “=” key. The timer may only be reset
once during each test. After the 5 minute timer expires, the MessageCenter will return to the Component Test Mode Menu, and display the last component tested.
d. Once the desired selection is displaying in the MessageCenter, press the ”=” Key to save the selection.
The MessageCenter will stop flashing. The new selection is now in memory.
e. Press the UP ARROW Key to continue to scroll
through the Configuration list.
To retest the same component and circuit again,
press the “=” key. Press the UP or DOWN Arrow key
to select another component.
5.2.2 Component Test Mode
WARNING
To stop an individual component test, press and hold the
“=” key for 6 seconds. The microprocessor will still be in
Component Test Mode, and ready for another
component to be selected. To stop component testing,
and turn the microprocessor off, place the Main Power
switch in the OFF position.
If the unit is in Standby Operation and
powered, voltage will be applied to high
voltage components (i.e. the fan motor contactor) and those components will operate
(i.e. the fan blades will turn) when those
components are energized using Component Test Mode.
To go to Configuration Mode or Service Mode, select
Main Menu and press the “=” key.
The only keys that operate during Component Test
Mode are the ALARM and SELECT keys. The alarm list
is available for review of any active or inactive alarms.
The SELECT key will only allow access to the data list
Amp Draw information for the component that is
currently being tested.
Component Test Mode allows the technician to energize
individual circuits for 5 minutes at a time. The engine or
compressor, when in Standby Operation, is not allowed
to start when the microprocessor is in Component Test
Mode. To enter the Component Test Mode:
62-11389
5−2
Component / Menu List
Table 5−1 Component Test
MessageCenter
Green Light
Amber Light
Defrost Light
Front Unloader (UL1)
Rear Unloader (UL2)
Speed Relay (SR)
Buzzer (B)
Glow Plug (Intake Air Heater) Relay (GP or
IAHR)
LIGHT OFF IN X MINS
LIGHT OFF IN X MINS
LIGHT OFF X MINS
UL1 OFF IN X MINS
UL2 OFF IN X MINS
SR OFF IN X MINS
BUZZER OFF IN X MINS
RELAY OFF IN X MINS
Heater Contactor 1 (1HTCON1)
HEATER CONT 1 OFF IN 5 MINS
Heater Contactor 2 (1HTCON2)
HEATER CONT 2 OFF IN 5 MINS
Evaporator Motor Contactor (1EVCON)
EVAPORATOR CONT 1 OFF IN 5 MIN
Power Supply Contactor Relay (PSCONR)
POWER SUPPLY CONT OFF IN X MIN
Compressor Motor Contactor Relay (CCONR)
COMPRESSOR CONT OFF IN X MINS
Condenser Motor Contactor (CDCON)
CONDENSER CONT OFF IN X MINS
Generator Contactor Relay (GENCONR)
GENERATOR CONT OFF IN 5 MINS
Main Menu ( Press the “=” key to go back to the the Configuration Mode or Service Mode
selection menu. Press the down or up arrow to continue scrolling the component test list.)
FET
Board
LED
7 & 14
14
16
23
22
27
18
30
10
21
20
19
2
1
3
formed. If the unit shifts to Charge Mode and
“CHARGE MODE – HOLD = TO EXIT” is displayed in
the MessageCenter, DO NOT perform refrigerant recovery, leak checking, or evacuation. Exit Service
Mode and then re-enter, making sure that “RECOVER / LEAK CHK / EVAC MODE” is displayed in
the MessageCenter before continuing any of these
service procedures.
5.2.3 Service Mode
CAUTION
Service Mode MUST be used whenever removing refrigerant charge, refrigerant leak
checking or evacuating.
f. The microprocessor will monitor the pressure transducer readings during evacuation. Once all pressure
transducers (CDP, CSP and EVOP) have dropped
below –20 inhg (0.68 Bar) and then 2 of the 3 pressure
transducers rise above 5 PSIG (0.34 Bar ), the microprocessor will close CSMV and EXV to 0% open.
When the valves are closed, “CHARGE MODE –
HOLD = TO EXIT” is displayed in the MessageCenter. This action is taken to prevent refrigerant migration to the compressor during charging,
NOTE
If the Main Power switch is toggled to the OFF
position, the microprocessor will exit service
Mode.
To enter Service Mode:
a. Enter the Technician Interface - Service Mode as described in Section 5.2.
g. To exit Service Mode at any time, press and hold the
”=” key for 3 seconds. “EXITING SERVICE MODE”
will then display in the MessageCenter.
b. “ENTERING SERVICE MODE” will display in the
MessageCenter.
When entering Service Mode the microprocessor opens
the CSMV and EXV to 100% open.
5.3 PC MODE
c. Once the valves are open, “RECOVER / LEAK CHK /
EVAC MODE” is displayed in the MessageCenter.
PC Mode allows the technician to access the
microprocessor without the engine running and without
the refrigeration system running. When in PC Mode the
microprocessor is fully functional and all Operator
Interfaces may be performed, the operation of the
microprocessor may be demonstrated and all PC
functions may be performed, again, without the unit
actually operating.
d. Refrigerant recovery, leak checking, or evacuation
may be performed on the unit at this time. Refer to
Service Procedures in Section 8.
e. The unit should remain in the RECOVER / LEAK CHK
/ EVAC MODE as these service procedures are per5−3
62-11389
Cards. General instructions for using the cards is
provided in Figure 5−3. Specific information on use is
provided in the following sub-paragraphs.
C
B
NOTE
For diagnoses of problems with the microprocessor, DataLink data recorder downloading,
file analysis using Reports or use of PC cards,
refer to Section 9.6
A
D
Insulated
Jumper
E
5.4.1 Handling PC Cards
Download Port
While these cards are not constructed for a rugged environment, they are not intended to be stored in a technician’s toolbox, back pocket or on the dashboard of a
vehicle.
GREEN WIRE
The label on each card clearly states that the card is to
be handled with care - not to be bent, dropped or exposed to impact. Heat, moisture and direct sunlight
should be avoided.
PC cards are designed to be used in a wide temperature
range of -40 to +185°F (-40 to +85°C). When a PC card
is connected to an Advance microprocessor or computer at temperatures outside this range, data transmission between the card and the other device may not be
performed correctly.
PC MODE CONNECTOR
P/N 22-50180-01
Retention of programmed data for extended periods of
time requires a temperature range of -4 to +149°F (-20
to +65°C). When PC cards are exposed to temperatures
outside of this range for several days data contained on
the card may be damaged.
Figure 5−2 PC Mode Connection
To place the microprocessor in PC Mode:
a. Place the Main Power switch in the OFF position.
b. Locate the serial download port (item 14, Figure 2−3)
remove the protective plug to gain access to the wire
terminals.
PC cards should never be:
• Dropped.
• Bent.
• Twisted.
• Squeezed.
• Submersed in any liquid.
• Exposed to electrostatic discharge.
• Exposed to intense ultraviolet light.
• Exposed to nearby magnetic or electromagnetic
fields.
c. Plug in a PC mode connector or install an insulated
jumper (see Figure 5−2).
WARNING
Do not toggle the Main Power switch out of
the OFF position when in PC Mode or the
unit will start.
d. The microprocessor will be energized but the engine
and refrigeration system will not be started.
Low X-Ray exposure, i.e. that experienced while
passing through a security screen, should not harm the
card data. High X-Ray exposure, i.e. that experienced in
a medical or dental environment may damage the card
data. PC cards should not be exposed to magnets such
as a pocket screwdriver with a magnetic end.
e. When work is complete, remove the PC Mode connector. The microprocessor will return to normal operation when the Main Power switch is toggled out of
the OFF position.
PC cards should be kept in a hard plastic jewel case
when not in use. Replacement cases P/N 58-50109-00
are available from Carrier Transicold’s Performance
Parts Group.
5.4 PC CARDS
PC Cards that are available include Program Cards,
Configuration Cards, Option Cards and Download
62-11389
5−4
1. Power the microprocessor by toggling the Main Power switch
out of the OFF position or enter PC Mode (refer to section
5.3).
FAULT LED
2. Insert the card into the PC card slot on the front of the microprocessor. Be certain that the instruction label is facing the
“Caution” label. Do not force card into slot. Hold the card at the
end opposite the plug end. DO NOT squeeze the card in the
middle while inserting.
CAUTION
3. The MessageCenter will display messages while the required
action is performed, the green PC CARD STATUS LED will
flash. Do not remove the card until prompted to do so.
4. When the required action is completed the PC Card Status
LED will be on solid. The message center will display a “remove card message. The PC card may then be removed.
5. When the card is removed, the MessageCenter will return to
the default message.
6. If any other messages display, refer to Section 6.1 MessageCenter for an explanation of the error message. If there is an
error, the PC CARD FAULT LED will be on until the card is removed.
MICROPROCESSOR
STATUS LED
PC CARD STATUS LED
Figure 5−3 PC Card Interaction
5.4.2 Program PC Card
CAUTION
A program card is used to load software into the
microprocessor. The card may contain any software
version however, only one version may be loaded to the
card at a time.
The display and MessageCenter may behave differently during the software loading
process, depending on the version of software currently in the microprocessor. DO
NOT INTERRUPT THE SOFTWARE INSTALLATION PROCESS ONCE IT HAS STARTED.
Also, do not place the Main Power switch in
the OFF position during the initial power up
following a software upgrade.
For complete instructions on loading data to the card
using ReeferManager, refer to manual 62-10889.
Software may be downloaded by a Carrier Transicold
dealer from the TransCentral site.
TIP
Whenever performing a major operation to a
microprocessor, such as installing new operating software, it is always a good idea to start the
unit and give it a quick check over prior to performing the operation.
To load software from the card into the microprocessor,
insert the card in accordance with the instructions
provided in Figure 5−3.
When loading new software, the MessageCenter will
display one of 3 different messages:
SAME SW: “= TO LOAD, ↑ TO CANCEL”
(The software loaded on the card is the same as the
software presently in the microprocessor)
OLD SW: “= TO LOAD, ↑ TO CANCEL”
(The software loaded on the card is older than the
software presently in the microprocessor)
NEW SW: “= TO LOAD, ↑ TO CANCEL”
(The software loaded on the card is newer than the
software presently in the microprocessor)
NOTE
Once the unit shuts down to begin the software
install process, the Compressor Suction Modulation Valve closing process begins. The software installation processes will not begin until
the CSMV is completely closed, which will delay
the actual process for about 45 seconds.
5−5
62-11389
5.4.4 Option PC Card
NOTE
All units should have the microprocessor software upgraded to the latest production software, provided for Carrier Transicold dealers on
the TransCentral site, except for those units
that are listed in the “Field Test Software” section. For units listed in the “Field Test Software”
section, ensure the latest software for that unit
is installed.
Option PC Cards allow installation of optional
programming into the microprocessor. Cards may be
purchased with five or ten “clicks”. Each “click” allows
downloading to an individual microprocessor. To
transfer data from the card to the microprocessor, insert
the card in accordance with the instructions provided in
Figure 5−3.
Press the “=” key to load the option. The
MessageCenter will display “INSTALLING OPTION,
PLEASE WAIT” while the option is being installed.
Press the “=” key to load the software. The
MessageCenter will display “ENGINE AND MICRO
WILL STOP NOW” and the unit will shutdown. After
about 45 seconds the MessageCenter backlight will dim
and the message “INSTALLING PROGRAM
SOFTWARE” will be displayed.
The microprocessor will continue and complete the
software loading in accordance with the instructions
provided in Figure 5−3. In the “INSTALLED, REMOVE
CARD XX” message displayed at the end of the loading
process, the “XX” is the number of installs left on the
card. A “click” will not be removed from the card if it is
inserted into a microprocessor that already has the
option installed.
The microprocessor will continue and complete the
software loading in accordance with the instructions
provided in Figure 5−3.
5.4.5 Download PC Card
Download PC cards allow coping of data from the
microprocessor DataLink data recorder to the card for
use with the Reports feature of ReeferManager. To copy
data from the microprocessor to the card, insert the card
in accordance with the instructions provided in
Figure 5−3.
5.4.3 Configuration PC Card
A configuration card may be loaded with Configuration
or maintenance files for download to the
microprocessor. The card may contain either type of file
however, only one may be loaded to the card at a time.
NOTES
When copying data to the card the MessageCenter will
display COPING DATA - PLEASE WAIT”. When the
copy is complete, the MessageCenter will display
“COPY COMPLETE, REMOVE CARD X”. The “X” is the
number or empty spaces remaining on the card.
NOTE
Only a copy of the data will be written to the
card. The actual data will remain inside the
DataLink data recorder.
1. There can be a single complete DataLink
data recorder and microprocessor setup
placed on the card for setting up reefers.
This is simply called creating a
“Configuration Card”. Unit specific and time
sensitive data cannot be loaded to a
configuration card. This data includes:
model number, serial number, hour meter
readings, date and time. These
configurations must be set using the
keyboard or ReeferManager.
For complete instructions on working with the data using
the Reports program, refer to manual 62-10889.
5.5 REEFERMANAGER & REPORTS
5.5.1 Introduction
2. There
can
be
certain
individual
microprocessor settings placed on the card
for maintenance purposes. This is called
creating a “Maintenance Card”.
The ReeferManager & Reports program allows the user
to access and download data, using a computer, when
the unit is not running and without starting the eight-hour
DataLink data recorder timer. Using the computer will
provide additional programming and configuring
capabilities that will not be available through the keypad.
The DataLink data recorder may also be configured and
downloaded using the ReeferManager program.
To load a file from the card into the microprocessor,
insert the card in accordance with the instructions
provided in Figure 5−3.
For complete instructions on using ReeferManager &
Reports, refer to manual 62-10889.
Press the “=” key to load the file. The MessageCenter
will display “LOADING INFO” while the FILE is being
installed.
NOTE
For diagnoses of problems with the microprocessor, DataLink data recorder downloading,
file analysis using Reports or use of PC cards,
refer to Section 9.6
The microprocessor will continue and complete the
loading in accordance with the instructions provided in
Figure 5−3.
62-11389
5−6
NOTE
Beginning with Reefer Manger version
03.08.00, USB to RS-232 adapter cables are
supported for communication between the PC
and the Download connector. The USB –
RS232 program must be installed from the
CD-ROM, and the instructions that are included
with the CD-ROM must be followed to successfully assign the USB driver to the correct USB
port on the PC that will be used for the serial
connection. Refer to bulletin SER09-033 for further information.
a. ReeferManager
ReeferManager enables the user to do the following:
Monitor in real-time via the download port (an RS-232
connection) the current status of the microprocessor
inputs, outputs, refrigeration, electrical, engine and
temperature sensors and alarms.
Record sensor data to a file for diagnostic purposes.
Download microprocessor and DataLink data recorder data via serial port communications directly to the
computer.
Display, edit and send unit model number, unit serial
number and trailer ID to the microprocessor.
c. Connecting Computer and Microprocessor:
To connect the microprocessor and computer:
Display, edit and send Functional Parameters and
Configuration settings to the microprocessor and
DataLink data recorder or to a PC Card.
a. Locate the serial download port (item 14, Figure 2−3)
remove the protective plug to gain access to the wire
terminals.
Write hour meter values to replacement microprocessors (during the first 25 hours).
b. Plug a download cable into the download port and
computer connection (see Figure 5−4). Once the
cable is connected to the download port, the microprocessor will power up, and display “PC MODE”
Initiate Pretrip and Defrost operations.
Support Download, Configuration and Program PC
Card operations.
c. Start the ReeferManager & Reports program by
double clicking on the icon on your computer desktop.
For complete instructions on using ReeferManager &
Reports, refer to manual 62-10889.
Provide a security log on system controlled by a System Administrator.
b. Reports
d. When work is complete, remove the download cable.
The microprocessor will return to normal operation.
The Reports Program enables the user to do the
following:
Read .DCX download files from the Advance microprocessor
Create various customized reports that include set
point, sensors, and events
Create various customized graphical reports
Print numerical, graphical, and event reports
View and print refrigeration system historical settings
and changes
Filter download data by date range and desired
sensors and events
Search for a sensor or event of interest
Synchronize multiple graphical and numerical windows to better understand historical operation
PC Setup enables the user to select how to display
various parameters for use in the graph and text window.
DOWNLOAD CABLE
P/N 22-01737-00 (6’ LONG)
OR
P/N 22-01737-04 (20’ LONG)
Easily adjust x and y axis and color scheme to accommodate various data
Export data to a spreadsheet friendly format such as
MS Excel.
Figure 5−4 ReeferManager & Reports Connection
5−7
62-11389
e. With the negative meter lead on QC2 (without removing the spade connector), test voltage at the microprocessor 6MP4 terminal, see Figure 5−5. If nominal
5 VDC is not present, the microprocessor has failed
and must be replaced.
5.6 MICROPROCESSOR DISPLAY
DIAGNOSTICS
Before replacing a microprocessor or display, the following procedure should be done to determine if the problem is with the microprocessor, display or interconnecting wiring.
f. Plug the 6MP connector back into the microprocessor.
g. Disassemble display to gain access to the display test
points. Refer to Section 8.4.4 for display disassembly.
NOTE
For diagnoses of problems with the microprocessor, DataLink data recorder downloading,
file analysis using Reports or use of PC cards,
refer to Section 9.6
CAUTION
Most electronic components are susceptible to damage caused by electrical static
discharge (ESD). In certain cases, the human body can have enough static electricity to cause resultant damage to the components by touch. This is especially true of the
integrated circuits found in the Advance microprocessor.
TP12
TP14
Figure 5−6 Display Test Points
a. Attach a grounded wrist strap (CTD P/N
07-00304-00) and ground it to a good unit frame
ground.
h. With the negative meter lead on TP12, test voltage at
TP14, see Figure 5−6. If nominal 12 VDC is not
present, check wiring from microprocessor to display.
b. With the microprocessor powered up (check the Microprocessor Status LED - See Figure 2−9 - is blinking at a 1 second pulse) and without removing the
spade connectors, check voltage between microprocessor terminal QC1 (+) and QC2 (-). Minimum
voltage to microprocessor is 11 VDC. If voltage is not
correct, repair wiring to microprocessor.
i. With the negative meter lead on TP13, test voltage at
TP12, see Figure 5−6. If nominal 5 VDC is not
present, check wiring from microprocessor to display.
j. If connections are good, replace the display board.
5.7 MICROPROCESSOR REPLACEMENT & SETUP
c. Unplug the 6MP connector from the microprocessor.
d. With the negative meter lead on QC2 (without removing the spade connector), test voltage at the microprocessor 6MP1 terminal, see Figure 5−5. If nominal
12 VDC is not present, the microprocessor has failed
and must be replaced.
CAUTION
Under no circumstances should a technician electrically probe the microprocessor
at any point, other than the connector terminals where the harness attaches. Microprocessor components operate at different
voltage levels and at extremely low current
levels. Improper use of voltmeters, jumper
wires, continuity testers, etc. could permanently damage the microprocessor.
6MP1
6MP4
Some microprocessor inputs operate at voltage levels
other than the conventional 12 VDC. These inputs include but are not limited to the pressure transducers and
temperature sensors. Under no circumstances should
12 VDC be applied at these connection points.
Figure 5−5 Connector 6MP Connections
62-11389
TP13
5−8
Engine Protect Hours.
Switch On Protect Hours.
Most electronic components are susceptible to damage caused by electrical static
discharge (ESD). In certain cases, the human body can have enough static electricity to cause resultant damage to the components by touch. This is especially true of the
integrated circuits found in the Advance microprocessor.
Engine Sleep Hours.
Standby Hours.
Switch On Sleep Hours.
High Speed Hours.
Start Cycles.
Date and Time.
Grounded wrist cuffs are available from Carrier (P/N
07-00304-00). These should be worn whenever handling a microprocessor.
ID Number.
CAUTION
a. If possible, power the original microprocessor up, by
entering PC Mode, or by toggling the Main Power
switch out of the OFF position.
Although there is less danger of electrical static discharge (ESD) damage in the outdoor environment or in
a repair shop - where the processor is likely to be handled - proper board handling techniques should always
be used. Advance Microprocessors should always be
handled by the plastic cover and not the exposed printed
circuit board. This not only precludes the possibility of
ESD damage, but also lowers the possibility of physical
damage to the electronic components.
b. Insert a Download PC Card into the PC Card slot and
download all data from the DataLink data recorder If
a Download Card is not available, data may also be
downloaded using the ReeferManager PC Program.
c. Scroll through the data list and hour meter readings
and make note of the unit specific data listed above.
If the original microprocessor will not power up, gather the unit specific data from the model/serial number nameplate and estimate hour meter readings
form the unit maintenance records. If PC Cards will
be used to setup the replacement microprocessor,
write the required data to the cards. Also, if the current configuration file is available for this customer
from the TransCentral site, it should be downloaded
and written onto the card prior to beginning work.
When field diagnosis of a Carrier Transicold
refrigeration unit determines that an Advance
Microprocessor is not performing properly and must be
replaced the replacement microprocessor must be
setup for this unit and customer by entering the required
Configurations, Functional Parameters and DataLink
data recorder settings.
If the replacement microprocessor is not loaded with the
most recent software, it should be updated. If software
is loaded, it should be verified that it is the approved
software for this model.
5.7.2 Microprocessor Replacement
a. Power down the microprocessor by removing the PC
Mode connector and/or placing the Main Power
switch in the OFF position.
The preferred method for setup of the microprocessor is
to use PC cards. All required changes, except unit
specific and time sensitive data, may be performed
using the cards. If cards are not available the
microprocessor may be setup using ReeferManager.
ReeferManager allows entry of all required data. If
neither PC Cards or ReeferManager are available the
microprocessor may be setup for immediate use using
the keypad. Changes to the default DataLink data
recorder settings may not be entered using the keypad,
if the microprocessor is setup using the keypad, this
feature will need to be loaded at a later date.
b. Remove negative battery cable from battery.
c. Remove Connectors 1MP, 2MP, & 3MP from the outside of the Control Box.
d. Open the control box door.
e. Remove Connectors 4MP, 5MP & 6MP inside the
Control Box. Remove all wires from the Microprocessor.
f. Locate wire to 80A fuse that runs through the current
sensor. Note the orientation of the wire through the
current sensor, to be certain that the wire is reinstalled through the new current sensor in the same
direction. (Inserting the wire through the current
sensor in the opposite direction will result in erroneous current readings.) Remove wire from fuse
holder and gently pull through the current sensor.
5.7.1 Pre-Replacement Steps
NOTE
For diagnoses of problems with the microprocessor, DataLink data recorder downloading,
file analysis using Reports or use of PC cards,
refer to Section 9.6
g. Remove the screws holding the sides of the microprocessor into the control box. Remove the single
screw holding the top of the microprocessor in place.
Before the unit can be started using the replacement
microprocessor certain unit specific and time sensitive
data must be known. That information includes:
Unit Serial Number.
Unit Model Number.
h. Pull the microprocessor back, and twist it out of the
control box.
i. Install the new microprocessor by reversing the preceding steps
5−9
62-11389
i. Using the same key presses as in step g., continue to
enter the correct numerical value for the Day, Year,
Hour and Minute. Hours are displayed and entered
as a 24 hour clock. 0 to 12 is AM. 13 to 24 is PM.
5.7.3 Microprocessor Setup
a. Ensure that the replacement microprocessor is in
place, all wires connected and the negative battery
cable is reconnected.
b. Power up the microprocessor by toggling the Main
Power switch out of the OFF position. The microprocessor will immediately go into the Configuration
mode.
c. Select the correct model family (Vector) and then
enter the correct model number by using the UP or
DOWN ARROW keys, scroll through the list until the
correct Model Number appears (verify by reading
the Model/Serial Plate on the unit). Press the = key to
enter the new model number.
d. Press the UP ARROW key again, and the Unit Serial
Number field will appear. Press the = key, then the
UP ARROW key. You will see a blinking cursor in the
field. Using the UP or DOWN ARROW key, scroll
through the Number/Letter list, until the first letter of
the serial number appears. Press the = key to enter
that letter and advance the cursor to the next place.
Repeat this process until the entire Unit Serial Number is entered. (i.e. MAL12345678).
e. Press the UP ARROW key again, and the ID field will
appear. Press the = key, then the UP ARROW key.
You will see a blinking cursor in the field. Using the
Up or DOWN ARROW key, scroll through the Number/Letter list, until the first letter / number of the ID
appears. Press the = key to enter that number / letter, and advance the cursor to the next place. Repeat
this process until the entire ID number is entered. If
the cursor is still blinking in a blank space after you
are finished, slowly (wait 2-3 seconds between
presses) press the = key to leave blanks in the remaining spaces. When you reach the end, the message “↑↓ TO SCROLL, THEN = TO SELECT” will
display.
f. Now, press the DOWN ARROW key until “SET
TIME” appears. Press the = key then the UP
ARROW key to enter that menu.
j. When you are finished, the MessageCenter will display “PRESS = TO SAVE TIME CHANGES”.
NOTE
If you do not press the = key the time changes
you just made will not be saved.
k. Press the UP ARROW key to go to “SET NEW
HOURS”. Press the = key then the Up Arrow key to
enter that menu.
l. The first hour meter is Engine Protect Hours. Press
the = key to select this meter. The cursor will be blinking on the ten-thousands place. Press the UP or
DOWN ARROW key to select the correct value, then
press the = key. If the correct number in any of the
locations is 0 (zero), just press the = key to enter 0 as
the value and move the cursor to the next place. For
example, if you are entering 567 hours, you will press
the = key twice to leave a 0 for the first two numbers,
then use the UP and DOWN ARROW key to scroll
through the numbers to enter the correct hours.
When the correct hours for Engine Protect Hours
has been entered, press the = key to advance to the
next hour meter. If an invalid number is entered, a
warning message will flash in the MessageCenter.
For example, you can not enter a higher number of
hours for Engine Protect than the number of Switch
On Hours.
NOTE
None of the “Total” hour meters are listed.
When the hours for all the hour meters are entered, the microprocessor will add the correct
hours together and calculate the Total Engine
Hours, Total Standby Run Hours and Total
Switch On Hours. When the end of the list is
reached “PRESS = TO SAVE HOURS” will be
displayed. Pressing the = key will save the
hours, and return you to the configuration list.
CAUTION
If you do not press the = key, none of the time
hours or cycles you just entered will be saved.
When setting the microprocessor time, ensure that the clock you are using is accurate. Also, some customers are located in
different time zones from the repair location. If you know the owners desired location time, enter that time. If you don’t, enter
the current time at your location.
Hour meters may be changed for 60 minutes
following the initial hour entry. If an error has
been made, be certain to correct it within the 60
minute time period. Following that time, the
hour meters will count the appropriate hours
because the unit switch is on and the unit is operating, and no further manual changes will be
allowed.
g. When MONTH appears, press the = key, then the
UP ARROW key. The MessageCenter will begin to
flash, indicating that it is ready to accept changes.
Use the UP or DOWN ARROW key to scroll through
the number list until the correct number of the current
month appears. Press the = key to enter that number
for the month.
NOTES
1. If a Configuration card will be used to setup
the remainder of the microprocessor
settings, proceed to Section 5.7.7 after the
settings are entered.
h. Press the UP ARROW key to go to Day.
62-11389
5−10
2. After the unit specific and time sensitive
configuration settings are complete use the
UP or DOWN ARROW keys until
“CONFIGS COMPLETE, = TO EXIT” is
displayed in the MessageCenter. Press the
= key to save.
Section 5.5 step c.). You will need ReeferManager
version 03.08.00 or higher.
3. If
the
Configurations,
Functional
Parameters and DataLink data recorder
setup will be set from the keypad and /or
ReeferManager, continue with following
steps.
c. In ReeferManager, go to the Serial Operations Tab,
and then click on Data Recorder/Microprocessor
setup button.
NOTE
ReeferManager 03.08.00 is REQUIRED in order to view, change and send new features to
and from the microprocessor.
d. Select the Sensors to be recorded and whether you
wish averaged or snapshot recordings (averaged is
recommended for all temperature sensors; snapshot is recommended for voltage, amperage, &
RPM).
5.7.4 Configurations Via Keypad
a. Refer to Section 5.2 for a list of available microprocessor Configurations. Refer to Section 5.2.1 for instructions on how to access them.
e. When the setup is correct, press the Send button to
send the new settings to the microprocessor.
f. From the “Confirm Send Information” Pop Up, check
the data you want to send and un-check the data you
don’t want to send. Click the OK button.
5.7.5 Functional Parameters Via Keypad
a. Refer to Section 3.15 for list of available Microprocessor Functional Parameters and for directions on
how to access them.
g. Verify that the settings were sent by waiting for the
confirmation pop up message.
b. Leave the microprocessor powered up as you continue with the next section.
NOTE
If the DataLink data recorder date and time
were not set earlier, they can be set from this
screen by clicking on Tools>Set Date and Time.
5.7.6 DataLink Data Recorder Via ReeferManager
NOTE
If the factory settings are used, you can skip this
section.
5.7.7 Microprocessor Final Checkout
a. Start the unit and allow it to run for a few minutes.
b. While the unit is running, scroll through the Data List
of the microprocessor. Verify that all the data is now
accurately displayed.
a. Refer to Section 3.19 for list of DataLink data recorder setups.
c. Initiate a Pretrip test. Allow the unit to complete the
Pretrip and check for any alarms. Make any necessary repairs before returning the unit into service.
b. Connect your computer to the download port of the
unit and start the ReeferManager program (refer to
5−11
62-11389
Table 5−2 Microprocessor Configurations
NOTE
Configurations are presented at the beginning of the list and progressing using the green UP arrow key
Configuration
UNIT MODEL NUMBER #
Selections
Unit Family types,
and then a list of
configurable model
numbers
UNIT SERIAL NUMBER #
TRAILER ID #
Description
Indicates to the microprocessor the model number
of the unit. There are several model numbers
provided in the list. Scroll to the Vector Family
entries and select the model number printed on the
Model/Serial Number nameplate.
The unit S/N may be entered. This may be up to 10
characters long. Numbers, Letters, and a space are
available by scrolling through the available list.
A customer assigned ID # may be entered. This
may be up to 10 characters long. Numbers, letters,
and spaces may be entered by scrolling through the
available list. After selecting the desired characters,
press SAVE to lock the characters in memory.
NOTE
The default display for this Configuration is “TRAILER ID #”. The display may be modified if the “UNIT OPERATION’” Configuration is set to “RAIL”. If this Configuration is set to “RAIL” then “ASSET ID #” or “CAR ID
#” may display rather than the “TRAILER ID #” default. Refer to the UNIT OPERATION Configuration later in
this table.
This Configuration will display when a replacement microprocessor is
installed. It allows entry of the hours (from the existing microprocessor)
into replacement microprocessor. This Configuration will only display until
SET NEW HOURS
one of the hour meters reaches 25 hours. Changes to these values may
be made for up to 60 minutes.
SHORT
Indicates to the microprocessor which engine is in
LONG
the system
INTAKE HEATER LONG = Glow Plug equipped and longer glow times
are used (TV engines)
GLOW TIME
SHORT= Glow Plug equipped and shorter glow
times are used (DI engines)
INTAKE HEATER = Intake Heater equipped (Tier 4
engines).
NOTE: Refer to Table 4−1 for glow times.
YES / NO
YES = When the refrigerated compartment temperature has been out-of-range for 45 minutes, the
alarm light will come on, and the unit will shutdown.
NO = When the refrigerated compartment temperaOUT OF RANGE SHUTDOWN
ture has been out-of-range for 30 minutes, the
alarm light will come on and the unit will continue to
run.
Refer to Alarm A53 - “BOX TEMPERATURE OUT
OF RANGE” (Section 7) for more information.
YES / NO
YES = Functional Parameters cannot be changed
using the keypad.
PARAMETERS LOCKOUT:
NO = Functional Parameters can be changed using
the keypad, unless individually locked out by Reefer
Manager.
62-11389
5−12
Table 5−2 Microprocessor Configurations - Continued
Configuration
RPM ALARM SHUTDOWN:
LOW PRESSURE SHUTDOWN
LP SHUTDOWN DELAY
Selections
YES / NO
Description
YES = When the A39 - “CHECK ENGINE RPM”
alarm is activated the alarm light will illuminate and
the engine will shutdown.
NO = When When the A39 - “CHECK ENGINE
RPM” alarm is activated the alarm light will illuminate and the engine will continue to run.
YES / NO
YES = When the A18 - “LOW REFRIGERANT
PRESSURE” alarm is activated the alarm light will
illuminate and the unit will shutdown.
NO = When the A18 - “LOW REFRIGERANT
PRESSURE” alarm is activated the alarm light will
illuminate and the unit will continue to run.
(0 - 255 seconds in If the Low Pressure Shutdown Configuration is set
1 second increto YES, shutdown is to be delayed for this amount
ments)
of time after the Low Pressure Shutdown signal is
255 SECS
received.
USE FACTORY DEFAULT SETTING ONLY, DO
NOT OPERATE UNIT WITH DIFFERENT
SETTING.
YES / NO
YES = When the A27 - “HIGH SUCTION PRESSURE” alarm is activated the alarm light will illuminate and the unit will shutdown.
NO = When the A27 - “HIGH SUCTION PRESSURE” alarm is activated the alarm light will illuminate and the unit will continue to run.
YES = When the A28 - “CHECK REFRIGERATION
SYSTEM” alarm is activated the alarm light will illuminate and the unit will shutdown.
NO = When the A28 - “CHECK REFRIGERATION
SYSTEM” alarm is activated the alarm light will illuminate and the unit will continue to run.
HIGH SUCT PRESS SHUTDOWN
YES / NO
REFRIGERATION SYST SHUTDOWN
30 PSIG (2.0 BAR)
SUCTION PRESSURE
0 - 50 psig (0 to
3.4 bar)
[in 1 psig (0.1 bar)
increments]
YES / NO
COMPRESSOR ALARM
SHUTDOWN
(This Configuration is an option, it
will not display if the option is not installed.)
If the “Compressor Alarm Shutdown” option has
been installed (refer to Unit Data), this setting will
be available.
YES = The unit will shutdown and not restart when
alarm A13, A17, A18, A27, A28 or A56 activate 3
times within 2 hours of continuous engine operation.
NO = Normal shutdown rules for above alarms.
In Start-Stop Operation the charging current must
drop below this value before the unit is allowed to
shutdown.
7.0A
CURRENT FOR S/S SHUTOFF
Pressure to maintain if discharge pressure transducer is opened or shorted.
1A TO 10A
(in 0.5A increments)
5−13
62-11389
Table 5−2 Microprocessor Configurations - Continued
Configuration
Selections
12.2V
12.0 TO 12.8V
Description
The engine will restart from a Start-Stop Off cycle
or a Sleep Mode Off cycle when the battery drops
to this value.
A lower selection may result in a longer off cycle
(based on battery voltage) and possibly overall
shorter battery life. A higher selection may result in
a shorter off cycle (based on battery voltage) and
possibly overall longer battery life.
105F (-12.25C)
10°F to 32°F
(-12.2°C to 0°C)
YES / NO
The engine will restart from a Start-Stop Off cycle
or a Sleep Mode Off cycle when the engine coolant
temperature drops to this value.
VOLTAGE FOR S/S RESTART
ENG TEMP FOR S/S RESTART
ALTERNATOR CHECK
SHUTDOWN:
BATT CHARGER
(Applicable to unit - not lift gate battery charger only.)
NO TEMP
SENSOR
ENGINE OIL LEVEL SWITCH
YES / NO
ENGINE OIL LEVEL SHUTDOWN
YES / NO
LOW COOLANT LEVEL
YES / NO
WITH TEMP
SENSOR
YES = When the A2 - “LOW ENGINE OIL LEVEL”
alarm is activated the alarm light will illuminate and
the unit will shutdown.
NO = When the A2 - “LOW ENGINE OIL LEVEL”
alarm is activated the alarm light will illuminate and
the unit will continue to run.
YES = A Coolant Level Sensor is installed.
NO = A Coolant Level Sensor is not installed..
YES / NO
YES = When the A11 - “LOW ENGINE OIL PRESSURE“ alarm has been activated three times in the
last two hours of engine operation the A21 _
“TECHNICIAN RESET REQUIRED“ alarm will be
activated.
NO = A21 will not be activated.
YES = When the A12 - “HIGH COOLANT TEMPERATURE” alarm has been activated three times
in the last two hours of engine operation the A21 “TECHNICIAN RESET REQUIRED“ alarm will be
activated.
NO = A21 will not be activated.
ENGINE OIL PRESS SHUTDOWN
YES / NO
HIGH ENGINE TEMP SHUTDOWN
62-11389
YES = When the A51 - “ALTERNATOR NOT
CHARGING” alarm is activated the alarm light will
illuminate and the unit will shutdown.
NO = When the A51 - “ALTERNATOR NOT CHARGING” alarm is activated the alarm light will illuminate and the unit will continue to run.
NO TEMP SENSOR = Use this setting when the
battery charger does not have the temperature
sensor wire.
WITH TEMP SENSOR = Use this setting when the
battery charger does have the temperature sensor
wire (connected to the battery positive post).
YES = An Engine Oil Level switch is installed.
NO = An Engine Oil Level switch is not installed.
5−14
Table 5−2 Microprocessor Configurations - Continued
Configuration
Selections
NO DEVICE
SWITCH
INSTALLED
0-5 VDC
0.25-4.75 VDC
Description
NO DEVICE = There is no fuel level sensor
installed in the fuel tank.
SWITCH INSTALLED = A low fuel level switch is
installed in the fuel tank.
0-5 VDC = An older style low fuel level sensor
(5 bolt mounting flange) with a 0 to 5 VDC signal
range is installed in the fuel tank.
0.25-4.75 VDC = A low fuel level sensor with a
0.25-4.75 VDC signal range is installed in the fuel
tank. (Sensor with 1/2” MPT mounting or newer
ultrasonic sensor.)
If a low fuel level sensor (0 to 100% sensor) is installed, the low fuel level warning (Alarm 1) will
come on when the level reaches 15% or less, and
the unit will shutdown (Alarm 19) when the level
reaches 10%.
OFF = No fuel sensor is installed in the tank.
30 to 120 GALLON = Size fo fuel tank installed.
(Refer to Fuel Sensor Configuration for additional information)
DIESEL MAX GEN AMPS
OFF
30 Gallons
50 Gallons
75 Gallons
100 Gallons
120 Gallons
25A
10 TO 35
in 0.5A increments
STANDBY MAX GEN AMPS
25A
10 TO 35
in 0.5A increments
Indicates to the microprocessor the maximum allowable amperage in Standby operation.
USE FACTORY DEFAULT SETTING ONLY, DO
NOT OPERATE UNIT WITH DIFFERENT
SETTING.
STARTUP MAX GEN AMPS
17A
10 TO 35
in 0.5A increments
Indicates to the microprocessor the maximum allowable amperage during start up.
USE FACTORY DEFAULT SETTING ONLY, DO
NOT OPERATE UNIT WITH DIFFERENT
SETTING.
4A
0 TO 10
in 0.5A increments
The maximum allowable amperage in low speed
operation will be the configured MAX GEN AMPS
or MAX STANDBY AMPS less this value.
USE FACTORY DEFAULT SETTING ONLY, DO
NOT OPERATE UNIT WITH DIFFERENT
SETTING.
Indicates to the microprocessor the delay for this
unit when starting in standby.
This setting is used when multiple units are on the
same line to stagger the occurrence of high inrush
current in situations such as restart after a power
loss.
YES = This hour meter will be displayed during the
startup messaging sequence and will be in hour
meter menu.
NO = This hour meter will not be displayed during
the startup messaging sequence. It will be displayed with the “other meters and counters”.
FUEL SENSOR
FUEL TANK SIZE
DIESEL OFFSET MAX AMPS
STANDBY STARTUP DELAY
OFF
5 Seconds
10 Seconds
15 Seconds
20 Seconds
YES / NO
DISPLAY TOTAL ENGINE HR
5−15
Indicates to the microprocessor the maximum allowable amperage in Diesel operation.
USE FACTORY DEFAULT SETTING ONLY, DO
NOT OPERATE UNIT WITH DIFFERENT
SETTING.
62-11389
Table 5−2 Microprocessor Configurations - Continued
Configuration
Selections
YES / NO
DISPLAY STANDBY RUN HR
YES / NO
DISPLAY TOTAL SWITCH ON HR
DIESEL RESET VALUE
(Refer to Table 8−1 for oil/filter
change intervals.)
STANDBY RESET VALUE
SWITCH ON RESET VALUE
PM 1 - 5 (Preventative Maintenance
Hour Meters)
62-11389
0FF
50 TO 30,000
hours in 50 hour increments
0FF
50 TO 30,000
hours in 50 hour increments
0FF
50 TO 30,000
hours in 50 hour increments
OFF
ENGINE
PROTECT
HOURS
SWITCH ON
PROTECT
HOURS
STANDBY HOURS
START CYCLES
HIGH SPEED
HOURS
COMPRESSOR
RUN HOURS
MAINTENANCE
DAYS
5−16
Description
YES = This hour meter will be displayed during the
startup messaging sequence and will be in hour
meter menu.
NO = This hour meter will not be displayed during
the startup messaging sequence. It will be displayed with the “other meters and counters”.
YES = This hour meter will be displayed during the
startup messaging sequence and will be in hour
meter menu.
NO = This hour meter will not be displayed during
the startup messaging sequence. It will be displayed with the “other meters and counters”.
When the engine maintenance hour meter is reset,
the value selected here will be added to the to the
present meter reading to indicate to the microprocessor when the next service interval alarm will be
activated. If the value entered is “0” the alarm feature is turned off.
When the standby maintenance hour meter is reset,
the value selected here will be added to the to the
present meter reading to indicate to the microprocessor when the next service interval alarm will be
activated. If the value entered is “0” the alarm feature is turned off.
When the switch on maintenance hour meter is reset, the value selected here will be added to the to
the present meter reading to indicate to the microprocessor when the next service interval alarm will
be activated. If the value entered is “0” the alarm
feature is turned off.
OFF = This selection will turn this meter OFF (will
not display).
ENGINE HOURS = this meter will count the engine
hours until the next reset interval.
SWITCH ON HOURS = this meter will count the
switch on hours until the next reset interval.
STANDBY HOURS = this meter will count the
standby hours until the next reset interval.
START CYCLES = this meter will count how many
times the engine has started until the next reset
interval.
HIGH SPEED HOURS = this meter will count the
number of hours the engine operated in high speed
until the next reset interval.
COMPRESSOR RUN HOURS = this meter will
count the number of hours the compressor has operated until the next reset interval.
MAINTENANCE DAYS = this meter will count the
number of days until the next reset interval.
Table 5−2 Microprocessor Configurations - Continued
PM 1 - 5 RESET INTERVAL
Note:
This Configuration will not display
for those meters that are configured OFF.
OFF
ENGINE
PROTECT
HOURS
0 or 50 TO 30,000
hours in 50 hour increments
SWITCH ON
PROTECT
HOURS
0 or 50 TO 30,000
hours in 50 hour increments
STANDBY HOURS
0 or 50 TO 30,000
hours in 50 hour increments increments
START CYCLES 0
or 1,000 TO
90,000 CYCLES in
1,000 cycle increments
HIGH SPEED
HOURS
0 or 50 TO 30,000
hours in 50 hour increments
COMPRESSOR
RUN HOURS
0 OR 50 to 30,000
hours in 50 hour increments
MAINTENANCE
DAYS
0 OR 10 to 990
days in 10 day increments
PRODUCTSHIELD SETUP
NOTE: Refer to Section 4.7.3 for
more information on the following
settings.
PRODUCTSHIELD ECONO
The value to be entered here is the desired number
of hours, cycles or days between PM Maintenance
Alarms for this meter.
When the meter is reset, the value selected here
will be added to the to the present meter reading to
indicate to the microprocessor when the next service interval alarm is to be activated.
When a PM hour meter is configured as a Maintenance Days meter, that meter will not count a specific instance such as hours of operation or number of
cycles for a particular component. The meter is
connected to the real time clock and will activate
the alarm after the entered number of days has
elapsed.
Press “=” to access the ProductShield menu. The
information set in the following configurations can
be read in the Unit Data list.
OFF
OFF = ProductShield Econo is OFF
GO TO
START/STOP
GO TO START/STOP = Allows unit to be set for
and operate in Continuous Run until ambient temperature falls within a user-defined range when
unit will go to START/STOP. This allows energy
savings while offering Continuous Run operation
protection when ambient is outside range. Unit will
return to Continuous Run when ambient goes beyond range.
GO TO
CONTINUOUS
5−17
GO TO CONTINUOUS = Allows unit to be set for
and operate in START/STOP until ambient temperature falls outside a user-defined range when unit
will go to Continuous Run. This provides continuous
air flow and good product protection for extreme
ambient temperatures. Unit will return to START/
STOP when ambient comes back inside range.
62-11389
Table 5−2 Microprocessor Configurations - Continued
PRODUCTSHIELD ECONO
MIN TEMP
OFF or
-20°F to +119.0°F
(-28.9°C to
+48.4°C )
(in 0.5° increments)
Default: 119.0°F
(48.4°C )
OFF = There is no lower limit for this parameter.
Select the lowest ambient temperature desired to
activate ProductShield Econo.
If ProductShield Econo is Go To Continuous there
is a minimum 10°F range. Therefore, this parameter’s upper limit is ProductShield Econo Maximum
Temperature minus 10°F (5.5°C).
PRODUCTSHIELD ECONO
MAX TEMP
OFF or
-20°F to +119.0°F
(-28.9°C to
+48.4°C )
(in 0.5° increments)
Default: 119.0°F
(48.4°C)
OFF = There is no upper limit for this parameter.
Select the highest ambient temperature desired to
activate ProductShield Econo
If ProductShield Econo Install is Go To Continuous
there is a minimum 10°F range. Therefore, this parameter’s lower limit is ProductShield Econo Min
Temp plus 10°F (5.5°C).
PRODUCTSHIELD
ECONO - DELTA-T
(used for “Go To S/S” only, not
available for “Go To Cont”)
OFF
+3.6°F to +27.0°F
(+2°C to 15°C) (in
0.5° increments
OFF = Delta-T is not used in determining when the
unit will go into Econo: Go To Start/Stop mode.
Select the desired delta-T value for activation of
ProductShield Econo. When Delta-T is below this
setting and within the minimum/maximum range, go
to start/stop will be allowed
OFF = The unit will operate normally in high and
low speeds.
OFF
ON
PRODUCTSHIELD HIGH AIR
ON = The unit will operate in high speed when the
ambient air temperature is outside a user defined
range. This provides increased air flow and good
product protection for extreme ambient temperatures. Unit may return to low speed when ambient
comes back within the range.
OFF = There is no lower limit for this parameter.
Select the lower limit of the ambient range desired
for this parameter. Refer to Section 4.7.3 for more
information on High Air Min. Temp.
HIGH AIR MIN. TEMP
OFF
-19°F to +119°F
(-28.3°C to
+48.3°C )
in 0.5°F or °C
increments
Default: 119°F
(48.3°C )
HIGH AIR MAX. TEMP
OFF
-19°F to +119°F
(-28.3°C to
+48.3°C )
in 0.5°F or °C
increments
Default: 119°F
(48.3°C )
OFF = There is no upper limit for this parameter.
Select the upper limit of the ambient range desired
for this parameter. Refer to Section 4.7.3 for more
information on High Air Max. Temp.
OFF
OFF = Delta-T is not used for determining the activation/de-activation of High Air Delta-T
+3.6° F to +27.0°F
(+2°C to 15°C)
in 0.5° C or °F increments
Select the desired Delta-T value for activation of
ProductShield High Air. Refer to Section 4.7.3 for
more information on High Air Delta-T.
HIGH AIR DELTA-T
PRODUCTSHIELD WINTER - XX° OFF
Select the desired ambient temperature below
-20°F to +32.0°F
which ProductShield Winter will operate (forced
(-28.9°C to 0°C) (in Continuous Run operation.)
0.5° C or °F increments
62-11389
5−18
Table 5−2. Microprocessor Configurations - Continued
Configuration
Selections
OFF
START-STOP
CONTINUOUS
Description
OFF = If both Range Locks are OFF, the unit will
operate normally.
If either Range 1 or Range 2 is not OFF, the unit
will operate as selected whenever the set point is
within that range
START-STOP = The unit will always operate in
Start-Stop whenever the setpoint is between the
minimum & maximum temperatures for that range
(see the following sub-configurations).
CONTINUOUS = The unit will always operate in
Continuous Run whenever the setpoint is between
the minimum & maximum temperatures for that
range (see the following sub-configurations).
• RANGE 1 (or 2) MINIMUM
TEMPERATURE
-22°F TO 89.6°F
(-30°C to 32°C)
in 0.1°F or °C increments
Select the lowest temperature desired for this
Range.
• RANGE 1 (or 2) MAXIMUM
TEMPERATURE
-22°F TO 89.6°F
(-30°C to 32°C)
in 0.1°F or °C increments
Select the highest temperature desired for this
range.
MIN SET POINT
-225F TO 89.6°F
(-305C to 32°C)
in 0.1°F or °C increments
Indicates to the microprocessor the desired minimum allowable set point .
MAX SET POINT
-22°F TO 89.65F
(-30°C to 325C)
in 0.1°F or °C increments
Indicates to the microprocessor the desired maximum allowable set point.
NO A/C POWER
ALARM &
SHUTDOWN
SWITCH TO ENGINE
ALARM & SHUTDOWN = If standby power is lost
unit is to shutdown
SWITCH TO ENGINE = If standby power is lost
engine will be started.
TOGETHER
SEPARATE
TOGETHER = When the Minimum Run Time, Minimum Off Time, Restart Temperature, Maximum Off
Time, and Override Temperatures are set in the
Functional Parameter List, the same values will be
used for both Frozen and Perishable setpoints.
SEPARATE = When the Minimum Run Time, Minimum Off Time, Restart Temperature, Maximum Off
Time, and Override Temperatures are set in the
Functional Parameter List, different values may be
entered for Perishable and Frozen setpoints.
RANGE 1 LOCK
OR
RANGE 2 LOCK
S/S PARAMETERS
REMOTE TEMP SENSOR 1 (or 2 or ON / OFF
3)
ON = A remote sensor has been added to the unit,
and connected into the wire harness.
OFF = There is no Remote Sensor (1or 2 or 3) in
this unit.
5−19
62-11389
Table 5−2. Microprocessor Configurations - Continued
Configuration
DOOR SWITCH
Selections
SWITCH NOT
INSTALLED
DOOR OPEN
SWITCH OPEN
DOOR OPEN
SWITCH CLOSED
Description
SWITCH NOT INSTALLED = There is no door
switch.
DOOR OPEN SWITCH OPEN = A Door switch has
been installed. The switch contacts will be OPEN
whenever the door is OPEN.
DOOR OPEN SWITCH CLOSED = A Door switch
has been installed. The switch contacts will be
CLOSED whenever the door is OPEN.
ALARM ONLY = When Door switch indicates that
the door is open, a warning alarm will be displayed
in the MessageCenter.
UNIT SHUTDOWN = When Door switch indicates
that the door is open, a warning alarm will be disDATA RECORDER played in the MessageCenter, and the unit will shutdown. If this setting is chosen the following “unit
ONLY
shutdown below” setting will also be available.
LOW ENGINE SPEED = When Door switch indicates that the door is open, the engine will be
forced to low speed. If this setting is chosen the
following “run low speed below” setting will also be
available.
NOTE
The DataLink data recorder will record every
time the door is opened or closed when using
any of the preceding alarm/shutdown/speed
change settings.
ALARM ONLY
UNIT SHUTDOWN
LOW ENGINE
SPEED
• DOOR SWITCH
DATA RECORDER ONLY = The DataLink data recorder will record every time the door is opened or
closed. There will be no alarms or messages displayed in the MessageCenter.
UNIT SHUTDOWN BELOW
(temperature)
OFF
120 to -20°F (49 to
-29°C)
If Door switch= Unit Shutdown is selected:
OFF = the unit will shutdown at any ambient temperature.
Value = when ambient temperature is below the
entered value, shutdown will be allowed. (When
ambient temperature is above the entered value,
the unit will not shutdown.)
RUN LOW SPEED BELOW
(temperature)
OFF
120 to -20°F (49 to
-29°C)
If Door switch= Low Engine Speed is selected:
OFF = the unit will transition to low speed at any
ambient temperature.
Value = when ambient temperature is below the
entered value, the engine will be forced to low
speed will be allowed. (When ambient temperature
is above the entered value, the engine will not be
forced to low speed.)
62-11389
5−20
Table 5−2. Microprocessor Configurations - Continued
Configuration
REMS1 (Remote Switch 1)
OR
REMS2 (Remote Switch 2)
NOTE
If the configuration is set for a
switch, not for a panel, the following
sub configuration will also be available.
• REMS1
OR
• REMS2
Selections
NOT INSTALLED
DOOR OPEN
SWITCH OPEN
DOOR OPEN
SWITCH CLOSED
SWITCH ON
CONTACTS OPEN
SWITCH ON
CONTACTS
CLOSED
REMOTE PANEL
Description
Switch not installed = There is no remote switch or
panel.
DOOR OPEN SWITCH OPEN = The remote switch
will be used as a door switch. The switch contacts
will be OPEN whenever the door is OPEN.
DOOR OPEN SWITCH CLOSED = The remote
switch will be used as a door switch. The switch
contacts will be CLOSED whenever the door is
OPEN.
SWITCH ON CONTACTS OPEN = The remote
switch will be used as a remote control switch. The
switch contacts will be OPEN whenever the switch
is in the ON position.
SWITCH ON CONTACTS CLOSED = The remote
switch will be used as a remote control switch. The
switch contacts will be CLOSED whenever the
switch is ON.
REMOTE PANEL = If set to this value, the remote
panel SYSTEM ON/OFF key will be enabled. The
switch panel mounted Main Power Switch must be
toggled out of the OFF position and the remote
panel SYSTEM ON/OFF key must be pressed for
the unit to operate. However, if the Override Remote Switch 1 or 2 Functional Parameter is set to
YES, the remote panel is disabled.
ALARM ONLY
ALARM ONLY = When the switch is activated, a
UNIT SHUTDOWN warning alarm will be displayed in the MessageCenter.
LOW ENGINE
UNIT SHUTDOWN = When the switch is activated,
SPEED
a warning alarm will be displayed in the MessageDATA RECORDER Center, and the unit will shutdown.
ONLY
LOW ENGINE SPEED = When the switch is activated, the engine will be forced to low speed.
DATA RECORDER ONLY = The DataLink data recorder will record every time the the switch is activated. There will be no alarms or messages displayed in the MessageCenter.
SET TIME
Indicates to the microprocessor the time and date for the DataLink data
recorder Real Time Clock .
• MONTH
• DAY
• YEAR
• HOURS
• MINUTES
1-12
1-31
1998 - 2037
0-23
0-59
Select the correct month of the year.
Select the correct day of the month.
Select the correct year.
Select the correct hour (0-11 is AM / 12-23 is PM)
Select the correct minute.
5−21
62-11389
Table 5−2. Microprocessor Configurations - Continued
Configuration
Selections
YES / NO
Description
YES = Natural defrost will be allowed
NO = Natural defrost will not be allowed
Refer to Section 4.6 for more information on natural
defrost)
NOT DISPLAYED
NOT DISPLAYED = set point will not be shown with
a decimal. All other temperatures will still be displayed with a decimal.
DISPLAYED = set point will be shown with a decimal and temperatures may be selected to a tenth of
a degree.
YES = When the Main Power switch is placed in
the OFF position, the DataLink data recorder will
continue to record data for an additional 8 hours.
NO = When the Main Power switch is placed in the
OFF position, the DataLink data recorder will stop
recording data.
Select the length of time unit remains in low speed
before transitioning to high speed.
NATURAL DEFROST
DECIMAL
DISPLAYED
YES / NO
8 HOURS ADDITIONAL DATA:
HIGH SPEED DELAY
SATELLITE COMM
(This Configuration is an option, it
will not display if the option is not installed.)
UNIT OPERATION:
VEHICLE ID:
RAIL SHUTDOWN OVERRIDE:
62-11389
1 Minute
0 to 10 minutes in
0.5 minute increments
OTHER = The microprocessor is set for communication from Qualcomm T2 (Trailer Tracs 2) or any
other supplier.
QUALCOMM =- The microprocessor is set for communication from Qualcomm Trailer Tracs.
OTHER
QUALCOMM
STANDARD = The microprocessor is set to control
over-the-road trailer refrigeration operation.
STANDARD
RAIL
RAIL = The microprocessor is set to control Rail
refrigeration operation. When this Configuration is
set to “RAIL” the following “VEHICLE ID”, “RAIL
SHUTDOWN OVERRIDE” and “RAIL OVERRIDE
RESTARTS” Sub-Configurations will be available.
This Configuration modifies the prefix wording used
for display of the customer assigned ID number
entered in the “TRAILER ID” Configuration. For example, if the customer assigned ID number entered
is 12345….
ASSET = will display “ASSET # 12345”
TRAILER = will display “TRAILER # 12345”
CAR = will display “CAR # 12345”
NO = When the A30 - “FAILED TO RUN MIN
TIME” or A31 - “FAILED TO START - AUTO” alarm
is activated, the microprocessor will not override the
alarm(s) and the unit will not restart until the alarms
are cleared manually.
YES = When either an A30 - “FAILED TO RUN MIN
TIME” or A31 - “FAILED TO START - AUTO alarm
is activated, the unit will automatically override and
clear the alarm(s) and attempt a restart after 4
hours. When this Configuration is set to “YES” the
following “RAIL OVERRIDE RESTARTS” Sub-Configurations will be available.
ASSET
TRAILER
CAR
NO
YES
5−22
Table 5−2. Microprocessor Configurations - Continued
Configuration
RAIL OVERRIDE RESTARTS:
Selections
1-20
3
ENABLE INTELLISET AT = KEY
NO
YES
SUPPLY AIR LIMIT FOR S/S
-21.6° to 0° F
(-12° to 0°C )
in 0.5°F or °C increments.
DEFAULT: -21.65F
(-125C)
SUPPLY AIR LIMIT FOR CONT
HIGH SPEED PULLDOWN
CONFIG COMPLETE
Description
With the default setting the microprocessor is allowed to override and clear the A30 - “FAILED TO
RUN MIN TIME” or A31 - “FAILED TO START AUTO alarm(s) three consecutive times before the
override is locked out and no further restart attempts will be allowed until the alarm(s) are cleared
manually.
The number of restart attempts allowed before the
override is locked out may be changed by entering
the desired number in this Sub-Configuration. Setting this number too high may result in a discharged
or damaged battery if the unit never actually starts
or fails to run long enough to charge the battery
prior to shutting down again.
YES = Allows access to the IntelliSet menu using
the = key.
NO = Allows access to the IntelliSet menu using the
SELECT key.
Value to be used to calculate the lowest allowable
supply air temperature, when in Start-Stop Operation, in accordance with the formula “Set Point +
this value = coldest allowable supply air temperature“. For example:
Fahrenheit: if the set point is 35°F and the Configuration value is set at -10°F the calculation is 35 +
(-10) = 25°F lowest allowed supply air temperature.
Celsius: if the set point is 2°C and the Configuration
value is set at -6°C the calculation is 2 + (-6) = -4°C
lowest allowed supply air temperature.
-21.6° to 0° F
Value to be used to calculate the lowest allowable
( -12° to 0°C)
supply air temperature, when in Continuous Opera(in 0.5°F or °C intion, in accordance with the formula “Set Point +
crements)
this value = coldest allowable supply air temperature“. For example:
DEFAULT: -5.05F
(-2.75C)
Fahrenheit: if the set point is 35°F and the Configuration value is set at -10°F the calculation is 35 +
(-10) = 25°F lowest allowed supply air temperature.
Celsius: if the set point is 2°C and the Configuration
value is set at -6°C the calculation is 2 + (-6) = -4°C
lowest allowed supply air temperature.
When active, this logic indicates if temperature limits regulating the exit of pulldown mode are modified or not.
ON / OFF
ON = Unit will continue in High Speed until it
reaches set point.
OFF = Normal unit operation.
Press the “=” key to exit configurations
5−23
62-11389
SECTION 6 − MESSAGECENTER
1
6
PARAGRAPH NUMBER
Page
6.1 MESSAGECENTER MESSAGES . . . . . . . . . . . . . . . . . . . . . . . . . . . . . . . . . . . . . . . . . . . . . . . . . . 6−1
62−11389
SECTION 6
MESSAGECENTER
6.1 MESSAGECENTER MESSAGES
The following table lists all of the messages which do not appear in other lists in this manual and a description of their
meaning. Refer to Section 7 for a list of alarm messages. Refer to Section 3.13 for a list of Unit Data messages. Refer
to Section 3.15 for a list of Functional Parameter messages. Refer to Section 5.2.1 for a list of Configuration
messages.
MessageCenter MESSAGES
Message
↑↓ TO SCROLL, THEN = TO LOCK
↑↓ TO SCROLL, THEN = TO SAVE
↑↓ TO SCROLL, THEN = TO SELECT
= TO INSTALL, INSTALLS LEFT XX
ACTIVE
ACTIVE ALARM LIST CLEARED
ALL ALARMS CLEARED
ALL INFO LOADED - REMOVE CARD
BACK TO CONFIGS
BACK TO FUNC PARAMS
BAD PC CARD OR CARD SLOT
BUZZER OFF IN X MINS
CALIBRATION UNSUCCESSFUL
CANNOT ENTER TRIP START
CANNOT START DEFROST CYCLE
CANNOT START PRETRIP
CANNOT DOWNLOAD - BATTERY TOO
LOW
CARD FULL, REMOVE CARD
Description
This message is used when viewing Unit Data. Use the UP and
DOWN arrow keys to move through the Data list. Press the = key
to lock a Data item in the MessageCenter.
Press the UP or DOWN arrow key to scroll through menu selections available in this mode. When you reach the desired selection,
press the = key to store new value in microprocessor’s memory.
Press the UP or DOWN arrow key to scroll through menu selections available in this mode. When you reach the desired selection,
press the = key to select it.
An Option PC Card has been inserted into the PC Card slot. Press
the = key to install the option into the microprocessor. The number
of installs remaining on the PC Card will be shown.
This message will appear in the MessageCenter along with the current IntelliSet indicating that the IntelliSet is active and none of its
settings have been modified.
The list of active alarms in the microprocessor has been erased.
(This does not remove alarms from the DataLink data recorder.)
The list of active and inactive alarms in the microprocessor alarm
lists have been erased. (This does not remove alarms from the
DataLink data recorder.)
All data has been loaded into the microprocessor from the PC
Card. The card may be safely removed from the microprocessor.
Pressing the = key with this message showing will return the user
to the main microprocessor Configuration list.
Pressing the = key with this message showing will return the user
to the main Functional Parameter list.
The microprocessor has detected a problem with either the PC
card or the PC card slot.
The Buzzer circuit has been energized in Component Test Mode.
The Buzzer circuit will continue to be energized for the number of
minutes shown.
An attempt to calibrate the discharge transducer failed.
Cannot enter Trip Start. A problem has been detected within the
DataLink data recorder.
Due to current unit conditions, the defrost cycle cannot be started.
Refer to Defrost Sections 3.9 and 8.8.9.
Due to current unit conditions a Pretrip test cannot be started. Refer to Pretrip Section 3.4.
Data cannot be downloaded and software upgrades are prohibited
when battery voltage is below 7.0 volts. This message will be displayed until the serial cable is removed.
The PC Download Card is full. There is no additional room to download information from the microprocessor. You may safely remove
the PC Card from the slot.
6−1
62-11389
MessageCenter MESSAGES - Continued
Message
CARD LOCKED - REMOVE CARD
CARD REMOVED, DATA NOT COPIED
CARD REMOVED, REINSERT CARD
CFG: =TO LOAD,↑ TO CANCEL
CHANGE INTELLISET TO EXIT
CHARGE MODE-HOLD=TO EXIT
CHECK AT NEXT SERVICE INTERVAL
CHECK DOOR
CHECK FUEL LEVEL
(Requires Optional Sensor)
CHK WIRES FROM MICRO TO KEYPAD
COMPONENT TEST MODE
CONFIG ERROR, REMOVE CARD
CONFIGS COMPLETE,= TO EXIT
CONFIGURATION MODE
CONFIGURATION NOT CHANGED
CONTINUOUS LOCKED
CONTINUOUS RUN MODE SELECTED
COPY COMPLETE, REMOVE CARD XX
COPY ERROR, REMOVE CARD XX
COPYING DATA-PLEASE WAIT
DATA RECORDER FAILURE
DEFROST CYCLE STARTED
DOOR OPEN
62-11389
Description
The lock switch on the PC Card is in the “Locked” position. To use
the PC Card, move the switch to the “Unlocked” position.
The PC Card was removed before all data was copied onto the
card.
The PC Card was removed from the card slot before the operation
was completed. Reinsert the PC Card into the card slot to perform
the operation.
A Configuration Card has been inserted into the PC Card slot.
Press the = key to load configurations into microprocessor.
The IntelliSleep IntelliSet is active. Alternates with “INTELLI-SLEEP MODE” at 5 second interval whether unit is running
or not.
Service Mode has the refrigeration system set so that it can be
charged with refrigerant through the liquid line service valve. Press
the = key to manually exit, or wait until the charging is complete.
The unit needs to be checked at next service interval.
There is currently an active non-shutdown alarm in the alarm list.
Door switch indicates that a refrigerated compartment door is not
closed.
The level in the fuel tank is very close to empty.
There is a communication signal lost between the keypad, display
and control module. Check and test the wiring to the keypad/display
Pressing the = key while this message is being displayed will allow
user access to Component Test Mode.
There was an error configuring the microprocessor with the Configuration PC Card. Remove the PC Card from the slot.
The user has reached the end of the Configurations List. Pressing
the UP or DOWN ARROW key will start list over. Press the = key
to exit Configuration List.
Press the = key to enter Configuration Mode.
New configuration selection was not entered (saved) within the 5
second time limit.
The current set point is within a range that has been locked into the
Continuous Run Mode. Start-Stop can not be selected.
The unit operating mode has been changed from Start-Stop to
Continuous Run.
A DownLoad PC Card has been inserted into the PC Card slot, and
all data from the DataLink data recorder has been copied onto the
PC Card. You may safely remove PC Card from the slot. XX =
number of empty download slots remaining on the card.
A DownLoad PC Card has been inserted into the PC Card slot and
an error occurred while the data was being copied onto the PC
Card. You may safely remove the PC Card from the slot.
XX indicates the number of empty download slots remaining on the
card.
A DownLoad PC Card has been inserted into the PC Card slot and
all data from the DataLink data recorder is being copied onto the
PC Card. DO NOT REMOVE THE CARD WHILE THIS MESSAGE
IS BEING DISPLAYED.
The microprocessor has stopped recording Unit Data.
The unit has gone into defrost.
A refrigerated compartment door is open.
6−2
MessageCenter MESSAGES - Continued
Message
DOOR OPEN - LOW SPEED
ENTERING SERVICE MODE
ERROR: ENG HRS > SWITCH ON
HOURS
ERROR: HI SP HRS > TOTAL ENG
HOURS
Description
A refrigerated compartment door is open forcing the unit to run in
low speed.
The initial message for Service Mode.
When setting up a replacement microprocessor, incorrect hours
have been entered
ERROR: SBY HRS > SWITCH ON SBY
HRS
EVAC / CHARGE MODE
EXITING PRETRIP MODE
EXITING SERVICE MODE
FORCED LOW ENGINE SPEED
FUNCTION NOT CHANGED
HOUR METERS NOT CHANGED
INACTIVE ALARMS IN MEMORY
INSTALLED, REMOVE CARD XX
The unit is in Service Mode, and the refrigeration system is ready
to be evacuated then charged with refrigerant. Refer to Section
5.2.3.
Pretrip has been aborted either by user or by a pretrip alarm.
Service Mode has been turned off and unit is returning to normal
operation.
Due to current ambient conditions and power requirements, the
engine is being set to operate in Low Speed. (See Section 4.8.3,
step 1 for more information.)
The = key was not pressed in the allotted amount of time to select
the new Functional Parameter setting. The new setting was not
stored and the old setting will be used.
Indicates that no changes have been made to the hour meters in
either the configuration or functional parameter lists.
There are inactive alarms in the microprocessor alarm list which
have not yet been cleared.
An Option PC Card has been inserted into the PC Card slot, and
the option has been installed in the microprocessor. The PC Card
may safely be removed from the slot. XX indicates the number of
option installations remaining on card.
INSTALLING OPTION, PLEASE WAIT
An Option PC Card has been inserted into the PC Card slot, and
the option is being installed in the microprocessor. DO NOT REMOVE THE CARD WHILE THIS MESSAGE IS BEING DISPLAYED.
INSTALL STOPPED, REINSERT CARD
An Option PC Card has been inserted into the PC Card slot, and
the install process has been stopped by the PC Card not being fully
inserted in the slot, or by being removed. Remove and reinsert PC
Card to continue.
INTELLI-SLEEP MODE
The IntelliSleep IntelliSet is active. This message alternates with
“CHANGE INTELLISET TO EXIT” at 5 second interval whether unit
is running or not
Once the battery voltage goes below 7.0 Volts for 10 seconds, all
of the keys on the keypad will be locked.
KEYPAD LOCKED-BATTERY TOO LOW
LIST END, = TO CLEAR ALARMS
LOADING INFO
MAIN MENU
MAX SETPOINT HAS BEEN REACHED
MICRO WILL RESET & RESTART NOW
The end of the Alarm list has been reached. Pressing the = key will
clear the Alarm list.
A Configuration PC Card has been inserted into the PC Card slot,
and information from the card is being loaded into the microprocessor. DO NOT REMOVE THE CARD WHILE THIS MESSAGE
IS BEING DISPLAYED.
Consists of Configuration Mode, Component Test and Service
Modes.
Maximum set point allowed by configuration settings has been
reached.
The microprocessor Program software has just been changed, or a
new configuration has been programmed into the microprocessor.
The microprocessor will turn itself off then on again (similar to a
computer reboot) in order for the changes to be effective.
6−3
62-11389
MessageCenter MESSAGES - Continued
Message
MICRO WILL STOP IN XXX SECONDS
MIN SETPOINT HAS BEEN REACHED
MODIFIED
NEW SW: = TO LOAD, TO ↑ CANCEL
Description
The Main Power switch has been placed in the OFF position and
the system valves are closing. The display will turn off when the
count down reaches zero.
Minimum Set Point allowed by configuration settings has been
reached.
This message will appear in the MessageCenter along with the current IntelliSet indicating that the IntelliSet is active and one or more
of its settings have been modified.
A Program PC Card has been inserted into the PC Card slot, and
the program on the PC Card is a newer version than what is already loaded in the microprocessor. Press the = key to load the
program.
NO ACTION TAKEN, REMOVE CARD
A Program PC Card has been inserted into the PC Card slot, and
no key presses have been made to install the program into the microprocessor. The PC Card may be safely removed from the slot.
NO ACTIVE ALARMS
There are no active alarms in the microprocessor Alarm List.
NO DATA ON CARD, REMOVE CARD
A Program or Configuration PC Card has been inserted into the PC
Card slot, and no valid data is present on the PC Card. The PC
Card may safely be removed from the unit.
NO DATA TO COPY, REMOVE CARD
A Download PC Card has been inserted into the PC Card slot, and
there is no valid data in the DataLink data recorder to copy onto the
PC Card. The PC Card may safely be removed from the unit.
NO INACTIVE ALARMS
There are no inactive alarms in the Alarm List
NO INSTALLS LEFT, REMOVE CARD
An Option PC Card has been inserted into the PC Card slot, and all
install options have been used. The PC Card may safely be removed from the unit.
OLD INTELLISETS-USE REEFERMAN
The IntelliSets that are on the Configuration PC Card were written
with too old of a PC Program, like ServiceManager. The software in
the micro requires IntelliSets to be written to the Configuration PC
Card using ReeferManager. Rewrite the information to the card using ReeferManager, then use it in the microprocessor again
OLD SW:CANNOT LOAD-REMOVE CARD A Program PC Card has been inserted into the PC Card slot, and
the major version of the program on the PC Card is an older version than what is already loaded in the microprocessor. Software
with older major versions can not be loaded into the microprocessor. Remove the PC Card.
OLD SW, = TO LOAD, ↑ TO CANCEL
A Program PC Card has been inserted into the PC Card slot, and
the minor version of the program on the PC Card is an older version than what is already loaded in the microprocessor. Press the =
key to load the older program.
PC MODE
PM DUE
PRESS ↑↓ TO VIEW DATA
PRESS ↑↓ TO VIEW SETTINGS
PRESS ↑↓ TO VIEW PRINT MENU
PRESS = TO MARK TRIP START
PRESS = TO START PRETRIP
PRESS ↑↓ TO VIEW INTELLISET
62-11389
The Main Power switch is in the OFF position, the PC Mode Jumper is connected and engine is not running in order to enter PC
Mode.
Preventative Maintenance is now due on the unit.
Press the UP or DOWN ARROW key to scroll through the Data
List.
Press the UP or DOWN arrow key to scroll through Functional Parameter Settings.
Press the UP or DOWN arrow key to view the Strip Print setup
menu.
Press the = key to mark the start of the trip in the DataLink data
recorder.
Press the = key to begin Pretrip tests.
Press the UP or DOWN arrow key to view IntelliSet list. This message will appear after IntelliSets are installed into the microprocessor, and the unit can not be started until an IntelliSet is selected.
6−4
MessageCenter MESSAGES - Continued
Message
PRETRIP FAIL & COMPLETED
PRETRIP FAIL IN TEST XX
PRETRIP PASS
PRETRIP STOPPED BY USER
PRODUCTSHIELD: ECONO ON
PRODUCTSHIELD: HIGH AIR ON
PRODUCTSHIELD: WINTER ON
READY TO INSTALL SOFTWARE
RECOVER / LEAK CHK / EVAC MODE
REMOVE CARD - BATTERY TOO LOW
REMOTE SWITCH 1 (2) OPEN
REMOTE SWITCH 1 (2) OPEN - LOW
SPEED
REMOVE JUMPER
SAME SW, = TO LOAD, ↑ TO CANCEL
SERVICE MODE
SETPOINT CHANGED
SETPOINT NOT CHANGED
SETTING SMV: XXX %
SLEEP MODE, OFF / ON TO WAKE
SLEEP WARNING: DOOR OPEN
SLEEP WARNING: NO TEMP CONTROL
SLEEP WARNING: REMS1(2) OPEN
SMV CLOSING: WAIT XXX SECONDS
Description
The Pretrip test is completed, and some of the Pretrip tests did not
pass. Check the Alarm List for Pretrip alarms.
Some of the Pretrip tests did not pass and the Pretrip was not completed. Check the Alarm List for Pretrip alarms.
All of the Pretrip tests were ok.
Pretrip has been stopped by user.
The unit is operating in ProductShield Econo which overrides normal unit Start-Stop or Continuous Run operation. Refer to Section
4.7.3.
The unit is operating in ProductShield High Air which overrides normal unit speed operation. Refer to Section 4.7.3.
The unit is operating in ProductShield Winter which overrides normal unit operation. Refer to Section 4.7.3.
The microprocessor has been forced into Program Install Mode. If
this message does not clear after loading the current version of
software, check for a shorted circuit between 5MP5 and 5MP6.
This message will be displayed when the unit is in Service Mode
and the system is ready for recovery and leak testing.
If a PC card is inserted when battery is below 7.0 volts this message will be displayed until card is removed.
Remote switch is open. May be connected to a refrigerated
compartment door or a remote control switch.
Shows that the remote switch is open and that the unit is running in
low speed. Switch may be connected to a refrigerated compartment door or a remote control switch.
The Configuration/Technician Test Mode has been entered. Remove the jumper wire before continuing.
A Program PC Card has been inserted into the PC Card slot and
the program on the PC Card is the same as the program currently
in the microprocessor. Press the = key to reload the same program
or press the UP ARROW key to cancel and remove card.
Selection in Configuration and Technician Test Modes which is
used when servicing the refrigeration system. Refer to Section
5.2.3.
The new set point has been entered (saved into microprocessor
memory), the new set point will be used.
The new set point has NOT been entered (NOT saved into microprocessor memory), the old set point will be used.
The Main Power Switch has been toggled out of the OFF position
and the CSMV is opening.
The unit is cycled off in Sleep Mode. Place the Main Power switch
in the OFF position, then back to the desired position to wake the
microprocessor up.
The unit is configured for Rail Mode and the unit is in Sleep Mode
and a refrigerated compartment door is open. The unit will start as
needed for Sleep Mode.
The unit is running in Sleep Mode to charge the battery and (in
Engine Operation) warm the engine coolant. It is not running to
provide temperature control.
The unit is configured for Rail Mode and the unit is in Sleep Mode
and a remote switch is open. The switch may be connected to a
refrigerated compartment door or to a remote control switch. The
unit will start as needed for Sleep Mode.
Power Up and the CSMV is closing. XX indicates the number of
seconds remaining until valve is fully closed.
6−5
62-11389
MessageCenter MESSAGES - Continued
Message
START STOP LOCKED
START-STOP MODE SELECTED
STATUS OK
TECHNICIAN RESET REQUIRED
(A21)
Description
The set point has been locked into Start-Stop Operation. Continuous Run can not be selected.
Start-Stop Operation has been selected.
The unit is operating correctly.
AL11 (Low Engine Oil Pressure) or AL12 (High Coolant Temperature) has been activated three times in the last two hours and the
unit has been locked out. The unit must be brought to a Carrier
Transicold Dealer for service.
TEST #1(to #15) XX% COMPLETE
TIME SELECTION NOT CHANGED
Pretrip is currently running this test and is XX% complete.
A time change was started but not entered (saved) in Configuration
List.
TRIP START ENTERED
The Trip Start marker has been placed in the DataLink data recorder.
The unit battery has dropped below 7 volts for more than 10 seconds.
UNIT BATTERY TOO LOW
UNIT SHUTDOWN - DOOR OPEN
UNIT SHUTDOWN - SEE ALARM LIST
UNIT SHUTDOWN - RMS1(2)
UNKNOWN CARD - REMOVE CARD
WARNING: DIESEL RESTART ON
WARNING: NO TEMP CONTROL
WRONG UNIT TYPE, REMOVE CARD
62-11389
The unit has shutdown because the refrigerated compartment door
is open.
An active shutdown alarm has shut the unit down.
The unit has shutdown because switch is open. May be connected
to a door or a remote control switch.
A defective or different type of PC Card has been inserted into the
PC Card slot. The microprocessor can not recognize any data on
the card. The card may be safely removed from the microprocessor.
When electric power is not available while the unit is operating in
Standby Operation, the unit will switch to Engine Operation.
The temperature sensors have failed and the unit has entered
Cargo Protect Mode. Refer to Section 4.8.1.
A configuration PC card has been inserted into the PC Card slot.
The unit model family type on the PC card is not in the same unit
family type as the microprocessor. The card may be safely removed from the microprocessor.
6−6
SECTION 7 − ALARM TROUBLESHOOTING
1
PARAGRAPH NUMBER
Page
7.1 INTRODUCTION . . . . . . . . . . . . . . . . . . . . . . . . . . . . . . . . . . . . . . . . . . . . . . . . . . . . . . . . . . . . . . . . . 7−1
7.2 NOTES . . . . . . . . . . . . . . . . . . . . . . . . . . . . . . . . . . . . . . . . . . . . . . . . . . . . . . . . . . . . . . . . . . . . . . . . . 7−2
7.3 DRIVER / OPERATOR ALARMS . . . . . . . . . . . . . . . . . . . . . . . . . . . . . . . . . . . . . . . . . . . . . . . . . . . . . . 7−3
7.4 SHUTDOWN ALARMS . . . . . . . . . . . . . . . . . . . . . . . . . . . . . . . . . . . . . . . . . . . . . . . . . . . . . . . . . . . . . . 7−4
7.5 START UP / ENGINE ALARMS . . . . . . . . . . . . . . . . . . . . . . . . . . . . . . . . . . . . . . . . . . . . . . . . . . . . . . . 7−22
7.6 WARNING / STATUS ALARMS . . . . . . . . . . . . . . . . . . . . . . . . . . . . . . . . . . . . . . . . . . . . . . . . . . . . . . . 7−36
7.7 ELECTRICAL ALARMS . . . . . . . . . . . . . . . . . . . . . . . . . . . . . . . . . . . . . . . . . . . . . . . . . . . . . . . . . . . . . . 7−46
7.8 SENSOR ALARMS . . . . . . . . . . . . . . . . . . . . . . . . . . . . . . . . . . . . . . . . . . . . . . . . . . . . . . . . . . . . . . . . . 7−65
7.9 PRETRIP ALARMS . . . . . . . . . . . . . . . . . . . . . . . . . . . . . . . . . . . . . . . . . . . . . . . . . . . . . . . . . . . . . . . . . 7−75
7
7.10 MAINTENANCE ALARMS . . . . . . . . . . . . . . . . . . . . . . . . . . . . . . . . . . . . . . . . . . . . . . . . . . . . . . . . . . 7−98
62−11389
SECTION 7
ALARM TROUBLESHOOTING
problem is not obvious, this troubleshooting guide will be
of assistance.
WARNING
Troubleshooting should begin with the first alarm that
appears in the active alarm list. The first alarm that
appears is the last alarm that was recorded. Other
alarms in the list may have contributed to the
occurrence of the first alarm.
Advance microprocessor equipped units
may start automatically at any time the Main
Power switch is not in the OFF position.
Also, the unit may be fitted with two way
communication equipment that will allow
starting of the unit from a remote location
even though the switch is in the OFF position.
The check items in the troubleshooting guide are listed
in order of their likeliness of occurrence and ease of
testing. We recommend that you follow the order in
which they are presented; however, there may be times
when situations or experience lead a to the use of a
different order. For example, if the trailer is loaded,
condensing unit checks should be done first, even
though some evaporator section checks may be listed
before them.
WARNING
Be aware of HIGH VOLTAGE supplied at the
power plug or from the generator. When
performing service or maintenance procedures: ensure any two way communication is
disabled in accordance with the manufacturer’s instruction, ensure the Main Power
Switch is in the OFF position and, whenever
practical, disconnect the high voltage
source, lockout/tagout the receptacle and
disconnect the negative battery connection. NEVER dis-assemble the generator:
HIGH MAGNETIC FIELD INSIDE! This field
can interfere with cardiac implants such as
pacemakers and defibrillators.
When the cause of the problem is corrected, it is not
necessary to continue through the remainder of the
steps. Some active alarms will inactivate themselves
automatically once the cause has been corrected.
Alarms that do not inactivate themselves automatically
must be cleared manually. (See Note 1 page 7−2.)
When repairs are completed, run the unit through a
Pretrip cycle and verify that no further active alarms
occur. Also, the inactive alarm list should be cleared so
that there are no ‘old’ alarms in memory when the unit
leaves the repair facility.
If the message CHECK WIRES FROM MICRO TO
KEYPAD appears in the MessageCenter, there is a
communication error between the keypad and the
microprocessor. With no communication, there will not
be an associated alarm. Should this occur, check the
wire connections behind the keypad assembly, at the
keypad itself (remove the rear cover to check), and at
connector 6MP on the microprocessor. Check for
microprocessor status led blinking at 1 second rate (1
second ON/1 second OFF).
7.1 INTRODUCTION
This section provides guidance for troubleshooting
alarms. The alarm light will be illuminated when there is
one (or more) alarm(s) stored in the microprocessor.
Instructions for reviewing the alarm lists are provided in
sections 3.11 & 3.12.
When an alarm occurs, look through both Active and
Inactive alarm lists in the microprocessor and make
note of all alarms. Each alarm begins with an A (active)
or I (inactive) followed by an alarm number and
description. Alarms are listed in this guide by alarm
number in ascending order.
When working on the refrigeration system, an
accurately calibrated manifold gauge set should always
be installed. It is not necessary to connect an additional
high pressure gauge at the liquid line service valve. The
compressor suction pressure, compressor discharge
pressure and evaporator outlet pressure can be read in
the unit data list.
Before beginning to actually troubleshoot an alarm,
visually inspect the unit, in particular the area of the unit
that is causing a problem. In many cases the cause of
the problem will be obvious once a visual inspection is
performed. For those cases where the cause of the
In high or low ambients it may be necessary to cool or
warm the refrigerated compartment temperature before
performing specific tests providing that the
compartment is not loaded with perishable product.
7−1
62-11389
switch labeled STANDBY/ENGINE (DES) in
the STANDBY position and then place the
SROS in the START/RUN position.
7.2 NOTES
Note 1
The active alarm list may be cleared by
scrolling to the end of the list. “LIST END, =
TO CLEAR ALARMS” will appear in the
MessageCenter. Pressing = will inactivate
the alarms. That is: the alarm is “cleared”
from the active alarm list and moved to the
inactive alarm list for later review if the
condition that caused the alarm has been
corrected. When Shutdown Alarms are
cleared, the unit will attempt to restart. When
non-Shutdown Alarms are cleared, there will
be no noticeable change in the unit’s
operation.
Note 3
Sensors may be tested at the component
plug. The sensor and interconnecting wiring
may also be tested at the 1MP plug. Remove
plug and, using an ohmmeter, measure
resistance. Be careful not to damage the
connector pins. (Refer to Section 8.9.10 for
chart of resistances for different sensors.)
Note 4
The switches, (Remote 1 & 2, Door, High
Pressure, Engine Oil Pressure, Defrost Air
and Evaporator High Temperature 1, 2 or 3)
may be tested at the component plug. The
switch and interconnecting wiring may also
be tested at the 1MP, 2MP, OC or EVC plug.
Remove plug and, referring to the wiring
schematic, check for voltage from the microprocessor through the switch to ground or
from the voltage source through the switch to
the microprocessor as applicable.
Note 5
Some tests can only be conducted while the
unit is operating. The unit may be started automatically in either Engine Operation or
Standby Operation.
The Inactive Alarm list is cleared in the same
way. When the inactive alarm list is cleared
both the inactive and active lists are cleared.
Clearing the inactive alarm list removes the
alarm from the microprocessor.
Note 2
Many electrical circuits may be tested by
powering the microprocessor without starting
the unit. Two methods are available to do this.
METHOD ONE:
Place the microprocessor in PC Mode. Refer
to Section 5.3.
METHOD TWO:
Set the NO A/C POWER Configuration to
ALARM & SHUTDOWN and ensure the unit
is disconnected from standby power. Start
the unit in standby:
For units equipped with a Main Power switch
labeled ENGINE/OFF/STANDBY (DOES),
place the DOES in the ENGINE or STANDBY
position as desired.
For units equipped with a Main Power switch
switch labeled ENGINE/OFF/STANDBY
(DOES), place the DOES in the STANDBY
position.
For units equipped with a Main Power switch
labeled START/RUN-OFF (SROS), place the
switch labeled STANDBY/ENGINE (DES) in
the ENGINE or STANDBY position as
desired and then place the SROS in the
START/RUN position.
For units equipped with a Main Power switch
labeled START/RUN-OFF (SROS), place the
62-11389
7−2
Alarm
NO.
1
Steps
Alarm/Cause
Corrective Action
7.3 DRIVER / OPERATOR ALARMS
LOW FUEL LEVEL WARNING
Note: This is an optional alarm which will not occur unless a fuel level sensor is present and configured ON.
• TRIGGER ON: Fuel level is 15% or less for more than 30 seconds.
• UNIT CONTROL:
Engine Operation: Alarm only.
Standby Operation: this alarm will not activate in standby Operation.
• RESET CONDITION: Auto reset when the fuel level is above 17% for more than 30 seconds, or
alarm may be manually reset via keypad or by turning the unit off, then back on again.
NOTE: Follow the steps below until a problem is found. Once a repair or correction has been made, the active
alarm should clear itself (see reset condition above). Operate the unit through the appropriate modes to see if
any active alarm occurs. Continue with the steps below as necessary.
1
Check For Low Fuel Level
Check fuel level in the fuel tank.
Add fuel as needed to the fuel tank.
2
Check Fuel Level Sensor. Refer to procedure for Alarm 126
2
LOW ENGINE OIL LEVEL WARNING
Note: This is an optional alarm which will not occur unless a fuel level sensor is present and configured ON.
• TRIGGER–ON: Engine oil level is sensed approx. 7 or more qts. (6.62 or more liters) low for longer
than 30 seconds.
• UNIT CONTROL: Alarm Only, or may be configured to shut unit down.
• RESET CONDITION: Auto reset if engine oil level is above 4 qt. (3.79 liters) low for more than 30
seconds or alarm may be manually reset via keypad or by turning the unit off, then back on again.
NOTE: Follow the steps below until a problem is found. Once a repair or correction has been made, the active
alarm should clear itself (see reset condition above). Operate the unit through the appropriate modes to see if
any active alarm occurs. Continue with the steps below as necessary.
1
Check engine oil level
a. Check engine oil dipstick
Add engine oil as needed to fill.
2
Check engine oil level switch
a. Inspect engine oil level switch & No physical damage to switch.
connector pins & terminals
No damaged or corroded pins in plug.
b. Check engine oil level switch Contacts open when level is more than 7 qts low
operation
Contacts closed when level is less than 4 qts low
3
Check engine oil level switch harness
a. Inspect harness & control box No physical damage to harness.
connector pins & terminals (See No damaged or corroded pins
wiring schematic)
b. Check for shorted circuit in harness, Ensure the Main Power stitch is not in the OFF
and continuity through the harness position.
Battery voltage reading (12-13 VDC) between wires
in plug
4
Check oil level switch
a. Drain oil level to approximately 2.8
to 3-4 quarts (3.8 liters) low.
Remove switch.
b. Visually and physically inspect Must be securely fastened to center rod.
upper and lower float stops.
7−3
62-11389
Alarm
NO.
11
Steps
Alarm/Cause
Corrective Action
7.4 SHUTDOWN ALARMS
LOW ENGINE OIL PRESSURE
• TRIGGER–ON: Engine oil pressure is below 12 psig (0.82 bar) for longer than 5 seconds while the
engine is running.
•
UNIT CONTROL:
•
RESET CONDITION: Auto Reset or Alarm may be manually reset via Keypad or by turning the unit
off, then back on again.
Engine Operation: Shutdown and alarm.
Standby Operation: Will not activate in standby.
NOTE: Follow the steps below until a problem is found. Once a repair or correction has been made, clear the
active alarm(s). (See Note 1 page 7−2.) Operate the unit through the appropriate modes to see if any active
active alarm occurs. Continue with the steps below as necessary.
1
Check For Low Engine Oil Level Warning Alarm
a. Check for alarm A2
Alarm conditions must be corrected and the alarm
cleared to continue
2
b. Check engine oil dipstick.
Add engine oil as needed.
Check Engine Oil Pressure Switch Wiring
a. Inspect switch & connector pins & No physical damage to switch.
No damage or corrosion in connector.
terminals.
b. Check switch circuit
3
62-11389
Energize circuit. (See Note 2 page 7−2.)
Check for voltage at switch plug Voltage should be approximately 12 VDC. If OK skip
between pins A (+) and B (ground) to step 4, if not continue with step 3.
Check Engine Oil Switch Harness
a. Inspect harness & control box
No physical damage to harness.
No damage, moisture, or corrosion in connectors.
connector pins & terminals. (See
wiring schematic Section 10.)
b. Check for shorted circuit in harness, Check for voltage from 2MP17 to plug terminal A
and continuity through the harness. Check for ground at plug terminal B.
4
Check Switch
Remove switch, connect to an Contacts closes on a pressure rise at 15 psig (1.02
bar.)
external pressure source and test.
Contacts open on a pressure fall at 12 psig (0.82
bar.)
5
Check Engine Oil Pressure
Connect mechanical oil gauge.
Oil pressure must be greater than 15 psig (1.02 bar.)
7−4
Alarm
NO.
12
Steps
Alarm/Cause
Corrective Action
HIGH COOLANT TEMPERATURE
• TRIGGER–ON: When in Engine Operation: for ambient temperatures below 120°F (48.9°C) Engine
coolant temperature is above 230°F (110°C), or Ambient temperatures above 120°F (48.9°C),
engine coolant temp is over 241°F (116°C), or Engine coolant temperature is between 230 and
241°F (110 and 116°C) for more than 5 minutes.
•
UNIT CONTROL:
•
RESET CONDITION: Auto Reset after 15 minutes if the engine coolant temp falls below 212°F
(100°C), or alarm may be manually reset via keypad or by turning the unit off, then back on again.
Engine Operation: Engine and unit shutdown and alarm.
Standby Operation: Will not activate in standby.
NOTE: Follow the steps below until a problem is found. Once a repair or correction has been made, the active
alarm should clear itself (see reset condition above). Operate the unit through the appropriate modes to see if
any active alarm occurs. Continue with the steps below as necessary.
1
Check Coolant Level
a. Check coolant level in overflow Level must be in the normal range.
bottle.
WARNING
Do not remove the cap from a hot
radiator or bottle; if the cap must be
removed, do so very slowly in order
to release the pressure without
spray.
b. Inspect connecting tube between Connections must be airtight. No leakage or holes in
tube.
overflow bottle and radiator.
2
Check For Bad Eng Coolant Sensor Alarm
Check for Alarm 129.
Alarm conditions must be corrected and the alarm
cleared to continue.
3
Check Freeze Point Of Coolant
Use Coolant Tester to check
Must be between 40% to 60% Ethylene Glycol to
water mixture.
concentration of anti-freeze
mixture.
Check Airflow Through Radiator & Condenser Coil
a. Inspect condenser & radiator.
Ninety percent or more of the coil surface must be
undamaged. No “dead” air spaces. Condenser / Radiator coil must be clean.
b. Check condenser fan rotation /
Fans should operate correctly. Air should be directed
in through the grill, and into the engine compartment.
operation.
4
5
6
Check Water Pump Belt
Check engine water pump belt.
No Glazing, no cracking, no slipping.
Check Engine Coolant Temperature Sensor
a. Inspect sensor & connector pins & No damage to sensor.
terminals.
No damage, moisture, or corrosion in connector.
b. Check sensor resistance.
(See Note 3 page 7−2.)
10,000 Ohms @ 77°F (25°C.) Refer to Table 8−5 for
complete table of temperatures and resistance values.
Additional steps on the next page.
7−5
62-11389
Alarm
NO.
12
Steps
Alarm/Cause
Corrective Action
HIGH COOLANT TEMPERATURE - Continued
7.
Check Engine Coolant Temperature Sensor Wiring
a. Inspect harness & control box
No physical damage to harness.
connector pins & terminals. (See
No damage or corrosion in connectors.
wiring schematic Section 10.)
b Check voltage at the sensor conVoltage reading should be 2.5 $ 0.1 VDC. This verinector with the microprocessor
fies microprocessor output and wiring connections to
powered up.
sensor.
8.
Check Engine Cooling System
a. Compare actual engine tempera- Temperature must be within ±20°F (±11.1°C.)
ture to the microprocessor reading.
b. Test operation of engine coolant
thermostat.
Must operate correctly.
c. Check water pump operation.
No seepage at weep hole. Bearings tight and quiet.
Impeller firmly attached to shaft.
d. Check cooling system for scale, Coolant must be clean & clear. No foreign particles or
sludge, rust, etc.
substances in it. Flush & clean the coolant system as
necessary.
e. Check water pump bypass hose to Must be clear and open.
thermostat housing for internal
blockage.
62-11389
7−6
Alarm
NO.
Steps
13
•
Alarm/Cause
Corrective Action
HIGH DISCHARGE PRESSURE (ALARM 75 WILL ALSO ACTIVATE)
TRIGGER–ON: Compressor discharge pressure switch (HP1) contacts are open. HP1 contacts
open when the discharge pressure rises to 465 psig (31.6 bar.)
•
UNIT CONTROL:
•
RESET CONDITION: Auto Reset after 15 minutes if the compressor discharge pressure falls below
350 psig (23.8 bar), or alarm may be manually reset via keypad or by turning the unit off,
then back on again.
Engine Operation: Engine and unit shutdown and alarm.
Standby Operation: Refrigeration system shutdown and alarm with PSCON
still energized.
NOTE: Follow the steps below until a problem is found. Once a repair or correction has been made, the active
alarm should clear itself (see reset condition above). Operate the unit through the appropriate modes to see if
any active alarm occurs. Continue with the steps below as necessary.
1
Check System Pressures
Install manifold gauge set and check Suction & Discharge Pressures must have the same
and compare compressor discharge reading on gauges & on microprocessor display.
& suction pressures with those
Pressures must be in the normal range for ambient &
shown on the microprocessor.
refrigerated compartment temperature conditions. If
discharge pressure is in normal range, proceed to
step 4.
NOTE: Microprocessor suction (CSP) and evaporator
(EVOP) pressure readings have a maximum value of
100 psig (7.5 bar) The actual suction pressure must
be lower than 100 psig in order to perform this test.
2
Check Airflow Through Condenser Coil
a. Inspect condenser & radiator.
Ninety percent or more of the coil surface must be
undamaged. Condenser coil and radiator must be
clean.
b. Check airflow (with unit running.)
Even airflow through the entire coil.
No “dead” spots.
c. Check condenser fans.
3
4
5
6
Both fans should operate correctly. Check rotation,
air should be pulled in through the grill, and discharge
into the engine compartment.
Check For Refrigerant Overcharge
Check refrigerant charge.
Refer to Section 8.6.2.
Check HP1 Switch
Inspect switch & connector pins & No physical damage to switch.
No damage, moisture, or corrosion in connector.
terminals.
Check HP1 Switch Harness
a. Inspect harness & control box
connector pins & terminals. (See
wiring schematic Section 10.)
b. Check for shorted circuit in harness,
and continuity through the harness.
Check HP1 Switch
Check switch operation.
No physical damage to harness.
No damage, moisture, or corrosion in connectors.
Energize Circuit. (See Note 2, page 7−2.) Check for
voltage from SP5, through switch and SP15 to microprocessor terminal 2MP29.
Test switch, refer to Section 8.8.7 step b.
7−7
62-11389
Alarm
NO.
14
Steps
Alarm/Cause
Corrective Action
HIGH A/C AMPS
• TRIGGER–ON: AC Current Sensor 1 is greater than 40A or AC Current Sensor 2 is greater than
40A for 3 seconds.
•
UNIT CONTROL:
•
RESET CONDITION: Auto reset after 15 minutes if the AC current sensor reading is less than
38 amps or alarm may be manually reset via keypad or by turning unit off then back on.
Engine Operation: Alarm will not activate.
Standby Operation: Refrigeration system shutdown and alarm with PSCON
still energized.
NOTE: Follow the steps below until a problem is found. Once a repair or correction has been made, the active
alarm should clear itself (see reset condition above). Operate the unit through the appropriate modes to see if
any active alarm occurs. Continue with the steps below as necessary.
1
Check Generator Voltage (If Used When Alarm Occurred)
Check voltage at GENCON L1-L2, Must be nominal 460 VAC
L1-L3, L2-L3.
2
Check Power Source Voltage (If Used When Alarm Occurred)
Check voltage at PSCON L1-L2, Must be nominal 460 VAC
L1-L3, L2-L3.
3
Check Voltage Output From Contactors
a. Check voltage at GENCON T1-T2, Must be nominal 460 VAC
T1-T3, T2-T3.
4
5
6
b. Check voltage at CCON with Must be nominal 460 VAC
compressor operating. T1-T2,
T1-T3, T2-T3.
Verify AC Current Sensor Accuracy
Power the microprocessor. Refer to
Unit AC Current #1 and #2 reading in Data List must
Note 2, page 7−2
be 0.0 " 1.0 amp.
Perform Pretrip Check
Clear Active Alarm list, then run Pretrip & check for any new alarms.
Any active alarms must be corrected and cleared
before proceeding.
Check High Voltage Components Amp Draw
a. Check condenser fan amp draw at
CDCON on all 3 legs.
b. Check evaporator fan motor amp
draw at 1EVCON, 2EVCON &
3EVCON (if applicable) on all 3
legs.
The unit must be running for these tests to be perc. Check compressor amp draw at formed. Refer to Section 2.11 for correct electrical
values.
CCON on all 3 legs.
d. Check evaporator heater amp draw
at
1HTCON1,
1HTCON2,
2HTCON1, 2HTCON2, 3HTCON1
AND 3HTCON2 (if applicable) on all
3 legs.
62-11389
7−8
Alarm
NO.
15
Steps
Alarm/Cause
Corrective Action
BATTERY VOLTAGE TOO HIGH
• TRIGGER–ON: Voltage at the microprocessor is greater than 17 VDC.
•
UNIT CONTROL:
•
RESET CONDITION: Auto Reset after 15 minutes when the voltage at the microprocessor is
between 11 and 14 VDC, or alarm may be manually reset via keypad or by turning the unit off,
then back on again.
Engine Operation: engine and unit shutdown and alarm.
Standby Operation: refrigeration system shutdown and alarm with PSCON
still energized.
NOTE: Follow the steps below until a problem is found. Once a repair or correction has been made, the active
alarm should clear itself (see reset condition above). Operate the unit through the appropriate modes to see if
any active alarm occurs. Continue with the steps below as necessary.
1
Check Battery Voltage
a. Test voltage at battery with unit
Must be between 11-16 VDC.
off.
b. Test voltage at battery with unit
running.
2
Must be between 12-16 VDC.
Check Battery Charger Voltage
a. Test voltage at battery charger Must be between 11-16 VDC.
output terminal with unit off.
b. Test voltage at battery charger Must be between 12-16 VDC.
output terminal with unit running.
3
Check Voltage At Microprocessor
a. Check voltage reading at
microprocessor input (QC1+ to
QC2-.)
b. Check voltage reading on
microprocessor display.
7−9
Energize circuit. (See Note 2 page 7−2.)
Must be between 11-16 VDC.
Must be within 0.5 VDC of reading obtained at QC-1.
62-11389
Alarm
NO.
16
Steps
Alarm/Cause
Corrective Action
BATTERY VOLTAGE TOO LOW
• TRIGGER–ON: Voltage at the microprocessor is less than 10 VDC (except when the engine starter
is engaged.)
•
•
UNIT CONTROL: Unit Shutdown & Alarm. Alarm condition only if activated while starting unit.
RESET CONDITION: Auto Reset after 15 minutes when the voltage at the microprocessor is
between 11 - 14 VDC, or alarm may be manually reset via keypad or by turning the unit off, then
back on again.
NOTE: Follow the steps below until a problem is found. Once a repair or correction has been made, the active
alarm should clear itself (see reset condition above). Operate the unit through the appropriate modes to see if
any active alarm occurs. Continue with the steps below as necessary.
1
Check For Alarm 51
Check for “Alternator Not Charging
Alarm conditions must be corrected and the alarm
Alarm”. (Note: The A51 name is car- cleared to continue.
ried over from unit models with alternators. For the Vector Model, Alarm
51 indicates that the solid state battery charger is not performing correctly.)
2
Check Battery Voltage
a. Inspect battery cable ends and Must be clean and tight.
posts.
b. Test voltage at battery with unit off. Must be above 11 VDC.
c. Test voltage at battery with unit
Must be above 11 VDC.
running.
3
62-11389
d. Test specific gravity of battery.
e. Perform load test on battery.
(Follow battery manufacturer’s
procedure.)
Check Voltage At Microprocessor
a. Check voltage reading at
microprocessor input (MPQC1+ to
MPQC2-).
b. Check voltage reading on
microprocessor display.
7−10
(Check for battery specifications.)
(Check for battery specifications.)
Must be above 11 VDC.
Must be within 0.5 VDC of reading obtained at QC-1.
Alarm
NO.
17
Steps
Alarm/Cause
Corrective Action
HIGH COMP DISCHARGE TEMP
• TRIGGER–ON: Discharge sensor alarm not active AND:
Ambient temp below 120°F (48.9°C) and discharge temp was between 310 and - 349°F
(154.4 to - 176.7°C) for 3 minutes, or
Ambient temp above 120°F (48.9°C) and discharge temp was between 340 and - 349°F
(171.1 and - 176.7°C) for 3 minutes, or
Discharge temp ever reaches 350°F (176.7°C.)
•
UNIT CONTROL:
•
RESET CONDITION: Auto Reset after 15 minutes with Ambient temp below 120°F (48.9°C) the
discharge temp falls below 300°F (148.8°C), or Auto Reset after 15 minutes with Ambient temp
above 120°F (48.9°C) the discharge temp falls below 330°F (165.4°C), or alarm may be manually
reset via Keypad or by turning the unit off, then back on again.
Engine Operation: engine and unit shutdown and alarm.
Standby Operation: refrigeration system shutdown and alarm with PSCON
still energized.
NOTE: Follow the steps below until a problem is found. Once a repair or correction has been made, the active
alarm should clear itself (see reset condition above). Operate the unit through the appropriate modes to see if
any active alarm occurs. Continue with the steps below as necessary.
1
Check For Bad Compressor Discharge Temperature Sensor
Check for Alarm 125.
Alarm conditions must be corrected and the alarm
cleared to continue.
2
3
4
5
6
7
8
9
Check Refrigerant Charge
Check for undercharged system.
Refer to Section 8.6.2.
Check Airflow Through Condenser Coil
a. Inspect condenser & radiator.
Ninety percent or more of the coil surface must be
undamaged. No “dead” air spaces. Condenser coil
and radiator must be clean.
b. Check airflow (with unit running).
Even airflow through the entire coil
No “dead” spots
Check CSMV
Check
compressor
modulation valve.
suction Refer to Section 8.8.5.
Check System Pressures
Install manifold gauge set and check
and compare compressor discharge
& suction pressures with those
shown on the microprocessor display.
Perform Pretrip Check
Clear Active Alarm list, then run Pretrip & check for any new alarms.
Suction & Discharge Pressures must have the same
reading on gauges & on microprocessor display.
NOTE: Microprocessor suction (CSP) and evaporator
(EVOP) pressure readings have a maximum value of
100 psig (7.5 bar) The actual suction pressure must
be lower than 100 psig in order to perform this test.
Any active alarms must be corrected and cleared
before proceeding.
Check Compressor Reed Valves & Gaskets
Remove compressor heads & inMust be in good condition. Install new parts and gasspect condition of all reeds & gaskets as required.
kets.
Check Expansion Valve (EVXV)
Check operation of valve.
Refer to Section 8.8.6
Check System For Non-Condensables
Check refrigeration system for nonNo non–condensable gas(es) may be present. (Refer
condensable gas(es).
to Section 8.6.2.)
7−11
62-11389
Alarm
NO.
18
Steps
Alarm/Cause
Corrective Action
LOW REFRIGERANT PRESSURE
• TRIGGER–ON:
The compressor is operating with the suction pressure less than -10 in Hg (-0.3 BAR), with both the
Front (UL1) and the Rear (UL2) unloaders energized, and the time that is selected for the LP Shutdown Delay Configuration has expired since UL1 was energized (Note: The MessageCenter does
not display in.Hg. This alarm triggers on when the display shows less than -4.7 psig.
•
UNIT CONTROL:
•
RESET CONDITION: If alarm only, auto reset when either UL1 or UL2 is de-energized. If unit and
system shutdown and alarm, auto reset after 15 minutes. Alarm may be manually reset via keypad
or by turning the unit OFF, then ON again.
Engine Operation: alarm only or (if configured for shutdown) engine and unit
shutdown and alarm.
Standby Operation: alarm only or (if configured for shutdown) refrigeration
system shutdown and alarm with PSCON still energized.
NOTE: Follow the steps below until a problem is found. Once a repair or correction has been made, the active
alarm should clear itself (see reset condition above). Operate the unit through the appropriate modes to see if
any active alarm occurs. Continue with the steps below as necessary.
1
Check Refrigerant Charge
Check for undercharged system.
Refer to Section 8.6.2.
2
Check System Pressures
Install manifold gauge set and check Suction pressure must be above 3 psig (0.2 bar.)
and compare compressor discharge Suction & Discharge Pressures must have the same
& suction pressures with those
reading on gauges & on microprocessor display.
shown on the microprocessor disNOTE: Microprocessor suction (CSP) and evaporator
play.
(EVOP) pressure readings have a maximum value of
100 psig (7.5 bar) The actual suction pressure must
be lower than 100 psig in order to perform this test.
3
4
5
6
Manually Defrost Unit
Defrost unit and terminate automatically.
Perform Pretrip Check
Clear Active Alarm list, then run Pretrip & check for any new alarms.
Any active alarms must be corrected and cleared
before proceeding.
Check Unloader Operation
Check Front (UL1) and Rear (UL2)
Unloaders.
Refer to Alarms 85 and 86.
Check CSMV
a. Check compressor suction
modulation valve.
Refer to Section 8.8.5 .
b. Check airflow (with unit running.)
Even airflow through the entire coil.
No “dead” spots.
Additional steps on the next page.
62-11389
Typical defrost cycle time is 5-20 minutes.
Visually verify that all ice is cleared from evaporator
coil.
7−12
Alarm
NO.
18
Steps
Alarm/Cause
Corrective Action
LOW REFRIGERANT PRESSURE - Continued
7
Check Evaporator Sections
a. Check evaporator section, return
Good Air Flow.
air bulkhead, air chute & cleanliReturn air not restricted.
ness of evap. coil.
Air chute in good condition.
No damage to evaporator fan motor assemblies.
Evap. coil clean.
Evap. fan rotation ok.
b. Check airflow (with unit running.)
Even airflow through the entire coil.
No “dead” spots.
8
9
Visually Inspect Unit
Visually inspect unit for damage to
the liquid line causing a restriction or
any signs of temperature drop at the
filter-drier.
All tubing from the receiver to the evaporator section
is in good condition
There is no temperature drop at the drier or anywhere on the liquid line
Check Electronic Expansion Valve (EVXV)
Check operation of EVXV.
Refer to Section 8.8.6.
7−13
62-11389
Alarm
NO.
19
Steps
Alarm/Cause
Corrective Action
LOW FUEL SHUTDOWN
Note:
This is an optional alarm. This alarm will not occur in Standby Operation or if the Fuel Level Sensor Configuration is NO DEVICE or if the Fuel Tank Size Configuration is OFF.
• TRIGGER ON: The unit is operating in Engine Operation and the fuel level is 10% or less for more
than 1 minute AND Alarm 126 - “Check Fuel Sensor Circuit” is not active.
• UNIT CONTROL:
Alarm only or (if configured for shutdown) engine and unit shutdown
and alarm.
• RESET CONDITION: Auto reset when fuel level is above 12% for more than 1 minute, or alarm may
be manually reset via keypad or by turning the unit off, then back on again.
NOTE: Follow the steps below until a problem is found. Once a repair or correction has been made, the active
alarm should clear itself (see reset condition above). Operate the unit through the appropriate modes to see if
any active alarm occurs. Continue with the steps below as necessary.
1
Check For Low Fuel Level Warning Alarm
Check for alarm 1.
Must be cleared.
2
Check For Low Fuel Level
Check fuel level in tank.
Add fuel as needed to the fuel tank.
3.
Check Low Fuel Level Sensor
a. Inspect sensor & connector pins & No damage to sensor.
terminals.
No damage, moisture, or corrosion in connector.
b. Check Low Fuel Level Sensor.
4.
62-11389
Refer to Section 8.9.10 for sensor check out procedure.
Check Low Fuel Level Sensor Wiring
a. Inspect harness & control box
No physical damage to harness.
connector pins & terminals. (See
No damage, moisture, or corrosion in connectors.
wiring schematic Section 10.)
b Check voltage at the Low Fuel
Voltage reading should be 12 - 13 VDC between terLevel Sensor connector with the
minals FLSA and FLSB.
microprocessor powered up.
Voltage reading should be between 0 - 5 VDC between FLSC and ground wire from unit with sensor
disconnected.
7−14
Alarm
NO.
20
Steps
Alarm/Cause
Corrective Action
MAXIMUM COMPRESSOR ALARMS
• TRIGGER ON: This option must be installed and alarm must be enabled by configuring the
Compressor Alarm Shutdown to YES. Alarms 13, 17, 18, 27 or 28 individually occur 3 times within
the last 2 hours.
•
UNIT CONTROL:
Engine Operation: engine and unit shutdown and alarm.
Standby Operation: refrigeration system shutdown and alarm with PSCON
still energized.
• RESET CONDITION: Reset from inactive alarm list only. Can not be reset by turning switch OFF
and then ON again.
NOTE: Follow the steps below until a problem is found. Once a repair or correction has been made, the active
alarm should clear itself (see reset condition above). Operate the unit through the appropriate modes to see if
any active alarm occurs. Continue with the steps below as necessary.
1
Determine Which Alarm Caused This Alarm To Be Active.
a. Check active alarm list for
One or more of these alarms will be present.
Alarm #’s 13, 17, 18, 27, 28,or 29.
2
21
b. Follow the steps for the alarm(s) All alarms condition must be fixed.
found above, and correct the alarm
condition.
Reset Alarm
Reset all alarms from the inactive
All alarms must be cleared to start unit.
alarm list.
TECHNICIAN RESET REQUIRED
• TRIGGER ON: The High Engine Temp Shutdown Configuration and/or Engine Oil Pressure
Shutdown Configuration is/are set to YES, and either Alarm 11 – Low Engine Oil Pressure, or
Alarm 12 – High Coolant Temperature has become active and shut the unit down three times within
the past 2 hours
•
UNIT CONTROL:
Engine Operation: engine and unit shutdown and alarm.
Standby Operation: This alarm will not activate in Standby Operation
• RESET CONDITION: Reset from inactive alarm list only. Can not be reset by turning switch OFF
and then ON again.
NOTE: Follow the steps below until a problem is found. Once a repair or correction has been made, the active
alarm should clear itself (see reset condition above). Operate the unit through the appropriate modes to see if
any active alarm occurs. Continue with the steps below as necessary.
1
Determine Which Alarm Caused This Alarm To Be Active.
a. Check active alarm list for
One or more of these alarms will be present.
Alarm #’s 11 or 12.
2
b. Follow the steps for the alarm(s) All alarms condition must be corrected.
found above, and correct the alarm
condition.
Reset Alarm
Reset all alarms from the inactive
All alarms must be cleared to start unit.
alarm list.
7−15
62-11389
Alarm
NO.
22
Steps
Alarm/Cause
Corrective Action
LOW SUCTION SUPERHEAT
• TRIGGER ON: Compressor suction superheat (Compressor Suction Temperature [CST] minus saturated temperature for Compressor Suction Pressure [CSP] refer to Table 8−7) is less than 9°F
(5°C) for more than 2 minutes.
•
UNIT CONTROL:
Engine Operation: engine and unit shutdown and alarm.
Standby Operation: refrigeration system shutdown and alarm with PSCON
still energized.
• RESET CONDITION: Auto reset after 15 minutes, or alarm may be manually reset via keypad or by
turning the unit off, then back on again.
NOTE: Follow the steps below until a problem is found. Once a repair or correction has been made, the active
alarm should clear itself (see reset condition above). Operate the unit through the appropriate modes to see if
any active alarm occurs. Continue with the steps below as necessary.
1
Check System Pressures
Install manifold gauge set and check Suction & Discharge Pressures must have the same
and compare compressor discharge reading on gauges & on microprocessor display.
& suction pressures and evaporator NOTE: Microprocessor suction (CSP) and evaporator
outlet pressure with those shown on (EVOP) pressure readings have a maximum value of
the microprocessor display.
100 psig (7.5 bar) The actual suction pressure must
be lower than 100 psig in order to perform this test.
2
Check Refrigerant Charge
Check for undercharged system.
Refer to Section 8.6.2.
3
Check For Restricted Evaporator Airflow
Check for restricted evaporator airCheck for proper Evaporator Fan operation (Refer to
flow.
Section 8.9.6.)
Check for correct Evaporator Fan rotation.
Check defrost air switch setting and hoses. Refer to
Section 8.8.9.
Check for restricted bulkhead or air chute installation.
4
Perform Pretrip Check
Clear Active Alarm list, then run Pre- Any active alarms must be corrected and cleared
trip & check for any new alarms.
before proceeding.
5
Check Compressor Suction Temperature (CST) and Evaporator Outlet Temperature
(EVOT) sensors.
a. Inspect CST & connector.
No damage to sensor.
No damage, moisture, or corrosion in connector.
b. Check CST resistance.
(See Note 3 page 7−2.)
10,000 Ohms @ 77°F (25°C) Refer to Table 8−5 for
complete table of temperatures and resistance values.
c. Check voltage at harness connec- Must be 2.5 $ 0.5 VDC. This verifies microprocessor
tion to CST.
output and wiring connections to sensor.
d. Verify accuracy of CST using inCST reading must be within $3°F (1.7°C) of test
frared or other accurate temperat- temperature tool reading.
ure testing tool.
Additional steps on the next page.
62-11389
7−16
Alarm
NO.
22
Steps
Alarm/Cause
Corrective Action
LOW SUCTION SUPERHEAT - Continued
5
Check Compressor Suction Temperature (CST) and Evaporator Outlet Temperature
(Cont’d) (EVOT) sensors - Continued.
e. Inspect EVOT & connector.
No damage to sensor.
No damage, moisture, or corrosion in connector.
f. Check EVOT resistance.
(See Note 3 page Note 3.)
10,000 Ohms @ 77°F (25°C.) Refer to Table 8−5 for
complete table of temperatures and resistance values.
g. Check voltage at harness connec- Must be 2.5 $0.5 VDC. This verifies microprocessor
tion to EVOT.
output and wiring connections to sensor.
6
h. Verify accuracy of EVOT using in- EVOT reading must be within $3°F (1.7°C) of test
frared or other accurate temperat- temperature tool reading.
ure testing tool.
Check EVOP and CSP
a. Check operation of both trans- Refer to Section 8.8.8.
ducers
b. Check Schrader valve fitting under Must not be physically damaged, depressor must
each transducer
fully open valve to allow pressure to transducer
7
8
Check EVXV
Check operation of EVXV
Refer to Section 8.8.6.
Check heat exchanger
With the unit running in high speed Inlet line (toward evaporator coil) must be colder than
cool, check temperature of suction outline (toward compressor).
line inlet and outlet at the heat exchanger.
7−17
62-11389
Alarm
NO.
Steps
23
Alarm/Cause
Corrective Action
A/C CURRENT OVER LIMIT
• TRIGGER ON: The high voltage amp draw is over the limit shown in the following table for more
than 10 seconds.
CONDITION
Engine High / Low Speed, Standby Cool or Pretrip
DRAW
30A
Engine High Speed Heat
18A
Engine Low Speed or Standby Heat
14A
Engine High Speed Defrost (With heaters energized)
16A
Engine Low Speed or Standby Heat Defrost
12A
Engine High/Low Speed or Null
8A
Engine Low Speed or Standby Null
8A
Engine or Standby Natural Defrost (when heaters are de-energized)
10A
•
UNIT CONTROL:
Engine Operation: refrigeration system shutdown and alarm.
Standby Operation: refrigeration system shutdown and alarm with PSCON
still energized.
• RESET CONDITION: Auto reset after 15 minutes or alarm may be manually reset via keypad or by
turning the unit OFF, then back ON.
NOTE: Follow the steps below until a problem is found. Once a repair or correction has been made, the active
alarm should clear itself (see reset condition above). Operate the unit through the appropriate modes to see if
any active alarm occurs. Continue with the steps below as necessary.
1
Perform Pretrip.
Clear Active Alarm list, then run Pre- Any active alarms must be corrected and cleared betrip & check for any new alarms.
fore proceeding.
2
Check Configurations for Correct Maximum Amps Settings
a. Check DIESEL MAX GEN AMPS Setting should be 24 - 25 Amps. Maximum recomconfiguration setting.
mended setting is 25 Amps. Minimum recommended
setting is 22 Amps.
b. Check STANDBY MAX GEN AMPS Setting should be 22 - 25 Amps. Maximum recomconfiguration setting.
mended setting is 25 Amps. Minimum recommended
setting is 22 Amps.
c. Check STARTUP MAX AMPS con- Setting should be 15 - 19 Amps. Maximum recomfiguration setting.
mended setting is 19 Amps.
d. Check DIESEL OFFSET MAX Setting should be 4 Amps.
AMPS configuration setting.
3
Check For Electrical Failure In System
a. Check electrical motors.
Visually inspect condenser fans and evaporator fan
for damage to motor or fan blade, or for foreign material obstructing the movement of the fan. Listen for
noise caused by failed bearing or motor obstruction.
b. Check for defective wiring.
Check for discolored wiring at contactors and loose
connections.
c. Check for defective contactor.
Remove and replace any suspected contactor(s).
Additional steps on the next page.
62-11389
7−18
Alarm
NO.
23
Steps
Alarm/Cause
Corrective Action
A/C CURRENT OVER LIMIT - Continued
4
Check High Voltage Components Amp Draw
a. Check condenser fan amp draw on These checks must be made with the unit operating.
all legs. (CDCON)
WARNING
b. Check evaporator fan motor amp
draw on all 3 legs (1EVCON)
Caution and good electrical practices must
be used when working around and with
c. Check compressor amp draw on all
high voltage circuits.
3 legs. (CCON)
d. Check heater amp draw.
(1HTCON1, 1HTCON2,
2HTCON1, 2HTCON2, 3HTCON1
& 3HTCON2 - if applicable)
Verify that all three actual amperage readings for
each component are within 10% of each other, and
are within the values shown in Section 2.11.
5
Check Generator Voltage (If Used When Alarm Occurred)
Check voltage at GENCON L1-L2,
Must be within voltage limits shown in Section 2.11.
L1-L3, L2-L3.
6
Check Power Source Voltage (If Used When Alarm Occurred)
Check voltage at PSCON L1-L2,
Must be within voltage limits shown in Section 2.11.
L1-L3, L2-L3.
7
Check Voltage Output From Contactors
a. Check voltage at GENCON T1-T2, Must be within voltage limits shown in Section 2.11.
T1-T3, T2-T3.
8
9
b. Check voltage at CCON with com- Must be within voltage limits shown in Section 2.11.
pressor operating. T1-T2, T1-T3,
T2-T3.
Verify AC Current Sensor Accuracy (CT2 & CT3)
Power the microprocessor by togUnit AC Current #1 and #2 reading in Data List must
gling the Main Power switch out of
be 0.0 " 1.0 amp.
the OFF position.
Defective Overload Ground Fault (OGF) Detector
Opens prematurely.
Remove and replace.
7−19
62-11389
Alarm
NO.
27
Steps
Alarm/Cause
Corrective Action
HIGH SUCTION PRESSURE
• TRIGGER ON: The refrigeration system is running and the suction pressure has been greater than
98 psig (6.7 bar) for more than 10 minutes.
•
UNIT CONTROL:
Engine Operation: alarm only or (if configured for shutdown) engine and
unit shutdown and alarm.
Standby Operation: alarm only or (if configured for shutdown) refrigeration
system shutdown and alarm with PSCON still energized.
• RESET CONDITION: Auto reset when suction pressure is less than 75 psig (5.1 bar) for 5 minutes
and configured for Alarm Only, or Auto Reset after 15 minutes if configured as a Shutdown Alarm
or, alarm may be manually reset via keypad or by turning the unit off, then back on again.
NOTE: Follow the steps below until a problem is found. Once a repair or correction has been made, the active
alarm should clear itself (see reset condition above). Operate the unit through the appropriate modes to see if
any active alarm occurs. Continue with the steps below as necessary.
1
Check System Pressures
Install manifold gauge set and check Suction pressure must be above 3 psig (0.2 bar.)
and compare compressor discharge
Suction & Discharge Pressures must have the same
& suction pressures with those
shown on the microprocessor disreading on gauges & on microprocessor display.
play.
NOTE: Microprocessor suction (CSP) and evaporator (EVOP) pressure readings have a maximum value of 100 psig (7.5 bar) The actual suction pressure must be lower than 100 psig in order to perform this test.
2
Check For Refrigerant Overcharge
Check refrigerant level in the receiv- Refer to Section 8.6.2.
er.
3
4
5
Perform Pretrip Check
Clear Active Alarm list, then run Pretrip & check for any new alarms.
Any active alarms must be corrected and cleared before proceeding.
Check EVXV
a. Check wiring and connections to
EVXV.
No physical damage to harness. No damage or
corrosion in connectors. Connector tight on valve.
b. Check operation of EVXV.
Check Compressor.
a. Perform Pump-Down Test.
Refer to Section 8.7.1
Refer to Section 8.8.6.
b. Cover condenser and build-up
discharge pressure.
Must be able to pump up to 400 psig (27.2 bar.)
Must hold a vacuum and not equalize in a short period of time
c. Disassemble and inspect
compressor valve plates, reeds,
pistons, etc.
62-11389
7−20
Must be intact, clean, and in good working order.
Alarm
NO.
Steps
28
Alarm/Cause
Corrective Action
CHECK REFRIGERATION SYSTEM
• TRIGGER ON: The compressor is running and the discharge pressure is less than 5 psig
(0.34 bar) higher than suction pressure for more than 10 minutes.
•
UNIT CONTROL:
Engine Operation: alarm only or (if configured for shutdown) engine and unit
shutdown and alarm.
Standby Operation: alarm only or (if configured for shutdown) refrigeration
system shutdown and alarm with PSCON still energized.
• RESET CONDITION: Auto reset when discharge pressure is more than 20 psig (1.36 bar) above the
suction pressure when in alarm only (for either trigger), or auto reset after Minimum Off Time
Functional Parameter setting when shutdown is configured or alarm may be manually reset via
keypad or by turning the unit off, then back on again.
NOTE: Follow the steps below until a problem is found. Once a repair or correction has been made, the active
alarm should clear itself (see reset condition above). Operate the unit through the appropriate modes to see if
any active alarm occurs. Continue with the steps below as necessary.
1
Verify Compressor Is Running.
Check compressor amp draw on all
Readings must be in the range as shown in Section
three legs.
2.11.
2
Check System Pressures
Install manifold gauge set and check
and compare compressor discharge
& suction pressures with those
shown on the microprocessor display.
Suction pressure must be above 3 psig (0.2 bar)
Discharge pressure must be more than 5 psig (0.3
bar) higher than the suction pressure.
Suction & Discharge Pressures must have the same
reading on gauges & on microprocessor display.
NOTE: Microprocessor suction (CSP) and evaporator (EVOP) pressure readings have a maximum value of 100 psig (7.5 bar) The actual suction pressure must be lower than 100 psig in order to perform this test.
3
4
Perform Pretrip Check
Clear Active Alarm list, then run Pretrip & check for any new alarms.
Any active alarms must be corrected and cleared before proceeding.
Check Compressor.
a. Perform Pump-Down Test.
Refer to Section 8.7.1
Must hold a vacuum and not equalize in a short period of time
b. Cover condenser and build-up
discharge pressure.
Must be able to pump up to 400 psig (27.2 bar.)
c. Disassemble and inspect
compressor valve plates, reeds,
pistons, etc.
7−21
Must be intact, clean, and in good working order.
62-11389
Alarm
NO.
30
Steps
Alarm/Cause
Corrective Action
7.5 START UP / ENGINE ALARMS
FAILED TO RUN MINIMUM TIME
• TRIGGER–ON: The unit has shutdown on an alarm 3 times without having run for at least 15
minutes between each shutdown (not including Door shutdowns.)
•
UNIT CONTROL:
•
RESET CONDITION: Alarm may be manually reset via keypad or by turning the unit off, then back on
again. If the Unit Operation configuration is set to Rail Mode, this alarm will reset after 4 hours.
Engine Operation: engine and unit shutdown and alarm.
Standby Operation: refrigeration system shutdown and alarm with PSCON
still energized.
NOTE: Follow the steps below until a problem is found. Once a repair or correction has been made, clear the
alarm(s). (See Note 1 page 7−2.) Operate the unit through the appropriate modes to see if any active alarm
occurs. Continue with the steps below as necessary.
Check For Alarms
Check for shutdown alarms.
Alarm conditions must be corrected and the alarm(s)
cleared to continue.
62-11389
7−22
Alarm
NO.
31
Steps
Alarm/Cause
Corrective Action
FAILED TO START - AUTO MODE
• TRIGGER–ON: Engine has tried to start three times unsuccessfully in the auto start mode.
• UNIT CONTROL: Unit Shutdown & Alarm
• RESET CONDITION: Alarm may be manually reset via keypad or by turning the unit off, then back on
again. If the Unit Operation configuration is set to Rail Mode, this alarm will reset after 4 hours.
NOTE: Follow the steps below until a problem is found. Once a repair or correction has been made, clear the
alarm(s). (See Note 1 page 7−2.) Operate the unit through the appropriate modes to see if any active alarm
occurs. Continue with the steps below as necessary.
1
Check For Flash Code on Engine Speed Control Unit (ENSCU).
Check for flash codes on the ENSCU. Refer to ENSCU LED Fault Chart, Section 9.5, must
be no LED alarm codes occurring to continue.
2
3
4
Check Fuel Level in Tank.
Check fuel gauge on tank.
Check For Alarms
Check for the following alarms:
71 Check for Bad F2 or F3 Fuse
alarm.
40 Check Glow Plug alarm.
35 Check Starter Circuit alarm.
Check ENSCU Power
a. Check run relay.
Fill tank as needed.
Alarm conditions must be corrected and the alarm
cleared to continue.
Using Component Test Mode, refer to Section 5.2.2,
energize run relay.
b. Check Run Relay LED.
c. Check voltage to ENSCU.
Must be ON.
Must have +12 VDC between
ENSCU13 and ENSCU19 and between
ENSCU24 and ENSCU19 with Run Relay energized
d. Inspect Fuel Solenoid Actuator No damage to FSA.
(FSA) & connector pins & terminals. No damage, moisture, or corrosion in connector.
e. Inspect harness & control box No physical damage to harness.
connector pins & terminals. (See No damage, moisture, or corrosion in connectors.
wiring schematic Section 10.)
f. Check Splice Pack 6 (SP6) (See No corrosion or oxidation.
wiring schematic Section 10.)
12 VDC reading to + battery cable.
5
Check Fuel System
a. Check fuel system prime.
No air in fuel system.
b. Check fuel flow.
Unrestricted fuel flow through system.
Additional steps on the next page.
7−23
62-11389
Alarm
NO.
31
Steps
Alarm/Cause
Corrective Action
FAILED TO START - AUTO MODE - Continued
6
Check Engine Air–intake Heater System (This step only applies when the engine coolant
temperature is less than 77°F (25°C.)
a. Check voltage to heater.
Must be 11 VDC or higher
b. Check operation of intake air heater
CAUTION
relay.
DO NOT leave the circuit energized for the full 5
minutes if full amperage is shown, as the intake air
heater element life will be greatly shortened.
Using Component Test Mode, refer to Section 5.2.2,
energize the intake air heater relay.
LED 30 must be illuminated.
Amperage must be correct, refer to Section 2.8 for
correct electrical values.
7
8
9
10
11
62-11389
Check Engine Air–intake System
a. Check air cleaner indicator.
b. Inspect air intake system.
Check For Correct Engine Oil
Check for correct oil viscosity
(weight) for conditions.
Flag must not be visible.
Hoses & tubes in good condition.
No kinks or restrictions.
Refer to Section 2.8.
Must be correct for ambient conditions.
Check Engine Exhaust System
Inspect the exhaust system.
Must be clear and unobstructed.
Check Generator
Check for proper preventative Refer to Section 8.9.9
maintenance
and
operating
precautions.
Check Engine
Check engine compression.
Refer to Engine Workshop manual
7−24
Alarm
NO.
Steps
34
•
Alarm/Cause
Corrective Action
ENGINE FAILED TO STOP
TRIGGER–ON: When in Engine Operation, engine is turning more than 500 RPM for 20 seconds
after unit shutdown or cycled off or Oil Pressure switch is closed longer than 20 seconds after unit
shutdown or cycle off.
•
UNIT CONTROL:
•
RESET CONDITION: Alarm may be manually reset via keypad or by turning the unit off, then back on
again.
Engine Operation: engine and unit shutdown and alarm.
Standby Operation: this alarm will not activate in standby Operation.
NOTE: Follow the steps below until a problem is found. Once a repair or correction has been made, clear the
alarm(s). (See Note 1 page 7−2.) Operate the unit through the appropriate modes to see if any active alarm
occurs. Continue with the steps below as necessary.
1
Check For Engine Running
Verify that engine is still running.
Engine should not be running.
2
Check For Bad Engine RPM Sensor Alarm
Check for Alarm 130.
Alarm conditions must be corrected and the alarm
cleared to continue.
3
Check Engine Oil Pressure Switch
a. Inspect switch & connector pins & No physical damage to switch.
No damage or corrosion in connector.
terminals.
b. Check engine oil switch operation. Contacts close on a pressure rise at 15 psig (1.02
bar.)
Contacts open on a pressure fall at 12 psig (0.82
bar.)
4
5
Check Engine Oil Switch Harness
a. Inspect harness & control box No physical damage to harness.
connector pins & terminals. (See No damage, moisture, or corrosion in connectors.
wiring schematic Section 10.)
b. Check for shorted circuit in Energize circuit. (See Note 2 page 7−2.)
harness, and continuity through the Battery voltage reading (12-13 VDC) between wires
in plug.
harness.
Check Fuel/Speed Actuator (FSA) & Circuit
a. Check Run Relay LED.
LED 28 must be OFF.
b. Check voltage at harness to
0 VDC between
ENSCU13 and ENSCU19 and between
ENSCU.
ENSCU24 and ENSCU19
c. Check FSA plunger.
Must be free to move to the stop position (extended
out of the solenoid.)
7−25
62-11389
Alarm
NO.
35
Steps
Alarm/Cause
Corrective Action
CHECK STARTER CIRCUIT
• TRIGGER–ON: Engine speed fails to reach 50 RPM during 2 start attempts.
•
UNIT CONTROL:
•
RESET CONDITION: Change unit to standby Operation or alarm may be manually reset via keypad or
by turning the unit off, then back on again.
Engine Operation: engine and unit shutdown and alarm.
Standby Operation: this alarm will not activate in standby Operation.
NOTE: Follow the steps below until a problem is found. Once a repair or correction has been made, clear the
alarm(s). (See Note 1 page 7−2.) Operate the unit through the appropriate modes to see if any active alarm
occurs. Continue with the steps below as necessary.
1
Check That Engine Has Actually Started
Check that engine starts, runs for a If NO, continue with Step 2 below.
If YES, check wiring to RPM sensor for a broken
few seconds then shuts off.
wire.
2
Check Starter Relay Circuit
a. Check operation of starter Energize Circuit. (See Note 2 page 7−2.)
Relay contacts closed when SSR85 is grounded.
solenoid relay.
b. Check relay socket and terminals. No signs of discoloration from overheating.
No corrosion.
3
c. Check voltage to starter solenoid Negative lead on 85, Positive lead on 86 = 12 VDC.
Negative lead on Gnd, Positive lead on 87 & 30 = 12
relay.
VDC.
d. Inspect wiring to starter solenoid No physical damage to wiring or battery cable end.
and starter motor. (See wiring No damage or corrosion in connections.
schematic Section 10.)
e. Check voltage to starter solenoid. Must be above 11.5 VDC.
f. Check voltage to starter motor.
Must be above 10 VDC while cranking.
Check Fuel/Speed Actuator (FSA) & circuit
a. Check Run Relay LED
LED 28 must be ON.
b. Check for 12 VDC on the Run Must be 0 VDC
Relay circuit
c. Check SPK20 for voltage
Must be 12 VDC
d. Check ENSCU terminals 13 & 15 Must be 12 VDC
for voltage
4
5
e. Check FSA plunger
Must be free to move
Check Starter
a. Inspect starter and wiring. (See No damage or corrosion.
Wiring and battery cable must be clean and tight
wiring schematic Section 10.)
b. Check resistance of starter motor.
c. Check amperage draw of starter.
Check Battery Voltage
a. Inspect battery cable ends and
posts.
Refer to Section 2.12 for correct electrical values.
Refer to Section 2.12 for correct electrical values.
Must be clean and tight.
No corrosion.
b. Test voltage at battery with unit Must be above 11 VDC.
off.
c. Test specific gravity of battery.
d. Perform load test on battery.
6
62-11389
Must be 1.225 or higher.
(Follow battery manufacturer’s procedure and
guidelines.)
Check For Correct Engine Oil
Check for correct oil viscosity (weight) Refer to Section 2.8.
Must be correct for ambient conditions.
for conditions.
7−26
Alarm
NO.
36
Steps
Alarm/Cause
Corrective Action
CHECK COOLANT TEMPERATURE
• TRIGGER–ON: Coolant temperature is below 32°F (0°C) after the engine has been running for 5
minutes.
•
UNIT CONTROL:
•
RESET CONDITION: Auto reset when coolant temperature is higher than 36°F (2.2°C) or alarm may
be manually reset via keypad or by turning the unit off, then back on again.
Engine Operation: alarm only.
Standby Operation: this alarm will not activate in standby Operation.
NOTE: Follow the steps below until a problem is found. Once a repair or correction has been made, clear the
alarm(s). (See Note 1 page 7−2.) Operate the unit through the appropriate modes to see if any active alarm
occurs. Continue with the steps below as necessary.
1
Check Coolant Temperature
Check temperature of coolant or Must be above 32°F (0°C)
upper radiator hose
2
Check Engine Coolant Sensor
a. Check resistance of engine
coolant sensor (See Note 3 page
7−2.)
b. Check harness and control box
connector pins and terminals. (See
wiring schematic Section 10.)
c. Check voltage at harness
connection to ENCT.
7−27
Refer to Section 8.9.10
No physical damage to harness
No damage, moisture, or corrosion in connectors.
Must be 2.5 $ 0.5 VDC. This verifies microprocessor
output and wiring to sensor.
62-11389
Alarm
NO.
37
Steps
Alarm/Cause
Corrective Action
CHECK LOW SPEED RPM
• TRIGGER–ON: The microprocessor is set for low engine speed operation, and engine speed is: less
than 1200 rpm, or greater than 1500 rpm for more than 60 seconds (120 seconds when the
microprocessor calls for a change from high to low speed, or when unit first starts).
•
•
UNIT CONTROL: Alarm Only
RESET CONDITION: Auto Reset if microprocessor is set for low engine speed operation and
signal is: Between 1200 to 1500 RPM for 60 seconds, or Alarm may be manually reset via keypad
or by turning the unit off, then back on again.
NOTE: Follow the steps below until a problem is found. Once a repair or correction has been made, the active
alarm should clear itself (see reset condition above). Operate the unit through the appropriate modes to see if
any active alarm occurs. Continue with the steps below as necessary.
1
Check Model Number
Verify that the model number on the Enter the correct number in Configurations. (Refer to
nameplate matches the model Section 5.2.1.)
number shown in the microprocessor
Unit Data.
2
Check For Proper Voltage To The Engine Speed Control Unit (ENSCU) Pin 16. Check
For Proper Voltage With Unit Running.
3
Check ENSCU 16.
Check Fuel/Speed Actuator (FSA)
Check fuel/speed actuator.
4
0 VDC between ENSCU 16 and ENSCU 19 (GND.)
Plunger must move in and out freely. Refer to Engine
Manual.
Force Low Speed operation
a. Using Functional Parameters, set Unit will run in low speed. RPM must be within range
the Low Speed Start Up Delay to 10 shown above for each specific model. Refer to
Speed Control System Diagnotics, Section 9.5. Clear
minutes.
all fault codes before continuing.
b. Check operation of Speed Relay LED 27 must be OFF.
LED.
c.Check voltage at engine speed Must be 0 VDC.
control unit (ENSCU) pin 16.
5
Check Engine RPM
a. Check actual engine RPM using Refer to Table 2-1.
hand held tachometer.
b. Compare actual RPM with those Both readings within ± 50 RPM.
shown on display.
6
7
8
62-11389
Check Engine Air–Intake System
a. Check air cleaner indicator.
b. Inspect air intake system.
Check Engine Fuel System
a. Check fuel tank level.
b Check fuel lines.
Flag must not be visible.
Hoses & tubes in good condition.
No kinks or restrictions.
Must have enough fuel to run engine.
Connections are tight and not leaking.
No kinks or sharp bends in the lines.
c
Check fuel screen.
Fuel screen is located in the inlet fitting to the lift
pump. Screen must be clean.
d
Check fuel filters.
Fuel filters must be clean and allow full flow of fuel
through them.
Check Engine Exhaust System
Inspect the exhaust system.
Must be clear and unobstructed.
7−28
Alarm
NO.
Steps
38
•
Alarm/Cause
Corrective Action
CHECK HIGH SPEED RPM
TRIGGER–ON: The microprocessor is set for high engine speed operation, and engine speed is:
less than 1650 rpm, or greater than 1950 rpm for more than 60 seconds (120 seconds when the
microprocessor calls for a change from low to high speed, or when unit first starts).
•
UNIT CONTROL:
•
RESET CONDITION: Auto Reset if microprocessor is set for high speed operation and the signal is
between 1650 and 1950 for 60 seconds or change unit to standby Operation or alarm may be
manually reset via keypad or by turning the unit off, then back on again.
Engine Operation: alarm only.
Standby Operation: this alarm will not activate in standby Operation.
NOTE: Follow the steps below until a problem is found. Once a repair or correction has been made, the active
alarm should clear itself (see reset condition above). Operate the unit through the appropriate modes to see if
any active alarm occurs. Continue with the steps below as necessary.
1
Check Model Number
Verify that the model number on the Enter the correct number in Configurations. (Refer to
nameplate matches the model Section 5.2.1.)
number shown in the microprocessor
Unit Data.
2
Check for proper voltage to the Engine Speed Control Unit (ENSCU) pin 16. Check for
proper voltage with unit running.
a. Check ENSCU 16.
12 VDC between ENSCU 16 and ENSCU19.
b. Check circuit from ENSCU 16 to Must be 12 VDC at MPQC3 and ENSCU16.
microprocessor connection MPQC3.
3
4
5
Check Fuel/Speed Actuator (FSA) plunger
Check plunger on fuel/speed actuator. Must move in and out freely.
Spring tension must hold rod firmly extended and in
place.
Check FSA Harness
a. Inspect harness & control box No physical damage to harness.
connector pins & terminals. (See No damage, moisture, or corrosion in connectors.
wiring schematic Section 10.)
b. Check resistance of fuel/speed Refer to Section 2.12 for correct electrical values.
actuator.
Force High Speed Operation
a. Adjust set point to at least 20 The microprocessor will call for High Speed operadegrees away from compartment tion.
temperature. If the unit does not
immediately go into High Speed,
ensure the Silent Mode Functional
Parameter is set to OFF and/or the
applicable High
Speed Delay
Configuration is set to OFF. (Reset
following testing.)
b. Check operation of Speed Relay LED 27 must be ON. (If LED 27 is not on, the microprocessor is not calling for High Speed operation.
LED.
Check Speed Overrides in Section 4.8.3 for more
information.)
c. Check voltage on the engine Must be 12-14 VDC
speed control unit (ENSCU, pin 16.)
Additional steps on the next page.
7−29
62-11389
Alarm
NO.
38
Steps
Alarm/Cause
Corrective Action
CHECK HIGH SPEED RPM - Continued
6
Check Engine RPM
a. Check actual engine RPM using Refer to Table 2-1.
hand held tachometer.
b. Compare actual RPM with those Both readings within ± 50 RPM.
shown on display.
7
8
62-11389
Check Engine Air–Intake System
a. Check air cleaner indicator.
b. Inspect air intake system.
Check Engine Exhaust System
Inspect the exhaust system.
Flag must not be visible.
Hoses & tubes in good condition.
No kinks or restrictions.
Must be clear and unobstructed.
7−30
Alarm
NO.
Steps
39
•
Alarm/Cause
Corrective Action
CHECK ENGINE RPM
TRIGGER–ON: In Engine Operation and Alarm 130 is not active and engine speed is less than
1250 rpm for 2 seconds or greater than 2100 rpm for 5 minutes or engine speed drops to less than
1200 rpm for 3 seconds after the engine speed has been greater than 1250 rpm.
•
UNIT CONTROL:
•
RESET CONDITION: Auto Reset if engine rpm is greater than 1150 and less than 2000 for 5
minutes or after 15 minutes if the engine has been shutdown or change unit to standby Operation
or alarm may be manually reset via keypad or by turning the unit off, then back on again.
Engine Operation: alarm only or (if configured for shutdown) engine and unit
shutdown and alarm.
Standby Operation: this alarm will not activate in standby Operation.
NOTE: Follow the steps below until a problem is found. Once a repair or correction has been made, the active
alarm should clear itself (see reset condition above). Operate the unit through the appropriate modes to see if
any active alarm occurs. Continue with the steps below as necessary.
1
Check Model Number
Verify that the model number on the Enter the correct number in Configurations. (Refer to
nameplate matches the model Section 5.2.1.)
number shown in the microprocessor
Unit Data.
2
Check For Flash Code On Engine Speed Control Unit (ENSCU)
Check for flash codes on the ENSCU. Refer to ENSCU LED Fault Chart, Section 9.5, must
be no LED alarm codes occurring to continue.
3
Check Fuel/Speed Actuator
Check plunger on fuel/speed actuator. Must move in and out freely.
Spring tension must hold rod firmly extended and in
place.
Check Fuel System
a. Check for Alarm 1.
Fill tank as needed.
b. Check fuel flow.
Unrestricted fuel flow through system.
Fuel not gelled.
4
5
6
c. Check fuel system prime.
Check Engine Air–Intake System
a. Check air cleaner indicator.
b. Inspect air intake system.
No air in fuel system.
Flag must not be visible.
Hoses & tubes in good condition.
No kinks or restrictions.
Force Low Speed Operation
a. Using Functional Parameters, set Unit will run in low speed. RPM must be within range
the High Speed Delay for at least 10 shown above for each specific model. Refer to
minutes so the unit starts in low speed. ENSCU LED Fault Chart, Section 9.5, must be no
LED alarm codes occurring to continue.
b. Check operation of Speed Relay LED 27 must be OFF when the microprocessor is
calling for Low Speed.
LED.
Additional steps on the next page.
7−31
62-11389
Alarm
NO.
39
Steps
Alarm/Cause
Corrective Action
CHECK ENGINE RPM - Continued
7
Check Low Speed Engine RPM
a. Check actual engine RPM using Refer to Table 2-1.
hand held tachometer.
b. Compare actual RPM with those Both readings within ± 50 RPM.
shown on display.
8
9
Force High Speed Operation
a. Place unit in continuous run and
adjust set point to at least 15 degrees
away from refrigerated compartment
temperature, and a temperature
greater than 20°F (5.6°C) If the unit
does not immediately go into High
Speed, set the AIRFLOW Functional
Parameter to HIGH.
b. Check operation of Speed Relay
LED.
The microprocessor will call for High Speed operation.
LED 27 must be ON. (If LED 27 is not on, the microprocessor is not calling for high speed operation.
Check Speed Overrides in Section 4.8.3 for more
information.)
Check high speed engine RPM
a. Check actual engine RPM using Refer to Table 2-1.
hand held tachometer.
b. Compare actual RPM with those Both readings within ± 50 RPM.
shown on display.
62-11389
7−32
Alarm
NO.
40
Steps
Alarm/Cause
Corrective Action
CHECK GLOW PLUGS (This alarm applies to the Intake Air Heater)
TRIGGER–ON: Engine Operation: Intake Air Heater amperage is less than 25 Amps, or greater
than 70 Amps after 14 seconds of glow time (NOTE: This can only occur when the
Engine Coolant Temperature is below 50°F (11°C) due to the glow time allowed.
Refer to Table 4−1 for glow times.
Standby Operation: This alarm will not activate in standby Operation.
• UNIT CONTROL: Alarm Only
• RESET CONDITION: Auto Reset if glow plug amperage is between 4 to 55 amps for at least 14
seconds during the glow cycle, or alarm may be manually reset via keypad or by turning the unit off,
then back on again.
•
NOTE: Follow the steps below until a problem is found. Once a repair or correction has been made, the active
alarm should clear itself (see reset condition above). Operate the unit through the appropriate modes to see if
any active alarm occurs. Continue with the steps below as necessary.
1
Check Model Number
Verify that the model number on the Enter the correct number in Configurations. (Refer to
nameplate matches the model Section 5.2.1.)
number shown in the microprocessor
Unit Data.
2
Check Glow Configuration
Verify that the Glow configuration is INTAKE HEATER must be the selection (Refer to
Section 5.2.1 for configuration settings.)
set to INTAKE HEATER.
3
Check Air Intake Heater circuit
a. Inspect relay & socket.
No signs of discoloration from overheating.
No damage, moisture, or corrosion in socket.
b. Check operation of intake air
heater relay.
CAUTION
DO NOT leave the circuit energized for the full 5
minutes if full amperage is shown, as the intake air
heater element life will be greatly shortened.
Using Component Test Mode, refer to Section 5.2.2,
energize the intake air heater relay.
LED 30 must be illuminated.
Amperage must be correct, refer to Section 2.8 for
correct electrical values.
c. Check voltage to Air Intake Must be 11 VDC or higher.
Heater.
4
Check Air Intake Heater circuit wiring
a. Inspect harness & control box No physical damage to harness.
connector pins & terminals. (See No damage, moisture, or corrosion in connectors.
wiring schematic Section 10.)
b. Check connection at Intake Air Ring terminal is tight on terminal.
No signs of overheating.
Heater.
7−33
62-11389
Alarm
NO.
41
Steps
Alarm/Cause
Corrective Action
ENGINE STALLED
• TRIGGER–ON: The engine is running, RPM sensor is good, and engine speed is less than 10
RPM; or the engine is running, RPM sensor alarm is ON, and the Oil Pressure switch contacts are
open.
•
UNIT CONTROL:
•
RESET CONDITION: Auto Restart after 15 minutes, or Alarm may be manually reset via keypad or
by turning the unit off, then back on again.
Engine Operation: Engine and unit shutdown and alarm.
Standby Operation: This alarm will not activate in standby Operation.
NOTE: Follow the steps below until a problem is found. Once a repair or correction has been made, clear the
alarm(s). (See Note 1 page 7−2.) Operate the unit through the appropriate modes to see if any active alarm
occurs. Continue with the steps below as necessary.
1
Check For Alarm 130 - Check RPM Sensor
Check for alarm 130.
When Alarms 130 and 41 occur at the same time,
generally the engine has run out or is running out of
fuel. This causes the engine RPM to surge and drop.
Check fuel tank and add fuel as necessary.
Check fuel lines between the fuel tank and the fuel
pump inlet for drawing air in.
2
Check For Flash Code On Engine Speed Control Unit (ENSCU)
Check for flash codes on the ENSCU. Refer to ENSCU LED Fault Chart, Section 9.5, must
be no LED alarm codes occurring to continue.
3
4
5
Was Engine Shut Off Manually?
Check for external cause.
Correct problem.
Check For Bad F2 Or F3 Fuse Alarm
Check for alarm 71.
Alarm conditions must be corrected and the alarm
cleared to continue.
Check Fuel System
a. Check for Alarm 1.
b. Check fuel flow.
Fill tank as needed.
Unrestricted fuel flow through system.
Fuel not gelled.
c. Check fuel system prime.
No air in fuel system.
d. Check fuel system check valve Check valve must hold fuel and not leak back.
from filter to injection pump.
6
Check Fuel/Speed Actuator (FSA)
a. Check Run Relay LED.
b. Check voltage to ENSCU.
LED 28 must be ON.
Use Component Test Mode to energize Run Relay.
(Refer to Section 5.2.2.)
Must have 12.0 VDC or higher reading between
ENSCU 13 and 19.
c. Inspect ENSCU connector pins & No damage, moisture, or corrosion in connector.
terminals.
d. Inspect harness & control box
connector pins & terminals. (See
wiring schematic Section 10.)
e. Check resistance of FSA.
f. Check operation of FSA.
g. Check connections at splice
points SP3, SP5 ans SP6.
Additional steps on the next page.
62-11389
7−34
No physical damage to harness.
No damage, moisture, or corrosion in connectors.
Refer to Section 2.12 for correct electrical values.
Plunger must move in when energized.
Connections must be good condition. No loose or
broken wires.
Alarm
NO.
41
Steps
Alarm/Cause
Corrective Action
ENGINE STALLED - Continued
7
Check Engine Speed Sensor (ENSSN)
Inspect harness & control box No physical damage to harness.
connector pins & terminals. (See No damage, moisture, or corrosion in connectors.
wiring schematic Section 10.)
8
Check Electrical System Amperage
a. Check the configuration setting for Must be set for 22 - 25 Amps
Diesel Max Gen Amps.
b. Check the configuration setting for Must be set for 4 Amps
Diesel Offset Max Amps.
c. With the unit operating, check all 3 Must be no more than 26 Amps.
high voltage circuits for amperage.
9
10
11
12
Check engine air–intake system
a. Check air cleaner indicator.
b. Inspect air intake system.
Check engine exhaust system
Inspect the exhaust system.
Check engine
a. Check Injection pump timing.
b. Check engine valve adjustment.
c. Check engine compression.
Check refrigeration system
Check discharge & suction pressures.
7−35
Flag must not be visible.
Hoses & tubes in good condition.
No kinks or restrictions.
Must be clear and unobstructed.
Timing must be correct.
Rocker arm clearance must be correct.
Compression must be above 400 psig (27.2 bar.)
Must be within normal operating range for conditions.
62-11389
Alarm
NO.
51
Steps
Alarm/Cause
Corrective Action
7.6 WARNING / STATUS ALARMS
ALTERNATOR NOT CHARGING (This alarm applies to the Battery Charger)
• TRIGGER–ON: Unit is running in either Engine or Standby Operation and the current flow is more
than -1.0 amps (discharge) between the battery charger and the battery for 3 continuous minutes.
•
UNIT CONTROL:
•
RESET CONDITION: Auto Reset (if not shutdown) when alternator is charging if not shutdown or
change unit to standby Operation or alarm may be manually reset via keypad or by turning the unit off,
then back on again.
Engine Operation: alarm only or (if Alternator Check Shutdown configuration
is set to YES (configured for shutdown) engine and unit shutdown and
alarm.
Standby Operation: alarm only regardless of configuration setting.
NOTE: Follow the steps below until a problem is found. Once a repair or correction has been made, clear the
alarm(s). (See Note 1 page 7−2.) Operate the unit through the appropriate modes to see if any active alarm
occurs. Continue with the steps below as necessary.
1
Check Microprocessor Current Sensor
Check microprocessor current value. Power up microprocessor in PC Mode. (Refer to Section 5.3.) Must be -2.0 to 1.5A with no load.
2
3
4
5
62-11389
Check Wire Direction Through Current Sensor
Visually inspect wire at current sensor. Must go through current sensor in the direction of the
arrow on the sensor:
away from the F-5 fuse for units with a Main Power
switch labeled Engine-Off-Standby
toward the F-5 fuse for units with a Main Power
switch labeled Start/Run-Off.
Check Battery Charger Wiring
a. Check output & ground wire (unit Negative lead on Ground terminal
Positive lead on Output terminal = same as battery
OFF.)
voltage.
b. Check battery charger input.
Check for AC voltage between SPX, SPY & (for 40
amp 3phase chargers) SPZ. Check fuses F7, F8 and
(for 40 amp 3phase chargers) F29.
c. Inspect harness & control box No physical damage to harness.
connector pins & terminals. (See No damage, moisture, or corrosion in connectors.
wiring schematic Section 10.)
d. Check output and ground wire When the unit is started, battery voltage at the battery will begin near 12.0 VDC, and slowly rise toward
voltages (unit running.)
13.5 VDC as the battery charges.
NOTE: Do not test for voltage at the output connector of the battery charger without the connector being
connected to the battery. Without the battery connected any reading will be very inaccurate. (Refer to
Section 8.9.8 for more information on checking battery charger.)
Check For Add–on Equipment Drawing Too Much Current
Check amperage of added–on Total current draw including the actual unit current
draw and all add–on components & accessories must
components & accessories.
be less than battery charger rating.
Perform Pretrip Check
Clear Active Alarm list, then run Any active alarms must be corrected and cleared
Pretrip & check for any new alarms. before proceeding.
7−36
Alarm
NO.
Steps
53
•
Alarm/Cause
Corrective Action
BOX TEMP OUT OF RANGE
TRIGGER–ON:
Condition One: If the unit is running in Pulldown Mode and the SAT is not greater than 1°F
(0.56°C) below the RAT or if the unit is running in Pull-Up Mode and the SAT is not above the RAT,
the configured action (Alarm only after 30 minutes or Alarm and Shutdown after 45 minutes) will be
activated.
NOTE: If the Out-Of-Range Alarm Functional Parameter is set to OFF, the following conditions will
not trigger an alarm or shutdown.
Condition Two: If the refrigerated compartment temperature has been within ±2.7°F (±1.5°C) for
perishable or +2.7°F (±1.5°C) for frozen of set point at least once since the unit was started and is
now further away from set point than the limit set in the Out-Of-Range Alarm Functional Parameter
[ 4°, 5°, or 7°F (2°, 3°, or 4°C)], the configured action (Alarm only after 30 minutes or Alarm and
Shutdown after 45 minutes) will be activated.
Condition Three: If a shutdown alarm occurs and the RAT is further away from set point than the
limit set in the Out-Of-Range Alarm Functional Parameter [ 4°, 5°, or 7°F (2°, 3°, or 4°C)], the
configured action (Alarm only after 30 minutes or Alarm and Shutdown after 45 minutes) will be
activated regardless if the refrigerated compartment temperature has been in-range or not.
•
UNIT CONTROL: Engine and standby Operation:
If the microprocessor is not configured for shutdown, alarm only.
If the microprocessor is configured for shutdown the unit will shutdown and alarm.
•
RESET CONDITION:
Condition 1: Auto Reset; If the unit is running in Pulldown Mode and the SAT is greater
than 1°F (0.56°C) below the RAT or if the unit is running in Pull-Up Mode and the SAT is greater
than the RAT.
Condition 2 & 3: Auto Reset when the temperature is within ±2.7°F (±1.5°C) for perishable
set points or +2.7°F (±1.5°C) for frozen set points.
For any Condition: alarm may be manually reset via Keypad OR by turning the unit off,
then back on again.
NOTE: The 30, or 45 minute timer is reset and starts again whenever:
•The unit cycles off and restarts in Start-Stop.
•The unit goes into and comes out of Defrost.
NOTE: This alarm does not go into the Inactive alarm List when it becomes inactive or is cleared.
NOTE: This alarm will not be activated in Sleep Mode.
NOTE: For Condition Two, the temperature criteria for this alarm is reset, and the refrigerated compartment
temperature must again go In Range before this alarm can be activated if any of the following occur:
•Pretrip is started.
•Set point is changed.
•A door switch or remote switch is installed and configured as a door switch, and the switch is opened indicating
that the compartment door has been opened.
Troubleshooting steps begin on the next page.
7−37
62-11389
Alarm
NO.
Steps
Alarm/Cause
Corrective Action
53
BOX TEMP OUT-OF-RANGE - Continued
NOTE: Follow the steps below until a problem is found. Once a repair or correction has been made, clear the
alarm(s). (See Note 1 page 7−2.) Operate the unit through the appropriate modes to see if any active alarm
occurs. Continue with the steps below as necessary.
1
Check Compartment Doors
Inspect all trailer compartment doors. Must be closed, no air leakage.
2
Defrost Evaporator
Initiate Manual Defrost Cycle.
Must terminate automatically.
All ice cleared from evaporator coil.
3
Check For Any Shutdown Alarm(s)
Check the Alarm List for any Alarm conditions must be corrected and the alarm
cleared to continue.
Shutdown Alarms.
4
Check For Low Refrigerant Pressure Alarm
Check for alarm 18.
Alarm conditions must be corrected and the alarm
cleared to continue.
5
Check Refrigerant Level
Visually check refrigerant level in Must be at correct level. Refer to Section 8.6.2.
receiver.
6
Check System Pressures
Install manifold gauge set and check Suction & Discharge Pressures must be in the normal range. Suction & Discharge Pressures must
system pressures.
have the same reading on gauges & on micro display.
7
Check Evaporator Motor or Contactor Alarm
Check for alarm 77 or 109.
Must be corrected and cleared to continue.
Verify accuracy of RAT & SAT sensors
Verify accuracy of RAT & SAT using RAT & SAT readings must be within $3°F (1.7°C) of
infrared or other accurate temperat- test temperature tool reading.
ure testing tool.
Perform Pretrip Check
Clear Active Alarm list, then run Any active alarms must be corrected and cleared
Pretrip & check for any new alarms. before proceeding.
8
9
10
62-11389
Check For Low Delta-T
Read Delta-T from Unit Data.
In Cool, the Delta-T must be greater than(cooling
more than) -1°F (-0.56°C.)
In Heat the Delta-T must be greater than 0 (SAT
must be higher than RAT.)
7−38
Alarm
NO.
54
Steps
Alarm/Cause
Corrective Action
DEFROST NOT COMPLETE
• TRIGGER–ON: Defrost cycle did not complete within 45 minutes
•
UNIT CONTROL: Engine and standby Operation: alarm only. While this alarm is active, the Defrost
Timer will be set to initiate a defrost cycle 90 minutes (1.5 hours) of unit running time after the alarm
comes on.
•
RESET CONDITION: Auto Reset when defrost cycle is started again, or alarm may be manually
reset via keypad or by turning the unit off, then back on again.
NOTE: Follow the steps below until a problem is found. Once a repair or correction has been made, the active
alarm should clear itself (see reset condition above). Operate the unit through the appropriate modes to see if
any active alarm occurs. Continue with the steps below as necessary.
1
Perform Pretrip Check
Clear Active Alarm list, then run Any active alarms must be corrected and cleared
Pretrip & check for any new alarms. before proceeding.
2
3
4
Check For Defective Defrost Sensor Location/Correct Installation
Has sensor fallen from location?
Must be corrected to continue.
Check Evaporator Fan Contactors
Check that contactors are not Must de-energize evaporator fan during defrost.
energized and that the contacts are
not stuck closed in defrost.
Check Evaporator Heater Current Draw
a. Check Heater amp draw at These checks must be made with the unit operating.
1HTCON1 & 1HTCON2
Verify that all three actual amperage readings for
each component are within 10% of each other, and
are within the values shown in section 2.11.
7−39
62-11389
Alarm
NO.
55
Steps
Alarm/Cause
Corrective Action
CHECK DEFROST AIR SWITCH
• TRIGGER–ON: The defrost air switch has called for a defrost cycle within 8 minutes of a defrost
termination for 2 consecutive defrost cycles. (The air switch contacts were closed continuously for
15 seconds before the defrost cycle was started.)
• UNIT CONTROL: Engine and standby Operation: alarm only. While this alarm is active, the defrost
air switch will NOT be used to initiate a defrost cycle; however the Defrost Timer will initiate a
defrost cycle 90 minutes after the alarm comes on, and the manual defrost switch will remain
operative.
•
RESET CONDITION: Auto Reset when defrost cycle terminates correctly, and the air switch does
not call for a defrost cycle within the 8 minutes following defrost termination, or alarm may be
manually reset via keypad or by turning the unit off, then back on again.
NOTE: Follow the steps below until a problem is found. Once a repair or correction has been made, the active
alarm should clear itself (see reset condition above). Operate the unit through the appropriate modes to see if
any active alarm occurs. Continue with the steps below as necessary.
1
Check Condition Of Refrigerated Compartment & Load
a. Check condition of refrigerated Doors must be closed, and door seals must seal and
prevent entrance of outside air.
compartment doors & seals.
2
3
62-11389
b. Check condition of evaporator.
Check for blockage sufficient to cause an air pressure differential across the coil great enough to close
the contacts of the defrost air switch.
Coil must be free of ice following defrost.
c.
If product is warm and moist, frequent defrost cycles
can be expected.
Check condition of product.
Check Switch Wiring
a. Inspect switch & connector pins & No physical damage to switch.
No damage or corrosion in connector.
terminals.
b. Check switch circuit. (See wiring Check wiring from switch to microprocessor terminal
2MP6 is not shorted to a power source, providing a
schematic Section 10.)
false signal.
Check Defrost Air Switch, Defrost Circuit and Tubing
a. Perform testing and reset switch if Refer to Section 8.8.9 page 8−31.
required.
7−40
Alarm
NO.
57
Steps
ALARM / CAUSE
CORRECTIVE ACTION
CHECK REMOTE SWITCH 1 (REMS1)
• TRIGGER–ON: Remote Switch 1 is set to activate an alarm if the switch is activated (opened or
closed, depending on switch type) for more than five seconds.
•
UNIT CONTROL: May be configured as alarm only, alarm and force low engine speed or alarm and
shutdown.
•
RESET CONDITION:
Alarm Only: Auto Reset after the switch has de-activated for more than five seconds.
Shutdown: Auto Reset after three minutes (minimum off time for door open condition) and the switch
has de-activated for more than five seconds.
NOTE: Follow the steps below until a problem is found. Once a repair or correction has been made, the active
alarm should clear itself (see reset condition above). Operate the unit through the appropriate modes to see if
any active alarm occurs. Continue with the steps below as necessary.
IF A SWITCH IS INSTALLED
1
Determine what REMS1 is controlled by.
REMS1 may be connected to a com- Locate the device used as REMS1.
partment door or some other device
and used to remotely control the unit.
2
Check To See If REMS1 Has Activated
Inspect device used to activate
For example, Compartment door must be closed,
REMS1.
and switch must be de-activated.
3
Check “REMS1 (Remote Switch 1)”
Verify that Configuration is set for the
type of switch being used (i.e. when
switch is activated, switch contacts
are closed; etc.)
4
Check Wiring
a. Visually inspect wiring to Remote Wiring must be connected.
Switch #1.
Configuration
Configuration must agree with switch type. Refer to
“REMS1 (Remote Switch 1)” Configuration,
Table 5−2.
b. Visually inspect condition of switch Must not be damaged, wet, corroded, etc.
c. Check circuit. (See wiring schemat- With the switch contacts closed, check for 12 VDC
through the wiring and switch to the correct microproic Section 10.)
cessor terminal (refer to applicable wiring schematic Section 10).
5
Temporary Solution Tip
In the event of a defective switch
In the Functional Parameter list set OVERRIDE
that can not be repaired or replaced, REMS1 SHUTDOWN to YES.
and the switch is forcing the unit into
a shutdown, this alarm may be temporarily overridden by setting the
correct Functional Parameter.
IF A SWITCH IS NOT INSTALLED
Locate and inspect 10 position conConnector must have cap on,
nector for optional sensors and
No corrosion or moisture inside connector.
switches (REMSN, see wiring sche- If there is a problem with the connector and there are
matic Section 10).
no remote sensors or switches in the unit, the connector may be removed and each individual wire separated from the others, terminated and insulated with
heat shrink.
7−41
62-11389
Alarm
NO.
58
Steps
ALARM / CAUSE
CORRECTIVE ACTION
CHECK REMOTE SWITCH 2 (REMS2)
• TRIGGER–ON: Remote Switch 2 is set to activate an alarm if the switch is activated (opened or
closed, depending on switch type) for more than five seconds.
•
UNIT CONTROL: May be configured as alarm only, alarm and force low engine speed or alarm and
shutdown.
•
RESET CONDITION:
Alarm Only: Auto Reset after the switch has de-activated for more than five seconds.
Shutdown: Auto Reset after three minutes (minimum off time for door open condition) and the switch
has de-activated for more than five seconds.
NOTE: Follow the steps below until a problem is found. Once a repair or correction has been made, the active
alarm should clear itself (see reset condition above). Operate the unit through the appropriate modes to see if
any active alarm occurs. Continue with the steps below as necessary.
IF A SWITCH IS INSTALLED
1
Determine what REMS2 is controlled by.
REMS2 may be connected to a com- Locate the device used as REMS2.
partment door or some other device
and used to remotely control the
compartment.
2
Check To See If REMS2 Has Activated
Inspect device used to activate
For example, compartment door must be closed, and
REMS2.
switch must be de-activated.
3
Check “REMS2 (Remote Switch 2) Configuration
Verify that Configuration is set for the Configuration must agree with switch type. Refer to
type of switch being used (i.e. when “REMS2 (Remote Switch 2)” Configuration,
switch is activated, switch contacts
Table 5−2.
are closed; etc.)
4
Check Wiring
a. Visually inspect wiring to Remote Wiring must be connected.
Switch #2.
5
62-11389
b. Visually inspect condition of switch Must not be damaged, wet, corroded, etc.
c. Check circuit. (See wiring schemat- With the switch contacts closed, check for voltage
from microprocessor terminal 2MP13, through the
ic Section 10.)
wiring and switch to ground.
Temporary Solution Tip
In the event of a defective switch
In the Functional Parameter list set OVERRIDE
that can not be repaired or replaced, REMS2 SHUTDOWN to YES.
and the switch is forcing the unit into
a shutdown, this alarm may be temporarily overridden by setting the
correct Functional Parameter.
IF A SWITCH IS NOT INSTALLED
Locate and inspect 10 position conConnector must have cap on,
nector for optional sensors and
No corrosion or moisture inside connector.
switches (REMSN, see wiring sche- If there is a problem with the connector and there are
matic Section 10).
no remote sensors or switches in the unit, the connector may be removed and each individual wire separated from the others, terminated and insulated with
heat shrink.
7−42
Alarm
NO.
59
Steps
Alarm/Cause
Corrective Action
DATALOGGER (DataLink data recorder) NOT RECORDING
• TRIGGER–ON: No data is being recorded by the DataLink data recorder.
• UNIT CONTROL: Engine and Standby Operation: alarm only.
• RESET CONDITION: Alarm may be manually reset via keypad.
NOTE: Follow the steps below until a problem is found. Once a repair or correction has been made, clear the
alarm(s). (See Note 1 page 7−2.) Operate the unit through the appropriate modes to see if any active alarm
occurs. Continue with the steps below as necessary.
1
Clear Alarm
a. Clear Active Alarm(s).
Alarms Clear.
b. Check
for
Active
Alarm If Inactive, download all data & retain.
If Active, go to next step.
re-occurrence.
2
Microprocessor Defective
a. Download previous data using Data retrieval OK.
Download
PC
Card,
or
ReeferManager Program.
b. Replace microprocessor & set New microprocessor in place.
Configurations,
Functional
Parameters, Enter hours from
removed
microprocessor,
set
Maintenance Hour Meters, and
DataLink data recorder Setup.
NOTE: Specific configurations may be found on the TransCentral Website (Authorized Carrier Transicold
Dealers only.)
7−43
62-11389
Alarm
NO.
60
Steps
Alarm/Cause
Corrective Action
DATALOGGER (DataLink data recorder) TIME WRONG
• TRIGGER–ON: The real time clock in the Data Recorder does not contain a valid date.
•
•
UNIT CONTROL: Engine and Standby Operation: alarm only.
RESET CONDITION: Auto Reset when the DataLink data recorder real time clock is reset, or alarm
may be manually reset by turning the unit off, then back on again.
NOTE: Follow the steps below until a problem is found. Once a repair or correction has been made, the active
alarm should clear itself (see reset condition above). Operate the unit through the appropriate modes to see if
any active alarm occurs. Continue with the steps below as necessary.
1
Check Real Time Clock
Check Real Time Clock in the Data Must show correct date and time. Change as needed
(Configuration List).
List, or using ReeferManager.
2
Reset Microprocessor
a. Place the Main Power switch in Microprocessor powers up OK.
the OFF position for 30 seconds and
then return it to the desired position.
b. Check for valid Real Time Clock Valid date and time in memory.
Alarm is cleared automatically.
reading in Data List.
c. Real Time Clock can not be Replace microprocessor.
changed.
3
62-11389
Microprocessor Defective
a. Download previous data using Data retrieval OK.
Download
PC
Card,
or
ReeferManager Program.
b. Replace microprocessor & set New microprocessor in place.
Configurations,
Functional
Parameters, Enter hours from
removed
microprocessor,
set
Maintenance Hour Meters, and
DataLink data recorder Setup.
7−44
Alarm
NO.
61
Steps
Alarm/Cause
Corrective Action
DOOR OPEN (DS1)
• TRIGGER–ON: DS1 is set to activate an alarm if the switch is activated (opened or closed, depending on switch type) for more than five seconds.
•
UNIT CONTROL: May be configured as alarm only, alarm and force low engine speed or alarm and
shutdown.
•
RESET CONDITION:
Alarm Only: Auto Reset after the switch has de-activated for more than five seconds.
Shutdown: Auto Reset after three minutes (minimum off time for door open condition) and the switch
has de-activated for more than five seconds.
NOTE: Follow the steps below until a problem is found. Once a repair or correction has been made, the active
alarm should clear itself (see reset condition above). Operate the unit through the appropriate modes to see if
any active alarm occurs. Continue with the steps below as necessary.
IF A SWITCH IS INSTALLED
1
Determine what DS1 is controlled by.
DS1 may be connected to a comLocate the device used as DS1.
partment door or some other device
and used to remotely control the unit.
2
Check To See If DS1 Has Activated
Inspect device used to activate DS1. For example, compartment door must be closed, and
switch must be de-activated.
3
Check “DOOR SWITCH” Configuration
Verify that Configuration is set for the Configuration must agree with switch type. Refer to
type of switch being used (i.e. when “door switch) Configuration, Table 5−2.
switch is activated, switch contacts
are closed; etc.)
4
Check Wiring
a. Visually inspect wiring to DS1
b. Visually inspect condition of switch
c. Check circuit. (See wiring schematic Section 10.)
5
Wiring must be connected.
Must not be damaged, wet, corroded, etc.
With the switch contacts closed, check for 12 VDC
through the wiring and switch to the correct microprocessor terminal (refer to applicable wiring schematic Section 10).
Temporary Solution Tip
In the event of a defective switch
In the Functional Parameter list set OVERRIDE
that can not be repaired or replaced, REMS1 SHUTDOWN to YES.
and the switch is forcing the unit into
a shutdown, this alarm may be temporarily overridden by setting the
correct Functional Parameter.
IF A SWITCH IS NOT INSTALLED
Locate and inspect 10 position conConnector must have cap on,
nector for optional sensors and
No corrosion or moisture inside connector.
switches (REMSN, see wiring sche- If there is a problem with the connector and there are
matic Section 10).
no remote sensors or switches in the unit, the connector may be removed and each individual wire separated from the others, terminated and insulated with
heat shrink.
7−45
62-11389
Alarm
NO.
71
Steps
Alarm/Cause
Corrective Action
7.7 ELECTRICAL ALARMS
BAD F2 OR F3 FUSE
• TRIGGER–ON: One or more of the following fuse circuits have been open for more than 2
seconds: F2, F3
•
UNIT CONTROL:
•
RESET CONDITION: Alarm may be manually reset via keypad or by turning the unit off, then back on
again.
Engine Operation: Alarm Only. If the engine shut off, see troubleshooting
steps below to correct.
Standby Operation: Additional verification required if the “NO A/C POWER”
configuration is set for “Installed and shutdown”, the refrigeration system
will shutdown with the alarm on and PSCON still energized.
NOTE: Follow the steps below until a problem is found. Once a repair or correction has been made, clear the
alarm(s). See Note 1 page 7−2. Operate the unit through the appropriate modes to see if any active alarm
occurs. Continue with the steps below as necessary.
1
Check Unit Operation
Did engine shutdown?
Yes
Check F3.
No
2
Check Fuses
a. Locate blown fuse(s).
b. Verify fuse size.
Will have open circuit.
Refer to Section 2.13 for correct electrical values.
Must be correct rating for circuit. (See wiring
schematic. Section 10.)
Terminals tight; No signs of overheating, melting or
discoloration.
c. Inspect fuse & fuse holder.
3
Check F2.
Check Circuit
a. Check amperage draw on Speed Refer to Section 2.13 for correct electrical values.
Relay circuit.
b. Check amperage draw on Run Refer to Section 2.13 for correct electrical values.
Relay circuit.
62-11389
7−46
Alarm
NO.
73
Steps
Alarm/Cause
Corrective Action
NO A/C POWER-CHECK POWER CORD
• TRIGGER–ON: The unit is set to operate in standby AND no AC power
•
UNIT CONTROL:
Engine Operation: this alarm will not activate in Engine Operation.
Standby Operation:
If the “NO POWER SWITCH TO DIESEL” Functional Parameter is set to “No” or
the “NO POWER SWITCH TO DIESEL” Functional Parameter is set to “Yes”
and the “NO A/C POWER” Configuration is set for “Alarm and shutdown” the
refrigeration system will shutdown (because of the loss of power) with the alarm
on and PSCON still energized.
If the “NO POWER SWITCH TO DIESEL” Functional parameter is set to “Yes”
and the “NO A/C POWER” Configuration is set to “Switch To Diesel” the unit will
remain off for 5 minutes, then start the engine. The unit will remain in Engine
Operation until the minimum run time has expired (regardless if the unit is set for
Start Stop or Continuous) and until standby power has been restored continually
for 5 minutes.
•
RESET CONDITION: Auto Reset when AC power is restored or the alarm may be manually reset
via keypad or by turning the unit off, then back on. If the unit is running in Engine Backup when the
A/C power has been restored for 5 continuous minutes and the above conditions have been met,
the engine will stop and the unit will restart in Standby Operation.
NOTE: Follow the steps below until a problem is found. Once a repair or correction has been made, the active
alarm should clear itself (see reset condition above). Operate the unit through the appropriate modes to see if
any active alarm occurs. Continue with the steps below as necessary.
1
Check Circuit Breaker On The Main External Power Supply
a. Check circuit breaker.
30A supply circuit breaker - Must be on.
b. Check the voltage in the plug.
460V / 3 / 60Hz.
2
Check Power Cord
a. Inspect connections in the socket Connections must be tight.
and the plug.
3
b. Inspect the cable.
Cable must not be frayed, cut or damaged.
Check For Power In The Control Box
a. Check for voltage at PSCON L1-L2, All three readings must be 460V "10% .
L2-L3, L1-L3.
b. Check for voltage at PSCON2 All three readings must be 460V "10%.
L1-L2, L2-L3, L1-L3.
4
5
Check Connections
Check for bad connections in the
control box.
Connections and wire crimps must be tight.
Check Phase Reversal Module (PRM)
a. Check for voltage at 5MP04.
Must be +12 VDC.
b. Check Phase Reversal Module for See Section 8.9.2. Replace PRM if defective.
correct operation.
7−47
62-11389
Alarm
NO.
75
Steps
Alarm/Cause
Corrective Action
COMP MOTOR OVERLOAD
• TRIGGER–ON: Compressor Motor Internal Protector (IPC) circuit is open.
•
UNIT CONTROL:
•
RESET CONDITION: Auto Reset when motor overload input is within limits, or change to engine
Operation, or alarm may be manually reset via keypad or by turning the unit off, then back on again.
Engine Operation: engine and unit shutdown and alarm.
Standby Operation: refrigeration system shutdown and alarm with PSCON
still energized.
NOTE: Follow the steps below until a problem is found. Once a repair or correction has been made, the active
alarm should clear itself (see reset condition above). Operate the unit through the appropriate modes to see if
any active alarm occurs. Continue with the steps below as necessary.
1
Check For Alarm13 (A13 or I13 = High Pressure)
Alarm 13 will always cause this
Review steps for Alarm 13 and correct if necessary.
alarm to activate, even when there
are no problems with this circuit.
2
Check For 12 VDC At 4MP1
a. If 12VDC.
Alarm should have cleared itself.
b. If no power (0VDC.)
Continue with step 3.
3
Check IPC circuit
a. Use Component Test Mode to ener- FET 2 will be on.
gize CCON circuit (Refer to Section
5.2.2.)
b. Check IPC harness to microproces- 12 VDC on terminals 8 & 9 at the compressor (white
sor.
wires.)
c. Check SP15.
d. Test continuity through IPC.
There should be 12 VDC from HP1 to SP15 to IPC.
Should be 0 Ohms. If compressor body is extremely
warm, allow it to cool off, then recheck IPC continuity.
e. Test IP circuit from compressor mo- 12 VDC at 4MP1.
tor to microprocessor.
4
Check Compressor Motor Contactor
a. Inspect the wire connections to the No signs of overheating of the contactor. Wiring is
contactor. (See wiring schematic routed correctly to the contactor.
Section 10.)
b. Check tightness of the contactor Tighten with screwdriver and check for discoloration
wire connections.
of wires.
5
Perform Pretrip
Clear Active Alarm list, then run Pretrip & check for any new alarms.
6
62-11389
Any active alarms must be corrected and cleared before proceeding.
Check Compressor Motor Operation
Turn the unit ON in Engine or Stand- Check voltage and current on each phase (voltage
by Operation.
and amperage must be within allowable range (Refer
to Section 2.11 for correct electrical values.)
7−48
Alarm
NO.
76
Steps
Alarm/Cause
Corrective Action
CONDENSER MOTOR OVERHEATED
• TRIGGER–ON: One or both of the condenser fan motor Internal Protectors (IP-CDM1 AND 2) circuit is open.
•
UNIT CONTROL:
•
RESET CONDITION: Auto Reset when motor overload input is within limits, or change to engine
Operation, or alarm may be manually reset via keypad or by turning the unit off, then back on again.
Engine Operation: engine and unit shutdown and alarm.
Standby Operation: refrigeration system shutdown and alarm with PSCON
still energized.
NOTE: Follow the steps below until a problem is found. Once a repair or correction has been made, the active
alarm should clear itself (see reset condition above). Operate the unit through the appropriate modes to see if
any active alarm occurs. Continue with the steps below as necessary.
1
Check Condenser Fan Blades for Free Operation
Visually inspect condenser fan
Fan blade must be in good condition.
blades for any foreign material or
No sticks or other material obstructing it’s movement
damage or anything that will prevent No ice build-up preventing blade rotation.
the blade and motor from turning
freely
2
Check For 12 VDC At 4MP2
a. If 12VDC.
Alarm should have cleared itself.
b. If no power (0VDC.)
Continue with step 2 below.
3
Check IPC circuit
a. Check MPQC9.
There should be 12 VDC from MPQC9 to Ground.
b. Use Component Test Mode to ener- FET 1 will be on.
gize CDCON circuit. (Refer to Section 5.2.2.)
c. Unplug the connector to condenser 12 VDC between pin 4 and pin 5 indicates the open
fan motor 1 (CDM1) and check circuit is in the IP for CDM1.
voltage on pins 4-5 in the engine
harness connector.
d. Test continuity through CDM1 IP at Should be 0 Ohms. If condenser fan motor 1 is
pins 4-5 in the fan motor harness extremely warm, allow it to cool off, then recheck IP
connector.
continuity.
e. Test continuity through IPC.
Should be 0 Ohms. If either condenser fan motor is
extremely warm, allow it to cool off, then recheck IPC
continuity.
f. Test IP circuit from condenser fan 12 VDC at 4MP2.
motor wires to microprocessor.
4
Check Condenser Fan Motor Contactor
a. Inspect the wire connections to
No signs of overheating of the contactor. Wiring is
the contactor. (See wiring schem- routed correctly to the contactor.
atic Section 10.)
b. Check tightness of the contactor
Tighten with screwdriver and check for discoloration
wire connections.
of wires.
5
Perform Pretrip
Clear Active Alarm list, then run Pretrip & check for any new alarms.
Any active alarms must be corrected and cleared before proceeding.
Additional steps on the next page.
7−49
62-11389
Alarm
NO.
76
Steps
Alarm/Cause
Corrective Action
CONDENSER MOTOR OVERHEATED - Continued
6
Check Condenser Fan Motors
Disconnect power plug at motor.
Test IP circuit for continuity using ohmmeter.
If open, remove and replace motor.
If closed, then an intermittent IP circuit is suspect.
Check phase to phase and phase to ground for short
or open circuits. Refer to Section 2.11 for correct
electrical values.
If motor tests good, check the DC IP circuit to
microprocessor.
7
Check Motor Operation
Turn the unit ON.
Check current on each phase (must be less than
shown on Section 2.11.)
Check voltage on each phase (must be within voltage
limits shown in Section 2.11.)
62-11389
7−50
Alarm
NO.
77
Steps
Alarm/Cause
Corrective Action
EVAP MOTOR OVERHEATED
• TRIGGER–ON: The evaporator fan motor Internal Protector (IP-EVM) is open.
•
•
UNIT CONTROL:
Engine and Standby Operation: shutdown and alarm
RESET CONDITION: Auto Reset after a 15 minute off time when motor overload input is within
limits or alarm may be manually reset via keypad or by turning the unit off, then back on again.
NOTE: Follow the steps below until a problem is found. Once a repair or correction has been made, the active
alarm should clear itself (see reset condition above). Operate the unit through the appropriate modes to see if
any active alarm occurs. Continue with the steps below as necessary.
1
Check Evaporator Fan Blades for Free Operation
Visually inspect evaporator fan for
Blower wheel must be in good condition.
any foreign material or damage or
No sticks or other material obstructing its movement
anything that will prevent the blade
No ice build-up preventing blade rotation.
and motor from turning freely
2
3
4
5
Check For 12 VDC At 4MP3
a. If 12VDC
b. If no power (0VDC)
Check IPC Circuit
a. Use Component Test Mode to energize Evaporator Motor Contactor
circuit. (Refer to Section 5.2.2.)
b. Unplug the connector to the evaporator fan motor and check voltage
on IP-EVM (white) wire.
c. Check MPQC9.
d. Test continuity through IPC.
Alarm should have cleared itself.
Continue with step 2 below.
FET 20 will be on.
12 VDC between pin 4 in the engine harness
connector and Ground.
There should be 12 VDC from MPQC9 to Ground.
Should be 0 Ohms. If the evaporator fan motor is
extremely warm, allow it to cool off, then recheck IPC
continuity.
e. Test IP circuit from evaporator fan 12 VDC at 4MP3
motor junction box to microprocessor.
Check Evaporator Fan Motor Contactor
a. Inspect the wire connections to
No signs of overheating of the contactor. Wiring is
the contactor. (See wiring schem- routed correctly to the contactor.
atic Section 10.)
b. Check tightness of the contactor Tighten with screwdriver and check for discoloration
wire connections
of wires.
Perform Pretrip
Clear Active Alarm list, then run Pretrip & check for any new alarms.
Any active alarms must be corrected and cleared before proceeding.
Additional steps on the next page.
7−51
62-11389
Alarm
NO.
77
Steps
Alarm/Cause
Corrective Action
EVAP MOTOR OVERHEATED - Continued
6
Check Evaporator Fan Motor
Disconnect power plug at motor
7
62-11389
Check Motor Operation
Turn the unit ON
Test IP circuit for continuity using ohmmeter
If open, remove and replace motor
If closed, then an intermittent IP circuit is suspect.
Check phase to phase and phase to ground for short
or open circuits. Refer to Section 2.11 for correct
electrical values.
If motor tests good, check the DC IP circuit to
microprocessor.
Check current on each phase (must be less than
shown on Section 2.11).
Check voltage on each phase (must be at within limits shown in Section 2.11.)
7−52
Alarm
NO.
84
Steps
Alarm/Cause
Corrective Action
CHECK REMOTE ALARM LIGHT
• TRIGGER–ON: The fault output circuit (amber “check unit” LED’s) to the light bar is shorted. (This
output [3MP19] from the microprocessor is negative, so the circuit will not be shorted to ground, but
is shorted either within the remote alarm light itself, or to a positive wire.)
•
•
UNIT CONTROL: Engine and Standby Operation: alarm only.
RESET CONDITION: Auto Reset when Alarm light current (amp) draw is normal, or alarm may be
manually reset via keypad or by turning the unit off, then back on again.
NOTE: Follow the steps below until a problem is found. Once a repair or correction has been made, the active
alarm should clear itself (see reset condition above). Operate the unit through the appropriate modes to see if
any active alarm occurs. Continue with the steps below as necessary.
1
Check 2-Light Bar Wiring
a. Inspect light bar & connector.
No damage to light bar.
No damage, moisture, or corrosion in connector.
2
b. Inspect harness & control box No physical damage to harness.
connector pins & terminals. (See No damage, moisture, or corrosion in connectors.
wiring schematic Section 10.)
Check 2-Light Bar
Check operation of 2-Light Bar
Refer to Section 8.9.3 for information on testing the
2-Light Bar.
7−53
62-11389
Alarm
NO.
85
Steps
Alarm/Cause
Corrective Action
CHECK UL1 CIRCUIT
• TRIGGER–ON: Front Unloader (UL1) circuit is shorted. (The UL1 output from the microprocessor
(3MP12) is negative, so the circuit will not be shorted to ground, but is shorted either within UL1
itself, or to a positive wire.)
•
•
UNIT CONTROL: Engine and Standby Operation: alarm only.
RESET CONDITION: Auto Reset when the UL1 Coil current (amp) draw is normal, or alarm may be
manually reset via keypad or by turning the unit off, then back on again.
NOTE: Follow the steps below until a problem is found. Once a repair or correction has been made, the active
alarm should clear itself (see reset condition above). Operate the unit through the appropriate modes to see if
any active alarm occurs. Continue with the steps below as necessary.
1
Check Front Unloader (UL1) Coil
a. Inspect Front Unloader (UL1) coil No damage to coil
& connector.
No damage, moisture, or corrosion in connector.
b. Check resistance of coil
Refer to Section 2.12 for correct electrical values.
Cannot be opened (infinite ohms), shorted (Zero
Ohms) or shorted to ground.
Refer to Section 2.12 for correct electrical values.
Use ammeter.
c. Check amp draw of coil.
2
3
62-11389
Check Front Unloader (UL1) Current Draw
Use Component Test Mode to test
Refer to Section 2.12 for correct electrical values.
actual current draw of the circuit.
View current draw in Data List.
(Refer to Section 5.2.2.)
Check Front Unloader (UL1) Coil Wiring
Inspect harness & control box conNo physical damage to harness.
nector pins & terminals. (See wiring
No damage, moisture, or corrosion in connectors.
schematic Section 10.)
7−54
Alarm
NO.
86
Steps
Alarm/Cause
Corrective Action
CHECK UL2 CIRCUIT
• TRIGGER–ON: Rear Unloader (UL2) circuit is shorted. (The UL2 output from the microprocessor
(3MP23) is negative, so the circuit will not be shorted to ground, but is shorted either within UL2
itself, or to a positive wire.)
•
•
UNIT CONTROL: Engine and Standby Operation: alarm only.
RESET CONDITION: Auto Reset when the UL2 Coil current (amp) draw is normal, or alarm may
be manually reset via keypad or by turning the unit off, then back on again.
NOTE: Follow the steps below until a problem is found. Once a repair or correction has been made, the active
alarm should clear itself (see reset condition above). Operate the unit through the appropriate modes to see if
any active alarm occurs. Continue with the steps below as necessary.
1
Check Rear Unloader (UL2) Coil
a. Inspect Rear Unloader (UL2) coil & No damage to coil.
connector.
No damage, moisture, or corrosion in connector.
b. Check resistance of coil.
2
3
Refer to Section 2.12 for correct electrical values.
Cannot be opened (infinite ohms), shorted (Zero
Ohms) or shorted to ground.
c. Check amp draw of coil.
Refer to Section 2.12. Use ammeter.
Check Rear Unloader (UL2) Current Draw
Use Component Test Mode to test
Refer to Section 2.12 for correct electrical values.
actual current draw of the circuit.
View current draw in Data List.
(Refer to Section 5.2.2.)
Check Rear Unloader (UL2) Coil Wiring
Inspect harness & control box conNo physical damage to harness.
nector pins & terminals. (See wiring
No damage, moisture, or corrosion in connectors.
schematic Section 10.)
7−55
62-11389
Alarm
NO.
89
Steps
Alarm/Cause
Corrective Action
CHECK REMOTE AUTO LIGHT (Light Bar)
• TRIGGER–ON: The normal operation output circuit (green “Status OK” light) to the light bar is
shorted. (The light bar output from the microprocessor [3MP32] is negative, so the circuit will not be
shorted to ground, but is shorted either within the light bar itself, or to a positive wire.)
•
•
UNIT CONTROL: Engine and Standby Operation: alarm only.
RESET CONDITION: Auto Reset when Auto light current (amp) draw is normal, or alarm may be
manually reset via keypad or by turning the unit off, then back on again.
NOTE: Follow the steps below until a problem is found. Once a repair or correction has been made, the active
alarm should clear itself (see reset condition above). Operate the unit through the appropriate modes to see if
any active alarm occurs. Continue with the steps below as necessary.
1
Check 2-Light Bar Wiring
a. Inspect light bar & connector.
No damaged to light bar
No damage, moisture, or corrosion in connector.
2
91
•
b. Inspect harness & control box No physical damage to harness.
connector pins & terminals. (See No damage, moisture, or corrosion in connectors.
wiring schematic Section 10.)
Check 2-Light Bar
Check operation of 2-Light Bar
Refer to Section 8.9.3 for information on testing the
2-Light Bar.
CHECK 1HTCON1 RELAY COIL
TRIGGER–ON: Heater Contactor 1 (1HTCON1) circuit is shorted. (The contactor output from the
microprocessor (4MP13) is negative, so the circuit will not be shorted to ground, but is shorted
either within the contactor coil itself, or to a positive wire.)
•
•
UNIT CONTROL: Engine and Standby Operation: alarm only.
RESET CONDITION: Auto Reset or alarm may be manually reset via keypad or by turning the unit
off, then back on again.
NOTE: Follow the steps below until a problem is found. Once a repair or correction has been made, the active
alarm should clear itself (see reset condition above). Operate the unit through the appropriate modes to see if
any active alarm occurs. Continue with the steps below as necessary.
1
Check 1HTCON1
a. Inspect heater contactor relay coil No damage to coil.
and connector.
No damage, moisture, or corrosion in connector.
b. Check contactor coil resistance.
c. Check amp draw of coil.
2
3
62-11389
Check 1HTCON1 Current Draw
Use Component Test Mode to test
actual current draw of the circuit.
(Refer to Section 5.2.2.)
Check 1HTCON1 Wiring
Inspect harness & control box connector pins & terminals. (See wiring
schematic Section 10.)
7−56
Refer to Section 2.12 for correct electrical values.
Cannot be opened (infinite ohms), shorted (Zero
Ohms) or shorted to ground.
Refer to Section 2.12 for correct electrical values.
Use ammeter.
Refer to Section 2.12 for correct electrical values.
View current draw in Data List.
No physical damage to harness.
No damage, moisture, or corrosion in connectors.
Alarm
NO.
92
Steps
Alarm/Cause
Corrective Action
CHECK 1HTCON2 RELAY COIL
• TRIGGER–ON: Heater contactor 2 (1HTCON2) circuit is shorted. (The contactor output from the
microprocessor (4MP14) is negative, so the circuit will not be shorted to ground, but is shorted
either within the contactor coil itself, or to a positive wire.)
•
•
UNIT CONTROL: Engine and Standby Operation: alarm only.
RESET CONDITION: Auto Reset or alarm may be manually reset via keypad or by turning the unit
off, then back on again.
NOTE: Follow the steps below until a problem is found. Once a repair or correction has been made, the active
alarm should clear itself (see reset condition above). Operate the unit through the appropriate modes to see if
any active alarm occurs. Continue with the steps below as necessary.
1
Check 1HTCON2
a. Inspect heater contactor coil and
No damage to coil
terminals
No damage or corrosion.
b. Check contactor coil resistance
Refer to Section 2.12 for correct electrical values.
Cannot be opened (infinite ohms), shorted (Zero
Ohms) or shorted to ground.
Refer to Section 2.12 for correct electrical values.
Use ammeter.
c. Check amp draw of coil.
2
3
Check 1HTCON2 Current Draw
Use Component Test Mode to test
actual current draw of the circuit.
(Refer to Section 5.2.2.)
Check 1HTCON2 Wiring
Inspect harness & control box connector pins & terminals. (See wiring
schematic Section 10.)
7−57
Refer to Section 2.12 for correct electrical values
View current draw in Data List.
No physical damage to harness.
No damage, moisture, or corrosion in connectors.
62-11389
Alarm
NO.
93
Steps
Alarm/Cause
Corrective Action
CHECK START UP BUZZER
• TRIGGER–ON: The Buzzer (B) circuit is shorted. (The Buzzer output from the microprocessor
[5MP08] is negative, so the circuit will not be shorted to ground, but is shorted either within the
Buzzer itself, or to a positive wire.)
•
•
UNIT CONTROL: Engine and Standby Operation: alarm only.
RESET CONDITION: Auto Reset when Buzzer amp draw is normal, or alarm may be manually
reset via keypad or by turning the unit off, then back on again.
NOTE: Follow the steps below until a problem is found. Once a repair or correction has been made, the active
alarm should clear itself (see reset condition above). Operate the unit through the appropriate modes to see if
any active alarm occurs. Continue with the steps below as necessary.
1
Check Buzzer
a. Inspect Buzzer & wire
No damage to buzzer.
connections.
No damage or corrosion.
b. Check resistance of buzzer.
2
3
94
Refer to Section 2.12 for correct electrical values.
Cannot be opened (infinite ohms), shorted (Zero
Ohms) or shorted to ground.
Check Buzzer Wiring
Inspect harness & control box connector pins & terminals. (See wiring
schematic Section 10.)
Check Buzzer Current Draw
Use Component Test Mode to test
actual current draw of the circuit.
(Refer to Section 5.2.2.)
No physical damage to harness.
No damage, moisture, or corrosion in connectors.
Refer to Section 2.12 for correct electrical values.
View current draw in Data List.
CHECK COMP CONTACTOR 1
• TRIGGER–ON: Compressor motor contactor relay (CCONR) circuit is shorted. (The relay output
from the microprocessor (4MP5) is negative, so the circuit will not be shorted to ground, but is
shorted either within the relay coil itself, or to a positive wire.).
•
•
UNIT CONTROL: Engine and Standby Operation: alarm only.
RESET CONDITION: Auto Reset or alarm may be manually reset via keypad or by turning the unit
off, then back on again.
NOTE: Follow the steps below until a problem is found. Once a repair or correction has been made, the active
alarm should clear itself (see reset condition above). Operate the unit through the appropriate modes to see if
any active alarm occurs. Continue with the steps below as necessary.
1
Check CCONR
a. Inspect compressor contactor
No damage to coil.
relay coil and terminals.
No damage or corrosion.
b. Check contactor coil resistance.
c. Check amp draw of coil.
2
3
62-11389
Check CCONR Wiring
Inspect harness & control box connector pins & terminals. (See wiring
schematic Section 10.)
Check CCONR Current Draw
Use Component Test Mode to test
actual current draw of the circuit.
(Refer to Section 5.2.2.)
7−58
Refer to Section 2.12 for correct electrical values.
Cannot be opened (infinite ohms), shorted (Zero
Ohms) or shorted to ground.
Refer to Section 2.12 for correct electrical values.
Use ammeter.
No physical damage to harness.
No damage, moisture, or corrosion in connectors.
Refer to Section 2.12 for correct electrical values.
View current draw in Data List.
Alarm
NO.
95
Steps
Alarm/Cause
Corrective Action
CHECK CDCON RELAY COIL
• TRIGGER–ON: Condenser fan motor contactor (CDCON) circuit is shorted. (The contactor output
from the microprocessor (4MP6) is negative, so the circuit will not be shorted to ground, but is
shorted either within the contactor coil itself, or to a positive wire.)
•
•
UNIT CONTROL: Engine and Standby Operation: alarm only.
RESET CONDITION: Auto Reset or alarm may be manually reset via keypad or by turning the unit
off, then back on again.
NOTE: Follow the steps below until a problem is found. Once a repair or correction has been made, the active
alarm should clear itself (see reset condition above). Operate the unit through the appropriate modes to see if
any active alarm occurs. Continue with the steps below as necessary.
1
Check CDCON
a. Inspect condenser fan contactor
No damage to coil.
coil and terminals.
No damage or corrosion.
b. Check contactor coil resistance.
c. Check amp draw of coil.
2
3
Check CDCON Current Draw
Use Component Test Mode to test
actual current draw of the circuit.
(Refer to Section 5.2.2.)
Check CDCON
Inspect harness & control box connector pins & terminals. (See wiring
schematic Section 10.)
7−59
Refer to Section 2.12 for correct electrical values.
Cannot be opened (infinite ohms), shorted (Zero
Ohms) or shorted to ground.
Refer to Section 2.12 for correct electrical values.
Use ammeter.
Refer to Section 2.12 for correct electrical values.
View current draw in Data List.
No physical damage to harness.
No damage, moisture, or corrosion in connectors.
62-11389
Alarm
NO.
96
Steps
Alarm/Cause
Corrective Action
CHECK GENCONR RELAY COIL
• TRIGGER–ON: Generator contactor relay (GENCONR) circuit is shorted. (The relay output from
the microprocessor (4MP7) is negative, so the circuit will not be shorted to ground, but is shorted
either within the relay coil itself, or to a positive wire.)
•
•
UNIT CONTROL: Engine and Standby Operation: alarm only.
RESET CONDITION: Auto Reset or alarm may be manually reset via keypad or by turning the unit
off, then back on again.
NOTE: Follow the steps below until a problem is found. Once a repair or correction has been made, the active
alarm should clear itself (see reset condition above). Operate the unit through the appropriate modes to see if
any active alarm occurs. Continue with the steps below as necessary.
1
Check GENCONR
a. Inspect generator contactor relay
No damage to coil.
coil and terminals.
No damage or corrosion.
b. Check contactor coil resistance.
c. Check amp draw of coil.
2
3
62-11389
Check GENCONR Current Draw
Use Component Test Mode to test
actual current draw of the circuit.
(Refer to Section 5.2.2.)
Check GENCONR Wiring
Inspect harness & control box connector pins & terminals. (See wiring
schematic Section 10.)
7−60
Refer to Section 2.12 for correct electrical values.
Cannot be opened (infinite ohms), shorted (Zero
Ohms) or shorted to ground.
Refer to Section 2.12 for correct electrical values.
Use ammeter.
Refer to Section 2.12 for correct electrical values.
View current draw in Data List.
No physical damage to harness.
No damage, moisture, or corrosion in connectors.
Alarm
NO.
98
Steps
Alarm/Cause
Corrective Action
CHECK HIGH TEMP THERMOSTAT
• TRIGGER–ON: With the Main Power switch toggled out of the OFF position, the 1EVHTS circuit is
open.
• UNIT CONTROL: Alarm AND no heat allowed.
• RESET CONDITION: Auto Reset when the 1EVHTS circuit is okay for 15 minutes, or alarm may be
manually reset via keypad or by turning the unit off, then back on again.
NOTE: Follow the steps below until a problem is found. Once a repair or correction has been made, the active
alarm should clear itself (see reset condition above). Operate the unit through the appropriate modes to see if
any active alarm occurs. Continue with the steps below as necessary.
1
Check Evaporator Area For High Temperature
Check Evaporator temperature using EVHTS opens when the temperature of the
a test thermometer.
evaporator becomes very high (Refer to Section
2.10). (For example, if the heaters are on when the
fan is not running.) If the temperature of the
evaporator section is very warm (hot), it will have to
cool down before the EVHTS closes.
2
Check High Temperature Thermostat (EVHTS)
Inspect thermostat and connector.
No damage to thermostat.
(See wiring schematic Section 10.)
No damage or corrosion in connector.
3
Check High Temperature Contacts
a. Contacts must be closed when
Must be 0 (zero) Ohms. Cannot be opened (infinite
temperature is normal. Unplug
ohms) or shorted to ground.
EVHTS and check for continuity.
b. Check for 12VDC on MPQC9.
12 VDC at MPQC9
Unplug EVHTS and check for 12 VDC at EVHTS pin
A harness connector.
Visually inspect and repair wiring as needed.
7−61
62-11389
Alarm
NO.
99
Steps
Alarm/Cause
Corrective Action
CHECK STANDBY CONTACTOR
• TRIGGER–ON: Standby motor contactor relay (PSCONR) circuit is shorted. (The relay output from
the microprocessor (5MP7) is negative, so the circuit will not be shorted to ground, but is shorted
either within the relay coil itself, or to a positive wire.)
• UNIT CONTROL: Engine and Standby Operation: alarm only. In engine Operation, the unit will continue to operate. In Standby the refrigeration system will not operate.
•
RESET CONDITION: Auto Reset when the PSCONR Coil current (amp) draw is normal, or alarm
may be manually reset via keypad or by turning the unit off, then back on again.
NOTE: Follow the steps below until a problem is found. Once a repair or correction has been made, the active
alarm should clear itself (see reset condition above). Operate the unit through the appropriate modes to see if
any active alarm occurs. Continue with the steps below as necessary.
1
Check PSCONR
a. Inspect standby contactor relay
No damage to coil.
coil and terminals.
No damage or corrosion.
b. Check contactor coil resistance.
c. Check amp draw of coil.
2
3
62-11389
Check PSCONR Current Draw
Use Component Test Mode to test
actual current draw of the circuit.
(Refer to Section 5.2.2.)
Check PSCONR Wiring
Inspect harness & control box connector pins & terminals. (See wiring
schematic Section 10.)
7−62
Refer to Section 2.12 for correct electrical values.
Cannot be opened (infinite ohms), shorted (Zero
Ohms) or shorted to ground.
Refer to Section 2.12 for correct electrical values.
Use ammeter.
Refer to Section 2.12 for correct electrical values.
View current draw in Data List.
No physical damage to harness.
No damage, moisture, or corrosion in connectors.
Alarm
NO.
100
Steps
Alarm/Cause
Corrective Action
OVERLOAD/GROUND FAULT
• TRIGGER–ON: Engine or Standby Operation is being called for and the overload ground fault
module is reading more than 40 Amps on any A/C current leg OR there is A/C voltage leaking to
ground of more than 150 miliamps.
•
UNIT CONTROL:
•
RESET CONDITION: Auto Reset in Engine Operation. Alarm may be manually reset via Keypad or,
alarm may be reset by turning the unit off, then back on again.
Engine Operation: engine and unit shutdown and alarm.
Standby Operation: refrigeration system shutdown and alarm.
NOTE: Follow the steps below until a problem is found. Once a repair or correction has been made, the active
alarm should clear itself (see reset condition above). Operate the unit through the appropriate modes to see if
any active alarm occurs. Continue with the steps below as necessary.
1
Check (Overload Ground Fault Detector (OGF) LED
Check status LED
LED is On - Ground Fault is detected. Start with Step
3 below.
LED is Off - Circuit Overload is detected. Start with
Step 2 below.
2
Check For Electrical Overload
Check high voltage amp draw from
GENCON if running in Engine Operation or PSCON2 if running in
standby Operation.
Must be less than 40 Amps.
3
Check For High Voltage Short To Ground
a. Check resistance between T1, T2 Reading must be greater than 25,000 Ohms.
and T3 for ALL High voltage
contactors to ground.
b. Perform Megohmmeter test on all See Section 8.9.
high voltage circuits.
4
Perform Pretrip Check
a. Clear Active Alarm list, then run Note during which test Alarm 100 occurs.
Pretrip & check for any new alarms.
b. Further test circuit from Step a. Use a megohmmeter to test.
above.
5
Check Overload / Ground Fault Device
With the engine OFF and standby
Must have 12 VDC at HC19 and 2MP26.
power disconnected, start the unit in
Refer to Section 8.9.4 for checking OGF.
Engine Operation.
7−63
62-11389
Alarm
NO.
109
Steps
Alarm/Cause
Corrective Action
CHECK 1EVCON RELAY COIL
• TRIGGER–ON: Evaporator fan motor contactor (1EVCON) circuit is shorted. (The contactor output
from the microprocessor (4MP15) is negative, so the circuit will not be shorted to ground, but is
shorted either within the contactor coil itself, or to a positive wire.)
•
•
UNIT CONTROL: Alarm only
RESET CONDITION: Auto Reset or alarm may be manually reset via keypad or by turning the unit
off, then back on again.
NOTE: Follow the steps below until a problem is found. Once a repair or correction has been made, the active
alarm should clear itself (see reset condition above). Operate the unit through the appropriate modes to see if
any active alarm occurs. Continue with the steps below as necessary.
1
Check 1EVCON
a. Inspect evaporator fan contactor No damage to coil
coil and terminals
No damage or corrosion.
2
3
62-11389
b. Check coil resistance
Cannot be opened (infinite ohms); Shorted (Zero
Ohms) or shorted to ground
c. Check amp draw of coil
Check 1EVCON Current Draw
Use Component Test Mode to test
actual current draw of the circuit.
(Refer to Section 5.2.2.)
Check 1EVCON Wiring
Inspect harness & control box
connector pins & terminals (See wiring schematic Section 10.)
Use ammeter.
7−64
Refer to Section 2.12 for correct electrical values.
View current draw in Data List.
No physical damage to harness.
No damage, moisture, or corrosion in connectors.
Alarm
NO.
121
Steps
Alarm/Cause
Corrective Action
7.8 SENSOR ALARMS
CHECK AMBIENT AIR SENSOR
• TRIGGER–ON: Ambient Air Temperature Sensor (AAT) is not within the range of -53 to +158°F
(-47° to +70° C.)
• UNIT CONTROL:
Engine and Standby Operation: A value of 122°F (50°C) will be used
for any calculations.
• RESET CONDITION: Auto Reset when Ambient Air Sensor is in range or alarm may be manually
resetvia keypad or by turning the unit off, then back on again.
NOTE: Follow the steps below until a problem is found. Once a repair or correction has been made, the active
alarm should clear itself (see reset condition above). Operate the unit through the appropriate modes to see if
any active alarm occurs. Continue with the steps below as necessary.
1
Check Sensor
a. Inspect sensor & connector.
No damage to sensor.
No damage, moisture, or corrosion in connector.
2
b. Check sensor resistance. (See 10,000 Ohms @ 77°F (25°C.) See Table 8−5 for
Note 3 page 7−2.)
complete table of temperatures and resistance
values.
Check Sensor Wiring
a. Inspect harness & control box
No physical damage to harness.
connector pins & terminals. (1MP, No damage, moisture, or corrosion in connectors.
See wiring schematic Section 10.)
b. Power up the microprocessor. See Voltage should be 2.5 VDC volts at harness plug beNote 2 page 7−2. Disconnect
tween pins. This verifies microprocessor output and
sensor from harness. Check for
wiring connections to the sensor.
2.5 VDC at harness plug between
pins.
7−65
62-11389
Alarm
NO.
122
Steps
Alarm/Cause
Corrective Action
CHECK RETURN AIR SENSOR
• TRIGGER–ON: Return Air Temperature Sensor (1RAT) is not within the range of -53 to +158°F (-47
to +70° C.)
• UNIT CONTROL:Engine and Standby Operation:
If Alarm 123 - Check Supply Air Sensor - is not active: alarm only and switch to supply air control.
If Alarm 123 is also active (Cargo Protect Mode, refer to section 4.8.1) and the functional parameter
Temperature Control is set for Return Air and the set point is in the perishable range: alarm and
shutdown.
If Alarm 123 is also active (Cargo Protect Mode, refer to section 4.8.1) and set point is frozen:
alarm and unit will operate in reduced capacity COOL mode. (Refer to Section 4.8.1.)
• RESET CONDITION: Auto Reset when Return Air Sensor is in range or, alarm may be manually
reset via keypad or by turning the unit off, then back on again.
NOTE: Follow the steps below until a problem is found. Once a repair or correction has been made, the active
alarm should clear itself (see reset condition above). Operate the unit through the appropriate modes to see if
any active alarm occurs. Continue with the steps below as necessary.
1
Check Sensor
a. Inspect sensor & connectors.
No damage to sensor
No damage, moisture, or corrosion in connectors.
2
b. Check sensor resistance (See 10,000 Ohms @ 77°F (25°C.) Refer to Table 8−5 for
Note 3, page 7−2.)
complete table of temperatures and resistance
values.
Check Sensor Wiring
a. Inspect harness & control box
No physical damage to harness.
connector pins & terminals. (1MP No damage, moisture, or corrosion in connectors.
& DP16, see wiring schematic
Section 10.)
b. Power up the microprocessor (see Voltage should be 2.5 VDC volts at harness plug beNote 2, page 7−2). Disconnect
tween pins. This verifies microprocessor output and
sensor from harness. Check for
wiring connections to the sensor.
2.5 VDC at harness plug between
pins.
62-11389
7−66
Alarm
NO.
123
Steps
Alarm/Cause
Corrective Action
CHECK SUPPLY AIR SENSOR
• TRIGGER–ON: Supply Air Temperature Sensor (1SAT) is not within the range of -53 to +158°F
(-47 to +70° C.)
• UNIT CONTROL: Engine and standby:
If Alarm 122 is not active and functional parameter Temperature Control is set for Supply Air and
the set point for is in the perishable range: alarm only and switch to return air control.
If Alarm 122 is active: set unit control as described in Alarm 122.
• RESET CONDITION: Auto Reset when Supply Air Sensor is in range or, alarm may be manually
reset via keypad or by turning the unit off, then back on again.
NOTE: Follow the steps below until a problem is found. Once a repair or correction has been made, the active
alarm should clear itself (see reset condition above). Operate the unit through the appropriate modes to see if
any active alarm occurs. Continue with the steps below as necessary.
1
Check Sensor
a. Inspect sensor & connectors.
No damage to sensor.
No damage, moisture, or corrosion in connectors.
2
b. Check sensor resistance. (See 10,000 Ohms @ 77°F (25°C.) See Table 8−5 for
Note 3, page 7−2.)
complete table of temperatures and resistance
values.
Check Sensor Wiring
a. Inspect harness & control box
No physical damage to harness.
connector pins & terminals. (1MP No damage, moisture, or corrosion in connectors.
& DP16, see wiring schematic
Section 10.)
b. Power up the microprocessor (see Voltage should be 2.5 VDC volts at harness plug beNote 2, page 7−2). Disconnect
tween pins. This verifies microprocessor output and
sensor from harness. Check for
wiring connections to the sensor.
2.5 VDC at harness plug between
pins.
7−67
62-11389
Alarm
NO.
Steps
124
•
Alarm/Cause
Corrective Action
CHECK DEFROST TERM 1 SENSOR
TRIGGER–ON: Defrost Termination Temperature Sensor (1DTT) is not within the range of -53° to
+158°F (-47° to +70° C.)
•
UNIT CONTROL: Engine and standby:
If Alarm 122 is not active: alarm and initiate defrost if 1RAT is below 45°F (7.2°C).
If Alarm 122 is also active: alarm and initiate defrost if 1SAT is below 45°F (7.2°C).
Under both of the above conditions, defrost will end after 10 minutes.
If Alarms 122 and 123 are also both active: alarm and defrost will not be allowed.
•
RESET CONDITION: Auto Reset when 1DTT is in range or, alarm may be manually reset via
keypad or by turning the unit off, then back on again.
NOTE: Follow the steps below until a problem is found. Once a repair or correction has been made, the active
alarm should clear itself (see reset condition above). Operate the unit through the appropriate modes to see if
any active alarm occurs. Continue with the steps below as necessary.
1
Check Sensor
a. Inspect sensor & connectors.
No damage to sensor.
No damage, moisture, or corrosion in connectors.
b. Check sensor resistance. (See
Note 3, page 7−2.)
2
10,000 Ohms @ 77°F (25°C.) See Table 8−5 for
complete table of temperatures and resistance values.
Check Sensor Wiring
a. Inspect harness & control box
connector pins & terminals. (1MP
& DP16, see wiring schematic
Section 10.)
No physical damage to harness.
No damage, moisture, or corrosion in connectors.
b. Power up the microprocessor (see Voltage should be 2.5 VDC volts at harness plug
Note 2 page 7−2). Disconnect
between pins. This verifies microprocessor output
sensor from harness. Check for
and wiring connections to the sensor.
2.5 VDC at harness plug between
pins.
62-11389
7−68
Alarm
NO.
125
Steps
Alarm/Cause
Corrective Action
CHECK COMP DISCHARGE SENSOR
• TRIGGER–ON: Compressor Discharge Temperature Sensor (CDT) is not within the range of –40°
to +392°F (-40° to +200°C.)
• UNIT CONTROL: Engine and Standby Operation: Alarm Only.
• RESET CONDITION: Auto Reset when Compressor Discharge Sensor is in range or, alarm may be
manually reset via keypad or by turning the unit off, then back on again.
NOTE: Follow the steps below until a problem is found. Once a repair or correction has been made, the active
alarm should clear itself (see reset condition above). Operate the unit through the appropriate modes to see if
any active alarm occurs. Continue with the steps below as necessary.
1
Check Sensor
a. Inspect sensor & connector.
No damage to sensor.
No damage, moisture, or corrosion in connector.
b. Check sensor resistance. (See 100,000 Ohms @ 77°F (25°C) See Table 8−6 for
Note 3, page 7−2.)
complete resistance chart.)
2
126
Check Compressor Discharge Sensor Wiring
a. Inspect harness & control box
No physical damage to harness.
connector pins & terminals. (1MP, No damage, moisture, or corrosion in connectors.
see wiring schematic Section 10.)
b. Power up the microprocessor (see Voltage should be 2.5 VDC volts at harness plug beNote 2 page 7−2). Disconnect
tween pins. This verifies microprocessor output and
sensor from harness. Check for
wiring connections to the sensor.
2.5 VDC at harness plug between
pins.
CHECK FUEL SENSOR CIRCUIT
• TRIGGER–ON: The fuel level sensor is configured as a 0-5VDC or 0.25-4.75VDC sensor and the
reading (in the data list) is less than 2% for 30 seconds.
• UNIT CONTROL:
Engine Operation: Alarm Only.
Standby Operation: This alarm does not activate in standby.
• RESET CONDITION: Auto Reset when fuel level is sensed above 4% for 30 seconds or, alarm may
be manually reset via keypad or by turning the unit off, then back on again.
NOTE: Follow the steps below until a problem is found. Once a repair or correction has been made, the active
alarm should clear itself (see reset condition above). Operate the unit through the appropriate modes to see if
any active alarm occurs. Continue with the steps below as necessary.
1
Check For Low Fuel Level
Check fuel level in tank.
Add fuel as needed.
2
Check Sensor Fuse & Wiring
Perform sensor check procedure,
NOTE: If new sensor is not available, the sensor may
refer to Section 8.5.6
be configured OFF temporarily. Refer to Section
5.2.1 - Configurations.)
7−69
62-11389
Alarm
NO.
127
Steps
Alarm/Cause
Corrective Action
CHECK SUCTION TEMP SENSOR
• TRIGGER–ON: Compressor Suction Temperature Sensor (CST) is not within the range of -53 to
+158°F (-47 to +70° C.)
• UNIT CONTROL: Engine and Standby Operation: alarm only.
• RESET CONDITION: Auto Reset or alarm may be manually reset via keypad or by turning the unit
off, then back on again.
NOTE: Follow the steps below until a problem is found. Once a repair or correction has been made, the active
alarm should clear itself (see reset condition above). Operate the unit through the appropriate modes to see if
any active alarm occurs. Continue with the steps below as necessary.
1
Check Sensor
a. Inspect sensor & connector
No damage to sensor
No damage, moisture, or corrosion in connector
2
128
b. Check sensor resistance (See 10,000 Ohms @ 77°F (25°C.) See Table 8−5 for
Note 3, page 7−2.)
complete table of temperatures and resistance
values.
Check Sensor Wiring
a. Inspect harness & control box
No physical damage to harness.
connector pins & terminals. (1MP, No damage, moisture, or corrosion in connectors.
see wiring schematic Section 10.)
b. Power up the microprocessor (see Voltage should be 2.5 VDC volts at harness plug beNote 2 page 7−2). Disconnect
tween pins. This verifies microprocessor output and
sensor from harness. Check for
wiring connections to sensor.
2.5 VDC at harness plug between
pins.
LOW/UNBALANCED A/C AMPS
• TRIGGER–ON: The compressor is on and AC Current Sensor 1 or 2 is less than 5 amps for 10
seconds OR If the difference between AC Current 1 and AC Current 2 is greater than 10 amps for
10 seconds.
• UNIT CONTROL: Engine and Standby Operation: alarm only.
• RESET CONDITION: Change unit to Standby Operation when AC Current Sensor 1 and 2 is greater than 7 amps for 5 minutes AND difference between AC Current 1 and AC Current 2 is less than
7 amps for 5 minutes OR alarm may be manually reset via keypad or by turning the unit off, then
back on again.
NOTE: Follow the steps below until a problem is found. Once a repair or correction has been made, the active
alarm should clear itself (see reset condition above). Operate the unit through the appropriate modes to see if
any active alarm occurs. Continue with the steps below as necessary.
1
Perform Pretrip Check
Clear Active Alarm list, then run Pre- Any active alarms must be corrected and cleared
trip & check for any new alarms.
before proceeding.
2
62-11389
Check Current Draw
a. Use a clamp around A/C ammeter
to check amps at power wires.
Must be "1.0 Amp of reading in Data List.
b. Check A/C amps with compressor
running.
Must be greater than 5 Amps.
c. Compare A/C Amp readings
between L1-L2-L3.
Maximum allowable difference is 10 Amps.
7−70
Alarm
NO.
129
Steps
Alarm/Cause
Corrective Action
CHECK ENG COOLANT SENSOR
• TRIGGER–ON: Engine Coolant Temperature Sensor (ENCT) is not within the range of -58 to
+266°F (-50 to +130°C).
• UNIT CONTROL:
Engine Operation: Alarm Only.
Standby Operation: This alarm does not activate in standby.
•
RESET CONDITION: Auto Reset or alarm may be manually reset via keypad or by turning the unit
off, then back on again.
NOTE: Follow the steps below until a problem is found. Once a repair or correction has been made, the active
alarm should clear itself (see reset condition above). Operate the unit through the appropriate modes to see if
any active alarm occurs. Continue with the steps below as necessary.
1
Check Sensor
a. Inspect sensor & connector.
No damage to sensor.
No damage, moisture, or corrosion in connector.
b. Check sensor resistance. (See
Note 3, page 7−2.)
2
10,000 Ohms @ 77°F (25°C.) See Table 8−5 for
complete table of temperatures and resistance
values.
Check Sensor Wiring
a. Inspect harness & control box
connector pins & terminals. (1MP,
see wiring schematic Section 10).
b. Power up the microprocessor (see
Note 2 page 7−2). Disconnect
sensor from harness. Check for
2.5 VDC at harness plug between
pins.
7−71
No physical damage to harness.
No damage, moisture, or corrosion in connectors.
Voltage should be 2.5 VDC volts at harness plug between pins. This verifies microprocessor output and
wiring connections to sensor.
62-11389
Alarm
NO.
130
Steps
Alarm/Cause
Corrective Action
CHECK ENGINE RPM SENSOR
• TRIGGER–ON: When in Engine Operation only. If ambient temperature is above 32°F (0°C), and
this is the second or third start attempt, and the engine oil pressure switch is closed (oil pressure
good), and engine RPM is sensed at less than 1000; OR, if ambient is below 32°F (0°C) and the
DC amp draw is more than 2 amps, and this is the second or third start attempt, and engine RPM is
sensed at less than 1000.
•
•
UNIT CONTROL: Alarm Only and engine will be considered running.
RESET CONDITION: Auto Reset in Auto Start when engine speed is greater than 1,000 RPM or
alarm may be manually reset via keypad or by turning the unit off, then back on again.
NOTE: Follow the steps below until a problem is found. Once a repair or correction has been made, the active
alarm should clear itself (see reset condition above). Operate the unit through the appropriate modes to see if
any active alarm occurs. Continue with the steps below as necessary.
1
Check Alarm List
Check for Alarm 41.
When alarms 41 and 130 occur at the same time,
generally, the engine has run out or is running out of
fuel. This causes the engine to surge. Check fuel in
tank and add fuel as necessary.
Check fuel lines between the fuel tank and the fuel
pump inlet to endure air is not being drawn in.
62-11389
2
Check Engine Speed Sensor (ENSSN)
a. Inspect circuit from ENSCU No damage to sensor or wiring.
terminal 3 to microprocessor No damage, moisture, or corrosion in connector.
connection 2MP18 & connector.
b. Compare actual engine speed with Must be ± 20 RPM.
that shown on the display using
Must be a steady reading.
hand held tachometer.
c. Check for 12 VDC between
Must be 12 VDC.
ENSSN 12V terminal & ENSSN
ground.
d. Check for 12 VDC at ENSSU
Must be 12 VDC.
terminal 25 to ground
3
Check Circuits With Test Sensor
Substitute known good sensor and
check Unit Data reading (Refer to
Section 3.13).
7−72
Must be within ± 20 RPM of reading on tachometer.
Alarm
NO.
131
Steps
Alarm/Cause
Corrective Action
CHECK EVAP TEMP SENSOR
• TRIGGER–ON: Evaporator Outlet Temperature Sensor (EVOT) is not within the range of -53 to
+158°F (-47 to +70°C.)
• UNIT CONTROL:
Engine and standby: alarm only and superheat for EVXV will be
calculated using SAT.
• RESET CONDITION: Auto Reset when Evap Temp Sensor is in range or, alarm may be manually
reset via keypad or by turning the unit off, then back on again.
NOTE: Follow the steps below until a problem is found. Once a repair or correction has been made, the active
alarm should clear itself (see reset condition above). Operate the unit through the appropriate modes to see if
any active alarm occurs. Continue with the steps below as necessary.
1
Check Sensor
a. Inspect sensor & connector.
No damage to sensor.
No damage, moisture, or corrosion in connector.
2
b. Check Evap Temp Sensor
resistance. (See Note 3, page
7−2.)
Check Sensor Wiring
a. Inspect harness & control box
connector pins & terminals. (1MP
& DP16, see wiring schematic
Section 10.)
10,000 Ohms @ 77°F (25°C.) See Table 8−5 for
complete table of temperatures and resistance
values.
No physical damage to harness.
No damage, moisture, or corrosion in connectors.
b. Power up the microprocessor (see Voltage should be 2.5 VDC volts at harness plug beNote 2 page 7−2). Disconnect
tween pins. This verifies microprocessor output and
sensor from harness. Check for
wiring connections to sensor.
2.5 VDC at harness plug between
pins.
7−73
62-11389
Alarm
NO.
133
134
135
Steps
Alarm/Cause
Corrective Action
CHECK REMOTE TEMP SENSOR 1
CHECK REMOTE TEMP SENSOR 2
CHECK REMOTE TEMP SENSOR 3
• TRIGGER–ON: Remote Temperature Sensor (REMSN1, REMSN2 or REMSN3) is not within the
range of -53 to +158°F (-47 to +70°C.)
• UNIT CONTROL: Engine and Standby Operation: Alarm only.
• RESET CONDITION: Auto Reset when Remote Temperature Sensor is in range or, alarm may be
manually reset via keypad or by turning the unit off, then back on again.
NOTE: Follow the steps below until a problem is found. Once a repair or correction has been made, the active
alarm should clear itself (see reset condition above). Operate the unit through the appropriate modes to see if
any active alarm occurs. Continue with the steps below as necessary.
IF A SENSOR IS INSTALLED
1
Check Sensor
a. Inspect sensor & connector.
No damage to sensor.
No damage, moisture, or corrosion in connector.
2
b. Check Remote Temp Sensor
resistance (See Note 3, page
7−2.)
Check Wiring
a. Inspect harness & control box
connector pins & terminals. (1MP
& REM,SN see wiring schematic
Section 10.)
10,000 Ohms @ 77°F (25°C.) See Table 8−5 for
complete table of temperatures and resistance
values.
No physical damage to harness.
No damage, moisture, or corrosion in connectors.
b. Power up the microprocessor (see Voltage should be 2.5 VDC volts at harness plug beNote 2 page 7−2). Disconnect
tween pins. This verifies microprocessor output and
sensor from harness. Check for
wiring connections to sensor.
2.5 VDC at harness plug between
pins.
IF A SENSOR IS NOT INSTALLED
Locate and inspect 10 position conConnector must have cap on,
nector for optional sensors and
No corrosion or moisture inside connector.
switches (REMSN, see wiring sche- If there is a problem with the connector and there are
matic Section 10).
no remote sensors or switches in the unit, the connector may be removed and each individual wire separated from the others, terminated and insulated with
heat shrink.
62-11389
7−74
Alarm
NO.
Steps
Alarm/Cause
Corrective Action
7.9 PRETRIP ALARMS
P141 PRETRIP STOPPED BY USER
• TRIGGER–ON: Pretrip cycle was stopped by user before the Pretrip cycle ended automatically.
• UNIT CONTROL: Engine and Standby Operation: Alarm Only.
• RESET CONDITION: Alarm may be manually reset via keypad or by turning the unit off, then back on
again.
NOTE: Follow the steps below until a problem is found. Once a repair or correction has been made, clear the
alarm(s). (See Note 1 page 7−2.) Operate the unit through the appropriate modes to see if any active alarm
occurs. Continue with the steps below as necessary.
1
Check For Any Pretrip Alarms
Scroll the alarm list for any Active
Alarm conditions must be corrected and the alarm
Pretrip alarms.
cleared to continue.
2
Rerun Pretrip Check (If Desired)
a. Clear Active Alarm List, then run Unit is in Pretrip. Check for any new alarms.
Pretrip & check for any new alarms.
b. Allow to terminate automatically.
Pretrip cycle operates normally.
P144 CHECK UL1 CIRCUIT
• TRIGGER–ON: Normal Amps for the Front Unloader (UL1) Circuit is 0.75 to 2.0 Amps. The circuit
tests outside this range.
• UNIT CONTROL: Engine and Standby Operation: Pretrip will fail in test 2 and display “PRETRIP
FAIL AND COMPLETED”.
•
RESET CONDITION: Auto Reset if Pretrip is started again, or alarm may be manually reset via
keypad or by turning the unit off, then back on again.
Check UL1 circuit - refer to procedure for alarm 85
7−75
62-11389
Alarm
NO.
Steps
Alarm/Cause
Corrective Action
P145 CHECK SPEED SOL CIRCUIT
• TRIGGER–ON: Normal Amps for the Speed Solenoid Circuit is 0 to 1.0 Amps. The circuit tests outsidethis range.
• UNIT CONTROL: Alarm Only
• RESET CONDITION: Auto Reset if Pretrip is started again or alarm may be manually reset via
keypad or by turning the unit off then back on again.
1
Check For Bad F2 Or F3 Fuse Alarm
Check for Alarm 71.
Alarm conditions must be corrected and the alarm
cleared to continue.
2
Check Speed Circuit To ENSCU And FSA
a. Check voltage to ENSCU and amp Use Component Test mode to energize the Speed
draw of engine speed control circuit Relay. (Section 5.2.2)
(ENSCU) pin 16 and MPQC3 on the Refer to Section 2.12 for amp values.
microprocessor.
View current draw in the Unit Data. (Refer to Section
3.13).
Check voltage at ENSCU16 and ground. Must be 11
VDC or higher.
b. Check operation of Speed Relay LED 27 must be ON when the Speed Relay is ON in
LED
component Test Mode.
3
Check Engine Speed Control Unit (ENSCU)
a.Check resistance of FSA
Refer to Section 2.12. With FSA unplugged, ohm
spec is 3 to 4 ohms, $ 10%.
b. Inspect ENSCU and wiring
4
62-11389
No physical damage to harness.
No damage, moisture, or corrosion in connectors.
No damage to ENSCU
Check ENSCU Circuit Wiring
Inspect harness & control box connector pins & terminals (See wiring
schematic)
7−76
No physical damage to harness.
No damage, moisture, or corrosion in connectors.
Alarm
NO.
Steps
Alarm/Cause
Corrective Action
P151 CHECK GLOW PLUG CIRCUIT (This applies to the Intake Air Heater)
• TRIGGER–ON: Normal Amps for the Intake Air Heater Circuit is 23 to 75 Amps after 15 seconds.
The circuit tests outside this range.
• UNIT CONTROL: Alarm Only
• RESET CONDITION: Auto Reset if Pretrip is started again or alarm may be manually reset via
keypad or by turning the unit off then back on again.
Check glow plug circuit - refer to procedure for alarm 40
P152 CHECK FUEL SOLENOID CIRC
• TRIGGER–ON: Normal Amps for the Fuel Solenoid Hold Circuit is 0.2 to 4.5 Amps (including
possible electric fuel pump). The circuit tests outside this range.
• UNIT CONTROL: Alarm Only
• RESET CONDITION: Auto Reset if Pretrip mode is started again, or Alarm may be manually reset
via
Keypad or by turning the unit off, then back on again.
NOTE: Follow the steps below until a problem is found. Once a repair or correction has been made, clear the
alarm(s). (See Note 1) Operate the unit through the appropriate modes to see if any active alarm occurs.
Continue with the steps below as necessary.
1
Check for bad F2 or F3 fuse alarm
Check for alarm 71
Alarm conditions must be corrected and the alarm
cleared to continue.
2
Check fuel and speed actuator (FSA)
a. Check resistance of FSA
Refer to Section 2.12.
b. Check amp draw between MPQC4 Use Component Test Mode (Section 5.2.2) to test.
& terminal 13 of the ENSCU.
Refer to Section 2.12 for amp values.
3
Check FSA & circuits
a. Inspect FSA and wiring
No physical damage to harness.
No damaged or corroded pins
No damage to component
With microprocessor powered, see Note 2. LED 28
must be ON.
b. Check operation of Run Relay
c. Check voltage to FSA
With microprocessor powered, see Note 2. OR
component test mode, 12 VDC between engine
speed control unit (ENSCU) pins 13 and 19.
With Main Power switch not in the OFF position, 12
VDC between ENSCU pins 24 and 19.
7−77
62-11389
Alarm
NO.
Steps
Alarm/Cause
Corrective Action
P153 CHECK RETURN AIR SENSOR
• TRIGGER–ON: Return Air Temperature Sensor (1RAT) is not within the range of -53 to +158°F
(-47 to +70°C.)
•
UNIT CONTROL:
•
RESET CONDITION: Auto Reset if Pretrip is started again, or alarm may be manually reset via
keypad or by turning the unit off, then back on again.
Engine and Standby Operation: Pretrip will fail and display
“PRETRIP FAIL AND COMPLETED”.
Check Sensor - refer to procedure for alarm 122
P154 CHECK SUPPLY AIR SENSOR
• TRIGGER–ON: Supply Air Temperature Sensor (1SAT) is not within the range of -53 to +158°F (-47
to +70°C.)
• UNIT CONTROL:
Engine and Standby Operation: Pretrip will fail and display
“PRETRIP FAIL AND COMPLETED”.
• RESET CONDITION: Auto Reset if Pretrip is started again, or alarm may be manually reset via
keypad or by turning the unit off, then back on again.
Check Sensor - refer to procedure for alarm 123
P155 CHECK COOLANT TEMP SENSOR
• TRIGGER–ON: Engine Coolant Temperature Sensor (ENCT) is not within the range of
-58 to +266°F (-50 to +130°C.)
• UNIT CONTROL:
Engine and Standby Operation: Pretrip will fail and display
“PRETRIP FAIL AND COMPLETED”.
• RESET CONDITION: Auto Reset if Pretrip is started again, or alarm may be manually reset via
keypad or by turning the unit off, then back on again.
Check Sensor - refer to procedure for alarm 129
P156 CHECK BATTERY VOLTS
• TRIGGER–ON: Battery voltage is less than 11 VDC or greater than 17 VDC.
• UNIT CONTROL: Engine and Standby Operation: Pretrip will fail and display “PRETRIP FAIL AND
COMPLETED”.
• RESET CONDITION: Auto Reset if Pretrip is started again, or alarm may be manually reset via
keypad or by turning the unit off, then back on again.
NOTE: Follow the steps below until a problem is found. Once a repair or correction has been made, clear the
alarm(s). (See Note 1 page 7−2.) Operate the unit through the appropriate modes to see if any active alarm
occurs. Continue with the steps below as necessary.
Refer to procedure for alarm 15 for high voltage condition or procedure for alarm 16
for low voltage condition
62-11389
7−78
Alarm
NO.
Steps
Alarm/Cause
Corrective Action
P157 CHECK BATTERY CURRENT
• TRIGGER–ON: With all circuits off, current flow of more than 1.5 amps is detected in the 12 VDC
electrical circuits.
NOTE: If this alarm occurs, Pretrip Test #2 will not be performed. You will need to run
pretrip again.
• UNIT CONTROL:
Engine and Standby Operation: Pretrip will fail and display
“PRETRIP FAIL AND COMPLETED”.
• RESET CONDITION: Auto Reset if Pretrip is started again, or alarm may be manually reset via
keypad or by turning the unit off, then back on again.
NOTE: Follow the steps below until a problem is found. Once a repair or correction has been made, clear the
alarm(s). (See Note 1 page 7−2.) Operate the unit through the appropriate modes to see if any active alarm
occurs. Continue with the steps below as necessary.
1
Check No Load Current Draw
a. Energize circuit (refer to Note 2 Reading is less than 1.5 Amps.
page 7−2). Observe current draw
on microprocessor display.
b. Disconnect F5 wire and remove Without wire in sensor, reading should be 0 +/- 1
from inside DC current sensor (see amp.
Figure 2−9, page 2−12). Reconnect NOTE: Ensure wire is rerouted through sensor prior
at F5 and power the microprocessor to returning unit to service.
by toggling the Main Power switch
out of the OFF position.
2
Check Individual Circuits
Isolate individual circuits and test
Must be in range. (Refer to Section 2.12 for correct
amp draw.
electrical values.)
3
Check for parasitic loads.
Check for electrical loads that are
drawing current with all circuits OFF
Check for non-factory installed devices such as lift
gates, inside lights, satellite systems, etc. These
devices must be wired so as to not draw current
during Pretrip testing.
P158 CHECK AMBIENT AIR SENSOR
• TRIGGER–ON: Ambient Air Temperature Sensor (AAT) is not within the range of -53 to +158°F
(-47 to +70°C.)
• UNIT CONTROL:
Engine and Standby Operation: Pretrip will fail and display
“PRETRIP FAIL AND COMPLETED”.
• RESET CONDITION: Auto Reset if Pretrip is started again, or alarm may be manually reset via
keypad or by turning the unit off, then back on again.
Check Sensor - refer to procedure for alarm 121
7−79
62-11389
Alarm
NO.
Steps
Alarm/Cause
Corrective Action
P159 CHECK DEFROST TERM 1 SENSOR
• TRIGGER–ON: Defrost Termination Temperature Sensor (1DTT) is not within the range of -53 to
+158°F (-47 to +70°0 C.)
• UNIT CONTROL:
Engine and Standby Operation: Pretrip will fail and display
“PRETRIP FAIL AND COMPLETED”.
• RESET CONDITION: Auto Reset if Pretrip is started again, or alarm may be manually reset via
keypad or by turning the unit off, then back on again.
Check Sensor - refer to procedure for alarm 124
P160 CHECK DISCHARGE TEMP SENSOR
• TRIGGER–ON: Compressor Discharge Temperature Sensor (CDT) is not within the range of
-40 to +392°F (-40 to +200°C. )
• UNIT CONTROL:
Engine and Standby Operation: Pretrip will fail and display
“PRETRIP FAIL AND COMPLETED”.
• RESET CONDITION: Auto Reset if Pretrip is started again or alarm may be manually reset via
keypad or by turning the unit off then back on again.
Check Sensor - refer to procedure for alarm 125
P161 CHECK SUCTION TEMP SENSOR (CST)
• TRIGGER–ON: Suction Temp Sensor (CST) is not within the range of -53° to +158°F
(-47° to +70°C.)
•
UNIT CONTROL:
•
RESET CONDITION: Auto Reset when suction temperature sensor is in range or, alarm may be
manually reset via keypad or by turning the unit off, then back on again.
Engine and Standby Operation: Pretrip will fail and display
“PRETRIP FAIL AND COMPLETED”.
Check Sensor - refer to procedure for alarm 127
P164 CHECK UL2 CIRCUIT
• TRIGGER–ON: Normal Amps for the Rear Unloader (UL2) Circuit is 0.75 to 2.0 Amps. The circuit
tests outside this range.
•
UNIT CONTROL:
•
RESET CONDITION: Auto Reset if Pretrip is started again, or alarm may be manually reset via
keypad or by turning the unit off, then back on again.
Engine and Standby Operation: Pretrip will fail in test 2 and display
“PRETRIP FAIL AND COMPLETED”.
Check UL2 circuit - refer to procedure for alarm 86
62-11389
7−80
Alarm
NO.
Steps
Alarm/Cause
Corrective Action
P174 CHECK LOW SPEED RPM
• TRIGGER–ON in Test #5: With Speed Relay turned off, engine speed is NOT between 1250 and
1450 rpm.
•
•
•
TRIGGER–ON in Test #7: 15 seconds after the High Speed Pretrip Test #6, engine speed has NOT
dropped back to the low speed range (within 15 seconds) as shown above.
Note: This test will be skipped if the RPM sensor alarm (A130) is active.
UNIT CONTROL:
Engine Operation: Pretrip will fail and display
“PRETRIP FAIL AND COMPLETED”.
Standby Operation: This test is not made.
RESET CONDITION: Auto Reset if Pretrip is started again or alarm may be manually reset via
keypad or by turning the unit off then back on again.
NOTE: Follow the steps below until a problem is found. Once a repair or correction has been made, clear the
alarm(s). (See Note 1 page 7−2.) Operate the unit through the appropriate modes to see if any active alarm
occurs. Continue with the steps below as necessary.
1
Check Model Number
Verify that the model number on the Enter the correct number in Configurations. Refer to
nameplate matches the model num- Section 5.2.1
ber shown in the microprocessor Unit Data.
2
3
Check the fuel/speed actuator
Check FSA plunger.
Must move in and out freely.
Verify low speed operation (See Note 5 page 7−2)
a. Set Functional Parameter “LOW LED 27 must be OFF.
SPEED START” for a high number
(30 to 90) then start the unit.
Set Functional Parameter back
to
original
setting
after
completing repairs.
b. Check operation of Speed Relay LED 27 must be OFF.
LED.
c. Check voltage to FSA.
Must be 0 VDC.
d. Check for 12 VDC on engine speed Must be 12 VDC.
control unit (ENSCU) pin 22.
4
Check for proper voltage to the Engine Speed Control Unit (ENSCU) Pin 16 Based On
Requested Speed From The Microprocessor
Check voltage at pin 16 with unit run- Must be 0 VDC.
ning.
5
Check engine RPM
a. Check actual engine RPM using Check Speed Control System, refer to Section 9.5
hand held tachometer.
b. Compare actual RPM with those Both readings within ± 50 RPM.
shown on display.
6
7
Check engine intake air system
a. Check air cleaner indicator.
b. Inspect air intake system.
Flag must not be visible.
Hoses & tubes in good condition.
No kinks or restrictions.
Check engine exhaust system
Inspect the exhaust system.
Must be clear and unobstructed.
7−81
62-11389
Alarm
NO.
Steps
Alarm/Cause
Corrective Action
P175 CHECK HIGH SPEED RPM
• TRIGGER–ON: With Speed Relay energized (voltage at the Engine Speed Control Unit for high
speed operation), engine RPM is NOT between 1700 and 1900.
• UNIT CONTROL:
Engine Operation: Pretrip will fail and display
“PRETRIP FAIL AND COMPLETED”.
Standby Operation: This test is not made.
• RESET CONDITION: Auto Reset if Pretrip is started again, or Alarm may be manually reset via
Keypad or by turning the unit off, then back on again.
NOTE: Follow the steps below until a problem is found. Once a repair or correction has been made, clear the
alarm(s). (See Note 1 page 7−2.) Operate the unit through the appropriate modes to see if any active alarm
occurs. Continue with the steps below as necessary.
1
Check Model Number
Verify that the model number on the Enter the correct number in the data list. (Refer to
nameplate matches the model num- Section 3.13.)
ber shown in the microprocessor Unit Data.
2
3
Check the fuel/speed actuator
Check FSA plunger.
Must move in and out freely.
Force high speed operation (See Note 5 page 7−2)
a. Set Functional Parameter “LOW LED 27 must be ON.
SPEED START” to zero and adjust
set point at least 10°F (5.6°C)
above or below refrigerated compartment temperature then start the
unit.
Set Functional Parameter back
to original setting after completing repairs.
b. Check operation of Speed Relay.
c. Check voltage to FSA.
d. Check resistance of FSA.
e. Check amp draw of FSA.
4
LED 27 must be ON.
Must be 12-14 VDC.
Refer to Section 2.12 for correct electrical values.
Use Component Test Mode to energize the Speed
Relay circuit. (Section 5.2.2.)
Refer to Section 2.12 for correct electrical values.
View current draw in the Unit Data. (Refer to Section
3.13.
f. Inspect harness & control box No physical damage to harness.
connector pins & terminals. (See No damage, moisture, or corrosion in connectors.
wiring schematic Section 10.)
Check for proper voltage to the Engine Speed Control Unit (ENSCU) Pin 16 Based On
Requested Speed From The Microprocessor
Check 12 VDC at pin 16 with unit
running.
5
Must be 12 VDC when the microprocessor is calling
for high speed.
Check engine RPM
a. Check actual engine RPM using Check Speed Control System, refer to Section 9.5
hand held tachometer.
b. Compare actual RPM with those Both readings within ± 50 RPM.
shown on display.
Additional steps on the next page.
62-11389
7−82
Alarm
NO.
Steps
Alarm/Cause
Corrective Action
P175 CHECK HIGH SPEED RPM - Continued
6
Check engine air-intake system
a. Check air cleaner indicator.
b. Inspect air intake system.
7
Flag must not be visible.
Hoses & tubes in good condition.
No kinks or restrictions.
Check engine exhaust system
Inspect the exhaust system.
Must be clear and unobstructed.
7−83
62-11389
Alarm
NO.
Steps
Alarm/Cause
Corrective Action
P177 CHECK EVAP SUPERHEAT
• TRIGGER–ON: With the unit running in Test 12, after the microprocessor closes the EVXV to 0%,
evaporator pressure fails to drop by 20 psig (1.36 bar) or fails to go below 0 psig / bar OR the
EVXV appears not to be opening to the full capacity position.
• UNIT CONTROL:
Engine and Standby Operation: Pretrip will fail and display
“PRETRIP FAIL AND COMPLETED”.
• RESET CONDITION: Auto Reset if Pretrip is started again or alarm may be manually reset via
keypad or by turning the unit off then back on again.
NOTE: Follow the steps below until a problem is found. Once a repair or correction has been made, clear the
alarm(s). (See Note 1 page 7−2.) Operate the unit through the appropriate modes to see if any active alarm
occurs. Continue with the steps below as necessary.
1
Check Refrigerant Level
Check refrigerant charge.
Refer to Section 8.6.2.
2
Check System Pressures
Install manifold gauge set and check Suction and Evaporator Outlet pressures must be
and compare compressor disabove 3 psig (0.2 bar.)
charge & suction pressures with
those shown on the microprocessor Suction, Evaporator Outlet & Discharge Pressures
display.
must have the same reading on gauges & on
microprocessor display.
NOTE: Microprocessor Suction (CSP) and
Evaporator (EVOP) pressure readings have a
maximum value of 100 psig (7.5 bar.) The actual
pressure must be lower than 100 psig in order to
perform this test.
3
Check EVXV
a. Visually inspect EVXV for
damage.
Check to see if coil is seated on valve properly.
b. Inspect EVXV coil and wire
connections.
No physical damage to harness.
No damage, moisture, or corrosion in connectors.
c. Check coil resistance.
d. Check EVXV operation.
e. Check basic refrigeration system.
f. Check the EVXV electrical
system.
See Section 8.8.6.
See Section 8.8.6.
Pressures normal. Compressor operation normal.
Check for good continuity in all circuits from micro to
EVXV.
g. Inspect component and wire
connections.
No physical damage to harness.
No damage, moisture, or corrosion in connectors.
h. Inspect harness & control box No physical damage to harness.
connector pins & terminals. (See No damage, moisture, or corrosion in connectors.
wiring schematic Section 10.)
62-11389
7−84
Alarm
NO.
Steps
Alarm/Cause
Corrective Action
P178 CHECK UL1
• TRIGGER–ON: The pressure differential between suction and discharge pressures did not change
as expected when the Front Unloader (UL1) was de-energized / loaded (discharge pressure should
rise and suction pressure should drop) or when it was energized / unloaded (discharge pressure
should drop and suction pressure should rise.
• UNIT CONTROL:
Engine and Standby Operation: Pretrip will fail in test 13 and display
“PRETRIP FAIL AND COMPLETED”.
• RESET CONDITION: Auto Reset if Pretrip is started again or alarm may be manually reset viakeypad or by turning the unit off then back on again.
NOTE: Follow the steps below until a problem is found. Once a repair or correction has been made, clear the
alarm(s). (See Note 1 page 7−2.) Operate the unit through the appropriate modes to see if any active alarm
occurs. Continue with the steps below as necessary.
1
Check wiring to DPT & SPT
a. Verify that correct wires are con- Plugs to transducers are the same. The correct wire
nected to each transducer.
plug must be connected to the proper transducer.
2
3
b. Verify that correct transducer is be- Mechanical connections to transducers are the
ing used in each position.
same.
The Discharge Transducer should have a RED marking dot on it.
The Suction Transducer should have a BLUE marking dot on it.
Check for Check UL1 Alarm
Check for alarm 85 or P144.
Alarm conditions must be corrected and the alarm
cleared to continue.
Confirm Compressor Suction Pressure Transducer Is Working
a. Check transducer operation
Refer to Section 8.8.8
b. Check Schrader valve fitting under Must not be physically damaged, depressor must
each transducer
fully open valve to allow pressure to transducer
a. Verify the correct Transducer is in Verify by part number or colored dot that the correct
place.
Transducer is installed for the SPT.
4
5
Check System Pressures
Install manifold gauge set and check
and compare compressor discharge
& suction pressures with those
shown on the microprocessor display.
Suction and Evaporator Outlet pressures must be
above 3 psig (0.2 bar.)
Suction, Evaporator Outlet & Discharge Pressures
must have the same reading on gauges & on microprocessor display.
NOTE: Microprocessor Suction (CSP and Evaporator (EVOP) pressure readings have a maximum
value of 100 psig (7.5 bar.) The actual pressure
must be lower than 100 psig in order to perform
this test.
Check Front Unloader (UL1) Operation - Unit must be running
(See Note 5 page 7−2)
Check operation of Front Unloader See Section 8.7.6
(UL1).
Unloader must load and unload properly.
7−85
62-11389
Alarm
NO.
Steps
Alarm/Cause
Corrective Action
P180 CHECK SUCTION MOD VALVE
• TRIGGER–ON: With the unit running in Pretrip Test #11, after the microprocessor attempts to close
CSMV, the suction pressure fails to drop below 4in. Hg (-0.14 bar.)
•
UNIT CONTROL:
•
RESET CONDITION: Auto Reset if Pretrip is started again or alarm may be manually reset via
keypad or by turning the unit off then back on again.
Engine and Standby Operation: Pretrip will fail and display
“PRETRIP FAIL IN TEST 11”.
NOTE: Follow the steps below until a problem is found. Once a repair or correction has been made, clear the
alarm(s). (See Note 1 page 7−2.) Operate the unit through the appropriate modes to see if any active alarm
occurs. Continue with the steps below as necessary.
1
Check Software Revision Level
Upgrade software.
Install (or have Carrier Transicold dealer install) latest
revision.
2
3
Check wiring to DPT & SPT
a. Verify that correct wires are con- Plugs to transducers are the same. The correct wire
nected to each transducer.
plug must be connected to the proper transducer.
b. Verify that correct transducer is be- Mechanical connections to transducers are the
ing used in each position.
same.
The Discharge Transducer should have a RED marking dot on it.
The Suction Transducer should have a BLUE marking dot on it.
Check Compressor Operation
Check compressor operation.
Refer to Section 8.7.1.
If compressor does not pass all tests, repair or replace compressor.
4
Check Suction Modulating Valve
a. Visually inspect CSMV.
No damage to valve.
b. Inspect CSMV coil and wire con- No damage to coil.
nections. Refer to Section 8.8.5.
No damage, moisture, or corrosion in connector.
c. Check CSMV operation. Refer to Must perform correctly.
Section 8.8.5.
d. Check wires from CSMV to micro- No visual damage to wires
processor.
Continuity test verifies that each wire is good.
62-11389
7−86
Alarm
NO.
Steps
Alarm/Cause
Corrective Action
P186 CHECK EVAP OUTLET TEMP
• TRIGGER–ON: Evaporator Outlet Temperature Sensor (EVOT) is not within the range of -53 to
+158°F (-47 to +70°C.)
•
UNIT CONTROL:
•
RESET CONDITION: Auto Reset if Pretrip is started again, or alarm may be manually reset via
keypad or by turning the unit off, then back on again.
Engine and Standby Operation: Pretrip will fail and display
“PRETRIP FAIL AND COMPLETED”.
Check Sensor - refer to procedure for alarm 131
P187 CHECK HEATER 1 CIRCUIT
This device is checked twice in Pretrip - once in Test 2 and again in Test 8.
•
TRIGGER–ON TEST 2 (unit not running): Normal draw for the 1HTCON1 relay coil is 0.05 to 1.0
Amps (12 VDC). The circuit tests outside this range.
•
TRIGGER–ON TEST 8 (unit running): Normal draw for the 1HTCON1 heaters is 1.0 to 3.5 Amps
(460 VAC). The circuit tests outside this range.
UNIT CONTROL:
Engine and Standby Operation: Pretrip will fail and display
“PRETRIP FAIL AND COMPLETED”.
RESET CONDITION: Auto Reset if Pretrip is started again or alarm may be manually reset via
keypad or by turning the unit off then back on again.
•
•
NOTE: Follow the steps below until a problem is found. Once a repair or correction has been made, clear the
alarm(s). (See Note 1 page 7−2.) Operate the unit through the appropriate modes to see if any active alarm
occurs. Continue with the steps below as necessary.
1
Determine Which Test This Alarm Occurred In
a. Review active alarm list.
Make a note of all alarms.
b. Clear active alarm list.
c. Restart and monitor Pretrip.
Stop Pretrip during Test #3 by holding = Key for 6
seconds.
d. Review active alarm list for Alarm If alarm is present, follow steps 2 thru 5 If alarm is
187.
not present, follow steps 6 thru 9.
2
3
12 VDC
CIRCUIT
4
5
Check 1HTCON1
a. Inspect heater contactor coil and No damage to coil.
wire connections.
Wire connections to contactor coil are tight.
No damaged or corroded wires to contactor coil.
b. Check contactor coil resistance.
Refer to Section 2.12 for correct electrical values.
Check 1HTCON1 Amp Draw
Check 1HTCON1 amp draw.
Use Component Test Mode (Section 5.2.2) to test.
Refer to Section 2.12 for correct electrical values.
View current draw in Data List.
Check 1HTCON1 Wiring
Inspect harness & control box conNo physical damage to harness.
nector pins & terminals. (See wiring
No damage, moisture, or corrosion in connectors.
schematic Section 10.)
Check Evaporator High Temperature Switch (EVHTS)
Inspect for open EVHTS per wiring
If open, replace switch as required.
schematic Section 10.
Additional steps on the next page.
7−87
62-11389
Alarm
NO.
Steps
Alarm/Cause
Corrective Action
P187 CHECK HEATER 1 CIRCUIT - Continued
6
Check Amp Draw of 1HTCON1 Heater Circuit
a. With the unit running and calling for Must be within range shown in Section 2.11 for all
Heat, use a clamp on ammeter to three legs.
check the current draw of all 3 legs.
b. Check fuses for heater elements. F10, F11, and F12 must not be blown.
c. Check voltage at 1HTCON1 con- Must be within range shown in Section 2.11 for
tacts.
L1-L2, L1-L3, and L2-L3.
Must be within range shown in Section 2.11 for
T1-T2, T1-T3, and T2-T3.
7
460
VAC
CIRCUIT
b. Check heater element resistance.
8
9
62-11389
Check Heater Elements
a. Check heater elements with the unit No visual physical damage.
Off.
Remove and replace if damaged.
Check from “T” terminals on 1HTCON1 contactor.
See section 2.11 for correct resistance.
Check Heater Element Connections
a. Inspect high voltage heater conNo corrosion, water damage or burning /
nections at evaporator.
discoloration.
Remove, repair, or replace if required.
b. Disconnect heater element plug.
Heater resistance per Section 2.11.
Remove and replace heaters if required.
a. Inspect plugs, plug seal and con- No corrosion, water damage or burning /
nectors.
discoloration.
Remove and replace if required.
Verify Accuracy of AC Current Sensor
Put microprocessor in PC Mode. Re- Must have 0 AC1 Amps and 0 AC2 Amps in Unit
fer to section 5.3 page 5−3.
Data.
7−88
Alarm
NO.
Steps
Alarm/Cause
Corrective Action
P188 CHECK HEATER 2 CIRCUIT
This device is checked twice in Pretrip - once in Test 2 and again in Test 8.
•
TRIGGER–ON TEST 2 (unit not running): Normal draw for the 1HTCON2 contactor coil is 0.05 to
2.0 Amps (12 VDC). The circuit tests outside this range.
•
TRIGGER–ON TEST 8 (unit running): Normal draw for the 1HTCON2 heaters is 1.0 to 3.5 Amps
(460 VAC). The circuit tests outside this range.
UNIT CONTROL:
Engine and Standby Operation: Pretrip will fail and display
“PRETRIP FAIL AND COMPLETED”.
RESET CONDITION: Auto Reset if Pretrip is started again, or alarm may be manually reset via
keypad or by turning the unit off, then back on again.
•
•
NOTE: Follow the steps below until a problem is found. Once a repair or correction has been made, clear the
alarm(s). (See Note 1 page 7−2.) Operate the unit through the appropriate modes to see if any active alarm
occurs. Continue with the steps below as necessary.
1
Determine Which Test This Alarm Occurred In
a. Review active alarm list.
Make a note of all alarms.
b. Clear active alarm list.
c. Restart and monitor Pretrip.
Stop Pretrip during Test #3 by holding = Key for 6
seconds.
d. Review active alarm list for Alarm If alarm is present, follow steps 2 thru 4 If alarm is
188.
not present, follow steps 5 thru 10.
2
3
12 VDC
CIRCUIT
4
5
Check 1HTCON2
a. Inspect heater contactor coil and No damage to coil.
wire connections.
No damage, moisture, or corrosion in connections.
b. Check contactor coil resistance.
Check 1HTCON2 Amp Draw
Check 1HTCON2 amp draw.
Refer to Section 2.12.
Use Component Test Mode (Section 5.2.2) to test.
Refer to Section 2.12 for correct electrical values.
View current draw in Data List.
Check 1HTCON2 Wiring
Inspect harness & control box conNo physical damage to harness.
nector pins & terminals. (See wiring
No damage, moisture, or corrosion in connectors.
schematic Section 10.)
Check Evaporator High Temperature Switch (EVHTS)
Inspect for open EVHTS per wiring
If open, replace switch as required.
schematic Section 10.
Additional steps on the next page.
7−89
62-11389
Alarm
NO.
Steps
Alarm/Cause
Corrective Action
P188 CHECK HEATER 2 CIRCUIT - Continued
6
Check Amp Draw of 1HTCON2 Heater Circuit
a. With the unit running and calling for Must be within range shown in Section 2.11 for all
pull up in, use a clamp on ammeter three legs.
to check the current draw of all 3
legs.
b. Check fuses for heater elements
F10, F11, and F12 must not be blown.
c. Check voltage at 1HTCON2 con- Must be within range shown in Section2.11for L1-L2,
tacts.
L1-L3, and L2-L3.
460
VAC
CIRCUIT
Must be within range shown in Section 2.11 for
T1-T2, T1-T3, and T2-T3.
7
Check Heater Elements
a. Check heater elements with the unit No visual physical damage
Off.
Remove and replace if damaged
b. Check heater element resistance.
8
9
62-11389
Check from “T” terminals on HTCON2 contactor. See
section 2.11 for correct resistance.
Check Heater Element Connections
Inspect high voltage heater connec- No corrosion, water damage or burning /
tions at evaporator.
discoloration.
Remove, repair, or replace if required.
Verify Accuracy of AC Current Sensor
Put microprocessor in PC Mode. Re- Must have 0 AC1 Amps and 0 AC2 Amps in Unit
fer to Section 5.3 page 5−3.
Data.
7−90
Alarm
NO.
Steps
Alarm/Cause
Corrective Action
P189 CHECK EVAPORATOR FAN MOTOR
This device is checked twice in Pretrip - once in Test 2 and again in Test 8.
•
TRIGGER–ON TEST 2 (unit not running): Normal draw for the 1EVCON contactor coil is 0.05 to
2.0 Amps (12 VDC). The circuit tests outside this range.
•
TRIGGER–ON TEST 9 (unit running): Normal draw for the Evaporator Fan motor is 0.7 to 3.5
Amps (460 VAC). The circuit tests outside this range.
UNIT CONTROL:
Engine and Standby Operation: Pretrip will fail and display
“PRETRIP FAIL AND COMPLETED”.
RESET CONDITION: Auto Reset if Pretrip is started again, or alarm may be manually reset via
keypad or by turning the unit off, then back on again.
•
•
NOTE: Follow the steps below until a problem is found. Once a repair or correction has been made, clear the
alarm(s). (See Note 1 page 7−2.) Operate the unit through the appropriate modes to see if any active alarm
occurs. Continue with the steps below as necessary.
1
Determine Which Test This Alarm Occurred In
a. Review active alarm list.
Make a note of all alarms.
b. Clear active alarm list.
c. Restart and monitor Pretrip.
Stop Pretrip during Test #3 by holding = Key for 6
seconds.
d. Review active alarm list for Alarm If alarm is present, follow steps 2thru 4 If alarm is not
189.
present, follow Steps 5 thru 8
2
12 VDC
CIRCUIT
3
4
Check 1EVCON
a. Inspect Evaporator Fan Motor con- No damage to coil.
tactor coil and wire connections.
No damage, moisture, or corrosion in connections.
b. Check contactor coil resistance.
Check 1EVCON Amp Draw
Check 1EVCON amp draw.
Refer to Section 2.12.
Use Component Test Mode (Section 5.2.2) to test.
Refer to Section 2.12 for correct electrical values.
View current draw in Data List.
Check 1EVCON Wiring
Inspect harness & control box conNo physical damage to harness.
nector pins & terminals. (See wiring
No damage, moisture, or corrosion in connectors.
schematic Section 10.)
Additional steps on the next page.
7−91
62-11389
Alarm
NO.
Steps
Alarm/Cause
Corrective Action
P189 CHECK EVAPORATOR FAN MOTOR - Continued
5
Check Amp Draw of 1EVCON Evap Fan Motor Circuit
a. With the unit running in either HEAT Must be within range shown in Section 2.11 for all
or COOL use a clamp on ammeter three legs.
to check the current draw of all 3
legs.
b. Check fuses for evaporator fan mo- F26, F27, and F28 must not be blown.
tor.
c. Check voltage at 1EVCON con- Must be within range shown in Section 2.11 for
tacts.
L1-L2, L1-L3, and L2-L3.
Must be within range shown in Section 2.11 for
T1-T2, T1-T3, and T2-T3.
460
VAC
CIRCUIT
6
7
8
62-11389
Check Evaporator Fan Motor
a. With the unit off, visually check fan No visual physical damage.
motor and blower wheel.
No blockage to blower wheels.
Blower wheels spin freely.
Remove and replace if required.
b. With the unit off, check the resist- See Section 2.11 for correct resistance.
ance of the evaporator fan motor Resistance (Ohms) must be in range.
windings.
No continuity from any high voltage lead to ground.
Check Evaporator Fan Motor Connections
Inspect high voltage fan motor conNo corrosion, water damage or burning / discolornections at evaporator.
ation.
Remove, repair, or replace if required.
Verify Accuracy of AC Current Sensor
Put microprocessor in PC Mode. Re- Must have 0 AC1 Amps and 0 AC2 Amps in Unit
fer to Section 5.3 page 5−3.
Data.
7−92
Alarm
NO.
Steps
Alarm/Cause
Corrective Action
P190 CHECK CONDENSER FAN MOTOR
• TRIGGER–ON Normal draw for the condenser fan motors is 0.8 to 3.5 Amps (460 VAC). The circuit
tests outside this range.
• UNIT CONTROL:
Engine and Standby Operation: Pretrip will fail and display
“PRETRIP FAIL AND COMPLETED”.
• RESET CONDITION: Auto Reset if Pretrip is started again, or alarm may be manually reset via
keypad or by turning the unit off, then back on again.
NOTE: Follow the steps below until a problem is found. Once a repair or correction has been made, clear the
alarm(s). (See Note 1 page 7−2.) Operate the unit through the appropriate modes to see if any active alarm
occurs. Continue with the steps below as necessary.
1
Check Amp Draw of Condenser Fan Motor Circuit
a. With the unit running use a clamp on Must be within range shown in Section 2.11 for all
ammeter to check the current draw three legs.
at CDCON on all 3 legs.
If higher than normal draw is read, the wiring for the
motors must be separated, and each motor tested individually.
b. Check fuses for condenser fan mo- F26, F27, and F28 must not be blown.
tors.
c. Check voltage at CDCON contacts. Must be within range shown in Section 2.11 for
L1-L2, L1-L3, and L2-L3.
Must be within range shown in Section 2.11 for
T1-T2, T1-T3, and T2-T3.
460
VAC
CIRCUIT
2
Check Condenser Fan Motors
a. Check condenser fan motors.
No visual physical damage.
No blockage due to debris.
Remove and replace if required.
b. With the unit off, visually check fan No visual physical damage.
motors and fan blades.
No blockage to fan blades.
Fan blades spin freely.
Remove and replace if required.
3
4
c. With the unit off, check the resist- See Section 2.11 for correct resistance.
ance of the condenser fan motor Resistance (Ohms) must be in range.
windings.
No continuity from any high voltage lead to ground.
Check Condenser Fan Motor Connections
Inspect high voltage connections at
No corrosion, water damage or burning / discolorthe condenser fan motors.
ation.
Remove, repair, or replace if required.
Verify Accuracy of AC Current Sensor
Put microprocessor in PC Mode. Re- Must have 0 AC1 Amps and 0 AC2 Amps in Unit
fer to Section 5.3 page 5−3.
Data.
7−93
62-11389
Alarm
NO.
Steps
Alarm/Cause
Corrective Action
P191 CHECK UL2
• TRIGGER–ON: The pressure differential between suction and discharge pressures did not change
as expected when the Rear Unloader (UL2) was de-energized / loaded (discharge pressure should
rise and suction pressure should drop) or when it was energized / unloaded (discharge pressure
should drop and suction pressure should rise.
•
UNIT CONTROL:
•
RESET CONDITION: Auto Reset if Pretrip is started again, or alarm may be manually reset via
keypad or by turning the unit off, then back on again.
Engine and Standby Operation: Pretrip will fail in test 13 and display
“PRETRIP FAIL AND COMPLETED”.
NOTE: Follow the steps below until a problem is found. Once a repair or correction has been made, clear the
alarm(s). (See Note 1 page 7−2.) . Operate the unit through the appropriate modes to see if any active alarm
occurs. Continue with the steps below as necessary.
1
Check wiring to DPT & SPT
a. Verify that correct wires are con- Plugs to transducers are the same. The correct wire
nected to each transducer
plug must be connected to the proper transducer.
2
3
4
62-11389
b. Verify that correct transducer is be- Mechanical connections to transducers are the
ing used in each position.
same.
The Discharge Transducer should have a RED marking dot on it.
The Suction Transducer should have a BLUE marking dot on it.
Check for Check UL2 Alarm
Check for alarm 86 or P164
Alarm conditions must be corrected and the alarm
cleared to continue
Check System Pressures
Install manifold gauge set and check
and compare compressor discharge
& suction pressures with those
shown on the microprocessor display.
Suction and Evaporator Outlet pressures must be
above 3 psig (0.2 bar.)
Suction, Evaporator Outlet & Discharge Pressures
must have the same reading on gauges & on microprocessor display.
NOTE: Microprocessor Suction (CSP and Evaporator (EVOP) pressure readings have a maximum
value of 100 psig (7.5 bar.) The actual pressure
must be lower than 100 psig in order to perform
this test.
Check Rear Unloader (UL2) Operation - Unit must be running. (See Note 5 page 7−2)
Check operation of Rear Unloader
See Section 8.7.6.
(UL2)
Unloader must load and unload properly.
7−94
Alarm
NO.
Steps
Alarm/Cause
Corrective Action
P206 CHECK CONDENSER FAN CIRCUIT
• TRIGGER–ON : Normal draw for the CDCON contactor coil is 0.05 to 2.0 Amps (12 VDC). The circuit tests outside this range.
• UNIT CONTROL:
Engine and Standby Operation: Pretrip will fail and display
“PRETRIP FAIL AND COMPLETED”.
• RESET CONDITION: Auto Reset if Pretrip is started again, or alarm may be manually reset via
keypad or by turning the unit off, then back on again.
NOTE: Follow the steps below until a problem is found. Once a repair or correction has been made, clear the
alarm(s). (See Note 1 page 7−2.) Operate the unit through the appropriate modes to see if any active alarm
occurs. Continue with the steps below as necessary.
1
Check CDCON
a. Inspect CDCON contactor coil and No damage to coil.
wire connections.
No damage, moisture, or corrosion in connections.
2
3
b. Check contactor coil resistance.
Check CDCON Amp Draw
Check CDCON contactor coil amp
draw.
Check CDCON Wiring
Inspect harness & control box connector pins & terminals. (See wiring
schematic Section 10.)
Refer to Section 2.12.
Use Component Test Mode (Section 5.2.2) to test.
Refer to Section 2.12 for amp values. View current
draw in Data List.
No physical damage to harness.
No damage, moisture, or corrosion in connectors.
P207 CHECK COMPRESSOR CONTACT CIRC
• TRIGGER–ON: Normal draw for the CCONR and CCON relay coils is 0.0 to 1.0 Amps (12 VDC).
The circuit tests outside this range.
• UNIT CONTROL:
Engine and Standby Operation: Pretrip will fail and display
“PRETRIP FAIL AND COMPLETED”.
• RESET CONDITION: Auto Reset if Pretrip is started again, or alarm may be manually reset viakeypad or by turning the unit off, then back on again.
NOTE: Follow the steps below until a problem is found. Once a repair or correction has been made, clear the
alarm(s). (See Note 1 page 7−2.) Operate the unit through the appropriate modes to see if any active alarm
occurs. Continue with the steps below as necessary.
1
Check CCONR
a. Inspect CCONR and CCON No damage to coil.
contactor
coils
and
wire No damage, moisture, or corrosion in connections.
connections.
b. Check contactor coil resistance
Refer to Section 2.12.
2
Check CCONR Amp Draw
a. Check CCONR and CCON contac- Use Component Test Mode (Section 5.2.2) to test.
tor coil amp draw.
Refer to Section 2.12 for correct electrical values.
View current draw in Data List. FET 2 On.
b. Listen for CCON to pull in.
If CCON contactor pulls in, CCONR and CCON are
OK.
If CCON contactor does not pull in, check for 12 VDC
at CCON coil. 12 VDC indicates defective CCON
coil. No voltage - check CCONR.
3
Check CCONR Wiring
Inspect harness & control box conNo physical damage to harness.
nector pins & terminals. (See wiring
No damage, moisture, or corrosion in connectors.
schematic Section 10.)
7−95
62-11389
Alarm
NO.
Steps
Alarm/Cause
Corrective Action
P208 CHECK GENERATOR CONT CIRC
• TRIGGER–ON: Normal draw for the GENCONR and GENCON coils is 0.0 to 1.0 Amps (12 VDC).
The circuit tests outside this range.
• UNIT CONTROL:
Engine and Standby Operation: Pretrip will fail and display
“PRETRIP FAIL AND COMPLETED”.
• RESET CONDITION: Auto Reset if Pretrip is started again, or alarm may be manually reset via
keypad or by turning the unit off, then back on again.
NOTE: Follow the steps below until a problem is found. Once a repair or correction has been made, clear the
alarm(s). (See Note 1 page 7−2.) Operate the unit through the appropriate modes to see if any active alarm
occurs. Continue with the steps below as necessary.
1
Check GENCONR
a. Inspect GENCONR and GENCON No damage to coil.
contactor coils and wire connec- No damage, moisture, or corrosion in connections.
tions.
b. Check contactor coil resistance.
Refer to Section 2.12.
2
Check GENCONR and GENCON Amp Draw
a. Check GENCONR and GENCON Use Component Test Mode (Section 5.2.2) to test.
contactor coils amp draw.
Refer to Section 2.12 for amp values. View current
draw in Data List. FET 3 On.
b. Listen for GENCON to pull in.
If GENCON contactor pulls in, GENCONR and
GENCON are OK.
If GENCON contactor does not pull in, check for 12
VDC at GENCON coil. 12 VDC indicates defective
GENCON coil. No voltage - check GENCONR.
3
Check GENCONR Wiring
Inspect harness & control box conNo physical damage to harness.
nector pins & terminals. (See wiring
No damage, moisture, or corrosion in connectors.
schematic Section 10.)
62-11389
7−96
Alarm
NO.
Steps
Alarm/Cause
Corrective Action
P209 CHECK STANDBY CONT CIRCUIT
• TRIGGER–ON: Normal amps for the PSCONR relay coil and PSCON or PSCON2 contactor coils
0.0 to 1.0 Amps (12 VDC). The circuit(s) test outside this range. (During this test either PSCON or
PSCON2 will be tested depending on the phase reversal module.)
•
UNIT CONTROL:
•
RESET CONDITION: Auto Reset if Pretrip is started again, or alarm may be manually reset via
keypad or by turning the unit off, then back on again.
Engine and Standby Operation: Pretrip will fail and display
“PRETRIP FAIL AND COMPLETED”.
NOTE: Follow the steps below until a problem is found. Once a repair or correction has been made, clear the
alarm(s). (See Note 1 page 7−2.) Operate the unit through the appropriate modes to see if any active alarm
occurs. Continue with the steps below as necessary.
NOTE: IF PRETRIP IS DONE IN STANDBY MODE, THIS PRETRIP ALARM WILL GENERATE MANY
OTHER PRETRIP ALARMS. THEREFORE, IT SHOULD BE ADDRESSED FIRST
1
2
3
Check PSCONR
a. Inspect PSCONR, PSCON and No damage to coils.
PSCON2 contactor coils and wire No damage, moisture, or corrosion in connections.
connections.
b. Check contactor coil resistance.
Refer to Section 2.12 for resistance values
Check PSCONR, PSCON, and PSCON2 Amp Draw
a. Check PSCONR, PSCON and Use Component Test Mode (Section 5.2.2) to test.
PSCON2 contactor coils amp draw. Refer to Section 2.12 for amp values. View current
draw in Data List. FET 19 On.
b. Listen for PSCON or PSCON2 to If PSCON or PSCON2 contactor pulls in, PSCONR
pull in.
and PSCON or PSCON2 are OK.
If PSCON or PSCON2 contactor does not pull in,
check for 12 VDC at Phase Reversal Module (PRM)
“N” terminal. 12 VDC indicates defective PSCON or
PSCON2 coil. No voltage - check PSCONR and
PRM.
Check PSCONR, PSCON, PSCON2 and PRM Wiring
Inspect harness & control box conNo physical damage to harness.
nector pins & terminals. (See wiring
No damage, moisture, or corrosion in connectors.
schematic Section 10.)
7−97
62-11389
Alarm
NO.
223
Steps
Corrective Action
7.10 MAINTENANCE ALARMS
ENGINE MAINTENANCE DUE
• TRIGGER–ON: The Engine Maintenance Hour Meter time has expired.
•
•
UNIT CONTROL: Alarm Only. Alarm Light will NOT be turned on.
RESET CONDITION: Alarm may be manually reset via keypad.
1
2
3
224
Alarm/Cause
Check Unit Maintenance Records
Schedule unit into service facility for
maintenance.
Must be done soon!
Perform Maintenance
Perform appropriate engine & unit
maintenance.
Follow instructions on proper maintenance form.
Reset Engine Maintenance Hour Meter
a. Check that the Engine Maintenance Reset configured Interval if required.
Hour Meter interval is set for your
requirements.
b. Reset Engine Maintenance Hour Hour Meter reset is a Functional Parameter.
Meter for the next service interval. Follow maintenance interval recommendations in
Section 8.2.
STANDBY MAINTENANCE DUE
• TRIGGER–ON: The Standby Hour Meter time has expired.
•
•
UNIT CONTROL: Alarm Only. Alarm Light will NOT be turned on.
RESET CONDITION: Alarm may be manually reset via keypad.
1
2
3
62-11389
Check Unit Maintenance Records
Schedule unit into service facility for
maintenance.
Must be done soon!
Perform Maintenance
Perform appropriate engine & unit
maintenance.
Follow instructions on proper maintenance form.
Reset Standby Hour Meter
a. Check
that
the
Standby Reset configured Interval if required.
Maintenance Hour Meter interval is
set for your requirements.
b. Reset Standby Maintenance Hour Hour Meter reset is a Functional Parameter.
Meter for the next service interval. Follow maintenance interval recommendations in
Section 8.2.
7−98
Alarm
NO.
225
Steps
Corrective Action
GENERAL MAINTENANCE DUE
• TRIGGER–ON: The General Maintenance Hour Meter time has expired.
•
•
UNIT CONTROL: Alarm Only. Alarm Light will NOT be turned on.
RESET CONDITION: Alarm may be manually reset via keypad.
1
2
3
226
Alarm/Cause
Check Unit Maintenance Records
Schedule unit into service facility for
maintenance.
Must be done soon!
Perform Maintenance
Perform appropriate engine & unit
maintenance.
Follow instructions on proper maintenance form.
Reset General Maintenance Hour Meter
a. Check
that
the
General Reset configured Interval if required.
Maintenance Hour Meter interval is
set for your requirements.
b. Reset General Maintenance Hour Hour Meter reset is a Functional Parameter.
Meter for the next service interval. Follow maintenance interval recommendations in
Section 8.2.
SERVICE SOON-PM #1 DUE
• TRIGGER–ON: The Maintenance Hour Meter #1 time has expired.
•
•
UNIT CONTROL: Alarm Only. Alarm Light will NOT be turned on.
RESET CONDITION: Alarm may be manually reset via keypad.
1
2
3
Check Unit Maintenance Records
Schedule unit into service facility for
maintenance.
Must be done soon!
Perform Maintenance
Perform appropriate engine & unit
maintenance.
Follow instructions on proper maintenance form.
Reset Maintenance Hour Meter #1
a. Check that Maintenance Hour
Reset configured Interval if required.
Meter #1 interval is set for your
requirements.
b. Reset Maintenance Hour Meter #1 Hour Meter reset is a Functional Parameter.
for the next service interval.
Follow maintenance interval recommendations in
Section 8.2.
7−99
62-11389
Alarm
NO.
227
Steps
Corrective Action
SERVICE SOON-PM #2 DUE
• TRIGGER–ON: The Maintenance Hour Meter #2 time has expired.
•
•
UNIT CONTROL: Alarm Only. Alarm Light will NOT be turned on.
RESET CONDITION: Alarm may be manually reset via keypad.
1
2
3
228
Alarm/Cause
Check Unit Maintenance Records
Schedule unit into service facility for
maintenance.
Must be done soon!
Perform Maintenance
Perform appropriate engine & unit
maintenance.
Follow instructions on proper maintenance form.
Reset Maintenance Hour Meter #2
a. Check that Maintenance Hour
Reset configured Interval if required.
Meter #2 interval is set for your
requirements.
b. Reset Maintenance Hour Meter #2 Hour Meter reset is a Functional Parameter.
for the next service interval.
Follow maintenance interval recommendations in
Section 8.2.
SERVICE SOON-PM #3 DUE
• TRIGGER–ON: The Maintenance Hour Meter #3 time has expired.
•
•
UNIT CONTROL: Alarm Only. Alarm Light will NOT be turned on.
RESET CONDITION: Alarm may be manually reset via keypad.
1
2
3
62-11389
Check Unit Maintenance Records
Schedule unit into service facility for
maintenance.
Must be done soon!
Perform Maintenance
Perform appropriate engine & unit
maintenance.
Follow instructions on proper maintenance form.
Reset Maintenance Hour Meter #3
a. Check that Maintenance Hour
Reset configured Interval if required.
Meter #3 interval is set for your
requirements.
b. Reset Maintenance Hour Meter #3 Hour Meter reset is a Functional Parameter.
for the next service interval.
Follow maintenance interval recommendations in
Section 8.2.
7−100
Alarm
NO.
229
Steps
Corrective Action
SERVICE SOON-PM #4 DUE
• TRIGGER–ON: The Maintenance Hour Meter #4 time has expired.
•
•
UNIT CONTROL: Alarm Only. Alarm Light will NOT be turned on.
RESET CONDITION: Alarm may be manually reset via keypad.
1
2
3
230
Alarm/Cause
Check Unit Maintenance Records
Schedule unit into service facility for
maintenance
Must be done soon!
Perform Maintenance
Perform appropriate engine & unit
maintenance.
Follow instructions on proper maintenance form.
Reset Maintenance Hour Meter #4
a. Check that Maintenance Hour
Reset configured Interval if required.
Meter #4 interval is set for your
requirements.
b. Reset Maintenance Hour Meter #4 Hour Meter reset is a Functional Parameter.
for the next service interval.
Follow maintenance interval recommendations in
Section 8.2.
SERVICE SOON-PM #5 DUE
• TRIGGER–ON: The Maintenance Hour Meter #5 time has expired.
•
•
UNIT CONTROL: Alarm Only. Alarm Light will NOT be turned on.
RESET CONDITION: Alarm may be manually reset via keypad.
1
2
3
Check Unit Maintenance Records
Schedule unit into service facility for
maintenance.
Must be done soon!
Perform Maintenance
Perform appropriate engine & unit
maintenance.
Follow instructions on proper maintenance form.
Reset Maintenance Hour Meter #5
a. Check that Maintenance Hour
Reset configured Interval if required.
Meter #5 interval is set for your
requirements.
b. Reset Maintenance Hour Meter #5 Hour Meter reset is a Functional Parameter.
for the next service interval.
Follow maintenance interval recommendations in
Section 8.2.
7−101
62-11389
Alarm
NO.
232
Steps
Alarm/Cause
Corrective Action
7.11 MICROPROCESSOR ALARMS
SETPOINT ERROR
• TRIGGER–ON: There is an error in the set point that is stored in the microprocessor memory.
•
•
UNIT CONTROL: Unit Shutdown & Alarm.
RESET CONDITION: Auto Reset when a valid set point is entered, or alarm may be manually reset
by turning the unit off, then back on again.
NOTE: Follow the steps below until a problem is found. Once a repair or correction has been made, the active
alarm should clear itself (see reset condition above). Operate the unit through the appropriate modes to see if
any active alarm occurs. Continue with the steps below as necessary.
1
Check Set Point
a. Check set point setting.
Must be between -22 and +89.6° F (-30° and +32°C)
b. Enter new set point.
2
233
Reset Microprocessor
a. Place the Main Power switch in the
OFF position for 30 seconds, then
back to the desired position.
b. Valid set point can not be entered
and alarm 232 remains active.
The microprocessor powers up OK and the latest set
point appears in the display.
Download and replace microprocessor. Refer to
Section 5.7.
MODEL # ERROR
• TRIGGER–ON: There is an error in the Model Number that is stored in the microprocessor memory
•
•
UNIT CONTROL: Unit Shutdown & Alarm
RESET CONDITION: Auto Reset only when a valid Model number is entered.
NOTE: Follow the steps below until a problem is found. Once a repair or correction has been made, the active
alarm should clear itself (see reset condition above). Operate the unit through the appropriate modes to see if
any active alarm occurs. Continue with the steps below as necessary.
1
Check Model Number
a. Check
Model
Number
in Check Model Number on Nameplate.
microprocessor.
Select the correct model number in the “MODEL
b. Enter correct Model Number.
NUMBER” Configuration. If correct model number is
not found, Install (or have Carrier Transicold dealer
install) latest software revision.
2
Reset Microprocessor
a. Place the Main Power switch in the Microprocessor powers up OK.
OFF position for 30 seconds, then
back to the desired position.
b. Check for valid Model number in Valid number is present.
Data List.
Alarm is cleared.
c. Valid model number can not be Download and replace microprocessor. Refer to
entered and alarm remains active. Section 5.7.
62-11389
7−102
Alarm
NO.
237
Steps
Alarm/Cause
Corrective Action
FUNCTION PARAMETERS ERROR
• TRIGGER–ON: There is an error in one or more of the Functional Parameters that are stored in the
microprocessor memory.
•
•
UNIT CONTROL: Incorrect Functional Parameter(s) will be automatically set for default value.
RESET CONDITION: Auto Reset when valid Functional Parameters are entered, or alarm may be
manually reset by turning the unit off, then back on again.
NOTE: Follow the steps below until a problem is found. Once a repair or correction has been made, the active
alarm should clear itself (see reset condition above). Operate the unit through the appropriate modes to see if
any active alarm occurs. Continue with the steps below as necessary.
1
Check Functional Parameters
Check Functional Parameters.
All must be set for selectable values.
2
Check Software Version
Check microprocessor Software
Upgrade to the latest version of software. Newer
version.
versions may contain functional parameters that
were not present in older versions of microprocessor
software. Refer to Section 5.4.2.
3
Reset Microprocessor
a. Place the Main Power switch in the Microprocessor powers up OK.
OFF position for 30 seconds, then
back to the desired position.
b. Check for valid Functional Parame- Valid number is set for all parameters.
ters in Functional Parameters List. Alarm is cleared.
c. Valid Functional Parameter(s) can Download and replace microprocessor. Refer to
not be entered and alarm remains Section 5.7.
active.
7−103
62-11389
Alarm
NO.
238
Steps
Alarm/Cause
Corrective Action
CONFIGURATIONS 1 ERROR
• TRIGGER–ON: There is an error in the Configuration settings that are stored in the microprocessor
memory.
•
•
UNIT CONTROL: Incorrect Configuration(s) will be automatically set for default value.
RESET CONDITION: Auto Reset when valid Configuration(s) are entered, or alarm may be
manually reset by turning the unit off, then back on again
NOTE: Follow the steps below until a problem is found. Once a repair or correction has been made, the active
alarm should clear itself (see reset condition above). Operate the unit through the appropriate modes to see if
any active alarm occurs. Continue with the steps below as necessary.
1
Check Configurations
Check Configurations.
All must be set for selectable values.
2
Check Software Version
Check microprocessor software ver- Upgrade to the latest version of software. Newer version.
sions of ReeferManager may contain configurations
that were not present in older versions of microprocessor software.
3
4
Reconfigure Microprocessor
Send settings to microprocessor.
Using the latest version of ReeferManager and a
Configuration PC Card, write the desired configuration file to the PC Card, then load the file into the microprocessor. Allow the microprocessor to reboot itself.
Reset Microprocessor
a. Place the Main Power switch in the Microprocessor powers up OK.
OFF position for 30 seconds, then
back to the desired position.
b. Check for valid Configuration set- Values are set correctly for all parameters.
tings in Configuration List.
Alarm is cleared.
c Disconnect positive battery cable Microprocessor powers up OK.
from the battery, wait 30 seconds,
then reconnect and place the Main
Power switch in the desired position.
d Check for valid Configuration Values are set correctly for all parameters.
settings in Configuration List.
Alarm is cleared.
c. Valid Configurations can not be Download and replace microprocessor. Refer to
entered and alarm remains active. Section 5.7.
62-11389
7−104
Alarm
NO.
242
Steps
Alarm/Cause
Corrective Action
DIS PRESS CALIBRATE ERROR
• TRIGGER–ON: There is an error in the Compressor Discharge Pressure Sensor Calibration value
stored in memory.
•
•
UNIT CONTROL: Alarm Only.
RESET CONDITION: Auto Reset when the Discharge Pressure Sensor is calibrated successfully,
or alarm may be manually reset via keypad or by turning the unit off, then back on again.
NOTE: Follow the steps below until a problem is found. Once a repair or correction has been made, the active
alarm should clear itself (see reset condition above). Operate the unit through the appropriate modes to see if
any active alarm occurs. Continue with the steps below as necessary.
1
Check Discharge Pressure Reading
Check Discharge Pressure Reading. Must read valid data.
2
Calibrate Discharge Pressure Sensor
a. Calibrate Discharge Pressure Calibration successful.
Sensor.
b. Discharge Pressure Sensor can not Download and replace microprocessor. Refer to
be successfully calibrated and Section 5.7.
alarm remains active.
7−105
62-11389
Alarm
NO.
243
Steps
Alarm/Cause
Corrective Action
SUCTION/EVAP CALIBRATE ERROR
• TRIGGER–ON: There is an error in either or both of the Suction Pressure (CSP) or Evaporator
Pressure (EVOP) Sensor Calibration values stored in the microprocessor memory. Note that neither
of these transducers can be calibrated manually. This is an error in the microprocessor.
•
•
UNIT CONTROL: Alarm only.
RESET CONDITION: Auto Reset when both Suction and Evaporator Pressure transducers are
reading correctly or alarm may be manually reset via keypad or by turning the unit off, then back on
again.
NOTE: Follow the steps below until a problem is found. Once a repair or correction has been made, the active
alarm should clear itself (see reset condition above). Operate the unit through the appropriate modes to see if
any active alarm occurs. Continue with the steps below as necessary.
1
Check Suction Pressure (CSP) and Evaporator Pressure (EVOP) Readings
a. Check Suction and Evaporator Must read valid data.
Pressure Readings in the Unit Data.
b. Install manifold gauge set and
check and compare compressor
suction & evaporator pressures with
those shown on the microprocessor
display.
2
62-11389
Suction and Evaporator Outlet Pressures must have
the same reading on gauges & on microprocessor
display.
NOTE: Microprocessor Suction (CSP) and Evaporator (EVOP) pressure readings have a maximum value of 100 psig (7.5 bar.) The actual pressure must be lower than 100 psig in order to perform this test.
Reset Microprocessor
a. Place the Main Power switch in the Microprocessor powers up OK
OFF position for 30 seconds, then
back to the desired position.
b. Wait 2-3 minutes, then check to see if Suction and Evaporator pressure values are reading
A-243 becomes active again.
OK when compared to test gauges.
Alarm is cleared.
c. Disconnect positive battery cable Microprocessor powers up OK
from the battery, wait 30 seconds,
then reconnect and place the Main
Power switch in the desired
position.
d. Wait 2-3 minutes, then check to see if Suction and Evaporator pressure values are reading
A-243 becomes active again.
OK when compared to test gauges.
Alarm is cleared.
e. Valid readings are not appearing for Download and replace microprocessor. Refer to
either or both the Suction and Section 5.7.
Evaporator Pressures in the Unit
Data.
7−106
Alarm
NO.
Steps
245
Alarm/Cause
Corrective Action
CANNOT SAVE SETTING
• TRIGGER–ON: There is an error in sending and saving new settings in the Microprocessor
•
•
memory.
UNIT CONTROL: Alarm only.
RESET CONDITION: Alarm may be manually reset via Keypad or by turning the unit off, then back
on again.
NOTE: Follow the steps below until a problem is found. Once a repair or correction has been made, the active
alarm should clear itself (see reset condition above). Operate the unit through the appropriate modes to see if
any active alarm occurs. Continue with the steps below as necessary.
1
Check Microprocessor Software Revision
Check microprocessor software revi- Will be a 6 digit number, upgrade if required. Refer to
sion.
Section 5.4.2.
2
246
•
•
•
Reset Microprocessor
a. Place the Main Power switch in the
OFF position for 30 seconds, then
back to the desired position.
b. Check Active Alarm List.
Alarm is cleared - microprocessor is OK.
c. Alarm 245 remains active.
Unit will operate, but changes to the settings will not
be retained in the microprocessor memory. Download
and replace microprocessor. Refer to Section 5.7.
EEPROM WRITE FAILURE
TRIGGER–ON: here is an error in the ability to write information to be stored in the memory.
UNIT CONTROL: Alarm only
RESET CONDITION: Alarm may be manually reset via Keypad or by turning the unit off, then back
on again.
NOTE: Follow the steps below until a problem is found. Once a repair or correction has been made, the active
alarm should clear itself (see reset condition above). Operate the unit through the appropriate modes to see if
any active alarm occurs. Continue with the steps below as necessary.
1
Check Microprocessor
a. Check set point setting.
Must be between -22 and +89.6°F (-30 and +32°C.)
b.Enter new set point.
Must be between -22 and +89.6°F (-30 and +32°C.)
2
Reset Microprocessor
a. Place the Main Power switch in the Microprocessor powers up OK.
OFF position for 30 seconds, then
back to the desired position.
b. Alarm 246 remains active.
Download and replace microprocessor. Download
and replace microprocessor. Refer to Section 5.7.
7−107
62-11389
Alarm
NO.
248
Steps
Alarm/Cause
Corrective Action
CONFIGURATION MODE / HP2 ERROR
• TRIGGER–ON: EEPROM configuration is out of range.
•
•
UNIT CONTROL: Shutdown and alarm.
RESET CONDITION: Auto Reset only when valid info is available for the microprocessor are
entered.
Follow the steps below until a problem is found. Once a repair or correction has been made, clear the alarm(s).
(See Note 1 page 7−2.) Operate the unit through the appropriate modes to see if any active alarm occurs.
Continue with the steps below as necessary.
1
Check microprocessor
a. Check set point setting.
Must be between -22 and +89.6°F (-30 and +32°C.)
b. Enter new set point.
Must be between -22 and +89.6°F (-30 and +32°C.)
c. Check Functional Parameters.
All settings must be valid.
2
Check Software Revision
a. Check microprocessor software Upgrade to the latest revision of software. The latest
revision.
revision may contain configurations that were not
present in older revisions.
b. Check Functional Parameters
All settings must be valid. Send desired settings to
microprocessor using the latest version of
ReeferManager or a PC Card (Do NOT use the
keypad.)
c. Check Configurations
3
62-11389
All settings must be valid. Send desired settings to
microprocessor using the latest version of
ReeferManager or a PC Card (Do NOT use the
keypad.)
Reset microprocessor
a. Place the Main Power switch in the Microprocessor powers up OK.
OFF position for 30 seconds, then
back to the desired position.
b. Alarm 248 remains active.
Download and replace microprocessor. Refer to
Section 5.7.
7−108
Alarm
NO.
249
Steps
Alarm/Cause
Corrective Action
MICROPROCESSOR ERROR
• TRIGGER–ON: Microprocessor Input Conversion Error.
•
•
UNIT CONTROL: Shutdown and alarm.
RESET CONDITION: Auto Reset when input conversions are valid, or Alarm may be manually
reset by turning the unit off, then back on again.
Follow the steps below until a problem is found. Once a repair or correction has been made, clear the alarm(s).
(See Note 1 page 7−2.) Operate the unit through the appropriate modes to see if any active alarm occurs.
Continue with the steps below as necessary.
1
Check Software Revision
Check microprocessor software revi- Upgrade to the latest revision of software.
sion.
2
Check Microprocessor
a. Check Temperature Sensor Data
Must be valid reading for RAT, SAT, AAT, etc.
b. Check for any Active Sensor Must all be cleared.
Alarms
3
Check Microprocessor & Unit Wiring
Check Wiring to Micro and at input
Must not be miss-wired to allow 12 VDC on any of
devices to the micro.
the sensor input circuits.
4
Reset Microprocessor
a. Place the Main Power switch in the Microprocessor powers up OK
OFF position for 30 seconds, then
back to the desired position.
b. Alarm 249 remains active.
Download (if possible) and replace microprocessor.
Refer to Section 5.7.
7−109
62-11389
SECTION 8 − SERVICE
PARAGRAPH NUMBER
Page
8.1 SECTION LAYOUT . . . . . . . . . . . . . . . . . . . . . . . . . . . . . . . . . . . . . . . . . . . . . . . . . . . . . . . . . . . . . . . 8−1
8.2 SCHEDULED MAINTENANCE . . . . . . . . . . . . . . . . . . . . . . . . . . . . . . . . . . . . . . . . . . . . . . . . . . . . . 8−1
8.3 PRE TRIP INSPECTION . . . . . . . . . . . . . . . . . . . . . . . . . . . . . . . . . . . . . . . . . . . . . . . . . . . . . . . . . . 8−1
8.4 EXTERNAL SURFACE SERVICE . . . . . . . . . . . . . . . . . . . . . . . . . . . . . . . . . . . . . . . . . . . . . . . . . . 8−5
8.4.1 Grille Insert Removal . . . . . . . . . . . . . . . . . . . . . . . . . . . . . . . . . . . . . . . . . . . . . . . . . . . . . . . . . .
8−5
8.4.2 Surround Removal . . . . . . . . . . . . . . . . . . . . . . . . . . . . . . . . . . . . . . . . . . . . . . . . . . . . . . . . . . . .
8−5
8.4.3 Door Latch Maintenance And Replacement . . . . . . . . . . . . . . . . . . . . . . . . . . . . . . . . . . . . . .
8−6
8.4.4 Display & Keypad Assembly . . . . . . . . . . . . . . . . . . . . . . . . . . . . . . . . . . . . . . . . . . . . . . . . . . .
8−6
8.5 ENGINE AND ENGINE RELATED SYSTEMS SERVICE . . . . . . . . . . . . . . . . . . . . . . . . . . . . . . . 8−7
8.5.1 Fuel System . . . . . . . . . . . . . . . . . . . . . . . . . . . . . . . . . . . . . . . . . . . . . . . . . . . . . . . . . . . . . . . . .
8−7
8.5.2 Priming The Fuel System . . . . . . . . . . . . . . . . . . . . . . . . . . . . . . . . . . . . . . . . . . . . . . . . . . . . . .
8−8
8.5.3 Mechanical Fuel Pump Screen . . . . . . . . . . . . . . . . . . . . . . . . . . . . . . . . . . . . . . . . . . . . . . . . .
8−8
8.5.4 Electric Fuel Pump Screen . . . . . . . . . . . . . . . . . . . . . . . . . . . . . . . . . . . . . . . . . . . . . . . . . . . . .
8−9
8.5.5 Fuel Filter . . . . . . . . . . . . . . . . . . . . . . . . . . . . . . . . . . . . . . . . . . . . . . . . . . . . . . . . . . . . . . . . . . .
8−9
8.5.6 Fuel Level Sensor (FLS) . . . . . . . . . . . . . . . . . . . . . . . . . . . . . . . . . . . . . . . . . . . . . . . . . . . . . . .
8−9
8.5.7 Fuel Heater . . . . . . . . . . . . . . . . . . . . . . . . . . . . . . . . . . . . . . . . . . . . . . . . . . . . . . . . . . . . . . . . . . 8−10
8.5.8 Engine Oil And Oil Filter . . . . . . . . . . . . . . . . . . . . . . . . . . . . . . . . . . . . . . . . . . . . . . . . . . . . . . . 8−10
8.5.9 Air Cleaner . . . . . . . . . . . . . . . . . . . . . . . . . . . . . . . . . . . . . . . . . . . . . . . . . . . . . . . . . . . . . . . . . . 8−11
8.5.10 Intake Air Heater . . . . . . . . . . . . . . . . . . . . . . . . . . . . . . . . . . . . . . . . . . . . . . . . . . . . . . . . . . . . . 8−12
8.5.11 Speed Control System . . . . . . . . . . . . . . . . . . . . . . . . . . . . . . . . . . . . . . . . . . . . . . . . . . . . . . . . 8−12
8.5.12 Cooling System . . . . . . . . . . . . . . . . . . . . . . . . . . . . . . . . . . . . . . . . . . . . . . . . . . . . . . . . . . . . . . 8−13
8.5.13 Water Pump V-Belt . . . . . . . . . . . . . . . . . . . . . . . . . . . . . . . . . . . . . . . . . . . . . . . . . . . . . . . . . . . 8−14
8.5.14 Crankcase Breather . . . . . . . . . . . . . . . . . . . . . . . . . . . . . . . . . . . . . . . . . . . . . . . . . . . . . . . . . . 8−14
8.6 REFRIGERANT SYSTEM SERVICE . . . . . . . . . . . . . . . . . . . . . . . . . . . . . . . . . . . . . . . . . . . . . . . . 8−14
8.6.1 Refrigerant System Service Connections . . . . . . . . . . . . . . . . . . . . . . . . . . . . . . . . . . . . . . . . 8−14
8.6.2 Servicing The Refrigerant Charge . . . . . . . . . . . . . . . . . . . . . . . . . . . . . . . . . . . . . . . . . . . . . . . 8−15
8.6.3 Leak Checking . . . . . . . . . . . . . . . . . . . . . . . . . . . . . . . . . . . . . . . . . . . . . . . . . . . . . . . . . . . . . . . 8−17
8.6.4 Evacuation And Dehydration . . . . . . . . . . . . . . . . . . . . . . . . . . . . . . . . . . . . . . . . . . . . . . . . . . . 8−19
8.7 COMPRESSOR AND UNLOADER SERVICE . . . . . . . . . . . . . . . . . . . . . . . . . . . . . . . . . . . . . . . . 8−20
8.7.1 Repair or Replacement Determination . . . . . . . . . . . . . . . . . . . . . . . . . . . . . . . . . . . . . . . . . . . 8−20
8.7.2 Removal and Replacement of Compressor . . . . . . . . . . . . . . . . . . . . . . . . . . . . . . . . . . . . . . . 8−21
8.7.3 Cylinder Head and Valve Plate Service . . . . . . . . . . . . . . . . . . . . . . . . . . . . . . . . . . . . . . . . . . 8−22
8.7.4 Oil Pump And Bearing Head . . . . . . . . . . . . . . . . . . . . . . . . . . . . . . . . . . . . . . . . . . . . . . . . . . . 8−23
8.7.5 Compressor Oil Level . . . . . . . . . . . . . . . . . . . . . . . . . . . . . . . . . . . . . . . . . . . . . . . . . . . . . . . . . 8−24
8.7.6 Unloaders . . . . . . . . . . . . . . . . . . . . . . . . . . . . . . . . . . . . . . . . . . . . . . . . . . . . . . . . . . . . . . . . . . . 8−25
8.8 REFRIGERANT SYSTEM COMPONENT SERVICE . . . . . . . . . . . . . . . . . . . . . . . . . . . . . . . . . . 8−26
8.8.1 Evaporator Coil . . . . . . . . . . . . . . . . . . . . . . . . . . . . . . . . . . . . . . . . . . . . . . . . . . . . . . . . . . . . . . 8−26
8.8.2 Condenser Coil . . . . . . . . . . . . . . . . . . . . . . . . . . . . . . . . . . . . . . . . . . . . . . . . . . . . . . . . . . . . . . . 8−27
8.8.3 Filter-Drier . . . . . . . . . . . . . . . . . . . . . . . . . . . . . . . . . . . . . . . . . . . . . . . . . . . . . . . . . . . . . . . . . . . 8−28
8.8.4 Replacing Receiver Sight Glass Or Fusible Plug . . . . . . . . . . . . . . . . . . . . . . . . . . . . . . . . . . 8−28
8.8.5 Compressor Suction Modulation Valve (CSMV) . . . . . . . . . . . . . . . . . . . . . . . . . . . . . . . . . . . 8−28
8.8.6 Electronic Expansion Valve . . . . . . . . . . . . . . . . . . . . . . . . . . . . . . . . . . . . . . . . . . . . . . . . . . . . 8−29
8.8.7 High Pressure Switch . . . . . . . . . . . . . . . . . . . . . . . . . . . . . . . . . . . . . . . . . . . . . . . . . . . . . . . . . 8−31
8.8.8 Pressure Transducers . . . . . . . . . . . . . . . . . . . . . . . . . . . . . . . . . . . . . . . . . . . . . . . . . . . . . . . . . 8−31
8.8.9 Defrost Air Switch . . . . . . . . . . . . . . . . . . . . . . . . . . . . . . . . . . . . . . . . . . . . . . . . . . . . . . . . . . . . 8−31
8.9 ELECTRICAL SYSTEM COMPONENT SERVICE . . . . . . . . . . . . . . . . . . . . . . . . . . . . . . . . . . . . 8−32
8.9.1 Megohmmeter Test Procedure . . . . . . . . . . . . . . . . . . . . . . . . . . . . . . . . . . . . . . . . . . . . . . . . . 8−32
8.9.2 Phase Reversal Module (PRM) . . . . . . . . . . . . . . . . . . . . . . . . . . . . . . . . . . . . . . . . . . . . . . . . . 8−33
8.9.3 Light Bar . . . . . . . . . . . . . . . . . . . . . . . . . . . . . . . . . . . . . . . . . . . . . . . . . . . . . . . . . . . . . . . . . . . . 8−34
8.9.4 Overload Ground Fault (OGF) . . . . . . . . . . . . . . . . . . . . . . . . . . . . . . . . . . . . . . . . . . . . . . . . . . 8−34
8.9.5 Evaporator Heaters . . . . . . . . . . . . . . . . . . . . . . . . . . . . . . . . . . . . . . . . . . . . . . . . . . . . . . . . . . . 8−34
8.9.6 Evaporator Blower & Motor . . . . . . . . . . . . . . . . . . . . . . . . . . . . . . . . . . . . . . . . . . . . . . . . . . . . 8−35
8.9.7 Condenser Fan Assemblies . . . . . . . . . . . . . . . . . . . . . . . . . . . . . . . . . . . . . . . . . . . . . . . . . . . . 8−36
8.9.8 Battery Charger (BTYC) . . . . . . . . . . . . . . . . . . . . . . . . . . . . . . . . . . . . . . . . . . . . . . . . . . . . . . . 8−37
8.9.9 Generator (GEN) . . . . . . . . . . . . . . . . . . . . . . . . . . . . . . . . . . . . . . . . . . . . . . . . . . . . . . . . . . . . . 8−37
8.9.10 Sensor Checkout . . . . . . . . . . . . . . . . . . . . . . . . . . . . . . . . . . . . . . . . . . . . . . . . . . . . . . . . . . . . . 8−41
62−11389
8
1
SECTION 8
SERVICE
8.1 SECTION LAYOUT
WARNING
Service procedures are presented herein under the
following major sections:
Advance microprocessor equipped units
may start automatically at any time the Main
Power switch is not in the OFF position.
Also, the unit may be fitted with two way
communication equipment that will allow
starting of the unit from a remote location
even though the switch is in the OFF position.
S Scheduled Maintenance - Section 8.2
S Pretrip Inspection - Section 8.3
S External Surface Service (grille, surround, doors and
display & keypad assembly) - Section 8.4, beginning
on page 8−5
WARNING
S Engine And Engine Related Systems Service- Section 8.5, beginning on page 8−7
Be aware of HIGH VOLTAGE supplied at the
power plug or from the generator. When
performing service or maintenance procedures: ensure any two way communication is
disabled in accordance with the manufacturer’s instruction, ensure the Main Power
Switch is in the OFF position and, whenever
practical, disconnect the high voltage
source, lockout/tagout the receptacle and
disconnect the negative battery connection. NEVER dis-assemble the generator:
HIGH MAGNETIC FIELD INSIDE! This field
can interfere with cardiac implants such as
pacemakers and defibrillators.
S Refrigerant System Service - Section 8.6, beginning
on page 8−14
S Compressor and Unloader Service - Section 8.7, beginning on page 8−20
S Refrigerant System Component Service - Section
8.8, beginning on page 8−26
S Electrical System Component Service - Section 8.9,
beginning on page 8−32.
Refer to the Table Of Contents to locate specific topics.
WARNING
8.2 SCHEDULED MAINTENANCE
Disconnect batteries before doing any electrical welding on unit or chassis to which
unit is attached (trailer, container, rail car,
metal building, etc).
For the most reliable operation and for maximum life,
your unit requires regular maintenance. This includes oil
and filter changes, fuel and air cleaner replacement,
coolant replacement and pretrip inspections.
Maintenance is to be performed in accordance with the
procedures provided in Table 8−1.
CAUTION
8.3 PRE TRIP INSPECTION
Unit uses R404A and POE oil. The use of inert gas brazing procedures is mandatory for
all Carrier Transicold refrigeration units;
otherwise compressor failure will occur.
For more information Refer to Technical
Procedure 98-50553-00 Inert Gas Brazing
Pre trip inspection should be performed before every trip
and at regular maintenance intervals. Pre trip
procedures are provided in Table 8−2.
8−1
62-11389
Table 8−1 Maintenance Schedule
System
Reference
Section
Operation
a. Pre Trip Inspections
1
2
3
4
Pre Trip Inspection - before starting
Pre Trip Inspection - after starting
Run Microprocessor Pretrip - Before loading
Check Engine Hours
8.3
8.3
3.4
3.14
b. Every Service Interval or Yearly
1 Check engine oil and filter change interval (refer to
Section e. of this table)
2 Check low oil pressure switch
3 Clean crankcase breather
4 Check engine speeds
5 Check water pump belt
Section e.
Fuel System
1 Clean mechanical and electric (if equipped) fuel pump screens
2 Change fuel filter
3 Check fuel heater (if equipped)
8.5.3 & 8.5.4
8.5.5
8.5.7
Cooling
System
1 Check coolant change interval (refer to Section f. of this table).
If replacement is not required, check antifreeze concentration
using a refractometer (Carrier Transicold part number
07-00435-00)
2 Clean condenser & radiator surfaces
3 Check water pump
4 Check water temperature sensor
8.5.12
1 Check mounting hardware
2 Check muffler and exhaust pipes
Check
Check
1 Change air cleaner filter element
2 Check and reset air cleaner indicator (if equipped)
8.5.9
Check
1
2
3
4
Check/Replace
Check/Replace
Check
Check
Engine
Exhaust
System
Air Intake
System
Starting
Circuit
Clean battery connections and cable ends
Check battery hold down clamps
Check battery condition
Check starter operation
Check
8.5.14
Table 2-1
Check
8.5.12
Check
Check
Charging
Circuit
1 Check battery charger output voltage
2 Check battery charger amperage
2.11
2.11
A.C.
Generator
1 Check voltage output
2 Check amperage output
2.11
2.11
1
2
3
4
5
6
Check
Check
8.4.3
Check
Check
Check
Unit
62-11389
Check unit mounting bolts
Check engine and compressor mounting bolts
Check door latches & hinges
Check unit switches and electrical connections
Check all electrical ground connections
Check control box condition
8−2
Table 8−1 Maintenance Schedule - Continued
System
Operation
Reference
Section
b. Every Service Interval or Yearly - Continued
Refrigeration 1 Check air switch and calibrate
System
2 Check & clean the evaporator coil and all defrost drain hoses
3 Install manifold gauge set and check refrigerant pressure
4 Check manual defrost operation
5 Perform Microprocessor Pretrip
Electrical
System
1
2
3
4
5
6
7
Check all ground connections for corrosion & tightness
Check Stand-by plug for signs of wear or damage
Check condenser fan amperage
Check evaporator fan amperages
Check compressor amperage
Check heater amperages
Perform insulation resistance verification for high voltage wiring,
refer to Section 8.9.1.
8.8.9
8.8.1
Check
3.9
3.4
Check
Check
2.11
2.11
2.11
2.11
--
c. Every Second Service Interval or 2 years
Cooling
System
Drain and flush cooling system
8.5.12
d. Every 10,000 Hour Maintenance
Perform complete annual Preventive Maintenance and the following:
Fuel System
Clean and adjust injector nozzles.
Engine Service Guide
e. Oil Change Intervals
Oil Type
Oil Change / ESI Filter Change
Petroleum
3000 hours or 2 yrs. (Maximum oil drain interval is 2 years.)
Mobile Delvac 1*
4000 hours or 2 yr (Maximum oil drain interval is 2 years.)
* Mobil Delvac1 is the only approved synthetic oil.
f. Coolant Change Intervals
Coolant Type
Service Interval
Standard
6000 hours or 2 yr
Extended Life
12000 hours or 5 yr
These maintenance schedules are based on the use of approved oils and regular Pretrip inspections of the unit.
Failure to follow the recommended maintenance schedule may affect the life and reliability of the refrigeration unit.
8−3
62-11389
Table 8−2 Pre Trip Inspection
WARNING
Inspect battery cables for signs of wear, abrasion or damage at every pre trip inspection and replace if
necessary. Also check battery cable routing to ensure that clamps are secure and that cables are not
pinched or chafing against any components.
BEFORE STARTING ENGINE
OK
ADJUST
Drain water from bottom of fuel tank
j
j
Drain water from water separator on fuel filter (if applicable)
j
j
Check radiator coolant level
j
j
Check condenser & radiator for cleanliness
j
j
Check air cleaner and hoses
j
j
Check engine oil level
j
j
Check condition of water pump belt
j
j
Check battery fluid level (if applicable)
j
j
Check battery cables and terminals
j
j
Check evaporator coil for cleanliness
j
j
Check bulkheads and return air screens
j
j
Check all defrost water drains
j
j
Place in continuous run and start unit
j
j
IMMEDIATELY AFTER STARTING ENGINE
OK
ADJUST
Check fuel lines and filter for leaks
j
j
Check oil lines and filter for leaks
j
j
Check coolant hoses for leaks
j
j
Check exhaust system for leaks
j
j
Check condenser fans for proper airflow.
j
j
Check evaporator fan for proper airflow.
j
j
Check for unusual noises
j
j
MICROPROCESSOR PRETRIP
PASS
FAIL
Initiate Pretrip
j
j
List Alarms occurring during Pretrip
AFTER OPERATING UNIT FOR 15 MINUTES OR MORE
Check refrigerant level
Check compressor oil level
Check for proper temperature control
Check Start-Stop Operation
Initiate defrost and allow to terminate
Check engine speeds
62-11389
8−4
OK
j
j
j
j
j
j
ADJUST
j
j
j
j
j
j
Table 8−2 Pre Trip Inspection - Continued
OPERATE UNIT IN HIGH SPEED COOL AND RECORD (From Microprocessor Unit Data)
Suction Pressure
Battery Voltage
Unit Model #
Discharge Pressure
Current Draw (DC)
Fuel Level*
Evaporator Pressure
Engine RPM
Hrs to Engine Maint
Engine Coolant Temp
Unit AC Current #1
Hrs to S/B Motor Maint
Return Air Temp
Unit AC Current #2
Hrs to Unit Maint
Supply Air Temp
CSMV %
Time Left to PM1*
Delta-T
EVXV %
Time Left to PM2*
Ambient Air Temp
Software Rev
Time Left to PM3*
Defrost Term Temp
Display Software Rev
Time Left to PM4*
Suction line Temp
Controller Serial #
Time Left to PM5*
Evap Outlet Temp
Trailer/Vehicle/Car ID #
Compr Disch Temp
Unit Serial #
Datalogger (DataLink
data recorder) Date/
Time
* Display is optional, record if displayed.
FINAL
Review Functional Parameters
Download DataLink data recorder (if required)
Enter Trip Start In Microprocessor
OK
j
j
j
ADJUST
j
j
j
8.4 EXTERNAL SURFACE SERVICE
GRILLE INSERT
GRILLE INSERT MOUNTING BOLTS
Procedures for servicing or maintaining the grille,
surround, doors, door latches and display & keypad
assembly are provided in the following sub-paragraphs.
SURROUND
8.4.1 Grille Insert Removal
To remove the grille insert, do the following.
NOTE
If difficulty is experienced when attempting to
remove the grille mounting bolts, the grille may
be removed with the surround attached to allow
access to the mounting clips. (Refer to Section
8.4.2.)
a. Ensure the unit will not start automatically by disabling any two way communication and placing the
Main Power switch in the OFF position. Disconnect
the high voltage source and lockout/tagout the receptacle.
LUBRICATE LATCHES AND PINS
b. Remove the 3 grille insert mounting bolts on each
side of the grille insert, See Figure 8−1
Figure 8−1 Grille Insert Removal And Door Latch
Maintenance
c. Remove the 2 grille insert mounting bolts on top of the
grille insert.
8.4.2 Surround Removal
d. The grille is fitted with locating tabs along the bottom.
To remove, swing insert down and lift out of locating
slots.
NOTE
It is not necessary to remove the grille before
removing the surround.
e. Reverse above steps to install grille insert.
8−5
62-11389
a. Ensure the unit will not start automatically by disabling any two way communication and placing the
Main Power Switch in the OFF position. Disconnect
the high voltage source and lockout/tagout the receptacle.
NOTE
The side door lower cable is inserted through
the upper cable eyelet. The lower cable is to be
removed to gain access to the upper cable.
3. Reverse above steps to install new cable.
b. Open both side and front doors.
c. Remove the bolts that secure the surround to the unit,
see Figure 8−2.
4
d. Reverse above steps to install surround.
MOUNTING BOLTS
3
1
2
1.
2.
3.
4.
Figure 8−3 Door Latch Cable Removal
MOUNTING BOLTS
8.4.4 Display & Keypad Assembly
REMOVE DECAL PLATE TO
ACCESS UNIT MOUNTING STUD.
a. Disassembly
1. Place the Main Power switch in the OFF position. Disconnect the negative battery cable. Disconnect the
high voltage source and lockout/tagout the receptacle. Attach a grounded wrist strap (Carrier
Transicold part number 07-00304-00) and ground it to
a good unit frame ground.
Figure 8−2 Surround Removal
8.4.3 Door Latch Maintenance And Replacement
2. Disconnect wiring between the keypad & display assembly and harness.
a. Door Latch Maintenance
Proper maintenance is important for smooth operation
of the latch assemblies and the latch pins that are mounted on the unit’s frame (See Figure 8−1). In order to
keep the movable parts clean and lubricated, CTD recommends the use of a de-greasing cleaner and LPS 2
lubricant. This lubricant should be available at any local
automobile and truck parts suppliers.
3. Loosen and remove the (4) hex head 1/4-20 bolts
holding the assembly to the unit, see Figure 8−4, and
lay the assembly on a clean work surface. Re-ground
wrist strap at new work surface.
4. Loosen and remove the (4) pan head screws holding
the display board to the keypad support. Carefully
separate the display board from the keypad support.
b. Cable Replacement
5. If additional disassembly is required, remove the eleven pan head screws (eight screws around the perimeter and three in the center) used to retain the
keypad support, keypad, gaskets and window to the
bezel.
1. Remove circular clip that secures the cable to the
paddle assembly. See Figure 8−3
2. Slide cable from paddle and rotate other end out of
latch assembly.
62-11389
Paddle Assembly (Typical, Front & Side Doors)
Circular Clips (Typical, Front & Side Doors)
Lower Cable Upper Connection (Side Doors Only)
Upper Cable (Side Doors Only)
8−6
DETENT NOTCH
5
4
3
2
1
7
9
12
1.
2.
3.
4.
5.
6.
Display Board
Keypad Support
Keypad
Latch
Spring
Bezel
11
8
6
10
7.
8.
9.
10.
11.
12
Condensate Drain
Door
Plug
Gasket (Window to Bezel)
Window
Gasket (Keypad to Window)
Figure 8−4 Display and Keypad Assembly
3. Reconnect negative battery cable and standby plug
as required and run Pretrip to check unit operation.
b. Reassembly
CAUTION
8.5 ENGINE AND ENGINE RELATED SYSTEMS
SERVICE
Do not over torque display & keypad pan
head screws. Torque all screws to 60 in lbs
(6.8 Nm).
Procedures for servicing the engine, fuel system,
engine cooling system and air cleaner are provided in
the following sub-paragraphs.
NOTE
All gaskets must be replaced any time the
keypad support is removed from the bezel. All
replacement display bezel assembly kits are
packaged with replacement gaskets.
8.5.1 Fuel System
The fuel system (see Figure 8−5) consists of the fuel
tank, mechanical lift pump, fuel filter, fuel injection
pump, the injectors and interconnecting tubing. The fuel
system may also be equipped with an optional electric
pump and/or optional electric fuel heater.
1. Clean all gasket surfaces and install keypad support,
keypad, gaskets and window to the bezel in the correct order, see Figure 8−4 Install the 11 mounting
screws.
Two fuel system configurations have been used. The
first has the leak-off line at the inlet side of the filter (with
an outlet line check valve) and the second has the
leak-off line at the outlet side of the filter (without an
outlet line check valve).
2. Install the display board. and reconnect wiring
between the keypad & display assembly and harness.
8−7
62-11389
b. Turn the top of the manual plunger counter-clockwise
to unlock it. S-L-O-W-L-Y (up/down once per second)
pump the manual plunger until positive pressure (resistance) is felt. This may take up to 200 strokes. This
will indicate fuel flow.
11
12
10
c. Continue to pump S-L-O-W-L-Y (up/down once per
second) approximately 100 more strokes to fill the filter and bleed the air out of the lines.
13
9
d. Start engine. It may be necessary to continue to
pump until the engine starts.
14
8
CAUTION
7
Running the engine for an extended period
of time with the manual plunger up can
cause a priming pump failure
1
5
6
4
3
2
e. Depress and turn the top of the manual plunger clockwise to lock in place.
f. When engine is running smoothly, turn bleed valve
clockwise until fully closed.
9
Item 8 = Leak-off
line connected at
the fuel inlet side
1.
2.
3.
4.
5.
6
7.
Fuel Tank
Supply Line
Electric Pump
Mechanical Pump
Water Separator
Heater
Filter
3
Item 8 = Leak-off
line connected at
the fuel outlet side
8.
9.
10.
11.
12.
13.
14.
2
Filter Leak-Off Line
Check Valve*
Injection Pump
Injector Nozzles
Bleed Screw
Return Line
Level Sensor
1
* CHECK VALVE USED WHEN LEAK-OFF
LINE IS INSTALLED AT THE INLET CONNECTION ONLY
1. Mechanical Fuel Lift
Pump
2. Manual Plunger
Figure 8−5 Fuel System Diagram
3. Bleed Screw
4. Injection Pump
Figure 8−6 Fuel Bleed Components
8.5.2 Priming The Fuel System
The mechanical fuel lift pump (See Figure 8−6) is
mounted on the engine next to the injection pump. This
pump has a manual plunger for priming the fuel system
when the fuel tank has been run dry.
8.5.3 Mechanical Fuel Pump Screen
The fuel screen (See Figure 8−7) may become plugged
or restricted with foreign particles or wax as a result of
using the wrong grade of fuel or untreated fuel in cold
weather. This will cause the engine to lose power. The
screen must be cleaned on a regular schedule such as
unit pre-trip or when the oil and fuel filters are changed.
(Refer to Section 8.2).
To prime the fuel system, use the following steps:
a. Turn the bleed valve (red) counter-clockwise until fully opened.
62-11389
4
8−8
1
3
2
1
2
3
4
2
1.
2.
3.
4.
Screen
Nut
Copper Rings
Banjo Fitting
1.
Cover 2. Gasket 3. Screen
Figure 8−8 Electric Fuel Pump
Figure 8−7 Mechanical Fuel Pump
8.5.5 Fuel Filter
To check or replace Screen
To replace filter:
a. Ensure the unit will not start automatically by disabling any two way communication and placing the
Main Power switch in the OFF position. Disconnect
the high voltage source and lockout/tagout the receptacle.
a. Ensure the unit will not start automatically by disabling any two way communication and placing the
Main Power switch in the OFF position. Disconnect
the high voltage source and lockout/tagout the receptacle.
b. Turn nut (Item 2, Figure 8−7) counter-clockwise to
loosen and remove it .
b. Place a shallow pan under filter (item 7, Figure 8−5)
and open the water separator (item 5) to drain contents.
c. Remove banjo fitting (Item 4) and let it hang loose.
Discard copper rings (Item 3) and replace with new
ones.
c. Remove water separator and O-ring and then remove
element.
d. Turn screen (Item 1) counter-clockwise and remove.
Check and clean.
d. Install water separator on new element using new
O-ring.
e. To install reverse above steps.
e. Fill new element with clean diesel fuel, lubricate the
seal and install. Tighten firmly by hand.
f. Start unit and check for leaks.
f. Start unit and check for leaks.
8.5.4 Electric Fuel Pump Screen
To check or replace Screen
8.5.6 Fuel Level Sensor (FLS)
a. Ensure the unit will not start automatically by disabling any two way communication and placing the
Main Power Switch in the OFF position. Disconnect
the high voltage source and lockout/tagout the receptacle.
An optional fuel level sensor (item1, Figure 8−9)
supplies an input signal to the microprocessor as to the
% of fuel remaining in the fuel tank. The microprocessor
will activate the A1 = “LOW FUEL LEVEL WARNING”
alarm when the level reaches 15%, and (if configured to
do so) shuts the engine down when the level reaches
10%. The fuel tank level is be displayed in the Unit Data.
b. Remove 3 screws from cover (See Figure 8−8).
c. Remove cover, gasket and screen.
To Check The Fuel Level Sensor, do the following
a. Ensure the unit will not start automatically by disabling any two way communication and placing the
Main Power switch in the OFF position. Disconnect
the high voltage source and lockout/tagout the receptacle.
WARNING
Use the required protective eye wear and
clothing when working with solvents.
b. Verify that the fuse (FLS) is not open. See Figure 8−9.
d. Wash screen in cleaning solvent and blow out with air
pressure. Clean cover.
c. Verify that the wiring is correct, cable shield is properly grounded and condition of connectors. No damage to sensor; no damage, moisture or corrosion in
connectors.
e. To Install reverse above steps.
f. Start unit and check for leaks.
8−9
62-11389
7
1
2
11
8
15
12
11
12
16
5
3
4
13
9
6
1.
2.
3.
4.
5.
6.
7.
8.
9.
14
10
Fuel Level Sensor
Gasket
Focus Tube
Sensor Flange
Fuel Level Sensor Flange
Fuel Tank
Wire 1MP26 - FLSC (Connection C)
Wire SP6 - FLSB (Connection B)
Wire SP5 - FLSA (Connection A)
10.
11.
12.
13.
14.
15.
16.
17.
18.
13
17
18
Fuse (FLS = 3A)
White Wire (Connection C)
Black Wire (Connection B)
Red Wire (Connection A)
Ground (Shield)
Yellow Wire (Connection C)
Black Wire (Connection B)
Red Wire (Connection A)
Wires From Sensor
Figure 8−9 Fuel Level Sensor
prevents paraffin wax crystals (and ice) that form when
diesel fuel is chilled thus enabling the water separator to
work more efficiently and to prevent the filter from
plugging with wax and/or ice crystals. When the ambient
air sensor is reading 77_F (25_C) or higher, the
microprocessor will not enable this circuit. Also, the
heater is fitted with an internal temperature switch
(FHTS - see schematic diagrams, Section 10) which will
close, on a temperature fall, to energize the heater
element at temperatures below 45_F (7.2_C) and open,
on a temperature rise, to de-energize the heater
element at 75_F (23.9_C).
d. Energize sensor circuit, refer to Note 2, page 7−2.
Check power (approximately 12 VDC) from SP5 (9,
Figure 8−9) through to connector (13). Check ground
from SP6 (8) through connector (12). Check signal
(greater than 0.24 VDC and less than 5VDC) at microprocessor (1MP-26).
e. If checks in the preceding step are OK, remove the
fuel level sensor, focus tube and gaskets. With the
trailer level, verify that the fuel level sensor flange is
within one-half bubble of level using a 24 inch level.
Adjust tank mounting as required.
To test the fuel heater, do the following:
CAUTION
a. Using Unit Data (refer to Section 3.13), check to ensure the Ambient Air Temperature reading is below
77_F (25_C), if the reading is below this temperature
the fuel heater relay (FHR) should be energized. If the
relay does not energize, check for power from microprocessor terminal 4MP16 to the relay coil and
ground from the coil connector.
Torque fuel level sensor mounting screws
to 15 to 18 inch/pounds. DO NOT over tighten, as little as 20 inch/pounds will damage
the sensor.
f. Using new gaskets, reinstall fuel level sensor components. The mounting holes are not symmetrical,
there is an alignment hole in the sensor, alignment
holes and index dimples in the gaskets and an alignment notch in the focus tube flange to assist in aligning the components. Install mounting screws and
washers in all mounting holes and bring to finger tight.
Tighten in accordance with the instructions provided
in the preceding CAUTION
b. Check for power from SP50, through fuse F19, the relay contacts and HC16 to the fuel heater connector.
Check also for ground from the fuel heater connector
to SP 6.
c. If the fuel heater temperature is below 45_F (7.2_C)
replace the fuel heater. If the fuel heater temperature
is above 45_F (7.2_C), the internal temperature
switch may be open. Retest at a temperature below
the switch close point as soon as conditions allow.
g. With the fuel tank empty the output reading should be
approximately 0.25 VDC.
8.5.8 Engine Oil And Oil Filter
h. With the fuel tank full, the output reading should be
approximately 4.75 VDC.
a. To Check The Engine Oil Level:
1 Warm up the engine and then stop it by placing the
Main Power switch in the OFF position. Ensure the
unit will not start automatically by disabling any two
way communication. Disconnect the high voltage
source and lockout/tagout the receptacle.
i. Start unit and check for leaks.
8.5.7 Fuel Heater
The optional fuel heater (item 6, Figure 8−5) applies
heat to fuel in the fuel filter. Heating the fuel dissolves /
62-11389
8−10
2 Unscrew the cap/dipstick see Figure 8−10. Wipe the
dipstick clean and insert the cap into the oil fill tube
without threading into tube.
3 Remove drain plug drain engine oil. Replace plug and
refill engine with oil. Continue with step c. and change
oil filter.
3 Remove the dipstick again and check oil level. DO
NOT add oil if the level is in the “safe” range. If needed, add oil as indicated by markings on dipstick until
level is in the “safe” range.
4 After checking or adding oil as necessary, ensure cap
is threaded back onto oil fill tube.
Cap
Dipstick
QTS
1
Figure 8−12 Oil Drain Tool
2 SAFE
c. To Change Engine Oil Filter:
1 If not continuing from preceding step b., warm up the
engine and then stop it by placing the Main Power
switch in the OFF position. Ensure the unit will not
start automatically by disabling any two way communication. Disconnect the high voltage source.
2 Remove oil filter. Ensure filter mounting is clean.
Figure 8−10 Engine Oil Level
4
5
1
CAUTION
When changing oil filters, the new filters
should be primed (partially filled) with clean
oil if possible. If the filters are not primed,
the engine may operate for a period with no
oil supplied to the bearings.
2
3 Lightly oil gasket on new filter before installing. Tighten 3/4 to 1 turn after the seal makes contact.
4. Start unit and check for leaks.
3
1.
2.
3.
4.
5.
8.5.9 Air Cleaner
Engine Block
Oil Pan
Oil Filter
Engine Oil Connection
Oil Pressure Switch
The air cleaner should be inspected regularly for leaks.
A damaged air cleaner or hose can seriously affect the
performance and life of the engine. The air cleaner is designed to effectively remove contaminants from the air
stream entering the engine. An excessive accumulation
of these contaminants in the air cleaner will impair its operation; therefore, a service schedule must be set up
and followed.
An air cleaner service indicator is connected to the intake manifold. Its function is to indicate when the air
cleaner requires replacement. During operation: when a
plugged air cleaner causes the intake manifold pressure
to drop to 20” (500 mm) WG, the indicator will move to
the red line. The air cleaner should then be replaced and
the indicator reset by pressing the reset button.
a. Ensure the unit will not start automatically by disabling any two way communication and placing the
Main Power switch in the OFF position. Disconnect
the high voltage source.
Figure 8−11 Engine Oil Flow Diagram
b. To Change Engine Oil:
1 Warm up the engine and then stop it by placing the
Main Power switch in the OFF position. Ensure the
unit will not start automatically by disabling any two
way communication. Disconnect the high voltage
source and lockout/tagout the receptacle.
2 If available, install oil drain tool (CTD P/N
68-15763-00). See Figure 8−12. The Oil Drain Tool
not only directs the oil over the door latch pin bracket
and bottom panel, on units so equipped, but also
holds a typical drain bucket in place while the oil is
draining from the engine.
8−11
62-11389
b. Check all connections for mechanical tightness. Be
sure filter outlet pipe is not fractured.
5 Clean gasket surfaces and reinstall intake air heater
and flange using new gaskets. Torque flange bolts to
11 to 18 ft/lbs (15 to 24 nm).
c. Release 2 clips on air cleaner housing and remove
the cover.
d. Remove filter element, wipe inside of air cleaner
housing clean inspect element and replace if required.
e. Wipe inside of the cover and re-install.
f. Re-secure 2 clips on air cleaner housing.
g. Reset air cleaner service indicator.
8.5.10 Intake Air Heater
The circuit amp draw for the air heater circuit is checked
during a Pretrip cycle. Refer to Section 2.12 for
amperage and resistance values.
a. Troubleshooting The Intake Air Heater (IAH)
1 Ensure the unit will not start automatically by disabling any two way communication and placing the
Main Power switch in the OFF position. Disconnect
the high voltage source and lockout/tagout the receptacle.
2 Disconnect the lead.
ENSSN
3 Measure the resistance between the + terminal and
the heater body.
FSA
ENSCU
4 If the resistance is infinite or zero, the intake air heater
is faulty and must be replaced.
+ TERMINAL
LED
HEATER BODY
The ENSCU is located on the air cleaner
bracket - see item 4,Figure 2−3)
Figure 8−13 Intake Air Heater
Figure 8−14 Electronic Speed Control
Components
b. Replacing The Intake Air Heater
1 Ensure the unit will not start automatically by disabling any two way communication and placing the
Main Power switch in the OFF position. Disconnect
the high voltage source and lockout/tagout the receptacle.
8.5.11 Speed Control System
2 Remove the inlet hose.
The ENSSN provides the speed signal to the ENSCU.
3 Disconnect the lead.
The ENSCU starts, stops and controls the speed of the
engine by varying the position of the FSA rod. It also
provides a speed signal to the microprocessor.
Engine speed is controlled by three components: the
engine speed control unit (ENSCU), the fuel/speed
actuator (FSA) and the engine speed sensor (ENSSN).
4 Remove the flange, intake air heater and gaskets.
The FSA combines the fuel shutoff solenoid and speed
control solenoid into one component.
NOTE
To avoid short-circuiting the heater, ensure that
the heater and the heater elements are vertical
when assembling to the intake manifold. The
plus terminal is to be mounted towards the front
of the unit.
62-11389
The ENSCU is fitted with an alarm LED which may be
used to diagnose failures within the system. Refer to
Section 10 for wiring schematic and to Section 9.5 for
Speed Control System Diagnostics.
8−12
8.5.12 Cooling System
NOTE
Only clean water should be used to flush the
cooling system. Do not use any radiator flush or
detergents to clean the radiator.
a. Cleaning and Flushing
Air flows through the condenser and then the radiator.
The cooling surfaces of both must be clean and the
interior of the radiator must be clean for adequate
cooling.
5. Start the engine and drain system while warm. Rinse
system three times after it has cooled down. Refill
system with water.
6. Run engine to operating temperature. Drain system
again and fill with 50/50 water/anti-freeze mixture.
(see Caution Note at the beginning of this section.)
CAUTION
Use only ethylene glycol anti-freeze (with
inhibitors) in system as glycol by itself will
damage the cooling system. Always add
pre-mixed 50/50 anti-freeze and water to radiator/engine. Never exceed more than a
60% concentration of anti-freeze. Use a low
silicate anti-freeze meeting specification
GM 6038M for standard life coolant or use
Texaco Havoline extended life coolant or
any other extended life coolant which is
Dexcool approved and has 5/150 (5
years/150,000 miles) on the label.
b. Radiator Replacement
1. Ensure the unit will not start automatically by disabling any two way communication and placing the
Main Power switch in the OFF position. Disconnect
the high voltage source and lockout/tagout the receptacle.
2. Drain coolant completely by removing radiator cap
and then the lower radiator hose.
3. Remove condenser fans, refer to Section 8.9.7.
When removing the road side fan assembly, remove
the condenser to subcooler line support bracket completely, to allow clearance for coil removal.
1. Ensure the unit will not start automatically by disabling any two way communication and placing the
Main Power switch in the OFF position. Disconnect
the high voltage source and lockout/tagout the receptacle.
4. Remove the radiator frame assembly mounting bolts
(see Figure 8−15) and and remove the radiator frame
assembly.
5. Remove top radiator mounting brackets and remove
the radiator through the top of the unit.
2. Remove all foreign material from the condenser coil and
radiator by reversing the normal air flow. (Air is pulled in
through the front and discharges over the engine.)
Compressed air or water may be used as a cleaning
agent.
6. Re-assemble in reverse order of removal.
7. Flush and fill radiator with coolant. (Refer to section
8.5.12.)
WARNING
1
2
3
4
Do not remove the cap from a hot radiator or
bottle; if the cap must be removed, do so
very slowly in order to release the pressure
without spray.
NOTE
Draining the coolant from the engine petcock
will leave approximately 1 quart (.9 liters) of
coolant in the block.
3. Drain coolant completely by removing radiator cap
and then the lower radiator hose.
5
CAUTION
Condenser coil not shown, for clarity
NEVER POUR COLD WATER INTO A HOT
ENGINE, however hot water can always be
added to a cold engine.
1.
2.
3.
4.
5.
4. Install hose and fill system with clean, untreated water.
Radiator Frame Assembly
Radiator Mounting Bracket
Radiator
Condenser Frame Assembly
Radiator Frame Mounting Bolts
Figure 8−15 Condenser And Radiator Assemblies
8−13
62-11389
in step 1), use a flat, blunt object to guide the belt
onto the crank pulley. Be careful not to damage
grooves on the pulley or belt.
8.5.13 Water Pump V-Belt
8.5.14 Crankcase Breather
WARNING
The engine uses a closed type breather with the
breather line attached to the cylinder head cover. (See
Figure 8−17)
The breather assembly should be cleaned once a year
or at every 2000 hours maintenance interval (whichever
comes first). See Table 8−1
Beware of moving poly V-belt and belt driven components.
WARNING
2
When working with belts, beware of pinch
points.
1
3
Water Pump Belt
4
1.
2.
3.
4.
Screw
Breather Cover
Breather Valve
Breather Tube
Figure 8−17 Engine Crankcase Breather
8.6 REFRIGERANT SYSTEM SERVICE
Service of the refrigerant system includes: connection
of refrigerant system equipment, servicing the
refrigerant charge, leak checking and evacuation.
Procedures for refrigerant system service are provided
in the following sub paragraphs.
Figure 8−16 Water Pump V-Belt
8.6.1 Refrigerant System Service Connections
To service the refrigerant system, service equipment is
connected to the system at the compressor discharge
service valve, compressor suction service valve and/or
the liquid line service valve.
The water pump v-belt is driven by a sheave on the
engine crankshaft. Frayed, cracked or worn belts must
be replaced. This belt is a one time use only type and
requires no tension adjustment.
When connecting to a valve, backseat the valve (turn
counterclockwise) to close off gauge connection and
attach service line to the valve. Open valve 1/4 to 1/2 turn
(clockwise) and then purge the service line. See
Figure 8−18 for an example of a full service connection
setup.
To replace the poly V-belt, perform the following steps:
a. Ensure the unit will not start automatically by disabling any two way communication and placing the
Main Power switch in the OFF position. Disconnect
the high voltage source and lockout/tagout the receptacle.
NOTE
To avoid damage to the earth’s ozone layer, use a
refrigerant recovery system whenever removing
refrigerant from a refrigeration system. When
working with refrigerants you must comply with all
local government environmental laws, U.S.A.
EPA section 608.
b. Using the proper size socket, slowly rotate the crank
by turning the crank pulley nut. At the same time, use
a flat, blunt object to guide the belt off the crank
pulley. Be careful not to damage grooves on the
pulley.
c.. Replace the poly V-Belt by positioning the belt on the
water pump pulley, and while rotating the engine (as
62-11389
8−14
ÂÂÂ
ÂÂÂ
10
8
3. Partially block off air flow to condenser coil so discharge pressure rises to 230 psig (15.7 bar).
12
18
15
17
2
11
Â
Â
Â
Â
Â
ÂÂÂ
ÂÂÂ
ÂÂÂ
9
7
2. Start unit in Continuous Run Operation. Adjust set
point so that unit is running in high speed, fully loaded
and operating in cooling. Run approximately ten minutes - until the refrigeration system is warmed up and
the refrigerated compartment temperature is approaching set point.
4. Check the receiver sight glasses to determine
charge. The system is correctly charged when the
lower sight glass is not empty and the upper sight
glass is not full.
13
14
4
3
5. If the system appears to be overcharged or under
charged, adjust charge. Refer to following step f.
b. Checking For Noncondensibles
To check for noncondensibles, proceed as follows:
1. Install a manifold gauge set to allow reading of suction
and discharge pressure. See Figure 8−18.
16
1
6
2. Stabilize system to equalize pressure between the
suction and discharge side of the system. The refrigerant system needs to be off for several hours.
5
1. Refrigerant
Cylinder
2. Refrigerant
Recovery Unit
3. Manifold Gauge
Set
4. Valve
5. Vacuum Indicator
6. Vacuum Pump
7. Discharge Service
Valve
8. Compressor
9. Heat Exchanger
10. Evaporator
3. Measure temperature at the copper tubing leaving
the condenser (not the subcooler).
11. Electronic
Expansion Valve
12. Receiver
13. Liquid Line Service
Valve
14. Subcooler
15. Filter-Drier
16 Condenser
17 Suction Service
Valve
18 Compressor
Suction
Modulation Valve
(CSMV)
4. Record compressor discharge pressure.
5. Determine saturation pressure as it corresponds to
the condenser temperature using the temperature
pressure chart, Table 8−7.
6. If gauge reading is not close to the calculated saturation pressure in step 5, noncondensibles or mixed refrigerants are present.
7. Remove refrigerant. Refer to following step c.
8. Leak check, evacuate and recharge the system.
c. Removing Charge
To remove the refrigerant charge, proceed as follows:
1. If the system is in operating condition, it will be quicker
to remove the charge by continuing with step 2. If the
system is not in operating condition, skip steps 2
through 5 and continue with step 6.
Figure 8−18 Refrigerant System
Service Equipment
2 Install a manifold gauge set to allow reading of suction
and discharge pressure. See Figure 8−18.
8.6.2 Servicing The Refrigerant Charge
Servicing of the refrigerant charge includes: checking
the charge level, checking for noncondensibles,
removing the charge, pumping down the low side,
pumping down the compressor, adjusting the charge
level and adding a complete charge. Procedures for
charge service are provided in the following sub
paragraphs.
CAUTION
Only a refrigerant cylinder that has previously been used with R404A should be connected to this refrigeration unit.
3. Connect a clean, evacuated refrigerant cylinder to the
liquid line service valve connection. Place the cylinder
on a weight scale so the refrigerant going into the cylinder can be monitored.
a. Checking Charge Level
Check the refrigerant charge before adding any
refrigerant to the system. Only add refrigerant if charge
is low. If charge is low, leak checking must be performed
(Refer to Section 8.6.3) and all leaks repaired before
adding refrigerant.
4. Start the unit and run in high speed cool. Cover the
condenser to raise the discharge pressure to as high
as 375 psig (25.5 bar). Do not let the discharge pressure exceed 400 psig (27.2 bar). Open the refrigerant
cylinder valve, and allow the refrigerant to flow into
1. Install a manifold gauge set to allow reading of discharge pressure. See Figure 8−18.
8−15
62-11389
the cylinder. The amount of refrigerant going into the
cylinder can be monitored by watching the weight of
the cylinder.
bar slowly open the liquid line service valve slightly
and then frontseat the valve again. Repeat as necessary in order to raise the pressure above 0.
5. Shut down the unit when the suction pressure drops
to 2 psig (0.2 bar). There should be very little refrigerant remaining in the system at this point.
9. Connect a refrigerant recovery device and a clean refrigerant recovery cylinder to the suction and discharge service valves and remove any remaining refrigerant from the low side. DO NOT bring the low side
pressure below 0 psig/bar.
6. Place the unit in Service Mode (Refer to Section
5.2.3). Ensure that the microprocessor MessageCenter displays “RECOVER/LEAK CHK/EVAC
MODE” during the refrigerant removal procedures. If
the microprocessor switches to charge mode during
the process, switch it back to the “RECOVER/LEAK
CHK/EVAC MODE”.
10. After making necessary repairs, leak check and
evacuate the low side of the refrigeration system.
(Refer to Sections 8.6.3 and 8.6.4.)
e. Pumping Down The Compressor
The compressor or any of the components attached to it
(unloaders, high pressure switch, discharge and suction
pressure transducers, discharge temperature sensor,
compressor heads and oil, etc.) may be serviced or
replaced by pumping the compressor down, and
isolating the compressor from the rest of the system.
1 Install a manifold gauge set to allow reading of suction
and discharge pressure. See Figure 8−18.
2 If the compressor is operational, start the unit and
slowly frontseat the suction service valve. Shut down
the unit when the suction pressure drops to 2 psig (0.2
bar). Ensure the unit will not start automatically by disabling any two way communication and placing the
Main Power switch in the OFF position. Disconnect
the high voltage source and lockout/tagout the receptacle. Frontseat the discharge service valve to
isolate compressor. There should be very little refrigerant remaining in the compressor at this point.
3 If the compressor is not operational, ensure the unit
will not start automatically by disabling any two way
communication and placing the Main Power switch in
the OFF position. Disconnect the high voltage source
and lockout/tagout the receptacle. and then frontseat
both the discharge and suction service valve to isolate
the compressor.
7. Connect a refrigerant recovery device and a clean refrigerant recovery cylinder (or continue to use the
same cylinder used in step 3) as shown in
Figure 8−18 and remove any remaining refrigerant
from the system.
8. Refer to instructions provided by the manufacturer of
the refrigerant recovery unit.
9. After making necessary repairs, leak check, evacuate and recharge the system.
d. Pumping Down The Low Side
Components on the low side of the refrigeration system
(the filter-drier, EVXV, evaporator coil, evaporator outlet
pressure transducer, CSMV, heat exchanger, suction
line etc.) may be serviced or replaced without having to
completely remove the refrigerant charge from the
system by pumping down the low side, and temporarily
storing the refrigerant in the condenser and receiver.
1. Install a manifold gauge set to allow reading of suction
and discharge pressure. See Figure 8−18.
2. Start the unit.
3. Frontseat the liquid line service valve.
4 Connect a refrigerant recovery device and a clean refrigerant recovery cylinder to the suction and discharge service valves and remove any remaining refrigerant from the compressor. DO NOT bring the
compressor pressure below 0 psig/bar.
5. After making necessary repairs, leak check and
evacuate the compressor. (Refer to Sections 8.6.3
and 8.6.4.)
4. Shut down the unit when the suction pressure drops
to 2 psig (0.2 bar). There should be very little refrigerant remaining in the low side of the system at this
point.
5. Monitor the gauges. The suction pressure should
not rise rapidly. If the suction pressure continues to
rise, the liquid line service valve may not be closed
properly. In this case, the low side cannot be
pumped down and the entire refrigerant charge
must be removed from the system. (Refer to preceding step c.)
f. Adjusting The Charge Level
Adjustment of the charge level may be required when
there has been a leak or the system was not correctly
charged during a previous service.
1 Check charge level by performing the procedures of
the preceding step a.
2 If charge removal is required: connect a clean evacuated refrigerant recovery cylinder to the liquid line service valve. Open liquid valve on cylinder. Midseat liquid line service valve and monitor the liquid
refrigerant flow into the cylinder. If the unit is operating, close the cylinder valve and backseat the liquid
line service valve when the ball in the upper sight
glass drops to the bottom of the glass. It the unit is not
operating, when approximately 5 lbs. (2.3 kg) have
been removed close the cylinder valve and backseat
the liquid line service valve. Proceed to step 7
6. Ensure the unit will not start automatically by disabling any two way communication and placing the
Main Power switch in the OFF position. Disconnect
the high voltage source and lockout/tagout the receptacle.
7. Frontseat (close by turning clockwise) the discharge
service valve and the refrigerant will be trapped between the compressor discharge service valve and
the liquid line service valve.
8. Before opening up any part of the low side of the system, a slight positive pressure should be indicated on
the pressure gauge. If the pressure is below 0 psig/
62-11389
8−16
3 If charge is to be added: place cylinder of refrigerant
on a scale and connect a charging line and gauge
from cylinder to liquid line service valve. Start unit in
Continuous Operation with a set point lower than refrigerated compartment temperature. Wait until unit
switches to high speed operation. Run approximately
ten minutes.
a. Leak Checking a Charged System
1. Ensure the unit will not start automatically by disabling any two way communication and placing the
Main Power switch in the OFF position. Disconnect
the high voltage source and lockout/tagout the receptacle.
NOTE
Service Mode is not required for this procedure.
4 Note weight of cylinder and refrigerant.
5 Frontseat the liquid line service valve (turn clockwise)
and watch the pressure on the manifold gauge. When
the pressure falls below the pressure in the refrigerant cylinder [or to 50 psig (3.4 bar)], open the cylinder
valve and monitor the liquid refrigerant to flow into the
unit.
2. Verify that the suspected leak area (high or low side)
has sufficient pressure [minimum 20 psig (1.4 bar)] to
detect the leak. The larger the leak the less pressure
is required. The smaller the leak, the greater the pressure required.
3. The recommended procedure for finding leaks from a
system is with an electronic leak detector. Checking
joints with soapsuds is satisfactory only for locating
large leaks, or pinpointing small leaks once a general
area has been located.
6 When approximately 5 lbs. (2.3 kg) have been added,
close the cylinder valve, and backseat the liquid line
service valve.
7 Recheck for the correct refrigerant charge. (Refer to
preceding step a.) Repeat preceding steps as required. When charge level adjustment is complete,
remove refrigerant service equipment.
4. Some leaks may be repaired by simply tightening a
connection. Others may require removal of the
charge, refer to Section 8.6.2.
g. Adding a Complete Charge
5. Check for proper unit operation by running Pretrip
(Refer to Section 3.4).
1 Evacuate unit and leave in deep vacuum. (Refer to
Section 8.6.4.)
b. Leak Checking a System Without Charge
The refrigeration system must be leak checked once it is
closed and all repairs complete.
2 Determine charge required for this unit (refer to the
model/serial number nameplate or Table 2-1) and
procure a refrigerant cylinder with sufficient weight of
refrigerant. Place cylinder on scale and connect
charging line from cylinder to liquid line service valve.
1. Ensure the unit will not start automatically by disabling any two way communication and placing the
Main Power switch in the OFF position. Disconnect
the high voltage source and lockout/tagout the receptacle.
3 Note weight of cylinder and refrigerant.
2. Connect refrigerant system equipment if not already
connected. Refer to Figure 8−18
4 Open liquid valve on cylinder. Midseat liquid line service valve and allow the liquid refrigerant to flow into
the unit until the correct weight of refrigerant has been
added.
CAUTION
Only a refrigerant cylinder containing
R404A should be connected to this refrigeration unit in order to pressurize the system.
However, dry nitrogen may be used to increase pressure. Any other gas or vapor will
contaminate the system and require additional removal and evacuation.
NOTE
It is possible that all liquid may not be pulled into
the receiver, as outlined in step 4. In this case,
add the additional refrigerant in accordance
with the charge adjustment procedures, refer to
preceding step f.
5 When scale indicates that the correct charge has
been added, close liquid line valve on cylinder and
backseat the liquid line service valve. Remove charging hose.
CAUTION
Do not vapor charge R404A. Only liquid
charging through the liquid line service
valve is acceptable.
8.6.3 Leak Checking
The condition that the system may be in when leak
checking is required include; when the system is
charged, when the system is without charge, when the
low side has been pumped down and when only the
compressor is to be leak checked. Procedures for each
condition are provided in the following subsections.
3. Ensure that the microprocessor MessageCenter displays “RECOVER/LEAK CHK/EVAC MODE” during
the pressurizing and leak checking procedures. (Refer to Section 5.2.3.) If the microprocessor switches
to charge mode during the process, switch it back to
the “RECOVER/LEAK CHK/EVAC MODE”.
8−17
62-11389
4 Pressurize the system to 5 to 10 psig (0.3 to 0.7 bar)
with refrigerant at the liquid line service valve.
CAUTION
Do not vapor charge R404A. Only liquid
charging through the liquid line service
valve is acceptable.
WARNING
3. Ensure that the microprocessor MessageCenter displays “RECOVER/LEAK CHK/EVAC MODE” during
the pressurizing and leak checking procedures. (Refer to Section 5.2.3.) If the microprocessor switches
to charge mode during the process, switch it back to
the “RECOVER/LEAK CHK/EVAC MODE”.
Do not use a nitrogen cylinder without a
pressure regulator. Cylinder pressure is
approximately 2350 psig (159.9 bar). Do not
use oxygen in or near a refrigerant system
as an explosion may occur. (See
Figure 8−30)
4. Pressurize the low side of the system to 5 to 10 psig
(0.3 to 0.7 bar) with refrigerant from the high side by
turning the liquid line service valve off frontseat for a
few seconds and then returning to frontseat.
5 Connect a cylinder of dry nitrogen. Use the dry nitrogen to increase the pressure as necessary to 20 to
150 psig (1.4 to 10.2 bar) to detect the leak. The larger
the leak the less pressure is required. The smaller the
leak, the greater pressure is required
6 The recommended procedure for finding leaks from a
system is with an electronic leak detector. Checking
joints with soapsuds is satisfactory only for locating
large leaks, or pinpointing small leaks once a general
area has been located.
7. Once leak checking is complete, remove the refrigerant/nitrogen vapor out of the system.
Do not use a nitrogen cylinder without a
pressure regulator. Cylinder pressure is
approximately 2350 psig (159.9 bar). Do not
use oxygen in or near a refrigerant system
as an explosion may occur. (See
Figure 8−30)
5. Connect a cylinder of dry nitrogen. Use the nitrogen to
increase the low side pressure to 20 to 150 psig (1.4
to 10.2 bar) to detect the leak. The larger the leak the
less pressure is required. The smaller the leak, the
greater the pressure required
8. If no leaks are found the system is ready for evacuation. (Skip to Step 11)
9. If any leaks are found they must be repaired before
proceeding.
6. The recommended procedure for finding leaks from a
system is with an electronic leak detector. Checking
joints with soapsuds is satisfactory only for locating
large leaks, or pinpointing small leaks once a general
area has been located.
10 Repeat steps 4 thru 9 as necessary.
11. Evacuate the system after all leaks are repaired.
(Refer to Section 8.6.4.)
7. Once leak checking is complete, remove the refrigerant/nitrogen vapor from the low side of the system.
c. Leak Checking With Low Side Pumped Down
The low side of the system must be leak checked once it
is closed and all repairs complete.
8. If no leaks are found the low side of the system is
ready for evacuation. (Skip to Step 11)
1. Ensure the unit will not start automatically by disabling any two way communication and placing the
Main Power switch in the OFF position. Disconnect
the high voltage source and lockout/tagout the receptacle.
9. If any leaks are found they must be repaired before
proceeding.
10. Repeat steps 4 thru 9 as necessary.
11. Disconnect the nitrogen cylinder. Evacuate the low
side of the system after all leaks are repaired. (Refer
to Section 8.6.4.)
CAUTION
d. Leak Checking Compressor
The compressor and its associated switches,
transducers, etc. must be leak checked once the
compressor is closed and all repairs complete.
Only a refrigerant cylinder containing
R404A should be connected to this refrigeration unit in order to pressurize the system.
However, dry nitrogen may be used to increase pressure. Any other gas or vapor will
contaminate the system and require additional removal and evacuation.
1. Ensure the unit will not start automatically by disabling any two way communication and placing the
Main Power switch in the OFF position. Disconnect
the high voltage source and lockout/tagout the receptacle.
2. Connect refrigerant system service equipment to the
suction and discharge service valves, if not already
connected. Refer to Figure 8−18.
2. Connect refrigerant system equipment if not already
connected. Refer to Figure 8−18
62-11389
WARNING
8−18
NOTES
CAUTION
1. Essential tools to properly evacuate any
system include a good vacuum pump
(5 cfm/8m#H volume displacement, Carrier
Transicold part number 07-00176-11) and a
good vacuum indicator such as a
thermocouple
vacuum
gauge
(micrometer). (Carrier Transicold part
number 07-00414-00)
Only a refrigerant cylinder containing
R404A should be connected to this refrigeration unit in order to pressurize the system.
However, dry nitrogen may be used to increase pressure. Any other gas or vapor will
contaminate the system and require additional removal and evacuation.
2. The use of a compound gauge is not
recommended for use in determining when
the evacuation process is completed
because of its inherent inaccuracy.
CAUTION
Do not vapor charge R404A. Only liquid
charging through the liquid line service
valve is acceptable.
3. Standard service hoses are not
recommended for evacuation purposes.
Evacuation hoses are recommended for
this procedure.
3. Pressurize the compressor to 5 to 10 psig (0.3 to 0.7
bar) by opening the suction service valve for a few
seconds, then closing (frontseating) it again.
a. Evacuation of the Complete System
1. Evacuate only after pressure leak check. (Refer to
Section 8.6.3.)
WARNING
2. If possible keep the temperature of the major components (condenser, evaporator, compressor and receiver) above 60_F (15.6_C) to speed evaporation of
moisture. If the temperature is lower than 60_F
(15.6_C), ice might form before moisture removal is
complete. Heat lamps, heat guns or alternate
sources of heat may be used to raise system temperature.
Do not use a nitrogen cylinder without a
pressure regulator. Cylinder pressure is
approximately 2350 psig (159.9 bar). Do not
use oxygen in or near a refrigerant system
as an explosion may occur. (See
Figure 8−30.)
3. The recommended method to evacuate the system is
to connect three evacuation hoses with vacuum
pump and vacuum indicator (see Figure 8−18).
4. Connect a cylinder of dry nitrogen. Use the nitrogen to
increase the compressor pressure to 20 to 150 psig
(1.4 to 10.2 bar) to detect the leak. The larger the leak
the less pressure is required. The smaller the leak,
the greater pressure required
5 The recommended procedure for finding leaks from a
compressor is with an electronic leak detector.
Checking joints with soapsuds is satisfactory only for
locating large leaks, or pinpointing small leaks once a
general area has been located.
6 Once leak checking is complete, remove the refrigerant/nitrogen vapor from the compressor.
4. Ensure that the microprocessor MessageCenter displays “RECOVER/LEAK CHK/EVAC MODE” during
the evacuation and dehydration procedures. (Refer
to Section 5.2.3.) If the microprocessor switches to
charge mode during the process, switch it back to the
“RECOVER/LEAK CHK/EVAC MODE”.
5. Backseat (turn counter-clockwise) the liquid line service valve, suction service and discharge service
valves.
9 Repeat steps 4 thru 9 as necessary.
6. With the unit service valves closed (back seated) and
the vacuum pump and vacuum indicator valves open,
start the pump and draw a deep vacuum. Shut off the
pump and check to see if the vacuum holds. This
operation is to test the evacuation setup for leaks. Repair if necessary.
10 Disconnect the nitrogen cylinder. Evacuate the
compressor after all leaks are repaired. (Refer to Section 8.6.4.)
7. Midseat the refrigerant system service valves. Ensure that the MessageCenter displays “RECOVER/
LEAK CHK/EVAC MODE”.
8.6.4 Evacuation And Dehydration
8. Start the vacuum pump. Evacuate unit until the vacuum indicator indicates 2000 microns. Close the vacuum pump valve and shut off the pump. Wait a few
minutes to ensure the vacuum holds.
7 If no leaks are found the compressor is ready for
evacuation. (Skip to Step 10)
8 If any leaks are found they must be repaired before
proceeding.
Moisture is detrimental to refrigerant systems. The
presence of moisture in a refrigeration system can have
many undesirable effects such as: copper plating, acid
sludge formation, “freeze-up” of the expansion valves,
and formation of acids, resulting in metal corrosion.
Proper evacuation of the system will remove any
moisture from inside the system.
9. Break the vacuum with dry nitrogen through the discharge service valve. Raise system pressure to
approximately 2 psig (0.1 bar). Ensure that the microprocessor does not switch to the charge mode. If this
8−19
62-11389
10. If vacuum holds below 2000 microns continue to
step 12. If vacuum rises above 2000 microns continue to step 11.
occurs, switch it back to the “RECOVER/LEAK CHK/
EVAC MODE” (Refer to Section 5.2.3)
10. Purge nitrogen from system at the suction service
valve.
11. Repeat steps 6 through 9 until the vacuum stays below 2000 microns.
11. Open the vacuum pump valve and start the pump.
Evacuate unit to 500 microns. Close the vacuum
pump valve and shut off the pump. Wait a few minutes
to be sure the vacuum holds below 2000 microns.
12. Once the system holds a good vacuum, open the
compressor discharge service valve and the liquid
line service valve.
13. Start unit and check the refrigerant charge. Refer to
Section 8.6.2.
12. If vacuum holds below 2000 microns continue to
step 14. If vacuum rises above 2000 microns continue to step 13.
c. Evacuation of the Compressor
1. Evacuate only after a compressor pressure leak
check. (Refer to Section 8.6.3.)
13. Repeat steps 8 through 11 until the vacuum stays
below 2000 microns.
2 Ensure the unit will not start automatically by disabling any two way communication and placing the
Main Power switch in the OFF position. Disconnect
the high voltage source and lockout/tagout the receptacle.
14. Once the system holds a good vacuum, it is ready to
be charged with refrigerant. Refer to Section 8.6.2.
b. Evacuation of the Low Side
3. If possible keep the temperature of the compressor
above 60_F (15.6_C) to speed evaporation of moisture. If the temperature is lower than 60_F (15.6_C),
ice might form before moisture removal is complete.
Heat lamps, heat guns or alternate sources of heat
may be used to raise compressor temperature.
1. Evacuate only after a low side pressure leak check.
(Refer to Section 8.6.3)
2. If possible keep the temperature of the major components (condenser, evaporator, compressor and receiver) above 60_F (15.6_C) to speed evaporation of
moisture. If the temperature is lower than 60_F
(15.6_C), ice might form before moisture removal is
complete. Heat lamps, heat guns or alternate
sources of heat may be used to raise system temperature.
4. Connect evacuation equipment to the compressor
suction and discharge service valves. See
Figure 8−18.
5. Start the vacuum pump. Evacuate compressor to 500
microns. Close the vacuum pump valve and shut off
the pump. Wait a few minutes to be sure the vacuum
holds. This checks for residual moisture and/or leaks.
3. The recommended method to evacuate the system is
to connect three evacuation hoses with vacuum
pump and vacuum indicator (see Figure 8−18).
6. Once the compressor holds a good vacuum, open the
compressor suction and discharge service valve to
allow refrigerant to enter the compressor.
4. Ensure that the microprocessor MessageCenter displays “RECOVER/LEAK CHK/EVAC MODE” during
the evacuation and dehydration procedures. (Refer
to Section 5.2.3.) If the microprocessor switches to
charge mode during the process, switch it back to the
“RECOVER/LEAK CHK/EVAC MODE”.
7. Start unit and check the refrigerant charge. Refer to
Section 8.6.2.
8.7 COMPRESSOR AND UNLOADER SERVICE
8.7.1 Repair or Replacement Determination
5. Leave the liquid line service valve and the discharge
service valve frontseated and then midseat the suction service valve.
Certain operating conditions or refrigeration system
components may be misdiagnosed and subsequently
lead to the determination that the compressor requires
replacement. These conditions or components should
be checked prior to replacing a compressor and after a
replacement compressor is installed to prevent
replacement compressor damage. To determine if
compressor replacement or repair is required, do the
following:
6. Start the vacuum pump. Evacuate unit until the electronic vacuum gauge indicates 2000 microns. Close
the vacuum pump valve and shut off the pump. Wait a
few minutes to be sure the vacuum holds.
7. Break the vacuum with dry nitrogen through the liquid
line service valve. Raise system pressure to approximately 2 psig (0.1 bar). Ensure that the microprocessor does not switch to the Charge Mode. If this occurs, switch it back to the “RECOVER/LEAK
CHK/EVAC MODE” (Refer to Section 5.2.3
a. If the compressor is operational, check the refrigerant
charge, refer to Section 8.6.2.
b. If the compressor is operational, check operation of
the unloaders, refer to Section 8.7.6.
8. Purge nitrogen from the low side of the system at the
suction service valve.
c. If the compressor is operational, check the system
components as follows:
9. Open the vacuum pump valve and start the pump.
Evacuate unit to 500 microns. Close the vacuum
pump valve and shut off the pump. Wait a few minutes
to be sure the vacuum holds below 2000 microns.
62-11389
1. Install gauges to allow reading of receiver, suction
and discharge pressure. See Figure 8−18.
2. Start the unit in cooling so that compressor operates.
8−20
3. Frontseat the liquid line service valve. Shut down the
unit when the suction pressure drops to 2 psig (0.2
bar).
WARNING
Do not unscrew service valve mounting
capscrews all the way before breaking seal.
Entrapped pressure could result in injury.
4. Monitor the gauges. If the receiver pressure drops
rapidly and the suction and discharge pressures rise
rapidly the liquid line service valve requires replacement before the compressor can be further tested.
c. Loosen the suction and discharge service valve
mounting bolts. Tap the valve bodies to break the seal
and then remove bolts.
5. Backseat the liquid line service valve and restart the
unit. Slowly frontseat the suction service valve. Shut
down the unit when the suction pressure drops to 2
psig (0.2 bar).
d. Locate the compressor junction box, item 5,
Figure 8−19. Note location if the power wires on the
terminal plate then remove wiring and compressor
junction box. Disconnect all low voltage connectors.
6. Monitor the gauges. If the suction and discharge
pressures do not equalize rapidly, the compressor is
not at fault.
e. Remove compressor mounting bolts.
d. Check condition of and repair cylinder heads and
valve plates. Refer to Section 8.7.3.
f. Remove compressor. Refer to Section 2.9 for weight
of compressor.
8.7.2 Removal and Replacement of Compressor
g. Draw a small sample of compressor oil and test for
acidity If acid is present a system cleanup may be necessary.
a. Pumpdown the compressor. (Refer to Section 8.6.2.)
b. Ensure the unit will not start automatically by disabling any two way communication and placing the
Main Power switch in the OFF position. Disconnect
the high voltage source and lockout/tagout the receptacle.
2
1
3 4
5
h. Remove all external compressor components such
as: the unloader coils; discharge strainer; switches,
transducers, temperature sensors & fittings.
Note: Location of items
5 & 6 may be reversed
3
7
8
6
9
10
15
16
BACK VIEW
1.
2.
3.
4.
5.
6.
7.
8.
11
14
13
Torque 33 to 37 ft lbs
(44 to 50 Nm)
Torque 60 to 70 ft lbs
(81 to 95 Nm)
12
FRONT VIEW
Compressor Discharge Pressure Transducer
9. Valve Plate
High Pressure Switch
10. Suction Pressure Transducer (Location)
Unloader Coil
11. Oil Level Sight Glass
Compressor Discharge Temperature Sensor
12. Oil Drain Location
Junction Box
13. Oil Pan
Serial/Model Plate
14. Motor End Cover
Discharge Service Valve Flange
15. Suction Service Valve Flange
Cylinder Head
16. Oil Fill Port
Figure 8−19 Compressor - model 06D
8−21
62-11389
8.7.3 Cylinder Head and Valve Plate Service
WARNING
Do not unscrew replacement compressor
lifting eyelet/blankoff plate mounting
capscrews all the way before breaking seal.
Entrapped pressure could result in injury.
a. Pumpdown the compressor. (Refer to Section 8.6.2.)
b. Ensure the unit will not start automatically by disabling any two way communication and placing the
Main Power switch in the OFF position. Disconnect
the high voltage source and lockout/tagout the receptacle.
i. Loosen the suction and discharge lifting eyelet/
blankoff plate mounting bolts. Tap the center of the
blankoff plates to break the seal and then remove
bolts, plates and gaskets.
j. If required add oil to the replacement compressor.
Add only 7.0 pints (3.3 liters) of oil when first adding oil
to the compressor. This procedure is designed to
compensate for excess oil that may have migrated
with refrigerant to other parts of the system during
unit operation.
WARNING
Do not unscrew cylinder head mounting
capscrews all the way before breaking seal.
Entrapped pressure could result in injury.
k. Install components removed in step h. Install blankoff
plates and plugs in original compressor for shipment.
l. Remove any remaining old gasket material from the
discharge and suction service valve sealing surfaces.
c. Loosen cylinder head capscrews. Tap the head lightly
with a wooden or lead mallet to break the seal and relieve any remaining pressure. Be careful not to drop
the head or damage the gasket sealing surface.
Remove cylinder head capscrews and gasket. (See
Figure 8−20)
m. Secure junction box to compressor.
n. Install compressor in unit. See Figure 8−19 for
mounting bolt torque information.
o. Connect all wiring per wiring schematic. Install junction box cover.
d. If removing the center head, remove the discharge
valve mounting hardware.
p. Install new gaskets and mounting bolts in service
valves. Torque discharge service valve mounting
bolts 20 to 30 ft lbs (27 to 40.7 Nm). Torque suction
service valve mounting bolts 55 to 80 ft lbs (74 to 108
Nm).
e. If required, free the valve plates from the cylinder
deck by using the discharge valve capscrews, without
washers, as jackscrews through the outermost
tapped holes in the valve plate after the valve stops
and valves have been removed. Remove the valve
plate gasket.
q. Leak check and evacuate the compressor. Refer to
Section 8.6.3 and Section 8.6.4.
12 11
4
5
10
9
8
7
6
5
4
3
6
Typical Arrangement - Center Head Shown
7
10
1.
2.
3.
4.
5.
6.
11
8
12
Capscrew
Cylinder Head
Cylinder Head Gasket
Capscrew
Lockwasher
Discharge Valve Backer
7.
8.
9.
10.
11.
12.
Discharge Valve
Valve Plate
Valve Plate Gasket
Suction Valve
Suction Valve Spring
Dowel Pin
Figure 8−20 Cylinder Head & Valve Plate
62-11389
8−22
2
1
f. Inspect the parts of the cylinder head and/or the valve
plate.
1. Inspect cylinder head gaskets for proper alignment
and center web blow-out.
2. Inspect the discharge valves for loose or damaged
valve stops, or any debris that may affect the proper
operation of the valves.
3. Inspect for broken, cracked, or chipped discharge
valves.
4. Inspect the side valve plate discharge check valves
to ensure the pistons move and contact the plates.
Figure 8−21 Checking Suction Valve
5. Inspect for broken, cracked, or chipped suction
valves.
6. Inspect the valve plate and the cylinder head for
cracks.
n. Install capscrews, cylinder head and new cylinder
head gasket (with flat side toward valve plate), ensuring that the gasket and cylinder head are properly
positioned on the valve plate. Torque the capscrews,
in a diagonal pattern, 42 to 55 ft-lbs (57 to 74 Nm)
7. Inspect valve plate gaskets for damage and wear.
o. Leak check and evacuate the compressor. Refer to
Section 8.6.3 and Section 8.6.4.
8.7.4 Oil Pump And Bearing Head
8. Remove any oil on top of the pistons. Inspect the top
of the piston for damage. Check for debris, burned
and carbonized oil sludge, or mechanical failure.
a. Pumpdown the compressor. (Refer to Section 8.6.2.)
b. Ensure the unit will not start automatically by disabling any two way communication and placing the
Main Power switch in the OFF position. Disconnect
the high voltage source and lockout/tagout the receptacle. the high voltage source.
9. Inspect cylinder bores for excessive wear. Excessive
wear for cylinder bores is defined as heavy and uneven scratches, gouges, or chipping of the internal
wall of the cylinder, with a depth greater than 0.025
inch, which are caused by foreign objects, other than
a normal reciprocating movement of the pistons and
piston rings. If cylinder(s) are damaged, compressor
replacement is required.
c. Loosen the eight capscrews, tap the pump to relieve
any remaining pressure and then remove the oil
pump bearing head assembly, gasket and thrust
washer. (See Figure 8−22.)
g. Discard valves and gaskets. Use only new valves and
gaskets when assembling cylinder head and valve
plate assemblies.
1
h. If required, install the discharge valves and discharge
valve stops with capscrews and lock washers onto
the valve plates. Torque the capscrews to 12 to 16 ft
lbs (16.3 to 21.7 Nm).
i. Turn the valve plate over.
j. Install the suction valve spring on the dowel pins with
the spring ends bearing away from the cylinder head.
(See Figure 8−20)
4
k. Place suction valve on dowel pins.
l. Place the valve plate and new valve plate gasket (with
flat side toward cylinder deck) on cylinder deck,
ensuring that the valve plate is properly positioned on
the four dowel pins.
1.
2.
3.
4.
m. Using a small screwdriver, operate the suction valves
to ensure that the valve tips are not being held by the
valve plate gasket. (See Figure 8−21)
2
3
Oil Pump & Bearing Head
Thrust Washer
Oil Pickup Tube
Oil Inlet Port
Figure 8−22 Oil Pump and Bearing Head Assembly
8−23
62-11389
d. If it is determined that the oil pump is not operating
properly, the entire oil pump and bearing head assembly must be replaced. Replacement parts for the
pump are not available except for the cover plate
O-ring. However, in the event the pump requires inspection or cleaning, refer to Figure 8−23 for disassembly and reassembly. Clean all parts; coat all moving parts with compressor oil before proceeding with
reassembly.
11
CAUTION
An overcharge of oil will reduce system capacity and possibly cause internal compressor damage.
1 Operate the unit in Cool Mode for at least 20 minutes.
2 Check the oil sight glass to ensure that no foaming of
the oil is present after 20 minutes of operation. If the
oil is foaming excessively after 20 minutes of operation, check the refrigerant system for flood-back of liquid refrigerant. Correct this situation before performing step 3
3 Turn unit off to check the oil level. The correct oil level
range should be 1/8 to 1/2 glass. If level is above 1/2
glass or below 1/8 glass, continue with the following
steps as required.
12
6
1
2
3
4
5
10
9
b. Adding Oil With Compressor In System
8
CAUTION
7
1
2
3
4
5
6
Capscrews
Cover
Eccentric Ring
Rotor
Idler
Shaft (Drive)
Use only Carrier Transicold approved Polyol Ester Oil (POE). Buy quantities of one gallon or less. When using this hygroscopic
oil, immediately reseal. Do not leave container of oil open or contamination will occur.
7 O-Ring
8 Oil Pump & Bearing
9 Dowel Pin
10 Relief Valve Assembly
11 Pins (2)
12 Thrust Washer
Two methods for adding oil are the oil pump method and
closed system method.
Oil Pump Method
One compressor oil pump that may be purchased is a
Robinair, part no. 14388. This oil pump adapts to a one
U.S. gallon (3.785 liters) metal refrigeration oil container
and pumps 2-1/2 ounces (0.0725 liters) per stroke when
connected to the oil fill (Item 12, Figure 8−19). There is
no need to remove pump from can after each use.
Figure 8−23 Oil Pump
e. Install the pump end thrust washer on the two dowel
pins located on the bearing head. (See Figure 8−22.)
CAUTION
When the compressor is in operation, the pump check
valve prevents the loss of refrigerant, while allowing the
technician to develop sufficient pressure to overcome
the operating suction pressure to add oil as necessary.
Ensure that thrust washer does not fall off
dowel pins while installing oil pump.
Backseat suction service valve and connect oil charging
hose to oil fill. Purge the oil hose at oil pump. Add oil as
necessary.
f. Install the bearing head assembly with a new gasket
on the compressor crankshaft. Carefully push oil
pump on by hand ensuring that the thrust washer remains on the dowel pins, the tang on the end of the
drive engages the slot in the crankshaft, and the oil
inlet port on the pump is aligned with the oil pickup
tube in the crankcase. The oil pump should mount
flush with the crankcase with the word “TOP” stamp
on the pump oriented straight up.
Closed System Method
CAUTION
Extreme care must be taken to ensure the
hose is immersed in the oil at all times.
Otherwise air and moisture will be drawn
into the compressor.
g. Align the gasket and install the eight capscrews in the
mounting flange. Torque capscrews, in a diagonal
pattern, 30 to 50 ft-lbs (40.7 to 87 Nm).
In an emergency where an oil pump is not available, oil
may be drawn into the compressor through the suction
service valve.
h. Leak check and evacuate the compressor. Refer to
Sections 8.6.3 and 8.6.4.
1. Pump down the compressor. Refer to Section 8.6.2.
2. With both manifold gauge set valves frontseated,
leave the suction connection connected to the com-
8.7.5 Compressor Oil Level
a. Checking Compressor Oil Level
62-11389
8−24
pressor suction service valve port and connect the
common connection to a vacuum pump. Remove
the discharge hose from the manifold gauge set;
connect the end with the Schrader depressor to the
compressor oil fill port (Item 12, Figure 8−19), and
immerse the other end in a container of refrigeration
oil. Start the vacuum pump throttle the manifold
gauge set suction valve and pull a vacuum on the
compressor while watching the the oil level in the
glass. Fill to 1/4 glass. Shut down pump and remove
oil fill line from the oil fill port.
NOTE
If pressures do not change as indicated, check
the unloader coil resistance (refer to Section
2.12). Replace if coil is open or shorted. If either
unloader coil energizes and the suction and discharge pressures do not change, the unloader
assembly must be checked.
b. Unloader Coil Replacement
NOTE
The coil may be removed while the compressor
is under pressure.
3. Break any remaining vacuum (raise to 0 psig/bar)
with refrigerant remaining in the system (crack open
the suction service valve), or from a fresh cylinder of
refrigerant. Evacuate the compressor crankcase to
500 microns. Remove service equipment, backseat
suction and discharge service valves and recheck oil
level.
1. Disconnect leads and lift coil (see Figure 8−24) off enclosing tube.
2. Verify replacement coil is the correct type, voltage
and frequency.
c. Removing Oil From The Compressor
1. Check compressor oil level, refer to preceding step a.
If the oil level is above the middle of the sight glass
(item 11, Figure 8−19), oil must be removed from the
compressor.
3. Place new coil over enclosing tube. With wiring facing
in the desired direction, ensure roll pin is fitted in one
of the detents in the bottom of the coil mounting. Coll
is to snap into place with bottom in contact with the
enclosing tube nut. Connect wiring.
2. Pump down the compressor. Refer to Section 8.6.2.
4. Check operation, refer to preceding step a.
3. Ensure the unit will not start automatically by disabling any two way communication and placing the
Main Power switch in the OFF position. Disconnect
the high voltage source and lockout/tagout the receptacle.
1
13
4. Loosen the oil drain plug (item 10, Figure 8−19) and
allow oil to seep out and bring the level to 1/8 glass.
Tighten the plug securely back into the compressor.
5. Leak check the oil drain plug, refer to Section 8.6.3.
Start compressor and recheck oil level
2
3
8.7.6 Unloaders
12
a. Unloader Checkout procedure
11
1 Install a manifold gauge set on the compressor suction and discharge service valves and start unit in
cooling with compartment temperatures at least 5_F
(2.8_C) below set point. The compressor will be fully
loaded (both unloader coils de-energized). Note suction pressure.
10
2 Unplug both unloader coils.
8
4
5
6
9
3 Using cable included in the test kit (Carrier Transicold
part number 07-50006-00), energize the front unloader (UL1). Note discharge and suction pressures. A
rise of approximately 3 psig (0.2 bar) will be noted on
the suction pressure gauge. Discharge pressure
should drop approximately 5 to 15 psig (0.4 to 1.0
bar).
1.
2.
3.
4.
5.
6.
7.
4 Disconnect UL1 and note pressures. Suction pressure should drop and discharge pressure should rise
by same amount as in step 3 above.
5 Repeat steps 3 & 4 for the rear unloader (UL2). At the
end of the test, reconnect both unloaders.
7
Coil Assembly
Pin, Roll
Enclosing Tube Nut
Enclosing Tube
Bolts, Valve Body (3)
Washers (3)
Piston
8.
9.
10.
11.
12.
13
Gasket
Valve Body
“O” Ring
Plunger
Plunger Spring
Installation/Removal
Tool
Figure 8−24 Unloader Coil
8−25
62-11389
loader ring pliers (Carrier Transicold part number
07-00223-00) compress the unloader ring while inserting the unloader into the compressor head.
c. Replacing Unloader Valve Internal Parts
1. Pump down the compressor. Refer to Section 8.6.2
step e.
6. One valve body mounting hole is offset to assist in
correctly aligning the valve body and gasket. Insert
mounting bolts, align with gasket holes and mounting
holes in head. Start bolts by hand and then toque
mounting bolts 12 to16 ft-lbs (1.3 to 1.8 Nm).
2 Ensure the unit will not start automatically by disabling any two way communication and placing the
Main Power switch in the OFF position. Disconnect
the high voltage source and lockout/tagout the receptacle.
7 Leak check and evacuate the compressor. Refer to
Sections 8.6.3 and 8.6.4.
3. Disconnect and remove coil.
8. Check operation, refer to preceding step a.
WARNING
8.8 REFRIGERANT SYSTEM COMPONENT
SERVICE
Do not unscrew unloader enclosing tube
nut all the way before breaking seal.
Entrapped pressure could result in injury.
8.8.1 Evaporator Coil
The use of recycled cardboard cartons is increasing
across the country. The recycled cardboard cartons
create much more fiber dust during transport than “new”
cartons. The fiber dust and particles are drawn into the
evaporator where they lodge between the coil fins. If the
coil is not cleaned on a regular basis, sometimes as
often as after each trip, the accumulation can be great
enough to restrict air flow, cause coil icing, repetitive
defrosts and loss of unit capacity. Due to the “washing”
action of normal defrost the fiber dust and particles may
not be visible on the face of the coil but may accumulate
deep within.
4 Loosen the enclosing tube nut (see Figure 8−24) using installation/removal tool supplied with repair kit.
Ensure tube is loose and seal is broken then remove
tool, enclosing tube nut, enclosing tube, plunger with
plunger spring and o-ring
5. Check plunger for restriction due to: (a) corroded or
worn parts; (b) foreign material lodged in valve; (c)
bent or dented enclosing tube.
6. Install new parts. Do not over tighten enclosing tube
assembly. Torque to a 100 inch pounds (11.3 Nm).
Clean the evaporator coil on a regular basis, not only to
remove cardboard dust, but to remove any grease or oil
film which sometimes coats the fins and prevents water
from draining into the drain pan.
7. Remove tool and install coil, refer to preceding step b.
8 Leak check and evacuate the compressor. Refer to
Sections 8.6.3 and 8.6.4.
9. Check operation, refer to preceding step a.
Cardboard fiber particles after being wetted and dried
several times can be very hard to remove. Therefore,
several washings may be necessary.
d. Unloader Valve Replacement
1. Pump down the compressor. Refer to Section 8.6.2.
a. Ensure the unit will not start automatically by disabling any two way communication and placing the
Main Power switch in the OFF position. Disconnect
the high voltage source and lockout/tagout the receptacle.
2. Disconnect and remove coil.
WARNING
b. Remove rubber check valves (Kazoo) from drain
lines of the evaporator to be cleaned.
Do not unscrew unloader valve body
mounting bolts all the way before breaking
seal. Entrapped pressure could result in
injury.
c. Spray coil(s) with a mild detergent solution such as
Oakite 164 or 202) or any good commercial grade automatic dish washer detergent such as Electrosol or
Cascade and let the solution stand for a few minutes
and reverse flush (opposite normal air flow) with clean
water at mild pressure. A garden hose with spray
nozzle is usually sufficient. Make sure drain lines are
clean.
3 Loosen the valve body mounting bolts. Tap the valve
body to break the seal and then remove bolts and
gasket.
4. Remove small screen from inside the compressor
head and ensure it is not obstructed. Clean or replace
as required.
d. Re-install check valves and run unit until defrost
mode can be initiated to check for proper draining
from drain pan.
5. Place new gasket onto replacement unloader valve
body (with flat side toward the head) and, using un-
62-11389
8−26
2
3
10
4
9
6
7
5
8
1
1.
2.
3.
4.
5.
Condenser/Radiator Assembly
Condenser Frame
Condenser Coil
Radiator
Radiator Frame
6.
7.
8.
9.
10.
Ambient Air Temperature Sensor (ATT)
Condenser/Radiator Assembly Mounting Bolts
Radiator Frame Mounting Bolts
Radiator Mounting Brackets
Condenser Coil Mounting Brackets
Figure 8−25 Condenser/Radiator Assembly
1. Remove the refrigerant charge. Refer to Section
8.6.2.
8.8.2 Condenser Coil
a. Cleaning
2. Drain coolant completely by removing radiator cap
and then the lower radiator hose.
Note
Only Clean Water Should Be Used To Wash
The Condenser. Do Not Use Any Detergents To
Clean The Condenser.
3. Remove the surround with the grille attached. Refer
to Section 8.4.2.
4. Remove hoses from radiator.
Remove all foreign material from the condenser coil by
reversing the normal air flow. (Air is pulled in through the
front and discharges over the engine.) Compressed air or
water may be used as a cleaning agent. Take care so that
the fins aren’t bent during this procedure.
5. Unsolder refrigerant lines from condenser coil.
b. Condenser Coil Replacement
7. Remove the eight bolts (7) securing the condenser/
radiator assembly to the unit.
6. Disconnect the hail and bug screen sufficient to
reach the ambient sensor (6) and wiring. Remove
sensor and wiring from radiator frame (5).
Note
If the condenser coil (Item 3, Figure 8−25) requires replacement, the entire condenser/radiator assembly (1) must be removed from the
unit and disassembled/reassembled on the
bench.
8. Remove the condenser/radiator assembly from the
unit.
9. Remove the eight bolts (8) securing the radiator
frame to the condenser frame (2) and set radiator
frame aside.
8−27
62-11389
10.Separate the radiator (4) from the condenser/radiator assembly by removing the top and bottom radiator
mounting brackets (9). Set radiator aside.
d. Leak check, evacuate and charge the system. Refer
to Sections 8.6.3, 8.6.4 & 8.6.2.
8.8.5 Compressor Suction Modulation Valve
(CSMV)
The purpose of the SMV is to maintain the compressor
within its operating envelope and maximize unit
capacity and fuel economy.
At initial startup, the microprocessor will go through a
self test. When the test is complete, the MessageCenter
will display “SMV CLOSING”. Then the MessageCenter
will display “SETTING SMV XX%” with actual
percentage depending on ambient temperature and
refrigerated compartment temperature. The unit will
then go through its normal start procedure.
11. Remove condenser coil by removing the condenser
coil mounting brackets (10).
12.Reassemble condenser/radiator assembly in reverse order using new coil.
CAUTION
Do not bend the copper tubing on the condenser coil when installing the new condenser. Bend the unit tubing if tubes do not
align correctly.
Note
Before applying heat to the new condenser apply a wet rag to the entire copper to aluminum
transition area to avoid melting the protective
heat shrink or damaging the joint.
STEPPER
MOTOR
VALVE
13. Reassemble condenser/radiator assembly into
unit.
Figure 8−26 Suction modulation valve (CSMV)
14. Leak check, evacuate and charge the system. Refer to Sections 8.6.3, 8.6.4 & 8.6.2.
If it is suspected that the SMV is malfunctioning, the
most efficient method of diagnosing the valve is to run a
Pretrip (refer to Section 3.4). The Pretrip steps will
check the remainder of the system and the #11 test will
check the SMV. The valve will be brought to a preset
position, the unit started and then the valve will be
opened while the microprocessor monitors suction
pressure. If there is a problem with the valve, stepper
motor or microprocessor wiring to the valve the test will
fail.
15. Refill engine coolant. Refer to Section 8.5.12.
8.8.3 Filter-Drier
a. Check Filter-Drier
The unit must be running in cool for this test. check for a
restricted or plugged filter-drier by feeling the liquid line
inlet and outlet connections of the drier cartridge. if the
outlet side feels cooler than the inlet side, then the
filter-drier should be replaced.
a. Diagnostics - Microprocessor or Wiring
b. Replace Filter-Drier
1. Locate the wires, on the engine harness side of the
SMV connector labeled CSMVA, CSMVB, CSMVC
and CSMVD. These will correlate to the connector
pins labeled A, B, C and D. Refer to Table 8−3.
1. Pump down the low side, refer to Section 8.6.2.
2. Remove bracket, loosen the inlet connection to relieve any remaining pressure then remove drier.
Table 8−3 CSMV Connections
Connector Pin
Wire Color
Winding/Pole
3. Procure new O-rings. Lubricate the O-rings, back
side of sleeves and coupling nuts. Using a backup
wrench at each connection torque 30 to 38 ft-lbs (41
to 51 Nm).
4. Leak check and evacuate the low side of the system.
Refer to Sections 8.6.3 & 8.6.4.
8.8.4 Replacing Receiver Sight Glass Or Fusible
Plug
A
BLACK
1A
B
WHITE
1B
C
RED
2B
D
GREEN
2A
2. Power the microprocessor by toggling the Main
Power switch out of the OFF position DO NOT ALLOW THE UNIT TO START. When the MessageCenter displays “SMV CLOSING”, measure the AC
voltage between pins A & B and then between C & D.
A voltage (10 to 16 VAC) should be read by the digital
voltmeter for each pair of wires. If the reading is present on the wire pairs there is a good signal coming
from the microprocessor.
a. Remove the refrigerant charge. Refer to Section
8.6.2.
b. Loosen the sight glass or fusible plug to relieve any
remaining pressure. Remove and discard glass or
plug.
c. Wrap threads of new sight glass or plug with Teflon
tape or spread sealing compound on pipe threads
and install. Torque the sight glass to 15 to 25 ft lbs (20
to 34 Nm). Torque the fusible plug to 4 to 8 ft lbs (5 to
11 Nm).
62-11389
2-1/8 INCH NUT
4 PIN CONNECTOR
3. If the reading is not present on one or more of the
wire pairs, check the wiring between the micropro8−28
Change 09/11
cessor and the SMV connector, or check the microprocessor for proper model number Configuration.
d. Replacing the Drive and Motor Assembly
1. Pump down the low side. (Refer to section 8.6.2).
b. Diagnostics - Stepper Motor
2. Remove valve piston and motor assembly and replace with a new assembly and gasket. The power
head should be set to 100% open when received from
the warehouse. This is to ensure the Teflon valve seal
is not damaged when it is installed. Ensure the valve
is fully open by using the stepper motor tester to
manually open the valve to 100% before it is installed.
Torque nut to 47.4 Nm (35 ft-lb).
The valve stepper motor may be tested using a stepper
motor drive tester or ohmmeter.
1. To test with a stepper motor drive tester (Carrier
Transicold part number 07-00375-00), connect the 4
pin test cable to the valve connector, refer to
Table 8−3, and the cable wires to the tester in accordance with wire and terminal color.
3. Leak check, evacuate the low side. Refer to Sections
8.6.3 and 8.6.4.
2. Set the step rate to 200 steps per second and either
open or close the valve. Each red LED should light sequentially until all four are illuminated. Any LED failing
to illuminate indicates an open on that leg and a need
to replace the piston and drive motor assembly .
e. Emergency Repair Procedures:
In the event that the SMV system has a failure, and
replacement components are not readily available in an
emergency. A LIMP-HOME procedure can be done as
follows :
3. To test with an ohmmeter, check the winding resistance between connector pin 1A & 1B and then
between 2A & 2B, see Figure 8−27. In normal ambient, the resistance between the pins should be 72 to
84 ohms. Also check each terminal to the coil casing
(ground). If an out of tolerance or zero reading is observed, the piston and drive motor assembly is to be
replaced.
1
1A (BLACK)
1. Install a manifold gauge set.
2. Pump down the low side. (Refer to section 8.6.2).
3. Remove SMV power head by loosening the 2-1/8
inch diameter nut (see Figure 8−26), and sliding the
power head out.
4. Remove the piston by loosening the Allen screw and
removing the piston and screw.
(WHITE) 1B
5. Install the power head assembly (without piston),
torque to 35 to 40 ft-lb (47 to 54 Nm).
2A (GREEN)
2
(RED) 2B
6. Leak check and evacuate the low side. Refer to Sections 8.6.3 & 8.6.4.
7. Start the unit.
Figure 8−27 CSMV Coil
8. Adjust the suction service valve so that the approximate temperature OR current limit is maintained.
For perishable loads, it is recommended that the adjustment be made so that the available capacity is
slightly larger than the load, the unit will cycle OFF
and ON.
c. Diagnostics - Valve
NOTE
If the valve failed pretest and passed the preceding diagnostic testing, this is an indication
that the valve internal mechanism is damaged
and the piston and motor assembly is to be replaced.
9. Once repair parts become available, repair as required.
8.8.6 Electronic Expansion Valve
The electronic expansion valve (EVXV - see
Figure 8−28) is a microprocessor driven device which
meters the flow of refrigerant into the coil. The flow
control provides: (a) response to match the evaporator
load and (b) prevention of liquid refrigerant return to the
compressor. Unless the valve is defective, it seldom
requires any maintenance.
1. To test the valve internal mechanism, install a manifold gauge set on the suction service valve and a
stepper motor drive tester.
2. Start the unit, set the step rate to 200 steps per
second and close the valve while watching the suction pressure. Within one minute the suction pressure
should begin to fall. Place the Main Power switch in
the OFF position before the reading enters a vacuum.
NOTE
3. If the suction pressure does not change, this is an indication the valve is stuck and the piston and drive
motor assembly is to be replaced.
As a preliminary check, ensure the EVXV coil is
snapped down fully, and the coil retention tab is properly
seated in one of the valve body dimples.
8−29
62-11389
good continuity before replacing the microprocessor.
3
b. Diagnostics - Stepper Motor
2
The valve stepper motor may be tested using a stepper
motor drive tester or ohmmeter.
4
1. To test with a stepper motor drive tester (Carrier
Transicold part number 07-00375-00), connect the 5
pin test cable to the valve connector, and the cable
wires to the tester in accordance with wire and terminal color. (if a 5 pin tester cable is required, order Carrier Transicold part number 07-00375-11.)
1
FLOW
DIRECTION
2. Set the step rate to 50 steps per second and either
open or close the valve. Each red LED should light sequentially until all four are illuminated. Any LED failing
to illuminate indicates an open on that leg and a need
to replace the drive.
1. Electronic Expansion
Valve
2. Coil Boot
3. To test with an ohmmeter, check the winding resistance between connector pin A & E, B & E, C & E and
then between D & E. In normal ambient, the resistance between the pins should be 46 ohms. If an infinite or zero reading is observed, the piston and drive
motor assembly is to be replaced.
3. Coil
4. Five Pin
Connector
c. Diagnostics - Valve
Figure 8−28 Electronic expansion valve
NOTE
If the valve failed Pretrip and passed the preceding diagnostic testing, this is an indication
that the valve internal mechanism is damaged
and the piston and motor assembly is to be replaced.
a. Diagnostics - Microprocessor or Wiring
1. Locate the wires, on the engine harness side of the
EVXV connector labeled EXVA, EXVB, EXVC,
EXVD and EXVE. These will correlate to the connector pins labeled A, B, C, D and E. Refer to Table 8−4.
Table 8−4 EVXV Connections
Wire Color
Winding
Connector Pin
A
ORANGE
A
B
RED
B
C
YELLOW
A
D
BLACK
E
GREY
PIN A (ORANGE)
A
B
COM (+12V)
2. Set the voltmeter to the DCV scale. Ensure the unit is
disconnected from standby power and start the unit
in Standby Operation. Wait for the MessageCenter
to display “UNIT SHUTDOWN - SEE ALARM LIST”.
A
3. Perform the following test on the wiring coming from
the microprocessor:
Place the positive (+) voltmeter lead on pin E, the
negative (-) voltmeter lead on pin A and observe the
meter for several seconds. The voltage reading will
be very low, then rise to battery voltage (approximately 12.3VDC with a good battery) for a few
seconds, then drop back to a lower reading
PIN B (RED)
COMMON
(+12VDC)
B
B
PIN D (BLACK)
PIN C (YELLOW)
PIN E (GRAY)
Figure 8−29 Electronic Expansion Valve
4. Repeat for pins B,C and D.
1. To test the valve internal mechanism, install a manifold gauge set on the suction service valve and a
stepper motor drive tester. Refer to Section 8.8.6b.
5. If there is no voltage reading or if the voltage never
rises to battery voltage level, there is a problem in the
wiring or the microprocessor. Test all wiring from the
EVXV connector to the microprocessor and verify
2. Start the unit, set the step rate to 200 steps per
second (refer to Section 8.8.6 step b.) and close the
valve while watching the suction pressure. Within one
minute the suction pressure should begin to fall.
62-11389
8−30
3. If the suction pressure does not change, this is an indication the valve is stuck and the piston and drive
motor assembly is to be replaced.
1. Remove switch as outlined in preceding section
2. Connect ohmmeter or continuity light across switch
terminals. Ohmmeter will indicate resistance and
continuity light will be illuminated if switch closed after
relieving pressure.
3. Connect switch to a cylinder of dry nitrogen. (See
Figure 8−30)
d. Replacing Expansion Valve & Screen
1. Pump down the low side. (Refer to section 8.6.2).
2. Remove coil and unbraze valve. Clean all tube stubs
so new valve fits on easily.
4. Set nitrogen pressure regulator higher than open setting for switch being tested. For pressure switch settings refer to Section 2.10.
5. Close valve on cylinder and open bleed-off valve.
3. Use a wet rag to keep the replacement valve cool and
braze in place.
4. Leak check and evacuate the low side. Refer to Sections 8.6.3 and 8.6.4.
6. Open cylinder valve. Slowly close bleed-off valve and
increase pressure until the switch opens. If light is
used, light will go out and if an ohmmeter is used, the
meter will indicate open. Close cylinder valve. Slowly
open bleed-off valve (to decrease pressure) until
switch closes (light will illuminate or ohmmeter will indicate open).
8.8.8 Pressure Transducers
The Compressor Discharge Pressure Transducer
(CDP) has a range of 0 to 500 PSIG (0 to 34.0 bar) while
the Compressor Suction Pressure Transducer (CSP)
and Evaporator Pressure Transducer (EVOP) have a
range of -14.7 to100 PSIG (-1 to 6.8 bar). To test the
transducers, do the following:
8.8.7 High Pressure Switch
a. Replacing High Pressure Switch
1. Pump down the compressor (Refer to section 8.6.2).
2. Disconnect wiring from switch, and remove switch.
3. Install switch after verifying switch settings. (Refer to
following step b.)
4. Leak check and evacuate the compressor. Refer to
Sections 8.6.3 and 8.6.4.
b. Checking High Pressure Switch
NOTE
The Compressor Discharge Pressure on the
microprocessor Data List will never read less
than 0 bar/psig, even if it is exposed to a
vacuum (such as when evacuating the system.)
Also, the compressor suction pressure and
evaporator pressure transducers will never
read higher than 100 psig, even if the actual
pressure is higher.
WARNING
Do not use a nitrogen cylinder without a
pressure regulator. Cylinder pressure is
approximately 2350 PSIG (160 bar). Do not
use oxygen in or near a refrigerant system
as an explosion may occur. (See
Figure 8−30.)
a. Verify that the wiring to the transducer is correct.
1
b. Power up the transducer circuit. Place the unit in PC
mode, refer to Section 5.3. Check Voltage to transducer connector. Voltage reading between B (positive) and A (negative) should be 5.0 VDC.
c. To check the signal wiring, check continuity between
the transducer connector C terminal and the following
microprocessor connector:
4
2
3
1.
2.
3.
4.
5.
6.
5
6
CDP = 1MP05, CSP = 1MP29, EVOP = 1MP06
d. If voltage and signal wire are good, replace the transducer. The transducer may be removed by disconnecting the connector and quickly backing it off the
Schrader valve fitting.
8.8.9 Defrost Air Switch
Cylinder Valve and Gauge
Pressure Regulator
Nitrogen Cylinder
Pressure Gauge 0 to 400 PSIG
(0 to 27.2 bar)
Bleed-Off Valve
Switch
NOTE
If the DTT temperature is above 40°F (4.4°C)
defrost cannot be initiated and the MessageCenter will display “CANNOT START DEFROST
CYCLE”.
a. Check air switch tubing. Red tube is to be connected to
the high connection and routed below the coil. Clear
Figure 8−30 Typical Setup for Testing High
Pressure Switch
8−31
62-11389
tube is to be connected to the low connection and
routed above coil. Check condition and mounting of air
sensing fittings on the coil end of both tubes.
g. Attach an ohmmeter to the air switch electrical contacts to check switch action.
NOTE
Use a hand aspirator (Carrier Transicold part
number 07-00177-01), since blowing into tube
by mouth may cause an incorrect reading.
b. To check the defrost air switch, run unit in cooling and
jumper across the air switch terminals. This will start
the defrost cycle as it simulates the action of the defrost air switch. Bypassing the switch in this manner
operates all components involved in defrost.
c. Unit should remain in defrost until the DTT reaches
55_F (12.8_C ), for normal defrost, or after 5 to 10
minutes, for natural defrost (refer to Section 4.6 for
more information on defrost). At this point the defrost
cycle will terminate, and the unit will resume automatic operation.
h. With the gauge reading at zero, apply air pressure
very slowly to the air switch. An ohmmeter will indicate continuity when switch actuates. The switch
contacts should close and the ohmmeter needle
move rapidly to 0. Any hesitation in the ohmmeter indicates a possible problem with the switch, and it
should be replaced.
d. If the above test indicates satisfactory operation, test
DAS settings using a Magnehelic gauge (Carrier
Transicold part number 07-00177) or similar instrument as follows.
i. Refer to Section 2.10 for switch setting. If switch fails to
actuate at correct gauge reading, adjust switch by turning adjusting screw clockwise to increase setting or
counterclockwise to decrease setting.
j. Repeat checkout procedure until switch actuates at
correct gauge reading.
2
k. After switch is adjusted, place a small amount of
paint or fingernail polish on the adjusting screw so
that vibration will not change switch setting.
5
6
4
8.9 ELECTRICAL SYSTEM COMPONENT
SERVICE
3
Procedures for servicing or maintaining the high voltage
electrical system components are provided in the
following sub-paragraphs.
1
8.9.1 Megohmmeter Test Procedure
This instruction will aid in the check of the electrical
wiring insulation integrity and field electrical
connections.
1. Ohmmeter or Continuity Device
2. Adjustment Screw
(0.050” socket head size)
3. Low Side Connection
4. Pressure Line or Aspirator Bulb (Carrier
Transicold part number 07-00177-01)
5. Magnehelic Gauge (Carrier Transicold part
number 07-00177-00)
6. High Side Connection
A megohmmeter test instrument (commonly known as a
Megger) can be purchased locally at most electrical
supply centers. This test requires a meter that can be
set to 1000V.
CAUTION
Figure 8−31 Defrost Air Switch Test Setup
Before connecting a megohmmeter, place
the Main Power switch in the OFF position.
Disconnect the high voltage source, lockout/tagout the receptacle and disconnect
the negative battery connection. Isolate the
microprocessor by disconnecting all connectors and wires going to it. Observe National Electric Manufacturer’s Association
(NEMA) rules and test equipment manufacturers instructions.
e. Ensure magnehelic gauge is in proper calibration.
NOTE
The magnehelic gauge may be used in any
position, but must be re-zeroed if position of
gauge is changed from vertical to horizontal or
vice versa. USE ONLY IN POSITION FOR
WHICH IT IS ZEROED.
f. With air switch in vertical position, connect high pressure side of magnehelic gauge, a tee and and aspirator to high side connection of air switch. Tee is to be
placed approximately half-way between gauge and air
switch or an improper reading may result. (See
Figure 8−31)
62-11389
a. Disconnect the generator ground wire (GEN-GRD =
green wire marked with red tape) from the unit ground
plate (PE plate) inside the control box. See
Figure 8−32.
b. Connect a megohmmeter lead to the ground plate.
8−32
1
8
2
3
7
4
6
5
Figure 8−32 Megohmmeter Connection to Ground
Plate
1.
2.
3.
4.
5.
6.
7.
8.
c. Connect the remaining lead to the red wire at the T1
terminal of power supply contactor 1 (PSCON) See
Figure 8−33
d. Set the megohmmeter reading to 1000V.
e. Turn on the meter and record reading. It should be
greater than 200 M
Heater contactor 1 (1HTCON1)
Condenser motor contactor (CDCON)
Evaporator motor contactor (1EVCON)
Power supply contactor (PSCON)
Power supply contactor 2 (PSCON2)
Generator contactor (GENCON)
Heater contactor 2 (1HTCON2)
Compressor contactor (CCON)
Figure 8−33 High Voltage Contactors
8.9.2 Phase Reversal Module (PRM)
One principle of three phase motors is that the direction
of rotation will be reversed if any two wires going to the
motor are reversed. When operating on the generator,
the wiring is not changed and therefore the PRM is not
active. However, when operating on standby power, the
incoming power may be reversed. The function of the
phase reversal module is to monitor the incoming
standby power and reverse the power to the motors if
that incoming power will result in incorrect rotation.
f. If the reading is less than 200 M run the unit for 15
minutes to dry out the windings and test again. If the
reading does not improve to above 200 M after running 15 minutes, check for a short to ground by:
S Visually inspecting the tested component for any poor
connections or chafed wires
When the unit is started in standby, power is supplied to
the PRM +12V terminal to activate the PRM. Refer to
wiring schematic, Section 10. Once the PRM is
activated, it will provide a 12VDC power signal to the
microprocessor at terminal 5MP04 to signal the
microprocessor that Standby Operation has been
selected and high voltage has been detected at the
power plug. The PRM has two output contacts PRM IN
S1 and PRM IN S2. If incoming power is correct, the
PRM IN S1 contact is closed, energizing PSCON to
supply power to the motors. If any two incoming power
wires are reversed, the PRM IN S2 contact are closed,
energizing PSCON2 to supply power to the motors.
Both PSCON and PSCON2 have a set of normally
closed auxiliary contacts wired in series with the “other”
contactor to prevent energizing of both contactors at the
same time.
S Isolating the component and wire harness.
S Retesting the harness and component (i.e. the motor
windings) with the megohmmeter to determine where
the short to ground is located
g. Continue testing each of the red wires on PSCON T2
and T3 terminals. Each should measure greater than
200 M. If not, follow the procedure outlined in Step f.
above.
h. To complete the test, all high voltage contactor connections must be tested on their T1, T2 and T3 terminals. See Figure 8−33 The fuses and the Overload
Ground Fault Module (OGF) do not need to be tested.
To test the PRM:
a. Check for 460 VAC power from the power plug to the
PRM. If required, correct wiring or power source.
i. Following the completion of all testing, reconnect the
generator ground wire at the unit ground plate.
8−33
62-11389
b. Check for 12 VDC to the +12V from the switch. If required, correct wiring.
“OVERLOAD/GROUND FAULT” alarm and illuminates
the OGF mounted fault LED.
c. Check for ground at the PRM OV terminal. If required,
correct wiring.
b. OGF Checkout Procedure
1. Check the FAULT LED on the module. If the LED is
illuminated the module has activated and 12 VDC
power supply is correct. Perform a megohm test
(refer to Section 8.9.1) to determine if a fault to
ground exists. This test will also help determine if an
excessive current condition exists due to leakage to
ground. Repair wiring or components as required.
d. Check for a 12 VDC signal from the PRM to microprocessor terminal 5MP04. If required, correct wiring
from PRM to the microprocessor.
e. If all wiring and voltage readings are correct, replace
PRM.
H
A
A
H
G
B
B
G
F
C
E
D
2. If a problem with the module is suspected, check for
12VDC power to the module at the +12V terminal
and ground at the OV terminal. Correct wiring as required. Reset module by placing the Main Power
switch in the OFF position and then back in the desired position. Check for 12 VDC at the S+ terminal.
If LED is off and the module normally closed connection is open, replace module.
3. If module is OK, check for 12 VDC at SP61 and wiring through to microprocessor terminals 2MP26,
4MP7 & 5MP7 as required.
F
D
E
C
LIGHT BAR
SIDE
4. If a problem with the current sensors is suspected,
check sensor output. Current sensor inputs to the
module are rated at 16.7mV per Amp. For every Amp
that is read at the wires coming from the GENCON
T1, T2 and T3 terminals with an amp meter, there
should be a corresponding voltage reading on the
blue, brown & orange wires to the black wire. For example: 20Amps = 0.33VAC.
CONTROL BOX
SIDE
Figure 8−34 Light Bar Connections
8.9.3 Light Bar
The light bar may be tested using a 12 VDC source. To
test the light bar:
GROUND
FAULT
a. Connect the ground (-) from the power source to pin B
on the light bar side of the connector.
S+
b. The green LEDs will illuminate when the 12 VDC side
(+) of the power source is connected to pin G.
L1
L2
L3
c. With the connection as in the preceding steps (+ on
pin G, and - on pin B), the amber LEDs will illuminate
when the ground (-) from the power source is also
connected to pin G.
OV
8.9.4 Overload Ground Fault (OGF)
+12V
+12V
BLUE
BROWN
ORANGE
BLACK
OV
TO CURRENT
SENSORS
S+
a. Operation
The OGF is designed to detect current overload and
fault to ground in the AC voltage circuits. The function of
the OGF is to shut down the power supply (generator or
standby) when current is over 40 amp for 2 seconds, or
leakage to ground is more than 150mA.
Figure 8−35 Overload Ground Fault Connections
8.9.5 Evaporator Heaters
NOTE
A good preliminary test of the heaters is to run a
Pretrip and check for heater alarms
Power, from SP52, energizes the OGF at terminal +12
V. The module is grounded by the microprocessor at the
OV terminal through microprocessor terminal 1MP15.
a. Ensure the unit will not start automatically by disabling any two way communication and placing the
Main Power switch in the OFF position. Disconnect
the high voltage source and lockout/tagout the receptacle.
This power also flows through the OGF normally closed
contacts and the S+ terminal to the GENCONR relay,
PSCONR relay and microprocessor terminal 2MP26. If
an overload or excessive leakage to ground condition
exists, the OGF contacts open to de-energize the relays
and stop the flow of power to microprocessor terminal
2MP26. Loss of power at 2MP26 activates the A100 62-11389
b. Remove the lower back panel or coil cover as applicable.
8−34
NOTE:
The blower motor bearings are factory sealed
and do not require additional grease.
c. To determine which heater assembly needs to be replaced , disconnect the suspect heater assembly and
check pin to pin resistance. For heater resistance
refer to Section 2.11.
a. Ensure the unit will not start automatically by disabling any two way communication and placing the
Main Power switch in the OFF position. Disconnect
the high voltage source and lockout/tagout the receptacle.
d. Remove the heater mounting brackets.
e. Remove and replace faulty heater. If removing a drain
pan heater, carefully remove heater from the clips on
the drain pan.
b. From inside of trailer, remove back panel and grille
(see Figure 8−36).
f. When reinstalling brackets torque to 6 to 7 ft/lbs (8.1
to 9.5 Nm). Rods should move freely from side to side
when installed.
c. Disconnect the motor electrical connector.
d. Remove the supply air sensor and then remove the
nozzle.
g. Route and secure electrical cables. Route along the
lower side of the heat exchanger at the 5 o’clock position (on the side closest to the evaporator coil). Ensure that all wires are clear of heaters.
e. Loosen the four bolts on the underside of the support
bracket that fasten the two mounting brackets.
f. Slide the blower assembly off the support bracket and
out of the unit.
8.9.6 Evaporator Blower & Motor
3
4
1
6
7
5
8
8
9
2
1.
2.
3.
4.
5.
Access panel
grille
Nozzle
Supply Air Sensor
Blower Assembly
6.
7.
8.
9.
Motor
Stator
Mounting Brackets
Support Bracket
Figure 8−36 Evaporator Blower Assembly
8−35
62-11389
g. To remove the fan, loosen the nut holding the blade to
the motor shaft using impact gun.
the lower right hand leg of the welded support. See
Figure 8−37
h. To remove motor remove four bolts that hold motor to
the stator.
c. Remove the condenser fan assembly mounting bolts
and slide the assembly out of unit. If required, the divider may be removed by removing the upper and
lower mounting bolts.
i. Complete the assembly in reverse order of removal.
Coat motor shaft with never-seize before assembly.
Torque:
Fan Nut
37 to 43 ft/lbs (50 to 58 Nm)
Motor Mounting
Bolts
5.5 to 7.5 ft/lbs (7.5 to 10 Nm)
Mounting Bracket
Bolts
5 to 7 ft/lbs (6.8 to 9.5 Nm)
d. Disassemble the fan and motor assembly from the
mounting and then disassemble the fan from the motor as required.
e. Complete the assembly in reverse order of removal.
When mounting fan & motor assembly, assemble so
wire connector is in line with lower right welded support leg, see in Figure 8−37. Torque:
8.9.7 Condenser Fan Assemblies
a. Ensure the unit will not start automatically by disabling any two way communication and placing the
Main Power switch in the OFF position. Disconnect
the high voltage source and lockout/tagout the receptacle.
b. Disconnect the motor electrical connector. Note motor is assembled to allow routing of the wiring down
Fan to motor bolts
4 to 6 ft/lbs (5.5 to 6.8 Nm)
Fan & motor assembly to welded
support bolts
5 to 6 ft/lbs (6.8 to 8.1 Nm)
Welded support to
frame bolts
7 to 8 ft/lbs (9.5 to 10.8 Nm)
Shroud to frame
and frame to unit
bolts
6 to 7 ft/lbs (8.1 to 9.5 Nm)
2
4
1
3
5
6
7
4 PLCS.
8
9
1.
2.
3.
4.
5.
Condenser Fan Assembly
Divider
Shroud
Frame
Fan & Motor Assembly
6.
7.
8.
9.
Fan
Motor
Welded Support
Wire Routing
Figure 8−37 Condenser Fan Assembly
62-11389
8−36
8.9.8 Battery Charger (BTYC)
WARNING
NOTE
A battery of known good condition must be connected to the charger before doing the following
test.
Do not direct water or steam into the generator openings. Do not allow any soap and
water solutions to enter the generator.
a. Run the unit with the battery charger connected to the
battery as usual.
NOTE
Always test suspect generators with
megohmmeter. (Refer to Section 8.9.1.)
b. Using a clamp-on ammeter, take a reading of the amperage on both output wires of the battery charger. If
charging current is between 3 and 20 Amps, for 20
amp (single phase) chargers, or 3 and 40 amps, for
40 amp (three phase) chargers, the battery charger is
functioning correctly.
c. If charging Amps = 0 check the AC input voltage to the
charger. The AC input voltage range should be
between 350 and 600 VAC.
a
WARNING
d. If there is no AC voltage, ensure the unit will not start
automatically by disabling any two way communication and placing the Main Power switch in the OFF position. Disconnect the high voltage source and lockout/tagout the receptacle.
Generators of this type should not be
“flashed.” Operation with external voltage
source or momentary shorting of leads will
damage the generator and may cause injury.
e. Check battery charger fuses and inspect fuse holder
wire connections. Inspect plugs, pins and wires at
charger connections.
8.9.9 Generator (GEN)
Costly repairs and down time can usually be prevented
by operating electrical equipment under conditions
which are compatible with those at which the equipment
was designed. Follow the instructions outlined below to
ensure maximum efficiency of the electrical equipment.
a. Preventive Maintenance and Operating Precautions
S Drying the Generator Windings
f. If input voltage, wiring connections and the fuses are
good, replace the battery charger.
Generators that have been in transit, recently steam
cleaned, or in storage for long periods may be subjected
to extreme temperature and moisture changes. This
can cause excessive condensation, and the generator
windings should be thoroughly dried out before bringing
the generator up to full nameplate voltage. If this
precaution is not taken, serious damage to the
generator can result.
WARNING
Be aware of HIGH VOLTAGE supplied at the
power plug or from the generator. When
performing service or maintenance procedures: ensure any two way communication is
disabled in accordance with the manufacturer’s instruction, ensure the Main Power
Switch is in the OFF position and, whenever
practical, disconnect the high voltage
source, lockout/tagout the receptacle and
disconnect the negative battery connection. NEVER dis-assemble the generator:
HIGH MAGNETIC FIELD INSIDE! This field
can interfere with cardiac implants such as
pacemakers and defibrillators.
Always test suspect motors, or generators described
above, with a megohmmeter (Refer to Section 8.9.1).
Do not set voltage higher than rating on wiring insulation
in order not to prevent insulation breakdown during
testing. Test each winding to ground, looking for very
high megohmmeter readings. Also test each phase to
phase winding looking for a low ohm reading but with
equal reading across all phases.
8−37
62-11389
b. Generator Removal
1. Ensure the unit will not start automatically by disabling any two way communication and placing the
Main Power switch in the OFF position. Disconnect
the high voltage source and lockout/tagout the receptacle.
5
2
6
6
8
7
5. Unbolt snubber. Unplug the ENSCU.
2. Remove the nuts (2) from the exhaust connection.
6. Remove the locking plates from the rear engine
mounting bolts and then remove the engine frame
bolts (Leave front bolt on pump side loose.)
7. Place the engine support tool (P/N
86-04751-00.)
8. Unbolt battery cable clamps.
3
9
4
3. Disconnect ground wire.
4. Cut the generator cables. (Leave the same length as
new generator wires.)
62-11389
9. Remove fuel filter assembly. Unclamp hoses.
8−38
NOTE
Do not remove and use the shim from a replacement generator, the replacement generator
shim must remain in place until the generator is
installed.
10
18
15
10.Use tool (Carrier Transicold part
07-60083-00) to lock the engine flywheel
number
17
11
15.Remove 3 of the 6 flywheel bolts on the generator.
16.Insert 3 guiding rods (P/N : SKM 5671.)
17.Place the mica shim (P/N 54-00630-25) between the
rotor and the stator prior to loosening any other bolts.
18.Remove the last 3 flywheel bolts.
14
21
13
20
19
11. Pull the harness on the top of generator out of the
way.
12.Swing out the engine.
13.Remove the fan cover (4 bolts)
14.Remove the fan blade center screw. Using two 6mm
bolts and a puller, remove the blade. NOTE: DO
NOT use 6mm bolts to drive the fan off.
19
CAUTION
A mica shim (Carrier Transicold part number 54-00630-25) must be installed before
removal of the generator. The generator is
to be removed as one piece, with the shim in
place. DO NOT attempt to remove the rotor
from the stator.
19.Install the lifting tool (Carrier Transicold part number
07-60085-01).
20.Remove the remaining stator bolts.
21.Remove the generator with a sling. DO NOT pry
against the spacer between engine and generator.
8−39
62-11389
4. Locate two screw holes on the face of the crankshaft
which are approximately 0.5 in (12.7mm) apart. See
Figure 8−39, all other screw holes are approximately
0.75 in (19mm) apart.
5. Assemble two guide rods (CTD P/N SKM-5671) into
the two holes on the crankshaft located in the previous step. Assemble the third rod across from the
first two rods.
6. Install the flywheel on the crankshaft using the guide
rods to align properly. Make sure the flywheel mates
with the crankshaft with no rocking or side to side
movement.
7. Lift the generator using the lifting tool and hang it in
front of the engine. Make sure the generator leads
(Item 11, Figure 8−38) exit the stator winding on the
side away from the engine.
8. The mounting holes on the generator rotor (Item 10)
have two holes offset to match the ones in the crankshaft and flywheel. Locate them and turn the engine
to line up the guide rods in the crankshaft with the offset holes in the generator rotor.
NOTE
The generator rotor does not turn in the stator.
c. Generator Assembly Procedure
2
8
5
4
9
7
3
6
1
12
10
11
1.
2.
3.
4.
5.
6.
Bolt, Stator
Washer, Stator
Fan Cover
Fan Mount Bolt
Fan Mount Washer
Fan
7.
8.
9.
10.
11.
12.
9. Slide the generator rotor over the guide rods and
mate the stator with the spacer installed in step 3.
Ensure the dowel pins in the bell housing are fully engaged in the stator.
NOTE
The generator should slide freely on the guide
rods if the holes in the generator rotor are
matched correctly with the crank shaft holes.
Otherwise it will bind up and the stator will not
mate properly with the spacer.
Bolt, Rotor
Stator
Spacer
Rotor
Generator Leads
Grommet
Figure 8−38 Generator Assembly
1. Verify the existence and condition of the two original
dowel pins in the bell housing. (See Figure 8−39,
CTD P/N 34-06210-00 - not included in the kit). The
pins are to be installed with the chamfer facing out.
DOWEL
10.Using new screws (DO NOT reuse old screws), install three screws and three washers to the rotor and
tighten.
NOTE
The screws will be torqued later.
11 O’CLOCK
11. Remove the guide rods and assemble and tighten
the remaining three rotor screws and washers.
NOTE
The screws will be torqued later.
0.5 in (12.7mm)
8 O’CLOCK
12.Install and tighten three stator screws and two washers with each screw in the following locations:
One in five o’clock location (See Figure 8−39)
One in eight o’clock location
One in eleven o’clock location
DOWEL
5 O’CLOCK
Figure 8−39 Bolt Hole Pattern For Bell Housing
and Crankshaft
NOTE
The remaining four stator mounting bolts will be
installed and will all be torqued after the fan
cover is installed.
2. Remove the flywheel and inspect it for any debris or
damage.
3. Install spacer (Item 9, Figure 8−38) onto the bell
housing using the dowel pins.
13.Torque the rotor bolts to 90-110 foot-pounds (122 to
149 Nm) using an alternating sequence.
NOTE
Install the spacer so the irregularly shaped
piece covers the starter opening.
62-11389
NOTE
Mark each rotor screw after it is torqued to
ensure that all the screws are torqued.
8−40
14.Remove the mica shim that is between the stator and
the rotor.
19.Torque the stator mounting screws to 33-37 foot
pounds (44.8Nm to 50.1 Nm).
NOTE
Mark each stator screw after it is torqued to
ensure that all the screws are torqued.
15.Install the fan onto the rotor.
NOTE
The fan must be installed with blades away from
the engine.
20.Assemble the strain grommet (Item 12).
21.Reconnect wires.
16.Torque the fan screw to 10-12 foot-pounds (14 to 16
Nm.
22.Reassemble engine into unit.
17.Feed all the wires through the inside of the fan cover
side opening. Ensure there are no loops or wires laying on the stator end.
8.9.10 Sensor Checkout
An accurate ohmmeter must be used to check
resistance values shown in Table 8−5 or Table 8−6.
18.Install the fan cover (Item 3) onto the generator stator and install the remaining mounting screws and
washers.
Due to variations and inaccuracies in ohmmeters,
thermometers or other test equipment, a reading within
2% of the chart value would indicate a good sensor. If a
sensor is bad, the resistance reading will usually be
much higher or lower than the resistance values given in
the tables.
NOTE
Make sure the insulation on lead wires is not
damaged during assembling of the fan cover.
Two preferred methods of determining the actual test
temperature at the sensor, is an ice bath at 32_F (0_C)
or a calibrated temperature tester.
Each mounting screw must be assembled with
two washers.
8−41
62-11389
Table 8−5 Sensor Resistance
Sensors AAT, 1RAT, 1SAT, ENCT, EVOT, CST, 1DTT, REMSN 1 & 2
°F
5C
Ohms
°F
5C
Ohms
°F
5C
Ohms
°F
5C
Ohms
-40
-40
336,500
18
-7.8
49,060
76
24.4
10,250
134
56.7
2,809
-38
-38.9
312,600
20
-6.7
46,230
78
25.6
9,760
136
57.8
2,697
-36
-37.8
290,600
22
-5.6
43,580
80
26.7
9,299
138
58.9
2,590
-34
-36.7
270,300
24
-4.4
41,100
82
27.8
8,862
140
60.0
2,488
-32
-35.6
251,500
26
-3.3
38,780
84
28.9
8,449
142
61.1
2,390
-30
-34.4
234,200
28
-2.2
36,600
86
30.0
8,057
144
62.2
2,297
-28
-33.3
218,200
30
-1.1
34,560
88
31.1
7,686
146
63.3
2,208
-26
-32.2
203,400
32
0
32,650
90
32.2
7,334
148
64.4
2,124
-24
-31.1
189,700
34
1.1
30,850
92
33.3
7,000
150
65.6
2,042
-22
-30
177,000
36
2.2
29,170
94
34.4
6,684
155
68.3
1,855
-20
-28.9
165,200
38
3.3
27,590
96
35.6
6,384
160
71.1
1,687
-18
-27.8
154,300
40
4.4
26,100
98
36.7
6,099
165
73.9
1,537
-16
-26.7
144,200
42
5.5
24,700
100
37.8
5,828
170
76.7
1,402
-14
-25.6
134,800
44
6.6
23,390
102
38.9
5,571
175
79.4
1,281
-12
-24.4
126,100
46
7.7
22,160
104
40.0
5,327
180
82.2
1,171
-10
-23.3
118,100
48
8.9
20,990
106
41.1
5,095
185
85.0
1,072
-8
-22.2
110,500
50
10
19,900
108
42.2
4,874
190
87.8
983
-6
-21.1
103,600
52
11.1
18,870
110
43.3
4,665
195
90.6
902
-4
-20
97,070
54
12.2
17,900
112
44.4
4,465
200
93.3
829
-2
-18.9
91,030
56
13.3
16,980
114
45.5
4,275
205
96.1
762
0
-17.8
85,400
58
14.4
16,120
116
46.7
4,095
210
98.9
702
2
-16.7
80,160
60
15.5
15,310
118
47.8
3,923
215
101.7
647
4
-15.6
75,270
62
16.6
14,540
120
48.9
3,759
220
104.4
598
6
-14.4
70,720
64
17.7
13,820
122
50.0
3,603
225
107.2
553
8
-13.3
66,460
66
18.9
13,130
124
51.1
3,454
230
110.0
511
10
-12.2
62,500
68
20.0
12,490
126
52.2
3,313
235
112.8
473
12
-11.1
58,790
70
21.1
11,880
128
53.3
3,177
240
115.6
438
14
-10.0
55,330
72
22.2
11,310
130
54.4
3,049
245
118.3
406
16
-8.9
52,090
74
23.3
10,760
132
55.6
2,926
250
121.1
378
62-11389
8−42
Table 8−6 Sensor Resistance (CDT)
°C
-40
-38.9
-37.8
-36.7
-35.6
-34.4
-33.3
-32.2
-31.1
-30
-28.9
-27.8
-26.7
-25.6
-24.4
-23.3
-22.2
-21.1
-20
-18.9
-17.8
-16.7
-15.6
-14.4
-13.3
-12.2
-11.1
-10.0
-8.9
-7.8
-6.7
-5.6
-4.4
-3.3
-2.2
-1.1
°F
-40
-38
-36
-34
-32
-30
-28
-26
-24
-22
-20
-18
-16
-14
-12
-10
-8
-6
-4
-2
0
2
4
6
8
10
12
14
16
18
20
22
24
26
28
30
Ohms
3,360,000
3,121,020
2,900,710
2,697,500
2,509,940
2,336,720
2,186,670
2,028,680
1,891,780
1,765,060
1,647,700
1,538,950
1,438,120
1,344,580
1,257,770
1,177,150
1,102,240
1,032,600
967,830
907,560
851,450
799,180
750,470
705,060
662,690
623,150
586,230
551,740
519,500
189,690
461,170
434,790
410,080
386,940
365,260
344,930
°C
0
1.1
2.2
3.3
4.4
5.5
6.6
7.7
8.9
10
11.1
12.2
13.3
14.4
15.5
16.6
17.7
18.9
20.0
21.1
22.2
23.3
24.4
25.6
26.7
27.8
28.9
30.0
31.1
32.2
33.3
34.4
35.6
36.7
37.8
38.9
°F
32
34
36
38
40
42
44
46
48
50
52
54
56
58
60
62
64
66
68
70
72
74
76
78
80
82
84
86
88
90
92
94
96
98
100
102
Ohms
325,860
307,970
291,180
275,410
260,590
246,670
233,570
221,260
209,670
198,760
188,490
178,820
169,700
161,100
152,990
145,340
138,120
131,310
124,870
118,790
113,040
107,600
102,460
97,600
92,990
88,630
84,510
80,600
76,890
73,380
70,040
66,880
63,880
61,040
58,330
55,770
°C
40.0
41.1
42.2
43.3
44.4
45.5
46.7
47.8
48.9
50.0
51.1
52.2
53.3
54.4
55.6
56.7
57.8
58.9
60.0
61.1
62.2
63.3
64.4
65.6
68.3
71.1
73.9
76.7
79.4
82.2
85.0
87.8
90.6
93.3
96.1
98.9
8−43
°F
104
106
108
110
112
114
116
118
120
122
124
126
128
130
132
134
136
138
140
142
144
146
148
150
155
160
165
170
175
180
185
190
195
200
205
210
Ohms
53,330
51,010
48,800
46,710
44,710
42,820
41,010
39,290
37,660
36,100
34,610
33,200
31,850
30,560
29,330
28,160
27,040
25,970
24,960
23,980
23,050
22,160
21,310
20,500
18,980
16,940
15,450
14,070
12,870
11,750
10,750
9,870
9,050
8,320
7,650
7,050
°C
101.7
104.4
107.2
110.0
112.8
115.6
118.3
121.1
126.7
132.2
137.8
143.3
148.9
154.4
160.0
165.5
171.1
176.7
182.2
187.8
193.3
198.9
204.4
210.0
215.6
221.1
226.7
232.2
237.8
243.3
248.9
254.4
260.0
°F
215
220
225
230
235
240
245
250
260
270
280
290
300
310
320
330
340
350
360
370
380
390
400
410
420
430
440
450
460
470
480
490
500
Ohms
6,510
6,000
5,540
5,130
4,760
4,410
4,090
3,800
3,290
2,850
2,490
2,170
1,910
1,680
1,480
1,310
1,160
1,040
920
830
740
670
600
540
490
450
410
370
340
310
280
260
240
62-11389
Table 8−7 Temperature Pressure Chart
Temperature
62-11389
Pressure
Temperature
Pressure
_C
-40
-37
-34
-32
-29
-28
-27
_F
-40
-35
-30
-25
-20
-18
-16
BAR
0.3
0.5
0.7
0.9
1.1
1.2
1.3
PSIG
4.5
7.1
9.9
12.9
16.3
17.7
19.2
_C
0
1
2
3
4
6
7
_F
32
34
36
38
40
42
44
BAR
5.0
5.2
5.4
5.7
5.9
6.1
6.4
PSIG
72.5
75.6
78.8
82.1
85.5
89.0
92.5
-26
-14
1.4
20.7
8
46
6.6
96.2
-24
-23
-22
-21
-20
-19
-18
-17
-16
-14
-13
-12
-11
-10
-9
-8
-7
-6
-4
-3
-2
-12
-10
-8
-6
-4
-2
0
2
4
6
8
10
12
14
16
18
20
22
24
26
28
1.5
1.7
1.8
1.88
2.0
2.1
2.3
2.4
2.5
2.7
2.8
3.0
3.1
3.3
3.5
3.7
3.8
4.0
4.2
4.4
4.6
22.3
23.9
25.6
27.3
29.1
30.9
32.8
34.8
36.8
38.9
41.1
43.3
45.6
48.0
50.4
52.9
55.5
58.1
60.9
63.7
66.5
9
48
6.9
99.9
-1
30
4.8
69.5
10
13
16
18
21
24
27
29
32
35
38
41
43
46
49
52
54
57
60
63
66
50
55
60
65
70
75
80
85
90
95
100
105
110
115
120
125
130
135
140
145
150
7.2
8.0
8.7
9.5
10.3
11.2
12.1
13.1
14.1
15.2
16.3
17.5
18.8
20.1
21.5
23.0
24.5
26.1
27.7
29.5
31.3
103.7
115.4
126.1
137.4
149.4
162.1
175.5
189.6
204.5
220.2
236.8
254.2
272.4
291.6
311.8
332.9
355.0
378.1
402.3
427.6
454.0
8−44
SECTION 9 − UNIT TROUBLESHOOTING
1
PARAGRAPH NUMBER
Page
9.1 ENGINE . . . . . . . . . . . . . . . . . . . . . . . . . . . . . . . . . . . . . . . . . . . . . . . . . . . . . . . . . . . . . . . . . . . . . . . . . 9−1
9.1.1
9.1.2
Engine Will Not Start . . . . . . . . . . . . . . . . . . . . . . . . . . . . . . . . . . . . . . . . . . . . . . . . . . . . . . . . . .
Engine Starts Then Stops . . . . . . . . . . . . . . . . . . . . . . . . . . . . . . . . . . . . . . . . . . . . . . . . . . . . .
9−1
9−2
9.1.3
9.1.4
Engine Will Not Shut Off . . . . . . . . . . . . . . . . . . . . . . . . . . . . . . . . . . . . . . . . . . . . . . . . . . . . . . .
Starter Motor Malfunction . . . . . . . . . . . . . . . . . . . . . . . . . . . . . . . . . . . . . . . . . . . . . . . . . . . . . .
9−2
9−2
9.1.5
9.1.6
Malfunction In The Engine Starting Circuit . . . . . . . . . . . . . . . . . . . . . . . . . . . . . . . . . . . . . . .
Miscellaneous Engine Troubleshooting . . . . . . . . . . . . . . . . . . . . . . . . . . . . . . . . . . . . . . . . . .
9−2
9−3
9.2
9.3
BATTERY CHARGER . . . . . . . . . . . . . . . . . . . . . . . . . . . . . . . . . . . . . . . . . . . . . . . . . . . . . . . . . . . . . 9−3
GENERATOR . . . . . . . . . . . . . . . . . . . . . . . . . . . . . . . . . . . . . . . . . . . . . . . . . . . . . . . . . . . . . . . . . . . . 9−4
9.4 REFRIGERATION / TEMPERATURE CONTROL . . . . . . . . . . . . . . . . . . . . . . . . . . . . . . . . . . . . . 9−4
9.4.1 Unit Will Not Cool . . . . . . . . . . . . . . . . . . . . . . . . . . . . . . . . . . . . . . . . . . . . . . . . . . . . . . . . . . . . .
9−4
9.4.3
9.4.4
Unit Operates Long Or Continuously In Cooling . . . . . . . . . . . . . . . . . . . . . . . . . . . . . . . . . . .
Unit Will Not Terminate Cooling . . . . . . . . . . . . . . . . . . . . . . . . . . . . . . . . . . . . . . . . . . . . . . . . .
9−4
9−5
9.4.6
9.4.7
Unit Will Not Terminate Heating . . . . . . . . . . . . . . . . . . . . . . . . . . . . . . . . . . . . . . . . . . . . . . . . .
Defrost Cycle Malfunction . . . . . . . . . . . . . . . . . . . . . . . . . . . . . . . . . . . . . . . . . . . . . . . . . . . . .
9−5
9−5
9.4.8
9.4.9
Abnormal Pressure . . . . . . . . . . . . . . . . . . . . . . . . . . . . . . . . . . . . . . . . . . . . . . . . . . . . . . . . . . .
Abnormal Noise . . . . . . . . . . . . . . . . . . . . . . . . . . . . . . . . . . . . . . . . . . . . . . . . . . . . . . . . . . . . . .
9−6
9−6
9.4.10 No Evaporator Air Flow Or Restricted Air Flow . . . . . . . . . . . . . . . . . . . . . . . . . . . . . . . . . . .
9.4.11 Evaporator Expansion Valve (EVXV) Malfunction . . . . . . . . . . . . . . . . . . . . . . . . . . . . . . . . .
9−6
9−7
9.4.12 Compressor Suction Modulation Valve (CSMV) Malfunction . . . . . . . . . . . . . . . . . . . . . . . .
9−7
9.5 Speed Control System Diagnostics . . . . . . . . . . . . . . . . . . . . . . . . . . . . . . . . . . . . . . . . . . . . . . . . . . 9−8
Microprocessor Diagnostics . . . . . . . . . . . . . . . . . . . . . . . . . . . . . . . . . . . . . . . . . . . . . . . . . . . . . . . . 9−13
9
9.6
62−11389
SECTION 9
UNIT TROUBLESHOOTING
CAUTION
Under no circumstances should anyone attempt to repair the keypad, display or internal control
module components. Should a problem develop with these components, contact your nearest Carrier Transicold dealer for replacement.
NOTE
Run a Pretrip and check all active alarms before continuing with troubleshooting.
9.1 ENGINE
Indication/Trouble
Possible Causes
Action/Reference Section
NOTE:
Refer to section 9.5 for electronic speed control system diagnoses
9.1.1 Engine Will Not Start
Starter motor will not
crank or low cranking speed
Starter motor cranks
but engine fails to start
Starter cranks, engages,
but dies after a few seconds
Battery insufficiently charged
Battery terminal post dirty or defective
Bad electrical connections at starter
Starter motor malfunctions
Starter motor solenoid defective
Open starting circuit
Incorrect grade of lubricating oil
Internal generator damage
No fuel in tank
Air in fuel system
Water in fuel system
9.2
Check
Check
9.1.4
Engine Manual
9.1.5
2.8
8.9.9
Check
8.5.2
Drain Sump &
8.5.5
Plugged fuel filter
Plugged inlet screen to mechanical pump.
Plugged inlet screen to electric pump.
Plugged fuel lines to injector(s)
ESC defective
Intake air heater defective
Incorrect grade of lubricating oil
Voltage drop in battery cable(s)
ESC defective
8.5.5
8.5.3
8.5.4
Check
9.5
8.5.10
2.8
Check
9.5
9−1
62-11389
Indication/Trouble
Possible Causes
Action/Reference Section
9.1.2 Engine Starts Then Stops
Engine stops after
several rotations
Fuel supply restricted
No fuel in tank
Leak in fuel system
Faulty fuel control operation
Plugged fuel filter
Plugged inlet screen to mechanical pump.
Plugged inlet screen to electric pump.
Injector nozzle(s) defective
Injection pump defective
Air cleaner or hose restricted
Safety device open
ESC defective
Electric fuel pump malfunction
Mechanical fuel pump malfunction
Oil pressure switch defective
9.1.3 Engine Will Not Shut Off
Engine will not shut off
ESC operation defective
9.1.4 Starter Motor Malfunction
Battery insufficiently charged
Battery cable connections loose or oxidized
Battery cables defective
Starter motor will not
Starter brushes shorted out
crank or turns slowly
Starter brushes hang up or have no contact
Starter solenoid damaged
Incorrect grade of lubricating oil
Starter motor turns
Pinion or ring gear obstructed or worn
but pinion does not engage
Starter motor does not disengage Starter motor solenoid defective
after engine starts
Defective starter
9.1.5 Malfunction In The Engine Starting Circuit
Battery defective
Loose electrical connections
No power to starter solenoid (SS)
ESC defective
No power to Starter Solenoid connector
62-11389
9−2
Check
Check
Check
Engine Manual
8.5.5
8.5.3
8.5.4
Engine Manual
Engine Manual
8.5.9
2.13
9.5
8.5.4
Engine Manual
Replace
9.5
9.2
Check
Replace
Engine Manual
Engine Manual
Engine Manual
2.8
Clean both,
remove burrs,
or replace
Engine Manual
Engine Manual
Check
Tighten
9.5
9.5
Indication/Trouble
Possible Causes
9.1.6 Miscellaneous Engine Troubleshooting
Air cleaner or hose restricted
Air in fuel system
Air vent restricted in fuel tank cap
Restricted fuel lines
Defective fuel injection pump
Loss of power
Defective injector(s) or incorrect type
Incorrect fuel injection pump timing
Incorrect valve timing
Poor compression
Engine shockmounts defective
Vibration
Poor compression
Air cleaner or hose restricted
Exhaust pipe restriction
Restriction in water jacket
Restriction in radiator
Overheating
Coolant level too low
Loose water pump
Defective thermostat
Defective water pump / belt
Excessive crankcase pressure
Plugged crankcase breather
Action/Reference Section
8.5.9
8.5.2
Clean
Engine Manual
Engine Manuall
Engine Manual
Engine Manuall
Engine Manual
Engine Manual
Replace
Engine Manual
8.5.9
Remove
Engine Manual
8.5.12
8.5.12
Engine Manual
Engine Manual
Engine Manual
8.5.14
9.2 BATTERY CHARGER
Indication/Trouble
F7 or F8 or F29 (if applicable)
fuse blows
Possible Causes
Action/Reference Section
Short in 12 volt wiring causing
overload of charger
8.9.8
Internal short
Bad cell in battery
8.9.8
Test battery for
defect according to battery
manufacturer’s
instructions
Replace
Replace.
Charging rate does not taper
back after charging for a few minutes of engine crank
Defective charger
Open F7 or F8or F29 (if applicable)
Charger does not charge
Charger is not receiving AC input
Charger output is not connected to 12 volt battery
Low output voltage measured
across charger output
Defective charger
Battery not connected to charger. It is
normal to measure 12 volts or less across
charger output with no battery connected
9−3
8.9.8
Check output
wiring connections to battery.
Replace
Check charging
leads from
charger to battery
62-11389
9.3 GENERATOR
Indication/Trouble
Possible Causes
Action/Reference Section
No voltage with engine running
Damaged harness
GENCON damaged
Open or short in stator windings
Check
Check
Check
Low voltage
Low engine speed
Excessive load
High resistance connections - connections
warm or hot
Correct
Check
Clean and
Tighten
Fluctuating speed
Irregular speed of engine
Loose terminal or load connections
Excessive engine speed
Generator overloaded
Clogged ventilation openings
Insufficient circulation
Unbalanced load
Loose laminations
9.5
9.5
Tighten
9.5
Check
Clean
Check Fan
Balance
8.9.9
Fluctuating voltage
High voltage
Overheating
Mechanical Noise
9.4 REFRIGERATION / TEMPERATURE CONTROL
Indication/Trouble
Possible Causes
Action/Reference Section
9.4.1 Unit Will Not Cool
Compressor contactor or relay defective
Compressor defective
A defrost cycle did not terminate. Check DTT
Abnormal pressure
Refrigeration system
Check system for noncondensibles
9.4.2 Unit Runs But Has Insufficient Cooling
Compressor internal damage
Compressor
Unloader malfunction
Abnormal pressure
Unloader malfunction
Expansion valve malfunction
Refrigeration system
No or restricted evaporator airflow
Suction Modulation Valve malfunction
Check system for noncondensibles
9.4.3 Unit Operates Long Or Continuously In Cooling
Hot Load
Compressor malfunction
Refrigerated Compartment
Refrigeration system
Compressor
62-11389
Check
8.7.1
8.9.10
9.4.8
8.6.2
8.7.1
8.7.6
9.4.8
8.7.6
9.4.11
9.4.10
8.8.5
8.6.2
Allow time to
pull down
Defective or insufficient refrigerated compartment insulation or air leak
Correct
Abnormal pressure
Temperature sensor malfunction
Check system for noncondensibles
Defective
9.4.8
8.9.10
8.6.2
8.7.1
9−4
Indication/Trouble
Possible Causes
9.4.4 Unit Will Not Terminate Cooling
Temperature sensor malfunction
Contactor (CCON) stuck closed
Unit fails to stop cooling
Microprocessor improperly set
Unit Will Not Heat Or Has Insufficient Heating
Heater(s) defective
Heater contactors or coil defective
Defective wiring / connectors
Loose terminal connections
Unit will not heat or has insufficient heat
Low voltage
No or restricted air flow
Temperature sensor malfunction
Compressor contactor stuck closed
9.4.6 Unit Will Not Terminate Heating
Microprocessor temperature improperly set
Microprocessor malfunction
Unit fails to stop heating
Temperature sensor malfunction
9.4.7 Defrost Cycle Malfunction
Defrost timer has not expired
Defrost air switch (DAS) malfunction
Will not initiate defrost
automatically
DTT is above 40F (4.4C)
Loose terminal connections (DAS)
Keypad defective
Loose terminal connections between keypad and microprocessor
Will not initiate defrost manually
DTT is above 40F (4.4C)
Unit has been running less than 15 seconds
Heater contactor or coil defective
Heater(s) burned out
Initiates but does not defrost
Evaporator fan contactor stuck closed
Defrost air switch (DAS) out of adjustment
Frequent defrost
Wet load
Does not terminate or
Defrost air switch (DAS) out of adjustment
cycles on defrost.
DTT malfunction
Hot Load
Action/Reference Section
8.9.10
Check
Check set point
Check whether
microprocessor
is set at °C or
°F
9.4.5
Refrigerated Compartment
Defective or insufficient refrigerated compartment insulation or air leak
9−5
8.9.5
Replace
Replace
Tighten
9.3
9.4.10
8.9.10
Check
Reset
9.6
8.9.10
Check/Reset
8.8.9
Cool Down
Tighten
8.4.4
Tighten
Cool Down
Try again
Replace
8.9.5
Check
8.8.9
Normal
8.8.9
8.9.10
Allow time to
pull down
Correct
62-11389
INDICATION/
TROUBLE
9.4.8 Abnormal Pressure
High discharge pressure
Low discharge pressure
Low suction pressure
High suction pressure
Suction and discharge
pressures tend to equalize
when unit is operating
Possible Causes
Action/Reference Section
Condenser coil dirty
Condenser fans rotating backwards
Condenser fan inoperative
Refrigerant overcharge or noncondensibles
Discharge service valve partially closed
Compressor valves(s) worn or broken
Low refrigerant charge
Suction modulation valve malfunction
Filter-drier partially plugged
Low refrigerant charge
Expansion valve malfunction
No evaporator air flow or restricted air flow
Excessive frost on evaporator coil
Evaporator fan rotating backwards
Suction modulation valve malfunction
Liquid or suction line service valve partially closed
Compressor valves(s) worn or broken
Compressor gasket(s) defective
Heater contactor stuck closed
8.8.2
Check Wiring
Check
8.6.2
Open
8.7.1
8.6.2
8.8.5
8.8.3
8.6.2
9.4.11
9.4.10
9.4.7
Check Wiring
8.8.5
Open
8.7.1
8.7.1
Check
Compressor valves defective
8.7.1
Compressor gasket(s) defective
8.7.1
9.4.9 Abnormal Noise
Loose mounting bolts
Worn bearings
Worn or broken valves
Compressor
Liquid slugging
Insufficient oil
Loose or striking shroud
Bearings defective
Condenser or evaporator fan
Bent shaft
Water pump belt
Cracked or worn
9.4.10 No Evaporator Air Flow Or Restricted Air Flow
Frost on coil
Evaporator coil blocked
Dirty coil
Evaporator fan loose or defective
No or partial evaporator
Evaporator fan rotating backwards
air flow
Evaporator air flow blocked
62-11389
9−6
Tighten
8.7.1
8.7.1
9.4.11
8.7.5
Check
8.9.6/8.9.7
8.9.6/8.9.7
Replace
8.8.9
8.8.1
8.9.6
8.9.6
Check
Indication/Trouble
Possible Causes
9.4.11 Evaporator Expansion Valve (EVXV) Malfunction
Low refrigerant charge
EVOT defective
EVOP defective
Coil not seated properly on valve
EVXV not controlling correctly
EVXV inlet screen plugged
Loose connector
Action/Reference Section
8.6.2
8.9.10
8.8.8
Check
Check and Replace
Check and
Tighten
9.4.12 Compressor Suction Modulation Valve (CSMV) Malfunction
Coil not seated properly
Coil defective
Loose connector
CSMV not controlling correctly
CST defective
CSP defective
CDT defective
CDP defective
9−7
Check
8.8.5
Check and
Tighten
8.9.10
8.8.8
8.9.10
8.8.8
62-11389
9.5 Speed Control System Diagnostics
Table 9−1 ENSCU LED Fault Chart
1
2
3
4
Fault
Engine Over Speed: more than 2,530 RPM
No signal from ENSSN for 2 seconds after RPM
is greater than 1,000 RPM for 10 seconds, OR
for 5 seconds while engine cranking (no voltage
at ENSCU pin 18).
Fuel/speed actuator (FSA) wiring disconnected
or open circuit. Coil Resistance Spec: 2.8 ohm
+/- 10%.
ENSCU supply voltage is greater than 26V.
62-11389
LED flash code
One Long–One Short
Two Long–One Short
Diagnostic tree
Figure 9−1
Figure 9−2
Two Long–Three Short
Figure 9−3
Two Long–Seven Short
Figure 9−4
9−8
START HERE
Start unit.
Using strobe light 07-00177-01
or equivalent, check engine
RPM. Is RPM equal to or over
2,530?
NO
NOTE : Ensure the run relay is energized during test . With ENSSN unplugged during testing , unit will stall
& go through start sequence again .
Unit will not start . This is normal .
Verify there is at least 11 VDC going
into the ENSSN 12V terminal ?
YES
NO
Check for high resistance or an open in the
ENSSN ground circuit.
Did you find and correct
the condition?
YES
Check high speed mechanical stop
on injection pump assembly for
loose screws or tampering.
Are the screws loose?
YES
YES
Check for high resistance or an open
between ENSCU terminal 25 & ENSSN
12V terminal. Did you
find and correct the
condition?
YES
System
OK
System
OK
NO
Set proper high speed RPM
(Table 2-1). Lock screws in
place and rewire.
Did you find and correct the
condition?
YES
NO
Remove new ENSCU
and
re-install
old
ENSCU back into unit,
ENSCU is not the fault.
Review results of above
tests with your supervisor. If necessary, go to
the beginning of the tree
& test again.
NO
NO
Using jumper wire, check for 5
VDC at ENSCU terminal 10.
Do you have 5 VDC at terminal
10?
System
OK
Check for proper internal mechanical
operation of injection pump assembly
and governor assembly. Did you find
and correct the condition?
YES
NO
NO
YES
NO
Replace ENSCU. Did you
find and correct the condition?
YES
Check for open or high resistance on circuit between
ENSSN and ENSCU. Did you
find and correct the condition?
YES
System
OK
NO
Review results of
above tests with your
supervisor. If necessary, go to the beginning of the tree & test
again.
System
OK
Replace ENSSN.. Did you find
and correct the condition?
YES
NO
Remove new ENSSN and re-install old ENSSN back into unit,
ENSSN is not the fault.
Review results of above tests
with your supervisor. If necessary, go to the beginning of the
tree & test again.
System
OK
Figure 9−1 ENSCU Diagnostic Tree - 1 Long, 1 Short LED Code
9−9
62-11389
START HERE
Verify unit starts, go into
high speed and stall after
running for a few seconds?
NO
Using jumper wire,
verify there is at least 11
VDC at ENSCU terminal 25?
YES
Verify there is at least 11
VDC going into the
ENSSN 12 V terminal?
Check for high
resistance or an
open between
ENSCU terminal
25 & ENSSN
12 V terminal. .
Did you find
and correct
the condition?
YES
Check for high
resistance or an
open in the
ENSSN ground
circuit.
Did you find and
correct the condition?
NO
System
OK
YES
Using jumper wire, check for
5 VDC at ENSCU terminal
10. Do you have 5 VDC at
terminal 10?
YES
YES
NO
Replace ENSCU.
Did you find and correct
the condition?
NO
NO
Remove new ENSCU
and re-install old
ENSCU back into
unit, ENSCU is not
the fault. Review
results of above
tests with your
supervisor. If
necessary, go to the
beginning of the tree &
test again.
System
OK
YES
Check for open or high
resistance on circuit
between ENSSN and ENSCU.
Did you find and correct the
condition?
Remove new ENSSN
and re-install old
ENSSN back into unit,
ENSSN is not the fault.
Review results of
above tests with your
supervisor. If
necessary, go to the
beginning of the tree
& test again.
NO
Replace ENSSN. Did you
find and correct the
condition?
NO
YES
System
OK
Figure 9−2 ENSCU Diagnostic Tree - 2 Long, 1 Short LED Code
62-11389
9−10
YES
System
OK
Go to Advance Micro
diagnostic tree Figure 9−6
START HERE
Does the engine starter
engage & turn the engine
over?
NO
YES
Check for high resistance
or an open on the FSA ground
circuit terminal 2.
Did you find and correct
the condition?
YES
YES
NO
With the FSA disconnected,
check the resistance of the
FSA coil. Spec is
2.8 ohms +/- 10%.
Is ohm reading within spec?
Verify the proper voltage
going into FSA terminal
1. 12 VDC when
Main Power switch is
first turned on for the
pull in voltage, 1 VDC for
hold in voltage & 0.8 VDC
during starter engagement.
Do you have the correct
voltage?
System
OK
YES
NO
YES
Replace ENSCU. Did you find
and correct the condition?
YES
Using jumper wire, are the
proper voltages present
at ENSCU terminal 7?
NO
Check for open or high
resistance on circuit
between FSA and ENSCU..
Did you find and correct
the condition?
NO
NO
Replace the FSA. Did
you find and correct
the condition?
NO
YES
Remove new FSA
and re-install old
FSA back into
unit, FSA is not
the fault. Review
results of above
tests with your
supervisor. If
necessary, go to the
beginning of the tree &
test again.
Remove the FSA from the
engine & inspect. FSA should
move freely without binding and
shaft should be straight. Is
FSA functioning properly?
NO
YES
Review results
of above tests
with your super
visor. If
necessary, go
to the
beginning of the
tree &
test again.
YES
NO
Remove new ENSCU
and re-install old
ENSCU back into unit,
ENSCU is not the fault.
Review results of above
tests with your
supervisor. If necessary,
go to the beginning of
the tree & test again.
Review results
of above tests
with your super
visor. If
necessary, go
to the
beginning of the
tree &
test again.
System
OK
System
OK
Figure 9−3 ENSCU Diagnostic Tree - 2 Long, 3 Short LED Code
9−11
62-11389
Replace ENSCU. Did you
find and correct the condition?
NO
NO
START HERE
With the Main Power
switch ON and the ENSCU
wire 13 removed from the
connector (connector
plugged in), check voltage
at ENSCU terminal 13. Is
voltage 26 VDC or higher?
NOTE: With connector
unplugged, unit will not
start but will crank.
Check voltage while unit
is cranking.
YES
YES
YES
NO
Remove new ENSCU
and re-install old
ENSCU back into
unit, ENSCU is not the
fault. Review results
of above tests with
your supervisor. If
necessary, go to the
beginning of
the tree & test again.
System
OK
Starting at terminal
13 at the ENSCU,
check circuit for
induced voltage
creating the 26 VDC
signal.
Did you find and
correct the condition?
YES
NO
System
OK
Check voltage output at
alternator. Is voltage 26
VDC or higher?
Replace alternator.
Did you find and
correct the condition?
NO
Remove new
alternator and
re-install old
alternator back into
unit, alternator is not
the fault. Review
results of above
tests with your
supervisor. If
necessary, go to the
beginning of the
tree & test again.
Review results
of above tests
with your super
visor. If
necessary, go
to the
beginning of the
tree &
test again.
Figure 9−4 ENSCU Diagnostic Tree - 2 Long, 7 Short LED Code
62-11389
9−12
YES
System
OK
microprocessor. Some steps will point to a possible
problem with the microprocessor. Whenever reaching
one of these steps, it is a very good practice to install the
new microprocessor, then verify unit operation PRIOR
TO writing hours, Trailer ID, Unit Serial Number, etc.,
into the new microprocessor. Once the technician is satisfied that a new microprocessor is required, the hours,
trailer ID, unit serial number, customer configurations,
etc., should be entered. Should the problem remain
even with the new microprocessor in place, once all repairs are made, the original microprocessor is to be reinstalled into the unit, to avoid unnecessary costs to the
customer or having the Warranty Request rejected if
there is no problem found with the returned microprocessor.
9.6 Microprocessor Diagnostics
The purpose of the following procedure is to provide a
logical and straightforward guide to be used when diagnosing operational or other problems occurring with
the microprocessor. Often users and technicians have
mistakenly worked to correct a problem that has ended
up being normal operation. The microprocessor has
several different conditions contributing to operating parameters. These conditions are called out in the various
diagnostic charts to aid the technician in pinpointing the
problem, or in realizing that the unit is performing normally.
When using these trees, it is important to verify the reported symptom or problem and then correctly identify
the appropriate tree for that particular condition. Using
the incorrect tree will lead to an incorrect diagnosis.
All steps leading to replacement of the microprocessor
have a number associated with them. When filling out
the MPR tag that will be attached to the returned part,
write the step number on the upper half of the tag in the
Failure Description Field. Include the same information
in the Failure Description Field when entering the warranty claim information on line. This will show which
diagnostic tree was used and the path that was followed
to determine the micro was at fault.
When using these diagnostic trees, it is very important
not to skip any steps. Follow the flow of the trees in the
order that they are laid out. These trees are formatted
into a logical diagnostic sequence. Skipping around the
trees will most likely lead to errors in diagnosis.
Throughout the trees, the steps will point the technician
to areas to look at or check for a problem. Most of the
steps will lead the technician to a circuit or other area of
the unit to check, test, and possibly repair other than the
Refer to the following table to identify the correct tree to
use.
Table 9−2 Microprocessor Diagnostics
Condition
1
2
3
4
5
6
7
8
Description
Main Power switch On - Unit Does Not Operate
Main Power switch On - Unit Operates But Not Properly
Main Power switch Off - Unit Fails To Stop
Unit Will Not Run In High Speed
Unit Will Not Run In Low Speed
DataLink Data Recorder Data Download Problems When Using
ReeferManager and a Download Cable. Data File Analysis Problems Using Reports
PC Card Problems
Programming Problems With PC Cards
9−13
Diagnostic tree
Figure 9−5
Figure 9−6
Figure 9−7
Figure 9−8
Figure 9−9
Figure 9−10
Figure 9−11
Figure 9−12
62-11389
START HERE
Is unit equipped
with two way communications?
Disconnect two way communications from
unit and install J1 jumper. This will eliminate
remote communication from the system.
YES
NO
Is Micro Status
LED blinking?
NO
YES
Check the F1 fuse.
Is the fuse blown?
Replace the fuse.
Did you find and
correct the
condition?
YES
NO
YES
YES
NO
Check ground
connectors at the
battery, starter,
engine block and
inside the control box.
Did you find and
correct the condition?
Check Micro Status
LED blink rate.
Return to
the top of
this chart
Micro Status LED
is blinking at 1
second ON & 1
second OFF.
Micro Status LED is blinking
at 1/2 second ON & 1/2
second OFF.
Inspect and repair poor
connections at the micro
and display. Did you find
and correct the condition?
NO
NO
Ensure the operator is waiting
YES
Load current version
long enough by turning the
NO
of software from http://
Main Power switch ON and
Check voltage
www.transcentral.
waiting 2minutes for the display
between QC1 & QC2.
carrier.com Did the
to come on. Did you find and
YES
Voltage should read
current version of
correct the condition?
11 volts or higher.
software load correctly?
NO
Is voltage within range
Is the
Inspect and repair
YES
NO
system
NO
he 3 wiring
operatharnesses for the
Check Wiring for high
ing OK
micro and display:
Go To Condition 8 - Programresistance or an open.
now?
the cable from the
YES
ming Problems with PC
YES micro to the back of
Did you find and
Cards if using a PC Card to
correct the condition?
YES
the display, the
upgrade software. Did the
cable
from
the
back
YES
software load correctly?
NO
YES
of the display to the
System OK
display itself and the
Check voltage
Re-install two
ribbon cable from
way commubetween 5MPA1 &
the keypad to the
NO
QC2. Voltage
nication if disDid the loading
board. Did you find
should read 11
connected
of the software
and correct the
NO
earlier.
volts or higher. Is
correct the
condition?
voltage
problem?
within range?
NO
(MPR Code #2)
NO
Review the results of
Check Wiring for high
YES
Replace micro and operate
above tests with your
NO
resistance or an open.
system in order to verify repair.
supervisor. If necessary,
Did you find and
go to the beginning of the
(MPR Code #1) Did you find and correct the
correct the condition?
condition?
tree & test again.
NO
System OK,
re-install two way communications if disconnected earlier.
Remove new micro and re-install old micro
back into the unit. Micro is not the fault.
Review results of above tests with your
supervisor. If necessary, go to the beginning
of the tree & test again.
YES
System OK,
re-install two way communications if disconnected earlier.
Figure 9−5 Micro Diagnostic Tree - Condition 1 - Main Power Switch On - Unit Does Not Operate
62-11389
9−14
Wrong Chart.
See Condition 1.
START HERE
The unit
starts & runs.
NO
NO
Unit may be running on old software.
Upgrade software to current version.
Did the software load correctly?
YES
YES
Micro may not be configured properly.
Verify correct model number is selected
in the micro via Unit Data. Did you find
and correct the condition?
YES
Did the loading of the
software correct the problem?
YES
NO
NO
YES
Check ground connectors at the
battery, starter, engine block and
inside the control box. Did you find
and correct the condition?
YES
NO
Go To Condition 8 - Programming
Problems with PC Cards if using a
PC Card to upgrade software. Did
the software load correctly?
Check for active & inactive alarms.
Refer to Section 7 for troubleshooting
alarms. Did you find and correct the
condition?
NO
NO
Review the results of above
tests with your supervisor. If
necessary, go to the beginning of the tree & test again.
Verify Functional Parameters and Configurations are installed & correct. Did
you find and correct the condition?
YES
YES
System
OK
NO
Use Pre Trip to check for any alarms.
Use the Component Test Mode (Section
5.2.2) to verify operation. Did you find and
correct the condition?
YES
NO
Use this manual to check for correct
operation. Did you find and correct the condition?
YES
NO
Download DataLink data recorder & review
unit operation. Did you find and
correct the condition?
YES
NO
Remove new micro & re-install
old micro back in the unit. Micro
is not the fault. Review results
of above tests with your
supervisor. If necessary, go to
beginning of tree & test again.
Are you sure unit is not operating
properly? Operate the system. Did you
find and correct the condition?
NO
YES
NO
(MPR Code #5)
Replace micro and operate system in
order to verify repair. Did you find
and correct the condition?
YES
Figure 9−6 Micro Diagnostic Tree - Condition 2 - Main Power Switch On - Unit Operates But Not Properly
9−15
62-11389
START HERE
Is the unit
equipped with two way
communication?
Place the Main Power
switch in the OFF position. Does the engine
continue to run?
NO
YES
Disconnect two way
communication from
the unit and install J1
Jumper. This will eliminate remote communication from the system.
There a problem with the remote communication system. Repair as necessary.
NO
YES
Check for defective
Main Power switch. Is
Switch defective?
YES
NO
Replace
defective
switch. Did you find
and correct the condition?
NO
YES
NO
Check wiring to the Main Power
switch for an open or short. Did you
find and correct the condition?
System OK, re-install
remote communication
disconnected earlier.
YES
NO
Verify the Run Relay de-energizes when the Main Power
switch is placed in the OFF
position.
Unplug fuel /speed actuator.
Does the unit stop?
YES
YES
Is the relay
defective?
NO NO
Check wiring to Run Relay
for an open or short. Did you
find and correct the condition?
NO
YES
Verify correct fuel/speed actuator
operation & replace if needed.
Operate system in order to verify
repair. Did you find and correct
the condition.
Fuel /speed actuator is
defective or mechanically
seized.
YES
YES
YES
NO
NO
Check wiring for fuel/speed
actuator for a short. Did you
find and correct the condition?
Replace Run
Relay. Did
you find and
correct
the
condition?
NO
System OK,
re-install
remote
communication disconnected earlier.
YES
YES
Did the loading
of the software
correct the
problem?
YES
Load current version of
software from http://www.
transcentral.carrier.com.
Did the software load
correctly?
Remove new fuel/speed
actuator & re-install old
component. Old component is
not the fault.
NO
NO
YES
Remove connectors from unit one at a
time to determine if any other devices
are providing power feedback,
causing the micro to remain powered.
Did you find and correct the condition?
NO
Review the results of
above tests with your
supervisor. If
necessary, go to the
beginning of the tree
& test again.
NO
Go To Condition 8 - Programming
Problems with PC Cards if using a PC
Card to upgrade software. Did the
software load correctly?
Figure 9−7 Micro Diagnostic Tree - Condition 3 - Main Power Switch Off - Unit Fails To Stop
62-11389
9−16
START HERE Check the fuel/speed actuator and plunger for correct operation.
Did you find and correct the condition?
Unit may be running old soft ware. Upgrade
software from http://www.transcentral.carrier.com. Did you find and correct the condition?
NO
System OK
YES
YES
NO
Check system suction pressure at compressor. Is suction pressure -2 psig or lower?
YES
NO
Does the message center show
“FORCED LOW ENGINE SPEED?
Check speed overrides, Section 4.8.3.
Did you find and correct the problem?
YES
YES
System OK
NO
NO
Check engine coolant temperature. Is coolant temperature 122°F (50°C) or below?
YES
NO
Is unit in defrost?
YES
YES
NO
NO
Does the unit have a
door or remote switch?
Is the switch configured
for low speed?
YES
Is the door
open?
YES
Check door switch
wiring for an open.
Did you find and correct the condition?
NO
NO
NO
YES
Is the the RAT 95°F or higher OR the SAT 115°F or higher?
Are alarms A122 & A123 both present
OR alarms A137 & A138 both present?
Is setpoint 10°F or lower in the compartment with the active alarms?
YES
YES
YES
NO
NO
Is the unit in Continuous operation?
Has the unit been running less that the selected
Continuous Operation High Speed Delay minutes?
YES
YES
NO
NO
Is the unit in
Start-Stop
operation?
YES
Has the unit been running less than the selected Start-Stop
Operation High Speed Delay minutes?
Is the setpoint
10.5°F or higher?
NO
Is return air temp equal to
or colder than setpoint?
Is selected probe temp
within +/- 3.6°F of setpoint?
Is speed relay LED27
illuminated on micro?
YES
Review the test results
with your supervisor. If
necessary, go to the
beginning of the tree
and test again.
NO
YES
YES
NO
Micro is calling for high
speed. Is there 12V at FSA
and ENSCU pin 16?
YES
NO
Is there voltage at QC3?
Replace relay. Did you
find and correct the condition?
NO
Check for proper operation of
the speed relay. Is the relay
operating properly?
YES
Check the F2 circuit
for excess amp draw
or short to ground. Did
you find and correct
the condition?
Is the F2 fuse blown?
NO
YES
NO
YES
YES
The micro is calling for low speed
operation. If you believe this is not
correct, review your testing with
your supervisor before changing
microprocessor.
YES
NO
NO
NO
System OK
YES
Has the unit restarted from an Off Cycle due to any
override other than compartment temperature?
NO
YES
YES
NO
YES
Check for proper operation
of the Engine Speed Control Unit or FSA.
YES
NO
NO
Check wiring and connections from QC3 to ENSCU or FSA.
Did you find and correct the condition?
Repair or replace ENSCU or
actuator as needed.
YES
Figure 9−8 Micro Diagnostic Tree - Condition 4 - Unit Will Not Run In High Speed
9−17
62-11389
START HERE
Is the unit operating in defrost?
YES
NO
Unit may be running old software. Upgrade
software from www.transcentral.carrier.com.
Did you find and correct the condition?
YES
NO
Check functional parameter settings for air flow.
Does the setting show high?
YES
NO
YES
Check setpoint
System OK
NO
Is setpoint +10.4F or
lower?
Is return air temperature
equal to or colder than
setpoint?
YES
YES
NO
Is there 12V or higher at the ENSCU
module pin 16 or FSA?
YES
NO
Is selected probe temperature greater than 3.6F from
setpoint?
Is speed relay LED27
illuminated on the
micro? Did you find and
correct the condition?
NO
Is there a voltage of 12V or
higher at QC3?
Is setpoint +10.5F or
higher?
NO
Check wiring for high resist
ance or shorted con
nections. Did you find and
correct the condition?
YES
YES
YES
System OK
NO
Check the ENSCU or FSA. Did you
find and correct the condition?
YES
NO
Review the test results with your
supervisor. If necessary, go to
the beginning of the tree and
test again.
Figure 9−9 Micro Diagnostic Tree - Condition 5 - Unit Will Not Run In Low Speed
62-11389
9−18
START HERE
What does the
ReeferManager program
display on the bottom of
the screen of your PC?
“CONNECTION OK”
Are the dates for the
data on the download
screen?
“NOT CONNECTED”
There is no
serial
connection.
YES
NO
DataLink data recorder date &
time may be set wrong. Set the
correct date & time. Did you find
and correct the condiditon?
YES
System
OK
Is the micro
status light
blinking 1
second on & 1
second off?
NO
NO
Did you have a communication
failure during a download?
Go to Condition 1 Unit does not operate.
YES
NO
NO
When viewing down
loaded data, does all the
data appear on Jan 01,
1970 or Jan 01, 1998?
Intermittent communication
problem. Ensure AC cord is
properly connected or PC battery
is fully charged. Did you find
and correct the condition?
DataLink data recorder
date & time have never
been set. Set date & time.
Operate the system in
order to verify the repair.
YES
Verify the integrity of
the download cable
and connections.
Did you find and
correct the condition?
NO
YES
YES
When viewing the
download in Reports, a
specific sensor or event
does not show up in the
data file. The
Reports data filter
settings may be set
incorrectly or specific
sensors and events may
not be recorded.
DataLink data recorder is
not configured properly.
Use the Reports Data
Filter pull down menu to
set sensors & events to
be viewed OR use
ReeferManager to
correctly set up recording
parameters. Operate the
system in order to verify
the repair.
YES
YES
YES
Use the tech interface connector to verify that download port wiring is correct
and doesn’t have an open,
high resistance or a short.
Refer to Section 5.2. Did
you find and correct the
condition?
NO
NO
Verify PC power saving features
are OFF. (I.E. screen saver, monitor
time out, hard disc time out, auto
power down/sleep mode).
Did you find and correct the condition?
Verify the correct com port is
selected in the PC software. See
YES Help>Contents>PC Setup for
additional information. Did you
find and correct the condition?
NO
NO
YES
Verify the integrity of the
download cable and
connections. Did you find
and correct the c ondition?
YES
NO
System
OK
Use PC
Download Card
to download
data.
System
OK
Verify com port availability
(I.E. infrared devices
turned off, PDA applications turned off, computer
has 9 pin serial port or use
a recommended USB to
serial port adapter. Did you
find and correct the
condition?
NO
Use PC
Download Card
to download
data.
Figure 9−10 Micro Diagnostic Tree - Condition 6 - DataLink Data Recorder Data Download Problems
When Using ReeferManager and a Download Cable. Data File Analysis Problems Using Reports
9−19
62-11389
Using either a PC card or computer with a
download cable hooked into the serial
port/download plug, load current version of
the software into micro. Insert PC card
into the PC card slot on the micro.
START HERE
Make sure the Main Power switch
is ON or the microprocessor is in
PC Mode. (Refer to Section 5.3.)
What does the MessageCenter
display say about the PC Card?
“UNKNOWN CARD”
PC Card may be
defective. Try a
different card. Did
you find and
correct condition?
NO
If you have tried 2 or
more PC cards on one
particular micro, take
those same suspect
PC cards and try
them on another micro.
If the cards function
properly on the
second micro, it
proves the first micro
is not reading the
PC cards properly.
Is the micro at fault?
NO
Micro is not the
fault.
MessageCenter has
addition PC Card
error messages.
“CARD FULL REMOVE CARD”
“CARD LOCKED REMOVE CARD”
The card “Write Protect”
switch is ON. Unlock PC
Card by sliding “Write
Protect” switch to the
“OFF” position & re-insert
the card. Operate the
system in order to verify
the repair.
Download card has no
more empty memory
space. Use
ReeferManager
to extract downloaded
data & then erase
card. Operate the
system in
order to verify the
repair.
Refer to Section 6.1 for
a list of MessageCenter
error messages. Find
your specific error message and follow the directions in the description column. Repair as
needed. Operate the
system in order to
verify the repair.
Doesn’t acknowledge
that a PC Card has
been inserted.
PC Card is not seated
properly. Remove card
from slot, wait 10
seconds & re-insert
card. Did you find and
correct the condition?
NO
System
OK
YES
YES
(MPR Code #4)
YES
YES
Replace micro and operate
system in order to verify
repair. Did you find and
correct the condition?
NO
Micro is not the
fault. Remove new
micro & re-install old
micro.
Review the test results
with your supervisor. If
necessary, go to the
beginning of the tree
and test again.
PC card slot may be
defective. Turn power off and
verify status light is not
blinking. Check for bent pins
in the card slot & straighten
as needed. Did you find and
correct the condition?
NO
Are pins unable to
be straightened or
pins broken?
YES
(MPR Code #4)
NO
Figure 9−11 Microprocessor Diagnostic Tree - Condition 7 - PC Card Problems
62-11389
9−20
START HERE
Are you trying to load an older
version of software than the version
in the micro?
Does the MessageCenter say
“OLD SOFTWARE: CANNOT LOAD”?
YES
NO
NO
Insert the PC Card into the PC Card slot on
the front of the micro. Be certain that the
instructions label on the download card is
facing the “Caution” label on the micro. Do
not force the card into the slot. Handle the
card from the edges. Did you find and
correct the condition?
YES
Once a newer version is installed into the
micro, it is no longer possible to load
previous software. Newer versions can be
loaded as released.
NO
System OK
YES
Does the MessageCenter acknowledge a
program card was nstalled by displaying
“OLD SOFTWARE,” “NEW SOFTWARE”
or “SAME SOFTWARE”?
NO
Verify you are using a Program PC card and not
another PC card. Did you find and correct the
condition?
NO
Once the unit shuts down to begin the
software installation process, the suction
modulation valve closing process begins. The
software installation processes will not begin
until the CSMV is completely closed, which
will delay the actual process for about 45
seconds. Did you find and correct the
condition?
YES
Micro display will show
“ENGINE AND MICRO WILL
STOP NOW” and engine will
stop. Did you find and correct
the condition?
YES
Can the card be read by the
ReeferManager program?
YES
Place card back
into the micro and
try again. Did this
solve the problem?
NO
System OK
YES
YES
NO
NO
Possible
defective
PC card. Retry
operation with
another card.
YES
System OK
NO
The display will show “ INSTALLING PROGRAM SOFTWARE.”
Make sure you wait until the display shows “INSTALLL COMPLETE”
before removing card. Did you find and correct the condition?
YES
NO
Using the ReeferManager
Program, install Program
card into computer and
re-install the correct .bex file.
Software has finished
loading.
YES
Does MessageCenter display “CARD DATA CORRUPT - CANNOT LOAD”?
NO
YES
Is the card status LED on solid?
NO
Is the card status LED flashing 1/2
second on and 1/2 second off?
YES
Has the card status
LED been illuminated for
more than 5 minutes?
NO
NO
Micro does not recognize the card. Try another
program card, or use MicroProgrammer.
YES
There is a problem loading
the software. Turn unit
Main Power switch
off. Remove the Program
card and try again.
Wait at least 5 minutes.
Figure 9−12 Micro Diagnostic Tree - Condition 8 - Programming Problems With PC Cards
9−21
62-11389
SECTION 10 − WIRING
1
PARAGRAPH NUMBER
Page
10.1 HARNESS PLUG WIRING FOR UNITS WITH A MAIN POWER SWITCH LABELED
ENGINE/OFF/STANDBY . . . . . . . . . . . . . . . . . . . . . . . . . . . . . . . . . . . . . . . . . . . . . . . . . . . . . . . . . . 10−1
10.2 HARNESS PLUG WIRING FOR UNITS WITH A MAIN POWER SWITCH LABELED
START/RUN-OFF . . . . . . . . . . . . . . . . . . . . . . . . . . . . . . . . . . . . . . . . . . . . . . . . . . . . . . . . . . . . . . . . 10−6
10.3 CONTROL BOX INTERIOR SPLICE POINTS FOR UNITS WITH A MAIN POWER SWITCH
LABELED ENGINE/OFF/STANDBY . . . . . . . . . . . . . . . . . . . . . . . . . . . . . . . . . . . . . . . . . . . . . . . . . 10−11
10.4 CONTROL BOX INTERIOR SPLICE POINTS FOR UNITS WITH A MAIN POWER SWITCH
LABELED START/RUN-OFF . . . . . . . . . . . . . . . . . . . . . . . . . . . . . . . . . . . . . . . . . . . . . . . . . . . . . . . 10−12
10.5 DISPLAY TEST POINTS . . . . . . . . . . . . . . . . . . . . . . . . . . . . . . . . . . . . . . . . . . . . . . . . . . . . . . . . . . 10−13
10
10.6 WIRING SCHEMATICS . . . . . . . . . . . . . . . . . . . . . . . . . . . . . . . . . . . . . . . . . . . . . . . . . . . . . . . . . . . 10−13
62−11389
SECTION 10
WIRING
10.1 HARNESS PLUG WIRING FOR UNITS WITH A MAIN POWER SWITCH LABELED ENGINE/OFF/
STANDBY
1MP - NATURAL
1MP - NATURAL (Continued)
Component
1
12
Component
REMSN1 (REMSN-E)
REMSN2 (REMSN-H)
CDP-3
EVOP-3 (DP16-S)
ENCT
CDT
CST
AAT
1RAT (DP16-H)
REMSN1 (REMSN-F) (SP1)
REMSN2 (REMSN-G) (SP1)
REMSN3 (REMSN-K) (SP1)
24
35
Terminal
3 (14)
4 (14)
5 (16) (30)
6 (17) (30)
7 (18)
9 (20)
10 (19)
11 (22)
12 (23)
14 (3)
14 (4)
14 (33)
Terminal
CSP-1 (SP16)
15 (29) (30)
OGF-OV (HC-1) (SP16)
CDP-1
15
16 (5) (30)
EVOP-1 (DP16-P)
17 (6) (30)
ENCT
18 (7)
CST (SP14)
EVOT (DP16-F) (SP14)
19 (10)
19 (32)
CDT
20 (9)
1DTT (DP16-B)
AAT
21 (34)
22 (11)
1SAT (DP16-D) (SP12)
23 (35)
1RAT (DP16-G) (SP12)
23 (12)
FLS-C
CSP-3
26
29 (15) (30)
CSP-2 (SP7)
30 (15) (29)
CDP-2 (SP7)
EVOP-2 (SP7) (DP16-R)
30 (5) (16)
30 (6) (17)
EVOT (DP16-E)
32 (19)
REMSN3 (REMSN-J)
33 (14)
1DTT (DP16-A)
1SAT (DP16-C)
34 (21)
35 (23)
Unused terminals: 1, 2,8,13, 24, 25, 27,28,31
10−1
62-11389
10.1 HARNESS PLUG WIRING FOR UNITS WITH A MAIN POWER SWITCH LABELED ENGINE/OFF/
STANDBY (Continued)
2 MP - Black
3 MP - Grey
1
24
1
24
12
35
12
35
Component
REMSN-C
DAS
CSMV-D
EVXV-B (DP16-K)
Component
Terminal
SATCOM-C (GND)
3 (15) (27)
SLP-C (GND)
5 (13)(17) (29)
UL1
12
SLP-E
13 (5) (17) (29)
SATCOM-B (RX)
15 (3) (27)
SLP-A (RX)
17 (5) (13) (29)
LB-H (AMBER)
19 (32)
UL2
23
SATCOM-A (TX)
27 (3) (15)
SLP-B (TX)
29 (5) (13) (17)
LB-B (GREEN)
32 (19)
Unused terminals:
1,2,4,6,7,8,9,10,11,14,16,18,20,21,22, 24, 25,
26,28,30, 31,33,34 35
Terminal
3
6
8 (19) (20) (32)
11 (12) (22) (23)
(35)
12 (11) (22) (23)
EVXV-E (DP16-N)
(35)
REMSN-D
13
DS-B
16
ENOPS
17
ENSCU-3
18
CSMV-C
19 (8) (20) (32)
CSMV-A
20 (8) (19) (32)
EVXV-D (DP16-M)
22 (11) (12) (23)
(35)
23 (11) (12) (22)
EVXV-A (DP16-J)
(35)
HC19 (SP61)
26
ENOLS
28
SP15
29
CSMV-B
32 (8) (19) (20)
35 (11) (12) (22)
EVXV-C (DP16-L)
(23)
Unused terminals: 1,2,4,5,7,9,10,14,15,21, 24, 25,
27, 30, 31, 33, 34
62-11389
10−2
10.1 HARNESS PLUG WIRING FOR UNITS WITH A MAIN POWER SWITCH LABELED ENGINE/OFF/
STANDBY (Continued)
5 MP
4 MP
1
9
Component
CCONR-1 (SP60)
CDCON-A2
1EVCON-A2
SP55
CCONR-2
CDCON-A1
GENCONR-2
CT BROWN/OGF BROWN
(SP54)
CT BLACK
CT BLUE/OGF BLUE (SP53)
1HTCON1-A1
1HTCON2-A1
1EVCON-A1
FHR-2
Unused terminals: 11, 12.
8
16
Terminal
1
2
3
4
5
6
7
8
1
6
7
12
Component
SP52
SP56
PRM-OUT+
PSCONR-2
BUZZER IAHR-85
SSR-85
Unused terminals: 3, 5, 6, 11, 12
9
10
13
14
15
16
Terminal
1
2
4
7
8
9
10
6 MP
1
4
5
8
Component
Connector
DISP-1 (BLK)
A
DISP-2 (WHT)
B
DISP-3 (RED)
C
DISP-4 (GRN)
D
DISP-5 (BRN)
E
DISP-7 (BLU)
F
DISP-6 (ORN)
G
DISP-8 (YEL)
H
Unused terminals: None
10−3
Terminal
1
2
3
4
5
6
7
8
62-11389
10.1 HARNESS PLUG WIRING FOR UNITS WITH A MAIN POWER SWITCH LABELED ENGINE/OFF/
STANDBY (Continued)
DP16
A
ENSCU
H
20
14
26
19
J
8
S
13
7
Component
1DTT
1DTT
1SAT
1SAT
EVOT
EVOT
1RAT
1RAT
EVXV-A
EVXV-B
EVXV-C
EVXV-D
EVXV-E
EVOP-1
EVOP-2
EVOP-3
Unused terminals: None
62-11389
Terminal
A
B
C
D
E
F
G
H
J
K
L
M
N
P
R
S
1
Component
Terminal
2MP-18
3
FSA-1
7
ESSN-S
10
SP3
13
MPQC3 (HC-2)
16
STARTER MOTOR
18
SP6 (GND)
19
SP5
24
ENSSN-3
25
FSA-2
26
Unused Terminals: 1, 2, 4, 5, 6, 8, 9, 11, 12, 14, 15,
17, 20,21, 22, 23
10−4
10.1 HARNESS PLUG WIRING FOR UNITS WITH A MAIN POWER SWITCH LABELED ENGINE/OFF/
STANDBY (Continued)
HC Plug
8
19
18
7
6
17
16
5
15
9
2
3
1
4
14
10
11
12
13
Component
OGF-OV/1MP15
MPQC-3/ENSCU-16
MPQC-1/BTY+
MPQC4/SP3
SP52/J1-A
SSR-87/SS
SP60/CCON-IPC
IAHR-87/IAH
SP57/GND-1
FHR-5/FHTS
DOES-1/J1-B
SP52/SP5
SP61/2MP26
Unused terminals: 5, 6, 10,12 & 13
Terminal
1
2
3
4
7
8
11
14
15
16
17
18
19
10−5
62-11389
10.2 HARNESS PLUG WIRING FOR UNITS WITH A MAIN POWER SWITCH LABELED START/RUN-OFF
1MP - NATURAL
1
24
12
35
Component
REMSN1 (REMSN-E)
REMSN2 (REMSN-H)
CDP-C
EVOP-C (DP16-S)
ENCT
CDT
CST
AAT
1RAT (DP16-G)
REMSN1 (REMSN-F) (SP1)
REMSN2 (REMSN-G) (SP1)
REMSN3 (REMSN-K) (SP1)
62-11389
1MP - NATURAL (Continued)
Component
Terminal
CSP-A (SP16)
15 (29) (30)
OGF-OV (HC-1) (SP16)
15
CDP-A
16 (5) (30)
EVOP-A (DP16-P)
17 (6) (30)
ENCT
18 (7)
CST (SP14)
19 (10)
EVOT (DP16-F) (SP14)
19 (32)
CDT
20 (9)
DTT (DP16-B)
21 (34)
AAT
22 (11)
1SAT (DP16-D) (SP12)
23 (35)
1RAT (DP16-H) (SP12)
23
FLS-C
26
CSP-C
29 (15) (30)
CSP-B (SP7)
30 (15) (29)
CDP-B (SP7)
30 (5) (16)
EVOP-B (SP7) (DP16-R)
30 (6) (17)
EVOT (DP16-E)
32 (19)
REMSN3 (REMSN-J)
33 (14)
2RAT (2EVC-J)
33 (23)
DTT (DP16-A)
34 (21)
1SAT (DP16-C)
35 (23)
Unused terminals: 1, 2,8,13,21, 24, 25, 27,28,31
Terminal
3 (14)
4 (14)
5 (16) (30)
6 (17) (30)
7 (18)
9 (20)
10 (19)
11 (22)
12 (23)
14 (3)
14 (33)
14 (33)
10−6
10.2 HARNESS PLUG WIRING FOR UNITS WITH A MAIN POWER SWITCH LABELED START/RUN-OFF
(Continued)
2 MP - Black
1
24
1
24
12
35
12
35
Component
OC-C
DAS
CSMV-D
EVXV-B (DP16-K)
EVXV-E (DP16-N)
REMSN-D
REMSN-C
ENOPS
ENSCU-3
CSMV-C
CSMV-A
EVXV-D (DP16-M)
EVXV-A (DP16-J)
HC19 (SP61)
SP15
CSMV-B
EVXV-C (DP16-L)
3 MP - Grey
Component
Terminal
SATCOM-C (GND)
3 (15) (27)
SLP-C (GND)
5 (13)(17) (29)
UL1
12
SLP-E
13 (5) (17) (29)
SATCOM-B (RX)
15 (3) (27)
SLP-A (RX)
17 (5) (13) (29)
LB-H (AMBER)
19 (32)
UL2
23
SATCOM-A (TX)
27 (3) (15)
SLP-B (TX)
29 (5) (13) (17)
LB-B (GREEN)
32 (19)
Unused terminals: 1, 2, 4,6, 7, 8, 9, 10, 11, 14,
16,18, 20,21, 22, 24, 25, 26, 28, 30,31, 33,34, 35
Terminal
3
6
8 (19) (20) (32)
11 (12) (22) (23)
(35)
12 (11) (22) (23)
(35)
13
16
17
18
19 (8) (20) (32)
20 (8) (19) (32)
22 (11) (12) (23)
(35)
23 (11) (12) (22)
(35)
26
29
32 (8) (19) (20)
35 (11) (12) (22)
(23)
Unused terminals:
1,2,4,5,7,9,10,14,15,21,24,25,27, 28,30, 31, 33, 34
10−7
62-11389
10.2 HARNESS PLUG WIRING FOR UNITS WITH A MAIN POWER SWITCH LABELED START/RUN-OFF
(Continued)
5 MP
4 MP
1
9
Component
CCONR-1 (SP60)
CDCON-A2
1EVCON-A2
SP55 (1HTCON1-A1 &
1HTCON2-A1)
CCONR-2
CDCON-A1
GENCONR-2
CT2/OGF (SP54)
CT2,3 & 4 BLACK
CT3/OGF (SP53)
1HTCON1-A1
1HTCON2-A1
1EVCON-A1
FHR-2
Unused terminals: 11, 12
8
16
Terminal
1
2
3
4
1
6
7
12
Component
MPQCC9/SP52
SP56 (DES-B & PRM +12V)
PRM-OUT+
PSCONR-2
BUZZER GPR-85
SSR-85
Unused terminals: 3, 5, 6,11, 12
5
6
7
8
9
10
13
14
15
16
6 MP
1
4
5
8
Component
Connector
DISP-1 (BLK)
A
DISP-2 (WHT)
B
DISP-3 (RED)
C
DISP-4 (GRN)
D
DISP-5 (BRN)
E
DISP-7 (BLU)
F
DISP-6 (ORN)
G
DISP-8 (YEL)
H
Unused terminals: None
62-11389
Terminal
1
2
4
7
8
9
10
10−8
Terminal
1
2
3
4
5
6
7
8
10.2 HARNESS PLUG WIRING FOR UNITS WITH A MAIN POWER SWITCH LABELED START/RUN-OFF
(Continued)
DP16
A
ENSCU
H
20
14
26
19
J
8
S
13
7
Component
1DTT
1DTT
1SAT
1SAT
EVOT
EVOT
1RAT
1RAT
EVXV-A
EVXV-B
EVXV-C
EVXV-D
EVXV-E
EVOP-A
EVOP-B
EVOP-C
Unused terminals: None
Terminal
A
B
C
D
E
F
G
H
J
K
L
M
N
P
R
S
1
Component
Terminal
2MP-18
3
FSA-1
7
ESSN-S
10
SP3
13
HC-2
16
STARTER MOTOR
18
SP6 (GND)
19
SP5
24
ENSSN-12V
25
FSA-2
26
Unused Terminals: 1, 2, 4, 5, 6, 8, 9, 11, 12, 14, 15,
17, 20,21, 22, 23
10−9
62-11389
10.2 HARNESS PLUG WIRING FOR UNITS WITH A MAIN POWER SWITCH LABELED START/RUN-OFF
(Continued)
HC Plug
(Control Box Side)
8
19
18
7
6
17
16
5
15
9
10
2
11
3
1
4
14
12
13
Component
OGF-OV/1MP15
MPQC-3/ENSCU-16
MPQC-1/BTY+
MPQC4/SP3
SP52/OC-B
SSR-87/SS
SP60/IP-C
F5-B/BTY+
GPR-87/IAH
SP57/SP6
SP50/SP43
RS-B/SP4
SP52/SP5
SP61/2MP26
Unused terminals: 5, 6,9, 10 & 13
62-11389
Terminal
1
2
3
4
7
8
11
12
14
15
16
17
18
19
10−10
10.3 CONTROL BOX INTERIOR SPLICE POINTS FOR UNITS WITH A MAIN POWER SWITCH LABELED
ENGINE/OFF/STANDBY
Splice Point No.
Component
Splice Point No.
Component
F5-A
FHR-1
F19-A
HC-15
IAHR-30
MPQC-2
50
F6-A
PRM-OV
57
SSR-30
CCON-A2
F9-A
GENCONR-3
BUZZER +
LOW VOLT GND
5MP-1
F9-B
OGF - +12V
CCONR-3
58
SSR-86
PSCONR-3
HC-18
EVM-4
52
MPQC-9
EVHTS-A
59
MPQC-8
SP52
SP59
4MP-1
HC-7
CCONR-1
60
SP62
HC-11
CT-BLUE
HC-19
4MP-10
OGF-S+
53
61
OGF-BLUE
GENCONR-1
CT-BROWN
PSCONR-1
4MP-8
SP52
54
OGF-BROWN
SP59
62
4MP-4
CDM2-4
1HTCON1-A2
SP55
55
63
1HTCON2-A2
EVHTS-B
SP63
5MP-2
PRM - +12V
56
DOES-6
10−11
62-11389
10.4 CONTROL BOX INTERIOR SPLICE POINTS FOR UNITS WITH A MAIN POWER SWITCH LABELED
START/RUN-OFF
Splice Point No.
Component
Splice Point No.
Component
F5-A
5MP-2
HC-16
PRM - +12V
56
GPR-30
DES-B
50
F6-A
HC-15
SSR-30
MPQC-2
F9-A
PRM-OV
57
BUZZER +
CCON-A2
5MP-1
GENCONR-3
OGF - +12V
LOW VOLT GND
SSR-86
F9-B
HC-18
CCONR-3
58
MPQC-9
PSCONR-3
52
MPQC-8
EVM-4
SP59
EVHTS-A
59
DES-A
SP62
HC-7
4MP-1
SP62
CCONR-1
60
CT-BLUE
HC-11
4MP-10
HC-19
53
OGF-BLUE
OGF-S+
61
CT-BROWN
GENCONR-1
4MP-8
PSCONR-1
54
OGF-BROWN
SP52
4MP-4
SP59
62
1HTCON1-A2
CDM2-4
55
1HTCON2-A2
SP55
63
SP63
EVHTS-B
62-11389
10−12
10.5 DISPLAY TEST POINTS
NOTE
Refer to Section 5.6 for microprocessor and display diagnostic procedures
Pin
Pin 1
Pin 2
Pin 3
Pin 4
Pin 5
Pin 6
Pin 7
Pin 8
Test Point
TP14
TP13
TP13
TP12
TP11
TP10
TP9
TP8
Color
Black
White
Red
Green
Brown
Orange
Blue
Yellow
Description
+12 Vdc for Display backlighting and indicator LED s
Ground for Backlighting and indicator LEDs
Ground for Backlighting and indicator LEDs
+5 Vdc for Display processor and LCD
Display ground
TX the serial communications from the control to the display
RX the serial communications from the display to the control
Display ground
VOLTAGE TESTS:
Negative Test Lead
TP13
TP13
TP13
TP13
TP11
TP11
TP8
Positive Test Lead
TP14
TP12
TP11
TP8
TP14
TP8
TP14
Voltage Reading
12
5
0
0
12
0
12
10.6 WIRING SCHEMATICS
The wiring schematics are provided on the following pages.
10−13
62-11389
VECTOR 6500
With Main Power Switch labeled
ENGINE−OFF−STANDBY
BASED ON 62−11580 ART2−S2−REVD
ZONE
C13
K7
L3
M2
T1
R12,R1
I8,R12
D10
C12
J9, S4
T4,T5
D8
D10
C11
E4
J1
D6
C5
C7
C12
C11
B15
O3
O3
J9,S3
L10
T3
D10
C15
D9
F4
G15
G15
F3
D4
L2
N10
P5
P2
L14
L15
O2
R12,P10,D1
J7,S10,S12
A1
J8, D16
−
−
C7
M5,M6
J10,O7,O5
K16
K8
K9
J9
I14
D10
E3 − E15
A10
B4,D8
H1
E4
A3,Q10,Q11
R10,D3,R11
P11
R11,D2,R10
Q11
J8,O10,O12
A2
C14
D7
D13,14,15
H15
D4
C13
J14
J6
L3
H15
L16
K3
J8
J14
ATT
B
BTY
BTYC
C
CCON
CCONR
CDP
CDT
CDCON
CDM 1,2
CSMV
CSP
CST
CT1
CT2,3,4
DAS
DES
IDS
DTT
ENCT
ENOPS
ENSCU
ENSSN
1EVCON
1EVHTS
EVM1
EVOP
EVOT
EVXV
F1
F2
F3
F5
F6
F7/F8
F9
F10/11/12
F26/27/28
FLS
FP
FSA
GENCON
GENCONR
GEN
GPR
GRD
GRN
HP1
HTR1,2
1HTCON1,2
IAH
IPC
IPCDM1,2
IPEVM1
LB
MAP
MP
OC
OCJ1
OGF
PWR
PRM
PSCON
PSCON ILK
PSCON2
PSCON2ILK
PSCONR
PSR
1RAT
REMS1,2
REMSN1−3
RR
RS
1SAT
SATCOM
SLP
SM
SR
SS
SSC
SSR
UL1,2
LEGEND
AMBIENT AIR TEMPERATURE SENSOR
BUZZER
BATTERY
BATTERY CHARGER (SOLID STATE)
COMPRESSOR
COMPRESSOR CONTACTOR
COMPRESSOR CONTACTOR RELAY
COMP’R DISCHARGE PRESSURE
COMP’R DISCHARGE TEMP SENSOR
CONDENSER MOTOR CONTACTOR
CONDENSER MOTORS 1 & 2
COMP”R SUCTION MODULATING VALVE
COMP’R SUCTION PRESSURE
COMPRESSOR SUCTION TEMPERATURE
DC CURRENT SENSOR
AC CURRENT SENSOR
DEFROST AIR SWITCH
DIESEL ELECTRIC SWITCH
DOOR SWITCH EVAP (OPTION)
DEFROST TEMP SWITCH
ENGINE COOLANT TEMP
ENGINE OIL PRESS SWITCH
ENGINE SPEED CONTROL UNIT
ENGINE SPEED SENSOR
MOTOR CONTACTOR EVAP 1
EVAP HIGH TEMP SWITCH
EVAPORATOR FAN MOTOR
EVAP OUTLET PRESSURE
EVAP OUTLET TEMPERATURE
EVAP EXPANSION VALVE
FUSE − POWER 7.5 AMP
FUSE − SPEED RELAY 10 AMP
FUSE − RUN RELAY 7.5 AMP
FUSE − MIDI FUSE 80.0 AMP
FUSE − MICRO POWER 15.0 AMP
FUSE BATTERY CHARGER 3 OR 6 AMP
FUSE − CONTACTORS 10.0 AMP
FUSE − HEATERS 12 AMP QUICK BLOW
FUSE − EVAP/COND FANS 12 AMP
FUEL LEVEL SENSOR (OPTION)
FUEL PUMP (OPTION)
FUEL SOLENOID ACTUATOR
GENERATOR CONTACTOR
GENERATOR CONTACTOR RELAY
GENERATOR
GLOW HEATER RELAY
GROUND
FRAME GROUND
HIGH PRESSURE SWITCH
ELECTRIC HEATER 1 & 2
HEAT CONTACTOR 1 & 2 EVAP 1
INTAKE AIR HEATER
INTERNAL PROTECTOR, COMPRESSOR
INTERNAL PROTECTOR COND MOTOR 1 & 2
INTERNAL PROTECTOR, EVAP MOTOR
LIGHT BAR (OPTION)
MANIFOLD ATMOSPHERIC PRESS SENSOR
MICROPROCESSOR BOARD
OPTIONAL CONTROL PANEL CONNECTOR
OPTIONAL CONTROL PANEL JUMPER
OVERLOAD GROUND FAULT
POWER (MACRO)
PHASE REVERSAL MODULE
POWER SUPPLY CONTACTOR
CONTACTOR INTERLOCK
POWER SUPPLY CONTACTOR 2
CONTACTOR 2 INTERLOCK
POWER SUPPLY CONTACTOR RELAY
POWER RECEPTACLE
RETURN AIR TEMPERATURE, EVAP
REMOTE SWITCH (OPTIONAL)
REMOTE SENSOR (OPTIONAL)
RUN RELAY
RUN/STOP SWITCH
SUPPLY AIR TEMPERATURE, EVAP 1
SATELLITE COMMUNICATION (OPTIONAL)
SERIAL PORT
STARTER MOTOR
SPEED RELAY
STARTER SOLENOID
STARTER SOLENOID CONTACTOR
STARTER SOLENOID RELAY
UNLOADER FRONT, REAR
VECTOR 6500
With Main Power Switch labeled START/RUN − OFF
BASED ON 62−11451 ART2−S2−REVD
INDEX
A
Compressor, Repair or Replacement Determination,
8−20
Air Cleaner, 2−7, 8−11
Compressor, Valve Plate, 8−22
Air Cleaner Service Indicator, 2−7, 8−11
Configuration Mode, 5−2
Air System, Engine, 2−7
Configurations, Microprocessor, 5−12
Alarms, Driver/Operator, 7−3
Configurations, Start−Stop, 4−3
Alarms, Electrical, 7−46
Controls, Engine , 2−7
Alarms, Maintenance, 7−98
coolant, capacity, 2−16
Alarms, Microprocessor, 7−102
Coolant, Engine, 1−1
Alarms, Pretrip, 7−75
Cooling System, 8−13
Alarms, Sensor, 7−65
Crankcase Breather, 8−14, 8−17
Alarms, Shutdown, 7−4
Current Draw, Component, 2−18
Alarms, Start Up/Engine, 7−22
D
Alarms, View Active, 3−15
Alarms, View Inactive, 3−16
Alarms, Warning/Status, 7−36
B
Battery, 1−1
Battery Charger, 2−7, 8−37, 9−3
Belt, Water Pump, 8−14
Blower, Evaporator, 8−35
C
Cargo Protect Mode, 4−13
Charge, Adding Complete, 8−17
Charge, Adjusting Level, 8−16
Charge, Checking, 8−15
Charge, Removing, 8−15
Data Recorder, 3−30
Data, Component Resistance and Current Draw, 2−18
Data, Compressor, 2−17
Data, Electrical, 2−17
Data, Engine, 2−16
Data, Refrigeration System, 2−17
DataTrak, 3−31
Decals, Safety, 1−6
Defrost, 4−3
Defrost, Initiation And Start, 4−8
Defrost, Manual, 3−13
Defrost, Modes, 4−8
Defrost, Termination, 4−8
Demand Control, Continuous Operation, 4−5
Display, 8−6
Door Latch, 8−6
Coil, Condenser, 2−10, 8−27
E
Coil, Evaporator, 2−10, 8−26
Component Test Mode, 5−2
Electrical Data, 2−17
Compressor, 2−7
Engine, 2−7, 9−1
Compressor Data, 2−17
Engine Data, 2−16
Compressor, Cylinder Head, 8−22
Engine Speed Control Unit, 2−7
Compressor, Oil Level, 8−24
Evacuation, Complete System, 8−19
Compressor, Oil Pump And Bearing Head, 8−23
Evacuation, Compressor, 8−20
Compressor, Removal and Replacement, 8−21
Evacuation, Low Side, 8−20
Index−1
62−11389
INDEX − Continued
F
Fan, Condenser, 8−36
Filter Drier, 2−10
Filter Drier, Checking, 8−28
Filter Drier, Replacement, 8−28
Leak Checking, Compressor, 8−18
Leak Checking, System Without Charge, 8−17
Leak Checking, With Low Side Pumped Down, 8−18
Light Bar, 2−15, 8−34
lockout/tagout, 1−1
Filter, Engine Oil, 8−10
M
Filter, Fuel, 8−9
Frozen Range, 4−3
Main Display, 2−13
Fuel/Speed Actuator, 2−7
Megohmmeter Test Procedure, 8−32
Fuel Heater, 2−7, 8−10
MessageCenter, 2−13, 2−14
Fuel Pump, Electric, 8−9
Messages, MessageCenter, 6−1
Fuel Pump, Mechanical, 8−8
Microprocessor, 3−30
Functional Parameters, Microprocessor, 3−22
Microprocessor, Diagnostics, 9−13
Fusible Plug, 8−28
Microprocessor, Display Diagnostics, 5−8
Microprocessor, Replacement & Setup, 5−8
G
Generator, 2−7, 8−37, 9−4
Grille Insert, 8−5
Model Chart , 2−1
Module, Control, 2−11
Module, Overload Ground Fault, 2−15
Module, Phase Reversal, 2−15, 8−33
H
Heat Exchanger, 2−10
Heaters, Evaporator, 8−34
N
Noncondensibles, 8−15
Hour Meters, View, 3−20
I
Indicator Lights, 2−13
Intake Air Heater, 4−2, 8−12
IntelliSet, 3−26
IntelliSet, Changing, 3−27, 3−28
K
Keypad, 2−14, 8−6
L
O
oil, capacity, 2−16
Oil, Engine, 8−10
Operation, Continuous, 3−10, 4−5
Operation, Engine/Standby, 4−1
Operation, Start−Stop, 3−9, 4−3
Options, 2−15, 3−31
Overload Ground Fault, 8−34
Overrides, 4−3
Overrides, Compressor Minimum Operating Time,
4−13
Overrides, Default Mode, 4−16
Overrides, Engine Speed, 4−13
Language, Selection, 3−25
Overrides, Preprogrammed, 4−13
Languages, 2−11
Overrides, Unloader Control, 4−14
Leak Checking, Charged System, 8−17
Overrides, User Selected, 4−9
62−11389
Index−2
INDEX − Continued
P
Parameters, Functional , 3−21
Parameters, Re−Start, 4−5
Parameters, Stop, 4−4
PC Cards, 5−4
PC Cards, Configuration, 5−6
PC Cards, Download, 5−6
PC Cards, Handling, 5−4
PC Cards, Option, 5−6
PC Cards, Program, 5−5
PC Mode, 5−3
Perishable Range, 4−3
Pre Trip Inspection, 8−1
Pretrip, 3−5
Priming The Fuel System, 8−8
ProductShield, 4−11
Pull Down, 4−3
Pull−Up, 4−3
Pumping Down, Compressor, 8−16
Pumping Down, Low Side, 8−16
R
Radiator, 8−13
Range Protect, 3−26
Receiver, 2−10
Receiver Sight Glass, 8−28
ReeferManager, 5−6
Refrigerant, 1−1
Refrigerant Circuit − Cooling, 2−20
Refrigerant Circuit − Heating & Defrosting, 2−20
refrigerant, charge, 2−1
Refrigeration System Data, 2−17
Remote Control Panel, 2−16, 3−32
Reports, 5−6
Resistance, Component, 2−18
S
Self Test, 3−4
Sensor, Ambient Air Temperature, 2−10
Sensor, Compressor Discharge Temperature, 2−9
Sensor, Compressor Suction Temperature, 2−10
Sensor, Defrost Termination Temperature, 2−10
Sensor, Engine Coolant Temperature, 2−7
Sensor, Engine Oil Level, 2−7
Sensor, Engine Speed, 2−7
Sensor, Evaporator Outlet Temperature, 2−10
Sensor, Fuel Level, 8−9
Sensor, Remote Temperature, 2−16
Sensor, Return Air Temperature, 2−10
Sensor, Supply Air Temperature, 2−11
Sensors, Service, 8−41
Service Mode, 5−3
Set Point, Changing, 3−8
Set Point, Changing with Remote Control Panel, 3−33
Sleep Mode, 3−11
Speed Control System, 8−12, 9−8
speed, engine, 2−1
Speed, Transition to High, 4−2
Standby Power, 1−1
Start−Stop, Automatic, 1−1, 2−11
Start−up, Engine Operation, 4−1
Start−Up, Standby Operation, 4−1
Starting, Engine Operation, 3−1
Starting, Standby Operation, 3−2
Starting, with Remote Control Panel, 3−33
Stopping, 3−29
Supply Air Limit Control, 4−9
Surround, 8−5
Switch Board, 2−14
Switch, Defrost Air, 8−31
Switch, Diesel/Electric, 2−14
Switch, Diesel/Off/Engine Standby, 2−14
Switch, Engine Oil Pressure, 2−7
Switch, Evaporator High Temperature, 2−10
Switch, High Pressure Service, 8−31
Switch, High Pressure, 2−10
Safety Devices, 2−19
Switch, Main Power, 2−13, 3−1, 3−2, 3−3
Safety Precautions, 1−1
Switch, Remote, 2−15
Scheduled Maintenance, 8−1
Switch, START/RUN−OFF, 2−14
Index−3
62−11389
INDEX − Continued
T
Technician Interface, 5−1
Temperature Control, 4−2, 9−4
Unloader, Coil Replacement , 8−25
Unloader, Replacing Internal Parts, 8−26
Unloader, Valve Replacement, 8−26
Unloaders, 2−7
Temperature Determination, 4−2
Temperature Range Lock, 4−10
V
Transducer, Compressor Suction Pressure, 2−9
Transducer, Discharge Pressure, 2−9
Transducer, Evaporator Outlet Pressure, 2−10
Valve, Compressor Suction Modulation, 2−10, 8−28
Valve, Electronic Expansion, 2−10, 8−29
Transducers, Service, 8−31
W
Trip Start, 3−14
Wiring − Harness Plugs, 10−1, 10−6
U
Wiring, Control Box Interior Splice Points, 10−11,
10−12
Unit Data, 3−17
Wiring, Display Test Points, 10−13
Unloader, Checkout procedure, 8−25
Wiring, Schematic, 10−13
62−11389
Index−4
North America
Carrier Transicold
700 Olympic Drive
Athens, GA 30601 USA
Tel: 1−706−357−7223
Fax: 1−706−355−5435
Central America
and Mexico
Ejercito Nacional No. 418
Piso 9, Torre Yumal
Col. Chapultepec Morales
11570 Mexico, D.F.
Tel: (5255) 9126.0300
Fax: (5255) 9126.0373
Carrier Transicold Division, Carrier
Corporation
Truck/Trailer Products Group
P.O. Box 4805
Syracuse, N.Y. 13221 U.S A
www.carrier.transicold.com
A member of the United Technologies Corporation family. Stock symbol UTX
©2011 Carrier Corporation Printed in U. S. A. 0611