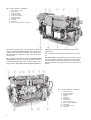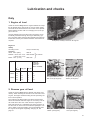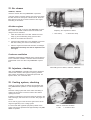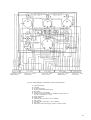
1
INSTRUCTION BOOK
TAMD60A/B, TAMD70C/D, AQD70C/D
Foreword
Read the instruction book before you attempt starting! The book contains the
information you need in order to run and maintain the engine in the best
possible way. Do not wait until something has gone wrong before you consult the
instruction book to see what you should do.
Volvo Penta has built up an extensive service organization in order to be able to
give your engine the service needed. At all major places all over the world there are
modern workshops with specially trained personnel at your service. One condition
for prompt service is that you always quote the type, designation and serial number
of the engine and its equipment.
Volvo Penta dealers and service stations are equipped with the special tools
required and they also have extensive stocks of parts so that you are always sure of
obtaining genuine parts for servicing and repairing. Always contact your local Volvo
Penta representative for service and spares.
A warranty certificate is provided with every engine, giving you information about
the protection to which the purchaser is entitled in the event of faults in the product.
The warranty certificate contains cards which should be completed by the dealer or
boat salesman and forwarded to Volvo Penta.
If our warranty is to apply, the servicing instructions in the handbook must be
followed.
AB VOLVO PENTA
Technical Publications
Reproduction permitted if the source is quoted
Instruction book
Marine diesel engines
TAMD60A, TAMD60B, TAMD70C, TAMD70D, AQD70C, AQD70D
Contents
Presentation
Page
Safety information ............................................................. 2
Type designation .............................................................. 7
Location of serial number ................................................. 7
Engine description ........................................................... 8
Instruments ..................................................................... 10
Controls .......................................................................... 12
Running
Procedure before starting ............................................... 12
Starting ........................................................................... 14
Procedure after starting .................................................. 15
Engine speed ................................................................. 15
Running-in ...................................................................... 15
Oil changing during running-in ...................................... 15
During running ............................................................... 16
Stopping ......................................................................... 17
Get-you-home device ..................................................... 17
Precautions in case of frost ............................................ 17
Propeller shaft brake ...................................................... 17
Lubricating oil and fuel
Lubricating oil for engine and reverse gear ................... 19
Fuels ............................................................................... 19
Electrical system
Electrical system ....................................................... 19, 32
Wiring diagram .......................................................... 42-47
Servicing
Page
Servicing scheme ........................................................... 20
Lubrication and checks .................................................. 21
Engine .................................................................. 21, 24
Reverse gear ....................................................... 21, 31
Disengageable clutches and reduction gears23, 25, 28
Hydraulic system .................................................. 24, 31
Coolant level .............................................................. 22
Fuel filters ................................................................. 25, 26
Venting ....................................................................... 26
Air cleaner ...................................................................... 29
V-belts ............................................................................. 27
Turbo-compressor .................................................... 27, 36
Lubricating oil filters ................................................. 28, 31
Zinc electrodes ............................................................... 27
Cooling system ................................................... 27, 29, 33
Electrical system ....................................................... 30, 32
Heat exchanger and after-cooler ................................... 33
Oil cooler ........................................................................ 34
General checking ........................................................... 36
Inhibiting and de-inhibiting ............................................. 37
Technical date
Engine and reverse gear ........................................... 38-41
Index
Index, alphabetical order ................................................ 48
1
Safety information
Read this chapter thoroughly. It concerns your safety. This section describes how safety information is presented
in this manual and on the product. It also includes a summary of basic safety regulations for boat trips and maintenance of the engine.
Make sure you are in possession of the right instruction manual before reading on. If this is not the case,
please get in touch with your Volvo Penta dealer.
Incorrect handling can cause personal injury or damage to the product and/or property.
Consequently, please read this instruction manual thoroughly before starting the engine or
carrying out maintenance and service. If anything is still not clear or if you are not sure of
any points, please get in touch with your Volvo Penta dealer for assistance.
This symbol is used throughout the instruction manual and on the product to bring your attention to points of safety-related information. Always read such information thoroughly.
Warnings in the instruction manual have the following order of priority:
WARNING! Warns for the risk of physical injury, severe damage to the product or other
property or serious malfunctions that may occur if the instructions are not followed.
IMPORTANT! Used to call your attention to points that may cause malfunctions or damage
to the product or other property.
NOTE! Used to call your attention to important information that can facilitate working methods or handling.
This symbol is used in certain cases on our products to refer to important information found
in the instruction manual. Make sure all warning and information symbols on the engine and
transmission are easily visible and legible. Replace symbols that have been damaged or
painted over.
2
Safety regulations for boat trips
The new boat
Read instruction manuals and other information accompanying the new boat thoroughly. Accustom yourself with handling the engine, controls and other equipment in a safe and correct manner.
If this is your first boat or if it is a type you are not
used to, we recommend practising manoeuvring the
boat in a peaceful environment. Learn the sea-going
and manoeuvring characteristics at different speeds
and in varying weather and load conditions before
casting off on your “real” maiden voyage.
Remember that when operating a boat, you have a legal responsibility to be aware of and follow regulations
concerning traffic and safety at sea. Inform yourself of
the regulations that apply to you and your waters by
getting in touch with the relevant authorities or marine
safety organisation.
Attending some kind of boat handling course is a good
idea. We recommend getting in touch with a regional
boat or marine safety organisation to help you locate a
suitable course.
Filling fuel
There is a risk of fire and explosion when filling fuel.
Smoking is prohibited and the engine must be turned
off.
Never overfill the tank. Close the filler cap securely.
Use only fuel recommended in the instruction manual.
The incorrect grade of fuel can disturb operation or
cause breakdown. This can also lead to the control
rod jamming on diesel engines, which will overrev the
engine and risk damaging machinery and causing personal injury.
Do not start the engine
Do not start or run the engine with a suspected fuel or
LPG leak in the boat, nor when you are close to or in
a discharge of explosive media, etc. There is risk for
fire and/or explosion in explosive surroundings.
Accidents and other incidents
Sea rescue statistics show that deficient maintenance
of boats and engines together with defective safety
equipment often causes accidents and other incidents
at sea.
Make sure your boat and engine are maintained in accordance with directions in the instruction manuals
and that the safety equipment on board is in good
working order.
Daily inspection
Make a habit of visually inspecting the engine and engine room before starting (before starting the engine)
and after stopping (when the engine has been
turned off). This will help you to quickly detect any
fuel, coolant or oil leaks and any other abnormalities
that have occurred or are about to occur.
Manoeuvring
Avoid violent and rapid rudder movement and gear
shifting. There is a risk of the passengers falling down
or falling overboard.
A rotating propeller can cause serious injury. Make
sure there is nobody in the water before engaging forward/reverse. Never run close to bathers or in places
where you have reason to believe there are people in
the water.
3
Carbon monoxide poisoning
When a boat is moving forward, it will cause a certain
vacuum to form behind the boat. In unfortunate circumstances, the suction from this vacuum can be so
great that the exhaust gases from the boat are drawn
into the cockpit or cabin and cause carbon monoxide
poisoning.
This problem is most prevailant on high, wide boats
with abrupt stern. In certain conditions, however, this
suction can be a problem on other boats, e.g. when
running with the cover up. Other factors that can increase the effect of the suction are wind conditions,
load distribution, swells, trim, open hatches and portholes, etc.
Most modern boats, however, are designed in such a
way that this problem is very rare. If suction should
arise anyway, do not open hatches or portholes at the
fore of the boat. Surprisingly, this will otherwise increase the suction. Try changing speed, trim or load
distribution instead. Try taking down/opening or in any
other way changing the setup of the cover as well.
Get in touch with your boat dealer for help in obtaining
the best solution for your boat.
Remember
●
●
●
●
Safety equipment: life jackets for everyone on board, communication equipment, distress rockets,
approved fire extinguisher, bandages, life buoy, anchor, paddle, torch, etc.
Spare parts and tools: Impeller, fuel filter, fuses, adhesive tape, hose clips, engine oil, propeller
and tools for tasks it may be necessary to perform.
Plan your desired route from the charts. Calculate distance and fuel consumption. Listen to weather reports.
Inform relations of your planned route for long trips. Remember to inform of changed plans or delays.
Inform the people on board of where the safety equipment is located and how it works. Make sure
there is more than one person on board that knows how to start and manoeuvre the boat safely.
This list should be supplemented with necessary safety equipment depending on the type of boat,
where and how it is being used, etc. We recommend you get in touch with a regional boat or marine
safety organisation to obtain more detailed marine safety information.
4
Safety directions for maintenance and service
Preparations
Knowledge
The instruction manual contains directions for performing normal maintenance and service in a safe and
correct manner. Read the directions carefully before
starting work.
More detailed service literature is available from your
Volvo Penta dealer.
Never perform a task unless you are absolutely sure
how it is to be carried out, call your Volvo Penta dealer for assistance instead.
Stop the engine
Stop the engine before opening or dismantling the engine hatch/hood. Maintenance and service must be
carried out with the engine stationary unless stated
otherwise in the instructions.
Prevent inadvertent start of the engine by removing
the starter key and turning off the power with the main
switch, locking it in the off position. Place a warning
sign in the driver position stating that service is in
progress.
Working on or approaching a running engine is a safety hazard. Loose clothing, hair, fingers or a dropped
tool can fasten in rotating parts and cause serious
bodily injury. Volvo Penta recommend leaving all work
requiring the engine to be running to an authorised
Volvo Penta service centre.
Lifting the engine
Always use the lifting eyes mounted on the engine (or
reverse gear) when lifting the engine. Always make
sure lifting equipment is in good condition and constructed for the lift (engine weight together with possible reverse gear and extra equipment). Use an adjustable lifting boom to ensure safe handling when lifting
the engine. All chains and wires must run parallel with
each other and as much at right-angle as possible to
the top of the engine. Note that any extra equipment
mounted on the engine can change the centre of gravity. Special lifting devices may be required to obtain
the right balance and safe handling. Never perform
service on an engine suspended only from a lifting device.
A turbocharged engine must never be started without
the air filter fitted. The rotating compressor wheel in
the turbocharger can cause severe personal injury.
There is also a risk of foreign objects being drawn in
and causing mechanical damage.
Fire and explosion
Fuel and lubricants
All fuel, most lubricants and many chemicals are
flammable substances. Always read and follow the directions on the packaging.
Work performed on the fuel system must be done on
a cold engine. Fuel leaks and spills on hot surfaces or
electrical components can cause fires.
Keep oil- and fuel-drenched rags and other hazardous
materials where they are safe in case of fire. Oil
drenched rags can self-ignite in certain conditions.
Never smoke when refuelling, topping up with oil or
when in the vicinity of the fuel station or engine room.
Non-original parts
Components in fuel, ignition and electrical systems on
Volvo Penta engines are designed and manufactured
to minimize the risk of explosion and fire in compliance with existing legislation.
The use of non-original parts can result in explosion or
fire.
Batteries
Batteries contain and generate oxyhydrogen gas, especially when charging. Oxyhydrogen is easily ignited
and extremely explosive.
Smoking, naked flames and sparks must never occur
in or close to the batteries or battery compartment.
A faulty battery connection or jumper cable can generate sparks which can cause the battery to explode.
Start spray
Never use start spray or similar start help. Explosions
can occur in the intake manifold. Risk for personal injury.
Before starting
Refit all guards and covers that have been removed
before starting the engine. Make sure there are no
tools or other objects left on the engine.
5
Hot surfaces and fluids
A hot engine always involves risk for burn injuries.
Take care with hot surfaces. E.g.: exhaust manifold,
turbocharger, oil pan, charge air pipe, starting heater,
hot coolant and warm lubricant in pipes and hoses.
Carbon monoxide poisoning
Start the engine in well ventilated spaces only. When
running in confined spaces, the exhaust gases and
crankcase gases must be evacuated.
Chemicals
Most chemicals such as glycol, anti-corrosion agent,
preservatives, degreasing agent, etc., are hazardous
to health. Always read and follow the directions on the
packaging.
Certain chemicals such as preservatives are flammable and harmful to inhale. Provide good ventilation and
use breathing protection when spraying. Always read
and follow the directions on the packaging.
Store chemicals and other hazardous materials out of
reach of children. Leave left over or used chemicals to
a destruction plant.
Cooling system
There is a risk of water entering when working on the
seawater system. Therefore, stop the engine and
close the sea cock before starting work.
Avoid opening the coolant filler cap when the engine is
warm. Steam or hot coolant may spurt out and cause
burn injuries.
If the filler cap, coolant pipe, cock, etc., must nevertheless be opened or dismantled while the engine is
warm, the filler cap must be opened carefully to release the pressure before removing it completely and
starting work. Note that the coolant can still be hot
and cause burn injuries.
Lubricating system
Hot oil can cause burn injuries. Avoid skin contact
with warm oil. Make sure the lubricating system is
depressurised before starting work. Never start or run
the engine with the oil filler cap removed or there will
be a risk of the oil being thrown out.
6
Fuel system
Always protect your hands when carrying out leak detection. Escaping fluids under pressure can pierce
bodily tissue and cause serious injury. Risk of blood
poisoning.
Always cover the generator if it is located under the
fuel filter. Fuel spills can damage the generator.
Electrical system
Turn off the power
Before starting work on the electrical system, the engine must be stopped and the powered turned off with
the main switch/switches. Shore power to the engine
heater, battery charger or other extra equipment fitted
to the engine must be disconnected.
Batteries
Batteries contain a highly corrosive electrolyte. Protect your eyes, skin and clothing when charging and
handing batteries. Always use protective goggles and
gloves.
In case of splashes on the skin, wash with soap and
plenty of water. In case of splashes in the eyes, rinse
immediately with plenty of water and call a doctor.
Presentation
The engines described in this instruction book are six-cylinder, in-line marine diesel engines with direct fuel injection and
fresh water cooling and equipped with a turbo-compressor and after-cooler for the intake air.
Type designations
Aquamatic
engines
Inboard
engines
AQD70C
AQD70D
TAMD60A
TAMD60B
TAMD70C
TAMD70D
Locating of
number plate
Engine: On the block above
the injection pump.
TAMD60: On the block in
front of the oil filters.
Reverse gear: On top
Drive 750: On the upper gear housing, port
side.
Fig. 1 Engine TAMD60B
1.
2.
3.
4.
5.
6.
7.
8.
9.
10.
11.
12.
13.
14.
Heat-exchanger
Coolant filler cap
Protecting plate
Fuel fine filters
Engine oil filler cap
Liquid cooled exhaust manifold
Filter, crankcase ventilation
Oil dipstick, reverse gear
Electric connection box with
fuses
Oil dipstick, engine
Stop solenoid
Injection pump
Alternator
Charging regulator
Fig. 2. Engine TAMD60A
1.
2.
3.
4.
5.
6.
7.
8.
9.
10.
11.
12.
Turbo-compressor
Air cleaner
After-cooler
Expansion tank (cooling system)
Oil cooler for engine
Connection for expansion vessel (extra
equipment)
Seawater pump
Lubricating oil filters
Starter motor
Outlet, crankcase ventilation
Reverse gear TD MG502
Oil cooler for reverse gear
7
Fig 3. Engine AQD70C, TAMD70C
1.
2.
3.
4.
5.
6.
7.
8.
9.
10.
Oil scavenging pump
After-cooler
Heat exchanger
Oil cooler, engine
Thermostat housing
Vibration damper
Seawater pump
Oil filters
Relay box
Electric connection box with fuses
The engines are fitted with a heat exchanger for thermostatically controlled fresh water cooling of the engine block,
cylinder heads and exhaust manifold. The exhaust manifold cooling jacket is designed so that it also cools all the
exhaust ports.
The engines are lubricated by means of a pressure lubricating system, where an oil pump supplies lubricating oil
to all the lubricating points in the correct quantities at all
engine speeds. The pistons in the 70-type engines are
cooled by oil fed through special nozzles located in the
engine block.
The lower part of the crankcase functions as an oil container.
The fuel system is well protected from interruptions during
running by means of effective, replaceable fuel fine filters.
On the TAMD60 engines the fuel injection pump is flange
mounted while the other engines have the pump fitted on a
bracket.
Fig. 4. Engine AQD70C, TAMD70C
1.
2.
3.
4.
5.
6.
7.
8.
9.
10.
11.
12.
8
Circulation pump
Charging regulator
Coolant filler cap
Injector
Fine filters
Oil filler cap
Stop solenoid
Turbo-compressor
Reverse gear TDMG506
Oil dipstick
Fuel injection pump
Alternator
Fig. 5. Engine TAMD70D
1.
2.
3.
4.
5.
6.
7.
8.
9.
10.
11.
12.
The engines have wet replaceable cylinder liners which
are cooled by fresh water.
The turbo-compressor supplies fresh air to the engine
during the induction stroke. Air is supplied under pressure,
resulting in a greater degree of volumetric efficiency. The
cylinders thus receive a greater quantity of air and consequently more oxygen per stroke. In consequence the
amount of fuel injected can also be increased, which leads
to increased output.
The turbo-compressor is lubricated from the engine lubricating system and cooled from the fresh water cooling system.
Voltage regulator
Thermostat housing
Fuel fine filters
Water-cooled exhaust manifold
Oil filler cap
Turbo-compressor
Reverse gear TD MG506
Stop solenoid
Oil dipstick
Fuel injection pump
Oil cooler
Alternator
In order to further increase the supply of oxygen, the air to
the engine is cooled down by an after-cooler located after
the compressor at the intake manifold.
The Aquamatic models are provided with a hydraulic pump
and a special connection flange at the reverse gear. Otherwise they are similar to the inboard engines. The hydraulic
pump, fitted at the rear side of the engine auxiliary drive
gear casing, close to the fuel injection pump coupling,
supplies oil under pressure to the power cylinder acting on
the lower, steerable part of the outboard drive. This results
in easy and effortless steering of the boat.
Fig. 6. Engine TAMD70D
1.
2.
3.
4.
5.
6.
7.
8.
9.
Air cleaner
Crankcase ventilation filter
After-cooler
Coolant filler cap
Heat exchanger
Seawater pump
Oil sump
Oil filter
Level indicator, lubricating oil
(extra equipment)
10. Oil dipstick (alternative location)
11. Relay box for air pre-heater
12. Electric connection box with fuses
9
Instruments and controls
Before starting to run your new marine engine, become acquainted with the controls and instruments. Make a habit
of checking the instruments now and again while running - any abnormal readings will then be detected in time.
Instruments
The most important instruments for the engine are grouped
on a basic panel (A). There is a second panel (B) with,
among other things, an hour meter, warning lamps, warning siren and pressure gauges for the reverse gear oil
pressure and the turbo-charging pressure.
There is also a third panel (C) where a rudder indicator and
fuel gauge are fitted. (Panels B and C are optional equipment).
The location of the panels in relation to each other can be
varied, since they are built to a modular system.
A separate panel with less instruments is available for the
Flying Bridge (optional equipment). See fig. 8.
The instrument panels for TAMD60 engines are not fitted
with the control lamps 2 and 7 (Fig. 7), since these engines
do not have air pre-heating. Otherwise the equipment is the
same as for the 70-engines.
Fig. 7. Instrument panel (Panels B
and C, optional equipment)
1.
Key switch with 4 positions.
Position 0 – the key can be inserted and removed
Position 1 – is not used, turn key past this position
Position II – running position
Position S – pre-heater engaged. Does not apply to
TAMD60.
(See also fig. 19)
2.
Control lamp - (does not apply to TAMD60). This lights
up when the air pre-heater is engaged (key turned to
position S). It remains alight while the air pre-heater is
engaged (approx. 120 sec). The pre-heater
disengages automatically.
3.
Stop button - pushing it engages the stop solenoid
causing the engine to stop.
4.
Revolution counter, engine speed - multiply the
figures on the scale by 100.
10
5.
Voltmeter, charging of batteries and system voltage.
With a 24 volt system, the gauge needle (during
running) should be pointing to approx. 28 volts, but for
a 12-volt system it should be approx. 14 volts. Should
the voltage during running drop to 24 (or 12) volts, the
batteries are not being charged.
The meter is wired via the master switch and indicates 24
(or 12) volts with the engine switched off.
6.
Instrument lighting - indirected lighting of all
instruments. Turn the button to vary lighting strength.
7.
Control lamp - (does not apply to TAMD60) - lights
when air pre-heater has been engaged long enough
for the engine to be started. The lamp lights about 60
seconds after the key has been switched to position S
and remains alight for about 60 seconds, that is, until
the pre-heater disengages automatically.
8.
9.
Pressure gauge - engine lubricating oil pressure,
should be at 300-500 kPa (3-5 kp/cm2 = 43-71 psi)
during normal operation. At idling speed it should be
min. 150 kPa (1.5 kp/cm2 = 21 psi). The engine must
not be run with excessively low oil pressure.
Starter button - pushing it engages the starter motor.
10. Temperature gauge engine coolant - During normal
operation the temperature should be between 65° and
95°C (149-203°F). The engine must not be run for
more than a few seconds if the temperature is
excessive.
11. Rudder indicator - indicates the position of the rudder.
The middle position of the needle indicates the rudder
in neutral.
12. Push - pull switches - for extra lighting. (Max. load 5A
per switch).
13. Fuel gauge - indicates how much fuel there is in the
tank. F means full tank, E empty tank, but a small
amount of spare fuel (R) however, still remains.
15. Pressure gauge - reverse gear oil pressure. The
pressure should be around the values given in
”Technical Data”, pages 40 and 41.
16. Battery charging warning lamp - lights if the batteries
discharge.
17. Warning lamp - lights if the engine lubricating oil
pressure is too low.
18. Warning lamp - lights if the engine temperature
becomes excessive.
19. Push-pull switch - for extra lighting (max. load 5A)
20. Siren - engages automatically if the engine temperature becomes excessive or its oil pressure too low.
Either lamp 17 or 18 will light and indicate the type of
fault which has arisen.
21. Pressure gauge - for the turbo-compressor charging
pressure. Concerning the pressure, see ”Technical
Data”, page 40.
14. Hour meter - registers the number of hours and minutes the engine has been running.
Fig. 8. Flying Bridge instrument panel, optional equipment.
The numbering on figs. 7 and 8 is similar. Flying Bridge instruments which have the same function as those on the
basic panel have been given the same numbers.
The engine can be stopped and (if it is warm) started from the Flying Bridge. On such occasions, the key on the lower instrument panel should be switched to the running position.
When the engine is cold, is should always be started from the lower control position and the air pre-heater (does not apply
to the TAMD60 engines) should be engaged before starting.
3.
Stop button – pushing it in engages the stop solenoid
and the engine stops,
16. Battery charging warning lamp – lights up if the
batteries discharge.
4.
Revolution counter, engine speed – multiply the value
by 100.
17. Warning lamp – lights if the engine lubricating oil
pressure is too low.
6.
Instrument lighting – indirect lighting of instruments
with switch pulled out.
18. Warning lamp – lights if the engine temperature
becomes excessive.
9.
Start button – pushing it in engages the starter motor.
20. Siren – engages automatically if the engine temperature becomes excessive or its oil pressure too low.
Either one of lamps 17 or 18 also lights up and
indicates the type of fault which has arisen.
12. Push-pull switches – for extra lighting (max. load 5A
per switch).
11
Fig. 10. Twin control
Fig. 9. Single control
Controls
Volvo Penta single lever control (single or twin), operates
both the reverse gear and the engine speed. When there
are two engines a twin control is used.
When it is desired to use the lever again for operating the
reverse gear, keep the button (2) pushed in and move the
lever to neutral again.
Lever (1) at N – neutral position.
From N to F – reverse gear engaged for running forward.
From N to R – reverse gear engaged for running in reverse.
T – engine speed control.
As optional equipment, the controls can have a neutral position switch, in which case the engine can only be started
with the reverse gear in neutral.
Disengaging reverse gear from control lever.
Push in the button (2) when the lever is in neutral and move
the lever forwards. The lever can then be used for controlling engine speed but with reverse gear disengaged. Take
care not to engage reverse gear unintentionally.
Disengageable clutch
Clutches – with or without reduction gear – have two control lever positions. Engaged – lever pushed towards engine; disengaged – lever pushed away from engine.
When engaging and disengaging the clutches, the engine
speed must not exceed 13.3 r/s (800 r/min)
Running
The following instructions apply to engines which have both standard instrumentation and optional instrument equipment. In the case of standard instruments only, the instructions apply where appropriate.
Procedure before starting
1.
Coolant level. Check that the level is about 5 cm below
the expansion tank filler cap sealing surface. There
must be an air cushion for the expansion of the fluid.
On TAMD60 engines the expansion tank is next to the
heat exchanger.
As optional equipment the TAMD60 engines can also
be provided with a separately positioned expansion
tank which is made of transparent plastic and where
the level should lie between the ”min.” and ”max.”
marks.
NOTE! Remove the cap very carefully if the engine is
hot.
When adding coolant, open the venting cocks to make
sure that no air pockets form. A ventilating cock is situated on the water pipe at the turbo. For 70-type engines there is also a cock at the front of the thermostat housing.
12
Fig. 11. TAMD60
1. Cap on expansion tank. For
topping-up.
2. Hexagon plug on heat
exchanger. For filling the
system.
Fig. 12. Separate
expansion tank
1.
2.
3.
4.
5.
Pressure cap.
Cover.
Max. level.
Min. level.
Hose from
engine.
6. Hose with open
end.
On the TAMD60 engines, small quantities required for
topping-up can be added to the expansion tank, but otherwise coolant should always be filled directly into the heat
exchanger through the hole for the hexagon plug, until the
engine is completely full and vented. Then close the venting cock at the turbo and screw the hexagon plug on the
heat exchanger. Thereafter, fill the expansion tank at the
side of the engine (1, fig. 11) with approx. 3 litres (0.66 Imp.
galls = 0.80 US galls) and replace the cap.
1.
Fig. 13. Vent the cooling system. (The picture shows a 70C
engine.)
If the engine is connected to a cabin heater, this must
also be vented before the cap on the expansion tank or
the plug on the heat exchanger are fitted. Otherwise
the engine may be damaged due to insufficient
cooling.
Finally, fill the separate expansion tank, if fitted, to
slightly above the MIN. level.
If the engine should run abnormally hot, carefully
vent the cooling system and top up with water.
2.
Lubricating oil level, engine. Check that the level is
between the marks on the dipstick. It must never be
permitted to fall below the lower mark.
Fig. 14. Oil level, all engines
(the picture shows a 70-type
engine).
Fig. 15. Check the oil level
in reverse gear BW and
V-drive BW 10-05.
(Check that the cock under the oil scavenging pump,
on the 70C-engine, is closed, see page 24.)
3.
Oil level, reverse gear. The level should reach the
mark (alternatively, it should lie between the two
marks) on the dipstick. Repeat the check for Twin Disc
reverse gears whilst idling with the control in the neutral position, since this indicates the true level for this
type of reverse gear.
The oil level in the Borg Warner and SCG reverse
gears should be checked when the engine is not
running. The oil level will lie above the ”max.” mark
when the engine has been stationary long enough for
the oil to run down from the cooler and passages. To
obtain a true level reading the check should be made
immediately after the engine has been stopped.
4.
Check that the seawater cocks on the engine are
closed. See the figures on page 18.
5.
Open the bottom valve and the trickle-feed cock to the
bilge pump, if fitted. (Fig. 18).
6.
Fuel. Check that there is sufficient fuel in the tanks and
open the fuel cocks.
7.
Switch on the master switches. They should be on
when the engine is running.
NOTE! Switching off and on must never be carried out
while the engine is running, since this can damage the
charging regulator.
Fig. 16. Check the oil level
in the reverse gear TD.
Fig. 17. Check the oil level in
reverse gear SCG.
Fig. 18. Cock on trickle-feed line to bilge pump, if fitted. The
scribed line should be in line with the pipe when the cock is
open.
13
Starting
With the exception of TAMD60, the engines have an air
pre-heater fitted in the intake manifold and this should always be used in order to provide a rapid and easy start and
to reduce exhaust smoke from a cold engine.
If the engine is warm, the pre-heater does not have to be
engaged, in which case the key is turned to position II, running position. Point 2 is excluded and the engine is started
regardless of the warning lamps mentioned in point 4.
1.
Turn the key to position II and check that the warning
lamps 16 and 17, figs. 7 and 8 light. The siren 20 is
switched on at the same time. Dampen the noise of the
siren by holding your thumb over it.
Fig. 19. Position 0, the key can be inserted and removed.
Position 1, not used.
Position II, running position
Position S, pre-heater engaged (not applicable to
TAMD60)
Always carry out this check before starting, to make
sure that warning lights and siren function; in order
to be well prepared for an emergency.
2.
(This point does not apply to TAMD60 engines.) Turn
the key to position S and release it. The key will then
return to position II. The warning lamp 2, fig. 7 lights
and shows that the pre-heater has been engaged.
3.
Set the control (both control levers for twin installation)
to neutral. Push in the button (1) so that the reverse
gear is disengaged. Keep the button pressed in and
then move the lever to full speed ”Forward” (2).
4.
On the 70-type engines, press the starter button 9, fig.
7, immediately when the control lamp 7 lights. (The
lamp 7, which lights for about 60 seconds, lights up 60
seconds after the lamp 2.) About 2 minutes after the
key has been released from position S, the pre-heater
disengages automatically and the lights 2 and 7 go out.
Fig. 20. The sound of the siren can be dampened by placing the thumb over it during the pre-heating period (on the
70-type engines)
The TAMD60 engines are not provided with the control
lamps mentioned in the point above and are therefore
started directly by pushing in button 9.
5.
6.
Reduce the speed to approx. 16.7 r/s (1000 r/min)
when the engine has started. Check that the warning
lamps 16 and 17 go out. The siren should stop when
lamp 17 goes out.
Fig. 21. Disengaging the reverse gear from the control.
If a second starting attempt has to be made on engine
TAMD60A, the control should be moved back to “Neutral” and then re-set to full speed in order to engage the
cold-starting device again.
On other engine types, just set the control directly to full
speed, at the same time as the pre-heater is reengaged for the 70-type engines.
7.
Never race a cold engine. The lubricating oil is
viscous in its cold condition and there is always risk of
seizing if the engine is raced.
Fig. 22. Engine speed
14
Procedure after starting
1.
Never race a cold engine. Run it warm under light
loading or at rapid idling speed.
2.
Check that the warning lamp for the oil pressure (17,
figs. 7 & 8) goes out immediately after the engine has
started. The oil pressure for the engine should be
between 300-500 kPa (3-5 kp/cm2 = 43-71 p.s.i.) at
normal operation. The warning lamp lights and the siren sounds if the pressure drops below 150 kPa (1.5
kp/cm2 = 21 p.s.i.), in which case the engine must be
stopped immediately in order to avoid engine damage.
3.
Check that the charging warning lamp (16) goes out.
4.
Keep the button (1, fig. 21) on the control pushed in
and pull the control lever to neutral.
Fig. 23. Engine lubricating oil pressure.
Check the oil level in the Twin Disc reverse gear while
idling and with the control lever in neutral.
5.
Check the engine temperature.
NOTE! The temperature should be between 65–95°C
(150°–203°F) during running. If the temperature rises
abnormally, open the air cocks on the thermostat
housing and the turbo for a few seconds in order to
evacuate any air in the coolant system. Top up with
water if required.
6.
Check the oil pressure for the reverse gear. See
”Technical data”.
Engine speed
NOTE! Special regulations apply with regard to
running-in, see under the heading ”Running-in”.
Fig. 24. Engine coolant temperature.
Fig. 25. Charging voltage. The figure shows the 24 V
system. Halve the value for a 12 V system.
Cruising speed is equal to about 3.3 r/s (200 r/min.) below
the maximum speed reached for a given load condition.
This results in economical and favourable operation.
Do not run for long periods of time with the engine speed
below 23.3 r/s (1400 r/min.) with the engine under load.
If the speed tends to drop gradually, this may be due to dirt
or marine growth on the bottom of the boat. For this reason,
the hull below the waterline should always be thoroughly
cleaned in such cases and treated with anti-fouling paint
before other measures are taken.
Fig. 26. Fuel gauge. F = Full tank
E = Empty tank R = Reserve fuel.
Running-in
When the engine is new it should be run with a certain
amount of caution during the first 200 hours. The same
applies to a newly reconditioned engine. Read the instruments often and make sure that they give normal readings.
Subsequently, the filter is normally changed every 600
hours. When removing, the entire filter is unscrewed in the
same way as the lubricating oil filters.
Run at full speed only during short periods for the first 50
hours. During this time, cruising speed should also be reduced so that it is at least 5.0 r/s (300 r/ min.) below the
maximum speed attained.
The cruising speed can subsequently be increased gradually, but as a rule, it should be approx. 3.3 r/s (200 r/min.)
below the maximum speed attained.
If a fresh water filter (Perry) is fitted it should be changed for
the first time after 150 hours of operation.
Oil changing during running-in
Change the oil in the engine for the first time after running
25 hours.
15
Change the oil again after running 100–150 hours and
change the oil filter (filters) at the same time. Never flush
out the engine with flushing oil since the bearing pressures
in a diesel engine are too high for the use of this kind of oil
to be suitable.
The oil in the reverse gear (and the filter element on SCG)
should be changed for the first time after 100-150 hours of
operation.
The oil is subsequently changed at the normal intervals given in the servicing scheme.
During running
Frequently check during running that all the instruments give normal readings. Some of the instruments are optional
equipment, see page 10.
Check
Engine lubricating oil
pressure
Number in
figs. 7 & 8
8
Observation
300-500 kPa (3-5 kp/cm2 = 43-71
p.s.i.), normally during operation
Warning lamp (low oil
pressure)
17
Warning siren
20
The siren is heard if the oil pressure falls below 150 kPa (1.5 kp/cm2 =
21 p.s.i.).
Engine coolant temperature
10
65-95°C (150-203°F) normally
during operation.
Warning lamp (coolant
temperature)
18
The light should not come on.
(Lights if engine temp. exceeds
approx. 95°C = 203°F, the siren
is also heard).
Charging voltage
5
Remarks/Actions
The lamp should not light. It lights
only when the pressure falls below
150 kPa (1.5 kp/cm2 = 21 P.s.i.).
If the lamp lights or if the siren is
heard the oil pressure is too low.
Stop the engine. Remedy the
fault.
If the lamp lights and the siren is
heard the engine temperature is
too high. Stop the engine. Remedy the fault.
During normal running approx. 28
volts for 24 V system and approx.
14 volts for 12 V system.
If the voltage drops to 24 (or 12)
volts during running, the batteries
are not being charged. Remedy
the fault as soon as possible.
Warning lamp (battery
charging)
16
The lamp should not light.
The batteries are not being charged if the lamp lights up. Remedy
the fault as soon as possible.
Turbo-charging pressure
21
Normal pressure, see ”Technical
data”. The pressure depends greatly on the output. The engine should
run at full load for 2-3 minutes before reading the pressure gauge.
The charging pressure is considerably lower than those values given in ”Technical Data”, unless full
engine output can be developed.
Check that the charging pressure
does not drop unduly from the normal test pressure reached for the
boat in question.
Reverse gear oil pressure
15
The pressure should correspond
with the values given in ”Technical
data”, pages 40 and 41.
Slipping can occur if pressure is
too low. This can cause damage
to the reverse gear.
Fuel quantity in tanks
13
16
Avoid stoppages for want of fuel. If
this should happen, the fuel system
must be vented, after filling with
fuel.
Stopping
1.
Let the engine run for a few minutes without load to
enable the engine temperature to drop, thereby
avoiding after-boiling.
2.
Press in the stop button and keep it pressed in until the
engine has stopped,
3.
Close the cock on the trickle-feed line to the bilge
pump, if such a pump is fitted. The scribed mark on the
cock should be at right-angles to the pipe when the
cock is closed.
4.
When the engine has stopped switch off the current by
turning the key switch to the 0-position. Neglecting to
do this will cause the batteries to discharge. If the
engine is to remain idle for 24 hours or more, the master switches should also be switched off. The volt meter
is wired directly over these switches.
NOTE! The master switches must not be switched
off while the engine is running, otherwise the charging
regulator can be damaged.
All fuel cocks and the bottom valve should be closed.
5.
If there is any risk of frost, follow the recommendations
given under ”Precautions in case of frost”, in order to
avoid damage to the cooling system.
Fig. 27. Removing the oil
pump, SCG.
Fig. 28. Locking screws for
get-you-home device, SCG.
The freshwater system should also be drained or Volvo
Penta glycol, or another glycol of approved quality, added.
Before draining, stop the engine, remove the filler cap
and close the bottom valve. Then open the drain cocks in
the fresh water and seawater system. There may also be
cocks at the lowest points of the cooling water and the exhaust lines.
Remove the cover on the seawater pump and the cover on
any extra bilgepump if fitted. Check to make sure that all
the water runs out.
Bilge-pump the boat and make sure there is no leakage
anywhere.
Get-you-home device
Propeller shaft brake
Reverse gears of type SCG MRF350 HDMK3, as standard
are equipped with a mechanical safety clutch.
For certain stipulated conditions of operation a propeller
shaft brake may be necessary, due to the fact that the propeller shaft may be caused to rotate by forces acting upon
the propeller, when the engine is shut down. This can damage the reverse gear. The reason for this is that the hydraulically operated reverse gear lubrication is insufficient
since the oil pump is driven by the input shaft which is stationary together with the engine.
In the event of a serious breakdown of the reverse gear hydraulic system, or excessive slipping when attempting forward running; the get-you-home device can be engaged in
order to reach port.
When engaged, this get-you-home device mechanically
locks the input and output shafts together, preventing the
disengagement of the reverse gear. The control lever must
unconditionally be in the ”forward” position while the engine is running with the get-you-home device engaged. In
any other position the clutch linings will be damaged.
Let a workshop carry out the necessary repairs as soon as
possible.
Engaging, SCG MRF 350 HDMK3B
Note! Stop the engine before engaging the get-you-home
device. Serious bodily injury can result otherwise
Remove the cover with the oil pump, which is located on
the port side of the reverse gear. Screw in the three screws
alternately until all the screws are properly tightened. Use a
hexagonal wrench (5 mm.).
Precautions in case of frost
When the engine is stopped and there is risk of frost, the
cooling sea water system should be drained in order to
prevent the cooling jackets and pipelines from being damaged by frost.
A special oil pump for the circulation of lubricating oil can,
however, be fitted to the SCG-reverse gear. This pump,
which is driven by the output shaft should be ordered at the
same time as the reverse gear (not included in Volvo
Penta’s standard range). If this pump is fitted, the shaft can
”trail” for unlimited periods of time, no shaft brake is
needed. The pump cannot be fitted to previously installed
reverse gears.
The propeller shaft may be allowed to rotate, whilst the
engine is shut down, for up to 24 hours. It is however, if
possible, advantageous to run the engine for a short while
after every 8 hours for lubrication and cooling of the reverse gear. In cases where the shaft rotates faster than during
normal operation, whilst under sail, for example, a temperature gauge should be connected to the reverse gear, in
order to monitor the oil temperature. Max. allowable temp.
for SCG reverse gear: 70°C (158°F) and for Twin Disc reverse gear 110°C (230°F).
If the above regulations cannot be fulfilled a propeller shaft
brake must be fitted (in exceptional cases the reverse gear
carrier may be disconnected).
Borg Warner reverse gears do not require a propeller shaft
brake for engines whilst under sail or in the case of twin
engine installations when one engine is shut down. The oil
level should, however, be checked carefully under these
conditions of operation, as well as during normal operation.
17
Fig. 29. TAMD60
F = Fresh water cocks
S = Seawater cocks
1 = Cap, topping-up, fresh water
2 = Plug for filling larger amounts of
fresh water
Fig. 31. All engines (The cocks are similarly placed.) The
dotted lines apply only to AQD70D, TAMD70D engines
F = Fresh water cocks
2 = Venting cock
Anti-freeze
During the cold season, suitable anti-freeze should be added to the cooling water in the fresh water system.
We recommend that you use our ethylene glycol (red, part
number 283241 in cans of 4.5 litres = 1 Imp.gall. = 1.2
U.S.gall.), which have the right amount of additive for neutralizing corrosive matter that may be in the cooling water.
If Volvo’s red glycol is used, it is sufficient to change the
coolant once a year, preferably in the autumn (fall).
Never use anti-freeze which is not approved. Among other
things, certain types of anti-freeze can cause corrosion in
the engine.
Methylated spirit of any kind should not be used since it
evaporates fairly quickly. It also increases the risk of corrosion in the cooling system.
At least 40% glycol should be used in order to avoid corrosion.
Flush the cooling system clean before filling it with antifreeze. Check hoses and connections and remedy any leakage.
Fig. 30. AQD70C, TAMD70C
F = Fresh water cocks
S = Seawater cocks
18
1 = Fresh water filler cap
2 = Venting cock
Cooling system capacity
dm3 (l) (Imp. gall. = US
gall) approx.:
Amount, dm3 (litres) (imp. gall. = US gall.) of
glycol necessary for frost protection down to
approx.:
–25°C (–13°F)
–30°C (–22°F) –40°C (–40°F)
TAMD60A, B 20
(4.4 = 5.3)
8.5 (1.9 = 2.1)
9.5 (2.2 = 2.5) 11 (2.4 = 2.9)
TAMD60A, B 23
(5.1 = 6.1)*
9.5 (2.2 = 2.5)
11 (2.4 = 2.9) 13 (2.9 = 3.4)
AQD70C, TAMD70C 28
(6.2 = 7.4)
11.5 (2.5 = 3.0)
13 (2.9 = 3.4) 15.5 (3.4 = 4.1)
AQD70D, TAMD70D 30
(6.6 = 7.9)
12.3 (2.7 = 3.2)
14 (3.1 = 3.7) 16.7 (3.7 = 4.4)
*Incl. separate expansion tank.
NOTE! If water without glycol is used during the summer do
not add anti-corrosion agent which can damage the lightalloy parts in the cooling system. In order to avoid corrosion, the easiest method is to use a suitable mixture of Volvo
Penta red glycol all year round. It should be changed every
autumn.
Fig. 32. AQD70D, TAMD70D
F = Fresh water cocks
S = Seawater cocks
1 = Fresh water filler cap
2 = Venting cock
Engine lubricating oil
The engine requires high-class diesel engine oil in order to
maintain good running economy and maximum performance. It is an absolute requirement that the correct quality of
lubricating oil is used according to our recommendations.
Note that our warranty does not apply if the engine is run
with the wrong lubricating oil.
We recommend that you use Volvo Penta diesel engine
lubricating oil which is on sale at our service stations.
Cetane rating
Viscosity at 20°C (68°F)
Lowest pour temperature
summer grade
winter grade
Flash point
Solid impurities
Sulphur content
min 45
2.0–6cSt
–10°C (+14°F)
–25°C (–13°F)
40°C min (104°F)
None
Max. 0.5 % by weight
The fuel oil property requirements stated above are also
covered, to a large extent, by the following standards.
Quality and viscosity
DIN 51601, CEC-ERF-D1 or ASTM-D975-No. 2-D
The lubricating oil should meet the requirements according
to one of the following standards:
Fuel oils complying with these standards can, therefore,
also be used.
Designation
Standard
CD (For service DS)
API (American Petroleum Institute)
MIL-L-2104C
US Government’s Military
(L-45199B)
Specification
Series 3
Caterpillar Tractor Co. Specification.
When buying lubricating oil, always make sure that the oil
container is marked with the oil designation in question,
and check with each oil company that they guarantee that
the oil they sell satisfies the demands made in the classification standards mentioned above.
Electrical system
As standard, the engines are equipped with a two-pole
electrical system and an alternator. See pages 42-47 for
the wiring diagrams. Engine TAMD60 has a voltage of 12 V
(alt. 24 V) whereas the 70-series engines have a voltage of
24 V (alt. 12 V) as standard.
1.
Never break the circuit between the alternator and
batteries while the engine is running. The master
switch must not be switched off until the engine has
stopped completely. No cable may be disconnected
while the engine is running as this too can damage the
charging regulator.
2.
The batteries, battery cables and cable terminals
should be checked regularly. The battery poles should
be well cleaned and the cable terminals firmly tightened and greased so that no interruption occurs. All
cables should be well tightened. No loose connections
are permitted. Note! When fitting the battery be
absolutely sure not to confuse the plus and the minus
poles. See the appropriate wiring diagram.
3.
When starting with the help of a spare battery, first
check that the spare battery has the same rated
voltage as the standard one. Connect the spare battery
to the standard battery, plus to plus and minus to minus. Remove the spare battery when the engine has
started. Note! The circuit to the standard battery must
not be broken.
4.
If electrical welding work is to be carried out on the
engine or installation units, disconnect the charging regulator and insulate the leads. Also, disconnect both
the battery terminals. Never connect the welding
cables so that current passes through a bearing.
5.
Should repair work need to be carried out on the
alternator equipment, the battery leads should be
disconnected first. This also applies if the batteries are
to be rapid-charged.
6.
Never test with a screwdriver, etc against any terminal
to see if it is live.
The viscosity used will depend on the ambient air temperature. See page 21.
Reverse gear lubricating oil and
hydraulic oil
For the reverse gear and hydraulic equipment the same
lubricating oil is used as for the engine. Concerning disengageable clutches with reduction gear, see ”Technical
data”.
Fuel
The diesel fuel oil used in the engine must satisfy certain
quality demands and must primarily be free from solid impurities and water. The sulphur content should also be as
low as possible.
If low quality fuel is used, this can give rise to abnormal
wear, running interruptions and smokey exhaust emissions.
Diesel fuel oil must satisfy the demands according to the
standard SIS 155432 or Volvo Group Standards (Diesel
fuel oil 97963-02).
A few of the points in the Volvo Standard concerned are given below:
19
Servicing scheme
The numbering in the scheme below lists the servicing operations described in the following pages under the corresponding numbers. Servicing work requiring the attention of experienced mechanics and the use of special tools
is marked with an ”A” and should, therefore, be carried out by authorized service personnel.
Daily
Every 600 hours
1.
Check the oil level in the engine
18. Replace the engine lubricating oil filters.
2.
Check the oil level in the reverse gear
3.
Check the coolant level and the seawater filter
(optional equipment).
19. Change the oil in the reduction gear (optional
equipment).
4.
Lubricate disengageable clutch (optional equipment)
5.
Check the oil level in the reduction gear (optional
equipment).
20. Check the valve clearance (A)
21. Air cleaner. Clean on 70C-engine. Replace on all
other engines. Replace the crankcase ventilation
filter.
22. Check the injectors (A).
23. Check and if necessary clean the cooling system.
24. Lubricate the starter motor.
Every 50 hours
6.
Lubricate disengageable clutch (optional equipment)
7.
Check the oil level in the hydraulic tank (AQ-type)
8.
Check the batteries.
25. Check/adjust disengageable clutch (optional
equipment).
Every 1200 hours
26. Replace the filter element and oil in the hydraulic
system (AQ-type).
Every 100 hours
9.
Change the oil in the engine.
10. Check (drain) extra fuel filters.
27. Change the oil in the reverse gear. Replace the filter
element (SCG), and clean the suction strainer on
other types of reverse gear. Check the reverse gear.
28. Check the starter motor and alternator. Lubricate the
large alternator (1600 W). Optional equipment.
Every 2400 hours or when necessary
Every 200 hours
29. Check/clean the heat exchanger and after-cooler.
11. Lubricate disengageable clutch (optional equipment)
30. Check/clean the engine and reverse gear oil cooler.
12. Replace inserts in the extra fuel filters.
13. Replace the fine filters in the fuel system1)
31. Replace the impeller in the seawater pump
(preferably at the beginning of the season).
14. Vent the fuel system.
32. Check the injection pump (A).
15. Check/tension the V-belts
33. Check the turbo-compressor for leakage, bearing
clearance and charging pressure (A).
16. Check the air lines, oil and cooling pipes at the turbo
for leakage.
34. Check the engine and its equipment in general (A)
17. Check the zinc electrodes. Clean the seawater filter
(optional equipment).
35. Inhibiting (when laying-up).
36. De-inhibiting (when launching).
All the measures listed above (except for No. 32) should be carried out at least once a year, even if the running time in the
schema has not been reached.
1)
The interval can be increased to 400-500 operating hours under favourable conditions.
20
Lubrication and checks
Daily
1. Engine oil level
Check the oil level daily with the engine switched off. Wipe
the oil dipstick with a clean cloth. Do not use cotton waste.
The level should be between the two marks on the dipstick.
Never below the lower mark. For changing the oil, see pages 19 and 20.
The fuel injection pump and the turbo-compressor are automatically lubricated through the engine lubricating system. The fresh water pump and the seawater pump are lubricated at the factory and further lubrication is therefore not
required.
Oil dipstick, similarly located for all engines.
Engine oil
Quality
according to API
CD (For service DS)
Viscosity
above +20°C (68°F)
SAE 30
between +20°C and –10°C: SAE 20/20W
(+68°F and +14°F)
below –10°C (+14°F)
SAE 10W
Engine
Volume incl. filters
or 15W/40
Engine inclination
(max. 18°
underway*
(max. 15°
when installed)
dm3
(litres)
Imp.gall.
US gall.
27.0
6
7
TAMD70 27.0
AQD70
}
0°
6
7
0°
16.0
3.5
4.2
18°
TAMD60 20.0
4.4
5.3
0°
13.0
2.9
3.4
18°
Oil dipstick BW73CR and
BW 10-05 (60 engines)
Oil dipstick, reverse gear
TD502 (60-engines)
*For TAMD60 20° applies under way
2. Reverse gear oil level
Check the oil level daily with the dipstick and add oil if necessary. When checking the oil level in the Twin Disc reverse gear, the engine should be idling and the operating control in neutral position.
The oil level in the Borg Warner and SCG reverse gears
should be checked when the engine is not running. The level will lie above the ”max” mark when the engine has
been switched off for a sufficiently long period of time to allow the oil to run down from the cooler and passages. In order to obtain a true level reading, check immediately after
the engine has stopped. Regarding changing oil, see
page 31.
Oil dipstick, reverse gear
TD506 (70-engines)
Oil dipstick, reverse gear
SCG (70-engines)
21
Reverse gear lubricating oil
Engine oil of same quality Oil capacity, approx.
and viscosity as in
(incl. cooler)
engine*
dm3
(litres)
Imp.gall. USgall.
Borg Warner 73CR*
2.5
0.5
0.7
Borg Warner 10-05* V-drive
5.5
1.2
1.5
Twin Disc, MG 502
2.5
0.5
0.7
Twin Disc, MG 506
6.5
1.4
1.7
SCG MRF 350 HDMK3
12.5
2.7
3.3
Venting cocks
* Oil viscosity for Borg Warner, SAE 30.
3. Engine coolant level
Check the level daily before starting.
NOTE! Open the coolant filler cap carefully when the
engine is hot.
For the TAMD60 engines fitted with a separate transparent
expansion tank the level should be between the ”max.” and
”min.” marks.
TAMD60
1. Cap on expansion tank.
Topping-up.
2. Hexagon plug on heat
exchanger. Filling.
On other engines, when cold, the level should be approx. 5
cm below the sealing surface of the filler cap so that the
coolant can expand when the engine becomes warm.
When there is danger of frost, the system should be drained or anti-freeze added. See under ”Precautions in case
of frost”.
When filling the coolant, remember to open the air venting cocks in order to avoid air pockets. There is a venting cock on the water pipe at the turbo. For the 70-engines
there is also a venting cock situated at the front of the thermostat housing.
On the TAMD60-engines, small quantities of coolant required for topping-up can be added to the expansion tank, but
otherwise the coolant should always be filled directly into
the heat exchanger through the hole for the hexagon plug
until the engine is completely full and air-vented. Then close the venting cock at the turbo and refit the hexagon plug
on the heat exchanger. Thereafter fill the expansion tank
with approx. 3 litres (0.7 Imp. gall.=0.8 US gall.) and refit
the cap.
Separate expansion tank
1. Over-pressure cap
2. Cover
3. Max. level
4. Min. level
5. Hose from engine
6. Hose with free end
If there is a separate transparent expansion tank this
should be filled last to slightly above the MIN-level, after
having first completely filled the engine’s expansion tank.
If the engine is connected to a heating radiator, this must
also be air-vented before the cap or plug on the heat exchanger are fitted. Otherwise the engine may be damaged
due to insufficient cooling.
If the engine runs abnormally hot, vent the cooling system
and top up with water.
Anti-corrosion additives should not be used since parts of
the cooling system are made of light-alloy.
The seawater filter (optional equipment) should be checked daily. With regard to cleaning, see page 28.
TAMD70, AQD70
22
4. Lubricating-disengageable
clutch, reduction gear
Optional equipment, TAMD70D.
Lubricate the throw-out bearing (nipple 1) daily, before
starting.
NOTE! Lubricate sparingly, to avoid risk of excess grease
finding its way onto the dry clutch linings and causing slip.
Use multi-purpose heat resistant grease.
Extra power take-off at front end. Rockford/BW (1:1)
5. Checking oil level in reduction
gear
Optional equipment, TAMD70D
Check the level daily before starting.
The oil should be filled up to the level plug (7). Top-up with
oil if required. Regarding oil quality and viscosity, see table
below. Concerning oil changing, see page 28.
Lubricating oil for reduction gear
Clutch with
reduction
gear
Rockford/BW
203 mm (8")
254 mm (10")
Twin Disc
Oil grade
Viscosity
Capacity,
dm3/litres
(qts.)
Engine oil
Engine oil
SAE 30
SAE 30
approx. 1 (1)
approx. 1.5 (1.5)
Engine oil,
SAE 40
or Hypoid oil SAE 80
approx. 1 (1)
Extra power take-off at front end, Rockford/BW (2.8:1)
Every 50 hours
6. Lubricating-disengageable
clutch, reduction gear
Optional equipment, TAMD70D
Lubricate the inner support bearing (nipple 4) every 50
hours. Unscrew the plug (4) for Rockford/BW 203 mm (8")
power take-off with reduction gear. Use multi-purpose heat
resistant grease.
Extra power take-off at front end, Twin Disc (3:6:1)
Picture text for extra power take-offs at front end
1. Nipple for throw-out
bearing
2. Inspection cover
3. Nipple for output shaft
bearing
4. Nipple for support bearing
5. Nipples (2 x) for disengagement shaft
6. Drain plug
7. Level plug
23
7. Hydraulic system, oil level
AQD70. Optional equipment for all other engines.
Check the level after every 50 hours of operation. The engine should be idling.
1.
Remove the filler cap on the hydraulic tank.
2.
Wipe the dipstick, and check the level which should be
at the max. mark on the dipstick.
3.
Fill with engine oil, if necessary. The oil quality is the
same as in the engine,
8. Checking batteries
Check the electrolyte level in the batteries every 50 hours
or more often. The level should be about 10 mm above the
cell plates. Top-up with distilled water if necessary. Also
make sure that the cable terminals are properly tightened
and greased.
Check the state of charge of the batteries with the aid of a
hydrometer if the voltage is low.
The density of the electrolyte should be 1.28 g/cm3. If it has
fallen to 1.23 the batteries should be re-charged. If a rapid
charger is used, first disconnect the battery cables, (both
the + and the - cables).
Every 100 hours
Oil being pumped out of the engine. 70-series
9. Engine, changing oil
Change the oil in the engine after every 100 hours of operation and when the engine is warm. However, during the
running-in period the oil should be changed for the first
time after 25 hours of operation. Do not use flushing oil for
cleaning the crankcase. Only drain (pump out) the old oil
carefully.
NOTE!
Collect the old oil carefully and hand it over to a service
station or disposal depot. Never pollute the water by discarding the oil over board.
AQD70C, TAMD70C, changing oil
1.
Open the cock at the oil scavenging pump (position 1)
and pump the oil over into a vessel.
2.
Close the cock and fill with engine oil through one of
the rocker arm casings after the ventilation cap has
been removed. See page 21 concerning the amount of
oil to be filled.
3.
Start the engine and allow it to idle for a minute or so.
4.
Stop the engine and check the oil level. Top up if
necessary. Note! The cock at the scavenging pump
should be closed when the engine is running. Position 0.
24
Cock under oil scavenging pump, 70C-engine
0 = Closed cock
1 = Emptying crankcase
2 = Emptying reverse gear
A = Free end of cock
The cock must be closed when running.
All other engines, changing oil
1.
Remove the oil dipstick and connect the hose from the
oil scavenging pump to the pipe for the dipstick. (Outer
diameter of pipe, 13 mm). An electric scavenging pump
is available as optional equipment.
2.
Start the pump and collect the oil in a vessel.
3.
Fill oil through the hole for the ventilation cap on the
rocker arm casing. It is also possible to use the
scavenging pump when filling with oil by reversing the
polarity of the pump motor (reversing the + and cables.) Regarding the capacity, see page 16. Insert
the oil dipstick and check the level.
4.
Start the engine and allow it to idle for a few minutes.
5.
Stop the engine, check the oil level and top-up if
necessary.
10. Fuel filters
Electrically driven oil scavenging pump
(Optional equipment) Checking
Check the fuel filter and drain any water that may be in it
after every 100 hours of operation by opening the cock or
removing the drain plugs. The check should be made with
the engine switched off and only after it has been off for a
few hours. Close the cock or fit the plugs and vent through
plug 1 or cock 3.
Every 200 hours
11. Lubricating-disengageable
clutch, reduction gear
Extra equipment, TAMD70D
Lubricate the shaft ball bearings (nipple 3) and the disengagement shaft bearings (with lubricating nipples (5), if fitted) every 200 hours.
Check, through the cover (2), the moving parts of the clutch
mechanism. Lubricate if necessary with a few drops of thin
oil.
Cleaning extra fuel filters
Single filter
1. Venting plug
2. Upper housing
3. Lower housing
4. Drain cock
The figures refer to the figures on page 23.
12. Fuel filters
Double filter
1. Filter housing number 1.
2. Filter housing number 2.
3. Venting cock
4. Drain plugs
(Optional equipment). Replacing elements
The elements in the double filter can be replaced and the
filter cleaned whilst running.
Note. Clean the filter housings carefully on the outside before loosening them and make sure that no impurities enter
the fuel system.
A.
B.
C.
D.
Filter 2 engaged. Vent filter 1.
Filter 2 engaged. Clean filter 1.
Filter 1 engaged. Vent filter 2.
Filter 1 engaged. Clean filter 2.
Normal running B or D. Alternatively
25
Both elements of the double filter and the lower element of
the single filter should be changed after 200 hours of operation or at least once every season, preferably at the beginning. Close the fuel cocks at the tank and loosen the filter housing by screwing out the centre screw. Clean the
filter housings carefully.
The upper element of the single filter should be changed
once a year.
Use new gaskets when reassembling.
Vent the filters before starting through the plug 1 or the
cock 3.
13. Replacing fine filters
Replace both fuel fine filters after every 200 hours of operation. Under favourable conditions, i.e. if the fuel is of a
very high quality and free from impurities, the interval between replacing the filters can be extended to 400-500
hours of operation.
However, the filters should be replaced at least once a
year, preferably at the beginning of the season.
At the same time replace the elements in the extra fuel filters. See point 12.
When working with the fuel system the highest possible
degree of cleanliness should be exercised in order to
prevent impurities entering the fuel system.
Replacing
1.
Wash the filter head carefully, especially at the lower
edge, then screw off both filters and discard them.
2.
Check that the new filters are absolutely clean and that
the gaskets are undamaged.
3.
Screw on the filters by hand until the gaskets touches
the filter head. Then tighten them one further half turn
but not more.
4.
Vent the fuel system according to the following
paragraph and pump up the fuel feed pressure. Check
for leakages.
14. Fuel system, venting
1.
Open the venting screw (1) on the filter head of the fine
filters and pump up the fuel with the hand primer (2)
until the fuel is free from air bubbles. Tighten the screw.
(The handle on the pump is released by screwing
anti-clockwise.)
2.
Open the venting screw (3) on the fuel injection pump
and pump up fuel until all air bubbles in the fuel
disappear. Then tighten the venting screw. (Applies
only to AQD70, TAMD70. The pump on
TAMD60-engines is vented directly through the fine filters.) Pump further to ensure that proper feed pressure
is obtained.
3.
Start the engine. If the engine does not start almost at
once, slacken the delivery pipes at the injectors a
couple of turns. Then run the starter motor until fuel
runs out. Tighten the delivery pipes and then start the
engine.
26
Replacing the fine filters
15. V-belts, checking
After every 200 hours of operation check that the belts are
properly tensioned and that they are not worn.
It should be possible to depress the belts about 10 mm
midway between the pulleys if they are properly tensioned.
The belts for the circulation pump are tensioned, after nut
(1) has first been slackened, by moving the tensioning pulley (2) outwards.
The belts for the large alternator (1600W) are tensioned after first having loosened the 4 attaching screws. For the
smaller alternators slacken the attaching screw (3) and the
tensioner bracket screw (4).
Belts operating in pairs should always be replaced simultaneously.
The belts are tensioned in the same way on all engines.
16. Turbo-compressor, checking
for leakage
Check for leakage after every 200 hours of operation. Air
leakage will lower the engine output and cause smokey exhaust gases.
Check that there is no leakage in the air lines by listening
carefully along them while the engine is running. A whistling or hissing sound indicates leakage. Leakage can also
be detected by applying soapy water to suspected areas
on the discharge side between the turbo and the engine.
Tighten the hose clamps or replace the hose if necessary.
Any leakage in the lubricating oil and cooling water lines
must be remedied immediately in order not to impair the
function of the turbo-compressor.
17. Zinc electrodes, checking
Check the zinc electrodes after every 200 hours of operation. First close the bottom valve and drain off some of the
coolant. Screw out the electrodes and scrape or brush off
any deposits. If about 50 % of an electrode is used up, the
electrode should be replaced. Make sure when fitting an
electrode that there is good metal contact between the
electrode and the part of the engine to which it is fitted.
TAMD60
If any of the electrodes is not attacked by corrosion, then
the reason can be poor contact between the electrode and
the engine. Scrape the surface clean and check that the
electrode is not loose in its retainer. Replace if necessary.
Close the drain cocks, open the bottom valve. Add the drained coolant which belongs to the fresh water system. Electrodes indicated by an S in the adjoining figures belong to
the seawater system and those indicated by an F to the
fresh water system.
AQD70, TAMD70. (The dotted line applies only to
AQD70C, TAMD70C.)
S = Electrodes in seawater system
F = Electrodes in fresh water system
27
Seawater filter
The filter (optional equipment) should be taken apart and
cleaned after every 200 hours of operation or more often if
necessary.
First close the bottom valve. Then screw the attaching
screws out of the cover (1). Lift up the cover and the element and clean the element in the housing (2) carefully.
Refit the parts, open the bottom valve and check that there
is no leakage.
Every 600 hours
18. Lubricating oil filters, replacing
Replace the lubricating oil filters after every 600 hours of
operation, or at least once a year, although during the
running-in period after the first 100 hours.
1.
Unscrew the oil filters and discard them. On AQD70D
and TAMD70D there is only one filter.
2.
Oil the rubber gaskets on the new filters and check
their contact surfaces on the engine.
3.
Screw on the new filters until the gaskets make contact.
Then tighten a further half turn but no more.
4.
Check for leakage after starting the engine.
5.
Check the oil level in the engine.
Seawater filter
1. Cover, transparent
2. Housing with element
19. Changing oil in the reduction
gear
Optional equipment, TAMD70D
Change the oil after every 600 hours of operation or at
least once a year.
During the running-in period the oil should be replaced after the first 100 hours of operation.
Drain the oil through the bottom plug (6), see figures page
18. Alternatively the oil can be sucked out with the help of
the oil scavenging pump.
Replacing the lubricating oil filters, TAMD60, AQD70C,
TAMD70C
Collect the oil carefully and hand it over to a service station or disposal depot. Never pollute the water by discarding the oil overboard.
Clean the ventilation cap above the filler opening on the
Twin Disc reduction gear in connection with changing the
oil.
Concerning oil quantity and quality, see ”Technical data”.
20. Valve clearance, checking
Check the valve clearance after every 600 hours of operation, or at least once a year. This should be carried out by
authorized service personnel. Concerning clearances, see
under ”Technical data”. Note! The clearance must never
be checked while the engine is running, but should always be carried out with the engine switched off, either
with a cold engine or when it is at operating temperature.
28
Oil filter, AQD70D, TAMD70D
21. Air cleaner
TAMD70C, AQD70C
Clean the cleaner after every 600 hours of operation.
Undo the clamps round the cleaner and remove and wash
the filter element in white spirit or diesel fuel oil. Allow the
filter element to drip-dry and then moisten it with engine
lubricating oil and refit it.
All other engines
Replace the filter with a new one after 600 hours of operation. Under favourable conditions the time between the
changes can be extended.
1.
Clean the rubber tube to the filter. Slacken the hose
clamp (1) and the attaching strap (2) for the filter.
2.
Remove the old filter and discard it.
3.
Check that the rubber tube is not damaged. Fit the new
filter after making sure that it is absolutely clean.
4.
Start the engine and check that there are no leakages.
Replacing the complete air cleaner.
1. Hose clamp
2. Attachment strap
NOTE! Make absolutely sure that no impurities enter
the engine.
Crankcase ventilation
TAMD60B, TAMD70D and AQD70D have a paper element
for the crankcase ventilation. This filter element should be
replaced with a new one after every 600 hours of operation.
22. Injectors, checking
Dismantling the air cleaner, AQD70C, TAMD70C
After every 600 hours of operation the injectors should be
cleaned and checked, with regard to opening pressure,
spray pattern and leakage, by authorized personnel. For
injector values, see ”Technical data”.
23. Cooling system, checking
Check the cooling system for leakage and blockage after
every 600 hours of operation or more frequently if necessary.
Flush the cooling system with clean water when filling or
draining the anti-freeze. Close the bottom valve before
opening the cocks.
If flushing is insufficient, remove and clean the inserts in the
heat exchanger, after-cooler and oil coolers. See pages 33
and 34.
Do not use any type of anti-corrosion agent which can damage the light-alloy in the cooling system.
If a fresh water filter (optional equipment) is fitted on the
engine it should be replaced after approximately every 600
hours of operation.
Filter for crankcase ventilation
1. Filter
2. Pressure valve
29
24. Starter motor, lubrication*
Lubricate the starter motor after every 600 hours of operation using Bosch oil 5944 290 000. Screw out the slotted
screw in the mounting flange against the flywheel housing
and fill the hole with oil, refit the screw and tighten it.
*Applies to starter motor type KG(R) which are provided with a
lubricating hole as shown in the figure.
Slotted screw for lubricating starter motor KG(R)
25. Clutch -reduction gear,
checking and adjusting
Optional equipment TAMD70D
Check the function of the clutch after every 600 hours of
operation.
Check to see if the clutch slips, becomes warm or has a
tendency to disengage. If the clutch is equipped with reduction gear it should be checked with regard to abnormally
high noise level, temperature or leakage.
Rockford/BW type clutch, 203 mm (8")
The Rockford/BW type clutches have a screw on locking
plate which retains the adjustment ring in position.
1.
Remove the inspection cover. Set the lever to the
disengaged position and turn the clutch so that the
locking plate becomes accessible.
2.
Loosen the locking plate and turn the adjustment ring
to the left so many notches that powerful force is
required to engage the lever.
3.
Screw on the locking plate and inspection cover.
Rockford/BW type clutch, 254 mm (10")
The Twin Disc type clutch is adjusted as follows:
1.
Remove the inspection cover. Set the lever to the
disengaged position and turn the clutch so that the
locking pin (1) becomes accessible.
2.
Pull out the locking pin and turn the adjustment ring (2)
so many notches to the right that a powerful force is
required to engage the lever.
3.
Screw on the inspection cover.
Twin Disc type clutch
30
Every 1200 hours
26. Hydraulic system
AQD70. Optional equipment on other engines.
Change the oil and the filter element after every 1200
hours, or at least once a year. See the instruction book for
the Aquamatic drive type 750, where venting and changing
are described in greater detail.
27. Reverse gear, changing oil
Change the oil after every 1200 hours of operation or at
least once a year. However, for a new or reconditioned reverse gear the oil should be changed for the first time after
100 hours of operation. When changing the oil the filter
element should also be replaced (SCG), for other reverse
gears the oil strainer should be cleaned.
1
2
3
1
2
3
4
Remove the oil dipstick.
Suck up the oil from the Twin Disc reverse gear with the
scavenging pump, and a hose which is connected to the
pipe for the dipstick.
For the Borg Warner and SCG type a pipe can be inserted
through the hole for the oil dipstick and the hose can be
connected to this pipe by means of a reducing nipple.
Alternatively, the oil can be drained off by removing the bottom plug.
Collect the used oil and hand it over to a service station
or disposal depot. Never pollute the water by discarding
the oil overboard.
After filling oil start the engine and run it for a few minutes
at idling speed. Then check the oil level on the Twin Disc
gear with the engine running at idling speed and the gear
in ”Neutral”.
Twin Disc reverse gear
MG506 (70-engines)
Twin Disc reverse gear
MG502 (60-engines)
1. Oil dipstick
2. Strainer
3. Filler cap
1. Plug, remove to clean
strainer.
2. Oil filler and breather.
3. Pipe for dipstick. Outer
diameter 13 mm.
4. Drain plug.
The level in the Borg Warner and SCG reverse gears
should be checked immediately after the engine has stopped.
Also check that the oil pressure in the reverse gear is normal and that there are no leakages and that no abnormal
sounds can be heard.
See also ”Precautions in connection with oil changing”, below.
Precautions in connection with oil changing
Applies to SCG 350 HDMK3: replacing the filter.
Unscrew the housing, remove the filter and clean the housing by washing in white spirit or fuel oil. Replace the rubber
gasket if necessary and fit a new filter.
Removing strainer,
BW reverse gear
(60-engines)
Replacing the filter,
SCG-reverse gear
(70-engines)
31
28. Starter motor, alternator and
fuses
NOTE! Disconnect both battery cables before carrying
out any work on the electrical system.
Starter motor, checking brushes and commutator
This check should be carried out after every 1200 hours of
operation.
Disconnect the starter motor cables and remove the starter
motor. Take off the starter motor protective cover. Lift the
brush springs and pull out the brushes. These should run
easily in their holders. Clean dirty or sticking brushes with a
cloth moistened with petrol (gasoline). Replace damaged
or worn brushes. If the commutator is scored, oval or burnt,
the starter motor should be reconditioned by authorized
service personnel. Check the tension of the brush springs
by using a spring balance. The spring force should be approx. 12-14N (1.2-1.4 kp = 2.6-3.1 lbf). Replace faulty
springs.
Alternator, checking brushes and slip rings.
The check should be carried out after every 1200 hours of
operation.
Small alternator
Clean the alternator externally. Unscrew the nuts on both
terminals on the alternator end cover (one of the terminals
is marked DF).
Remove the cover and unscrew both the brush holder
screws. Carefully lift out the brush holder taking care not to
damage the brushes.
Check that the brushes run easily in their holders and that
at least 5 mm of the brushes project and that the brush cables are not damaged and are well soldered. If necessary,
replace the complete brush holder including the brushes. If
the slip rings are scored, they should be rectified by authorized service personnel.
Large alternator (1600W. Optional equipment)
Clean the alternator externally. Check that the ventilation
holes in the front end are open.
Remove the cover, the casing and the brush cap at the rear
end of the alternator. Remove the screws retaining the
brush cap and then carefully bend up the cap. Note the
rubber gasket.
Check that the length of the brushes is at least 8 mm and
that they run easily in their holders. Check that the brush
cables are undamaged and well secured.
Check that the brush spring force is 2.3-2.8N (0.23-0.28 kp
= 0.5-0.6 lbf).
Also check the slip rings. Scored or corroded slip rings
must be rectified by authorized service personnel.
If it is necessary to replace the brushes, loosen the connection screws, lift up the springs and pull out the brushes. Assembly is carried out in reverse order.
32
Lubrication
The large alternator should be lubricated after every 1200
hours of operation. (The small alternator is only lubricated
in connection with an overhaul.)
Unscrew the plug above the lubricating hole at the bearing,
close to the belt pulley. Use a small quantity of Shell Retinax A or equivalent lubricant. Refit the plug.
Fuses
The fuses are positioned in the black plastic box at the side
of the engine.
When changing fuses, first bend the cover (1) open in the
direction indicated by the arrows in the figure. Replace the
damaged fuse with a new one. Make sure that the terminal
block (2) is located in its groove and press the cover shut
again. Lastly, the cable sealing rings should be pushed
into their grooves.
Every 2400 hours
(Or when necessary.)
29. Heat exchanger and
after-cooler, cleaning
Connecting box with fuses
1.
2.
3.
4.
Cover over fuses
Terminal block
Fuses (25A, engine)
Fuses (50A, for standard alternator but
80A for the 1600W alternator)
Clean the inserts once a year or after every 2400 hours of
operation.
Close the bottom valve and drain the coolant before carrying out any work on the cooling system. After completing work, pump the coolant out of the boat if necessary.
TAMD60
1.
Remove the cover over the after-cooler and lift up the
insert.
2.
Remove the heat exchanger end cover and pull out the
insert.
3.
Clean the inserts, both inside and out.
4.
Clean the heat exchanger housing and the after-cooler
housing. Make sure that no impurities enter the engine.
5.
Check that the small drain hole (1.5 mm) in the bottom
of the after-cooler housing is open.
6.
Grease the heat exchanger pipe connections and the
connections to the after-cooler with water resistant
grease prior to assembly. Use new gaskets and seals
and assemble the parts.
After-cooler TAMD60
33
AQD70, TAMD70
1.
Remove the screws securing the cooling water pipe
between the heat exchanger end cover and the reverse
gear oil cooler.
2.
Carefully bend loose the pipe from the end cover.
3.
Undo the hose clamp between the after-cooler and the
heat exchanger and the clamp on the cooling water line
under the after-cooler.
4.
Remove the screws securing the end cover at the front of
the heat exchanger and the cover over the after-cooler
and remove these. Pull out the inserts.
5.
Clean the inserts inside and out. Also clean the
housings. Make sure that the drain hole (1.5 mm) in the
bottom of the after-cooler housing is open. Make sure
that no impurities enter the intake manifold.
6.
Heat exchanger TAMD60
Replace all gaskets and sealing rings and re-fit the parts.
30. Oil cooler, cleaning
Clean the inserts (for engine and reverse gear) once a year
or after every 2400 hours of operation. If the oil cooler is to
be pressure-tested it should be removed from the engine.
Close the bottom valve and drain the coolant before carrying
out any work on the cooling system.
Oil-cooler for TAMD60-engines
1.
Remove the front end of the cooler and the pipe between
the seawater pump and the cooler.
2.
Remove the cover with the oil trap from the block
(applies to TAMD60A) and pull out the cooler insert. The
insert can only be pulled out forwards because it is
provided with a flange at the front end.
3.
Wash the insert in white spirit and blow it dry with
compressed air. Clean the end sides of the inserts with a
wire brush and clean the inside of the tubes with a
suitable brush. Clean the housing.
4.
Use new gaskets and fit the parts.
Inserts in after-cooler and
heat exchanger, AQD70, TAMD70
Oil cooler for AQD70C, TAMD70C engines
The oil cooler for the AQD70C and TAMD70C engines have
an insert which can only be removed and fitted in one way,
due to the design of the deflector plates. To ensure correct
location of the insert it has a guide on the lower edge of one
of its ends which fits into a recess in the end cover.
1.
Remove both end covers. Note the position for the guide
and then remove the housing from the engine.
2.
Push out the insert by pressing on the end with the
guide.
3.
Wash the insert in white spirit and blow dry with
compressed air. Clean the end sides of the insert with a
wire brush and clean the inside of the tubes with a
suitable brush. Clean the housing.
4.
34
Fit the insert by first pushing in the end which does not
have the guide. The insert should fit with its guide in the
end cover recess.
Oil cooler AQD 70 C, TAMD 70 C
1. End cover with recess for
guide
2. Guide
3. Deflector plates
4. Housing
5.
Use new gaskets and fit the housing to the engine.
6.
Fit new sealing rings on the ends and then fit the end
covers. The covers for this cooler lie tight against the
housing.
Oil cooler for AQD70D, TAMD70D engines
1.
Drain the coolant from the fresh water system. Remove
the oil cooler coolant pipes.
2.
Place a collecting vessel under the oil cooler and
loosen the oil distribution housing from the cylinder
block. Pull out the connections from the oil cooler
cover.
3.
Take off the cover and remove the insert. Take care of
the flat seals (rubber) at the upper and lower ends of
the insert.
4.
Wash the insert in white spirit, flush out internally and
blow dry using compressed air. Clean the housing.
5.
Refit the parts in reverse order. Note that the lower flat
seal is equipped with cut outs for the flow of oil. Use
new sealing rings. Grease the cooler element pipe
connections with water-resistant grease before
connecting the coolant pipes.
6.
Fill the engine with the coolant.
Oil cooler AQD70D, TAMD70D
Oil coolers for all reverse gears
1.
Loosen both the ends of the oil cooler and remove the
insert.
2.
Wash the insert in white spirit and blow dry using
compressed air. Clean the end sides of the insert with
a wire brush and clean the inside of the tubes with a
suitable brush. Clean the housing.
3.
Use new sealing rings when fitting. Do not tighten the
screws too hard. Normally there should be a space
between the housing and the end covers.
31. Impeller, replacing
The impeller should be changed once a year before the
beginning of the season.
Close the bottom valve and drain the seawater from the
engine.
1.
Remove the pump end cover. Prize out the impeller
with the help of two screwdrivers.
NOTE. Place some kind of protection under the
screwdrivers in order not to damage the housing.
2.
Clean the inside of the housing.
3.
Press in the new impeller and fit the sealing washers
on the outer end of the impeller centre, if this has not
already been done. Fit the cover together with a new
gasket. Close the cocks and open the bottom valve.
Make sure that there is always a spare impeller and
gasket on board.
Impeller, seawater pump
35
32. Fuel injection pump
NOTE! Any repair work required to be done on the fuel
injection pump should be carried out by specially trained
mechanics who have the necessary tools and testing
devices at their disposal. All warranty on the engine becomes null and void if the seals are broken by unauthorized persons.
Since operating conditions vary considerably, it is difficult
to indicate any definite interval, but the pump settings, max.
and idle speeds, exhaust smoke, etc. should generally be
checked after every 2400 hours of operation.
Always check and clean the injectors and make sure that
the air lines to the turbo do not leak before checking the
engine exhaust smoke. The air cleaner should also be cleaned and the air lines must be free from constrictions.
In order to ensure even loading of the cylinders, the fuel injection pump should be checked on a test bench. This is
extremely important with regard to engine life. This check is
preferably carried out in connection with the laying-up of
the boat at the end of the season.
Pump drive TAMD 60
1. Screws in drive flange
2. Lock washer
33. Turbo-compressor
Check the turbo-compressor thoroughly after every 2400
hours of operation with regard to leakages of the oil lines
and air hoses. Check also the bearing clearance and charging pressure as well as the general condition of the unit.
This check should be carried out by authorized personnel.
If necessary, replace the turbo-compressor with a new or
reconditioned unit.
Always fit new oil filters and change the engine oil when
replacing the turbo-compressor. Fill the turbo-compressor
bearing housing with 0.1 litre (0.1 quart) of oil before connecting the oil delivery pipe.
Pump coupling (protective cover removed) 70-engines
1. Nuts
2. Coupling screws
34. General checking
It is difficult to indicate a definite time for reconditioning the
engine since operating conditions vary considerably. By
measuring the compression pressure and observing the
consumption of lubricating oil it is, however, possible to
estimate roughly when the engine should be dismantled
and checked for wear.
In connection with a major overhaul of the engine, the reverse gear and reduction gear, if fitted, should also be
removed and checked for wear.
Cylinder heads and gaskets
Both cylinder heads have separate steel gaskets with special rubber seals for sealing against water and oil.
A used gasket must never be refitted. Always fit a new gasket. The cylinder head bolts should be tightened with a torque wrench and in the correct sequence by personnel from
an authorized service workshop.
The valve clearance should always be adjusted after the
cylinder heads have been tightened.
36
Angle graduation marking on flywheel
35. Inhibiting
6.
Corrosion of the engine components must be prevented as
otherwise the engine will gradually be destroyed. For this
reason, the engine should be protected against such damage by the following measures:
Vent the fuel system and start the engine. See chapter
”Running”. Let the engine run at rapid idle until about 2
litres (2 quarts) have been consumed from the vessel.
7.
Stop the engine and pump out the rust-proofing oil
from the oil sump. Connect the ordinary fuel lines.
However, if a change of oil has recently been carried
out where Volvo Penta lubricating oil was used, this
need not be pumped out.
A. If the engine is to remain idle for a period of time not
exceeding one month it should be started after 14 days
and run warm for about one hour.
If there is risk of frost, the seawater circuit in the cooling
system should be drained after stopping the engine. The
fresh water system should be filled with a Volvo Penta ethylene glycol mixture. The concentration of glycol used
should be able to cope with the lowest temperature likely to
occur. Do not use less than 40 % by volume of ethylene
glycol. With a low ethylene glycol content there is risk of damage from corrosion. Regarding volumes, see page 13.
The drain plug in the exhaust line condensation water collector, if fitted, should be removed to allow the condensate
to run out. Drain any water that may have collected at low
points in the exhaust line.
8.
Close the bottom valve and drain the seawater system
completely, see under ”Precautions in case of frost”.
The engine fresh water system must either be
completely drained or have anti-freeze added, suitable
in the form of Volvo Penta ethylene glycol.
9.
Remove the batteries from the boat and take them to a
charging station for periodical charging in accordance
with the manufacturers instructions.
10. Protect all external unpainted surfaces with suitable
preservative fluid. The surfaces should be clean and
dry before the fluid is applied.
NOTE! Certain preservative fluids intended for
outside use are inflammable and should, therefore,
be used with care. Furthermore, some fluids are
dangerous to inhale, a breathing mask should
therefore be worn when such fluid is being sprayed
on.
B. If the engine is to remain idle for more than one
month, inhibiting is recommended according to the
points given in the following text.
If inhibiting is intended only to cover the normal winter
lay-up, Volvo Penta engine oil can be used instead of the
rust-proofing oil specified in the following text. This will
enable the engine to be driven directly at the beginning of
the new season. In this case, the oil and oil filter(s) should
be changed immediately before laying-up and should not,
of course, be drained. The engine should be run warm after
the oil change.
Remember to utilize the break in operation to carry out the
periodical routine servicing which must, in any case, be
carried out.
1.
Run the engine warm to its normal operating temperature.
2.
Stop the engine and drain or pump out the lubricating
oil from the oil sump.
3.
Fill the engine with rust-proofing oil to a level between
the marks on the dipstick. Suitable rust-proofing oils
are Esso Rust-Ban 623 or other manufacturers
equivalent oils.
In the case of normal winter lay-up the engine can be
filled to the usual level with Volvo Penta lubricating oil
instead of rust-proofing oil.
11. From this point on, the engine must not be turned over
again until it is to be taken into use. Mark the engine
clearly with some kind of notice saying that the engine
has been inhibited and give the date. Also state that
the seawater has been drained and whether the fresh
water system has been drained or glycol been added
and state the freezing point of this protection. Also
make a note of whether the oil has been drained or a
change of Volvo Penta lubricating oil has been carried
out.
12. Cover the engine if necessary as protection against
dirt.
36. De-inhibiting
1.
Remove any covers on the engine.
2.
Wash off the preservative fluid on the outside with
white spirit.
3.
Provided the coolant was drained, close the drain
cocks and fill the fresh water system with water mixed
with Volvo Penta glycol. See under ”Running”. Open
the bottom valve.
4.
Fill the engine, if necessary, with the correct quality of
lubricating oil and check the level in the reverse gear
and reduction gear if fitted. Fit new oil filters, if they
were not changed in connection with the changing to
Volvo Penta lubricating oil when laying-up the boat.
5.
Connect the batteries.
6.
Fit new fuel filters, vent the fuel system and start the
engine. See under ”Running”. Run the engine warm at
rapid idle before running under load.
7.
Check for oil, fuel or cooling water leakage.
The reverse gear and reduction gear if fitted should be
filled to the (upper) mark on the dipstick with the usual
recommended lubricating oil.
4.
Pump the oil out of the injection pump camshaft
housing using a pump. Thereafter, fill the housing with
the same type of rust-proofing oil as used in the
engine, (approx. 1 litre = 1 quart). This point is omitted
if Volvo Penta lubricating oil is used.
5.
Disconnect the fuel line to the feed pump and the return line to the tank. Connect the lines, using hoses, to
a vessel containing 1/3rd Volvo Penta lubricating oil,
Rust-proofing oil of type Esso Rust-Ban 623 or
equivalent and 2/3rds diesel fuel.
37
Technical Data
Engine
Type designation .........................................................................
TAMD60A
TAMD60B
6
98.4
120
5,48
10.9 (650)
Number of cylinders .....................................................................
Cylinder bore .......................................................................... mm
Stroke ...................................................................................... mm
Displacement ................................................................. dm3 (litre)
Idling speed ................................................................... r/s (r/min)
Compression pressure at starter motor
speed .......................................................... MPa (kp/cm2, p.s.i.)
2.5/3.8 r/s
(25,356/230 r/min)
Firing order (No. 6 cylinder nearest flywheel) ..............................
1-5-3-6-2-4
Direction of rotation seen from front end of engine ......................
Clockwise
Cylinder liners, type ......................................................................
Wet, replaceable
Valve system ................................................................................
Overhead
Valve clearance, engine not running, (cold or operating temperature)
Inlet ...................................................................................... mm
0.40
Outlet ................................................................................... mm
0.45
Inboard engines
Inclination when running, max. degrees ..................................
20
Weight of engine without reverse gear
AQ-version ............................................................................. kg
–
(lb)
–
Inboard version ...................................................................... kg
670
(lb)
(1477)
Lubricating system
Oil quality according to API system ..............................................
Viscosity above +20°C (68°F) ......................................................
between +20°C and -10°C (68°F and 14°F) ............................
below -10°C (14°F) ...................................................................
all temperatures ........................................................................
Oil capacity
AQ-version and inboard version without
20 (4.4-5.3)
inclination ............................................... dm3 (Imp.gall.-USgall)
3
13 (2.9-3.4)
Inboard version (inclination 18°) ........... dm (Imp.gall.-USgall)
Oil pressure warm engine at operating
speed .......................................................... MPa (kp/cm2, p.s.i.)
AQD70C
TAMD70C
AQD70D
TAMD70D
6
104.77
130
6.73
9.2 (550)
2.35/3.0 r/s
(24,341/180 r/min)
1-5-3-6-2-4
Clockwise
Wet, replaceable
Overhead
0.40
0.55
18
840
(1852)
810
(1786)
850
(1874)
820
(1808)
CD (For Service DS)
SAE 30 Alt. 20W/30
SAE 20/20 W
SAE 10W or 10W/20
SAE 15W/40
27 (6-7)
16 (3.5-4.2)
0.3-0.5 (3-5, 43-71)
Cooling system
Capacity incl. heat exchanger .................. dm3 (Imp.gall.-USgall.)
Thermostats begin to open at ............................................. °C(°F)
20 (4.4-5.3)
23 (5-6)*
68-72 (154-162)
74-78 (165-172)**
fully open at ........................................................................ °C(°F)
78-82 (172-180)
28 (6.2-7.4)
30 (6.6-7.9)
74-78 (165-172)
84-88 (183-190)
84-88 (183-190)**
* With a separate expansion tank
** The thermostats on the 60-series engines open at different temperatures
Hydraulic system
AQD70C, AQD70D and otherwise as optional equipment
Oil quality and viscosity ................................................................
Oil capacity .............................................. dm3 (Imp. gall-US gall.)
38
Same as in engine
7 (1.5-1.9)
Fuel system
TAMD60A
Fuel injection pump Bosch ...........................................................
Injectors (holders) Bosch ..............................................................
Nozzles Bosch ..........................................................................
Hole diameter (4 holes) .......................................................... mm
Opening pressure ........................................... MPa (kp/cm2, p.s.i.)
Injectors (holders) Bosch (without rod filter)*** ............................
Nozzles Bosch ..........................................................................
Hole diameter (4 holes) ...................................................... mm
Opening pressure ....................................... MPa (kp/cm2, p.s.i.)
Centrifugal governor, Bosch ........................................................
Feed pump operating pressure ....................... kPa (kp/cm2, p.s.i.)
Fuel injection pump, setting B.T.D.C. .........................................
AQD70C, TAMD70C
PES6MW 100/320
RS5Z
KBAL 112S 28/4
DLLA 150S 204
PE6P 110 A 320RS 260Z
PE6P 110A 320RS 260Y*
KBAL 112S 28/4**
DLLA 150S 634 (early prod.)
DLLA 150S 582 (late prod.)
0.32
0.40
19.6 (200, 2845)
19.1 (195, 2775) early prod.
18.6 (190, 2700) late prod.
KBL 112S 82/13*
DLLA 150S 138*
0.355*
19.6 (200, 2845)*
RWV 300-1400 MW4
EP/RSV250-1250
PO/374/2R
100-150 (1.0-1.5, 14-21) 100-150 (1.0-1.5, 14-21)
22°
22°
*
TAMD70C set for 176 kW (240 hp), from and including engine
No. 55286/xxxx and engines set for 152 kW (206 hp) output and for
the Japanese market from and including engine No. 55094/xxxx.
** Without rod filter on AQD70C, TAMD70C from and including
engine No. 55144/xxxx.
*** With rod filter on TAMD70C for the Japanese market, early prod.
Fuel injection pump Bosch ...........................................................
Injectors (holders) Bosch ..............................................................
Nozzles Bosch ..............................................................................
Hole diameter ......................................................................... mm
Opening pressure ........................................... MPa (kp/cm2, p.s.i.)
Centrifugal governor Bosch .........................................................
Fuel feed pump, working pressure .................. kPa (kp/cm2, p.s.i.)
Injection pump, setting B.T.D.C. .................................................
TAMD60B
PES6MW 100/320
RS1004Z
KBEL 95 P 9/4
DLLA 150 P 28
4 x 0.34
24 (245,3485)
RSV 250-1400
MW2/308
100-150 (1.0-1.5,
14-21)
22°
AQD70D, TAMD70D
PE6P 110A 320
RS260Z
KBEL 95 P 9/4
DLLA 150 P 32
3 x 0.46
27 (275,3911)
EP/RSV 250-1250
PO/374/2R
140-160 (1.4-1.6, 20-22)
TAMD60
AQD70, TAMD70
12 (alt. 24)
24 (alt. 12)
500 (650)
1600
3 (4)
650 (500)
1600
3 (4)
20°
Electrical system
Voltage of electrical system ........................................................ V
Alternator,
output (SEV Marchal, std) .......................................................... W
alt. (CAV optional equipment) ................................................... W
Starter motor output .......................................................... kW (hp)
Battery capacity, 24V system voltage,
Engine with starter motor type KG (R) ..........................................
Engine with starter motor type KB ................................................
Battery capacity, 12V system voltage,
Engines with starter motor type KG (R) ........................................
Engines with starter motor type KB ..............................................
Density of electrolyte at +20°C (68°F)
fully charged battery ............................................................ g/cm3
recharge at .......................................................................... g/cm3
2 batteries connected in series 12V/152 Ah,
(Max 180Ah)
2 batteries connected in series 12V, max. 110 Ah*
2 or 3 batteries connected in parallel 12V/70
Ah, (total max. 210 Ah)
2 batteries connected in parallel 12V, max 110
Ah*, (total max. 220 Ah*)
1.275-1.285
1.230
* According to DIN 72311
39
Turbo-compressor
Manufacturer, type (TAMD60A-AQD70C, TAMD70C) .................
(TAMD60B-AQD70D, TAMD70D) ................................................
Lubrication ....................................................................................
Cooling .........................................................................................
TAMD60
AQD70, TAMD70
Holset 3LD-530A/
Holset 3LD-530A/
2.5 WSO
2.5 WSO
KKK-K27-2970 N/14.7
KKK-K27-3068/14.7
From engine lubricating system
From engine fresh water cooling system
Charging pressure
Charging pressure at 100% engine
load and an ambient air temperature of approx. +20°C (68°F). Curve 2
applies to pleasure boats (output
according to curve B) and curve 1
for other installations (output according to curve C).
A considerably lower charging
pressure is obtained if the engine is
not running at full output.
Reverse gear
Twin Disc model ..........................................................................
Ratios ............................................................................................
Oil quality and viscosity ................................................................
Oil capacity (including cooler) ................... dm3 (imp.gall-US.gall)
Working pressure at oil temperature 82°C (180°F)
(engaged 30r/s-1800 r/min) ........................... MPa (kp/cm2, p.s.i.)
at cruising speed, min .................................... MPa (kp/cm2, p.s.i.)
Weight ................................................................................. kg (lb)
TAMD60
AQD70, TAMD70
MG502
MG506
1.5:1, 2:1, 2.5:1
1:1, 1.5:1, 2:1, 3:1
Same as in engine
2.5 (0.6-0.7)
6.5 (1.4-1.7)
2.2-2.4 (21.8-24.0,
310-340)
1.93 (19.3, 275)
80 (176)
2.1-2.2 (21-22.5,
300-320)*
1.9 (19.0, 270)
100 (220)
* 2.5 (25.3,360) for engines with 199 kW (270 hp) propeller shaft output.
SCG, model ..................................................................................
Ratios ............................................................................................
Oil quality and viscosity ................................................................
Oil capacity (incl. cooler) ......................... dm3 (Imp.gall. USgalls)
Oil pressure, normal when running ................ MPa (kp/cm2, p.s.i.)
Weight, (rotation same as engine) ................................... kg (lbs)
(rotation opposite to engine) ......................................... kg (lbs)
40
MRF 350 HDMK3B
1.5:1, 2:1, 3:1
Same as in engine
12.5 (2.8, 3.3)
0.85 (8.5, 121)
175 (386)
170 (375)
Borg Warner, model ....................................................................
Ratios ............................................................................................
Oil quality ......................................................................................
Oil capacity (including cooler) .................. dm3 (Imp.gall,US gall.)
Oil pressure, normal during running .............. MPa (kp/cm2, p.s.i.)
Weight ................................................................................. kg (lb)
TAMD60
AQD70, TAMD70
73 CR
V-drive 10-05
2:1, 3:1
1.5:1, 2:1
Same as in engine
(viscosity, however SAE 30)
2.5 (0.6-0.7)
5.5 (1.2-1.5)
0.85-1
0.77-1.05
(8.5-10, 120-140)
(7.7-10.5, 110-150)
85 (187)
120 (265)
Clutch – Reduction gear
Permitted engine speed with engaged power
take-off ........................................................................... r/s (r/min)
Twin Disc
Reduction .....................................................................................
Size ................................................................................... mm (in)
Weight, approx ................................................................... kg (lb)
Oil quality and viscosity ................................................................
Oil capacity .................................................. dm3 (Imp.qts, USqts)
Borg Warner/Rockford
Reduction .....................................................................................
Size (1.1; 2.8:1) ................................................................. mm (in)
Weight, approx (1:1) ........................................................... kg (lb)
(2.8:1) .................................................................................. kg (lb)
Oil quality and viscosity (red. gear) ................. Engine oil SAE 30
Oil capacity, approx (red. gear 8") ................ dm3 (imp.qts,USqts)
(red. gear 10") ............................................... dm3 (imp.qts,USqts)
15.0-30.0 (900-1800)
3.6:1
203 (8")
75 (165)
Engine oil SAE 40 alt Hypoid
oil SAE 80
1 (0.9-1.1)
1:1; 2.8:1
203 (8") alt 254 (10")
65 (143)
75 (165)
1 (0.9-1.1)
1.5 (1.3-1.6)
41
Wiring diagram
Fig. K1. Block diagram (same for all engines in this book)
A.
B.
C.
D.
E.
F.
Basic instrument panel
Panel with supplementary instruments (alarm, etc)
Panel with fuel gauge and rudder indicator
Flying Bridge instrument panel
Engine
Connection box with fuses
If panel D is fitted but not B, contact No. 1 from the Flying
Bridge instrument panel is wired to contact No. 2 from the
engine. However, contacts Nos. 1 and 7 should not be wired together when panel D is not fitted.
42
1. Contact (male and female) Red, 8-pole
2. Contact (male and female) Red, 8-pole
3. Contact (male and female) Black, 4-pole
4. Contact (male and female) Black, 4-pole
5. Contact (male and female) Black, 8-pole
6. Contact (male and female) Black, 8-pole
7. Contact (male and female) Green, 8-pole
Male and female contacts belonging together have the same
colour.
When only the basic instrument panel A is fitted, contacts 5
and 6 only are wired together.
Contacts left over should not be wired together but should
be insulated and hung up and protected individually. Cables should not be cut.
Fig. K2A. Wiring diagram. Engine
TAMD60A*, TAMD60B
1. Batteries. Capacity see ”Technical
data”
2. Master switch
3. Starter motor
4. Alternator
4x. Alternator (1600 W, optional equipm.)
5. Voltage regulator
5x. Voltage regulator (optional equipm.)
Must not be fitted to engine.
6. Fuses 50 A for standard alternator (80
A for 1600 W alternator)
7. Fuses 25 A (in both cases)
8. Oil pressure sender, engine
9. Stop solenoid
10. Engine coolant temperature sender
11. Oil pressure sensor (for hour meter)
12. Speed sender
13. Oil pressure sender – reverse gear
14. Oil pressure sensor
15. Pressure sender – turbo
16. Engine coolant temperature sensor
17. Starter cut-out relay (only TAMD60B)
* TAMD60A engines
The cable from terminal 105 connects
to the starter motor terminal 50 and the
cable from terminal 110 connects directly to the alternator terminal 61.
If the large alternator is used (1600W)
a cable connects from the voltage regulator terminal WL to terminal 110.
Cable areas are indicated in mm2 for all
wiring diagrams. The corresponding sizes in AWG can be seen from the table.
Relation mm2/AWG
mm2
0.75
AWG 19
1.5
2.5
4
6
10
16
70
15 (16)
13
11
9 (10)
7
5
00
43
Fig. K2B. Wiring diagram
TAMD70C*, TAMD70D, AQD70C*,
AQD70D
1. Batteries. For capacity see ‘Tech.
data”.
2. Master switch
3. Starter motor
4. Alternator
4x. Alternator (1600 W, optional
equipm.)
5. Voltage regulator
5x. Voltage regulator (optional equipm.)
Must not be fitted to engine.
6. Fuses 50 A for standard alternator
(80 A for 1600 W alternator)
7. Fuses 25 A (in both cases)
8. Oil pressure sender, engine
9. Stop solenoid
10. Engine coolant temperature sender
11. Oil pressure sensor (for hour
meter)
12. Speed sender
13. Oil pressure sender -- reverse gear
14. Oil pressure sensor
15. Pressure sender, turbo
16. Engine coolant temperature sensor
17. Relay box for air pre-heater
18. Solenoid valve
19. Flame glow plug
20. Starter cut-out relay (only
TAMD70D, AQD70D)
*TAMD70C, AQD70C engines:
Cables from terminal 105 connect to
the starter motor terminal 50 and to the
relay box terminal 4. The cable from
terminal 110 goes directly to the alternator terminal 61.
If the large alternator is used (1600 W)
a cable connects directly from the voltage regulator terminal WL to terminal
110.
44
Fig. K3. Wiring diagram. Instruments, basic instrument panel
31.
32.
33.
34.
35.
36.
37.
38.
39.
40.
41.
42.
43.
44.
Instrument lighting
Voltmeter
Oil pressure gauge
Engine coolant temperature gauge
Stop button
Time relay (not on TAMD60)
Holding current relay (Omitted on TAMD60 but green cable 2.5
from 35 is connected to + on 33)
Series resistance
Starter button
Indicating lamp (pre-heater, not on TAMD60)
Rev counter
Indicating lamp (start engine, not on TAMD60)
Key switch
Rheostat for instrument lighting. (Switch on earlier models.)
45
Fig. K4. Wiring diagram. Panel with supplementary instruments (alarm, etc)
51.
52.
53.
54.
55.
56.
57.
58.
59.
60.
46
Instrument lighting
Oil pressure gauge – reverse gear
Alarm separator
Pressure gauge – turbo
Extra switches (max. 5 A per switch)
Charging warning lamp
Oil pressure warning lamp – engine
Engine coolant temperature warning lamp
Siren
Hour meter
Fig. K5. Wiring diagram. Panel with fuel gauge and rudder
indicator.
71.
72.
73.
74.
75.
76.
Instrument lighting
Fuel gauge
Rudder indicator
Extra switches (max. 5 A per switch)
Sender, fuel gauge
Sender, rudder indicator
(The free, blue 1.5 cable should be connected to 104 on the
engine terminal box)
Fig. K6. Wiring diagram
Flying Bridge instrument panel
81.
82.
83.
84.
85.
86.
87.
88.
89.
90.
91.
Battery charging warning lamp
Oil pressure warning lamp – engine
Coolant temperature warning lamp
Extra switches (max. 5 A per switch)
Alarm separator
Siren
Instrument lighting
Switch, instrument lighting
Stop button
Rev counter
Starter button
47
Index
A
I
After-cooler ........................................................... 9, 33, 34
Air cleaner ...................................................................... 29
Anti-freeze ...................................................................... 18
Inhibiting ......................................................................... 37
Injection pump ........................................................... 36,39
Injectors .................................................................... 29, 39
Instruments ............................................................... 10, 11
B
Battery ................................................................. 19, 24, 39
wiring up (wiring diagram) ....................................... 43, 44
C
Charging pressure, turbo ............................................... 40
Checking, air cleaner ..................................................... 29
batteries .......................................................................... 24
coolant .......................................................... 12, 17, 18, 22
injectors .......................................................................... 29
oil levels ........................................................ 13, 21, 23, 24
starter motor, alternator ............................................ 32, 33
valve clearance .............................................................. 28
V-belts 22
zinc electrodes 22
Cleaning, after-cooler ............................................... 33, 34
air cleaner ....................................................................... 29
cooling system .................................................... 33, 34, 35
heat exchanger ......................................................... 33, 34
oil cooler ................................................................... 34, 35
Cooling system, capacity .......................................... 18, 38
changing coolant ................................................ 17, 18, 22
Cylinders .................................................................... 7, 38
Controls .......................................................................... 12
D
Draining, coolant ...................................................... 17, 18
engine oil .................................................................. 24, 25
reverse gear oil ............................................................... 31
Drive belts ....................................................................... 27
De-inhibiting ................................................................... 37
E
Electrical system ............................................ 19, 39, 42-47
Engine number ................................................................. 7
Engine speed ................................................................. 15
M
Maintenance, see Servicing ........................................... 20
Manoeuvring (Forward/Reverse) ................................... 12
Manoeuvring controls ..................................................... 12
Master switch ...................................................... 19, 43, 44
N
Number plates .................................................................. 7
O
Oil capacities ................................................. 21-23, 40, 41
Oil change, engine ................................................... 24, 25
reverse gear ................................................................... 31
Oil filters, change ...................................................... 28, 31
Oil pressure ........................................................ 38, 40, 41
Oil quality and viscosity ..................... 19, 21-23, 38, 40, 41
p
Precautions in case of frost ............................................ 17
Propeller shaft brake ...................................................... 17
R
Running .......................................................................... 12
Running-in ...................................................................... 15
Rustproofing (inhibiting) ................................................. 37
S
Seawater pump (impeller) .............................................. 35
Servicing ......................................................................... 20
Specifications (Technical Data) ................................ 38-41
Speeds ..................................................................... 15, 41
Starting ........................................................................... 14
T
F
Feed pressure ................................................................ 39
Feed pump ..................................................................... 26
Fuel filter, change ..................................................... 25, 26
Fuel, quality .................................................................... 19
Fuses .................................................................. 33, 43, 44
G
Glycol ........................................................................ 17, 18
Get-you-home device ..................................................... 17
Technical data ........................................................... 38-41
Turbo-compressor .............................................. 27, 36, 40
Type designations (number plate) ................................... 7
V
Valve clearance ........................................................ 28, 38
Venting, fuel system ....................................................... 26
W
Warming up (after starting) ............................................. 15
Weights ............................................................... 38, 40, 41
H
Hydraulic oil .............................................................. 19, 38
Z
Zinc electrodes ............................................................... 27
48
SI unit system
Units according to the international SI system have been used in this book. The earlier units are given after the SI units.
Power is given in kW (kilowatt)
earlier unit hp (horse-power)
Speed is given in r/s (revolutions per second)
earlier unit r/min (revolutions per minute)
Torque is given in Nm (newton metre)
earlier unit kpm (kilopond metre)
earlier unit lbf.ft (poundfoot)
Volume is given in dm3 (cubic decimetre)
earlier unit l (litre)
earlier unit Imp.gall (British Imperial gallon)
earlier unit USgall. (United States gallon)
Pressure is given in Pa (Pascal)
earlier unit kp/cm2 (kiloponds per square centimetre)
earlier unit p.s.i. (lbf/in2) (pounds per square inch)
Personal Information:
Name ........................................................................................................................................................................................
Address .....................................................................................................................................................................................
Tel. ............................................................................................................................................................................................
Nearest Volvo Penta Dealer/Service Workshop
Name ........................................................................................................................................................................................
Address .....................................................................................................................................................................................
Tel. ............................................................................................................................................................................................
Information-Engine:
Type of engine ..........................................................................................................................................................................
Serial Number ..........................................................................................................................................................................
Type of reverse gear/No. ..........................................................................................................................................................
Ratio .........................................................................................................................................................................................
Direction of rotation ..................................................................................................................................................................
Clutch with disengaging device, type/No. ................................................................................................................................
Ratio .........................................................................................................................................................................................
Direction of rotation ..................................................................................................................................................................
We reserve the right to carry out modifications without previous notice and for this reason the content in this book is not binding.
AB VOLVO PENTA
7731201-5
English 7-1979