1
Nomad Preliminary Manual
=
• Zaxcom Inc.
230 West Parkway Po mpton Plain s New Jersey 07444
Table of contents
Overview ........................................................................................................................... 3
Microphone preamplifier.......................................... ........................ .................
... ..... 3
Auto Trim . ................................. ........... ............................................................................. 4
Input limiters ...................................................................................................................... 4
General graphic user interface operation ... ............................... ........... ................. .......... 5
Powering Nomad .............. ............. ...................................................... ......... ...................... 5
Software updates ................................................................................................................ 6
Boot-loader programming ,..... " ..................................................................................... 6
Meters...................................................................... ............... .....................
. ... ......... 7
Home menus .............................. ........................................ ................................................ 7
Chann el Setup ....... ........ ........................................ .............................................................. 8
To ne Generation ................................................................................................................ 8
Main Headphone Monitoring (1/4 inch jack) ... .. ........... .............................. ........ ............... 9
Headphone 2 monitoring (3.5 mm jack) ............................................................................. 9
Recording .......................................................................................................................... 10
Media selection ....... ,..... ...... ....... .................................... ............................................... 10
Transport controls.......................................... ................ .............. .......................... 10
Primary card record ing .................. ............................................................................... 11
Mirror card recording ........................ ........................................................................... 12
Main Menu ............................................................................................. ........................... 13
Meta Data Menu ............................................................................................................. . 13
Slate Display .. ... .
. ... .. ......................... ........... .... ......... ................. ............ .............. .. . 14
Record Enables .................................................................................................................. 14
Fader Assign .................................................................................................................... 15
Card / Mirror Setu p Menu ................... ... ........ ...............
........... ....... ................. 15
Mirror CF mode .......... ......................................... .............. ........................... .............. 16
AUX REC MODE ........................................................................................................... 16
AIRMA IL ................................................... ..................................... .......... .................. 16
WR ITE .C5V FILE .......................................................................................................... 16
FOLDER ............................................................................................................. ............. 16
PRIMARY CF MENU ........................................................................... .......................... 17
MIRROR CF MENU ......................................................................................................... 17
Mode Menu ............................................................... ..................... ........ .......................... 18
I/O configuratio n.... .....................
................................... .. ..................................... 18
Memory Menu .................................................................................................................. 19
Nomad Engineering Setup . ............................................................................................... 19
Headphone #2 VOL ....................................................................................................... 20
Set ti me and date.............. ............ ............. ...................
.. ................................ 20
Zaxnet Setup ............................................................................ ... ............................... 20
limiter Enable ............................................................................ ... ............................... 21
Output Bus and Card limiter men us ............................. ............................................ . 21
Tra ck Names .... ............................................................. ..... ........................................... 22
Monitor memory names ............................................................................................... 22
Warnings
.. ......................... 23
.
.....................................
23
Input Levels . .................................................................
Internal and External slate level adjust ...........................
....................................... 24
Output Level s................................ .......... ..................... ............................................. 24
XLR 1-4 and TA5 1-6 output bus leve ls .. .... ..................
.. ...................................... . 24
Mono and tape out levels. .... .....................
............. ..................
............... 24
Prefader effects................... ............... ... ..........
.. ............................ ................. 24
Transport Keys (Shifted/U nshifted) ................................................. ............................. 25
Time Code ..... ...... ...................... ................ ....................................... ................ ........... .... 25
Bus Routing ... .. ........................ ........................................................................................ 26
Pre Fad er Listen .................... ........................... ..............................
.. ...................... 27
Com and Slate functions .................................................................................................. 28
ENGjEFP bag operation ........ ...... .. ............... ..................................................................... 28
10 cha nnel mix operation .. ........................................................................................... .. 30
Card operation ............................ .............. ................................................... ................... 30
Nomad pin outs ............................................ ..................................................................... 31
All lAS male input and output connectors ................................................................... 31
All XlR inputs and outputs .......... ... .......... .................... ..... ................... ....................... 31
Mono and Tape out ........... ...................... .................. ................ ......... .......................... 32
All Head phone Outs ............................... ..................................................... ................ 32
External slate mic in ................................... ................................................................... 32
Hirose power input ................................................................................... .................. 32
Specifications .... ......... ................................................................ ....................................... 33
2
Overview
Nomad is a new concept in location sound recording and mixing. It redefines the
function of bag audio syste m. A simplified user interface eliminates the need for
hardware trim controls, pan and PFlswitches. Nom ad eliminates any possi bility
of clipping analog inputs; it provides wireless time code transmission, wireless
IFB transmission, and wireless remote control to Zaxcom wireless un its. Nomad
also featu res a visu al slate and provides metering, mon itoring and mixing
capabilities far beyond any other current multi track mixer/reco rder
combination. All of this is in a package that is smaller, lighter and consumes up to
50% less power than current solutions .
Nomad can record up to 12 audio tracks and mix audio for a variety of
applications. While Nomad has been designed for use in the film and television
industries, its exceptional audio quality and feature set makes it a clear choice
for any application that requires high resolution audio mixing and recording. 10
analog inputs and 8 AES inputs may be mixed to 8 output busses as well as 2
sepa rate headphone output busses. The unit is designed to be the highest
reliability recorder available. Nomad records on all solid state media, it has very
low power consumption this makes the Nomad the best choice for location
sound recordi ng.
In addition featu res like Zaxnet time code transmission, wireless IFB
transmission, wireless microphone remote control, visual slate display, MP3
recording and wireless file transfer make the Nomad a unique produ ct that will
set a new standard for loca ti on sound recording.
Microphone preamplifier
Nomad contains six mic/line level inputs. Ea ch input is individually configurable.
A super low distortion and super low noise amplifier provides studio like
performance in a portable package. A hardware based high pass filter is used to
limit distortion due to low freq uency vibrations an d wind noise. Th e input
dynamic range is 135 DB. And each input utilizes two A·D converters to achi eve
the unprecedented dynamiC range. If enabled a soft knee compressor
automatically normalizes the in put dyn am ic range to a more typi cal 115 DB. This
compression system uses a look ahead archit ecture that provides the most
natural sound available in a location mixer recorder. Nomads input architecture
is a transformer free design. Transform ers contribute to a la rge amount of low
frequency distortion that is not desirable under any circumstances.
3
Auto Trim
Auto-t rim el imi nates the need for hardware trim knobs. The auto-t rim mod e is
enabled in the Mode selection menu. When enabled, auto-trim will route the
input trim fun ction to the menu knob based on the last fader knob that was
adjusted. In ma ny of the home menus an input meter with a floating diamon d
will show the current trim setting of the channel that will be adjusted by the
auto trim function when the encoder is adjusted. A blue LED indicator a lamp
located next to each fader points to the channel that is being adjusted by Autotrim. Wh en Auto-trim is not selected the channel setup men u is used to adjust
the input level of each of the six main input channels. The floating meter
di amon d indicates the relative position of the input trim adju stm ent.
Input limiters
When mixing for film and TV production it is desirable to record audio with the
most dynamic range possible. The proble m is that actors can vary thei r
performance in a way that is unexpected and can cause input clipping and limiter
distortion. In an effort to provide a quantum leap forward over existing mixing
technology Zaxcom designed Nomad so that the need to utilize the input trim
controls and input limiters, to prevent the input preamp distortion typical of
unexpected high levels of audio, is unnecessary.
Nomad has a very unique input structure. The input dynamic range of Nomad is
135 dB. Therefore it is impossible to clip Nomads input.
In practical use inputs are set so that a microph one input peaks at -20dB FS to lOdB FS as is the case in any typica l m ixer.
Nomad will allow an inpu t to exceed the typ ica l OdBFS range by 20dB (FS+20dB)
w ithout any risk of dipping. With 135 dB of input dynamic ra nge, 30 db of head
room and a floating point mixing system, the need f or any use of the trim co ntrol
during normal operation is elimin ated. Faders are all that is ne eded to control
the level of an input channel mixed to an output or record ed track.
Even though the traditional input limiter is not needed, a soft knee compressor is
provided on each mic/line input and each output and recorded bus .
4
General graphic user interface operation
All menu functi ons of nomad are accessed
by push ing in the menu knob
Adjustments are made by a combination of turning and pushing in the menu
knob. Pushing in the headphone knob will act as a back key taki ng Nomad back
on e level. Nomad's menu system is configured in the sa me way as a
conventional mp3 player. A right pOinting arrow associated with any menu item
indicates a path t o anothe r menu. Any selectable function will be highlighted
w ith a blue background.
Pow ering Nomad
Nomad is designed to be powered f rom external DC voltage. A nominal voltage
of 12 volts is recommended. The unit will draw approximately 500 milliamps at
12 volts. The maximum allowa ble input voltage is 18 volts. Nomad's internal
battery functions as an un· interruptible power source. If internal batteries are
loaded, six nickel metal hydride or lithium batteries man datory as the internal
power source.
Never use alka line batteries in the Nomad. They will only last a few minutes
and they will get very hot.
Nomad will keep the internal batteries charged as long as the internal charging
circuit is en abled in the engineering setu p men u. If non rechargeable batteries
are utilized the cha rging circuit must be disabled or damage to Nomad may
result. The charging circuit will take up to 24 hours to return the batteries to a
full charge. It was designed to keep the internal batteries ready for use when
external power is lost. Nomad's intern al battery can be quickly changed if they
are drained by continuous use.
Nomad will dynamically adj ust its powe r consum ption based on the amount of
inputs and outputs utilized . Due to nomads efficient design very little if any heat
is generated by nomad.
5
Software updates
The Nomad software is easily upd ated . The operating system is "brick" proof. To
update Nomad copy the current software from the Zaxcom web site to a
compact flash card . The card should have a FAT32 format from a PC/ MAC or
Zaxco m recorder product . Insert th e card in the mirror slot. With the power off,
press and hold the "* /lkey, wh ich is located between the headph one and menu
knob. Now switch on the power. After the display screen comes up the ...,11 key
can be rel eased . The Nomad will find the software update on the mirror card and
begin the update process . It is important to have a rel iable power source while
the unit is updat ing. The software version ca n be viewed in the about Nomad
m en u accessed in the main menu.
The boot loader searches for the first program file it finds on the card .
When placing a progra m file onto a card using a PC or MAC be careful to
delet e any older nomad program files on the card BEFORE co ping the
new program file t o the CF card. Th is will prevent the nomad from aCcidenta lly
finding the old program file inadvertently (even though it was deleted).
It may be wise to always format the CF ca rd with a MAC, PC or Nomad before
copying a nomad program file to the CF ca rd.
Boot-Loader programming
The Nomad boot loader (currently version 12) should never need to be updated.
If instructed by the factory, the boot loader can be updated by entering the
"advanced setup menu" from the ENG setup menu. Follow the in structions on
the Nomad screen to update the boot loader.
The boot loader (currently V12) is a sma ll program that runs wh en the unit
pow ers on.
It normally reads the main progra m from ROM and executes it.
If no program is fond in internal ROM the boot loader will attempt to boot from
a program on the CF mirror card automatically.
6
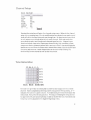
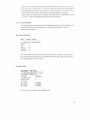
Meters
00:05:08:05 MON l
TL 1111 :02:03
-.
IHI
IH I
1111
1111
!Il11II.
Nomad m et ers are the most comprehensive of any location recorder there are
several selectable meteri ng options to choose from. Th e co lor of the meter
und er the · 20 level indicators will indicate the source type bei ng metered. Ught
blue for input, Green for output busses and Purple for recorded tracks. The t rack
name is indicated within the m eter itself to aid in chann el id entification. If a
comp ressor is en gaged a wh ite gain reduction ind ication will appear at the left
side of the meter jf the compression threshold has been exceeded.
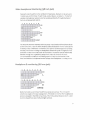
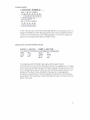
Home menus
ST OP
MONl
00:01:06:0980:05:08:05 "ONI
U.N! l OK
. -. . NII 1 QF n
..
Tlt1 ,t:: 13
Tt
,., :«Z'.«I
.,.~
~
.." .JIll
1 '~I ".' Im !:It . , !D~
·~
I"
I
--=
Press and hold the menu knob while pressing the "COM" button or the "SLT"
button will toggl e t hrough the metering menus. Eight different home menus are
available. Two menus can be stored for fast access, one un der the "CO M " and
one "SLT" keys. Repeated operation of the "COM" button or the "SLT" button
will cycle through the available home m en us.
7
Channel Setup
CHI SETUP
TYPE
Mle
DELAY
HPF
OFF
OFF
PH ASE
NORMAL
[ t LIM
PHANTOM
OFF
OFF
OFF
HOTCH1
••
.,.
.,.
·'. .i
Pressing the setup key will enter the cha nnel setup menu. When in the channel
setup menu, pressing any ofthe six multifunction keys located near each control
knob will select the input channels one th rough ten . An input meter is provided
in each setup menu to help adjust trim in each channel. Push and rotate the
menu knob to select and cha nge each channel input fun ction . Channel input
functions include: input trim, input type, channel delay, high pass filtef, phase,
compressor lim ite r, phantom power select and notch filters. Use the head phone
back button to return to th e home menu. Notch filters have separate On/Off and
frequency adjustments. Notch freq ue ncies can be entered by utilizing the
fun ction keys on the nomad as well as the menu knob.
Tone Generation
R3 R4 s e T
x oUT1
X 0 UT2
X 0 UT3
X 0 UT4
X 0 UT5
XO UT6
AUX BUS ASSIGN
Noma ds tone generator is ind ividually ro uta ble to each output and recordable
channel. Tone is assigned by selecting a tone cross point in the bus menu. A ''1''
indicates the tone cross point column. To enable tone generati on hold down the
menu knob, the n press the setup button. Pressing and holding the setup button
for approximately one second will also ena ble or disable the tone. Tone level and
frequency ca n be adjusted in the Engineering Setup menu.
8
Main Headphone Monitoring (1/4 inch j ack)
Nomad's main headphone has 12 Monitor Memories. Nomad ca n be set up to
monit or any combin ation of card tracks, output busses, or returns. If selected
wireless microphone receivers can be monitored di rectly through the Zaxn et
System on Nomad 6, 8 and 12.
1
2
4
3
5
6
7
8
I ICRD
L
OUT
X
RET
J ICRD
X
R
OUT
RE T
J ZAXHET
To setup the monitor memory selection press menu knob and headphone knob
at the same t ime. Use t he menu kno b to select the desired monitor cross po int s
to change. Any combination of monitor cross pOints can be engaged depend ing
on user preference. Pressing the headphone switch will cycle thro ugh all of th e
available monitor m em ories. Each of the mon itor memories can be ind ividually
labeled through the engineering setup menu. Nom ad conta ins the most
comprehensive headph on e m onit oring syste m of any locat ion sound mixer.
Press and hold the headphone knob to escape the headphone 1 routing menu .
Headphone 2 monit oring (3.5 mm jack)
i
- X
RET
i
IeRO
OUT
R
HPH 2
Nomad provides a seconda ry headphon e stereo output bus. Th e cross point
selectio n is made in the bus routing m enu . The level control for the headphone 2
output is located in the ENG setup menu. The menu above shows output s 1 and
2 sent to head pho ne out 2 left and right iso lated.
9
cording
Media selection
Nomad current ly works best with 32 gig 133x CF cards. Sandisk, Transend,
Kin gston and Delkin cards usu ally work well with Nomad. Con tact you r dealer to
get recommendations on the best memory card s to use. Because there are 100s
of ca rds available and the list constantly changes contacting the dealer is the
best source of card information. Pur chasing higher performance media will not
increase performance and may not be compati ble with Nomad.
Transport controls
Record, Stop and Play are always di rectly available by pressing the corresponding
keys on th e nomad control panel. The functions are either shifted or un-shifted
depending on the state of the transport key fun ction in the Engin eering Setu p
m en u.
Nomad factory default is set that the TC, Automix and Zaxnet buttons primary
function direct entry non~shi fted functions. Tto go into record, stop or play you wi ll
have to hold down the menu key, as a shift key, then press the corresponding key.
Nomad will allow the REC/ STOP/PLAY keys to be un-shifted to provide d irect
access to their functions. Meaning if un-shifted is selected and you tap the record .
stop . or play keys their functions will access immed iate ly. In addit ion if the unshifted is sel ected to then access t he Te, Automix, and Zaxnet menus become
shift ed and you will have to hold down the men u button before hitting these keys.
If the transport functions are shifted, they are still accessib le by holding the
fu nction keys f or about 1 seco nd to activate th e function.
to
Primary card recording
PRIMARY CF
DELETE LAST SEC
ERASE CUR FOLDER
FORMAT CF CARD
PRIMARY FOLDER
fOLDER
> XlO2
> XU03
> XU""
SIZE
202 M8
20J til
2011 Ie
....
265 lIB
206 It!
",.
'118 ..
"05
XIII7
2117 HS
SEes
22
•
",.
25
2.
27
"
Nomad is unlike any other recorder. The Nomad 4 and 6 ca n record to t wo Compact
Flash cards at the sa me time. The Nomad 8·12 can record to two Com pact Flash
cards and either an external USB record ing device or to internal m icro SD card at
the sam e time.
The Primary media uses the Zaxcom MARF file system . The advantage to this is that
any power loss to the system while in record will not result in a loss of recorded
audio as is common to all other portable recording systems. Nomad automatically
closes all open files at the point the audio recording was interru pted with no loss of
audio up to that poi nt. The Primary media while using a proprietary file system is
100% compati ble with mac or PC by lJtilizing the free file conversion utility
Zaxconvert. This utility may be downloaded from www.zaxcom.com . The mirror
card will record t he files as a BWAV file.
All recorded files are directed to individual folders . The prima ry folder m enu allows
for a recording folder to be selected and erased. Holding the stop key while the
Noma d is in stop mode will also allow for the deletion of the last recorded segment.
The primary and mirror folders can be different or t he same . If select to be the
same then th e mirror audio will be the same as the audio currently being recorded
on the primary media .
Note all primary and mirror cards m ust be formatted by Nomad before use.
Curren tly 32gig cards are the largest r eco mmend for use in Nomad. Check with
Zaxcom for a current update on this restriction.
II
Mirror cord recording
rUR 0
c
START SEC
1
999
END SEC
BWA U ~lOHO
FILE TYPE
FI LE RESOL UTION 24 BITS
TC OFFSET
g~s
FORHAT MIRROR CARD
>
The mirror CF menu controls the recording of the mirro r CF card . Th e mirror ca rd
wi ll record from the selected start segment to the selected end segment. The start
segment will automat ically increment wit h each new reco rdi ng of the primary
media. The file t ype and th e file resolution are set in the me nu. Th e type of fi le and
resoluti on reco rded is usually determined by post product ion. Broadcast Wave poly
24 bit is the most common format. The mirror card is formatted as FAT3 2. All files
reco rded in the mirror d rive is fully comp atible will all M ac and PC platforms. All
new m irror card must be formatted in Nomad before use. Nomad can currently
handle any size card up to a 32 GB card.
The mi rror card is generally used as a deliverab le form at to post production.
M irror recording has two operational modes. It can be set to mirror cont inuou sly
(CONTINUOUS) or only when the Nomad is in st op mode (ON) . Contin uous mirror
means when Noma d's primary card is recordi ng the mirror card will record at the
same t ime. Depending on the t rack counts the mirror card may lag beh ind a bit . Not
to worry after you stop the prima ry card fro m record ing the mirror card will catch
up. The ON mode mean s that the m irror recording will st art only when the prim ary
card is st opped . This is useful when h igh track cou nts are mirrored and recorded
fil es are sh ort du ration.
When mirroring you mu st set t he mirror folder number to
the folder you want to mirror. This is not necessarily the
same as the primary folder. If the primary folder and the
mirror folder are not t he same number the wrong audio data
may be mirrored.
12
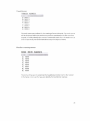
Main Menu
MA I N MENU
r
SLATE DISP LAY
REC ORD EHAB LES
FADER ASSIGH
MY HOMAD (CARD/H IRROR)
MOD E
MEMORY STORE/R EC ALL
ABO UT HOI1JlD
ENG SETUP
)
)
)
)
)
)
>
)
From a home meter screen, press the menu knob t o enter the main m enu
screen. Please note from some meter scree ns you may have to push and hold
the menu knob for 1 second to enter the main menu .
Met a Data M enu
META DATA
SR:48000
TC:23. 98 PRE : OFF
AIRMA IL OH
NI H 1 OF 20
TL 01:02 : 03
---
FOLDER 2001 (5 s eg s)
S :123A
H: I LOUE HOMAD
T: 100
This menu displays key Nomad operat ing parameters as well as allowing for
entry of metadata. Scene take and note metadata are selected with the menu
knob and selected to enter the text entry menu. When a scene name is entered
th e take number will automatically go t o a value of 1. Whe n any text is entered
the "OK" may be selected or press th e headphone knob to take the new selected
name. Meta· data for any recorded segm ent or the next recorded segme nt can
be edited f rom t he meta-data menu.
13
Slate Display
This display is used to show a visual time code slate to a camera. Pressing the
me nu kno b will freeze the displ ay and cause a 1 frame long beep tone in the
audio on any bus that is selected for output tone . Th is is used to provide sync for
the camera to match picture and sound . The slate numbers are intention ally up
side down to make it easy for a cam era person to shoot the nu mbers correctly.
Record Enables
RECORD ENABLES
1
2
345
6
7
8
IX X X X XIXIXIXI PRI
IX X
I I I I' II R
I
This menu enables the tracks that are t o be recorded on each media. On Nomad
8 and 12, three media can be recorded at the same time . For a track to be
recorded to the mirror or aux media it mu st also be re corded on the primary
media. Simply said you ca nnot mirro r a track that is not being recorded t o the
Prim ary CF card . The example pictured above shows 8 tracks recorded to the
pri mary media with 2 tracks each recorded to th e mirror and aux media. When a
sa mple rate of 88.2 KHz or 96KHz is selected only 8 Prima ry tracks are allowed to
be recorded. The record en ables can not be ch anged while the Nomad is in t he
record mode.
14
Fader Assign
FADER ASSIGN
1
2
a
4
S
6
7
8
FAD1
IA
FAD 2
A
FADa
A
FAD4
A
I
T
IA A A A
FADS
FAD6
The 6 hardware fad ers can be routed with the fader ro uting matrix. Go to the
main menu and select "fader assign" to enter the matrix. Analog inputs 1-6,
digital inputs 1-8 and analog trim controls can be routed to the faders. Ma sters
ca n be m ade in order to better con trol surround microphones . Because the
Nomad has a digital mixer no actu al audio is going through the Nomad fader
controls allowing for complete flexibility for the mixing hardware faders. Return
inputs 7-10 may be used 35 line level inputs and are mixed with the virtu al faders
in the 10 chan nel mix home menu and cannot be assign ed to a hardware fader.
The pictured example above shows fader 1-4 controlling the fader functions of
the channels 1-4. Fader S is controlling the input trim of channe lS and fader 6 is
a master for chan nels 1-4.
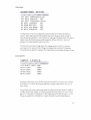
Card I Mirror Setup Menu
MY NOMAD
AUK REC MODE
OFF
AIRMAIL
OFF
IIRITE .CSI1 FILE
FOLDER
PRIHARY CF MEttU
MIRROR CF HEHU
AUK REC MEHU
AIRMAil HE....
>
>
>
>
>
This menu controls the recordi ng functionality of the Nomad . Each of the
recording media can be accesse d and controlled . The Airmail function for the
wire less delivery of MP3 files is also accessed through this menu.
15
Mirror CF mode
Mirror mode enable is f'lt the top of t he menu . When enabled, the Nomad will
mirror its files to the mirror compact flash card. Two mi rror modes are available.
The "ON " mode mirrors files when the nomad is in stop mode. This is ideal for
"scene and take" style of product ion. The "CONTI NUOUS" mode mirrors
whenever the p rimary card is recording and is best for continuous record ing like
that of reali ty television . Th e segme nts to mirror are selected in the "M IRROR CF
,VlE NU" . (See recordi ng section of this manua l for more information)
AUX REC MODE
When enabled, the Nomad will mirror its files to the aux media. This is only
ava ilable on Nomad 8 and 12. The segments to mirror are selected in the "AUX
REC MENU ".
AIRMAIL
This will enable the t ransmission of MP3 files over w ifi connections. Sec
"AIRMAil" menu for details.
WRITE .CSV FILE
This funct ion will write a metadata list file to the mirror drive. It should be done
after the last file is recorded so it can contain all of the info rmation on the files
recorded for post production.
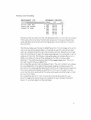
FOLDER
FOLDERS
FOLDER
SI ZE
SEGS
~
X002
X0 03
X O~~
X005
X006
XO O7
X008
202
203
2 04
2 05
206
207
208
HO
MO
MO
MO
MO
MO
HO
22
23
24
25
26
27
28
This menu allows multiple memory ca rd folders to be created. A new folder can
be chosen for each new job or day of production .
16
PRIMARY CF MENU
PRIMARY CF
DELETE l AST SEC
ERASE CUR FOLDER
FORHAT CF CARD
>
>
>
This menu allows for the co ntrol of the primary Compact Flash ca rd.
Delete last segment erases the last recorded segment. Th is funct ion is not
recomm ended as erasing f iles can create diffe rences between m irrored media
and the primary ca rd . Erase current folder clears only the current folder leaving
the other folders untouch ed . Format CF card will completely erase the contents
of t he card. Nomad will ask jf you are su re as this function erases primary card
contents that can not be recovered.
Please note all new cards must be formatted by Nomad with the fu nctio n before
record ing is allowed. The ca rd form at is Zaxcom MARF. This format is not FAT32
compatible and jf you want to use it with a Ma c or PC pl atform it must be read
with Zaxconvert.
Ple ase see recording section of this manual for more information regarding
primary recording
MIRROR CF MENU
MIRROR CF
1
START SEC
END SEC
999
BWAU HOHO
FILE TYPE
FILE RESOlUTI OH 24 BITS
TC OFF SET
Oms
FORHAT HIRROR CARD
>
This menu controls the Mirror CF functions. Start and end segment controls
which files are mirrored from the primary card to the mirror card . The segment
end is automatically incremented with each new record ing to the primary.
Please see the recording section of this manual for more information regarding
mirror recording.
J7
M od M nu
F
M
I"
,::·'F
486 :; ~;
; .. "i P.(u'l'.: (.IH
ND!Hl lh.
GPI REMOlE ROll OFF
SLA TE SOURCE
PRERECORD
AUTO TRI M
INTERNAL
OFF
OFF
M[X8
OFr
PAN 1/2
orr
~p J
;~ £ /!G T[
::; U. I t
mIl l
':U L! CF
HIX 8
PAN 1/2
PAH 3/11
! l~ -: J:!'{((l
OFF
OFF
PH E~ECOR D
IIUTO TRIM
I/O COHF Ie
OFF
IE""
)
OFF
OFF
OFF
Th is m enu is use d to set the operating modes of the Nomad . Sample rate,
transport control. GPI remote record ing control, slate microphone sou rce, prerecord time, auto trim control, I/O configuration, Mix 8 extern al fader enable
and PAN men u routing controls are all fou nd in the mode menu.
The Pa n ro uting enables and selects which pair of outputs will be assigned to th e
two channel ENG pan routing feature. This mode would most likely be used
when sending two channels of audio to be recorded di rectly to camera. When
select ed each pan pair will act as a left/right output pair. Example: if pan 1/2 is
selected output bus 1 will be the left out and output bus 2 will be th e r ight out .
I/o configuration
I/O CONFIGURATION
RES
AES
RES
AES
1/2
3/1a
ON
OFF
5/6
7/8
OfF
RET 3/1a
AHnlOG 5/6
OFF
0"
0"
The fa ct ory defau lt is set up that so that Nom ad can handle one pair of AES
inputs. If more than one pair of AES inputs is required, tha n the Input
configuration must be changed in order t o make the AES add itional resources
available . The I/O co nfiguration m enu is used t o select between AES inp uts and
other nomad resources. Simply put for Nomads proce ssors to handle the
additio na l AES cha nnels then oth er input items may need t o be deactivated.
Eight sel ections are provided to give you various options of AES input s, tape
return 3/4 and ana log inpu t 5/6. You ca n choose wh ich option works best for
you. To access the I/O configuration menu, en ter the main men u, select the
mode m enu, and then select the I/O menu. The I/O configuration will not be
altered after a factory reset of Nomad.
18
Memory Menu
MEMORY
~.
STORE 2
STORE 3
CLEAR FADERS
RECALL 1
RECALL 2
RECALL 3
RECALL FA CTO RY DEFAULTS
STORE TO MIRROR CF
>
>
>
>
>
>
>
>
This is used to save and recall the user settings. Three memori es are provided. A
factory default memory is also provided to restore the Nomad to its factory
defa ult settings. If factory defaults are reca lled you will need to reset the user
settings.
Nom ad allows for settings to be saved to the mirror compact flash card. This will
allow for settings t o be exchanged between multiple Nom ads.
Nomads internal settings are stored in flash memory contained w ithin Nomad.
External media is never necessa ry to maintain nomad memories.
Nomad Engineering Setup.
ENG SETUP
ENG SETUP
SET TIME DA TE
ZAXHET SET UP
LIMITER ENABLE
INPUT LI MI TER
OUTPUT LIMITER
CARD LIM ITER
TRACK NAME S
MON ITOR HAlES
> INPUT LEUELS
> OUTP UT LEUELS
> LCD BRIGHTNESS
> LEO BRIGHTNESS
> TRANSPORT KEYS
> TOlE FREQ
> TOHE LEUEL
>
>
>
>
WARNIHG S SET UP
0
0
SHI FTED
o Hz
OdB
Nomad engineering setups are designed to configure the device for your speCific
applicatio n. To enter the setup menu go to the ma in men u and select the "ENG
SETUP" me nu.
Thi s men u sets the input and outp ut levels as well as other engin eering
parameters for Nomad . Use the me nu knob to scroll th rough all of the
19
engi neering parameters. All of the parameters will not fit on the screen at one
ti~e so the screen wi!! s:::,cl! as you move!O lh e lower parameters. Pressing the
men u knob will select the cu rrent paramete r and highlight it. Press the men u
knob to select the function . That function will be high light with a blue
. ;J ckground on the menu screen. Rotat e the menu knob to change the selected
.JJrameter. Press the headphone knob to exit th e function.
t·
:et:t'[phone #2 VOL
This will adjust the output level of the Headphone #2 output (3.5mm) jack. This
jack IS designed to feed a headp hone. It can also be used as a separ ate
un balanced output bus.
Set time and date
SET TIME DATE
ttonth
oay
Hours
Hinutts
Stconds
,
••
Noma d co ntains a battery backed real time clock an d cal en dar. Th is is used to
jam the time code and user bits. The dock keeps the time code runn ing wh en
the Nomad power is switched off.
Zaxnet Setup
ZAXNET SETUP
TRANSPORT SlA UEO
n: FREQ
TK AUDIO BUS
GROUP COD E
n:: POWE.R
RX FRE Q1
RX FRE02
RX FREQa
OFF
2 _403GHz
1
1
,
2 _403G Hz
2 _403 GHz
2. 483GHz
This feature is currently under development
211
Limiter Enable
LIMITER ENABLE
CARD LIMITER EHABLE
1 2 3
4 5
6 1 8
I I I I 19-t I I I
BUS LIMI TER EHABLE
123456
I I I I I I I
In this menu you can choose which card track and wh ich output bus you wan t to
engage the limiters on. Select the cross point in the matrix to enable the limiter.
The limiter is imp lemented as a soft knee compresso r. The limiters settings are
adj usted in the output limiter and card li miter menus.
Output Bus and Card Limiter menus
OUTPUT LIMITER
DECA Y
THR[SH
"'"
I . OdB
RAT 10
CAl ff
1. 0:1
".
CARD LIHITER
-
DECAY
THRESH
On'
RATIO
II . OdD
1. I:'
CAIH
Od.
The output bus and ca rd limiter menus allow for the adj ustment of
limiter/Com pressor parameters . The adjustments are on a global basis, mea ning
that all output or card cha nne ls that the limiter is engaged on will operate on the
same settings that are set up in this menu. Nomad limiters have a factory preset
setting. But the attack, decay, threshold, ratio and gai n ca n be adjusted to
provide your desired effects. The output limiter only affects the selected 6 main
output busses. The Card limiter tracks affect only t he tra cks that are re corded on
the CF card med ia.
21
Track Names
TRACK NAMES
2 , CARO 2
3, I:ARO 3
~, I:ARO 4
5 , I: ARO 5
\I: I:ARD
I:ARO 7
8 , I: ARD 8
9, I:ARD 9
"
•
The track name menu allows for t he naming of reco rde d tracks. The track name s
will be displ ayed within the card meters and are contained in the file meta data
so post can easily identify the source of a record ed track. After the track name is
entered you must pre s OK for Nomad to accept t he inputted name.
Monitor m emory names
HON MEM NAMES
2: 110H2
3:
4:
5:
6:
7:
8:
9:
MOH3
MOH4
MOH5
MOH6
MOH7
MOH8
MOH9
Th is men u allo ws you to customize the headphone monitor na mes th at appear
in the home screens so that you can identify the headp hone memory.
22
Warnings
WARNINGS SETUP
INT BATT THRES HOL D 5. 5U
EXT BATT WARNING
OFF
EXT BATT THRESHOLD 10.5U
HP BEEP LOUDNESS 20
HP BEEP BATTERY
OFF
HP BEEP LOW DI SK OFF
HP BEEP REC /STOP OF F
The Warnin gs setup menu allows for customiz ation of the Nomad warn ing
system. Wa rnings a provided for battery and external power level as well as
record ing time availabi lity. Intern al batte ry warning should be set to 7.0 volts for
Nickle meta l hydride batteries and 8.0 volts for lithium batter ies. External
battery threshold shou ld be set to 10 volts.
The batte ry threshold settings select the voltage level at which the batte ry
warnings sta rt to appea r. This setting also changes the scalin g of the battery
meter graph ic to adj ust for battery ch emistry based on t he dead voltage setting.
Input Levels
INPUT LEVELS
EXT SLATE LEUn
RET1 LEUEL
RET2 LEUEL
RET3 LEUEL
RET4 LEUn
OdB
OdB"
OdB"
OdB"
OdB"
The input levels men u controls the levels fo r the slate mic inputs and the return
level inputs. The return level inputs will effect inputs 7,8,9 and 10 . Retu rn 1-4
input adjust
These inputs are continuously adjustable to accept a line input level of +4dBu to
-15 d8u. Since these inputs can also be used as line level inputs the ret urn level
adjustment provides a calibration for the input level of the Rl-R4 inputs. (These
inpu ts are sometimes referred to as inputs 7-10 wh en used to feed busses )
23
Internal and External slate level adjust
The internal slate microphone and extern al input connector input level adjust is
continuously adjustabie. Set the level to a comfo rtable operating level. (It IS
normal for the internal slate audio to have a high no ise floor. Th is is due to the
audio routing within the Nomads digital wiring section .)
Output Levels
OUTPUT LEVELS
XLR
XlR
Xl R
lAS
lA S
lAS
OU12
OU13
OU T4
OU11
DUl2
OU1 3
IRS OU14
lAS OUT5
"dOu
OdBu
..Bu
" Bu
"Bu
IJdBu
""Bu
ItdBu
The output level menu will allow the Nomad outputs to be selected at 0, -10 and
-35 dB levels.
X1111-4 and TAS 1-6 output bus levels
The 6 main output buses can each independently be selected to three outpu t
levels. OdBu (line level), -10d Bu (tape / con sumer level) and -35d Bu (mic level ).
For example, output bu s 1 ca n feed the XLR out at OdBu and the TA5 at -35 at the
same time.
Mono and tape out levels.
These outputs are continuously adj ustable in 1 dB steps from -12dBu to +21dB u
Pre/oder effects
When a channel is routed pre-fad er to a card track or outpu t bus, it is usually
desirable to route it w ith out effects like notch filters and co mpressors. This
se tting will allow you to assign the effects to a pre-fade tra ck. If you select this
function to be on th e effects will be assigned to all pre-fade channel it is a glob al
function.
24
Transport Keys {Shifted/Unshifted}
Nomad factory default is set t hat the TC, Auto mix and Zaxnet buttons pri mary
fu nction are just that. And to go into record, stop or play you wi ll have to hold
down the men u key, as a shift key, then press the corresponding key. Nomad will
allow the REC/STOPjPLAY keys to be un-shifted to provide direct access to their
functions . Meaning if un-shifted is selected and you tap the record, stop, or play
keys th eir func tions will access immediately. In addition if the un-shifted is
sele cted to then access the Te, Automix, and Zaxnet menus beco me sh ifted and
you will have to hold down the m en u button before hitti ng these keys.
Time Code
TIME CODE
ENTER TIME CODE
~un[1I DI
00:00:00:01 CEil
00:00:00:04
Ie
B0:00:00:00cEH DB
JRM
"If
J~1t
11'1:1
.... "'
[ litER )8
TI ME CODE SETUP
I C RIllE
IC DurUYfo
Ie OUI
IHCRU1(MI U811S
D9 UTE STYI[
23.98
GUI:.RAIOIt
;['-;AATOR
OfF
[U ,",on
JflK 11 Il10
Nomad' s time code input and output are located on th e left sid e of the ch assis.
Two BNC connectors are used to connect nomad directl y to broadcast came ras.
There are three t ime code menus available under the time code key.
Press the TC key to enter the first tim e code menu . Press the t ime code key
again to enter the other t ime code menus. This first menu shows the current
time of Nomads internal time code ge nerator. Both the runn ing t ime code and
user bits are displayed. Nomad's t ime code reader will show incom ing t ime code
data as well as the rate of the incoming time code . This menu is used to jam
incom ing code as well as ja mming to Nomads internal time code generator.
Time code can also be jammed from Zaxn et if the system is in use.
The second time code men u allows for direct numeric entry of time code values.
Rotate th e menu knob to select the desired entry position. Then use the Nom ads
function keys to enter a numeric value. The " COM" (7/9) and "SLT" (8/0) keys
are used to enter two num bers each as indicated by the front panel overlay.
Once a time code value is entered press t he back key to exit the function.
The thi rd time code menu is used to set the operat ion al mode of the nomad
time code system. Nomad supports all standard broa dcast t ime code rates. Both
free-run and recorder run generator modes are also supported.
25
Nom ad conta ins a batte ry backed rea l time clock. Th is dock is used to maintain
;u!1ning time code. The battery should be changed every 2 yea rs in order t o
ma int ain the ;:apability.
Bus outin&
BUS ROUTH('O
w
MOHO OUT
TAP E OUT
CARD MI;>; 1-4
CARD MJX 5- 8
CARD HI X 9- 12
HEADPHONE 2
PLAY OUTPUT ROUTE R
PLAY HPH RO UTER
>
>
>
>
>
>
>
>
Press the Bus key to enter the bus routing men u. This menu provides access to
the routing of any inp ut to any output as well as the record card routi ng. When
in the bus menu press the bus key again to toggle through the additional bus
menus.
1
2
xx
3
4
5
6 R1 R2
X'X X X
P
P
OUT3
P
i
r
OUT1
OUT2
P
p
Dun
OUT5
OU16
ANALOG INPUTS
Nomad inputs are indicated along the top row of the routing display. Nomad
output buses are indic ated by the column along the right side of the dis play . Use
the menu knob to select the des ired cross point. Pressing the menu knob will
toggle th rough the available cross points . Each bus menu will have different cross
po int s available . Some menus allow for phase inversion of input cross points.
Phase inversion is ava ilable by pressing the St ar key whi le in th e bus menu. This
will enable the selection of phase inverted cross points . Since phase inversion
cross po int s are sel dom selected th is system allows for a fa ster select ion of
common pre-fader and post-fader cr oss po ints. An "X" indicates a post fader cross
point. A lip" indi cates a Pre Fader cross point. An X or a P with a line over it
represents that the ph ase is inversed. Bus routing is fully cross faded so select ion
may be changed during th e nomad recording process .
26
a
1 2
&~jX
4 5 6 7 8
x
1
,
XX
XX
XX
2
3
~.
DI GITAL
•s
!-.
,
>~-
ASSIGN
Som e bus point selections may be indicated with the color red. This indicates
t hat cross poi nts are not available in your current configu ration. Go to the Input
Configu ration Menu to ch ange the digita l input sel ect ions.
Pre Fader Listen
STOP
0 1 :56:40:28
12- - - - AIR MA IL ON
.
1
MI R10F20
TlO1:02 : 03
2
3
11
5
6 R1 R2
I I I I I I I I
•
lOUT
Press the PFl key to ent er to pre fader list en function. The PFl monitor ch annels
will be in dicated on the home screen by a flashing PFl display. The home screen
will show th e channe ls that are selected for PFl. Use the six multi function keys
to select the desired mon itor channel or chann els. Holding one of the 6 channel
keys for .5 seconds will add a channel to the PFL mix. Qu ickly pressing the 6
ch annel keys will isolate the channel to be monitored.
Pressing th e headphone kn ob will restore normal headphone mon it ori ng
select ion .
27
Com and Slate functions
,
-- - ---r- .UT1
R3 R4 s e T
I
~
___
X
0 UT'
0 UTl
I
0UT4
X
X
0UTS
0
U"
AUX BUS ASS IGN
The com and state keys are used to enable th e internal or ext ernal slat e
m icrophone. Aud io is routed to the selecte d destinations by the bus rout ing
menus. These keys will ro ute the audio fro m th e slate microph one to th e
selected dest inations. Slate cross points are ind icated with an "S" at the top of
the routing menu column. Com cro ss points are indicated with a "(" at th e top of
the routing menu colum n. The example shows the sl ate routed to outputs 1·2
and th e com routed to outputs 5·6.
Holding down the menu kno b and pressing the Com and slate keys will select
differe nt home menus. If the menu knob is not he ld down slate or com audio w ill
be rou ted t o ther e destinations when t he keys are pressed. Selection of inte rnal
or external slate audio is designated in the mode me nu. The sl ate microphon e
gain is controlled in the ENG setup m enu.
If the extern al slate input is used, balanced dyn amic micro phon es as welJ as S.O V
powered t wo wire mic rophones are supported.
2X
ENG/EFP bag operation
STOP
HON 1
00:01:06:09
AIRMRIl OH
H1R10F20
-~,..... TL ., : .2 :03
·n
·n
1
2
3
_
5
6 R1 R2
I I I I I I I
HPUT 6
I
lOUT
r
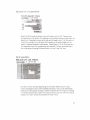
Select the EN G Hom e menu w ith the 8 chan nel routing matri x. This menu shows
output busses 1 and 2 as well as t he input meter indicating the auto trim
function.
The pan routing m atrix reflects the bus routing o f busses 1 and 2 at all times . If
PAN 3,4 or PAN 5,6 are enabled in th e mode menu, utilizing the pan routing
se lection in the home men u will ro ute bus 1,2 and the other busses that are
select ed in the mod e m en u.
To use the pan function, press the bus key to enter the PAN routing sel ections -
the pan matrix will th en be highlighted. Rotate the me nu knob to select th e input
you w ant to PAN. Pressing the menu knob will assign the input as right, left or
cent er to each inp ut pair that was selected in the mod e menu.
Th e PAN rou ting selection simp ly is a short cut and controls the cross poi nts in
the output bus routing menu. It can only route post fad er analog inputs to the
Nomad out put busses. Any other routing must be done in the bus routing m en u.
When in the ENG home menu the "bus" key must be pressed twice to enter the
bus routing men us.
If the pan cross point color is black this indicates th at all bus ses under contro l are
co rrectly reflected by the L,R, or C cross point character in the 8 bo x pan matrix.
If the cross point color is red the Nomad is indicating that one or m ore of the
controll ed bus pairs is not correctly routed. Reselect ing the pan cross po int will
clear the routi ng error condition .
29
10 chan . t?1 >nix operation
:e>
:08:05 'ION 1
Tl U1 : 82 :03
Inl
I II I
I II I
!IJltlI.
I II I
.i~
Select th e 10 channel mix home me nu with input meters 7-10. Th ese meters
incorporate 4 virtual faders. Pressing the men u knob will select an input fa der for
adj ustment. Pressing the menu knob will cycle through inputs 7·10. Using the 6
input knobs and the 4 virtual faders 10 channels can be ea sily mixed with no
need for external hardware fa der panels . Virtual fade rs 7-10 are f jxed and are
not assigna ble,lnput trim adjustments for channels 7-10 are accesa ble und er
the setup key by selecting 7,8,9 and 0 wit h the "co m" and "sit" keys
Ca rd operation
00: 10:27:28 MON 1
1::.:tb~TL
01 : 02 : 03
Nomad records 4-12 tracks depending on the model. When the card track
mete rs are displayed each of the available record ing tracks ca n be individually
mete red. If a line appears throug h a meter it indicates that the track is not be ing
recorded on the primary media. The tracks can be tu rned o n or off in the record
ena ble menu wh ich can be found within the main me nu.
Nomad pin outs
AES in/out OBiS male small profile
(Use twi sted pairs where possible)
1
2
3
4
5
6
7
8
9
10
11
12
13
14
15
RX34+
RXI2+
TX56+
RX78+
RX56+
TX12TX I2+
GROUND
TX 34TX34+
RXI2 RX34TX5 6RX78RX56-
All TA5 male input and output connectors
1
GROUND
2
CHA+
3
CHA-
4
(H8+
5
CH B-
All XLR inputs and outputs
1
2
3
GROUND
CH+
CH-
31
Mono and Tape out
Tip
Ring
Sleeve
Output
No con nect
Gro und
ALL Headphone Outs
TIP
RING
SLEEVE
CHA
CHB
GROUND
External slate mic in
Tip
INPUT+
Ring INPUTSleeve
Grou nd
(biased to SV)
(biased to SV)
(This is a ba lanced input. It can be used with dynamic micro phones. It can also be used
unbalanced with powered low voltage microphones.)
Hirose power input
Ground
+8 to l8V
Pin 1
Pin 4
32
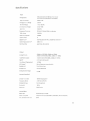
Specifications
Input
Ana log Inputs
6 M ic/Une·level w ith 48V phantom power
4 nne·level (c Olm er.! re tum or ml~ inputs)
Input Connl'Ctors
6XlR, 2 TAS
An;tlog Dynamic Range
115 dB
Mic-level Range
-56 to ·26 riBu
Ll ne·levellnpu! Range
·10 to +8 dB
DIsto rtion
O.C1015~
Frequency Response:
20 Hz to 22 kHz ilt 48 kHl sample rate
THO
0.0015%
I
NOise
Input Clipping Level
+28 dBu
Input limiters
6
Digital Inputs·
8 (3 AES pairs with SRC, 1 Af542 Pair with SRC) •
Digital inpul Connector·
OB15 mini
Hish Pass filter
adjust able, 30to 240 Hz
Output
Analoll Outputs
4 Balanc ed )(lR OdBu,-lOdBu and ·3OdBu
3 Balan ced TASI6 Bus) OdBu,-lOdBu and · 30dBu
Tape/Mono ou tput
2 unbalanced l .Smm OdBu,. 10dBu and 30dBu
D,sitalO
4 AES pairs (8 ch annels)
Une Outout Clipping level
+20dBu
AES Ou tput"
Mix or Oirect out. user ~eler:tab lf!
Headphone l
~
Headphone 2.
3.5 mm stereo bus
Analoe Dynamic Range
inch STereo bus
115 dB
Z;urnet RF interface "
2,4 Ghl
Tran~mjtter
SOmW output power
frequency Range
2403 to 2.475 GHz
ModulatIon type
Spread spect rum
Bilrldwidth
Connector
I MHz
SMA fem ale
Internal Mixer
MIKel Type
Mixer crO\S point
A0
I
Q·A Convers,on size
]2 bit floJting po;nT osp
16 inpu l x 16 output ( Pre·f~der
I Post·fader I Phlse Inllerslon)
24 bit
33
Head Room
Selectable 12 to 20 d8
Effects
o t060 mS In .1mS steps
2 band, 20 Hz to 20 kHz freqventY range adj usta ble
Compreuor Type
Soft Kntoe
COMpres~OI
Attack, Release, Threshold, Ratio, Ma ke·up Gain
High
Pa~s
Adjus!ments
I ·It!"r
20 Hz Ie 230 Hz
Re<ord inr
Tracks
4,6,8, 12 tracks (Model dependent)
Pre·R Ko rd
010 10 seconds
Sample
R at e~
4',100, 47952,48000,4804888100.96000
Data Storace
Int ernal
2 Compact Flash Card slots, 1 Micro SO card slot
External
US8400
USB H05t power
Z,5 W atts
fite Formats
Internal Slot 1
Mobile Audio Re cording Format
(MA~F)
II
Internal Slot 2,3 / [ )(Iernal
FAT3 Z writIng 8roadcast Way mono or poly
File Re solution
24 bit or 16 bit se!ectabl e
Sample Rate
47952, 48000,48048,88200, 96000,96096
Misc.
Delay
o t o 60 ms per channel
Serial
Zaxcom Propitary
Display
Full colo' teO Sunli ght read able
Meters
Output, Input. card hor,zontal formal
Size(HxW xD)
2.0"
W"ll!ht
3,8 Ibs Wit h in terNI batte ry
x 9.9" x 7.0"
Power
Internal
6AA 7·9 VOC, 2· 4 hours of usag e (NiMh)
[xternal
10 to 18 VOC
External Power
8to 18VDC@300mA
Battery Meter
on leO display
All specification prelimi nary and subject to change
• Fea ture is model dependent
34