1
•
•
Making flat white/cappuccino/latte/milk
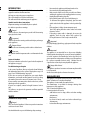
1. Press the icon corresponding to the required drink.
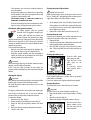
2. After a few seconds, frothed milk is delivered from the
milk spout into the cup below. Delivery of milk stops
automatically and (if needed for the drink), coffee
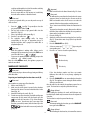
delivery starts. An image of the drink being prepared is
displayed (fig. 32) together with a progress bar which fills
gradually.
come out of the holes in the chocolate carafe lid.
Heating the milk causes splashes inside the carafe. This is
normal.
The hot chocolate quantity in the cup will vary varying the
density: if you choose thick density, there will be fewer
chocolate than that contained in the cup if choosing the
other densities.
MAKING MILK DRINKS
Please note!
Milk or coffee delivery can be interrupted by pressing the STOP
icon. To stop preparation altogether, press the ESC icon.
Please note!
A few seconds may elapse between Energy Saving and delivery
of the first drink.
Programming the quantities of coffee and milk in the
cup
The appliance is set by default to automatically deliver standard
quantities. To change these quantities, proceed as follows:
1. Place a cup under the coffee spouts and milk spout.
2. Press the icon corresponding to the function to be
programmed (flat white, cappuccino, latte, milk). The
machine starts delivering milk.
3. Press the PROG icon.
4. When the required quantity of milk has flowed into the
cup, press the STOP MILK icon.
5. If needed for the drink, after a few seconds, the machine
starts delivering coffee. When the required quantity of
coffee has flowed into the cup, press the STOP COFFEE
icon. Coffee delivery stops.
The machine is now reprogrammed with the new quantities.
Filling and attaching the milk container
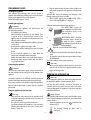
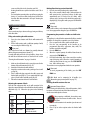
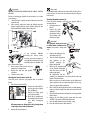
1. Press the release buttons and lift the milk container lid
(fig. 25).
2. Fill the milk container with a sufficient quantity of milk,
not exceeding the MAX level (fig. 26).
Please note!
For a richer denser froth, use skimmed or partially skimmed
milk at refrigerator temperature (about 5°C).
To avoid milk with poor froth or large bubbles, always clean
the milk lid and hot water nozzle as described in the section
“Cleaning the milk container” on pages 36 and 40.
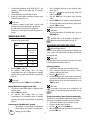
3. Make sure the milk intake tube is correctly inserted in the
bottom of the milk container lid (fig. 27).
4. Attach the lid back on the milk container.
5. Attach the container to the nozzle, pushing as far as it will
go (fig. 28).
6. Place a sufficiently large cup under the coffee spouts and
frothed milk spout (fig. 29). To use particularly tall cups/
glasses, lift the coffee and milk spouts (fig. 30).
7. Follow the instructions below for each function.
•
Milk drinks can be customised in all profiles (see
“Memorising your personal profile” on page 17).
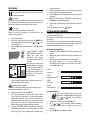
Cleaning the milk container after use
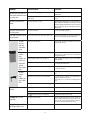
Adjusting the amount of froth
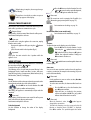
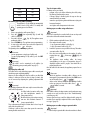
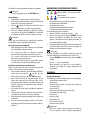
Turn the froth adjustment dial on the milk container lid to
adjust the amount of froth on the milk delivered while making
milk drinks (fig. 31). Follow the tips given in the following
table:
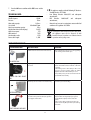
Dial
position
Description
Recommended for…
No froth
FLAT WHITE /
MILK (hot milk)
Min. froth
LATTE
Max. froth
Cappuccino /
MILK (frothed milk)
Please note!
To cancel programming of the drinks, press the EXIT
PROG icon.
Important! Danger of burns
When cleaning the internal tubes of the milk container, a little
hot water and steam leak out of the frothed milk spout.
Avoid contact with splashes of water.
After preparing a milk drink, the machine must
be cleaned to remove the milk residues. Proceed
as follows:
1. Leave the milk container in the machine (you do not need
to empty it);
2. Place a cup or other recipient under the frothed milk
spout.
15