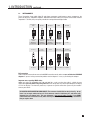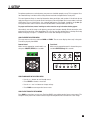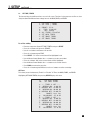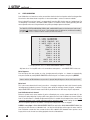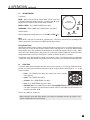
1
STATEMENT D2
OPERATING MANUAL
UPDATES: www.anthemAV.com
SOFTWARE VERSION 1.3x
™
SAFETY PRECAUTIONS
READ THIS SECTION CAREFULLY BEFORE PROCEEDING!
WARNING
RISK OF ELECTRIC SHOCK
DO NOT OPEN
WARNING: TO REDUCE THE RISK OF ELECTRIC
SHOCK, DO NOT REMOVE COVER (OR BACK).
NO USER-SERVICEABLE PARTS INSIDE. REFER
SERVICING TO QUALIFIED SERVICE PERSONNEL.
The lightning flash with arrowpoint within an equilateral triangle
warns of the presence of uninsulated “dangerous voltage”
within the product’s enclosure that may be of sufficient
magnitude to constitute a risk of electric shock to persons.
The exclamation point within an equilateral triangle warns users
of the presence of important operating and maintenance
(servicing) instructions in the literature accompanying the appliance.
WARNING: TO REDUCE THE RISK OF FIRE OR ELECTRIC SHOCK, DO NOT EXPOSE THIS PRODUCT TO RAIN OR MOISTURE
AND OBJECTS FILLED WITH LIQUIDS, SUCH AS VASES, SHOULD NOT BE PLACED ON THIS PRODUCT.
CAUTION: TO PREVENT ELECTRIC SHOCK, MATCH WIDE BLADE OF PLUG TO WIDE SLOT, FULLY INSERT.
CAUTION: FOR CONTINUED PROTECTION AGAINST RISK OF FIRE, REPLACE THE FUSE ONLY WITH THE SAME AMPERAGE
AND VOLTAGE TYPE. REFER REPLACEMENT TO QUALIFIED SERVICE PERSONNEL.
WARNING: UNIT MAY BECOME HOT. ALWAYS PROVIDE ADEQUATE VENTILATION TO ALLOW FOR COOLING. DO NOT
PLACE NEAR A HEAT SOURCE, OR IN SPACES THAT CAN RESTRICT VENTILATION.
IMPORTANT SAFETY INSTRUCTIONS
1. Read Instructions – All the safety and operating instructions should be read before the product is operated.
2. Retain Instructions – The safety and operating instructions should be retained for future reference.
3. Heed Warnings – All warnings on the product and in the operating instructions should be adhered to.
4. Follow Instructions – All operating and use instructions should be followed.
5. Cleaning – Unplug this product from the wall outlet before cleaning. Do not use liquid cleaners or aerosol cleaners. Use
a damp, soft cloth for cleaning.
6. Water and Moisture – Do not use this product near water – for example, near a bath tub, wash bowl, kitchen sink, or
laundry tub; in a wet basement; or near a swimming pool; and the like.
7. Accessories – Do not place this product on an unstable cart, stand, tripod, bracket, or table. The product may fall,
causing serious injury to a child or adult, and serious damage to the product. Use only with a cart, stand, tripod, bracket,
or table recommended by the manufacturer, or sold with the product. Any mounting of the product should follow
manufacturer’s instructions, and should use a mounting accessory recommended by the manufacturer.
8. Ventilation – Slots and openings in the cabinet are provided for ventilation and to ensure reliable operation of the
product and to protect it from overheating, and these openings must not be blocked or covered. The openings should
never be blocked by placing the product on a bed, sofa, rug, or other similar surface. This product should not be placed
in a built-in installation such as a bookcase or rack unless proper ventilation is provided or the manufacturer’s
instructions have been adhered to.
9. Power Sources – This product should be operated only from the type of power source indicated on the marking label.
If you are not sure of the type of power supply to your home, consult your product dealer or local power company. For
products intended to operate from battery power, or other sources, refer to the operating instructions.
10. Grounding and Polarization – This product may be equipped with a polarized alternating-current line plug (a plug having
one blade wider than the other). This plug will fit into the power outlet only one way. This is a safety feature. If you are
unable to insert the plug fully into the outlet, try reversing the plug. If the plug should still fail to fit, contact your
electrician to replace your obsolete outlet. Do not defeat the safety purpose of the polarized plug.
11. Power-cord Protection – Power-supply cords should be routed so that they are not likely to be walked on or pinched
by items placed upon or against them, paying particular attention to cords at plugs, convenience receptacles, and the
point where they exit from the product.
12. Outdoor Antenna Grounding – If an outside antenna or cable system is connected to the product, be sure the antenna
or cable system is grounded so as to provide some protection against voltage surges and built-up static charges. Article
810 of the National Electrical Code, ANSI/NFPA 70, provides information with regard to the proper grounding of the mast
and supporting structure, grounding of the lead-in wire to an antenna-discharge unit, size of grounding conductors,
location of antenna-discharge unit, connection to grounding electrodes, and requirements for the grounding electrode.
Antenna Lead-In Wire
Ground Clamp
Antenna-Discharge Unit
(NEC Section 810-20)
Electrical Service
Equiptment
Grounding Conductors
(NEC Section 810-21)
Ground Clamps
S2898A
NEC-National Electrical Code
Power Service Grounding
Electronic System
(NEC ART 250. Part H)
13. Lightning – For added protection for this product during a lightning storm, or when it is left unattended and unused for
long periods of time, unplug it from the wall outlet and disconnect the antenna or cable systems. This will prevent
damage to the product due to lightning and power-line surges.
14. Power Lines – An outside antenna system should not be located in the vicinity of overhead power lines or other electric
light or power circuits, or where it can fall into such power lines or circuits. When installing an outside antenna system,
extreme care should be taken to keep from touching such power lines or circuits as contact with them might be fatal.
15. Overloading – Do not overload wall outlets, extension cords, or integral convenience receptacles as this can result in
a risk of fire or electric shock.
16. Object and Liquid Entry – Never push objects of any kind through openings as they may touch dangerous voltage points
or short-out parts that could result in a fire or electric shock. Do not expose this product to dripping or splashing and
ensure that no objects filled with liquids, such as vases, are placed on the product.
17. Servicing – Do not attempt to service this product yourself, as opening or removing covers may expose you to
dangerous voltage or other hazards. Refer all servicing to qualified service personnel.
18. Damage Requiring Service – Unplug this product from the wall outlet and refer servicing to qualified personnel under
the following conditions:
• When power-supply cord or plug is damaged.
• If liquid has been spilled, or objects have fallen into the product.
• If the product has been exposed to rain or water.
• If the product does not operate normally by following the operating instructions. Adjust only those controls that are
covered by the operating instructions as an improper adjustment of other controls may result in damage and will require
extensive work by a qualified technician to restore the product to its normal operation.
• If the product has been dropped or damaged in any way.
• If the product exhibits a distinct change in performance – this indicates a need for service.
19. Replacement Parts – When replacement parts are required, be sure the technician has used replacement parts
specified by the manufacturer or have the same characteristics as the original part. Unauthorized substitutions may
result in fire, electric shock, or other hazards.
20. Safety Check – Upon completion of any service or repairs to this product, ask the service technician to perform safety
checks to determine that the product is in proper operating condition.
21. Heat – The product should be situated away from heat sources such as radiators, heat registers, stoves, or other
products (including amplifiers) that produce heat.
RECYCLING AND REUSE GUIDELINES (Europe)
In accordance with the European Union WEEE (Waste Electrical and Electronic Equipment) directive effective
August 13, 2005, we would like to notify you that this product may contain regulated materials which, upon disposal,
require special reuse and recycling processing. For this reason Paradigm Electronics Inc. (the manufacturer of
Paradigm speakers and Anthem electronic products) has arranged with its distributors in European Union member
nations to collect and recycle this product at no cost to you. To find your local distributor please contact the dealer
from whom you purchased this product or go to our website at www.paradigm.com.
Please note that only the product falls under the WEEE directive. When disposing of packaging and other shipping
material we encourage you to recycle through the normal channels.
Anthem, AnthemLogic, ARC, Sonic Frontiers, and Paradigm are trademarks or registered trademarks of Paradigm Electronics Inc.
Copyright Paradigm Electronics Inc. All rights reserved. The information contained herein may not be reproduced in whole or in
part without our express written permission. We reserve the right to change specifications and/or features without notice as
design improvements are incorporated.
Manufactured under license from Dolby Laboratories. “Dolby”, “Pro Logic”, “Surround EX” and the
double-D symbol are trademarks of Dolby Laboratories.
“DTS”, “DTS-ES Extended Surround” and “Neo:6” are trademarks of Digital Theater Systems, Inc.
Manufactured under license from THX Ltd. U.S. patent numbers 5,043,970; 5,189,703; and/or 5,222,059. European patent number
0323830. Other U.S. and foreign patents pending. Ultra2 and THX are trademarks or registered trademarks of THX Ltd. Lucasfilm is
a trademark of Lucasfilm Ltd. Surround EX is a trademark of Dolby Laboratories. Used under authorization.
This product incorporates copyright protection technology that is protected by U.S. patents and other intellectual property rights.
Use of this copyright protection technology must be authorized by Macrovision, and is intended for home and other limited
viewing uses only unless otherwise authorized by Macrovision. Reverse engineering or disassembly is prohibited.
HDMI, the HDMI logo and High-Definition Multimedia Interface are trademarks or registered trademarks of HDMI Licensing LLC.
VXP, Visual Excellence Processing and the VXP logo are trademarks or registered trademarks of Gennum Corporation.
All other trademarks are the property of their respective owners.
TABLE of CONTENTS
SECTION
PAGE
1. INTRODUCTION
1.1 Before Making Connections. . . . . . . . . . . . . . . . . . . . . . . . . . . . . . . . . . . . . . . . . . . . . . . . . . . . . . . . . . . . . 1
1.2 In-Use Notices . . . . . . . . . . . . . . . . . . . . . . . . . . . . . . . . . . . . . . . . . . . . . . . . . . . . . . . . . . . . . . . . . . . . . . . . 1
1.3 Front Panel . . . . . . . . . . . . . . . . . . . . . . . . . . . . . . . . . . . . . . . . . . . . . . . . . . . . . . . . . . . . . . . . . . . . . . . . . . . . 2
1.4 Front Panel Display . . . . . . . . . . . . . . . . . . . . . . . . . . . . . . . . . . . . . . . . . . . . . . . . . . . . . . . . . . . . . . . . . . . . . 3
1.5 Rear Panel . . . . . . . . . . . . . . . . . . . . . . . . . . . . . . . . . . . . . . . . . . . . . . . . . . . . . . . . . . . . . . . . . . . . . . . . . . . . 4
1.6 Remote Control . . . . . . . . . . . . . . . . . . . . . . . . . . . . . . . . . . . . . . . . . . . . . . . . . . . . . . . . . . . . . . . . . . . . . . . . 5
1.7 Speaker Placement . . . . . . . . . . . . . . . . . . . . . . . . . . . . . . . . . . . . . . . . . . . . . . . . . . . . . . . . . . . . . . . . . . . . . 6
1.8 Interconnects . . . . . . . . . . . . . . . . . . . . . . . . . . . . . . . . . . . . . . . . . . . . . . . . . . . . . . . . . . . . . . . . . . . . . . . . . 7
2. CONNECTIONS
2.1 Video . . . . . . . . . . . . . . . . . . . . . . . . . . . . . . . . . . . . . . . . . . . . . . . . . . . . . . . . . . . . . . . . . . . . . . . . . . . . . . . . . 8
2.2 Audio . . . . . . . . . . . . . . . . . . . . . . . . . . . . . . . . . . . . . . . . . . . . . . . . . . . . . . . . . . . . . . . . . . . . . . . . . . . . . . . . . 9
2.3 FM•AM Antennas . . . . . . . . . . . . . . . . . . . . . . . . . . . . . . . . . . . . . . . . . . . . . . . . . . . . . . . . . . . . . . . . . . . . . 11
2.4 12 Volt Triggers . . . . . . . . . . . . . . . . . . . . . . . . . . . . . . . . . . . . . . . . . . . . . . . . . . . . . . . . . . . . . . . . . . . . . . . 11
2.5 Powered IR (Infra Red) Receivers. . . . . . . . . . . . . . . . . . . . . . . . . . . . . . . . . . . . . . . . . . . . . . . . . . . . . . . 11
2.6 IR (Infra Red) Emitters. . . . . . . . . . . . . . . . . . . . . . . . . . . . . . . . . . . . . . . . . . . . . . . . . . . . . . . . . . . . . . . . . . 11
2.7 Power . . . . . . . . . . . . . . . . . . . . . . . . . . . . . . . . . . . . . . . . . . . . . . . . . . . . . . . . . . . . . . . . . . . . . . . . . . . . . . . . 11
3. SETUP
Entering / Navigating / Exiting the Setup Menu . . . . . . . . . . . . . . . . . . . . . . . . . . . . . . . . . . . . . . . . . . . . . . . 15
3.1 Video Output . . . . . . . . . . . . . . . . . . . . . . . . . . . . . . . . . . . . . . . . . . . . . . . . . . . . . . . . . . . . . . . . . . . . . . . . . 16
3.2 Set Time and Timers. . . . . . . . . . . . . . . . . . . . . . . . . . . . . . . . . . . . . . . . . . . . . . . . . . . . . . . . . . . . . . . . . . . 21
3.3 Speaker Configuration. . . . . . . . . . . . . . . . . . . . . . . . . . . . . . . . . . . . . . . . . . . . . . . . . . . . . . . . . . . . . . . . . 24
3.4 Listener Position . . . . . . . . . . . . . . . . . . . . . . . . . . . . . . . . . . . . . . . . . . . . . . . . . . . . . . . . . . . . . . . . . . . . . . 29
3.5 Level Calibration . . . . . . . . . . . . . . . . . . . . . . . . . . . . . . . . . . . . . . . . . . . . . . . . . . . . . . . . . . . . . . . . . . . . . 30
3.6 Source Setup . . . . . . . . . . . . . . . . . . . . . . . . . . . . . . . . . . . . . . . . . . . . . . . . . . . . . . . . . . . . . . . . . . . . . . . . . 32
3.7 Mode Presets. . . . . . . . . . . . . . . . . . . . . . . . . . . . . . . . . . . . . . . . . . . . . . . . . . . . . . . . . . . . . . . . . . . . . . . . . 36
3.8 Analog Input Levels. . . . . . . . . . . . . . . . . . . . . . . . . . . . . . . . . . . . . . . . . . . . . . . . . . . . . . . . . . . . . . . . . . . . 37
3.9 ADC and Audio Output . . . . . . . . . . . . . . . . . . . . . . . . . . . . . . . . . . . . . . . . . . . . . . . . . . . . . . . . . . . . . . . . 38
3.10 Volumes and Path Names . . . . . . . . . . . . . . . . . . . . . . . . . . . . . . . . . . . . . . . . . . . . . . . . . . . . . . . . . . . . . . 39
3.11 Triggers, IR, and RS-232 . . . . . . . . . . . . . . . . . . . . . . . . . . . . . . . . . . . . . . . . . . . . . . . . . . . . . . . . . . . . . . . 40
3.12 Displays and Timeout. . . . . . . . . . . . . . . . . . . . . . . . . . . . . . . . . . . . . . . . . . . . . . . . . . . . . . . . . . . . . . . . . . 42
3.13 Save and Load Settings . . . . . . . . . . . . . . . . . . . . . . . . . . . . . . . . . . . . . . . . . . . . . . . . . . . . . . . . . . . . . . . . 44
3.14 Lockout and Passwords . . . . . . . . . . . . . . . . . . . . . . . . . . . . . . . . . . . . . . . . . . . . . . . . . . . . . . . . . . . . . . . 45
3.15 ARC-1 Anthem Room Correction . . . . . . . . . . . . . . . . . . . . . . . . . . . . . . . . . . . . . . . . . . . . . . . . . . . . . . . . 46
4. OPERATION
4.1 Power On and Off . . . . . . . . . . . . . . . . . . . . . . . . . . . . . . . . . . . . . . . . . . . . . . . . . . . . . . . . . . . . . . . . . . . . . 50
4.2 Path Selection . . . . . . . . . . . . . . . . . . . . . . . . . . . . . . . . . . . . . . . . . . . . . . . . . . . . . . . . . . . . . . . . . . . . . . . . 50
4.3 Manually Copying the Main Path to Zone2/3 and Record . . . . . . . . . . . . . . . . . . . . . . . . . . . . . . . . . . . 51
4.4 Source Selection . . . . . . . . . . . . . . . . . . . . . . . . . . . . . . . . . . . . . . . . . . . . . . . . . . . . . . . . . . . . . . . . . . . . . 51
4.4.1 FM•AM Tuner
52
4.4.2 Simulcast
52
4.5 Volume Control . . . . . . . . . . . . . . . . . . . . . . . . . . . . . . . . . . . . . . . . . . . . . . . . . . . . . . . . . . . . . . . . . . . . . . . 53
4.6 Level Trim . . . . . . . . . . . . . . . . . . . . . . . . . . . . . . . . . . . . . . . . . . . . . . . . . . . . . . . . . . . . . . . . . . . . . . . . . . . 53
4.7 Bass, Treble, and Balance . . . . . . . . . . . . . . . . . . . . . . . . . . . . . . . . . . . . . . . . . . . . . . . . . . . . . . . . . . . . . 54
4.8 Surround Modes . . . . . . . . . . . . . . . . . . . . . . . . . . . . . . . . . . . . . . . . . . . . . . . . . . . . . . . . . . . . . . . . . . . . . .
4.8.1 AnthemLogic
4.8.2 Dolby Digital 2.0
4.8.3 Surround Modes for 2.0-Channel Source Material
4.8.4 Dolby Digital EX and Pro Logic IIx for 5.1-Channel Source Material
4.8.5 DTS-ES
4.8.6 THX Ultra2 and THX Surround EX
4.8.7 Mode and THX Operation for 2.0-Channel Source Material
4.8.8 Mode and THX Operation for Dolby Digital 5.1 and 6-Ch S/E
4.8.9 Mode and THX Operation for DTS Source Material
4.8.10 Dynamics
54
55
55
56
57
57
57
61
62
63
64
4.9 Lip-Sync Delay . . . . . . . . . . . . . . . . . . . . . . . . . . . . . . . . . . . . . . . . . . . . . . . . . . . . . . . . . . . . . . . . . . . . . . . . 64
4.10 Display Brightness . . . . . . . . . . . . . . . . . . . . . . . . . . . . . . . . . . . . . . . . . . . . . . . . . . . . . . . . . . . . . . . . . . . 64
4.11 Video Source Adjustment . . . . . . . . . . . . . . . . . . . . . . . . . . . . . . . . . . . . . . . . . . . . . . . . . . . . . . . . . . . . . .
Picture
Crop Input
Scale Output
Aspect Ratio Control Examples
Output
Test Patterns
Info Panel
Shortcuts and emergency exits
64
65
67
68
69
71
72
73
73
4.12 Sleep Timer . . . . . . . . . . . . . . . . . . . . . . . . . . . . . . . . . . . . . . . . . . . . . . . . . . . . . . . . . . . . . . . . . . . . . . . . . . . 74
4.13 Enable and Disable Timers . . . . . . . . . . . . . . . . . . . . . . . . . . . . . . . . . . . . . . . . . . . . . . . . . . . . . . . . . . . . . 74
4.14 Status Display. . . . . . . . . . . . . . . . . . . . . . . . . . . . . . . . . . . . . . . . . . . . . . . . . . . . . . . . . . . . . . . . . . . . . . . . . 74
5. REMOTE CONTROL CUSTOMIZATION
5.1 Codes for Other Brands . . . . . . . . . . . . . . . . . . . . . . . . . . . . . . . . . . . . . . . . . . . . . . . . . . . . . . . . . . . . . . . . 75
5.2 Learning Commands. . . . . . . . . . . . . . . . . . . . . . . . . . . . . . . . . . . . . . . . . . . . . . . . . . . . . . . . . . . . . . . . . . . 75
5.3 Copying Commands . . . . . . . . . . . . . . . . . . . . . . . . . . . . . . . . . . . . . . . . . . . . . . . . . . . . . . . . . . . . . . . . . . . . 76
5.4 Volume Lock . . . . . . . . . . . . . . . . . . . . . . . . . . . . . . . . . . . . . . . . . . . . . . . . . . . . . . . . . . . . . . . . . . . . . . . . . 76
5.5 Programming Macros . . . . . . . . . . . . . . . . . . . . . . . . . . . . . . . . . . . . . . . . . . . . . . . . . . . . . . . . . . . . . . . . . . 77
5.6 Resetting the Remote Control . . . . . . . . . . . . . . . . . . . . . . . . . . . . . . . . . . . . . . . . . . . . . . . . . . . . . . . . . . 77
6. SOFTWARE UPDATING
6.1 Software Version Identification . . . . . . . . . . . . . . . . . . . . . . . . . . . . . . . . . . . . . . . . . . . . . . . . . . . . . . . . 78
6.2 Software Updating Via Your Dealer. . . . . . . . . . . . . . . . . . . . . . . . . . . . . . . . . . . . . . . . . . . . . . . . . . . . . . 78
6.3 Software Updating Via Your Computer and the Internet . . . . . . . . . . . . . . . . . . . . . . . . . . . . . . . . . . . . 78
Appendix A – IR Macros for Surround Modes and FM•AM Banks
80
Appendix B – Preset Memory Codes
81
Specifications
88
Warranty
91
Big Pictures of Front and Rear Panels
Inside Back Cover
1. INTRODUCTION
Thank you for purchasing the Anthem Statement D2 processor.
The Statement D2 is a cutting-edge home theater audio processor with HDMI switching and video
upconversion, multizone capabilities, and FM/AM tuner, along with state of the art video processing which
includes deinterlacing, scaling, aspect ratio control, and picture adjustment. Anthem products are
engineered to recreate the passion of live performance and thrill of the best movie theaters by using the
highest level of circuit design, proprietary software, superior build quality, innovative features, and intuitive
ergonomics with tremendous flexibility.
1.1
BEFORE MAKING CONNECTIONS
Check that you have received everything listed below and report discrepancies to your dealer as soon as
possible. In case they are needed one day, keep the packing materials and the invoice that you received from
your authorized Anthem dealer at time of purchase – without it, service will not be provided under warranty.
Packing List:
• Statement D2
• FM antenna
• IR terminal block (on rear panel)
• 2 Remote controls
• FM antenna adapter
• Power cord (North America only)
• 4 AA batteries
• AM loop antenna
• Serial extension cable
Additional items with ARC-1 Anthem Room Correction:
• Software installation CD
• Microphone
• Telescopic stand
• USB microphone cable
• Microphone clip
• Base
Safety Instructions:
• Read all precautions and instructions at the beginning of this manual.
• Do not connect power if there are signs of damage to any part of the exterior.
• The front panel power buttons and the rear panel AC switch do not disconnect the product from the
AC line. Ensure that the power cord remains readily accessible at all times.
• To connect power, only use the supplied double-insulated power cord.
• Allow adequate ventilation to ensure reliable operation and to prevent overheating. The amount of
space required above the unit for radiation depends on ambient air temperature and circulation.
Installation inside an unventilated space such as a cabinet with a front that can be closed or a
closet is not recommended.
• Failing to comply with any safety instruction, precaution, or warning in this operating manual is in
violation of the intended use of the product.
• Anthem and any related party assume no liability for the user’s failure to comply with requirements.
1.2
IN-USE NOTICES
• Disconnect the power cord before connecting or disconnecting any components.
• Do not remove the top cover.
• Do not modify the product.
• Due to continuing advances operational characteristics may change. If this manual contains
discrepancies please check www.anthemAV.com for the latest manual or software.
1
1. INTRODUCTION continued …
1.3
FRONT PANEL
1
2
3
4
5
6
7
17
16
15
13
12
11
10
9
1 – Path selection
9 – Mute
2 – Mode and decoder indicators
10 – Status review / setup menu access
3 – Display
11 – Balance setting
4 – FM•AM preset selection
12 – Bass / treble settings
5 – FM•AM tuning / setup menu navigation
13 – LED and display brightness setting / video adjustment
menu access
6 – Master Control Knob:
• Volume
14 – Front panel IR sensor
• Tune for FM•AM
15 – Surround mode / Dynamics / THX options / shortcuts
to most common video adjustments
• Settings adjustment
• Setup for time and source naming
7 – Speaker group and headphone access
8 – Power on / standby
For a larger diagram, see inside back cover.
2
14
16 – Headphone jack
17 – Source selection
8
1. INTRODUCTION continued …
1.4
FRONT PANEL DISPLAY
MAIN Display Example:
2
1
3
DVD1 Dolby D 1080p
5.1+PLIIx Movie -7.5
5
4
1 –
Source selection.
2 –
Audio input format or sleep timer if engaged.
3 –
Video input resolution.
4 –
Volume.
5 –
Number of input channels + surround mode.
FM•AM Display Example:
1
2
3
FM2-5 St Sk>
480i
101.3 MHz -18.5 dB
4
1 –
Band+bank+preset. The tuner has three FM banks (FM1, FM2, and FM3) and one AM bank.
2 –
FM mode. Displays “St” when in stereo, “HB” when in Hi-Blend, or “Mn” when in mono.
3 –
Seek and scan indications.
4 –
Frequency. FM is tuned to the nearest 0.1 MHz. AM is tuned to nearest 10 kHz (120V model) or
9 kHz (230V model).
3
1. INTRODUCTION continued …
1.5
REAR PANEL
2
1
3
5
4
6
8
7
9
10
11
SHOCK HAZARD
DO NOT OPEN.
RISQUE DE CHOC ÉLECTRIQUE
NE PAS OUVRIR
E X PA N S I O N P O R T
12
27
SUB 2
120V 60Hz
170W MAX
M A I N
13
A U D I O - O U T
M A I N
26
25
24
23
22
21
19
18
17
16
( B A L A N C E D )
15
1 – 7 composite video inputs
15 – RS-232 interface (bidirectional)
2 – 7 S-Video inputs
16 – Main audio output (10 jacks)
3 – 5 S-Video outputs
17 – 6-channel analog audio input
4 – 5 composite video outputs
18 – AES/EBU digital audio input
5 – HDMI output)
19 – Analog audio balanced L/R input
6 – 2 component video outputs (3 jacks/ea)
20 – ZONE2, ZONE3, and REC analog audio outputs
7 – 3 12V trigger outputs
21 – 3 optical digital audio inputs
8 – 4 component video inputs (3 jacks/ea)
22 – 2 digital audio REC outputs
9 – 4 HDMI inputs
23 – 7 analog audio L/R inputs
10 – FM and AM antenna connections
24 – 7 digital audio coaxial inputs
11 – Expansion port
25 – Ground terminal
12 – 2 IR emitters
26 – Power cord connection
13 – Main audio output (10 balanced jacks)
27 – AC switch
14 – 3 IR extension inputs with 12V supply
For larger diagrams, see inside back cover.
4
20
A U D I O - O U T
14
1. INTRODUCTION continued …
REMOTE CONTROL
1
2
36
3
POWER
LEARN
SSP PATH
MAIN
Z2
Z3
CD
DVD
TV
SAT
VCR
1
2
4
3
5
6
FM/AM PRE-SETS
35
4
5
6
34
SCREEN
ON
DISPLAY
BYPAS
ONE
7
8
33
MODE
0
ENTER
MUTE
31
CH PRE-SET
INPUT
TIMERS
SLEEP
28
27
9
THX
VOLUME
GUIDE
GUIDE
10
BACKBACK
TUNE
SEEK
FRT
12
STATUS
25
23
13
SELECT
INFO INFO
SETUPSETUP
SUR
RR
SUB
LFE
20
TREBLE
BASS
BALANCE
16
17
PIP
SWAP
MOVE
COPY
2-Ch
6-Ch
PA
SSP TH
REC
CD
AUX
TAPE
FM
AM
DVD
TV
19
14
15
SOURCE SEEK
22
11
CTR
26
24
7
8
SSP OFF
LAST
30
29
9
M
DYNA ICS
S
1 – IR transmitter (front face)
2 – LED
3 – Power on for MAIN, ZONE2, and ZONE3
Power on/off for other control modes
This key does not turn off the processor (see #31)
4 – Control mode (to control other components)
These are not the source selection keys (see #19)
5 – FM•AM preset setting and selection
6 – Tone bypass
7 – Mode / video adjustments (press and hold for 3 seconds)
8 – Dynamics setting
9 – FM•AM preset up
10 – FM•AM preset down
11 – Sleep timer selection / timers setting
12 – Center channel selection for level / bass / treble
32
13 – Back (for Setup)
14 – Subwoofer / LFE selection for level adjustment
15 – Setup (press and hold for 3 seconds)
16 – Source seek
17 – Balance
18 – RECORD path selection (must be in MAIN – see #4)
19 – Source selection
20 – Copy MAIN when ZONE2, ZONE3, or RECORD is selected
21 – Bass selection for adjustment
22 – Treble selection for adjustment
23 – Surrounds / rears selection for level / bass / treble / balance
24 –
• FM•AM tuning
• Adjustment for surround mode, dynamics, THX,
levels, bass / treble, timers, brightness
• Setup navigation
21
25 – • FM•AM seek
• Balance adjustment
• Setup navigation
26 – Status / FM•AM direct entry / setup selection
27 – Fronts / headphones selection for level / bass / treble / balance
28 – Volume down
29 – THX selection
30 – Volume up
31 – Power off when in MAIN, ZONE2, or ZONE3 control mode
32 – Mute
33 – Front panel LED / display brightness setting / lip-sync delay
34 – On-screen display of current front panel display
35 – Scaler menu – press and hold for 3 seconds
36 – Learn – for customization of remote
T
1.6
18
SSP SOURCE
SAT
VCR
Rear: Battery cover (when batteries are running low and a key is
pressed, the backlight stops working and the LED blinks twice)
5
1. INTRODUCTION continued …
1.7
SPEAKER PLACEMENT
These illustrations show typical speaker placement for a 7.1-channel surround system. The surround and
rear speakers are normally positioned 2-3 feet above ear level. The subwoofer can be placed in any location
where severe resonances are prevented – see section 3.3.
2
3
1
8
7
4
6
5
5 and 6 are not used in a 5.1 system
1.
2.
Front-Left
Center
3.
4.
Front-Right
Surround-Right*
5.
6.
Rear-Right*
Rear-Left*
7.
8.
Surround-Left*
Subwoofer (“.1”)
*Dipole speakers shown with “null” facing listening area. Direct radiating speakers are shown below.
3
2
3
2
1
1
6
5
4
6
5
4
9
80
9
80
7
7
slightly
behind
position
110˚
fromlistening
center
Placement with dipole surrounds
6
Placement with direct radiating surrounds
1. INTRODUCTION continued …
1.8
INTERCONNECTS
These illustrations show audio, video, IR, and trigger connectors used between source components, the
processor, displays, and power amplifiers. Note that when RCA cables have coaxial construction and their
impedance is 75 ohms, they are equally suitable for analog video and digital audio.
RCA Black or
White
RCA Red
RCA Yellow
Analog Left
Channel
Analog Right
Channel
Digital Audio or
Composite Video
RCA Green:
Component Y
RCA Blue:
Component Pb
RCA Red:
Component Pr
1/4” Stereo
3.5mm
Mini (Mono)
Optical
XLR Female
XLR Male
(connects to output) (connects to input)
Headphone
12V Trigger
IR Emitter
Digital Audio
Analog Balanced or AES/EBU
HDMI
Mini DIN
Digital Video
and Audio
S-Video
DVI connection:
Cables with DVI connection on one end and HDMI connection on the other are more reliable than DVI-HDMI
adapters. If you are having a connection problem and an adapter is in use, try eliminating the adapter.
Important notes regarding HDMI cables:
1080p uses twice the bandwidth that 720p and 1080i do – make sure that the cable is suitable for your
application especially when using a long cable otherwise the picture may contain pixel dropouts or not play
at all. If the display is far from the processor, a repeater or special connection system may be needed –
contact your dealer.
BE CAREFUL WHEN INSERTING HDMI CABLES. The connector should slide into the jack easily – do not
insert it on an angle and do not force it. Each connector contains 19 delicate pins, and cables with
damaged pins can damage jacks. This type of damage is not covered under warranty. If your HDMI
cables have been connected so many times that they are about to wear out, we strongly recommend
that you replace them.
7
2. CONNECTIONS
2.1
VIDEO CONNECTIONS
To configure inputs, see section 3.6 and to configure video outputs see section 3.1.
HDMI:
Video is sent with audio from source components to the processor. Maximum video resolution is 1080p/60.
Connect MAIN HDMI output to a display with HDMI or DVI input – one with High-bandwidth Digital Content
Protection (HDCP) is required to display copy-protected material. DVD players usually enable HDCP even on
home movies. If the source is protected, only HDMI video output is active (see section 4.14).
HDMI switching requires
at least two seconds per
stage, i.e. at least four
seconds from source to
processor to display.
Component Video (analog):
Component video uses three coaxial cables and has a maximum resolution of 1080p when unprocessed or
480p when the source material is copy-protected with Macrovision. Maximum input resolution is 1080i/60 if
the input is processed or converted to HDMI. The second Component output can be used in MAIN,
processed or unprocessed, or in ZONE2.
S-Video (analog):
Maximum resolution is 480i (NTSC) / 576i (PAL). This connection keeps brightness and color separate for a
better picture than Composite. S-Video input can be converted to Component and HDMI output (MAIN only).
Composite Video (analog):
Maximum resolution is 480i (NTSC) / 576i (PAL). This traditional format combines the black/white and color
information for transmission on a single coaxial cable. To be displayed, the information has to be separated,
a process that degrades video quality. Composite inputs can not be converted or processed. If you use a
VCR, one with S-Video output is recommended. If a composite video source is black and white, it can be
plugged into a Component video’s Y input. If there is no choice but to convert a color source’s composite
output, a composite to S-Video converter is needed (not an adapter turned backwards).
8
2. CONNECTIONS continued …
2.2
AUDIO CONNECTIONS
There are two methods of transmitting audio signals: Analog and digital. Analog is an electrical waveform
representation of sound and requires one cable for each channel. Digital represents sound using a sequence
of numbers and requires only one cable for all channels.
Digital Audio Inputs and Outputs:
Digital audio source components can be connected with a coaxial, optical, balanced, or HDMI cable. These
carry 2-channel PCM, Dolby Digital, and DTS. The HDMI inputs also accept up to six channels of PCM.
Should you need
audio from the HDMI
output to your display,
it’s 2-channel PCM.
Use the HDMI inputs if your display has HDCP-compliant HDMI or DVI input, otherwise use the coaxial or
optical inputs. The processor also provides one balanced AES/EBU connection, which is used on
professional equipment. Any digital input can be assigned to any number of sources that are set to digital.
To change digital audio connection from the factory default assignments, see section 3.6.
Digital Rec-Out can provide a signal to the digital audio input of a Mini Disc recorder, CD recorder etc. from
any source set to Digital (except HDMI) or Anlg-DSP – see sections 3.6 to 3.9.
Analog Audio Inputs:
Analog audio connections are made with RCA or XLR cables.
If you are going to use ZONE2, ZONE3, or RECORD, connect both the digital and analog outputs from the
source components. ZONE2, ZONE3, and RECORD require analog connection unless they’re set to copy
MAIN (see sections 3.6 and 4.3).
6-Ch Analog Input:
The 6-Ch input is for connecting DVD-Audio and multichannel SACD players that do not have HDMI output.
When 6-Ch is selected, the video signal from DVD input is routed to the video outputs by factory default – to
change this, see section 3.6.
9
2. CONNECTIONS continued …
Analog Audio Outputs:
Balanced connection offers the highest transmission quality over long cable lengths, because it rejects
noise pickup. In the processor, XLR output voltage is twice that of RCA (6 dB higher). The RCA outputs and
the XLR outputs are always active – both can be used at the same time if the system requires it.
Parallel outputs are provided for a second center channel speaker and/or subwoofer. If your screen is large,
you might want to use one center channel speaker above it and another one below it. One way to tame room
resonances is by using multiple subwoofers playing the same signal from different locations in the room.
If you are not using the second set of balanced SUB2 and CENTER2 outputs, they can be reassigned as
ZONE2 L/R outputs to ensure noise rejection if the ZONE2 amplifier has balanced input and it’s at a distance
from the processor (see section 3.9).
If you’re using one rear channel, use the Rear-L output to connect it (see section 3.3).
SUB 2
M A I N
A U D I O - O U T
M A I N
A U D I O - O U T
( B A L A N C E D )
Shown below are the analog audio RECORD outputs which connect to the audio inputs of recording devices,
together with the outputs that connect to amplifiers for ZONE2 and ZONE3:
Why am I not getting sound in ZONE2, ZONE3, or RECORD?
For ZONE2, ZONE3, and RECORD to have any output, the source components being used there must be
connected to the processor with the same type of connection. For example, if a source is connected via
HDMI, there won’t be output in ZONE2 unless you make additional connections from the source to the
processor – analog L/R for audio, and Component, S-Video, or Composite video – whichever type the
display in ZONE2 uses.
The only exception is when using Copy mode for audio – see section 4.3.
10
2. CONNECTIONS continued …
2.3
FM•AM ANTENNAS
To connect the AM loop antenna, press the spring-loaded tabs of the
AM ANTENNA connector and insert the bare ends of the two wires.
Move the antenna until best reception is found.
To connect the FM antenna, connect the two wires to the screw terminals of the
75-ohm to 300-ohm adapter, then connect the adapter to the FM ANTENNA
connector. Move the antenna until best reception is found – this is usually a “T”
formation. If your cable company provides FM service, you can connect the cable
to the processor.
2.4
75-ohm to 300-ohm adapter
12 VOLT TRIGGERS
If your other components have provisions for a trigger, you can have them turn on
and off together with the processor, or when a specified source is selected.
Connect a trigger output from the processor to the trigger input of your power
amplifier, display, etc., using a cable with 3.5mm mono mini plugs.
The processor provides flexible trigger options. From the factory, all the triggers are disabled. Through the
setup menu, you can specify the conditions for enabling triggers (see section 3.11).
2.5
POWERED IR (INFRA RED) RECEIVERS
External IR receivers allow the remote control to be used from other locations in
your home. Once an IR receiver is wired to another room, connect it to one of the
three IR RECEIVER inputs through the removable terminal block. To use the
terminal block, remove it from the processor, loosen the proper screw, insert the
wire in the slot, tighten the screw onto the wire, and insert the terminal block into
the processor. See section 3.11 for Setup information.
In addition, there is no need for an external 12V supply to power the receivers –
use the processor’s built-in supply instead for up to three IR receivers and
connect according to the IR receiver manufacturer’s instructions.
Custom Installers: The processor’s IR inputs sense modulated 38 kHz carrier, not demodulated data.
With some control systems, an emitter face-to-face with an IR receiver may be needed.
2.6
IR (INFRA RED) EMITTERS
IR emitters allow control of your source components from any location in your
home that has an IR receiver connected to the processor. After positioning the IR
emitter according to its instructions, connect it to IR EMITTER output. Commands
through the rear IR RECEIVER are re-transmitted through the IR emitters.
2.7
POWER
To connect power, use the supplied double-insulated power cord then turn on the rear panel AC switch.
11
2. CONNECTIONS continued …
Example 1:
DVD Player to processor to main display
HDTV receivers are connected the same way as DVD players.
HDMI IN
DVD
SHOCK HAZARD
DO NOT OPEN.
RISQUE DE CHOC ÉLECTRIQUE
NE PAS OUVRIR
E X PA N S I O N P O R T
SUB 2
120V 60Hz
170W MAX
M A I N
A U D I O - O U T
M A I N
Connect if using
digital REC-OUT or
if source’s video
output is DVI
Connect if
using
ZONE2/3 or
REC
A U D I O - O U T
Connect for
MAIN
Connect if
using ZONE2
L
R
AUDIO
OUT
12
COAX
OUT
( B A L A N C E D )
YPbPr OUT
HDMI
OUT
2. CONNECTIONS continued …
Example 2: Video recorder to processor
VCR
EJECT
SHOCK HAZARD
DO NOT OPEN.
RISQUE DE CHOC ÉLECTRIQUE
NE PAS OUVRIR
E X PA N S I O N P O R T
SUB 2
120V 60Hz
170W MAX
M A I N
A U D I O - O U T
M A I N
A U D I O - O U T
( B A L A N C E D )
For ZONE2, ZONE3, and
REC, in most cases you
must use the same input
type as the output type.
If MAIN uses a different
input connection, all you
need to do is add these
connections for ZONE2,
ZONE3, and REC.
L
L
R
VIDEO
OUT
AUDIO
OUT
R
VIDEO
IN
AUDIO
IN
13
2. CONNECTIONS continued …
Example 3: Processor to amplifiers and subwoofer (Balanced connection shown, single-ended is similar)
Trigger Setup Suggestion:
If it is not necessary to have both
amplifiers turned on when stereo
sources are playing, set triggers
to turn on only the 2-channel
amplifier when a stereo source is
selected (see section 3.11).
SHOCK HAZARD
DO NOT OPEN.
RISQUE DE CHOC ÉLECTRIQUE
NE PAS OUVRIR
To powered
subwoofer
E X PA N S I O N P O R T
SUB 2
120V 60Hz
170W MAX
M A I N
A U D I O - O U T
M A I N
WARNING
WARNING
14
A U D I O - O U T
( B A L A N C E D )
3. SETUP
For optimum performance and enjoyment, your processor should be properly set up. This may appear like a
lot of work but keep in mind that most settings do not need to be changed from the factory ones.
The most important things are entering information about your display and speakers if the defaults do not
apply, the distance from each speaker to the listening area, balancing output levels to one another, and input
connections. The rest is preference – the surround mode presets, for example, should be set up after you
have played various source materials and have decided which surround modes you like best.
For proper audio balance, menus involving test noises must be set up in the order that they appear.
Alternatively, most of the setup can be done on your personal computer through RS-232 connection and a
program from our web site, called Setup Editor. This can also save your configuration as a backup file. Setup
Editor cannot play test signals – calibration still has to be done through the setup menu.
HOW TO ENTER THE SETUP MENU
The setup menu can be accessed from MAIN and ZONE2. The on-screen display shows only in that path.
Test noises play only from MAIN.
Remote Control
Make sure the appropriate control mode is set
then press SUB/LFE (SETUP) for 3 seconds.
Front Panel
Make sure the appropriate path is selected then press
and hold STATUS (Setup) for 3 seconds.
SSP PATH
Z2
MAIN
Z3
T
GUIDE
TUNE
SEEK
FRT
BACK
CTR
STATUS
SELECT
INFO
SETUP
SUR
RR
SUB
LFE
S
HOW TO NAVIGATE IN THE SETUP MENU
• Use the buttons to scroll through menus.
F
• Press SELECT to choose
a menu item.
• Use the and buttons to change settings.
• Press BACK to return to previous item or menu.
HOW TO EXIT FROM THE SETUP MENU
Press BACK as many times as necessary. Each time BACK is pressed the previous item or menu returns. The
Setup will exit by itself if not used for 5 minutes to prevent the potential of a burned-in on-screen image.
15
3. SETUP continued …
SETTING UP THE PROCESSOR
Upon entering the setup menu your display will show the menu below. Only 8 menu items can be displayed
at once – for clarity this manual shows each menu with all its items. On-screen display is recommended
although the front panel shows similar information, one item at a time. If the default video output settings do
not work with your display, use the front panel display to set video output.
On-screen display is available from the following video outputs:
MAIN – HDMI, Component (processed) and S-Video
ZONE2 – S-Video
1.
2.
3.
4.
5.
6.
7.
8.
9.
10.
11.
12.
13.
14.
STATEMENT D2 SETUP
VIDEO OUTPUT
SET TIME / TIMERS
SPEAKER CONFIG
LISTENER POSITION
LEVEL CALIBRATION
SOURCE SETUP
SOURCE PRESETS
ANALOG INPUT LEVELS
ADC / AUDIO OUTPUT
VOLUMES / PATH NAMES
TRIGGER / IR / RS232
DISPLAYS / TIMEOUT
SAVE / LOAD SETTINGS
LOCKOUT / PASSWORDS
SELECT Enters Submenu
To go to a submenu, highlight a menu item and press SELECT. Each on-screen menu also has a scrolling help
line at the bottom as shown above.
3.1
VIDEO OUTPUT
Highlighting VIDEO OUTPUT then pressing SELECT displays this menu:
1.
a.
b.
c.
d.
16
VIDEO
VIDEO
VIDEO
VIDEO
VIDEO OUTPUT
OUT
OUT
OUT
OUT
CONFIG
CONFIG
CONFIG
CONFIG
1
2
3
4
3. SETUP continued …
Video Output Configurations:
The Statement D2 allows you to set four video output configurations – only Configuration 1 is needed in most
cases. The rest can be used to match the output refresh rate to source material refresh rates, i.e. 1080p/24,
1080p/50, and 1080p/60 if your display accepts these rates, or with a secondary display that needs different
settings – only one display can be used at a time in this case. Output assignment by source is explained in
section 3.6, and on-the-fly selection is explained at the end of section 4.11.
Calibration professionals: Live Video Settings Editor, a program downloadable from our web site, allows
control via computer and file creation for video processing described in section 4.11, plus gamma
correction (single or separate RGB curves) and custom output resolution and timing.
Once entering Configurations 2 through 4, the menu asks whether or not you want to use the same settings
as Configuration 1 – the factory default is Yes. If different settings are used, the output changes according
to the line that’s highlighted in the VIDEO OUTPUT menu. Highlighting VIDEO OUT CONFIG 1 in the VIDEO
OUTPUT menu then pressing SELECT displays this menu:
1a. VIDEO OUT CONFIG 1
a. S-VIDEO OSD: NTSC
b.
PREFERRED: HDMI
c. RESL'N: 1280x720p/60
d. COLOR SPACE: Auto
e.
DATA: Auto
f.LETTERBOX: Black
g.
SYNC: Normal
h.COMPNT2 OUT: Passthru
Items a. through g. pertain to MAIN output only.
Changes in this menu do not take place immediately to prevent loss of video output as you scroll through
settings. Once you leave this menu, it asks for confirmation – use the buttons to change to Yes, then
press SELECT. To put a change into effect before leaving the menu, press SELECT then confirm.
17
3. SETUP continued …
Where possible disable video processing in your source components so that the Statement D2’s
advanced processing can be used to its potential.
For standard-def DVD, set the player’s output to 480i/576i because if output is progressive-scan you will
be looking at the player’s deinterlacing, not the Statement D2’s. If the player does not allow 480i/576i
HDMI output, using 480i/576i component video output may be best. If the player can be set to put out
both 480i (NTSC) and 576i (PAL) according to source material, you can use that setting since the
Statement D2 accepts both formats.
If your HD cable/satellite receiver has passthrough mode where output resolution follows each station’s
resolution, use it. If not, set the receiver’s output according to the HD channels that you watch most.
HD material on disc is natively 1080p/24 or 1080i/60 – if your player has a passthrough mode where
output resolution and refresh rate follow that of the source material, you can use it with Configuration 1
resolution set to, for example, 1920x1080p/60 and Configuration 2 set to 1920x1080p/24.
If your display allows, set it to 1:1 pixel or dot-for-dot mode. The display’s stretch modes, including edge
cropping or overscan, should not be used if avoidable since they rescale the image unnecessarily.
S-Video On-Screen Display Format:
If using S-Video output use the buttons to select NTSC or PAL, whichever matches your display. If your
display supports both formats, try NTSC first.
Preferred Video Output:
Use the buttons to select Component or HDMI – the video will be optimized for that type. The other
output may or may not produce a usable picture – this depends on the remaining settings. HDMI-only
selections in the menu are not shown when Component is selected. If your settings apply to both HDMI and
Component output, both will work simultaneously unless the source material’s copy protection prevents this.
18
3. SETUP continued …
Output Resolution:
Input from S-Video, Component, and HDMI is scaled to this resolution for Component and HDMI output. If
interlaced to progressive scan conversion is in effect, it is uncompromisingly pixel-adaptive even with 1080i,
and the same robust film mode detection applies as with standard-definition interlaced input.
Resolution is expressed as follows:
number of pixels across the screen
frames per second (Hz)
1920x1080p/60
number of pixels or lines from top to bottom
scan type: p=progressive, i=interlaced
From the list below, use the setting that gives the best picture on your display. Other resolutions and refresh
rates are available through Live Video Settings Editor including computer monitor and custom resolutions.
•
•
•
•
•
•
•
•
720 x 480i or 480p / 60 Hz (480i is not applicable to DVI input on display)
720 x 576i or 576p / 50 Hz (576i is not applicable to DVI input on display)
1280 x 720p / 50 Hz or 60 Hz
1024 or 1280 or 1360 or 1366 x 768p / 60 Hz (DVI input on display is required)
1920 x 1080i / 50 or 60 Hz
1920 x 1080p / 24 Hz or 50 Hz* or 60 Hz*
Custom
Auto§
*high-bandwidth cable is required
Color Space:
Set this to match your display type: HDTV (high definition TV), SDTV (standard definition), or Auto§.
Data Format:
Select YCbCr 4:2:2, YCbCr 4:4:4, Studio RGB, Extended RGB, or Auto§ – whichever looks best. When YCbCr is
selected, the HDMI output uses YCbCr format and Component output uses YPbPr.
To determine whether Studio vs Extended RGB is the correct setting, compare shadow detail in dark scenes
or play the color bar test pattern in section 4.11 and look at the stripes in the lower right. If using YCbCr
output, compare detail around edges in colorful scenes to determine whether 4:2:2 vs 4:4:4 is best.
If colors look totally wrong with all sources, try all settings before contacting tech support. If colors look
wrong only when certain sources are selected, see section 4.11.
§ Auto setting: Works with most displays, but you may get a better result selecting the format manually.
19
3. SETUP continued …
Letterbox:
When the source material’s aspect ratio (the proportion of image width to height) does not match the
display’s aspect ratio and you want to preserve the original image’s proportions, the unused areas of the
screen will be blank. You can select the shade of these areas from ten levels between light gray and black.
If you do not want letterbox (bars on top/bottom) or pillarbox (sidebars) on your screen, see section 4.11.
Synchronization:
Try Inverted setting if the image via HDMI is not centered or does not show.
Component 2 Out:
The second Component video output can be configured in one of the following three ways or turned Off:
• MAIN output, processed (same signal as Component 1).
• MAIN output, passthrough – this bypasses the video processing and on-screen display is not
available. If a secondary display in the main room does not accept the format being fed to the main
display, use this setting.
• ZONE2 output – bypasses video processing and on-screen display not available.
20
3. SETUP continued …
3.2
SET TIME / TIMERS
The time and day, plus 6 different timers are set in this menu. The timers in the processor are like an alarm
clock, but allow two different timer settings for each of MAIN, ZONE2, and ZONE3.
2. SET TIME / TIMERS
a.
b.
c.
d.
e.
f.
g.
FORMAT: 12 Hr
TIME: 12:00 AM
DAY: Sunday
ALL TIMERS: Disabled
SET MAIN TIMERS
SET ZONE2 TIMERS
SET ZONE3 TIMERS
To set Time and Day:
• Enter the setup menu. Go to SET TIME / TIMERS and press SELECT.
• Press the button until you reach FORMAT.
• Use the buttons and choose 12 Hr or 24 Hr.
• Press the button to go to TIME.
• Press SELECT. “12” or the current hour will be highlighted in red.
• Use the Master Control Knob or the buttons to set the current hour.
• Press the button. “00” or the current minutes will be highlighted.
• Use the Master Control Knob or the buttons to set current minutes.
• Press BACK to return to the menu line.
• Press the button to go to DAY then use the buttons to set the current day.
All Timers:
This allows you to simultaneously “Enable” or “Disable” all Timers for MAIN, ZONE2, and ZONE3.
Highlighting SET MAIN TIMERS then pressing SELECT displays this menu:
2e.
a.
b.
c.
d.
e.
f.
g.
h.
i.
j.
k.
l.
m.
n.
SET MAIN TIMERS
--- TIMER 1:
WEEKDAY ON:
WEEKDAY OFF:
WEEKEND ON:
WEEKEND OFF:
SOURCE:
ON-VOLUME:
--- TIMER 2:
WEEKDAY ON:
WEEKDAY OFF:
WEEKEND ON:
WEEKEND OFF:
SOURCE:
ON-VOLUME:
Off --8:00 AM
11:00 PM
10:00 AM
11:00 PM
Last Stn
-35.0 dB
Off --8:00 AM
11:00 PM
10:00 AM
11:00 PM
Last Stn
-35.0 dB
21
3. SETUP continued …
Timer Options:
There are two Timers for Main and each Zone to allow greater flexibility. You can set week and weekend
on/off times twice – once for the morning and again for the evening, for example.
Using the buttons, TIMER 1 and TIMER 2 choices are:
• Off – Timer is disabled.
• Week – Timer operates from Monday to Friday.
• Wkend – Timer operates on Saturday and Sunday.
• Wk+Wkend – Timer operates every day.
On and Off Times:
Auto-on/off times are entered for:
T1 or T2 WEEKDAY ON: Sets the Monday to Friday turn-on time.
T1 or T2 WEEKDAY OFF: Sets the Monday to Friday turn-off time.
T1 or T2 WEEKEND ON: Sets the Saturday and Sunday turn-on time.
T1 or T2 WEEKEND OFF: Sets the Saturday and Sunday turn-off time.
Timers may also be set to only turn on or only turn off (see Example 2) – this way, the processor can be set
to turn on automatically, and it won’t turn off until you turn it off manually.
If the processor is already on, Timer On settings are ignored to ensure that source and volume are not
changed while in use.
Source:
Select what you want to be playing when a Timer turns the power on – any source, any preset FM • AM
station, or Last Stn (the tuner setting when processor was turned off). Be sure that the source and the power
amplifier are turned on or will be on at the Timer turn-on time. If your components have trigger inputs, you
can set a processor trigger to turn them on (see section 3.11).
On-Volume:
Sets the volume that will play when a Timer turns the power on. The volume increases slowly when a Timer
turns the power on.
22
3. SETUP continued …
Example 1: Select a source for the ZONE2 Timer:
• Enter the setup menu. Go to SET TIME / TIMERS and press SELECT.
• Press the button until you reach SET ZONE2 TIMERS.
• Press SELECT. The SET ZONE2 TIMERS submenu will appear.
• Press the button until you reach SOURCE.
• Use the buttons to change to desired source.
• Press BACK to leave this submenu and return to the SET TIME/TIMERS menu.
To have the Timer turn on to a Preset Station, do the following from the SOURCE menu line:
(setting Preset Stations is explained in section 4.4.1)
• Use the buttons to change to “Last Stn”.
• Press SELECT to highlight “Last Stn”.
• Use the buttons to select an FM • AM Preset. These scroll from AM 1-1 to AM 1-6 then from
FM1-1 to FM3-6 and back to “Last Stn”.
• Press BACK once you have selected a preset.
The Timer submenu setup procedure is the same for MAIN, ZONE2, and ZONE3.
Example 2: Change ZONE2, TIMER2 to come on Weekdays at 7:30 AM.
• Enter the setup menu. Go to SET TIME/TIMERS and press SELECT.
• Press the button until you reach SET ZONE2 TIMERS.
• Press SELECT. The SET ZONE2 TIMERS submenu will appear.
• Press the button to reach TIMER 2.
• Use the buttons to change to “Week”.
• Press the button until you reach WEEKDAY ON.
• Press SELECT. The hour is now highlighted. Use the Master Control Knob or the buttons to set
the hour to “7” AM. (Continuing through “12” will advance the AM/PM settings.)
• Press the button. “00” minutes will be highlighted.
• Use the Master Control Knob or the buttons to set the minutes to “30”.
• Press BACK to leave this submenu and return to SET TIME/TIMERS menu.
When scrolling between 11 PM and 12 AM settings, the display shows “--:--”. Timers set in the “--:--”
position will be skipped. For example, to set the Timer to only turn on, set the Off time to “--:--”. To set
the Timer to only turn off, set the On time to “--:--”.
23
3. SETUP continued …
3.3
SPEAKER CONFIGURATION
The Speaker Configuration Setup allows you to enter information about your speakers so that sounds from
source materials are not lost or distorted.
3. SPEAKER CONFIGURATION
a.
b.
c.
d.
e.
f.
g.
h.
BASS MANAGEMENT-MOVIE
BASS MANAGEMENT-MUSIC
SURROUNDS: Dipole
REARS: Dipole-7.1
UNITS: ft
CENTER EQ: No
TV SIZE: 30-42 in
ROOM RESONANCE FILTER
Skip items f. to h. if using Anthem Room Correction on all sources.
Bass Management Configurations for Movies and Music:
The processor memorizes two bass management configurations – if using both (Music configuration is
optional), always use Movie for source material that contains LFE. The BASS MANAGEMENT-MUSIC menu
asks whether or not you want to use the same settings as the Movie configuration – the default is “Yes”.
Setting up a configuration is described later in this section. Assigning a configuration to a source or enabling
automatic activation according to presence/absence of LFE is explained in section 3.6.
If your source components have bass management and time alignment, turn them off by setting all
channels “large” and to the same distance in the source components.
Surround and Rear Speaker Quantity and Type:
Surround speakers fall in two radiation pattern categories: Direct and Dipole. No delay is necessary in
channels using dipole speakers since most of the sound is delayed through room reflections. When Dipole
is selected, distance is matched internally with the greatest one in the LISTENER POSITION menu.
If you are using one rear speaker, set d. REARS to 6.1 and use the Rear-L output.
If you are using no rear speakers, skip the d. REARS setting. It makes no difference what it’s set to.
Units:
Feet (ft) or metres (m). This will be used for size and distance measurements.
Center EQ:
When a speaker sits directly above or below a vertical surface such as a TV screen, reflections can change
frequency response making dialog less natural. With Anthem’s unique CENTER EQ set to “Yes” the negative
effects of vertical surfaces close to the front of the speaker can be cancelled.
TV Size:
This determines the CENTER EQ response curve. Select from 18 - 30” / 30 - 42” / 42 - 54” / 54 - 66” / 66 - 78”.
If UNITS is set to “m” the selections are 45 - 75 cm / 75 - 100 cm / 100 - 135 cm / 135 - 165 cm / 165 - 200 cm.
Since room/TV/furniture acoustics vary as do center channel speakers and their positioning, play a few
DVDs and use the setting that provides the clearest dialog even if it doesn’t match the TV’s size.
24
3. SETUP continued …
Highlighting BASS MANAGEMENT-MOVIE then pressing SELECT displays this menu:
3a.BASS MANAGEMENT-MOVIE
a. ADV SETTINGS: Off
b.
FRONTS: Small
c.
CENTER: Small
d. SURROUNDS: Small
e.
REARS: Small
f.
SUBS: 1 Sub
g. XOVER FREQ: 80 THX
h. FRONTS XOVER: -- Hz
i. CENTER XOVER: -- Hz
j. SURND XOVER: -- Hz
k.
REAR XOVER: -- Hz
l.SUB/LFE XOVER: -- Hz
m. SUB POLARITY: -n.
SUB PHASE: -- Deg
o. BYPASS LFE XOVER: --
Skip items a. to l. if using Anthem Room Correction on all sources.
Advanced Settings:
The default is Off. Use of advanced settings is described later in this section.
Small or Large:
Most speakers should be set to Small and used with a subwoofer unless they use large drivers that play deep
bass and LFE accurately. Even then, the question is which speaker can produce deeper and cleaner bass at
higher output? It’s almost always the subwoofer, which has the advantage of flexible positioning in the room
to help control boominess. All THX certified speakers are designed for Small setting.
Subwoofer:
• 1 Sub
The subwoofer plays two things – bass from channels set to Small and the Low Frequency
Effects track on 5.1-channel source material. This setting is preferred by THX. Use this
setting if using a subwoofer with Anthem Room Correction.
• 1 Super As above except bass from all channels is included, not just the ones set to Small. This
setting is not recommended for the Movie configuration.
• 2 Subs or 2 Supers – Select if using both subwoofer outputs and not using ARC. This simply reduces
the subwoofer channel’s test noise level to compensate for the additional subwoofer.
“None” setting for:
• CENTER – the center channel plays from the L/R fronts.
• SURROUNDS – the L-Surround channel plays from the L-Front channel and the R-Surround channel
plays from the R-Front channel (except Dolby Pro Logic modes).
• REARS – the rear channel on Surround EX and DTS-ES sources plays from the surrounds.
• SUBWOOFER – the subwoofer channel plays from L/R fronts (forced to Large) and surrounds.
If you are using 5.1 speakers, use the SURROUND outputs and set REARS to None so no sound is lost!
25
3. SETUP continued …
Bass response highly depends on room acoustics and experimentation with subwoofer placement is
recommended. Start by temporarily placing the subwoofer in the listening area, play some music with a
range of bass and walk around the room. Positions where the bass range sounds smooth are suitable
for permanent subwoofer placement as long as decor allows.
Crossover (Xover) Frequency:
The crossover divides audio in two frequency bands, resulting in lower bass level in Small channels and no
midrange/treble in the subwoofer. If your subwoofer has a crossover, it should be bypassed – set its
frequency control to the highest frequency.
A crossover does not cut frequencies off like a cliff, but rolls them off according to a slope. If set to 80 Hz,
for example, your main speakers will still play lower frequencies – they just won’t have to play them as loudly.
This also lightens the load on the amplifier leaving extra power for mid and high frequencies. Setting the
crossover to the lowest number on your speaker’s specification page is unlikely to provide the best result.
Using the buttons choose a frequency between 25 Hz - 160 Hz suitable for the low frequency capability
of your speakers. With THX certified speakers, the crossover should be set to 80 Hz.
LFE is redirected only when Subwoofer is set to No. If set to Yes or Super, the Movie configuration XOVER
FREQ should not be set much lower than 80 Hz otherwise some LFE information will be lost.
Advanced Settings – Crossover Frequency:
When ADV SETTINGS is set to On, each speaker type can be set to a Crossover Frequency that best suits its
low frequency characteristics and room acoustics. For example, if placing a speaker against a wall causes
excessive bass, the Advanced Crossover can be used to roll off the excess bass.
If room acoustics cause response to drop in the crossover region, the subwoofer channel can be set to
overlap other channels to compensate, for instance setting SUB/LFE XOVER to 90 Hz and FRONTS XOVER to
70 Hz. In the opposite situation, if there is a bass peak in the crossover region, you can spread settings to
flatten response, for example SUB/LFE XOVER to 70 Hz and FRONTS XOVER to 90 Hz.
A very low setting, such as 25 Hz, may be used to protect full-range speakers from potentially harmful
signals. Scrolling below 25 Hz or above 160 Hz brings the Off setting which bypasses the crossover.
Advanced Settings – Subwoofer Phase and Polarity:
Certain subwoofer positions can cause bass frequency cancellation. When the front speakers and
subwoofer are out of phase or misaligned, they work against each other resulting in weak and dislocated
sounding bass. This can be corrected by adjusting Phase and Polarity.
If your subwoofer has these controls, set them to zero/normal before making menu adjustments. The
advantage of adjusting through the setup menu is hearing changes instantly from the listening position.
As a general guide, set Polarity to Normal if the subwoofer is near the front speakers and to Inverted if the
subwoofer is near the back of the room. With bass material or the “shhhh” noise between FM radio stations
playing, compare Normal to Inverted and use the setting that provides louder bass.
The Phase control provides further alignment – listen to FM “shhhh” noise and adjust until bass is loudest.
Advanced Settings – Bypass LFE Crossover:
If you have set SUB/LFE XOVER to much lower than 80 Hz, the upper portion of the LFE signal will be lost.
With BYPASS LFE XOVER set to Yes, LFE goes to the subwoofer without going through the crossover,
preventing loss of LFE information. This also applies to the 6-Ch input’s SUB input (effectively an LFE input).
26
3. SETUP continued …
Highlighting ROOM RESONANCE FILTER then pressing SELECT displays this menu:
R
ROOM RESONANCE
RESONANCE FILTER
RESULT
3h.ROOM RESONANCE FILTER
a.
TEST TONE: Off
b.
TEST LEVEL: +0.0dB
c.
TEST FREQ: 21 Hz
d. APPLY FILTER: No
e. CENTER FREQ: 60 Hz
f. FILTER DEPTH: 1 dB
g. FILTER WIDTH: 20 Hz
h. THX ULTRA2 SUB: No
i.THX BG COMPENSAT'N: NA
Skip this menu if using Anthem Room Correction on all sources.
Rooms often have a single prominent resonance peak which can make bass sound boomy, even with the
finest subwoofer. The processor has a proprietary set of low frequency test tones that allow you to find and
easily remove that resonance peak.
The Room Resonance Filter is a notch filter – it is not designed to boost weaker bass frequencies. While
running the test tones, if you discover that instead of a prominent peak there is a prominent dip in response,
the best way to fill it is through repositioning the subwoofer and/or listening position. Using electronics alone
to accomplish this is often met with frustration, for example, a 10 dB boost would require the amplifier to
work ten times harder, as well as speakers that can handle that much more power.
Test Tone and Level:
Test tones sweep from 18 Hz up to the XOVER FREQ (or the SUB/LFE XOVER frequency) that you have set in
BASS MANAGEMENT -MOVIE or -MUSIC, whichever is higher. You can vary the level to a comfortable one.
Center Frequency
Filter Depth
Filter Width
Filter Center Frequency:
The frequency that is reduced the most when the filter is applied is called the Center Frequency. Set this to
the frequency that sounds the loudest or most boomy when the built-in test tones are played. If you’re using
a sound pressure level meter, set it to C-weighting or Flat.
Filter Depth:
This is the amount of center frequency ‘cut’, or reduction in volume, in the subwoofer channel. Frequencies
just above and just below the center frequency are also reduced, but not as much. Range is from 1 to 20 dB.
Adjust to bring the level of the resonant peak down to the same level as the other frequencies.
Filter Width:
This adjustment varies the range and sharpness of the filter. For example, if Filter Width is set to 3 Hz, the
Room Resonance Filter cuts a very narrow range at the filter center frequency. If Filter Width is changed to
18 Hz, a broader range is reduced. Adjust so that resulting frequency response is as flat as it can be made.
Frequency and Depth settings affect Width adjustment range – this changes automatically.
THX Boundary Gain Compensation:
If your listening room layout results in the subwoofer and/or listeners being too close to a wall, an excessive
bass effect can result. With a subwoofer that extends to 20 Hz, including all THX Ultra2 certified subwoofers,
Boundary Gain Compensation can improve bass balance. To enable, set THX ULTRA 2 SUB to Yes and THX
BG COMPENSATION to On.
27
3. SETUP continued …
Procedure for adjusting Room Resonance Filter:
• Enter the setup menu. Go to SPEAKER CONFIGURATION and press SELECT.
• Press the button until you reach ROOM RESONANCE FILTER and press SELECT.
• Use the buttons to set TEST TONE to Auto. Press SELECT to start automatic sweeping of the
test tones. Alternatively, you can set TEST TONE to Manual – to vary the frequency, press the buttons to reach TEST FREQ, then use the buttons to change frequency.
• Some subwoofers are not able to accurately reproduce frequencies below 30 Hz or so, especially
at higher levels. In addition, it can be quite difficult to hear these frequencies. If playing them
causes unusual sounds indicating the subwoofer is being stressed, do not continue to play them.
• TEST FREQ changes to show the frequency being played during automatic sweep. Listen for (or
measure) the frequency that sounds too loud compared to the other frequencies.
• Press the button until you reach CENTER FREQ and select the frequency that is closest to the
test tone frequency that was found to be the loudest.
• Press the button until you reach APPLY FILTER and set it to Yes.
• Press the buttons to go to FILTER DEPTH and FILTER WIDTH. Adjust both to achieve the flattest
response across the range of test tones.
• Press BACK to stop the test tones and leave this submenu.
28
3. SETUP continued …
3.4
LISTENER POSITION
The Listener Position menu lets you enter the distance between each speaker and the listening area. Ideally,
speakers should be placed at an equal distance so that their sound arrives at the listening area at the same
time, but since this is rarely practical, the processor can delay the sound coming from speakers that are
closer to the listener. This way, sound reaches the listening area at the same time from all speakers, and
proper imaging can be achieved.
The speaker with the greatest distance setting will have no delay – speakers with shorter distance settings
will be delayed according to their setting. Speakers set to Dipole in the SPEAKER CONFIGURATION menu
have their distance set internally to the greatest distance that you enter for the other speakers.
4. LISTENER POSITION
a.
FRONT-L: 12.0 ft
b.
CENTER: 12.0 ft
c.
FRONT-R: 12.0 ft
d.
SUR-R: Auto
e.
REAR-R: Auto
f.
REAR-L: Auto
g.
SUR-L: Auto
h. SUBWOOFER: 12.0 ft
i. REARS L-R: 4+ ft
Distance Adjustment:
Enter the distance between your primary listening area and each speaker. Range is 0-99 ft in 0.5 ft increments
or 0-99 m in 0.2 m increments.
Example: Set center speaker distance to 11 feet.
• Enter the setup menu. Go to LISTENER POSITION and press SELECT.
• Press the button until you reach CENTER.
• Use the buttons to change to 11.0 ft.
• When finished, press to go to another menu item, or...
• Press BACK to leave the submenu and return to the main menu.
Rear-L to Rear-R Distance:
ASA (Advanced Speaker Array) is a proprietary THX technology that processes the sound fed to the two
surround and two rear speakers to provide an optimal surround sound experience. When using all 7.1
speaker outputs, placing the two rear speakers close together will provide the largest sweet spot. If for
practical reasons you have to place the rear speakers further apart, choose the setting that most closely
corresponds to the speaker spacing to optimize the surround soundfield.
29
3. SETUP continued …
3.5
LEVEL CALIBRATION
Level Calibration uses internal test noises to match the relative level of each speaker at the listening position.
Use of noises from home theater setup discs is not recommended – some use incorrect methods.
Use of a Sound Pressure Level meter is recommended if not using ARC. Set the meter to C-weighting or Flat
if C-weighting is unavailable, and Slow or RMS responses if available. At the listening position, point the
meter upwards when measuring and hold it away from your body to prevent reflections.
The FRONTS, CENTER, SURROUNDS, REARS, SUB, and BALANCE buttons on the front panel and remote
control do not change settings in this menu – they provide on-the-fly adjustment, memorized according
to input format, in case a source material needs it (sections 4.6 and 4.7).
5. LEVEL CALIBRATION
a. NOISE SEQUENCE: Off
b. NOISE LEVEL: +0.0 dB
c.
FRONT-L: +0.0 dB
d.
CENTER: +0.0 dB
e.
FRONT-R: +0.0 dB
f.
SUR-R: +0.0 dB
g.
REAR-R: +0.0 dB
h.
REAR-L: +0.0 dB
i.
SUR-L: +0.0 dB
j.
MOVIE SUB: +0.0 dB
k.
MUSIC SUB: +0.0 dB
k. is displayed when item a. in BASS MANAGEMENT-MUSIC is set to No.
Skip items b. to i. if using ARC unless mic cannot detect sweep tones – raise NOISE LEVEL in that case.
Noise Sequence:
Test noise plays from one speaker at a time, changing manually using the buttons or automatically
every two seconds by setting NOISE SEQUENCE to Auto using the buttons, then pressing SELECT.
Source switches to FM • AM when any test noise is played. (Anlg-Dir bypasses the test noise generator.)
Noise Level:
This is the master volume for this menu’s test noises – changing it changes the levels of all channels equally
including normal playback of sources. The noise comes out of the left front channel. Using the buttons,
adjust NOISE LEVEL so the SPL meter reads 75 dB. If you do not have an SPL meter, skip this adjustment.
Level Calibration of each channel:
Balances speaker levels to one another. If you’re calibrating by ear, use the remote control and sit in the
listening area when adjusting. If using an SPL meter, adjust level so it reads 75 dB for each channel. If Noise
Level is set while Front-L is at 0 dB, no adjustment of Front-L is needed since the output is the same. If using
a powered subwoofer, make a rough adjustment with its input level control before setting sub level in this
menu or using ARC. Speakers set to None in the Speaker Configuration menu are skipped.
If SUBS is set to Super in BASS MANAGEMENT-MOVIE (not advised) or BASS MANAGEMENT-MUSIC, do
not rely on an SPL meter to set subwoofer level – set it by ear while playing various types of source material.
Level Calibration cannot take into account the bass that’s added to the subwoofer from speakers set to
Large, which results in more bass during playback than the calibrated level.
30
3. SETUP continued …
Procedure for Manual Test Sequence:
• Enter the setup menu. Go to LEVEL CALIBRATION and press SELECT.
• Use the buttons to set NOISE SEQUENCE to Manual.
• Press the buttons to go from speaker to speaker.
• As each speaker plays, use the buttons to adjust its loudness relative to other speakers.
• Press BACK to stop the test noise.
Procedure for Auto Test Sequence:
• Enter the setup menu. Go to LEVEL CALIBRATION and press SELECT.
• Use the buttons to set NOISE SEQUENCE to Auto.
• Press SELECT to start the automatic sequence.
• As each speaker plays, use the buttons to adjust its loudness relative to other speakers. After
you make an adjustment, the next speaker will play.
• Press BACK to stop the test noise.
31
3. SETUP continued …
3.6
SOURCE SETUP
This is where you set up each source and path according to how you want them to be used.
6.
a.
b.
c.
d.
e.
f.
g.
h.
i.
j.
k.
l.
m.
n.
o.
p.
q.
r.
s.
t.
SOURCE SETUP
CD
2-Ch
6-Ch
TAPE
FM/AM
DVD1
DVD2
DVD3
DVD4
TV1
TV2
TV3
TV4
SAT1
SAT2
VCR
AUX
ZONE2 COPY: Manual
ZONE3 COPY: Manual
REC COPY: Manual
Copy MAIN to ZONE or REC:
If you want MAIN to always be copied to another path (see section 4.3), change Manual to Always. This is
recommended if you want a source that only has digital audio output to be used in ZONE2, ZONE3, or REC,
or if you want MAIN and another path to always play the same source. “Always” setting is not recommended
if you want independent source selection – see the highlighted part of section 2.2.
Source Setup:
Besides setup of each source, DVD, TV, and SAT have expanded memory allowing you to set multiple
configurations, which are useful for two reasons:
• Use multiple layers for same source, with different video adjustments on each layer, such as aspect
ratio control (see section 4.11).
• Use multiple layers with different sources when you have more than nine source components.
To enable DVD2, DVD3, DVD4, TV2, TV3, TV4, or SAT2, at the top of its submenu change SAME AS to Custom
to create its own Source Setup profile, or to any of the other sources to use the same Source Setup profile
but with different video processing adjustments.
To copy settings from one source to another layer while having the ability to make changes to the new layer,
select another source for SAME AS then press SELECT. When asked “Are you sure?” that you want to copy
settings, use the buttons to change No to Yes and press SELECT. The new layer becomes Custom using
the copied settings and changes can then be made.
Once set up, select a layer by pressing the source button one, two, three, or four times, or through the
direct-access macros in Appendix A.
32
3. SETUP continued …
Highlighting DVD1 then pressing SELECT displays this menu – the other submenus are similar:
6f. DVD1 SOURCE SETUP
a.
RENAME: DVD1
b. VID OUT CNFG: 1
c. SCALER INPUT: HDMI1
d. COMPONENT IN: 1
e.
S-VIDEO IN: DVD
f. COMPOSITE IN: DVD
g.AUDIO IN: Dig HDMI
h.AUTO DIG: No
i.HDMI MAP: Auto
j. MUTING: Med
k.EQ LF +0.0dB HF +0.0dB
l. BASS MGR: Auto-LFE
m.
ROOM EQ: On
n. LIP-SYNC:
0.0 ms
Rename:
The factory assigned source names that appear on the front panel display and the on-screen display can be
changed to another name, up to six characters long. The following characters are available:
A, B, C....Z, a, b, c....z, blank, dash (–), period (.), slash (/), 0, 1, 2....9, colon (:).
After highlighting the RENAME line, press SELECT and use the buttons to move from character to
character, then use the buttons or rotate the Master Control Knob to change the character. It is also
possible to rename ZONE2, ZONE3, and RECORD – see section 3.10.
When a source is renamed, the new name appears next to the factory name in the Source Setup and Mode
Presets root menus and at the top of the renamed source’s submenu.
Example: Rename “AUX” to “GAME”.
• Enter the setup menu. Go to SOURCE SETUP and press SELECT.
• Press the button until you reach AUX and press SELECT.
• RENAME: AUX will be highlighted in red.
• Press SELECT. The first character “A” will be highlighted in red.
• Use the Master Control Knob or the buttons to change characters. Change the first one to “G”.
• Press the button to move to the next character. Change it to “A”.
• Use the buttons to move to each remaining character. Change to “M” and “E”.
• Press BACK to leave the submenu and return to the main menu.
Video Output Configuration (MAIN only):
Choose between configurations 1 to 4 as set in the VIDEO OUTPUT menu, or Last Used. When Last Used is
selected, the video configuration will be the same as the one that the previously selected source was using.
33
3. SETUP continued …
Scaler Input (MAIN only):
Assign which input is used by the video processor when the source is selected – any HDMI, Component
video, S-Video input, or “None”. Before setting this, be sure that you have read section 2.1. Note that if
S-Video is selected, the input connection is the one specified in S-VIDEO IN. To increase seeking speed for
the seek function in section 4.4, set this to None if the source does not use video processing.
Component, S-Video, Composite Video Inputs:
Assign which video input (or None) is used for unprocessed video switching when the source is selected,
including in ZONE2, ZONE3, and REC.
Audio In (MAIN only):
There are three input types to choose from – Digital, Analog-DSP, and Analog-Direct. After highlighting
AUDIO IN use the buttons to select an input format.
In Digital and Analog-DSP, all channels are upsampled to 24-bit / 192 kHz ensuring the finest
in high-end sound reproduction. This applies even when the input is Dolby Digital or DTS.
• Dig (Digital): Choose any HDMI, coaxial, optical, or the AES/EBU connection. Any digital input can
be assigned to multiple sources. This allows, for example, two setups for the same DVD player –
one for DVDs using DVD1 source setup, and the other for CD music using CD source setup. Note
that Dolby Digital and DTS are transmitted only through a digital connection.
• Anlg-DSP (Analog with Digital Signal Processing): If you want your subwoofer to play from an
analog L/R input, use this setting. Analog input is converted to digital using the processor’s high-end
A/D converters – this enables bass management, time alignment, surround mode, Anthem Room
Correction, bass/treble, lip-sync delay, and THX. These are also available for the 6-Ch input. With
the bass management and time alignment, sound quality from DVD-Audio or SACD is improved
compared to Anlg-Dir mode.
• Anlg-Dir (Analog-Direct): The preamp plays the traditional role of switching inputs and adjusting
levels. All digital processing is bypassed.
Auto Digital (MAIN only):
If set to Yes, the input type switches to Digital when sensing a digital clock signal from a source and to
Analog-DSP when no clock signal is present. This feature is useful with older digital cable boxes that use the
digital output for digital channels and analog output for analog channels.
Example: Change SAT1 Digital Input to optical.
• Make sure satellite receiver is connected to OPT1 and playing.
• Enter the setup menu. Go to SOURCE SETUP and press SELECT.
• Press the button until you reach SAT1 and press SELECT.
• Press the button until you reach AUDIO IN.
• Use the buttons to change to OPT1 (sound will now be heard).
• Press BACK to leave the submenu and return to the main menu.
HDMI 6-Channel Map: (MAIN only, for DVD-A format only):
If you hear channels coming out of the wrong speakers, for example the dialog coming out of the right
surround, change HDMI 6CH MAP to the setting that makes each channel come from the correct speaker.
34
3. SETUP continued …
Muting (MAIN only):
This eliminates popping sounds that may occur with some digital source components during a bitstream
change. If popping is heard when changing chapter on a DVD or channel on a digital satellite receiver or
cable box, use Max setting. However, if the beginning of a track is cut off when playing a CD, use Min setting.
EQ (MAIN only):
For sources set to Digital or Anlg-DSP, you can preset low and high frequency levels. This is useful for source
components that have frequency irregularities. After highlighting the EQ line, press SELECT and use the
buttons to select LF (low frequency) or HF (high frequency), then use the buttons to adjust. In the
FM/AM Setup/Presets menu, FM and AM can be adjusted separately. The EQ settings in this menu and the
on-the-fly BASS / TREBLE adjustments do not affect each other (see section 4.7).
Bass Manager (MAIN only):
Choose between Movie or Music configuration as set in the Bass Management menu, or Auto-LFE. When
Auto-LFE is selected, the Movie configuration is used if there is LFE in the source material, and changes to
the Music configuration at all other times. Auto-LFE is recommended when using two bass management
configurations and the same player for DVDs and CDs.
Room EQ (MAIN only, for units with optional ARC-1 Anthem Room Correction):
To disable room correction equalization performed with the ARC-1 microphone kit, change this to Off.
Lip-Sync (MAIN only):
Video can fall out of synchronization with audio for a variety of reasons. The Statement D2’s video processing
causes video to be delayed by 24 milliseconds, which is less than the duration of one frame, thus considered
synchronized. If for whatever reason audio is heard before the corresponding image is seen, you can set up
to 170 milliseconds of audio delay. To adjust while watching video see section 4.9.
Example: Set DVD1 Lip-Sync delay to 24 milliseconds.
• Enter the setup menu. Go to SOURCE SETUP and press SELECT.
• Press the button until you reach DVD1 and press SELECT.
• Press the button until you reach LIP-SYNC and press SELECT.
• Use the buttons to move from digit to digit and the buttons to adjust to 24 ms.
• Press BACK to leave the submenu and return to the main menu.
35
3. SETUP continued …
3.7
MODE PRESETS
When you or another member of your family uses the processor, the mode and THX presets that are set here
are recalled, ensuring trouble-free operation. The presets are applied when a source is selected or MAIN
power is turned on. Each type of source material except 1.0-channel has a setting. Presets do not apply to
sources set to Anlg-Dir. If you do not want to have presets, set this to Last Used.
After selecting a source in the MODE PRESETS root menu, a menu such as the one below appears – DVD1
is shown as the example. Use the buttons to highlight an input format, then use the buttons to
select. For descriptions of surround modes and when to use them, refer to section 4.8.
7f. DVD1 MODE PRESETS
a. 6.0:
b. 2.0:
c.2Sur:
d. DD5:
e. EX:
f. DTS:
g. ES:
PLIIx Movie
AnthemLogic-Cin
PLIIx Movie
PLIIx Movie
PLIIx Movie
Neo:6
DTS-ES Matrix
Program
Preset Selections
• 6.0
Select your playback preference for multichannel PCM (via HDMI) and 6-Ch analog input:
PLIIx Movie (with or without THX Cinema), PLIIx Music, Dolby D EX, THX Surround EX,
THX Cinema, THX Ultra2 Cinema, THX MusicMode, THX Games Mode, Neo:6 (with or
without THX Cinema), Last Used, or None (see sections 4.8.4 and 4.8.6).
• 2.0
For stereo input, select any mode in section 4.8.3, THX Games Mode, or Last Used. Dolby
Pro Logic, Pro Logic IIx Movie, and Neo:6 Cinema can be set with or without THX Cinema.
The following apply to Digital inputs only:
• 2.0-Sur
Separate setting especially for surround-flagged Dolby Digital 2.0 material (section 4.8.2),
normally PLIIx Movie but any setting that applies to regular stereo input can also be used.
• DD-5.1
Select your playback preference for Dolby Digital 5.1 material: PLIIx Movie (with or
without THX Cinema), PLIIx Music, Dolby D EX, THX Surround EX, THX Cinema,
THX Ultra2 Cinema, THX MusicMode, THX Games Mode, Neo:6 (with or without
THX Cinema), Last Used, or None (see sections 4.8.4 and 4.8.6).
• DD-EX
For material encoded in Dolby Digital Surround EX: PLIIx Movie (with or without
THX Cinema), PLIIx Music, Dolby D EX, THX Surround EX, Neo:6 (with or without
THX Cinema), Same as DD-5.1, Last Used, or None (see sections 4.8.4 and 4.8.6)
• DTS-5.1 For DTS material: Neo:6 (with or without THX Cinema), PLIIx Movie (with or without
THX Cinema), PLIIx Music, Dolby D EX, THX Cinema, THX Ultra2 Cinema, THX MusicMode,
THX Games Mode, Last Used, or None (sections 4.8.5 and 4.8.6).
• DTS-ES For DTS-ES: DTS-ES Matrix (with or without THX Cinema), PLIIx Movie (with or without
THX Cinema), PLIIx Music, Dolby D EX, Same as DTS, Last Used, or None (see sections
4.8.5 and 4.8.6). Note that for ES Discrete, this setting is overridden and playback is in 6.1.
36
3. SETUP continued …
3.8
ANALOG INPUT LEVELS
For sources set to Anlg-DSP or Anlg-Dir in under Source Setup, you can match input levels in MAIN to each
other so there are no large changes in volume as you change sources. This is also where recording level is
set when using the processor as an analog-to-digital converter (see sections 3.6, 3.9, and 4.3).
8. ANALOG INPUT LEVELS
a.
b.
c.
d.
e.
f.
g.
h.
i.
j.
k.
l.
m.
n.
o.
p.
q.
CD:
2-Ch:
6-Ch:
TAPE:
FM/AM:
DVD1:
DVD2:
DVD3:
DVD4:
TV1:
TV2:
TV3:
TV4:
SAT1:
SAT2:
VCR:
AUX:
+0.0
+0.0
+0.0
+0.0
-5.0
+0.0
+0.0
+0.0
+0.0
+0.0
+0.0
+0.0
+0.0
+0.0
+0.0
+0.0
+0.0
dB
dB
dB
dB
dB
dB
dB
dB
dB
dB
dB
dB
dB
dB
dB
dB
dB
If a source that is set to Analog-DSP is playing while you adjust the Input Level, you will notice a vertical bar
graph to the left of the dB settings. With the on-screen display, this Bar Graph has a green, pink, and red
area. The pink area, when showing, represents the last 6 dB of undistorted range and the red area, when
showing, indicates overload. On the front panel display the overload indication is the uppermost segment,
and the one below it is the “6 dB or less remaining” indicator.
Before making changes or adjustments in this menu, have all connected source components playing
similar music material. Then, as you switch through each highlighted source, you will hear that
component play. This lets you know that each component is connected to the processor, and it also
allows for easy comparative level adjustments of analog sources. Remember, adjusting input levels only
functions with sources set to Analog, and the bar graph only works with Analog-DSP setting.
Example: Adjust TAPE Input Level.
• Make sure a source component is connected to TAPE Analog L/R Input and playing.
• Enter the setup menu. Go to ANALOG INPUT LEVELS and press SELECT.
• Press the button until you reach TAPE: +0.0 dB.
• Press SELECT. +0.0 dB will be highlighted in red.
• Use the buttons to change the Level.
• When finished, press BACK then to go to another source, or...
• Press BACK to leave the submenu and return to the main menu.
37
3. SETUP continued …
3.9
ADC / AUDIO OUTPUT
In the ADC / Audio Output menu you can configure the surround and rear channels, set analog to digital
conversion parameters for the digital Record output, and configure the balanced analog outputs.
9. ADC / AUDIO OUTPUT
a.
b.
c.
d.
e.
f.
g.
6-Ch REVERSE S/R: No
COPY SUR TO REAR: No
6-ch Anlg-DSP: 96 kHz
2-ch Anlg-DSP:44.1kHz
MAIN>REC: 24Bit
DIGITAL2: DIGITAL 1
BAL OUT: Ctr2/Sub2
Reverse Surrounds/Rears:
If you are using a 7.1 speaker system and want to use the rear speakers instead of the surrounds when the
6-Ch input is selected, set REVERSE SUR/REAR to Yes and re-connect the processor as follows: Surround
outputs on the processor to the rear inputs on your amplifier, and the rear processor outputs to the surround
amplifier inputs. The 6-Ch surround inputs will now play through your rear speakers. The processor flips the
SUR/REAR channels back to normal when a mode with 6.1 or 7.1 output is turned on for the 6-Ch input or
when any other input is selected. If you are not getting sound from surround or rear speakers, check that
this is set up correctly before calling tech support.
Copy Surrounds to Rears:
When playing material or using a mode that has surround channel information but no rear information,
setting this to Yes plays the surround channel out of both sets of speakers.
Sampling Frequency (Fs):
When a source that is set to Anlg-DSP is copied from MAIN to RECORD, the analog signal is converted to
digital using the processor’s high-end A/D converters, and sent to DIGITAL1. This is useful for recording
analog music on a CD burner or computer with S/PDIF input on the sound card. You can select from 44.1, 48,
88.2, or 96 kHz sampling rates. Recording level is set by the input level in the Analog Input Levels menu.
This is also the signal processing rate for MAIN. Neo:6 does not function when 2-Ch Anlg-DSP Fs is set
to 88.2 kHz or 96 kHz, therefore leave this set to 44.1 or 48 kHz unless a recording is being made, and use
48, 88.2, or 96 kHz only if the equipment connected to DIGITAL1 and DIGITAL2 accepts those rates.
For the 6-Ch input, a separate setting is used so that signal processing can be performed at the same high
resolution that DVD-Audio and SACD provide. When 6-Ch is copied from MAIN to RECORD, the DIGITAL1
output is a 2-channel downmix.
Bit Rate of DIGITAL1 when MAIN is copied to REC:
Choose from 16 or 24 bit output, to match the recorder. At 16 bits, dither is added to improve low level signals.
Output of DIGITAL2:
Set it to have the same output as DIGITAL1, or a fixed output from any source set to Digital (DVD1, SAT1, etc.).
DIGITAL1 and DIGITAL2 transmit data from digital sources in the same format it comes in – if it’s Dolby Digital
or DTS encoded, it stays that way and can be linked to other digital equipment.
Balanced Output:
If the Balanced CENTER2 and SUB2 outputs are not in use for a second center channel or subwoofer in
MAIN, they can be used as Balanced ZONE2 L/R outputs.
38
3. SETUP continued …
3.10
VOLUMES / PATH NAMES
This menu allows you to define the power-on volume settings, set whether or not MAIN outputs shut off
when headphones are used, and to rename ZONE2, ZONE3, and RECORD.
10. VOLUMES / PATH NAMES
a.
MUTE LEVEL: Silent
b. MAIN ON VOLUME: -35.0
c.MAIN MAX VOLUME: +10.0
d.
ZONE2 ON VOL: -35.0
e. ZONE2 MAX VOL: +0.0
f.
ZONE3 ON VOL: -35.0
g. ZONE3 MAX VOL: +0.0
h. HPHONE ON VOL: -20.0
i. HPHONE MAX VOL: +0.0
j.HPHONE MUTE SPK: No
k. RENAME ZONE2: ZONE2
l. RENAME ZONE3: ZONE3
m. RENAME RECORD: RECORD
Mute Level:
When MUTE is pressed, sound can cut out completely, or decrease in volume by the amount that you set to
keep some of it in the background – select from Silent or –5 to –30 dB in 5 dB steps.
Power-On Volume:
When you turn MAIN, ZONE2, or ZONE3 on, or plug in your headphones, the volume for each will come on
at the known levels you have set in this menu. This prevents surprises when not knowing the volume
someone had set when turning the processor off, then having the power-on volume be too loud or quiet. You
can set independent volumes for MAIN, ZONE2, ZONE3, and HEADPHONE.
Maximum Volume:
These settings allow you to limit the volume of MAIN, ZONE2, ZONE3, or HEADPHONE to avoid damaging
your equipment and/or your ears. This can also serve as a parental volume control feature. The range of
settings available for MAIN is from –95.5 dB to +31.5 dB in steps of .5 dB, and for ZONE2, ZONE3, and
HEADPHONE, the range is from –70.0 dB to +10.0 dB in 1.25 dB steps.
To set a fixed output for ZONE2 or ZONE3, scroll MAX VOL past +10.0 dB to select LockOnVol, then set the
desired fixed output level in ON VOL. When the path is on, “Lock” is displayed beside the volume readout to
indicate that its volume cannot be changed with the volume control.
Headphone Mutes Speakers:
Determines whether or not the MAIN speakers turn off when headphones are plugged into the front panel:
• Yes
The MAIN speakers mute. “HPHONE” is displayed instead of “MAIN” to indicate that
adjusting volume, bass, treble, and balance affect HEADPHONE only.
• No
MAIN speakers continue to play when headphones are plugged in.
Rename Path:
The factory assigned path names that appear on the front panel and on-screen displays can be changed to
another name up to six characters long – the procedure is the same as Rename Source under Source Setup.
39
3. SETUP continued …
3.11
TRIGGERS / IR / RS232
When a trigger output on the processor is connected to the trigger input of another component, such as an
amplifier or projector, the processor can turn it on or off according to the trigger’s Setup. For components
that do not have trigger inputs, a triggerable power bar may work (see your dealer).
Three 12 volt trigger outputs are provided – Trigger1 and Trigger2 each have maximum current output of
50 mA and Trigger3 has maximum current output of 200 mA. There is a quarter of a second delay between
each trigger to minimize line voltage drops caused by switching on too many devices at once.
11. TRIGGER / IR / RS232
a.
b.
c.
d.
e.
f.
g.
h.
ALL
SET
SET
SET
SET
TRIGGERS:Disabled
TRIGGER 1
TRIGGER 2
TRIGGER 3
IR-INPUTS
BAUD RATE: 19200
FLOW CONTROL: None
RS-232 TX STATUS: Off
All Triggers:
When “Disabled” all triggers remain off. When “Enabled” the trigger chart below is used to set conditions.
For custom installation, the “RS-232 Ctrl” setting uses external control.
Set Trigger:
Highlighting SET TRIGGER 1 then pressing SELECT displays this menu:
11b. SET TRIG-1 SOURCES
a.
b.
c.
d.
e.
f.
g.
h.
i.
j.
k.
l.
m.
n.
o.
p.
q.
r.
POWER:
CD
:
2-Ch :
6-Ch :
TAPE :
FM/AM:
DVD1 :
DVD2 :
DVD3 :
DVD4 :
TV1 :
TV2 :
TV3 :
TV4 :
SAT1 :
SAT2 :
VCR :
AUX :
MAIN
*
-
Z2
-
Z3 REC
-
In the example shown, TRIGGER 1 activates when MAIN power is turned on. Trigger outputs can also be set
to activate according to source instead of Power.
40
3. SETUP continued …
After highlighting Power or a source, press SELECT and use the buttons to move from one path to
another. To set the condition, use the buttons to change the “–” to a “*”. Don’t forget: In the root menu
you have to set ALL TRIGGERS to Enabled for the triggers to work.
Changes to the trigger setup do not take effect until exiting from the setup menu, to avoid unnecessary
rapid turning off and on of triggers while making changes.
Example: Activate Trigger2 when DVD1 is selected in MAIN.
• Enter the setup menu. Go to TRIGGER / IR / RS232 and press SELECT.
• Upon entering this menu item, ALL TRIGGERS will be highlighted in red.
• Use the buttons to change to Enabled.
• Press the button to go to SET TRIGGER 2. Press SELECT.
• Use the buttons to go to DVD1. Press SELECT.
• Use the buttons to change the “–” to “*”.
• Press BACK twice to leave this submenu.
Set IR Inputs:
This allows you to enable or disable the processor’s infra-red inputs. Being able to do so can be useful when
an IR receiver, connected to the processor, is located in the same room as the processor. In such a case, the
processor can receive two IR signals for the same command – one through the front, and one through the
back. The potential result is that whatever you’re trying to command may not respond. Disabling the front IR
solves this problem.
The IR signal may also leak into the unit through the vents in the top cover, which could also cause IR
commands to be intermittent or ineffective. If the rear IR inputs are not in use, try disabling them.
11e. SET IR-INPUTS
a. FRONT IR:
b. REAR IR 1:
c. REAR IR 2:
d. REAR IR 3:
MAIN
*
*
*
*
Z2
*
*
*
*
Z3
*
*
*
*
After highlighting an IR input, press SELECT and use the buttons to move from one path to another. To
turn the input off, use the buttons to change the “*” to a “–”. Do this through the front panel, since
remote control commands are ineffective once an IR sensor is turned off.
If the processor does not respond to remote control commands, enter the Setup using the front panel
buttons, go to the TRIGGER / IR / RS232 menu then SET IR-INPUTS, and make sure the
FRONT IR settings are set to “*”. Try this before contacting technical support (see also section 5.6).
Baud Rate and Flow Control (normally for use only by custom installers):
The Baud Rate (adjustable from 1200 to 115200 bps), and Flow Control (RTS, CTS, or None), allow
configuration of the serial port communication parameters.
RS-232 TX Status (normally for use only by custom installers):
When On, all commands, status changes, and control information are echoed through the RS-232 port.
41
3. SETUP continued …
3.12
DISPLAYS / TIMEOUT
This menu allows you to configure on-screen display, front panel display, and selection time.
12. DISPLAYS / TIMEOUT
a. MAIN OS OUT: S-V + HD
b.MAIN OS INFO:All Zones
c.MAIN OS POS'N: Bottom
d.MAIN OS COLOR: Blue
e.MAIN VID MUTE: Gray
f.
Z2 OS OUT: S-V Only
g. Z2 OS INFO: Z2 Only
h. Z2 OS POS'N: Bottom
i. Z2 OS COLOR: Blue
j. Z2 VID MUTE: Gray
k. FP WAKE-UP: Up 1
l. DISPLAY TIMEOUT: 5 s
Main / Z2 On-Screen Output:
Lets you select the outputs that display on-screen information, or Bypassed, which turns the on-screen
display off. If you choose Bypassed, you will have to rely on the front panel display. If you are using S-Video
inputs and prefer the appearance of the HD characters, select HD Only – the HD characters will be used if
a video signal is present.
Main / Z2 On-Screen Info:
Select the path adjustments that are shown by the on-screen displays. For example, if ZONE2 is set up with
an IR repeater for the remote control and you are using the processor in the MAIN room, you may not want
to see information about ZONE2. On the other hand, you may want to see the ZONE2 information, for example,
while adjusting ZONE2 yourself from the MAIN room.
Main / Z2 On-Screen Position:
Allows you to position the on-screen display to reduce the chance of it interfering with the on-screen display
positions of other video components (e.g. satellite receiver’s status info). Choose from Bottom, Mid, or Top.
Main / Z2 On-Screen Color:
If the on-screen display of the setup menu appears unstable, it could be that your display is not synchronizing
to the blue (factory default) background color. You can change the background color to one that your display
can synchronize to – gray and magenta are also available.
Main / Z2 Video Mute Color:
For when there’s no video input, select the “no signal” output – gray, blue, or magenta screen.
42
3. SETUP continued …
Front Panel Wake-Up:
If Display is set to Medium, Low, or Off, it can be made to change to a brighter level while you make any
adjustment – choose None, Up 1 brightness level, or Hi. When None is chosen and the Display is Off, it will
behave as if set to Up 1 to prevent confusion as to whether the power is on or off.
Example: Disable the front panel wakeup.
• Enter the setup menu. Go to DISPLAYS/TIMEOUT and press SELECT.
• Press the button until you reach FP WAKE-UP.
• Use the buttons to change to None.
• When finished, press to go to another menu item, or...
• Press BACK to leave the submenu and return to the main menu.
Display Timeout:
This is the time that elapses after an adjustment is made in any path. After that, on-screen text disappears,
the front panel becomes dim, and the regular MAIN display returns. Adjustable from 1 to 15 seconds.
43
3. SETUP continued …
3.13
SAVE / LOAD SETTINGS
Two memories are provided: User and Installer. If your system is set up by your dealer, the settings can be
saved in the Installer file by the dealer and you can then make further adjustments – save those settings in
your User file. Video processor settings (section 4.11) and FM • AM presets are also saved in User and
Installer settings. If someone makes unwanted changes, you can quickly load saved settings.
13. SAVE / LOAD SETTINGS
a.
b.
c.
d.
e.
SAVE
LOAD
SAVE
LOAD
LOAD
USER SETTINGS
USER SETTINGS
INSTALLER SET'NS
INSTALLER SET'NS
FACTORY DEFAULTS
Save and Load Settings:
When saving or loading settings, the processor will prompt you to confirm that you want to replace the
current settings – press BACK at this point if you don’t want to make the changes.
To clear adjustments described in sections 4.6 and 4.7, save User Settings, then load Factory Defaults,
then load User Settings. The Setup will remain as it was. If certain channels don’t sound as loud as they
should under certain conditions, and you have calibrated levels according to section 3.5, try this before
contacting technical support. The cause may just be a forgotten adjustment, or an adjustment that
someone else made and didn’t tell you. Happens sometimes!
Example 1: Save User Settings.
• Enter the setup menu. Go to SAVE / LOAD SETTINGS and press SELECT.
• Upon entering this menu item, SAVE USER SET’NS will be highlighted in red.
• Press SELECT. You will be asked to confirm that you want to over-write current settings.
• Use the buttons and change to Yes. If you are using a Password, you will be asked for it. Use
the 0 – 9 buttons to enter your Password. The on-screen display will say Saving Successful and the
front panel will say Done.
Example 2: Load Installer Settings.
• Enter the setup menu. Go to SAVE / LOAD SETTINGS and press SELECT.
• Press the button until you reach LOAD INSTALLER SET’NS.
• Press SELECT. You will be asked to confirm that you want to restore installer settings.
• Use the buttons to change to Yes and press SELECT. The on-screen display will say Installer
Settings Loaded and the front panel will say Done.
Example 3: Load Factory Defaults.
• Enter the setup menu. Go to SAVE / LOAD SETTINGS and press SELECT.
• Press the button until you reach LOAD FACTORY DEFAULTS.
• Press SELECT. You will be asked to confirm that you want to load factory settings.
• Use the buttons to change to Yes and press SELECT. The on-screen display will say Factory
Defaults Loaded and the front panel will say Done.
44
3. SETUP continued …
3.14
LOCKOUT / PASSWORDS
Passwords are used to protect the saved User and Installer settings. Once you have set a password, it can
also be used as a Lockout to prevent settings from being changed by anyone without one of the passwords.
14. LOCKOUT / PASSWORDS
a. LOCK SETTINGS
b. SET USER PASSWORD
c. SET INSTALLER PASSW'D
Lock Settings:
When set to Yes, entry to the setup menu is prevented unless the password is entered first.
Set User or Installer Password:
Whether or not settings are locked, if a password is set, it will still be required to save changes to User or
Installer settings. Pick a 4-digit number that you will remember easily. To enter it, use the 0 – 9 keys on the
remote control (password cannot be entered from the front panel). To change a password, enter the old one,
then enter (and confirm) the new one. Keep a record of your password in case it’s forgotten!
Example 1: Set User Password (remote control only).
• Enter the setup menu. You must enter the USER or INSTALLER password if there is one.
• Go to LOCKOUT / PASSWORDS and press SELECT.
• Press the key to go to SET USER PASSWORD.
• Press SELECT. You will be asked to enter a four digit number – use the 0 – 9 keys. If you are
changing your password you will be asked to enter your old one first. You will also be asked to
confirm your new one.
Clearing the password: When asked for your new password, press the key four times. You will also
be asked to confirm – press the key four times again. Message will say “User Password Removed”.
Example 2: Lock Settings (remote control only).
• Enter the setup menu. Go to LOCKOUT / PASSWORDS and press SELECT.
• Upon entering this menu item, LOCK SETTINGS will be highlighted in red.
• Press SELECT. You will be asked to enter a password. The USER or INSTALLER password will work.
• Use the buttons to change to Yes or No.
• Press SELECT or BACK.
45
3. SETUP continued …
3.15
ARC-1 ANTHEM ROOM CORRECTION
ARC-1 corrects the effects of reflective surfaces and room boundaries on sound quality by measuring the
response of each speaker relative to the listening area and equalizing it. ARC equalizes response without
stressing the amplifier or speakers and does not downsample the source material to process it. ARC’s filters
are neither graphic nor parametric – ARC is a sophisticated system that flattens response using its ability to
create practically any suitable function, inherently correcting phase effects created by the room.
The default correction range is up to 5 kHz. Although the limit can be changed if needed, a higher one is
generally not advised since the microphone becomes directional at upper frequencies, affecting
measurement accuracy especially if the height of the speaker’s high frequency driver is not at ear level.
By analyzing the bass trend common to all measured positions, ARC also detects how much gain the room
adds. Room gain shows as a bump in the bass of the target response that ARC tailors for each speaker. ARC
does not remove it because if a room’s gain is flattened, bass sounds thin – ideal speaker response
measured anechoically, which is a straight line sloping down, is not the same as ideal in-room response.
ARC senses where each speaker’s low-frequency response declines and sets high-pass filters accordingly.
Calibration is set such that average level is the same when comparing EQ “On” vs “Off”. Note that to set
levels ARC uses a midrange band that’s wider than the standard home theater setup noise, which is centered
at 1 kHz and narrow so there’s no chance its level would be reduced by a crossover.
Sample response:
Calculated response after EQ
Measured response before EQ
Target response – dotted line
My subwoofer also has equalization. Should I use it?
Since rooms, correction systems, number of subwoofers, and speaker/listener positions vary, the
answer varies although it is best to disable the subwoofer’s EQ before running ARC. If the resulting
calculated and target curves resemble each other, there is usually no reason to use the sub’s EQ. If the
curves significantly differ through a wide range, enable the sub’s EQ and run ARC again to see if it helps.
If you have run ARC with the sub’s EQ enabled, ARC must be run again once the sub’s EQ is turned off.
46
3. SETUP continued …
Before starting:
• Ensure that the processor software and ARC software that you will be using are compatible with
one another – check www.anthemAV.com for latest versions. Processor software installation
instructions are in section 6.
• Your ARC-1 microphone, its support files, and your processor are a system with matching serial
numbers – substitutions are not possible. Before a mic can be used for measurement, its response
must be known. Each ARC-1 microphone’s frequency response is measured precisely and this data
is used to create your microphone calibration files.
• Your computer must be running Windows XP or Vista and have one 9-pin
serial port (for connecting the processor) and one USB port (for connecting
the mic), or one USB port and one card slot and a serial card, or two USB
ports and a USB to serial adapter. The latter is least preferred.
If using a USB to serial adapter to connect the processor:
1. It must be one that supports two stop bits – check with adapter manufacturer.
2. Check the adapter manufacturer’s website for the latest driver. If a message warns that the
driver is not Windows-certified as it’s about to be installed, do not use the adapter. Some
“budget” adapters load bad data into the processor, possibly causing its operation to freeze.
3. The virtual port must be assigned to COM1-COM6. If the processor software installer cannot
locate the processor, use your adapter’s port manager to check the setting.
• If you are using a laptop computer, check its power settings and battery meter to ensure that
procedures will not be interrupted.
• If the room contains large objects that won’t be present during the system’s normal use, move them
out so ARC doesn’t pick up reflections that won’t be present during normal use.
• While taking measurements it would be best to keep pets and younger or talkative family members
out of hearing range. The measurements reject continuous background noise such as fans but if a
sudden noise is made ARC will indicate that re-measurement is required.
• ARC bypasses Center Channel EQ, Room Resonance Filter, and Boundary Gain Compensation.
• Two configurations may be saved – one under Movie bass management and the other under Music.
ARC software installation:
Play the ARC CD in your computer’s CD or DVD drive. Instructions will appear on your screen. If your
computer does not allow a CD to auto-run then double-click on the My Computer icon that’s on Desktop,
select the drive that the CD is in to view its contents, and double-click on setup.exe.
The installation will put several files into an Anthem folder on your computer and create shortcuts on your
Start Menu and Desktop. Two files begin with your processor’s serial number. Examples: 123456_100002.cal
and 123456_100002Anthem.file.
Custom installers: To set up multiple systems using one computer, copy the two serialized files from
each ARC CD to this directory after ARC is installed:
My Computer, Local Disk C:\Program Files\Anthem\AnthemRoomCorrection
47
3. SETUP continued …
Microphone stand assembly:
Screw the telescoping tube into its base and the microphone clip onto the tube. Position the clip vertically.
Connect the USB microphone cable to the microphone and slide the microphone into the clip.
Microphone positioning:
During measurement the microphone must point straight up. The microphone’s height is critical to proper
measurement and should be at ear level when seated.
Ideally, the front speakers’ high-frequency drivers should be at approximately the same height as the
listener’s ears but if they aren’t and the result sounds dull or bright, microphone height will have to be
adjusted and measurements repeated.
To adjust the length of the telescoping tube, first loosen its clamp by rotating it counterclockwise.
Five listening area positions are normally measured but this number can be increased up to ten. The first
must be at or just in front of the central seating position. This is also used to set Speaker Calibration levels.
Positions 2 and 3 should be symmetric to the left and the right of the center line, and the same applies to the
remaining positions. If your room has less than five seating positions, measurements must still be taken from
five positions at least 2 feet (70 cm) apart to ensure optimal sound.
Measurement:
• Connect the microphone and the processor to the computer.
• Set the microphone in the first position. Don’t stand near the microphone while sweep tones are
playing otherwise reflections from your body may cause bad measurements.
• Run Anthem Room Correction by selecting it from the Start Menu or double-clicking the Desktop
shortcut and select Standard mode. The program will guide you through the remaining steps and at
the end will load the correction data to your processor. The process takes about 20 minutes
depending on the number of measurements.
• Once the ARC program is finished, you can disconnect the computer. Turn on the processor and set
“Room EQ:” On/Off in the Source Setup menu according to each source. If you made measurements
for a Music configuration, assign Bass Manager accordingly.
• Save your settings in the Save / Load Settings menu. Note that changing the Sub crossover in the
Bass Management menu affects only Room EQ “Off” sources.
Advanced:
After a file is created in Standard mode, it can be opened in Advanced mode to change EQ range, crossover
points, and room gain. To do this, change Targets then click on Calculate, then Upload.
Since rooms and systems vary the only advice that Anthem technical support can provide without being
at your house to hear your system is to use the auto-detected settings. The alternative is trial and error.
To change the amount of room gain, the Force checkbox has to be checked for the manually entered change
in dB to take effect once clicking on Calculate. To restore the settings sensed by ARC, click on Auto Detect
and re-calculate. Clicking on Erase uploads flat parameters.
48
3. SETUP continued …
Updating ARC:
Check www.anthemAV.com periodically for ARC software updates. The download contains revision history,
which may also indicate that the processor requires an update for the ARC version to work correctly.
If a newer version is posted and you would like to use it, check your current version:
• Run Anthem Room Correction in Advanced mode.
• Click on Help then click on About. The version number will be displayed.
Proceed only if your version is not the latest:
• Download the latest software from our web site to Desktop.
• When download is complete, right-click on the downloaded .zip file and extract it to Desktop.
• Open the extracted folder and double click on setup. Software installation instructions will appear
on your screen. If you are installing ARC on the computer for the first time, copy your two
serialized files from your software CD to the extracted folder on Desktop before double-clicking
on setup. This way they will be added to Program Files automatically.
• When installation is complete, you can delete the downloaded file and the extracted folder.
IMPORTANT:
With ARC v1.2 the Program Files folder is
My Computer, Local Disk C:\Program Files\Anthem\AnthemRoomCorrection
instead of this one which was used with previous versions:
My Computer, Local Disk C:\Program Files\Anthem\AnthemStatement\AnthemRoomCorrection
If you installed a prior version and do not have the CD at hand, be sure to either:
• copy your serialized files into the extracted folder before double clicking on setup, or...
• if the update has been installed and ARC says that microphone files cannot be found, move your
serialized files from the old AnthemRoomCorrection folder to the new one.
If you are updating from v1.2 to a later version, it is not necessary to relocate serialized files.
49
4. OPERATION
4.1
POWER ON/OFF
The processor comes on at the volume setting in the Volumes setup menu. The power amplifier should be
turned on last and off first to prevent “popping” when upstream components are turned on and off.
Front Panel – Main on
• Press MAIN in the POWER or the PATH group. Alternatively, if ZONE2 and
ZONE3 are off, press any SOURCE button, FM • AM preset, or TUNE.
Front Panel – Zone off
• Press ZONE2 or ZONE3 in the POWER or PATH group.
Front Panel – Main or a Zone off
• Press MAIN or ZONE2 or ZONE3 in the POWER group.
Remote Control – Main or a Zone on
POWER
SSP PATH
• Make sure the appropriate control mode is set (MAIN, Z2, or Z3 in the
SSP PATH group) then press POWER.
Remote Control – Main or a Zone off
• Make sure the appropriate control mode is set then press SSP OFF.
4.2
MAIN
Z2
Z3
SSP OFF
LAST
PATH SELECTION
Path routes sources to the MAIN, ZONE2, ZONE3, or RECORD outputs.
• MAIN: Routes sources to your main listening/viewing room, with outputs for 7.1-channel audio and
the main display.
• ZONE2 and ZONE3: Routes sources to other rooms in your home. The source selection can be the
same as or different from the source selected in other paths. ZONE2 and ZONE3 each have outputs
for a TV and 2-channel audio. To listen to a source that is not connected via L/R analog audio, you
must “copy” it from MAIN (see section 4.3).
• RECORD: Except when prevented by copy protection, allows you to record sources independently
of what is selected in other paths. Composite and S-Video, and fixed-level analog audio outputs are
available for two recorders. In addition, the two coaxial digital audio outputs DIGITAL1 can put out
the audio of any digital source, or convert an analog source to digital. DIGITAL2 can put out the
same signal as DIGITAL1, or any of the sources set to Digital. To use conversion or downmixing, the
source must be copied from MAIN – see section 4.3. Analog audio RECORD output has a signal only
if L/R analog audio is connected or when MAIN is copied.
PA
SSP TH
Remote control – the REC PATH key is near the bottom of the remote control.
REC
The displayed path returns to MAIN a few seconds after an adjustment is made in ZONE2, ZONE3, RECORD,
or HEADPHONE*. This is designed to prevent accidents. For example, if someone in the MAIN room wants
to turn up the volume there, and the path is in ZONE2, the volume would increase in ZONE2, not MAIN. Since
the person adjusting the volume doesn’t hear the change, chances are that he or she would keep turning
up the volume in ZONE2, unaware of what’s happening there.
* Except when MAIN is off or HEADPHONE is set to mute the MAIN speakers in the Volumes setup menu.
50
4. OPERATION continued …
4.3
MANUALLY COPYING THE MAIN PATH TO ZONE2, ZONE3, OR RECORD
When Main is copied to another path, the source selected in MAIN is directed to the other path.
If a source component’s audio is connected to the processor using digital connection only, the Copy
function is the only way to deliver the sound to another path.
Front Panel
Press MAIN simultaneously with ZONE2, ZONE3, or REC. Use MAIN to select the source.
Remote Control
Make sure the appropriate control mode is set, or REC path is selected, then press COPY.
PIP
SWAP
MOVE
COPY
A
When MAIN is copied, the display for the other paths reads “–MAIN–> ZONE2” (or ZONE3 or REC), along
with the information normally displayed. Copy can also be set permanently in the source setup menu.
Downmixing to 2-Channel Stereo:
The center, surround, and rear channels can be mixed into the left and right channels for the ZONE2, ZONE3,
TAPE, and VCR outputs. This can be done by the DVD player or the processor:
• Processor downmix: If the digital audio output from your DVD player is connected to the processor,
the processor down-mixes 5.1 channels into 2.0 when you copy MAIN to another path. This applies
whether the input is, Dolby Digital, DTS, or 6-Ch input.
• DVD player downmix: If the left/right analog outputs from your DVD player are connected to the
processor’s Analog Audio-In, the Dolby Digital down-mix done by your DVD player can be used for
ZONE2, ZONE3, TAPE, and VCR outputs, without having to copy MAIN. Note thatL DVD players do not
normally provide a down-mix for DTS material.
4.4
SOURCE SELECTION
After making sure that you are in the appropriate path (front panel) or appropriate control mode is set
(remote control), select a source.
S
PIP
SWAP
MOVE
COPY
2-Ch
6-Ch
PA
SSP TH
REC
CD
AUX
TAPE
FM
AM
SSP SOURCE
DVD
TV
SAT
VCR
6-Channel Analog Audio Input:
The 6-Ch audio can be routed to ZONE2, ZONE3, and RECORD outputs as long as Copy mode, which creates
the stereo down-mix, is used.
Source Seek (remote control only):
The SOURCE SEEK keys detect the previous/next active source, while
the key advances one source at a time.
SOURCE SEEK
51
4. OPERATION continued …
4.4.1 FM•AM TUNER
The processor has an FM•AM tuner. The selected station is common to all paths.
Manual Tuning:
After selecting the desired band by pressing FM•AM, use the buttons (remote
control) or press TUNE and rotate the Master Control Knob (front panel).
T
Automatic Tuning:
To find the next station, press SEEK or SEEK. To scan and listen to all available
stations for a few seconds, press and hold SEEK or SEEK for about a second.
The Sk or Sk indicator on the display will change to Prv or Nxt. To stop
scanning, press one of the SEEKbuttons to return to Seek mode, or press
TUNE to tune manually (front panel only). Press TUNE a second time to restore the
regular functions and display (the TUNE function does not time out).
GUIDE
TUNE
SEEK
FRT
BACK
CTR
STATUS
SELECT
INFO
SETUP
SUR
R
SUB
L
S
Direct Tuning (remote control only):
A station’s frequency can be entered as a four-digit number. For example, to tune into 98.3 FM, press and hold
SELECT until the display shows “<blank>0.0” in the lower left corner, then press 0, 9, 8, 3.
Presets:
18 FM and 6 AM stations can be stored. The presets are divided into four banks of six. By repeatedly pressing
F
FM•AM, the display will show that you are cycling through FM1, FM2, FM3, and AM. Once you have selected
the desired bank, you can store the currently tuned radio station by pressing and holding one of the six
preset keys (1 through 6) for about a second. You can even do this while scanning for stations. The lower line
of the display briefly flashes once the station is stored. To skip a preset, set it to 87.5 FM or 530 AM.
1
2
3
CH PRE-SET
FM/AM PRE-SETS
4
5
6
To recall a preset, select the bank that it is in, then press the respective preset key. From the remote control,
you can also use the CH+ and CH keys to run through all FM or AM presets.
ST / HiB / M (front panel only):
If FM reception is weak, switching a station out of stereo can reduce or eliminate
unwanted noise. Press ST / HiB / M repeatedly to cycle through Stereo, Hi-Blend, or
Mono. Hi-Blend offers an alternative to Mono, offering decreased noise without the
T
complete loss of stereo – it decreases hiss and noise by reducing some stereo separation
only at higher frequencies. The setting is memorized for each preset.
4.4.2 SIMULCAST
Simulcast allows you to select one video source and a different audio source. For example, you could view
a sports event on TV while listening to your favorite FM•AM station. Simulcast is available for all paths.
Press and hold the desired video source button for 2 seconds. The display shows “Video Source” and the
video source in the top line, and “SELECT AUDIO SOURCE” in the bottom line – while this is on the display,
press another source button to select the audio source. When the regular display returns, the source LED
indicates the video source, and the display shows the audio source next to a “+”. Either the video or the
audio source has to be connected through a non-HDMI connection for Simulcast to be applicable.
To exit from Simulcast mode, press any source button – both the audio and video will switch to this selection.
52
4. OPERATION continued …
4.5
VOLUME CONTROL
Front Panel:
MAIN – Adjust using the Master Control Knob. If levels have been
calibrated according to setup instructions, set volume to 0 dB for the
playback level at which the film was presented in theaters.
MASTER
CONTROL KNOB
ZONE2 or ZONE3 – Press ZONE2 or ZONE3, then adjust.
HEADPHONE – While in MAIN, press FRONTS twice, then adjust.
Remote Control:
After the appropriate control mode is set, use the VOL+ and VOL keys.
Mute:
When MUTE is pressed, the audio of the selected path is silenced or reduced in level according to the
L
Volumes setup menu. To un-mute, press MUTE again or adjust volume.
Dialog Normalization:
Dolby Digital program material contains non-audio data which the processor uses to adjust playback level,
when necessary, so that volume variations between movies and programs are eliminated. Without Dialog
Normalization, movies not encoded at standardized levels for the dialog could lose dynamic range – higher
levels can result in distorted peaks, lower levels can result in quiet sounds disappearing into the noise floor.
Dialog Normalization also ensures that Dynamics control (section 4.8.10) works as intended.
If the display reads “Dial Norm Offset -4.0 dB” at the start of a movie, it is indicating that the encoded level
is higher than standard by 4.0 dB – the playback level of all channels is then automatically reduced by 4 dB.
4.6
LEVEL TRIM
If a speaker group sounds too loud or soft with certain source materials, its level can be adjusted
on the fly.
T
Settings are memorized according to input format. Adjust using the Master Control Knob or on the
remote as follows:
BACK
GUIDE
TUNE
• Fronts: Press FRONTS, then adjust (this changes left, center, and right
levels together).
FRT
• Rears: Press SURR•REARS twice, then adjust.
CTR
STATUS
• Center: Press CENTER, then adjust.
• Surrounds: Press SURR•REARS, then adjust.
SEEK
SELECT
INFO
SETUP
SUR
RR
SUB
LFE
SOURCE SEEK
• Subwoofer Only: Press SUB•LFE, then adjust. Pressing SUB•LFE twice allows you to reduce LFE
level while leaving the bass derived from the other channels unchanged. Early DTS material may
need LFE reduced to -10 dB.
To reset all to 0 dB, see section 3.13.
F
When listening in stereo with front speakers set to large, the subwoofer must be set to Super in the
speaker configuration if you want it to play.
53
4. OPERATION continued …
4.7
BASS / TREBLE / BALANCE
To change the Bass, Treble, or Balance of:
• MAIN – All Speakers Simultaneously: Press BASS, TREBLE,
or BALANCE, then adjust.
TREBLE
BALANCE
T
BASS
BYPAS
ONE
9
S
• MAIN – Fronts Only: Press FRONTS, press BASS, TREBLE, or
BALANCE, then adjust.
MOD
• MAIN – Center Only: Press CENTER, press BASS or TREBLE, then adjust.
• MAIN – Surrounds Only: Press SURR•REARS, press BASS, TREBLE, or BALANCE, then adjust.
• MAIN – Rears Only: Press SURR•REARS twice, press BASS, TREBLE, or BALANCE, then adjust.
• ZONE2 or ZONE3: Press ZONE2 or ZONE3, press BASS, TREBLE, or BALANCE, then adjust.
• HEADPHONE: Press FRONTS•
twice, press BASS, TREBLE, or BALANCE, then adjust.
Pressing BYPASS disables the adjustment. Bass/Treble does not apply to sources set to Anlg-Dir.
4.8
SURROUND MODES
A surround mode is signal processing that enhances original source material.
Surround modes fall into two main categories – those that apply to stereo source
material and those that apply to multichannel source material.
By default, all surround speakers are used except with 1.0-channel sources –
after finding your preferences, change presets in the mode presets menu.
M
M
DYNA ICS
MODE
THX
0
ENTER
INPUT
Surround modes do not apply to sources set to Anlg-Dir.
F
With analog input there is no way for a processor to detect how the source material was encoded.
Stereo Source Material:
This includes analog stereo, digital PCM stereo, and Dolby Digital 2.0 source material. Surround modes can
be applied to provide up to 7.1 channels of output. They are described later in this section. Each source
memorizes its mode setting, so you can, for example, set TV to AnthemLogic-Cinema, and CD to
AnthemLogic-Music.
5.1- and 6.1-Channel Source Material:
The processor engages decoding according to the format that you select on each DVD.
Once the processor’s display shows the format, you can select additional processing described throughout
this section. Your selections are memorized by format and by source.
Why isn’t my processor detecting the sound format that I’m trying to play?
A connection carries one format at a time and the processor plays exactly what it gets. If the connection
is coaxial, optical, or AES/EBU make sure the source’s setup menu is set to leave Dolby Digital and DTS
unchanged (Bitstream) if it is an SD-DVD player or cable/sat box, otherwise output will be 2.0-channel
PCM! You must also select the soundtrack that you want to hear from each disc’s menu, or after the
movie starts by pressing AUDIO on the player’s remote control.
HDMI audio on a Blu-ray or HD-DVD player should be set to PCM or Auto in the player’s menu.
54
4. OPERATION continued …
LOGIC
4.8.1
AnthemLogic™
These are proprietary surround modes developed by Anthem that offer outstanding surround performance
and can be applied to any 2-channel source material:
AnthemLogic-Music™
AnthemLogic-Music™ enhances the stereo listening experience without detracting from the
stereo soundstage. Through extensive listening tests a very effective design was developed.
This is a minimalist design that uses no echo or reverberation effects which could negatively
affect the purity of the sound.
6.1
CHANNEL
OUTPUT
Up to 6.1 channels of output are provided. AnthemLogic-Music™ does not utilize the center channel to ensure
that the purity of the stereo music soundstage will in no way be compromised when you’re sitting in the
“sweet spot” and listening to your favorite stereo recordings.
AnthemLogic-Music™ is very effective in creating an expansive musical soundstage that helps to remove the
barrier of the listening room in a non-intrusive and compelling way. This is the factory default 2-channel
surround mode for CD, TAPE, and FM•AM.
AnthemLogic-Cinema™
AnthemLogic-Cinema™ provides a large, enveloping and dynamic movie listening experience
that makes 2-channel movies sound more like what is experienced in a state-of-the art movie
theater. Again through extensive listening tests a very effective design was developed. This
is also a minimalist design that avoids the use of echo effects, which could otherwise
negatively affect the purity of the sound.
7.1
CHANNEL
OUTPUT
Up to 7.1 channels of output, depending on your speaker configuration. AnthemLogic-Cinema™ provides the
missing link that lets you experience full impact home theater sound from any 2-channel stereo analog
source such as VCR or TV, or any Dolby Digital 2-channel source, such as DVD or satellite. This is the factory
default 2-channel surround mode for all sources except CD, TAPE, and FM•AM.
4.8.2
DOLBY DIGITAL 2.0
Dolby Digital 2.0 soundtracks with surround encoding contain a flag that is normally used to activate
Pro Logic IIx Movie mode. The processor can be set to use this flag or to ignore it.
To find out if the Dolby Digital 2.0 material being played has the surround flag, press MODE. If flagged, the
first line of the display says “DOLBY D 2.0 SUR AUTO” and if not flagged, it says “MODE FOR 2 CH INPUT”.
The modes in the next section may be selected separately for flagged and unflagged stereo source material.
Single-channel soundtracks can be encoded two ways – using the center channel or with the same
signal into the left/right channels. The mode changes to Mono if the soundtrack uses only the center
channel – you can switch it to Mono-Academy or All Channel Mono afterwards.
55
4. OPERATION continued …
4.8.3 SURROUND MODES FOR 2.0-CHANNEL SOURCE MATERIAL
Number of output channels for each mode is indicated below in bold type. THX must be Off for all modes to
be available. Press MODE then use the Master Control Knob or (up/down) on the remote control to
cycle through selections:
Stereo
No surround mode is applied.
AnthemLogic-Music
6.1 – One of Anthem’s proprietary surround modes, designed to expand the
soundstage of stereo music in a very natural way without losing soundstage
integrity or image focus. The center channel is not used.
AnthemLogic-Cinema
7.1 – Another proprietary mode from Anthem, designed to provide the impact of a
large theater experience from 2-channel movies and TV programs.
Pro Logic IIx Music
7.1 – Created for use with stereo music material. The following three parameters
can be adjusted by pressing the MODE button one, two, or three times while in
Pro Logic IIx Music then using the Master Control Knob or on the remote:
Center Width is adjustable from 0 to 7. Setting this to 0 places all center sound in
the center speaker while 7 places it equally in the left and right channels.
Dimension has seven steps of balance adjustment between the surround and
center channels.
Panorama when “On” extends the front stereo image to include the surround
channels. Effective for recordings with strong left or right channel elements.
Pro Logic IIx Movie
7.1 – Dolby Surround decoder for 2-channel movies and TV programs.
Pro Logic IIx Matrix 7.1 – A matrix decoder that does not steer the image from one speaker to another.
56
Pro Logic IIx Game
7.1 – Bass from surround effects in video games is optimized for visceral impact.
Dolby Pro Logic
4.1 – In case there’s a desire to hear it “as it used to be” (surrounds are mono).
Neo:6 Music
6.1 – Can be used with stereo music material to create 6.1 output channels. The
center image can be adjusted by pressing MODE while in Neo:6 Music and
rotating the Master Control Knob or using (up/down) on the remote:
Center Image is adjustable from 0 to 5 – an increase makes the center channel
more prominent.
Neo:6 Cinema
6.1 – A matrix decoder that can be used with any matrix-encoded movie.
Separation is created by allowing sounds to be placed at different points in the
sound field.
All Channel Stereo
7.1 – The left and right channels are also sent to the surround and rear channels,
while the center channel and subwoofer receive a combination of both. Some
processing is used to retain image clarity. Useful for playing music at parties so
that it can be heard with equal loudness in all parts of the room.
All Channel Mono
7.1 – Combines the left and right channels and sends the signal to all speakers.
Mono
1.1 – Combines the left and right channels and sends them to the center speaker.
Mono-Academy
1.1 – Gives a presentation closer to the original on movies made from the 1930s to
the 1960s, which relied on high-frequency rolloff for sound balance and to mask
inherent hiss. Use with old mono movies that sound overly noisy. Can also be
useful with DVDs of some TV shows if high-pitched noise leakage from a CRT
(cathode ray tube) monitor is audible in the recording.
4. OPERATION continued …
Why can’t I select a surround mode when playing a 5.1-channel source?
If you are using 5.1 speakers, with rears correctly set to None in the speaker configuration, modes that
require 6.1 or 7.1 speakers cannot be selected.
4.8.4 DOLBY DIGITAL EX / PRO LOGIC IIx FOR 5.1 SOURCES
Dolby Digital EX and Pro Logic IIx can be used to decode DVDs encoded in Dolby Digital Surround EX by
extracting rear channel information from the surround channels. Dolby Digital EX creates a mono rear signal
whereas with Pro Logic IIx, the rear channels play a stereo signal. Either of these modes can be applied to
any 5.1-channel material except DTS 96/24.
A list of movies encoded in Dolby Digital Surround EX can be found on the Dolby web site at www.dolby.com
and on the THX web site at www.thx.com. A flag to engage Dolby Digital EX / Pro Logic IIx is usually
contained in newer titles. Press MODE when a movie starts playing and use the Master Control Knob to
select the mode that sounds best – the display says “DOLBY D 5.1 INPUT” if the soundtrack is unflagged, and
“DOLBY D EX AUTO” if it is flagged.
4.8.5 DTS-ES
There are two ways that rear channel information is encoded in DTS-ES – Matrix and Discrete:
• Matrix – DTS-ES Matrix movies contain a matrixed rear channel. The processor engages Neo:6 to
decode DTS-ES Matrix. Neo:6 can also be turned on manually and applied to any other
5.1-channel material except DTS 96/24 – when a movie starts playing, press MODE and use the
Master Control Knob to select. A mono rear channel is derived from the left and right surround
channels. This rear channel may or may not be pleasing depending the soundtrack.
• Discrete – DTS-ES Discrete soundtracks contain 6.1 channels with an independent rear channel.
The processor engages DTS-ES Discrete decoding.
4.8.6 THX ULTRA2 / THX SURROUND EX
THX is an exclusive set of standards and technologies established by the world-renowned film production
company, Lucasfilm Ltd. THX grew from George Lucas’ desire to make your experience of the film
soundtrack, both in movie theaters and in your home theater, as faithful as possible to what the director
intended. Movie soundtracks are mixed in special movie theaters called dubbing stages and are designed to
be played back in movie theaters with similar equipment and conditions. This same soundtrack is very often
transferred to DVD, Laserdisc, VHS tape, etc. without any adjustments for playback in the smaller home
theater environment. THX engineers developed patented technologies to accurately translate the sound
from the movie theater environment into the home, restoring proper tonal and spatial balance.
Each THX mode includes a combination of the following:
• Re-Equalization – Restores the correct tonal balance for home playback. A film soundtrack may
sound too bright when played in the home, because film soundtracks are designed for large movie
theaters where acoustical properties are different. To enable or disable Re-EQ, press THX twice to
display “THX RE-EQUALIZATION”, then select On or Off with the Master Control Knob or (up/down) on the remote control. You can even apply Re-EQ when THX is Off – this can be useful if
the high-pitched noise produced by standard CRT monitors accidentally leaked into the audio while
it was being recorded, and you would like to filter it out.
57
4. OPERATION continued …
• Timbre Matching – The human ear changes our perception of a sound depending on the direction
from which the sound is coming. In a movie theatre, there is an array of surround speakers so that
the surround information is all around you. In a home theatre, you use only two speakers located to
the side of your head. Timbre Matching, which includes Re-EQ, filters the information going to the
surround speakers so that they more closely match the tonal characteristics of the sound coming
from the front speakers. This ensures seamless panning between the front and surround speakers.
• Adaptive Decorrelation – In a movie theatre, a large number of surround speakers help create an
enveloping surround sound experience, but in a home theatre there are usually only two speakers.
Unless you are using properly positioned dipoles, surround speakers can sound like headphones
that lack spaciousness and envelopment – they will also collapse into the closest speaker as you
move away from the middle seating position. Adaptive Decorrelation senses the presence of
identical surround channels (mono) and slightly changes one surround channel’s time and phase
relationship with respect to the other. This expands the listening position and creates – with only
two speakers – the same spacious surround experience found in a movie theatre. Adaptive
Decorrelation does not operate when the surround channels are different, as is often the case in
discrete multichannel source material.
• ASA (Advanced Speaker Array) – explained in section 3.4.
Depending on source material and speaker configuration, THX processing is available as follows:
THX Cinema:
5.1 to 7.1 output with 2.0- and 5.1-channel movies (see overview that follows)
Processing: Re-Equalization, Timbre Matching, Adaptive Decorrelation (if applicable)
When THX Cinema is selected, Dolby Pro Logic IIx Movie is engaged.
Alternatively, Dolby Pro Logic or DTS Neo:6 Cinema may be selected. Other
surround modes do not apply and do not appear when pressing MODE.
THX Ultra2 Cinema:
7.1 output with 5.1-channel movies
Processing: Re-Equalization, Timbre Matching, Adaptive Decorrelation, ASA (Cinema)
THX Ultra2 Cinema mode plays 5.1 movies using all 7.1 speakers giving you the
best possible THX movie watching experience with 5.1 program material. In this
mode, ASA processing blends the surround speakers and rear speakers providing
the optimal mix of ambient and directional surround sounds.
THX MusicMode:
7.1 output with 5.1-channel music (including DVD-Audio, multichannel SACD)
Processing: Timbre Matching, Adaptive Decorrelation, ASA (Music)
THX MusicMode can be selected when playing multi-channel music. In this mode
THX ASA processing is applied to the surround channels of all 5.1 channel
encoded music sources to provide a wide stable rear soundstage.
THX Games Mode:
7.1 output with 2.0- and 5.1-channel games
Processing: Timbre Matching, ASA (Games)
Game audio is mixed and monitored in a different environment than that of music
and movies. The interactive nature of the audio requires a playback system which
can provide 360 degree panning while preserving the ambient nature of
background sound elements. When playing back 5.1 games, THX Games Mode
may be engaged. Suitable sources are Dolby Digital 5.1 and DTS 5.1 game sources.
If THX Games Mode is engaged with 2.0 input, the source is first converted to 5.1
via Pro Logic IIx Game mode.
58
4. OPERATION continued …
THX Surround EX:
6.1 output with Dolby Digital Surround EX
Processing: Re-Equalization,Timbre Matching
THX Surround EX – Dolby Digital Surround EX is a joint development of Dolby
Laboratories and the THX division of Lucasfilm Ltd.
In a movie theater, film soundtracks that have been encoded with Dolby Digital
Surround EX technology are able to reproduce an extra channel which has been
added during the mixing of the program. This channel (called Surround Back, but
named Rear in the processor), places sounds behind the listener in addition to the
front, center, surround, and subwoofer channels. This additional channel provides
the opportunity for more detailed imaging behind the listener and brings more
depth, spacious ambience, and sound localization than before.
Movies that were created using the Dolby Digital Surround EX technology may
exhibit wording to that effect on the packaging when released on DVD. A list of
movies created using this technology can be found on the Dolby web site at
www.dolby.com. A list of DVD titles encoded with this technology can be found on
the THX web site at www.thx.com.
Bearing the THX Surround EX logo, the processor will faithfully reproduce this
technology in the home when in THX Surround EX mode.
The processor also allows you to engage THX Surround EX with 5.1-channel
material that is not encoded with Dolby Digital Surround EX. Rear channel content
will be program dependent and may or may not be pleasing depending on the
soundtrack and your preference.
In compliance with THX, Bass/Treble, Level Trim, and Balance adjustments are reset to 0 dB when a THX
mode is selected, after which you can make adjustments with THX engaged. When THX is Off, previous
settings except Balance are restored. Due to the nature of bitstreams, adjustments made with THX
engaged will be reset to 0 dB if the source is paused for longer than 3 seconds.
Outputs indicated are the number of output channels as follows:
6.1 = L-Front, Center, R-Front, R-Surround, Rear*, L-Surround, LFE/Subwoofer
7.1 = L-Front, Center, R-Front, R-Surround, R-Rear, L-Rear, L-Surround, LFE/Subwoofer
* If two rear speakers are used, the same rear channel information goes to both.
59
4. OPERATION continued …
THX Ultra2 Overview
Key:
Re-EQ
Timbre
Adp-Decor
ASA
–
–
–
–
De-emphasizes treble. May be turned on or off at any time after pressing THX twice.
Matches the sound character, or timbre, of the surround channels to the front channels.
When the source has one surround channel, adjusts time and phase to restore spaciousness.
Surround and rear channels are processed to provide a wide rear soundstage.
Program
Decoding / Processing
THX Available
Stereo
Selected Mode
PLIIx Movie†
PLIIx Games
Dolby Pro Logic
Neo:6 Cinema
Off
up to 7.1
THX Cinema
7.1
THX Games Mode
7.1
THX Cinema
5.1
THX Cinema
6.1
Off
Re-EQ, Timbre
Timbre, ASA (Gam)
Re-EQ, Timbre, Adp-Decor
Re-EQ, Timbre
Dolby Digital 5.1
Dolby Digital
Dolby Digital
Dolby D 5.1+PLIIx Movie
Dolby Digital
Dolby Digital
Dolby Digital
Dolby Digital EX *
Dolby D 5.1+Neo:6
Off
THX Cinema
THX Cinema
THX Ultra2 Cinema
THX MusicMode
THX Games Mode
THX Surround EX
THX Cinema
5.1
5.1
7.1
7.1
7.1
7.1
6.1
6.1
Off
Re-EQ, Timbre, Adp-Decor
Re-EQ, Timbre
Re-EQ, Timbre, Adp-Decor, ASA (Cin)
Timbre, Adp-Decor, ASA (Mus)
Timbre, ASA (Gam)
Re-EQ, Timbre
Re-EQ, Timbre
DTS 5.1
DTS
DTS
DTS+Neo:6
DTS
DTS
DTS
DTS+PLIIx Movie
Off
THX Cinema
THX Cinema
THX Ultra2 Cinema
THX MusicMode
THX Games Mode
THX Cinema
5.1
5.1
6.1
7.1
7.1
7.1
7.1
Off
Re-EQ, Timbre, Adp-Decor
Re-EQ, Timbre
Re-EQ, Timbre, Adp-Decor, ASA (Cin)
Timbre, Adp-Decor, ASA (Mus)
Timbre, ASA (Gam)
Re-EQ, Timbre
DTS-ES Matrix §
DTS+Neo:6
DTS+Neo:6
DTS+PLIIx Movie
Off
THX Cinema
THX Cinema
6.1
6.1
7.1
Off
Re-EQ, Timbre
Re-EQ, Timbre
Off
THX Cinema
6.1
6.1
Off
Re-EQ, Timbre
DTS-ES Discrete § DTS-ES Discrete
DTS-ES Discrete
Outputs
THX Processing
† DVDs with Dolby Digital 2.0 Surround may be flagged for auto-detection.
* DVDs with Dolby Digital Surround EX may be flagged for auto-detection.
§ DVDs with DTS-ES Matrix and DTS-ES Discrete are flagged for auto-detection.
60
4. OPERATION continued …
4.8.7
Mode and THX Operation for 2.0-Channel Source Material – To make all modes available, turn THX Off.
Cycle through modes and THX using Master Control Knob or keys on remote control.
Press MODE
presets are in
setup menu
Stereo (2-Ch)
AnthemLogic-Music (6.1)
LOGIC
AnthemLogic-Cinema (7.1)
Dolby PLIIx Music (7.1)
If THX Cinema
is selected,
mode changes
to PLIIx Movie.
Press Mode Once
Center Width: Adjust using MCK (or N/S keys)
Press Mode Twice
Dimension: Adjust using MCK (or N/S keys)
Press Mode 3 Times
Panorama: On using MCK (or N/S keys)
Front-to-back balance – Center (C----+----S) Surrounds
Extends the front stereo image to include surrounds
THX Options
Dolby PLIIx Movie (7.1)
Press THX
THX Cinema
Processing – Re-EQ, Timbre Matching
Output channels – All
Dolby PLIIx Matrix (7.1)
If THX Games
is selected,
mode changes
to PLIIx Game.
Increasing # decreases center level and places it into L/R
THX Games Mode
Dolby PLIIx Game (7.1)
Processing – Timbre Matching, ASA (Game)
Output channels – All
Press THX Twice
RE-EQ: On/Off using MCK (or N/S keys)
THX Options
Dolby Pro Logic (4.1)
Press THX
THX Cinema
Processing – Re-EQ, Timbre Matching, Adp.Decorrelation
Output channels – LF, C, RF, RS, LS, Sub
Press THX Twice
DTS Neo:6 Music (6.1)
Press Mode
RE-EQ: On/Off using MCK (or N/S keys)
Center Image: Adjust using MCK (or N/S keys)
Increasing the number makes center more prominent
THX Options
DTS Neo:6 Cinema (6.1)
Press THX
Processing – Re-EQ, Timbre Matching
Output channels – LF, C, RF, RS, Rear, LS, Sub
All Channel Stereo (7.1)
All Channel Mono (7.1)
THX Cinema
Press THX Twice
RE-EQ: On/Off using MCK (or N/S keys)
Mono (1.1)
Mono Academy (1.1)
Selections are memorized separately for each source and for Dolby Digital Surround 2.0-flagged vs unflagged material.
THX Processing:
• Re-Equalization
• Timbre Matching
• Adaptive Decorrelation
• ASA
–
–
–
–
De-emphasizes treble. Not applicable to THX Games Mode.
Matches the sound character, or timbre, of the surround channels to the front channels.
When the source has one surround channel, adjusts time and phase to restore spaciousness.
Surround and rear channels are processed to provide a wide rear soundstage.
61
4. OPERATION continued …
4.8.8
Mode and THX Operation for Dolby Digital 5.1 and 6-Ch S/E – To make all modes available, turn THX Off.
Cycle through modes and THX using Master Control Knob or keys on remote control.
THX Options
None (5.1)
Press MODE
presets are in
setup menu
Press THX
THX Cinema
Processing – Re-EQ, Timbre Matching, Adp.Decorrelation
Output channels – 5.1 (LF, C, RF, RS, LS, Sub)
THX Ultra2 Cinema
Processing – Re-EQ, Timbre, Adp.Decor, ASA (Cinema)
Output channels – All
THX MusicMode
Processing – Timbre Matching, Adp.Decor, ASA (Music)
Output channels – All
THX Games Mode
Processing – Timbre Matching, ASA (Game)
Output channels – All
THX Surround EX
Processing – Re-EQ, Timbre Matching
Output channels – 6.1 (LF, C, RF, RS, Rear, LS, Sub)
Press THX Twice
RE-EQ: On/Off using MCK (or N/S keys)
THX Options
Dolby PLIIx Movie (7.1)
Press THX
THX Cinema
Processing – Re-EQ, Timbre Matching, Adp.Decorrelation
Output channels – All
Press THX Twice
RE-EQ: On/Off using MCK (or N/S keys)
Dolby PLIIx Music (7.1)
If THX Sur EX
is selected,
mode changes
to Dolby D EX.
THX Options
Dolby Digital EX (6.1)
Press THX
THX Surround EX
Processing – Re-EQ, Timbre Matching
Output channels – All
Press THX Twice
RE-EQ: On/Off using MCK (or N/S keys)
THX Options
DTS Neo:6 (6.1)
Press THX
THX Cinema
Processing – Re-EQ, Timbre Matching
Output channels – 6.1 (LF, C, RF, RS, Rear, LS, Sub)
Press THX Twice
RE-EQ: On/Off using MCK (or N/S keys)
Selections are memorized separately for each source and for Dolby Digital Surround EX-flagged vs unflagged material.
THX Processing:
• Re-Equalization
• Timbre Matching
• Adaptive Decorrelation
• ASA
62
–
–
–
–
De-emphasizes treble. Not applicable to THX MusicMode and THX Games Mode.
Matches the sound character, or timbre, of the surround channels to the front channels.
When the source has one surround channel, adjusts time and phase to restore spaciousness.
Surround and rear channels are processed to provide a wide rear soundstage.
4. OPERATION continued …
4.8.9
Mode and THX Operation for DTS Source Material – To make all modes available, turn THX Off.
Cycle through modes and THX using Master Control Knob or keys on remote control.
THX Options
None (5.1)
Press MODE
presets are in
setup menu
Press THX
THX Cinema
Processing – Re-EQ, Timbre Matching, Adp.Decorrelation
Output channels – 5.1 (LF, C, RF, RS, LS, Sub)
THX Ultra2 Cinema
Processing – Re-EQ, Timbre, Adp.Decor, ASA (Cinema)
Output channels – All
THX MusicMode
Processing – Timbre Matching, Adp.Decor, ASA (Music)
Output channels – All
THX Games Mode
Processing – Timbre Matching, ASA (Game)
Output channels – All
Press THX Twice
RE-EQ: On/Off using MCK (or N/S keys)
THX Options
Dolby PLIIx Movie (7.1)
Press THX
THX Cinema
Processing – Re-EQ, Timbre Matching, Adp.Decorrelation
Output channels – All
Press THX Twice
RE-EQ: On/Off using MCK (or N/S keys)
Dolby PLIIx Music (7.1)
Dolby Digital EX (6.1)
THX Options
DTS Neo:6 (6.1)
Press THX
THX Cinema
Processing – Re-EQ, Timbre Matching
Output channels – 6.1 (LF, C, RF, RS, Rear, LS, Sub)
Press THX Twice
RE-EQ: On/Off using MCK (or N/S keys)
Selections are memorized separately for each source and for DTS vs DTS-ES.
DTS-ES Discrete: The only applicable selection is THX Cinema (6.1, Re-EQ, Timbre Matching).
DTS 96/24:
Dolby Pro Logic IIx, Dolby Digital EX, and DTS Neo:6 can not be applied.
THX Processing:
• Re-Equalization
• Timbre Matching
• Adaptive Decorrelation
• ASA
–
–
–
–
De-emphasizes treble. Not applicable to THX MusicMode or THX Games Mode.
Matches the sound character, or timbre, of the surround channels to the front channels.
When the source has one surround channel, adjusts time and phase to restore spaciousness.
Surround and rear channels are processed to provide a wide rear soundstage.
63
4. OPERATION continued …
4.8.10 DYNAMICS
This allows you to control the difference between the softest and loudest passages on 5.1/6.1-channel
soundtracks, as long as the soundtrack contains dynamic scaling information and at least 5.1 speakers are
used. Press DYNAMICS and use the Master Control Knob or keys on the remote control to select:
Reduced:
Allows the quieter parts to be heard more easily, and works by raising the level of quieter
sounds and/or reducing the level of louder ones according to cues encoded on the DVD.
Late Night: Further reduces the softest-to-loudest difference.
Reduced and Late Night get reset to Normal when Main power is turned off.
4.9
LIP-SYNC DELAY (remote control only)
To adjust lip-sync while playing a video source instead of viewing the setup menu, press and hold
the DISPLAY key until the display shows “LIP-SYNC DELAY”, then use the keys to move from
digit to digit and the keys to adjust.
4.10
DISPLAY
8
AM
DISPLAY BRIGHTNESS (front panel only)
To change the brightness of the front panel display and LED indicators, press DISPLAY
and use the Master Control Knob to select Maximum, High, Medium, Low, or Off.
4.11
VIDEO SOURCE ADJUSTMENT
Source materials sometimes contain anomalies. HD inputs may have the wrong color space, while S-Video
and component video signals may need adjustment before being converted to digital, for HDMI output. The
processor allows separate adjustment for each source.
Anthem’s video processor allows separate adjustment for each source. Adjust after setting up menu 1 and
your display. Upon entering the Video Processing Menu, the on-screen display appears together with the
video source so that you can see changes to the picture as you make them in the menu.
The outcome of the settings in the Video Processing Menu depends on settings in your source components,
so set them up first, for example, set your DVD player’s output to 16:9.
64
4. OPERATION continued …
SCREEN
ON
Entering the video processing menu:
For three seconds, press and hold DISPLAY on the front panel or ON SCREEN on the Remote.
7
Navigating through menus and items:
Use the and keys.
T
Selecting an item:
Press SELECT. Menu items with a right-arrow beside them lead to further
selections or adjustments once SELECT is pressed again.
GUIDE
FRT
TUNE
SEEK
BACK
CTR
STATUS
Making adjustments when a slider is displayed:
SELECT
Use the keys. Use to go to the next slider if the menu has more than one.
INFO
SETUP
SUR
R
SUB
L
Returning after making an adjustment:
Press SELECT to return to the item or BACK to return to the item’s menu.
Exiting from the menu:
Press BACK as many times as necessary.
PICTURE
The Picture menu provides video adjustments for the source material and each source component. Do not
make adjustments in this menu if your display has not been calibrated – skip to the Test Patterns section
and return to this section after calibrating your display.
PICTURE
CROP INPUT
Input Color Space
SCALE OUT
OUTPUT
PATTERNS
INFO
Bright / Contrast / Color Film Mode
Detail Enhancement
Noise Reduction
Motion Threshold
Chroma Bug Filter
Video ADC
65
4. OPERATION continued …
Input Color Space
For YCbCr input, the default is Auto, which switches between HD and SD color space according to whether
input has HD or SD resolution. In case the source material contains the wrong color space for its resolution,
for example, a cable box that converts 480i channels to 1080i output without converting SD color space to
HD causing some unnatural hues, the color space can be corrected by forcing the setting to SD or HD.
If the source is in RGB format instead of YCbCr, choose between Studio and Extended – detail in dark scenes
can be used to find the correct setting. The default is Studio.
Brightness / Contrast / Color / Tint
If a source needs Brightness (black level), Contrast (white level), Color (saturation), or Tint (hue) adjustment,
you can do it here. The default for each of these is 50. If the source component puts out RGB and output in
menu1 is set to RGB, Color and Tint are not adjustable so that unnecessary color space conversion is
avoided. If you need to adjust the image in such a case, set the source component to YCbCr output.
Film Mode
Did the source originate from film or from video? If from a video camera, which type? If it’s a film source on
TV, was a regular pattern of fields deleted to change the playing speed? Is it animation, and if so, according
to which animation spec? Is it a mix of sources edited together? Are video characters being scrolled across
a film source?
For a video processor to provide best image quality, it must detect the source’s cadence, or pattern of field
sequence, and deconstruct it accordingly. The Gennum VXP processor can not only do that, it can do so even
when the input is high-definition. Film Mode can be overridden by changing the setting from Auto to Off, but
don’t do it unless you need to.
Detail Enhancement
Digital processing is used to do what the name implies – experiment with the level adjustment and leave it
where the picture looks best. The factory default is 0.
Noise Reduction
This can be used to reduce or remove “snow” in the picture, often seen in broadcasts – experiment with the
level adjustment and leave it where the picture looks best. The factory default is 0.
Motion Threshold
A high-quality deinterlacer has to treat the areas of the picture that contain motion differently from the areas
that have very little or no motion. The motion threshold is the point where one type of deinterlacing changes
to another. The factory default (4) should work best but adjustment is provided in case it’s needed.
Chroma Bug Filter
An encode/decode error inherent in DVD and digital TV appears as horizontal streaks over areas that are
rich in color, especially red areas in cartoons and graphics. Turn correction On if you see such an artifact,
but don’t spend energy looking for it – your DVD player, depending on model, may have it taken care of.
Video ADC
S-Video and component video signals containing anomalies may need adjustment before being converted to
digital. Video Input Gain (default: Auto) changes the white level and Video Input Offset (default: 50) changes
the black level. Sampling Phase adjustment (default: 15) can be useful when video comes from a video DAC
(e.g. computer video card) containing ringing edges due to improper filtering – adjust for minimal “ghost”
imaging while using a static black and white picture with lots of detail and sharp edges.
For S-Video inputs, two more adjustments are available. Chroma Transient Improvement Level can fix blurred
edges where two colors meet. Luma Digital Noise Reduction Level suppresses spikes in the signal which are
usually noise. The default for both is 0 – experiment and leave where the picture looks best.
66
4. OPERATION continued …
CROP INPUT
The Crop Input menu is where the image’s frame is set. If there’s anything outside of the image that you want
to remove, this is the best place to do it, i.e. before the image is scaled, preventing unnecessary artifacts.
PICTURE
CROP INPUT
SCALE OUT
OUTPUT
PATTERNS
INFO
Auto Detect
16:9
4:3
Custom Setting
Edges Off
Edges On
Y/C Delay / H Offset
Input Aspect Ratio – Auto Detect, 16:9, 4:3
The default is Auto Detect. In this mode, a 4:3 input frame is assumed if the input is standard definition (480
or 576 lines), and a 16:9 input frame is assumed if the input is high definition (720p and higher). If a forced
setting is needed, select the one that displays the picture correctly – most often, this means selecting 16:9
when the source is standard-definition letterboxed. The most common aspect ratios are:
1.33:1 (4:3)
1.78:1 (16:9)
2.4:1
SDTV, classic movies
HDTV, widescreen movies
“Scope” movies, anamorphic projection
movies also 1.37:1
movies also 1.66:1, 1.85:1
also 2.20:1, 2.35:1, 2.55:1 and beyond
Custom
If the above settings aren’t suitable, select Custom and adjust Horizontal Size, Vertical Size, Horizontal
Position, and Vertical Position. If using an anamorphic projection lens, set Vertical Size to 810 (even if output
resolution in menu 1 isn’t 1920x1080 – the relationship is maintained to make setup easy).
Since position can be adjusted after size is adjusted, this can also be the right choice for off-center sources
but in this case be sure to adjust size proportionally – you can use a geometry test pattern for a visual
adjustment, or calculate the numbers by maintaining the 16:9 ratio between Horizontal Size (default 1920) and
Vertical size (default 1080). If the input is standard-definition and letterboxed, use 64:27 to calculate the
correct setting for a 16:9 screen. Horizontal and Vertical position defaults are 960 and 540, respectively.
Edges
This selection is independent of the preceding ones. When “On” is selected, the edges of the input are
trimmed. Use if you see “garbage” on the edges of the image or for removing the small amount of
letterboxing that results from displaying movies with a 1.85:1 aspect ratio on a 16:9 (or 1.78:1) screen when
the display is not overscanning. Number of pixels removed is adjustable from 0 to 20.
Y/C Delay and Horizontal Offset
Adjust if image is not centered, or if YCbCr source needs Y/C delay adjustment. See also Sync in menu 1.
67
4. OPERATION continued …
SCALE OUTPUT
The Scale Output menu provides options for making non-16:9 inputs fit on a 16:9 screen.
PICTURE
CROP INPUT
SCALE OUT
OUTPUT
PATTERNS
INFO
Panoramic Stretch
Anamorphic Stretch
Letter/Pillar Box
Zoom
No Scaling
Panoramic Stretch
Fills the screen by stretching only the sides of the picture while the middle portion stays undistorted. Use
with 4:3 input if you don’t like seeing empty sides on a 16:9 screen.
Anamorphic Stretch
Fills the screen by stretching the picture sideways. Use this setting for standard-def DVDs that are
anamorphic or “enhanced for widescreen TVs” – the image on these DVDs is squeezed sideways so that no
vertical resolution is wasted on a letterbox, and made normal upon playback assuming that the DVD player
is properly set (16:9 output). Also use this setting with anamorphic projection and Custom input cropping.
Letterbox and Pillarbox
With this setting, original aspect ratio is preserved for standard-def input, leaving the sides of the screen
empty. The shade of the empty areas can be adjusted in menu 1. Not applicable when input is 720p or higher.
Zoom
Intended for temporary close-up. Zoom Size is adjustable, and if changed from the factory default (100),
Horizontal Position and Vertical Position become adjustable. Note that Zoom acts on the output, after
processing, and does not produce an image with as high quality as Custom Setting under Crop Input – Zoom
enlarges artifacts as well as the image whereas Crop Input discards the unwanted material before
processing, thus using the processor’s power towards the part of the frame that you want to view.
No Scaling
To quickly check what the source component is putting out in unscaled form, select No Scaling then make
the appropriate selection above. Horizontal Size and Vertical Size adjustments close in on the outside of the
image, and if they’re changed from the factory defaults (100), Horizontal Position and Vertical Position
become adjustable.
If the source and the display have the same resolution then No Scaling also allows trimming the edges of an
input without enlarging it to compensate for the empty area. For example, if you’re using a 1080p-native
display and a 1080i source needs trimming, use Edges On in the Crop Input menu (minimum 2 pixels) and
select No Scaling. The result is 1:1 pixel mapping for the remaining image.
Since a disc’s menu and the main title do not always have the same aspect ratio, select scaling
according to the main title.
68
4. OPERATION continued …
Aspect Ratio Control Examples – how to crop and scale various sources for display on 16:9 and 2.4:1 screens:
Display as original
Standard-definition 4:3 source
CROP INPUT: Auto Detect
SCALE OUTPUT: Letter / Pillar Box
Stretch sideways to fill screen
Standard-definition 4:3 source
CROP INPUT: Auto Detect
SCALE OUTPUT: Anamorphic Stretch
Stretch sides more than center
Standard-definition 4:3 source
CROP INPUT: Auto Detect
SCALE OUTPUT: Panoramic Stretch
Display as original
Standard-definition letterboxed source
CROP INPUT: 16:9
SCALE OUTPUT: Anamorphic Stretch
Display as original
Anamorphic SD-DVD, 16:9 source
CROP INPUT: Auto Detect
SCALE OUTPUT: Anamorphic Stretch
Display as original
Anamorphic SD-DVD, 2.4:1 source
CROP INPUT: Auto Detect
SCALE OUTPUT: Anamorphic Stretch
69
4. OPERATION continued …
Aspect Ratio Control Examples continued
Crop and/or stretch to fill screen
Anamorphic SD-DVD, 2.4:1 source
CROP INPUT: Custom, adjust to taste
SCALE OUTPUT: Anamorphic Stretch
Display as original using anamorphic lens
Anamorphic SD-DVD, 2.4:1 source
CROP INPUT: Custom, Vertical Size 810
SCALE OUTPUT: Anamorphic Stretch
Display as original
Hi-definition 16:9 source
CROP INPUT: Auto Detect
SCALE OUTPUT: Anamorphic Stretch
Display as original
Hi-definition 2.4:1 source
CROP INPUT: Auto Detect
SCALE OUTPUT: Anamorphic Stretch
Crop and/or stretch to fill screen
Hi-definition 2.4:1 source
CROP INPUT: Custom, adjust to taste
SCALE OUTPUT: Anamorphic Stretch
Display as original using anamorphic lens
Hi-definition 2.4:1 source
CROP INPUT: Custom, Vertical Size 810
SCALE OUTPUT: Anamorphic Stretch
70
4. OPERATION continued …
OUTPUT
The Output menu is used to select gamma correction and to turn frame lock on/off.
PICTURE
CROP INPUT
SCALE OUT
OUTPUT
PATTERNS
INFO
Gamma Corr Exponential
Gamma Corr Custom Singl
Gamma Corr Custom RGB
Gamma Corr Off
Frame Lock
Gamma Correction (normally for use only by calibration specialists)
The default is Off. Curves other than exponential (default 100) are created with a computer – see section 3.1.
Frame Lock
The default is Off. Frame Lock is useful with video games by cutting processing time. When Auto is selected,
buffering is disabled and the processor’s output synchronizes with the source.
If your display accepts various refresh rates and your disc player has passthrough mode, you can also use
Frame Lock to match refresh rate to the source material (24 Hz / 50 Hz / 60 Hz), overriding the refresh rate
selected in menu 1. Engaging Frame Lock increases source switching time, therefore it should not be used
if not needed – assigning different video output configurations in menu 1 is more effective in this case.
“Auto” means that if the source has a nature that prevents Frame Lock from engaging, it will not engage.
71
4. OPERATION continued …
TEST PATTERNS
This section is a primer on display calibration and although the procedure is no match for a professional
setup, the result will almost always be better than using the display with its factory settings. The only tool
needed to adjust color this way is a blue filter that comes with test discs or the glasses from www.thx.com.
These digitally generated patterns can be more accurate than those played from a disc since some discs
and players contain errors in design or user settings.
PICTURE
CROP INPUT
SCALE OUT
OUTPUT
PATTERNS
INFO
Gray Bars
Red Bars
Green Bars
Blue Bars
Gray/Red/Green/Blue Bars
Color Bars
Before starting calibration
Set the room’s lighting to the level that will be used during normal viewing. If your display varies light output
according to the brightness of the image and/or ambient light, turn off these functions for now. If color
temperature is selectable, select “medium” or the one that is neither too blue nor too red. If your display has
DVI input, ensure that the correct output between Studio and Extended RGB is selected in menu 1.
The best setting for the display’s sharpness control is usually at its lowest even when the default position is
in the center. Sharpness is the addition of false edges around objects in the image and there is no reason to
add false edges on all video sources unless there is something wrong with all video sources.
Any of these patterns can also be used to check whether the display is showing the whole image – if the
bars at the left and right of the screen are narrower than the rest, your display is cropping and rescaling the
image. As mentioned in section 3.1, see if you can disable this (select dot-by-dot mode in your display).
This is the gray 20-bar pattern – the red, green, blue, and gray/red/green/blue ones are similar:
Black level is one step below the pattern’s darkest bar and full level is one step beyond the brightest bar.
72
4. OPERATION continued …
Color Bars is the SMPTE test pattern, with bars at 75% saturation:
D
D
C
C
B B B
D
D
C
C
A A
Setting your display’s brightness and contrast
Increase brightness (black level) so that areas A can be seen as two areas with different brightness, then
reduce the level until these areas match each other, or in other words, when the A on the left disappears by
blending into the background. (Difference in shade will not appear if output in menu 1 is Extended RGB.)
After setting brightness, set contrast (white level) as high as possible so that areas B remain three areas with
different and equally-spaced brightness. If the B in the middle starts to get closer in brightness to the B on
the right, the contrast setting is too high for most lighting conditions.
Next, select the gray/red/green/blue bars pattern and if the rightmost bars in any of the colored areas are
blended, reduce contrast until the areas can be seen separately. Depending on your display and/or lighting
conditions, compromises in the settings may be necessary – try some source materials with and without the
display’s automatic brightness compensation (where applicable) and trust your senses.
Setting your display’s color and tint
Looking through the blue filter or glasses, adjust color (saturation) so that areas C match as closely as
possible, then adjust tint (hue) so that areas D match as closely as possible.
After setting contrast and tint, check brightness and color – some fine tuning back and forth may be needed.
Once again, trust your senses if the blue filter does not provide satisfactory results.
INFO
The Info panel shows Input Status (Video Source, Signal Type, Audio Source, and Film Mode) and Output
Status (Signal Type, Frame Rate, Line Rate, and Frame Lock).
Shortcuts and emergency exits: Commonly adjusted settings and settings that make displays say “no
signal” when the wrong selection is made can be accessed without entering menus. Press and hold
MODE until “SCALE OUTPUT” is displayed, then select using the Master Control Knob or the keys
on the remote control. Repeatedly pressing MODE before timeout cycles through Video Output
Configuration, Frame Lock, and Gamma Correction.
If you have lost video output by changing settings, use the front panel display to correct the settings.
To quickly access Brightness, Contrast, Color, and Tint press and hold DYNAMICS until the Brightness
slider appears, then use the keys to change slider and the keys to adjust.
73
4. OPERATION continued …
4.12
SLEEP TIMER (remote control only)
If you would like to go sleep while listening to a program or music, the Sleep Timer will turn the
processor power off after the selected amount of time:
TIMERS
SLEEP
I
• Select the desired path (MAIN, ZONE2, or ZONE3), then press SLEEP (the Sleep timer will operate
for that path only).
• The first SLEEP keystroke always resets the timer to 30 minutes. Additional keystrokes then cycle
as follows: Second=60, third=90, fourth=Disabled.
• Once set, the time remaining appears as the number following “Zzz” in the display.
4.13
ENABLE / DISABLE TIMERS (remote control only)
To enable or disable all timers without entering the Setup, press and hold the SLEEP key until the display
shows “ALL TIMERS”, then use the keys to enable/disable.
4.14
STATUS DISPLAY
Press, Release, Press to cycle through display screens that show the following:
• Software version, day, and time.
• Video Input: Resolution and refresh rate of video source, and
copy-protection status if available – “CP” means copy-protected,
“NP” means not protected.
STATUS
SELECT
• Audio Input: Bit rate / sample rate of digital source, or Analog.
• Input Format: Channels in the source.
• Video Output Configuration: The active one and its resolution/refresh rate. “DnRes” or “Muted” is
also displayed if component video output is reduced in resolution or muted due to copy protection.
• Audio Output: Bit rate / sample rate running in the digital to analog converters. “DIG Mute” is also
displayed if DIG1 or DIG2 record output is muted due to copy protection.
• Output Format: Channels producing output.
• Dialog Normalization: Shown if not equal to 0 dB.
• Tone Controls: Enabled, Bypassed, or N/A.
• Serial Number: If the number on the rear panel does not match, contact Anthem immediately.
When in ZONE2 or ZONE3, information relating only to the selected path is displayed.
74
5. REMOTE CONTROL CUSTOMIZATION
5.1
CODES FOR OTHER BRANDS
The processor remote can control other components – brands and setup instructions are in Appendix B. If the
brand for your component is not listed, try searching for a code as follows:
1. Turn on the component, for example the DVD player.
2. Press a control mode key other than MAIN, Z2, or Z3, for example DVD.
3. Press and hold LEARN until the LED flashes twice then press 9, 9, 1.
4. Press 0 for cable converters, satellite receivers, or video accessories, 1 for TVs, 2 for DVD players
or VCRs, or 3 for CD players or audio amps/tuners.
5. Aim the remote towards the player and press POWER (or Play). If the player does not respond, press
CH+ to try the next code. If the player responds, press LEARN to lock the code. Codes are sent in
order of popularity. CH goes to the previous code. If no code is found, see section 5.2.
6. After finding a code, record it: Press and hold LEARN until the LED flashes twice, then press 9, 9, 0, 1.
Wait 3 seconds and count the number times that the LED flashes. This represents the first digit (for
example, 3 flashes = 3, no flash = 0) – write this down. Next, press 2 for the second digit, 3 for the
third digit, 4 for the fourth digit, 5 for the fifth digit and write the number of flashes each time.
5.2
LEARNING COMMANDS
Commands from almost any other infra-red remote control can be captured by the processor remote control.
The factory command is still available by pressing LEARN before pressing the taught key.
If the factory command is used more than the learned command, the learned command can be programmed
in Layer2 instead. In this case, the learned command is sent by pressing LEARN before pressing the key.
Before teaching a key note the following:
• Control mode keys and LEARN can not be taught. These keys never send IR commands.
• A multiple key sequence (for example Rec+Pause or Rec+Play) can not be taught to one key.
• A high level of ambient light, light from displays, and exposed fans could interfere with learning.
To teach a key:
1. Point the source and processor remotes at each other, holding them 2 inches apart.
2. Press and hold LEARN until the LED flashes twice then press 9, 7, 5. One long blink indicates low
battery or faulty memory – the remote will not go into learn mode under these conditions.
3. Press the desired control mode key.
4. Press the key to be taught, or to program the command into Layer2 press LEARN (don’t hold) then
press the key to be taught.
5. The LED flashes rapidly. Within 4 seconds, press and hold the teaching key on the source remote
until the LED flashes twice. One long blink means bad capture (try again), memory full (delete
another command), or unlearnable code.
6. Repeat steps 3-5 or 4-5 as often as desired until memory is full.
7. To exit, press and hold LEARN until the LED flashes twice or wait 10 seconds.
Deleting learned commands:
1. Press and hold LEARN until the LED flashes twice, then press 9, 7, 6.
2. To delete a learned command from one key, press the control mode key, then the key to be deleted
twice. To delete all learned commands in the control mode, press the control mode key twice.
75
5. REMOTE CONTROL CUSTOMIZATION continued …
5.3
COPYING COMMANDS
The command from one key can be copied to another key (not applicable to Power, Record, and Learn keys).
To copy a command to another key in the same control mode:
1. Press the control mode key.
2. Press and hold LEARN until the LED flashes twice.
3. Press 9, 9, 4.
4. Press the key to be copied.
5. Press the new key that will have the command. The LED flashes twice.
To copy a command into a different control mode:
1. Press and hold LEARN until the LED flashes twice.
2. Press 9, 9, 4.
3. Press the control mode key of the key to be copied then the key to be copied.
4. Press the new control mode key then the new key that will have the command. The LED flashes twice.
To set the original functions:
1. Press the control mode key.
2. Press and hold LEARN until the LED flashes twice.
3. Press 9, 9, 4.
4. Press the control mode key twice.
5.4
VOLUME LOCK
With Volume Lock engaged, the volume and mute keys control the processor regardless of control mode,
making operation more convenient.
To engage Volume Lock for MAIN:
1. Press and hold LEARN until the LED flashes twice.
2. Press 9, 9, 3.
3. Press MAIN.
To dis-engage Volume Lock for ZONE2 (or ZONE3), and re-engage the ZONE2 (or ZONE3) volume control:
1. Press ZONE2 (or ZONE3).
2. Press and hold LEARN until the LED flashes twice.
3. Press 9, 9, 3.
4. Press VOL .
The volume and mute keys now control MAIN for every control mode selection except ZONE2. You may
continue to disengage other control modes one at a time. To disengage all, press VOL+ in step 4.
76
5. REMOTE CONTROL CUSTOMIZATION continued …
5.5
PROGRAMMING MACROS
Macros are used to execute multiple functions with one key press, such as powering the processor, cable
box, and display On at the same time. Up to 32 commands can be programmed.
Programming a Macro that works regardless of control mode setting:
1. Press and hold LEARN until the LED flashes twice.
2. Press 9, 9, 5.
3. Press the key you want to use to activate your macro (e.g. Power).
4. Enter the command sequence that you want the macro to execute.
5. To exit, press and hold LEARN until the LED flashes twice or wait 10 seconds.
To clear the macro, repeat the steps above but skip step 4.
Programming a Macro that works in one control mode:
1. Press the control mode key.
2. Press and hold LEARN until the LED flashes twice.
3. Press 9, 7, 8.
4. Press the key you want to use to activate your macro (e.g. Power).
5. Enter the command sequence that you want the macro to execute.
6. To exit, press and hold LEARN until the LED flashes twice or wait 10 seconds.
To clear the macro:
1. Press and hold LEARN until the LED flashes twice, then release.
2. Press 9, 7, 8.
3. Press the control mode key where you programmed the macro.
4. Press the key that was programmed to activate the macro.
5. To exit, press and hold LEARN until the LED flashes twice or wait 10 seconds.
5.6
RESETTING THE REMOTE CONTROL
To erase user memory, press and hold LEARN until the LED flashes twice, then press 9, 8, 0. To reset MAIN,
Z2, or Z3 control mode, see the beginning of Appendix B.
If your remote control has stopped working, try resetting it before contacting technical support.
77
6. SOFTWARE UPDATING
The operational characteristics of the processor are controlled by software installed through the RS-232 port
on the rear panel. Updates can be downloaded from our web site and installed afterwards.
6.1
SOFTWARE VERSION IDENTIFICATION
To find out which software version is in your processor, press STATUS and the display will show it. The latest
software and manual are available from our web site. A list of changes comes with the download.
6.2
SOFTWARE UPDATING VIA YOUR DEALER
If you do not have a computer or wish to do software updates yourself but still want to have them done,
please make arrangements with your dealer. Whether your dealer comes to your theater to do the update or
you bring your processor to the dealer, the dealer may charge for this service.
6.3
SOFTWARE UPDATING VIA YOUR COMPUTER
Your computer must be running Windows XP or Vista and have a 9-pin serial port or a
card slot and a serial card or a USB port and a USB to serial adapter. The latter is least
preferred. If using a USB to serial adapter to connect the processor:
1. It must be one that supports two stop bits – check with adapter manufacturer.
2. Check the adapter manufacturer’s website for the latest driver. If a message warns that the driver
is not Windows-certified as it’s about to be installed, do not use the adapter. Some “budget”
adapters load bad data into the processor, possibly causing its operation to freeze.
3. The virtual port must be assigned to COM1-COM6. If the processor software installer cannot locate
the processor, use your adapter’s port manager to check the setting.
If you are using a laptop computer, check its power settings and battery meter to ensure that procedures will
not be interrupted.
Software installation:
1. Find out which version is installed by pressing STATUS.
2. Go Anthem’s web site www.anthemAV.com and locate the latest software. Proceed only if your
version is a lower number, indicating that it is older.
3. Click on the software link. You will be asked where to save a .zip file – save it to Desktop.
4. Double click or right-click on the downloaded file then extract it to Desktop.
5. In the extracted folder see Read Me.txt for the change history.
6. Double click on Installer.exe. The remaining instructions will appear.
Troubleshooting:
If the installer keeps returning a message saying that the processor is not found, make sure that the serial
port on your computer isn’t being used by another application – you must go into the application that is using
it to turn off the serial port.
78
79
APPENDIX A – IR MACROS
Using the factory remote control’s IR codes for MAIN path, the following 3-key sequences can be programmed into
macro-capable aftermarket remotes to create a separate button for each mode, source, and tuner bank:
For Stereo sources:
MODE, 0, 1 – Stereo
MODE, 0, 2 – AnthemLogic-Music
MODE, 0, 3 – AnthemLogic-Cinema
MODE, 0, 4 – Pro Logic IIx Music
MODE, 0, 5 – Pro Logic IIx Movie
MODE, 0, 6 – Dolby Pro Logic
MODE, 0, 7 – DTS Neo:6 Music
MODE, 0, 8 – DTS Neo:6 Cinema
MODE, 0, 9 – All Channel Stereo
MODE, 1, 0 – All Channel Mono
MODE, 1, 1 – Mono
MODE, 1, 2 – Mono-Academy
MODE, 1 ,3 – Pro Logic IIx Matrix
MODE, 1, 4 – Pro Logic IIx Game
THX, 0, 1 – THX Off
THX, 0, 2 – THX Cinema
THX, 0, 3 – THX Games Mode
For Surround-flagged Dolby Digital 2.0 sources:
MODE, 2, 1 – Stereo
MODE, 2, 2 – AnthemLogic-Music
MODE, 2, 3 – AnthemLogic-Cinema
MODE, 2, 4 – Pro Logic IIx Music
MODE, 2, 5 – Pro Logic IIx Movie
MODE, 2, 6 – Dolby Pro Logic
MODE, 2, 7 – DTS Neo:6 Music
MODE, 2, 8 – DTS Neo:6 Cinema
MODE, 2, 9 – All Channel Stereo
MODE, 3, 0 – All Channel Mono
MODE, 3, 1 – Mono
MODE, 3, 2 – Mono-Academy
MODE, 3 ,3 – Pro Logic IIx Matrix
MODE, 3, 4 – Pro Logic IIx Game
THX, 0, 4 – THX Off
THX, 0, 5 – THX Cinema
THX, 0, 6 – THX Games Mode
For Dolby Digital 5.1 sources:
THX, 1, 0 – None
THX, 1, 1 – THX Cinema
THX, 1, 2 – THX Ultra2 Cinema
THX, 1, 3 – THX MusicMode
THX, 1, 4 – THX Surround EX
THX, 1, 5 – THX Games Mode
THX, 1, 6 – PLIIx Movie
THX, 1, 7 – PLIIx Movie+THX Cinema
THX, 1, 8 – PLIIx Music
THX, 1, 9 – Dolby Digital EX
THX, 2, 0 – Neo:6
THX, 2, 1 – Neo:6+THX Cinema
For Dolby Digital Surround EX-flagged sources:
MODE, 5, 1 – None
MODE, 5, 2 – Dolby Digital EX
MODE, 5, 3 – THX Surround EX
MODE, 5, 4 – PLIIx Movie
MODE, 5, 5 – PLIIx Movie+THX Cinema
MODE, 5, 6 – PLIIx Music
MODE, 5, 7 – Neo:6
MODE, 5, 8 – Neo:6+THX Cinema
For DTS sources:
THX, 4, 0 – None
THX, 4, 1 – THX Cinema
THX, 4, 2 – THX Ultra2 Cinema
THX, 4, 3 – THX MusicMode
THX, 4, 4 – Neo:6+THX Cinema
THX, 4, 5 – THX Games Mode
THX, 4, 6 – PLIIx Movie
THX, 4, 7 – PLIIx Movie+THX Cinema
THX, 4, 8 – PLIIx Music
THX, 4, 9 – Dolby Digital EX
THX, 5, 0 – Neo:6
For DTS-ES sources:
MODE, 6, 1 – None
MODE, 6, 2 – DTS-ES Matrix
MODE, 6, 3 – DTS-ES+THX Cinema
MODE, 6, 4 – PLIIx Movie
MODE, 6, 5 – PLIIx Movie+THX Cinema
MODE, 6, 6 – PLIIx Music
MODE, 6, 7 – Dolby Digital EX
The macros below also work in ZONE2/3.
For 6-Ch sources (analog or HDMI):
MODE, 7, 0 – None
MODE, 7, 1 – THX Cinema
MODE, 7, 2 – THX Ultra2 Cinema
MODE, 7, 3 – THX MusicMode
MODE, 7, 4 – THX Surround EX
MODE, 7, 5 – THX Games Mode
MODE, 7, 6 – PLIIx Movie
MODE, 7, 7 – PLIIx Movie+THX Cinema
MODE, 7, 8 – PLIIx Music
MODE, 7, 9 – Dolby Digital EX
MODE, 8, 0 – Neo:6
MODE, 8, 1 – Neo:6+THX Cinema
Pro Logic IIx Music adjustment:
MODE, 4, 1 – Center Width display
MODE, 4, 2 – Dimension display
MODE, 4, 3 – Panorama Off
MODE, 4, 4 – Panorama On
Neo:6 Music adjustment:
MODE, 4, 5 – Center Image display
THX Re-EQ:
THX, 3, 0 – Re-EQ Off when THX is on
THX, 3, 1 – Re-EQ On when THX is on
THX, 3, 2 – Re-EQ Off when THX is off
THX, 3, 3 – Re-EQ On when THX is off
Tuner Bank Selection:
MODE, 9, 0 – AM
MODE, 9, 1 – FM1
MODE, 9, 2 – FM2
MODE, 9, 3 – FM3
Source Selection:
THX, 8, 0 – CD
THX, 8, 1 – 2-Ch BAL
THX, 8, 2 – 6-Ch S/E
THX, 8, 3 – TAPE
THX, 8, 4 – FM•AM
THX, 8, 5 – DVD1
THX, 8, 6 – DVD2
THX, 8, 7 – DVD3
THX, 8, 8 – DVD4
THX, 8, 9 – TV1
THX, 9, 0 – TV2
THX, 9, 1 – TV3
THX, 9, 2 – TV4
THX, 9, 3 – SAT1
THX, 9, 4 – SAT2
THX, 9, 5 – VCR
THX, 9, 6 – AUX
When using Simulcast mode, all sources must
be selected using macros, and within 2 seconds.
Some tips if you’re using a macro-capable remote control:
• If you do not want separate mode selection according to flagged vs unflagged source material, you can program
macros as a 6-key sequence, for example MODE, 0, 1, MODE, 2, 1 and flag will make no difference to selection.
• You can program your source selection keys with the power-on command preceding each source-select
command. This way, when a source is selected, the processor will turn on at the same time if it is off, similar to
front panel operation.
• If your source components also have discrete commands for power-on and power-off, you can take the above
idea even further, for example, program the TV button with the following sequence: Power-on the processor,
select TV, power-on the satellite receiver / cable box, power-on the TV. This way, when the entire system is off
and you or a family member wants to watch TV, “just push TV”.
80
APPENDIX B – PRESET MEMORY CODES
The following codes are for setting operation of other components with the processor’s remote control. If codes for your
components are not in this library, see sections 5.1 and 5.2.
To enter a 5-digit code:
1. Press the control mode key near the top of the remote (e.g. DVD).
2. Press and hold LEARN until the LED flashes twice.
3. Enter the 5-digit code. Two LED blinks indicate that the code is accepted.
Anthem Processors:
D1/2, AVM 20/30/40/50 – MAIN
D1/2, AVM 20/30/40/50 – ZONE2
D1/2, AVM 20/30/40/50 – ZONE3
AVM 2 – MAIN
AVM 2 – ZONE2
31185
31186
31187
31096
31097
Audio Amplifiers:
Accuphase
Acurus
Adcom
Aiwa
AudioSource
Bel Canto Design
Bose
Carver
Classe
Curtis Mathes
Denon
Durabrand
GE
Harman/Kardon
JVC
Kenwood
Korsun
Left Coast
Lenoxx
Linn
Logitech
Luxman
Magnavox
Marantz
Mark Levinson
Nakamichi
NEC
Optimus
Panasonic
Parasound
Philips
Pioneer
Polk Audio
PS Audio
RCA
Realistic
Sansui
Shure
Sony
Soundesign
Technics
Victor
Wards
Yamaha
YBA
30382
30765
31100, 30577
30406
30011
31583
30674
30269
31461, 31462
30300
30160
31561
30078
30892
30331
30356
31483
30892
31561
30269
31408
30165
30269
30892, 30321, 30269
31483
30321
30264
30395, 30300
30521, 30308
30246
30892, 30269
30013, 30300
30892, 30269
31523
30300
30395
30321
30264
30689, 30220, 30815
30078, 30211
30521, 30308
30331
30078, 30211, 30013
30354, 30143, 30133, 30504,
31502
Audio Amp/Tuners:
ADC
Adcom
Aiwa
30531
31616, 30616, 31617
31405, 30158, 30189, 31243,
31089, 31388, 30121, 30405,
31321, 31641, 31347
Akai
30224, 30076, 31512, 31255
Alco
31390
Amphion Media Works 31615, 31563
AMW
31563, 31615
Anam
31609, 31074, 30281
Apex Digital
31430, 31257
Arcam
31120
Audiophase
31387
Audiotronic
31189
Audiovox
AVLight
Bel Canto Design
Bose
Brix
Cambridge Soundwks
Capetronic
Carver
Casio
Clarinette
Classic
Coby
Compaq
Criterion
Curtis
Curtis Mathes
Daewoo
Dell
Denon
Dynamic Bass
Emerson
Fisher
Fonmix
Fosgate
Garrard
Gateway
GE
Glory Horse
Go Video
GoldStar
GPX
Hafler
Harman/Kardon
Hewlett Packard
Hitachi
Initial
Inkel
Integra
JBL
JVC
Kansai
Kenwood
KLH
Koss
Lasonic
Lenoxx
Lexicon
Linn
Liquid Video
Lloyd's
LXI
Magnavox
Marantz
MCS
Memorex
Mitsubishi
Modulaire
Musicmagic
NAD
Nakamichi
NEC
Norcent
31390, 31627
30158
31584
31229, 31253, 30639
31602
31477, 31370
30531
31189, 30189, 30042, 31089,
30008, 30360
30195
30195
31352
31513, 31389, 31263
31136
31420
31596
30080
31250
31383
31360, 30004, 31104, 30771,
31311, 30273, 31142, 30301
30360
30424, 30255
31409, 30360, 30219, 31801,
30042
31360
31487
30424, 30281, 30463, 30146,
30440
31517, 31567
31379
31263
31532
30281
31299
30146
30110, 30189, 30891
31181
31801, 31273
31426
30027, 30062, 30502, 30491
30135, 31298
30110, 31306, 30281
30074, 31282, 31263, 31495,
31374
30440
31313, 31570, 31569, 30027,
31051, 30077, 30313, 31027,
30042, 30239, 30569, 31052,
30186, 30314
31412, 31390, 31428
30424, 30255, 31366
31798, 31510
31437
31076
30189
31497
30195
30181
31189, 31269, 30189, 30128,
30391, 30195, 31089, 31514,
30531
31189, 31269, 30039, 30189,
31089, 31289, 30200, 30128
30039, 30346
31596
31393
30195
31089
30320
30347, 30097, 31555
30235
31389
Onkyo
Optimus
Oritron
Panasonic
Penney
Philco
Philips
Pioneer
Polaroid
Polk Audio
Proscan
Qisheng
Quasar
RadioShack
RCA
Realistic
Regent
Rio
Saba
Samsung
Sansui
Sanyo
Scott
Sharp
Sharper Image
Sherwood
Shinco
Shinsonic
Silsonic
Sonic
Sonic Blue
Sony
Soundesign
Stereophonics
Sunfire
Tae Kwang
Teac
Technics
Techwood
Thorens
Venturer
Victor
Wards
Yamaha
Yorx
Zenith
30135, 31298, 30842, 30380,
31531
31023, 30801, 31074, 30080,
30186, 30531, 30797, 30042,
30181, 30440, 30738, 30849,
30177, 30219, 30670
31497, 31366
31518, 30039, 31548, 31764,
30518, 31350, 31763, 30367,
31316, 31509, 31633, 30309,
31288, 31363
30195
31390
31189, 31269, 30189, 31365,
31089, 31266, 31283, 30891,
31368, 30391, 31120, 31268
31023, 30150, 30630, 31184,
30080, 30531, 31084, 31384,
30244, 31343
31508
30189, 31289
31254
31609, 31390
30039
31263
31023, 31609, 31254, 30346,
30531, 31154, 31511, 30080,
30530, 31074, 31390, 30054,
30360
30195, 30181, 30163
31437
31869, 31383
31519
31500, 31295
30189, 30346, 30193, 31089
30801, 30360, 31469, 30219,
31251
30163, 30322
31286, 30186, 31386, 31361
31545, 31556, 30797, 31409,
31416, 31549, 31385, 31411,
31546, 31723, 31263, 31410
30491, 31423, 30062, 31077,
30502, 31653
31390
31426
30176, 31426
30281
31383, 31869, 31532
31058, 31441, 31258, 31759,
30158, 31442, 31529, 31758,
31371, 31503, 31042, 31658,
31158, 31858, 31367, 31406,
31458, 30168, 31558, 31131,
31349, 31382
30670
31023
31313, 30314, 30313, 31052
30440
30163, 31267, 31074, 31528,
30463, 31390
31308, 31518, 30039, 30518,
30309, 31309, 30208
30281
31189
31390, 30849
30074
30158, 30189, 30080, 30054
30176, 30081, 31176, 31375,
30186, 31331, 31276
30195
31293, 30857, 30281, 31869
81
APPENDIX B – PRESET MEMORY CODES continued …
Cable Converters:
ABC
Allegro
Americast
Antronix
Archer
Belcor
Bell & Howell
Bell South
Cable Star
Cabletenna
Cableview
Century
Citizen
Clearmaster
ClearMax
Colour Voice
Comtronics
Contec
Coolmax
Daeryung
Digi
Director
Dumont
Eastern
Emerson
Everquest
Focus
Funai
Garrard
GC Electronics
Gehua
Gemini
General Instrument
Global
GMI
GoldStar
Goodmind
Hamlin
Hitachi
Hytex
Jasco
Jebsee
Jerrold
Leon
LG
Linsay
Magnavox
Memorex
Motorola
Movie Time
MS
MultiVision
Novaplex
NSC
Oak
Optimus
Pace
Panasonic
Panther
Paragon
Philips
Pioneer
Popular Mechanics
Pulsar
Quasar
RadioShack
RCA
Realistic
Recoton
82
00003, 00008, 00014, 00001,
00007, 00013, 00011, 00017
00315, 00153
00899
00207, 00022
00797, 00207, 00153, 00022
00056
00014
00899
00056
00022
00022
00153
00315, 00153
00883
00883
00025, 00031
00040
00019
00883
01877, 00877, 00477, 00008
00637
00476
00637
00002
00797
00040, 00015
00400
00019
00153
00207, 00056
00476
00797, 00015
00476, 00810, 00276, 00003,
00014, 00011, 00015
01327
00015, 00797
00144, 00040
00797
00009, 00273, 00034, 00020,
00259
00014, 00011
00007
00015, 00315, 00153
00400
00476, 00810, 00276, 00003,
00012, 00014, 00011, 00015
00015
00144, 00040
00440
00027
00000
00476, 00810, 00276, 01254,
01106, 01376
00156, 00063
00015
00012
00618
00063, 00156
00019, 00007
00021
01877, 00237
00000, 00008, 00107, 00040,
00021
00637
00000
00317, 00027, 00025, 00153,
00013, 00031, 01305
01877, 00877, 00144, 00533,
01021
00400
00000
00000
00015, 00883, 00797, 00315
00021
00207
00400
Regal
Regency
Rembrandt
Runco
Samsung
Scientific Atlanta
Seam
Signal
Signature
SL Marx
Sony
Sprucer
Starcom
Stargate
Starquest
Supercable
Supermax
Sylvania
Tandy
Teleview
Texscan
TFC
Timeless
Tocom
Torx
Toshiba
Trans PX
Tristar
TS
Tusa
TV86
Unika
United Artists
Universal
V2
Viewmaster
Viewstar
Vision
Vortex View
Zenith
Zentek
00279, 00273, 00259, 00020
00002
00011
00000
00000, 00144, 00040
01877, 00877, 00477, 00008,
00017
00510
00040, 00015
00011
00040
01006
00021
00003, 00014, 00015
00015, 00797, 00040
00015
00276
00883
00001
00258
00040
00001
00310
00040
00012, 00013
00003
00000
00276, 00153, 00315
00883
00003
00015
00063
00207, 00153, 00022
00007
00153, 00056, 00207, 00022,
00191
00883
00883
00063, 00027, 00258
00883
00883
00000, 00525, 00899
00400
CD Players:
ADC
Adcom
Aiwa
Akai
Audio Alchemy
Audio-Technica
BSR
Burmester
California Audio Labs
Carrera
Carver
Classic
Crown
DAK
DBX
Denon
DKK
DMX Electronics
Dynamic Bass
Emerson
Fisher
Garrard
GE
Gemini
Genexxa
GoldStar
GPX
Harman/Kardon
Hitachi
Inkel
Integra
JVC
Kenwood
KLH
Kodak
Korsun
Koss
Krell
Kyocera
LG
Linn
Luxman
LXI
Magnavox
Marantz
Mark Levinson
McIntosh
MCS
Miro
Mission
MTC
Nakamichi
NEC
Nikko
NSM
Onkyo
Optimus
Panasonic
Parasound
Philips
Pioneer
Polk Audio
Proton
QED
Quad
Quasar
RadioShack
RCA
Realistic
30018
30155, 30234
30157, 30124, 30012
30156
30194
30170
30245, 30194
30420
30029, 30303
30194
30157, 30437, 30179
31297
30122
30245
30254
30873, 30003
30000
30157
30179
30305, 30164, 30155, 30469
30179, 30174, 31325, 30088,
30342
30245, 30420, 30393, 30280,
30425
30009
30625
30032, 30305, 30164
30417
31296
30157, 30173, 31202, 30426
30032, 30155
30196, 30180, 30437
30101
Rotel
SAE
Sansui
Sanyo
SAST
Scott
Sears
Sharp
Sherwood
Shure
Silsonic
Sonic Frontiers
Sony
Soundesign
STS
Symphonic
TAG McLaren
Tascam
TDK
Teac
Technics
Tivoli Audio
Vector Research
Victor
Wards
Yamaha
YBA
Yorx
Zonda
30072, 31294, 30655
30681, 30826, 30626, 30028,
30037, 30036, 30190
31318
30287
31484
31317
30157
30018
31208
30157
30093
30305
30157, 30305
30626, 30029, 30157, 30180
31484
30287
30029, 30043
30000
30157
30420, 30625
30147
30043, 30234
30174, 30170, 30164, 30625
30157
30868, 30101
31063, 30000, 30032, 30037,
30342, 30437, 31075, 30145,
30194, 30305, 30426, 30087,
30179, 30280, 30420, 30468,
30175, 30196
30029, 30752, 30303
30420, 30194
30626, 30157, 30287
31063, 31062, 30032, 30305,
30468, 31087
30157
30157
30157
30157
30029
31075
31062, 30032, 30305, 30764,
30179, 30468, 30009, 30155,
30420, 30053
30164, 30180, 30155, 30179,
30175, 30420
30157, 30420
30157
30157, 30305, 30202
30179, 30087
30157
30305, 30164, 30155
30305
30861, 30037, 30180
31067, 30196, 30180, 30426
30043
30888, 30036
30157
30490, 30000, 31364, 30185,
30605, 30100, 30604
30425, 30145
30018
30305
30157
30420
31208
30393, 30180, 30174, 30420
30029, 30207, 30303
31553
30194, 30417
30072
30157, 30053
30888, 30036, 30187, 30170,
31292
30625
30461
30157
APPENDIX B – PRESET MEMORY CODES continued …
DVD Players:
Adcom
21094
Advent
21016
Aiwa
20641, 21912
Akai
20899, 20770, 21975, 21089
Allegro
20869
Amphion Media Works 22016, 22001
AMW
20872, 22016, 22001, 21176
Anam
21913
Apex Digital
20672, 20717, 20797, 21020,
21100, 20796, 21004, 21061,
21937, 20794, 20830, 21056,
21915, 20755
Aspire Digital
21168
Audiologic
20736
Audiovox
21071, 21122, 21041, 21121,
21072
Axion
21071, 21072
B&K
20662, 20655
Bel Canto Design
21571
Blaupunkt
20717
Blue Parade
20571
Broksonic
20868, 20695
Cambridge Soundwks 21916
CAVS
21057
Changhong
20627, 21061
CineVision
20876, 20869
Classic
21917
Coby
20778, 21107, 21086, 21923,
20852, 21165
Criterion
22007
Curtis Mathes
21087
CyberHome
21023, 21129, 20816, 21117,
21024
Daewoo
20784, 20869, 20833, 21918,
21172, 20705
Denon
20490, 20634
Dual
21085, 21068
DVD2000
20521
Emerson
20591, 20675, 20821
Enterprise
20591
Fisher
20670, 21919
Funai
20675
Gateway
21077, 21073, 21158
GE
20522, 20815, 20717
Go Video
20744, 20869, 21099, 21970,
20715, 20833, 21075, 21730,
20783, 21044, 21144
GPX
20699, 20769
Greenhill
20717
Harman/Kardon
20582, 20702
Hitachi
20573, 20664, 21919
Hiteker
20672
Initial
20717, 21931
Integra
20627, 21924
Jamo
22003
Jaton
21078
JBL
21926, 20702
Jensen
21016
JVC
20558, 20623, 21940, 21901,
20867
jWin
21051, 21049
Kenwood
20490, 20534, 21063, 20682
KLH
20717, 21939, 21149, 21020
Konka
20720, 20719, 20711, 20721
Koss
20651
Landel
20826
Lasonic
20798, 21173
Lenoxx
21938
LG
20801, 20101
Lite-On
21158, 21058
Loewe
20511
Magnavox
20503, 20675, 21976, 21914,
20821
Malata
21159, 20782
Marantz
20539
Memorex
20695
Microsoft
Mintek
Mitsubishi
Momitsu
NEC
Nesa
Next Base
Niro
Norcent
Onkyo
Oritron
Panasonic
Philco
Philips
Pioneer
Polaroid
Polk Audio
Portland
Prima
Princeton
Proscan
ProVision
Qwestar
RCA
Regent
Rio
Rotel
Rowa
Saba
Sampo
Samsung
Sansui
Sanyo
Sharp
Sharper Image
Sherwood
Shinco
Shinsonic
Sigma Designs
Sonic Blue
Sony
Sungale
Superscan
SVA
Sylvania
Symphonic
Teac
Technics
Technosonic
Techwood
Terapin
Theta Digital
Tivo
Toshiba
Tredex
TYT
Urban Concepts
US Logic
V Inc.
Vocopro
Xbox
Xwave
Yamaha
Zenith
20522
20839, 20717
21521, 20521
21082
20785
20717
20826
22024
21003, 20872, 21923, 21107
20503, 20627, 21924, 20792,
21985
20651, 21980
20490, 21462, 21907, 21910,
21990, 21362, 21762, 21909,
21986, 20632, 21490, 21908,
21925, 22017
22000
20503, 20539, 20646, 20885,
20854, 21914
20525, 20571, 20638, 20632,
20631, 21902
21086, 21061, 21998, 21200
20539
20770
21016
20674
20522
20778
20651
20522, 20571, 20717, 20822,
21193, 21974, 21132, 21965,
21022, 21913
21938
20869
20623
20823
21977
20752, 20698
20490, 20573, 20820, 21932,
21075, 20899, 21979
20695
20695, 20670, 21967, 20873
20630, 20752
21995, 21117
21043, 20770, 20633, 21077
20717
20533, 20839, 21931
20674
20869, 21970, 21099
20533, 21533, 20864, 21033,
21904, 22020, 21903, 21981,
20772, 21934
21074
20821
20717, 20860, 21105
20821, 20675
20675
21984, 20809
20490
20730
20692
21031
20571
21996
20503, 21154, 22006, 21045,
21996, 20695, 21988
20803, 20800, 20799, 20804
20705
20503
20839
21226, 21064
21027
20522
21001
20490, 20539, 20545
20503, 20591, 21906, 20869,
22002
Satellite Receivers:
AlphaStar
Chaparral
Crossdigital
DirecTV
00772
00216
01109
00392, 00566, 00639, 01639,
01142, 00247, 00749, 01749,
00724, 00819, 01856, 01076,
01109, 00099, 01444, 01108,
01392, 01443, 01640, 01442,
01414
Dish Network System 01005, 00775, 01775, 01505,
01170
Dishpro
01005, 00775, 01505, 01775
Echostar
01005, 00775, 01170, 01775,
01505
Expressvu
00775, 01775
Funai
00338
GE
00566
General Instrument
00869
GOI
00775, 01775
Goodmans
01246
Hisense
01535
Hitachi
00819, 01250, 00214, 00491,
00489, 00201
HTS
00775, 01775
Hughes Network Sys 01142, 00749, 01749, 01443,
01442, 01444
I-Lo
01535
JVC
00775, 01170, 00492, 01775
LG
01414, 01226
Magnavox
00724, 00722
Matsushita
00340, 00214, 00500
Memorex
00724
Mitsubishi
00749, 00491
Motorola
00869
NEC
00496, 01270
Next Level
00869
Panasonic
00247, 00701, 00214, 00500,
00340
Paysat
00724
Philips
01142, 00749, 01749, 00724,
01076, 00722, 00099, 01442
Proscan
00392, 00566
Proton
01535
RadioShack
00869
RCA
00392, 00566, 00855, 00143,
01392
Samsung
01276, 01109, 01108
Sanyo
00493, 01219
Sharp
00494
SKY
00856
Sony
00639, 01639, 00294, 01640,
00163
Star Choice
00869
Tivo
01142, 01444, 01443, 01442
Toshiba
00749, 01749, 00790, 00486,
01285
UltimateTV
01392, 01640
Uniden
00724, 00722
US Digital
01535
USDTV
01535
Victor
00492
Voom
00869
Zenith
00856, 01856
83
APPENDIX B – PRESET MEMORY CODES continued …
Curtis Mathes
TVs:
888
A-Mark
Abex
Addison
Admiral
Advent
Adventura
Aiko
Aiwa
Akai
Alaron
Albatron
Ambassador
America Action
Ampro
Anam
Anam National
Anhua
AOC
Aolinpike
Apex Digital
Archer
Audiovox
Axion
Baihe
Baile
Baohuashi
Baosheng
Beijing
Belcor
Bell & Howell
BenQ
Bradford
Brockwood
Broksonic
Caihong
Cailing
Candle
Carnivale
Carver
Celebrity
Celera
Changcheng
Changfei
Changfeng
Changhai
Changhong
Chengdu
Ching Tai
Chun Yun
Chunfeng
Chung Hsin
Chunsun
Cinema
Citizen
Clairtone
Clarion
Colt
Concerto
Conrowa
Contec
Craig
Crosley
Crown
84
10264
10003
10032
11150, 10653, 10092
10093, 10463
10761, 10817, 10815, 11933,
10783, 10842
10046
10092
11914, 11910
10812, 10702, 10030, 10672,
11903, 10264
10179
10843, 10700
10177
10180
10751
10250, 10180, 10003, 10700,
10161, 10628
10250, 10161, 10055, 10650
10051
10451, 10093, 10180, 10060,
10030, 10178, 10019, 10185,
11150, 10018, 10052, 10474,
10003, 10092, 10179
10264
10748, 10765, 10767, 11943,
10879
10003
10451, 10180, 10875, 11952,
10802, 11951, 10092, 10623,
11937, 10003
11937
10264
10001, 10391
10264
10817
10812, 10391, 10264, 10817,
10001
10019
10154, 10016
11032
10180
10019
10236, 10463, 11911, 11938,
10003, 11905, 11935, 11929
10817
10748
10030, 10046, 10186, 10056
10030
10054, 10170
10000
10765
10051, 10817, 10001, 10391,
10264
10817
10817, 10264
10817
10156, 10765, 10817, 10264,
10783, 10767, 11910
10817
10003, 10474, 10179, 10092
10000, 10180, 10161, 10474,
11150, 10092, 10843, 10003,
10179, 10700
10264
10180, 10053, 11150, 10036,
10474
10817
10672
10060, 10030, 10039, 10280,
10056, 10186, 10046, 10092,
11928
10185
10180
11906
10056
10156, 10145, 10264
10180, 10157, 10185
10180, 10161
10054
10180, 10039
CXC
Daewoo
Daytron
Dayu
Dell
Denon
Dumont
Durabrand
Dwin
ECE
Electroband
Electrohome
Elektra
Emerson
Envision
Epson
Ether
Feilu
Feiyan
Feiyue
Firstar
Fisher
Fortress
Fujitsu
Funai
Furi
Futuretech
Ganxin
Gateway
GE
General
Gibralter
Gintai
Go Video
GoldStar
Goodmans
Grunpy
Haier
Haiyan
Hallmark
Hankook
Harley Davidson
Harman/Kardon
Harvard
Havermy
Hello Kitty
Himitsu
Hisense
Hitachi
Hongmei
Hongyan
Hua Tun
10047, 10054, 10154, 10451,
10093, 10060, 10702, 10030,
10145, 10166, 10466, 11347,
10039, 10056, 11147, 10016,
11919
10180
10154, 10451, 10180, 10030,
10178, 11661, 10474, 10003,
10628, 10032, 11150, 10092,
11928, 10627, 10700, 10056,
11909, 10170, 10391, 10623,
10019, 10672, 10039
10019
10391
11080
10145, 10511
10017, 10019
10463, 10180, 10178, 10171,
11034, 10003
10774, 10720
10037
10000, 10185
10381
10017, 11661
10154, 10236, 10463, 10180,
10178, 10171, 10280, 10623,
10038, 11911, 11944, 10179,
10019, 11909, 11929, 10185,
10282, 11905, 10039, 11928,
10177
10030, 10813
10833, 10840
10030, 10161, 10003
10817
10264
10817
10236
10154, 10159
10093
10186, 10853, 10179, 10809,
10683
10180, 10171, 10264, 11904,
10179, 10342
10145, 10817, 10264
10180
10817
11756, 11755
11447, 10047, 11454, 10051,
10451, 10180, 10030, 10178,
10092, 11147, 11919, 10055,
10027, 11917, 10135, 10282,
11347, 10021, 11907, 11922
10186
10017, 10030, 10019
11150, 10474
10886
10154, 10030, 10178, 11926,
10019, 10037, 11910, 10001,
10032, 10056, 11150, 10039
10360
10180, 10179
11034, 10768
10264, 10817
10178
10180, 10030, 10178, 10019,
10056, 10628
11904, 10179
10054
10180
10093
10451
10180, 10628
10156, 10748, 10145
11256, 10156, 10030, 10178,
11145, 10145, 10038, 11245,
10092, 10027, 10381, 10036,
11150, 10056, 11904, 10151,
10165, 10019, 10186, 10032,
10039, 10157, 10016, 10179,
10474
10093, 11910, 10817, 10264
10817, 10264
11150
Huafa
Huanghe
Huangshan
Huanyu
Huaqiang
Huari
Huodateji
Hyundai
Imperial Crown
Infinity
Inteq
Janeil
JBL
JCB
Jean
Jensen
Jiahua
Jialicai
Jinfeng
Jinhai
Jinque
Jinta
Jinxing
Juhua
JVC
Kaige
Kangchong
Kangli
Kangyi
Kaypani
KEC
Kenwood
KLH
KLL
Kloss
Kolin
Kongque
Konka
KTV
Kuaile
Kunlun
LG
Lihua
Lloyd's
Loewe
Logik
Longjiang
Luxman
LXI
Magnasonic
Magnavox
Magnin
Majestic
Marantz
Maruman
Matsushita
Megapower
Megatron
MEI
Meile
Memorex
Mermaid
MGA
Midland
10145
10817
10264, 10817
11910, 10817, 10264
10264
10145, 10264
10051
10849
10001, 10391, 10264
10054
10017
10046
10054
10000
10156, 10051, 10236, 10092,
10179, 10003, 10474
10761, 10815, 11933, 10817
10051
10264
10051, 10817
11910
10817, 10264
10264, 11910
10054, 10156, 10145, 10264,
10037, 10817
10817, 10264
10053, 10160, 11923, 11253,
10036, 10653
10264, 10817
11910
10001, 10817, 10391, 10264
10264
10052
10180
10030, 10019
10765, 10767
10037
10046, 10024
10180, 10053, 11150, 10036,
10474
10264, 10817
10632, 10707, 11940, 10628,
10703, 11939, 10638, 10817
10180, 10030, 10185, 10039,
10280
10264
10051, 10817, 10264
10060, 10030, 10178, 10056,
10442, 10856, 10001, 10038,
10700, 10019, 10037, 10474,
11178, 10003, 10032, 10006
10817
11904
10136
10016
10264, 10817
10056
10047, 10054, 10154, 10156,
10178
11928, 11913
11454, 10054, 10030, 10706,
11904, 10020, 11944, 10036,
10179, 10386, 11931, 10096,
10187, 11254, 11913, 10024,
10186
11907
10016
10054, 10030, 10854, 10704,
11154, 10855
10627, 10391
10250, 10650, 10161
10700
10178, 10145, 10003
10185
10264, 11910, 10817
10154, 10463, 10150, 10178,
10179, 11920, 11927, 10016,
11911, 11926, 11924
10037
10150, 10030, 10178, 11907,
10019
10047, 10017, 10051, 10039,
10135, 10032
APPENDIX B – PRESET MEMORY CODES continued …
RCA
TVs continued:
Minutz
Mitsubishi
Monivision
Motorola
MTC
Mudan
Multitech
NAD
Nanbao
Nansheng
National
NEC
Newave
Nikko
Nikon
Norcent
Noshi
NTC
Onking
Onwa
Optimus
Optoma
Optonica
Orion
Panasonic
Panda
Penney
Philco
Philips
Pilot
Pioneer
Portland
Prima
Princeton
Prism
Proscan
Proton
Pulsar
Qingdao
Quasar
RadioShack
10021
10154, 10250, 10093, 10236,
10180, 11250, 10150, 10030,
10178, 10381, 10836, 10036,
10179, 10817, 11150, 10474,
10019, 10868, 10056, 11917
10843, 10700
10093, 10055
10060, 10030, 10185, 10019,
10056
10051, 10817, 10264
10180
10156, 10178, 10866
11910, 10264
10817, 10264
10051
10154, 10156, 10051, 10053,
10030, 10178, 10046, 11150,
10056, 10165, 10186, 10474,
10036, 10882, 10381, 10817,
11704, 10170, 10264, 10019,
10497
10093, 10178, 11150, 10092,
10161
10030, 10178, 10092
11910
10748, 10824
10018
10092
10280
10180
10154, 10250, 10166, 11924,
11913, 10650, 11927
10887
10093, 10165
10236, 10463, 11911, 11905,
10179, 11463, 11929
10054, 10250, 10051, 10161,
11410, 11927, 11947, 10037,
10055, 10650, 11924, 11946,
11919, 11941
10051, 10706, 10817, 10264,
11910
10047, 10156, 10051, 10060,
10030, 10178, 10135, 11347,
11926, 10018, 10027, 10039,
11919, 10003, 10021, 10032,
11907, 10019
10054, 10180, 10030, 10178,
10628, 10474, 10020, 10037,
10096, 10186, 10774, 10019,
10032, 10056
11454, 10054, 10000, 10051,
10030, 10178, 10474, 10019,
11154, 10092, 10187, 10774,
10024, 10037, 10056, 10186,
10690, 10020, 10032
10030, 10019, 10039
10166, 10038, 10866, 10679
10092, 10039, 10019
10761, 10815, 10783, 11933,
10817
10717, 10700
10051
11447, 10047, 11347, 11922
10030, 10178, 10001, 10039,
10466, 10003, 10052, 10474
10017, 10019
10051, 10817, 10264
10250, 10051, 11924, 10165,
11919, 10055, 10650
10047, 10154, 10180, 10030,
10178, 10032, 10056, 11920,
10165, 11904, 10019, 10039
Realistic
Rhapsody
Rowa
Runco
Ruyi
Saige
Sampo
Samsung
Samsux
Sanjian
Sansui
Sanyo
Sanyuan
Scimitsu
Scotch
Scott
Sears
Shancha
Shanghai
Shaofeng
Sharp
Sharper Image
Shen Ying
Shencai
Sheng Chia
Shenyang
Shogun
Signature
Simpson
Skygiant
Skyworth
Sony
Soundesign
Sowa
Spectricon
Squareview
SSS
Starlite
Studio Experience
Supre-Macy
Supreme
SVA
Sylvania
11447, 10047, 11454, 10000,
10030, 10178, 10679, 11247,
11917, 10090, 11948, 11147,
10019, 11907, 11922, 10135,
11958, 11047, 11347, 10018,
11547, 10038, 11919, 10092,
11953
10154, 10180, 10030, 10178,
10056, 10019, 10039, 10165,
10032
10185
10748, 10037, 10817
10017, 10030, 10603, 10497
10817
10817
10154, 10093, 10030, 10178,
10171, 10032, 10052, 10474,
11755, 10039, 10700, 10036,
10092, 10650
10154, 10156, 10060, 10812,
10702, 10030, 10178, 10019,
10056, 11060, 10092, 10474,
10774, 10032, 10817, 10090,
11903, 10264, 10766, 10814,
11150, 10179
10039
10264
10463, 11904, 11929, 11911
10154, 10156, 10180, 10145,
10376, 10474, 10036, 10893,
11907, 10159, 10280, 10424,
10799, 11154, 10157, 10264,
10381, 10798, 10088, 11150
10093, 10817
10019
10178
10236, 10180, 10178, 10179,
10019
10047, 10054, 10154, 10156,
10178, 10171, 11926, 11904,
10056, 10159, 10179
10817, 10264
10264, 11910, 10817
10145, 10817
10093, 10030, 10157, 10386,
10650, 10720, 10032, 10851,
10256, 10491, 10689, 10818,
10039, 10165, 10474, 10688,
10787, 10036, 11917
11950
10092, 10003, 10474, 10179
10145, 10264
10093, 10236, 10179, 11150,
10474
10817, 10264
10019
10016
10187, 10186
10180
10748, 10264, 10037, 10817
11100, 10000, 10036, 10650,
11300, 10111, 11925, 10080,
10834, 11904
10180, 10178, 10179, 10186
10156, 10051, 10060, 10178,
10036, 10092, 10474, 11150
10003
10171
10180, 10019
10180
10843
10046
10000
10748, 10587, 10865, 10872,
10768, 10871, 10870
10054, 10030, 10171, 11931,
10381, 11944, 10020, 10096
10180, 10171, 11913, 11904
10000, 10451, 10093, 10060,
10178, 10092, 10036, 10474
Tacico
10178, 10179, 11150, 10092,
10474
Tai Yi
11150
Taishan
10817, 10391
Tandy
10093
Tashiko
11150, 10650, 10092
Tatung
10054, 10154, 10156, 10051,
10060, 11150, 10474, 10036,
10055, 11756, 10003
Technics
10250, 10051
Technol Ace
10179
Techview
10847
Techwood
10051, 10003, 10056
Teco
10051, 10093, 10178, 10474,
10036, 10280, 10092, 10264,
10653
Teknika
10054, 10180, 10150, 10060,
10019, 10056, 10186, 10016,
10092, 10039, 10179
Telefunken
10702, 10056
Tera
10030, 10466, 10474
Thomas
11904
Tiane
10093, 10817
TMK
10178, 10177, 10056
TNCi
10017
Tobo
10748, 10264
Tongguang
10264
Toshiba
10154, 11256, 10156, 10060,
10145, 11918, 11945, 10381,
10832, 10036, 11704, 11936,
10264, 10650, 11150, 11656,
11935, 10161, 10509, 10845,
11356
Tosonic
10185
Totevision
10039
Trical
10157
Tuntex
10030, 10474, 10092
TVS
10463
Ultra
10391
Universal
10027
V Inc.
11756, 10885, 10864
Vector Research
10030
Victor
10250, 10053, 10160, 10650,
10376, 10036, 10653
Vidikron
10054
Vidtech
10178, 10019, 10036
Viewsonic
10857, 11755, 10885, 10864
Viking
10046
Wards
10054, 10030, 10178, 10020,
10080, 10165, 10866, 10019,
10027, 10056, 10111, 10179,
10016, 10021, 10096
Warumaia
10391
Waycon
10156
Westinghouse
10889
White Westinghouse 10463, 10186, 11909, 10623
Xiahua
10817, 10264
Xiangyang
10264
Xihu
10817, 10264
Xinghai
10264
Xinrisong
11910
Xuelian
11910
Yamaha
10030, 10838, 10019, 10833,
10769, 10839
Yapshe
10250
Yongbao
11910
Youlanasi
10817
Yousida
11910
Zenith
10017, 10463, 10178, 11911,
10016, 11909, 10092, 11904,
11929
Zonda
10003
Symphonic
Synco
85
APPENDIX B – PRESET MEMORY CODES continued …
VCRs:
ABS
Admiral
Adventura
Aiko
Aiwa
21972
20048, 20209
20000
20278
20037, 20000, 20307, 20468,
20124, 20406, 20348, 20479
Akai
20041, 20061, 20175, 20106
Alienware
21972
America Action
20278
American High
20035
Amoisonic
20479
Anam
20162, 20037, 20240, 20278,
20226, 21037
Anam National
20162, 20226
Asha
20240
Audiovox
20037, 20278
Beaumark
20240
Bell & Howell
20104
Blaupunkt
20226
Broksonic
20184, 20121, 20209, 20002,
20348, 20295, 21479, 20479
Calix
20037
Canon
20035, 21174, 20167
Carver
20081
CCE
20072, 20278
Changhong
20048, 20081
Citizen
20037, 20278, 21278
Colt
20072
Craig
20037, 20047, 20240, 20072,
20271
Curtis Mathes
20060, 20035, 20162, 20041,
20760, 21035
Cybernex
20240
CyberPower
21972
Daewoo
20045, 20104, 20278, 20210,
20368, 21278, 20637, 20046,
20212, 20561
Dell
21972
Denon
20042
DirecTV
20739, 21989, 21954, 21949
Dish Network System 21943, 21946, 21945, 21944
Dishpro
21944, 21943
Durabrand
20039, 20038
Dynatech
20000
Echostar
21943, 21946, 21945, 21944
Electrohome
20037
Electrophonic
20037
Emerex
20032
Emerson
20035, 20037, 20184, 20240,
20045, 20000, 20121, 20043,
20209, 20002, 20278, 20295,
20036, 20637, 21593, 20561,
21479, 20068, 20208, 20479,
21278, 20061, 20212
Euro1
21962
Expressvu
21944
Fisher
20047, 20104, 20066, 20054
Fuji
20035, 20033
Fujitsu
20045, 20052, 20366
Funai
20000, 20593, 21593
Garrard
20000
Gateway
21972
GE
20060, 20035, 20240, 21060,
20202, 20760, 21035, 20807,
20226, 20761
General
20045, 20366, 20052
Go Video
20643, 20526, 20432
GOI
21944
GoldStar
20037, 20209, 20038, 20226,
20225, 21237
Gradiente
20000
Haojie
20240
Harley Davidson
20000
Harman/Kardon
20081, 20038
Harwood
20072, 20068
Hauppauge
21992
Headquarter
20046
Hewlett Packard
21972
HI-Q
20047
Hitachi
20037, 20000, 20042, 20041,
86
Howard Computers
HP
HTS
Hughes Network Sys
Hyundai
iBUYPOWER
Jensen
JVC
KEC
Kenwood
KLH
Kodak
Kolin
LG
Lloyd's
Logik
LXI
Magnasonic
Magnavox
Magnin
Marantz
Marta
Matsushita
Media Center PC
MEI
Memorex
MGA
MGN Technology
Microsoft
Mind
Minolta
Mitsubishi
Motorola
MTC
Multitech
NAD
National
NEC
Newave
Nikko
Nikon
Noblex
Northgate
Olympus
Onkyo
Optimus
Optonica
Orion
Panarex
Panasonic
Pansat
Penney
Pentax
Philco
Philips
Pilot
Pioneer
Polk Audio
Profitronic
Proscan
20166, 20105, 20089
21972
21972
21944
20042, 21949, 20739
21951
21972
20041
20045, 20067, 20041, 21945,
20008, 21944, 20384, 20366
20037, 20278
20067, 20041, 20038, 20384
20072
20035, 20037
20043, 20041
20037, 20045, 20042, 20209,
20038, 22010, 21037, 20040
20000, 20208
20072
20037
21278, 20593
20035, 20039, 20081, 20000,
20593, 20563, 20110, 21781
20240
20035, 20081, 21381
20037
20035, 20162, 20226, 21162,
20367, 20227
21972
20035
20035, 20162, 20037, 20048,
20039, 20047, 20240, 20000,
20104, 20209, 21237, 20046,
20479, 21162, 20348, 21048,
21262, 20307, 21037
20240, 20043, 20061
20240
21972
21972
20042, 20105
20067, 20043, 20041, 20061,
20807, 20173
20035, 20048
20240, 20000
20000, 20072
20058
20226
20035, 20037, 20048, 20104,
20067, 20041, 20038, 20040,
20008, 20370
20037
20037
20253, 20034
20240
21972
20035, 20226, 21046
20222
21062, 20162, 20037, 20048,
20104, 21048, 21262, 20593,
21162, 20058, 20432
20062
20184, 20209, 20002, 20479,
20295, 21479
21950
21062, 20035, 20162, 20077,
20226, 20616, 21162, 20225,
20367, 20227, 21035, 21262
21950
20035, 20037, 20240, 20042,
20038, 21035, 20040, 20054,
21237
20042, 20105
20035, 20000, 20226, 20479
20035, 20081, 20000, 20226,
20739, 21381, 20110, 20618,
21181, 20563, 21081, 21949,
20062
20037
20042, 20067, 20058
20081
20240
20060, 20760, 21954, 20202,
Protec
Pulsar
Qisheng
Quarter
Quartz
Quasar
RadioShack
Radix
Randex
RCA
Realistic
ReplayTV
Ricoh
Runco
Sampo
Samsung
Samtron
Sanky
Sansui
Sanyo
Scott
Sears
Sharp
Shinco
Shintom
Shogun
Singer
Sonic Blue
Sony
STS
Sunpak
Sylvania
Symphonic
Systemax
Tagar Systems
Tashiko
Tatung
Teac
Technics
Teco
Teknika
Thomas
Tivo
TMK
Toshiba
Totevision
Touch
UltimateTV
Unitech
Vector
Vector Research
Victor
Video Concepts
Videomagic
Videosonic
Viewsonic
21060, 20761
20072
20039
20060
20046
20046
20035, 20162, 21035, 20077,
21162
20000, 21037
20037
20037
20060, 20035, 20240, 20000,
20042, 20807, 21060, 21989,
20106, 20761, 21035, 20058,
21964, 20105, 20226, 20760,
20880, 21954, 20077, 20202,
20453
20035, 20037, 20048, 20047,
20000, 20104, 20066, 20046,
20062
20614, 20616
20253, 20034
20039
20037, 20048
20240, 20045, 20212, 20760,
20210, 20432, 21014
20643
20048, 20039
20000, 20067, 20209, 20041,
20479, 20271, 21479
20047, 20240, 20104, 20046,
20159, 20369, 20368
20184, 20045, 20121, 20043,
20210, 20212
20035, 20037, 20047, 20000,
20042, 20104, 20046, 20066,
21237, 20054, 20105
20048, 20209, 20363, 20848,
20807, 20062, 20738, 21048
20000
20072
20240
20072
20614, 20616
20035, 20032, 20033, 20000,
20253, 20639, 21232, 21972,
20636, 21032, 21957, 20034,
20586, 20640, 21956
20042
20253
20035, 20081, 20000, 20043,
20110, 21781, 21593, 20593
20000, 21593, 20593
21972
21972
20037
20045, 20067, 20041, 20366,
20008
20000, 20041
20035, 20162
20035, 20037, 20048, 20041,
20038, 20040
20035, 20037, 20000, 20052
20000
20739, 21957, 20636, 21956,
20618, 21503
20240, 20208, 20036
20045, 20067, 20043, 20041,
20210, 20384, 21008, 21972,
20366, 20845, 21503, 20066,
20212, 20828, 21145, 20008
20037, 20240
21972
21989
20240
20045
20038, 20040
20067, 20041, 20008, 20384
20045, 20040, 20061
20037
20240
21972
APPENDIX B – PRESET MEMORY CODES continued …
VCRs continued:
Video Accessories:
Villain
Wards
ABS
Alienware
CyberPower
Gateway
Hewlett Packard
Howard Computers
HP
iBUYPOWER
InterVideo
Jensen
JVC
Keyspan
KWorld
LG
Linksys
Macro Image Tech
Media Center PC
Microsoft
Mind
Motorola
20000
20060, 20035, 20048, 20047,
20081, 20240, 20000, 20042,
20072, 20062, 20212, 20760
White Westinghouse 20209, 20072, 20637
XR-1000
20035, 20000, 20072
Yamaha
20041, 20038
Zenith
20039, 20033, 20000, 20209,
20034, 20479, 21479, 21139,
20637
ZT Group
21972
01272
01272
01272
01272
01272, 01267
01272
01272
01272
01393
01165
01384
01344
01403
01415
01365
01383
01272
01272
01272
01363
MyHD
Northgate
Panasonic
Pinnacle Systems
Pioneer
Princeton
Rabbit
Roku
Samsung
Sensory Science
Sharp
SMC
Sony
Streamzap
Systemax
Tagar Systems
TeleCaption
Toshiba
Touch
Viewsonic
ZT Group
01383
01272
01120
01268
01010
00113, 00295
00081
01486
01190, 01490
01126
01010
01456
01272, 01324, 01364
01309
01272
01272
00171
01272
01272
01272, 01329
01272
87
SPECIFICATIONS
ANALOG VIDEO SWITCHING
Bandwidth from input jack to output jack (bypass mode for component video)
Composite & S-Video . . . . . . . . . . . . . . . . . . . . . . . . . . . . . . . . . . . . . . . . . . . . . . . . . . . . . . . . . 70 MHz
Component: Y. . . . . . . . . . . . . . . . . . . . . . . . . . . . . . . . . . . . . . . . . . . . . . . . . . . . . . . . . . . . . . . 110 MHz
Pr. . . . . . . . . . . . . . . . . . . . . . . . . . . . . . . . . . . . . . . . . . . . . . . . . . . . . . . . . . . . . . . 90 MHz
Pb . . . . . . . . . . . . . . . . . . . . . . . . . . . . . . . . . . . . . . . . . . . . . . . . . . . . . . . . . . . . . . 80 MHz
All analog video inputs and outputs are 75 Ω, 1.5 Vp-p.
ANALOG AUDIO
Input Impedance . . . . . . . . . . . . . . . . . . . . . . . . . . . . . . . . . . . . . . . . . . . . . . . . . . . . . . . . . . . . . . . . . . . . . . 20 kΩ
Output Impedance
Main . . . . . . . . . . . . . . . . . . . . . . . . . . . . . . . . . . . . . . . . . . . . . . . . . . . . . . . . 300 Ω (RCA), 600 Ω (XLR)
Zone2/3 & Record . . . . . . . . . . . . . . . . . . . . . . . . . . . . . . . . . . . . . . . . . . . . . . . . . . . . . . . . . . . . . . 51 Ω
Rated Input . . . . . . . . . . . . . . . . . . . . . . . . . . . . . . . . . . . . . . . . . . . . . . . . . . . . . . . . . . . . . . . . . . . . . . . . . 2.0 Vrms
Maximum Input . . . . . . . . . . . . . . . . . . . . . . . . . . . . . . . . . . . . . . . . . . . . . . . . . . . . . . . . . . . . . . . . . . . . . 5.3 Vrms
Minimum Load . . . . . . . . . . . . . . . . . . . . . . . . . . . . . . . . . . . . . . . . . . . . . . . . . . . . . . . . . . . . . . . . . . . . . . . . . 5 kΩ
Rated Output (100 kΩ load) . . . . . . . . . . . . . . . . . . . . . . . . . . . . . . . . . . . . . . . . . . . . . . . . . . . . . . . . . . . 2.0 Vrms
Maximum Output
RCA . . . . . . . . . . . . . . . . . . . . . . . . . . . . . . . . . . . . . . . . . . . . . . . . . . . . . . . . . . . . . . . . . . . . . . . 6.3 Vrms
XLR. . . . . . . . . . . . . . . . . . . . . . . . . . . . . . . . . . . . . . . . . . . . . . . . . . . . . . . . . . . . . . . . . . . . . . . 12.6 Vrms
Headphone Output. . . . . . . . . . . . . . . . . . . . . . . . . . . . . . . . . . . . . . . . . . . . . 100 mW into 32 Ω at 0.2% THD+N
Volume Control Range
Main . . . . . . . . . . . . . . . . . . . . . . . . . . . . . . . . . . . . . . . . . . . . . -95.5 to +31.5 dB in 0.5 dB increments
Zone2/3 and Headphone . . . . . . . . . . . . . . . . . . . . . . . . . . . -62.5 to +10.0 dB in 1.25 dB increments
Crosstalk (at 1 kHz) . . . . . . . . . . . . . . . . . . . . . . . . . . . . . . . 82 dB between channels, 86 dB between inputs
XLR Pin Configuration . . . . . . . . . . . . . . . . . . . . . . . . . . . . . . . Pin 1: Ground, Pin 2: Positive, Pin 3: Negative
DIGITAL AUDIO
Crossover
High-Pass Slope (Small Speaker Setting) . . . . . . . . . . . . . . . . . . . . . . . . 12 dB/octave (2nd order)
Low-Pass Slope (Subwoofer) . . . . . . . . . . . . . . . . . . . . . . . . . . . . . . . . . . . 24 dB/octave (4th order)
Frequency (Adjustable). . . . . . . . . . . . . . . . . . . . . . . . . . . . . . . . . . . 25 to 160 Hz in 5 Hz increments
Tone Control
Filter Type . . . . . . . . . . . . . . . . . . . . . . . . . . . . . . . . . . . . . . . . . . . . . . . . . . . . . . . . . . . . . . . . . . . . . Shelf
Range . . . . . . . . . . . . . . . . . . . . . . . . . . . . . . . . . . . . . . . . . . . . . . . . . . . . . . . . . . . . . . . . . . . . . . . ±12 dB
Bass Turnover Frequency . . . . . . . . . . . . . . . . . . . . . . . . . . . . . . . . . . . . . . . . . . . . . . . . . . . . . . 200 Hz
Treble Turnover Frequency . . . . . . . . . . . . . . . . . . . . . . . . . . . . . . . . . . . . . . . . . . . . . . . . . . . . . . 2 kHz
Analog to Digital Conversion S/N Ratio at digital Rec output (IEC-A filter) . . . . . . . . . . . . . . . . . . . 100 dB
All digital inputs and outputs comply with HDMI, S/PDIF, or AES/EBU standards. Sample rate converter
output is 24-bit / 192 kHz regardless of input.
88
SPECIFICATIONS continued …
MAIN Path (RCA & XLR output)
Frequency Response and Bandwidth
Analog-Direct Inputs. . . . . . . . . . . . . . . . . 10 Hz to 20 kHz (+0, -0.2 dB), 1 Hz to 130 kHz (+0, -3 dB)
Analog-DSP Inputs at 24/96 . . . . . . . . . . . . 10 Hz to 20 kHz (+0, -0.3 dB), 2 Hz to 44 kHz (+0, -3 dB)
Digital Inputs at 24/96 . . . . . . . . . . . . . . . . . 10 Hz to 20 kHz (+0, -0.2 dB), 1 Hz to 45 kHz (+0, -3 dB)
THD+N (at Rated Input & Output)
Analog-Direct Inputs . . . . . . . . . . . . . . . . . . . . . . . . . . . . . . . . . . . . . . . . . . . . . . 0.006% (80 kHz BW)
Analog-DSP Inputs at 24/48 or 24/96 . . . . . . . . . . . . . . . . . . . . . . . . . . . . . . . . 0.004% (AES17 filter)
Digital Inputs at 24/48 or 24/96 . . . . . . . . . . . . . . . . . . . . . . . . . . . . . . . . . . . . . 0.004% (AES17 filter)
IMD (CCIF at 15 kHz & 16 kHz)
Analog-Direct Inputs . . . . . . . . . . . . . . . . . . . . . . . . . . . . . . . . . . . . . . . . . . . . . . . . . . . . . . . . <0.001%
Analog-DSP Inputs at 24/48. . . . . . . . . . . . . . . . . . . . . . . . . . . . . . . . . . . . . . . . . . . . . . . . . . . . 0.001%
Digital Inputs at 24/48 or 24/96 . . . . . . . . . . . . . . . . . . . . . . . . . . . . . . . . . . . . . . . . . . . . . . . . . 0.001%
S/N Ratio (ref. 2.0 Vrms, IEC-A filter)
Analog-Direct Inputs . . . . . . . . . . . . . . . . . . . . . . . . . . . . . . . . . . . . . . . . . . . . . . . . . . . . . . . . . . 107 dB
Analog-DSP Inputs at 24/48 or 24/96 . . . . . . . . . . . . . . . . . . . . . . . . . . . . . . . . . . . . . . . . . . . . 101 dB
Digital Inputs at 24/48 or 24/96. . . . . . . . . . . . . . . . . . . . . . . . . . . . . . . . . . . . . . . . . . . . . . . . . . 104 dB
ZONE2 and ZONE3 Paths
Frequency Response and Bandwidth . . . . . . . . . . 20 Hz to 20 kHz (+0, -0.1 dB), 3 Hz to 140 kHz (+0, -3 dB)
THD+N (at Rated Input & Output). . . . . . . . . . . . . . . . . . . . . . . . . . . . . . . . . . . . . . . . . . . . . 0.06% (80 kHz BW)
IMD (CCIF at 15 kHz & 16 kHz). . . . . . . . . . . . . . . . . . . . . . . . . . . . . . . . . . . . . . . . . . . . . . . . . . . . . . . . . . . 0.06%
S/N Ratio (ref. 2.0 Vrms, IEC-A filter) . . . . . . . . . . . . . . . . . . . . . . . . . . . . . . . . . . . . . . . . . . . . . . . . . . . . . 97 dB
FM TUNER
Sensitivity
50 dB S/N . . . . . . . . . . . . . . . . . . . . . . . . . . . . . . . . . . . . . . . . . . . . . . . . . . . . 13 dBµ typ., 25 dBµ max.
IHF . . . . . . . . . . . . . . . . . . . . . . . . . . . . . . . . . . . . . . . . . . . . . . . . . . . . . . . . . . 10 dBµ typ., 20 dBµ max.
S/N Ratio
Mono . . . . . . . . . . . . . . . . . . . . . . . . . . . . . . . . . . . . . . . . . . . . . . . . . . . . . . . . . . . 75 dB typ., 65 dB min.
Stereo . . . . . . . . . . . . . . . . . . . . . . . . . . . . . . . . . . . . . . . . . . . . . . . . . . . . . . . . . . 69 dB typ., 60 dB min.
Distortion
Mono. . . . . . . . . . . . . . . . . . . . . . . . . . . . . . . . . . . . . . . . . . . . . . . . . . . . . . . . . . . . 0.2% typ., 1.0% max.
Stereo . . . . . . . . . . . . . . . . . . . . . . . . . . . . . . . . . . . . . . . . . . . . . . . . . . . . . . . . . . . 0.3% typ., 1.5% max.
Stereo Separation. . . . . . . . . . . . . . . . . . . . . . . . . . . . . . . . . . . . . . . . . . . . . . . . . . . . . . . . 40 dB typ., 25 dB min.
Adjacent Channel Selectivity (±400 kHz) . . . . . . . . . . . . . . . . . . . . . . . . . . . . . . . . . . . . 70 dB typ., 60 dB min.
Frequency Response . . . . . . . . . . . . . . . . . . . . . . . . . . . . . . . . . . . . . . . . . . . . . . . . . 25 Hz to 15 kHz (+0, -2 dB)
AM TUNER
Sensitivity (20 dB S/N) . . . . . . . . . . . . . . . . . . . . . . . . . . . . . . . . . . . . . . . . . . . . . . . . . 49 dBµ typ., 56 dBµ max.
S/N Ratio . . . . . . . . . . . . . . . . . . . . . . . . . . . . . . . . . . . . . . . . . . . . . . . . . . . . . . . . . . . . . . . 50 dB typ., 43 dB min.
Distortion . . . . . . . . . . . . . . . . . . . . . . . . . . . . . . . . . . . . . . . . . . . . . . . . . . . . . . . . . . . . . . . . 0.7% typ., 2.0% max.
One Signal Selectivity (±10 kHz) . . . . . . . . . . . . . . . . . . . . . . . . . . . . . . . . . . . . . . . . . . . 24 dB typ., 18 dB min.
89
SPECIFICATIONS continued …
CONTROL
Infra Red
Carrier Frequency. . . . . . . . . . . . . . . . . . . . . . . . . . . . . . . . . . . . . . . . . . . . . . . . . . . . . . . . . . . . . 38 kHz
Max. 12V Supply Current . . . . . . . . . . . . . . . . . . . . . . . . . . . . . . . . . . . . . . . . . . . . . . . . . . . . . . 150 mA
Max. Emitter Current . . . . . . . . . . . . . . . . . . . . . . . . . . . . . . . . . . . . . . . . . . . . . . . . . 60 mA per output
RS-232 Interface
Connection . . . . . . . . . . . . . . . . . . . . . . . . . . . . . . . . . . . . . . . . . . . . . . . . . . . . . DB-9F, straight-wired
Pinout (Statement D2 side) . . . . . . . . . . . . . . . . . . . . . . . . . . . . . . Pin 2: Tx, Pin 3: Rx, Pin 5: Ground
Baud rate . . . . . . . . . . . . . . . . . . . . . . . . . . . . . . 1200, 2400, 4800, 9600, 19200, 38400, 57600, 115200
Configuration . . . . . . . . . . . . . 8 data bits, 1 stop bit, no parity bits, flow control (RTS/CTS, None)
Trigger Outputs
Polarity . . . . . . . . . . . . . . . . . . . . . . . . . . . . . . . . . . . . . . . . . . . . . . . . . . . . tip positive, sleeve ground
Max. Current at 12 VDC . . . . . . . . . . . . . . . . . . . . Triggers 1 and 2: 50 mA each, Trigger 3: 200 mA
Sequential Delay . . . . . . . . . . . . . . . . . . . . . . . . . . . . . . . . . . . . . . . . . . . . . . . . . . . . . . . . . . . . . 250 ms
POWER REQUIREMENT
Consumption . . . . . . . . . . . . . . . . . . . . . . . . . . . . . . . . . . . . . . . . . . . . . . . . . . . . . . . . . . . . . . . . Maximum 170 W
Low voltage version: In countries where the line voltage is 120V, this product operates from a single
phase AC power source that supplies between 108V and 132V at a frequency of 60 Hz.
High voltage version: In countries where the line voltage is 220, 230, or 240V, this product operates from
a single phase AC power source that supplies between 216V and 264V at a frequency of 50 or 60 Hz.
DIMENSIONS
Height
. . . . . . . . . . . . . . . . . . . 5 7/8 in. (14.9 cm) including feet, rackmounting – 3 rack units without feet
Width
Standard Version. . . . . . . . . . . . . . . . . . . . . . . . . . . . . . . . . . . . . . . . . . . . . . . . . . . . . . 19 1/4 in. (49 cm)
Rackmount Version . . . . . . . . . . . . . . . . . . . . . . . . . . . . . . . . . . . . . . . . . . . . . . . . . . . . 19 in. (48.3 cm)
No-Handle Version. . . . . . . . . . . . . . . . . . . . . . . . . . . . . . . . . . . . . . . . . . . . . . . . . . . 17 1/4 in. (43.8 cm)
Depth
. . . . . . . . . . . . . . . . . . . . . . . . . . . . . . . . . . . . . . . . . . . . . . . . . . . . . . . . . . . . . . . . . . . . 15 1/4 in. (38.7 cm)
Weight (unpacked, not including 8 lb (3.5 kg) microphone kit) . . . . . . . . . . . . . . . . . . . . . . . . 27 lb (12.3 kg)
90
WARRANTY
CANADA & USA
Anthem Electronics warrants to the original purchaser that each Anthem Statement D2 processor is free from defects in
workmanship and materials, during normal use, for a period starting from the date of sale of three (3) years, except for
video circuitry, which is covered for two (2) years, and remote controls which are covered for one (1) year. During the
warranty period, Anthem Electronics will repair or replace any defective components free of charge.
This warranty is not transferable unless the product is traded-in with an Authorized Anthem Dealer, who may resell the
product with the remaining warranty if it is cosmetically acceptable, in perfect working condition, and has not been
internally or externally altered.
Warranty is void if the Anthem product is not purchased from an Authorized Anthem Dealer, if the serial number has been
removed, altered, or defaced, if the product has been operated or handled other than in accordance with the instructions
in its Operating Manual or otherwise abused, misused, damaged by accident or while in transport, tampered with,
modified, or repaired by anyone other than Anthem Electronics or an authorized Anthem Electronics service center. If
inspection by Anthem Electronics discloses that the repair required is not covered by this warranty, regular repair
charges shall apply.
Display products sold by an Authorized Anthem Dealer are covered under the same warranty terms, except that the
warranty period commences from the date of the dealer invoice, not the purchaser’s invoice, and cosmetic flaws, if there
are any, are excluded.
If a problem or defect is discovered in your Anthem product, please contact your Authorized Anthem Dealer. It is the
Dealer’s responsibility to determine the nature of the problem and arrange for the appropriate replacement parts, or the
return of the product to Anthem Electronics.
A Return Authorization (RA) number must be obtained from Anthem Technical Support before any product can be
returned to Anthem Electronics for any reason. The RA Number must be clearly visible on the outside of the shipping
carton for Anthem Electronics to accept the return. Product shipped to Anthem Electronics without a RA Number will be
refused and returned to the sender, freight collect. Product shipped to Anthem Electronics for repair must have shipping
and insurance prepaid by the sender, be packaged in the original carton and packing material, and should be
accompanied by a written description of the defect. Anthem Electronics will accept no responsibility for any damage
occurring to a product that is shipped in any type of carton and packing material other than the original carton and
packing material.
To receive service under warranty, an accompanying copy of the original sales receipt is required. Product repaired
under warranty will be returned with shipping and insurance prepaid by Anthem Electronics (within Canada and USA
only). All other repairs are subject to charges for labor, parts, return shipping, and insurance.
Disclaimer of Liability
Under no circumstances does Anthem Electronics assume liability or responsibility for injury or damages sustained in
the use or operation of Anthem products, or for damages to any other connected products.
In no event shall Anthem Electronics, its agents, representatives, or employees, be responsible for any incidental or
consequential damages. Some jurisdictions do not allow limitations of incidental or consequential damages, so this
exclusion may not apply to you.
Anthem Electronics reserves the right to make design changes or improvements to products without any obligation to
revise prior versions. All specifications are subject to change without notice.
On the expiration of the warranty period all liability of Anthem Electronics in connection with the product shall terminate.
This warranty constitutes the only warranty applicable to products sold by Anthem Electronics. No other warranty or
condition, statutory or otherwise, expressed or implied, shall be imposed upon Anthem Electronics, nor shall any
representation made by any person, including a representation by a representative or agent of Anthem Electronics, be
effective to extend the warranty coverage provided herein.
INTERNATIONAL
Outside of Canada and USA, terms and conditions are set and maintained by the Authorized Anthem Distributor, not
Anthem Electronics.
91
THE BIG PICTURE FRONT PANEL
120V 60Hz
170W MAX
SHOCK HAZARD
DO NOT OPEN.
RISQUE DE CHOC ÉLECTRIQUE
NE PAS OUVRIR
THE BIG PICTURE REAR PANEL
SUB 2
M A I N
A U D I O - O U T
M A I N
A U D I O - O U T
( B A L A N C E D )
E X PA N S I O N P O R T
DESIGNED AND MANUFACTURED IN NORTH AMERICA
t e l . ( + 1 ) 905-362-0958
M-F
9:00 am - 5:30 pm (ET)
www.anthemAV.com
OM-825
8/8/08