1
Archive Service
33. Select Manage System > Manage Licensing. If you are configuring a NAS archive perform the
following steps:
34. Drag an Archive license onto the server you want to host the NAS Archive. This must be on the same
server on which you have performed the above configuration.
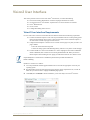
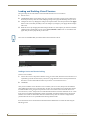
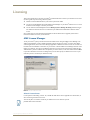
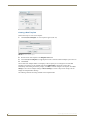
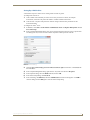
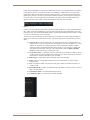
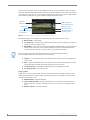
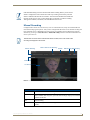
35. Double-click the New Archive license to configure the Archive (FIG. 73).
FIG. 73 Configure Archive
36. Do not change the Archive Path but set the Content Archive text box to the UNC Path of your NAS
Archive, for example: \\NASservername\ArchiveNAS. You will see the Available Storage on this Drive
graphic change and display the New Storage space on the NAS.
37. Change the following Streaming URLs to point to the NAS drive Virtual Directory. Edit existing URLs
excluding the Flash URL. For example, from
MPEG-2 = http://<servername>/v2/Archives/ArchiveX
to
MPEG-2 = http://<servername>/v2/Archives/ArchiveNAS
38. Click Apply to save the changes.
39. The server is now configured to use the NAS share for the Archive service.
40. Restart the server.
Once you have configured an Archive and started to upload media to the archive you
should not change the settings (except the service name) as you will lose access to your
data.
Vision2 Operation/Reference Guide
71