1
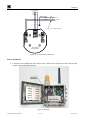
SmartWireless® CX Sensor Station for SmartWireless® Mobile Gas Detection System Operator’s Installation and Instruction Manual DETCON, Inc. 4055 Technology Forest Blvd., The Woodlands, Texas 77381 Ph.713.559.9200 / Fax 281.298.2868 www.detcon.com Nov. 20, 2013 • Document #4409 • Revision 1.2 Sentinel CX This page left intentionally blank Shipping Address: 4055 Technology Forest Blvd., The Woodlands Texas 77381 Mailing Address: P.O. Box 8067, The Woodlands Texas 77387-8067 Phone: 713.559.9200 • Fax: 281.292.2860 • www.detcon.com • [email protected] Sentinel CX Sensor Station IM Rev. 1.2 ii Sentinel CX Table of Contents 1. Introduction............................................................................................................................................1 1.1 1.2 1.3 1.4 1.5 1.6 1.7 1.8 1.9 2. 3. Safety Guidelines for safe use ...............................................................................................................9 Installation............................................................................................................................................10 3.1 4. Initial Setup .................................................................................................................................................. 10 Recharging the Internal Battery Pack ...............................................................................................16 4.1 4.2 5. 6. 7. 8. Features .......................................................................................................................................................... 1 Optional Components..................................................................................................................................... 2 Alarms and Fault Condition ........................................................................................................................... 2 Power Supply-Internal Rechargeable Battery and Charging Accessory ........................................................ 3 Radio Module ................................................................................................................................................. 3 Sensor Inputs .................................................................................................................................................. 4 Alarm Outputs ................................................................................................................................................ 6 Power Switch.................................................................................................................................................. 7 Power Connector ............................................................................................................................................ 7 Non-Hazardous Area Location..................................................................................................................... 16 Connecting to Mains Supply ........................................................................................................................ 16 Troubleshooting Guide........................................................................................................................17 Customer Support and Service Policy ...............................................................................................18 Warranty Notice ..................................................................................................................................19 Appendix...............................................................................................................................................20 8.1 8.2 8.3 Specifications ............................................................................................................................................... 20 Spare Parts and Wireless Accessories .......................................................................................................... 21 Revision Log ................................................................................................................................................ 22 Table of Figures Figure 1 SmartWireless® CX Sensor Station..................................................................................................1 Figure 2 SmartWireless® CXT Radio Module ...............................................................................................4 Figure 4 Sensor Input PCA..............................................................................................................................5 Figure 5 Sensor Input Connector Pin-out ........................................................................................................5 Figure 5 Relay PCA.........................................................................................................................................6 Figure 6 External Alarm Connector pin out for ‘Wet’ alarm contacts ............................................................6 Figure 7 External Alarm Connector Pin out for ‘Dry’ alarm contacts.............................................................7 Figure 9 Power Connector ...............................................................................................................................8 Figure 9 Mount CX on Tripod.......................................................................................................................10 Figure 10 Attach Sensor Brackets to Tripod .................................................................................................11 Figure 12 A1 C1D2 Alarm Connections .......................................................................................................12 Figure 13 Enclosure.......................................................................................................................................12 Figure 14 Connector to Transceiver ..............................................................................................................13 Figure 15 Battery Bracket in position............................................................................................................13 Figure 16 Battery and Battery Bracket ..........................................................................................................14 Figure 17 Battery Connections ......................................................................................................................14 Sentinel CX Sensor Station IM Rev. 1.2 iii Sentinel CX This page left intentionally blank Shipping Address: 4055 Technology Forest Blvd., The Woodlands Texas 77381 Mailing Address: P.O. Box 8067, The Woodlands Texas 77387-8067 Phone: 713.559.9200 • Fax: 281.292.2860 • www.detcon.com • [email protected] Sentinel CX Sensor Station IM Rev. 1.2 iv Sentinel CX 1. Introduction 1.1 Features The SmartWireless® CX Sensor Station (Figure 1) is an accessory to the SmartWireless® CXT. The CX wirelessly transmits the data from the sensors to the CXT and includes a battery that powers the radio, alarm devices, and the attached sensors. The CX can sustain either two or four 4-20mA wired sensors. Remote mounted gas detection sensors include any analog 4-20maDC device such as; toxic gas, combustible gas, or oxygen deficiency sensors. Antenna Strobe Power LED Optional Ext Alarm Connector 4-20 Sensor Input PCA & 4 Relay PCA RXT-320 Transceiver Sensor Ports Battery Pack Power Connector Power Switch Alarm Horn Figure 1 SmartWireless® CX Sensor Station The SmartWireless® CX control package is a Division 2 assembly housed in a 316 stainless steel enclosure that offers various connector options for multiple configurations. System components of the SmartWireless® gas detection system include; Smart Wireless CXT Controller Smart Wireless CX Sensor Station, alarm stations and gas detection sensors. Sentinel CX Sensor Station IM Rev. 1.2 Page 1 of 1 Sentinel CX SmartWireless® CXT Controller The Detcon SmartWireless® CXT controller is a multi-channel mobile gas detection control system mounted on a tripod or a suitable stand. The CXT can be utilized as a self-contained gas detection, display/alarm system package or wirelessly connected to the main network. The CXT is equipped with an auto configure system to automatically search for Detcon equipment associated with the controller. SmartWireless® CX Sensor Station The SmartWireless® CX Sensor Station is an accessory to the SmartWireless® CXT. The CX wirelessly transmits the data from up to 4 wired sensors back to the CXT and includes a battery that powers the radio, alarm devices, and the attached sensors. Alarm Stations Alarm stations can be used as part of the gas detection system. Class I Division I and Class I Division II alarm stations are available. The stations are battery powered and controlled wirelessly by the CXT. The strobe and horn installed on the CX are activated by the CXT when the alarms levels are reached. Alarm options are as follows: 1. Integral audio visual mounted on the CX (Class 1; Division 2 only) 2. Standalone audio visual alarm station (Class 1; Division 2) 3. Standalone audio visual alarm station (Class 1; Division 1) Gas Detection Sensors Gas sensors with a 4-20mA output can be connected directly to the CX. The Model CX sensors from Detcon are designed specifically to work with the SmartWireless® CX. 1.2 Optional Components Options for the SmartWireless® CX are as follows: strobe horn external ‘Wet’ or ‘Dry’ alarm port 1.3 Alarms and Fault Condition The CX includes an optional strobe and/or a piezoelectric horn and an external alarm connector. The strobe is associated with Alarm 1, the horn is associated with Alarm2 and the external alarm connector utilizes all alarm outputs (alarm 1, 2, 3 and fault) for connection to external alarm devices. The external alarm outputs can be used to control annunciating devices or as signal inputs to other control devices. The CX permits alarm and fault conditions to cause an assigned relay to fire, triggering external alarm devices. When the alarm level is reached either the devices mounted to the box or attached to the external alarm connector are activated, or both. The assigned relay outputs will return to normal state when a gas alarm or a fault condition clears. The Alarm Relay Output can be either ‘Wet’ or ‘Dry’ determined when the unit is ordered. The ‘Wet output connector provides 12V outputs for external alarms. The ‘Dry’ output connector provides dry contacts for external power to control external alarms. All alarms can be configured as Energized/De-Energized, Latching/Non-Latching and Silenceable/NonSilenceable for the relays. This setup must be performed at the controller, refer to the controller manual for more information. Sentinel CX Sensor Station IM Rev. 1.2 Page 2 of 2 Sentinel CX 1.4 Power Supply-Internal Rechargeable Battery and Charging Accessory SmartWireless® CXT is powered by an internal rechargeable Smart Battery capable of delivering continuous operation in a no alarm condition for two to eight weeks depending on the quantity and type of sensors tied to the control panel. The internal re-chargeable battery pack shall only be charged in a nonhazardous area where the required operating temperature limits are 0C to +45C. It may be used in the field and be discharged in the temperature range of -20C to +60C. The internal re-chargeable battery pack shall only be charged in a non-hazardous area where the required operating temperature limits are 0C to +45C. Charging CAUTION outside this temperature range may degrade the life of the battery pack. The Battery Pack Detcon PN 360-3S6PFP-290 contains an internal protection CAUTION circuit which maintains its safe operation against all potential hazard conditions. No other Battery Pack except Detcon PN 360-3S6PFP-290 may be used in the CAUTION operation of this device. The internal battery can only be recharged in a non-hazardous area and only using the Detcon supplied Battery Charger Accessory that runs on AC power. Detcon Approved Battery Charger Accessory Ratings: AC Input Power Voltage: 100-240 VAC, 50-60 Hz (requires correct PN version for optional 110 or 220 VAC use) Current: 2.0 Amps maximum DC Output Power Voltage: 24+/- 1 VDC Current: 3.1 Amps maximum NOTE 1 No other Battery Charger or VDC input power source may be used with this CXT Controller product. 1.5 Radio Module The SmartWireless® CX offers a wireless option to connect it to the SmartWireless CXT and other devices wirelessly. The Radio Module includes a transceiver that operates at 2.4GHz and conforms to non-licensed radio frequency usage worldwide. Spread spectrum technology supports integrity and security for the wireless network. The SmartWireless CXT and CX products use a wireless network with a mesh topology. If radio communication directly between two devices is impossible due to distance or obstruction, each wireless device is capable of locating an alternate route through an additional wireless device to communicate with the designated device. This innovative technology is designed to create a robust network that automatically Sentinel CX Sensor Station IM Rev. 1.2 Page 3 of 3 Sentinel CX routes around congestion and line-of-sight obstacles while improving throughput as subscriber device density increases. The radio module is housed in a black ABS box mounted inside of the CX stainless steel enclosure. The standard package includes two PCAs mounted inside the black ABS box (radio PCA and Smart battery charging PCA), 5 dB antenna, and a protective antenna cover. The battery PCA includes circuitry to safely recharge the battery from a 24VDC input and a fuel gauge circuit to monitor the charge remaining in the battery. The radio PCA includes a 2.4Ghz radio and a rotary switch for setting the RF channel of the system (Figure 2). Use a small screwdriver to rotate the switch until the arrow points to the desired RF channel number (16 channels available, 0h-Fh). NOTE All devices within the network must be on the same RF channel to operate correctly. Each radio module is required to have a unique address. These addresses typically start at 01h and continue sequentially for each SmartWireless CX in the gas detection system. The radio PCA includes a pair of rotary switches to set this address (Figure 2). NOTE The switch for the most significant digit (MSD) is on the right and the least significant digit (LSD) is on the left. Modbus Address LSD Switch RF Channel Selector Switch Modbus Address MSD Switch Figure 2 SmartWireless® CXT Radio Module 1.6 Sensor Inputs The SmartWireless® CXT includes a Sensor Input PCA that accepts 4-20mA inputs from up to 4 attached sensors. The PCA includes two rotary switches to set its Modbus address (Figure 3). This address is set to 01 for SmartWireless® systems using a CXT or Model X40 controller. If an MCX-32 controller is being used, this address needs to be unique for each CXT in the system. For an MCX-32 system, the addresses should start at 40h and continue sequentially for each CXT in the system. Sensor Connector Ratings Voltage: 9-11.2 VDC Current: 100 mA max through any single sensor connector Sentinel CX Sensor Station IM Rev. 1.2 Page 4 of 4 Sentinel CX Modbus Address LSD Switch Modbus Address MSD Switch Figure 3 Sensor Input PCA Four "quick connects" on the side of the CXT are for sensor connection (Figure 4), supply power to the sensor from the internal battery and accept the 4-20mA signal from the sensor. NOTE Power supplied to the sensors is 11VDC. Any attached sensor must be designed to work at this voltage level. The four sensor input lines are fused at the PC board level for safety purposes. These fuses are not designed for field replacement and shall not under any circumstances be attempted to be changed out by anyone but Detcon Factory trained Service personnel. These PC board mounted fuses are not designed for field replacement and shall not under any circumstances be attempted to be changed out by anyone but Detcon CAUTION Factory-Trained Service personnel. Enclosure Pin 1 1 PCB PWR (Brown) GND (Blue) Shld (Gray) 4-20mA (Grn/Ylw) 1 1 2 3 4 Sensor Connector (Grn/Ylw) 4-20mA (Brown) PWR (Blue) GND Shld Sensor Cable to Sensor 1 Figure 4 Sensor Input Connector Pin-out Sentinel CX Sensor Station IM Rev. 1.2 Page 5 of 5 Sentinel CX 1.7 Alarm Outputs The SmartWireless® CXT can optionally include an internal Relay PCA for activating alarm annunciators. The Relay PCA includes four Class I Division II relays rated for 10A @ 30VDC/250VAC. If the SmartWireless® CXT includes an attached strobe and/or horn, these devices are also activated by the Relay PCA. Each Relay PCA must have a unique Modbus address. The Relay PCA includes a single rotary switch to set its Modbus address (Figure 5). The most significant digit of the address is hard-wired to “8”. The least significant digit (LSD) is controlled by the rotary switch. The Relay PCA addresses should start at 80h and continue sequentially for each SmartWireless® CXT in the system. Alarm Relay Connections Modbus™ LSD Address Modbus™ Connections Internal Alarm Connections Figure 5 Relay PCA If the Smart Wireless® CXT is ordered with the Relay PCA option, the Relay PCA can be configured to provide either ‘Wet’ or ‘Dry’ contacts for external annunciator activation. The ‘Wet’ contact option provides 12V Battery Power to external annunciators when an alarm is initiated. The ‘Wet’ contacts are available on a 5 pin Alarm Connector (Figure 6). These outputs are specifically meant for external 12V annunciators such as the external A1 C1D2 Horn, which is designed to operate on the unit’s 12V Battery. 3 Enclosure 4 12V Battery Power 12V Return FAULT NC COM NO ALARM 3 NC COM NO ALARM 2 NC COM NO ALARM 1 NC COM NO 2 1 5 FAULT ALARM 3 ALARM 2 ALARM 1 GND 1 (BLUE) (Brown) (Gray) (White) (Black) 5 4 3 2 1 Alarm Connector Relay PCA Figure 6 External Alarm Connector pin out for ‘Wet’ alarm contacts Sentinel CX Sensor Station IM Rev. 1.2 Page 6 of 6 Sentinel CX Sensor Connector Ratings Voltage: 9-11.2 VDC Current: 2 Amps max through single relay connector (2 Amps max total across 4 connectors. When utilizing ‘Wet’ contacts, the maximum power that can be drawn by the annunciators is 2A. CAUTION The Smart Wireless® CXT is also available with ‘Dry’ relay contacts (Figure 7). Dry relay Contacts allow the user to control annunciators that operate off an exterior power source that relies on the controller to provide only contact closure to apply voltage to the annunciator. The relays are rated for 10A @ 30VDC/250VAC. It is important to note that the ‘Dry’ contact feature utilizes a common return for all annunciators. 3 Enclosure 4 2 1 5 1 6 FAULT NC COM NO ALARM 3 NC COM NO ALARM 2 NC COM NO ALARM 1 NC COM NO FAULT (Blue) 6 ALARM 3 (Orange) 4 ALARM 2 (Green) 3 ALARM 1 (White) 1 COM (Black) 5 Alarm Connector (Pin 2 is not used) Relay PCA Figure 7 External Alarm Connector Pin out for ‘Dry’ alarm contacts 1.8 Power Switch Power to the SmartWireless CX is controlled by a power switch located on the bottom of the enclosure (Figure 1). Pressing this switch while the power is off will turn the CX on. Pressing the switch while the power is on will turn the power off. When the power to the CX is on, the green LED indicator on top of the enclosure will be illuminated. 1.9 Power Connector The internal battery inside the SmartWireless® CXT controller can be recharged by connecting 24VDC to the power connector on the side of the enclosure (Figure 1). A VAC/24VDC battery charging adapter is included with every CX. Sentinel CX Sensor Station IM Rev. 1.2 Page 7 of 7 Sentinel CX Detcon Approved Battery Charger Accessory Ratings: AC Input Power Voltage: 100-240 VAC, 50-60 Hz (requires correctly selected 110 VAC or 220 VAC Charger) Current: 2.0 Amps maximum DC Output Power Voltage: 24+/- 1 VDC Current: 3.1 Amps maximum The SmartWireless® CXT must be charged with the Detcon supplied Battery Charger. (Detcon P/N: 976-0003BC-00T for 110VAC and P/N 976-0003BC-220 CAUTION for 220VAC ). Use of any other charger may damage the controller. Pin 2 Pin 3 Pin 1 +24VDC (White) 3 GND (Black) 2 Chassis GND (Green) 1 Figure 8 Power Connector Sentinel CX Sensor Station IM Rev. 1.2 Page 8 of 8 Sentinel CX 2. Safety Guidelines for safe use If equipment is used in a manner not specified by Detcon, the protection provided by the equipment may be impaired. It is mandatory to read and follow all of the Safety Warnings and Cautions listed below. Warning This apparatus is suitable for use in Class (as applicable), Division 2 groups (as applicable), or unclassifiedlocations. Warning Explosion Hazard. Do not make any disconnections while the circuit is live or unless the area is known to be free of ignitable concentrations. Warning Charging of the internal Battery Pack shall never be done while equipment is located in the Division 2 hazardous area. The equipment must be moved to a nonhazardous are for the battery charging to take place. Substitution of any component may impair suitability for Division 2 use. Warning Warning CAUTION DANGER Sentinel CX Sensor Station IM Exposure to some chemicals may degrade the sealing properties of materials used in the following devices used in this equipment; namely the Div2 Strobe, relay contacts, and magnetic programming switches The user must consult this manual for more information about any location marked with this symbol. Danger of electrical shock. User must ensure that power has been disconnected prior to installation or servicing of the equipment. Rev. 1.2 Page 9 of 9 Sentinel CX 3. Installation 3.1 Initial Setup NOTE The Detcon tripod (P/N 975-TRIPOD-100) provides a stable and mobile base for the SmartWireless® CX Sensor Station. A maximum of two sensors can be secured to the tripod using Detcon brackets (P/N 943-004413-000) installed on the tripod 1. Unpack the tripod, open the legs and place on a level surface. 2. Mount the CX to the center pipe using the supplied U-bolts in accordance with Figure 9. Pipe Mounting U-Bolts and hardware Tripod Center Pipe Figure 9 Mount CX on Tripod 3. Install the 8" antenna on the antenna connector on the top right of the CX controller (Figure 1). 4. Secure the antenna cover over the antenna. 5. If sensors are being mounted on the tripod legs, attach the sensor mounting brackets to the tripod legs using the supplied 1/4" bolts, nuts and lock washers in accordance with Figure 10. Sentinel CX Sensor Station IM Rev. 1.2 Page 10 of 10 Sentinel CX Tripod Leg Mounting Hardware Sensor with Mini Condulet Mounting Plate Mounting Support Figure 10 Attach Sensor Brackets to Tripod 6. Hang the sensors on the brackets using the hook and pin supplied with the bracket. 7. Connect sensor cables to the sensor ports on the CX (Figure 1). 8. If the unit is ordered with the optional external A1 C1D2 Horn, the horn should be mounted either on the tripod, or on a separate tripod. . The optional A1 C1D2 Horn requires the cable for the External ‘Wet’ Alarms. a. The horn should be wired to the ‘Wet’ Alarm Output cable per Figure 11. b. The alarm Cable should be connected to the External Alarm Connector on the controller. Sentinel CX Sensor Station IM Rev. 1.2 Page 11 of 11 Sentinel CX White Gray Black Turck Alarm Cable from Sentinel Green/Yellow Red Black To Horn C1D1 Cable Assembly 12-24 Alarm Terminal PCA Figure 11 A1 C1D2 Alarm Connections Battery Installation 9. Loosen the screws holding the door panel in place, and swing the front door of the enclosure open to gain access to the battery bracket. Figure 12 Enclosure Sentinel CX Sensor Station IM Rev. 1.2 Page 12 of 12 Sentinel CX 10. Unplug the connector from the transceiver, and move it out of the way to gain access to the screws holding the battery bracket in place. There should be enough of a service loop to safely move this connector out of the way for removal/installation of the battery bracket. Figure 13 Connector to Transceiver 11. Remove the 6-32 screws and washers holding the battery bracket is place, and remove the bracket from the enclosure. Retain the screws and washers for installation of the bracket with the battery pack. Figure 14 Battery Bracket in position Sentinel CX Sensor Station IM Rev. 1.2 Page 13 of 13 Sentinel CX 12. Install the battery pack in the bracket. The battery will fit snugly into the holder, being somewhat held in place by the foam padding in the bracket. Figure 15 Battery and Battery Bracket 13. Position the battery bracket (and battery) with the connector on the left side, and install the battery and bracket in the enclosure using the 6-32 screws removed is step 11. Some wiring may need to be moved out of the way during this process to ensure that the wiring is not caught under the bracket. 14. Locate the connector mate for the battery connector, and plug the two connectors together. Figure 16 Battery Connections 15. Re-install the connector to the transceiver (removed in step 10). Sentinel CX Sensor Station IM Rev. 1.2 Page 14 of 14 Sentinel CX 16. Cycle power to ensure that the unit powers up. The LED on the top of the unit should illuminate to indicate power is applied. Close the front door panel and screw the front cover down. The screws should be tightened down to a ‘snug’ fit. These screws do not need to be tightened down completely, but need to be tightened down enough to give the front door a water tight seal. 17. If an optional Solar Panel is to be connected, connect the solar panel cable to the power-in port on the CX (Figure 1). 18. Turn power on to the unit. The LED on the top of the unit should illuminate to indicate power is applied. Sentinel CX Sensor Station IM Rev. 1.2 Page 15 of 15 Sentinel CX 4. Recharging the Internal Battery Pack 4.1 Non-Hazardous Area Location At a safe time interval prior to full discharge of the internal battery pack, relocate the CXT Controller to a non-hazardous area that has suitable 110 VAC or 220 VAC AC power receptacles available. 4.2 Connecting to Mains Supply Using the appropriate Battery Charging Accessory product (PN 976-0003BC-00T for 110 VAC or PN 9760003BC-220 for 220 VAC), find the corresponding Mains Supply receptacle in the non-hazardous area and plug-in the pronged end of the cable. Connect the Turck connector to the external port labeled external power. Turn on the power switch and begin charging. Operate the charger for the necessary time it takes to accomplish a full charge. Only the Mains supply cord that is supplied with the Detcon-approved Battery Charger Accessory product shall be used. Use of any other Mains supply cords will CAUTION impair the safety of this device. Sentinel CX Sensor Station IM Rev. 1.2 Page 16 of 16 Sentinel CX 5. Troubleshooting Guide Sensor COMM Error Verify all SmartWireless CX devices have a unique Modbus ID number. Verify the Sensor Input PCA and Relay PCA Modbus address are set correctly Verify the Radio Module Modbus address is set correctly Sensor Fault Verify if sensor displays any fault. If so, follow sensor trouble shooting notes. Verify if sensor cell needs replacement. Low Battery Attach external battery charger Verify solar panel (if used) is oriented correctly Poor Link Quality Verify antenna is securely attached to all devices. Verify obstructions are eliminated or minimized between SmartWirelessCX devices and controller or other CX devices. Slow Gas Response Some delay in gas response is normal if the network update rate is greater than zero. To increase response time, reduce the update rate. Reducing the update rate will reduce the battery life for devices. SmartWirelessCX not found during controller Auto Configure Verify CX device set to correct RF Channel Verify Radio Module has correct Modbus address Verify the Sensor Input PCA and Relay PCA Modbus address are set correctly Verify a proper mA load is present on sensor input. Sensor inputs are not detected unless the mA input is greater than 1.9mA. Contact the Detcon Service Department for further troubleshooting assistance at 713-559-9200 Sentinel CX Sensor Station IM Rev. 1.2 Page 17 of 17 Sentinel CX 6. Customer Support and Service Policy Detcon Headquarters Shipping Address: 4055 Technology Forest Blvd, The Woodlands, Texas 77381 Mailing Address: P.O. Box 8067, The Woodlands Texas 77387-8067 Phone: 713.559.9200 Fax: 281.298.2868 • www.detcon.com • [email protected] • [email protected] All Technical Service and Repair activities should be handled by the Detcon Service Department via phone, fax or email (contact information given above). RMA numbers should be obtained from the Detcon Service Department prior to equipment being returned. For on-line technical service, have the model number, part number, and serial number of product(s) in question available. All Sales activities (including spare parts purchase) should be handled by the Detcon Sales Department via phone, fax or email (contact information given above). NOTE All additional parts must be supplied by Detcon. Use of parts from a third party will void warranty and safety approvals. NOTE The SmartWireless CX should only be repaired by Detcon personnel or a Detcon trained representative. Sentinel CX Sensor Station IM Rev. 1.2 Page 18 of 18 Sentinel CX 7. Warranty Notice Detcon Inc. warrants the SmartWireless® CX System to be free from defects in workmanship of material under normal use and service for one year from the date of shipment. Detcon Inc. will repair or replace without charge any such equipment found to be defective during the warranty period. Full determination of the nature of, and responsibility for, defective or damaged equipment will be made by Detcon Inc. personnel. Defective or damaged equipment must be shipped to the Detcon Inc. factory or representative from which the original shipment was made. In all cases, this warranty is limited to the cost of the equipment supplied by Detcon Inc. The customer will assume all liability for the misuse of this equipment by its employees or other contracted personnel. All warranties are contingent upon the proper use in the application for which the product was intended and does not cover products which have been modified or repaired without Detcon Inc. approval, or which have been subjected to neglect, accident, improper installation or application, or on which the original identification marks have been removed or altered. Except for the express warranty stated above, Detcon Inc. disclaims all warranties with regard to the products sold. Including all implied warranties of merchantability and fitness and the express warranties stated herein are in lieu of all obligations or liabilities on the part of Detcon Inc. for damages including, but not limited to, consequential damages arising out of, or in connection with, the performance of the product. Sentinel CX Sensor Station IM Rev. 1.2 Page 19 of 19 Sentinel CX 8. Appendix 8.1 Specifications System Specifications Capacity: Sensor Inputs: Outputs: Warranty: 32 I/O Channels Up to 4 Analog 4-20mA or up to 32 wireless sensors 4 switched alarm outputs, (11VDC) One year Environmental Specifications 1) Operating Temperature: 2) Operating Temperature: Storage Temperature: Humidity: Altitude: -20C to +60C (for field use where battery pack is only discharging) 0C to +45C (for non-hazardous area where battery is only charging) -40C to +85C 0-99%RH, non-condensing 0 – 2000m Electrical Specifications Battery Charger Input: Battery Charger Output: Internal Battery Pack: External Alarm Connectors: Sensor Input Connectors: RFI/EMI Protection: Electrical Classification: Cabling Specifications External Alarms Cables: Sensor Input Cables: Power Input Cable: Mechanical Specifications Dimensions: Wireless Specifications Frequency: Range: Spread Spectrum: Modulation: Sensitivity: Sentinel CX Sensor Station IM 100-240 VAC, 50-60 Hz, Max Current 2 Amps 24 +/- 0.1 VDC nominal, Max Current 3.1 Amps Rechargeable Lithium–Ion, 9-11.2 VDC, 17.4Ah capacity ‘Wet’: 9-11.1 VDC, 2A max total (A1, A2, A3, and FLT outputs combined) ‘Dry’: Dry Contact 120-220VAC/24VDC, 5A Max 9-11.1 VDC, 100mA max per connector Complies with EN61326 NEMA 4X, Class I Division II (pending) Use only Detcon cables, termination insulation resistance > 10K ohms. ‘Wet’: Connector style is 5 pin Turck connector with security clip. ‘Dry’: Connector style is 6 pin Turck connector with security clip. Use only Detcon cables, termination insulation resistance > 10K ohms Connector style is 4 pin Turck connector with security clip. Use only Detcon Battery Charging Accessory product Connector style is 3 pin Turck connector with security clip. 12" W x 21.3" H x 4.73" D (including antenna and strobe) 12" W x 12.25" H x 4.73 D (without antenna and strobe) ISM 2.4GHz Indoor/No Line of Sight – 1,000ft Outdoor RF Line of Sight (with directional antenna) – 1.5 Miles Digital-Sequence Spread Spectrum (DSSS) 0-QPSK -102dBm (1% PER) Rev. 1.2 Page 20 of 20 Sentinel CX 8.2 Spare Parts and Wireless Accessories Part Number 976-0003BC-00T 976-0003BC-220 976-0003A4-200 960-798434-000 894-7845K6-400 500-005199-000 500-005194-000 360-3S6PFP-ASM 320-N45161-000 302-RSFCC0-05M 302-RFK40D-05M 302-RFK380-05M 302-RFK520-05M 302-PRSF63-M20 275-556160-432 976-001320-CHR Spare Parts CXT Battery Charger Accessory for 110 VAC CXT Battery Charger Accessory for 220 VAC Antenna Assembly Condensation Prevention Packet (replace annually) Hole Plug Relay Board Sensor Input Board Battery Pack Power Switch Connector Dust Cap Sensor Connector Power Connector External Alarm Connector for ‘ Wet’Relay Contacts External Alarm Connector for ‘ Dry’Relay Contacts Power LED Indicator Radio Module (320 Network) Part Number 975-TRIPOD-100 943-004413-000 975-TRIPOD-MNI 980-PRSM40-02M 980-PRSM40-10M 980-PRSM40-30M 980-PRSM40-45M 980-PRSM52-02M 980-PRSM52-30M 980-PRSM52-45M 980-PRKM63-30M 980-PRKM63-45M Sentinel CX Sensor Station IM Accessories Detcon tripod Detcon Tripod sensor brackets Mini Sensor Tripod 2m Sensor Cable (with security clip) 10m Sensor Cable (with security clip) 30m Sensor Cable (with security clip) 45m Sensor Cable (with security clip) 2m External Alarm Cable for ‘ Wet’Alarms (with security clip) 30m External Alarm Cable for ‘ Wet’Alarms (with security clip) 45m External Alarm Cable for ‘ Wet’Alarms (with security clip) 30m External Alarm Cable for ‘ Dry’Alarms (with security clip) 45m External Alarm Cable for ‘ Dry’Alarms (with security clip) Rev. 1.2 Page 21 of 21 Sentinel CX 8.3 Revision Log Revision Date 1.0 1.1 1.2 03/27/2013 10/30/13 11/20/13 Changes made Release Update for removable battery pack Updates for Approval Agency Approval LBU LBU BM Shipping Address: 4055 Technology Forest Blvd., The Woodlands Texas 77381 Mailing Address: P.O. Box 8067, The Woodlands Texas 77387-8067 Phone: 713.559.9200 • Fax: 281.292.2860 • www.detcon.com • [email protected] Sentinel CX Sensor Station IM Rev. 1.2 Page 22 of 22