1
A0300IVZ.fm
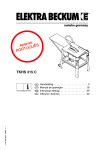
TKHS 315 M
115 169 3748 / 0804 - 1.1
Betriebsanleitung . . . . . . . . . . . . . . . . . . . . .3
Operating Instruction . . . . . . . . . . . . . . . . .18
Instructions d'utilisation . . . . . . . . . . . . . . .32
Manuale d’istruzioni . . . . . . . . . . . . . . . . . .47
U2a0300.fm
D DEUTSCH
ENG ENGLISH
KONFORMITÄTSERKLÄRUNG
Wir erklären in alleiniger Verantwortlichkeit, dass dieses Produkt mit
den folgenden Normen übereinstimmt* gemäß den Bestimmungen
der Richtlinien**
EG-Baumusterprüfung *** durchgeführt von ****
DECLARATION OF CONFORMITY
We herewith declare in our sole repsonsibility that this product
complies with the following standards*
in accordance with the regulations of the undermentioned Directives**
EC type examination *** conducted by ****
F FRANÇAIS
NL NEDERLANDS
DECLARATION DE CONFORMITE
Nous déclarons, sous notre seule responsabilité, que ce produit est en
conformité avec les normes ou documents normatifs suivants* en
vertu des dispositions des directives **
Contrôle européen du modèle type *** effectué par ****
CONFORMITEITSVERKLARING
Wij verklaren als enige verantwoordelijke, dat dit product in
overeenstemming is met de volgende normen*
conform de bepalingen van de richtlijnen** EG-typeonderzoek ***
uitgevoerd door ****
IT ITALIANO
ES ESPAÑOL
DICHIARAZIONE DI CONFORMITÀ
Noi dichiariamo sotto la nostra esclusiva responsabilità che il presente
prodotto è conforme alle seguenti norme* in conformità con le
disposizioni delle normative ** Omologazione CE *** eseguita da ****
DECLARACION DE CONFORMIDAD
Declaramos bajo nuestra exclusiva responsabilidad, que el presente
producto cumple con las siguientes normas* de acuerdo a lo
dispuesto en las directrices** Homologación de tipo CE *** llevada a
cabo por ****
PT PORTUGUÊS
SV SVENSKA
DECLARAÇÃO DE CONFORMIDADE
Declaramos sob nossa responsabilidade que este produto está de
acordo com as seguintes normas* de acordo com as directrizes dos
regulamentos ** controle de amostra de Construção da CE ***
efectuado por ****
FÖRSÄKRAN OM ÖVERENSSTÄMMELSE
Vi försäkrar på eget ansvar att denna produkt överensstämmer med
följande standarder* enligt bestämmelserna i direktiven**
EG-materialprovning *** genomfört av ****
FIN SUOMI
NO NORGE
VAATIMUKSENMUKAISUUSVAKUUTUS
Vakuutamme, että tämä tuote vastaa seuraavia normeja* on
direktiivien määräysten mukainen**
EY-tyyppitarkastustesti *** testin suorittaja: ****
SAMSVARSERKLÆRING
Vi erklærer under eget ansvar at dette produkt samsvarer med
følgende normer* henhold til bestemmelsene i direktiv**
EU-typegodkjennelse *** utstilt av ****
DA DANSK
POL POLSKI
OVERENSSTEMMELSESATTEST
Hermed erklærer vi på eget ansvar, at dette produkt stemmer overens
ed følgende standarder* iht bestemmelserne i direktiverne** EFtypekontrol *** gennemført af ****
OŚWIADCZENIE O ZGODNOŚCI
Oświadczamy z pełną odpowiedzialnością, że niniejszy produkt
odpowiada wymogom następujących norm* według ustaleń
wytycznych **Kontrola wzorców UE *** przeprowadzone przez ****
EL ΕΛΛHNIKA
HU MAGYAR
∆ΗΛΩΣΗ ΑΝΤΙΣΤΟΙΧΕΙΑΣ
∆ηλώνουµε µε ιδία ευθύνη ότι το προϊόν αυτό αντιστοιχεί στις
ακόλουθες προδιαγραφές*
σύµφωνα µε τις διατάξεις των οδηγιών**
Έλεγχος-ΕΟΚ δοµικού πρωτοτύπου*** πραγµατοποιούµενος από
το****
MEGEGYEZŐSÉGI NYILATKOZAT
Kizárólagos felelősségünk tudatában ezennel igazoljuk, hogy ez a
termék kielégíti az alábbi szabványokban lefektetett követelményeket*
megfelel az alábbi irányelvek előírásainak**
által végzett vizsgálat szerint megegyezik az alábbi építési
mintapéldánnyal *** a ****
TKHS 315 M
2,5 WNB - 3,1 WNB - 3,4 DNB - 4,2 DNB
*EN 1870-1, EN 55014-1, EN 55014-2, EN 61000-3-2, EN 61000-3-3, DIN EN 62079
** 98/37/EG, 89/336/EWG, 73/23/EWG, 93/68/EWG
*** M6 03 08 13037 057
**** TÜV Product Service, Sylvesterallee 2, D - 22525 Hamburg
Ing. grad. Hans-Joachim Schaller
Leitung Entwicklung und Konstruktion
Metabowerke GmbH
Business Unit Elektra Beckum
Daimlerstr. 1
D - 49716 Meppen
Meppen, 26.08.2003
2
1001118
ENGLISH
2. Machine overview
25
24
26
27
28
36
29
34
30
33
35
32
24
Table rear extension
25
Suction hose
26
32
Accessory holder for saw blade
change wrenches
Blade guard
33
Mitre fence
27
Rip fence
34
28
Accessory holders for push
stick / feeding aid and push
block handle
Motor carrier unit – angle of
inclination steplessly adjustable
from 0° through 47°
35
Wheel set
36
Table top
29
Crank for cutting height setting,
stepless
from 0 – 85 mm
30
ON/OFF switch
31
Transport handles
31
19
ENGLISH
Table of contents
1.
Scope of delivery ......................18
2.
Machine overview .....................19
3.
Please read first! .......................20
4.
Safety instructions....................20
4.1 Specified conditions of use .........20
−
The equipment manufacturer is not
liable for any damage resulting from
neglect of these operating instructions.
4.2
•
Information in these instructions is
denoted as under:
When using this tool observe the following safety instructions, to
exclude the risk of personal injury or
material damage.
•
Danger!
Risk of personal injury or
environmental damage.
Please also observe the special
safety instructions in the respective
chapters.
•
Where applicable, follow the legal
directives or regulations for the prevention of accidents pertaining to
the use of circular saws.
4.2 General safety instructions..........20
4.3 Symbols on the machine.............21
4.4 Safety devices.............................21
5.
Special product features ..........22
6.
Operational controls .................22
7.
Assembly ...................................23
Risk of electric shock!
Risk of personal injury
by electric shock.
7.1 Mains connection ........................27
Drawing-in/trapping
hazard!
Risk of personal injury
by body parts or clothing
being drawn into the
rotating saw blade.
7.2 Installation ...................................27
8.
Operation ...................................27
8.1 Dust collector ..............................28
8.2 Setting the depth of cut ...............28
8.3 Setting the saw blade tilt .............28
Caution!
Risk of material damage.
8.4 Sawing with the rip fence ............28
A General hazards!
•
Keep your work area tidy – a messy
work area invites accidents.
•
Be alert. Know what you are doing.
Set out to work with reason. Do not
operate tool while under the influence of drugs, alcohol or medication.
•
Consider environmental conditions:
keep work area well lighted.
•
Prevent adverse body positions.
Ensure firm footing and keep your
balance at all times.
•
Use suitable workpiece supports
when cutting long stock.
•
Do not operate the tool near inflammable liquids or gases.
•
The saw shall only be started and
operated by persons familiar with
circular saws and who are at any
time aware of the dangers associated with the operation of such tool.
Persons under 18 years of age shall
use this tool only in the course of
their vocational training, under the
supervision of an instructor.
•
Keep bystanders, particularly children, out of the danger zone. Do not
permit other persons to touch the
tool or power cable while it is running.
•
Do not overload tool – use it only
within the performance range it was
designed for (see "Technical specifications").
8.5 Sawing with the mitre fence ........29
9.
Tips and tricks...........................29
Note:
Additional information.
10. Care and maintenance..............29
10.1 Saw blade change.......................29
10.2 Cleaning the saw blade's
height adjustment mechanism ....30
10.3 Saw storage ................................30
−
10.4 Maintenance................................30
11. Repairs .......................................30
12. Transportation...........................30
13. Available accessories..........30/63
14. Environmental Protection ........30
15. Trouble Shooting ......................30
16. Technical specifications...........31
3. Please read first!
These instructions have been written in
a way which facilitates learning of how to
safely operate your saw. Here is a guide
on how you should read these instructions:
−
Read instructions before use. Pay
special attention to the safety information.
−
These instructions are intended for
persons having a basic technical
knowledge of the operation of
machines such as the one
described herein. If you have no
experience whatsoever, we strongly
recommend to seek the advise of an
experienced person.
−
−
20
Keep all documents supplied with
this machine for future reference.
Retain proof of purchase in case of
warranty claims.
If you lend or sell this machine be
sure to have these instructions go
with it.
General safety instructions
Numbers in illustrations (1, 2, 3, ...)
− denote component parts;
− are consecutively numbered;
− relate to the corresponding
number(s) in brackets (1), (2), (3)
... in the neighbouring text.
−
Instructions to be carried out in a
certain sequence are numbered.
−
Instructions which can be carried
out in any sequence are indicated
by a bullet.
−
Listings are indicated by an En Dash.
4. Safety instructions
4.1
Specified conditions of
use
This machine is intended to rip and
crosscut grown timber, faced boards,
chip board and wood-core plywood
sheets, and similar wood-derived materials.
Do not cut round stock without suitable
jigs or fixtures. The rotating saw blade
could turn the workpiece.
Any other use is considered to be not as
specified and not allowed. The manufacturer is not liable for any damage caused
by unspecified use.
Modification of the machine or use of
parts not approved by the equipment
manufacturer can cause unforeseeable
damage!
B Danger! Risk of electric shock!
•
Do not expose tool to rain.
Do not operate tool in damp or wet
environment.
Prevent body contact with earthed
objects such as radiators, pipes,
cooking stoves, refrigerators when
operating this tool.
•
Do not use the power cable for purposes it is not intended for.
of personal injury and
A Risk
crushing by moving parts!
•
Do not operate the tool without
installed guards.
ENGLISH
•
Always keep sufficient distance to
the saw blade. Use suitable feeding
aids, if necessary. Keep sufficient
distance to driven components
when the operating electric tool.
•
Wait for the saw blade to come to a
complete stop before removing cutoffs, scrap, etc. from the work area.
•
Do not attempt to stop the saw
blade by pushing the workpiece
against its side.
•
Ensure the tool is disconnected from
power before servicing.
•
Ensure that when switching on (e.g.
after servicing) no tools or loose
parts are left on or in the tool.
•
Turn power off if the tool is not used.
A
− cords,
− cables or
− wires, or to which any of the
above are attached.
A Hazard
•
•
Wear hearing protection.
•
Wear hearing protection.
•
Wear safety glasses.
•
•
Wear dust mask.
•
Wear suitable work clothes.
•
Make sure the riving knife is not
bend. A bent riving knife will push
the workpiece against the side of the
saw blade, causing noise.
When working outdoors wearing of
non-slip shoes is recommended.
generated by insufficient personal protection gear!
of injury by inhaled wood
A Risk
dust!
•
Cutting hazard, even with the
cutting tool at standstill!
•
Wear gloves when changing cutting
tools.
•
Store saw blade in such manner that
nobody will get hurt.
A Risk of kickback (workpiece is
•
caught by the saw blade and thrown
against the operator):
•
Always work with a properly set riving knife.
•
Do not jam workpieces.
•
Make sure the saw blade is suitable
for the workpiece material.
•
Cut thin or thin-walled workpieces
only with fine-toothed saw blades.
•
Always use sharp saw blades.
•
If in doubt, check workpiece for
inclusion of foreign matter (e.g. nails
or screws).
•
Cut only stock of dimensions that
allow for safe and secure holding
while cutting.
•
Never cut several workpieces at the
same time – and also no bundles
containing several individual pieces.
Risk of personal injury if individual
pieces are caught by the saw blade
uncontrolled.
•
Remove small cutoffs, scrap, etc.
from the work area – when doing so
the saw blade must be at a complete standstill.
c Drawing-in/trapping hazard!
•
•
Dust of certain timber species (e.g.
beech, oak, ash) can cause cancer
when inhaled. Work only with a suitable dust collector attached to the
saw. The dust collector must comply
with the data stated in the technical
specifications.
Ensure that as little as possible
wood dust will get into the environment:
− remove wood dust deposit in the
work area (do not blow away!);
− fix any leakages on the dust collector;
− ensure good ventilation.
A
Hazard generated by modification of the machine or use of parts
not tested and approved by the equipment manufacturer!
•
Assemble tool in strict accordance
with these instructions.
•
Use only parts approved by the
equipment
manufacturer.
This
applies especially for:
− saw blades (see "Technical specifications" for stock nos.);
− safety devices (see "Technical
specifications" for stock nos.).
•
Do not change any parts.
A
Hazard generated
defects!
by
tool
•
Keep tool and accessories in good
repair. Observe the maintenance
instructions.
•
Before every use check tool for possible damage: before operating the
tool all safety devices, protective
guards or slightly damaged parts
need to be checked for proper function as specified. Check to see that
all moving parts work properly and
do not jam. All parts must be correctly installed and meet all conditions necessary for the proper operation of the tool.
Ensure that no parts of the body or
clothing can be caught and drawn in
by rotating components (no neckties, no gloves, no loose-fitting
clothes; contain long hair with hairnet).
Never attempt to cut any workpieces
which contain
− ropes,
− strings,
by a qualified specialist. Have damaged switches replaced by a service
centre. Do not operate tool if the
switch cannot be turned ON or OFF.
•
Damaged protection devices or
parts must be repaired or replaced
Keep handles free of oil and grease.
A Risk of injury by noise!
4.3
Symbols on the machine
Information on the nameplate:
37
38
39
40
41
42
43
(37) Manufacturer
(38) Serial number
(39) Machine designation
(40) Motor specifications (see also
"Technical specifications")
(41) Year of make
(42) CE-mark – This machine conforms to the EC directives as per
Declaration of Conformity
(43) Dimensions of permissible saw
blades
4.4
Safety devices
Riving knife
The riving knife (44) prevents the workpiece from being caught by the rising
teeth of the saw blade and being thrown
against the operator.
Always have the riving knife installed
during operation.
44
45
Blade guard
The blade guard (45) protects against
unintentional contact with the saw blade
and from chips flying about.
Always have blade guard installed during operation.
21
ENGLISH
− firmly attached to the machine
stand, or
− only hooked into the machine
stand for convenient folding away
without the need for using tools.
Push stick
The push stick (46) serves as an extension of the hand and protects against
accidental contact with the saw blade.
Always use the push stick if the distance
between saw blade and rip fence is less
than 120 mm.
46
−
Robust sheet steel construction –
high load-bearing capacity and permanently protected against corrosion.
−
Steplessly adjustable rip fence.
3 Note:
In the event of a power failure an
undervoltage relay will be tripped to prevent the starting of the machine when
the power is restored. To restart the
machine turn the switch ON again.
Setting device for saw blade tilt
With the handwheel (52) the saw blade
is steplessly tilted from 0° to 47°.
6. Operational controls
52
53
Main switch
• To turn power supply ON = set
rotary switch (49) to position “I”.
•
47
Guide the push stick at an angle of 20°
… 30° against the saw table's surface.
When the push stick is not used, it can
be hung to the holder (47) provided.
Replace the push stick if damaged.
ON/OFF switch
• To turn machine ON = set rotary
switch (50) to position “I”.
•
−
Stepless depth of cut setting to
85 mm.
−
An undervoltage relay prevents the
machine from starting up when
power is restored after a power failure.
−
Mitre fence with adjustable fence
extrusion.
−
All operating elements are located
at the machine's front.
−
22
Table extension for variable use is
standard delivery:
Set the ON/OFF switch to position
“O” if the machine is turned OFF by
the overload protection.
2.
Push the reset pin (51) back in to
reset the overload protection.
3.
Wait for the motor to cool down
before restarting the machine.
5. Special product features
Steplessly adjustable bevel tilt from
0° to 47°.
To make machine operational again
after actuating the E-STOP button =
turn E-STOP button (48) in direction
of arrow. The E-STOP button will be
released from the locked E-Stop
position and returned to the normal
operating position.
To keep the set angle of inclination from
changing when sawing, it is locked by
means of of the wingnut (53) at the front
of the chipcase.
Crank for cutting height adjustment
The cutting height is adjusted by turning
the crank (54).
Protection against overheating
The overload protection prevents the
overheating of the motor under permanent load. The motor is then turned off
and the reset pin (51) pops out.
1.
−
To turn machine OFF = set rotary
switch (50) to position “O”.
Emergency-stop button
• To turn the machine OFF in case of
emergency = press the E-STOP button (48).
•
Handle for push block
To be affixed to a suitable board. For the
safe guiding of small stock.
To turn power supply OFF = set
rotary switch (49) to position “O”.
48
54
Fence
The saw is equipped with two fences:
−
Mitre fence (for cross/mitre cuts):
57
49
55
51
56
For use as mitre fence the short
fence extrusion must be installed.
50
The mitre fence is mounted on a
guide bar, which is fastened to the
left-hand side of the saw table.
− Star-knob screw (56) for mitre
setting. The setting range is 45°.
ENGLISH
When sawing with the mitre fence
the star-knob screw (56) must be
firmly tightened.
− Knurled nuts (57) for fence extrusion position adjustment. The
plastic lug (55) of the fence extrusion must point toward the saw
blade, at a minimum distance of
10 mm to the saw blade.
−
7. Assembly
A
−
Assemble the saw in strict
accordance with these instructions.
−
Use only the parts supplied as
standard delivery.
−
Do not change any parts.
Rip fence (for ripping):
58
65
Danger!
Modifications of the saw or the
use of parts not tested and approved
by the equipment manufacturer can
lead to unforeseen damage during
operation!
66
64
67
68
Only if you follow the instructions exactly
does the saw conform to the safety regulations and can be safely operated.
If you also observe the following notes,
the assembly will cause no problems:
•
•
59
For use as rip fence the long fence
extrusion (58) must be installed. It is
mounted on the guide extrusion at
the front of the saw table.
− For ripping the fence extrusion
(58) must be parallel with the saw
blade and locked in position by
lock lever (59).
− Knurled nuts (62) for attaching
the fence extrusion. After loosening the two knurled nuts (62), the
fence extrusion can be removed
and shifted:
60
Read the instructions for each step
before executing it.
Item
Leg
65
Flange nut M8
66
Hexagon head screw
M8 x 16
M8 x 20
67
Stanchion, short
68
Stanchion, long
69
1.
3 Note:
The scale's
zero position is
adjusted so that is corresponds to the
high edge (see “Adjusting the rip fence”
in chapter “Assembly”.
If the small edge of the fence extrusion is
installed there will be 47 mm offset from
the reading.
Description
64
63
The rip fence has an opening with a
scale reading edge (63).
Fit long stanchions (68) between the
side legs, short stanchions (67)
between the front and rear legs:
− the wide sides of the stanchions
face the table panel;
− the nibs and recesses must fit
into each other;
− fit hexagon head screws into
holes from the outside;
− from the inside screw on flange
nuts – do not yet tighten fully.
4.
Screwing up the stanchions with
each other:
− Fit hexagon head screws from
the side of the table top;
− Screw on flange nuts from the
opposite side.
− With the help of another person,
turn the saw over and stand it on
a level floor.
Stand assembly
62
(61) Wide edge:
− for cutting thick stock.
3.
Lay out the parts required for each
assembly step.
Required tools
− Allen key 4 mm
− Allen key 6 mm
− Phillips screwdriver
− Spanner SW 10
− Spanner SW 13
− Spanner SW 19
(supplied)
− Ring spanner 46 mm
(supplied)
61
(60) Small edge:
− for cutting thin stock;
− when the saw blade is tilted.
69
Table top with chipcase
Qty.
4
20
18
2
2
2
1
Place table panel (69), motor facing
up, on a stable support.
A
Caution!
Saw blade and riving knife
must not rest on the support! To prevent damage to the saw or support,
the table panel should be placed onto
two sawhorses.
2.
Attaching the four legs (64) to the
inside of the table panel's corners:
− Insert the hexagon head screws
(66) from the outside;
fit the two screws M8 x 20 to the
rear edge of the table (for the
table extension);
− screw on the flange nuts (65)
from the inside – do not fully
tighten yet, this is done only after
installation of the table extension.
Installing the ON/OFF switch
Item
70
Description
Flange nut
71
Distance sleeve
72
Hexagon head screw
Qty.
2
2
2
1.
Loosen the shipping brace of the
ON/OFF switch.
2.
Put hexagon head screws (72)
through the switch plate of the ON/
OFF switch.
3.
Fit one each distance sleeve (71)
onto the hexagon head screws.
4.
Attach the ON/OFF switch with the
hexagon head screws (72) and
flange nuts (70) to the left-hand front
leg as illustrated.
23
ENGLISH
76
Installing the dust collection gear
Item
70
71
72
80
Description
Blade guard
83
Suction hose
85
Flange nut M8
( ) = already installed
87
Hexagon head screw
M8 x 16
( ) = already installed
87
A
Caution!
Make sure the cable does not
run over sharp edges and is not bent.
Adjusting the riving knife
To align the riving knife:
1.
Remove blade guard.
2.
Turn the flat head screw (74) of the
table insert extrusion (73) clockwise
by 1/4 turn and remove the table
insert.
73
74
3.
4.
in the distance to the saw blade;
−
in its lateral alignment.
Distance to the saw blade:
The distance between the saw blade's
peripheral edge and the riving knife shall
be between 3...8 mm.
The riving knife must project at least the
same distance over the saw table as the
saw blade.
1
1
1
(1)
Hose carrier with
bracket for table extension
1
(1)
1
1.
Raise saw blade fully.
2.
Install blade guard (80) on the riving
knife (81).
Tighten the Keps nut.
81
Lateral alignment:
riving knife and saw blade must be perfectly in line. The lateral riving knife position is factory preset and indicated by a
marking (76).
80
In case a fine setting should become
necessary:
1.
Loosen the Keps nut (75) holding
the riving knife by one turn.
2.
Adjusting the riving knife's lateral
position:
•
To move riving knife to the left: turn
hexagon socket screw (77) further
in.
•
To move riving knife to the right: turn
hexagon socket screw (77) further
out.
When making this adjustment
ensure the inner section of the inner
riving knife holder rests against the
hexagon socket screw.
To adjust the riving knife position exactly
to the saw blade, it is adjustable in two
planes:
−
Make sure that both parts of the
inner riving knife holder are not offset against each other (marking)
(76).
Qty.
3.
3.
Push one end of the suction hose
(83) on the blade guard's suction
port (82).
4.
Fit other end of the suction hose to
the dust extraction port (84) on the
chipcase.
82
83
Tighten the Keps nut.
77
84
After the alignment:
1.
Loosen the Keps nut (75) holding
the riving knife by one turn.
2.
Adjust distance of the riving knife to
the saw blade.
24
5.
78
75
1.
Fit table insert extrusion (78) flush
into the saw table.
79
2.
Turn the countersunk screw (79)
counter-clockwise against the stop.
3.
Install blade guard
knife.
on the riving
Installing the hose carrier (87):
− put two hexagon head screws
from the outside through the hose
carrier and table panel;
− from the inside screw on flange
nuts (85) – do not yet tighten
fully.
ENGLISH
3.
85
86
− the washers (102) must be fitted
between between upper fence
carrier and knurled nuts.
Slide the lower fence carrierl (89),
with the angle facing the front of the
saw on the guide bar and swing it
down.
88
89
100
90
87
102
6.
7.
Align hose carrier, tighten hexagon
head screws and flange nuts. Hook
the suction hose into the hose carrier (87).
Connect the saw's dust extraction
port at the chipcase to a suitable
dust collector (see "Dust collector" in
chapter "Operation").
Mitre fence assembly
Item
Description
88 Guide bar
89 Fence carrier, lower
90 Flange nut M8
( ) = already installed
91
92
93
94
95
97
98
99
100
1.
2.
Hexagon head screw
M8 x 20
( ) = already installed
Mounting bracket
Qty.
1
1
2
(2)
2
91
92
4.
Put the rear mounting bracket (93)
on the guide bar and secure by turning it sligthly.
5.
Attach the rear mounting bracket,
with the bracket (95) for table extension installation to the saw.
6.
Align guide bar exactly parallel with
the saw blade.
7.
Tighten all screws
mounting brackets.
8.
Fit plugs (94) to both ends of the
guide bar.
holding
the
12. By means of the set screw (96) the
fence extrusion can be set exactly
square to the saw blade. The set
screw (96) is accessible when the
mitre fence is swung down.
3 Note:
When
the mitre fence is not
required swing it down, out of the way.
Adjusting the rip fence
1. Slide rip fence (106) on the guide
rail adn lock with the lock lever
(105).
2.
Install the fence extrusion (103) as
illustrated below and secure it with
the two knurled thumb screws.
3.
Slightly loosen both set screws
(104) of the rip fence and align the
fence extrusion parallel with the saw
blade. Retighten both set screws
afterwards.
95
(2)
2
94
93
Plug
Bracket for table
extension
Star-knob screw M8
Washer 8.4
Fence carrier, upper
Fence extrusion,
short
101
2
1
103
1
1
1
1
Attaching the front mounting bracket
(92) to the left-hand front side of the
saw:
− Remove the hexagon head
screws (91) from the left-hand
front and rear side of the table
panel.
− Put two each hexagon head
screws (91) fitted, from the outside through the mounting
bracket (92) and the table panel;
− from the inside screw on flange
nuts (90) – do not yet tighten
fully.
Mounting the guide bar (88): Insert
the guide bar into the mounting
bracket (92) so that the nose fits into
the slot in the guide bar. A slight turn
of the guide bar keeps it from sliding
off.
104
107
9.
Swing the lower fence carrier up.
10. Install the upper fence carrier (99)
with washer (98) and star-knob
screw (97).
96
97
106 105
4.
Set rip fence against the right-hand
side of the saw blade, across its
entire diameter. Crank saw blade
up, if necessary.
5.
Adjust scale so that its zero position
coincides exactly with the scale
reading edge (107) of the rip fence.
6.
Tighten the scale fastening screw
and verify the setting by making a
trial cut.
98
99
11. Put the short fence extrusion (100)
on and secure with knurled nuts
(101):
− the plastic nose of the fence
extrusion must point towards the
saw blade;
25
ENGLISH
Wheel set installation
Item
Description
Wheel set
108
110
Hexagon head screw
M6 x 16
Washer 6.4
111
Flange nut, M6
109
hexagon nut (122) to the lower end
of the struts.
112
Qty.
2.
1
4
113
4
4
114
115
The wheel set attaches to the rear legs
of the saw.
1.
Through each of the wheel set
brackets (108) two hexagon head
screws (109) with washers fitted
(110) must be put from the rear.
2.
Screw on the flange nuts (111) from
inside the leg.
3.
Adjust position of brackets so that
the wheels are approx. 1 mm above
the floor when the saw is standing
on all four legs.
123
2.
116
117
Tightening the bolted connections
• Check all bolted connections of the
saw. Tighten all bolted connections
hand-tight with a suitable tool.
Observe the following when tightening the screws:
− After tightening the machine must
stand firmly and securely;
− Table extension alignment: The
top of the table extension must
be parallel and level with the
saw's table top.
119
110
118
3.
4.
Tighten flange nuts.
Table extension installation
Item
112
113
116
Description
Plate, table rear
extension
Washer 8.4
Tigthen all bolted connections of the
table extension handtight using a
suitable tool.
3 Note:
The supports of the table exten-
108
Qty.
1
4
114
117
Flange nut M8
4
115
119
Bearing bolt
M8 x 10
4
118
Support
120
122
Hexagon nut, prevailing torque-type M6
2
2
121
123
Countersunk screw
M6 x 10
sions can be stationary fastened. Alternatively they can be installed in such
way that the table extension can swing
down.
2.
2.
Lift supports out of the strut and
swing table extension down as illustrated.
Fasten the supports with one each
countersunk screw (121) and prevailing torque-type hexagon nut
(120) to the strut as illustrated.
2
120
A
Fasten extension panel (112) with
two bearing bolts (115), two washers (113) and two flange nuts
(114)to the two brackets as illustrated.
If necessary, adjust the position of
the brackets to match the width of
the table extension – retighten the
screw fitting.
26
Swinging the table extension down
1. Slide the lower ends of the supports
towards each other.
Installing the supports stationary
1. Insert the offset ends of the supports
into the slots of the short strut at the
reat of the saw and slide them
towards the outside.
Caution!
When installing the rear table
extension, both panel and support
struts need to be held as long as they
are only bolted to one end.
1.
122
Attach the supports (118) with one
each bearing bolt (119), washer
(116) and flange nut (117) to the
table extension (see illustration).
109
111
Insert the lower ends of the supports
into the slots of the short strut at the
reat of the saw and slide them
towards the outside (see illustration).
Transport handle installation
121
Item
124
126
Hexagon head screw
M6 x 16
Washer 6.4
127
Flange nut, M6
125
Installing the supports to allow the
table extension to swing down
1. Attach one each countersunk screw
(123) and prevailing torque-type
Description
Transport handle
Qty.
2
4
4
4
The transport handles are installed to
the front legs of the saw.
ENGLISH
1.
From the front put through each
transport handle (124) two hexagon
head screws (125) with washers
(126) fitted.
−
−
126
Mains voltage and system frequency conform to the voltage
and frequency shown on the
machine's rating label.
Protection against electric shock
by a residual current device
(RCD) of 30 mA sensivity.
−
Fuse protection of 16 A maximum
against short circuits.
−
System impedance Zmax. at the
house service connection: see
separate supplement.
127
125
3 Note:
Check with your local Electricity
124
2.
Install transport handle in such way
that the tubes can be folded down.
3.
From inside, screw on one each
flange nut (127)
Accessory holder installation
Item
128
129
Description
Flange nut M6
Qty.
4
2
Hexagon head screw
M6 x 50
In a final assembly step, two hexagon
head screws are fitted as holders for the
push stick, push block handle and
assembly wrench to front legs:
1.
2.
3.
Turn one each flange nut (128)
approx. 10 mm on the two hexagon
head screws (129).
Fit hexagon head screw from the
outside through the hole on the side
of the left-hand front leg and secure
with another flange nut.
Attach the other hexagon head
screw likewise to the right-hand
front leg.
Board or electrician if in doubt whether
your house service connection meets
these requirements.
Position power supply cable so it
does not interfere with the work and
is not damaged.
Protect power supply cable from heat,
aggressive liquids and sharp edges.
Use only rubber-jacketed extension
cables with sufficient lead cross-section (see "Technical specifications").
Do not pull on power supply cable to
unplug.
B Changing the direction of rotation! (three-phase motors only)
Depending on the phase sequence of
the electric supply it is possible the
saw blade will turn in the wrong direction. This can lead to the workpiece
being hurled away when attempting to
make a cut. The direction of rotation
must therefore be check every time the
saw is connected to another outlet. In
case of an incorrect direction of rotation, the wiring of the outlet must be
changed by a qualified electrician:
1.
128
129
7.1
Mains connection
B
Danger! Electrical hazard
Operate saw in dry environment only.
Operate saw only on a power source
matching the following requirements
(see also "Technical specifications"):
−
−
After the saw and all of its safety
devices have been assembled, connect it to the mains supply.
2.
Raise saw blade fully.
3.
Start saw and switch OFF immediately.
4.
Check the saw blade's direction of
rotation from the left-hand side of
the saw. The saw blade must rotate
clockwise.
5.
If the saw blade rotates counterclockwise, unplug the power cable
at the saw.
6.
Have the electric supply changed by
a qualified electrician!
7.2
Installation
installed,
•
Place the machine on a firm, level
floor.
Three-phase outlets with neutral
wire.
•
Ensure there is sufficient space to
handle larger workpieces.
Outlets
properly
earthed and tested.
For maximum upright stability the saw
can be bolted to the floor:
1.
Place the fully assembled saw at a
suitable site and mark the bore
holes on the floor.
2.
Move saw aside and drill the holes.
3.
Align saw with the holes and bolt to
the floor.
8. Operation
of injury!
A Risk
This saw may only be operated
by one person at a time. Other persons shall stay only at a distance to
the saw for the purpose of feeding or
removing stock.
Before starting work, check to see
that the following are in proper working order:
−
power cable and plug;
−
ON/OFF switch
−
riving knife
−
blade guard
−
feeding aids (push stick, push
block and handle).
Use personal protection gear:
−
dust respirator;
−
hearing protection;
−
safety goggles.
Assume proper operating position:
−
at the front of the saw;
−
in front of the saw;
−
to the left of the line of cut;
−
when working with two persons,
the other person must remain at
an adequate distance to the saw.
If the type of work requires, use the
following:
−
suitable workpiece supports – if
otherwise workpiece would fall
off the table after cutting;
−
dust collector.
Avoid typical operator mistakes:
−
Do not attempt to stop the saw
blade by pushing the workpiece
against its side. Risk of kickback.
−
Always hold the workpiece down
on the table and do not jam it.
Risk of kickback.
−
Never cut several workpieces at
the same time – and also no bundles containing several individual
pieces. Risk of personal injury if
individual pieces are caught by
the saw blade uncontrolled.
hazard!
c Drawing-in/trapping
Never cut stock to which
ropes, cords, strings, cables or wires
are attached or which contain such
materials.
27
ENGLISH
8.1
Dust collector
A
Danger!
Dust of certain timber species
(e.g. beech, oak, ash) can cause cancer when inhaled. Use a suitable dust
collector when working in enclosed
spaces The dust collector must meet
the following requirements:
−
suitable for the outer diameter of
the suction ports (blade guard
38 mm; chipcase 100 mm);
−
air flow volume ≥ 460 m3/h;
−
vacuum at dust extraction port of
saw ≥ 530 Pa;
−
air speed at dust extraction port
of saw ≥ 20 m/ s.
8.2
Setting the depth of cut
133
A
134
Danger!
Parts of the body or objects in
the setting range can be caught by
the running saw blade! Set the depth
of cut only with the saw blade at
standstill!
The saw blade's cutting height must be
adapted to the workpiece height: The
blade guard must rest with its front edge
on the workpiece.
3.
Arrest the set angle of inclination by
tightening the wing nut (134).
8.4
1.
The dust extraction ports are located at
the chipcase assembly and at the saw
blade guard.
Sawing with the rip fence
Adopt fence extrusion to the workpiece height:
To do so, loosen the knurled nuts
(137).
135
The sliding plate (131) at the underside
of the chipcase must be closed.
136
Observe the dust collector's operating
instructions as well!
137
•
Operation without a dust collector is only
possible:
−
outdoors;
−
for short-term operation
(up to a maximum of 30 minutes);
−
with dust respirator.
Adjust cutting height by turning the
handwheel (132) on the chipcase.
138
− Small edge (135) =
for cutting thin stock
− Wide edge (136) =
for cutting thick stock
A
Caution!
If no dust collector is hooked
up the sliding plate on the chipcase
must be opened, otherwise chips and
sawdust build up inside the chipcase.
To open the sliding plate:
1.
Loosen booth screws (130) at the
underside of the chipcase slightly.
131
132
3 Note:
To compensate for possible play
in the blade height setting mechanism,
always raise the blade to the desired
position.
8.3
Setting the saw blade tilt
A Danger!
Parts of the body or objects in
130
2.
Slide sliding plate (131) to the side.
3.
Tighten screws (130).
If there is sawdust build-up in the chipcase nevertheless, the chipcase needs
cleaning:
1.
Remove blade guard and table
insert.
2.
Dismount the saw blade (see “Saw
blade change” in chapter “Care and
Maintenance”).
3.
Clean chipcase.
4.
Mount saw blade, replace table
insert and blade guard.
28
the setting range can be caught by
the running saw blade! Set the depth
of cut only with the saw blade at
standstill!!
The saw blade tilt is steplessly adjustable between 0° and 47°.
1.
Loosen wing nut at the front (134) of
the chip case by approx. one turn.
A retaining nut on the opposite side
of the chip case prevents an unintended change on the angle of inclination while the wing nut is not tightened.
2.
Set the desired saw blade tilt with
the handwheel (133).
2.
The rip fence (140) is set from the
top on the guide extrusion (141) at
the front of the saw.
3.
Set the rip fence to the cutting width.
The cutting width is measured from
the scale reading edge (138).
3 Note:
The scale's
zero position is
adjusted with reference to the wide edge
of the fence extrusion.
If the small edge of the fence extrusion is
installed there will be 47 mm offset from
the reading.
4.
Lock the rip fence in position with
the lock lever (139).
141 140 139
ENGLISH
A Danger!
Always use the push stick if
the distance between saw blade and
rip fence is less than 120 mm.
5.
Set the cutting height of the saw
blade. The blade guard must rest
with its front edge on the workpiece.
7.
Switch machine off if no further cutting
is to be done immediately afterwards.
9. Tips and tricks
•
Before cutting a workpiece to size
make trial cuts on pieces of scrap.
•
Always place a workpiece on the
saw table in such way that it cannot
tilt or rock (e.g. always place a
curved board on the table with the
convex side up).
•
When working long stock use suitable
supports, such as roller support or
table extension (optional accessories).
•
Keep surfaces of saw table and
extension tables clean – in particular, remove resin residue with a suitable cleaning and maintenance
spray (optional accessory).
10. Care and maintenance
A
6.
Start motor.
8.
Cut workpiece in a single pass.
9.
Switch machine off if no further cutting is to be done immediately afterwards.
8.5
Sawing with the mitre
fence
1.
Swing mitre fence on the table top.
2.
Set to desired mitre angle and lock
in that position. For mitre cuts, the
fence extrusion is adjustable to
45°maximum.
A
Caution!
The plastic nose must have at
least 10 mm distance to the line of
cut.
3.
Set the cutting height of the saw
blade.
4.
Set and arrest the saw blade tilt.
5.
Start motor.
6.
Cut workpiece in a single pass.
Danger!
Unplug before servicing.
−
Repair and maintenance work other
than described in this section should
only be carried out by qualified specialists.
−
Replace defective parts, especially
of safety devices, only with genuine
replacement parts. Parts not tested
and approved by the equipment
manufacturer can cause unforeseen
damage.
−
Check that all safety devices are
operational again after each service.
Set and arrest the saw blade tilt.
7.
4.
10.1 Saw blade change
A Danger!
Directly after cutting the saw
blade can be very hot – burning hazard! Let a hot saw blade cool down.
Do not clean the saw blade with combustible liquids.
Risk of injury, even with the blade at
standstill. Wear gloves when changing blades.
When fitting a saw blade, observe the
direction of rotation!
Loosen arbor bolt (144) with spanner (L.H. thread!). Hold outer blade
collar (145) with open jaw wrench to
counter.
144
145
146
5.
Remove outer blade collar (145)
and saw blade from the saw spindle.
6.
Clean clamping surfaces of saw
spindle and saw blade.
A Danger!
Do not
use any cleaning
agents (e.g. to remove resin residues), which could corrode the light
alloy components; the stability of the
saw may be adversely affected.
7.
Put on a fresh saw blade (observe
direction of rotation!).
A Danger!
Use only suitable saw blades
(see "Available accessories") – when
using unsuitable or damaged blades
parts could be explosive-like hurled
from it by centrifugal force.
Do not use:
−
saw blades made of high speed
steel (HSS or HS);
−
saw blades with visible damage;
−
cut-off wheel blades.
A Danger!
1.
Raise saw blade fully.
2.
Remove blade guard.
−
3.
Turn the flat head screw (142) of the
table insert extrusion (143) clockwise by 1/4 turn and remove the
table insert.
Mount saw blade using only genuine parts.
−
Do not use loose-fitting reducing
rings; the saw blade could work
loose.
−
Saw blades have to be mounted
in such way that they do not wobble or run out of balance and cannot work loose during operation.
8.
Put on outer blade collar (145) (the
inner blade collar's (146) lug must
engage in the groove of the outer
blade collar).
143
142
29
ENGLISH
9.
Turn arbor bolt (144) into saw spindle (left-handed thread!) and tighten.
Hold outer blade collar (145) with
ring spanner to counter.
A Danger!
−
Do not extend arbor bolt tightening wrench.
−
Do not tighten arbor bolt by hitting on the wrench.
−
After the arbor bolt has been
tightened, remove all tools used
during saw blade installation!
10. Fit table insert extrusion (147) flush
into the saw table.
147
148
11. Turn the countersunk screw (148)
counter-clockwise against the stop.
12. Install blade guard on the riving
knife.
10.2 Cleaning the saw blade's
height adjustment mechanism
1.
Crank saw blade up to its uppermost
position.
2.
Clean spindle with brush, vacuum,
or compressed air.
3.
Apply a light coat of Care and Maintenance Spray.
4.
Grease slide faces of the height
adjustment mechanism (149) and
crank the saw blade up and down
several times to distribute the
grease evenly on the slide faces.
10.4 Maintenance
E
Before switching ON
Visual check if distance saw blade – riving knife is 3...8 mm.
F
Visual check of power cable and power
cable plug for damage; if necessary
have damaged parts replaced by a qualified electrician.
After switching OFF
Check to see if the saw blade post-runs
for more than 10 seconds; if so, have the
electronic motorbrake replaced by a
qualified electrician.
Monthly (if used daily)
Remove saw dust and chips with vacuum or brush; apply light coat of oil to
guide elements:
−
threaded rod of height adjustment;
−
swivel segments.
Every 300 hours of operation
Check all screwed joints, retighten if
necessary.
11. Repairs
A
Danger!
Repairs to electric tools must
be carried out by qualified electricians only!
Electric tools in need of repair can be
sent to the service centre of your country. Refer to the spare parts list for the
address.
A Danger!
Store saw so that
−
it cannot be started by unauthorized persons, and
−
nobody can get injured.
A
Caution!
Do not store saw unprotected
outdoors or in damp environment.
30
I
J
K
L
14. Environmental Protection
The machine's packing can be 100%
recycled.
Worn out power tools and accessories
contain considerable amounts of valuable raw and rubber materials, which can
be recycled.
These instructions are printed on paper
produced with elemental chlorine-free
bleaching process.
15. Trouble Shooting
12. Transportation
service or maintenance work, always:
•
Lower saw blade fully.
•
Dismount add-on parts (fence, sliding carriage, table extension).
13. Available accessories
10.3 Saw storage
H
Please attach a description of the fault to
the electric tool.
If possible use original carton for shipping.
149
G
Saw blade CV 315 x 1.8 x 30
56 multiple combination teeth
for solid wood and particle board.
Saw blade CV 315 x 1.8 x 30
80 neutral multiple teeth
For especially smooth cuts in solid
wood and particle board.
Saw blade TCT 315 x 2.8 x 30
48 universal alternate bevel teeth
For all woods and wood-derived
materials.
Saw blade TCT 315 x 2.8/1.8 x 30
20 square teeth, combination bore
with locating holes
For rip and crosscuts in solid wood.
Saw blade HW 315 x 3.0/2.0 x 30
24 alternate bevel teeth
General purpose blade for rip and
cross cuts, also in particle board.
Roller Stand RS 420
Roller Stand RS 420 W
Roller Stand RS 420 G
For special tasks the following accessories are available at your specialized
dealer – see back cover for illustrations:
A Sliding Carriage
For convenient guiding of long
stock.
B Table Side Extension, right-hand
tabel size 1000 mm x 600 mm;
with foldable support legs.
C Suction Adapter
To connect a shop vacuum to the
dust collection attachment.
D Care and Maintenance Spray
To remove resin residue and preserve metal surfaces.
A Danger!
Before carrying out any fault
1.
switch machine OFF;
2.
unplug power cable;
3.
wait for saw blade to come to
standstill.
Check that all safety devices are
operational again after each fault
service.
Motor does not run
Undervoltage relay tripped by power failure:
−
switch on again.
No mains voltage:
−
Check cables, plug, outlet and
mains fuse.
Motor overheated, e.g. by a blunt saw
blade or chip build-up in the chipcase:
−
remove cause for overheating, wait
for a few minutes, then start saw
again.
Motor supply voltage too low:
−
use a shorter extension cable or
extension cable with larger lead
cross section
(≥ 1.5 mm2).
ENGLISH
−
Have power supply checked by a
qualified electrician.
−
Connect dust collector, or
−
open sliding plate or
Loss of cutting performance
Saw blade blunt (possibly tempering
marks on blade body or workpiece):
−
increase suction capacity.
−
Height adjustment mechanism of saw
blade working stiff
Spindle of height adjustment mechanism
gummy:
replace saw blade (see chapter
"Care and maintenance").
−
Saw dust build-up
No dust collector or dust collector of
insufficient capacity connected (see
“Dust collector” in chapter “Operation”):
clean spindle and spray with Care
and Maintenance Spray (see chapter "Care and maintenance").
Bevel tilt adjustment working stiff
Wing nut or retaining nut on on the opposite side of the chip case tightened to
much:
−
Slightly loosen wing nut or retaining
nut.
Motor carrier unit tilts independently
If the motor carrier unit tilts independently when setting the bevel tilt, the
retaining nut on the opposite side of the
chip case is not tightened enough:
−
Adjust retaining nut as required.
16. Technical specifications
Voltage
Nominal current
Fuse protection min.
Degree of protection
Motor speed
Motor capacity input capacity P 1
power output P2
Cutting speed saw blade approx.
Saw blade diameter (outer)
Arbor bore
Depth of cut
with saw blade vertical
at 45° saw blade tilt
Dimensions
length saw table
width table
extension height
width saw table
length table extension
(saw table)
height (over all)
A
A
min-1
kW
kW
m/s
mm
mm
TKHS 315 M
TKHS 315 M
TKHS 315 M
TKHS 315 M
TKHS 315 M
2.5 WNB
3.1 WNB
3.4 DNB
4.2 DNB
2,5 WNB
230 V / 1~50 Hz 230 V / 1~50 Hz 400 V / 3~50 Hz 400 V / 3~50 Hz 110 V / 1~50 Hz
10,9
13,4
5,8
7,5
23
1 x 16 (time-lag) 1 x 16 (time-lag) 3 x 10 (time-lag) 3 x 16 (time-lag)
–
IP 54
IP 54
IP 54
IP 54
IP 54
2750
2800
2700
2800
2750
2.5 kW S6
3.1 kW S6
3.4 kW S6
4.2 kW S6
2,5 kW S6
40%
40%
40%
40%
40%
1.72 kW S6
2.2 kW S6
2.5 kW S6
3.0 kW S6
1,6 kW S6
40%
40%
40%
40%
40%
47
47
47
47
47
315
315
315
315
315
30
30
30
30
30
mm
mm
0 ... 85
0 ... 53
0 ... 85
0 ... 53
0 ... 85
0 ... 53
0 ... 85
0 ... 53
0 ... 85
0 ... 53
mm
mm
mm
mm
800
600
794
510
800
600
794
510
800
600
794
510
800
600
794
510
800
600
794
510
mm
mm
850
1000
850
1000
850
1000
850
1000
850
1000
64
Weight complete approx.
kg
64
64
64
64
Sound power level
according to DIN 23746*
no-load
dB (A)
84,0
84,0
84,0
84,0
84,0
when sawing
dB (A)
99,3
99,3
99,3
99,3
99,3
Sound pressure level
according to DIN 31202*
no-load
dB (A)
74,8
74,8
74,8
74,8
74,8
when sawing
dB (A)
85,0
85,0
85,0
85,0
85,0
Ambient temperature range
°C
–10 … +40
–10 … +40
–10 … +40
–10 … +40
–10 … +40
Extension cable – min. lead cross section
3 x 1.5
3 x 2.5
5 x 1.0
5 x 1.5
3 x 2,5
Length of cable 10 m
mm2
mm2
3 x 2.5
3 x 2.5
5 x 1.5
5 x 2.5
–
Length of cable 25 m
mm2
–
–
5 x 2.5
5 x 2.5
–
Length of cable 50 m
* The values stated here only indicate the loudness emitted by this machine. Whether the operator is required to wear hearing protection can not be determined here. This depends on how much noise reaches the ear of the operator. And this, among other things,
depends on the existing ambient conditions (such as other sources of noise near by). Even though it may not be explicitly required, it is
in your own interest to always wear hearing protection when operating this machine.
31
U3a0300.fm
A
091 005 3680
B
091 001 4030
C
091 003 1260
D
091 101 8691
E
091 000 0250
F
091 000 0195
G
091 001 2282
H
091 000 0314
I
091 005 8851
J
091 005 3353
K
091 005 3361
L
091 005 3345
63
www.elektra-beckum.com
ZINDEL AG - Technische Dokumentation und Multimedia, www.zindel.de
U4BA_EB3.fm