1
BEFORE USE
INSTALLING THE PAD
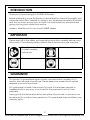
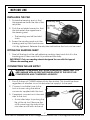
1. Rotate the bearing seat so that
the apperture faces the tab of the
set plate.
2. Push the set plate forward so that
the tab enters the apperture in
the bearing seat.
• The bearing seat will be held
static.
3. Screw the sanding pad onto the
bearing seat by hand and ensure
it is fully tightened. Release the set plate tab before the tool can be used.
FITTING THE SANDING SHEET
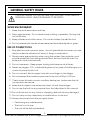
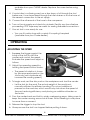
1. Peel off the back of the self adhesive sanding sheet and stick it to the
backing pad. Take care that it is positioned centrally.
IMPORTANT: Only use sanding sheets designed for use with this type of
150mm dia sanding pad.
CONNECTING THE AIR SUPPLY
WARNING: COMPRESSED AIR CAN BE DANGEROUS. ENSURE THAT YOU
ARE FAMILIAR WITH ALL PRECAUTIONS RELATING TO THE USE OF AIR
COMPRESSORS AND COMPRESSED AIR SUPPLY.
1. Pour 2-3 drops of CLARKE airline oil into the air inlet. This should be done
regardless of whether or not a lubricated air supply is to be used.
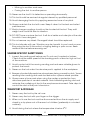
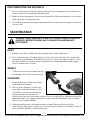
2. Connect a suitable hose to the
tool as shown using the airline
connector supplied with the tool.
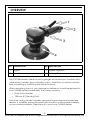
3. If required, connect an in-line mini
oiler to the tool.
• A mini oiler helps to prolong the
life of the air tool. Remove the
oil fill screw from the side of the
mini oiler and fill with air-line oil
7
Parts & Service: 020 8988 7400 / E-mail: [email protected] or [email protected]