1
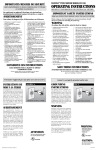
Electric Powerhead
Owners Manual
P/N 9476
IMPORTANT SAFETY INSTRUCTIONS
Read These Instructions Before Using This Electric Powerhead
WARNING: To reduce the risk of fire, electrical
shock or injury:
•
•
•
•
•
•
•
•
•
•
•
•
•
•
•
•
•
Unplug and disconnect power before servicing.
Do not use on wet surfaces.
Do not allow to be used as a toy. Close attention is necessary
when used by or near children.
Use only as described in this manual. Use only manufacturer’s
recommended attachments.
Do not use with damaged cord or plug. If appliance is not
working as it should, has been dropped, damaged, left
outdoors, or dropped into water, return it to an authorized
servicing dealer.
Do not pull or carry by cord, use cord as a handle, close a door
on cord, or pull cord around sharp edges or corners. Do not run
appliance over cord. Keep cord away from heated surfaces.
Do not unplug by pulling on cord. To unplug, grasp the plug, not
the cord.
Do not handle system or appliance with wet hands.
Do not put any object into openings. Do not use with any
opening blocked. Keep openings free of dust, lint, hair and
anything that may reduce airflow.
Keep hair, loose clothing, fingers and all parts of body away
from openings and moving parts.
Do not pick up anything that is burning or smoking, such as
cigarettes, matches or hot ashes.
Turn off all controls before unplugging.
Use extra care when cleaning on stairs.
Do not use to pick up flammable or combustible liquids such as
gasoline or use in areas where they may be present.
Always turn off this appliance before connecting or
disconnecting either hose or motorized nozzle.
The hose contains electrical wires. Do not use if damaged, cut
or punctured. Avoid picking up sharp objects.
Do not leave vacuum or brush when plugged in. Unplug from
outlet when not in use and before servicing.
SAVE THESE INSTRUCTIONS
Intended for Household Use Only
Parts & Features
It is important to know your vacuum cleaner’s parts and
features to assure its proper and safe use. Review these
before using your cleaner.
WARNING
Always unplug the EG1400 before cleaning the brush area
as brush may suddenly restart. Failure to do so
can result in personal injury.
Assembly Instructions
WARNING!
Do NOT plug into electrical supply until
assembly is complete. Failure to do so could result in
electrical shock or injury.
1. Slide wands together until Wand
wand button 1 snaps into
place. Turn wand
Fig. A
button 1 to the slotted
area of the wand swivel.
(Fig. A) The swivel allows
you to turn the handle to
the left side to reach under
low furniture.
1
2. Insert connected wands into the
EG1400 until the wand button 2 snaps
into place.
3. Secure cord into the cord holder on
wand swivel.
4. Connect EG1400 plug
into the plug holder. (Fig.
B) Do NOT force.
Fig. B
1
Cord
Holder
5. Insert the hose handle
into the wand until the
lock button snaps into
place. (Fig. C) Be
sure the hose is not
twisted. To remove:
Press handle release
button and pull up on
handle.
Fig. C
To remove wands: Step on wand quick
release pedal, then pull up on wands.
6. Insert the hose wall adapter into the
vacuum inlet valve. Plug the 120V
cord into the nearest electrical outlet
if hose is equipped with a pigtail.
2
General Operation
•
•
•
The EG1400 is controlled by the on/off power control switch located
on the hose handle. The headlight will operate when the EG1400 is
turned on.
To lower wand from the upright position, simply press on the handle
release pedal.
Fig. D
The powerhead has a pile height pedal
for various carpet heights. (Fig. D) Select
a pile height setting by pressing the small
pedal on the rear of the EG1400. Use the
extra low setting for short napped carpets
and the high setting for plush carpets.
CAUTION: Do NOT leave the EG1400 running in one spot in the
upright position for any length of time. Damage to carpet may occur.
Attachments
Using attachments on the hose handle:
1. Press handle quick release button, then pull up on
handle. (Fig. E) NOTE: if the EG1400 is
attached, turn the powerhead off before removing
handle from wands.
Fig. E
2. Slide attachments firmly on hose handle as needed.
In some cases, the button may need to be
depressed to allow the attachment to slide up
higher where it can seal on the metal tube.
Fig. F
Using attachments on wands:
1. To remove the wands from the EG1400, lock wands
in straight-up position. (Fig. F)
2. Press wand quick release pedal with foot and pull
straight up out of the EG1400. (Fig. G) The plug
and cord do not have to be removed to use
attachments on wands.
Fig. G
3. Put attachment on wands as needed. In some cases,
the button may need to be depressed to allow the
attachment to slide up higher where it can seal on the
metal tube.
Performance Features
Edge Cleaner
Active brush edge cleaners are on both sides of the
EG1400. Guide either side of the EG1400 along
baseboards or next to furniture to help remove dirt
trapped at carpet edges.
Overload Protector
The EG1400 has built-in protection against motor and
belt damage should the agitator jam. If the agitator
slows down or stops, the overload protector shuts off
the EG1400. The power unit will continue to run. To
correct the problem, turn off the power unit, remove
obstruction, the press Overload Protector Reset
button.
Suction Control
The suction control allows you to change the vacuum
suction for different fabric and carpet weights.
Opening the control decreases suction for draperies
and lightweight rugs, while closing the control
increases suction for upholsteries and carpets.
Maintenance and Care
WARNING!!! Disconnect electrical supply before servicing or cleaning
the unit. Failure to do so could result in electrical shock or personal
injury from cleaner suddenly starting. Always follow all safety
precautions specified when caring for your EG1400.
Belt Changing & Agitator Cleaning
Disconnect hose and brush from electrical outlet. Frequently check and
remove hair, string and lint buildup in the agitator and support areas. If
buildup becomes excessive, disconnect the EG1400 from the wand and
follow the steps below.
To Remove Belt
Fig. H
1. Turn EG1400 upside down and unscrew the 2
cover screws. (Fig. H)
Fig. I
2. Turn EG1400 right side up. Press handle
release pedal and lower the swivel. Lift rear
latches up. (Fig. I)
3. To remove cover, grasp the side and pull out.
Fig. J
4. Depress tabs on rear of agitator cover and
rotate forward to release from the EG1400
base. (Fig. J)
5. Lift agitator assembly out and remove worn
belt. (Fig. K)
6. Check and clean end cap areas.
Fig. K
Maintenance and Care
Fig. L
To Replace Belt:
1. Install new belt (Part # 9439-01) over motor drive
then over belt path. (Fig. L)
2. Place agitator assembly back into EG1400.
(Fig. M)
3. Reinstall agitator cover by lining up the front
tabs and slots and rotating downward until
the latches snap into place. (Fig. N)
4. Line up front of cover and base. Rest
cover on front edge of base as shown. (Fig. O)
5. Rotate cover back. Press cover firmly until side
and rear tabs snap into place. (Fig. P)
Fig. M
Fig. N
Fig. O
Fig. P
6. Turn EG1400 upside down and replace 2 cover
screws.
Light Bulb Changing
1. Remove EG1400 cover as
shown in Belt Changing &
Agitator Cleaning.
2. Push in and turn bulb
counterclockwise, then pull
out to remove. (Fig. Q)
3. Push in and Fig. R
turn bulb
clockwise to
replace.
Bulb must
not be higher
than 15 Watts (130 Volts).
(Fig. R)
Fig. Q
4. Reinstall EG1400 Cover as
shown in Belt Changing &
Agitator Cleaning.
EG1400 Explosion & Parts List
Illustration #
H-P Part #
Description
8
9
10
11
12
13
14
15
16
17
18
19
20
21
22
23
24
25
26
27
28
29
30
31
32
33
34
35
36
42
43
44
45
47
50
51
52
53
54
55
56
7925
9438
9439-01
7962
9440
9441
7959
7941
7967
9442
7940
7929
9443
7966
7930
9444
7928
7969
7946
9445
7963
9446
9447
9448
7972
9449
9450
9451
7933
7932
7931
7934
7935
7939
7948
7950
7949
7951
9452
7958
9453
Screw
Motor Gasket
Belt
Motor Spring
Lower Plate
Motor
Motor Bridge
Overload Protector
Light Bulb
Bulb Socket
Handle Release Pedal
Swivel
Furniture Guard
Wire Connector
Swivel Seal
Wheel
Pedal Quick Release
Rear Cover
Front Axle Assembly
Agitator Unit
Indicator Window
Window Cover
Exhaust Foam
Button Extension
Lead Wire Unit
AGT Cov
Nozzle Housing
Swivel Cap
Cam Indicator
Indicator Lever
Pad Foot Pedal
Indicator Block
Spring Assist
Lifter
Washer Thrust
Catch Indexing
Washer
Ratchet Catch
Indicator Block Assembly
Screw
Bushing
LIMITED WARRANTY
H-P PRODUCTS, INC. warrants that the EG1400 Electric
Powerhead, when used for household purposes, pursuant to
Seller’s instructions, will be free from defects in materials and
workrkmanship for a period of one (1) year from the date of the
initial consumer purchase. H-P PRODUCTS, INC. warrants that
the EG1400 Electric Powerhead, when used in a commercial
application, pursuant to Seller’s instructions, will be free from
defects in materials and workmanship for a period of ninety (90)
days from the date of the initial sale by H-P PRODUCTS, INC.
This warranty is limited to the replacement of defective parts and
any costs of shipping shall be incurred by the purchaser.
THIS WARRANTY IS EXCLUSIVE AND IS IN LIEU OF ALL
OTHER WARRANTIES, EXPRESS, IMPLIED, OR
STATUTORY, AND H-P PRODUCTS, INC. SPECIFICALLY
DISCLAIMS RESPONSIBILITY FOR CONSEQUENTIAL AND
INCIDENTAL DAMAGES, AND LIMITS THE IMPLIED
WARRANTY OF MERCHANTABILITY TO THE PERIOD OF
EFFECTIVENESS OF THIS EXPRESS WARRANTY.
H-P Products, Inc.
512 W. Gorgas Street
Louisville, OH 44641
www.centralvacservice.com