Download Bell Huawei E182 User manual
Transcript
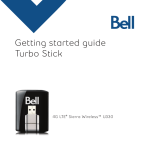
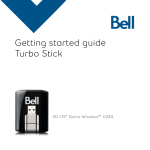
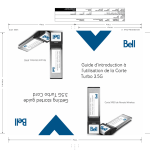
Getting started guide
Turbo Stick
Huawei E182
Welcome
Thank you for purchasing a Turbo Stick from Bell. This Turbo
Stick will enable you to connect to the Internet. This guide
provides an overview of your new Turbo Stick and details on
how to configure your computer for use with this Turbo Stick.
Getting started
2
System requirements 3
Inserting your Bell SIM card
4
Preparing your computer for installation
5
Installation
6
Start-up
8
Using your Turbo Stick
10
Hardware overview
11
Inserting and removing your Turbo Stick from your computer
12
Unblocking a SIM card
13
Troubleshooting
14
1
Getting started
Before installing your Turbo Stick, please ensure you
have the following:
A Bell wireless account with a Mobile Internet plan. (If you don’t
have an account or a Mobile Internet plan, speak with a Bell
account representative to get set up.)
An active Bell SIM card.
Your Mobile Directory Number (MDN),
or phone number ______________________________ .
2
System Requirements
To install and operate your Turbo Stick, ensure your computer has
the following system resources:
WINDOWS
Operating system
Microsoft® Windows XP (SP 2 & 3, 32/64 bit),
Windows Vista™ (SP 1 & 2, 32/64 bit) with 500 MHz
CPU, or Windows 7 (32/64-bit) with 1 GHz CPU
Card slot
1 USB 1.1 or 2.0 port
COM ports
2 free COM ports
I/O Resources
1 IRQ, 4096 bytes of I/O space
Memory
512MB (XP), 1GB (Vista), or 1GB (7)
Disk space
50MB
3
Inserting your Bell SIM card
Your Turbo Stick requires an activated Bell SIM card to function. If
the SIM card was not inserted at the time of purchase, please
insert it now, as described below.
1. Slide the back cover to remove it from the Turbo Stick.
2.Insert the SIM/USIM card and the microSD card into the
corresponding card slots, as shown in the following figure.
3. Replace the back cover and slide it into place.
NOTE
nsure that the beveled edge of the SIM/USIM card is properly aligned with that of the
E
SIM/USIM card slot and the microSD card is inserted according to the direction as labeled
on the microSD card slot.
Do not remove the microSD or SIM/USIM card when the card is in use. Otherwise, the
card as well as your Turbo Stick may get damaged and the data stored on the card
may be corrupted.
4
Preparing Your Computer for Installation
1.Ensure your antivirus and firewall programs are set to allow
software installation.
2.Ensure you have Administrator Rights and the user name
and password – check your computer’s Help files for details
on this feature.
5
Installation
Installing your Turbo Stick is easy, simply follow these instructions.
If you have a current version of Mobile Connect on your computer,
the version on your Turbo Stick will uninstall the current version
automatically before installing the new one.
Insert your Turbo Stick into a USB port. Do not forcibly insert it as
this may damage both the device and the port. Your Turbo Stick
powers on when inserted, and your computer may beep.
Follow the InstallShield® Wizard,
it will guide you through the
process of installing the Mobile
Connect application starting with
the language selection.
Use the Next and Back buttons
to navigate through the
installation steps.
To continue the installation, you
must read and accept the terms
of the License Agreement.
6
The installation process may take
several minutes to complete with
no progres shown on the progress
bar – please be patient. Select
Finish to complete the installation.
Once the installation is complete, you may need
to restart your computer. If a restart is not required,
Mobile Connect will launch automatically. If your
computer restarts, launch Mobile Connect by
double-clicking on the Mobile Connect icon.
7
Start-up
With your Turbo Stick inserted, double-click on the Mobile Connect
icon from your desktop.
Mobile Connect will initialize, scan for your Turbo Stick,
and the main program window will appear with
“Bell high-speed network is available.” Click “Connect.”
IMPORTANT
Once a connection has been established, the application may open your
web browser and load a predetermined URL. This is to demonstrate
that Internet access is operating correctly. If you wish to disable
this Auto Launch web browser feature or change the start page,
you may do so prior to connecting by following these instructions:
Go to Tools. Select Profiles. Profiles window will be displayed.
Select Profile named “Bell high-speed network”. Click Edit.
Select the “General” tab at the top of the window.
Uncheck Auto Launch browser checkbox OR if you want a different
web page to automatically launch, enter the desired web address in
the text box.
8
Mobile Connect will initialize, scan for your Turbo Stick, and the
main program window will appear when Bell service is found.
When you try to connect, Mobile Connect will check if your Turbo
Stick and account have been activated on the Bell network.
Your Turbo Stick must be activated and in an area with network
coverage to operate on the Bell Mobility data network.
To download the full Mobile Connect user manual or software
updates, please visit bell.ca/mobileconnect
9
Using your Turbo Stick
From the Mobile Connect main
program window, you can establish
a network connection and view
the connection status.
SOME OF THE KEY INDICATORS AND BUTTONS INCLUDE:
A. Connect/Disconnect button
Connect or disconnect from the network.
B. Signal strength indicator
Graphically illustrated network signal status.
C. Status display
Indicates the availability of the network and status
of current network connection.
D. Usage counters
An overview of the data you have transmitted
and received.
E. Minimize and close buttons
Minimize and close Mobile Connect to the
System Tray.
F. Roaming indicator
Notification that your network connection is with a Bell
partner network (additional roaming charges will apply).
G. Menu Buttons
Buttons to access the Tools menu, SMS Messaging window,
Wi-Fi Hotspot Finder, Help menu, and Bell Self Serve.
H. Quick Buttons
Customize buttons to launch support programs.
I. Show Available Networks
Lists the Wi-Fi networks available for connection when on
Wi-Fi tab.
To connect to the Internet, click the Connect button on the Mobile
Connect main program window. To disconnect, click the Disconnect
button. Check your SMS Messaging Window often for updates and
information from Bell.
NOTE
Bell administrative SMS messages are free to receive. Additional charges
may apply for other SMS messages sent or received. Visit www.bell.ca/text
for more information.
10
Hardware overview
USB Connector
Slider
SIM/USIM card slot
LED Indicator
MicroSD card slot
USB Connector Connects the Turbo Stick to a PC. Ensure to always
slide in the USB connector while your Turbo Stick is not in use.
Slider Extends or retracts the USB connector.
LED indicator Provides connection status. Refer to Troubleshooting,
on page 14, for a detailed list of the colour and their defined states.
SIM/USIM card slot Holds a Subscriber Identity Module (SIM)/Universal Subscriber
Identity Module (USIM) card which gives you access to the Bell network. Refer to
Inserting your Bell SIM card on page 4.
MicroSD card slot Holds a microSD card which allows you to store up to 32GB
of removable memory. The microSD card is an optional accessory and is not
included within the package.
Your new Turbo Stick must be handled with care to ensure reliable operation. The
following handling guidelines are recommended:
Do not apply adhesive labels to your Turbo Stick; this may cause your Turbo Stick to
overheat and may alter the performance of the antenna.
Do not force the SIM card into the SIM card slot.
The USB connector should plug easily into your computer’s Type A USB port. Forcing
your Turbo Stick into a port may damage the connector.
Protect your Turbo Stick from liquids, dust and excessive heat.
Store your Turbo Stick in a a dry and clean environment when not in use.
Do not apply force to the top or bottom of your Turbo Stick.
Remove your Turbo Stick from the USB port before transporting your laptop.
11
Inserting and removing your Turbo Stick from
your computer
Now that the Mobile Connect software is installed on your computer,
your Turbo Stick can be inserted or removed at any time.
As an external device, your Turbo Stick is vulnerable to damage
during transport. It is recommended that you remove and securely
store your Turbo Stick when transporting your computer.
TO INSERT YOUR TURBO STICK
1. Slide out the USB connector and insert your Turbo Stick into the USB port. Do not
forcibly insert your Turbo Stick; this may damage both your Turbo Stick and the
USB port.
2. Your computer may beep.
3. Start Mobile Connect from the desktop or from the AutoPlay prompt.
4. Your Turbo Stick powers on when inserted.
TO REMOVE YOUR TURBO STICK
1. Disconnect from the network by clicking “Exit” from the Mobile Connect Tools menu.
2. Carefully remove your Turbo Stick from the USB port.
3. The computer may beep.
USING YOUR TURBO STICK ON ANOTHER COMPUTER
Your Turbo Stick can be used on multiple computers. Simply install
the Mobile Connect software on each new computer you wish to
use. Please note that data network usage is tied to your Turbo
Stick itself and that usage between computers is cumulative and
will be billed together. The usage shown in your Event History
Manager (Tools>Diagnostics>Event History Manager) is for the
data solely used on that computer. For more accurate total usage
amounts when using multiple computers with your Turbo Stick,
please login to www.bell.ca/mybell to view your unbilled data
usage up to the previous 2 hours.
12
Unblocking a SIM card
Some SIM cards will be provisioned with a Personal Identification
Number (PIN) which locks user access to your Turbo Stick. When
using a locked SIM card, you may be asked to enter the PIN number.
Service providers frequently limit the number of incorrect PIN entry
attempts. If you fail to enter a correct PIN within the number of
permitted attempts, the SIM card may become blocked. You will see
a warning message on your last attempt.
In the event that the card becomes blocked, you have the ability
to re-enable the PIN mechanism by entering a Personal Unblocking
Key (PUK). You will be prompted to enter a new PIN in combination
with the PUK code to unblock and reset the PIN lock.
IMPORTANT
You will have a limited number of attempts to enter the correct PUK
code. If you fail to enter the correct code within the allowed number
of attempts, it will be necessary to replace the SIM card.
The PUK is available through eCare at www.bell.ca/mybell or by
calling client care.
13
Troubleshooting
Below is a list of LED indicator lights which outline the
status of your Turbo Hub.
LED COLOR
SERVICE
LED STATE
DESCRIPTION
Green
2G
Blinking twice
every 3s
Powered on
Blinking once
every 3s
Registering with a 2G network.
Solid
Connected to a 2G network.
Blinking once
every 3s
Registering with a 3G/3G+ network.
Solid
Connected to a 3G network.
--
Blue
3G
--
Cyan
3G+
Solid
Connected to a 3G+ network.
Off
--
--
Removed
14
Troubleshooting continued
Below is a list of common error messages and possible solutions
regarding the use of your Turbo Stick.
SYMPTOMS
SOLUTION
Intermittent connectivity
and/or low throughput.
elocate the entire computer to a different area.
R
Coverage maps are available at bell.ca/coverage
Bell does not show in the
status display.
Service may not be available in your location. Relocate
the computer to a different area. Coverage maps are
available at bell.ca/coverage.
The network may be unavailable due to maintenance. Try
the connection again at a later time.
Your Turbo Stick may not be inserted properly. Remove and
reinsert your Turbo Stick into the USB port.
Your computer may not have the correct hardware
drivers for your Turbo Stick. Remove your Turbo Stick,
uninstall the software, and reinstall.
When clicking Connect, the
message “Your connection
attempt to the network failed”
is displayed.
Service may not be available in your location. Relocate
the computer to a different area. Coverage maps are
available at bell.ca/coverage
The network may be unavailable due to maintenance. Try
the connection again at a later time.
Your Turbo Stick may not be activated. First, remove your
Turbo Stick, uninstall the software, and reinstall. If this does
not resolve the problem, contact Bell Client Care.
15
Troubleshooting continued
SYMPTOMS
SOLUTION
The LED indicator on
your Turbo Stick is not lit.
our Turbo Stick may not be inserted properly. Remove
Y
and firmly reinsert your Turbo Stick into the USB port.
The SIM card may be missing or incorrectly inserted.
Remove your Turbo Stick and SIM card and carefully
reinsert.
our computer may not have the correct hardware drivers
Y
for your Turbo Stick. Remove your Turbo Stick, uninstall
the software, and reinstall.
Before contacting Bell Client Care:
• Shut down your computer and remove
your Turbo Stick.
• Restart the computer and reinsert your
Turbo Stick after startup is complete.
• If the above actions do not resolve this problem,
contact Bell Client Care.
16
Copyright © 2010 Bell, Inc.
All rights reserved.
The information in this document is subject to change without notice. The statements, configurations, technical data, and
recommendations in this document are believed to be accurate and reliable, but are presented without express or implied
warranty. Users must take full responsibility for their applications of any products specified in this document.
The information in this document is proprietary to Bell.
The software described in this document is furnished under a license agreement and may only be used in accordance with
the terms of that license.
Third-Party Trademarks
Product trademarks and registered trademarks are the property of their respective owners.
Statement of Conditions
In the interest of improving internal design, operational function, and/or reliability, Bell reserves the right to make changes
to the products described in this document without notice.
Bell does not assume any liability that may occur due to the use or application of the product(s) or circuit layout(s)
described herein.
In addition, the program and information contained herein are licensed only pursuant to a license agreement that contains
restrictions on use and disclosure (that may incorporate by reference certain limitations and notices imposed by third parties).
PER-KILOBYTE DATA TRANSPORT CHARGES USING YOUR HANDHELD DEVICE FOR “TETHERED” DATA TRANSMISSION (E.G.
USING YOUR DEVICE AS A MODEM FOR YOUR PC), INCLUDING TO DOWNLOAD APPLICATIONS OR CONTENT, OR FOR
GAMING, WILL RESULT IN PER-KILOBYTE DATA TRANSPORT CHARGES AT BELL MOBILITY’S THEN CURRENT RATES.
You will be charged for data transmissions from or to your PC or other device through your Bell Mobility handheld device.
Data transmissions include automated security updates to your PC, Internet gaming, sending and receiving emails including
attachments, and downloading music or other content. If you subscribe to a data plan, you will be charged additional
per-kilobyte rates as set out in the plan, for any data transport usage in excess of the data transport included in the monthly
data plan fee.
Data roaming charges may also apply if you are transmitting data through your device on one of Bell Mobility’s roaming
partners’ networks.
Note to subscribers of Bell Mobility’s Unlimited Mobile BrowserTM: In tethering your Bell Mobility handheld device to your
PC or other device, data transmission does NOT occur through the Unlimited Mobile Browser. You will be charged for data
transport usage in addition to the monthly charge for the browser.
We encourage you to minimize these charges by subscribing to an appropriate price plan or feature. Visit www.bell.ca or call
1-888-4-MOBILE to subscribe. Be sure to check the Connection Details and Session Log in Mobile Connect to keep track of
your data usage.
Designed in the United States of America. Microsoft, Windows and Windows Vista are registered trademarks and/or
trademarks of Microsoft Corporation in the United States and/or other countries. InstallShield is a registered trademark or
trademark of Macrovision Corporation in the United States of America and/or other countries. All other brands and product
names are trademarks of their respective holders.
Product meets current FCC Radio Frequency Exposure Guidelines. FCC Equipment ID: QISCP12. IC: 6369A-E182E. Additional
details within and at http://www.fcc.gov/oet/fccid. Huawei E182E USB Slider Data Stick. Huawei Technologies Canada Co.,
LTD. Phone Number: 1-877-4-HUAWEI. Website: www.huawei.com. Email: [email protected]. All Rights
Reserved.
You may also contact Bell Wireless Data Support at:
1 877 DATA-123 (1 877 328-2123)
17


