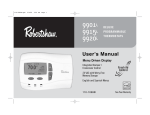
1
insight
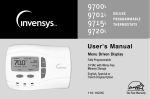
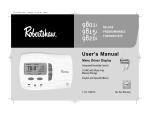
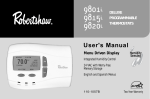
Models:
9701i
9715i
9720i
DELUXE
PROGRAMMABLE
THERMOSTATS
User's Manual
Menu Driven Display
Fully Programmable
24 VAC with Worry-Free
Memory Storage
English, Spanish or
French Display Option
110-1023
Two Year Warranty
2
This page intentionally left blank.
IMPORTANT SAFETY INFORMATION
!
WARNING:
■ Always turn off power at the main power source by unscrewing fuse or switching circuit
breaker to the off position before installing, removing, or cleaning this thermostat.
■ Read all of the information in this manual before programming this thermostat.
■ This is a 24V AC low-voltage thermostat. Do not install on voltages higher than 30V AC.
■ All wiring must conform to local and national building and electrical codes and ordinances.
■ Do not short (jumper) across terminals on the gas valve or at the system control to test instal-
lation. This will damage the thermostat and void the warranty.
■ This thermostat is equipped with automatic compressor protection to prevent potential dam-
age due to short cycling or extended power outages. The short cycle protection provides a 5minute delay between heating or cooling cycles to prevent the compressor from being damaged.
■ Do not switch system to cool if the temperature is below 50°F (10°C). This can damage the
cooling system and may cause personal injury.
■ Use this thermostat only as described in this manual.
3
4
TABLE OF CONTENTS
How do I change the time of day and day of the week?
How do I turn on the heating or cooling cycles?
How do I cycle the fan?
How does INTERMITTENT FAN work?
How do I temporarily change the temperature?
Can I set a temporary adjustment for longer than 3 hours?
Can I set the thermostat to hold one temperature indefinitely?
How do I return to the Program Mode after being in HOLD?
How do I set the Vacation Mode?
How do I program my thermostat?
How do I copy one day’s program to another day?
What is an event?
How do I know what program is right for me?
What are the USER settings?
Detailed Information on the USER SETTINGS (Or what do these USER SETTINGS do?)
When would I need to change the USER settings?
What are the INSTALLER settings?
When would I need to change the INSTALLER settings?
How does Energy Efficient Recovery™ (EER™) work?
How does my remote indoor sensor work?
When would I need a remote indoor sensor?
How does my remote outdoor sensor work?
Where should I install a remote outdoor sensor?
Who should I call for additional help?
What should I do if my power goes out?
How do I reset the thermostat program to factory conditions?
How do I know if the heating or cooling is on?
My energy bills are too high. Is there anything I can do?
Page 5
Page 6
Page 7
Page 7
Page 8
Page 9
Page 10
Page 10
Page 11
Page 12
Page 14
Page 15
Page 15
Page 16
Page 17
Page 19
Page 20
Page 22
Page 23
Page 23
Page 23
Page 23
Page 23
Page 24
Page 24
Page 24
Page 24
Page 25
How do I change the time of day and day of the week?
MONDAY
3:29 PM
78.1
COOL
FAN AUTO
HOLD TEMP
MENU
From the main screen press MENU.
SET AT
78
MENU
BACK
DAY / TIME
FAN
USER SETTINGS
INSTALLER SETTINGS
HOME
Use the UP or DOWN arrows to highlight DAY/TIME.
Press SELECT.
SELECT
Use the UP or DOWN arrow to highlight DAY, HOUR
or MINUTES. Press SET.
SET DAY & TIME
DAY
HOUR
FRIDAY
12 PM
MINUTES
06
SET DAY & TIME
MAIN MENU
SET
Use the UP or DOWN arrow to scroll through
the days of the week, hours or minutes.
Press SET to select desired value.
Press MAIN MENU when complete.
DAY
FRIDAY
HOUR
12 PM
MINUTES
31
MAIN MENU
SET
5
6
How do I turn on the heating or cooling cycles?
MONDAY
3:29 PM
78.1
COOL
FAN AUTO
HOLD TEMP
MENU
From the main screen press MENU.
SET AT
78
MENU
PROGRAM
Use the UP or DOWN arrows to highlight HEAT/COOL.
Press SELECT.
HEAT / COOL
DAY / TIME
FAN
HOME
MORE
SELECT
Use the UP or DOWN arrows to highlight HEAT, COOL
or AUTO. Press ON/OFF. The ON/OFF button will turn
on or off the desired cycle. You do not have to turn off
HEAT to turn on COOL. When HEAT or COOL or AUTO
is turned on, all others are automatically shut off. To
return to the main screen press MAIN MENU.
NOTE: Emergency heat is only used on the 9720i model.
HEAT / COOL SETTINGS
HEAT
ON
COOL
AUTO
EMERGENCY HEAT
MAIN MENU
SELECT
HEAT / COOL SETTINGS
HEAT
COOL
ON
AUTO
EMERGENCY HEAT
MAIN MENU
SELECT
How do I cycle the fan?
MONDAY
3:29 PM
78.1
COOL
FAN AUTO
HOLD TEMP
MENU
From the main screen press MENU.
SET AT
78
Use the UP or DOWN buttons until FAN is highlighted. Press SELECT.
MENU
PROGRAM
HEAT / COOL
DAY / TIME
FAN
HOME
MORE
SELECT
FAN MENU
FAN SETTINGS
FAN PROGRAM
MAIN MENU
How does INTERMITTENT FAN work?
INTERMITTENT FAN
ON !
TIME!
5! MIN
OFF !
TIME!
20! MIN
FAN MENU
SELECT
SELECT
Use the UP or DOWN buttons to highlight FAN settings.
Press SELECT.
Four choices are available:
FAN SETTINGS
ON will turn the fan on continuously.
ON
AUTO will turn the fan on only when
AUTO
there is a call for heating or cooling.
INTERMITTENT
INTERMITTENT will turn the fan on for
PROGRAM
a set period of time for a given interval.
MAIN MENU
SELECT
PROGRAM allows events to be
set as AUTO or ON.
Highlight the choice you desire
and press SELECT.
INTERMITTENT will turn the fan on for a set period of time for a given interval.
The thermostat will cycle the fan on for the set ON cycle. The fan will remain off for the set OFF cycle.
If the HVAC system runs for a longer period that the ON cycle, the OFF cycle will start counting over
again when the system shuts off.
7
8
How do I temporarily change the temperature?
MONDAY
3:29 PM
78.1
COOL
FAN AUTO
HOLD TEMP
MENU
SET AT
78
From the main screen, press the UP or DOWN button. The screen
will change to the following.
SET TEMPERATURE AT
70.0˚
Use the UP or DOWN button to adjust to the desired
temperature. This is a temporary 3-hour hold. For a
longer duration see page 9.
F
UNTIL 6:29 PM
HOME
SET TEMP
SET AT 70°F UNTIL 6:29 PM
70.5˚
F
COOL
FAN AUTO
OUTSIDE 24˚F
RESUME
PROGRAM
MENU
After pressing the SET
TEMP button or after 5
seconds the screen will
indicate the new setpoint
and its duration. To return
to the normal operating
program mode, press
RESUME PROGRAM.
Can I set a temporary adjustment for longer than 3 hours?
MONDAY
3:29 PM
78.1
COOL
FAN AUTO
HOLD TEMP
MENU
Yes you can! Press the HOLD TEMP button. The following screen appears.
SET AT
78
HOLD SETTINGS
Press the DOWN button to highlight TEMPORARY HOLD. Press SELECT.
PERMANENT HOLD
TEMPORARY HOLD
VACATION HOLD
HOME
SELECT
TEMPORARILY AT
70.0˚
The temperature should be highlighted.
Press the UP or DOWN button to adjust
the temperature. Press SET TEMP.
F
UNTIL 3:49 PM
HOME
SET TEMP
TEMPORARILY AT
The time should be highlighted. Press the UP or
DOWN button to adjust the time. Press SET TIME.
70.0˚
F
UNTIL 3:49 PM
HOME
SET TIME
The main screen will now indicate a TEMPORARY HOLD until the
desired time. Press RESUME PROGRAM to return to the program
operating mode.
SET AT 70°F UNTIL 8:29 PM
77.0°
F
RESUME
PROGRAM
COOL
FAN AUTO
MENU
9
10
Can I set the thermostat to hold one temperature indefinitely?
MONDAY
3:29 PM
78.1
COOL
FAN AUTO
HOLD TEMP
MENU
You can do that too! From the main screen press the HOLD TEMP button. The following screen appears.
SET AT
78
HOLD SETTINGS
The PERMANENT HOLD feature should be highlighted. If it is not, use
the UP or DOWN arrow to highlight it. Press SELECT.
PERMANENT HOLD
TEMPORARY HOLD
PERMANENTLY AT
VACATION HOLD
HOME
SELECT
70.0˚
HOME
Use the UP or DOWN arrow to set the temperature to
the desired level. Press SET TEMP.
F
SET TEMP
PERMANENTLY SET AT 71.0°F
70.0˚
F
COOL
FAN AUTO
OUTSIDE 24˚F
RESUME
PROGRAM
MENU
The main screen will now
indicate a PERMANENT
HOLD. Press RESUME
PROGRAM to return to the
program operating mode.
How do I return to the Program Mode after being in HOLD?
PERMANENTLY SET AT 71.0°F
70.0˚
F
COOL
FAN AUTO
OUTSIDE 24˚F
RESUME
PROGRAM
MENU
Simply press the RESUME PROGRAM button. This works from all HOLD screens.
How do I set the Vacation Mode?
MONDAY
3:29 PM
78.1
COOL
FAN AUTO
HOLD TEMP
MENU
Take a trip and don’t worry about the temperature! From the main screen press the HOLD TEMP button. The following screen appears.
SET AT
78
HOLD SETTINGS
Use the UP or DOWN arrow to highlight the VACATION HOLD feature.
Press SELECT.
PERMANENT HOLD
TEMPORARY HOLD
VACATION HOLD
HOME
SELECT
VACATION SETTING
The temperature should be highlighted. Use the UP
or DOWN arrow change to the desired temperature.
Press SET TEMP.
70.0˚
F
FOR 7 DAYS
HOME
SET TEMP
The number of days should be blinking. Use the
UP or DOWN arrow to set the length of your
vacation. Press SET DAY.
VACATION SETTING
70.0˚
F
FOR 7 DAYS
HOME
SET DAY
SET AT 70°F FOR 7 DAYS
77.0°
F
The main screen will now indicate the VACATION settings.
Press RESUME PROGRAM to cancel and return to the
program operating mode.
COOL
FAN AUTO
OUTSIDE 24°F
RESUME
PROGRAM
MENU
11
12
How do I program my thermostat?
MONDAY
3:29 PM
78.1
COOL
FAN AUTO
HOLD TEMP
MENU
SET AT
78
From the main screen press the MENU button.
MENU
Use the UP or DOWN button to highlight PROGRAM. Press SELECT.
PROGRAM
HEAT / COOL
DAY / TIME
FAN
HOME
MORE
SELECT
SELECT PROGRAM DAYS
MON TO SUN
MON TO FRI
SAT TO SUN
MONDAY
MAIN MENU
MORE
SELECT
You can select a variety of programming. Make your
selection and press SELECT. MON-SUN allows every
day to be set the same. MON-FRI allows for weekday
programming while SAT-SUN will adjust weekends differently. You also can select each day of the week individually. NOTE: Even if you select MON-SUN, you still can
go back and change individual days to suit your lifestyle.
MONDAY PROGRAM
WAKE!
MORN!
EVE!
NIGHT!
06:30A!
08:30A!
04:30P!
10:30P!
MAIN MENU
HEAT
70.0!
62.0!
70.0!
62.0!
COOL
78.0
85.0
78.0
82.0
SELECT
Please go to the next page for a continued discussion on "How to program your thermostat."
Use the UP or DOWN button to
select the event to program. The
thermostat can be selected for 2,
4, or 6 events per day. See USER
SETTINGS for EVENTS PER
DAY selection. After selecting the
event to program, press SELECT.
How do I program my thermostat? (Con’t.)
MONDAY PROGRAM
WAKE!
MORN!
EVE!
NIGHT!
06:00A!
08:30A!
04:30P!
10:30P!
MAIN MENU
HEAT
70.0!
62.0!
70.0!
62.0!
COOL
78.0
85.0
78.0
82.0
The time for the first event should be highlighted. Use the UP or DOWN key to change the time.
Press SET TIME.
SET TIME
MONDAY PROGRAM
WAKE!
MORN!
EVE!
NIGHT!
06:30A!
08:30A!
04:30P!
10:30P!
MAIN MENU
HEAT
70.0!
62.0!
70.0!
62.0!
COOL
78.0
85.0
78.0
82.0
The heating setpoint for the first event will be highlighted. Use the UP or
DOWN key to change the desired temperature. Press SET HEAT.
SET HEAT
MONDAY PROGRAM
WAKE!
MORN!
EVE!
NIGHT!
06:30A!
08:30A!
04:30P!
10:30P!
MAIN MENU
HEAT
70.0!
62.0!
70.0!
62.0!
COOL
78.0
85.0
78.0
82.0
The cooling setpoint for the first event will
be highlighted. Use the UP or DOWN key
to change the desired temperature. Press
SET COOL.
SET COOL
MONDAY PROGRAM
The second event will now be highlighted.
Use the UP or DOWN key to change events if
desired. When the desired event is highlighted,
press SELECT. Continue programming until all
events are programmed.
WAKE!
MORN!
EVE!
NIGHT!
06:30A!
08:30A!
04:30P!
10:30P!
MAIN MENU
HEAT
70.0!
62.0!
70.0!
62.0!
COOL
78.0
85.0
78.0
82.0
SELECT
13
14
How do I copy one day’s program to another day?
MONDAY PROGRAM
MORN!
EVE!
NIGHT!
COPY
08:30A!
04:30P!
10:30P!
MAIN MENU
HEAT
62.0!
70.0!
62.0!
COOL
85.0
78.0
82.0
In the program screen, press the DOWN button until COPY is highlighted.
SELECT
COPY MONDAY TO
TUESDAY!
WEDNESDAY
THURSDAY
FRIDAY!
FINISHED
YES
YES
Use the UP or DOWN button to highlight the
day to copy to. Press YES / NO. A YES will
appear next to the day. Do this for each day to
which that program is to be copied. Press
FINISHED when complete.
YES / NO
CONTINUE
PROGRAMMING?
After pressing FINISHED, you can choose to program other days or exit. YES will take you back to
the Select Program Days screen. NO will exit you
to the main screen.
NO!!
YES
What is an event?
An event is a programming period. This could be the period in the morning when you are preparing for work or school. It could be the
period when no one is at home. It could be the period when the household is asleep at night.
The time for an event is selected based on when you want the event to occur. For example, if you wake up at 6:30 AM, set the first
event for 6:30 AM. The thermostat will automatically make sure that your home is at the desire temperature selected for that event by
the time you wake.
This thermostat can be selected for 2, 4, or 6 events.
Two events should be selected if someone is home all day thereby requiring a constant temperature during the day and a different
temperature at night.
Four events are the most common for working households. Event 1 (WAKE) is the morning period. Event 2 (DAY) is when everybody
has left for school or work. Event 3 (EVE) is the return period, coming home from school or work. Event 4 (NIGHT) is the night period
when everybody is asleep.
Six events can be used especially when there is activity during the day. Event 1 (WAKE) is the morning period. Event 2 (MORN) is
when everybody has left for school or work. Event 3 (NOON) is the lunch period, when the kids may be home for a break.
Event 4 (DAY) is the afternoon period when the house is empty. Event 5 (EVE) is the return period, coming home from school or
work. Event 6 (NIGHT) is the night period when everybody is asleep.
How do I know what program is right for me?
The thermostat is set up with the US EPA ENERGYSTAR® recommended times and temperatures for optimal energy savings. You can
change these to suit your lifestyle.
The best rule is to examine your schedule and set the times and temperatures that best fit. This thermostat is so versatile, you can
easily temporarily change temperatures or programs at a whim.
15
16
What are the USER settings?
MONDAY
3:29 PM
78.1
COOL
FAN AUTO
HOLD TEMP
MENU
The USER SETTINGS can change the way information is displayed on the thermostat and help
to optimize comfort. It’s one way to truly personalize your new thermostat.
SET AT
78
MENU
BACK
HEAT / COOL
DAY / TIME
FAN
MORE
USER SETTINGS
HOME
SELECT
To get to the USER SETTINGS, press the MENU button from the main screen.
USER SETTINGS are below the FAN settings. Use the DOWN button to scroll below the
screen. Press SELECT.
Choose the setting you would like to change. When the SETTING is highlighted, press SELECT. There are 13 USER
SETTINGS in all as listed below. For detailed information on each user setting, please go to the next page.
USER SETTINGS MENU
F OR C!
12 OR 24hr!
SHOW SET TEMP!
EVENTS / DAY!
HOME
˚F
12
YES
4
SELECT
USER SETTINGS MENU
1ST STAGE DIFF!
2ND STAGE DIFF!
2ND DELAY!!
FILTER MONITOR!
HOME
1˚F
2˚F
20
0 hr
SELECT
USER SETTINGS MENU
COOLING LIMIT!
HEATING LIMIT!
LANGUAGE!!
SENSOR SELECT!
HOME
68˚F
78˚F
ENG
L&R
SELECT
USER SETTINGS MENU
HEATING LIMIT!
LANGUAGE!!
SENSOR SELECT!
SECURITY!!
HOME
78˚F
ENG
L&R
OFF
SELECT
Detailed Information on the USER SETTINGS (Or what do these USER SETTINGS do?)
To select a USER SETTING, use the UP or DOWN button to highlight the desired value. Press SELECT to select desired value.
TEMPERATURE
TEMPERATURE: Fahrenheit or Celsius
Temperature will be displayed in F or C.
˚F
˚C
USER MENU
SELECT
CLOCK
CLOCK SETTINGS
Displays time in standard 12-hour format or military format.
12 HOUR
24 HOUR
USER MENU
SELECT
DISPLAY SET POINT
TEMPERATURE ?
SETPOINT TEMPERATURE
Each event has a setpoint temperature. Choose whether to display this value or not.
YES
NO
USER MENU
SELECT
SELECT EVENTS / DAY
EVENTS / DAY 4
0
6
USER MENU
12
18
NUMBER OF EVENTS PER DAY
Select events per day. Choose from 2, 4, or 6 events per day.
24
SELECT
17
18
More Detailed Information on the USER SETTINGS.
DIFFERENTIAL SETTING
1ST DIFF!!
2ND DIFF!!
2ND DELAY!!
USER MENU
1˚F
2˚F
20 MIN
SELECT
FILTER SERVICE MENU
CHANGE INTERVAL
RESET!!
980 HR
USER MENU
SELECT
SET COOLING LIMIT
LOWEST COOLING!
SETTING ALLOWED
USER MENU
45 °F
SELECT
DIFFERENTIAL SETTINGS
The temperature differential is your comfort level. A lower differential means your system may
cycle with greater frequency but will control closer to desired setpoint temperature.The second
stage delay is a timed delay to indicate how much time should pass before the second stage is
turned on. This is an energy saving feature. To use less energy, set this higher. For greater comfort, set it lower.
FILTER SETTINGS
This feature will alert you to needed filter changes. Press CHANGE INTERVAL. Simply set the
number of hours between filter changes (see instructions on your filter for recommended intervals).
Select RESET when you’ve changed your filter.
SET HEATING LIMIT
HIGHEST HEATING!
SETTING ALLOWED
USER MENU
90 °F
SELECT
HEATING and COOLING LIMITS
To prevent individuals (probably your kids) from adjusting the thermostat too hot or too cold, you can limit the maximum setting for the
heating and cooling modes. This will help you save on
energy costs.
SELECT A LANGUAGE
ENGLISH
ESPANOL
˜
FRANÇAIS
USER MENU
SELECT
LANGUAGE SETTING
This screen allows you to choose the displayed language; English, French, or Spanish.
More Detailed Information on the USER SETTINGS.
SENSOR SETTINGS
USE LOCAL SENSOR
AVG. LOCAL / REMOTE
USE REMOTE SENSOR
USER MENU
SELECT
SECURITY
CHANGE TEMP. ONLY
PREVENT ALL CHANGES
USER MENU
SELECT
ENTER SECURITY CODE
FOR TEMPERATURE
0 0 0 0
USER MENU
SELECT
SENSOR SETTINGS
This screen will appear when a remote indoor sensor (9720i) is connected to the thermostat.
USE LOCAL SENSOR will disable the remote sensor and only sense from the thermostat.
AVG. LOCAL/REMOTE will take a temperature reading from both the thermostat and the remote
sensor and average the two for even temperature control. USE REMOTE SENSOR will disable
the sensor in the thermostat and only control from the remote location.
SECURITY SETTINGS
In order to prevent tampering with the program and your desired settings, two levels of security are
available.The first will allow only temporary changes to the temperature. It protects all other programmed setpoints. The second will restrict changes to EVERYTHING, including temporary
changes to the temperature.
SECURITY CODE
In this screen you enter a four-digit code. Use the UP or DOWN button to change the first value,
press OK. The second digit will be highlighted. Repeat for all four values. And don’t forget your
code. If you do, you will have to reset the entire thermostat and that will erase all the schedules
you’ve programmed into the unit.
When would I need to change the USER settings?
About the only features you may need to change are the FILTER INTERVAL (in case you get a new type of high efficiency filter), the temperature differentials (if you desire additional comfort), and the security settings. All the other settings probably will not need to be changed.
19
20
What are the INSTALLER settings?
The INSTALLER SETTINGS are setup during the initial installation. They tell the thermostat how to function with your heating or cooling equipment. The following is a brief overview and discussion of these settings.
INSTALLER SETTINGS
SYSTEM SETUP!
RESIDUAL COOL!
LOW BALANCE!
HIGH BALANCE!
GAS
60
45˚F
95˚F
HOME
SELECT
INSTALLER SETTINGS
AUTOCHANGEOVER!
EER!!
DEADBAND!!
SECURITY!!
HOME
OFF
ON
3˚F
OFF
SELECT
SYSTEM SETUP
FURNACE
SYSTEM SETUP
Choose the system component which the thermostat will control.
HEAT PUMP
INSTALL MENU
SELECT
1ST STAGE HEATING
GAS / OIL
ELECTRIC
INSTALL MENU
SELECT
1st STAGE HEATING
The 9701i and the 9715i can have a gas/oil or electric first stage heating.
Choose the energy source for 1st stage heating.
INSTALLER settings (continued)
AUXILIARY HEAT
STANDARD - COMP. =ON
ADD ON - COMP. =OFF
INSTALL MENU
SELECT
AUXILIARY HEAT
The 9720i can be set to use your 2H/2C heat pump internal auxiliary heating or to use an external add-on source. The add-on feature will be used most often when a single stage heat pump
uses a gas or electric furnace as its second stage of heating.
RESIDUAL COOL
SECONDS DELAY!
INSTALL MENU
60
SELECT
BALANCE POINTS
LOW BALANCE!
HIGH BALANCE!
45 ˚F
95 ˚F
INSTALL MENU
SELECT
AUTO CHANGEOVER
DISABLE!
ENABLE
INSTALL MENU
RESIDUAL COOL
In order to get greater efficiency from the cooling system, the fan can be programmed to run for
0 (OFF), 30, 60, 90, or 120 seconds after the air conditioner has shut off.
BALANCE POINTS
This screen will appear only when the optional outdoor sensor (9025i) is connected to the thermostat. When this sensor is used with the 9720i, you can set the lower and upper temperatures
to disable or enable 2nd stage heat.
AUTO CHANGEOVER
When turned on, the thermostat will switch automatically between heating and cooling to maintain
the optimal temperature in your home.
SELECT
21
22
INSTALLER settings (continued)
ENERGY EFFICIENT
RECOVERY
ENERGY EFFICIENT RECOVERY
When turned on, the thermostat will look up to two hours before the next event and anticipate when
to turn on to reach the desired temperature.
DISABLE
ENABLE
USER MENU
SELECT
DEADBAND SETPOINT
3 ˚F
USER MENU
SELECT
DEADBAND SETPOINT
Deadband is used with the AUTO CHANGEOVER feature. The deadband is the temperature difference from the setpoint temperature during which the heating or cooling will not be turned on. This is
adjustable from 3-8°F (1.5-4°C).
ENTER SECURITY CODE
FOR INSTALLER
SETTINGS
0 0 0 0
USER MENU
SECURITY CODE
Enter a code to prevent changes to the INSTALLER settings.
SELECT
When would I need to change the INSTALLER settings?
NEVER! The INSTALLER SETTINGS are selected based on the type of equipment you have in your home. This feature should be set
only by a certified HVAC technician. Changing these settings could result in higher energy costs and may even damage your equipment. There is a security lock on this feature to prevent tampering. USE IT!
How does Energy Efficient Recovery™ (EER™) work?
Energy Efficient Recovery™ is an energy saving feature. During a set back period (or set up in cooling), it allows the thermostat to
look up to two hours ahead to determine when to turn on the heating (cooling) system. During this time period, the second stage is
locked out to allow the first (and most efficient stage) to bring your home to the desired temperature.
How does my remote indoor sensor work?
The remote indoor sensor (part # 9020i) can be used to improve the comfort of your home. When used in conjunction with the local
sensor on the thermostat, the two sensors average the sensed temperature and control to that average temperature.
You also can use the remote sensor in a stand-alone situation when you want to control the temperature in a remote room but have
the thermostat in a secure location.
When would I need a remote indoor sensor?
Large rooms are ideal for remote sensors. Installing a remote sensor across from the thermostat will provide constant comfort throughout the living space.
How does my remote outdoor sensor work?
The remote outdoor sensor (part # 9025i) can be used to aid in the comfort of your home or simply as a sensing device to inquire
about outdoor conditions. In most applications, the thermostat will have a display of the temperature sensed by the remote outdoor
sensor. With your heat pump system, the remote outdoor sensor can help determine when to turn on the second stage of heating for
optimal comfort.
Where should I install a remote outdoor sensor?
The remote outdoor sensor should be installed on the northern wall of your home, away from direct sunlight or other heat sources that
may affect its sensitivity.
23
24
Who should I call for additional help?
For additional troubleshooting information, visit our web site at www.aboutinsight.com. To talk with a service representative, give us a
call at 800-445-8299.
What should I do if my power goes out?
Make sure your family is safe and don’t worry about the thermostat. Your insight™ thermostat automatically retains the time of day for
approximately two hours in the event of a power outage. All other programmed parameters are stored permanently in memory. So, if
your power is out for more than two hours, simply reset the clock. See page 5.
How do I reset the thermostat program to factory conditions?
To reset the thermostat to factory conditions, press the UP button and the LEFT button at the same time. Hold for 3 seconds. The time
of day will display 12:00 indicating a reset has occurred.
NOTE:
This will erase all programming and return the thermostat to the factory conditions including the installer settings. Use this
only as a last resort.
How do I know if the heating or cooling is on?
The display of the thermostat will indicate the operating mode, HEAT or COOL. When the temperature in your home decreases or
increases, the HEATING or COOLING cycle will come on based on the displayed mode. When the HVAC system is ON, LEDs along
the bottom crease will turn on.
My energy bills are too high. Is there anything I can do?
While we can’t do anything about the high cost of energy, we can try to use less energy thereby lowering our heating and cooling costs.
Generally, the best way to do this is to use the EPA ENERGYSTAR® recommended setpoints for heating and cooling.
Morning
Day
Evening
Night
ENERGYSTAR® Setpoints
Winter
Summer
(Heating)
(Cooling)
70°F (21°C) 78°F (25°C)
62°F (17°C) 85°F (29°C)
70°F (21°C) 78°F (25°C)
62°F (17°C) 82°F (28°C)
Another way to contain costs is to cycle the heat pump or air conditioner with moderation. The thermostat controls the cycle rate
based on temperature differentials. By maintaining a reasonable differential setpoint, 1°F for 1st stage and 2°F for 2nd stage,
your furnace will cycle with moderation.
Finally, using the remote outdoor sensor coupled with the balance point feature (see INSTALLER SETTINGS, page 21) will
allow your furnace to cycle to the most efficient stage for your heating or cooling needs.
25
26
TWO YEAR LIMITED WARRANTY
Invensys plc warrants to the original contractor installer or to the original consumer user, each new Invensys plc
thermostat to be free from defects in materials and workmanship under normal use and service for a period of
two (2) years from the date of purchase.
This warranty does not cover batteries (if so equipped), damage caused by batteries, damage resulting from
improper installation, alteration, misuse or abuse of the thermostat occurring after the date of purchase.
Invensys plc agrees to repair or replace at its option any thermostat under warranty provided it is returned within the warranty period, postage prepaid, with proof of the date of purchase. Cost of thermostat removal or reinstallation is not the responsibility of Invensys plc.
Repair or replacement as provided under this warranty is the exclusive remedy of the consumer. This warranty
and our liability does not apply to batteries on the merchandise that has been damaged caused by misuse, neglect, mishandling, alterations, improper installation, or use in a way other than in accordance with the recommendations and instructions of Invensys plc. Except to the extent prohibited by applicable law, any implied warranty of merchantability or fitness for a particular purpose on this product is limited to the duration of this warranty.
Some states do not allow the exclusion or limitation of incidental or consequential damages, or allow limitations
on how long an implied warranty lasts, so the above limitations or exclusions may not apply to you. This warranty gives you specific legal rights, and you may also have other rights which vary from state to state.
Instructions for return:
Pack the thermostat carefully in a well-padded carton. Be sure to include a note describing, in detail, what is
wrong with the product. Return, postage prepaid, to: Invensys plc 515 South Promenade Ave., Corona,
CA 91719, Attn: Warranty Department
NOTES __________________________________________________
__________________________________________________________
__________________________________________________________
__________________________________________________________
__________________________________________________________
__________________________________________________________
__________________________________________________________
__________________________________________________________
__________________________________________________________
__________________________________________________________
__________________________________________________________
__________________________________________________________
__________________________________________________________
27
28
110-1023