1
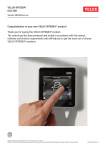
Directions for use
GGL INTEGRA® / GGU INTEGRA®
KMX 100
KMX 200
KLR 100
Read directions for use carefully before operating
VELUX, DK-2970 Hørsholm
www.VELUX.com
451452-1205
Contents
Congratulations on your new VELUX product
In order to make the best use of it please read these instructions on
operation and maintenance.
Important information
4-5
Getting started
Initial set-up
Function guide
6-7
8-9
Operation
Locating and operating a product
- One window
- More than one window
Choosing positions and luminous intensity
Menu functions
Menu guide
Navigating in the menus
Changing language
Definition of Room, Group and Zone
Creating a Room
Editing a Room
Creating a Group
Naming
Program keys P1 and P2
- Recording a Program P1/P2
- Activating and interrupting a Program P1/P2
2
10-12
10
11-12
13
14
15
16
17
18-19
20-21
22-23
24-25
26-29
26-27
28-29
Timer
Access code
Keypad lock
Rearranging order
Display light
Clearing remote control settings
30-31
32
33
34-35
36
37
Extending the system with VELUX and
io-homecontrol ® products
Registering a new product
Using additional remote controls
- Copying to a remote control not yet in operation
- Copying to a remote control in operation
Registering products from other types of control units
Copying products to other types of control units
Security key
38-39
40-43
40-41
42-43
44-45
46-47
48-49
Resetting the system
50-51
Installation
Holder for remote control
Rain sensor
Blinds, roller shutters etc
52-53
54
55
Specifics of the window
Manual operation
Maintenance
56-57
58-59
Further information
Display symbols
Glossary
60
61-62
3
Important information
Please keep instructions for future reference and hand them over to
any new user.
Safety
• Before operating ensure that the window with electrical products
can be and is operated without risk of damage to property or
injury to people or animals.
• For personal safety, never have your hand or body out of the window without switching off the power.
• Children must not be allowed to play with the window and its
electrical products, and the remote control should be kept out of
reach of children.
• If repair or adjustment work is needed, disconnect from mains
supply and ensure that it cannot be reconnected unintentionally.
• The plug on the mains cable is for indoor use only.
• It is recommended to place a remote control in the room where
the window and its electrical products have been installed.
Function
• If the rain sensor gets wet, the window operator automatically
closes the window; however, the ventilation flap remains open.
• To prevent the window from closing because of very fine/weak
rain, fog or dew, the rain sensor is equipped with a heating element to keep the surface dry.
• If the window has been opened manually, the window operator
will not be activated via the rain sensor.
• From fully open, it will take up to one minute before the window is
completely closed. Therefore, in case of sudden rain, water may
enter the room before the window is closed.
• In case of snow and/or ice, the operation of the window may be
blocked.
4
Product
• This product has been designed for use with genuine VELUX
products. Connection to other products may cause damage or
malfunction.
• The product is compatible with products with the io-homecontrol ®
logo.
• Electrical products must be disposed of in conformity with national regulations for electronic waste and not with usual household
waste.
• Used batteries have to be disposed of in conformity with the relevant environmental regulations.
• Expected battery lifetime: Approx. 1 year.
• The packaging can be disposed of with usual household waste.
• Radio frequency band: 868 MHz.
• Noise level: Max 70 dB(A).
Maintenance and service
• Disconnect from mains supply before carrying out any maintenance (including cleaning of pane) or service work to the window
and products connected to it and ensure that it cannot be reconnected unintentionally during this time.
• If mains cable is damaged, it must be replaced by qualified personnel in accordance with national regulations.
• Spare parts are available through VELUX. Please provide information from data plates.
• If you have any technical questions, please contact VELUX.
io-homecontrol® provides advanced and secure radio technology that is easy to install.
io-homecontrol® labelled products communicate with each other, improving comfort,
security and energy savings.
www.io-homecontrol.com
55
Initial set-up
The initial set-up must be completed within
10 minutes so please read items 1-8 before
proceeding.
IMPORTANT!
In case of one remote control only,
all products must be registered
in this remote control.
In case of more than one remote control, all
products must be registered in one of the remote
controls. Then the information must be copied from this
remote control to the other
remote controls, see section
Using additional remote
controls.
Within 10 minutes of inserting the batteries, you
must choose your language and prepare automatic registration of relevant electrical products
in the remote control. If this time limit is exceeded,
you must start afresh.
When the initial set-up has been completed, all
windows with electrical products connected will
appear in the display.
1
3 Choose language:
Press
Press
to highlight your language.
"Enter" to confirm your choice.
Enter
P1
P2
on mains power to the window(s) with elec4 Switch
trical products.
Note: Prepare other io-homecontrol ® products
for registration in accordance with the instructions
provided with the product in question.
5 Press
"Ready" to start automatic registration of
each product.
------------- AUTO SET-UP --------------
Connect product
to mains supply
and press Ready
within 10 minutes
Ready
three batteries supplied (type AA, 1.5 volt) into
the remote control. Replace cover.
Info
P1
P2
------------- AUTO SET-UP --------------
6 Automatic registration is running. Please wait.
7 The display shows "Completed" when all products have been registered. If the display shows
"Failed", refer to the instructions in section
Resetting the system.
------------- AUTO SET-UP --------------
Completed
Ensure mains power to the window(s) with electrical products to be registered is switched off.
2 Slide off the battery cover as shown. Insert the
6
--- LANGUAGE ---
Dansk
English
Français
Deutsch
House
8 The display shows a registered product.
Operation can start.
The new product is placed in House as default.
No. 1
Window
Menu
Locate
P1
P2
7
Function guide
House
The following describes the functions of the
remote control.
The display tells you which product is being
operated, which menu function is being used
etc. The bottom line of the display states the
function of the two selection keys.
Note: Your display may look different
depending on the last product operated.
Selection, navigation and program keys
Selection keys
- for activating the menu and confirming the chosen menu function. The current function of the key
is stated directly above in the display.
- for locating the Room, the Group, the Zone or
the product to be operated. The current function of
the key is stated directly above in the display.
House
No. 1
Window
Menu
Locate
Navigation keys
- for scrolling up and down in the product or
menu list.
Program keys
- for activating a pre-set operating sequence by
pressing just one key.
Keys for operating the product chosen
No. 1
Window
Menu
Locate
P1
P2
P1
P2
P1
P2
P1
P2
Keys for operating the product
OPEN/UP/ON or
CLOSE/DOWN/OFF
Short key pressure: Product will travel to maximum
top or bottom position.
Long key pressure: Product will travel to one of the
pre-set positions.
See section Choosing positions and luminous intensity.
The main function of the keys for everyday use is shown on the next page. More
advanced functions are shown in greater
detail later in the instructions.
8
Stop and status key
STOP
Short key pressure: The product in operation stops.
Long key pressure: All products in operation stop.
Short key pressure when a product not in operation has been chosen: Status of product is displayed.
9
Locating and operating a product
More than one window
To be able to operate a product (eg a blind), you
first have to locate the product in question in the
display.
The examples show the easiest way to find the
product you want to operate, and have been
divided into two groups: one window or more
than one window.
1
With one electrical product
Three windows are equipped with window operators only.
One window
The example shows how to locate and operate
window No. 2.
With one electrical product
House
The window is equipped with a window operator only and therefore you do not have to locate
the product first.
Press
to start operation.
3
2
No. 2
Window
House
No. 1
Window
Locate
Menu
Press
to find window No. 2.
Press
to start operation.
Menu
Locate
P1
P2
With more electrical products
The window is equipped with a window operator, a roller shutter, a blind and frame lights.
House
The example shows how to locate and operate
the blind.
10
Press
to find "Blind".
Press
to start operation.
No. 1
Blind
Menu
Locate
P1
P2
More than one window with more electrical
products: see next page.
11
Locating and operating a product
Choosing positions and luminous intensity
More than one window
A product or a Group of products can be set
to travel to a certain position. The example shows
how to set a roller shutter to run 50% down.
1 Locate the product in question, see section
Locating and operating a product.
1
2
3
The example shows roller shutter No. 2.
With more electrical products
Three windows are each equipped with a window
operator, a roller shutter, a blind and frame lights.
3 Press and hold key
The example shows how to locate and operate
blind No. 3.
1 Press
"Locate".
2 Product chosen is displayed.
and watch the display.
Each black spot corresponds to the roller shutter
running 10% down. Five black spots thus correspond to it running 50% down.
House
No. 1
Window
Menu
Locate
House
No. 2
Roller shutter
Menu
Locate
P1
P2
Run to position
50% down
and the roller shutter will travel to
Release key
the position chosen.
Note: A short key pressure will make the roller
shutter travel to maximum top or bottom position.
------------- HOUSE -------------
2 Displays the list of product types in House.
Press
Press
to highlight "Blind".
"Enter".
Window
Roller shutter
Blind
Lights
Enter
P1
Back
P2
------------- BLIND -------------
No. 1
No. 2
No. 3
3 Press
4
12
Press
to highlight blind "No. 3".
"Enter".
Press
to start operation.
Enter
P1
Back
P2
Lights or a Group of lights can be operated on
the same principle. The percentages correspond
to luminous intensity. Short key pressure: The lights
are switched on or off completely.
A Venetian blind can be operated in two ways.
It can be drawn up and down, as described for
the roller shutter, and its slats can be tilted. To tilt
the slats of the Venetian blind, choose Tilt with
when the product has been
the navigation keys
located.
To obtain ventilation via the ventilation flap without opening the window, release key
when
“Ventilation” is displayed.
13
Menu guide
Navigating through the menus
Guide to the menu functions of the remote control.
The example shows how to find the menu item
Room by means of menu choices.
Additional information about the individual function is provided in
the relevant section.
1 Press
"Menu".
House
No. 1
Window
Menu
Locate
P1
P2
--- Menu ---
Keypad lock
Timer
Settings
2 Displays a list of menu items under Menu.
Press
Press
Enter
to highlight "Settings".
"Enter" to confirm your choice.
Back
P1
P2
--- Settings ---
--- Set-up of House ---
House
Room
Group
Rearrange order
Rename
Clear
No. 1
Window
Menu
Locate
Enter
--- Menu ---
Keypad lock
Timer
Settings
Enter
p. 33
p. 30-31
Set-up of House
User settings
System settings
Enter
Back
--- User settings ---
--- Settings --Back
p. 18-21
p. 22-23
p. 34-35
p. 24-25
p. 37
Back
Language
Programs P1/P2
Display light
Access code
Enter
p. 16
p. 26-29
p. 36
p. 32
Back
--- System settings ---
Register product
Copy system
Security key
Configure
Enter
Back
p. 38-39
p. 40-43
p. 48-49
p. 46-47
3 Displays a list of menu items under Settings.
Press
Press
to highlight "Set-up of House".
"Enter" to confirm your choice.
Enter
House.
Press
to highlight "Room".
"Enter" to confirm your choice.
Press
--- Set-up of House ---
Enter
Back
P1
This way of choosing menu items is shown as
follows in the rest of the instructions:
Set-up of House
P2
Room
Group
Rearrange order
Rename
You can now proceed with the menu functions
under menu item Room.
1 Press "Menu".
2 Scroll through the menus:
Back
P1
4 Displays a list of menu items under Set-up of
Settings
14
Set-up of House
User settings
System settings
P2
House
No. 1
Window
Menu
Locate
P1
P2
Room
15
Changing language
Definition of Room, Group and Zone
You can change the display text language.
To make it easier to operate especially large systems it is recommended to link each product to a
Room and/or a Group.
The example shows how to change it.
House
No. 1
Window
1
Press
"Menu".
2 Scroll through the menus:
Settings
User settings
Room 1
Room 2
Menu
Locate
P1
P2
Language
Definition of Room
A Room consists of one or more products of any
type located in the same physical room, eg bedroom or kitchen.
A product can be assigned to one Room only.
--- LANGUAGE ---
Dansk
English
Français
Deutsch
3 The display shows a list of languages. The current
language has been ticked.
Enter
Definition of Group
Back
P1
P2
--- LANGUAGE ---
Dansk
English
Français
Deutsch
Press
to highlight a new language.
4 Press
"Enter" to confirm your choice.
på
Enter
A Group consists of at least two products of the
same type (eg two roller shutters).
For every product type, a Group “All” is automatically created. Each Group “All” consists of all
products of the same type in the House list or in
the Room in question.
Groups created across more Rooms are called
Zones.
Room 1
Room 2
Back
P1
P2
Definition of Zone
Room 1
A Group created across more Rooms.
Room 2
--- INFORMATION ---
5
16
The display shows that the change has been
saved.
Kitchen
Saved
17
Creating a Room
House
If you have many products,
you can collate them in
Rooms to make these easier
to find and operate.
When creating a Room, you have to create at
least two Rooms. Room 2 may consist of all the
products not assigned to Room 1, see item 8.
5 Displays the product chosen.
The example shows two rooms with two windows
in each. Below it is shown how to create Room 1
by moving the relevant products from House to
Room 1.
6 Displays a list of options.
Press
"More" to move additional products to
Room 1. You will return to the list in item 4. Repeat
items 4-5 until these products have been moved
to Room 1.
"Continue" to proceed.
Press
Press
Press
No. 1
Window
1 Press
Menu
2 Scroll through the menus:
Settings
Set-up of House
Save new Room
Undo product
Undo new Room
Enter
Back
P1
P2
Room
created
7 The display shows that a new Room has been
created.
Room
Create
8 The display asks whether you want the remaining
--- PRODUCT FROM ---
3 Displays the areas in House.
Press
to highlight the area with the product to
be assigned to Room 1 first.
Press
"Enter" to confirm your choice.
House
Enter
P1
Back
P2
uct type appears second from the top line in the
display. The individual products can be identified
by pressing
for a short period of time.
to highlight the product to be moved to
Press
Room 1.
Press
"Enter" to confirm your choice.
products to be assigned to the next Room automatically.
"Yes" to save the remaining products
a) Press
in Room 2.
"No" to return automatically to the list
b) Press
in item 3.
--- INFORMATION ---
Save all remaining
products in next
Room
Yes
No
--- INFORMATION ---
4 Displays a list of all products in House. The prod-
18
Continue
-- INFORMATION --
Locate
"Menu".
More
--- CONTINUE ---
to highlight "Save new Room".
"Enter" to confirm your choice.
(Highlight one of the other options to undo your
choice).
House
HOUSE
--------- WINDOW ---------
No. 1
HOUSE
--------- WINDOW ---------
No. 1
No. 2
No. 3
Enter
P1
Back
P2
Room
created
9 The display shows that a new Room has been
created.
Note: The products are
automatically renumbered
when assigned to a Room.
Room 1
Room 2
19
Editing a Room
5
You can edit the Rooms you have created, ie one
or more products can be moved from one Room
to another.
The example shows how the window operator
in window No. 1 can be moved from Room 1 to
Room 2.
6
Room 1
No. 1
Window
1 Press
"Menu".
2 Scroll through the menus:
Settings
Set-up of House
Menu
Locate
P1
P2
Displays a list of the individual products within the
product type in question.
to highlight the product to be moved. The
Press
individual products can be identified by pressing
for a short period of time.
Press
"Enter" to confirm your choice.
Displays a list of Rooms in which the product can
be placed.
Press
to highlight the Room in which the product is to be placed.
Press
"Enter" to confirm the new location of the
product.
--- WINDOW ---
No. 1
No. 2
No. 3
Enter
Back
P1
P2
--- PLACE IN ---
Room 1
Room 2
Room 3
Enter
Back
P1
P2
--- INFORMATION ---
7 The display shows that several Rooms have been
Rooms
modified
modified.
Room
Edit
--- MOVE FROM ---
3 Displays a list of the Rooms created.
to highlight the Room from which the
Press
product is to be moved.
"Enter" to confirm your choice.
Press
Room 1
Room 2
Room 3
Enter
Back
P1
Note: The products are automatically renumbered
when assigned to a new Room.
P2
--- ROOM 1 ---
4
20
Displays a list of product types in the Room from
which the product is to be moved.
to highlight "Window".
Press
Press
"Enter" to confirm your choice.
Window
Roller shutter
Enter
P1
Back
P2
21
Creating a Group
To make it easier to operate products of the same
type simultaneously, you can create a Group.
The example shows a Room with four windows,
each with a window operator. It
shows how to create Group 1 con2
1
sisting of the window operators
Room 1
on the two windows No. 3 and
No. 4. The example presumes
that Room 1 has been created.
--- ROOM 1 ---
Window
Roller shutter
Blind
4 Displays a list of the product types in Room 1.
Press
Press
Enter
to highlight "Window".
“Enter” to confirm your choice.
Back
P1
P2
3
4
5 Displays a list of the individual products within the
product type in question.
Press
to highlight the product to be included in
Group 1. The individual products can be identified
for a short period of time.
by pressing
“Enter” to confirm your choice.
Press
Note: A number of Groups “All” each consisting
of all products of the same type in the Room in
question was created automatically when Room 1
was created.
--- Window --No. 1
No. 2
No. 3
No. 4
Enter
Back
P1
P2
6 The display asks whether additional products are
Room 1
No. 1
Window
1 Press
"Menu".
Menu
Locate
P1
P2
to be moved to Group 1.
"More" to move additional products
Press
to Group 1. You will return to the list in item 5.
Repeat items 5-6 until these products have been
moved to Group 1.
Press
"Save" to create Group 1.
--- INFORMATION ---
Add more
to Group
or save Group
More
Save
P1
P2
--- INFORMATION ---
2 Scroll through the menus:
Settings
Set-up of House
Group
in Room 1.
Create
--- PRODUCT FROM ---
3 Displays a list of the Rooms created.
to highlight the Room in which Group 1
Press
is to be created.
Press
"Enter" to confirm your choice.
22
Group 1 created
in Room 1
7 The display shows that Group 1 has been created
Room 1
Room 2
Room 3
Enter
P1
Back
P2
Note: When operating
Groups a delayed execution of
commands might occur. If you
want a particular product to
respond at once, this product
must be operated individually.
1
2
Group 1
3
Room 1
4
23
Naming
You can change the names of House, Rooms,
Zones, Groups, products and Programs displayed
into more personal names.
--- RENAME ---
K
6 Enter the new name using the list of characters.
The example shows how to change Room 1 into
Kitchen.
Note: When having used the function Rename,
the products are not automatically renumbered
any longer.
1 Press
"Menu".
through the menus:
2 Scroll
Settings
Set-up of House
Press
Press
to highlight the character required.
"Enter" after each character.
Room 1
GHI
KLMNO
Enter
Back
P1
No. 1
Window
P2
--- RENAME --Save
Menu
Locate
P1
P2
KITC HEN
7 Save the new name by choosing
in the list when
the last character has been entered.
"Enter".
Press
CDEFGHI
JK
Enter
Back
P1
P2
Rename
--- INFORMATION ----- RENAME ---
3
Displays a list of House, Rooms, Zones, Groups,
products and Programs.
to highlight "Room".
Press
"Enter" confirm your choice.
Press
Room
Zone
Group
Product
Enter
8 The display shows that the new name has been
Kitchen
Saved
saved.
Back
P1
P2
--- AREA ---
4 Displays a list of the names automatically given to
the Rooms.
to highlight "Room 1".
Press
Press
"Enter" to confirm your choice.
Room 1
Room 2
Room 3
Enter
Back
P1
P2
--- RENAME ---
Room 1 A
5 Displays a list of characters including the save
function , the delete function
character .
24
and the space
ABCDEFGHI
Enter
P1
Back
P2
25
Recording a Program P1/P2
The program keys P1 and P2 can be used for
pre-setting a series of operating sequences that
can be activated by a single key pressure.
-- RECORD PROGRAM --
Start recording by
pressing Enter.
Stop recording by
pressing P1 or P2
You can record up to eight programs; four under
each of the program keys P1 and P2. The programs can contain commands about operating
the products and activating the timer function.
4 Press
The example shows how to program a window
and a roller shutter to close/run down by pressing
the program key P1 just once.
5 The display shows the latest operated product.
Icon
"Enter" to start recording.
Enter
Back
indicates that the recording is in progress.
1. Locate the window and close it (see sections Locating and operating a product and
Choosing positions and luminous intensity).
IMPORTANT! Choose a position by pressing
and holding key
until the desired position
has been reached.
Do not use the stop key
.
House
No. 1
Window
1 Press
Menu
"Menu".
Locate
Settings
User settings
2. Locate the roller shutter and roll it down.
3. Press P1 "P1" when the roller shutter has rolled
down.
2 Scroll through the menus:
House
No. 1
Window
Menu
Locate
P1
P2
Programs P1/P2
--- PROGRAM (P1) ---
--- PROGRAMS P1/P2 ---
Record Program
Delete Program
3
26
Press
Press
to highlight "Record Program".
"Enter" to confirm your choice.
Enter
P1
Back
6 The display asks whether to save the new program.
Press
"Yes" to save the new program.
Save new
Program
Yes
No
P2
27
Activating and interrupting a Program P1/P2
Activating a program
Interrupting a program
You can activate eight programs at a time. You
can still use the various functions of the remote
control at the same time as one or more programs
are activated by pressing a program key.
Icon ▸ indicates that a program has been activated. A program in progress can be interrupted
as follows:
House
No. 1
Window
Below four programs have been recorded under
program key P1.
The example shows how to activate Program 3
under program key P1.
1
Press
P1
or
P2
to find the program in progress.
▸
Menu
Locate
P1
P2
House
--- PROGRAM P1 ---
No. 1
Window
1
2
28
Press
P1
"P1" three times to activate Program 3.
Program 3 is marked in the display and the program automatically starts.
Note: Maximum time interval between each key
pressure: 2 seconds. Otherwise the program that
happens to be highlighted will automatically be
activated.
Menu
Locate
P1
P2
2
The activated program has been ticked.
Press
to highlight the program in question.
"Stop" to interrupt the program.
Press
Program 1
Program 2
Program 3
Program 4
Stop
P1
Back
P2
--- PROGRAM P1 ---
Program 1
Program 2
Program 3
Program 4
Start
P1
Back
P2
29
Timer
With the timer you can for example close a window, roll down a sunscreening product or turn off
frame lights after a pre-set time interval.
-- SET TIMER --
6
The example shows how to set window No. 1 in
Room 1 to close after 1 hour and 10 minutes.
Press
to set the desired start position of the
window when activated via the timer.
100% corresponds to fully open.
"Enter" to confirm the setting.
Press
Start position
100%
Enter
Back
P1
P2
House
No. 1
Window
1 Press
"Menu".
Menu
--- SET TIMER ---
Back
7
--- MENU ---
to set the stop position of the window
Press
when deactivated via the timer. 0% corresponds
to fully closed.
Press
"Enter" to confirm the setting.
Keypad lock
Timer
Settings
2 Press
Press
to highlight "Timer".
“Enter” to confirm your choice.
Enter
8
-- TIMER --
Press
to choose the time period required.
First choose minutes.
Press
"Enter" to change to hours.
Set timer
Delete timer
3 Press
Press
4
5
30
to highlight "Set timer".
"Enter" to confirm your choice.
P1
P2
Enter
Back
P1
P2
--- SET TIMER ---
P2
9
10
Room 1
--- WINDOW ---
No. 1
Enter
P1
Time period
01 h 10min
Back
Locate the window, see section Locating and operating a product.
The display shows the relevant product. The individual products can be identified by pressing
for a short period of time.
"Enter" to proceed.
Press
Back
--- SET TIMER ---
P2
Enter
Enter
Time period
00 h 10 min
Back
P1
Stop position
0%
Back
to choose hours. The window is now set
Press
to close after 1 hour and 10 minutes.
Press
"Enter" to confirm the setting.
The display shows that the timer has been activated.
Window No. 1 in Room 1 now closes after 1 hour
and 10 minutes.
Enter
Back
P1
P2
Room 1
No. 1
Window
Menu
Locate
Note: The timer can be interrupted by choosing
"Delete timer" in item 3.
31
Access code
Keypad lock
You can choose a personal access code to protect
the settings under the menu item Settings. The
access code must consist of four digits from 0 to 9.
1 Press
"Menu".
through the menus:
2 Scroll
Settings
User settings
3 Press
Press
The keypad can be locked so that products cannot be operated without unlocking the keypad.
The stop key can still be used.
House
No. 1
Window
Menu
Locate
P1
P2
1 Press
"Menu".
House
No. 1
Window
Menu
Locate
P1
P2
--- MENU ---
--- ACCESS CODE ---
Access code
to highlight "Choose/Change".
"Enter" to confirm your choice.
Keypad lock
Timer
Settings
Choose/Change
Delete
Enter
Back
2 Press
Press
P1
to highlight "Keypad lock".
"Enter" to confirm your choice.
to choose the first digit.
Press
"Enter" to go to the next digit.
"Enter" when the last digit has been
Press
chosen.
Enter code
1 * * *
Enter
P1
P1
Back
P2
P2
- ACCESS CODE -
4 Press
Enter
Back
P2
--- KEYPAD LOCK ---
3 Press
to highlight "Enable".
"Enter" to confirm your choice.
Press
The keypad lock is immediately activated.
Enable
Disable
Enter
P1
Back
P2
- ACCESS CODE -
Confirm code
1 2 3 4
Save
5 Press
"Save" to confirm and save the code.
Every time you now choose Settings in the menu,
you must enter the access code before you can
proceed.
Note: The access code can be cancelled by
choosing "Delete" in item 3.
32
P1
Back
P2
Unlocking keypad if the keypad has been
locked:
Message as shown.
"Menu". Press
"Locate".
Press
The keypad has temporarily been unlocked.
The keypad will automatically be locked again
10 seconds after it has been used.
--- KEYPAD LOCK ---
Press Menu and
then Locate
Menu
Locate
P1
P2
Note: The keypad lock can be deactivated by
choosing "Disable" in item 3.
33
Rearranging order
5 Displays a list of the individual products of the
You can benefit by having the products used most
frequently at the top of the list. This is done by
rearranging the order of the individual products,
Groups, Rooms and Zones displayed.
chosen product type. The individual products can
be identified by pressing
for a short period of
time.
to highlight the product in question.
Press
Press
"Enter" to confirm your choice.
In the example, three Rooms have been created.
It shows how to rearrange the order of the roller
shutters in Room 2.
1
"Menu".
2 Scroll through the menus:
Settings
Set-up of House
Menu
Locate
P1
P2
P2
6 The list of the individual products of the chosen
product type is still displayed.
to move the chosen product.
Press
"Enter" to confirm the rearranged order.
Press
No. 1
No. 3
No. 2
Enter
P1
Back
P2
7 The display asks, whether the order of more prod-
Rearrange order
products in question.
Press
to highlight the Room in which the order
of the individual products is to be rearranged.
"Enter" to confirm your choice.
Press
P1
Back
-- REARRANGE ORDER --
Product
3 Displays a list of the Rooms created containing the
Enter
Room 1
No. 1
Window
Press
-- REARRANGE ORDER --
No. 1
No. 2
No. 3
-- REARRANGE ORDER --
Room 1
Room 2
Room 3
Enter
P1
Back
P2
ucts is to be rearranged or whether the changes
made till now are to be saved.
"More" to rearrange the order of more
Press
products. You will return to the list in item 5.
Repeat items 5-7 until the required order of products has been obtained.
Press
"Save" to save the rearranged product
order.
--- INFORMATION ---
Save new order or
rearrange more
products
Save
P1
More
P2
--- INFORMATION ---
4 Displays a list of the product types in Room 2.
to highlight the product type where the
Press
order of the individual products is to be rearranged.
Press
"Enter" to confirm your choice.
34
-- REARRANGE ORDER --
Window
Roller shutter
Awning blind
Blind
Enter
P1
8 The display shows that the order has been rear-
Order rearranged
ranged.
Back
P2
Note: The products are automatically renumbered
when the order has been rearranged.
35
Display light
Clearing remote control settings
When clearing the remote control settings, all
settings for Rooms, Zones, Groups and Programs
and all personal names are deleted. The products,
however, remain registered in the remote control.
In standard settings, the light in the display is
turned on when the keypad is activated and is
turned off again after 10 seconds. If you do not
want any light in the display, you can opt out of
this.
Room 1
House
The example shows how to turn off the light in the
display.
1
Press
"Menu".
2 Scroll through the menus:
Settings
3 Press
Press
User settings
to highlight "Display light".
"Enter" to confirm your choice.
No. 1
Window
No. 1
Window
Menu
Locate
P1
P2
1 Press
"Menu".
Menu
Locate
P1
P2
2 Scroll through the menus:
Settings
Set-up of House
- USER SETTINGS -
Language
Programs P1/P2
Display light
Access code
Enter
P1
Back
P2
-- SET-UP OF HOUSE --
3 Displays a list of menu items.
Press
Press
to highlight "Clear".
"Enter" to confirm your choice.
Group
Rearrange order
Rename
Clear
Enter
Back
P1
P2
--- DISPLAY LIGHT ---
On
Off
4
Press
Press
to highlight "Off".
to confirm your choice.
Note: The light in the display can be turned on by
choosing "On" in item 4.
36
Enter
P1
Back
P2
4 The display asks whether you want to clear all
Groups, Rooms, Zones, Programs and personal
names you might have created.
"Yes" to confirm your choice.
Press
Press
"No" to return to item 3.
--- CLEAR ---
Clear all Groups/
Rooms/Zones/
Programs/Names
Yes
P1
No
P2
The remote control settings are cleared.
37
Registering a new product
When a new product has been installed, it can be
registered in a remote control already in operation. This new product can be a new INTEGRA
roof window, a blind, a roller shutter etc.
--- INFORMATION ---
6 The display shows that the new product has been
registered.
The example shows how to register a new roller
shutter in the remote control and place it in Room 1.
Now the product must be placed.
The registration must be completed within
10 minutes, so please read items 1-9 before
proceeding.
7a If no Rooms have been created, the product is
automatically placed in House.
Operation can start.
cal products. If this has already been done, switch
power off and then back on again.
"Menu".
through the menus:
3 Scroll
Settings
System settings
4
Press
Press
to highlight "Register product".
"Enter" to confirm your choice.
5
38
be placed in the appropriate Room.
The display shows a list of new products. In case
of more new products, the individual products
can be identified by pressing
for a short
period of time.
Press
to highlight the product to be placed.
Press
"Enter" to confirm your choice.
House
No. 1
Window
Menu
Locate
P1
P2
Menu
Locate
P1
P2
New products
--- ROLLER SHUTTER ---
No. 1 new
Enter
P1
P2
--- PLACE IN ----- SYSTEM SETTINGS ---
Register product
Copy system
Security key
Configure
Enter
P1
Back
8
Displays a list of the Rooms created.
Press
to highlight the Room in which the product is to be placed.
Press
"Enter" to confirm your choice.
Room 1
Room 2
New Room
Enter
P1
Back
P2
P2
--- AUTO SET-UP ---
Automatic registration is running.
House
No. 1
Roller shutter
7b If Rooms have been created, the product has to
1 Switch on mains power to the window with electri-
2 Press
New products
registered
9 The display shows that the Room has been modified.
Operation can start.
--- INFORMATION ---
Room modified
39
Copying to a remote control not yet in operation
If you have additional two-way VELUX remote
controls (marked with the symbol
) or other
types of two-way io-homecontrol ® control units,
you can copy the settings from one remote control
to another.
Step 2: Remote control B
2
The example shows how to copy from a VELUX
remote control A to a VELUX remote control B not
yet in operation.
4 Insert the three batteries supplied (type AA,
A
1.5 volt) into the remote control as
shown.
B
2
2
--- LANGUAGE ---
Note: When copying from a VELUX remote control to another type of io-homecontrol® control
unit, only the products registered will be copied,
not the remaining settings.
5 Choose language:
Press
Press
to highlight your language.
"Enter" to confirm your choice.
Step 2 must be completed within 2 minutes
after implementing step 1, so please read
steps 1-2 before proceeding.
Dansk
English
Français
Deutsch
Enter
P1
P2
------------- AUTO SET-UP --------------
6
House
No. 1
Window
Step 1: Remote control A
Menu
1 Press
B
Press
"Ready" to start automatic registration of
each product. Please disregard the indication of
time in the display.
Connect product
to mains supply
and press Ready
within 10 minutes
Ready
Info
Locate
"Menu".
The display now indicates that copying is in
progress.
2 Scroll through the menus:
Settings
System settings
--- SYSTEM SETTINGS ---
Register product
Copy system
Security key
Configure
3 Press
Press
to highlight "Copy system".
"Enter" to confirm your choice.
Enter
P1
Note: Program functions P1/P2 cannot be copied.
Back
P2
Step 2 must now be completed within 2 minutes.
40
41
Copying to a remote control in operation
If you have additional two-way VELUX remote
) or other
controls (marked with the symbol
types of two-way io-homecontrol ® control units,
you can copy the settings from one remote control
to another.
The example shows how to copy from a VELUX
remote control A to a VELUX remote control B
already in operation.
Step 3: Remote control B
Reset remote control B, see section Resetting the
system, step 2.
2
Note: When copying from a VELUX remote control to another type of io-homecontrol ® control
unit, only the products registered will be copied,
not the remaining settings.
A
B
Step 4: Remote controls A and B
2
2
Copy remote control A to B, see section Copy to a
remote control not yet in operation.
Now both remote controls will be able to operate
all products in the system.
Note: Program functions P1/P2 cannot be copied.
The copying takes place in 4 steps. Please
read carefully first as it is important to execute them in the order stated.
Step 1: Remote controls A and B
Change the security key in both remote controls
so that they have the same common key, see section Security key.
Step 2: Remote control A
Register all products in remote control A, see
section Registering a new product, items 2-7a (or
items 2-9).
All products operated by remote control B will
automatically be registered in remote control A.
42
43
Registering products from other types of control units
The remote control can also operate products
registered in another type of VELUX or
io-homecontrol ® control unit if they are transferred to the remote control.
The example shows how to register products from
from a one-way VELUX remote control B in a twoway VELUX remote control A.
Step 2: Remote control A
House
No. 1
Window
A
B
2
1
2 Press
"Menu".
Menu
Locate
through the menus:
3 Scroll
Settings
System settings
Steps 1 and 2 must be completed within
10 minutes, so please read items 1-6 before
proceeding.
- SYSTEM SETTINGS-
Register product
Copy system
Security key
Configure
4 Press
Press
to highlight "Register product".
"Enter" to confirm your choice.
Enter
P1
Back
P2
Step 1: Control unit B
- AUTO SET-UP -
1
Set the control unit into configuration mode by
pressing the RESET button at the back for at least
5 seconds.
5 Automatic registration is running.
--- INFORMATION ---
6 The display shows that the new product(s) has/
New products
registered
have been registered.
Now the product(s) must be placed. Please refer
to the instructions in section Registering a new product, item 7a and onwards.
Note: For other types of io-homecontrol ® control
units, please refer to the instructions provided with
the product in question to execute step 1.
44
45
Copying products to other types of control units
You can copy one or more products registered
in the remote control to another type of VELUX
or io-homecontrol ® control unit. This other type of
control unit can thus operate both its own and the
copied products.
The example shows how to copy a roller shutter
from a two-way VELUX remote control A to a oneway VELUX remote control B.
-- INFORMATION --
Choose products to
be configured
4 Press
A
B
2
1
"Enter" to choose the product(s) to be
copied to another type of control unit (B).
Enter
Back
5 Locate the product, see section Locating and
operating a product.
House
Note: A one-way VELUX remote control can
operate products of the same type only, eg roller
shutters.
No. 3
Roller shutter
6 Displays the relevant product.
Press
"Enter" to confirm your choice.
Steps 1 and 2 must be completed within
10 minutes, so please read items 1-8 before
proceeding.
Enter
Back
-- INFORMATION --
7 The display shows that the product is ready for
Product ready for
configuration
being copied to another type of control unit (B).
House
Step 1: Remote control A
1 Press
"Menu".
2 Scroll through the menus:
Settings
3 Press
Press
46
System settings
to highlight "Configure".
"Enter" to confirm your choice.
No. 1
Window
Menu
Locate
Step 2: Control unit B
8 Press the RESET button at the back briefly (max
--- SYSTEM SETTINGS --
Register product
Copy system
Security key
Configure
Enter
P1
Back
P2
5 seconds) to register the new product. The product chosen can now be operated by control unit B.
Note: For other types of io-homecontrol ® control
units, please refer to the instructions provided with
the product in question to execute step 2.
47
Security key
Each remote control has an individual security key
ensuring that external control units cannot communicate with your system.
The example shows how to change the security
key in remote control A and in the products registered in A (step 1). If you have more than one
remote control, the new security key must also be
transferred to these (step 2).
Step 2: Remote control B (and other)
A
2
B
A
B
2
2
2
House
No. 1
Window
House
No. 1
Window
Step 1: Remote control A
1 Press
Menu
"Menu".
Settings
2
3
Press
to highlight "Change".
Press
"Enter" to confirm your choice.
The display now indicates that the security key
has been changed.
System settings
Menu
Locate
"Menu".
2 Scroll through the menus:
Scroll through the menus:
Settings
Locate
1 Press
System settings
Security key
Security key
--- SECURITY KEY ---
Change
Receive
Enter
Back
P1
P2
3 Press
to highlight "Receive".
Press
"Enter" to confirm your choice.
The display indicates that the security key is being
transferred from remote control A to remote control B.
--- SECURITY KEY ---
Change
Receive
Enter
P1
Back
P2
display asks whether the security key of other
4 The
remote controls is to be changed.
Press
"No" to finish if this is the only remote
control being changed.
Press
"Yes" if there are other remote controls.
Execute step 2 for these.
48
-- CHANGE --
Change security key
in another
remote control
Yes
No
49
Resetting the system
The whole system, ie remote control and window
with electrical products, can be reset to its initial
state. To reinstate the connection between remote
control and window after reset, please refer to the
instructions in section Initial set-up.
Resetting the system is carried out in two steps
(steps 1 and 2).
Step 2: Remote control
1 Slide off the battery cover as shown.
2 Press and hold the button on the right side of the
remote control with a pointed object for at least
5 seconds.
Step 1: Window
1 Open the window manually.
3 Replace the battery cover.
-- INFORMATION --
2 Press the test button on the window operator for
at least 5 seconds. The window and its electrical
products run briefly back and forth.
4 Press
"Yes" to confirm that you want to reset
the remote control.
The remote control
will be reset.
Continue?
Yes
No
3 Disconnect mains supply when all products have
stopped moving.
Proceed with step 2.
50
The system has now been reset. To reinstate the
connection between remote control and window,
please refer to the instructions in section Initial
set-up.
51
Fitting of holder for remote control
The remote control is provided with a wall-mounted
holder, which can be fitted anywhere in your
home.
Note: Check that the remote control can operate
the relevant products from the proposed position
before it is fastened to the holder.
If required, the remote control can be fastened
with screws to the holder.
1 Fit the back section to the wall with the two screws
supplied.
1 Fit the back section to the wall with the two screws
supplied.
2 Place the remote control in the front section. Clip
2 Hook the front section onto the back section at the
top, click it into place at the bottom and fix it with
a screw.
3 Place the remote control in the holder. It is secured
by means of built-in magnets.
52
the white strap around the assembled unit. Hook
the assembled unit to the back section at the top.
Ensure that the strap fits into the openings in the
sides of the back section. Lock the unit into place
at the bottom.
3 Fix the unit with screw at the bottom.
53
Fitting of rain sensor
If the rain sensor has not already
been fitted, fit it as shown, see
instructions for rain sensor.
If the rain sensor gets wet, the window operator will automatically
close the window.
The mains supply must be
switched off when fitting the
rain sensor!
Fitting of blinds, roller shutters etc
GGL
GGU
The window is prepared for fitting of interior and
exterior decoration and sunscreening products as
well as frame lights. Product availability may differ in your country. For further information, please
refer to appropriate instructions or contact VELUX.
SML
SMG
MML
KRA
SML
Installation on top cover of
window (GGL/GGU)
Adhere the rain sensor to a dry,
clean surface. Lead cable into the
window as shown and connect it to
the connection box on the motor (A).
PML
RML
DML
FML
MML
Installation on roller shutter (SML)
or awning blind (MML)
Adhere rain sensor to a dry, clean
surface. Lead cable under roller
shutter/awning blind so that the window can be opened when the roller
shutter/awning blind is rolled down.
Then lead the cable into the window
as shown and connect it to the connection box on the motor (A).
54
Products
A
B
SML/SMG
A
Electrically operated roller shutter
MML
Electrically operated awning blind
PML
Electrically operated Venetian blind
RML
Electrically operated roller blind
DML
Electrically operated blackout blind
FML
Electrically operated pleated blind
KRA
Frame lights
SML
SMG
MML
PML
RML
DML
FML
KRA
55
Manual operation of the window
The window may be manually operated (A). If
opened manually, it must also be closed manually.
A
Cleaning the pane
Do not open the window with the remote control!
Switch off the mains supply.
Pull the control bar to open the window (A).
Rotate the sash fully and secure it in position by
sliding the sash barrel bolt into the bushing at the
bottom left hand corner of the frame (B). This safety feature leaves both hands free for cleaning (C).
Clean the pane with a soft, clean, lint-free cloth/
chamois leather/non-abrasive sponge or clean
non-metal window squeegee. Clean water will
normally be sufficient for cleaning the pane.
Ordinary, non-abrasive household cleaners can
also be used. "Soft" water is best for cleaning
panes. In hard-water areas, a small amount of
detergent can be used to soften the water.
Warning
• Do not use any cleaning products containing
silicone or abrasive particles.
• Do not use chemical products.
• Avoid contact with the pane from all sharp or
abrasive objects including jewellery.
• Never attempt to clean off dirt on the pane without first applying water.
• If any works are taking place in the vicinity of
the pane, protect the pane with a clean plastic
sheet to prevent any splashes or staining from
aggressive compounds.
56
B
Closing window in case of power
failure
The chain can be disengaged by
pressing the release clip on the
ventilation flap bracket (D). Fold
the chain as shown, and close the
window (E). When the power is
reconnected, the chain can be reengaged by opening the window
manually and running the chain
back into the window operator.
D
Closing window if the remote
control has been mislaid
The chain can be disengaged by
pressing the release clip on the
ventilation flap bracket (D) and run
back by pressing the test button on
the window operator (F).
E
C
F
57
Maintenance of the window
Switch off the mains supply before proceeding with items 2, 3 and 5!
1 Minimising condensation
Particularly in rooms with high levels of humidity,
condensation can form on the inner pane of the
window. This can be minimised by fitting a radiator directly below the window and by airing the
room frequently.
2 Cleaning the air filter
The air filter can be removed and washed with
ordinary household cleaners. Fully rotate and lock
the window, then remove the filter from the filter
rail. (New filters are available from VELUX).
3 Cleaning the flashing
Leaves and other debris should be removed from
the flashing around the window once per year to
allow rainwater to flow freely.
4 Snow and ice
Remove snow and ice to allow melt water to drain
off from and around the window.
58
5 Cleaning the rain sensor
Dirt on the rain sensor may cause operating problems. Therefore, it is recommended to clean the
rain sensor with a soft wet cloth once or twice a
year or when needed.
6 Maintenance of timber (GGL)
Pre-varnished (TOPfinish) and
painted windows (PAINTfinish)
The timber has received basic treatment and
a finished coating at the factory and can be
cleaned with ordinary household cleaners. It must
receive further treatment at least every four years
and whenever required. Windows exposed to
strong heat, strong sunlight and/or high levels of
humidity (eg in kitchens or bathrooms) must however receive treatment at least every two years.
Surface maintenance: Remove surface treatment
(varnish or paint). Ensure surface is clean and
dry and apply primer to the timber. When dry,
apply a coat of waterbased acrylic varnish/paint
(always follow the manufacturer’s directions).
Apply the same method to the affected areas if
the varnish/paint is damaged.
7 Cleaning the window (GGU)
The white polyurethane surface can be cleaned
with ordinary household cleaners.
59
Display symbols
Glossary
Batteries must be changed within 2 weeks
(type AA, 1.5 volt).
Adjustment: VELUX electrical decoration and sunscreening products are not adjusted to the window size on delivery. When operated the first time, they will therefore run from bottom to top or from
top to bottom of the window without interruption. After adjustment
the product is ready for use.
Timer function has been activated for the product
in question.
Timer function has been activated for one of the
products in the remote control.
Automatic registration of product(s) is running.
Battery level low: The battery is running out of power.
Blocked: Unknown object obstructs operation of product. Remove
obstruction to obtain normal operation.
Operation of a product.
Defect during operation: The product has stopped during operation. Check the product.
The product or function requested is highlighted.
Limited by rain sensor: It is raining and the rain sensor has been
activated. Manual operation of the window is possible.
A Program (P1/P2) has been activated.
Manual operation: The window has been opened manually.
Close the window to allow for electrical operation.
A Program (P1/P2) is being recorded.
Memory: The following functions occupy the memory of the remote
control: Timer, Room, Group, Rename, Programs P1/P2. Use of
these functions will reduce the total memory.
Slats of Venetian blinds can be tilted from
0 to 100%.
A Venetian blind can be drawn up or down from
0 to 100%.
A name can be saved, see section Naming.
Deletion of character, see section Naming.
One-way remote control: Product based on one-way RF communication and marked with the symbol . This symbol can be found
under the battery cover.
1
Power usage high: The power usage in the light module is too high.
The light bulbs are too strong compared to the specifications or the
light module is defective.
Space character, see section Naming.
60
61
Glossary
Declaration of Conformity
Power usage low: The power usage in the light module is too
low. The light bulbs are either too weak compared to the specifications or one or more bulbs are defective. The light module might be
defective.
Product: A VELUX or io-homecontrol ® product, which can be operated via the remote control such as an INTEGRA roof window, a
roller shutter, a light module etc.
Reduced power supply: The power supply to the product has
been reduced. Limited operation.
Repeater: A unit increasing the range of the remote control.
SCD (Secured Configuration Device): A security device may be
integrated in the system. If installed, the security device must be
activated to be able to use the functions under menu item System
settings. In addition, the configuration button on the product (test
button on window operator) will not work. For further information
regarding SCD usage, please contact VELUX.
Two-way remote control: Product based on two-way RF communication and marked with the symbol . This symbol can be found
under the battery cover.
2
In accordance with the Council Directives 98/37/EEC,
89/336/EEC (2004/108/EEC), 73/23/EEC and 1999/5/EEC
We herewith declare that
VELUX roof windows GGL INTEGRA® (----21) and GGU INTEGRA® (----21),
VELUX electrical conversion kit KMX 100 (3MG A01, 3UC A02,
3LA A01 and 3LR A01) for VELUX roof windows GGL and GGU and
VELUX remote control KLR 100 (3LR A01)
- are in conformity with the provisions of Machinery Directive
98/37/EEC, EMC Directive 89/336/EEC (2004/108/EEC), Low
Voltage Directive 73/23/EEC and R&TTE Directive 1999/5/EEC as
amended,
- have been manufactured in accordance with the harmonised standards EN 300220-3, EN 301489-1, EN 301489-3, EN 55014-1,
EN 55014-2, EN 55022, EN 55024, EN 60335-1, EN 60335-2-103,
EN 61558-1 and EN 61558-2-17.
The above-mentioned VELUX roof windows and VELUX electrical conversion kit when installed on a VELUX roof window are to be considered as machines, which are not to be put into service until they have
been installed according to instructions and requirements.
The total system then complies with the essential requirements of the
Council Directives 98/37/EEC, 89/336/EEC (2004/108/EEC),
73/23/EEC and 1999/5/EEC as amended.
Ventilation: Ventilation via ventilation flap without opening the
window.
VELUX A/S: ........................................................................
(Klaus Lorentzen, Product Management)
Ådalsvej 99, DK-2970 Hørsholm .................................
Declaration no. 932886-00
62
63
A:
VELUX Österreich GmbH
02245/32 3 50
J:
VELUX-Yespan Ltd.
03(3478)81 41
AUS:
VELUX Australia Pty. Ltd.
(02) 9550 3288
LT:
VELUX Lietuva, UAB
(85) 270 91 01
B:
VELUX Belgium
(010) 42.09.09
LV:
VELUX Latvia SIA
7 27 77 33
BG:
VELUX Bulgaria EOOD
02/955 99 30
N:
VELUX Norge AS
22 51 06 00
BiH:
VELUX Bosna i Hercegovina d.o.o.
033/626 493, 626 494
NL:
VELUX Nederland B.V.
030 - 6 629 629
BY:
VELUX Roof Windows
(017) 217 7385
NZ:
VELUX New Zealand Ltd.
09-6344 126
CDN: VELUX Canada Inc.
1 800 88-VELUX (888-3589)
P:
VELUX A/S - Sucursal em Portugal
21 880 00 60
CH:
PL:
VELUX-POLSKA Sp. z o.o.
(022) 33 77 000 / 33 77 070
CHN: VELUX (CHINA) CO. LTD.
0316-607 27 27
RA:
VELUX Argentina S.A.
0 114 711 5666
CZ:
VELUX Česká republika, p.r.o.
531 015 511
RCH:
VELUX Chile Limitada
2-231 18 24
D:
VELUX Deutschland GmbH
0180-333 33 99
RO:
VELUX România S.R.L.
0-8008-83589
DK:
VELUX Danmark A/S
45 16 45 16
RUS:
VELUX Rossia ZAO
(095) 737 75 20
E:
VELUX Spain, S.A.
91 509 71 00
S:
VELUX Svenska AB
042/144450
EST:
VELUX Eesti OÜ
601 1046
SK:
VELUX Slovensko, p.r.o.
(02) 60 20 15 00
F:
VELUX France
0821 02 15 15
0,119€ TTC/min
SLO:
VELUX Slovenija d.o.o.
01 564 14 84
TR:
FIN:
VELUX Suomi Oy
09-887 0520
VELUX Çatı Pencereleri
Ticaret Limited Şirketi
0 216 302 54 10
GB:
VELUX Company Ltd.
0870 166 7676
UA:
VELUX Ukraina TOV
(044) 490 5703
H:
VELUX Magyarország Kft.
(06/1) 436-0530
USA:
VELUX America Inc.
1-800-88-VELUX
HR:
VELUX Hrvatska d.o.o.
01/6221 212
YU:
VELUX Jugoslavija d.o.o.
011 3670 468
I:
VELUX Italia p.p.a.
045/6173666
IRL:
VELUX Company Ltd.
01 816 1620
VELUX Schweiz AG
062/289 44 44
www.VELUX.com
Directions for use for INTEGRA. Order No. VAS 451452-1205
©2004, 2005 VELUX Group
® VELUX, the VELUX logo, INTEGRA, io-homecontrol and the io-homecontrol logo are registered trademarks