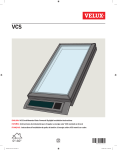
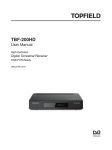
1
VELUX INTEGRA®
KLR 200
Version: 002.001.xxx.xxx
Congratulations on your new VELUX INTEGRA® product!
Thank you for buying this VELUX INTEGRA® product.
The control pad has been produced and tested in accordance with the newest
methods and strictest requirements and will help you to get the most out of all your
VELUX INTEGRA® products.
DIRECTIONS FOR USE FOR VELUX INTEGRA ® KLR 200. ©2013, 2014 VELUX GROUP
® VELUX, THE VELUX LOGO, INTEGRA, io-homecontrol AND THE io-homecontrol LOGO ARE REGISTERED TRADEMARKS USED UNDER LICENCE BY THE VELUX GROUP
VAS 453347-2014-01
VELUX INTEGRA®
KLR 200
Contents
Important information
1
Control pad
Control pad functions
2
4
5
Operation
Basic operation
Operation of windows
6
Operation of sunscreening products
7
Operation of lights
8
Operation of products connected to on/off switch
8
Operation of other types of io-homecontrol® products
8
Product position
8
Turn on/Home/Stop all products
8
Programs
Using programs
VELUX programs
9
10-14
- Using a program
10-11
- Editing a program
12-13
- Adding a program to the product navigator
14
- Resetting to default settings
14
Own programs
15-22
- Creating a program
15-17
- Editing a program
18-19
- Adding a program to the product navigator
20
- Renaming a program
21
- Silent mode operation
22
- Deleting a program
22
Smart operation
Finding products
23
Keyboard
23
Renaming products
Groups
24
25-28
- Creating a group
25
- Editing a group
26
- Renaming a group
27
- Deleting a group
Rooms
28
29-32
- Creating a room
29
- Editing a room
30
- Renaming a room
31
- Deleting a room
32
VELUX 2
VELUX INTEGRA®
KLR 200
Contents
Favourites
33-34
- Editing order of products in the product navigator
33
- Editing favourites
34
Operation without using the control pad
Manual operation of centre-pivot windows
35
Closing centre-pivot windows in case of power failure or discharged battery
36
Closing windows if the control pad has been mislaid
37
3
Setting up
Start-up of a new VELUX INTEGRA® system
Initial set-up
38
If the initial set-up fails
39
Extension of your VELUX INTEGRA® system
Adding products to the control pad
40
Adding a control
41-93
- Adding a control to your system already operated with a VELUX INTEGRA® control pad KLR 200
41-53
- Adding a VELUX INTEGRA® control pad KLR 200 to your system already operated with another control
54-68
- Allowing controls already in use in their separate systems to operate each other’s products
69-93
Deleting products in the control pad
94
Joint operation of io-homecontrol® products
95-97
- Sending the security key to another io-homecontrol® control
96
- Receiving the security key of another io-homecontrol ® control
97
®
- Creating a new security key in VELUX INTEGRA control pad KLR 200
97
Settings
Time and date
98-99
Language
100
Silent mode operation of products
100
Resetting the control pad
101
Security
Password
Changing the security key
102
103-113
4 Installation
Fitting the control pad to the wall
114
Repositioning the rain sensor in case of retrofitting
115
Declaration of conformity
116
VELUX 3
VELUX INTEGRA®
KLR 200
Important information
Read instructions carefully before installation. Please keep
instructions for future reference and hand them over to any new
user.
Note: These instructions cover products, product features and
product offerings that may vary with markets and selected language. Consequently, the display illustrations, the display texts
and the available features related to your product may differ
from what is shown in these instructions. Contact your VELUX
sales company for specific information, see telephone list or
www.velux.com.
Safety
• The control pad is intended for operation by persons with the
relative experience and knowledge or persons who have been
given instruction concerning its use by a person responsible
for their safety.
• Children must not be allowed to play with the window and its
electrical products, and the control pad should be kept out of
their reach.
• If repair or adjustment work is needed, disconnect from mains
or battery supply and ensure that it cannot be reconnected
unintentionally.
• Before operating, ensure that the window and its electrical
products can be operated without risk of damage to property
or injury to people or animals.
• For personal safety, never have your hand or body out of the
window without first having switched off the mains or battery supply.
Function
• If the rain sensor gets wet, the window operator automatically closes the window; however, the ventilation flap remains
open.
• Disabling the rain sensor implies acceptance of the risk of rain
water being able to enter the building while the window is
open.
• To prevent the window from closing because of very fine/
weak rain, fog or dew, the rain sensor is equipped with a heating element to keep the surface dry.
• If the window has been opened manually, the window operator will not be activated via the rain sensor or other automatic
functions.
• From fully open, it will take up to one minute from the time of
activation before the window is completely closed. Therefore,
in case of sudden rain, water may enter the room before the
window is closed.
• In case of snow and/or ice, the operation of the window may
be blocked.
• It is recommended to place a control pad in the room where
the window and its electrical products have been installed.
Product
• The control pad has been designed for use with genuine
VELUX products. Connection to other products may cause
damage or malfunction.
• The control pad is, within each market region, compatible
with products with the io-homecontrol® logo.
• Electrical products must be disposed of in conformity with
national regulations for electronic waste and not with household waste.
• Used batteries must not be disposed of together with household waste but have to be disposed of in conformity with the
relevant national environmental regulations. Batteries contain
substances that can be harmful if not handled and recycled
correctly.
•
Use local authority battery disposal point where available.
• The packaging can be disposed of with usual household
waste.
• Sound pressure level: Max 70 dB(A).
• Radio frequency band: 868 MHz within Europe and 2.4 GHz in
most countries outside Europe.
• Radio frequency range: 200 m free field. Depending on building construction, the indoor range is approx 20 m. However,
constructions with reinforced concrete, metal ceilings and
plaster walls with steel members may reduce the range.
• Expected battery lifetime of control pad: Up to 1 year.
• Expected battery lifetime of solar powered window operator:
Approx 10 years.
Maintenance and service
• Disconnect from mains or battery supply before carrying out
any maintenance or service work to the window and products
connected to it and ensure that it cannot be reconnected
unintentionally during this time.
• Maintenance and installation must be carried out in consideration to Health and Safety at work requirements.
• If mains cable is damaged, it must be replaced by qualified
personnel in accordance with national regulations.
• Clean the control pad with a soft dry or damp cloth.
• Dirt on the rain sensor may cause operating problems. Therefore, it is recommended to clean the rain sensor with a soft,
wet cloth once or twice a year or when needed.
• In case of accumulation of dirt, the solar cell should be
cleaned with water and ordinary household cleaners.
• Spare parts are available through your VELUX sales company.
Please provide information from the data label.
• If you have any technical questions, please contact your
VELUX sales company, see telephone list or www.velux.com.
io-homecontrol® provides advanced and secure radio technology that is easy to install.
io-homecontrol® labelled products communicate with each other, improving comfort,
security and energy savings.
www.io-homecontrol.com
VELUX 4
VELUX INTEGRA®
KLR 200
Control pad
1
Control pad functions
Shows product
location
Running program
Low battery
Product navigator.
Shows operable product or
program
Activates products, for instance closing a window
or running up a blind
Sets the product position,
for instance running a blind
partly down
/
Pre-set closing
Awning blind control
Roller shutter with upper/lower elements
Opens the ventilation flap of
the window. The window is
still closed
Light gauge
Access to programs and settings
Stops running products.
Shows the position of the
product shown in the display
Activates products, for instance opening a window or
running down a blind
Indicates the product position
from 0-100. A fully opened
window is 100 (100 % open),
and a fully closed blind is 100
(100 % closed)
Tapping the Home button
turns on the display again
after sleep mode and shows
the first product in the product navigator. Touching and
holding it for 3 seconds stops
all products
Battery compartment
Diode
Key button
RESET button
USB stick (type micro-USB B)
Release button for battery
compartment lid
VELUX 5
VELUX INTEGRA®
KLR 200
Operation
2
Basic operation
You can operate all products by tapping icons/buttons or by dragging the slider and tapping the bar in the display.
The product to be operated is shown in the middle of the product
navigator display. If more products are registered in the control
pad, they are shown as shadows in the display sides. Select the
product you want to operate by swiping a finger over the display
in the directions of the arrows.
Operation of windows
1
2
3
4
5
6
7
8
Close
Stop
Open
Open ventilation flap only. The window is still closed.
Drag the slider or tap the bar to open the window to desired
position. The position from 0-100 is shown in the bottom right
corner.
Tap the clock to close the window automatically after a given
period of time.
Choose for how many minutes the window is to be open and tap
"OK".
The icon in the bottom left corner shows for how many minutes
the window will still be open.
5
1
2
4
3
7
6
8
Note: If you try to open a window while it is raining, only the
ventilation flap will be opened. This function prevents the rain from
coming in. Tap "OK" to accept.
Alternatively, tap "Open anyway" if you want to open the window
even if it is raining. The window can now be opened up to a maximum of 50 %. After 15 minutes, the window will close automatically if it is still raining.
If you set the automatic closing to less than 15 minutes, the window will close automatically at the end of this time period.
VELUX 6
VELUX INTEGRA®
KLR 200
Operation
2
Basic operation
Operation of sunscreening products
Roller shutters/Awnings blinds/Blinds
1
2
3
4
Run up
Stop
Run down
Drag the slider or tap the bar to set the position of the sunscreening product. The position from 0-100 is shown in the
bottom right corner.
4
1
2
3
Roller shutters with upper/lower elements
5
6
7
6
Tap
.
Tap the element you want to operate.
Tap "OK". You can now operate the element as described above.
7
5
Venetian blinds
1 Run up
2 Stop
3 Run down
4 Drag the slider or tap the bar to set the position of the Venetian
blind. The position from 0-100 is shown in the bottom right
corner.
5 Tap
to set the tilting of the slats.
6 Tap
to tilt the slats upwards.
7 Stop
8 Tap
to tilt the slats downwards.
9 Drag the slider or tap the bar to set the tilting of the slats.
The tilting from 0-100 is shown in the bottom right corner.
10 Tap
to return to setting the position of the Venetian blind.
4
1
2
3
5
9
6
7
8
10
VELUX 7
VELUX INTEGRA®
KLR 200
Operation
2
Basic operation
Operation of lights
1
2
3
4
Turn off
Stop
Turn on
Drag the slider or tap the bar to set the intensity of the light.
The intensity from 0-100 is shown in the bottom right corner.
4
1
2
3
Operation of products connected to on/off switch
1
2
Turn off
Turn on
1
2
Operation of other types of io-homecontrol® products
1
2
3
Open
Stop
Close
Note: The example shows a garage door.
1
2
3
Product position
Tap "STOP" and the position of the product can now be seen in
the bottom right hand corner of the product navigator display. For
instance, you can see how far a window is open.
Turn on/Home/Stop all products
To prolong the lifetime of the control pad batteries, the display
goes into sleep mode shortly after the last touch. You turn on the
display again by tapping .
When the display is on, a tap on takes you home to the first
product in the product navigator.
Touching and holding
for at least 3 seconds stops all products.
VELUX 8
VELUX INTEGRA®
KLR 200
Operation
2
Programs - Using programs
A program can help you get a smarter home. It can ensure that
your house is ventilated regularly, that internal temperatures are
kept down during the day when necessary, and that the heat loss
is reduced at night.
Tap in the top right corner of the display to get access to the
programs.
Under "Programs", you will find the VELUX programs available for
the products registered in your control pad. The more different
products registered, the more VELUX programs available. There
are eight VELUX programs.
Two programs will run only once when activated. You can edit
these programs.
Six programs, when activated, will automatically run repeatedly
according to a set schedule until you stop them. You can edit the
programs. A clock at the bottom right of the program icons indicates that the program will run repeatedly.
Ventilation
Leaving home
Good morning
Sunscreening
Good night
On vacation
Indoor climate
Energy Balance
In addition, you can make your own programs, see the section
Creating a program. Here you can combine the program settings
as you wish.
When choosing a VELUX program, its contents are shown on the
display. Tap to go back.
Tap "Start" to activate a program. Tap "Edit" to change the individual actions/settings of the program to make them match your
wishes.
Tap to go back.
VELUX 9
VELUX INTEGRA®
KLR 200
Operation
2
Programs - VELUX programs
Using a program
Two examples of how to use VELUX programs are shown.
Example 1
The program "Ventilation" makes it easy to open and close your windows.
The example shows how to use it.
2
Tap "Programs".
Tap "Ventilation".
4
Tap "Start".
5
The display asks if you want to
add the program to the product navigator for easier access.
Tap "No".
Note: Tap "Yes" if you want to
add the program to the product navigator (see page 14).
6
The clock turns blue when the
program is running.
Tap "Ventilation" to stop the
program.
7
Tap "Stop".
8
Tap
1
Tap
3
.
to finish.
VELUX 10
VELUX INTEGRA®
KLR 200
Operation
2
Programs - VELUX programs
Example 2
The program "Leaving home" ensures that all windows are closed and that all registered locks are operated.
The example shows how to use it.
1
Tap
3
Tap "Leaving home".
5
Your home is now secured until
you tap "Unlock".
.
2
Tap "Programs".
4
Tap "Start".
Note: The display notifies you
if a window has been opened
manually. This window must
be closed manually again to enable you to secure your home.
NOTE!
After starting "Leaving home",
you can still operate products
ordinarily with another control
pad or control.
However, if you try to activate a
program, the display shows
that operation has been
blocked.
VELUX 11
VELUX INTEGRA®
KLR 200
Operation
2
Programs - VELUX programs
Editing a program
You can change the settings in a program to make it suit you better.
The example shows how to change the settings in the program "Ventilation" into opening just one window and setting its opening position
for ventilation purposes.
2
Tap "Programs".
Tap "Ventilation".
4
Tap "Edit".
5
Tap "Program settings".
6
Tap "All windows".
7
Tap "All windows".
8
1
Tap
3
.
2
1
9
Tap the bar with the blue slider.
10
2
1
Remove ticks for the windows
not to be opened 1 .
Note: The individual products
can be identified by tapping
the icon. See also the section
Finding products.
2.
Tap
Drag the slider or tap the bar
to open window to desired
position. The position from
0-100 is shown in the bottom
right corner 1 .
2.
Tap
Continue on the next page
VELUX 12
VELUX INTEGRA®
KLR 200
Operation
2
Programs - VELUX programs
11
Tap
13
Tap "All windows".
.
Tap "All windows".
12
14
2
1
15
Tap
.
17
Tap
to finish.
16
Remove ticks for the windows
not to be closed 1 .
Note: The individual products
can be identified by tapping
the icon. See also the section
Finding products.
2.
Tap
Tap
.
VELUX 13
VELUX INTEGRA®
KLR 200
Operation
2
Programs - VELUX programs
Adding a program to the product navigator
You can place your program in the product navigator to make it easier to activate.
The example shows how to add the program "Ventilation" to the product navigator.
1
Tap "Ventilation".
2
Tap "Start".
3
The display asks whether you
want to add the program to
the product navigator.
4
Now the program has been
added to the product navigator
where you can access it easier.
Tap "Yes".
Resetting to default settings
To cancel your settings, you can reset to default settings.
1
Tap "Ventilation".
2
Tap "Edit".
3
Tap "Reset to default settings".
4
Tap "Yes".
VELUX 14
VELUX INTEGRA®
KLR 200
Operation
2
Programs - Own programs
Creating a program
If the VELUX programs do not cover your requirements, you can make your own program. You may for instance need to ventilate a room
at a certain time every day.
The example shows how to make a program with the name "Night cooling".
2
Tap "Programs".
Tap "My own program".
4
Tap "Create program".
Tap "Program with a schedule"
if the program is to be repeated
on selected days 1 .
Note: Tap "Program" only if the
program is to run immediately.
2.
Tap
6
Tap "Add products".
1
Tap
3
5
2
1
7
2
.
Tap "Windows"
2.
Tap
1
.
8
2
1
1
9
Tap "Set position".
10
2
1
Scroll down the display and tick
the windows to be included in
the program 1 .
Note: The individual products
can be identified by tapping the
icon. See also the section Finding products.
2.
Tap
Drag the slider or tap the bar to
set the opening of the windows. The position from 0-100
is shown in the bottom right
corner 1 .
2.
Tap
Continue on the next page
VELUX 15
VELUX INTEGRA®
KLR 200
Operation
2
Programs - Own programs
Tap "Start step: 00:00".
11
Roll the wheel to set the time to
open the windows 1 .
Tap "OK" 2 .
12
1
2
Tap "Repeat: All days".
13
14
2
Scroll down the display and
remove tick for the days not to
be part of the program 1 .
2.
Tap
1
.
15
Tap
17
Tap "Add products".
Tap "Create new program step"
to set the time to close the
windows again.
16
18
2
Tap "Windows"
2.
Tap
1
.
1
19
2
1
21
2
1
Scroll down the display and tick
the windows to be part of the
program 1 .
Note: The individual products
can be identified by tapping the
icon. See also the section Finding products.
2.
Tap
20
Tap "Set position".
Drag the slider or tap the bar to
set the opening of the windows
to 0%. The position from 0-100
is shown in the bottom right
corner 1 .
2.
Tap
22
Tap "Start step: 00:00".
Continue on the next page
VELUX 16
VELUX INTEGRA®
KLR 200
Operation
2
Programs - Own programs
23
Roll the wheel to set the time to
close the windows 1 .
Tap "OK" 2 .
24
Tap "Repeat: All days".
Scroll down the display and
remove tick for the days not to
be part of the program 1 .
2.
Tap
26
Tap
Tap
28
1
2
25
2
.
1
27
.
2
1
29
31
Tap "Start" to activate the
program.
30
Enter a name for the program,
in this case "Night cooling" 1 .
For use of keyboard, see the section Keyboard.
2.
Tap
Tap "OK".
The program "Night cooling" is
now in the program overview.
From this overview you may
start, stop and edit the program
at any time. When you start it,
the clock turns blue.
VELUX 17
VELUX INTEGRA®
KLR 200
Operation
2
Programs - Own programs
Editing a program
You can change the settings in a program to make it better suit your requirements.
The example shows how to change the settings so that Window 3 is no longer part of the program "Night cooling".
2
Tap "Programs".
Tap "Night cooling".
4
Tap "Edit".
5
Tap "Program settings".
6
Tap "All windows".
7
Tap "All windows".
8
1
Tap
3
.
2
1
9
Tap
.
10
Remove tick for the window
not to be opened 1 .
Note: The individual products
can be identified by tapping
the icon. See also the section
Finding products.
2.
Tap
Tap "All windows".
Continue on the next page
VELUX 18
VELUX INTEGRA®
KLR 200
Operation
2
Programs - Own programs
11
Tap "All windows".
12
2
1
13
Tap
.
15
Tap
to finish.
14
Remove tick for the window
not to be closed 1 .
Note: The individual products
can be identified by tapping
the icon. See also the section
Finding products.
2.
Tap
Tap
.
VELUX 19
VELUX INTEGRA®
KLR 200
Operation
2
Programs - Own programs
Adding a program to the product navigator
You can place a program in the product navigator to make it easier for you to activate it.
The example shows how to add the program "Night cooling" to the product navigator.
1
Tap
3
Tap "Night cooling".
5
Tick "Show in product navigator".
6
Tap
.
to finish.
2
Tap "Programs".
4
Tap "Edit".
7
Now the program has been
added to the product navigator where you can start and
stop it.
VELUX 20
VELUX INTEGRA®
KLR 200
Operation
2
Programs - Own programs
Renaming a program
You can rename your own programs.
In the example, the name of the program "Night cooling" is changed into "Night program".
Tap "Night cooling".
2
Tap "Edit".
3
Tap "Choose new name".
4
repeatedly to delete
Tap
the present name. For use
of keyboard, see the section
Keyboard.
5
Enter a new name for the
program, in this case "Night
program" 1 .
2.
Tap
6
Tap "OK".
Tap
8
You can find the program with
the new name in the product
navigator.
2
+
1
1
7
to finish.
VELUX 21
VELUX INTEGRA®
KLR 200
Operation
2
Programs - Own programs
Silent mode operation
Some products have been set to silent mode operation when they are activated by programs running according to a schedule, see also
the section Using programs. This may for instance be convenient if the products are activated automatically at night. Please note that
products run slower when they have been set to silent mode operation. If you opt out of silent mode operation, the products will run
faster.
The example shows how to deselect silent mode operation of products operated via the program "Night cooling".
1
Tap "Night cooling".
2
Tap "Edit".
3
Remove the tick for "Silent
mode operation of products".
4
Silent mode operation has now
been deselected.
5
Tap
to finish.
Deleting a program
If you do not want to use one of your own programs anymore, you can delete it.
The example shows how to delete the program "Night cooling".
1
Tap "Night cooling".
2
Tap "Edit".
3
Tap "Delete program".
4
Tap "Yes".
VELUX 22
VELUX INTEGRA®
KLR 200
Operation
2
Smart operation
Finding products
It may be difficult to tell the products from each other in the product navigator. If you are in doubt you can identify the product of interest
at Window 3.
by tapping the icon for product, for instance
The example shows how to find Window 3 if for instance you are renaming the window.
1
Tap
3
Window 3 will now run briefly
back and forwards so you can
see whether you found the right
one or not.
Tap "Window 3".
You can now continue renaming
the window or finding another
product.
for "Window 3".
Tap "Show".
2
Keyboard
To change the names created automatically, you can enter new names via the keyboard. The keyboard is only visible when it is possible to
use it.
Keyboard functions:
Switching between lower and
upper case letters and between
figures and special characters.
Switching between letters and
figures.
Deleting the latest entered
character.
The example shows how to use the keyboard, for instance when you
are renaming groups and want to call a group "Group 1".
Enter "Group" 1 .
Tap "123#" to switch to
figures 2 .
1
1
2
Tap the space bar 1 .
Enter "1" 2 .
Tap to continue 3 .
3
2
1
2
VELUX 23
VELUX INTEGRA®
KLR 200
Operation
2
Smart operation
Renaming products
You can change the names of products to make it easier to find and operate them.
The example shows how to change the names of Window 4 and Window 5 into Left and Right respectively.
3
2
1
5
2
Tap "Name product".
Tap "Window 4" 1 .
Note: The individual products
can be identified by tapping the
icon. See also the section Finding products.
2.
Tap
4
Scroll down the display to find a
name for the product on the list.
Note: You can also enter a
name of your own by tapping
"Enter name". For use of keyboard, see the section Keyboard.
.
6
Tap "OK".
Tap
1
.
Select "Left"
2.
Tap
2
1
1
7
Tap "Window 5"
2.
Tap
2
1
.
8
10
1
.
1
1
9
Select "Right"
2.
Tap
2
Tap "OK".
Tap
to finish.
11
The windows are now called
"Left" and "Right" in the
product navigator.
VELUX 24
VELUX INTEGRA®
KLR 200
Operation
2
Smart operation - Groups
Creating a group
If you have several products of the same type, you can operate them simultaneously by grouping them. For instance, you can open
and close all windows facing south or all windows in a room at the tap on a button.
The example shows how to create the group "Group 1" containing Window 2 and Window 3.
N
Venetian blind 1
Blind 2
Window
1
Blind 1
Window
6
Light 3
Light 1
Roller shutter 4 Roller shutter 3
Roller shutter 2 Roller shutter 1
Window
4
Window
5
Window
2
Group
1
Light 2
1
Tap
3
Tap "Create group".
.
Window
7
Window
3
Light 4
Tap "Groups".
2
4
2
Tap "Windows"
2.
Tap
1
.
1
5
2
1
7
Scroll down the display and tick
the windows to be included in the
group 1 .
Note: The individual products
can be identified by tapping the
icon. See also the section Finding
products.
2.
Tap
6
Tap "Operate group" to finish.
Note: Tap "Create more" to create more settings.
8
2
1
Enter a name for the group, in
this case "Group 1" 1 .
For use of keyboard, see the
section Keyboard.
2.
Tap
You can find the group
"Group 1" in the product
navigator.
VELUX 25
VELUX INTEGRA®
KLR 200
Operation
2
Smart operation - Groups
Editing a group
You can change the contents of a group by adding or removing products.
The example shows how to add Window 4 and Window 5 to the group "Group 1" already consisting of Window 2 and Window 3.
N
Venetian blind 1
Blind 2
Window
1
Blind 1
Window
6
Light 3
Roller shutter 2 Roller shutter 1
Group
1
Window
4
Light 1
Roller shutter 4 Roller shutter 3
Window
5
Window
2
Light 2
1
Tap
3
Tap "Edit group".
.
Window
7
Window
3
Light 4
Tap "Groups".
2
4
Tap "Group 1"
2.
Tap
2
1
.
1
5
7
Scroll down the display to find
the relevant windows.
Note: The individual products
can be identified by tapping the
icon. See also the section Finding
products.
6
Tap "Operate group" to finish.
Note: Tap "Edit more" to create
more settings.
8
2
1
Tick the windows to be added
to the group 1 .
Note: Products can similarly
be removed from a group by
removing the tick.
2.
Tap
You can find the group
"Group 1" containing the additional products in the product
navigator.
VELUX 26
VELUX INTEGRA®
KLR 200
Operation
2
Smart operation - Groups
Renaming a group
You can change the name of a group.
The example shows how to change the name "Group 1" into "South windows".
.
1
Tap
3
Tap "Rename group".
Tap "Groups".
2
4
2
Tap "Group 1"
2.
Tap
1
.
1
5
2
Enter a name for the group, in
this case "South windows" 1 .
For use of keyboard, see the section Keyboard.
2.
Tap
6
Tap "Operate group" to finish.
Note: Tap "Name more" to create more settings.
1
7
The group is now called "South
windows" in the product navigator.
VELUX 27
VELUX INTEGRA®
KLR 200
Operation
2
Smart operation - Groups
Deleting a group
You can delete a group if it is not relevant anymore.
The example shows how to delete the group "South windows".
Note: Only the group is deleted. You can still operate the products individually via the product navigator.
.
1
Tap
3
Tap "Delete group".
Tap "Groups".
2
4
2
1
5
Tap "Yes".
7
The group "South windows" is
not in the product navigator
anymore.
However, you can still operate
the products individually via
the product navigator.
6
Tap the group to be deleted, in
this case "South windows" 1 .
2.
Tap
Tap
to finish.
VELUX 28
VELUX INTEGRA®
KLR 200
Operation
2
Smart operation - Rooms
Creating a room
You can create rooms corresponding to the actual rooms in your home, and put your VELUX products in them. This makes it easier to find
and operate the right products.
The example shows how to create the room "Bedroom" including Window 4 and Window 5 in it.
Roller shutter 2 Roller shutter 1
N
Venetian blind 1
Window
1
Window
4
Blind 2
Window
6
Window
5
Light 3
Roller shutter 2
Window
4
Roller shutter 1
Window
5
Blind 1
Window
7
Light 1
Roller shutter 4 Roller shutter 3
Window
2
Window
3
Bedroom
Light 2
.
1
Tap
3
Tap "Create room".
5
2
Select "Bedroom"
2.
Tap
1
.
2
Tap "Rooms".
4
Scroll down the display to find a
name for the room on the list.
Note: You can also enter a
name of your own by tapping "Enter name". For use
of keyboard, see the section
Keyboard.
6
Scroll down the display and tick
the windows in the room 1 .
Note: The individual products
can be identified by tapping the
icon. See also the section Finding products.
2.
Tap
2
1
1
7
Tap "Operate room" to finish.
Note: Tap "Create more" to create more settings.
Light 4
8
You can now find the room
"Bedroom" in the product
navigator.
VELUX 29
VELUX INTEGRA®
KLR 200
Operation
2
Smart operation - Rooms
Editing a room
You can change the contents of a room by adding or removing products.
The example shows how to add Roller shutter 2 and Roller shutter 1 to the room "Bedroom" already consisting of Window 4 and
Window 5.
Roller shutter 2 Roller shutter 1
N
Venetian blind 1
Blind 2
Window
1
Window
4
Blind 1
Window
6
Window
5
Light 3
Roller shutter 2
Window
4
Roller shutter 1
Window
7
Light 1
Roller shutter 4 Roller shutter 3
Window
5
Window
2
Window
3
Bedroom
Light 2
1
Tap
.
3
Tap "Edit room".
Light 4
Tap "Rooms".
2
4
2
Tap "Bedroom"
2.
Tap
1
.
1
5
7
Scroll down the display to find
the roller shutters in the room.
Note: The individual products
can be identified by tapping the
icon. See also the section Finding
products.
6
Tap "Operate room" to finish.
Note: Tap "Edit more" to create
more settings.
8
2
1
Tick the roller shutters to be
added to the room 1 .
Note: Products can similarly be
removed from a room by removing the tick.
2.
Tap
You can now see the changed
contents of the room
"Bedroom" in the product
navigator.
VELUX 30
VELUX INTEGRA®
KLR 200
Operation
2
Smart operation - Rooms
Renaming a room
You can change the name of a room.
The example shows how to change the name "Bedroom" into "Child's room".
.
1
Tap
3
Tap "Rename room".
Tap "Rooms".
2
4
2
Tap "Bedroom"
2.
Tap
2
Select "Child's room"
2.
Tap
1
.
1
5
7
Scroll down the display to find a
name for the room on the list.
Note: You can also enter a name
of your own by tapping "Enter
name". For use of keyboard, see
the section Keyboard.
6
Tap "Operate room" to finish.
Note: Tap "Rename more" to
create more settings.
8
1
.
1
The room is now called "Child's
room" in the product navigator.
VELUX 31
VELUX INTEGRA®
KLR 200
Operation
2
Smart operation - Rooms
Deleting a room
You can delete a room if it is not relevant anymore.
The example shows how to delete the room "Child's room".
Note: Only the room is deleted. You can still operate the products individually via the product navigator.
.
1
Tap
3
Tap "Delete room".
Tap "Rooms".
2
4
2
1
5
Tap "Yes".
7
The room "Child's room" is
not in the product navigator
anymore.
However, you can still operate
the products individually via
the product navigator.
6
Tap the room to be deleted, in
this case "Child's room 1 .
2.
Tap
Tap
to finish.
VELUX 32
VELUX INTEGRA®
KLR 200
Operation
2
Smart operation - Favourites
Editing order of products in the product navigator
If you use some products, groups or programs more often than others, it may be convenient to show them in another order in the product
navigator.
The example shows how to put the products Window 4 and Window 5 first in the product navigator.
1
Tap
.
3
Tap "Order of products".
5
Tap
7
Scroll down the display to find
the relevant product, in this
case "Window 5".
Note: The individual products
can be identified by tapping the
icon. See also the section Finding products.
9
Tap
.
10
Tap "OK".
11
Tap
to finish.
12
Window 4 and Window 5 are
now at the top of the product
navigator.
.
2
Tap "Product navigator".
4
Scroll down the display to find
the relevant product, in this
case "Window 4".
Note: The individual products
can be identified by tapping the
icon. See also the section Finding products.
6
Tap three consecutive times
to put Window 4 in front of
Window 1.
8
Complete the actions in items
5 and 6 for Window 5 to put it
beneath Window 4.
VELUX 33
VELUX INTEGRA®
KLR 200
Operation
2
Smart operation - Favourites
Editing favourites
When activating the function "Favourites", the product navigator only shows the products, groups and/or programs you use most often.
You can at any time choose to see all your products, groups and/or programs again.
The example shows how to choose Window 1, Roller shutter 1 and Venetian blind 1 as favourites. In consequence, these products will be
the only ones shown in the product navigator. This may be convenient if the control pad is only to be used in the room where these products are located.
2
Tap "Product navigator".
Tap "Favourites".
4
Tap "Edit favourites".
As default all products have
been chosen as favourites.
Remove the tick for all products
not to be favourites.
6
Tap when only the products
to be favourites remain ticked,
in this case Window 1, Roller
shutter 1 and Venetian blind 1.
8
Tap
1
Tap
3
5
.
Note: The individual products
can be identified by tapping the
icon. See also the section Finding products.
7
Tap "OK".
9
The product navigator now
shows the three chosen products only.
to finish.
To be able to see all products
again, you must remove the tick
for "Show favourites" in item 8.
VELUX 34
VELUX INTEGRA®
KLR 200
Operation
Operation without using the control pad
2
Manual operation of centre-pivot windows
You can open and close your centre-pivot window manually.
If the window is already open, you must close it fully via the control pad first.
• Open the window by pulling downwards on the control bar of
the window.
• Close the window again by pushing the control bar back again.
Note: If you have opened the window manually, you must also
close it manually to be able to operate it with the control pad
again. This also applies to making the programs run and the window close automatically in case of rain.
VELUX 35
VELUX INTEGRA®
KLR 200
Operation
2
Operation without using the control pad
Closing centre-pivot windows in case of power failure or discharged battery
A
B
1
2
In case of power failure or discharged battery, you can close your
centre-pivot window manually by disengaging the chain on the ventilation flap of the window.
There are two different ways of doing this, depending on window
type, where the ventilation flap can look like A or B . See below on
how to disengage the chain on the ventilation flap according to your
window type.
A
The ventilation flap of the window looks like A :
1 Disengage the chain by pressing the release clip on the flap
bracket.
2 Remove the flap bracket.
3 Fold the chain as shown, and close the ventilation flap of the
window to ventilation position.
3
B
1
The ventilation flap of the window looks like B :
1 Disengage the chain by pressing the release clip on the flap
bracket.
2 Fold the chain as shown, and close the window manually.
2
When the power has been reconnected or the battery has been
recharged, you must re-engage the chain.
• Open the window manually and unfold the chain.
• Replace the flap bracket if the ventilation flap looks like A .
• Run back the chain by pressing the test button on the window
operator briefly.
• Close the window manually.
VELUX 36
VELUX INTEGRA®
KLR 200
Operation
2
Operation without using the control pad
Closing windows if the control pad has been mislaid
If your control pad has been mislaid, you can still close your window by carrying out the following actions.
Note: This feature is only available for the products shown.
Centre-pivot windows
1
Determine window type A or B as shown on the previous
page. Disengage the chain according to window type.
2
Press the test button on the window operator briefly. Wait
until the chain stops moving then close the window manually.
1
A
B
2
Flat roof windows
1
Carefully remove the cover cap on the kerb.
2
Press the test button on the window operator behind the cover
cap briefly and refit the cover cap.
Top-hung windows
1
Remove the cover of the window operator.
2
Press the test button on the window operator briefly and refit
the cover.
1
2
1
2
VELUX 37
VELUX INTEGRA®
KLR 200
Setting up
3
Start-up of a new VELUX INTEGRA® system
Initial set-up
Before you can operate your VELUX INTEGRA® products, they must be registered in the control pad.
1
Remove the battery compartment lid
by pressing the release button with a
screwdriver as illustrated 1 , 2 .
Insert batteries (type AA/LR6) 3 .
Replace lid.
1
3
2
In the display screen, roll the
wheel in the directions of the
arrows to choose language 1 .
2.
Tap
3
Follow the instructions in the
display, and tap when you
are ready.
Tap
when the control pad
has found all products.
Note: Tap "Search again" if
the control pad did not find
all products and follow the
instructions in the display. Go
to the section If the initial setup fails if the control pad still
cannot find all products even if
they are connected to power.
5
Tap "OK".
2
2
1
4
VELUX 38
VELUX INTEGRA®
KLR 200
Setting up
3
Start-up of a new VELUX INTEGRA® system
If the initial set-up fails
If the control pad cannot find some of the products, you can make the products ready for registration by manually resetting them to their
initial factory settings.
Note: Reset products cannot be operated until they have been registered in the control pad. See the section Initial set-up.
Products can be reset in different ways, depending on window type.
1
Open window manually (if the window is already open, close it
by pressing the test button on the window operator).
2
Press the test button on the window operator for at least
10 seconds.
The window operator and other electrical products on the
window will run briefly back and forth. Frame lights, if installed,
will flash briefly.
Flat roof windows
1
Carefully remove the cover cap on the kerb.
2
Press the test button on the window operator behind the cover
cap for at least 10 seconds.
The window operator and other electrical products on the
window will run briefly back and forth. Refit cover cap.
Modular skylights
1
Remove bottom flashing section from the modular skylight and
unscrew the small, right-hand cover of the control unit.
2
Press the reset button in the control unit for 6-10 seconds.
Screw on the cover again and refit bottom flashing section.
Note: As registration in the control pad must take place within
10 minutes, you are advised to register the products before refitting bottom flashing section.
1
2
1
2
1
2
O
Centre-pivot windows
INT
Note: Contact your local VELUX sales company for reset of products not shown.
VELUX 39
VELUX INTEGRA®
KLR 200
Setting up
3
Extension of your VELUX INTEGRA® system
Adding products to the control pad
You can operate up to 200 products, for instance windows, roller shutters and blinds, by registering them in your control pad.
The example shows how to add more products to the control pad by following the instructions in the display.
.
1
Tap
3
Tap "Add new products".
5
Tap when the control pad
has found the products.
2
Tap "New product".
4
Tap
.
You can now operate the new
products.
VELUX 40
VELUX INTEGRA®
KLR 200
Setting up
3
Extension of your VELUX INTEGRA® system - Adding a control
Adding a control to your system already operated with a
VELUX INTEGRA® control pad KLR 200
"Control" is used as a generic term for all devices that can operate
VELUX INTEGRA® products.
To operate your VELUX INTEGRA® products with additional controls,
the contents of the control pad KLR 200 already in use can be copied
to other controls.
Note: If you have edited the standard programs or made your own
programs, these are not copied to the additional control.
To find the control you want to add to your system, please see the
page references below.
VELUX INTEGRA®
control pad KLR 200
(3LR A02)
Pages 42-43
VELUX INTEGRA®
controller KRX 100
(3LF D02)
Pages 44-46
VELUX INTEGRA®
remote control without display
(3UR B01)
Page 47
VELUX INTEGRA®
interface KLF 050 fitted
into a wall switch/socket
of another make
(3LF D50)
Page 49
VELUX INTEGRA®
interface KLF 100
(3LF D01)
Pages 50-51
Other types of io-homecontrol®
controls
Pages 52-53
1
4
7
¿
2
5
8
0
3
6
9
#
VELUX INTEGRA®
control switch KLI 110
(3LI D01)
Page 48
VELUX 41
VELUX INTEGRA®
KLR 200
Setting up
3
Extension of your VELUX INTEGRA® system - Adding a control
Adding a VELUX INTEGRA® control pad KLR 200 to your system already operated with a control pad KLR 200
The instructions below show how to copy the contents of one
control pad KLR 200 to another.
Control pad KLR 200 to send a copy is called control A .
Control pad KLR 200 to receive a copy is called control B .
A
First execute items 1-4 with
B
.
1
B
1
B
3
Remove the battery compartment lid
by pressing the release button with a
screwdriver as illustrated 1 , 2 .
Insert batteries (type AA/LR6) 3 .
Replace lid.
2
2
2
B
1
4
In the display screen, roll the
wheel in the directions of the
arrows to choose language 1 .
2.
Tap
3
B
Follow the instructions in the
display and tap when you
are ready.
Do not tap "Receive copy" until
item 9.
B
Continue on the next page
VELUX 42
VELUX INTEGRA®
KLR 200
Setting up
3
Extension of your VELUX INTEGRA® system - Adding a control
Now execute items 5-8 with
5
A
.
Tap
.
6
A
A
7
Tap "Copy control pad".
8
Tap
.
A
A
You now have two minutes to execute item 9 with
9
Tap "New product".
B
.
Tap "Receive copy".
B
Follow the instructions in the
display and tap when you
are ready.
11
Tap on both control pads to
finish.
10
Tap "OK".
B
VELUX 43
VELUX INTEGRA®
KLR 200
Setting up
3
Extension of your VELUX INTEGRA® system - Adding a control
Adding a VELUX INTEGRA® controller KRX 100 to your system
already operated with a control pad KLR 200
The instructions below show how to copy the contents of control
pad KLR 200 to controller KRX 100. See also the instructions for
the controller.
Note: Only available for VELUX INTEGRA® products with radio
frequency 868 MHz.
Control pad KLR 200 to send a copy is called control A .
Controller KRX 100 to receive a copy is called control B .
First execute items 1-3 with
B
Connect to mains supply:
Remove the back cover of the controller as shown. Click the adaptor plug into the controller and replace the cover. Connect the
adaptor to mains supply.
Note: The controller saves the selected settings even if the mains
supply is disconnected. Therefore, it is advisable not to fit the
controller permanently until the sunscreening products and the
sensors have been registered in the controller.
However, time and date are only saved for 30 seconds after disconnection of mains supply.
B
RESET
B
Select language:
to highlight your
Press
language.
Press
"Enter" to confirm
your choice.
LANGUAGE
Dansk
English
Français
Deutsch
Enter
P1
P2
B
.
1
2
A
3
SET TIME
B
11:0 0
Enter
Back
P1
P2
Set time:
Press
to set minutes.
Press
"Enter" to change to
hours.
Press
to set hours.
Press
"Enter" to confirm
your settings.
Continue on the next page
VELUX 44
VELUX INTEGRA®
KLR 200
Setting up
3
Extension of your VELUX INTEGRA® system - Adding a control
Prepare sensors and register them in the controller.
Note: You have 10 minutes to execute items 4-8.
Prepare sensors for registration:
Press the button at the bottom
of the sensor with a pointed
object for at least 5 seconds
until the diode flashes.
4
B
reset
5
B
AUTO SET-UP
Prepare sensors
for registration and
press Register
within 10 minutes
Register
Register sensors in the controller:
"Register" to register
Press
the two sensors.
Back
reset
6
Registration is running. This
may take several minutes.
AUTO SET-UP
B
7
INFORMATION
B
Sensor
registered
The display shows "Sensor registered" when the sensors have
been registered.
Press
"Continue" to proceed.
Continue
8
INFORMATION
B
VELUX ACTIVE
not enabled
Menu
Enable
Execute items 10-13 with
10
A
The display shows that the
program VELUX ACTIVE has
not been enabled.
Press
"Enable" to start
registration of sunscreening
products in the controller.
A
AUTO SET-UP
B
Prepare products
for registration and
press Register
Register
Do not press "Register" until
item 14.
Back
.
Tap
.
11
Tap "New product".
A
A
12
9
Tap "Copy control pad".
13
Tap
.
A
Continue on the next page
VELUX 45
VELUX INTEGRA®
KLR 200
Setting up
3
Extension of your VELUX INTEGRA® system - Adding a control
You now have two minutes to execute item 14 with
14
B
AUTO SET-UP
Prepare products
for registration and
press Register
Register
INFORMATION
B
VELUX ACTIVE
enabled
18
.
Press
"Register" in the controller to start registration.
15
AUTO SET-UP
Registration is running. This
may take several minutes.
B
Back
16
Menu
B
Details
The display shows that the
program VELUX ACTIVE has
been enabled.
If the display shows that the
program VELUX ACTIVE has
not been enabled, please refer
to the section Initial set-up,
Interior sunscreening products
in the instructions for the
controller.
Tap
The display shows the program
mode including current temperature and time.
12 : 32
17
B
25°C
Menu
Disable
to finish.
A
VELUX 46
VELUX INTEGRA®
KLR 200
Setting up
3
Extension of your VELUX INTEGRA® system - Adding a control
Adding a VELUX INTEGRA® remote control without display to
your system already operated with a control pad KLR 200
The instructions below show how to copy the contents of control
pad KLR 200 to the remote control without display. See also the
instructions for the remote control.
Note: Only available for VELUX INTEGRA® products with radio
frequency 868 MHz.
Control pad KLR 200 to send a copy is called control A .
The remote control without display to receive a copy is called
control B .
First execute items 1-5 with
A
.
2
Tap "Prepare one-way control".
3
4
Tap "Choose products".
A
A
A
Tap "New product".
A
A
5
B
.
Tap
1
A
2
1
Scroll down the display and choose
the product to be added 1 .
Note: individual products can be
identified by tapping the icon. See
also the section Finding products.
2.
Tap
You now have 10 minutes to execute item 6 with
6
B
Max 1 sec
B
.
Press briefly the RESET button
on the back with a pointed
object to register the new
product.
You can now operate the chosen product with B .
7
A
Tap
to finish.
Note: To add more products,
tap "Choose more" and repeat
items 5-7.
VELUX 47
VELUX INTEGRA®
KLR 200
Setting up
3
Extension of your VELUX INTEGRA® system - Adding a control
Adding a VELUX INTEGRA® control switch KLI 110 to your
system already operated with a control pad KLR 200
The instructions below show how to copy the contents of control
pad KLR 200 to control switch KLI 110. See also the instructions
for the control switch.
Control pad KLR 200 to send a copy is called control A .
Control switch KLI 110 to receive a copy is called control
B
.
A
First execute items 1-5 with
A
.
Tap
1
B
.
2
Tap "New product".
A
A
Tap "Prepare one-way control".
3
4
Tap "Choose products".
A
A
5
Scroll down the display and choose
the product to be added 1 .
Note: individual products can be
identified by tapping the icon. See
also section Find products.
2.
Tap
2
A
1
You now have 10 minutes to execute item 6 with
6
+
B
Max 1 sec
B
.
Press briefly the RESET button
on the back to register the new
product.
You can now operate the chosen product with B .
7
A
Tap
to finish.
Note: To add more products,
tap "Choose more" and repeat
items 5-7.
+
VELUX 48
VELUX INTEGRA®
KLR 200
Setting up
3
Extension of your VELUX INTEGRA® system - Adding a control
Adding a VELUX INTEGRA® interface KLF 050, which is fitted
into a wall switch/socket of another make, to your system
already operated with a control pad KLR 200
The instructions below show how to copy the contents of control
pad KLR 200 to interface KLF 050 fitted into a wall switch/socket of another make. See also the instructions for the interface.
Note: Only available for VELUX INTEGRA® products with radio
frequency 868 MHz.
Control pad KLR 200 to send a copy is called control
Interface KLF 050 to receive a copy is called control
First execute items 1-5 with
A
.
.
.
2
Tap "Prepare one-way control".
3
2
B
4
Tap "Choose products".
1
Scroll down the display and
choose the product to be added 1 .
Note: The individual products
can be identified by tapping the
icon. See also the section Finding
products.
2.
Tap
You now have 10 minutes to execute item 6 with
6
Tap "New product".
A
A
A
B
A
A
5
A
.
Tap
1
A
B
Max 1 sec
B
.
Press briefly the SET button on
the back with a pointed object
to register the new product.
You can now operate the chosen product with B .
7
A
Tap
to finish.
Note: To add more products,
tap "Choose more" and repeat
items 5-7.
VELUX 49
VELUX INTEGRA®
KLR 200
Setting up
3
Extension of your VELUX INTEGRA® system - Adding a control
Adding a VELUX INTEGRA® interface KLF 100 to your system
already operated with a control pad KLR 200
The instructions below show how to copy the contents of control
pad KLR 200 to interface KLF 100. See also the instructions for
the interface.
Control pad KLR 200 to send a copy is called control A .
Interface KLF 100 to receive a copy is called control B .
A
First execute item 1 with
1
B
B
.
Follow the instructions for
the interface until the section
where menu item H is highlighted.
A B CD E F GH
SYSTEM SETTINGS
Register products
Select products
Security key
Enter
Back
Now execute items 2-5 with
2
A
.
Tap
.
A
3
Tap "New product".
A
A
4
B
Tap "Copy control pad".
5
Tap
.
A
Continue on the next page
VELUX 50
VELUX INTEGRA®
KLR 200
Setting up
3
Extension of your VELUX INTEGRA® system - Adding a control
You now have two minutes to execute item 6 with
6
B
A B CD E F GH
SYSTEM SETTINGS
Register products
Select products
Security key
Enter
Back
8
INFORMATION
B
New products registered
.
Press
to highlight
"Register products".
Press
"Enter" to confirm
your choice.
7
AUTO SET-UP
B
Automatic registration is running. Please wait. The registration can take up to one minute.
Back
The display shows that the
new product(s) has/have been
registered.
Back
10
B
Tap
9
B
A B CD E F GH
Press
"Back" to finish.
SYSTEM SETTINGS
Register products
Select products
Security key
Enter
Back
to finish.
A
VELUX 51
VELUX INTEGRA®
KLR 200
Setting up
3
Extension of your VELUX INTEGRA® system - Adding a control
Adding other types of io-homecontrol® controls to your system
already operated with a VELUX INTEGRA® control pad KLR 200
1
4
7
The instructions below show how to copy the contents of control
pad KLR 200 to another type of io-homecontrol® control. See also
the instructions for the control in question.
¿
2
5
8
0
3
6
9
#
Note: Only available for VELUX INTEGRA® products with radio
frequency 868 MHz.
Control pad KLR 200 to send a copy is called control A .
io-homecontrol® control to receive a copy is called control
B
.
A
The instructions are divided into two
sections:
Instructions for one-way controls
marked with this symbol on the product
1
Instructions for two-way controls
marked with this symbol on the product
2
One-way controls
1
First execute items 1-5 with
A
.
Tap
1
.
2
Tap "Prepare one-way control".
3
4
Tap "Choose products".
A
A
5
2
A
1
Scroll down the display and choose
the product to be added 1 .
Note: The individual products
can be identified by tapping the
icon. See also the section Finding
products.
2.
Tap
You now have 10 minutes to execute item 6 with
B
Tap "New product".
A
A
6
B
1
4
7
¿
2
5
8
0
3
6
9
#
B
.
See instructions for the
io-homecontrol® control.
7
Tap
to finish.
A
VELUX 52
VELUX INTEGRA®
KLR 200
Setting up
3
Extension of your VELUX INTEGRA® system - Adding a control
Two-way controls
2
First execute items 1-4 with
A
.
Tap
1
.
2
A
A
Tap "Copy control pad".
3
You now have two minutes to execute item 5 with
B
4
Tap
.
Tap
to finish.
A
A
5
Tap "New product".
1
4
7
¿
2
5
8
0
3
6
9
#
B
.
See instructions for the
io-homecontrol® control.
You may also refer to the
section Joint operation of
io-homecontrol® products.
6
A
VELUX 53
VELUX INTEGRA®
KLR 200
Setting up
3
Extension of your VELUX INTEGRA® system - Adding a control
Adding a VELUX INTEGRA® control pad KLR 200 to your system
already operated with another control
"Control" is used as a generic term for all devices that can operate
VELUX INTEGRA® products.
To operate your VELUX INTEGRA® products with additional controls,
the contents of the control already in use can be copied to your new
control pad KLR 200.
Note: If you have edited the standard programs or made your own
programs, these are not copied to your new control pad.
To find the control already operating your system, please see the
page references below.
VELUX INTEGRA®
remote control KLR 100
(3LR A01)
Pages 55-56
VELUX INTEGRA®
controller KRX 100
(3LF D02)
Pages 57-58
VELUX INTEGRA®
interface KLF 050 fitted
into a wall switch/socket
of another make
(3LF D50)
Pages 63-64
VELUX INTEGRA®
interface KLF 100
(3LF D01)
Pages 65-66
Other types of io-homecontrol®
control
Pages 67-68
1
4
7
¿
2
5
8
0
3
6
9
#
VELUX INTEGRA®
remote control without display
(3UR B01)
Pages 59-60
VELUX INTEGRA®
control switch KLI 110
(3LI D01)
Pages 61-62
VELUX 54
VELUX INTEGRA®
KLR 200
Setting up
3
Extension of your VELUX INTEGRA® system - Adding a control
Adding a VELUX INTEGRA® control pad KLR 200 to your
system already operated with a remote control KLR 100
The instructions below show how to copy the contents from the
remote control KLR 100 already in use to control pad KLR 200.
See also the instructions for the remote control.
Remote control KLR 100 to send a copy is called control A .
Control pad KLR 200 to receive a copy is called control B .
A
First execute items 1-4 with
B
B
.
Remove the battery compartment lid by
pressing the release button with a screwdriver as illustrated 1 , 2 .
Insert batteries (type AA/LR6) 3 .
Replace lid.
1
B
1
3
2
2
2
B
1
4
In the display screen, roll the
wheel in the directions of the
arrows to choose language 1 .
2.
Tap
3
B
Follow the instructions in the
display and tap when you
are ready.
Do not tap "Receive copy" until
item 8.
B
Continue on the next page
VELUX 55
VELUX INTEGRA®
KLR 200
Setting up
3
Extension of your VELUX INTEGRA® system - Adding a control
Now execute items 5-7 with
House
A
No. 1
Window
A
.
Press
5
7
A
"Menu".
A
B
10
B
MENU
House settings
User settings
System settings
Program settings
Menu
Locate
Enter
Back
P1
P2
P1
P2
SYSTEM SETTINGS
Register product
Copy system
Security key
&RQ¿JXre
to highlight "System
Press
settings".
Press
"Enter" to confirm
your choice.
Press
to highlight "Copy
system".
"Enter" to confirm
Press
your choice.
Enter
Back
P1
P2
You now have two minutes to execute item 8 with
8
6
B
.
Tap "Receive copy".
Follow the instructions in the
display and tap when you
are ready.
Tap
to finish.
Tap "OK".
9
B
11
A
SYSTEM SETTINGS
Press
"Back" to finish.
Register product
Copy system
Security key
&RQ¿JXre
Enter
Back
P1
P2
VELUX 56
VELUX INTEGRA®
KLR 200
Setting up
3
Extension of your VELUX INTEGRA® system - Adding a control
Adding a VELUX INTEGRA® control pad KLR 200 to your
system already operated with a controller KRX 100
The instructions below show how to copy the contents from the
controller KRX 100 already in use to control pad KLR 200. See
also the instructions for the controller.
Note: Only available for VELUX INTEGRA® products with radio
frequency 868 MHz.
Controller KRX 100 to send a copy is called control A .
Control pad KLR 200 to receive a copy is called control
First execute items 1-4 with
B
B
A
.
B
.
Remove the battery compartment lid
by pressing the release button with a
screwdriver as illustrated 1 , 2 .
Insert batteries (type AA/LR6) 3 .
Replace lid.
1
B
1
3
2
2
2
B
1
4
In the display screen, roll the
wheel in the directions of the
arrows to choose language 1 .
2.
Tap
3
B
Follow the instructions in the
display and tap when you
are ready.
Do not tap "Receive copy" until
item 8.
B
Continue on the next page
VELUX 57
VELUX INTEGRA®
KLR 200
Setting up
3
Extension of your VELUX INTEGRA® system - Adding a control
Now execute items 5-7 with
A
Press
12 : 32
5
.
"Menu".
6
to highlight "System
Press
settings".
MENU
User settings
A
A
25°C
Menu
Program settings
Disable
P1
7
A
P2
SYSTEM SETTINGS
Register product
Copy system
Security key
Delete sensor
Enter
Back
P1
P2
B
10
B
Enter
Back
P1
P2
to highlight "Copy
Press
system".
Press
"Enter" to confirm
your choice.
You now have two minutes to execute item 8 with
8
Press
"Enter" to confirm
your choice.
System settings
B
.
Tap "Receive copy".
Follow the instructions in the
display and tap when you
are ready.
Tap
to finish.
Tap "OK".
9
B
11
A
SYSTEM SETTINGS
Press
"Back" to finish.
Register product
Copy system
Security key
&RQ¿JXre
Enter
Back
P1
P2
VELUX 58
VELUX INTEGRA®
KLR 200
Setting up
3
Extension of your VELUX INTEGRA® system - Adding a control
Adding a VELUX INTEGRA® control pad KLR 200 to your
system already operated with a VELUX INTEGRA® remote
control without display
The instructions below show how to copy the contents from the
remote control without display already in use to control pad
KLR 200. See also the instructions for the remote control.
Note: Only available for VELUX INTEGRA® products with radio
frequency 868 MHz.
The remote control without display to send a copy is called
control A .
Control pad KLR 200 to receive a copy is called control B .
First execute item 1 with
A
B
.
1
A
Min 10 sec
Press the RESET button
on the back with a
pointed object for at least
10 seconds to prepare the
products for copying.
You now have two minutes to execute items 2-7 with
B
.
2
B
1
A
3
Remove the battery compartment lid by
pressing the release button with a screwdriver as illustrated 1 , 2 .
Insert batteries (type AA/LR6) 3 .
Replace lid.
2
3
2
B
1
In the display screen, roll the
wheel in the directions of the
arrows to choose language 1 .
2.
Tap
Continue on the next page
VELUX 59
VELUX INTEGRA®
KLR 200
Setting up
3
Extension of your VELUX INTEGRA® system - Adding a control
4
B
6
B
Follow the instructions in the
display and tap when you
are ready.
5
Tap "OK".
7
B
The control pad shows that
it has found the products.
Note: Tap "Search again" if
the control pad did not find all
products and follow the instructions in the display. Go to the
section If the initial set-up fails
if the control pad still cannot
find all products even if they are
connected to power.
Tap
to finish.
B
VELUX 60
VELUX INTEGRA®
KLR 200
Setting up
3
Extension of your VELUX INTEGRA® system - Adding a control
Adding a VELUX INTEGRA® control pad KLR 200 to your
system already operated with a control switch KLI 110
The instructions below show how to copy the contents from the
control switch KLI 110 already in use to control pad KLR 200. See
also the instructions for the control switch.
Control switch KLI 110 to send a copy is called control A .
Control pad KLR 200 to receive a copy is called control B .
A
First execute item 1 with
A
.
1
+
A
B
Press the RESET button
on the back for at least
10 seconds to prepare the
products for copying.
Min 10 sec
+
You now have two minutes to execute items 2-7 with
B
.
Remove the battery compartment lid
by pressing the release button with a
screwdriver as illustrated 1 , 2 .
Insert batteries (type AA/LR6) 3 .
Replace lid.
2
B
1
3
2
3
2
B
1
In the display screen, roll the
wheel in the directions of the
arrows to choose language 1 .
2.
Tap
Continue on the next page
VELUX 61
VELUX INTEGRA®
KLR 200
Setting up
3
Extension of your VELUX INTEGRA® system - Adding a control
4
B
6
B
Follow the instructions in the
display and tap when you
are ready.
5
Tap "OK".
7
B
The control pad shows that
it has found the products.
Note: Tap "Search again" if
the control pad did not find all
products and follow the instructions in the display. Go to the
section If the initial set-up fails
if the control pad still cannot
find all products even if they are
connected to power.
Tap
to finish.
B
VELUX 62
VELUX INTEGRA®
KLR 200
Setting up
3
Extension of your VELUX INTEGRA® system - Adding a control
Adding a VELUX INTEGRA® control pad KLR 200 to your
system already operated with an interface KLF 050 fitted
into a wall switch/socket of another make
The instructions below show how to copy the contents from
interface KLF 050 already in use to control pad KLR 200. See
also the instructions for the interface.
Note: Only available for VELUX INTEGRA® products with radio
frequency 868 MHz.
Interface KLF 050 to send a copy is called control A .
Control pad KLR 200 to receive a copy is called control
First execute item 1 with
1
A
.
A
B
.
Min 10 sec
A
B
Press the SET button on the
back with a pointed object for
at least 10 seconds to prepare
the products for copying.
You now have two minutes to execute items 2-7 with
B
.
Remove the battery compartment lid
by pressing the release button with a
screwdriver as illustrated 1 , 2 .
Insert batteries (type AA/LR6) 3 .
Replace lid.
2
B
1
3
2
3
2
B
1
In the display screen, roll the
wheel in the directions of the
arrows to choose language 1 .
2.
Tap
Continue on the next page
VELUX 63
VELUX INTEGRA®
KLR 200
Setting up
3
Extension of your VELUX INTEGRA® system - Adding a control
4
B
6
B
Follow the instructions in the
display and tap when you
are ready.
5
Tap "OK".
7
B
The control pad shows that
it has found the products.
Note: Tap "Search again" if
the control pad did not find all
products and follow the instructions in the display. Go to the
section If the initial set-up fails
if the control pad still cannot
find all products even if they are
connected to power.
Tap
to finish.
B
VELUX 64
VELUX INTEGRA®
KLR 200
Setting up
3
Extension of your VELUX INTEGRA® system - Adding a control
Adding a VELUX INTEGRA® control pad KLR 200 to your
system already operated with an interface KLF 100
The instructions below show how to copy the contents from
interface KLF 100 already in use to control pad KLR 200. See
also the instructions for the interface.
Interface KLF 100 to send a copy is called control A .
Control pad KLR 200 to receive a copy is called control
B
.
A
First execute item 1-4 with
B
B
.
Remove the battery compartment lid
by pressing the release button with a
screwdriver as illustrated 1 , 2 .
Insert batteries (type AA/LR6) 3 .
Replace lid.
1
B
1
3
2
2
2
B
1
4
In the display screen, roll the
wheel in the directions of the
arrows to choose language 1 .
2.
Tap
3
B
Follow the instructions in the
display and tap when you
are ready.
Do not tap "Receive copy" until
item 6.
B
Continue on the next page
VELUX 65
VELUX INTEGRA®
KLR 200
Setting up
3
Extension of your VELUX INTEGRA® system - Adding a control
Now execute item 5 with
5
A
A
.
A B CD E F GH
SYSTEM SETTINGS
Select products
Security key
Copy system
Enter
Back
Follow the instructions for
the interface until the section
where menu item H is highlighted.
to highlight "Copy
Press
system".
Press
"Enter" to confirm
your choice.
You now have two minutes to execute item 6 with
6
B
8
B
B
.
Tap "Receive copy".
Follow the instructions in the
display and tap when you
are ready.
Tap
to finish.
Tap "OK".
7
B
9
A
A B CD E F GH
Press
"Back" to finish.
SYSTEM SETTINGS
Select products
Security key
Copy system
Enter
Back
VELUX 66
VELUX INTEGRA®
KLR 200
Setting up
3
Extension of your VELUX INTEGRA® system - Adding a control
Adding a VELUX INTEGRA® control pad KLR 200 to your
system already operated with another type of
io-homecontrol® control
The instructions below show how to copy the contents from the
io-homecontrol® control already in use to control pad KLR 200.
See also the instructions for the control or the section Joint
operation of io-homecontrol® products.
1
4
7
¿
Note: Only available for VELUX INTEGRA® products with radio
frequency 868 MHz.
io-homecontrol® control to send a copy is called control
Control pad KLR 200 to receive a copy is called control
First execute items 1-4 with
A
2
5
8
0
3
6
9
#
A
.
B.
A
B
.
Remove the battery compartment lid
by pressing the release button with a
screwdriver as illustrated 1 , 2 .
Insert batteries (type AA/LR6) 3 .
Replace lid.
1
B
1
3
2
2
2
B
1
4
In the display screen, roll the
wheel in the directions of the
arrows to choose language 1 .
2.
Tap
3
B
Follow the instructions in the
display and tap when you
are ready.
Do not tap "Receive copy" until
item 6.
B
Continue on the next page
VELUX 67
VELUX INTEGRA®
KLR 200
Setting up
3
Extension of your VELUX INTEGRA® system - Adding a control
Now execute item 5 with
5
A
1
4
7
¿
2
5
8
0
3
6
9
#
A
.
See instructions for the iohomecontrol® control.
If you have two-way controls,
you may also refer to the section Joint operation of
io-homecontrol® products.
You now have two minutes to execute item 6 with
6
B
8
B
.
Tap "Receive copy".
Follow the instructions in the
display and tap when you
are ready.
Tap
7
Tap "OK".
B
to finish.
B
VELUX 68
VELUX INTEGRA®
KLR 200
Setting up
3
Extension of your VELUX INTEGRA® system - Adding a control
Allowing controls already in use in their separate systems to
operate each other’s products
"Control" is used as a generic term for all devices that can operate
VELUX INTEGRA® products.
If you have two (or more) controls that are already in use in their
separate systems where they operate their separate products, you
can make these operate each other’s products. To do this, you must
register all products already registered in each separate control in
both controls so that all products will have the same security key.
To find the control with which control pad KLR 200 is to be merged,
please see the page references below.
VELUX INTEGRA®
control pad KLR 200
(3LR A02)
Pages 70-71
VELUX INTEGRA®
remote control KLR 100
(3LR A01)
Pages 72-73
VELUX INTEGRA®
controller KRX 100
(3LF D02)
Pages 74-75
VELUX INTEGRA®
control switch KLI 110
(3LI D01)
Page 77
VELUX INTEGRA®
interface KLF 050 fitted
into a wall switch/socket
of another make
(3LF D50)
Page 78
VELUX INTEGRA®
interface KLF 100
(3LF D01)
Pages 79-80
Other types of io-homecontrol®
controls
Pages 81-83
1
4
7
¿
2
5
8
0
3
6
9
#
VELUX INTEGRA®
remote control without display
(3UR B01)
Page 76
VELUX 69
VELUX INTEGRA®
KLR 200
Setting up
3
Extension of your VELUX INTEGRA® system - Adding a control
Allowing two or more VELUX INTEGRA® control pads KLR 200
in their separate systems to operate each other’s products
The instructions below show how to make a control pad KLR 200
also operate the products registered in another control pad
KLR 200.
Control pad KLR 200 to receive products is called control A .
Control pad KLR 200 to send products is called control B .
A
First execute items 1-4 with
1
A
.
Tap
.
2
A
3
Tap "Merge control pads".
Tap
B
Tap "Receive products".
.
.
B
B
4
A
You now have two minutes to execute items 5-8 with
7
Tap "New product".
A
A
5
B
6
Tap "New product".
B
Tap "Merge control pads".
8
Tap "Send products".
B
now transfers products to
A
B
Continue on the next page
VELUX 70
.
VELUX INTEGRA®
KLR 200
Setting up
3
Extension of your VELUX INTEGRA® system - Adding a control
Execute items 9-11 with
9
A
.
Tap
Products received
.
1 product received. Note that the name of
the received product has been changed.
10
The display asks if you want to
receive more products.
A
Tap "No".
A
Tap
11
to finish.
A
Execute items 12-13 with
12
B
B
.
Tap "No" if the control pad
shall be able to operate its own
products only.
13
Tap
to finish.
B
Note: Tap "Yes" if the opposite
is the case.
Now A can operate all products. To be able to operate all products
with B as well, you must follow the section Adding products to the
control pad.
If you have additional controls that prior to the transfer were able
to operate the same products as A , their security keys must also
be synchronised to be able to operate these products again. Please
refer to the list on page 84.
1
4
7
¿
2
5
8
0
3
6
9
#
VELUX 71
VELUX INTEGRA®
KLR 200
Setting up
3
Extension of your VELUX INTEGRA® system - Adding a control
Allowing a VELUX INTEGRA® control pad KLR 200 and a
remote control KLR 100 in their separate systems to operate
each other’s products
The instructions below show how to make a control pad KLR 200
also operate the products registered in a remote control KLR 100.
Control pad KLR 200 to receive products is called control A .
Remote control KLR 100 to send products is called control B .
A
First execute items 1-4 with
A
.
Tap
1
.
A
Tap "Merge control pads".
3
A
Tap "Receive products".
4
A
You now have two minutes to execute items 5-7 with
Press
5
House
B
No. 1
Window
B
Tap "New product".
2
A
7
B
B
.
"Menu".
6
B
to highlight "System
Press
settings".
MENU
User settings
"Enter" to confirm
Press
your choice.
System settings
Program settings
Menu
Locate
Enter
Back
P1
P2
P1
P2
SYSTEM SETTINGS
Register product
Copy system
Security key
Delete sensor
to highlight "Copy
Press
system".
Press
"Enter" to confirm
your choice.
B
Enter
Back
P1
P2
to
now transfers products
A.
Continue on the next page
VELUX 72
VELUX INTEGRA®
KLR 200
Setting up
3
Extension of your VELUX INTEGRA® system - Adding a control
Execute items 8-10 with
8
A
.
Tap
Products received
.
9
1 product received. Note that the name of
the received product has been changed.
A
A
The display asks if you want to
receive more products.
Tap "No".
Tap
10
to finish.
A
Execute item 11 with
11
B
B
.
SYSTEM SETTINGS
Press
"Back" to finish.
Register product
Copy system
Security key
Delete sensor
Enter
Back
P1
P2
Now A can operate all products. To be able to operate all products
with B as well, you must follow the section Registering new products in the directions for use for remote control KLR 100.
If you have additional controls that prior to the transfer were able
to operate the same products as A , their security keys must also
be synchronised to be able to operate these products again. Please
refer to the list on page 84.
1
4
7
¿
2
5
8
0
3
6
9
#
VELUX 73
VELUX INTEGRA®
KLR 200
Setting up
3
Extension of your VELUX INTEGRA® system - Adding a control
Allowing a VELUX INTEGRA® control pad KLR 200 and a
controller KRX 100 in their separate systems to operate each
other’s products
The instructions below show how to make a control pad KLR 200
also operate the products registered in a controller KRX 100.
Note: Only available for VELUX INTEGRA® products with radio
frequency 868 MHz.
Control pad KLR 200 to receive products is called control
Controller KRX 100 to send products is called control B .
First execute items 1-4 with
A
A
.
A
B
.
Tap
1
.
Tap "New product".
2
A
A
Tap "Merge control pads".
3
A
Tap "Receive products".
4
A
You now have two minutes to execute items 5-7 with
Press
12 : 32
5
B
.
"Menu".
6
to highlight
Press
"System settings".
MENU
User settings
B
B
25°C
7
B
"Enter" to conPress
firm your choice.
System settings
Program settings
Menu
Disable
Enter
Back
P1
P2
P1
P2
SYSTEM SETTINGS
Register product
Copy system
Security key
Delete sensor
Press
to highlight "Copy
system".
Press
"Enter" to confirm
your choice.
B
Enter
Back
P1
P2
to
now transfers products
A.
Continue on the next page
VELUX 74
VELUX INTEGRA®
KLR 200
Setting up
3
Extension of your VELUX INTEGRA® system - Adding a control
Execute items 8-10 with
8
A
.
Tap
Products received
.
1 product received. Note that the name of
the received product has been changed.
A
Tap
10
9
The display asks if you want to
receive more products.
A
Tap "No".
to finish.
A
Execute item 11 with
11
B
B
.
SYSTEM SETTINGS
Press
"Back" to finish.
Register product
Copy system
Security key
Delete sensor
Enter
Back
P1
P2
Now A can operate all products. To be able to operate all products
with B as well, you must follow the section Registering sunscreening products in controller in the instructions for controller KRX 100.
If you have additional controls that prior to the transfer were able
to operate the same products as A , their security keys must also
be synchronised to be able to operate these products again. Please
refer to the list on page 84.
1
4
7
¿
2
5
8
0
3
6
9
#
VELUX 75
VELUX INTEGRA®
KLR 200
Setting up
3
Extension of your VELUX INTEGRA® system - Adding a control
Allowing a VELUX INTEGRA® control pad KLR 200 and a
VELUX INTEGRA® remote control without display in their
separate systems to operate each other’s products
The instructions below show how to make a control pad KLR 200
also operate the products registered in a remote control without
display.
Note: Only available for VELUX INTEGRA® products with radio
frequency 868 MHz.
A
Control pad KLR 200 to receive products is called control A .
The remote control without display to send products is called
control B .
First execute item 1 with
B
.
1
B
Min 10 sec
Press the RESET button
on the back with a
pointed object for at least
10 seconds to prepare the
products for registration.
You now have 10 minutes to execute items 2-6 with
Tap
2
A
.
.
A
3
Tap "New product".
A
Tap "Add new products".
4
A
5
Tap
.
A
6
A
B
1
Tap when the control pad
has found the products 1 .
You can now operate the new
products.
Tap to finish 2 .
2
To be able to operate selected products with B as well, you must
follow the section Additional remote controls in the instructions
for control system KUX 100.
VELUX 76
VELUX INTEGRA®
KLR 200
Setting up
3
Extension of your VELUX INTEGRA® system - Adding a control
Allowing a VELUX INTEGRA® control pad KLR 200 and a control switch KLI 110 in their separate systems to operate each
other’s products
The instructions below show how to make a control pad KLR 200
also operate the products registered in a control switch KLI 110.
Control pad KLR 200 to receive products is called control A .
Control switch KLI 110 to send products is called control B .
A
First execute item 1 with
B
.
1
+
B
B
Press the RESET button
on the back for at least
10 seconds to prepare the
products for registration.
Min 10 sec
+
You now have 10 minutes to execute items 2-6 with
Tap
2
A
.
.
A
Tap "New product".
A
Tap "Add new products".
4
A
5
Tap
.
A
6
A
3
1
Tap when the control pad
has found the products 1 .
You can now operate the new
products.
Tap to finish 2 .
2
To be able to operate selected products with B as well, you must
follow the section More than one activation control in the instructions for control switch KLI 110.
VELUX 77
VELUX INTEGRA®
KLR 200
Setting up
3
Extension of your VELUX INTEGRA® system - Adding a control
Allowing a VELUX INTEGRA® control pad KLR 200 and an
interface KLF 050 in their separate systems to operate each
other’s products
The instructions below show how to make a control pad KLR 200
also operate the products registered in an interface KLF 050.
Note: Only available for VELUX INTEGRA® products with radio
frequency 868 MHz.
Control pad KLR 200 to receive products is called control
Interface KLF 050 to send products is called control B .
First execute item 1 with
1
B
Tap
A
B
.
.
A
3
Tap "New product".
A
Tap "Add new products".
4
A
5
Tap
.
A
6
A
A
Press the SET button on
the back with a pointed
object for at least
10 seconds to prepare the
products for registration.
You now have 10 minutes to execute items 2-6 with
2
.
.
Min 10 sec
B
A
1
Tap when the control pad
has found the products 1 .
You can now operate the new
products.
Tap to finish 2 .
2
To be able to operate selected products with B as well, you must
follow the section Putting into operation in the instructions for
interface KLF 050.
VELUX 78
VELUX INTEGRA®
KLR 200
Setting up
3
Extension of your VELUX INTEGRA® system - Adding a control
Allowing a VELUX INTEGRA® control pad KLR 200 and an
interface KLF 100 in their separate systems to operate each
other’s products
The instructions below show how to make a control pad KLR 200
also operate the products registered in an interface KLF 100.
Control pad KLR 200 to receive products is called control
Interface KLF 100 to send products is called control B .
A
.
A
First execute items 1-4 with
A
.
Tap
1
.
2
A
Tap "Merge control pads".
A
4
Tap "Receive products".
A
You now have two minutes to execute item 5 with
B
Tap "New product".
A
3
5
B
A B CD E F GH
SYSTEM SETTINGS
Select products
Security key
Copy system
Enter
Back
B
.
Follow the instructions for
the interface until the section
where menu item H is highlighted.
Press
to highlight "Copy
system".
Press
"Enter" to confirm
your choice.
B
to
now transfers products
A.
Continue on the next page
VELUX 79
VELUX INTEGRA®
KLR 200
Setting up
3
Extension of your VELUX INTEGRA® system - Adding a control
Execute items 6-8 with
6
A
.
Products received
Tap
.
1 product received. Note that the name of
the received product has been changed.
A
Tap
8
7
The display asks if you want to
receive more products.
A
Tap "No".
to finish.
A
Execute item 9 with
9
B
B
.
A B CD E F GH
Press
"Back" to finish.
SYSTEM SETTINGS
Select products
Security key
Copy system
Enter
Back
Now A can operate all products. To be able to operate all products
with B as well, you must follow the section Register products in
the directions for use for interface KLF 100.
If you have additional controls that prior to the transfer were able
to operate the same products as A , their security keys must also
be synchronised to be able to operate these products again. Please
refer to the list on page 84.
1
4
7
¿
2
5
8
0
3
6
9
#
VELUX 80
VELUX INTEGRA®
KLR 200
Setting up
3
Extension of your VELUX INTEGRA® system - Adding a control
Allowing a VELUX INTEGRA® control pad KLR 200 and another
type of io-homecontrol® control in their separate systems
operate each other’s products
1
4
7
The instructions below show how to make a control pad KLR 200
also operate the products registered in another type of
io-homecontrol® control.
¿
2
5
8
0
3
6
9
#
Note: Only available for VELUX INTEGRA® products with radio
frequency 868 MHz.
Control pad KLR 200 to receive products is called control
io-homecontrol® control to send products is called control
A
B
.
.
A
B
The instructions are divided into two sections:
Instructions for one-way controls
marked with this symbol on the product
1
Instructions for two-way controls
marked with this symbol on the product
2
One-way controls
1
First execute item 1 with
1
B
3
1
4
7
¿
2
5
8
0
3
6
9
#
B
.
See instructions for the
io-homecontrol® control.
2
You now have 10 minutes to
execute items 2-6 with A .
A
Tap "New product".
4
.
Tap "Add new products".
A
A
5
Tap
Tap
.
A
6
A
1
Tap when the control pad
has found the products 1 .
You can now operate the new
products.
Tap to finish 2 .
2
To be able to operate selected products with B as well, you
must follow items 1-7 in the section Adding other types of
io-homecontrol® controls to your system already operated
with a VELUX INTEGRA® control pad KLR 200.
VELUX 81
VELUX INTEGRA®
KLR 200
Setting up
3
Extension of your VELUX INTEGRA® system - Adding a control
Two-way controls
2
First execute items 1-4 with
A
.
Tap
1
.
2
A
A
Tap "Merge control pads".
3
A
B
4
Tap "Receive products".
A
You now have two minutes to execute item 5 with
5
Tap "New product".
1
4
7
¿
2
5
8
0
3
6
9
#
B
.
See instructions for the
io-homecontrol® control.
You may also refer to the
section Joint operation of
io-homecontrol® products.
B
to
now transfers products
A.
Continue on the next page
VELUX 82
VELUX INTEGRA®
KLR 200
Setting up
3
Extension of your VELUX INTEGRA® system - Adding a control
Execute items 6-8 with
6
Products received
A
.
Tap
.
1 product received. Note that the name of
the received product has been changed.
A
8
Tap
7
The display asks if you want to
receive more products.
A
Tap "No".
to finish.
A
Now A can operate all products. To be able to operate all
products with B as well, you must follow the instructions
for the io-homecontrol® control.
If you have additional controls that prior to the transfer were able
to operate the same products as A , their security keys must also
be synchronised to be able to operate these products again. Please
refer to the list on page 84.
1
4
7
¿
2
5
8
0
3
6
9
#
VELUX 83
VELUX INTEGRA®
KLR 200
Setting up
3
Extension of your VELUX INTEGRA® system - Adding a control
Synchronise the security keys in controls in the same system so
they can operate products again
"Control" is used as a generic term for all devices that can operate
VELUX INTEGRA® products.
If you have a control that no longer can operate the products
because they have been given a new security key, the security key of
this control must be synchronised to be able to operate the products
again.
To find the control that is to have the same security key as control
pad KLR 200, please see the page references below.
VELUX INTEGRA®
control pad KLR 200
(3LR A02)
Pages 85-86
VELUX INTEGRA®
remote control KLR 100
(3LR A01)
Pages 87-88
VELUX INTEGRA®
interface KLF 100
(3LF D01)
Pages 91-92
Other types of io-homecontrol®
controls
Page 93
1
4
7
¿
2
5
8
0
3
6
9
#
VELUX INTEGRA®
controller KRX 100
(3LF D02)
Pages 89-90
VELUX 84
VELUX INTEGRA®
KLR 200
Setting up
3
Extension of your VELUX INTEGRA® system - Adding a control
Synchronise the security keys in two VELUX INTEGRA® control
pads KLR 200 in the same system so they both can operate
products again
The instructions below show how to transfer the security key of a
control pad KLR 200 to another control pad KLR 200.
Control pad KLR 200 to send the security key is called control
Control pad KLR 200 to receive the security key is called
control C .
A
.
A
First execute items 1-4 with
1
A
.
Tap
.
2
A
3
Tap "Copy control pad".
Tap
.
C
C
4
Tap
.
A
You now have two minutes to execute items 5-8 with
7
Tap "New product".
A
A
5
C
C
.
6
Tap "Settings".
C
Tap "Security".
8
Tap "Receive security key".
C
Continue on the next page
VELUX 85
VELUX INTEGRA®
KLR 200
Setting up
3
Extension of your VELUX INTEGRA® system - Adding a control
9
Tap
.
10
C
11
Tap "OK".
C
Tap
to finish.
C
The security key is now identical in both controls, and
products again.
C
can operate
If you have additional controls in the same system, you must also
synchronise their security keys to make them operate the products
again. Please refer to the list on page 84.
To be able to operate all products with C as well, you must follow
the section Adding products to the control pad.
VELUX 86
VELUX INTEGRA®
KLR 200
Setting up
3
Extension of your VELUX INTEGRA® system - Adding a control
Synchronise the security keys in a VELUX INTEGRA® control
pad KLR 200 and a remote control KLR 100 in the same
system so they both can operate products again
The instructions below show how to transfer the security key of a
control pad KLR 200 to a remote control KLR 100.
Control pad KLR 200 to send the security key is called control
Remote control KLR 100 to receive the security key is called
control C .
A
.
A
First execute items 1-4 with
A
.
Tap
1
.
A
Tap "Copy control pad".
3
A
Tap
4
.
A
You now have two minutes to execute items 5-8 with
Press
5
House
C
No. 1
Window
C
Tap "New product".
2
A
7
C
C
.
"Menu".
6
C
Press
to highlight "System
settings".
MENU
User settings
Press
"Enter" to confirm
your choice.
System settings
Program settings
Menu
Locate
Enter
Back
P1
P2
P1
P2
SYSTEM SETTINGS
Register product
Copy system
Security key
Delete sensor
Press
to highlight "Security
key".
Press
"Enter" to confirm
your choice.
8
C
SECURITY KEY
Change
Receive
Enter
Back
Enter
Back
P1
P2
P1
P2
to highlight "Receive".
Press
Press
"Enter" to confirm
your choice.
The display now indicates
that the security key is being
transferred.
Continue on the next page
VELUX 87
VELUX INTEGRA®
KLR 200
Setting up
3
Extension of your VELUX INTEGRA® system - Adding a control
9
Tap
to finish.
10
A
The security key is now identical in both controls, and
products again.
C
C
SECURITY KEY
Press
"Back" to finish.
Change
Receive
Enter
Back
P1
P2
can operate
If you have additional controls in the same system, you must also
synchronise their security keys to make them operate the products
again. Please refer to the list on page 84.
To be able to operate all products with C as well, you must follow
the section Registering new products in the directions for use for
remote control KLR 100.
VELUX 88
VELUX INTEGRA®
KLR 200
Setting up
3
Extension of your VELUX INTEGRA® system - Adding a control
Synchronise the security keys in a VELUX INTEGRA® control
pad KLR 200 and a controller KRX 100 in the same system so
they both can operate products again
The instructions below show how to transfer the security key of a
control pad KLR 200 to a controller KRX 100.
Note: Only available for VELUX INTEGRA® products with radio
frequency 868 MHz.
Control pad KLR 200 to send the security key is called control A .
Controller KRX 100 to receive the security key is called control C .
First execute items 1-4 with
A
A
C
.
Tap
1
.
Tap "New product".
2
A
A
Tap "Copy control pad".
3
A
Tap
4
A
You now have two minutes to execute items 5-8 with
Press
12 : 32
5
C
.
"Menu".
6
Press
to highlight "System
settings".
MENU
User settings
C
C
25°C
7
C
.
Press
"Enter" to
confirm your choice.
System settings
Program settings
Menu
Disable
Enter
Back
P1
P2
P1
P2
SYSTEM SETTINGS
Register product
Copy system
Security key
Delete sensor
Press
to highlight "Security
key".
Press
"Enter" to confirm
your choice.
8
C
SECURITY KEY
Change
Receive
Enter
Back
Enter
Back
P1
P2
P1
P2
to highlight "Receive".
Press
Press
"Enter" to confirm
your choice.
The display now indicates
that the security key is being
transferred.
Continue on the next page
VELUX 89
VELUX INTEGRA®
KLR 200
Setting up
3
Extension of your VELUX INTEGRA® system - Adding a control
9
Tap
to finish.
10
A
The security key is now identical in both controls, and
ate products again.
C
C
SECURITY KEY
Press
"Back" to finish.
Change
Receive
Enter
Back
P1
P2
can oper-
If you have additional controls in the same system, you must also
synchronise their security keys to make them operate the products
again. Please refer to the list on page 84.
To be able to operate all products with C as well, you must follow
the section Registering sunscreening products in controller in the
instructions for controller KRX 100.
VELUX 90
VELUX INTEGRA®
KLR 200
Setting up
3
Extension of your VELUX INTEGRA® system - Adding a control
Synchronise the security keys in a VELUX INTEGRA® control
pad KLR 200 and an interface KLF 100 in the same system so
they both can operate products again
The instructions below show how to transfer the security key of a
control pad KLR 200 to an interface KLF 100.
Control pad KLR 200 to send the security key is called control A .
Interface KLF 100 to receive the security key is called control C .
A
First execute items 1-4 with
A
.
Tap
1
.
A
Tap "Copy control pad".
3
A
Tap
4
.
A
You now have two minutes to execute items 5-6 with
C
Tap "New product".
2
A
5
C
A B CD E F GH
SYSTEM SETTINGS
Register products
Select products
Security key
Enter
Back
C
.
Follow the instructions for
the interface until the section
where menu item H is
highlighted.
Press
to highlight
"Security key".
6
A B CD E F GH
C
SECURITY KEY
Change
Receive
Enter
to highlight
Press
"Receive".
"Enter" to confirm
Press
your choice.
Back
"Enter" to confirm
Press
your choice.
Continue on the next page
VELUX 91
VELUX INTEGRA®
KLR 200
Setting up
3
Extension of your VELUX INTEGRA® system - Adding a control
7
Tap
to finish.
A
8
A B CD E F GH
C
SECURITY KEY
Change
Receive
Enter
The security key is now identical in both controls, and
operate products again.
C
Press
"Back" to finish.
Back
can
If you have additional controls in the same system, you must also
synchronise their security keys to make them operate the products
again. Please refer to the list on page 84.
To be able to operate all products with C as well, you must follow the section Registering products in the directions for use for
interface KLF 100.
VELUX 92
VELUX INTEGRA®
KLR 200
Setting up
3
Extension of your VELUX INTEGRA® system - Adding a control
Synchronise the security keys in a VELUX INTEGRA® control
pad KLR 200 and another type of io-homecontrol® controls in
the same system so they both can operate products again
1
4
7
The instructions below show how to transfer the security key of a
control pad KLR 200 to an io-homecontrol® control.
¿
2
5
8
0
3
6
9
#
Note: Only available for VELUX INTEGRA® products with radio
frequency 868 MHz.
Control pad KLR 200 to send the security key is called control
io-homecontrol® control to receive the security key is called
control C .
First execute items 1-4 with
A
.
.
2
A
Tap "Copy control pad".
A
Tap "New product".
4
Tap
.
Tap
to finish.
A
You now have two minutes to execute item 5 with
C
C
A
3
5
A
.
Tap
1
A
1
4
7
¿
2
5
8
0
3
6
9
#
C
.
See instructions for the
io-homecontrol® control.
You may also refer to the
section Joint operation of
io-homecontrol® products.
The security key is now identical in both controls, and
operate products again.
C
6
A
can
If you have additional controls in the same system, you must also
synchronise their security keys to make them operate the products
again. Please refer to the list on page 84.
To be able to operate all products with C as well, you must follow
the instructions for the io-homecontrol® control.
VELUX 93
VELUX INTEGRA®
KLR 200
Setting up
3
Extension of your VELUX INTEGRA® system
Deleting products in the control pad
You can delete products from the control pad if you do not want to be able to operate them with the control pad anymore.
1
Tap
3
Tap "Delete products".
.
Tap "New product".
2
4
2
1
5
Tap "Yes".
6
Tap
to finish.
7
Tap the product to be deleted,
in this case "Roller shutter 1" 1 .
Note: The individual products
can be identified by tapping the
icon. See also the section Finding products.
2.
Tap
You cannot find the product
"Roller shutter 1" in the
product navigator anymore.
VELUX 94
VELUX INTEGRA®
KLR 200
Setting up
3
Extension of your VELUX INTEGRA® system - Joint operation of io-homecontrol® products
To operate other types of io-homecontrol® products than
VELUX INTEGRA® products with control pad KLR 200 or
operate your VELUX INTEGRA® products with another type of
io-homecontrol® control than control pad KLR 200, all products
must have the same security key.
Please refer to the lists with reference pages in the section Extension of your VELUX INTEGRA® system to see how control pad
KLR 200 can be combined with other specifically described types
of io-homecontrol® products and systems using the same radio
frequency when communicating. Below you can see how to configure io-homecontrol® products in general to include them in joint
systems and how to create a new security key. In principle, control
pad KLR 200 is combinable with other controls without any need
for further instructions but please be aware that not all controls
offer joint operation of io-homecontrol® products.
Under the lid on the back of the control pad KLR 200, a key
button can be activated by pressing it with a pointed object.
Depending on whether you want to receive, send or create a new
security key, you must press this key button for a certain period of
time.
Receive the security key of another control:
Press the key button briefly (max 2 seconds) until the diode starts
flashing slowly
(1 flash per sec).
Diode
Key button
RESET button
Send the security key to another control:
Press the key button a little longer (2-7 seconds) until the diode
starts flashing a little faster
(3 flashes per sec).
Create a new security key:
Press the key button for a long time (7-15 seconds) until the diode
starts flashing very fast
(7 flashes per sec).
IMPORTANT: Prior to creating a new security key, you must check
that all products in the control pad are operable. If a product is not
operable, this product will not be operable with a new security key
either.
To cancel receiving, sending or creating a security key, you must
press and hold the key button until the diode goes out.
The instructions on the following pages show how to transfer the
security key depending on which of the three situations is relevant.
Continue on the next page
VELUX 95
VELUX INTEGRA®
KLR 200
Setting up
Extension of your VELUX INTEGRA® system - Joint operation of io-homecontrol® products
3
Sending the security key to another io-homecontrol® control
VELUX INTEGRA® control pad KLR 200
Tap
to ensure that the control pad display is on.
Press the key button for 2-7 seconds until the diode starts flashing
(3 flashes per sec).
Note: The transfer can be interrupted by pressing the key button
once more.
io-homecontrol® control
A
Press the key button briefly (max 2 seconds) until the diode starts
flashing slowly
(1 flash per sec).
When the diode on your control pad KLR 200 stays green for
about 2 seconds and then goes out, the transfer has succeeded.
KEY
If the diode on your control pad KLR 200 flashes red quickly three
consecutive times
and then goes out, the transfer
has failed. In this case, you must repeat the process with both
controls.
When the security key has been sent, you have to add the
products from control pad KLR 200 to io-homecontrol® control
Please refer to the instructions for io-homecontrol® control A .
A
.
A
Continue on the next page
VELUX 96
VELUX INTEGRA®
KLR 200
Setting up
Extension of your VELUX INTEGRA® system - Joint operation of io-homecontrol® products
3
Receiving the security key of another io-homecontrol® control
io-homecontrol® control
A
Press the key button for 2-7 seconds until the diode starts flashing
(3 flashes per sec).
Note: The transfer can be interrupted by pressing the key button
once more.
KEY
VELUX INTEGRA® control pad KLR 200
Tap
to ensure that the control pad display is on.
Press the key button briefly (max 2 seconds) until the diode starts
flashing slowly
(1 flash per sec).
A
When the diode on your control pad KLR 200 stays green for
about 2 seconds and then goes out, the transfer has succeeded.
If the diode on your control pad KLR 200 flashes red quickly three
consecutive times
and then goes out, the transfer
has failed. In this case, you must repeat the process with both
controls.
When the security key has been received, you have to add the
products from io-homecontrol® control A to control pad KLR 200.
Please refer to the section Adding products to the control pad.
Creating a new security key in VELUX INTEGRA® control pad
KLR 200
Tap
to ensure that the control pad display is on.
Note: All products in the control pad must be operable; otherwise
they will not be operable with a new security key either. Therefore
please make sure that all products are connected to power and
within range before continuing.
Press the key button for 7-15 seconds until the diode starts
flashing very fast
(7 flashes per sec).
When the diode on your control pad KLR 200 stays green for
about 2 seconds and then goes out, the creation has succeeded.
If the diode on your control pad flashes red quickly three consecutive times
and then turns off, the creation has
failed. Some products are now not operable with this control pad
anymore.
VELUX 97
VELUX INTEGRA®
KLR 200
Setting up
3
Settings
Time and date
You can set time and date at any time.
Note: You cannot use programs until you have set time and date.
Setting time
The example shows how to set time.
1
Tap
3
Tap "Time and date".
.
2
Tap "Settings".
2
Roll the wheel in the directions
of the arrows to choose hours
and minutes 1 .
Tap "OK" 2 .
Set hours and minutes
1
Tap "Set time".
1
2
Switch between 12 hours (am/pm) and 24 hours format
1
Scroll down the display until
"Time format" is shown.
2
Tap either 12 or 24 hours
format 1 .
2.
Tap
2
1
Adjust to summer time
1
Time switches automatically
from summer time/daylight saving time to standard time and
vice versa.
This function can be disabled by
removing the tick for "Adjust to
summer time".
Continue on the next page
VELUX 98
VELUX INTEGRA®
KLR 200
Setting up
3
Settings
Setting date
The example shows how to set date.
.
1
Tap
3
Tap "Time and date".
2
Tap "Settings".
2
Roll the wheel in the directions
of the arrows to choose day,
month and year 1 .
Tap "OK" 2 .
Set date
1
Tap "Set date".
1
2
Set date format
1
Scroll down the display and tap
"Date format".
Roll the wheel in the directions
of the arrows to choose date
format 1 .
Tap "OK" 2 .
2
1
2
Tap or when you have
finished setting time and/or
date.
VELUX 99
VELUX INTEGRA®
KLR 200
Setting up
3
Settings
Language
You must choose a language the first time the control pad is put into operation. The chosen language can be changed at any time.
The example shows how to change language.
1
Tap
.
3
Tap "Language".
Tap "Settings".
2
4
2
Roll the wheel in the directions of the arrows to choose
language 1 .
2.
Tap
1
Silent mode operation of products
Some products can be set to silent mode when operated. This may be convenient, for instance if the products are automatically activated
by a program at night.
Note: Products set to silent mode operation run slower.
The example shows how to set products to run in silent mode.
1
Tap
3
Tap "Silent mode operation of
products".
.
Tap "Settings".
2
4
2
Tick the product(s) to run
silently 1 .
2.
Tap
1
VELUX 100
VELUX INTEGRA®
KLR 200
Setting up
3
Resetting the control pad
The control pad can be reset to its initial factory settings if you want to delete all registered products and personal settings and start
afresh.
Note: If you have one control pad only, all products must be reset before you can register them in the control pad again, see the section
If the initial set-up fails. If you have an additional control, you can copy this to the control pad you are resetting instead, see the section
Adding a control.
1
Tap to ensure that the control pad display is on.
2
Remove the battery compartment lid by pressing the release
button with a screwdriver as
illustrated
1, 2.
Press the RESET button on the
back of the control pad with a
pointed object for at least
5 seconds 3 . Replace lid.
2
3
3
Reset control pad
You are about to reset the control pad to
inital factory settings. This means that
products and personal settings will be
deleted.
Do you want to continue?
In the display screen, tap "Yes"
to confirm that you want to
reset the control pad.
The control pad has now been
reset. To be able to use it, the
products must be registered
again. See the section Initial
set-up.
1
VELUX 101
VELUX INTEGRA®
KLR 200
Setting up
3
Security
Password
To ensure that your settings cannot be changed by anyone except yourself, access to the settings of the control pad can be limited by
means of a password.
The example shows how to lock the settings by means of a password.
2
Tap "Settings".
Tap "Security".
4
Tap "Lock settings".
Tap "Lock settings with password" 1 .
2.
Tap
6
1
Tap
3
5
2
.
2
1
1
7
2
Enter the password you have
chosen (at least 4 characters)
1.
For use of keyboard, see the
section Keyboard.
2.
Tap
Enter the chosen password
once more 1 .
2.
Tap
1
8
Tap
to finish.
9
Access to the settings of the
control pad has now been
restricted.
To cancel the password,
execute items 1-5 and tap "Full
access, no password" in item 5.
VELUX 102
VELUX INTEGRA®
KLR 200
Setting up
3
Security
Changing the security key
Controls and products have a security key to ensure that only controls
with the authorised security key can operate your products. If you suspect that the security key in your control has been changed without
your consent, you can create a new one. If you change the security key,
all products in the system must have the new security key.
"Control" is used as a generic term for all devices that can operate
VELUX INTEGRA® products.
To find the control that operates the same system as your control
pad KLR 200 and needs a change of security key, please see the page
references below.
VELUX INTEGRA®
control pad KLR 200
(3LR A02)
Pages 104-105
VELUX INTEGRA®
remote control KLR 100
(3LR A01)
Pages 106-107
VELUX INTEGRA®
interface KLF 100
(3LF D01)
Pages 110-111
Other types of io-homecontrol®
controls
Pages 112-113
1
4
7
¿
2
5
8
0
3
6
9
#
VELUX INTEGRA®
controller KRX 100
(3LF D02)
Pages 108-109
VELUX 103
VELUX INTEGRA®
KLR 200
Setting up
3
Security - Changing the security key
Changing the security key in systems with one or more
VELUX INTEGRA® control pads KLR 200
Control pad KLR 200 to send the security key is called control A .
Control pad KLR 200 to receive the security key is called control B .
It does not matter which control pad is called A or B .
A
First execute items 1-6 with
1
A
.
Tap
.
A
3
A
2
Tap "Settings".
A
Tap "Security".
A
5
B
4
Tap "Lost control pad".
A
Tap
.
6
A
Tap "Send security key".
Note: Tap "No" if you have one
control pad only.
Continue on the next page
VELUX 104
VELUX INTEGRA®
KLR 200
Setting up
3
Security - Changing the security key
You now have two minutes to execute items 7-12 with
7
Tap
B
.
.
B
9
Tap "Settings".
B
Tap "Security".
10
Tap "Receive security key".
B
B
11
8
Tap
.
B
12
Tap "OK".
B
The security key is now identical in both controls.
If you have additional controls, you must execute item 6 with A
and items 7-12 or corresponding items for each additional B , please
see the page references in the section Changing the security key.
Tap or corresponding "Back"
key on all controls to finish.
VELUX 105
VELUX INTEGRA®
KLR 200
Setting up
3
Security - Changing the security key
Changing the security key in systems with one or more
VELUX INTEGRA® control pads KLR 200 and remote
controls KLR 100
Control pad KLR 200 to send the security key is called control
Remote control KLR 100 to receive the security key is called
control B .
A
.
A
First execute items 1-6 with
1
A
.
Tap
.
A
3
A
2
Tap "Settings".
A
Tap "Security".
A
5
B
4
Tap "Lost control pad".
A
Tap
.
6
Tap "Send security key".
A
Continue on the next page
VELUX 106
VELUX INTEGRA®
KLR 200
Setting up
3
Security - Changing the security key
You now have two minutes to execute items 7-10 with
Press
7
House
B
No. 1
Window
Menu
9
B
B
.
"Menu".
8
B
to highlight
Press
"System settings".
Press
"Enter" to confirm your choice.
MENU
User settings
System settings
Program settings
Locate
SYSTEM SETTINGS
Register product
Copy system
Security key
Delete sensor
Press
to highlight "Security
key".
"Enter" to confirm
Press
your choice.
10
B
Enter
Back
P1
P2
SECURITY KEY
Change
Receive
Enter
Back
Enter
Back
P1
P2
P1
P2
Press
to highlight
"Receive".
"Enter" to confirm
Press
your choice.
The display now indicates
that the security key is being
transferred.
The security key is now identical in both controls.
If you have additional controls, you must execute item 6 with A and
items 7-10 or corresponding items for each additional B , please see
the page references in the section Changing the security key.
Tap or corresponding "Back"
key on all controls to finish.
VELUX 107
VELUX INTEGRA®
KLR 200
Setting up
3
Security - Changing the security key
Changing the security key in systems with one or more
VELUX INTEGRA® control pads KLR 200 and controllers
KRX 100
Note: Only available for VELUX INTEGRA® products with radio
frequency 868 MHz.
Control pad KLR 200 to send the security key is called control A .
Controller KRX 100 to receive the security key is called control B .
A
First execute items 1-6 with
1
A
.
Tap
.
A
3
A
2
Tap "Settings".
A
Tap "Security".
A
5
B
4
Tap "Lost control pad".
A
Tap
.
6
Tap "Send security key".
A
Continue on the next page
VELUX 108
VELUX INTEGRA®
KLR 200
Setting up
3
Security - Changing the security key
You now have two minutes to execute items 7-10 with
Press
7
House
B
No. 1
Window
Menu
9
B
B
.
"Menu".
8
B
to highlight
Press
"System settings".
Press
"Enter" to
confirm your choice.
MENU
User settings
System settings
Program settings
Locate
SYSTEM SETTINGS
Register product
Copy system
Security key
Delete sensor
Press
to highlight "Security
key".
"Enter" to confirm
Press
your choice.
10
B
Enter
Back
P1
P2
SECURITY KEY
Change
Receive
Enter
Back
Enter
Back
P1
P2
P1
P2
Press
to highlight
"Receive".
"Enter" to confirm
Press
your choice.
The display now indicates
that the security key is being
transferred.
The security key is now identical in both controls.
If you have additional controls, you must execute item 6 with A and
items 7-10 or corresponding items for each additional B , please see
the page references in the section Changing the security key.
Tap or corresponding "Back"
key on all controls to finish.
VELUX 109
VELUX INTEGRA®
KLR 200
Setting up
3
Security - Changing the security key
Changing the security key in systems with one or more
VELUX INTEGRA® control pads KLR 200 and interfaces
KLF 100
Control pad KLR 200 to send the security key is called control
Interface KLF 100 to receive the security key is called control
A
B
.
.
A
First execute items 1-6 with
1
A
.
Tap
.
A
3
A
2
Tap "Settings".
A
Tap "Security".
A
5
B
4
Tap "Lost control pad".
A
Tap
.
6
Tap "Send security key".
A
Continue on the next page
VELUX 110
VELUX INTEGRA®
KLR 200
Setting up
3
Security - Changing the security key
You now have two minutes to execute items 7-8 with
7
B
A B CD E F GH
SYSTEM SETTINGS
Register products
Select products
Security key
Enter
Back
B
.
Follow the instructions for
the interface until the section where menu item H is
highlighted.
Press
to highlight
"Security key".
Press
"Enter" to confirm
your choice.
8
A B CD E F GH
B
SECURITY KEY
Change
Receive
Enter
Back
to highlight
Press
"Receive".
Press
"Enter" to confirm your choice.
The display now indicates
that the security key is
being transferred.
The security key is now identical in both controls.
If you have additional controls, you must execute item 6 with A and
items 7-8 or corresponding items for each additional B , please see
the page references in the section Changing the security key.
Tap or corresponding "Back"
key on all controls to finish.
VELUX 111
VELUX INTEGRA®
KLR 200
Setting up
3
Security - Changing the security key
Changing the security key in systems with one or more
VELUX INTEGRA® control pads KLR 200 and other types
of io-homecontrol® controls
1
4
7
Note: Only available for VELUX INTEGRA® products with radio
frequency 868 MHz.
Control pad KLR 200 to send the security key is called control
io-homecontrol® control to receive the security key is called
control B .
¿
A
1
A
Tap
.
A
2
Tap "Settings".
A
Tap "Security".
A
5
B
.
A
3
3
6
9
#
.
A
First execute items 1-6 with
2
5
8
0
4
Tap "Lost control pad".
A
Tap
.
6
Tap "Send security key".
A
Continue on the next page
VELUX 112
VELUX INTEGRA®
KLR 200
Setting up
3
Security - Changing the security key
You now have two minutes to execute item 7 with
7
B
1
4
7
¿
2
5
8
0
3
6
9
#
B
.
See instructions for the
io-homecontrol® control. You
may also refer to the section
Joint operation of
io-homecontrol® products.
The security key is now identical in both controls.
If you have additional controls, you must execute item 6 with A and
item 7 or corresponding items for each additional B , please see the
page references in the section Changing the security key.
Tap on the control pad to
finish.
VELUX 113
VELUX INTEGRA®
KLR 200
Installation
4
Fitting the control pad to the wall
You can secure the control pad directly to the wall without using
the holder supplied A . The control pad will be almost flush with
the wall and you will always know where it is.
A
B
The control pad can be made movable by fitting the holder supplied to the wall B and placing the control pad in the holder.
You may also choose not to fit the control pad to the wall.
A
Control pad fitted directly to the wall
The holder is not required.
1
Remove the battery compartment lid by pressing the release
button with a screwdriver as
illustrated.
2
Fit the battery compartment
lid to the wall with the two
screws supplied.
4
1
Press with a pointed object at
the bottom of the holder and
remove the back section.
2
Fit the back section onto the
wall with the two screws supplied.
3
Clip on the holder to the back
section.
4
Place the control pad in the
holder. The control pad is
secured by means of built-in
magnets.
Made in Denma
ark
a
k byVELUX
2
35BA09B
3LR
R AK011 WW
Clip on the control pad to the
battery compartment lid.
T pe 83046
Ty
04 5
5 V d.c max
x 500 mA
Made in Denma
a k byVELUX
ark
2
35BA09B
3LR
R AK011 WW
B
T pe 83046
Ty
04 5
5 V d.c max
x 500 mA
3
Control pad with holder
VELUX 114
VELUX INTEGRA®
KLR 200
Installation
4
Repositioning the rain sensor in case of retrofitting
Retrofitting a VELUX INTEGRA® roller shutter or awning blind
onto a VELUX INTEGRA® centre-pivot window
1
SML
2
If you want to retrofit a VELUX INTEGRA® roller shutter or awning blind onto your VELUX INTEGRA® centre-pivot window, you
must reposition the rain sensor to the side channel of the roller
shutter or the awning blind.
Note: The mains or battery supply must be switched off while
repositioning the rain sensor.
1
Move the rain sensor from window side cover to roller shutter
or awning blind side channel.
Important: The surface to which the rain sensor is to be adhered must be clean and dry.
2
Lead the cable under roller shutter or awning blind without
pulling it tight.
3
Lead the cable into the window as shown.
3
1
MML
2
3
VELUX 115
VELUX INTEGRA®
KLR 200
Declaration of Conformity
For products offered in Europe
For products offered in Australia, Canada, Japan, New Zealand
and the United States of America
In accordance with the Council Directive 2006/95/EC
We herewith declare that the VELUX INTEGRA® products
•
•
•
•
•
•
•
•
roof windows GGL (----21) and GGU (----21),
Solar roof windows GGL (----30) and GGU (----30),
flat roof window CVP (3MX A02),
modular skylight HVC (3MA A01, 3MA A02, 3MA A03,
3MA A04 and 3MA A05),
conversion kit KMX 100 (3MG A01, 3UC A02, 3LA A01
and 3LR A01) for VELUX roof windows GGL and GGU,
conversion kit KMX 200 (3MX A01, 3LA A01 and 3LR
A01) for VELUX roof windows GHL, GHU, GPL, GPU, GTL,
GTU and VKU,
Solar conversion kits KSX 100 (3SM B01, 3SD B01 and
3LR A01) and KSX 100K (3SM BK01 and 3LR A02) for
VELUX roof windows GGL and GGU and
control pad KLR 200 (3LR A02)
-
are in conformity with the Machinery Directive 2006/42/EC,
EMC Directive 2004/108/EC, Low Voltage Directive
2006/95/EC and R&TTE Directive 1999/5/EC and
-
have been manufactured in accordance with the harmonised
standards EN 300220-2, EN 301489-3, EN 55014-1
(2006-12), EN 55014-2(1997-02), EN 55022(2006-09),
EN 55024(1998-09), EN 61000-3-2(2006-04),
EN 61000-3-3(1995-01), EN 50366, EN 60335-1,
EN 60335-2-103, EN 61558-1 and EN 61558-2-16.
We herewith declare that the VELUX INTEGRA® products
• control pad KLR 200 (3LR A02 US),
• Solar skylights VSS and VCS and,
• skylights VSE and VCE
comply with part 15 of the FCC rules, RSS-210 of the IC rules,
ARIB STD T33 and T66 and AS/NZS 4268:
-
Control pad
FCC ID: XSG832794, IC ID: 8642A-832794 and Certificate
of Radio Equipment in Japan: No. 13215185,
-
Window operator (solar powered skylight operator)
FCC ID: XSG832876 and IC ID: 8642B-832876,
-
Window operator (electrically powered skylight operator)
FCC ID: XSG863765 and IC ID: 8642A-863765.
The above-mentioned VELUX INTEGRA® products are to be
considered as machines, which are not to be put into service
until they have been installed according to instructions and
requirements.
The total system then complies with the essential requirements of the Council Directives 2006/42/EC, 2004/108/EC,
2006/95/EC and 1999/5/EC.
VELUX A/S: .................................................................................................
(Lars Gylstorff, Product Management)
22-12-2011
Ådalsvej 99, DK-2970 Hørsholm ............................................................
CE DoC 942000-00
VELUX 116