1
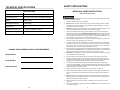
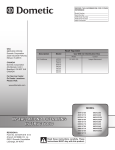
2.0 CU. FT. 15LBS FRONT LOAD WASHER/DRYER INSTALLATION & USERS MANUAL MODEL WDCVLW Form No. 3020307A2542 Released 4/14 USA SERVICE OFFICE Dometic Corporation 2320 Industrial Parkway Elkhart, IN 46516 CANADA Dometic Corporation 46 Zatonski, Unit 3 Brantford, ON N3T 5L8 CANADA For Service Center Or Dealer Locations Please Visit: www.eDometic.com Contents SAFETY PRECAUTIONS Important Safety Instructions Grounding Instructions Before Operating this Appliance Appliance Handling Cautions Before Moving the Appliance Cautions when Washing Clothes INSTALLATION REQUIREMENTS Tools and parts Location requirements Installation Clearances Electrical Requirements Appliance Dimensions Unpacking Appliance Disposal of Packing Materials INSTALLATION INSTRUCTIONS Removal of Transportation Bolts Location Selection Connect Inlet Pipe Connect Inlet Hoses Drain System Options Fastening and Leveling the Appliance Electrical connection OPERATING INSTRUCTIONS Checklist and Preparation before Washing Clothes View of Control Panel and Functions Washing Clothes the First Time Put Detergent into Washing Machine Selecting the Wash Cycle Add Garment Table of Washing Procedures CARE AND CLEANING TROUBLESHOOTING TIPS ALARM CODES APPENDIX TECHNICAL SPECIFICATIONS NOTES 3-4 5 5 5 5 5-6 7 8 8 8 9 9 9 10 10 10 10 10-11 11-12 12 13-15 15-17 17 17 18 18 19 20-22 23 24 25 26 2 27 TECHNICAL SPECIFICATIONS SAFETY PRECAUTIONS IMPORTANT SAFETY INSTRUCTIONS SPECIFICATIONS Power Supply 120V / 60Hz Dimension (W*D*H) 23.5”*21.5”*33.5” (597mm*546mm*838mm) Weight 165lbs (75kg) Washing/Dry Capacity 15.4lbs (7kg) Rated Current 12A Standard Water Pressure 7.3‐145 psi (0.05MPa—1MPa) Max. Spin Speed 1200 rpm Save these instructions To reduce the risk of fire, electric shock, or injury to persons when using your appliance, follow basic precautions, including the following: RECORD THIS INFORMATION FOR FUTURE REFERENCE Model Number: Serial Number: Date Purchased: 26 Read all instructions before using the appliance. DO NOT wash or dry articles that have been previously cleaned, washed, soaked, or spotted with gasoline, dry-cleaning solvents, or other flammable or explosive substances, as they give off vapors that could ignite or explode. DO NOT add gasoline, dry-cleaning solvents, or other flammable or explosive substances to the wash water. These substances give off vapors that could ignite or explode. Under certain conditions, hydrogen gas may be produced in a hot-water system that has not been used for 2 weeks or more. HYDROGEN GAS IS EXPLOSIVE. If the hot-water system has not been used for such a period, before using a washing machine, open all hot-water faucets and allow water flow for several minutes. This will release any accumulated hydrogen gas. The gas is flammable, do not smoke or use an open flame during this time. Always unplug the washing machine from the power supply before attempting any service. Disconnect the power cord by grasping the plug, not the cord. To reduce the risk of fire, clothes, cleaning rags, mop heads and the like which have traces of any flammable substance, such as vegetable oil, cooking oil, petroleum based oils or distillates, waxes, fats,etc.,must not be placed in the washing machine. These items may contain flammable substances which ,even after washing, may smoke or catch fire. Never place items in the washer that have been dampened with gasoline or any combustible or explosive substance. DO NOT wash or dry anything that has been soaked in or spotted with any type of oil (including cooking oils). Doing so can result in fire, explosion, or death. DO NOT allow children to play on or in the appliance. Close supervision of children is necessary when the appliance is used near children. Pets and children may climb into the machine. Check the machine before every operation. Glass door or protector may be very hot during the operation. Caution should be used when opening the door of the appliance after the drying cycle to prevent any potential contact with the hot glass door. Keep children and pets away from the machine during the operation. This machine is not intended for use by persons (including children) with reduced physical, sensory or mental capabilities, or lack of experience and knowledge, unless they are considered by their legal Parent/Guardian to be capable of safely operating the product and have received complete instructions on said safe operation. Children should be supervised to ensure that they do not play with the machine. When children become old enough to operate the appliance, it is the legal responsibility of the parents or legal guardians to ensure that they are instructed in safe practices by qualified persons. DO NOT machine wash fiberglass materials (such as curtains and window coverings that use fiberglass materials.) Small particles may remain in the washing machine and stick to fabrics in subsequent wash loads causing skin irritation. Before the appliance is removed from service or discarded, remove the door and cut off the power cord. Always turn the appliance off before opening the door. DO NOT reach into the appliance if the tub or agitator is moving. 3 SAFETY PRECAUTIONS DO NOT install or store this appliance where it will be exposed to the weather. APPENDIX Clothing Care Labels DO NOT tamper with controls. DO NOT repair or replace any part of the appliance or attempt any servicing unless specifically recommended in the user-maintenance instructions or in published user-repair instructions that you understand and have the skills to carry out. Graphic Symbol Illustration Graphic Symbol Illustration Never stop a drying before the end of the program as heat will be lost extending the dry cycle time. Disconnect power cord plug from the power socket before cleaning or maintenance. Sharp or metal Objects such as coins, nails, screws, pebbles, jewelry, hair broaches or curlers, or hand tools may cause serious damage to this appliance. Make sure that all pockets of clothing to be laundered are emptied. Disconnect the power and shut off the water supply when the appliance is not in use for any period of more than one week. Please check whether the water inside the drum has been drained before opening the door. DO NOT open the door if there is any water visible. DO NOT try to repair the machine by yourself. The machine may be damaged or more troublesome repair work may be caused and even dangerous operation may take place if it is repaired by any inexperienced or unqualified person. If the plug (power cord) is damaged, have it replaced by the manufacturer or a service agent to avoid any danger. This is a 120v/60Hz appliance. Make sure you connect the power cord to a 120v/60Hz power source. Make sure you only use this appliance on a dedicated 120V electrical circuit that has an ampacity rating of no less than 15 Amps and has over current protection at no more than 15 Amps. NEVER DISCONNECT THE POWER CORD WITH WET HANDS! Take care that power supply voltage and frequency are identical to those of washing machine. DO NOT use any socket with rated current less than that of washing machine. Never pull out power plug with wet hand. To ensure your safety, power cord plug must be inserted into a National Electric Code Compliant three blade grounded outlet. Check carefully and make sure that your socket is properly and reliably ground. This machine must be repaired only by an authorized service center and only authentic accessories and service parts can be used. An appliance shall be clearly and permanently marked with a warning that the appliance is intended for use only with fabrics that have been washed with water as a cleaning agent. If connected to a circuit protected by fuses, use time-delay fuses with this appliance. DO NOT use fabric softeners or products to eliminate static unless recommended by the manufacturer of the fabric product. DO NOT use heat to dry articles containing foam rubber or similarly textured rubber-like materials. The interior of the appliance should be cleaned periodically by qualified service personnel. DO NOT place items exposed to cooking oils in your dryer. Items contaminated with cooking oils may contribute to a chemical reaction that could cause a load to catch fire. 4 Electrical To avoid fire, electrical shock and other accidents, please remember the following: Only the voltage indicated on power label can be used. If you are not clear of the voltage at home, please contact the local power company. When you are using the heating function, the maximum current through the washing machine will reach 12A. Therefore, please make sure the power supply units (current, voltage and cable) have a minimum circuit ampacity of 15A . Protect the power cord properly. Power cord shall be fixed well so that it will not trip people or be damaged. DO NOT connect this machine to: A receptacle that is not a National Electrical Code approved device. ANY extension cords. DO NOT make the wall-mounted socket overloaded or cable extended. Overloading of the wiring may cause fire or electrical shock. Do not pull out power plug with wet hand. To ensure your safety, power plug must be inserted into a grounded three pole socket. Carefully check and ensure that your socket is properly and reliably grounded. 25 ALARM CODES SAFETY PRECAUTIONS Grounding Instructions Alarm Code Description E30 Door lock problem. Reason Solution Door not properly closed. Restart after the door is closed. This appliance must be grounded. In the event of a malfunction or breakdown Electrical short, grounding will reduce the risk of electric shock by providing a path of least resistance for the electric current. This appliance is equipped with a cord that has an equipment-grounding conductor and a grounding plug. The plug must be plugged into an appropriate outlet that is properly installed and grounded in accordance with all local codes and ordinances as well as the National Electric Code. Please call up service line if there are still problems. Water injecting problem when washing (water injecting line exceeds 5 minutes). E10 Tap is not opened or water flows slowly. Inlet valve filter is blocked. Inlet pipe is twisted. If water is not supplied. Open tap or wait until the water supply becomes normal. Check inlet valve filter. Check the other water taps in the room. Improper connection of the equipment grounding conductor can result in electric shock. Connect to individual branch Circuit. Check with a qualified electrician or serviceman if you are in doubt as to whether the washer is properly grounded. DO NOT modify the plug provided with the appliance if it will not fit the outlet . Connect only to a proper National Electric Code Compliant outlet installed by a qualified electrician. Please call up service line if there are still problems. Drain problem while washing (drain time exceeds 3 minutes). E21 Outlet hose is blocked or twisted. Drain pump is blocked. Wash and strengthen outlet hose. Wash drain pump filter. Please call up service line if there are still problems. Please call up the service line if there is any other problem. Before Operating this Appliance Packing materials may be dangerous to children. Please keep all packing materials (plastic bags, foams etc.) far away from children. Washing machine shall not be installed in a bathroom or very wet rooms as well as in rooms with explosive or caustic gases. Make sure that the water and electrical hookup is connected by a qualified technician in accordance with the manufacturer's instructions (refer to page 8 “Installation Requirements”) and local safety regulations. Before operating this appliance, all packages and transport bolts must be removed. Otherwise, the appliance may be seriously damaged while washing clothes (refer to page10 “Remove Transport Bolts”.) Prior to the first wash cycle through the cotton and hot water modes without clothes inside. This is required to flush out any debris that may be in the pipes or drum. This washing machine is for indoor use only. Appliance Handling DO NOT climb on, or sit on top cover of the machine. DO NOT lean against machine door. DO NOT close the door with excessive force. If it is difficult to close the door, check that the load of the laundry is not excessive or not well distributed. Cautions Before Moving the Appliance Transport bolts must be reinstalled by a qualified person. The accumulated water must be drained out of the appliance. Handle the appliance carefully. Never hold a protruded part while lifting. Appliance door can not be used as the handle during conveyance. Cautions when Washing Clothes 24 Your washing machine is only for home or RV use and is only designed for the textiles suitable for machine washing. Flammable and explosive or toxic solvents are forbidden. Gasoline and alcohol etc. must not be used as detergents. Only select liquid detergents suitable for front loading washing machines are acceptable. 5 SAFETY PRECAUTIONS DO NOT wash carpets. TROUBLESHOOTING TIPS BURN HAZZARD! Be careful of scalding when washing machine drains hot wash water. Troubles Reason After the program is completed, open the door after the bell. Always follow the fabric care instructions recommended by the clothing manufacturer. Washing machine does not start up. Check if the door is closed tightly. Check if the power plug is inserted properly. Check if water supply tap is open. Check if button “Power” is pressed. Check if button “Start/Pause” is pressed. DO NOT use the washing machine if it has a worn power cord or loose plug. Contact an authorized service agent. DO NOT operate the washing machine if any guards, panels and /or fasteners except transport fixing bolts have been removed. Check the fill hose connections on a regular basis to ensure that they are tight and not leaking. Door does not open. Machine’s safety protection design is working. Inside temperature above 122°F. Disconnect the power. Heating fault. Negative temperature coefficient thermistor (NTC) sensor is damaged and heating pipe is aging. Can normally wash the clothes. Only cannot wash with heating. Contact the service center promptly. Water leakage. The connection between inlet pipe or outlet hose and tap or washing machine is not tight. Drain pipe in the room is blocked. Check and fasten water pipes. Clean up outlet hose and ask a specialized person to repair it when necessary. DO NOT operate the washing machine if parts are missing or broken. DO NOT touch the door if washing at high temperatures. DO NOT use powdered detergents! Use caution and limit quantities of decontaminant and bleach used to pretreat stains and clothes. Note: Solution Never refill the water by hand during washing. The Important Safeguards and Warnings indicated in this manual do not cover all possible conditions which may occur. Common sense, caution and care must be exercised when installing, maintaining or operating this appliance. Always contact your dealer, distributor, service agent or the manufacturer about any problems or conditions that you do not understand. Water is overflowed from The inlet pipe is not connected the bottom of the machine. firmly. Outlet hose has water leakage. Fix the inlet pipe. Replace the drain hose Indicator or display does not light. Power is disconnected. PC board has problems. Harness has connection problem. Check if the power is shut down and power plug is connected correctly. If not, please call up service line. Detergent residues in the box. Washing powder is dampened. Using powdered detergent Clean and wipe the box. Use liquid detergents. Washing effects are not good. The clothes are too dirty. Insufficient detergent quantity. Select a proper procedure. Add the proper detergent quantity according to the instructions in detergent package. Abnormal noise, or vibration. Check if the (transit bolts) have been removed. If cabinet is installed on the solid level floor. Check if there are any heavy or metal articles inside. Check if the legs in the washing machine are adjusted level. See page 6. 6 23 CARE AND CLEANING INSTALLATION REQUIREMENTS Proceed as follows: 1. Turn knob clockwise 2. Open the filter's door This machine must be grounded properly. If there is any short circuit, grounding can reduce the danger of electrical shock. This appliance MUST be connected to a dedicated 15 Amp circuit separate from other electrical appliances and MUST have overcurrent protection device rated at 15Amps. Otherwise, power protector may be tripped or fuse may be burned out. Pull out coin trap and drain excess water 1. 2. 3. 4. 5. 6. 7. Disconnect the appliance; If necessary wait until the water has cooled down. Open the service panel .Place a container close to collect any spillage. When no more water comes out, unscrew the pump cover and remove it. Always keep a rag nearby to dry up spillage of water when removing the cover. Remove any objects from the pump impeller by rotating it. Screw the pump cover fully in. Close the service panel. When the appliance is in use and depending on the program selected there can be hot water in the pump. Never remove the pump cover during a wash cycle, always wait until the appliance has finished the cycle, and is empty. When replacing the cover, ensure it is securely tighten to avoid leaks and children from remove it. Risk of Fire Clothes washer/dryer installation must be performed by a qualified installer. Install the clothes washer/dryer according to the manufacturer’s instructions, The National Electric Code, and local codes must be followed. To reduce the risk of severe injury or death, follow all installation instructions. Save these instructions. Failure to comply with these warnings could result in serious personal injuries. If you plan to dispose this machine, please comply with the local waste disposal regulations. Cut off the power cord so that it will not be put into reuse. Remove the door so that children and animals will not be trapped in the machine. The maximum angle of inclination is 2°. Do not operate appliance beyond this limit. It will affect the dynamic balance and shorten the life of the washer/dryer. Tools and Parts Gather the required tools and parts before starting installation. The parts supplied are in the washer drum. Other items are the responsibility of the installer. I tems Included: 2 Water Hoses 1 Template 3 Bracket 4 Transportation Plugs Items Not Included: 1/4 nut driver 7/16″ socket with ratchet 3/8 socket with ratchet Adjustable wrench 9/16″ open- end wrench Channel- lock adjustable pliers Carpenter’s level Flexible Screw Driver Extension Cable Tie Screws Water Hoses (2) 3/8″ open end wrench Bracket Transportation Plug (4) Siphon Break Template Cable Tie 22 7 INSTALLATION REQUIREMENTS CARE AND CLEANING Location Requirements Selecting the proper location for your washer improves performance and minimizes noise and possible washer vibration and possible movement. In selecting your washer/dryer location consideration must be taken for the drain system, see “Drain System Options ” on page 11,. Requirements: 1. A water heater set to deliver 120°F (49°C) water to the washer. 2. A grounded electrical outlet located within 6 ft.(1.8 m) of where the power cord is attached to the back of the washer. See “Electrical Requirements.” 3. Hot and cold water faucets located within 4 ft.(1.2 m) of the hot and cold water fill valves, and water pressure of 7.3 - 145 psi (0.05 - 1 MPa). 4. A level floor with a maximum slope of 2° under entire washer. Installing the washer on soft floor surfaces, such as carpets or surfaces with foam backing, is not recommended. 5. A sturdy and solid floor to support the washer with a total weight (water and load) of 280lbs. 6. DO NOT operate your washer in temperatures below 32°F (0°C). Some water can remain in the washer and can freeze, causing damage in low temperatures. 7. DO NOT operate washer/dryer if the angle of inclination exceeds 2°. Refer to installation requirements page 7. Installation Clearances 1. 2. 3. 4. The location must be large enough to allow the washer door to be fully opened. Additional spacing should be considered for ease of installation and servicing. The door opens more than 90°, and it is not reversible. Additional clearances might be required for wall, door, and floor moldings. A 25mm or 1” clearance should be maintained on all sides of the appliance to reduce noise transfer. Clean inlet filter Inlet filter must be cleaned if there is little or no water flow when the tap is opened. Clean the tap filter: 1. 2. 3. 4. 5. 6. Washing the filter in washing machine: 1. 2. 3. 4. 5. Electrical Shock Hazard Connect to a grounded 3 prong outlet with an individual branch circuit protected by a 15 amp maximum circuit breaker. Do not use an adapter. Do not use an extension cord. Failure to follow these instructions can result in electrical shock, fire or death. Electrical Requirements 1. 2. 3. 4. 5. 6. 7. A dedicated NEC compliant 120v/60Hz, 15Amp, fused electrical supply is required. A time-delay fuse or circuit serving only this appliance must be provided . This washer is equipped with a power supply cord having a 3 prong grounding plug. To minimize possible shock hazard, the cord must be plugged into a mating,3 prong, grounding type outlet, grounded in accordance with the National Electric Code (NEC), with local codes and ordinances. If codes permit and a separate ground wire is used, it is recommended that a qualified electrician determine that the ground path is adequate. DO NOT ground to a gas pipe . Check with a qualified electrician if you are not sure the washer is properly grounded DO NOT have a fuse in the neutral or ground circuit. 8 Close the tap. Select any procedure except “Wash” or “Drain” procedure. Press the button “Start/Pause” and keep the procedure running for about 40 seconds. Remove the inlet pipe from the tap. Use water to wash the filter. Reconnect the inlet pipe. Screw off the inlet pipe from the backside of the machine. Pull out the filter with long nose pliers and reinstall it back after being washed. Reconnect the inlet pipe. Open the tap and make sure there is no water leakage. Close the tap. Pull out the power plug from power outlet to avoid electrical shock before cleaning. After using the washing machine, pull out the power cord from power outlet and close the door tightly to avoid injury to children. Remove Foreign Object: Drain Pump Filter -Drain pump filter can filter the lint and small foreign objects from the washing. Clean the filter periodically to ensure the normal operation of washing machine. 1. First, drain the water with drain pump and then open the drain pump to clean away foreign objects from drain pump filter. 2. Take care if the drained water is hot. 3. Cleaning the pump Important! - According to the soil level within the cycles and the frequency of the cycles, you have to inspect and clean the filter regularly. The pump should be inspected if the machine does not empty and/or spin; the machine makes an unusual noise during draining due to objects such as safety pins, coins etc. blocking the pump. 21 CARE AND CLEANING INSTALLATION REQUIREMENTS Before your maintenance starts, disconnect the power plug or disconnect power and shut the water valves off. Appliance Dimen- sions 41½” (105cm) 23½” (60cm) Solvents are forbidden to avoid damaging the washing machine and generating toxic gases which can explode. Never spray water on the washing machine to clean it. 33½” (85cm) It is forbidden that detergents containing PCMX are used to clean the washing machine. Cleaning and Maintenance of Washing Machine Cabinet Proper maintenance on the washing machine can extend its working life. The surface can be cleaned with diluted non-abrasive neutral detergents when necessary. If there is any water overflow, use a wet cloth to wipe it off immediately. No sharp items are allowed to strike the cabinet. Note: formic acid and its diluted solvents or equivalent are forbidden. Clean Internal Drum 21½” (55cm) Any rust left inside the drum by metal articles must be removed immediately with chlorine-free detergents. Never use steel wool. Avoid Machine Damage from Freezing If your washing machine is located in the room where it can get frozen easily, please drain the remaining water inside drain pipe and inlet pipe thoroughly. Damages not covered under warranty. The dimensions shown are for the minimal spacing. Custom under counter installation Thaw Out a Frozen Washing Machine 2” (5cm) When the temperature drops below 32° F (0° C) and your washing machine will freeze, you must: 1. Disconnect the power supply for the washing machine. 2. Wash the tap with warm water to loosen inlet pipe. 3. Take down inlet pipe and immerse it in warm water. 4. Pour warm water into washing drum and wait for 10 minutes. 5. Reconnect inlet pipe to the tap and check whether inlet and outlet are working normally. Notes: when the washing machine is reused, make sure the ambient temperature is above 32°F (0°C). 33½” (85cm) Remove the remaining water in inlet pipe: 1. 2. 3. 4. 5. Close the tap. Screw off the inlet pipe from tap and put its end into the container. Start up any procedure except single Wash or Drain procedure. Water will be drained out of inlet pipe if any for about 40 seconds. Reconnect the inlet pipe to tap. Remove the remaining water in drain pump Burn Hazard! It should be done after the hot water inside the machine cools down. 23½” (60cm) 1” (2.5cm) 1” (2.5cm) Unpacking the Appliance Unpack your washing machine and check if there is any damage during the transportation. Also make sure that all the items included (as shown in Page 7) in the attached bag are received. If there is any damage to the washing machine during the transportation, or any item is missing, please contact the local dealer immediately. Disposal of Packing Materials Clean detergent box and grooves Clean detergent drawer and grooves 1. Press down the arrow location on softener cover inside the drawer. 2. Lift the clip up and take out softener cover and wash all grooves with water. 3. Restore the softener cover and push the drawer into position. The packing materials of this machine may be dangerous to children. Please dispose of them properly and avoid easy access by children. Please dispose the related packing materials according to the relevant local regulations. 20 9 INSTALLATION REQUIREMENTS OPERATING INSTRUCTIONS Removal of Transportation Bolts Table of Washing Procedures Before using this washing machine, transport bolts must be removed from the backside of this machine. Please take the following steps to remove the bolts: 1. Loosen the bolts with wrench and then remove them. 2. Cover the holes with transport hole plugs. 3. PROCEDURE Keep the transport bolts for future use. Location Selection Pre‐wash Temp. Spin Speed Soil Level Extra Rinse Drying Co on/ Normal YES 100°F (37°C) 90°F (32°C) Tap Cold 1200, 1000, 800, 600, 400 NO SPIN YES YES YES YES Bulky/Large NO 100°F (37°C) 90°F (32°C) Tap Cold 1200, 1000 800, 600, 400 NO SPIN YES YES YES NO Sport NO 100°F (37°C) 1200, 1000, 800, 600, 400 NO SPIN YES YES YES NO Delicate NO 90°F (32°C) Tap Cold 600, 400 NO SPIN YES YES YES NO Hand Wash/ Wool NO 90°F (32°C) Tap Cold 800, 600, 400 NO SPIN YES YES YES NO Baby Wear YES 100°F (37°C) 90°F (32°C) Tap Cold 1200, 1000, 800, 600, 400 NO SPIN YES YES YES YES Speed Wash NO 90°F (32°C) Tap Cold 1000, 800, 600 400, NO SPIN NO YES YES YES YES Sanitary NO 175°F (80°C) 400 NO YES YES YES NO Rise/Spin NO NO 1200, 1000, 800, 600, 400 NO SPIN NO YES YES YES NO Spin NO NO 1200, 1000, 800, 600, 400 NO SPIN NO YES YES NO NO Refresh NO NO NO NO YES YES NO NO Dry Co on/ Normal NO NO 1200,1000,800 ,600,400, NO SPIN NO YES YES NO NO Before installing the washing machine, the location must be Selected by the following criteria: Rigid, dry, and level surface (if not level, make the appliance level with reference to the following section “Level the washer “ on page 12). Avoid direct sunlight. Ventilation. Room temperature is above 32° (0° C). Keep far away from the heat resources such as coal or gas. Make sure that the washing machine will not stand on power cord. It is recommended that the appliance not be installed on soft floor surfaces, such as carpets or surfaces with foam backing. Connect inlet pipe DESCRIPTION Connect the inlet pipe as indicated in the figure. For the model which has hot valve, please connect the hot valve to hot water tap. Install inlet hose (Prevent Damage-Do Not Overtighten) 1. 2. Connect the fitting to tap and fasten it clockwise. Connect the other end of inlet hose to the inlet valve at the backside of washing machine and fasten the fitting tightly clockwise. Note: after connection, if there is any leakage, confirm hose end has rubber ring and repeat the steps to connect inlet hose. Drain System Options Standpipe drain system - wall or floor (views A & B) The standpipe drain requires a minimum diameter standpipe of 2" (5cm). 10 Limit Damage 19 Delay MyCycle OPERATING INSTRUCTIONS INSTALLATION REQUIREMENTS Selecting the Wash Cycle The minimum carry away capacity can be no less than 17 gal.(64 L) per minute. The top of the standpipe must be at least 23.6” (60cm) high and no higher than 39.4” (100cm) from the bottom of the washer. Warm II. III. Min 28” (71cm) Moderately Soiled, colorful flax, co on and syn‐ the c ar cles with certain color fade degree (for example: shirts, night pajamas) Normal Soiled ar cles (including synthe c and wool) The proper wash cycle must be selected according to the types, quantities, and soil level of the clothes to be washed in combination with the following washing temperature table. I. A Laundry tub drain system (view C) The laundry tub needs a minimum 20 gal.(76 L) capacity. The top of the laundry tub must be at maximum 39.4” (100cm) above the floor with a minimum of 23.6” (60cm) . C First, turn the rotary switch to select the corresponding procedures according to the types of textiles. Second, select the proper temperature according to the soil level. Generally, the higher the temperature is, the more power consumed. Third, select the proper revolution speed. The higher the revolution speed is, the drier the textiles are spun, with faster spinning . Add Garment This operation can be executed during the washing procedure. When the drum of the washing machine is still rolling and there is large amounts of very hot water present. DO NOT attempt to open the door, it is dangerous and could result in property damage or serious personal injury. If inside temperature exceeds 122 ° F the door will not open, you must wait until it cools below this temperature. Floor drain system (view D). The floor drain system requires an air gap, siphon break that may be purchased separately. See “Tools and Parts”. The siphon break must be a minimum of 28"( 71cm) from the bottom of the washer. Additional hoses might be needed. Max 39.4” (100cm) Hot Heavily Soiled, pure white co on or flax (for exam‐ ple: coffee table cloths, canteen table cloths, towels, bed sheets) Min 23.6” (60cm) Extra Hot D Min 23.6” (60cm) Max 39.4” (100cm) Fastening and leveling the Appliance 1. 2. 3. 4. 18 If the template is not placed flush to the back of the installation area to provide the minimum spacing, measure its location to align the appliance correctly in the cabinet. Align with template and secure the brackets with screws on the exposed bracket sides. Then remove the template and finish securing the brackets. Note the slot opening must be facing toward the front. Make sure the floor surface is protected against damage. Slide the appliance and align the rear legs to the rear bracket slot TEMPLATE openings. Making sure that the legs are SCREWS touching or within 1/4” from touching the back of the slot. Level the machine using the front legs. FLOOR a. When positioning the washing machine, first check if the front legs are in the shortest position that will allow room for the foot to fit inside the brack If not, adjust them to their shortest et. position with hand or spanner and BRACKETS tighten the nuts with wrench. 11 OPERATING INSTRUCTIONS INSTALLATION REQUIREMENTS b. 5. After positioning the washing machine, press four corners on top cover of washing machine in sequence. If the washing machine is not stable when being pressed, this leg must be adjusted. c. Ensure the positioning status of washing machine. Loosen the lock nut with wrench and turn the leg with hand until it closely contacts with the floor. d. Press the leg with one hand and fasten the nut tightly to the cabinet with wrench. e. After being locked properly, press corners again to make sure that they have been adjusted properly. If it is still not stable, repeat Step B. f. Put a level on the top cover of the washing machine from the left, right, front and back directions. If the level bubble stay in the center then the washing machine is level. If it not, the washing machine is not level. The bubble direction is the direction of higher ground surface. Then, the two legs in this direction must be lowered at the same time until the washing machine is level. Steps B & D are repeated until machine is level. Then the leg nuts must be tightly locked. Align the bracket on the front left or right leg side and slide foot into slot until it touches the back of the slot. The slot opening must be facing the back of the appliance. Fasten the bracket (use flexible screw extension if needed) with screws. Spin Speed: The washer drum spins at up to 1200 RPM. This reduces drying time and saves energy. Press the SPIN SPEED button until the indicator light for the desired setting is lit. Some fabrics, such as delicates, require a slower spin speed. Temp.: Press this button to select the temperature you need. There are four temperatures available. Pre-wash: Select this option to add a prewash and spin cycle to the chosen cycle. This is especially useful for heavily soiled items. Child Lock: Press the soil level and delay buttons at the same time to unlock/lock control panel. Reference Symbols displayed on panel. Pre-wash Wash Rinse Spin Drying Washing Clothes the First Time Before washing clothes the first time, the washing machine must run through the complete cycle of procedures without clothes as follows: 1. Connect power source and water. 2. Put a little liquid detergent into the box and close it. 3. Press the button “Power”. 4. Press the button “Start/Pause”. The drawer is separated as follows: I : Pre-detergent or washing powder. II : main detergent, softener, pre-dip, bleaching or decontaminating products. : washing additive, such as fabric softener. REAR FRONT Electrical Con- BRACKET LEG NUT BRACKET Put detergent into Washing Machine. 1. 2. 3. 4. Pull out the drawer. Fill liquid pre-detergent into Case I (when necessary). Fill liquid detergent into Case II. Fill softener into Case (when necessary). Notes: nection mum current As the maxithrough the unit is 12A when you are using its heating function, please make sure the minimum circuit ampacity of the supply wire is 15A. Connect the power to a socket which is correctly installed and properly grounded. Make sure the supply voltage is the same as that in the machine's rating label. For liquid detergents or additives, before they are poured into the detergent box, it is suggested to use some water for dilution to prevent the inlet of detergent box from being blocked and overflowing while filling water. Do not use bleach. Hazardous fumes can form Start up washing machine Connect the power. Check if water pipes are connected properly. Open the tap completely. Put in the clothes to be washed and fill in the detergent and fabric softener. Then press the button “Power”, Select the proper procedures and functions and press the button “Start/Pause”. Power plug must match the socket and cabinet must be properly and effectively grounded. DO NOT use multi-purpose plug or socket as extension cord. DO NOT connect and pull out plug with wet hand. When connecting and pulling out the plug, hold the plug tightly and then pull it out. DO NOT pull power cord forcibly. If power cord is damaged or has any sign of being broken, special power cord must be selected or purchased from its manufacturer or service center for replacement. – To reduce the risk of fire, electric shock, or injury to persons, 12 17 OPERATING INSTRUCTIONS Therefore, the displayed time may not be the actual run time. Bulky/Large: To increase the washing affects, washing time is increased. Except single quick, wash, drain and spin procedures, the other procedures can select Cotton intensive function. It is recommended to wash the clothes for babies or worn by persons with allergic skin. Bulky/large: The Bulky/Large wash cycle runs at approximately 1 hour and 30 minutes. It does not come with the option of wash+dry. When it refers to the “main additional washing time is increased. It means the preset cycle time is increased from the preset cycle time of the Cotton/Normal cycle. The wash and dry times cannot be manually adjusted (all cycles are preset). The LCD screen displays a preset run time, but essentially, the run time is dependent on washer sensors. Therefore, the displayed time may not be the actual run time. Sport: In this cycle, active enzyme can help wash the clothes which are not easily cleaned due to the 104°F (40°C) prewash and main wash. Delicate: You can choose this procedure to wash silk clothes. Hand Wash/Wool: You can select this procedure to wash wool textiles labeled “Machine Wash”. Select the proper washing temperature according to the label on the articles to be washed. Furthermore, the proper detergent must be selected for wool textiles. Speed Wash: This procedure is suitable for light washing and small loads quickly. Rinse & Spin: Select this option to rinse and spin a load separately from a regular cycle. This can be helpful in preventing fresh stains from setting in fabrics. Refresh: During this cycle, there is only hot air rather than water ejecting from inside the drum to wash the clothing. Also it can be used to dry clothes weighing less than 1.1lbs (0.5kg). For example: a shirt or a pair of shorts. Spin: Separate Spin Procedure. Soap water or rinse water shall be drained out before spinning. Cotton/Normal Dry: This is a normal drying procedure. Moisture content of the clothes after drying is 3%, when the drying load is not more than 7.7lbs (3.5kg). NOTE: The drying time is based on weight of load. OPTION BUTTONS read the IMPORTANT SAFETY INSTRUCTIONS before operating this appliance. Checklist and Preparation before Washing Clothes Please read this operation method carefully to avoid the troubles with washing machine and damage to clothes. Do not operate washer/dryer if the angle of inclination exceeds 2°. Refer to installation requirements page 7. If washing clothes for the first time, check their color fastness. Use a white towel touched with liquid detergent to rub a portion of the clothes and check if the white towel is stained with clothes' original color. Wash clothes that lose their color separately. Wash temperature-sensitive clothes as required by the labels. Otherwise, color change may occur. Baby Wear: You can choose this procedure to wash children's underwear. Sanitary (Self Cleaning Function): This cycle is specially set in this machine to clean the drum and tube. It will provide an extra high temperature sterilization to make the clothes washing more “Green”. When proper amount of oxidizing bleaching agent is put in, the barrel cleaning effect will be better. The customer can use this procedure regularly according to the need. NOTE: Do not use this cycle with clothes, and do not add detergent or fabrics softener. If you use this cycle on a monthly basis, the wash drum will be kept clean. OPERATING INSTRUCTIONS Drying: This option will add a drying cycle to the selected cycle. Keep in Mind: Never put the clothes to be washed in washing machine for a long period of time. Otherwise they may get moldy and cause spots. Therefore, please wash the clothes and dry in due time. The clothes also may have color change or fading if they are not washed according to the stated washing temperature. Clothes that can not be washed by washing machine Delay: The delay start light will flash to indicate the delay time. It will start the cycle after the selected delay hour(s) has elapsed. Soil Level: It's divided into three levels. Choosing the right soil level before the washer started is necessary. 16 Ties, waistcoats, western-style clothes, outer garments etc. may have obvious shrinkage if immersed in water. DO NOT wash clothes marked for dry-cleaning only in the washer machine. Wrinkle-style clothes, embossed clothes, resin clothes etc. may be damaged when immersed in water. Among cotton and wool materials, the clothes that are easily damaged are wrinkle-style silk, fur products and fur decorations. DO NOT wash clothes without material labels and washing requirements. Never wash clothes stained with the chemicals such as gasoline, petroleum, benzene, paint thinner and alcohol. Please pay attention with regard to detergents Extra Rinse: This option will add an extra rinse cycle to the selected cycle. My Cycle: Press and hold this button to load the cycle you are in into the appliances programmable memory. Once in memory, quickly pressing on this button brings the appliance back to the cycle loaded into memory. Clothes that may be damaged if immersed in water. Use recommended Dometic Detergent Pods or “Low bubble” liquid detergent or washing detergent special for front-load washing machine shall be selected according to fiber types (cotton, synthetic fiber, soft products and wool products), colors, washing temperatures, and soiled level. Otherwise, excessive bubbles may be generated and overflow out of the drawer. Bleach can damage clothes, so it is suggested to use as little as possible. DO NOT use powder detergents because it can leave residues in clothes and leave bad odors, otherwise they must be rinsed multiple times. Detergent can not easily get dissolved completely if there is too much detergent or water temperature is rather low. It can remain in clothes, pipes and washing machines. 13 OPERATING INSTRUCTIONS OPERATING INSTRUCTIONS Clothes which easily get fuzzed should be turned inside-out for washing. Washing effectiveness depends on water hardness as well as the recommendations from the detergent manufacturers. Note: Keep detergents and additives in safe and dry places out of reach from children. Clothes are classified according to the following characteristics: DO NOT wash water-proof materials (ski suits, raincoats, etc.). It is better not to wash fiber products that water does not easily soak into such as water-proof cushions, and clothes. Examples include raincoats, umbrellas, ski suits, car covers, sleeping bags, etc.. View of Control Panel and Functions Care labels: clothes to be washed are classified into cotton, blended fiber, synthetic fiber, silk, wool and artificial fiber categories. Color: white and colorful colors must be identified. All new colorful articles should be washed separately. Delicate articles must be washed separately. As for new pure wool textiles, curtains and silks, the soft washing procedure shall be selected. Clothes should be sorted before being put into washing machine. Curtains with hooks, must have hooks removed before being washed. Decorations on the clothes may damage the washing machine. Clothes with buttons or embroideries, should be turned inside-out before being washed. Fasteners: Zippers should be zipped closed and buttons or hooks shall be fixed. 1. It is suggested to put bras into a pillow slip with zip or buttons sealed to prevent the steel wire from popping out of bras into the drum and damaging the machine. Delicate textiles such as laced curtains, small articles (stockings, handkerchiefs, ties etc.) should be put into string bag for washing. When washing a single big and heavy dress such as Turkish towels, jeans, padded jackets etc., may cause load imbalance. Therefore it is suggested to add one or two more clothes to be washed together to avoid excessive vibration and movement of the machine. 2. NOTE: If the washer is paused and the cycle is not restarted within 10 minutes, the current wash cycle will be cancelled. 3. 4. Baby articles (baby clothes and towels) should be washed separately. Rinsing times are increased to ensure the thorough rinsing and cleaning without the detergent residues in clothing. It is suggested that areas that are stained such as white socks, collars and sleeves etc. be hand washed prior to washing for a more effective wash. Confirm the washing capacity: Do not use excessive loads; otherwise washing performance will decrease . Confirm the maximum washing load according to the following table. 5. Fiber Type Maximum Loading Capacity Co on 15.4 lbs (7.0kg) Synthe c 7.7 lbs (3.5kg) Wool 5.5 lbs (2.5kg) 14 Power: Pressing [Power] to start the display. If the display is active, press to put the washer into standby mode .If the washer is paused and the cycle is not restarted within 10 minutes, the current wash cycle will be cancelled. Start/Pause: Press to start a wash cycle. If the washer is running, pressing it once will pause the washer. Press again to restart the wash cycle. 6. Change Cycles and Options: Not all Options are available with all Cycles. Cycles and Options can be changed anytime before Start/Pause is pressed. To cancel a cycle a. Press and hold the power button until the unit shuts off. Press the power button once to turn on the unit. After turning on the unit, wait for 3-5 seconds and an audible click will be heard as the unit door unlocks. A new wash/dry cycle may be selected at this time. (Warning: Turning the unit off while it is running will not save any of the information of the cycle it was currently running on such as time or any other custom settings to the cycle) b. Press and hold the play/pause button until one audible beep can be heard. Wait for 35 seconds and an audible click will be heard as the unit door unlocks. The current cycle will be paused at this time and the user may add additional garments to the wash load. To resume the current cycle, press the play/pause button once. An audible click can be heard as the unit door locks and the cycle will resume. (Note: A new cycle cannot be selected when following the steps in this option. To select a new cycle, follow the steps in step 1 in this section of how to unlock the washer/dryer door) To drain the washer manually a. Press Power for approximately 3 seconds b. Select Spin c. Press and hold START/PAUSE d. When the spin is complete, the door unlocks. Items can be removed from the washer Wash cycle Cotton/Normal: The Cotton/Normal wash cycle runs at approximately 1 hour and 10 minutes. It comes with the option of wash+dry. When dry is turned on, the Cotton/ Normal cycle runs at approximately 3 hours and 10 minutes. The LCD screen displays a preset run time, but essentially, the run time is dependent on washer sensors. 15