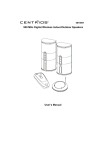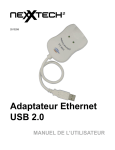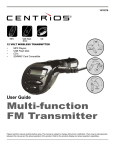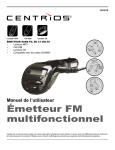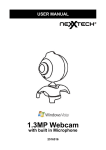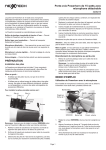
1
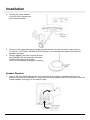
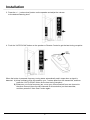
4015115/4015116/4015117
Black Oak / Light Oak /
Cherrywood Wireless
Panel Speaker
With Infrared Remote Control
USER GUIDE
For use with:
Introduction
These 900 MHz stereo wireless speaker system uses the latest wireless technology that enables
you to enjoy music and TV sound anywhere inside or outside your home. You can simply connect the
system to any audio source such as Radio, TV, VCR, Hi-Fi and CD/MP3/VCD/DVD player. Without
complicated wiring and installation with your Audio/Video equipments and rear channel amplifier, the
system enables you to enjoy thrilling, lifelike sound stereo in minutes.
Features
1.
2.
3.
4.
5.
6.
7.
8.
9.
10.
900 MHz RF technology panel-like speaker system.
Phase Lock Loop (PLL) technology on the transmitter.
RF technology lets you roam freely throughout your house.
Operating distance up to 50 Meters.
Infrared remote control unit for your convenience (must be in line with transmitter).
No line of sight limitation for the speakers.
Virtually interference free stereo quality.
ALC and auto ON/OFF control.
Auto tuning function.
Bass boost function.
Parts List
•
•
•
•
•
•
Remote Control
2 x AAA batteries (not included)
Audio cable
Transmitter
A/C power adapter (x 3)
2 wireless panel speakers with detachable speaker grills. Each wireless speaker requires 6 x AA
batteries (not included)
Transmitter
1.
Insert the antenna into the antenna wire.
2.
Connect the supplied AC power adaptor to an electrical wall outlet.
1
Installation
3.
Plug the AC power adapter
in the DC jack located on the
rear of the transmitter.
3/8 jack
4.
5.
The rear of the transmitter has one audio cord that can be connected to audio output jack of a
TV, Monitor, VCR, Radio, CD/MP3/VCD/DVD player or to a headphone/earphone jack with the
connector provided.
Plug the adapter into the AC source and the
blue POWER LED will illuminate. If the blue
POWER LED does not illuminate,
make sure the adaptor is plugged in properly.
Speaker Receiver
1.
Insert 6 ‘AA’ size ALKALINE batteries (not included) into the battery compartment with correct
polarity at the rear of the speaker or connect the 12V power adaptor to the DC input jack on the rear
of each speaker, then plug it to the wall AC outlet.
2
Installation
2.
Switch on the speaker by pressing the
POWER switch and the
POWER/STEREO LED will light up
in blue. Switch off the speaker by
pressing the POWER switch again.
Operation
1.
Turn on the audio source (TV or audio component)
to which the transmitter is connected with. As soon
as the transmitter receives the audio signal,
the green SIGNAL LED will illuminate.
2. Select the channel 1 or 2 of the transmitter for best performance in your location.
3
Installation
3. Press the + / - (volume level) button on the speaker and adjust the volume
to the desired listening level.
4. Push the “AUTO SCAN” button on the speaker or Remote Control to get the best tuning reception.
When the button is pressed, frequency tuning starts automatically and it stops when a signal is
detected. A) Keep a distance from the speaker up to 7 meters apart from the transmitter, and then
press the “AUTO SCAN” button for the best tuning reception.
B) Whenever you find a frequency jam, move your channel switch from one channel to
the other channel (there are two channels for this selection) on the transmitter,
and then press the “Auto Scan” button again.
4
Installation
5. The BOOST BASS button can be used to enhance the bass sound depending on your own music
preferences. Turn bass/boost effect ON simply by pressing the button, and pressing it once again
to OFF.
Remote Control Unit
1. Remove the battery cover at the rear of the remote control unit and insert 2 “AAA” size batteries
(not included) into the battery compartment with the correct polarity.
2. Replace the cover to close the battery compartment.
Note
You should now be able to move the speakers freely from room to room without disruption. If
disruption should occur (signal breaks up), press the speaker’s AUTO SCAN button to maximize
the best reception. If you hear interference from other components, switch the channel control of the
transmitter, and then move the speakers to another free location. You can re-adjust the tuning control
by moving it either to channel 1 or 2 of the transmitter, then pressing AUTO SCAN button for the best
reception. When transmitting / receiving over long distances, the signal from the system will
become weaker.
Switching Off
1. For protection of the transmitter and for power saving, the transmitter will cut off automatically if
there is no or weak operation input signal from audio source for 4 minutes.In other words, if the
signal comes back, the transmitter will work again automatically.
2. Press the POWER button to turn off the speaker and the blue POWER LED light will go off. If you
use the remote control unit to turn off the speakers, the speakers will be at stand-by mode for 5
minutes and the LED will change from blue to yellow. You can switch on the speakers again by
using the remote control unit during stand-by time. If there is no signal from the remote control unit
for 5 minutes, the speakers will automatically power off.
5
Trouble Shooting
No Sound
- Ensure the AC adaptor is fully inserted into the AC outlet
and the power connection input on the transmitter.
- Ensure the speaker switch is ON.
- Speaker’s battery capacity is too low, replace with new
batteries or connect the AC adaptors to the speakers.
- Ensure the TV or audio component is ON.
- The connected audio / video equipment is not playing.
Start playing the equipment.
- The volume of speaker is too low, adjust the volume
to an appropriate level.
Distorted
- Press the AUTO SCAN button on the speakers or remote
control unit until the frequency of the transmitter matches.
- Change the position of the channel selector on the transmitter.
You must then press the AUTO SCAN button on the speaker.
- Battery capacity is too low. Replace with the new battery.
- Ensure the volume level of speakers is adjusted properly.
- The speaker is too far from transmitter, move closer.
- The input level of the audio signal is too low. Turn up the
volume of the audio source equipment.
Specifications
Transmission
UHF stereo
Carrier Frequency
900 MHz (CH-1: 912.00 MHz /
CH-2: 913.00 MHz)
Operation Voltage
Transmitter, DC 12V 200mA
Speaker, 6 x “AA” size Alkaline
batteries (not included) or DC
12V 600mA adapter
Remote Control Unit, 2 x “AAA”
size batteries (not included)
Frequency Response
50Hz - 12kHz
S/N Ratio
70dB
Channel Separation
60dB
Operation Distance
Up to 50M (Open Area)
Output Power
2 x 2.0W (RMS)
Warning
Changes or modifications to this unit not expressly approved by the party responsible for compliance
could void the user’s authority to operate the equipment. Operation is subject to the following two
6
conditions: (1) this device may not cause interference, and (2) this device must accept any
interference, including interference that may cause undesired operation of the device. The device must
be used accompany with the provided AC/DC adapter. The provided AC/DC adapter shall always
remain readily operable. Please use the device in normal indoor environment. The ventilation should
not be impeded by covering the ventilation openings with items such as newspapers, table-cloths,
curtains, etc. This device shall not be exposed to dripping or splashing. No objects filled with liquids,
such as vases, shall be placed on this device.
The FCC Wants You To Know
This equipment has been tested and found to comply with the limits for a Class B digital device,
pursuant to Part 15 of the FCC Rules. These limits are designed to provide reasonable protection
against harmful interference in a residential installation.
This equipment generates, uses, and can radiate radio frequency energy and, if not installed or used in
accordance with the instructions, may cause harmful interference to radio communications. However,
there is no guarantee that interference will not occur in a particular installation.
If this equipment does cause harmful interference to radio or television reception, which can be determined by turning the equipment off and on, the user is encouraged to try to correct the interference by
one or more of the following measures:
1) reorient or relocate the receiving antenna;
2) increase the separation between the equipment and the receiver;
3) connect the equipment to an outlet on a circuit different from that to which the receiver is connected;
4) consult the dealer or an experienced radio/TV technician for additional suggestions.
Any changes or modifications not expressly approved by the party responsible for compliance could
void the user’s authority to operate the equipment. Where shielded interface cables have been
provided with the product or specified additional components or accessories elsewhere defined to be
used with the installation of the product, they must be used in order to ensure compliance with FCC
regulation.
INDUSTRY CANADA RSS 210 NOTICE:
CLASS B LIMITS WITH INTERFERENCE STATEMENT
This equipment complies with the limits of a Class B digital device as specified in Industry Canada
Regulations.
These limits provide reasonable protection against radio and TV interference in residential areas.
However, this device might cause radio or TV interference even when it is operating properly.
Operation is subject to the following two conditions:
(1) This device may not cause interference, and
(2) This device must accept any interference including interference that may cause undesired
operation of the device.
To eliminate the interference, you can try one or more of the following:
• Reorient or relocate the receiving antenna.
• Move your device away from the receiver.
• Connect your device to an outlet that is on a different electrical circuit from the receiver. This digital
apparatus does not exceed the Class B limits for radio noise emissions from a digital apparatus.
7
Warranty
ORBYX ELECTRONICS WARRANTY
ORBYX Electronics warrants that this product will be free from defects in materials and workmanship for a period of one
(1) year from the date of purchase. Within this period, simply take the product and your proof of purchase to any ORBYX
Electronics store or dealer and the product will be repaired without charge for parts and labour. ORBYX Electronics reserves
the right to charge for transportation. Any product which has been subject to misuse or accidental damage is excluded from
this warranty.
This warranty is only applicable to a product purchased through ORBYX Electronics’ company owned stores and dealers
and to a product that is presented for repair in a country where ORBYX Electronics offers the product for sale. While this
warranty does not confer any legal rights other than those set out above, you may have additional statutory rights which will
vary under the laws of the various countries, states, province and other governmental entities in which ORBYX Electronics
operates. This warranty is subject to all statutory rights you may have in the country of purchase.
Imported in Canada for
Importé au Canada pour
Orbyx Electronics,
Concord, Canada, L4K 4M3
Manufactured in China/Fabriqué en Chine
For product support please contact www.orbyxelectronics.com or
1-866-363-3059
Pour le service à la clientèle, veuillez visiter notre site Internet au
www.orbyxelectronics.com ou appelez au 1-866-363-3059
Limited Warranty/Garantie Limitée
© 2008 ORBYX Electronics. All Rights Reserved.
8