Download 78-7348 1LIM-No Mass Strg.indd
Transcript
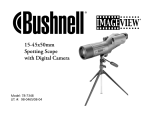
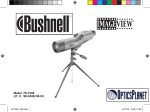
15-45x50mm
Spotting Scope
with Digital Camera
Model: 78-7348
LIT. #: 98-0468/09-04
ENGLISH
Congratulations on your purchase of the Bushnell ImageView®
spotting scope! The Bushnell ImageView spotting scope takes
the technology of digital photography and combines it with a
high-quality compact spotting scope. This allows you to observe
sporting events, wildlife, scenic vistas or anything you would
normally use a spotting scope for, and then save the image in a
built-in attached digital camera. You can then download these
images to your computer and e-mail them to your friends and
family, print off the picture using the included software or save
them in a photo album for future use.
System Requirements:
Pentium 166MMX minimum
(Recommended Pentium II 266)
Windows 98 /ME / NT and Windows 2000/XP
Minimum 32 MB of RAM
USB port
Minimum 200 MB of Hard Drive space with additional 65 MB space for IE and DirectX
CD-ROM driver
Super VGA Monitor and video card
Software Installation:
To load the software insert the CD into your CD-ROM drive and it will self-start. The CD
contains Roxio PhotoSuite, a photo editing program, as well as the drivers necessary for your
computer to recognize the camera. Even if you have photo-imaging software on your computer you prefer to use, and do not need the PhotoSuite software, you will still need to install
the drivers BEFORE CONNECTING the camera .
Click the button on the CD startup screen labeled “Install Driver". After the driver installation is complete, click “Install PhotoSuite” . Follow the on screen instructions after clicking
an install button. For more details regarding connecting the camera and downloading photos,
see the section titled “Downloading the Pictures to Your Computer”. After downloading from
the camera to your computer, the photo files are standard .jpg files that may be opened and
viewed with any digital imaging software.
1
2
CAMERA OPERATION INSTRUCTIONS
A. Button Descriptions
a. The MODE button has three functions:
1. Power on: Press and hold button until camera turns on. When camera is
connected to a PC via the USB cable provided, the camera will power
on automatically
2. Power off: While camera is on, press and hold button until camera turns off.
If camera has not been used or if a button has not been pressed for over
2 minutes, the camera will automatically power off to save battery life. If the
camera is connected via USB, camera will not power off except when PC
powers off.
3. Mode change: press this button rapidly
to change modes.
b. The SNAP button has two functions:
1. Take a picture: press this button to take
a picture when the camera is on. (But not
in the pc mode and mode change)
2. Select: in "Mode Change", press this
button to confirm the function that
is flashing.
3
B. LCD Display
1. Timer: Select the timer to take a delayed
picture. This gives you approximately a
10 second delay.
2. Repeat Shot: Takes 3 continuous shots,
with only one press of the SNAP button.
Shots are approximately 1 second apart.
3. Hi/Low Quality: No icon shows when
camera is in High Resolution Mode
(640 X 480). "LQ" shows when camera is in
Low Resolution Mode (320 X 240).
4. AVI Mode: This mode allows you to take
short movie clips, saved as ".avi" files.
5. Battery Indicator: Shows the amount of battery life left.
6. 50/60: Shows electrical power frequency output. "50" corresponds to 50Hz
electrical power frequency, and "60" corresponds to 60Hz electrical power
frequency, which is the frequency used in the United States. The correct setting
(i.e. 60 in the U.S., 50 in some countries) will not cause any flickering on images.
7. Delete Last/All: "
" deletes the last picture taken, and "
" deletes all the
pictures in the memory.
8. Picture Number/PC/Memory-Full: This area will show the number of pictures
in the memory when camera is in "Normal" mode. "PC" will appear when unit is
plugged in via USB cord to your PC. When memory is full in "Normal" mode,
display will show "FUL" and alarm will sound.
4
OPERATION GUIDE
1. The camera is powered by two "AAA" batteries (not included) or USB power (via PC connection)
2. Insert two AAA alkaline batteries into battery compartment
3. Press and hold MODE button until camera turns on.
4. Press SNAP to take a picture, or press MODE button quickly to change mode
settings as described above. The camera is set at infinity and will not be focused
on an object closer than 20 feet.
5. The mode setting operation is a cycle loop, so press MODE button to switch to
another mode. The loop order of the different modes is shown here:
8. When in "Normal" mode, press SNAP to take a picture. The counter will advance
by 1
9. When in "Normal" mode, pressing the MODE button will cause the camera to
enter "Mode Change."
10. To change to the "Self-Timer" mode, press MODE once and then press SNAP to
select. The self-timer is now on. The camera will remain in this mode until you
change the mode.
Press MODE
6. To change settings, toggle through the different modes by pressing the MODE
button. When a mode is selected, the indicator symbol on the LCD will start
flashing. You can then select that mode by then pressing the SNAP button.
7. When changing modes, if no buttons are pressed for 5 seconds, the camera will
return to normal mode.
5
Press SNAP to enter this mode
11. When in "Normal" mode press MODE button twice to change
to "Repeat Shot" mode. When you see the " " icon blinking,
“ icon will stop
press SNAP to enter this mode (the “
blinking). By pressing and holding the SNAP button you
will now be able to take 3 consecutive pictures. The camera
will remain in this mode until you change the mode or until the
camera’s memory is full. When memory is full the display will show "FUL" and an
alarm will sound.
Alarm will sound
6
12. To enter "Low Resolution" mode, which will cause your
pictures to be of a lower resolution, but will also allow you to
store many more pictures in the camera’s memory, press the
MODE button 3 times until you see the "LQ" icon blinking.
Press the SNAP button to select this mode. The "Low" icon
will then stop blinking. Entering this mode later and pressing
SNAP again will return you to "High Resolution" mode.
13. When in "Normal" mode press the MODE button 4 times to enter the "AVI"
mode. The "
" icon will begin to blink. Press the SNAP button to select this
mode. The "
" will then stop blinking. Holding down the SNAP button will
take AVI clips as long as you continue to depress the button or until the memory
is full. Once you release the button the camera will revert back to "Normal" mode
so you can take still (i.e. non-action) pictures again as long as there is unused
memory left. Repeat step 11 if you want to change the camera to the AVI mode again.
14. You can chose between the 50mhz and 60mhz settings for the camera output.
The camera’s default mode is the "60" mode, which matches the power frequency
for the United States. To change to the "50" mode, press the SNAP button until
the "60" changes to "50." Confirm the selection by pressing the SNAP button. To
avoid any flickering on the picture, the correct power frequency (either 50 or 60)
for your country must be selected.
7
15. If "Delete Last" mode is selected, the display will show the following:
delete last picture then quit this mode
Press SNAP to delete the last picture from the camera’s memory.
16. If "Delete All" mode is selected, the word "ALL" appears next to the icon on the
display. To delete all pictures in the camera’s memory, select this mode. The picture
number will then blink. Press and hold the SNAP button. You will hear a tone that
becomes higher as the pictures are deleted. Once complete, the picture number
will reset to zero. If no button is pressed for a while, the camera returns to stand-by.
17. If the "Battery" indicator is only one third highlighted, it is necessary to replace the
batteries soon.
the "
" icon will blink and buzzer will sound
8
18. If the camera is connected to your PC via USB cable, the display will show
8.
9.
Click the “Transfer Photos” button (#3).
After several seconds, the driver screen will appear. Click on the “Download photos”
button (round red camera icon on bottom left) to start the download from the
ImageView to your computer.
10. When the download is finished, you should see “thumbnail” preview frames showing
DOWNLOADING THE PICTURES TO YOUR COMPUTER:
1.
2.
your photos in the driver window.
11. Next, click the second button from the right at the bottom of the driver window, to
You may have a brief wait for the process as Windows “builds a driver information
“select all photos in this page”, if you want to transfer all the photos to your PC.
database” and confirms that the PC matches the correct software to the attached
Or, click on the thumbnail frames to select just the photos you want to work with
hardware device.
(click again to deselect one), then click “Transfer photos” (second button from left)
3.
Open the program PhotoSuite 5
at the bottom of the driver window. You are then returned to the PhotoSuite transfer
4.
Click “Transfer” in the left frame area under “Home Page”
screen, and should see all of your transferred photos, identified by the date and file
5.
Select “Transfer from new device”
number (beginning with 00000).
6.
7.
9
Connect the USB cable from the computer to the camera.
Under (#1) “Select a device from the list”, click “Bushnell Imageview”, then click
12. Click “Next”, then “Done” at the bottom of the left frame area.
“Next” at the bottom of the left frame area.
13. You may now wish to edit (click Edit & Create, then Edit), or print (click Print & Share,
You may now name the group of photos if you wish (#2), or accept the default
then Print) your photos. For detailed instructions for using these and other PhotoSuite
“Captured (current date). Note that your photos will also be added to your hard drive
features, please refer to “Roxio PhotoSuite Help”, available by selecting the Help
in a folder of the same name, located in C:/My Documents/My Pictures.
menu at the top of your screen.
1
10
SPOTTING SCOPE INSTRUCTIONS
MOUNTING
Remove the spotting scope from the packaging. Attach the tripod
with the provided screw to the tripod mount hole located on the
base of the spotting scope. Spread the tripod legs and set on a
solid surface.
MAGNIFICATION
To "zoom" the spotting scope, grasp and rotate the variable
magnification ring to change power. The magnification ring is
located on the eyepiece. When rotating this ring, the image will
increase or decrease in apparent size. It may be necessary to refocus when the magnification is changed.
FOCUSING
The focus ring is located in front of the eyepiece, towards the
middle of the spotting scope body. By turning this adjustment, the
image will sharpen until in focus.
11
USING THE TRIPOD
To pan side to side or up and down, unloosen the tripod control handle by rotating it
counterclockwise. To lock into a desired position, rotate the tripod control handle clockwise.
CAUTION: DO NOT LOOK AT THE SUN THROUGH THIS SPOTTING
SCOPE AS SEVERE DAMAGE TO YOUR EYES MAY RESULT!
CARE
The lenses of your spotting scope are coated for highest light transmission. As with any coated
optics, special care must be taken in cleaning the lenses. Moisten the surface of the lens slightly
and wipe dry using a circular motion starting at the center of the lens. Wipe or brush off any
dirt or dust on the outside of the spotting scope.
CAUTION
Never disassemble your spotting scope. Special tools and equipment are required for service and
irreparable damage can result from untrained attempted service. Unauthorized service may also
void the warranty.
12
TWO-YEAR LIMITED WARRANTY
Your Bushnell® product is warranted to be free of defects in materials and workmanship for
two years after the date of purchase. In the event of a defect under this warranty, we will, at
our option, repair or replace the product, provided that you return the product postage prepaid.
This warranty does not cover damages caused by misuse, improper handling, installation, or
maintenance provided by someone other than a Bushnell Authorized Service Department.
Any return made under this warranty must be accompanied by the items listed below:
1)
2)
3)
4)
5)
A check/money order in the amount of $10.00 to cover the cost of postage and handling
Name and address for product return
An explanation of the defect
Proof of Date Purchased
Product should be well packed in a sturdy outside shipping carton, to prevent
damage in transit, with return postage prepaid to the address listed below:
IN U.S.A. Send To:
Bushnell Performance Optics
Attn.: Repairs
8500 Marshall Drive
Lenexa, Kansas 66214
IN CANADA Send To:
Bushnell Performance Optics
Attn.: Repairs
25A East Pearce Street, Unit 1
Richmond Hill, Ontario L4B 2M9
For products purchased outside the United States or Canada please contact your local dealer for
applicable warranty information. In Europe you may also contact Bushnell at:
BUSHNELL Performance Optics Gmbh
European Service Centre
MORSESTRASSE 4
D- 50769 KÖLN
GERMANY
Tél: +49 (0) 221 709 939 3
Fax: +49 (0) 221 709 939 8
13
This warranty gives you specific legal rights. You may have other rights which vary from country to country.
©2004 Bushnell Performance Optics
WARNING
Make sure you download any pictures from your camera
BEFORE you remove the batteries from the camera.
2 AAA Batteries Required, Not Included
FCC Note:
This equipment has been tested and found to comply with the limits for a Class B digital device, pursuant to
Part 15 of the FCC Rules. These limits are designed to provide reasonable protection against harmful interference in a residential installation. This equipment generates, uses and can radiate radio frequency energy
and, if not installed and used in accordance with the instructions, may cause harmful interference to radio
communications. However, there is no guarantee that interference will not occur in a particular installation. If
this equipment does cause harmful interference to radio or television reception, which can be determined by
turning the equipment off and on, the user is encouraged to try to correct the interference by one or more of
the following measures:
· Reorient or relocate the receiving antenna.
· Increase the separation between the equipment and receiver.
· Connect the equipment into an outlet on a circuit different from that to which the receiver is connected.
· Consult the dealer or an experienced radio/TV technician for help.
The shielded interface cable must be used with the equipment in order to comply with the limits for a digital
device pursuant to Subpart B of Part 15 of FCC Rules.
14
Addendum
REMOTE SHUTTER CABLE
Whenever possible, using the included remote shutter release cable is recommended to
avoid accidentally jarring the camera when the SNAP button is pressed. Due to the high
magnification of the camera, any motion when the shutter is open can result in photos
with a blurred or shaky appearance. The remote cable is plugged into the jack on the
bottom of the camera pod as shown below. Pressing the button on the remote will then
take a photo, just as if SNAP was pressed.
If the remote shutter cable is not available, you may
instead use the self-timer (as previously described in
the manual) to trip the shutter without touching or
jarring the camera. However, the timer will not allow
you to take a photo at the exact moment you choose,
as the remote cable will.
1


