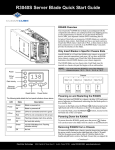
1
R-Series Data Center Products User’s Guide Technical Support Please refer to our support website for technical updates, additional warranty information and documentation, and software revisions: Web: http://support.clearcube.com Email: [email protected] Phone: (512) 652-3400 or call toll free (866) 652-3400 (United States) ClearCube Technology Corporate Headquarters Mailing and Shipping Address: The ClearCube Building 8834 Capital of Texas Hwy N. Austin, Texas 78759 Email: [email protected] Main Phone: (512) 652-3500 or call toll free (866) 652-3500 (United States) Main Fax: (512) 652-3501 Or your local ClearCube Reseller or Authorized Service Provider Copyrights ©2005 – 2010 by ClearCube Technology Inc. All rights reserved. Under copyright laws, this publication may not be reproduced or transmitted in any form, electronic or mechanical, including photocopying, recording, storing in an information retrieval system, or translating, in whole or in part, without the prior written consent of ClearCube Technology, Inc. This information is subject to change without notice and ClearCube shall not be liable for any direct, indirect, special, incidental or consequential damages in connection with the use of this material. Trademarks ClearCube™, Sentral™, Blade Switching BackPack™, PC Blade™, C/Port™, and I/Port™, PC-over-Ethernet™, PCoE™, and the PCoE™ logo are trademarks of ClearCube Technology Inc. Product and company names mentioned herein are trademarks or trade names of their respective companies. Patents The ClearCube Architecture and its components described in this user manual are protected by numerous granted and pending U.S. and international patents. Granted patents include: US05926172, US05966056, US05994952, US06012101, US06020839, US06037884, US06038616, US06119146, US06148182, US06167241, US06385666, US06421393, US06426970, US06633934, US06708247, US06735658, and US06886055. Patents pending include: US S/N 09/755378, US S/N 10/279475, US S/N 10/198719, US S/N 10/198650, US S/N 10/409219, US S/N 09/728667, US S/N 09/728669, US S/N 10/411804, US S/N 10/411908, US S/N 10/458853, US S/N 10/364584, US S/N 10/301536, US S/N 60/411066, US S/N 10/662933, US S/N 10/662889, US S/N 10/662932, US S/N 10/662968, US S/N 10/301563, US S/N 10/662936, US S/N 10/301518, US S/N 10/662955 and US S/N 10/662954. Inquiries regarding patented technology should be directed to ClearCube Corporate Headquarters. Contents How to Use this Guide . . . . . . . . . . . . . . . . . . . . . . . . . . . . . . . . . . . . . . . . . . . . . . . . . . . . . . . ix FCC Warning . . . . . . . . . . . . . . . . . . . . . . . . . . . . . . . . . . . . . . . . . . . . . . . . . . . . . . . . . . . . . . ix California Proposition 65 Statement . . . . . . . . . . . . . . . . . . . . . . . . . . . . . . . . . . . . . . . . . . . . ix WEEE Information. . . . . . . . . . . . . . . . . . . . . . . . . . . . . . . . . . . . . . . . . . . . . . . . . . . . . . . . . . .x Warning Regarding Medical and Clinical Use of ClearCube Products . . . . . . . . . . . . . . . . . . .x Avertissement concernant l'usage médical et clinique des produits ClearCube . . . . . . . . . . . .x Warnung zum medizinischen oder klinischen Einsatz von ClearCube-Produkten . . . . . . . . . xi El Cuidado con Respecto al Uso Médico y Clínico de los Productos de ClearCube. . . . . . . . xi Symbols – English . . . . . . . . . . . . . . . . . . . . . . . . . . . . . . . . . . . . . . . . . . . . . . . . . . . . . . . . . . xi Safety Guidelines . . . . . . . . . . . . . . . . . . . . . . . . . . . . . . . . . . . . . . . . . . . . . . . . . . . . . . . . . . xiii Symboles – Français. . . . . . . . . . . . . . . . . . . . . . . . . . . . . . . . . . . . . . . . . . . . . . . . . . . . . . . . xiv Guide de sécurité . . . . . . . . . . . . . . . . . . . . . . . . . . . . . . . . . . . . . . . . . . . . . . . . . . . . . . . . . . xvi Symbole – Deutsche . . . . . . . . . . . . . . . . . . . . . . . . . . . . . . . . . . . . . . . . . . . . . . . . . . . . . . . xviii Sicherheitsrichtlinien . . . . . . . . . . . . . . . . . . . . . . . . . . . . . . . . . . . . . . . . . . . . . . . . . . . . . . . xix Símbolos – Español . . . . . . . . . . . . . . . . . . . . . . . . . . . . . . . . . . . . . . . . . . . . . . . . . . . . . . . . xxi Directrices de seguridad . . . . . . . . . . . . . . . . . . . . . . . . . . . . . . . . . . . . . . . . . . . . . . . . . . . . xxii Chapter 1. ClearCube Architecture and Product Overview . . . . . . . . . . . . . . . . . . . . 1 R-Series PC Blade . . . . . . . . . . . . . . . . . . . . . . . . . . . . . . . . . . . . . . . . . . . . . . . . . . . . . . . . . . .2 R-Series Chassis . . . . . . . . . . . . . . . . . . . . . . . . . . . . . . . . . . . . . . . . . . . . . . . . . . . . . . . . . . . . .5 C/Port . . . . . . . . . . . . . . . . . . . . . . . . . . . . . . . . . . . . . . . . . . . . . . . . . . . . . . . . . . . . . . . . . . . . .6 Multi-Video Solution . . . . . . . . . . . . . . . . . . . . . . . . . . . . . . . . . . . . . . . . . . . . . . . . . . . . . . . . .7 Fiber Optic Extension System . . . . . . . . . . . . . . . . . . . . . . . . . . . . . . . . . . . . . . . . . . . . . . . . . .7 Fiber Transceiver . . . . . . . . . . . . . . . . . . . . . . . . . . . . . . . . . . . . . . . . . . . . . . . . . . . . . . . . .8 C7420 Fiber C/Port . . . . . . . . . . . . . . . . . . . . . . . . . . . . . . . . . . . . . . . . . . . . . . . . . . . . . . .8 Zero Clients and Thin Clients. . . . . . . . . . . . . . . . . . . . . . . . . . . . . . . . . . . . . . . . . . . . . . . . . . .9 Chapter 2. Network Planning and Site Preparation . . . . . . . . . . . . . . . . . . . . . . . . . 11 Rack and Cabinet Requirements . . . . . . . . . . . . . . . . . . . . . . . . . . . . . . . . . . . . . . . . . . . . . . .11 Space and Floor Support Requirements . . . . . . . . . . . . . . . . . . . . . . . . . . . . . . . . . . . . . . . . . .12 Power and Cooling Requirements . . . . . . . . . . . . . . . . . . . . . . . . . . . . . . . . . . . . . . . . . . . . . .13 Additional Power Considerations . . . . . . . . . . . . . . . . . . . . . . . . . . . . . . . . . . . . . . . . . . .13 Additional Cooling and HVAC Considerations . . . . . . . . . . . . . . . . . . . . . . . . . . . . . . . .14 Cable Requirements . . . . . . . . . . . . . . . . . . . . . . . . . . . . . . . . . . . . . . . . . . . . . . . . . . . . . . . . .14 Free IP Address Requirement . . . . . . . . . . . . . . . . . . . . . . . . . . . . . . . . . . . . . . . . . . . . . . . . .17 Chapter 3. Chassis and Blade Installation. . . . . . . . . . . . . . . . . . . . . . . . . . . . . . . . . 19 R-Series Data Center Products User’s Guide Contents • iii Tools for Installation. . . . . . . . . . . . . . . . . . . . . . . . . . . . . . . . . . . . . . . . . . . . . . . . . . . . . . . . Shipment Components . . . . . . . . . . . . . . . . . . . . . . . . . . . . . . . . . . . . . . . . . . . . . . . . . . . . . . Chassis Installation . . . . . . . . . . . . . . . . . . . . . . . . . . . . . . . . . . . . . . . . . . . . . . . . . . . . . . . . . Unpacking the Chassis . . . . . . . . . . . . . . . . . . . . . . . . . . . . . . . . . . . . . . . . . . . . . . . . . . . Installing the Chassis . . . . . . . . . . . . . . . . . . . . . . . . . . . . . . . . . . . . . . . . . . . . . . . . . . . . Standard Chassis Mounting Hardware. . . . . . . . . . . . . . . . . . . . . . . . . . . . . . . . . . . . Chassis Rapid Mount Kit . . . . . . . . . . . . . . . . . . . . . . . . . . . . . . . . . . . . . . . . . . . . . . Chassis Power Requirements . . . . . . . . . . . . . . . . . . . . . . . . . . . . . . . . . . . . . . . . . . . . . . Chassis Power Receptacles, Redundant Power, and Power Cords . . . . . . . . . . . . . . . . . Chassis Configuration and Operation . . . . . . . . . . . . . . . . . . . . . . . . . . . . . . . . . . . . . . . . . . R4300 Modules . . . . . . . . . . . . . . . . . . . . . . . . . . . . . . . . . . . . . . . . . . . . . . . . . . . . . . . . Power Modules. . . . . . . . . . . . . . . . . . . . . . . . . . . . . . . . . . . . . . . . . . . . . . . . . . . . . . . . . Connecting Cables . . . . . . . . . . . . . . . . . . . . . . . . . . . . . . . . . . . . . . . . . . . . . . . . . . . . . . . . . Spare Allocation Examples . . . . . . . . . . . . . . . . . . . . . . . . . . . . . . . . . . . . . . . . . . . . . . . R4300 Chassis . . . . . . . . . . . . . . . . . . . . . . . . . . . . . . . . . . . . . . . . . . . . . . . . . . . . . . . . . Mixed-Mode Chassis Cabling . . . . . . . . . . . . . . . . . . . . . . . . . . . . . . . . . . . . . . . . . . . . . R3040S Cabling . . . . . . . . . . . . . . . . . . . . . . . . . . . . . . . . . . . . . . . . . . . . . . . . . . . . . . . . NICs When Using a Traditional Video Card. . . . . . . . . . . . . . . . . . . . . . . . . . . . . . . NICs When Using a V52x0 PCoIP Host Card. . . . . . . . . . . . . . . . . . . . . . . . . . . . . . How OS Network Connections Are Mapped to NICs on Chassis Backpack. . . . . . . . . . MAC Address Label on R-Series Blades . . . . . . . . . . . . . . . . . . . . . . . . . . . . . . . . . . . . . R3040S Labels . . . . . . . . . . . . . . . . . . . . . . . . . . . . . . . . . . . . . . . . . . . . . . . . . . . . . . R3080D Labels . . . . . . . . . . . . . . . . . . . . . . . . . . . . . . . . . . . . . . . . . . . . . . . . . . . . . R1350 Labels . . . . . . . . . . . . . . . . . . . . . . . . . . . . . . . . . . . . . . . . . . . . . . . . . . . . . . . C/Port Cabling . . . . . . . . . . . . . . . . . . . . . . . . . . . . . . . . . . . . . . . . . . . . . . . . . . . . . . . . . R3080D Cabling. . . . . . . . . . . . . . . . . . . . . . . . . . . . . . . . . . . . . . . . . . . . . . . . . . . . . . . . How OS Network Connections Are Mapped to NICs on Chassis Backpack. . . . . . . . . . C/Port Cabling . . . . . . . . . . . . . . . . . . . . . . . . . . . . . . . . . . . . . . . . . . . . . . . . . . . . . . . . . RMM Firmware Update Procedures . . . . . . . . . . . . . . . . . . . . . . . . . . . . . . . . . . . . . . . . . . . . Updating RMM Firmware Using Telnet . . . . . . . . . . . . . . . . . . . . . . . . . . . . . . . . . . . . . Updating RMM Firmware with Sentral . . . . . . . . . . . . . . . . . . . . . . . . . . . . . . . . . . . . . . Remote Management Card Configuration . . . . . . . . . . . . . . . . . . . . . . . . . . . . . . . . . . . . . . . Control Chain Auto-Negotiation . . . . . . . . . . . . . . . . . . . . . . . . . . . . . . . . . . . . . . . . . . . Configuring the RMM . . . . . . . . . . . . . . . . . . . . . . . . . . . . . . . . . . . . . . . . . . . . . . . . . . . Resetting the RMM Settings to the Factory Defaults. . . . . . . . . . . . . . . . . . . . . . . . . . . . Configuring the RMC. . . . . . . . . . . . . . . . . . . . . . . . . . . . . . . . . . . . . . . . . . . . . . . . . . . . Changing the IP Address of the RMC . . . . . . . . . . . . . . . . . . . . . . . . . . . . . . . . . . . . Resetting the RMC IP Settings to the Factory Defaults . . . . . . . . . . . . . . . . . . . . . . R4300 Chassis Upgrade Kit Installation. . . . . . . . . . . . . . . . . . . . . . . . . . . . . . . . . . . . . . . . . iv • Contents 19 19 20 20 20 21 22 24 24 25 26 32 33 34 35 37 40 40 40 41 42 42 42 43 43 43 44 44 44 44 45 46 46 48 49 51 53 55 55 R-Series Data Center Products User’s Guide Fiber Transceiver and Cable Requirements . . . . . . . . . . . . . . . . . . . . . . . . . . . . . . . . . . . . . . .57 PC Blade Installation . . . . . . . . . . . . . . . . . . . . . . . . . . . . . . . . . . . . . . . . . . . . . . . . . . . . . . . .58 Unpacking the PC Blades . . . . . . . . . . . . . . . . . . . . . . . . . . . . . . . . . . . . . . . . . . . . . . . . .58 Installing PC Blades. . . . . . . . . . . . . . . . . . . . . . . . . . . . . . . . . . . . . . . . . . . . . . . . . . . . . .58 Connecting Ethernet Cables. . . . . . . . . . . . . . . . . . . . . . . . . . . . . . . . . . . . . . . . . . . . . . . .60 R3040S Blades . . . . . . . . . . . . . . . . . . . . . . . . . . . . . . . . . . . . . . . . . . . . . . . . . . . . . .60 R3080D Video Options and Ethernet Port Behavior . . . . . . . . . . . . . . . . . . . . . . . . .61 R1350 Video Options and Ethernet Port Behavior . . . . . . . . . . . . . . . . . . . . . . . . . . .61 Using USB 2.0 Capability on the R3040S and R1350 . . . . . . . . . . . . . . . . . . . . . . . . . . .61 R1350 Monitor Support . . . . . . . . . . . . . . . . . . . . . . . . . . . . . . . . . . . . . . . . . . . . . . . . . . .62 R3080D and R3040S Display Support and Configuration . . . . . . . . . . . . . . . . . . . . . . . .62 Graphics Options and Number of Displays Supported . . . . . . . . . . . . . . . . . . . . . . . .62 Configuring Multiple DVI-I Displays with V52x0 PCoIP Host Cards. . . . . . . . . . . .62 Video Resolution . . . . . . . . . . . . . . . . . . . . . . . . . . . . . . . . . . . . . . . . . . . . . . . . . . . . . . . .63 Changing CMOS Settings . . . . . . . . . . . . . . . . . . . . . . . . . . . . . . . . . . . . . . . . . . . . . . . . .63 Resetting an R1350 CMOS Password . . . . . . . . . . . . . . . . . . . . . . . . . . . . . . . . . . . . . . . .64 Clearing All R3080D and 3040S CMOS Settings. . . . . . . . . . . . . . . . . . . . . . . . . . . . . . .65 Configuring RAID on an R3040S Blade . . . . . . . . . . . . . . . . . . . . . . . . . . . . . . . . . . . . . .66 Prerequisites and Overview of Required RAID Tasks . . . . . . . . . . . . . . . . . . . . . . . .66 Enable RAID in BIOS. . . . . . . . . . . . . . . . . . . . . . . . . . . . . . . . . . . . . . . . . . . . . . . . .67 Creating a RAID Volume Using Software RAID . . . . . . . . . . . . . . . . . . . . . . . . . . . .68 Installing a Windows OS on a RAID Volume . . . . . . . . . . . . . . . . . . . . . . . . . . . . . .69 Removing a PC Blade . . . . . . . . . . . . . . . . . . . . . . . . . . . . . . . . . . . . . . . . . . . . . . . . . . . .71 Mass Storage Lockout: Disabling Access to USB Mass Storage Devices . . . . . . . . . . . .71 Re-installing System Software. . . . . . . . . . . . . . . . . . . . . . . . . . . . . . . . . . . . . . . . . . . . . .74 Flashing the Blade BIOS . . . . . . . . . . . . . . . . . . . . . . . . . . . . . . . . . . . . . . . . . . . . . . . . . .75 Chapter 4. Hardware Upgrade and Replacement Procedures . . . . . . . . . . . . . . . . . 77 Drivers . . . . . . . . . . . . . . . . . . . . . . . . . . . . . . . . . . . . . . . . . . . . . . . . . . . . . . . . . . . . . . . . . . .79 Upgrading Memory . . . . . . . . . . . . . . . . . . . . . . . . . . . . . . . . . . . . . . . . . . . . . . . . . . . . . . . . .80 Model R3040S . . . . . . . . . . . . . . . . . . . . . . . . . . . . . . . . . . . . . . . . . . . . . . . . . . . . . . . . . .80 Model R3080D. . . . . . . . . . . . . . . . . . . . . . . . . . . . . . . . . . . . . . . . . . . . . . . . . . . . . . . . . .82 Important Installation Considerations . . . . . . . . . . . . . . . . . . . . . . . . . . . . . . . . . . . . .82 Installing 2 DIMMs . . . . . . . . . . . . . . . . . . . . . . . . . . . . . . . . . . . . . . . . . . . . . . . . . . .82 Installing 3 DIMMs . . . . . . . . . . . . . . . . . . . . . . . . . . . . . . . . . . . . . . . . . . . . . . . . . . .83 Installing 4 DIMMs . . . . . . . . . . . . . . . . . . . . . . . . . . . . . . . . . . . . . . . . . . . . . . . . . . .83 Model R1350 . . . . . . . . . . . . . . . . . . . . . . . . . . . . . . . . . . . . . . . . . . . . . . . . . . . . . . . . . . .83 Replacing and Upgrading Hard Disks . . . . . . . . . . . . . . . . . . . . . . . . . . . . . . . . . . . . . . . . . . .84 R3040S Hard Disks . . . . . . . . . . . . . . . . . . . . . . . . . . . . . . . . . . . . . . . . . . . . . . . . . . . . . .84 R3040S Hard Disk Tray, Drive Layout, and SATA Headers on Motherboard . . . . .85 R-Series Data Center Products User’s Guide Contents • v Replacing an R3040S Hard Disk . . . . . . . . . . . . . . . . . . . . . . . . . . . . . . . . . . . . . . . . 85 R3080D Hard Disk . . . . . . . . . . . . . . . . . . . . . . . . . . . . . . . . . . . . . . . . . . . . . . . . . . . . . . 88 R1350 Hard Disk . . . . . . . . . . . . . . . . . . . . . . . . . . . . . . . . . . . . . . . . . . . . . . . . . . . . . . . 89 Replacing CPU Fans . . . . . . . . . . . . . . . . . . . . . . . . . . . . . . . . . . . . . . . . . . . . . . . . . . . . . . . . 89 R3040S Fans. . . . . . . . . . . . . . . . . . . . . . . . . . . . . . . . . . . . . . . . . . . . . . . . . . . . . . . . . . . 90 R3080D Fan . . . . . . . . . . . . . . . . . . . . . . . . . . . . . . . . . . . . . . . . . . . . . . . . . . . . . . . . . . . 94 Replacing a Front LCD Panel . . . . . . . . . . . . . . . . . . . . . . . . . . . . . . . . . . . . . . . . . . . . . . . . . 97 Replacing the CMOS Memory Battery. . . . . . . . . . . . . . . . . . . . . . . . . . . . . . . . . . . . . . . . . 100 Replacing Blade Interposer Cards. . . . . . . . . . . . . . . . . . . . . . . . . . . . . . . . . . . . . . . . . . . . . 102 R3040S Interposer Cards . . . . . . . . . . . . . . . . . . . . . . . . . . . . . . . . . . . . . . . . . . . . . . . . 102 R3080D and R1350 Interposer Card . . . . . . . . . . . . . . . . . . . . . . . . . . . . . . . . . . . . . . . 104 Replacing R4300 Modules . . . . . . . . . . . . . . . . . . . . . . . . . . . . . . . . . . . . . . . . . . . . . . . . . . 105 Replacing the R4300 Fan Pack . . . . . . . . . . . . . . . . . . . . . . . . . . . . . . . . . . . . . . . . . . . . . . . 105 Replacing an R4300 Power Supply Unit (PSU) . . . . . . . . . . . . . . . . . . . . . . . . . . . . . . . . . . 106 Chapter 5. Troubleshooting . . . . . . . . . . . . . . . . . . . . . . . . . . . . . . . . . . . . . . . . . . . 107 PCoIP Issues . . . . . . . . . . . . . . . . . . . . . . . . . . . . . . . . . . . . . . . . . . . . . . . . . . . . . . . . . . . . . 107 PCoIP Host on Different Subnet Than PCoIP Client Is Unable to Wake Up from Various Power States . . . . . . . . . . . . . . . . . . . . . . . . . . . . . . . . . . . . . . . . . . . . . . . . 107 Power Issues . . . . . . . . . . . . . . . . . . . . . . . . . . . . . . . . . . . . . . . . . . . . . . . . . . . . . . . . . . . . . 108 No power to PC blade. . . . . . . . . . . . . . . . . . . . . . . . . . . . . . . . . . . . . . . . . . . . . . . . . . . 108 No video or link lights at desktops and no power to blades. . . . . . . . . . . . . . . . . . . . . . 108 Chassis power does not come on . . . . . . . . . . . . . . . . . . . . . . . . . . . . . . . . . . . . . . . . . . 108 Video Issues . . . . . . . . . . . . . . . . . . . . . . . . . . . . . . . . . . . . . . . . . . . . . . . . . . . . . . . . . . . . . 108 Digital link shows red at blade but green on C/Port. . . . . . . . . . . . . . . . . . . . . . . . . . . . 108 Fiber Optic Troubleshooting. . . . . . . . . . . . . . . . . . . . . . . . . . . . . . . . . . . . . . . . . . . . . . . . . 109 No video and/or digital link present . . . . . . . . . . . . . . . . . . . . . . . . . . . . . . . . . . . . . . . . 109 The monitor’s Auto-Adjust does not give a clear, sharp image . . . . . . . . . . . . . . . . . . . 109 Network and PXE Booting Troubleshooting . . . . . . . . . . . . . . . . . . . . . . . . . . . . . . . . . . . . 109 Unable to network or PXE boot using an R3040S . . . . . . . . . . . . . . . . . . . . . . . . . . . . . 109 Appendix A. Specifications . . . . . . . . . . . . . . . . . . . . . . . . . . . . . . . . . . . . . . . . . . . 111 R-Series Blades . . . . . . . . . . . . . . . . . . . . . . . . . . . . . . . . . . . . . . . . . . . . . . . . . . . . . . . . . . . 111 R4300 Chassis. . . . . . . . . . . . . . . . . . . . . . . . . . . . . . . . . . . . . . . . . . . . . . . . . . . . . . . . . . . . 112 F6150–160 Fiber Transceiver . . . . . . . . . . . . . . . . . . . . . . . . . . . . . . . . . . . . . . . . . . . . . . . . 112 Appendix B. Regulatory Compliance . . . . . . . . . . . . . . . . . . . . . . . . . . . . . . . . . . . 115 Appendix C. Technical Support . . . . . . . . . . . . . . . . . . . . . . . . . . . . . . . . . . . . . . . . 117 Contact Information . . . . . . . . . . . . . . . . . . . . . . . . . . . . . . . . . . . . . . . . . . . . . . . . . . . . . . . 117 Product Updates . . . . . . . . . . . . . . . . . . . . . . . . . . . . . . . . . . . . . . . . . . . . . . . . . . . . . . . . . . 117 Return Merchandise Authorization (RMA) . . . . . . . . . . . . . . . . . . . . . . . . . . . . . . . . . . . . . 118 vi • Contents R-Series Data Center Products User’s Guide Fuse and Power Cord Replacement . . . . . . . . . . . . . . . . . . . . . . . . . . . . . . . . . . . . . . . . . . . .118 Appendix D. Warranty. . . . . . . . . . . . . . . . . . . . . . . . . . . . . . . . . . . . . . . . . . . . . . . . 121 Appendix E. Waste Electrical and Electronic Equipment Directive (WEEE) . . . . 125 WEEE Information. . . . . . . . . . . . . . . . . . . . . . . . . . . . . . . . . . . . . . . . . . . . . . . . . . . . . . . . .125 Informations sur la DEEE . . . . . . . . . . . . . . . . . . . . . . . . . . . . . . . . . . . . . . . . . . . . . . . . . . .126 Informationen über WEEE . . . . . . . . . . . . . . . . . . . . . . . . . . . . . . . . . . . . . . . . . . . . . . . . . . .126 La información de REEE . . . . . . . . . . . . . . . . . . . . . . . . . . . . . . . . . . . . . . . . . . . . . . . . . . . .127 R-Series Data Center Products User’s Guide Contents • vii viii • Contents R-Series Data Center Products User’s Guide Introduction How to Use this Guide Thank you for purchasing your quality ClearCube products. The ClearCube Architecture was developed to bring you unprecedented levels of manageability, security, reliability, and space savings. The ease of use of ClearCube’s products will make installation straightforward. This manual provides all the product and installation information needed to set up and run ClearCube Technology’s R-Series architecture for managed desktop environments. We recommend that you familiarize yourself with the ClearCube Architecture and product descriptions and read through the entire installation and setup procedures before beginning installation. If you encounter any problems, please contact our Technical Support using the contact information provided on the inside front cover of this manual and in Appendix C on page 117. FCC Warning This equipment generates and uses radio frequency energy and, if not installed and used in strict accordance with the instructions in this manual, may cause interference to radio and television reception. Changes or modifications not expressly approved by ClearCube Technology could void the user's authority to operate the equipment under the FCC Rules. California Proposition 65 Statement WARNING: ClearCube products contain chemicals, including lead, known to the State of California to cause cancer, birth defects, or other reproductive harm. Wash hands after handling. ClearCube products should be disposed of in accordance with local laws governing computer equipment disposal. R-Series Data Center Products User’s Guide Introduction • ix WEEE Information See “Appendix E.Waste Electrical and Electronic Equipment Directive (WEEE)” on page 125 for detailed information about the Waste Electrical and Electronic Equipment Directive. Warning Regarding Medical and Clinical Use of ClearCube Products ClearCube products are not designed with components and testing for a level of reliability suitable for use in or in connection with surgical implants or as critical components in any life support systems whose failure to perform can reasonably be expected to cause significant injury to a human. Applications of ClearCube products involving medical or clinical treatment can create a potential for death or bodily injury caused by product failure, or by errors on the part of the user. Because each end-user system environment is customized and differs from ClearCube testing platforms and because a user may use ClearCube products in combination with other products in a manner not evaluated or contemplated by ClearCube, the user is ultimately responsible for verifying and validating the suitability of ClearCube products whenever ClearCube products are incorporated in a system, including, without limitation, the appropriate design, process and safety level of such system or application. Avertissement concernant l'usage médical et clinique des produits ClearCube Les produits ClearCube ne sont pas conçus pour être utilisés avec une efficacité adéquate dans ou avec des implants chirurgicaux ou dans des appareils de maintien de vie pour lesquels toute panne causerait de sérieux problèmes de santé ou blessures à l'être humain. Les applications des produits de ClearCube dans des traitements médicaux ou cliniques peuvent être dangereuses et toute panne du produit ou erreur de l'utilisateur peuvent provoquer la mort ou des blessures. Du fait que l'environnement de chaque utilisateur final est unique et diffère de celui des plate-formes de tests de ClearCube, et que l'utilisateur peut employer les produits ClearCube avec d'autres appareils d'une manière qui n'a pas été évaluée ou envisagée par ClearCube, l'utilisateur est entièrement responsable de la vérification et de la confirmation de la compatibilité des produits ClearCube lorsqu'ils sont incorporés dans un système, incluant, sans limitations, le concept approprié, le procédé et le niveau de sécurité des dits systèmes ou applications. x • Introduction R-Series Data Center Products User’s Guide Warnung zum medizinischen oder klinischen Einsatz von ClearCube-Produkten ClearCube-Produkte sind nicht für Komponenten oder zum Testen geeignet, bei denen eine Betriebssicherheit gewährleistet sein muss, die bei der Verwendung mit oder im Zusammenhang mit chirurgischen Implantaten oder als kritische Komponenten in jeglicher Art von Lebenserhaltungssystemen einher geht, bei denen ein Funktionsausfall eine ernstzunehmende Verletzung eines Menschen zur Folge haben kann. Die Anwendung von ClearCube-Produkten bei medizinischen oder klinischen Behandlungen kann potentiell zum Tode oder zu Verletzungen bei Funktionsausfällen des Produkts oder bei Bedienungsfehlern durch den Benutzer führen. Da jede Endbenutzerumgebung speziell angepasst ist und sich von ClearCube-Testplattformen unterscheidet, und da ein Benutzer ClearCube-Produkte zusammen mit anderen Produkten auf eine nicht von ClearCube in Betracht gezogene Art verwenden kann, liegt die endgültige Verantwortung über die Prüfung und Validierung der Eignung von ClearCube-Produkten beim Benutzer, wenn ClearCube-Produkte in ein System eingebunden sind, einschließlich und ohne Einschränkung, das geeignete Design, der Prozess und die Sicherheitsebene eines solchen Systems oder einer solchen Anwendung. El Cuidado con Respecto al Uso Médico y Clínico de los Productos de ClearCube Productos de ClearCube no son diseñados con componentes aprobados para un nivel de certeza adecuada para el uso en o con respecto a injertos quirúrgicos o componentes críticos en ningún sistema de apoyo de vida, cuyo fracaso para actuar, se puede esperar razonablemente causar una herida significativa a un humano. Las aplicaciones de productos de ClearCube, el tratamiento médico, o clínico, que implica, puede crear un potencial para la muerte o en herida personal causada por el fracaso del producto, o por errores por parte del usuario. Porque cada ambiente de sistema de usuario es construido al gusto del comprador y difiere en plataformas de prueba de ClearCube y porque un usuario puede usar los productos de ClearCube en la combinación con otros productos en una manera no evaluada ni contemplada por ClearCube, el usuario es últimamente responsable de verificar y validar lo apropiado de los productos de ClearCube cuando los productos de ClearCube se incorporan en un sistema, incluyendo, sin limitación, el diseño apropiado, el nivel del proceso, y la seguridad de tal sistema o la aplicación. Symbols – English Symbols are used on the equipment to convey specific information to the operator and service person. It is important to understand the intended meaning of these symbols. R-Series Data Center Products User’s Guide Introduction • xi Below are the graphical symbols that are used on ClearCube Technology, Inc. Products and their meaning. Refer to Manual Used on the equipment’s rating label to direct the operator or service person to the manual for additional information. Shock Hazard This symbol indicates the presence of electric shock hazards. Enclosures marked with these symbols should only be opened by qualified service personnel. Refer to the manual for additional information. Power Identifies the soft-start switch located on front of the blade, used to power the blade on and off. Fuse Located on equipment rating label. Symbol is accompanied with the specifications needed for replacement. Only qualified technicians should perform this operation. Protective Earth Terminal This symbol identifies the location of the protective earth terminal on the equipment. This terminal is used to connect the protective earth conductor of the power cord to the building's electrical distribution system's ground. Ground Bond Terminal This symbol identifies the location ground bond terminal. This terminal is used to connect the ground bonding conductor, or the combination of conductive parts to earth ground for safety purposes. Equipment Protection Class II May be located on the power adapter’s rating label. Indicates that equipment is double insulated from hazardous voltages. Not to be confused with “Class 2” that is a US National Electrical Code (NEC) circuit classification. These same symbols are used within this document where appropriate to indicate situations that merit checking this or another manual, or situations that could result in damage to equipment or physical injury. CAUTION: A Caution notice in this manual indicates that equipment damage or minor injury may result if proper procedures are not followed. xii • Introduction R-Series Data Center Products User’s Guide WARNING: A Warning notice in this manual indicates that catastrophic equipment damage, or serious injury including death may result if proper procedures are not followed. Safety Guidelines Before undertaking any troubleshooting or maintenance procedure, read carefully all WARNING and CAUTION notices. This equipment contains voltage hazardous to human life and is capable of inflicting personal injury. • • • • • Installations – ClearCube equipment is required to be installed in accordance with the local electrical codes and may be subject to inspection by the authority having jurisdiction. Chassis Grounding – ClearCube’s chassis and Fiber Transceiver have been designed with a three-conductor IEC 60320 appliance inlet that – with the proper power cord – connects the building’s external protective earthing conductor to all accessible metal parts of the enclosure. To minimize shock hazard, make sure your electrical power outlet has an appropriate earth safety ground that is connected each time you power on the equipment. Swedish safety regulations require the following statement: —Apparaten skall anslutas till jordat uttag när den anslutas till ett nätuerk.— Finnish safety regulations require the following statement: — Laite on liitettävä suojamaadoituskoskettimilla varustettuun pistorasiaan.— Power Cord Selection – ClearCube or ClearCube’s Distributors provides power cords that are specifically designed for use with that particular piece of equipment and are approved for use by the local authority having jurisdiction in the country where the equipment is put into service. Please refer to the installation sections of this manual for specific power cord requirements. For replacement of power cords, refer to Appendix C – Technical Support. Power Adapters – ClearCube or ClearCube’s Distributors provides power adapters that are specifically designed for use with that particular piece of equipment and are approved for use by the local authority having jurisdiction in the country where the equipment is put into service. Please refer to the installation sections of this manual for specific power cord requirements. For replacement of power cords, refer to Appendix C – Technical Support. IT Power Systems – ClearCube equipment has been evaluated and found to be compatible with IT power distribution systems with a phase-to-phase voltage not to exceed 240 V. R-Series Data Center Products User’s Guide Introduction • xiii • • • • • Live Circuits – Operating personnel and service personnel must not remove protective covers when operating the ClearCube chassis. Adjustments and service to internal components must be undertaken by qualified service technicians. During any service of this product other than replacing a PC blade or externally accessible modules on the chassis, the main connector to the premise wiring must be disconnected. Dangerous voltages may be present under certain conditions. Use extreme caution. Explosive Atmosphere – Do not operate the chassis in conditions where flammable gases are present. Under such conditions this equipment is unsafe and may ignite the gases or gas fumes. Part Replacement – Only service equipment with parts that are exact replacements, both electrically and mechanically. Contact ClearCube Technology for replacement part information. Installation of parts that are not direct replacements will void the warranty and may cause harm to personnel operating the chassis. Furthermore, damage or fire may occur if replacement parts are unsuitable. Modification – Do not modify any part of the C/Port, chassis, or PC blade from its original condition. Modifications may result in hazards. Laser Safety – The Fiber Transceiver and the Fiber C/Port have been evaluated and certified to an EN 60825-1 – Safety of laser products. Refer to Appendix B for more details. CAUTION: Use of controls or adjustments or performance of procedures other than those specified herein may result in hazardous radiation exposure. ClearCube Technology products that use lasers display the following graphic on the rating label: Marked devices comply with the FDA code of Federal 21 CFR 1040 per Notice 50 and/or the Canadian Radiation Emitting Devices Act REDR C1370. Symboles – Français Les symboles sur l'appareil indiquent des informations spécifiques à l'intention de l'utilisateur ou d'un technicien de maintenance. Il est important de bien comprendre la xiv • Introduction R-Series Data Center Products User’s Guide signification de ces symboles. Les symboles graphiques et leur signification, ci-dessous, sont utilisés sur les produits de ClearCube Technology, Inc. Se reporter au manuel Ce symbole sur l'étiquette d'identification de l'appareil est destiné à attirer l'attention de l'utilisateur ou du technicien de maintenance sur les renseignements supplémentaires portés sur le manuel. Risque de choc Ce symbole indique la présence des risques de décharge électrique. Des clôtures identifiées par ces symboles devraient seulement être ouvertes par le personnel de service qualifié. Se référer au manuel pour l'information additionnelle. Attente Un symbole correspondant à chaque lame se trouve sur le devant du châssis. Le bouton pour démarrage Soft Start active chaque lame particulière. Fusible Voir l'étiquette d'identification de l'appareil. Le symbole est accompagné des spécifications nécessaires au remplacement du fusible. Seul un technicien qualifié devrait effectuer cette opération. Protection à la terre Ce symbole identifie la borne utilisée pour connecter toutes les pièces métalliques de la boîte par un conducteur externe vers la masse, afin de protéger l'appareil contre les chocs électriques en cas de panne. Borne en esclavage au sol Ce symbole identifie la borne de lien d'au sol d'endroit. Cette borne est utilisée pour relier le conducteur moulu de liaison, ou la combinaison des pièces conductrices pour mettre à la terre la terre pour la sûreté. Protection d'équipement Classe II L'information est souvent située sur l'étiquette d'identification de l'alimentation. Elle indique que l'appareil est doublement isolé contre les surtensions dangereuses. Ne pas confondre avec la mention “Class 2” qui est une classification de circuit du NEC américain (National Electrical Code). Tous ces symboles sont utilisés dans ce document aux chapitres appropriés, afin d'indiquer les situations qui demandent une vérification ou la consultation d'un autre manuel, ou dans des situations qui risqueraient d'endommager l'appareil ou de provoquer des blessures à l'utilisateur. R-Series Data Center Products User’s Guide Introduction • xv PRÉCAUTION : une note de précaution indique que l'appareil peut être endommagé ou que l'utilisateur risque d'être légèrement blessé si les procédures correctes ne sont pas suivies. ATTENTION : ce message indique que l'appareil pourrait être sérieusement endommagé ou que de graves blessures ou la mort peuvent résulter au cas où les procédures correctes ne seraient pas suivies. Guide de sécurité Avant de dépanner ou de commencer des opérations de maintenance, veuillez lire attentivement tous les messages sous les rubriques ATTENTION et PRÉCAUTION. La tension de cet équipement est dangereuse pour l'être humain et peut provoquer des blessures. • • • • xvi • Introduction Installations – L'équipement de ClearCube doit être installé en conformité avec les codes électriques locaux et est sujet à une inspection par les autorités compétentes. Mise à la masse du châssis – Le châssis et le transceiver fibre de ClearCube ont été conçus avec un socle de connecteur trois conducteurs IEC 60320 qui, avec le cordon d'alimentation adéquat, connecte la masse protectrice externe du bâtiment à toutes les parties métalliques du châssis. Afin de réduire les risques d'électrocution, assurez-vous que votre prise électrique est bien connectée à la masse chaque fois que vous branchez l'appareil. Les règlements de sûreté de la Suède exigent le rapport suivant : —Apparaten skall anslutas till jordat uttag när den anslutas till ett nätuerk.— Les règlements de sûreté de la Finlande exigent le rapport suivant : — Laite on liitettävä suojamaadoituskoskettimilla varustettuun pistorasiaan.— Choix du câble d'alimentation – ClearCube ou ses distributeurs fournissent des câbles d'alimentation conçus spécialement pour ce type d'équipement et qui ont été approuvés par les autorités locales compétentes du pays de mise en service. Veuillez vous référer au chapitre sur l'installation pour en savoir plus sur le type de câble d'alimentation spécifique requis. Pour le remplacement des cordons d'alimentation, consulter Annexe C – Support Technique (Appendix C – Technical Support). Adaptateurs – ClearCube ou ses distributeurs fournissent des adaptateurs conçus spécialement pour ce type d'équipement et qui ont été approuvés par les autorités locales compétentes du pays de mise en service. Veuillez vous référer au chapitre sur l'installation pour en savoir plus sur le type de câble d'alimentation spécifique R-Series Data Center Products User’s Guide • • • • • • requis. Pour le remplacement des cordons d'alimentation, consulter Annexe C – Support Technique (Appendix C – Technical Support). Système d'alimentation IT – L'équipement ClearCube a été évalué et déclaré compatible avec les systèmes de distribution d'alimentation IT d'une tension composée d'un réseau triphasé ne devant pas dépasser 240 V. Circuits sous tension – Les agents installateurs et de maintenance ne doivent pas enlever les caches protecteurs lorsqu'ils travaillent sur le châssis ClearCube. Les ajustements ou réparations sur les composants internes doivent être effectués par des techniciens qualifiés. Pour tout service sur cet appareil, à l'exception du remplacement d'une lame PC ou du module de ventilation, le connecteur principal doit être débranché. Sous certaines conditions, les tensions présentes peuvent être dangereuses. Soyez extrêmement prudent. Atmosphère explosive – Ne pas faire fonctionner le châssis si des gaz inflammables sont présents. Dans ces conditions, cet équipement est dangereux et risque d'enflammer les gaz ou vapeurs gazeuses. Remplacement des pièces – Utiliser uniquement des pièces parfaitement conformes, tant au niveau électrique que mécanique. Contacter ClearCube Technology pour tout renseignement sur les pièces détachées. L'installation de pièces qui ne sont pas parfaitement semblables annulera la garantie et risque de causer des blessures au personnel travaillant sur le châssis. De plus, les pièces non conformes peuvent provoquer des dégâts ou un incendie. Modification – Ne modifier aucun élément d'origine du C/Port, du châssis ou du PC lame. Toute modification peut constituer un danger. Sécurité du laser – Le transceiver fibre et le C/Port ont été évalués et certifiés conformes à la norme EN 60825-1 – Sécurité des appareils à laser. Consulter l'Annexe B pour plus de renseignements. PRÉCAUTION : Une utilisation de commandes, un ajustement ou fonctionnement par des procédures différentes de celles spécifiées dans ce document peuvent provoquer une irradiation dangereuse. L'étiquette ci-dessous est apposée sur les appareils de ClearCube Technology qui utilisent un affichage laser : Les appareils ainsi identifiés sont en conformité avec le code FDA "Federal 21 CFR 1040, Notice 50" et/ou le "Canadian Radiation Emitting Devices Act REDR C1370". R-Series Data Center Products User’s Guide Introduction • xvii Symbole – Deutsche Symbole auf den Geräten geben dem Benutzer und dem Wartungspersonal bestimmte wichtige Informationen. Es ist wichtig, die beabsichtigte Bedeutung dieser Symbole zu verstehen. Die nachstehend angezeigten Symbole verweisen auf die durch ClearCube Technology, Inc. verwendeten Symbole und ihre Bedeutungen. Nähere Angaben im Handbuch Wird auf dem Gerätebewertungsetikett verwendet, um den Benutzer oder das Wartungspersonal auf weitere Informationen im Handbuch aufmerksam zu machen. Schlag-Gefahr Dieses Symbol zeigt das Vorhandensein der Gefahren des elektrischen Schlages an. Die Einschließungen, die mit diesen Symbolen gekennzeichnet werden, sollten von qualifiziertem Service-Personal nur geöffnet werden. Auf das Handbuch zu zusätzlicher Information sich beziehen. Bereitstehen Ein Symbol wird für jedes an der Vorderseite des Käfigs angebrachte Blade verwendet. Der Soft Start-Schalter, der das jeweilige Blade einschaltet. Sicherung Befindet sich auf dem Gerätebewertungsetikett. Das Symbol wird von den Spezifikationen zum Austausch begleitet. Dieser Vorgang sollte nur durch qualifiziertes Fachpersonal ausgeführt werden. Schützender Masse Anschluß Kennzeichnet die Klemme, die alle Metallteile des Gehäuses durch einen externen Leiter mit der Masse verbindet, um so eine Erdung zum Schutz gegen elektrische Stromschläge bei einer Fehlersituation herzustellen. Grundbondanschluß Dieses Symbol kennzeichnet die Position des Grundbondanschlusses. Dieser Anschluß wird benutzt, um den Grundabbindenleiter oder die Kombination der leitenden Teile anzuschließen, um Boden zu den Sicherheit Zwecken mit Erde zu bedecken. Geräteschutzklasse II Befindet sich auf dem Gerätebewertungsetikett. Gibt an, dass das Gerät doppelt gegen gefährliche Spannungen isoliert ist. Die ist nicht mit der “Class 2”-Schaltkreisklassifizierung des US National Electrical Code (NEC) zu verwechseln. Diese Symbole werden im Dokument verwendet, um auf Situationen hinzuweisen, in denen dieses oder ein weiteres Handbuch zu Rate gezogen werden sollten, oder falls die Möglichkeit von Schäden oder Verletzungen besteht. xviii • Introduction R-Series Data Center Products User’s Guide VORSICHT: Ein Vorsichtshinweis weist darauf hin, das Geräteschäden oder geringe Verletzungen bei unsachgemäßer Bedienung erfolgen können. WARNUNG: Ein Warnhinweis weist darauf hin, das vollständige Geräteschäden oder schwere Verletzungen einschließlich des Todes bei unsachgemäßer Bedienung erfolgen können. Sicherheitsrichtlinien Vor der Durchführung von Fehlerbehebungs- oder Wartungsarbeiten sollten Sie alle WARNUNGS- und VORSICHTSHINWEISE genau durchlesen. Dieses Gerät weist Spannungen auf, die zu Todesfällen und persönlichen Verletzungen führen können. • • Installationen – ClearCube-Geräte müssen in Übereinstimmung mit den örtlichen elektrischen Richtlinien installiert werden und unterliegen unter Umständen der Überwachung durch die jeweiligen Behörden. Gehäuseerdung – ClearCubes Chassis und Glasfaser-Transceiver wurden mit einem Dreifachleiter-IEC 60320-Gerätesteckeingang entwickelt, welches anhand eines geeigneten Netzkabels den externen Schutzmasseleiter des Gebäudes mit allen zugänglichen Metallteilen des Gehäuses verbindet. Um die Gefahr eines elektrischen Schlags zu minimieren, stellen Sie sicher, dass der Netzausgang eine geeignete Sicherheitserdungsmasse aufweist, die bei jedem Einschalten des Gerätes damit verbunden ist. Sicherheit Regelungen von Schweden erfordern die folgende Aussage: —Apparaten skall anslutas till jordat uttag när den anslutas till ett nätuerk.— Sicherheit Regelungen von Finnland erfordern die folgende Aussage: — Laite on liitettävä suojamaadoituskoskettimilla varustettuun pistorasiaan.— • • Netzkabelauswahl – ClearCube oder der ClearCube Vertrieb bieten Netzkabel an, die jeweils für das bestimmte Gerät entwickelt wurden und deren Verwendung durch die örtlichen Behörden des jeweiligen Landes, in dem das Gerät betrieben wird, genehmigt ist. Genaue Netzkabelanforderungen entnehmen Sie bitte den Installationsabschnitten in diesem Handbuch. Nähere Angaben zur Auswechslung von Netzkabeln finden Sie im Anhang C – Technischer Support (Appendix C – Technical Support). Netzadapter – ClearCube oder der ClearCube Vertrieb bieten Netzadapter an, die jeweils für das bestimmte Gerät entwickelt wurden und deren Verwendung durch die örtlichen Behörden des jeweiligen Landes, in dem das Gerät betrieben wird, genehmigt ist. Genaue Netzkabelanforderungen entnehmen Sie bitte den Installationsabschnitten in diesem Handbuch. Nähere Angaben zur Auswechslung R-Series Data Center Products User’s Guide Introduction • xix von Netzkabeln finden Sie im Anhang C – Technischer Support (Appendix C – Technical Support). • • • • • • IT-Leistungssysteme – ClearCube-Geräte wurden ausgewertet und kompatibel zu IT-Leistungsverteilungssystemen mit einer Phasenspannung von nicht mehr als 240 V befunden. Angeschlossene Stromkreise – Betriebs- und Wartungspersonal sollten die Schutzabdeckungen nicht entfernen, wenn der ClearCube Chassis in Betrieb ist. Justierungen und Wartungsarbeiten an internen Komponenten sollten nur durch qualifiziertes Fachpersonal vorgenommen werden. Der Hauptanschluss muss während allen Wartungsarbeiten an diesem Produkt, außer dem Austausch eines PC-Blades oder des Lüftereinsatzes, vom Netz getrennt werden. Unter bestimmten Bedingungen können gefährliche Spannungen vorhanden sein. Vorsicht ist angezeigt. Explosive Umgebung – Betreiben Sie den Chassis nicht in Umgebungen, in denen entflammbare Gase vorhanden sind. Der Betrieb des Gerätes in solchen Umgebungen ist unsicher und kann die Gase entzünden. Teileersatz – Geräte sollten nur mit elektrischen und mechanischen Teilen, die exakte Ersatzteile sind, gewartet werden. Wenden Sie sich an ClearCube Technology, um Ersatzteilinformationen zu erhalten. Die Installation von Teilen, die nicht direkte Ersatzteile sind, hat ein Erlöschen des Garantieanspruches zur Folge und kann dem Benutzungspersonal des Gehäuses Schaden zufügen. Weiterhin können ungeeignete Ersatzteile Schäden sowie Brandschäden hervorrufen. Modifizierungen – Das C/Port, Chassis oder PC Blade darf in keiner Weise vom Originalzustand geändert werden. Modifizierungen können Risiken hervorrufen. Lasersicherheit – Der Glasfaser-Transceiver und das Glasfaser-C/Port wurden ausgewertet und entsprechen der Richtlinie EN 60825-1 – Sicherheit von Laserprodukten. Nähere Angaben finden Sie im Anhang B. VORSICHT: Die Bedienung oder das Vornehmen von Justierungen oder Vorgängen entgegen der hier aufgeführten können eine gefährliche Laserstrahlungsbelastung zur Folge haben. ClearCube Technology-Produkte, die Laser verwenden, weisen das folgende Symbol auf dem Gerätebewertungsetikett auf: Gekennzeichnete Geräte entsprechen dem FDA Code of Federal 21 CFR 1040 per Notice 50 und/oder dem Canadian Radiation Emitting Devices Act REDR C1370. xx • Introduction R-Series Data Center Products User’s Guide Símbolos – Español Los símbolos se usan en el aparato para comunicar información específica a el operador y a la persona de servicio. Es importante entender la intención del significado de estos símbolos. Abajo se muestran los símbolos gráficos que se usan en los productos ClearCube Technology, Inc., así como su significado. Consultar el manual Se usa en la etiqueta de especificaciones del aparato para dirigir al operador o persona de servicio a que consulte el manual para información adicional. Peligro de choque Este símbolo indica la presencia de los peligros de la descarga eléctrica. Los recintos marcados con estos símbolos se deben abrir solamente por el personal de servicio cualificado. Referir al manual para la información adicional. Hacer una pausa Un símbolo que se usa para cada blade o bandeja instalada, localizado enfrente de el chassis. Switch de inicio suave usado para encender cada blade en particular. Fusible Localizado en la etiqueta de especificaciones del aparato. El símbolo está acompañado de las especificaciones necesarias para su reemplazo. Solamente técnicos calificados deben de realizar esta operación. Terminal a tierra protectiva Identifica a la terminal que se usa para conectar todas las partes metálicas del gabinete a través de un conductor externo para conectar a tierra y proteger contra descarga eléctrica en caso de una condición de falla. Terminal en enlace de tierra Este símbolo identifica la localización del terminal en enlace de tierra. Este terminal se utiliza para conectar el conductor de tierra de la vinculación, o la combinación de piezas conductoras para conectar a tierra la tierra para los propósitos de seguridad. Protección del aparato Clase II Puede estar localizado en la etiqueta de especificaciones en el adaptador de corriente. Indica que el aparato tiene aislamiento doble para voltajes peligrosos. No confundirlo con la "Clase 2" que es una clasificación de circuito NEC de E.U. (National Electrical Code). R-Series Data Center Products User’s Guide Introduction • xxi Estos mismos símbolos se usan en este documento cuando es apropiado para indicar situaciones que ameritan revisar este u otro manual, o que pudieran resultar en daño al aparato o lesión física. PRECAUCIÓN: Un aviso de Precaución indica que puede ocurrir daño al aparato o lesiones menores si no se siguen los procedimientos adecuados. ADVERTENCIA: Un aviso de Advertencia indica que puede ocurrir daño fatal al aparato, o lesiones serias incluyendo la muerte si no se siguen los procedimientos adecuados. Directrices de seguridad Antes de llevar a cabo cualquier procedimiento de diagnostico de fallas o mantenimiento, lea cuidadosamente todas los avisos de ADVERTENCIA y PRECAUCIÓN. Este aparato contiene voltaje peligroso para el cuerpo humanos y tiene la capacidad de infligir lesiones personales. • • • xxii • Introduction Instalaciones – Se requiere que los aparatos de ClearCube se instalen de acuerdo con los códigos eléctricos locales y pueden estar sujetos a inspección por las autoridades en jurisdicción. Conexión a tierra del chasis – El chassis de ClearCube y el Transceptor de Fibra han sido diseñados con una entrada de aparato con tres conductores IEC 60320 que (con el cable de alimentación apropiado) conecta al conductor aterrizado externo protectivo de construcción a todas las partes accesibles de metal del gabinete. Para minimizar el peligro de descarga eléctrica, asegure que su toma de corriente eléctrica tiene una conexión a tierra de seguridad apropiada cada vez que usted enciende el aparato. Las regulaciones de seguridad de Suecia requieren la declaración siguiente: —Apparaten skall anslutas till jordat uttag när den anslutas till ett nätuerk.— Las regulaciones de seguridad de Finlandia requieren la declaración siguiente: — Laite on liitettävä suojamaadoituskoskettimilla varustettuun pistorasiaan.— Selección del cable de alimentación – ClearCube o distribuidores de ClearCube proveen de cables de alimentación que están específicamente diseñados para usarse con la pieza del aparato en particular y están aprobados para su uso por las autoridades en jurisdicción en el país donde el aparato se pone en servicio. Por favor consulte las secciones de instalación de este manual para los requerimientos específicos de los cables de alimentación. Para el reemplazo de los cables de alimentación, consulte el Apéndice C – Soporte Técnico (Appendix C – Technical Support). R-Series Data Center Products User’s Guide • Adaptadores de alimentación – ClearCube o distribuidores de ClearCube proveen de adaptadores de alimentación que están específicamente diseñados para usarse con la pieza del aparato en particular y están aprobados para su uso por las autoridades en jurisdicción en el país donde el aparato se pone en servicio. Por favor consulte las secciones de instalación de este manual para los requerimientos específicos de los cables de alimentación. Para el reemplazo de los cables de alimentación, consulte el Apéndice C – Soporte Técnico (Appendix C – Technical Support). • Sistemas de alimentación eléctricos IT – El equipo ClearCube ha sido evaluado y es compatible con sistemas de alimentación eléctricos de distribución IT con un voltaje "fase a fase" que no exceda 240 V. Circuitos vivos – Personal de operación y de servicio no deben de remover las cubiertas protectivas cuando estén operando el ClearCube chassis. Ajustes y servicio a componentes internos deben de realizarse por técnicos de servicio calificados. Durante cualquier servicio a los productos excluyendo el reemplazo de la PC blade y la bandeja del ventilador, el conector principal al cableado local se debe de desconectar. Voltajes peligrosos pueden estar presentes bajo ciertas circunstancias. Use extrema precaución. Atmósfera explosiva – No opere el chassis en condiciones donde gases inflamables estén presentes. Bajo tales condiciones este aparato no es seguro y puede encender los gases o vapores de gases. Reemplazo de partes – El servicio al aparato debe de ser con partes que son de reemplazo exacto, mecánica y eléctricamente. Comuníquese con ClearCube Technology para información sobre partes de reemplazo. Instalación de partes que no son reemplazos directos cancelarán la garantía y pueden causar daño al personal que opera el chasis. Además, puede ocurrir daño o fuego si las partes de reemplazo son inapropiadas. Modificación – No modifique de su condición original ninguna parte de el C/Port, chassis, o PC Blade. Las modificaciones pueden resultar peligrosas. Seguridad del láser – El Transceptor de Fibra y el C/Port han sido evaluados y certificados a un EN 60825-1 – seguridad de productos láser. Consulte el Apéndice B para más detalles. • • • • • PRECAUCIÓN: El uso de controles, ajustes o rendimiento de los procedimientos, diferentes a los especificados en este documento puede resultar en exposición a radiación peligrosa. Productos de ClearCube Technology que usan láser muestran el siguiente gráfico en la etiqueta de especificaciones. R-Series Data Center Products User’s Guide Introduction • xxiii Los dispositivos marcados cumplen con el código federal FDA 21 CFR 1040 por notificación 50 y/o el acta canadiense REDR C1370 para dispositivos con emisión de radiación. xxiv • Introduction R-Series Data Center Products User’s Guide Chapter 1. ClearCube Architecture and Product Overview The ClearCube architecture delivers Intel®-based PC functionality to the desktop from a secure, centralized location. This architecture provides significant increases in manageability and security while providing mission-critical reliability, performance, and uptime improvements with lowered costs. Replacing a traditional PC box with a ClearCube C/Port or client in an office or cubicle saves space, eliminates fan noise, and simplifies cabling resulting in a clear cube. The key components of the ClearCube Architecture are: • • PC Blade—a remotely located, Intel-based computer in a dense form factor. Chassis—a centralized chassis that houses multiple PC blades and accepts a variety of plug-in module options that allow connecting all of the external cables to the blades. Previously known as the chassis and BackPack. • Client—a remote desktop unit (C/Port, PCoIP zero client, or thin client) to which standard peripherals are connected. • System Management Software—ClearCube Management Suite software and monitoring hardware that is built into ClearCube blades, chassis, and user ports. The ClearCube management suite software, Sentral, is an optional component. • PC-over-Ethernet™ (PCoE™) remote protocol software—You can use ClearCube PCoE to access remote devices (such as traditional computers or virtual machines) from your local computer, client, or thin client. PCoE provides bidirectional audio, USB redirection, and user experience settings you can adjust to accommodate a variety of usage and network scenarios. PCoE is an optional component in your ClearCube environment. This guide is one of a series of manuals that describe the ClearCube architecture. Other manuals include: • • • • • PCoIP User’s Guide I/Port User’s Guide C/Port and Multi Video Extender User’s Guide PCoE User’s Guide A-Series Data Center Products User’s Guide R-Series Data Center Products User’s Guide ClearCube Architecture and Product Overview • 1 R-Series PC Blade The ClearCube PC blade is a dedicated computer that delivers full PC functionality (including USB) to the desktop from a centralized location. Each R-series PC blade contains all the industry-standard components of a desktop PC: processor, memory, hard disk, video support, and Ethernet. You can easily connect peripherals to the PC blade through USB ports on the User Port that is connected to the blade over a network. Additionally, a single USB port is located on the front of the blade. You can load application software on to your PC blade through peripherals connected to the USB ports, or via the Ethernet connection on each blade. Each blade has its own systems management circuitry powered independently from the main components. This system illuminates the front panel status indicators and monitors blade parameters even when the blade is powered off. The front panel LCD shows the last three digits of the blade serial number as a default. ClearCube Sentral software can be used to program as many as 10 alphanumeric characters into the display. Figure 1 shows several R-series PC blades. Dual-Slot R3040S Single-Slot R1350 Single-Slot R3080D Figure 1 R-series PC Blades: Dual-Slot R3040S, Single-Slot R3080D, and Single-Slot R1350 2 • ClearCube Architecture and Product Overview R-Series Data Center Products User’s Guide A display area at the front of each blade provides active status indicators. The four LEDs on the front panel of the blade are described in Table 1 on this page and shown in Figure 2 on page 4. Table 1 Blade LED Functions LED Color Description Green Blade is powered on. Off Blade is powered off. Power C/Port Green C/Port is connected, and link is good. Red C/Port is not connected, or link is bad. NOTE: The C/Port LED does not provide any information about PCoIP link status. If you are using a PCoIP client, see the LED on the PCoIP client for link status information. If you are connecting to a blade using a PCoIP zero client and a C/Port is not connected to the blade, the C/Port LED is not applicable and is always red. Green Flashing indicates hard disk activity. Disk Off E-Net No hard disk activity. Green Model R3040S: 10/100/1000 Mb/s link — flashing indicates activity. Model R3080D: 10/100/1000 Mb/s link — flashing indicates activity. Model R1350: 1000 Mb/s link — flashing indicates activity. Yellow/ Amber Model R3040S: Not applicable. Model R3080D: Not applicable. Model R1350: 10/100 Mb/s link — flashing indicates activity. Off No link. The following figure shows the blade font panel as it appears on the blade, and also as it appears inside a chassis with the chassis door closed. Labels on the chassis door identify the front panel LEDs, buttons, and port. R-Series Data Center Products User’s Guide ClearCube Architecture and Product Overview • 3 Front Panel Display outside of Chassis Power Indicator 138 C/Port Link Indicator‡ Hard Disk Activity Indicator Network Activity Indicator Reset Button Power Button Front Panel Display inside Chassis (Including Labels on Chassis Door) 138 Chassis Slot Designation (1 to 8) USB Port Figure 2 ClearCube R-Series Blade Front Panel Display outside of Chassis and inside Chassis (the Chassis Door Provides LED and Button Labels) ‡ The C/Port LED is only applicable if a C/Port is connected to a blade. If you are using a PCoIP zero client to connect to a blade and a C/Port is not connected to the blade, the C/Port LED is not applicable and is always red. 4 • ClearCube Architecture and Product Overview R-Series Data Center Products User’s Guide R-Series Chassis The ClearCube R-series chassis is a centralized chassis that houses up to eight single-slot PC blades and up to four dual-slot PC blades. A standard 42U 19-inch rack can hold as many as 14 chassis, for a total of 112 single-slot PC blades, 56 dual-slot blades, or a combination of both. Each chassis is a self-contained unit providing all of the Ethernet connections, C/Port connections, airflow management, and power connections for PC blades. The R4300 chassis features interchangeable modules for maximum flexibility. Each chassis provides system management connections through network and RS-485 links that you can daisy chain from chassis to chassis. Figure 3 shows a chassis with PC blades installed. The R4300 chassis, shown in Figure 4, provides a wide range of options for C/Port and client connections to blades and to the ClearCube network. The R4300 chassis provides advanced monitoring and switching functionality, with software support for these modules provided by Sentral. The R4300 chassis and Sentral are fully compatible with all R-series blades. The R4300 also provides full backwards compatibility with all features implemented in Switch Manager 4.5, and is compatible with ClearCube R4200 chassis systems utilizing Blade Switching BackPacks (BSBPs) and Direct Connect BackPacks (DCBPs). The R4300 also features dual redundant power supplies and dual AC power inputs. Sentral communicates with the chassis through an Ethernet connection on the management controller housed in each R4300. The management controller is installed inside the R4300 and does not take up a blade slot. Figure 3 ClearCube R-Series Chassis Front View R-Series Data Center Products User’s Guide ClearCube Architecture and Product Overview • 5 Figure 4 R4300 Chassis Rear View C/Port The C/Port, shown in the following figure, is a desktop unit to which a user’s standard peripherals are connected. The C/Port supports a 200-meter (660-foot) connection distance from the blade and has two USB 1.1 ports, PS/2 mouse and keyboard ports, speaker and microphone ports, and SVGA video output port. Other C/Port options such as the Multi-Video Expander (MVX) are also available from ClearCube. For more information, see the C/Port and Multi Video Expander User’s Guide. Figure 5 ClearCube C/Port 6 • ClearCube Architecture and Product Overview R-Series Data Center Products User’s Guide Multi-Video Solution The ClearCube multi-video solution provides a revolutionary way to multi-task and process information. While the C/Port provides all the peripheral and USB connections, the multiplexed video signal can be passed through to the Multi-Video Expander (MVX) via a noise-limiting VGA connector cable. Shown in Figure 6, the MVX is physically the same size as the standard C/Port and can be stacked on top of a C/Port. The MVX distributes the individual video frames to the appropriate output connectors. The two video outputs on the MVX are special, high-density connectors that can each drive two monitors. The MVX can be used with either the standard C/Port or the Fiber C/Port for connection over copper or fiber optic cable (the MVX does not function with other clients). The MVX requires that the PC blade have a multi-monitor graphics card installed. The centralized ClearCube architecture combined with multi-video capabilities results in the ideal solution for space-constrained trading floors and other applications requiring multiple displays. For more information, see the C/Port and Multi Video Expander User’s Guide. Figure 6 ClearCube MVX Back View Fiber Optic Extension System The Fiber Optic Extension System adds fiber optic connectivity to the ClearCube architecture via a pair of multi-mode fiber optic cables. The system is compatible with ClearCube R4300 chassis, backpacks, and blades. It securely extends user desktops from centralized PC blades to a distance as great as 2000 meters (6562 feet) over a pair of 62.5 micron multi-mode fibers. The system consists of two components, the Fiber Transceiver and the Digital Fiber C/Port. R-Series Data Center Products User’s Guide ClearCube Architecture and Product Overview • 7 Fiber Transceiver The Fiber Transceiver, shown in Figure 7, is a 1U high, rack-mounted device designed to work specifically with the ClearCube architecture. Figure 7 ClearCube F6150-160 Fiber Transceiver The F6150-160 Fiber Transceiver converts signals sent between C740 Fiber C/Ports (shown below) and ClearCube blades. A single 16-port Transceiver supports two R4300 chassis or 16 PC blades. Each blade in a chassis is connected to the transceiver by an Ethernet cable ( 10 meters). C7420 Fiber C/Port Figure 8 shows the C7420 Digital Fiber C/Port. In a standard installation, the Digital Fiber C/Port resides on the user's desktop and provides standard peripheral connections including USB, PS/2, audio, and video. The Fiber C/Port is compatible with the Multi-Video Expander (MVX). Front Rear Figure 8 ClearCube C7420 Digital Fiber C/Port For more information about the Fiber C/Port, see the C/Port and Multi Video Expander User’s Guide. 8 • ClearCube Architecture and Product Overview R-Series Data Center Products User’s Guide Zero Clients and Thin Clients ClearCube PCoIP® zero clients and thin clients connect to PC blades over a standard Ethernet network. The Clients deliver video and peripheral signals to a local user from a centralized PC blade, just like the C/Port. However, the key difference is that the client connection (depending on the model) uses PCoIP protocol, Ethernet protocol, or both, allowing it to work over standard switched networks. Therefore, ClearCube clients do not require a point-to-point connection to a blade (no homerun cabling needed). ClearCube clients enable IT managers to use their existing IP network and cabling infrastructure regardless of the distance between users' desktops and their centralized PC blades. • • • • • • • I9440—No operating system. Quad monitor using PCoIP technology I9424—No operating system. Dual monitor using PCoIP technology with internal smart card reader I9422—No operating system. Dual monitor using PCoIP technology I9420—No operating system. Dual monitor using PCoIP technology I8520—Windows Embedded Standard with optional internal smart card reader I8442—Windows XP Embedded or Embedded Linux® I8440—Windows XP Embedded or Embedded Linux Figure 9 shows several ClearCube clients. For more information, see the I/Port User’s Guide. ClearCube I9424 PCoIP Zero Client ClearCube I9440 PCoIP Zero Client ClearCube I8520 Thin Client Figure 9 Various ClearCube Clients R-Series Data Center Products User’s Guide ClearCube Architecture and Product Overview • 9 10 • ClearCube Architecture and Product Overview R-Series Data Center Products User’s Guide Chapter 2. Network Planning and Site Preparation Rack and Cabinet Requirements Before installing the components of the ClearCube Architecture it is very important to properly prepare the site where you will install the chassis and PC blades. This chapter provides important information on how to plan for installation. Figure 10 Standard 19-Inch Rack and Standard 19-Inch Cabinet Figure 10 shows two frequently-used structures for holding ClearCube chassis. A standard 42U rack or cabinet can hold as many as 14 chassis. CAUTION: Equipment racks and cabinets can become highly unstable if not adequately secured. Please read and follow the manufacturer's specifications and recommendations for mounting instructions. Additional ClearCube guidelines are provided throughout this section that—with the manufacturer's requirements—will ensure a safe installation. R-Series Data Center Products User’s Guide Network Planning and Site Preparation • 11 Fully enclosed electrical cabinets are the preferred option for mounting your ClearCube chassis. When using cabinets, make sure that both front and back panels and doors are vented to provide sufficient airflow for intake and exhaust. If you plan to use a cabinet enclosure, ensure that you have at least 34 inches (86cm) of interior depth measured from the front of the unit, to accommodate the cabling that exits from the back of the chassis. Provide adequate space on the back of the rack or cabinet to allow servicing the cables and equipment. Cabinets may be fitted with casters for easier mobility or service access. WARNING: When installing a chassis in a cabinet enclosure, never use only one set of mounting brackets at the front. Select a cabinet with an adjustable center rail or back rail in addition to the front rail. ClearCube's adjustable mounting kit will then be required to attach the chassis to both the front and center/back rails. Space and Floor Support Requirements The following table details the weight of a 42U rack or cabinet with 14 fully-loaded chassis (not including the weight of the cabling or the rack). NOTE Blade and chassis weights can vary depending on the components each device contains. Blade and chassis weights shown in the following table are the maximum weights for each device, where all possible components are populated in the device. Table 2. Maximum total weight and load in fully-loaded 42U rack Blade Blade Weight Chassis Weight Total Weight of 14 Fully-Loaded Load per Square Foot Chassis (Square Meter) (Not Including Cables or Rack) R3040S (4 per Chassis) 13 lbs (5.8 kg) 42 lbs (19 kg) 1316 lbs (597 kg) 219 lbs (99 kg) R3080D (8 per Chassis) 5.2 lbs (2.4 kg) 42 lbs (19 kg) 1170.4 lbs (531 kg) 195 lbs (88 kg) R1350 (8 per Chassis) 6 lbs (2.7 kg) 42 lbs (19 kg) 1260 lbs (572 kg) 210 lbs (95 kg) Verify that the rack and floor will support this weight, even if initial installation does not include 14 chassis units. This allows for future expansion at the location. If other equipment is to be installed in the rack or cabinet, take this additional weight into consideration. WARNING: Improper structural support could cause the rack or cabinet to lean and the floor to buckle, possibly to the point of structural damage. 12 • Network Planning and Site Preparation R-Series Data Center Products User’s Guide Power and Cooling Requirements The ClearCube Support site provides ClearCube Power and Cooling Requirements Spreadsheets that you can use to determine power and cooling requirements for ClearCube blade and chassis deployments. Documentation and tools provide: • Tables describing chassis power requirements • Data center branch circuit requirements for various chassis and blade deployment scenarios • Power requirements for uninterruptible power supply (UPS) sizing • Maximum and minimum British thermal unit (BTU) values • BTU calculator with features enabling you to adjust the percentage of users and application intensity To download ClearCube Power and Cooling Requirements Spreadsheets: 1. See the following URL: http://support.clearcube.com 2. In the Product Support section, find your blade model in the PC Blades drop-down list. 3. Click the Manuals link below the product description. 4. Click the Power & Cooling Requirements link to download an archive file. The archive file contains spreadsheets for various product configurations. Choose the appropriate spreadsheet and read the included instructions about how to calculate cooling requirements. The following sections discuss additional items to consider when planning and designing data centers. Additional Power Considerations As described in the previous section, obtain ClearCube Power and Cooling Requirements Spreadsheets to determine power requirements for your ClearCube deployment. Your ClearCube system centralizes all computing components in a single location thereby concentrating the majority of the power needed to this one area. Although the ClearCube solution reduces the overall power required when compared to traditional PCs, the power demands in the data center are increased. Ensure that your power circuits can safely handle the maximum current that a chassis can draw (see the Mains Supply Requirement columns in the ClearCube Power & Cooling Requirements spreadsheets). If your existing power circuit cannot handle the maximum current, you must have additional power system capacity installed by a qualified electrician. R-Series Data Center Products User’s Guide Network Planning and Site Preparation • 13 If you are putting multiple chassis assemblies on a single power circuit, ensure that the circuit can safely handle the combined maximum currents of all chassis. CAUTION: Make sure your power strips, power grid, and circuit breakers can safely provide the required current. Ensure that any extension cords used meet local safety regulations and local fire codes. When installing uninterruptible power supplies (UPS), consult your UPS specifications for proper sizing. ClearCube provides kVA columns in the spreadsheets for reference. See the ClearCube Power and Cooling Requirements Spreadsheets on the ClearCube Support site at http://support.clearcube.com for detailed power and cooling requirements. Additional Cooling and HVAC Considerations As described above, obtain ClearCube Power and Cooling Requirements Spreadsheets to determine cooling requirements for your ClearCube deployment. Ensure that the air conditioning and ventilation system for the installation area can accommodate the calculated thermal load. The rear of the chassis has air vents for four fans. The fan openings must be at least four inches from any airflow-impeding barriers such as walls, the back of the rack door or panel, large bundles of cables, and so on. The availability of an air exit path from these fans is imperative to the efficient operation of the unit. Failure to provide sufficient air venting will result in a thermal overload of the blade. If the chassis is installed in a cabinet, use a fully-vented back door or panel. CAUTION: Failure to provide sufficient space and room ventilation will result in overheating that can cause eventual unit failure not covered as part of the unit warranty. Cable Requirements The chassis uses standard network cables with RJ45 connectors to connect to C/Ports and to an Ethernet network. These can be CAT5, CAT5e, CAT6, or CAT6e cables. C/Ports require straight-through cables with all four twisted pairs available. Network connections follow standard Ethernet guidelines. In practice, identical copper media can be used for C/Ports and for network connections, although ClearCube recommends using different cable colors for C/Port and network connections to simplify installation and maintenance. Throughout this guide, “C/Port cable” and “network cable” refer interchangeably to copper-media cable such as CAT5, CAT5e, CAT6, or CAT6e. 14 • Network Planning and Site Preparation R-Series Data Center Products User’s Guide Each fully loaded chassis requires eight C/Port cables with RJ-45 connectors for connections to C/Ports at the desktop and eight network cables for blade connections to the Ethernet network hub or switch. Additionally, short color-coded C/Port cables (Green for RS485, Red for Sparing, and Yellow for Admin Port) are provided to configure and daisy-chain your BackPacks. You need eight network cables per chassis to connect the blades to your network switch. If using blades with dual network ports and a 16-port Ethernet module in an R4300, you need 16 Ethernet cables per chassis. For installations using only PCoIP clients and thin clients, you will not need to connect any cables to the C/Port connections. With these clients, the cables going to the desktop are connected directly to your network switch. NOTE The C/Port cable connections use all four-wire pairs for the connection from the PC blade to the C/Port. If your installation currently splits out wire pairs for multiple uses, you must ensure that a separate full connection is available for each blade to C/Port connection. Figure 11, Figure 12, Figure 13, and Figure 14 provide schematics of the cabling required to connect your chassis to User Ports and your Ethernet network. User Desktops with C/Ports Data Center Chassis Admin C/Port and Terminal Homerun C/Port Cables Ethernet Cables Network Switch Figure 11 ClearCube C/Port Architecture Cabling Diagram R-Series Data Center Products User’s Guide Network Planning and Site Preparation • 15 User Desktops with Fiber C/Ports Data Center Chassis Admin C/Port and Terminal Ethernet Cables Network Switch (Alternatively, Deployments Can Omit the Network Switch and Directly Connect the Chassis to the Fiber Transceiver) Fiber Cables F6150 Fiber Transceiver Figure 12 ClearCube Digital Fiber C/Port Architecture Cabling Diagram User Desktops with Zero Clients and Thin Clients Data Center Chassis Admin C/Port and Terminal Ethernet Cables Network Switch Figure 13 ClearCube Client Architecture Cabling Diagram 16 • Network Planning and Site Preparation R-Series Data Center Products User’s Guide The following figure shows cabling between PCoIP zero clients and blades with PCoIP host cards. For more information about the cabling, shown in the following figure, see Table 7, “R4300 Network Module Features: Models 4362 (EP2) and 4363 (EP6),” on page 32. User Desktops with PCoIP Clients Data Center & Blades with PCoIP Host Cards Chassis Ethernet Admin C/Port and Terminal Ethernet for PCoIP Traffic Ethernet Network Switch Figure 14 Cabling Diagram Showing Optional Separation of PCoIP Traffic (Dashed Cabling) Free IP Address Requirement With the R4300 chassis, the default startup configuration is DHCP (Dynamic Host Configuration Protocol), which automatically requests an IP address from your DHCP server. If you do not have a DHCP server, the R4300 chassis defaults to a static IP address of 192.168.1.251. If there is no DHCP server in your environment, set the IP Mode to Fixed IP and assign it a unique IP. This Free IP Address requirement on R4300 in a Fixed IP mode is same as on R4200 with an installed Remote Management Card/Controller. The R4200 chassis with a Remote Management Controller/Card (RMC) does not support DHCP and is always in Fixed IP mode. R-Series Data Center Products User’s Guide Network Planning and Site Preparation • 17 18 • Network Planning and Site Preparation R-Series Data Center Products User’s Guide Chapter 3. Chassis and Blade Installation The following instructions are intended for use by IT technicians familiar with computer systems at the hardware configuration level. Tools for Installation All functions and operations described in the following installation procedures can be performed with the following tools: • #2 Phillips screwdriver • C/Port adjustment tool (included in Chassis Accessory Kit) A 1/4-inch nut driver with a magnetic tip is suggested for removing and replacing the self-tapping sheet metal screws used on the chassis. Shipment Components Upon receipt of your shipment, carefully examine the outside of all the boxes before opening. If you find any external damage, do not open the boxes. Contact and notify the shipper that damage has occurred and request an inspection by them before proceeding. The following components are shipped in separate cartons: • Chassis—This should be the first carton to be opened and used in the installation process after the racks or cabinets have been installed. • R4300 modules—Packaged separately from the chassis, these modules are installed by the user when the chassis is installed. Each module box contains the interconnection cables necessary to interface it to another chassis. • PC blades – These are shipped four to a box. Do not open these boxes until your chassis assemblies are installed and you are ready to install the PC blades. • User ports – C/Port or other client desktop units are shipped with or without power supplies, depending on your configuration. Do not open these boxes until your blades are installed and you are ready to begin desktop installations. R-Series Data Center Products User’s Guide Chassis and Blade Installation • 19 • Monitors and keyboards – Monitors are normally shipped in their own cartons. Keyboards, if not included with user ports, may be bulk-packaged. Shipping cartons and packing materials should be retained until your ClearCube installation has been completed and tested. Chassis Installation Unpacking the Chassis Open the chassis box, remove the packing material, and check the chassis for any visible damage. Contact the carrier for an immediate on-site inspection if damage is found. If there are no visible problems, remove the unit from the box and set it on a flat working surface. R4300 modules are packaged individually and shipped in a carton separate from the chassis, with their appropriate patch cables in each package. Installing the Chassis CAUTION: To avoid equipment damage and potential personal injury, assemble and position the chassis without blades installed. ClearCube offers two methods to mount chassis in a rack: • Chassis Accessory Kit, included with all chassis • Chassis Rapid Mount (CRM) kit, available separately. The standard Chassis Accessory Kit fits all standard 19-inch racks and provides a set of front and back mounting brackets, with the necessary hardware. The optional CRM kit is specially designed to fit ClearCube-supplied cabinets and racks that feature four posts with square mounting holes for snap-in rack nuts. While this is an industry-standard style for mounting hardware, not all third-party racks can accept the CRM kit. If you plan to use a cabinet enclosure, ensure that you have at least 34 inches (86 cm) of interior depth measured from the front of the unit, to accommodate the cabling that exits from the back of each chassis. The spacing between the front and back rails can be no more than 30 inches (76 cm). A chassis assembly using the Chassis Accessory Kit can be installed either from the front or from the back of the rack. A chassis assembly using the CRM kit can be installed only from the front of the rack. 20 • Chassis and Blade Installation R-Series Data Center Products User’s Guide Begin installing your chassis assemblies at the bottom of the rack or cabinet. This provides support for each chassis before it is securely mounted, and greatly simplifies getting the chassis square and level in the rack. Standard Chassis Mounting Hardware To install a chassis using the standard Chassis Accessory Kit, do the following: 1. When installing into a cabinet enclosure, loosely attach the back adjustable mounting brackets to the chassis with 5 screws on each side. 2. Position the chassis in the cabinet so that the front of the chassis lines up with the front rail and then slide the adjustable back brackets into place. Tighten the screws that hold the back brackets in place. 3. With the back brackets firmly attached to the chassis, slide the chassis into the cabinet from the back. Open the front bezel of the chassis and then attach the front brackets with three screws on each side that pass from the inside of the chassis to tapped holes in the brackets on the outside. NOTE For your convenience, the front brackets can be attached from either the inside or the outside of the chassis. 4. Using the hardware provided with your cabinet, attach the chassis mounting brackets to the cabinet rails. CAUTION: To avoid equipment damage and potential personal injury, never install the chassis with only the front bracket as an attachment. 5. If you are installing a chassis into a two-post rack with only a central mounting point, use the front brackets attached at the center of gravity of the chassis. The center of gravity is 14.7 inches (37 cm) back from the front faceplate. A set of rack ear mounting holes is provided at this location (the third group of 3 holes back). This point should line up with the rack sidebars to assure maximum stability of the rack. Figure 15 shows a two-post open rack with one chassis installed, properly centered in the rack. NOTE The CRM kit cannot be used in a two-post rack, as shown in the following figure. R-Series Data Center Products User’s Guide Chassis and Blade Installation • 21 Figure 15 Side View of Chassis Centered in a Two-Post Rack 6. Attach the AC power cord(s) packaged and supplied with the chassis and route it to the back panel power connector(s) and then to a surge-protected power source such as an uninterruptible power supply (UPS) or power strip. Use the cable retention clamp on the chassis to avoid inadvertently disconnecting the power If your ClearCube system installation is part of a larger office renovation or deployment, complete the chassis hardware installation and wiring, but delay installation of the PC blade computers until the rest of the area has been finished and cleaned. If installing R4300 chassis assemblies, the R4300 modules can be installed now, but installation should be delayed until construction cleanup is completed. Modules are required to complete cabling, but preliminary cabling for C/Ports and clients can be completed without the modules being installed. Chassis Rapid Mount Kit The Chassis Rapid Mount (CRM) kit allows installing chassis in a cabinet enclosure or other rack that provides both front and back posts. 22 • Chassis and Blade Installation R-Series Data Center Products User’s Guide To install a chassis using the CRM kit, do the following: Front Rack Ears Locking Latch Main Bracket Spring Slider Slider (Back) Rack Ears Finger Handle Flanges Figure 16 Rack Bracket for CRM Kit 1. Unscrew the thumbscrew holding each pair of chassis and rack brackets together, and slide the brackets apart. 2. Mount the chassis bracket to the chassis with 4 flathead screws. Repeat on the other side. NOTE The chassis and rack brackets are interchangeable side-for-side. 3. Determine the location and holes to be used to mount the rack ears on the rack bracket. A guide is provided in the CRM packaging. Insert rack ears on spring-loaded slider to the back side of the back rack post. Back of Rack Bracket Front of Rack Bracket Figure 17 Rack Bracket Attachment Points R-Series Data Center Products User’s Guide Chassis and Blade Installation • 23 4. Pull the rack bracket forward and insert the front rack ears on the back bracket into holes on the front side of the front post. Push forward on the ears until the latch snaps and locks into place. Ensure the front ears are placed into the corresponding holes as the back ears, so that the rack bracket is level. To remove, pull the finger tab inward with your finger and slide the ears forward. 5. Repeat steps 2 and 3 with the other chassis bracket on the opposite side of the rack, in mirrored orientation. Ensure that the brackets are level with respect to each other. 6. Slide the chassis and brackets onto the rack brackets from the front. Ensure the “U” channels on the chassis bracket engage the flanges on the rack bracket. 7. Slide the chassis all the way onto the rack brackets until flush with the front of the rack. 8. Fully tighten the thumb screws with a Phillips head screwdriver. 9. Attach the AC power cord(s) packaged and supplied with the chassis and route it to the back panel power connector(s) and then to a surge-protected power source such as an uninterruptible power supply. Use the cable retention clamp on the chassis to avoid inadvertently disconnecting the power. The cabling and module installation notes from the previous section, “Standard Chassis Mounting Hardware” on page 21, apply to this procedure. Chassis Power Requirements The Power & Cooling Requirements Spreadsheets on the ClearCube Support site provide tools and detailed information about chassis power and cooling requirements. See “Power and Cooling Requirements” on page 13 for an overview of the spreadsheets and for instructions about downloading them. Chassis Power Receptacles, Redundant Power, and Power Cords The R4300 chassis has two power receptacles that provide redundant power sources. For redundant AC inputs and increased reliability, each power receptacle must be connected to a separate branch power circuit. If only one power cord is connected to the R4300 chassis, it is powered only by one circuit. Use the AC power cord packaged and supplied with your chassis. For systems shipped to countries that utilize a 100-130-volt power system, the included power cord is rated at 15 amps. Systems shipped to countries with 208-240-volt power systems are packaged with power cords rated at 10 amps. NOTE 24 • Chassis and Blade Installation Older model chassis (R4200 and lower) used 10-amp-rated power cords—these cords are NOT approved for use with current model chassis on 100-130-volt power systems. R-Series Data Center Products User’s Guide The standard 10-amp power cords are acceptable for use with the Fiber Transceiver. See “Safety Guidelines” on page xiii for more information. Make sure your power strips, power grid, and circuit breakers can safely provide the required current. Ensure that any extension cords used meet local safety regulations and fire codes. When specifying uninterruptible power supplies (UPS) be sure to include the Fiber Transceiver peak current draws in your calculations to ensure the UPS has adequate capacity. Chassis Configuration and Operation By using a range of hot-swappable modules, the R4300 chassis provides a wide range of options for C/Port and client connections to blades and to the network. Modules can be installed either when the chassis is installed, or when the blades are installed. Because these modules provide all the data I/O for the system, cabling cannot be completed until these modules are in place. CAUTION: To avoid equipment damage and potential personal injury, always install the chassis in the rack before installing any blades in it. The three externally accessible module bays are as follows: • Connect Bay • Management Bay • Network Bay R-Series Data Center Products User’s Guide Chassis and Blade Installation • 25 The R4300 accepts the modules as shown in the positions in Figure 18. Chassis AC Backplane Power Supply Modules Fan Pack Dual A/C Input Module Connect Bay Module Network Module Management Module Figure 18 R4300 Exploded View R4300 Modules The R4300 modules are installed by sliding them into their respective bays and seating the connector. The three bays are of different sizes and shapes, and a module cannot be accidentally inserted into the wrong bay. All modules are hot-swappable, and can be replaced without affecting any existing switching configurations within the 26 • Chassis and Blade Installation R-Series Data Center Products User’s Guide chassis. A small label on each module indicates its position in the R4300, as shown in Figure 19. Management Bay Module Network Bay Module Connect Module designator label Network Module designator label Management Module designator label Figure 19 Module Designator Labels The first three characters of the module’s serial number, shown on the back apron and visible when the module is installed in its bay, are the same as the module’s abbreviation. For example, the serial number XCM12345 identifies a 8 x 8 Connect Module. Table 3 Serial Number Formats for R4300 Modules Serial Number Format Module ACMxxxxx R4380 – Administrator Connect Module XCMxxxxx R4387 – 8 x 8 Connect Module (C/Port Switching) RMMxxxxx R4345 – Remote Management Module EP2xxxxx R4363 – Ethernet Passthrough 16-Port GB Module (EP2) EP6xxxxx R4362 – Ethernet Passthrough 16-Port Module (EP6) FPMxxxxx R4320 – Fan Pack Module (contains Variable Fanspeed Controller) DIMxxxxx R4315 – Dual AC Input Module PSUxxxxx R4316 – Power Supply Unit To remove a Connect, Management, or Network module, press down on its green lever (or levers) until the module is released, and pull the module out of its bay. NOTE When hot-swapping modules from an R4300, remove the module and wait for at least 5 seconds before replacing it. R-Series Data Center Products User’s Guide Chassis and Blade Installation • 27 Figure 20 shows the back apron of the R4300, with the three module bays designated. Figure 21 shows typical R4300 modules. Connect Bay Network Bay Management Bay Figure 20 R4300 Module Bays Connect Module Management Module Network Module Figure 21 R4300 Modules The Connect Module (shown on the left in Figure 20) provides connectors for C/Ports, USB ports, and sparing. On the right, the Network Module (either Model R4362 [EP6] or Model R4363 [EP2]) provides Ethernet connections. In the center, the Remote Management Module provides network and daisy-chain control connections, chassis health indicators, and fan speed control. The Status LEDs in the blue area above the Management Bay are shared between the sets of connectors to provide information about each kind of connection to each blade in a manageable fashion. Table 4 on page 29 provides details of the features of the modules, and describes their interactions. Note that some features are color-coded to show that their functions are inter-related. For example, features coded blue are for monitoring the status of the various connection ports on the R4300. 28 • Chassis and Blade Installation R-Series Data Center Products User’s Guide Table 4 R4300 Connect Module Features Digital Link Selected LED C/Port Connections Spare Daisy Chain Connections Admin Daisy Chain Connections USB Selected LED Status LEDs USB Connections Connectors Label Color Description ADMIN IN Yellow RJ45 connection that links the Admin C/Port into the Admin daisy chain, or passes the Admin connection to another chassis by connecting to that chassis’ ADMIN OUT port. As many as 14 chassis per Control Chain can be connected on one Admin daisy chain. A Control Chain can have more than one Admin daisy chain. ADMIN OUT Yellow RJ45 connection that links to the ADMIN IN connection of the next chassis in the Admin daisy chain. On the end of the Admin daisy chain opposite the Admin C/Port, this connector is not used. SPARE IN Red RJ45 connection that links a Spare blade into the Spare daisy chain, or passes the Spare connection to another chassis by connecting to that chassis’ SPARE OUT port. As many as 14 chassis per Control Chain can be connected on one Spare daisy chain. A Control Chain can have more than one Spare daisy chain. Not populated on ACM. SPARE OUT Red RJ45 connection that links to the SPARE IN connection of the next chassis in the Spare daisy chain. On the end of the Spare daisy chain opposite the Spare blade, this connector is not used. Not populated on ACM. C/PORTS — RJ45 connections that connect the digital and analog signals to each individual end user’s C/Port. The numbers correspond to the blade slot numbers on the front of the chassis. Not populated on ACM. USB — These connections provide USB 2.0 on blades equipped with back-panel USB capability. LEDs STATUS Blue These indicator LEDs work in conjunction with the Mode button on the RMM to provide status information for three key functions: 1) blade digital link, 2) USB ports, and 3) blade network ports. By pressing the Mode button on the RMM, administrators can step through the three modes in sequential order. See Table 5 on page 30 for a description of the LED functions. R-Series Data Center Products User’s Guide Chassis and Blade Installation • 29 Table 5 R4300 Status LEDs Status LEDs These bi-color LEDs that indicate status for the connections on the module whose blue LED is lit. Status for each set of connections can be viewed by pressing the Mode switch on the Management Bay module. The blue LED over the connections being monitored is lit. The numbers for the LEDs correspond to the blade slot numbers on the front of the chassis. • C/Port connection status — Green = good digital link to blade — Red = bad digital link to blade — Off = no blade • STATUS USB connection status — Green = USB available — Red = USB not available — Off = no blade Blue • Network connection status — Green = good network connection — Off = no network connection, or no blade C/PORTS USB Blue Blue Blue LED that, when lit, indicates that the Status LEDs above the Management Bay module are displaying status for the C/Port connections. Not populated on ACM. The Status LEDs display these conditions for C/Ports: • • • Green = good digital link to blade Red = bad digital link to blade Off = no blade Blue LED that, when lit, indicates that the Status LEDs above the Management Bay module are displaying status for the USB connections. The Status LEDs display these conditions for USB connections: • • • Green = USB available Red = USB not available Off = no blade 30 • Chassis and Blade Installation R-Series Data Center Products User’s Guide Table 6 R4300 Remote Management Module Features RMM Reset Default Switch Ethernet LEDs RMM Hardware Reset Switch Ethernet LEDs LINK RMM Status LEDs ACTIVITY Control Chain Connections Module Mode Switch Ethernet Connection RMM Status LEDs Fan Mode Switch RMM MODE DHCP DC POWER HEALTH Connectors Label Color Code CONTROL IN Green RJ45 connection that receives control and management signals from the previous chassis in the Control Chain via RS-485. As many as 14 chassis can be connected per Control Chain. CONTROL OUT Green RJ45 connection that passes control and management signals to the next chassis in the Control Chain via RS-485. MANAGEMENT — RJ45 connection that passes control and management signals from the chassis to the Sentral console via Ethernet. Has two LEDs in socket to indicate Ethernet link speed and activity. Connection is self-adapting and does not require a crossover cable. Description Switches MODE Blue Push button switch that toggles through the blue Mode Selected LEDs on the Connect and Network Modules. Press this switch to display status for the connections whose blue LED is lit. FAN MAX — Push button switch that defeats the temperature sensor in the Fan Pack Module to set fans to maximum speed. RST — Pinhole switch that resets the RMM power. Switching information is not affected. RMM configuration information is not affected. DFLT — Pinhole switch that resets the RMM configuration information to the default configuration settings, and then resets the RMM power. See Table 10 on page 49 for a list of defaults. Switching information is not affected. LEDs Bi-color LED indicates RMM Mode RMM MODE — • • • Green = Primary Yellow = Secondary Off = Standby R-Series Data Center Products User’s Guide Chassis and Blade Installation • 31 Bi-color LED indicates IP address assignment mode DHCP — • • Green = DHCP Off = fixed IP address Bi-color LED indicates power supply status DC POWER — • • • Green = 2 supplies good Red = 1 supply bad Off = no power or RMM not seated properly Bi-color LED indicates system health HEALTH — • • • • Green = good Amber = RMM firmware update in progress Red = bad Off = no power or RMM not seated properly See the Sentral Administrator’s Guide for more information on RMM Status indicators Bi-color LEDs that indicate Ethernet link speed LINK — • • ACTIVITY — Green LED – flashing indicates activity Green = 100 Mb/sec. Amber = 10 Mb/sec. Table 7 R4300 Network Module Features: Models 4362 (EP2) and 4363 (EP6) Secondary Ethernet Primary Ethernet Connectors PRI/SEC ETHERNET Blue — Blue LED that, when lit, indicates that the Status LEDs above the Management Bay module are displaying status for the Primary or Secondary Ethernet connections. RJ45 connections that provide Ethernet connections for each PC blade in the chassis. Label numbers correspond to the blade slot numbers on the front of the chassis. • R4363 (EP2)—GB Primary ports (right side) and GB Secondary ports (left side) • R4362 (EP6)—GB Primary ports (right side) and 10/100 Secondary ports (left side) Power Modules The R4300 contains two Power Supply Units (PSUs) and a Dual Input Module (DIM). With the redundancy provided by two PSUs and two power inputs, the R4300 will stay running even if one PSU fails, or a power input fails, or if a PSU and a power input fail together. 32 • Chassis and Blade Installation R-Series Data Center Products User’s Guide The PSUs are factory-installed, field-replaceable units. Each PSU has a green LED visible through the fan pack that indicates its powered-on status. If one of the PSUs fails, the DC POWER status LED on the RMM turns red to indicate a failure, and the green LED on the failed power supply turns red. The DIM allows providing redundant power inputs. For best reliability, attach a power cord to both receptacles, and plug the cords into separate power sources. When using only one power source, plug it into the receptacle labeled A for best reliability. The DIM is not hot-swappable. Fuses on the DIM can be accessed by powering down the chassis and removing the fan module. CAUTION: DOUBLE POLE/NEUTRAL FUSING The DIM employs fuses in both the neutral and hot lines. Please contact ClearCube or a ClearCube-certified technician for assistance with servicing or replacing these modules or replacing the fuses in them. Dual AC Input Module (DIM) Fuses Power Supply Unit (PSU) Figure 22 R4300 Power Modules Connecting Cables This section provides an overview of inter-chassis connections. NOTE If you choose to use pre-assembled cables, be sure that the cables for the desktop employ and terminate all four twisted pairs. Standard Ethernet works with only two of the four pairs connected, but the ClearCube C/Port operates only when all four pairs of wire are used. The R4300 or R4200 link the blades within each chassis to their respective user ports and to control signals. In addition to the user port connections, three signal paths are provided: • Control Chain – The RS-485-based control and management chain between chassis. A Control Chain contains one Primary controller—either an RMC or an R-Series Data Center Products User’s Guide Chassis and Blade Installation • 33 RMM. When an RMC is present in a Control Chain, it always asserts itself as Primary, and RMMs on the chain all serve as Tertiary controllers. A Control Chain can contain as many as 14 chassis. • Admin Daisy Chain – The link between an Admin C/Port and the chassis served by that Admin C/Port. An Admin Daisy Chain can connect from 1 to 14 chassis within a single Control Chain, depending on the model of the connected C/Port. The Admin Daisy Chain uses the same ClearCube proprietary data link that connects blades to C/Ports. • Spare Daisy Chain – The link between a Spare blade and the chassis served by that Spare blade. A Spare Daisy Chain can connect from 1 to 14 chassis within a single Control Chain, depending on the model of the connected C/Port. The Spare Daisy Chain uses the same ClearCube proprietary data link that connects blades to C/Ports. Table 8 shows the distance and node limitations on the Admin and Spare Daisy Chains for various C/Ports used with the R4300. Table 8 R4300 Daisy-Chain Distance Limitations C/Port Model C7100 (p/n 091024) C7110 (p/n 091052 or 091055) Distance from R4300 10M 100M 150M 200M 10M 100M 150M 200M Admin Daisy Chain (# of chassis) 14 14 14 14 14 14 14 14 Spare Daisy Chain (# of chassis) 14 14 14 14 14 14 14 14 C/Port Model C7120 (p/n 091056) C7100–C7120 + MVX Distance from R4300 10M 100M 150M 200M 10M 100M 150M 200M Admin Daisy Chain (# of chassis) 14 14 14 14 14 14 14 14 Spare Daisy Chain (# of chassis) 14 14 14 14 14 14 14 14 C/Port Model C7120W (p/n 091169) C7120W + MVX Distance from R4300 10M 100M 150M 200M 10M 100M 150M 200M Admin Daisy Chain (# of chassis) 14 14 14 14 14 14 11 5 Spare Daisy Chain (# of chassis) 14 14 14 14 14 14 8 0 C/Port Model C7130 (p/n 091154) rev C02 or lower C7130 (p/n 091154) rev D01 or higher Distance from R4300 10M 100M 150M 200M 10M 100M 150M 200M Admin Daisy Chain (# of chassis) 8 7 7 6 10 10 12 14 Spare Daisy Chain (# of chassis) 4 4 5 2 9 9 10 11 Spare Allocation Examples When using the spare switching feature of the chassis, you must consider how to arrange your spares and how many to use. The chassis can support a ratio of one spare for one active PC blade. A more common ratio is one spare for every seven active 34 • Chassis and Blade Installation R-Series Data Center Products User’s Guide blades. The lowest ratio of sparing that ClearCube recommends is one spare for 47 PC blades (configured by daisy-chaining the spare connections). Figure 23 on page 35 shows these sparing scenarios as examples. NOTE Sparing is a switching function of the R4300 chassis. If no spare blade is connected to the Spare Daisy Chain, or if the Spare blade is completely powered down, the spare switch action will succeed but the user will not be connected to a usable blade. Spare Ratio 1:7 Chassis 1 Chassis 2 Chassis 3 Chassis 4 Chassis 5 Chassis 6 S P A R E S P A R E S P A R E S P A R E S P A R E S P A R E Spare Ratio 1:47 7 6 5 4 3 2 1 Chassis 1 S P A R E 7 6 5 4 3 2 1 Chassis 2 8 7 6 5 4 3 2 1 7 6 5 4 3 2 1 Chassis 3 8 7 6 5 4 3 2 1 7 6 5 4 3 2 1 Chassis 4 8 7 6 5 4 3 2 1 7 6 5 4 3 2 1 Chassis 5 8 7 6 5 4 3 2 1 7 6 5 4 3 2 1 Chassis 6 8 7 6 5 4 3 2 1 7 6 5 4 3 2 1 Figure 23 Spare Allocation Examples For a dual-slot PC blade, verify that the C/Port cable is plugged into the even-numbered port (for example, for a PC blade installed in chassis slots 3 and 4, the C/Port cable should be plugged into port 4). R4300 Chassis To connect cables to R4300-equipped chassis, do the following: 1. Label, identify, or use different color cables to discriminate between desktop and network wiring. This color code is recommended, and matches the jumper cables provided by ClearCube: • Control Chain – Green • Admin Daisy Chain – Yellow • Spare Daisy Chain – Red 2. Daisy-chain the CONTROL OUT port on the top chassis in the rack to the next lower chassis’ CONTROL IN port using the green daisy-chain cable. Continue this daisy chain to connect all chassis in the rack. R-Series Data Center Products User’s Guide Chassis and Blade Installation • 35 3. Connect the MANAGEMENT port on at least one of the RMMs to your Ethernet network hub or switch. For the best reliability, connect redundant RMMs to more than one switch and/or subnet to better protect against network-related failures. As many as 14 RMMs per Control Chain (all of them) can be connected to the network to provide failover capability. In practice, three is probably enough. NOTE Do not use an Ethernet port on the chassis for this connection. 4. Skip this step if installing only other clients, or if using a chassis with an ACM. Connect eight C/Port cables from the XCM ports marked C/PORT to the patch panel going to your desktops. If using dual-slot PC blades, plug the C/Port cable into the even-numbered port for the two slots occupied by the blade, and leave the odd-numbered port empty (for example, for a PC blade installed in chassis slots 3 and 4, the C/Port cable should be plugged into port 4). 5. Connect eight network cables from the EP8 ports marked ETHERNET to your Ethernet network patch panel, hub, or switch. 6. Daisy-chain the ADMIN IN port on one chassis to the ADMIN OUT port on the next chassis using the yellow daisy-chain cable provided. Connect the remaining ADMIN OUT port to the Admin C/Port. If any C/Port users also use a Multi-Video Expander (MVX) with multiple monitors, the Admin C/Port should also be equipped with an MXV and multiple monitors. Otherwise, video from a blade equipped with an MVX will not be viewable at the Admin C/Port. 7. Daisy-chain the SPARE IN port on one chassis to the SPARE OUT port on the next chassis using the red daisy-chain cable provided. Connect the remaining SPARE IN port to the Spare blade’s C/PORT port. 36 • Chassis and Blade Installation R-Series Data Center Products User’s Guide We suggest routing the cables down the sides of the rack to the back panel, with the network cables on one side and the desktop cables on the other. Admin C/Port and Terminal Primary Chassis with E-net Control Link To Network Spare Configuration Cable Secondary Chassis with E-net Control Link Spare Daisy Chain Admin Daisy Chain To Network Tertiary Chassis No E-net Control Link Control Chain Figure 24 R4300 Daisy-Chain Cabling Example NOTE Connecting a network cable to a C/Port jack on the chassis, or a C/Port cable to a Network jack, will not damage the unit, but the system will not operate correctly. This is a common installation error and should be one of the first things checked when troubleshooting a problem with a system’s operation. Mixed-Mode Chassis Cabling Mixed-mode cabling is the attachment of R4300-equipped chassis to chassis with Blade Switching BackPacks (BSBPs) or Direct Connect BackPacks (DCBPs). The recommended practice is to use one or more R4300s for Primary and auto-negotiated R-Series Data Center Products User’s Guide Chassis and Blade Installation • 37 control. One or more RMMs need to be connected to Ethernet to allow auto-negotiation and control failover. Figure 25 shows an example of this. Admin C/Port and Terminal Primary R4300 with E-net Control Link CLEARCUBE Admin C/Port To Network Spare Configuration Cable Secondary R4300 with E-net Control Link Spare Daisy Chain Admin Daisy Chain To Network Tertiary BSBP R4200 No RMC No E-net Control Link Control Chain Figure 25 Mixed-Mode Daisy-Chain Cabling Example NOTE 38 • Chassis and Blade Installation With an RMC-equipped BSBP as Primary, no other chassis in the Control Chain can serve as Secondary, because Secondary mode is not supported on the RMC. R-Series Data Center Products User’s Guide Admin C/Port and Terminal #1 Primary Chassis with E-net Control Link Spare Configuration Cable To Network Spare Daisy Chain Spare Configuration Cable Primary Chassis with E-net Control Link To Network Admin C/Port and Terminal Spare Daisy Chain #1 Admin Daisy Chain #1 Admin Daisy Chain Control Chain Control Chain Spare Configuration Cable Admin C/Port and Terminal #2 Spare Daisy Chain #2 Admin Daisy Chain #2 Spare Configuration Cable Spare Daisy Chain #3 Control Chain with Single Daisy Chains Control Chain with Multiple Daisy Chains Figure 26 Daisy-Chain Examples R-Series Data Center Products User’s Guide Chassis and Blade Installation • 39 R3040S Cabling Because R3040S blades use two slots in a chassis, the rear of a ClearCube chassis (shown below) provides up to four Gigabit Ethernet ports (two primary ports and two secondary ports) for each blade, depending on video card configuration. Secondary Ports Primary Ports R4300 Chassis Network Module Figure 27 The Primary and Secondary Ports in an R3400 Chassis Network Module NICs When Using a Traditional Video Card When using a traditional video card in an R3040S (such as a ClearCube MGA6), the blade provides four Gigabit Ethernet NICs. On the back of an R4300 chassis (shown in Figure 27 above), the primary and secondary ports of both slots the blade occupies are Gigabit Ethernet. NICs When Using a V52x0 PCoIP Host Card When an R4300S contains a PCoIP Host card (such as a V5220 or V5420), the blade provides three Gigabit Ethernet NICs. The odd-numbered secondary port on the back of the chassis (see Figure 27 above) is for PCoIP communication. The three other ports corresponding to the slots the blade occupies are Gigabit Ethernet. Use standard Ethernet cables in the ports you use for PCoIP traffic between ClearCube PCoIP clients and blades containing PCoIP Host cards. After connecting one end of an Ethernet cable to the appropriate odd-numbered secondary port on the rear of the chassis, you have multiple options about how to connect the other end of the cable: • Direct connection to a PCoIP Client—You can use homerun cabling, or a direct connection, between an R3040S and a ClearCube PCoIP client. Connect one end of an Ethernet cable to the chassis port reserved for PCoIP communication (as noted above), and then connect the other end of the cable to the Ethernet port of a PCoIP client. • Connect to a network—You can connect an R3040S blade to a network that ClearCube PCoIP clients can access. Connect one end of an Ethernet cable to the chassis port reserved for PCoIP communication (as noted above), and then connect the other end of the cable to a network switch or router. Ensure that the 40 • Chassis and Blade Installation R-Series Data Center Products User’s Guide blade and client are on the same subnet or, if they are on different subnets, that the devices can communicate. • Connect to a network that reserved for PCoIP traffic—To isolate PCoIP traffic on a specific network, connect one end of an Ethernet cable to the chassis port reserved for PCoIP communication (as noted above), and then connect the other end of the cable to a network that you specify for PCoIP traffic. For detailed information about setting up, configuring, and using ClearCube PCoIP clients and hosts (blades), see ClearCube PCoIP User’s Guide. How OS Network Connections Are Mapped to NICs on Chassis Backpack After you insert a blade in a chassis, your Windows operating system shows 4 network connections in the Network Connections window (click Start > Control Panel and then double-click Network Connections to display all connections). The following table shows how each Ethernet port on the Chassis Network Module (on the rear of the chassis and shown above) is mapped to each network connection that your OS displays (the following examples assume that the blade is inserted in chassis slots 3 and 4). Table 9: Mapping of LAN Connection Names in OS, in BIOS, and in Chassis Backpack Default LAN Connection Name in OS Local Area Connection Local Area Connection 2 Local Area Connection 3 Local Area Connection 4 Default Name in BIOS Ethernet Port Mapping on Chassis Backpack Lan controller #1 Mapped to the 2nd (higher number) port in the pair of Primary ports Lan controller #2 Mapped to the 1st (lower number) port in the pair of Primary ports Lan controller #3 Lan controller #4 Port Location (If Blade Is in Slots 3 & 4) 4 3 2 PRI 1 4 3 1 4 3 2 SEC 1 4 3 2 SEC 1 Mapped to the 2nd (higher number) port in the pair of Secondary ports Mapped to the 1st (lower number) port in the pair of Secondary ports R-Series Data Center Products User’s Guide 2 PRI Chassis and Blade Installation • 41 MAC Address Label on R-Series Blades A label on the exterior of each R-series blade specifies the Media Access Control address (MAC address) of each network adapter. The following sections illustrate the location of the MAC address label and additional labels. R3040S Labels The following figure shows the label on the blade exterior that specifies each network adapter MAC address and additional labels. Blade Part Number & Regulatory Compliance Blade Serial Number & Network Adapter MAC Addresses Microsoft Certificate of Authenticity Intel Inside Decal System Configuration PCoIP Video Card Configuration (No Label if Blade Contains MGA6 1 Label if Dual Configuration 2 Labels if Quad Configuration) Blade System Configuration Details (Including OS, CPU, Memory, Hard Disk, and Video Card) R3080D Labels The following figure shows the label on the blade exterior that specifies each network adapter MAC address and additional labels. Blade Part Number & Regulatory Compliance Microsoft Certificate of Authenticity Intel Inside Decal Blade Serial Number & Network Adapter MAC Addresses Video Configuration Blade System Configuration Details (Including OS, CPU, Memory, Hard Disk, and Video Card) 42 • Chassis and Blade Installation R-Series Data Center Products User’s Guide R1350 Labels The following figure shows the label on the blade exterior that specifies each network adapter MAC address and additional labels. Blade Part Number & Regulatory Compliance Video Configuration Intel Inside Decal Blade Serial Number & Network Adapter MAC Addresses Blade System Configuration Details (Including OS, CPU, Memory, Hard Disk, and Video Card) Microsoft Certificate of Authenticity C/Port Cabling When connecting a C/Port to an R3040S, only use C/Port connectors 2, 4, 6, or 8 on the Connect Bay Module (located on the far left side of the chassis). For example, if an R3040S is in chassis slots 3 and 4, connect your C/Port to connector 4. Connect C/Port cables to the Connect Bay Module, as shown in Table 4 on page 29. R3080D Cabling The rear of a ClearCube chassis (shown Figure 27 on page 40) provides up to 2 Gigabit Ethernet ports (1 primary port and 1 secondary port) for each R3080D blade, depending on video card configuration. The following list describes each possible video configuration. • ClearCube MVX (MGA6) and onboard graphics—in R3080D blades with these video configurations, the primary and secondary ports of the slot that the blade occupies are Gigabit Ethernet. For example, if the blade is in slot 3, primary port 3 and secondary port 3 provide Gigabit Ethernet for the blade. • V5x20 PCoIP Host card—in R3080D blades with this video configuration, the primary port is Gigabit Ethernet and the secondary port is for PCoIP communication. For example, if the blade is in slot 3, primary port 3 provides Gigabit Ethernet and secondary port 3 provides PCoIP communication. R-Series Data Center Products User’s Guide Chassis and Blade Installation • 43 How OS Network Connections Are Mapped to NICs on Chassis Backpack After you insert a blade in a chassis, your Windows operating system shows 2 network connections in the Network Connections window (click Start > Control Panel and then double-click Network Connections to display connections). The following table shows how each network connection that your OS displays is mapped to the Ethernet ports (Primary & Secondary) on the rear of the chassis (shown Figure 27 on page 40). LAN Connection Shown in OS Port on Chassis Rear Local Area Connection Primary port Local Area Connection 2 Secondary Port C/Port Cabling When connecting a C/Port to an R3080D, use the C/Port connector on the Connect Bay Module that corresponds to the slot that the blade is in (the Connect Bay Module is located on the rear of the chassis on the far left side, as shown in Table 4 on page 29). For example, if an R3080D is in chassis slot 3, connect your C/Port cable to C/Port connector 3. RMM Firmware Update Procedures To update RMM firmware, you need to have a TFTP server configured on your network. The firmware can be installed using Telnet or using Sentral. You need to first install the firmware on the Primary RMM of each Chassis Group, and then propagate the firmware update to the rest of the RMMs in the group. Although downgrading a firmware version is possible with the RMM architecture, it is never recommended. NOTE Do not remove any R4300 modules when updating the RMM firmware. This can cause the firmware to become corrupted. The HEALTH LED on the RMM displays an amber signal when firmware is being updated. Updating RMM Firmware Using Telnet To install an RMM firmware update using telnet, do the following: 1. Download the firmware update package from the ClearCube Support Web site. 2. Unzip the package, and copy the files to the directory where the TFTP server is configured to get the file. 44 • Chassis and Blade Installation R-Series Data Center Products User’s Guide 3. Telnet into the Primary RMM and verify your RMM firmware version. a. Telnet into the Primary RMM by entering the following at a command prompt: telnet RMMIPAddress where RMMIPAddress is the IP address for the RMM. b. Log in to the RMM, and enter the following command: ver If the RMM is version 5.x or higher, continue with this procedure. If the RMM is version 4.x or lower, contact ClearCube Technical Support. 4. Enter the following command to update the Primary RMM: tftp rmm52b2 TFTPServerIPAddress where TFTPServerIPAddress is the IP address for the TFTP server. The Primary RMM firmware will be updated along with firmware for the other modules in this chassis. When the firmware update is completed, the RMM restarts automatically. 5. After the RMM restarts, log into the RMM again and enter the following command: sfw 0 The other RMMs and modules in this Chassis Group are updated. Updating RMM Firmware with Sentral To update firmware using Sentral, the following pre-existing conditions must be met: • The R4300 Chassis Group to be updated must already be discovered within Sentral. • A TFTP Server must be configured in Sentral's Console Configuration screen, and running. • The firmware update must be in a directory that is visible to the Sentral Console. NOTE If the Sentral server is also the TFTP server, do not copy the firmware update file to the root directory, or to the directory where the TFTP server is configured to get the file. This will cause the update to silently fail. For example: If the user has the rmm52b2 file in the directory C:\Firmware, do not configure the TFTP server to “get” the files from this same location. To update RMM firmware using Sentral, do the following: 1. Download the update package from the ClearCube support Web site. R-Series Data Center Products User’s Guide Chassis and Blade Installation • 45 2. Unzip the update package and read the enclosed Technical Bulletin (a PDF file) to learn any special considerations for the package. 3. Copy the package to a directory visible to the Sentral Console. 4. From the Functional menu, select Management > Chassis. 5. In the Tasks menu, click Update Firmware. 6. Select the primary RMM from the Primary Execution Pane. 7. In the Tasks menu, click on Select for Update. 8. In the Serial Number column, select the serial number of the chassis containing the RMM to be updated. 9. Click Browse and choose the firmware update file. 10. Press Update Now. The Primary RMM and the other modules in this chassis are updated. After the Primary RMM has been updated, do the following to update the other RMMs in the Chassis Group: 1. From the Functional menu, select Management > Chassis. 2. In the Tasks menu, click Update Firmware. 3. In the Tasks menu, click on Update Group. 4. Select the Chassis Group that contains the RMM you just updated, and click Select for Update. 5. Select Browse and browse for the update file. 6. Press Update Now. The other RMMs and modules in this Chassis Group are updated. After updating each Chassis Group, re-discover the Chassis Group. For more information, see the Sentral Administrator’s Guide. Remote Management Card Configuration Control Chain Auto-Negotiation Two types of Remote Management Cards may be present in your network: • Remote Management Module (RMM) in R4300 chassis • Remote Management Card (RMC) in R4200 chassis The RMC in Blade Switching (BSBP) and Direct Connect (DCBP) BackPacks is not capable of auto-negotiation. A BCBP or DCBP with an RMC installed is always the Primary in the Control Chain. RMCs can be installed only in BCBPs and DCBPs. 46 • Chassis and Blade Installation R-Series Data Center Products User’s Guide RMMs can only be installed in R4300 chassis. A BSBP without an RMC installed can perform C/Port Switching, Admin Switching, and Sparing under the control of an RMC or an RMM. Each RMM in an R4300 series chassis provides an Ethernet connection, allowing it to control a chain of as many as 14 chassis. If an RMM is not connected to Ethernet, it does not auto-negotiate, and provides control and monitoring only for the chassis in which it is installed. The RMM has three auto-negotiation modes: • Primary (including jumper-strapped Primary) • Secondary • Standby The model for auto-negotiation assumes that a given network contains a mix of R4300 chassis, and legacy BSBPs and DCBPs. The R4300 Remote Management Module uses the following auto-negotiation rules: • An RMM must be active (that is, powered up and functioning correctly) to assert its status as Primary or other. • If a jumper-configured RMM is present in a chain, that RMM is always Primary, as shown in Figure 28. • Never jumper-configure an RMM in a Control Chain that also contains an RMC. RMM (Bottom View) JP1 JP1 – Leave JP1 jumpered on pins 2 and 3 for auto-negotiation (Default shown) or remove jumper entirely – Jumper Pins 1 and 2 to force Primary Figure 28 RMM Jumper Location The RMC (in a BSBP or DCBP) uses the following rules for auto-negotiating a Primary RMC in a Control Chain: • An RMC must be active (that is, powered up and functioning correctly) to assert its status as Primary. If an RMC is present in a chain, that RMC must always be the Primary. For best results, follow these guidelines for configuring your Control Chains: R-Series Data Center Products User’s Guide Chassis and Blade Installation • 47 • Do not use Mixed Mode (connecting a mix of R4300s, BSBPs, and/or DCBPs) for connecting your Control Chain. • Use an RMC to manage only BSBP- and DCBP-equipped chassis. • Configure RMCs using Telnet. • Use an RMM to manage new R4300 chassis, and BSBP- and DCBP-equipped chassis that do not contain an RMC. • Configure RMMs using Sentral. • If your Control Chain contains a mix of R4300s, BSBPs, and/or DCBPs and you have an RMC installed in a BSBP or DCBP, that RMC is always the Primary and it does not provide access to all of the functions of the R4300. • If you add BSBPs or DCBPs to a Control Chain that contains one or more RMMs, exchange BackPacks with RMCs installed for BackPacks that do not have RMCs. NOTE Maintain the default setting of JP1 on the RMM (auto-negotiation enabled). See Figure 28 on page 47. Change this setting only at the recommendation of ClearCube Technical Support or a ClearCube Support Engineer. Configuring the RMM ClearCube recommends using Sentral as the primary configuration tool for RMMs. See the Sentral Administrator’s Guide for complete information. The RMM can also be configured with Telnet. To configure an RMM using Telnet, do the following: 1. Open a command window and enter telnet RMM_IPAddress where RMM_IPAddress is the IP address of the RMM to be configured. 2. Enter the password for the RMM (no characters are echoed), and type cfg all 48 • Chassis and Blade Installation R-Series Data Center Products User’s Guide The following figure shows the list of configuration parameters. Figure 29 RMM Parameters via Telnet 3. Enter the command to change a parameter in the format: cfg ParameterName Value where ParameterName is the parameter and Value is its desired new value. 4. When finished changing parameters, type exit to close the Telnet window. Resetting the RMM Settings to the Factory Defaults In normal use, the RMM is configured using Sentral. However, it can be reset to its factory configurations by pressing the DFLT pinhole switch on the back of the RMM. Table 10 provides the default RMM settings. For information on configuring an RMM with Sentral, see the Sentral Administrator’s Guide. Table 10 R4300 RMM Default Configuration Settings Field Name Function Setting Options Default Setting IPMode IP Address Mode Static | DHCP DHCP RMMIP RMM Fixed IP Address Ignored if IP Mode = DHCP 192.168.1.251 RMMNetmask RMM Netmask Ignored if IP Mode = DHCP 255.255.255.0 R-Series Data Center Products User’s Guide Chassis and Blade Installation • 49 Table 10 R4300 RMM Default Configuration Settings (Continued) Field Name Function Setting Options Default Setting RMMGateway RMM Gateway Ignored if IP Mode = DHCP 192.168.1.1 RMMLocation1 RMM Location 1 User-editable text string Blank RMMEthernetSpeed RMM Ethernet Speed Auto | 10 | 100 Auto RMMEthernetDuplex RMM Ethernet Duplex Auto | Half | Full Auto RMMLocation2 RMM Location 2 User-editable text string Blank SessionTimeout Session Time-out Time period for which the session ID is honored 120 seconds SMIP Sentral Primary Console IP Address xxx.xxx.xxx.xxx 192.168.1.252 SMPort Sentral Management Port TCP port to the Sentral console 8080 Logging Logging Enabled | Disabled Disabled LogServerIP Log Server IP Address Only if logging is enabled 192.168.1.253 LogServerPort Log Server Port TCP port to the Log Server 8080 Logging Level • • • 2 (highest) LogLevel Alerting Alerting Enabled | Disabled Disable AlertServerIP Alert Server IP Address Only if alerting is enabled 192.168.1.254 AlertServerPort Alert Server Port TCP port to the Alert Server 8080 AlertLevel Alert Level • • • 2 (highest) Note: All RMM ALerts are in English CommunityString Community String Public | Private Public SSL SSL Enabled | Disabled Disabled SSH SSH Enabled | Disabled Disabled Telnet Telnet (un-encrypted) Enabled | Disabled Enabled http HTTP (un-encrypted port 80) Enabled | Disabled Enabled AuthMode Authentication mode Domain | Local Local AuthGroup Authentication group Group names on active directory N/A Username Username Text string, when in local mode clearcube Password Password Text string, when in local mode clearcube 50 • Chassis and Blade Installation 2 — Errors, Warnings, and Notes 1 — Errors and Warnings 0 — Errors only 2 — Errors, Warnings, and Notes 1 — Errors and Warnings 0 — Errors only R-Series Data Center Products User’s Guide Table 10 R4300 RMM Default Configuration Settings (Continued) Field Name Function Setting Options Default Setting Timestamp Timestamp Seconds since Jan. 1, 1970 Set from real-time clock RMMPoll RMM Poll Time period for RMM “heartbeat” 5 minutes SMIP2 Sentral Secondary Console IP Address xxx.xxx.xxx.xxx 192.168.1.252 NOTE For failover between Primary and Secondary RMMs to occur successfully, the RMMs must have the same password, and Alerting and Logging must be activated. See the Sentral Administrator’s Guide for more information. Configuring the RMC The following steps outline the process required to set up and configure your choice of chassis control computer/server. These steps also explain the setup of the communication link to the chassis. This description assumes that you are choosing to control your chassis with an RMC, rather than with the recommended RMM. • Select your chassis control computer/server: For browser-based control you can use a PC blade or a third-party box PC, server, or a notebook computer that has an Ethernet connection. This computer/server does not need to be dedicated solely to this function—it can also be used for other tasks depending on the application. • Connect your control computer to the network: Your control computer must be on the same LAN that connects to the Ethernet control port of the Primary chassis with the RMC installed. • Connect the Primary chassis and RMC to the network: An RMC can be installed in either a BSBP or a DCBP. If an RMC is installed in a Control Chain that contains R4300 chassis with RMMs, the Primary chassis is always the one that has the RMC installed. The Primary chassis is indicated by a LED on the back of the chassis next to the control in/out ports that are colored green. When the ENET indicator is lit, this means that an RMC card is installed and this is a Primary chassis. If the RS-485 indicator is lit, it means that this is a Slave chassis. If you have more than one rack of chassis, you will have multiple Primary chassis, typically one per rack. • Daisy-chain multiple chassis: If your installation has multiple chassis, then daisy-chain the RS-485 control connections with C/Port cables. A green cable is provided with the chassis. Connect the RS-485 Control Output from the first BackPack to the RS-485 Control Input on the next BackPack/chassis. Continue daisy-chaining until all chassis are connected. You can connect all 14 chassis in a rack together in this way. Additional chassis require an RMC for each rack of chassis. R-Series Data Center Products User’s Guide Chassis and Blade Installation • 51 • Configure the Blade Switching BackPack for Various Modes: Configuration of your Blade Switching BackPack depends on that modes of operation you will use. All modes can be used together, or individual modes can be used alone. • Spare Switching Configuration: Multiple spare PC blades can be configured per chassis. At the other extreme, one spare can be made available to support 14 chassis. A Spare blade is configured by connecting a short C/Port cable from its C/Port connection to the SPARE IN connection on the chassis. For one spare to support multiple chassis the SPARE OUT connector is daisy-chained to the SPARE IN connector on the next chassis and so on. A short red cable for Spare daisy-chaining is included with your chassis. • Administrator Switching Configuration: For on-site control, the IT administrator can connect a separate C/Port directly to the chassis’ administrator C/Port input. This console is separate from the computer that is used to control the chassis. For administering PC blades in more than one chassis, the Administrator C/Port Output connection can be daisy-chained to the Administrator C/Port Input connection on the next chassis and so on (as many as 14 chassis can be linked). A short yellow cable for Administrator C/Port daisy-chaining is included with your chassis. • Supervisor Switching Configuration: This feature is configured in the same way as the Administrator mode. • 8 x 8 Switching: This capability lets as many as eight C/Ports switch between any eight blades in a single chassis. This capability also lets one or more users share multiple blades dynamically. Control over the 8 x 8 matrix of connections is through the Sentral software. Note that 8 x 8 functionality cannot be daisy-chained to build larger matrices. You can also use the 8 x 8 mode as a method to provide more than one spare per chassis. • Install and run Sentral: The Blade Switching BackPack is controlled by ClearCube Sentral. Installation of the tools on the controlling computer is via a CD-ROM drive. Figure 24 on page 37, Figure 25 on page 38, and Figure 26 on page 39 show examples of three chassis connected together to support Spare, Administrator, Supervisor, and 8 x 8 modes. NOTE Your Chassis Accessory Kit includes snap-on ferrite cores that must be added to both ends of the red and yellow daisy-chain cables in order to meet FCC and CE requirements for radiated emissions. The administrator's console connects to the Primary chassis through an Ethernet connection to the RMC. The primary chassis is then daisy-chained to all other secondary chassis in the rack via a simple cable daisy-chaining method, using the RS-485 bus. Secondary chassis do not need an installed RMC. Each RMC can support as many as 14 chassis (the Primary chassis plus 13 Secondary chassis). Software components of the ClearCube Management Suite communicate with each RMC via a unique static IP address. If your system includes more than 14 chassis or you have more than one group of chassis to manage, you need to configure 52 • Chassis and Blade Installation R-Series Data Center Products User’s Guide each RMC with a different IP address. This allows you to log in to each group of chassis independently. NOTE Every primary R4200 chassis with an RMC installed is shipped with the same default network settings. If you are using multiple Chassis groups, you must configure new IP addresses per the instructions below to avoid a conflict. Default RMC Settings: IP Address: Gateway: Network: Netmask: 192.168.1.251 192.168.1.1 192.168.1.0 255.255.255.0 Changing the IP Address of the RMC To change the IP address on an RMC, do the following: 1. From any computer on the network connected to the RMC, open a telnet session to log into the RMC using the default RMC IP address of 192.168.1.251. If your network settings are incompatible with the RMC’s default settings, then you need to select one computer (notebook, blade, or other PC) that you can use to program the RMC. Set this computer’s network settings to be compatible with the RMC default settings and connect its network port directly to the CONTROL IN port on the R4200 using the provided cross-over cable. To telnet into the RMC from a DOS prompt, type: H:\>Telnet 192.168.1.251 The result should be: Password: 2. Type clearcube as the default password. For example: Password: clearcube NOTE You will not see any letters as you type the password. The result should be: RMC Configuration 1. IP address: 192.168.1.251 2. Gateway: 192.168.1.1 3. Network: 192.168.1.0 4. Netmask: 255.255.255.0 5. Password: clearcube 6. Exit 3. From the list of options, select 1 to change the IP address. For example: >1 R-Series Data Center Products User’s Guide Chassis and Blade Installation • 53 The result should be: >1 new ip: 4. Type in the desired new IP address. For example: >1 new ip: 192.168.1.100 (your desired IP address) The result should be: RMC Configuration 1. IP address: 192.168.1.100 2. Gateway: 192.168.1.1 3. Network: 192.168.1.0 4. Netmask: 255.255.255.0 5. Password: clearcube 6. Exit NOTE The IP address should be the new one you typed in. 5. Change the Gateway, Network, and Netmask settings, using the same procedure. For Gateway, use your network’s default gateway setting. For Netmask, use your network’s subnet mask setting. For Network, use the base network address, which is typically your subnet mask ANDed with the IP address (also called the Subnet ID). For example, if your IP address is 192.168.1.154 and your subnet mask is 255.255.255.0, then if you AND the two addresses together you get a Network setting of 192.168.1.0. 6. Enter 6 to exit. For example: >6 The result should be: >6 Save changes and reboot <y/n>? 7. Enter y for yes. For example: >6 Save changes and reboot <y/n>? y The result should be: Connection to host lost. The RMC accepts only a lowercase y as a valid positive response. If you type yes, or an upper-case Y, the changes are not saved. Watch for the Saving changes... message, which confirms the configuration was saved successfully. NOTE 54 • Chassis and Blade Installation You may have to close the telnet window by selecting the X in the top right corner. R-Series Data Center Products User’s Guide Connect the CONTROL IN port to your regular network using a standard network cable. Make sure not to use the cross-over cable you were just using. Test the connection to the RMC by pinging its address from any other computer on the network. NOTE It is recommended that you change your password for security reasons. If you are unable to connect to the RMC card across your network, make sure the network connection at the switch for your RMC is able to pass 10Mbps traffic. Resetting the RMC IP Settings to the Factory Defaults To reset the IP address on an RMC to the factory default, do the following: 1. Shut down power on all blades in the primary R4200 chassis that houses the RMC. 2. Remove the AC power cord from the back of the primary R4200 chassis. 3. Remove the Ethernet cable from the RS485 OUT port on the back of the primary R4200 chassis, if one is connected. 4. Plug the Factory Default Jumper cable (provided with your R4200 chassis in the Chassis accessory kit) into the RS485 OUT port on the back of the primary R4200 chassis. 5. Plug the AC cable back into the R4200 chassis and wait at least 15 seconds. 6. Remove the Factory Default Jumper cable. 7. Reattach the Ethernet cable to the RS485 OUT port on the back of the primary R4200 chassis, if one was previously connected. 8. Power the blades back up in the primary R4200 chassis (if desired). The RMC network controller is reset to the factory default settings, with an IP address of 192.168.1.251. Resetting the RMC to its factory defaults and connecting to it with a laptop computer using a crossover cable is a helpful troubleshooting technique. R4300 Chassis Upgrade Kit Installation An R4200 chassis can be upgraded to an R4300 chassis with an available chassis upgrade kit. To install the R4300 chassis upgrade kit, do the following: 1. Power down the blades in the chassis. 2. Disconnect AC power from the chassis. 3. Open the front bezel of chassis and pull any installed blades out approximately one inch to disconnect them from the BackPack connectors. 4. Remove the 5 hex head screws retaining the fan pack. 5. Use the side finger holes to pull the fan pack from the chassis. R-Series Data Center Products User’s Guide Chassis and Blade Installation • 55 6. Remove the 2 Phillips screws retaining the BackPack. 7. Pull the BackPack by the two tabs and remove it from the chassis. 8. Unsnap and remove the black plastic shield from the AC backplane by pulling upwards on it. 9. Remove the 9 hex head screws from the AC backplane. 10. Remove and discard the AC backplane. Figure 30 Exploded View of Upgrade Kit Components 11. Install the new R4300 upgrade parts in the chassis. 12. Place the AC backplane module in the chassis and secure it with 4 hex head screws. 13. Insert the R4300 frame into the base of chassis. Ensure that the frame is fully seated against the AC backplane module. Secure the R4300 frame with 2 hex head screws in the locations indicated. 14. Insert the AC input module, and secure it with 2 hex head screws. 15. Slide the power supply modules onto the top of the frame. Ensure each unit is captured on both sides by the guide flanges and is fully seated into the backplane connectors. 16. Remove the cardboard shipping brace from the fan pack module and install the fan pack into the chassis. Secure the fan pack with 5 hex head screws to complete the base R4300 chassis assembly. 17. Connect the power cords supplied with the upgrade kit to appropriate power source(s). 18. Install the desired modules in the Connect, Management, and Networking Bays, as described in “Chassis Configuration and Operation” on page 25. 19. Reseat the blades and power up the chassis. 20. Power up the blades. 56 • Chassis and Blade Installation R-Series Data Center Products User’s Guide Fiber Transceiver and Cable Requirements See ClearCube F6150 Fiber Transceiver User’s Guide for information about installing and using the fiber transceiver and for information about transceiver power requirements. See http://www.clearcube.com/support/controller/home.php to download the F6150 Fiber Transceiver User’s Guide. The Fiber Transceiver and Fiber C/Port are Laser Class 1 Products. See “Safety Guidelines” on page xiii for additional information. Make sure your power strips, power grid, and circuit breakers can safely provide the required current. Ensure that any extension cords used meet local safety regulations and fire codes. When specifying uninterruptible power supplies (UPS) be sure to include the Fiber Transceiver peak current draws in your calculations to ensure the UPS has adequate capacity. The F6150 Fiber transceiver contains 16 media converters. Each media converter accepts: • An Ethernet cable to connect the transceiver to a ClearCube chassis (CAT5, CAT5e, CAT6, or CAT6e Ethernet cable) • A fiber cable to connect each media converter to a fiber C/Port (multi-mode, 50µm or 62.5µm fiber cable with an SC connector on the transceiver end and an LC connector on the C/Port end) Ethernet Cables to ClearCube Chassis Fiber Optic Cables to Fiber C/Port (SC Connector on Transceiver End and LC Connector on C/Port End) Figure 31 F6150 Fiber Transceiver R-Series Data Center Products User’s Guide Chassis and Blade Installation • 57 The fiber optic cables from the output of the Transceiver can be home runs to the individual fiber C/Ports, or they can be patch cables that run to one or more fiber patch panels. The following requirements apply to the ClearCube Fiber Optic Extension System: • The power budget through all the connections between the Transceiver and the Fiber C/Port must be 6 dB or less, including the cable itself. • This system connects PC blades at a maximum distance of 2000 meters over a pair of 50µm or 62.5µm multi-mode fibers. PC Blade Installation Unpacking the PC Blades Once the chassis has been installed and connected to power and signal connections, open the PC blade boxes and remove the PC blades. Examine each PC blade for damage as a result of shipping. If you find any damage contact the carrier to file a claim and call the ClearCube Customer Service Department for replacement. Do not use any PC blade that shows any sign of damage. Subsequent damage from a defect caused by shipping could be extensive. Installing PC Blades Never leave a PC blade out in the open. It should either be in the chassis or in its storage box. Dust, dirt, and other debris can cause problems so keep the boards clean by keeping them installed or in their storage box. Never force blades into a chassis. Mishandling blades can cause critical hardware failure, data loss, or both. NOTE The interposer on the rear of R-series blades determines the chassis in which you can install them. • 44–pin interposer—This default configuration enables you to install R-series blades in R4300 chassis • 30–pin interposer—Available as a downgrade kit, this interposer enables you to install R3080D and R1350 blades in an R4200 or in an R4300 chassis. If you use a 30–pin interposer with the R4300 chassis, you cannot use the USB port on the rear apron of the chassis. 58 • Chassis and Blade Installation R-Series Data Center Products User’s Guide To install a blade, do the following: NOTE Never force blades into a chassis. Mishandling blades can cause critical hardware failure, data loss, or both. 1. Lower the front bezel on the chassis by depressing the latches on each side. 2. Orient each blade right-side up (LCD panel on the bottom) and then slowly insert the blade into the chassis by lining up the blade edges with both the top and bottom guides in the chassis. 3. Start inserting blades with the left-most slot. There will be a slight resistance to insertion when the back connector goes into the backplane socket. NOTE The R3040S (and other ClearCube dual-slot blades) can only be inserted into chassis slots 1&2, 3&4, 5&6 and 7&8. Always insert the PC blade slowly to avoid damage resulting from misaligning the PC blade edges with the guides. When properly seated, the PC blade is flush with the front edge of the bottom guide bracket. 4. After inserting all blades, raise the chassis front bezel and snap into place. 5. In a rack installation, you can lock the chassis front bezel using a Kensington lock on each side of the chassis. In a cabinet installation, use a locking front door to secure the chassis and blades. NOTE The very first time you insert the PC blade, the power does NOT turn on automatically. You must depress the power button on the front of the blade to power it on. Blades have three options for power state after AC power recovery. AC power failure could mean either the whole chassis losing power and recovering, or just unplugging and plugging a blade back in. The three options are: • Power On – After power is reapplied, the blade powers up and stays on. • Stay Off – After power is reapplied, the blade stays off • Last State – After power is reapplied, the blade returns to the power state that it had when the power was lost. For example, if the blade was off when it was power was lost, it stays off; if the blade was on when power was lost, it turns on and stays on. The default power settings for the R-series blades are Power On. NOTE If the user last turned the blade off by holding down the power button for 4 seconds, the blade will only power back on by a subsequent power button press, regardless of the power recovery state. R-Series Data Center Products User’s Guide Chassis and Blade Installation • 59 When a blade is inserted into a chassis, it takes approximately 30 seconds for the chassis and its RMM to detect the blade and relay its information to Sentral. Note that the blue LCD panel and the C/Port indicator remain lit, independently of whether the blade is powered on. These indicators run off of chassis power. After the first on/off cycle, you can power the blade back on from the shutdown state by either pushing the power button on the blade or the Reset/Power button on the C/Port. Connecting Ethernet Cables The following sections describe the configuration of R-series blade Ethernet adapters. See “R3040S Cabling” on page 40 and “How OS Network Connections Are Mapped to NICs on Chassis Backpack” on page 41 for more information. The following figure shows the primary and secondary ports on the rear of an R4300 chassis. Secondary Ports Primary Ports R4300 Chassis Network Module Figure 32 The Primary and Secondary Ports in an R3400 Chassis Network Module R3040S Blades The type of video card installed in a blade determines the number of available Ethernet adapters: • • Traditional video card: (such as ClearCube MGA6 or off-the-shelf card) provides four Gigabit Ethernet adapters: – Primary ports: Gigabit Ethernet – Secondary ports: Gigabit Ethernet V52x0 PCoIP Host card: provides three Gigabit Ethernet adapters: – Odd-numbered secondary port: PCoIP communication to PCoIP zero clients – Three other ports: Gigabit Ethernet 60 • Chassis and Blade Installation R-Series Data Center Products User’s Guide To connect C/Ports to a dual-slot blade, use only the even-numbered C/Port connectors 2, 4, 6, or 8, relative to those slot pairs. The odd-numbered C/Port connections on the chassis are not connected to dual-slot blades. R3080D Video Options and Ethernet Port Behavior The R3080D provide two Ethernet ports that correspond to the primary and secondary Ethernet jacks on the rear of a chassis. Your graphics card configuration determines the behavior of the blade’s Ethernet ports. • Quadro4 PCI-Express card and integrated graphics (with i5-660 processor): – Primary port: Gigabit Ethernet NOTE: Always connect cables to the primary Ethernet port first. – Secondary port: Gigabit Ethernet NOTE: In an R4200 chassis only the primary port is connected. • V5220 Dual Host card: – Primary port: Gigabit Ethernet – Secondary port: PCoIP communication to PCoIP zero clients R1350 Video Options and Ethernet Port Behavior The R1350 provide two Ethernet ports that correspond to the primary and secondary Ethernet jacks on a chassis. Your graphics card configuration determines the behavior of the blade’s Ethernet ports. • Quadro4 PCI-Express card and GMA 950 integrated graphics: – Primary port: Gigabit Ethernet NOTE: Always connect cables to the primary Ethernet port first. – Secondary port: 10/100 Ethernet NOTE: In an R4200 chassis only the primary port is connected. • V5120 Dual Host card: – Primary port: Gigabit Ethernet – Secondary port: PCoIP communication to PCoIP zero clients Using USB 2.0 Capability on the R3040S and R1350 The R3040S and R1350 provide two USB 2.0 ports: one on the front of the Blade and one on the back apron of the R4300 when the blade has a 44-pin interposer installed. The 30-pin interposer does not bring the USB 2.0 signals onto the R4300 signal backplane. The USB port on the R1350 connects to the corresponding USB port on the R4300. R-Series Data Center Products User’s Guide Chassis and Blade Installation • 61 When connecting to an R3040S, use the even-numbered USB ports on the back apron of the R4300. The odd-numbered USB ports on the chassis are not connected to the R3040S. This is the same scheme as with connecting C/Ports to a dual-slot blade. See “Mass Storage Lockout: Disabling Access to USB Mass Storage Devices” on page 71 for information about enabling and disabling USB ports on user ports (zero clients, clients, and so on). R1350 Monitor Support The following table lists each R1350 video option and the number of supported monitors for each option. Graphics Option Single Monitor Dual Monitor Intel® GMA 950 integrated graphics engine X NVIDIA® Quadro®4 PCI-Express® card (MGA6) X V5120 Dual Host card X X V5140 Quad Host card X X Quad Monitor X X (with ClearCube MVX) (with ClearCube MVX) X R3080D and R3040S Display Support and Configuration This section details maximum supported displays for each R3080D and R3040S graphics option (card), and describes how to configure display types when using V52x0 PCoIP Host cards. Graphics Options and Number of Displays Supported The following table lists each video option and the number of supported displays for each option. Graphics Option Single Monitor Dual Monitor NVIDIA® Quadro®4 PCI-Express® card (MGA6) X V5220 Dual Host card X X V5240 Quad Host card X (R3040S only) X (R3040S only) Quad Monitor X X (with ClearCube MVX) (with ClearCube MVX) X (R3040S only) Configuring Multiple DVI-I Displays with V52x0 PCoIP Host Cards If your R3080D or R3040S blade contains a V52x0 PCoIP Host card, the blade supports one DVI-I monitor and one VGA monitor by default. You can use the included S3 Graphics® ScreenToys utility to change video settings so you can connect 62 • Chassis and Blade Installation R-Series Data Center Products User’s Guide two or more DVI-I displays to your PCoIP client. Perform the following steps to disable the default VGA display and enable one or more additional DVI displays. 1. Connect one or more additional DVI displays to your PCoIP client. 2. Right-click an empty area on the desktop. 3. Select ScreenToys from the right-click menu to display the Device Management dialog box. Monitor Menu Display Devices Area 4. From the Monitor menu, select the VGA display. The icons in the Display Devices area refresh to reflect your selection. 5. From the Display Devices area, clear the VGA checkbox to disable the monitor and then click Apply All. Video Resolution The ClearView Quadro4 video driver that comes pre-installed on ClearCube PC blades supports video resolutions as high as 1280 x 1024. If you require video resolutions greater than this, you need to uninstall the ClearView Quadro4 driver from the blade and install the standard, high resolution Quadro4 video driver from the ClearCube web site at http://support.clearcube.com/. Do not use drivers downloaded directly from the NVIDIA web site, as they have not been validated to work properly with a ClearCube system. Changing CMOS Settings You can change CMOS and BIOS settings using the BIOS setup utility. To access the utility, power on a blade and press the F2 key when the ClearCube splash screen appears (the splash screen should provide prompts about additional options and corresponding keys to press). R-Series Data Center Products User’s Guide Chassis and Blade Installation • 63 From the BIOS setup utility you can configure boot sequence, hard disk settings, power-up defaults, power management settings and more. (Note that you can select the first boot device without entering the BIOS setup utility. Follow the on-screen prompts as the blade boots. If you are booting from a USB CD-ROM device, select CDROM (do not select removable device.) ClearCube PC blades uses a lithium coin-cell battery for backing up parameter memory. When you change this battery, remove the old battery and wait at least 30 seconds before inserting the new battery. Otherwise, memory corruption may occur, and may require sending the blade back to ClearCube for repair. You can clear existing CMOS settings and reset BIOS passwords as described in the following sections. Resetting an R1350 CMOS Password To reset the CMOS password on an R1350, move the JP1 jumper on the motherboard. You will need a set of needle-nose pliers to move the jumper. When the jumper is in the Reset CMOS on restart position, the CMOS password is reset when the R1350 restarts. To reset the CMOS password, perform the following steps. 1. Power down the blade normally, and remove it from the chassis. 2. Move the CMOS jumper to the Reset CMOS on restart position (pins 2 and 3 jumpered). 3. Return the blade to the chassis and power it on. Wait until the operating system starts. 4. Power off the blade, and remove it from the chassis. 5. Return the CMOS jumper to its default position (covering pins 1 and 2). NOTE If you do not return this jumper to its default position, the blade will always reset the CMOS password when it restarts. 6. Return the blade to the chassis and power it on. 64 • Chassis and Blade Installation R-Series Data Center Products User’s Guide MSL Jumper USB Mass Storage devices function normally (default) 3 JP6 USB Mass Storage devices do not function 3 JP1 1 1 CMOS Jumper Normal operation (default) 3 Reset CMOS password on restart 3 1 1 Figure 33 Model R1350 MSL and CMOS Jumper Locations and Settings Clearing All R3080D and 3040S CMOS Settings The R3080D and R3040S motherboards provide a jumper you can use to clear all current CMOS settings. By default, the jumper is on pins 1 and 2 for normal operation. The following figures show the location of the JP3 header and default jumper position on the R3080D and on the R3040S. Clear CMOS Moving Jumper to This Position Clears CMOS Settings R3080D Blade MSL R520 CMOS JP6 1 JP10 Disable Clear CMOS CMOS Settings are Maintained (Default Position) Detail of the JP10 Clear CMOS Header (on Bottom) Figure 34 Model R3080D CMOS Header and Jumper Settings Detail of the JP3 Clear CMOS Header Base of R3040S Blade and Motherboard 1 Battery 2 Enable 3 CPU 0 Disable CPU 1 JP3 Figure 35 Model R3040S CMOS Header and Jumper Settings (Default Setting Shown) R-Series Data Center Products User’s Guide Chassis and Blade Installation • 65 Perform the following steps to clear all CMOS settings. 1. Power down the blade and remove the blade from the chassis (if the blade is not in an enclosure—for example, for configuration—ensure that power is disconnected). 2. Locate header JP10 on the R3080D (see Figure 34 on page 65) or header JP3 on the R3040S (see Figure 35 on this page). 3. Use needle-nose pliers to move the jumper from the default position (on pins 1 and 2) to the reset/clear position (on pins 2 and 3). 4. Wait five seconds. 5. Using your pliers, move the jumper back to the default position (on pins 1 and 2). 6. Return the blade in a chassis as described in “Installing PC Blades” on page 58. 7. Power on the R3040S. The CMOS is cleared, including any administrator or user passwords. You can now enter BIOS setup to make any necessary changes by pressing F2 when prompted while starting the blade. Configuring RAID on an R3040S Blade R3040S blades can contain up to 4 hard disks, and supports the following RAID configurations: • RAID 0—implements a striped disk array. Data is broken down into blocks and each block is written to a separate disk drive. Since no redundant information is stored, performance is very good, but the failure of any disk in the array results in complete data loss. RAID 0 is only used to increase disk performance. • RAID 1—implements mirroring. This redundancy of data means that no rebuild is necessary in case of a disk failure, only a copy to the replacement disk. • RAID 10—implements mirroring (RAID 1) and a striped disk array (RAID 0); RAID 10 is also called RAID 1+0. This configuration requires a minimum of four disks: two mirrored disks to hold half of the striped data and two mirrored disks for the remaining data. • RAID 5—stripes both data and parity information across three or more drives. writing data and parity blocks across all the drives in the array. RAID 5 volumes functions if one drive fails, though performance is degraded. Prerequisites and Overview of Required RAID Tasks The following list provides an overview of the steps required to create a RAID volume (perform tasks in the order listed below). • Back up all data on your blade. • If applicable, obtain all drivers required for your blade. After creating a RAID volume, you will install an OS on the blade. By default, images installed on ClearCube blades contain all necessary drivers, including the RAID drivers and hardware drivers (NIC, chipset, and video). You can obtain drivers from the 66 • Chassis and Blade Installation R-Series Data Center Products User’s Guide ClearCube blade image and from the ClearCube Support Web site before you create a RAID volume, which will remove the drivers from the hard disk. • Determine the RAID configuration to use for the volume you are creating. • Enable RAID in R3040S BIOS and make additional BIOS configurations as described in the following section. • Use Intel Storage Matrix Manager to create RAID volume. • Obtain a USB floppy drive and floppy disk to install the drivers during operating system installation. Save the drivers to the floppy disk. • Install an operating system on the new RAID volume, ensuring that you have the necessary floppy drive and floppy disk containing the RAID drivers. • Also ensure that if you are using more than two hard disks, you are using ClearCube drive holder G0700059, with a four-disk maximum capacity. • Ensure that each hard disk is made by the same manufacturer and is the same model and size. (though, you shouldn't' be adding any drives because they're FRUs in that case) • R3040S blades support RAID 0, 1, 10, and 5. Ensure that: – – You have a thorough understanding of the RAID configuration you are choosing. Each hard disk included in the RAID volume is made by the same manufacturer and is the same model and size. Enable RAID in BIOS Perform the following steps to enable RAID in the BIOS (the following steps assume that the R3040S is in a chassis and there are two or more hard disks in the blade, as appropriate for the RAID level you are implementing). 1. Power on the blade, and press F2 when prompted to enter the BIOS Setup Utility (Setup). Use your ARROW keys, TAB, and ENTER to navigate through the menu. Press ESC to exit menus. 2. From Setup, use your arrow keys to display the Advanced menu, and then select IDE Configuration. Press Enter. 3. Ensure that SATA#1 Configuration is set to Compatible. Change the setting if necessary. 4. Select Configure SATA#1 as and press Enter. Select RAID and press Enter. 5. Select Stable ID Support and set to Enabled. 6. Press ESC to return to the previous screen. 7. Navigate to the Boot menu, select Boot Settings Configuration, and press Enter. 8. Select Quick Boot and set to Disabled. 9. Select Quiet Boot and set to Disabled. R-Series Data Center Products User’s Guide Chassis and Blade Installation • 67 10. Press F10 to save your changes and exit Setup. NOTE As discussed in the first step in the following section (“Creating a RAID Volume Using Software RAID”), be prepared to press CTRL+I when prompted after the blade reboots. 11. Select OK and then press Enter to reboot the blade. You can now continue to create the RAID volume using the Intel Matrix Storage Manager, as described in the following section. Creating a RAID Volume Using Software RAID This section describes how to use the Intel Matrix Storage Manager Configuration Utility to set up and configure a RAID volume. This section assumes you are using SATA drives and configuring software RAID. Improper RAID configuration will result in data loss. Never change RAID configuration without making a complete system back-up. Perform the following steps. 1. After rebooting as described above, several post screens are displayed. Press CTRL+I when the Intel Matrix Storage Manager displays Press <CTRL-I> to enter Configuration Utility at the bottom of the screen (the following figure is an example; your screen will be similar). Press CTRL+ I When This Message Is Displayed Intel(R) Matrix Storage Manager option ROM v8.9.1.1002 ICH10R/DO wRAIDn Copyright(C) 2003-09 Intel Corporation. All Rights Reserved. RAID Volumes: ID Name 0 myRAID_n * = Data is Encrypted Level Strip Size Status Bootable RAIDnn(RAIDnn) 64KB 596.2GB Initialize Yes Physical Disks: Port Drive ModelSerial # Size 0 ST9320423AS5VH0R2PP 298.0GB 1 ST9320423AS5VMSEDAW 298.0GB 2 ST9320423AS5VH4T2NI 298.0GB 3 ST9320423AS5VH9D1KY 298.0GB Press <CTRL-I> <CTRL-I> to enter Configuration Utility... Type/Status(Vol ID) Member Disk(0) Member Disk(0) Member Disk(0) Member Disk(0) Figure 36 Press CTRL+I When Prompted at the Bottom of the Screen to Display the Configuration Utility If you do not press CTRL+I in the time provided, the message Press <ESC> to is displayed. Restart the blade (it will not boot because an OS is not installed yet) and press CTRL+I when prompted during reboot. boot 2. When the Intel Matrix Storage Manager Configuration Utility is displayed, ensure that Create RAID Volume is selected and press Enter. 68 • Chassis and Blade Installation R-Series Data Center Products User’s Guide 3. From the Name field, type a name for the RAID volume you are creating (there is a 16-character maximum and special characters are not allowed). Press Enter after typing the name. 4. Use the arrow keys to scroll through the menu of RAID levels (R3040S supports RAID levels 0, 1, 10, and 5). Select a level and then press Enter. 5. If you are configuring RAID 10, skip this step and continue to step 7. Select Disks is highlighted. Press ENTER to specify disks to add to the volume. 6. Select disks to add to the volume: – RAID 0: Select 2 to 4 disks as described below. – RAID 1: Select 2 disks as described below. – RAID 5: Select 3 to 4 disks as described below. Use the arrow keys to highlight a disk to add and then press the SPACEBAR to select it. A green icon ( ) adjacent to the disk name indicates that the disk is selected. After selecting disks to add to the volume, press ENTER. 7. If you are configuring RAID 1, skip this step and continue to step 8. Use the arrow keys to specify a strip size, and then press ENTER. 8. Specify a volume capacity and press ENTER. 9. Select Create Volume, and then press ENTER. The utility displays a warning message indicating that you will loose all data on the disks that you add to the volume. 10. Press the Y key to create the volume and display the Main Menu. Information about the volume you just created and each disk in the volume is displayed in the DISK/VOLUME INFORMATION area. 11. Press ESC to exit and then press Y. The blade will attempt to boot. 12. Power off the blade. You can now continue to install a supported OS on the blade as described in the following section. Installing a Windows OS on a RAID Volume This section describes how to install an operating system from an optical disk and include RAID drivers during installation. These instructions assume that you are: • REQUIRED: Installing RAID drivers from a USB 3½-inch floppy drive • Installing a Windows operating system from an optical disc To connect the external drives to your blade, ClearCube recommends that you connect a USB hub to the USB port on the front of the R3040S, and then connect the floppy drive and the optical disk drive to the USB hub. 1. Ensure that you have all required drivers (RAID drivers, chipset drivers, network [NIC] drivers, and video drivers). a. You can download an archive file containing all drivers for an R3040S from the ClearCube Support site: http://support.clearcube.com R-Series Data Center Products User’s Guide Chassis and Blade Installation • 69 From the Support site, click PC Blades > R3040S > Drivers and then click the link for the operating system you are installing. b. Extract the RAID drivers in the archive file you just downloaded to a 3½-inch floppy disk (see the readme file in the archive for the location of the RAID drivers). c. Extract the remaining drivers to a storage device so you can install them after installing the operating system. 2. As noted above, connect the external floppy drive and external optical drive to the R3040S and insert the floppy disk and optical disk in the drives. 3. Place the operating system optical disk that you are installing in the optical drive. 4. Set the blade's boot priority to boot to the optical disc drive containing the OS CD-ROM or DVD. a. Start or restart the blade and press F2 to enter the BIOS Setup Utility. b. Use the arrow buttons to select the Boot menu, highlight Boot Device Priority, and then press ENTER. c. Use the arrow keys on your keyboard to select the optical drive name. d. Press and hold the SHIFT key and then press the + key one or more times to move the optical drive to the top of the list, so it as listed as the 1st Boot Device. e. Press F10 to display a confirmation screen. NOTE Very shortly after the Windows Setup screen is displayed in the following step, a message displayed on the bottom of the screen prompts you to press F6 to install SCSI or RAID drivers. Be prepared to press F6 very quickly after pressing ENTER, below. Select OK and then press ENTER to save your changes and exit setup. The blade will reboot to the optical disk and start Windows Setup. 5. Press F6 when the Press F6 if you need to install a third party SCSI or RAID driver message is displayed at the bottom of the screen (almost immediately after Windows Setup starts). After you press F6, the installer continues installation for several minutes. 6. Windows Setup displays a screen stating that it could not determine the type of one or more mass storage devices, and that it will load support for <none>. This is normal operation. NOTE Before continuing, ensure that a floppy disk drive and the disk with RAID drivers is connected to the blade (as described in step 2 above). Press S to specify drivers for the RAID disk controller. If the drive is not connected, Windows Setup displays a message stating that it could not find a floppy drive. If this is the case, connect the floppy drive and press ESC to return to the screen. You can now press S and continue installation. 70 • Chassis and Blade Installation R-Series Data Center Products User’s Guide 7. Setup displays a screen requesting that you specify the SCSI adapter. Scroll to Intel(R) ICH8R/ICH9R/ICH10R/DO/5 Series/3400 Series SATA RAID Controller (the third entry) and press ENTER. A message is displayed at the bottom of the screen indicating that setup is loading files. 8. Setup displays a screen indicating that is will load support for the controller you specified in the previous step. Press ENTER to continue. Messages are displayed at the bottom of the screen while files are loaded. 9. Setup displays a screen in which you can configure disk partitions. Configure the partition or partitions on the RAID volume as appropriate for your environment. 10. Windows Setup continues through additional installation and configuration steps. Configure the operating system as appropriate for your environment. As installation continues, the operating system typically restarts the blade; remove the floppy disk drive from the blade as the blade restarts. After OS installation is complete, you can deploy the R3040S in your environment. Removing a PC Blade To remove a blade, perform the following steps: Always completely power down a blade using the power button or by shutting down the OS before removing it from a chassis. Removing a blade before completely powering down can cause critical hardware failure, data loss, or both. 1. Lower the front bezel on the chassis by depressing the latches on each side. 2. Power down the blade and pull gently on the handle until it slides out. Be sure to support both ends of the blade when you remove it completely from the chassis. Never forcefully remove blades from a chassis. Mishandling blades can cause critical hardware failure, data loss, or both. Some surfaces on the blade may be hot, especially when the blade has been powered on. Remove and handle the blade with care. Never leave a PC blade unprotected when not in use. It should either be in the chassis or in its storage box. Dust, dirt, and other debris can cause problems so keep the boards clean by keeping them installed or in their storage box. Mass Storage Lockout: Disabling Access to USB Mass Storage Devices R-series PC blades offer a unique Mass Storage Lockout (MSL) security feature that disables the use of USB mass storage devices (such as flash drives, floppy drives, CD-ROM drives, and so on) on ClearCube C/Ports and PCoIP clients. R-Series Data Center Products User’s Guide Chassis and Blade Installation • 71 MSL is disabled by default. To enable MSL, you must set a jumper on the MSL header: • To enable MSL on an R1350 blade with a V5120 Host card, use MSL header J7 located on the V5120 Host card (shown in Figure 37 on page 72). This configuration does not support MSL through the JP6 header on the motherboard. • For all other configurations, enable MSL using the JP6 header on the motherboard. Additionally, ClearCube Sentral provides software-based MSL to prevent the use of mass storage devices. See Sentral Administrator’s Guide for more information. NOTE When the MSL jumper is physically set to lock out mass storage devices, software MSL cannot override this. Use needle-nose pliers to move the jumper, as described in the following steps. 1. Power down the blade and remove it from the chassis (if the blade is not in an enclosure—for example, for maintenance—ensure that power is disconnected). 2. Locate the MSL header: – R1350 with V5120 Dual Host Card MSL header J7 is located on the lower edge of the V5120 card, to the left of the USB port, as shown in the following figure. R1350 and MSL Header on V5120 Host Card (for MSL on PCoIP Client) USB Mass Storage devices function normally (default) USB Mass Storage devices do not function MSL Header J7 (Adjacent to USB Port on V5120 Card) Figure 37 MSL Header on V5120 Card in R1350 Blade (MSL Header on Motherboard Is Unsupported in This Configuration) 72 • Chassis and Blade Installation R-Series Data Center Products User’s Guide – R1350 Using a C/Port MSL header JP6 is located to the left of the DIMM slots, above and to the left of the SATA cable, as shown in the following figure. R1350 and MSL Header and Jumper (for MSL on C/Port) USB Mass Storage Devices Function Normal (Default) 3 USB Mass Storage Devices Do Not Function 3 1 MSL Header JP6 on Motherboard 1 Figure 38 R1350 MSL Header and Jumper Settings for Use with C/Port – R3080D MSL header JP6 is located below the video card and to the right of the Ethernet port on the bottom edge of the blade, as shown in the following figure (the CMOS header is immediately below the MSL header; ensure that you move the jumper on the top-most header, not on the CMOS header). Front of Blade MSL Header (on Top) MSL R520 CMOS JP6 1 JP10 MSL Disabled Access to USB Device Is Permitted (Default Setting) MSL Enabled Access to USB Device Is Prohibited Figure 39 Model R3040S MSL Header Location and Settings (Default Setting Shown on Motherboard) R-Series Data Center Products User’s Guide Chassis and Blade Installation • 73 R3040S MSL header JP6 is located near the top edge of the motherboard, between the upper set of memory modules and CPU1, as shown in the following figure. Disable 3 2 CPU 0 1 CPU 1 Battery Enable JP6 – JP6 Mass Storage Lockout Header Figure 40 Model R3040S MSL Header Location and Settings (Default Setting Shown on Motherboard; Top Blade Sections Not Shown for Clarity) 3. Use needle-nose pliers to move the jumper. Perform one of the following steps: – To enable MSL Move the JP6 jumper to pins 1 and 2. This setting prevents access to USB devices connected to the blade or to the client. —OR— – To disable MSL Move the JP6 jumper to pins 2 and 3. This setting enables access to USB devices connected to the blade or to the client. 4. Return the blade to a chassis as described in “Installing PC Blades” on page 58. 5. Power on the blade. Depending on the MSL option you set, access to USB devices connected to the blade or to the client is enabled or disabled. Re-installing System Software ClearCube blades are normally shipped with operating system factory-installed. Other operating systems may be optionally available. All factory-installed operating systems are images customized specifically for ClearCube blades, and each blade model uses an image version that is specific to that blade model. Installing an operating system image from one blade model onto another blade model (for example, installing the system image from an R1350 onto an R3040S) will result in a system failure and will require re-imaging the blade with the correct version, or reinstalling the operating system. Standard system imaging tools are compatible with ClearCube blades and system images. In the event that operating system re-installation is necessary, or a custom image is desired, you may want to contact ClearCube Technical Support for assistance. 74 • Chassis and Blade Installation R-Series Data Center Products User’s Guide Flashing the Blade BIOS You can flash (install or re-install) the BIOS for your blade. The BIOS download contains file the following: • BIOS files • BIOS flash utility • Instructions about how to use the flash utility From the ClearCube Support site (http://support.clearcube.com), select your blade form the drop-down list, and then click the BIOS link, located under the blade description. Save and then extract the archive file. Read the enclosed readme.txt file for detailed instructions about flashing the BIOS. R-Series Data Center Products User’s Guide Chassis and Blade Installation • 75 76 • Chassis and Blade Installation R-Series Data Center Products User’s Guide Chapter 4. Hardware Upgrade and Replacement Procedures The ClearCube architecture simplifies upgrading PC blades. All blade hardware and software components are classified as one of the following: Customer Replaceable Units (CRUs) Items that customers can replace. Field-Replaceable Units (FRUs) Items that trained service providers and ClearCube Systems Engineers (SEs) can replace, either on site or through an RMA process. To maintain your ClearCube warranty and ensure proper operation, only use ClearCube approved commodities when performing upgrades of CRU components. The following table details hardware and software components in R-series blades and indicates if each component is a CRU or an FRU. Table 11: Blade Components and CRU/FRU Designation Blade Component Drivers R1350 R3040S R3080D Instructions CRU CRU CRU See “Drivers” on page 79. Operating System CRU CRU CRU See OS manufacturer documentation. Additionally, see “Re-installing System Software” on page 74, “Configuring RAID on an R3040S Blade” on page 66, and “Network and PXE Booting Troubleshooting” on page 109. Video Card: MGA6 PCI-n CRU CRU CRU See “Quick Start Guide” that accompanies upgrade kit. Video Card: Off-the-Shelf Not Applicable CRU Video Card: PCoIP (V5xx0) CRU FRU CRU See “Quick Start Guide” that accompanies upgrade kit. Memory Modules CRU CRU CRU See “Upgrading Memory” on page 80. R-Series Data Center Products User’s Guide Not See “Quick Start Guide” that Applicable accompanies upgrade kit. Hardware Upgrade and Replacement Procedures • 77 Table 11: Blade Components and CRU/FRU Designation Blade Component R1350 R3040S *FRU R3080D Instructions & CRU CRU See “Replacing and Upgrading Hard Disks” on page 84 CRU FRU & CRU CRU See “Replacing and Upgrading Hard Disks” on page 84 Front LCD Panel CRU CRU CRU See “Replacing a Front LCD Panel” on page 97. Chassis Interposer Card CRU CRU CRU See “Replacing Blade Interposer Cards” on page 102. CPU Fan FRU CRU CRU See “Replacing CPU Fans” on page 89. CMOS Battery CRU CRU CRU See “Replacing the CMOS Memory Battery” on page 100. CPU FRU FRU FRU Return blade to ClearCube to replace CPUs. CPU Heat Sink FRU FRU FRU Return blade to ClearCube to replace CPU heat sinks. Not Applicable FRU Hard Disk Drive (HDD) CRU HDD Cable * Voltage Regulator Module (VRM) Not Return blade to ClearCube to replace Applicable VRMs. * Customers can replace existing R3040S HDDs, but must return R3040S blades to ClearCube to add additional HDDs. See “R3040S Hard Disks” on page 84 for more information. Other components such as the processor or motherboard are not intended for field replacement. Removal voids your warranty. Contact ClearCube Technical Support for assistance. A complete PC blade is easily upgraded by lowering the chassis front bezel, slowly pulling out the old PC blade, and then replacing with a new PC blade. Some surfaces on the blade may be hot, especially when the blade has been powered on. Remove and handle the blade with care. 78 • Hardware Upgrade and Replacement Procedures R-Series Data Center Products User’s Guide CAUTION: All upgrades should be performed by a qualified computer technician. Take proper precautions to avoid damaging electrostatic discharges by working at a grounded computer equipment repair bench. Damage caused by improper upgrade procedures will void your warranty. Disconnect all sources of power before servicing the R4300 chassis. Drivers You can obtain drivers for ClearCube blades from the ClearCube Support site at the following URL: http://support.clearcube.com/. To obtain drivers: 1. From the Support site, select the product for which you need drives from the drop-down lists near the middle of the page. 2. From the product page, click Drivers, located below the product description. 3. Under the drivers heading, click the link for the drivers you require. Depending on your browser, you should receive a message indicating that the download has started. Click OK and specify a location to save the file. 4. Navigate to the location the driver archive file is saved. The archive should include a readme file that provides information about extracting and installing the drivers. R-Series Data Center Products User’s Guide Hardware Upgrade and Replacement Procedures • 79 Upgrading Memory Only use ClearCube-supplied or ClearCube-approved memory modules. Model R3040S The R3040S provides six DDR3 DIMM sockets in six channels, as shown in Figure 41. Each channel contains one DIMM socket: Channel A Channel B Channel C CPU 1 CPU 0 CPU 1 Slots Front of Blade CPU 0 Slots Channel D Channel E Channel F Figure 41 DIMM Slots on R3040S Board DIMMs for R3040S must meet the following requirements: • Use DIMMs with the same part number by the same manufacturer (the same type, size, speed, and/or rank). • Use 240-pin DDR3 DIMMs. • Use either registered DDR3 DIMMs (RDIMMs) or ECC unbuffered DDR3 DIMMs (UDIMMs). The R3040S does not support the mixing of RDIMMs and UDIMMs. • DDR3-800, DDR3-1066, or DDR3-1333. Ensure the following when populating DIMMs: • The minimal memory population is channel A. In this configuration, the system operates in the Independent Channel Mode. Mirrored Channel Mode is not possible. 80 • Hardware Upgrade and Replacement Procedures R-Series Data Center Products User’s Guide • You must populate CPU 0 socket first to enable and operate the CPU 1 socket. • If the blade uses CPU 0 socket only, a minimum of one 1-GB DDR3 DIMM is required in channel A. If both CPU sockets are populated, a minimum of one 1-GB DDR3 DIMM is required in channel A and in channel D. • If a blade uses two CPUs and there are DIMMs for each CPU, ensure that you populate matching channels. For example, populate channel A and channel D. If A and D are already populated and you are adding DIMMs, populate channel B and channel E. • If both CPU sockets are populated and channels A through C are unpopulated, the blade operates using remote memory in channels D through F. Note that using remote memory causes latency and reduced platform performance. NOTE • Because of a limitation in 32-bit Microsoft Windows, the operating system reports and utilizes no more than 3 GB of memory when 4 GB of memory is installed. Do not mix RDIMMs and UDIMMs Recommendation for memory module configuration: After determining a total memory density (total size requirement) for a blade, ClearCube recommends using the lowest possible size DIMMs to reach the required density. For example, if to reach 8 GB, use four 2 GB DIMMs instead of two 4 GB DIMMs. This configuration accesses multiple sticks in parallel and increases throughput. NOTE This recommendation only applies to memory configurations using an even number of DIMMs. To replace R3040S memory modules: 1. Pull the tabs on either side of the memory socket apart to remove the existing module. 2. Carefully insert the new memory module into the socket, making sure that the tabs snap inward securing the module in place. The memory operational mode is configurable at the channel level. Independent Channel Mode and Mirrored Channel Mode are both supported. R-Series Data Center Products User’s Guide Hardware Upgrade and Replacement Procedures • 81 Model R3080D The R3080D motherboard supports DDR3 1333 MHz Dual Inline Memory Modules (DIMMs), and provides four 240-pin DDR3 SDRAM DIMM sockets in two channels (channel A and channel B), as shown in the following figure. R3080D Blade Fan and Heatsink DIMM 2 Channel A DIMM 1 DIMM 4 Channel B DIMM 3 Figure 42 Detail of R3080D Memory Channels and Sockets Important Installation Considerations Ensure the following when you are populating DIMMs. • Only use DIMMs supplied by ClearCube. • Ensure that DIMMs are the same speed and size. • If you are using a processor that does not support Intel Graphic Technology, you must install a DIMM in at least one of the DIMM 0 (blue) sockets for the blade to boot. Installing 2 DIMMs 1. Pull the tabs on either side of the memory socket away from the module to remove the existing DIMMs. 2. Insert the new DIMMs in sockets 1 and 3 (the black socket of both channels). Align the DIMM in the socket guides and firmly press down until the tabs snap into place. 82 • Hardware Upgrade and Replacement Procedures R-Series Data Center Products User’s Guide Installing 3 DIMMs 1. Pull the tabs on either side of the memory socket away from the module to remove the existing DIMMs. 2. Insert DIMMs in sockets 1 and 3 (the black socket of both channels) as described above. 3. Continue by installing the third DIMM in socket 2 or 4 (the blue socket of either channel). Installing 4 DIMMs 1. Pull the tabs on either side of the memory socket away from the module to remove the existing DIMMs. 2. Insert DIMMs in sockets 1 and 3 (the blue sockets of both channels) as described above. 3. Install a matched pair of DIMMs in sockets 2 and 4 (the blue sockets of both channels). NOTE All other DIMM configurations result in single-channel memory operation. Model R1350 The R1350 can work with a single DIMM, as well as two DIMMs of different sizes and speeds. When equal size DIMMs are used, the memory controller on the R1350 uses interleaved memory, which gives better performance. To replace or upgrade the memory on the R1350, do the following: 1. Pull the tabs on either side of the memory socket apart to remove the module. 2. Carefully insert the new memory module into the socket, making sure that the tabs snap inward securing the module in place. DIMM slots Figure 43 R1350 Memory Layout NOTE Using mismatched DIMMs incurs a performance penalty. With equal-sized DIMMs, a mismatch in speed or timing causes the system to run at the slower of the two DIMMs. With mismatched sizes, the system always runs in non-interleaved mode at the slower speed or timing of the two DIMMs. R-Series Data Center Products User’s Guide Hardware Upgrade and Replacement Procedures • 83 Replacing and Upgrading Hard Disks The following sections describe how to work with hard disk drives (HDD, or hard disks) in R-series blades. Ensure that you observe the following when working with HDDs: • Hard disk mechanisms are sensitive to mechanical shock, and are most vulnerable when handled as an unmounted unit. Handle them gently, especially when setting them down on a work surface. • Drive cables should be removed by pulling on the connector, not by pulling the cable. Pull the connector straight out, not at an angle. • Imaged drives swapped between dissimilar blade models will not function correctly. • Store unused drives in an anti-static bag in a climate-controlled area. R3040S Hard Disks This section describes how to replace an existing 2.5-inch R3040S hard disk. NOTE You must return R3040S blades to ClearCube to install additional hard disks. See “Contact Information” on page 117 for information about contacting Customer Support, and see “Return Merchandise Authorization (RMA)” on page 118 for information about RMA procedures. R3040S blades can contain one to four 2.5-inch hard disk drives. The R3040S hard disk tray, located on the top of the blade (shown in the following figure), contains all hard disks. Figure 44 A Four-Bay Hard Disk Tray on Top of an R3040S Depending on the hard disk configuration and video card configuration, an R3040S can contain either of the following hard disk trays: 84 • Hardware Upgrade and Replacement Procedures R-Series Data Center Products User’s Guide • Small tray (part number G0700056)—contains up to two hard disks. • Large tray (part number G070059)—for multiple configurations: – – – For up to four standard-capacity hard disks For two 300 GB hard disk drives (part number G913040-300) For all hard disk configurations with V5224 PCoIP cards R3040S Hard Disk Tray, Drive Layout, and SATA Headers on Motherboard The following figure shows each R3040S hard disk tray model and details the location of the drives in the tray and the associated cables. Small Tray Disk 4 Disk 2 Disk 3 Disk 1 CPU 1 Front of Blade Front of Blade Disk 1 Front of Blade Disk 2 Large Tray CMOS Battery CPU 0 1 4 3 2 SATA Headers and Numbered Cables on Motherboard (on Underside of Blade Near Interposers) Figure 45 R3040S Hard Disk Drive Trays, Cables, and Cable Headers Replacing an R3040S Hard Disk Perform the following steps to replace an R3040S hard disk. 1. Power off the blade and remove it from the chassis. Place the blade on a stable surface, such as a desk or bench. R-Series Data Center Products User’s Guide Hardware Upgrade and Replacement Procedures • 85 2. Position the blade so the hard disk tray is facing up (the hard disk tray is located on the left side of the blade if you are looking at the front of the blade). 3. Use a a Phillips screw driver to remove the four screws (M3 x 5, flat head screw, part number G7110009) from the hard disk tray, located on the top of the blade. 4. Use the finger holes in the center of the tray to carefully raise tray. Do not pull the tray straight up; rotate the tray on the its long edge as shown in the following figure. Bottom of Blade Remove Hard Disk Tray by Rotating on the Long Edge Closest to the Bottom of the Blade Figure 46 Remove the Hard Disk Tray by Rotating on the Long Edge Closest to Bottom of Blade 5. Remove SATA data cables and power cables from the hard disks. Before disconnecting any SATA cables, note their position so you can easily reconnect each cable to the correct hard disk. NOTE: Figure 45 on page 85 shows hard disk cables and header numbering. 6. Remove the four screws (M3 x 5, flat head screw, part number G7110009) securing each hard disk to the tray. Ensure that you save these screws to use when replacing each hard disk. 86 • Hardware Upgrade and Replacement Procedures R-Series Data Center Products User’s Guide 7. Place the new hard disk in the tray. – – Insert hard disks so that the label on the top of the hard disk faces the solid surface of the tray (and you can see the circuitry on the bottom of the hard disk), as shown in the following figure. Ensure that the SATA data and power connectors on each disk are facing away from the front of the blade. An arrow on the underside of the tray points to the front of the blade. Arrow Pointing toward Front of Blade SATA Connectors Pointing toward Rear of Blade Hard Disk #2 Circuitry on Bottom of Hard Disk is Visible Hard Disk #1 Hard Disk Tray Figure 47 Hard Disk Tray with Hard Disks Showing Correct Orientation 8. Align the holes in the side of the hard disk with the holes in the side of the tray. Secure hard disks to the tray with the appropriate screws. Use the correct ClearCube-supplied or ClearCube-approved screws to secure each hard disk to the tray. Screws that are too long can damage hard disks, damage threads in the tray, or both. 9. Reconnect the SATA power cables and numbered data cables to each hard disk. – – Hard disks 1 and 3 use short (11-inch) data cables (part number G0600055) Hard disks 2 and 4 use long (12-inch) data cables (part number G0600056) Ensure that you reconnect data cables correctly. Figure 45 on page 85 shows the correct placement of hard disks in the tray, and shows how SATA headers on the motherboard are mapped to each hard disk number. 10. Carefully lower the tray into the blade by rotating the tray and hard disks into the tray opening. Ensure that cables are out of the way and are not preventing you from completely lowering the tray. 11. Align the holes in the tray and the blade, replace the four screws, and tighten. 12. Ensure that all SATA cables are completely connected to the SATA headers on the motherboard (as shown in Figure 45 on page 85). You can now replace the blade in a chassis and power it on. R-Series Data Center Products User’s Guide Hardware Upgrade and Replacement Procedures • 87 R3080D Hard Disk To replace or upgrade a 2.5-inch hard disk in an R3080D, perform the following steps. Use the correct ClearCube-supplied or ClearCube-approved screws to secure each hard disk to the tray. Screws that are too long can damage hard disks, damage threads in the tray, or both. 1. Power off the blade and remove it from the chassis. Place the blade on a stable surface, such as a desk or bench. Some surfaces on the blade may be hot, especially when the blade has been powered on. Remove and handle the blade with care. 2. Remove the hard disk carrier (shown in the following figure) from the blade frame. a. Remove SATA data cables and power cables from the hard disks and, optionally, from the motherboard. b. Remove the 3 screws attaching the hard disk carrier to the blade. 3. Remove the 4 screws connecting the hard disk to the carrier (note that these screws are smaller than the screws you removed in the previous step). Remove the old hard disk and set it aside (contact the hard disk manufacturer or ClearCube for recycling information). NOTE You will need a screwdriver that you can insert through 6 mm holes to remove 2 of the screws attaching the hard disk to the rear or the carrier, as shown in the following figure. SATA Power and Data Connectors Hard Disk 88 • Hardware Upgrade and Replacement Procedures HDD Manufacturer Label Facing Down R-Series Data Center Products User’s Guide 4. Attach the new hard disk. a. Carefully place the new hard disk in the hard disk carrier, ensuring that the: – – Manufacturer label faces the correct direction, as shown above SATA power and data connectors face the end of the carrier that extends past the side walls, as shown above – Carrier and hard disk screw holes are aligned b. Use the four small screws you removed in Step 3 to connect the hard disk to the carrier. 5. Reconnect the carrier to the blade using the three screws you removed in Step 2. 6. Reconnect the SATA power and data cables. Ensure that the hard disk manufacturer label faces down (faces the motherboard), and that the SATA power and data connectors point toward the fan and the front of the blade. If you removed the SATA cables from the motherboard, ensure that you reconnect them. Your hard disk is now installed. R1350 Hard Disk To replace or upgrade a 3.5-inch hard disk in an R1350, perform the following steps. 1. Remove the blade from the chassis. Some surfaces on the blade may be hot, especially when the blade has been powered on. Remove and handle the blade with care. 2. Remove the 3 screws that attach the hard disk to the PC blade frame. 3. Disconnect the SATA and power cables from the hard disk, making sure to note the proper orientation of the cables for later reassembly. 4. Install the new hard disk in the reverse order of disassembly, making sure to reconnect the cables in the proper orientation. 5. Replace the blade in the chassis. 6. Power up the blade. 7. Reinstall the operating system and application software. Replacing CPU Fans The following sections describe how to replace R-series CPU fans. R-Series Data Center Products User’s Guide Hardware Upgrade and Replacement Procedures • 89 R3040S Fans Each R3040S has two CPU fans: • CPU fan 0, used with CPU 0. The power cable of fan 0 exits from the right side of the fan (a label is on the front of the fan). • CPU fan 1, used with CPU 1. The power cable of fan 1 exits from the left side of the fan (a label is on the front of the fan). Fans are seated in brackets to ensure correct airflow through the blade. NOTE Do not insert screws in fan bracket. No screws are required. CPU Fan 0 (Cable Exits Right Side) Fan Bracket CPU Fan 1 (Cable Exits Left Side) Power Cables Figure 48 CPU Fans, Distinguished by the Side on Which the Power Cable Exits R3040S CPU fans are wrapped in an anti-vibration foam strip. The following figure shows the position of the fans when inserted in the blade (note that mounting holes in the fan bracket are offset to ensure proper positioning). NOTE To ensure that airflow is correct, fan 0 and fan 1 must be in the correct slots, as shown in the following figure. 90 • Hardware Upgrade and Replacement Procedures R-Series Data Center Products User’s Guide PU 0 C PU C Front of Blade CPU 1 Fan (Cable Exits Left Side of Fan) 1 CPU 1 Fan Header CPU 0 Fan (Cable Exits Right Side of Fan) CPU 0 Fan Header Figure 49 The Location of CPU Fan 0, CPU Fan 1, Power Headers, and the Positioning of Power Cables Perform the following steps to replace a fan. 1. Power off the blade and remove it from the chassis. Place the blade on a stable surface, such as a desk or a bench. 2. Position the blade so the hard disk tray is facing up (the hard disk tray is located on the left side of the blade when you are looking at the front of the blade). 3. Use a a Phillips screwdriver to remove the four screws from the hard disk tray. 4. Use the finger holes in the center of the tray to carefully raise the tray. Do not pull the tray straight up; rotate the tray on its long edge as shown in Figure 46 on page 86. Remove SATA data cables and power cables from the hard disks. NOTE Before disconnecting any SATA cables, mark them so you can easily reconnect each cable to the correct hard disk. Figure 45 on page 85 shows hard disk numbering. 5. Remove each fan’s power cable from the fan headers located on the motherboard. Carefully use your fingers or needle-nose pliers to gently pull back on the header’s release tab, located in front of the cable. Gently Pull Back on Fan Header Release Tab Front of Blade C PU 0 C PU 1 Fan 1 Header Fan 0 Header Figure 50 The Location of Power Headers R-Series Data Center Products User’s Guide Hardware Upgrade and Replacement Procedures • 91 Ensure that you do not loosen memory modules, voltage regulator modules (VRMs), or other components. 6. From the second tier of the blade, unscrew both screws that secure the fan bracket to the blade. Be sure the remember the orientation and position of each fan. Front of Blade Screws Screws Figure 51 CPU Fan Bracket Screws 7. Remove the fan by lifting up the fan bracket and withdraw it from the blade. Make sure that the fan’s power cable does not catch on the blade frame when you remove the fan. 8. R3040S CPU fans are wrapped in insulating foam to reduce vibration. Remove the fan and foam from the metal fan bracket. a. Grasp the power cord exiting from the bottom of the fan. Gently move the cable from the side of the bracket to the center, so that the socket on the end of the cable does not catch on the bracket when you remove the fan. NOTE Remember the side of the fan from which the power cord exits so you can place the replacement cable in the same position. Fan Bracket Power Cord b. Place the fan on a solid surface, such as the top of a table. Hold the bracket in one hand and pull the fan up. Push out on the flanges on the top of the bracket to make removal easier. Remove any insulating foam from the inside of the fan bracket. 92 • Hardware Upgrade and Replacement Procedures R-Series Data Center Products User’s Guide 9. Insert the replacement fan in the fan bracket. a. Rest—but do not insert—the new fan in the top of the fan bracket, ensuring that: – – The fan and the bracket are facing forward (a label is on the front of the fan and the front of the bracket has four mounting holes). The power cord is behind the mounting hole. DO NOT INSERT SCREWS IN BRACKET Ensure Fan and Bracket Are Facing Forward Move Power Cord Behind Flanges Before Inserting b. Push the fan down to fully seat it in the bracket (push out of the flanges on the top of the bracket to ease insertion). NOTE Do not insert screws in fan bracket. No screws are required. c. Ensure that the power cable exits the fan on the correct side. Figure 48 on page 90 shows the correct power cable positioning for each fan. 10. Place the fan and bracket in the blade. Ensure that CPU fan 0 is in the left slot, and CPU fan 1 is in the right slot, as shown in Figure 49 on page 91. Replace both screws in the holes on the top of each bracket and tighten. 11. Connect each fan’s power cable to the appropriate fan header. Carefully use your fingers or needle-nose pliers to push the cable socket onto the header. Ensure that you do not loosen memory modules, VRMs, or other components. 12. Reconnect all SATA data and power cables to the hard disks in the hard disk tray. Ensure that you reconnect all data cables exactly as they were before you disconnected them. See “R3040S Hard Disk Tray, Drive Layout, and SATA Headers on Motherboard” on page 85 for more information. 13. Replace the hard disk tray and secure the tray with the four screws that you previously removed. 14. Ensure that all SATA cables are fully seated on the motherboard headers, and that all memory modules and VRMs are fully seated. You can now replace the blade in a chassis, as described in “PC Blade Installation” on page 58, and power on the blade. R-Series Data Center Products User’s Guide Hardware Upgrade and Replacement Procedures • 93 R3080D Fan The R3080D CPU fan is attached to the CPU heatsink by a bracket. CPU Heatsink Fan Bracket Power Cable NOTE Do not remove the CPU heatsink from the motherboard. Only remove the fan bracket, as shown in the following figure. Perform the following steps to replace the CPU fan. 1. Power off the blade and remove it from the chassis. Place the blade on a stable surface, such as a desk or a bench. 2. Disconnect the fan power cable, located immediately above the fan, from the motherboard header labeled CPU FAN1. CPU FAN1 Power Cable Header Heatsink and Fan 3. Use a Phillips screwdriver to remove both bracket screws from the heatsink. NOTE Do not remove the heatsink from the motherboard. Only remove the fan bracket, as shown in the following figure 94 • Hardware Upgrade and Replacement Procedures R-Series Data Center Products User’s Guide . Heatsink 4. Remove the 4 screws from the bracket and remove the bracket from the fan. 5. Now attach the bracket to the new fan. Ensure that the: • Power cable exits the bottom of the fan • Bracket is oriented so that flange holes are on the bottom • Bracket is attached to the side of the fan housing where the rotating fan blades are located Bracket Attached to Side Closest to Rotating Blades Airflow toward Heatsink and Rear of Blade Power Cable Exits Bottom Flange Holes on Bottom R-Series Data Center Products User’s Guide Hardware Upgrade and Replacement Procedures • 95 An indicator on the bottom of the fan shows the direction of airflow. Airflow Indicator on Bottom of Fan Power Cable Ensure that air flows toward the heatsink and toward the rear of the blade. Heatsink Fan Airflow toward Rear of Blade Place the bracket on the side of the fan where the rotating blades are located. Insert 4 screws you removed in the previous step and tighten. 6. Attach the fan to the heatsink by replacing the two screws you removed in step 3. Ensure the fan is mounted so the power cable: • Is on the bottom, against the motherboard • Exits the right side of the fan, closest to the CPU FAN1 header on the motherboard 7. Connect the power cable to the CPU FAN1 header on the motherboard. The fan is now replaced. You can now return the blade to a chassis as described in “Installing PC Blades” on page 58. 96 • Hardware Upgrade and Replacement Procedures R-Series Data Center Products User’s Guide Replacing a Front LCD Panel This section describes how to replace the LCD front panel of an R-series blade. 138 Figure 52 The Front LCD Panel The following instructions assume that you have a ClearCube Front LCD Panel kit, ClearCube part number G081001. 1. Power off the blade and remove it from the chassis. Place the blade on a stable surface, such as a desk or a bench. 2. Perform one of the following steps: • R3040S—Position the blade so the hard disk tray is facing up (the hard disk tray is located on the left side of the blade when you are looking at the front of the blade). • R3080D and R1350—Lay the blade on its side so the motherboard is visible. 3. Perform one of the following steps to remove the screw that secures the front LCD panel to the blade: R-Series Data Center Products User’s Guide Hardware Upgrade and Replacement Procedures • 97 • R3040S—Insert a screwdriver in the access hole, shown below, to remove the screw. Access Hole for Front LCD Panel Screw Insert Screwdriver Here • R3080D and R1350—Remove the LCD screw, shown in the following figure. LCD Screw Tab LCD Cable 4. Remove the LCD panel. a. From the front of the blade, grasp the LCD panel and cable and lift the panel up. b. Gently rotate the LCD panel forward toward the opposite, interior wall of the blade. Ensure that you do not bind or break the tab extending through the hole 98 • Hardware Upgrade and Replacement Procedures R-Series Data Center Products User’s Guide shown below. It might help to push up on the lower tab from the outside of the blade. Ensure That Plastic Tab Is Clear of Blade Frame c. When the panel is clear of the USB connector, pull the panel out of the blade. 5. Remove the LCD by grasping the end of the cable and by grasping the base of the LCD panel. Pull apart to separate. 6. Connect the LCD cable and the replacement front LCD panel. 7. Insert the replacement LCD in the blade (it can be helpful to rotate the LCD panel before inserting it in the blade). Insert the tab into the slot and push down to fully seat the panel. Ensure that the bump on the bottom of the LCD panel rests in the hole in the center of the supporting surface. Hole Bump R-Series Data Center Products User’s Guide Hardware Upgrade and Replacement Procedures • 99 8. Replace the LCD panel screw, ensuring that the plastic LCD panel flange is on top of the metal blade frame flange, and that the holes are aligned. Do not overtighten or you can break the plastic LCD flange. Ensure That Plastic Flange is on Top of Metal Flange and Holes are Aligned Your front LCD panel replacement is now complete. Replacing the CMOS Memory Battery ClearCube blades use a lithium coin cell to maintain CMOS settings. When blades remain powered on or on stand-by power, these cells rarely require replacing. If you notice that CMOS settings do not appear to remain set, you may need to replace this battery. The CMOS memory battery is located under the hard disk on single-width blades, or under the primary hard disk (located closest to the power supply) on double-width blades. CAUTION: Risk of battery explosion if battery is inserted incorrectly or is replaced by an incorrect type. Dispose of used battery according to manufacturer instructions. Perform the following steps to replace the CMOS battery in an R-series blade. 1. Remove the blade from the chassis, as described in “Removing a PC Blade” on page 71. Lay the blade on a stable surface, such as a table top. 2. Locate the battery on the blade: 100 • Hardware Upgrade and Replacement Procedures R-Series Data Center Products User’s Guide • R3040S—CMOS battery is located near the rear edge of the blade, below the J4 header and the JP3 jumper. Side View Rear View Release Tab Battery Battery Release Tab Graphics Card Interposers Battery Holder • R3080D—CMOS battery is located near the center of the blade, adjacent to the processor and beneath the video card. Ensure that you remove any video card that is installed. The following figure shows a blade with the video card removed. Battery • R1350—CMOS battery is located on the lower edge of the motherboard, beneath the hard disk. Ensure that you remove the hard disk, as described in “R1350 Hard Disk” on page 89, before removing the battery. Battery R-Series Data Center Products User’s Guide Hardware Upgrade and Replacement Procedures • 101 3. There is a release tab at the top of the battery holder that releases the battery when you push the tab away from the battery. Use a non-conductive tool (such as a plastic writing pen) to push the release tab and remove the battery with your fingers. The R1350 battery holder does not have a release tab; use your finger to remove the battery. 4. Allow at least 30 seconds for the CMOS memory to be lost before inserting a new battery. NOTE Observe battery polarity. 5. Replace the blade in the chassis. 6. Power up the blade and restore any custom CMOS configuration settings. Dispose of the old battery in an approved fashion. Replacing Blade Interposer Cards The following sections describe how to replace blade interposer cards on R-series blades. R3040S Interposer Cards The R3040S uses interposer cards to enable data and signal transmission from the blade to the chassis backplane. Interposers are located on the bottom of the blade, as shown in the following figure. Do Not Replace This Interposer Replaceable Interposer Card Figure 53 The R3040S Interposer Cards; Replace Only the Shorter Interposer in the Black Shroud You can replace the shorter of the two interposers, the R3040S secondary interposer (part number G0100040). Perform the following steps to replace the interposer. 1. Power down the blade and remove it from the chassis as described in “Removing a PC Blade” on page 71. Place the blade on a stable surface, such as a table, so that the interposers are facing up. 102 • Hardware Upgrade and Replacement Procedures R-Series Data Center Products User’s Guide 2. Ensure that you are working with the shorter of the two interposers, contained in the black, plastic shroud. 3. Unscrew and remove both screws securing the interposer to the blade. Screws 4. Use your finger to gently lift the right side of the shroud and remove it by sliding it off the interposer to the right. 5. Remove the interposer: a. Using your right hand, place your thumb on the edge of the blade frame, just to the right of the interposer. b. Place the pad of your index finger on the edge of the circuit board. Gently push up with your finger until the interposer is free from the blade. Discard this interposer. Contact [email protected] for information about recycling ClearCube products, or contact your local electronic waste recycling authority. 6. Place the plastic shroud on the replacement interposer. R-Series Data Center Products User’s Guide Hardware Upgrade and Replacement Procedures • 103 a. Hold the green interposer so the text and labels on the top face up, and hold the shroud so that the CLEARCUBE logo is facing up. b. Hold the shroud above the interposer and slide the gold fingers on the left edge of the interposer though the slot on the left edge of the shroud. Shroud Interposer c. Align the holes of both pieces, and make sure that the pins on the top of the interposer rest in the recesses on the underside of the shroud. NOTE Do not push or force the interposer and shroud together; the shroud only rests on top of the interposer. 7. Position the shroud and interposer over the gold fingers on the motherboard, accessible on the edge of blade. Press down gently to fully seat the interposer. Interposer Front of Blade Gold Fingers on Motherboard 8. Replace screws and screw the shroud and interposer into the blade frame. You can now insert the blade back into a chassis, as described in “Installing PC Blades” on page 58, and power on the blade. R3080D and R1350 Interposer Card While the R3040S has two interposers, the R3080D and the R1350 blades have a single blade interposer card. You can perform the procedure described in the previous 104 • Hardware Upgrade and Replacement Procedures R-Series Data Center Products User’s Guide section, “R3040S Interposer Cards” on page 102, to remove an R3080D or an R1350 interposer. Replacing R4300 Modules R4300 modules are hot-swappable. To replace a module, do the following: 1. Label all cables attached to the module. 2. Remove the cables. 3. Press down on the two green levers on each side of the module. NOTE Management modules have only one lever. 4. Pull the module from its bay. The old module must remain out of the bay for at least five seconds for the replacement module to be recognized by the system. 5. Place the replacement module squarely in the bay, slide it in, and press firmly to seat it. 6. Replace the cables. Do not remove or insert R4300 modules during a firmware update. When the RMM Status LEDs are flashing amber, a firmware update is in progress. Replacing the R4300 Fan Pack To replace the Fan Pack on the R4300 chassis, do the following: Disconnect all sources of power before servicing the R4300 chassis. 1. Power down the blades in the chassis. 2. Unplug the chassis power cords. 3. Using a #2 Phillips screwdriver, remove the 5 screws on the back of the chassis that attach the fan pack. 4. Insert a finger in the slot on the left side of the fan pack and slowly pull the fan pack out. 5. Slowly insert the new fan pack to ensure proper seating of the connector. R-Series Data Center Products User’s Guide Hardware Upgrade and Replacement Procedures • 105 6. Replace the screws to secure the fan pack. 7. Replace the power cords. 8. Turn on the blades. Figure 54 R4300 Fan Pack Attachment Points Replacing an R4300 Power Supply Unit (PSU) To replace a PSU in the R4300 chassis, do the following: 1. Power down the blades in the chassis. 2. Unplug the chassis power cords. 3. Using a #2 Phillips screwdriver, remove the 5 screws on the back of the chassis that attach the fan pack. Insert a finger in the slot on the left side of the fan pack and slowly pull the fan pack out. 4. Pull the failed PSU (the one with the red LED displaying) straight out until it clears the chassis. 5. Insert the replacement PSU and push it firmly until the connector seats. A green LED is displayed. 6. Slowly insert the new fan pack to ensure proper seating of the connector. 7. Replace the screws to secure the fan pack. 8. Replace the power cords. 9. Turn on the blades. 106 • Hardware Upgrade and Replacement Procedures R-Series Data Center Products User’s Guide Chapter 5. Troubleshooting If you have any problems with your system, please check the following items prior to calling for support. PCoIP Issues PCoIP Host on Different Subnet Than PCoIP Client Is Unable to Wake Up from Various Power States This issue is restricted to R3040S blades that contain V5120, V5220, and V5240 PCoIP host cards. When a PCoIP host system is shut down (S5) or is in hibernate (S4), the PCoIP host transitions to receive a Wake-on-Lan (WOL) packet. Because the host is no longer powered (or in low power mode depending on architecture), the TCP/IP stack is no longer maintained. The PCoIP host will now only respond to a WOL packet and will not respond to an ARP WHOHAS message from the local gateway/router. After the PCoIP host has been powered down for a short amount of time (typically 5 to 10 minutes), the entry for the PCoIP host in the gateway/router's ARP table will decay. The gateway/router will now send an ARP WHOHAS message to determine how to route the WOL packet. Because the PCoIP host cannot respond to the APR WHOHAS message, a WOL packet will be lost. The issue is seen under the following conditions • The PCoIP host and client are not on the same subnet • The PCoIP host has been in a sleep state for greater than approximately 5 to 10 minutes (gateway/router dependent) The following list details multiple workarounds for this issue. • Manually power on or power cycle the host. • If you have a ClearCube Sentral server in your environment that is on the same subnet as the host, use Sentral to wake up the host. • Connect PCoIP host and clients in your environment using direct connections. • Use a single subnet for PCoIP hosts and clients in your environment. If you use multiple subnets, ensure that connected clients and hosts are on the same subnet. • Use static IPs and permanent ARP table entries for each PCoIP host. R-Series Data Center Products User’s Guide Troubleshooting • 107 Power Issues No power to PC blade • • • Check the power button on the front of the PC blade. Verify that the power circuit to the chassis is operational. Check all power strips, UPS, and extension cords to make sure they are in working order. No video or link lights at desktops and no power to blades • R4300: Have a qualified service technician check the fuse. CAUTION: DOUBLE POLE/NEUTRAL FUSING The DIM employs fuses in both the neutral and hot lines. Chassis power does not come on • R4300: Have a qualified service technician check the fuse. Video Issues Digital link shows red at blade but green on C/Port • The switch matrix in the R4300 chassis may be in a partially switched condition. Switch the affected blade to the Admin C/Port and then back. NOTE 108 • Troubleshooting The C/Port light is only applicable if a C/Port is connected to the blade. If you are connecting to a blade with a PCoIP zero client and a C/Port is not connected to the blade, the C/Port light is not applicable and is always red. R-Series Data Center Products User’s Guide Fiber Optic Troubleshooting No video and/or digital link present • • • Check all the C/Port and fiber optic cables and their associated jacks for signs of damage or wear. Replace any suspicious cables with new, commercially manufactured cables and test the remaining cables with a quality tester. Non-commercial cables are frequently the culprits when equipment fails to work properly. For this reason, ClearCube strongly discourages the use of Non-commercial cables. Check that the power supply brick is the proper one for the Fiber C/port. It should have a rated output of +5 VDC, 7 A; –5 VDC, 1 A. The power supply for the standard C/Port and the MVX does not work with the Fiber C/Port. The monitor’s Auto-Adjust does not give a clear, sharp image • • Monitor auto-adjust routines do not always optimally adjust the image. Using the auto-adjust routine a second or even third time may provide a better result. Because all monitor manufactures have unique adjustment settings and auto-adjust algorithms, customers should contact the monitor manufacturer directly for assistance in achieving the optimal image quality. Use the monitor’s manual functions to adjust picture size, position, brightness, and contrast. Network and PXE Booting Troubleshooting Unable to network or PXE boot using an R3040S If you are unable to to image an R3040S using a PXE server, try disabling all NICs except the primary NIC. Perform the following steps. 1. At boot time, press F2 to enter BIOS Setup Utility. 2. From the PCIPnP menu, scroll to the bottom of the screen. 3. Ensure that Disable Lan controller #2 through #4 are set to Yes. 4. Then boot to your PXE server. After imaging the blade, return to the PCIPnP menu and re-enable all four NICs. R-Series Data Center Products User’s Guide Troubleshooting • 109 110 • Troubleshooting R-Series Data Center Products User’s Guide Appendix A. Specifications R-Series Blades Table 1 PC Blade Specifications R1350 • Core2 Duo or Intel Pentium 4 with • Hyper Threading LGA775 socket Intel® Xeon® processor 5500 series (Nehalem microarchitecture) • Intel 945G with 1066 MHz front-side bus • Intel 5520 chipset w/ 6.4GT/sec Quick Path Interconnect • DDR2-667, un-registered, non-ECC Two DIMM sockets Dual-Channel, Interleaved 2 GB per socket; 4 GB Maximum • • DDR3-1333, Reg/ECC SDRAM DDR3-1333, non-ECC SDRAM Processor • Chipset Memory R3040S • • • Video • • • V5220 PCoIP™ remote graphics adapter • Integrated Intel GMA 950 Graphics NVIDIA® Quadro4 NVS285 with • 128 MB video memory (upgrade option) • Audio • AC97 compliant via USB • • Dual network NICs (with MGA6 or integrated graphics): • 10/100/1000 Mb/s Primary 10/100 Mb/s Secondary 1 Gigabit NIC when using PCoIP • Host card SMB support • DMI 2.0 • Networking • Manageability • ACPI • • • WfM 2.0 • SATA 3 Gb/s. 3.5-inch, half height, • scalable to any capacity drive • SSD SLC SATA II Hard Disk • • Operating System Support • • Front Panel USB Port • • Microsoft® Windows® XP Professional Microsoft Vista™ capable Linux ready USB 2.0 R-Series Data Center Products User’s Guide • • R3080D • • Intel Core™ i5 and i7 series (Nehalem microarchitecture) Intel Pentium® Dual-Core • Intel Q57 chipset with 6.4GT/sec Quick-path Interconnect • DDR3-1333, Non-ECC SDRAM v5220 PCoIP remote graphics adapter • v5240 PCoIP remote graphics adapter (V5220 required) • NVIDIA Quadro4 PCIe (Not compatible with v5220 option) PCIe x16 GeForce 8400GS 256MB V5220 PCoIP remote graphics adapter NVIDIA Quadro4 PCIe (Not compatible with V5220 option) AC97 compliant via USB • AC97 compliant via USB 4 Gigabit Ethernet NICs when using ClearCube MGA6 card or traditional video card 3 Gigabit Ethernet NICs when using PCoIP Host card • 2 Gigabit Ethernet NICs when using ClearCube MGA6 card or integrated graphics 1 Gigabit Ethernet NIC when using PCoIP Host card ACPI AMT • • ACPI AMT SATA II SSD SLC SATA II • • SATA II SSD SLC SATA II • Microsoft Windows XP Pro Windows 7 Ready, Windows 2003 Server Ready, 2008 Server Ready, and Linux® Ready • Windows XP Professional SP2 Windows 7 Professional 32-bit and • 64-bit • Windows 7 Ultimate 64-bit Windows Server 2008 R2, Standard License with CD-ROM Without operating system • USB 2.0 USB 2.0 • • • Appendix A. Specifications • 111 BIOS Dimensions • • Phoenix® BIOS • Supports PXE, Secure Agent, Multiprobe, PnP, Phoenix Phlash & • Multikey • • 4.7” (H) x 23.5” (L) x 1.9” (W) Weight: 6 lbs. Environmental • Stationary office, 0–35C AMI® BIOS Supports PXE • • AMI BIOS Supports PXE • • 4.7” (H) x 23.5” (L) x 4.7” (W) Weight: 10-13 lbs. depending on configuration • • Size: 4.7” (H) x 23.5” (D) x 1.9” (W) Weight: 4 to 5 lbs, depending on configuration • Stationary office, 0–35C • Stationary office, 0–35C R4300 Chassis Table 2 R4300 Chassis Specifications Connections • • • • • • 8-slot chassis Hot-swappable modules provide Ethernet, C/Port, and USB connections Backwards compatible with Direct Connect or Blade Switching BackPack Fit 14 chassis (112 PC blades) in a single 42U rack or cabinet Four variable-speed exhaust fans located in rear Rear power connection Dimensions • • 3U (5.25-inch high, standard 19-inch rack width) 17.0 inches (w) x 5.25 inches (h) x 29.8inches (d) Power Input • • • • • Dual AC input 100–240 VAC, 50/60 Hz, dual redundant PSUs Power supplied to each individual PC blade slot 1440 W power required per full chassis (max.) 12 Amps current required per full chassis (at 120 VAC) (max.) T15A, 250V (5x20 mm slow-acting 15 amp fuse) • AC Input Fuse R4300 CAUTION DOUBLE POLE/NEUTRAL FUSING Weight • 42 lbs empty, 85 lbs with 8 PC blades Environmental • Rack mounted, 0–35º Celsius (C) F6150–160 Fiber Transceiver Table 3 Fiber Transceiver Specifications Connector I/O • 16 RJ-45 copper inputs and 16 MT-RJ dual fiber outputs Fiber Type • 62.5 micron, multi-mode, straight-through connection fiber Max. Distance • 60/62.5 micron: 2000 meters (6562 feet) for each C/Port connection 112 • Appendix A. Specifications R-Series Data Center Products User’s Guide Fiber Signal Loss • Maximum signal attenuation through all fiber runs, patch panels and connectors must meet the following specification: 50/62.5 micron fiber: 4.5 dB Max. Jumper Length • R4300 to Transceiver jumper max. length = 100 meters (333 feet) Rack Height • 1U (1.75 inches) Rack mount kit included Power Adapter • • Dual internal, fully redundant, universal — IEC standard connector Input 100–240 VAC, 50/60 Hz Environmental • Stationary installation, 0–35° C ambient temperature R-Series Data Center Products User’s Guide Appendix A. Specifications • 113 114 • Appendix A. Specifications R-Series Data Center Products User’s Guide Appendix B. Regulatory Compliance The products described in this document meet the following: • • • • Electromagnetic Compatibility (EMC) Various safety compliance standards CE compliance Various environmental standards, including RoHS and REACH See support.clearcube.com for regulatory and environmental certifications for all ClearCube Technology, Inc. products. R-Series Data Center Products User’s Guide Appendix B. Regulatory Compliance • 115 116 • Appendix B. Regulatory Compliance R-Series Data Center Products User’s Guide Appendix C. Technical Support Contact Information In the event any problems arise with your ClearCube hardware or software, we recommend that you first check the support Web site for any relevant technical bulletins and updates for your specific product(s) before calling your authorized reseller or the ClearCube Technical Support Department. If your system is being serviced by a local service partner for ClearCube (such as an authorized reseller), please refer to the contact information provided by the service partner or refer to the ClearCube Web site for partner contact information. For direct access to ClearCube technical support use the contact information below. [email protected] Email address for ClearCube Technical Support support.clearcube.com ClearCube Support Web site http://www.clearcube.com/support/controller/rma.php Link to service part replacement form on the Web. (866) 652-3400 Toll-free number for ClearCube Technical Support (512) 652-3400 ClearCube Technical Support If you are instructed to return any hardware, you must obtain a Return Merchandise Authorization (RMA) number from ClearCube and clearly mark the RMA number on the outside of all shipments to ensure proper and prompt handling. Please do not return any equipment without the appropriate ClearCube packaging materials. If you no longer have ClearCube boxes, please contact us for replacement boxes. Product Updates To receive regular product update notifications from ClearCube, please visit http://www.clearcube.com/support/controller/product_updates_reg.php on the web. It's free to register and you can receive notifications on all product updates, or on updates to specific product lines that you select. When ClearCube releases new hardware or software, you will be among the first to know. All ClearCube software comes with one year of maintenance included, entitling you to free software upgrades, and registering for notifications is the best way to stay current. Automatic notifications will allow you to keep your environment up to date with the latest ClearCube offerings. R-Series Data Center Products User’s Guide Appendix C. Technical Support • 117 Return Merchandise Authorization (RMA) ClearCube’s policy for products under warranty is to ship replacement parts to the customer within 24-48 hours after the replacement has been approved by the ClearCube Tech Support department. If an issue arises that may require a warranty replacement part, the customer should places a telephone call to Tech Support (see numbers above), use the RMA form on the CCT Support Web site (support.clearcube.com), or send an e-mail to ClearCube Tech Support ([email protected]) with the product issue. For product RMAs, customers need to provide the following information: • • • • Name and address information Product serial number(s) Product configuration information A brief description of the product. Tech Support opens a call ticket and provides a case number to the customer. Tech Support then gathers required information on issue, and runs its troubleshooting process to determine whether a replacement part is required. If the product is covered under warranty, Tech Support makes arrangements to ship a replacement to the customer. If the product is not under CCT warranty, Tech Support advises the customer of the cost to replace the product or gives information on the manufacturer’s warranty for non-ClearCube branded product. Customers who choose to purchase replacement product should contact their Account Executive to confirm the replacement purchase, who follows the standard process for a new purchase. Fuse and Power Cord Replacement ClearCube equipment has been designed with a three-conductor IEC 60320 appliance inlet that – with the proper power cord – connects the building’s external protective earthing conductor to all accessible metal parts of the enclosure. To minimize shock hazard, make sure your electrical power outlet has an appropriate earth safety ground that is connected each time you power on the equipment. Use the AC power cord packaged and supplied with the chassis. For systems shipped to countries that utilize a 100–130-volt power system, the power cord is rated at 15 amps. Systems shipped to countries with a 208–240-volt power systems are packaged with power cords rated at 10 amps. Older model BackPacks utilized 10 amp-rated power cords that are NOT approved for use with current model BackPacks on 100–130-volt power systems. The standard 10 amp power cords are acceptable for use 118 • Appendix C. Technical Support R-Series Data Center Products User’s Guide with the Fiber Transceiver. Refer to the Safety Guidelines on page 4 for more information. The maximum steady-state current draw of a single fully loaded chassis ranges between 6 and 8 amps at 120 VAC, based on the level of user activity. The peak initial current draw is 12 amps. If you are placing multiple chassis on a single power circuit, make sure that the circuit can safely handle the combined currents of all the equipment. Therefore, if you place two chassis on a single branch circuit, it must be able to support a peak current of 25 amps at 120 VAC. R-Series Data Center Products User’s Guide Appendix C. Technical Support • 119 120 • Appendix C. Technical Support R-Series Data Center Products User’s Guide Appendix D. Warranty ClearCube Warranty For One to Three Years PURPOSE. This ClearCube hardware warranty statement defines for you, the “Customer”, the warranty provided by ClearCube on equipment manufactured by ClearCube and purchased by you as new from ClearCube or a ClearCube authorized dealer (“ClearCube Product”). Please keep a copy of your purchase order and invoice as documentation of your warranty. Customer must maintain proof of purchase for the covered ClearCube Product. WARRANTY PROVISIONS Warranty Repair or Replacement. ClearCube warrants to you that for a period of one (1) year [or in the case of an extended warranty purchase, up to three (3) years as applicable] from the date of original purchase of the ClearCube Product or the manufacturer’s date (“Warranty Period”), such ClearCube Product will be free from defects in materials and workmanship when installed and operated in accordance with ClearCube’s specifications for such ClearCube Product and used for the purpose for which it was designed (such defect hereinafter “Product Defect”). ClearCube, however, does not warrant that any ClearCube Product will operate uninterrupted or error-free. If a ClearCube Product contains a Product Defect and customer notifies ClearCube via our Web site (by completing the required RMA form), email, or in writing of such Product Defect within the Warranty Period, ClearCube will repair or replace such ClearCube Product containing such Product Defect within a commercially reasonable period of time, subject to the conditions set forth herein. THE ABOVE REPAIR OR REPLACEMENT REMEDY SHALL BE CLEARCUBE’S SOLE OBLIGATION AND CUSTOMER’S SOLE AND EXCLUSIVE REMEDY FOR BREACH OF THE CLEARCUBE PRODUCT WARRANTY. RMA and Shipping Procedures. In order to receive warranty support, you must obtain from ClearCube, the ClearCube Authorized Support Provider, or other ClearCube designate, an authorization in the form of a Return Merchandise Authorization (“RMA”) number within the warranty period and prior to returning any ClearCube Product to ClearCube. Upon issuance of an RMA for the claimed defective ClearCube Product (“Defective Product”), ClearCube may, but is not obligated to, ship you a replacement product (“Replacement Product”) in advance of receiving the returned Defective Product. Upon issuance of an RMA, you must promptly return the Defective Product to ClearCube, the ClearCube Authorized Support Provider, or other ClearCube designate for repair. If you have received a Replacement Product in advance, the packaging for such Replacement Product contains a pre-paid return label for shipment of the Defective Product in the United States. Defective Products should be returned in the original ClearCube packaging and shipping carton or, if applicable, the packaging and shipping carton containing the Replacement Product (“Approved Packaging”) and the RMA number must be marked on the outside of the box in which the Defective Product is being returned. ClearCube is not responsible for shipping damage incurred when products have been returned in anything other than Approved Packaging. If returned products are damaged due to unsuitable packaging ClearCube will invoice Customer for the replacement cost of the damaged items. Product sold outside of the United States shall follow the same procedures with the authorized distributor through which the product was purchased. The returned products must be shipped to ClearCube utilizing the enclosed Package Returns Program (PRP) shipping label only. Utilizing the enclosed PRP shipping label provides a confirmed tracking mechanism for both Customer and ClearCube while insuring the product is shipped to the proper address. R-Series Data Center Products User’s Guide Appendix D. Warranty • 121 The Defective Product must be shipped back to ClearCube within five (5) business days of ClearCube’s issuance of a RMA for such Defective Product. If ClearCube issues a RMA for Defective Product and ships a Replacement Product to customer, customer will be billed in accordance with the prices and payment terms contained in its original invoice for any Defective Product that is not received by ClearCube, the ClearCube Authorized Support Provider, or other ClearCube designate within ten (10) business days of the date of such RMA. Data Backup Procedures. The customer is solely responsible for backing up all data and programs in compliance with the applicable license agreements prior to returning the ClearCube Product to ClearCube for service under this Warranty. ClearCube has sole discretion over whether to repair Defective Product or ship Replacement Product under this warranty. ClearCube does not warrant the loss or corruption of data or software programs. As a practice, ClearCube, the ClearCube Service Provider, or other ClearCube RMA Centers will delete all information on storage devices returned to ClearCube. ClearCube shall not be liable for any information, including without limitation data and software, left on such ClearCube Product by Customer. Used and Reconditioned Parts. Unless otherwise stated, and to the extent permitted by local law, ClearCube may repair or replace ClearCube Products or any hardware components thereof with products and/ or components that are have been subject to prior incidental use or that are used and have been refurbished, reconditioned or remanufactured. In addition ClearCube may repair or replace ClearCube Products or any hardware components thereof with Products and/or components that are equivalent or better in performance to the Products or components being repaired or replaced. Third Party Products. ClearCube is not responsible for, and warranty service herein does not cover, hardware, components or peripherals not manufactured by ClearCube (“Non-ClearCube Hardware”), including without limitation products manufactured by third parties which are installed as part of a system with the ClearCube Product, or products external to the central processor unit–such as external storage subsystems, printers, and other peripherals. Customer agrees to look to the manufacturer of such Non-ClearCube Hardware for any applicable warranty coverage, and acknowledges such warranty coverage, if any, may be subject to separate terms and conditions provided by the manufacturers of such Non-ClearCube Hardware and proof of purchase requirements. Excluded Coverage. This Warranty does not apply to defects resulting from: (a) improper or inadequate maintenance or calibration; (b) software, interfacing, supplies, or consumable materials; (c) Non-ClearCube Hardware; (d) parts not supplied by ClearCube; (e) unauthorized repair, maintenance, modification or misuse; (f) operation outside of the published operating specifications for the ClearCube Product, including but not limited to improper temperature control or improper power; (g) improper site preparations or maintenance; (h) virus infections; (i) lightning strikes, power surges, acts of God, acts of Terrorism, nuclear disaster, or any other cause outside the reasonable control of ClearCube; or (j) such other exclusions as may be expressly set forth in this Warranty Statement. WARRANTY DISCLAIMER. TO THE MAXIMUM EXTENT PERMITTED BY APPLICABLE LAW AND EXCEPT FOR THE WARRANTY COVERAGE EXPRESSLY PROVIDED IN THIS WARRANTY STATEMENT, CLEARCUBE DISCLAIMS ALL OTHER REPRESENTATIONS, WARRANTIES AND CONDITIONS, EITHER EXPRESS OR IMPLIED, INCLUDING BUT NOT LIMITED TO IMPLIED REPRESENTATIONS, WARRANTIES OR CONDITIONS OF MERCHANTABILITY, FITNESS FOR A PARTICULAR PURPOSE, SATISFACTORY QUALITY, SUITABILITY AND NON INFRINGEMENT OF THIRD PARTY INTELLECTUAL PROPERTY RIGHTS. LIMITATION OF LIABILITIES. TO THE MAXIMUM EXTENT PERMITTED BY APPLICABLE LAW, IN NO EVENT SHALL CLEARCUBE BE LIABLE FOR ANY SPECIAL, INCIDENTAL, CONSEQUENTIAL OR INDIRECT DAMAGES WHATSOEVER (INCLUDING WITHOUT LIMITATION, DAMAGES FOR LOSS OF BUSINESS PROFITS, BUSINESS INTERRUPTION, LOSS OF DATA OR BUSINESS INFORMATION, LOSS OF USE OR ANY OTHER PECUNIARY LOSS) ARISING OUT OF THE USE OF OR INABILITY TO USE THE CLEARCUBE PRODUCT, OF THIS EXTENDED WARRANTY OR THE PROVISION OF OR FAILURE TO PROVIDE WARRANTY SERVICE, WHETHER BASED IN CONTRACT, TORT OR OTHERWISE EVEN IF CLEARCUBE HAS BEEN ADVISED OF THE POSSIBILITY OF SUCH DAMAGES. SOME JURISDICTIONS MAY NOT ALLOW DISCLAIMERS OF WARRANTIES OR LIMITATIONS OF LIABILITIES TO THE FULL EXTENT SET FORTH ABOVE. 122 • Appendix D. Warranty R-Series Data Center Products User’s Guide GOVERNING LAW. These terms and conditions shall be governed by the laws of the State of Texas, excluding its choice of law provisions. The parties specifically disclaim application of the UN Convention on Contracts for the International Sale of Goods. SUPPORT CONTACTS. [email protected] support.clearcube.com support.clearcube.com/rma (866) 652-3400 Email address to ClearCube Technical Support ClearCube Support Web site Link to service part replacement form on the Web Direct line to ClearCube Technical Support WEEE Directive For any electrical and electronic equipment subject to European Union Directive 2002/96/EC produced by ClearCube Technology, Inc. which is exported, imported or otherwise transferred into a European Union Member State and is used in connection with the subject matter of this licence by a licensee who is a business user of the Equipment, the licensee shall be responsible for ensuring, and shall meet all the costs and expenses of, the collection, treatment, recovery and environmentally sound disposal of the Equipment in the relevant Member State. Where such Equipment is to be used to replace equivalent products or products fulfilling the same function (“Replaced Equipment”) the licensee agrees to accept the same obligations in respect of such Replaced Equipment. The licensee shall also be responsible for complying with all the reporting requirements under Waste Legislation in the relevant Member State. The licensee hereby agrees that the collection, treatment, recovery and environmentally sound disposal of any Equipment or Replaced Equipment, and compliance with relevant reporting requirements, shall be in accordance with the provisions of the WEEE Directive and Waste Legislation. The licensee also agrees to defend, indemnify and hold ClearCube Technology, Inc. and its suppliers harmless against any claims arising out of its violation of the above obligations. For purposes of this license agreement, the following definitions shall apply: “EEE” means electrical and electronic equipment subject to the WEEE Directive; ”Equipment” means any EEE produced by ClearCube or its subcontractors; “Waste Legislation” means all statutes, regulations and subordinate legislation, treaties, European Union laws, common law, statutory or non-statutory guidance, circulars, codes of practice, directives and conventions which at any time relate to WEEE, including, without limitation, the WEEE Directive; “WEEE Directive” means Directive 2002/96/EC on WEEE; and “WEEE” means waste EEE. R-Series Data Center Products User’s Guide Appendix D. Warranty • 123 124 • Appendix D. Warranty R-Series Data Center Products User’s Guide Appendix E. Waste Electrical and Electronic Equipment Directive (WEEE) WEEE Information The products described in this document are subject to regulation under the European Union Directive 2002/96/EC, that mandates separate waste collection, treatment, and recycling of electronic products. This directive is commonly known as WEEE, for Waste from Electrical and Electronic Equipment, and its intent is to promote the safe and sensible disposal of products that have outlived their usefulness. The “crossed-out” trash bin symbol, shown to the left, identifies products that should be recycled, not simply discarded. ClearCube Technology supports the reuse, recycling, recovery, and responsible disposal of all products, not just our systems. ClearCube Technology is committed to meeting the requirements of the European Union WEEE Directive and is currently developing country-specific implementation plans that comply with the WEEE legislation. The goal of the directive is to reduce the environmental impact due to the disposal of electrical and electronic equipment that has reached the end of its useful service life. This directive goes into enforcement on August 13, 2005. ClearCube products are sold exclusively to commercial and industrial customers and not to private households. Under the WEEE legislation terms, commercial and industrial customers have the responsibility to ensure that all electrical and electronic equipment is disposed of properly and in accordance with all applicable laws and local regulations. For more information, visit the ClearCube Technology web site at www.clearcube.com, email at [email protected], or call at (866) 652-3400 or at +1 (512) 652-3400. Materials used in this product, if not disposed of properly, could have adverse effects on the environment and human health. Do not dispose of these products in unsorted municipal waste containers. Deliver electronic waste only to an approved recycling, and/or treatment facility. If one is not available, contact ClearCube for assistance. R-Series Data Center Products User’s Guide WEEE • 125 Informations sur la DEEE Les produits décrits dans ce document sont soumis à la directive 2002/96/EC de l'Union Européenne qui requiert la collecte, le traitement et le recyclage séparés des déchets issus d'équipements électroniques. Cette directive est connue sous le nom de DEEE (Déchets d'Équipements Électriques et Électroniques), ou WEEE en anglais (Waste from Electrical and Electronic Equipment) et son but est de promouvoir le traitement sûr et approprié des produits en fin de vie. Le symbole de la poubelle barrée, illustré ci-contre, identifie les équipements qui devraient être recyclés et non pas simplement jetés. ClearCube Technology approuve la réutilisation, le recyclage et la collecte de déchets de tous les équipements, y compris les siens. ClearCube Technology s'engage à être conforme aux exigences de la directive européenne DEEE et prépare actuellement des plans de mise en œuvre de cette législation DEEE dans chaque pays. Le but de la directive est de réduire l'impact sur l'environnement des déchets des équipements électriques et électroniques en fin de vie. Cette directive entre en vigueur le 13 août 2005. Les produits ClearCube sont vendus exclusivement à des professionnels du commerce et de l'industrie et non à des particuliers. Selon les termes de la loi DEEE les clients commerciaux et industriels sont responsables de l'enlèvement approprié des équipements électriques et électroniques, en conformité avec les lois actuelles et les réglementations locales. Pour de plus amples renseignements, veuillez consulter le site internet de ClearCube Technology à www.clearcube.com, envoyer un courriel à [email protected], ou appeler au (866) 652-3400 pour les clients en Amérique du Nord ou au +1 (512) 652-3400 pour les autres pays. Les matériaux utilisés pour la fabrication de ce produit peuvent avoir des conséquences graves sur l'environnement et la santé s'ils ne sont pas collectés correctement lors de leur mise au rebut. Ne pas jeter ces produits dans les poubelles municipales s'ils ne sont pas triés. Les déchets électroniques doivent être apportés aux services de recyclage et de traitement agréés. Si de tels services ne sont pas disponibles, contacter ClearCube pour assistance. Informationen über WEEE Die in diesem Dokument beschriebenen Geräte unterliegen der Richtlinie 2002/96/EG der Europäischen Union über Elektro- und Elektronikaltgeräte und deren Rücknahme, Verwertung und Recycling. Diese Richtlinie wird allgemein als WEEE ("Waste from Electrical and Electronic Equipment") bezeichnet. Sie hat zum Ziel, die sichere Entsorgung von Produkten nach deren Lebensdauer zu fördern. Das Symbol der durchgestrichenen Mülltonne, links gezeigt, kennzeichnet Produkte, die dem Recycling zuzuführen sind und nicht im Müll zu entsorgen sind. ClearCube Technology unterstützt die Wiederverwendung, das Recycling, die Wiederherstellung und umweltgerechte Entsorgung von allen Produkten, nicht nur von unseren Systemen. ClearCube Technology verpflichtet sich zur Einhaltung der Bedingungen der WEEERichtlinie der Europäischen Union und ist zur Zeit im Begriff, landesspezifische Implementierungspläne zu entwickeln, die der WEEE-Gesetzgebung unterliegen. Das Ziel dieser Richtlinie ist es, die Einwirkung auf die Umwelt durch die Entsorgung von 126 • WEEE R-Series Data Center Products User’s Guide Elektro- und Elektronikaltgeräten nach deren Lebensdauer zu reduzieren. Diese Richtlinie tritt am 13. August 2005 in Kraft. ClearCube-Produkte werden ausschließlich an kommerzielle und industrielle Kunden, jedoch nicht an Privathaushalte verkauft. Unter den Bedingungen der WEEE-Richtlinien sind kommerzielle und industrielle Kunden dafür verantwortlich, dass Elektro- und Elektronikaltgeräte auf geeignete Weise und gemäß allen anwendbaren Gesetzen und örtlichen Richtlinien entsorgt werden. Weitere Informationen erhalten Sie auf der ClearCube Technology-Website unter www.clearcube.com, per E-Mail unter [email protected] oder telefonisch unter +1-512-652-3400. Die in diesem Produkt verwendeten Materialien können bei unsachgemäßer Entsorgung zu nachteiligen Auswirkungen auf die Umwelt und auf die Gesundheit führen. Diese Produkte sind nicht in unsortierten städtischen oder gemeindlichen Müllbehältern zu entsorgen. Elektronikschrott ist nur an zugelassenen Recycling- und/oder Verwertungshöfen abzugeben. Sollte dies nicht verfügbar sein, wenden Sie sich an ClearCube für weitere Unterstützung. La información de REEE Los productos descritos en este documento son conforme a las regulaciones con sujeción debajo de a Parlamento Eurepeo y Consejo, la Directiva 2002/96/EC, esos mandatos separan la colección del desecho, el tratamiento de lo mismo, y el reciclaje de productos electrónicos. Esta directiva se conoce comúnmente como REEE, para los residuos del equipo eléctrico y electrónico, y su intención deberá promover la disposición sensata y segura de los productos que han sobrevivido su utilidad. El símbolo "contenedor te basura tachado" del compartimiento de la basura, mostrado a la izquierda, identifica los productos que deben ser reciclados, desechados no simplemente. La Tecnología ClearCube apoya el volver a emplear, reciclar, la recuperación, y la disposición responsable de todos los productos semejantes, no solamente nuestros sistemas. La Tecnología ClearCube esta cometida a cumplir con los requisitos de la directiva de la Unión Europea WEEE, y al corriente fomenta la implementación de planes país-especifico que conforman con la legislación de REEE. La meta de la directiva es reducir el impacto ecologista debido a la disposición del equipo eléctrico y electrónico que ha alcanzado el fin de su vida útil. Esta directiva se aplica de hecho en el 13 de agosto de 2005. Los productos de ClearCube se venden exclusivamente a los clientes de comercio y industria y no a hogares privados. Bajo los términos de la legislación de WEEE, los clientes comerciales y industriales tienen la responsabilidad de asegurar que todo equipo eléctrico y electrónico se descarten apropiadamente y de acuerdo con todas leyes aplicables y las regulaciones locales. Para más información, visite nuestra página Web (en Internet) de Tecnología ClearCube en www.clearcube.com, o enviar correo electrónico (email) a la tecnología de ClearCube en www.clearcube.com, el email en [email protected], también puede llamar a (866) 652-3400 o +1 (512) 652-3400. R-Series Data Center Products User’s Guide WEEE • 127 Los materiales usados en este producto, si no se descartan apropiadamente, podría tener efectos adversos en el ambiente y la salud humana. No descarte estos productos en contenedores municipales de desecho que no son surtidos. Entregue el desecho electrónico sólo a una facilidad aprobada de reciclaje, y/o de tratamiento. Si no hay uno disponible, contacte a ClearCube para asistencia. 128 • WEEE R-Series Data Center Products User’s Guide P/N G020078 Revision E 20100609