1
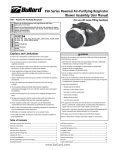
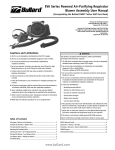
TM
PA20 Series Powered Air-Purifying Respirator
PA1/PA2 Blower Assembly User Manual
Powered Air-Purifying Respirator with High Efficiency (HE) Filter – Approval No. TC-21C-0765
PA20 PAPR
Cautions and Limitations
A. Not for use in atmospheres containing less than 19.5%
oxygen.
B. Not for use in atmospheres immediately dangerous to
life or health.
C. Do not exceed maximum use concentrations established
by regulatory standards.
F. Do not use respirator if airflow is less than four cfm
(115 lpm) for tight fitting face pieces or six cfm
(170 lpm) for hoods and/or helmets.
I. Contains electrical parts which have not been evaluated
as an ignition source in flammable or explosive
atmospheres by MSHA/NIOSH.
J. Failure to properly use and maintain this product could
result in injury or death.
L. Follow the manufacturer’s user instructions for
changing cartridges and/or filters.
M. All approved respirators shall be selected, fitted, used
and maintained in accordance with MSHA, OSHA and
other applicable regulations.
N. Never substitute, modify, add or omit parts. Use only
exact replacement parts in the configuration as
specified by the manufacturer.
O. Refer to User’s Instructions, and/or maintenance
manuals for information on use and maintenance of
these respirators.
P. NIOSH does not evaluate respirators for use as surgical
masks.
WARNING
Use strictly in accordance with instructions, labels and
limitations pertaining to the PA20 respirator.
1. The PA20 respirator does not supply oxygen. Use only
in adequately ventilated areas containing at least
19.5% oxygen.
2. Do not use when concentrations of contaminants are
immediately dangerous to life or health.
3. Do not use these respirators for respiratory
protection during abrasive blasting.
4. Do not use in circumstances where the airborne
concentration level of contaminant exceeds maximum
use concentration for this type of respirator as
established by regulatory standards.
5. Leave area immediately if:
• Breathing becomes difficult
• Dizziness or other distress occurs
• You taste or smell the contaminant
• Unit becomes damaged
• Battery alarm sounds
6. This apparatus must not be worn with the blower unit
switched off. If the blower switched off, a rapid buildup of carbon dioxide and depletion of oxygen may
occur, which could result in death or serious injury.
7. Never alter or modify this respirator. Use only NIOSH
approved PA20 components and replacement parts
for this respirator.
Failure to follow these warnings could result in death or
serious injury.
Table of Contents
Donning the Blower . . . . . . . . . . . . . . . . . . . . . . . . . . . . . . . . . . . 6
Principle of Operation . . . . . . . . . . . . . . . . . . . . . . . . . . . . . . . . . 2
Low Battery Alarm . . . . . . . . . . . . . . . . . . . . . . . . . . . . . . . . . . . . 6
Battery Pack . . . . . . . . . . . . . . . . . . . . . . . . . . . . . . . . . . . . . . . . . 3
Troubleshooting . . . . . . . . . . . . . . . . . . . . . . . . . . . . . . . . . . . . . . 7
Pre-Operational Inspection . . . . . . . . . . . . . . . . . . . . . . . . . . . . . 3
Cleaning and Storage . . . . . . . . . . . . . . . . . . . . . . . . . . . . . . . . . . 7
Mounting the Breathing Tube . . . . . . . . . . . . . . . . . . . . . . . . . . . . 4
Ordering Information . . . . . . . . . . . . . . . . . . . . . . . . . . . . . . . . . . 8
Checking Air Flow . . . . . . . . . . . . . . . . . . . . . . . . . . . . . . . . . . . . 4
NIOSH Approval Label . . . . . . . . . . . . . . . . . . . . . . . . . . . . . . . . . 9
High Efficiency Filter . . . . . . . . . . . . . . . . . . . . . . . . . . . . . . . . . . 5
Cautions and Limitations
Cautions and Limitations . . . . . . . . . . . . . . . . . . . . . . . . . . . . . . . 1
1
PA20 Series Powered Air-Purifying Respirator
PA1/PA2 Blower Assembly User Manual
PA1/PA2 - Principle of Operation
The PA20 Powered Air-Purifying Respirator (PAPR) System
is supplied in four parts:
1. The Blower Assembly (Part No. PA1, or Part No. PA2)
which includes:
PA1BU, or PA2BU Blower Unit with Battery
PA1FG Filter/Gasket
PA1SB Belt Assembly
PA1AFI Air Flow Indicator
User Instructions
2. The hood with headband suspension and/or hard hat,
or loose fitting facepiece. The following hood models
may be used with the PA1BU or PA2BU blower unit: (See
listing of hoods for materials and packaging quantities.)
20TJ Hood
20TP Hood with Solvent-Resistant lens
20TIC Hood with Inner Bib
20TPC Hood with Inner Bib and Solvent-Resistant Lens
20TICH Hood for use with Bullard Hard Hat
20TICS Hood with Taped and Sealed Seams
20SIC Hood with Taped and Sealed Seams
20SICH Hood with Taped and Sealed Seams for use
with Bullard Hard Hat
20LFM Loose-Fitting Facepiece Hood, Small-Medium*
20LFL Loose-Fitting Facepiece Hood, Large*
*Uses PA20LFBT Breathing Tube
3. The breathing tube. Choose PA1BT for hoods and
PA20LFBT for loose fitting facepieces
4. The Battery Charger. Both standard and quick chargers
are available.
The high efficiency air-purifying element must be mounted
inside the blower body. The blower unit draws in
contaminated air through the filter. The filtered air is blown
into the wearer’s hood through the breathing tube. A flow
indicator is provided to check that there is an adequate
volume of air available to the wearer prior to use.
The units are designed for use at temperatures from 32º F
to 90º F (0º C to 32º C).
The system is designed to operate at a minimum air flow of
7.5 cubic feet of air per minute (210 liters per minute) in
the hood under normal use. In a heavily contaminated
environment, the battery life may be reduced due to
clogging of the filter.
The PA1BU system (only) is fitted with an audible alarm
which will sound due to low battery power.
NIOSH Approval No. TC-19C-154, Type C
The same headpieces approved for use with the PA20
Series of Powered Air-Purifying Respirators are also
approved for use with the CC20 Series of Supplied Air
Respirators. CC20 Series Respirators provide a high level
of respiratory protection and user comfort over long work
periods, in a wide variety of hazardous environments.
The CC20 SAR air flow control devices and other
components are described in the CC20/PA20 Series User
Manual.
Principle of Operation
2
TM
Battery Pack
A fully charged battery pack will power a blower unit to
provide adequate air volume for the respirator hood for
approximately 10 hours for the PA1BU, and approximately 6
hours for the PA2BU, under normal working conditions. The
battery pack is mounted inside the blower unit body and is
not designed to be removed or replaced except by
authorized service personnel. The ON/OFF switch must be
in the OFF position for re-charging.
NOTE
If using a Quick Charger or Gang Charger, please
see the instructions in “Initial Charging Procedure
with Quick Charger” prior to charging the battery
for the first time. Also, follow this procedure
following periods of extended storage.
Charging for periods longer than 16 hours with the
standard charger will reduce battery capacity.
To charge the battery pack, do the following (see Figure 1):
• Open the cover on the charging port of the blower unit
by turning the retaining collar counter-clockwise and
pulling it off.
• Connect the lead from the battery charger to the
charging port on the blower unit.
• Connect the battery charger to a 120-volt (AC)
electrical outlet.
• The ON/OFF switch on the blower must be off.
Battery Pack/Pre-Operational Inspection
To ensure a full charge on a new blower unit being charged
with a Quick Charger or Gang Charger, follow these
important guidelines. These guidelines also apply to blower
units that have been in storage for extended periods of
time.
For new blower units or blower units that have been in
storage for extended periods of time, follow the directions
above under “Battery Pack”, and when the light begins to
flash on the Quick Charger do the following:
• Unplug the charger power cord. Wait 15 seconds.
Plug the charger in again. The charger light will now
remain on.
• When the light begins flashing again, unplug the
charger power cord. Wait 15 seconds. Plug the charger
in again. The charger light will now remain on.
The charger light will flash a third time, indicating that the
battery is fully charged.
This procedure should also be followed after periods of
prolonged storage. Without periodic charging, the nickel
metal hydride batteries will lose up to 1% of their charge
per day. Allowing a battery to self-discharge during periods
of prolonged storage will not damage the battery.
Pre-Operational Inspection
Charge the battery pack for 14 to 16 hours with standard
charger and 8 hours with quick charger.
Prior to each work shift, perform the following PreOperational Inspection to ensure proper operation and
that you have the following items.
While the battery is charging the light on the charger will
remain on.
1. Belt Mounted Blower Unit, Part No.
PA1BU/PA2BU (with on board battery)
• Check that the unit is clean and undamaged.
WARNING
3
Initial Charging Procedure with
Quick Charger
The charging port plug and cover assembly must be
mounted and locked in position on the charging port
during use and at all times except when recharging the
battery. Failure to follow these instructions could result
in death or serious injury.
NOTE
The standard charger will not automatically
terminate charging!
• Inspect for deterioration, physical damage, and
improper assembly.
• Ensure that a PA1FG high efficiency filter and gasket
are properly mounted and seated inside the blower
unit.
Consult the NIOSH approval label and your own in-plant
safety professional if you have any questions as to the
suitability and efficiency of the air-purifying element.
2. Hood with Suspension or Hard Hat, or
Loose Fitting Facepiece
• The hood is constructed of either Tychem® QC or
Tychem SL. Depending on the model ordered, it may
be used with either a headband suspension or a
hard hat. The loose fitting facepiece is constructed of
Tychem QC and features an internal suspension
• All hoods are approved for use with the
PA1BU/PA2BU Blower Units.
• Inspect the hood for any physical damage.
Figure 1
PA20 Series Powered Air-Purifying Respirator
PA1/PA2 Blower Assembly User Manual
Mounting the Breathing Tube on the
PA1BU/PA2BU Blower
Ensure that a gray rubber gasket is in place in the
breathing tube coupler on the blower unit.
Screw one end of the breathing tube into the blower unit
(hand tight is sufficient) (see Figure 2).
Ensure that the ON/OFF Switch is in the OFF position.
Ensure that neither the breathing tube nor the filter is
blocked.
Switch on the blower. For the PA1BU blower, if the Low
Battery Alarm sounds at this time, the battery needs to be
recharged. See notes on previous page regarding properly
charging the battery.
Ensure that the air outlet holes in the Airflow Indicator
tube are not blocked.
Apply a light downward pressure to the Airflow Indicator
to get a reasonable seal at the breathing tube end. Two
hands may be used if preferred, one to hold the breathing
tube and one to hold the Airflow Indicator.
The position of the ball in the Airflow Indicator should be
observed. If any part of the ball is below the PASS LINE on
the Airflow Indicator, check for:
• Clogged or damaged air-purifying filter element. See
“Replacing the PA1FG High Efficiency Filter” on the
next page for filter mounting instructions.
• Low battery charge or battery malfunction.
• Blower malfunction.
If the ball is completely above the PASS LINE on the Airflow
Indicator then the system is ready for use.
NOTE
Due to the back-pressure of the ball, the Low
Battery Alarm may sound when a reading is being
taken. If the ball bounces, let it stabilize, and then
read the lowest point.
When the blower passes the flow test, it is ready to use.
Turn off the blower, remove the flow indicator and store the
air flow indicator safely for future use.
NOTE
Figure 2
Take the free end of the breathing tube in one hand, hold it
upright and place the Airflow Indicator into the end of the
tube (see Figure 3).
Figure 3
WARNING
If the blower malfunctions during use in a hazardous
area:
DO NOT remove the respiratory inlet covering, blower
or waist-belt while in the hazardous area.
DO remain calm and LEAVE the hazardous area
immediately.
After reaching a hazard-free area, immediately remove
the hood and respirator.
DO NOT use a blower that fails the flow test.
Failure to observe these warnings could result in death
or serious injury.
Mounting the Breathing Tube/Checking Airflow
Checking Airflow with the Airflow
Indicator (PA1AFI)
Use ONLY Bullard High Efficiency Filter No. PA1FG,
which complies with and has the NIOSH approval
label.
4
TM
PA1FG High Efficiency Filter
Air-Purifying Element
Check that the filter has a filter gasket and that it is
positioned flat behind the filter lip.
NOTE
Principle of Operation
The PA1FG high efficiency filter element is NIOSH
approved when used in the PA20 PAPR for respiratory
protection subject to the limitations of the NIOSH approval.
Always use a new filter gasket when refitting or
changing a filter. Unclip the blower latches and
remove the back cover and belt assembly from the
blower unit (see Figure 4).
HE particulate filters are 99.97% effective against all
particulate aerosols.
Check that the mating faces of blower unit body and the
back cover are free from debris or any deep scratches.
Filters are supplied in quantities of 3 filters and gaskets
per box.
Remove the old filter and gasket and discard in accordance
to local, state and federal guidelines..
NOTE
The following abbreviation is approved by NIOSH
to indicate the particulate filter approval for
PAPRs:
HE = High Efficiency Particulate Air Filter for
Powered Air-Purifying Respirators
Replacing the PA1FG High Efficiency
Filter
The high efficiency filter and gasket must be replaced
when:
1. An airflow check with the airflow indicator shows that
any part of the ball is blow the PASS line (see
instructions on page 4);
2. When the high efficiency filter has been damaged; or
Slide the filter and filter gasket into the blower unit (see
Figure 5).
Check that the filter gasket is positioned flat on the rear of
the blower.
Refit the back cover and belt, ensuring that the lip of the
cover fits over the blower edges and the male and female
locking latches are located together and lined up properly.
The back cover will fit on the unit in only one direction. The
latches will not line up properly if the back cover is put on
the wrong way.
Snap shut the blower latches once the back cover is
oriented properly, and check to make sure that the latches
are secure.
Refer to the “Checking Air Flow with the Airflow Indicator”
section on the previous page for instructions on checking
the filter for clogging.
3. In compliance with any applicable administrative
procedures.
Carefully remove a new HE filter from its packaging.
NOTE
High Efficiency Filter
Care must be taken to avoid touching or allowing
any objects to contact the exposed filter pleat.
Hold the filter only by its edges.
5
Figure 4
Figure 5
PA20 Series Powered Air-Purifying Respirator
PA1/PA2 Blower Assembly User Manual
Donning the Blower and Respirator
Prepare to don the blower and hood in a safe, hazard- free
area and do the following:
Check that the blower unit is securely clamped closed.
Prior to assembling the system, fit the blower and belt
around the user’s waist. With the blower at the rear of the
user, adjust the belt for a comfortable fit.
Put on the belt and blower assembly and make any final
adjustments to the belt as necessary, keeping the breathing
tube and hood behind the head.
Switch on the blower.
Place the hood on the head making any final adjustments to
the fit as required at this time to ensure a comfortable and
stable fit. See the CC20/PA20 Series Tychem Hood User
Manual.
Remove the belt and blower.
Ensure that the filter is an approved filter suitable for the
challenge being applied and is compatible with the PAPR.
WARNING
The use of any filter not approved with the PA1BU and
PA2BU units may put the user at risk and could result in
death or serious injury.
For Respirator Hoods:
Insert the breathing tube 5 inches into the air entry sleeve
at the rear of the hood being used (see Figure 6).
WARNING
Do not enter a hazardous area until you are sure that
the blower and hood are fully operational and the
blower is running. The user should periodically leave
the hazardous area to check the airflow through the
system. If the PA1 Low Battery Alarm should sound, or
if the user experiences any laboring of breath, any
grittiness between the teeth or any odors from the
hazard, he/she should leave the hazardous area
immediately. Failure to observe these warnings could
result in death or serious injury.
PA1BU Low Battery Alarm
The PA1BU Blower unit is fitted with a Low Battery Alarm.
This device will activate if the battery power is below
acceptable levels. The device is indicating that insufficient
airflow is imminent. The user should do the following:
Figure 7
Leave the hazard area, remove the headpiece, disconnect
the breathing tube from the hood and check the airflow with
the airflow indicator (see page 5).
Install nylon clamp over air entry sleeve and breathing
tube, inserting clamp locks through two holes in plastic
anchorplate that is sewn into hood. Locks should face away
from user’s neck (see Figure 7).
If the airflow indicator indicates insufficient airflow, the
battery should be fully charged (see “Battery Pack” on
page 4).
Figure 6
Engage clamp locks and squeeze together until tight.
For Loose-Fitting Facepiece Hoods:
Insert the bayonet connector of the PA20LFBT breathing
tube in the hood connector and turn clockwise until it locks
in place (see Figure 8).
Figure 8
For PA20 Powered Air-Purifying Respirators:
For PA20 powered air-purifying respirators, attach other
end of breathing tube to PA1BU or PA2BU by screwing
the adapters together.
Remove any protective film covering the visor of the hood.
NOTE
The PA1BU and PA2BU blowers are provided with a
circuit to protect the battery. It will not allow the
battery to be discharged below a safe voltage for
the cells, regardless of airflow, without the Alarm
sounding. When the Low Battery Alarm sounds
(PA1BU blower only) and the filter is not clogged,
the battery should be recharged to protect the
battery and thereby prolong the working life of the
unit. If the ball in the Airflow Indicator is BELOW
or PARTLY BELOW the PASS LINE with a fully
charged battery, the filter may need to be changed.
Clean off the outside of the unit to prevent contaminated
material falling into the blower unit when it is opened and
then change the filter.
Donning the Blower/Low Battery Alarm
The 20LFM and 20LFL hoods have a sewn-in breathing tube
connector on the back. The PA20LFBT breathing tube has a
special connector on the hood end with bayonet type pins.
The PA1BU Low Battery Alarm should not be relied upon as
an indication of a low air flow condition. Only the Air Flow
Indicator should be utilized for checking for adequate
air flow.
6
TM
Troubleshooting
The following guide will enable you to locate and correct malfunctions:
Malfunction
Possible Cause
Solution
No power
Battery charging port plug not in position
Install charging port plug.
PA1BU Low Battery Alarm is
sounding, but Airflow Indicator
shows adequate air flow
Low Battery
Air inlet to hood is twisted
Re-charge battery.
Remove and reinsert PA1BT breathing
tube 5" into hood inlet.
No/low airflow into covering
(Alarm sounding for low battery in
PA1BU unit)
Clogged/damaged air-purifying
filter element
Replace the filter and gasket.
Battery low
Re-charge battery.
Smell or taste contaminant
Blower Unit does not run for
full service life
(10 hours - PA1, 6 hours - PA2)
Blower malfunction
Replace blower.
Breathing tube or hood damaged
Replace breathing tube and/or hood.
Shipping card not removed
Remove card and install filter &
gasket.
Equipment damaged or filter
needs to be replaced
Leave hazardous area immediately
and check equipment. Replace filter.
If the problem persists and no
damage is found, return equipment
for repair.
Low airflow
See above.
Improper initial charge
Prolonged storage of unit not on charger
Review “Initial Charging Procedure”
on page 4.
Troubleshooting/Cleaning and Storage
Cleaning
7
WARNING
Avoid contaminant entry into the breathing tube, as this
will compromise respiratory protection and could result
in death or serious injury. Consult your local safety
professional if you suspect that contaminant has entered
the breathing tube. When cleaning the equipment, do the
following:
Ensure water does not enter filter. Replace wet filter.
DO NOT use gasoline, organic-based solvents, or
chlorinated degreasing fluids (such as trichloroethylene)
as they will cause damage.
DO NOT immerse the equipment in water or other
cleaning fluid as this may cause contamination in the
breathing tube and blower interior that will be difficult to
remove.
Failure to observe the instructions and warnings in this
manual invalidates all performance statements and
approvals for this equipment and could result in death or
serious injury.
Use a lint-free cloth moistened in a mild solution of soap
and warm water to clean the outer surface of the
equipment.
Consult the CC20/PA20 Series Tychem Hood User Manual
for cleaning instructions for the hood components. Remove
filter and discard (if it has reached the end of its useful life)
in accordance with federal, state and local guidelines and
in conformance with plant safety regulations.
Re-charge the battery pack (see instructions on page 3).
Storage
When the apparatus is completely dry, store in a clean, dry
area, away from direct sunlight and sources of direct heat.
The storage temperature should be between 32º F to 90º F
(0º C to 32º C) with humidity less than 90% RH.
Consult the CC20/PA20 Series Tychem Hood User Manual
for storage instructions on hood components.
PA20 Series Powered Air-Purifying Respirator
PA1/PA2 Blower Assembly User Manual
Ordering Information
CATALOG
NUMBER
DESCRIPTION
Blower Assembly for PA20
PA1
PA2
Blower with 10 hour battery and low voltage
alarm Includes filter, gasket, belt assembly and
air flow indicator
Blower with 6 hour battery
Includes filter, gasket, belt assembly and air flow
indicator
Battery Chargers for PA1BU Blower Unit
PA1SMC
PA1GC
PA1STC
Quick charger for PA1BU
5-Unit Gang Charger
Standard charger for PA1BU
Battery Chargers for PA2BU Blower Unit
PA2SMC
PA2STC
Quick charger for PA2BU
Standard charger for PA2BU
Replacement Filter/Gasket
PA1FG3
PA1FGBP
Filter/gasket assembly (3 per box)
Filter/gasket assembly (36 per box)
Replacement Parts and Accessories
PA1SB
PA1DB
PA1EB
PA1DEB
PA1LSK
PA1AFI
PA1BU
PA2BU
PA1BT
PA1BTXS
PA20LFBT
PA20LFBTXS
PA1BTS
Standard belt
Decon belt
Extension belt kit
Extension decon belt kit
Blower latch and screw kit (4 latches, 16 screws)
Air Flow Indicator
PA1 Blower housing unit, motor, and impeller
PA2 Blower housing unit, motor, and impeller
Breathing tube assembly (tube/clamp)
Short breathing tube assembly (tube/clamp)
Breathing tube (lightweight) for 20LFM and 20LFL
hoods, standard length
Breathing tube (lightweight) for 20LFM and 20LFL
hoods, short length
Breathing tube seal
Ordering Information
8
HE
PA20
X
1
X
X
X
X
X X X X X X X X X X ABCFIJLMNOP
CAUTIONS
AND
LIMITATIONS2
L. Follow the manufacturer’s instructions for changing cartridges and/or filters.
M. All approved respirators shall be selected, fitted, used, and maintained in accordance with
MSHA, OSHA, and other applicable regulations.
N. Never substitute, modify, add, or omit parts. Use only exact replacement parts in the
configuration as specified by the manufacturer.
O. Refer to users instructions, and/or maintenance manuals for information on use and
maintenance of these respirators.
P. NIOSH does not evaluate respirators for use as surgical masks.
X
ACCESSORIES
Cynthiana, KY 41031 USA
1-800-827-0423
Bullard
ALTERNATE ALTERNATE
BREATHING BLOWER FILTER
FLOW ALTERNATE
UNIT
TUBE
INDICATOR BELT
X X X X X X X X X X X X X X X X X X X X
Protection
HE - High Efficiency Particulate Air Filter for Powered Air-Purifying Respirators
2
Cautions and Limitations
A. Not for use in atmospheres containing less than 19.5% oxygen.
B. Not for use in atmospheres immediately dangerous to life or health.
C. Do not exceed maximum use concentrations established by regulatory
standards.
F. Do not use this respirator if airflow is less than four cfm (115 lpm) for tightfitting facepieces or six cfm (170 lpm) for hoods and/or helmets.
I. Contains electrical parts which have not been evaluated as an ignition
source in flammable or explosive atmospheres by MSHA/NIOSH.
J. Failure to properly use and maintain this product could result in death or
serious injury.
21C-0765
PA20
SERIES
ALTERNATE
SUSPENSION/
HARD HAT
20TJN
20TICN
20SICN
20TICSN
20TICH
20SICH
20TPN
20TPCN
20LFM
20LFL
20TG
20RT
3000
3000R
5100
5100R
PA1BT
PA1BTXS
PA20LFBT
PA20LFBTXS
PA1BU
ALTERNATE
HOOD
ASSEMBLIES
PA2BU
PROTECTION1 MODEL
PA1FG
TC#
RESPIRATOR COMPONENTS
This respirator is approved only in the following configurations:
PA1AFI
PA20 Powered Air-Purifying Respirator
PA1SB
PA20 Approval Label
PA1DB
9
PA1STC
PA1SMC
PA2STC
PA2MC
PA1EB
PA1DEB
20NC
ES42
20LCL
20LC
NIOSH Approval Label
TM
TM
Head
Protection
Respiratory
Protection
Fire and Rescue
Safety
Thermal
Imaging
1
if i
ed
ISO
900
Cer
t
ISO 9001
certified
Bullard
1898 Safety Way
Cynthiana, KY 41031-9303
Toll free: 877-BULLARD (285-5273)
Tel: 859-234-6616
Fax: 859-234-8987
www.bullard.com
Bullard GmbH
Hochkreuzallee 36
53175 Bonn-Bad Godesberg
Germany
Tel: +49 228 931933 0
Fax: +49 228 931933 50
©2003 Bullard. All rights reserved.
“It’s Your Life and You’re Worth It”is a trademark of Bullard.
Tychem is a registered trademark of E.I. DuPont de Nemours & Company.
6028005766(0203)