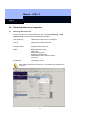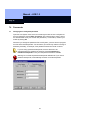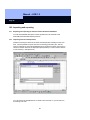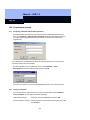
1
Manual – LDB 1.5
Published: December 2006
Manual – LDB 1.5
Page 2
1.0
2.0
3.0
4.0
Commissioning .............................................................................. 7
1.1
Standard toolbar / button functions................................................... 7
1.2
Installing the software......................................................................... 8
1.3
Testing the Configuration tool ......................................................... 10
1.4
Current software version .................................................................. 10
Setting up a Lock Plan................................................................. 12
2.1
Creating a new Lock System ............................................................ 12
2.2
Define door names ............................................................................ 12
2.3
Inserting divider bars ........................................................................ 15
2.4
Setting up transponders ................................................................... 16
2.5
Authorizing transponders for specific times and dates................. 17
2.6
Authorizing transponders................................................................. 18
2.7
Setting up groups of transponders.................................................. 19
2.8
Programming locks ........................................................................... 21
2.9
Programming transponders ............................................................. 24
2.10
Adding locks ...................................................................................... 26
2.11
Adding transponders ........................................................................ 27
2.12
Changing authorizations .................................................................. 30
Time zone management .............................................................. 31
3.1
Creating a time zone plan ................................................................. 31
3.2
Planning holidays.............................................................................. 34
3.3
Changing the holiday list.................................................................. 37
3.4
Integrating a time zone plan ............................................................. 38
3.5
Allocating a time zone plan .............................................................. 39
3.6
Allocating time zone groups ............................................................ 40
Configuring the components ...................................................... 43
4.1
Digital US Lock .................................................................................. 43
4.2
Digital control unit with pulse control ............................................. 44
4.3
Digital control unit as flip-flop.......................................................... 45
4.4
Digital control unit as time switch ................................................... 46
4.5
Digital SmartRelay............................................................................. 49
2
Manual – LDB 1.5
Page 3
4.6
Digital SmartRelay – Access control ............................................... 50
4.7
Digital SmartRelay – Time zone control .......................................... 51
4.8
Digital SmartRelay – Overlay............................................................ 51
4.9
Digital SmartRelay – Flip-flop........................................................... 51
4.10
Digital SmartRelay – Repeater ......................................................... 51
4.11
Digital SmartRelay – OMRON ........................................................... 51
4.12
4.12.1
4.12.2
4.12.3
4.12.4
4.13
4.13.1
4.13.2
4.13.3
5.0
6.0
7.0
Advanced Properties......................................................................... 52
Digital SmartRelay – Pulse length ............................................................................................ 52
Digital SmartRelay – Time switching....................................................................................... 52
Digital SmartRelay – Limited range ......................................................................................... 53
Digital SmartRelay – Logging unauthorized access attempts................................................... 53
Advanced Functions ......................................................................... 53
Digital SmartRelay – Number of extension modules................................................................ 53
Digital SmartRelay – Interface ................................................................................................. 53
No acoustic programming confirmations.................................................................................. 54
4.14
Replace control unit with SmartRelay ............................................. 54
4.15
SmartOutput Modules (SOM) – Extension modules....................... 54
4.16
Furniture lock .................................................................................... 64
Master level ................................................................................... 65
5.1
Setting up a master level .................................................................. 65
5.2
Setting up a master transponder ..................................................... 66
5.3
Programming master transponders................................................. 67
5.4
Deleting a level .................................................................................. 68
5.5
Changing the password.................................................................... 69
Retrieving data from a component............................................. 71
6.1
Retrieving data from a lock .............................................................. 71
6.2
Retrieving transponder lists............................................................. 72
6.3
Retrieving Access Lists .................................................................... 72
6.4
Organizing Access Lists................................................................... 73
6.5
Retrieving data from transponders.................................................. 74
Passwords..................................................................................... 76
7.1
Changing the Lock System password............................................. 76
7.2
Password for access monitoring ..................................................... 77
7.3
Changing the file password.............................................................. 77
3
Manual – LDB 1.5
Page 4
8.0
9.0
Replacing a component............................................................... 79
8.1
Replacing a lock ................................................................................ 79
8.2
Resetting a lock ................................................................................. 79
8.3
Copying a transponder ..................................................................... 80
8.4
If a transponder is lost ...................................................................... 81
8.5
Resetting a transponder ................................................................... 84
Block lock components ............................................................... 85
9.1
Arming unit (SSM and SSS).............................................................. 85
9.2
Deactivation unit................................................................................ 86
10.0 Opening, saving, printing . . ....................................................... 88
10.1
Opening a file..................................................................................... 88
10.2
Saving a file ....................................................................................... 89
10.3
Printing out a Lock Plan ................................................................... 90
10.4
Printing statistics .............................................................................. 91
10.5
Printing labels.................................................................................... 93
11.0 Additional functions..................................................................... 95
11.1
Find and move ................................................................................... 95
11.2
Sorting transponders and locks....................................................... 95
11.3
Changing names................................................................................ 96
11.4
Performing emergency opening....................................................... 97
11.5
Setting the time.................................................................................. 97
11.6
Deactivate Storage Mode.................................................................. 98
12.0 Importing and exporting .............................................................. 99
12.1
Exporting and importing to and from Palm & Pocket PC databases
............................................................................................................ 99
12.2
Importing locks and transponders................................................... 99
12.3
Importing a complete Lock Plan .................................................... 101
12.4
Overview of lock properties ........................................................... 103
12.5
Overview of transponder properties.............................................. 106
12.6
Exporting a complete Lock Plan .................................................... 109
13.0 Views ...........................................................................................111
4
Manual – LDB 1.5
Page 5
13.1
Cross-hairs, label boxes, ID numbers ........................................... 111
13.2
Installed lock lengths ...................................................................... 112
13.3
Authorization for a transponder..................................................... 112
13.4
Authorizations for a lock ................................................................ 114
13.5
Transponder groups ....................................................................... 115
14.0 Special transponders.................................................................116
14.1
Password transponders.................................................................. 116
14.2
Activation transponder ................................................................... 117
14.3
Creating a CD transponder (not compatible with SmartCD)........ 118
15.0 Setting up a network ..................................................................119
15.1
Setting up a CentralNode................................................................ 119
15.2
Network Setup ................................................................................. 120
15.3
Registering a network node ........................................................... 121
15.4
Testing Lock Nodes ........................................................................ 121
15.5
Assigning/changing the network password ................................. 123
15.6
Configuring network nodes ............................................................ 123
15.7
Adding network nodes.................................................................... 125
15.8
Removing network nodes............................................................... 126
15.9
Configuring attenuation.................................................................. 126
15.10 Input/output ..................................................................................... 127
15.11 Messages ......................................................................................... 127
15.12 Configuring SMS messages ........................................................... 129
15.13 Configuring e-mail........................................................................... 130
15.14 Creating a log file ............................................................................ 131
16.0 Organizing a network.................................................................133
16.1
Assigning a Network Administrator password ............................. 133
16.2
Testing Lock Nodes ........................................................................ 133
16.3
Activating locks ............................................................................... 134
16.4
Program Lock System..................................................................... 135
16.5
Retrieving individual Access Lists ................................................ 136
16.6
Retrieving multiple Access Lists simultaneously ........................ 137
5
Manual – LDB 1.5
Page 6
16.7
Synchronizing the time ................................................................... 139
16.8
Task Manager .................................................................................. 140
17.0 Event Manager............................................................................145
17.1
Definition.......................................................................................... 145
17.2
Procedure......................................................................................... 145
17.3
Defining reactions ........................................................................... 146
17.4
Run file ............................................................................................. 147
17.5
Send e-mail ...................................................................................... 147
17.6
Configuring network tasks ............................................................. 148
17.7
Configuring network messages ..................................................... 150
17.8
Send SMS......................................................................................... 151
17.9
Creating a log file ............................................................................ 152
17.10 Configuring events.......................................................................... 152
17.11 Configuring input events ................................................................ 154
17.12 Configuring keyboard combinations ............................................. 155
17.13 Setting up a time interval................................................................ 156
17.14 Entry event....................................................................................... 158
Note: SimonsVoss Technologies, Inc reserves the right to makes changes to its
products without prior announcement. As a consequence, the descriptions and
explanations in this documentation may theoretically differ from the latest version of
the product and software. In case of doubt, the original German edition should be
used as a content reference. Subject to faults and grammatical errors.
6
Manual – LDB 1.5
Page 7
1.0
Commissioning
1.1
Standard toolbar / button functions
Comment [WS1]: Need to redu this
to change „locking“
7
Manual – LDB 1.5
Page 8
1.2
Installing the software
System requirements for installing the Lock Plan software:
¾
¾
¾
¾
¾
Windows 98, Windows ME, Windows NT/2000, Windows XP
If you are using the Event Manager, then we recommend that you run the
software on the professional version of the Windows NT/2000 or Windows XP
operating system
Free hard disk space: 20 MB, RAM: 32 MB (recommended: 64 MB)
Storage space required per Lock Plan: 1–5 MB
RS232 or USB port, depending on the Configuration tool
Windows NT/2000/XP users: the software must be installed by your System
Administrator. If you are already using SimonsVoss Lock Plan software,
please remove the old version using the Control Panel before installing the
new software.
Warning: Depending on the structure and size of your Lock Plan, it may be that the
computer hardware you use has to meet certain minimum requirements (memory,
processor speed, etc.). These requirements are available directly from SimonsVoss.
8
Manual – LDB 1.5
Page 9
Insert the SimonsVoss CD. In Windows Explorer, select the CD-ROM drive and click
on Software > System3060 > English > Setup.exe. Follow the setup instructions.
Once you have finished the installation, restart your computer.
One way to start the program is from the Windows Task Bar. To do this, choose Start
> Programs > System 3060.
The very first time you start the program, the software will check whether a
Configuration tool (see section 1.3) is connected. This will take a few seconds.
Connect your Configuration tool to a free port (i.e. COM1) and click the OK button.
The default setting in the software is for the Configuration tool to be connected to the
COM1 port. If you do not connect the Configuration tool to COM1, a selection box will
open in which you can choose another port. If you are using a SmartCD type
Configuration tool, then you will have to first install the necessary device drivers,
which you will find on the CD-ROM, which comes with the SmartCD. The software
can also detect your Configuration tool on a port higher than COM4 without you
having to make settings yourself.
9
Manual – LDB 1.5
Page 10
1.3
Testing the Configuration tool
You can test the Configuration tool you have connected at Programming > Check
Programming Interface. The Configuration tool will respond with its software
version: Config Device SW 2.7 or 2.8; PalmCD SW 8.6 or 8.7; PalmCD2 SW 9.1–9.3;
SmartCD SW 9.6.0.15 or higher; CentralNode SW 1.0. The term ‘Configuration tool’
used in this document relates to all of these devices. Any variations in the way these
are handled will be described, or can be found in the latest versions of the appropriate
manuals.
Confirm with OK.
If the Configuration tool does not respond, check to see if the port is blocked by
another program (such as HotSync Manager) or set it to another COM port. You can
choose from four serial ports; settings can be made at Options > Comport.... The
COM1 port is set by default.
1.4
Current software version
You can display this by clicking on the question mark (?) and then About LDB....
Warning: If an older version of the software (< 1.50) is installed, please contact
your retailer or SimonsVoss directly. You can download the latest version of the
10
Manual – LDB 1.5
Page 11
software on the Internet at www.simons-voss.us (Products – Downloads
folder).
To install a newer version of the software, proceed as described in
‘Commissioning, Installing the software’. Existing Lock Plans will not be affected,
and can be opened and managed using the new version of the software.
11
Manual – LDB 1.5
Page 12
2.0
Setting up a Lock Plan
2.1
Creating a new Lock System
Choose New > Lock System. Enter the name of the Lock System (for example your
company name). Then press the Tab key.
The software will now ask for the password for the Lock System. Make sure you do
not lose or forget the password. If you do lose it, you will not be able to make changes
to the Lock Plan or perform tasks using the Configuration Device. The password
guards your Lock System. You should therefore treat it like a debit card PIN or other
personal secret code, and never give it to anyone who is not authorized to use it.
Never use obvious character sequences such as birthdays or first names. It is best to
use combinations of words and numbers that would never be found in a dictionary but
are easy for you to remember.
Enter the password and confirm it, taking care to use the correct upper and lower
case characters. Define whether you would like to operate the Lock System in
Overlay Mode (see ‘System manual, Legend’), then click on OK.
2.2
Define door names
The next step is to enter the first door name (i.e., Main Entrance). Choose a unique
name that can be clearly distinguished; using room numbers is one way of doing this.
Select the component that you are using (i.e., US Lock). The default setting is US
Lock. If you would like to set up more locks, then click OK & Continue, otherwise
click on OK & Finish.
You can change the name of a lock at any time; reprogramming is not
necessary.
You can also import the names of the locks from an existing database; for
more information, refer to the section of this manual on importing and
exporting.
12
Manual – LDB 1.5
Page 13
If you clicked OK & Continue, you can now define more locks. Simply enter the door
name and confirm by pressing Enter.
Note: If the type of lock changes, then mark it accordingly.
Warning: You cannot change a SmartRelay type lock to any other type of lock
after it has been defined.
The locks you have set up will now appear at the left-hand side of the screen.
The yellow flash to the right of the lock signifies that changes have been made
to the lock definition but not yet programmed into the lock.
If you do not want to make any more entries, click the Finish button.
13
Manual – LDB 1.5
Page 14
If you are entering room numbers, then you can set up several locks easily using the
copy function. Enter the room number involved (i.e., Office 101).
Confirm the entry by pressing OK & Finish. Then, select the lock with the left-hand
mouse button so that it appears highlighted. Click the right-hand mouse button, then
choose Multiple Copy using the left-hand button, and specify how many copies you
want to make (i.e., 5).
If you do not need a room number (lock), then simply delete it by selecting the
lock and choosing Edit > Cut.
14
Manual – LDB 1.5
Page 15
2.3
Inserting divider bars
Divider bars are used to categorize locks – into particular areas, for instance
(buildings, floors and so on).
Click on the lock above which you would like to insert a divider bar. Click the righthand mouse button and select New Æ Divider bar.
Next, enter the name of the divider bar and confirm with OK.
For example: Central lock, Building 402 – 1st floor Admin, Building
402 – 2nd floor Marketing & Product Management
You can also insert divider bars between the transponders. The divider
bar is always created in front of the selected transponder.
15
Manual – LDB 1.5
Page 16
2.4
Setting up transponders
Select New > Transponder. Enter the name of the first transponder owner. This
name can only be allocated once. You can also specify the serial number of the
transponder along with the name (i.e., 12030 Jack Black).
The advantage of doing this is clear if we look at an example. Assume you give three
transponders to your cleaning company. The company calls up to say it has lost a
transponder. By asking for the serial numbers of the other two transponders you can
determine exactly which of the three has been lost. Next, allocate more names. Each
time you have finished an entry, confirm it with Enter. Once you have entered all the
names you want to define for now, click on OK & Finish.
You can change the names of transponders at any time; reprogramming is not
necessary. You can also import the names of the transponders from an
existing database; for more information, refer to the section of this Manual on
importing and exporting.
16
Manual – LDB 1.5
Page 17
2.5
Authorizing transponders for specific times and dates
Choose New > Transponder. Allocate a name (i.e., Assistant). Click on the Validity
Period button. You can now define an activation date and/or an expiry date, either of
which can be up to six months in the future. Uncheck the relevant box using the lefthand mouse button, then click on Change. Enter the required date and time.
For example: Validate date 04/06/2006, 8:00AM, Expiration Time 05/17/2006,
3:00PM.
Transponders with validity dates can only be programmed in a single Lock
System. The level of inaccuracy is approximately 1% of the time period
defined. If the transponder is given a new date, or if its expiration time lapses,
then it is first reset, after which it will be available once again for programming.
Confirm your entries with OK.
17
Manual – LDB 1.5
Page 18
2.6
Authorizing transponders
Authorization is allocated at the click of a mouse, and can be changed later if
required. This also applies if locks are already programmed.
To create a master key, click on the name you want to allocate it to using the lefthand mouse button (i.e., 12010 Toni Curtis), then click the right-hand mouse button.
Select Add row/column and the whole row will appear marked.
The same applies to locks. For example, if you would like to authorise all employees
to use the main entrance, then select that lock and click the right-hand mouse button.
Select Add row/column and the whole column will appear marked.
You can also block a whole row. Simply select Erase row/column, and the
crosses will disappear.
When authorizing groups: click the left-hand mouse button and keep it pressed. Move
the mouse over the matrix until all of the transponders and locks for the group are
marked within the rectangle you have drawn. Release the mouse button.
A dialog then opens entitled Multiple selection. Define whether you would like to Add
or Erase the group, then press OK to confirm.
18
Manual – LDB 1.5
Page 19
This is a very easy way of authorizing to several transponders.
You can also authorize transponders individually using the left-hand mouse button.
Position the mouse over the square involved and click the left-hand mouse button. A
cross appears. If you would like to cancel an authorization, then move to the cross
concerned and click the left-hand mouse button again.
2.7
Setting up groups of transponders
To reduce the programming required to set up new transponders you can create
reserves at the outset. These do not appear in the Lock Plan, but they are all ready
programmed in the locks.
As an example, let us assume you create a transponder group for each department.
One group may, for example, be given authorization for all the locks in the Marketing
Department offices, and the central lock. If you have programmed the Lock System
and you would like to add a new transponder at a later stage, then assign this
transponder to the transponder group (in this case Marketing) and program it. The
locks that belong to this transponder group do not have to be reprogrammed.
Click on the bar at the left-hand edge of the Lock Plan which contains the name of the
Lock Plan. Select Edit > Properties, then click on the Transponder groups tab. Click
the New button. Enter a name for the group. Under Supply, specify how many
reserve transponders you would like to create (it can be any amount between 8 and
504).
19
Manual – LDB 1.5
Page 20
Beneath the ”Approve for lock units”’ area, click on the Manage button. Select the
locks for which this transponder group is to be authorized, then click OK.
We recommend setting up a transponder group for each department in a
company. In a Lock System, a transponder can only be allocated to one
transponder group. Removing a transponder from a transponder group will not
deactivate that transponder. To deactivate it, the locks have to be
reprogrammed. If you would like to allocate a programmed transponder to a
different group, then it is better to take back the programmed transponder and
give the user a new one which is allocated to the other transponder group.
Confirm your entries by clicking OK.
If you would like to make changes to these transponder groups – such as
removing a lock from a group – then the lock will have to be reprogrammed.
20
Manual – LDB 1.5
Page 21
2.8
Programming locks
Once you have finished making changes to the Lock System, you must then approve
it. Locks can be programmed only after the Lock System is authorized.
Choose Authorize > Authorize Lock System. Enter your password and confirm by
pressing OK. Now you can no longer make any changes to the Lock System until it is
reopened.
To open the Lock System again, select Authorize > Open Lock System. Enter your
password and confirm it with OK.
21
Manual – LDB 1.5
Page 22
You can see if a Lock System is approved, because, when it is, there will be a
check after its name (i.e., to the left of Central Lock).
Click on the lock you want to program using the left-hand mouse button. This will
result in highlighting the lock (i.e., Main Entrance) on the list.
Choose Programming > Lock. Position the Configuration Device within range of the
lock and click OK.
Make sure there are no other locks or sources of interference nearby.
22
Manual – LDB 1.5
Page 23
The yellow flash behind the lock disappears, and the cross appears in bold.
If you are programming a lock or SmartRelay with the audit feature and/or time
zones enabled, ensure that your computer’s date and time settings are correct.
If they are not, the time zone control will not work correctly, and an incorrect date
and time will be produced in the Access List.
Confirm successful execution by clicking OK. You can now program more locks. In
the Program lock window which is open, simply select another lock using the lefthand mouse button.
The locks are listed alphabetically in the programming dialog’s Lock combo
control..
23
Manual – LDB 1.5
Page 24
Once you have programmed all the locks, close the window by clicking on Exit.
You can always add new locks at a later stage.
2.9
Programming transponders
Select the first transponder.
For example: 12010 Toni Curtis
Click on Programming > Transponder. The name will appear in the box at the top.
The programming of transponders also requires approval, in order to ensure that
unauthorized persons cannot program them.
Click the Authorize... button.
24
Manual – LDB 1.5
Page 25
Enter the password for your Lock System. The word is concealed by asterisks as you
enter it to prevent unauthorized people from learning your password by looking over
your shoulder.
Warning: Choose a password you will remember. There is no way to get around
the password if you have forgotten it.
Then click OK & Finish. A window opens with the message that the programming of
the transponders is authorized.
Confirm this message by clicking OK.
25
Manual – LDB 1.5
Page 26
Hold the transponder in front of the Config Device, click Program, and briefly press
the button on the transponder.
Warning: Make sure that there are no sources of interference nearby.
Warning: Transponders that are not authorized cannot be programmed.
Confirm successful execution with OK. The yellow programming flash next to the
transponder name will disappear signifying that its programming is now up to date.
You can continue to program transponders by choosing the next one in the open
window. If desired, the software can move automatically to the next transponder
following successful programming. To activate this, check the box next to Move to
next transponder following programming. Click on OK and program the next
transponder as described above. Once you have programmed all the transponders,
click on Exit.
2.10
Adding locks
26
Manual – LDB 1.5
Page 27
Open the Lock System for editing (Authorize > Open Lock System).
A new lock is added above the selected lock. Click the right-hand mouse button then
choose New > Lock. Enter the name of the lock (i.e., Server room).
If you did not select a lock, the software will create the new lock beneath all of
the existing ones.
Choose the type of lock, and then click the OK & Exit button, or OK & Next if you
wish to add more locks.
When you have finished defining new locks the system must be authorized before the
lock(s) can be programmed. The system is authorised by selecting Authorize >
Authorize Lock System. Once the system has been authorized the
Click on the newly created lock, making it appear in blue.
You can now program the lock as described previously, using Programming > Lock.
The transponders authorized for the newly created lock do not need to be
reprogrammed.
2.11
Adding transponders
Open your Lock System, to allow changes, by entering the password. New
transponders are added to the left of the selected transponder. Select the column
containing the transponder in front of which you would like to insert a new
27
Manual – LDB 1.5
Page 28
transponder. Click the right-hand mouse button then choose New > Transponder.
Enter the name of the new transponder (i.e., 12032 Walter Summers).
If you do not select a transponder, the new one will be created at the end of
the columns.
Finally, click the OK & Exit button, or the OK & Next button if you want to add more
transponders. If you wish to assign the new transponder to a transponder group,
double click on the bar at the side of the matrix containing the name of the Lock
System or select Edit > Properties, then choose the Transponder groups tab. Select
the group most appropriate to the transponder (i.e., Marketing). Click on Properties.
28
Manual – LDB 1.5
Page 29
Beneath Transponders, click the Manage button. Then select the new transponder
(i.e., 12032 Walter Summers). Click the Add button, and then close the window. The
software will automatically assign authorization (crosses) to the locks concerned.
If you would like the transponder not to have authorization for one of these locks, then
simply remove the cross and program the lock. You can cancel this block in the
Transponder group properties window: select the lock involved, and then click the
Block list button. Click the Cancel block button, then confirm with OK.
If the transponder does not belong to any transponder group, then simply allocate its
authorizations specifically in the matrix by placing an X at the intersection of the
transponder’s column and the appropriate door rows.
When the transponder(s) have been added select Authorize > Authorize Lock
System to accept the changes and allow the programming of system devices.
Programming of transponders also requires a separate authorization which is
accomplished by selecting Authorize > Authorize Transponder Programming.
The transponder is programmed by selecting Programming > Transponder. If you
would like to authorize a transponder to open a lock which does not belong to a
transponder group, then again you can simply use the mouse to assign individual
rights. The transponder is already authorized for all the other locks without needing to
be reprogrammed.
29
Comment [WS2]: Phil, is this
correct?
Manual – LDB 1.5
Page 30
2.12
Changing authorizations
Choose Authorize > Open Lock System. Enter the password for your Lock System
and confirm with OK.
Change the authorizations as described above.
In this example Mr. Potter is given authorization for offices 101 and 102.
Once you have completed your changes, approve the Lock System and program the
locks that require programming. The transponders do not have to be reprogrammed.
30
Manual – LDB 1.5
Page 31
3.0
Time zone management
Electronic access control systems provide the ability to limit access by time and date.
This is accomplished by defining time periods when a user is allowed access and
time periods when the user is not allowed (disallowed) access. The simple concept of
assigning these times to each user becomes very tedious to apply and manage when
the list of users starts to grow. Because of this, the concept of time zones was
created.
This name does not refer to the geographical time zones such as Eastern, Central,
Mountain, or Pacific. These security time zones usually define the start time, the stop
time, and the days of the week that apply.
Security Time Zone Example 1: Start Time: 8:00 am Stop Time: 5:00 pm Days:
Monday, Tuesday, Wednesday, Thursday and Friday.
Security Time Zone Example 2: Start Time: 1:00 am Stop Time: 7:00 am Days:
Monday, Wednesday, Friday
Each lock in the SimonsVoss system can be programmed with up to 63 security time
zones. Each collection of security time zones used to define a lock is called a Time
Zone Plan. The Time Zone Plan is given a name to distinguish it from all the other
plans. Each lock can have its own Time Zone Plan or multiple locks can share the
same Time Zone Plan.
In addition to the times a user can and can not access a lock, The Time Zone Plan
also defines what time a lock is automatically locked or unlocked.
3.1
Creating a time zone plan
Choose Time zone plans > Time Zone Management. In the window which opens,
click New... then enter the name of your time zone plan (i.e. the name of the door or
building for which you are creating this Plan).
Confirm by clicking OK.
You can assign any lock to a different time zone plan. A lock can manage up
to six time groups, one of which is authorized to operate the lock at all times.
The time zone group which is always authorized is not shown in the time zone
plan. The other 5 groups can be defined as required in the Time zone
management window.
31
Manual – LDB 1.5
Page 32
Click on the first group, then on the day or days of the week.
By keeping the mouse button pressed you can select several days of the week
(i.e. Monday to Friday). You can select individual days (i.e. Tuesday and
Thursday) by holding down the Ctrl key while selecting.
Next, define the times during which the first group are to be allowed to operate the
lock.
Each bar represents quarter of an hour.
For this example Group 1 is allowed to operate the lock on Monday to Friday from 7
am to 3.30 pm.
32
Manual – LDB 1.5
Page 33
If you would like to specify another day of the week for the same group, then click on
it – Saturday for example.
In the following example Group 1 is given additional locking authorization between
7AM and 12PM on Saturday. Sunday is blocked for Group 1.
33
Manual – LDB 1.5
Page 34
Allocate the time zones for the next groups, as described above.
A maximum of 126 switching points (authorize or block the transponder) may be
allocated to a time zone plan.
For example: Group 1 is authorized to operate the locks from Monday to
Friday, 7AM to 3.30PM. The transponder is authorized at 7AM (first action),
then deactivated at 3.30PM (second action). On Tuesday the same thing
happens (third and fourth action), etc.
If you do not want to add any holidays, then click Save followed by Ready. Read on
from section 3.4.
3.2
Planning holidays
Click Plan holidays. In the window which opens, simply select the public holidays
that apply to you and confirm each one by pressing Load.
34
Manual – LDB 1.5
Page 35
The public holidays shown on the right-hand side are treated like Sundays.
Since Group 1 does not have authorization to use the lock on Sunday, it will
automatically be blocked on those public holidays as well.
You can also add your own holidays (for other countries for example, or for a plant
shutdown). Click New Entry and enter the name and date of your holiday. If this
holiday is repeated on the same date each year, then place a check next to Any
year.
In the Holidays box you can define a period of time during which you also want
particular transponders to be blocked.
Confirm each of the entries you make with Save.
To leave the window, click OK.
35
Manual – LDB 1.5
Page 36
The holiday you have created (i.e., Works holiday) will now appear together with the
other selected public holidays in the right-hand window.
Next, click on the empty box entitled Name, and assign a designation to the list of
holidays you have created (i.e., Sample Holidays).
To save the information, click Save.
The holidays will move over to the left-hand window.
36
Manual – LDB 1.5
Page 37
If you do not want to make any more changes to the holiday list, then confirm with
OK.
3.3
Changing the holiday list
If you want to modify the holiday list (i.e., Sample Holidays), then select the Template
from the drop-down box.
Click on the first Holiday, hold the left-hand mouse button down, and drag the mouse
downwards until all of the Holidays are marked blue. Then click Load.
If you would like to delete holidays, click on the holiday concerned (in this example,
Works holiday).
Next, click the Delete entry button. Give the modified holiday list a new name and
confirm with Save.
If you would like to add holidays, then select all holidays from the Templates dropdown box in the window that is currently open.
Click on the holiday you want to add (i.e., Ascension Day), and then press Load.
The holiday will move into the right-hand window. Give a new name to the modified
holiday list.
37
Manual – LDB 1.5
Page 38
Now press Save.
Confirm the holiday list with OK.
3.4
Integrating a time zone plan
Choose the holiday list you have created from the Associated Holiday Lists dropdown box, clicking on it with the left-hand mouse button. Next, press the Save button
and the entire time zone plan including holiday list will be saved.
38
Manual – LDB 1.5
Page 39
If you do not want to make any more changes, then click on Ready. If there are still
changes to be made, select the required time zone plan (i.e., Main entrance) in the
right-hand window.
Clicking on Load will then make the complete time zone plan available for
modification.
3.5
Allocating a time zone plan
Open the Lock System, and then click on the lock (i.e., Main entrance) to which you
want to allocate a time zone plan.
Choose Edit > Properties. Under Time zone plan, select the Plan you want to
allocate. Confirm the entry with OK.
39
Manual – LDB 1.5
Page 40
A programming flash will appear behind the name of the lock. This means that the
lock has to be reprogrammed. Approve the Lock System and program the lock
(Programming > Lock).
The clock signifies time zone control for this lock.
Since certain public holidays do not always fall on the same date, the holiday
list has to be regenerated after two years. The affected locks must be
reprogrammed. Changes do not have to be made to the time zone plan or the
holiday list. When the holiday list expires, the locks involved will automatically
be marked as requiring programming (yellow flash behind the lock).
Warning: The date and time of the computer are used, so check that these
settings are correct.
3.6
Allocating time zone groups
If the Lock System is approved, then open it for modification. Select the transponder
to be assigned a time zone group (i.e., 12012 Karin Lewis).
40
Manual – LDB 1.5
Page 41
Choose Edit > Properties. Click on the Time control tab and choose the Lock
System and the relevant group (i.e., Lock System: Sample and Time zone group:
Group 1).
Confirm with OK.
Enter your groups one after the other, as described previously. For transponders that
do not belong to a time zone group (authorized to use the lock 24 hours a day, every
day), proceed as follows:
In the Time zone group tab, choose No time restriction or, alternatively, do not
select the transponder at all in the first place.
An overview of time groups, which you can save and print out, is available at View >
Time zone groups.
41
Manual – LDB 1.5
Page 42
The transponders that have a specified time zone control must now be
reprogrammed.
42
Manual – LDB 1.5
Page 43
4.0
Configuring the components
4.1
Digital US Lock
If necessary, you can configure digital US Locks to remain engaged for a longer
period of time (approx. 10 seconds).
Doing this reduces the lifespan of the battery.
Open your Lock System for modification. Select the US Lock you would like to
configure (i.e., Main entrance)
Choose Edit > Properties, then click the Configuration tab. Click on Long release
and confirm with OK.
Approve your Lock System, and then program the digital US Lock.
Lock software version 10.2 and above provides you with the option of configuring the
lock in such a way as to log any access attempts by an unauthorized transponder.
Only transponders from your own Lock System are logged, since transponders from
other lock systems cannot communicate with your US Locks, so therefore cannot be
recorded.
Open your Lock System for modification. Select the US Lock you would like to
configure (i.e., Main entrance).
Choose Edit > Properties, and then select the Configuration tab. Click on Log
unauthorized accesses and confirm with OK.
43
Manual – LDB 1.5
Page 44
Approve your Lock System, and then program the digital US Lock.
4.2
Digital control unit with pulse control
The relay is preset to pulse control. It unlocks for a set length of time, then re-locks
again automatically. You can define this period of time. Open your Lock System for
modification and click on the control unit you would like to configure.
Choose Edit > Properties. Select the Configuration tab, and then choose the time
you require from the Relay pulse duration drop-down box. Confirm with OK.
44
Manual – LDB 1.5
Page 45
Approve the Lock Plan and program the digital control unit.
4.3
Digital control unit as flip-flop
The relay is preset to pulse control. You can configure the control unit so that its relay
pulls on when the transponder is pressed, and remains on until a transponder is
pressed again. This mode is known as flip-flop. Open your Lock System for
modification and click on the control unit you would like to configure.
45
Comment [WS3]: Need a lockcentric term
Manual – LDB 1.5
Page 46
Choose Edit > Properties. Click on the Configuration tab and check the Flip-flop box.
Confirm with OK and approve the Lock System. Program the digital control unit.
4.4
Digital control unit as time switch
You can program the US Lock so that the lock unlocks at a particular time without a
transponder being pressed, and re-locks again at another set time. In this mode it
functions like a time switch.
For example, the lock under consideration protects the lobby door. You can configure
this lock so that it unlocks at 8:00 am when the business opens and re-locks at 5:00
pm when the business closes. Between 5:00 pm and 8:00 am, authorized user can
gain access by using their transponders.
This feature only works with Access Control versions.
Select Time zone plans and Organize time zone plans. Click on New... and
allocate a name to the new time zone plan.
46
Manual – LDB 1.5
Page 47
Confirm with OK.
Choose Group 5 self-locking and the Days of the week you require. Next, mark the
times at which you want the relay to be activated.
For example if the relay will be active from Monday to Friday, 7 am to 6.30 pm.
You can now choose times for the other days of the week. If you like you can define
holidays in the time zone plan, as described in the section on time zone management.
Save your time zone plan and confirm with Finished.
Mark the control unit you would like to configure. Choose Edit > Properties.
47
Manual – LDB 1.5
Page 48
Under Time zone plan, select the Plan you have created.
Click on Accept.
Choose the Configuration tab. Using the left-hand mouse button, check Flip-flop and
Self-locking so that a tick appears next to each. Access control and Time zone control
must also be checked.
48
Manual – LDB 1.5
Page 49
Confirm with OK. Approve your Lock System and program the digital control unit.
4.5
Digital SmartRelay
If SmartRelay is selected as the lock type in the SimonsVoss software (from version
1.40 onwards), then the following configuration options will be available:
49
Manual – LDB 1.5
Page 50
4.6
Digital SmartRelay – Access control
SimonsVoss in the United States primarily sells the Advanced version
(SREL.ADV) of the SmartRelay. If you make arrangements to purchase the
Standard version (SREL) this feature is not included.
The 1024 most recent transponder actions (respectively) are logged with their dates
and times.
50
Manual – LDB 1.5
Page 51
4.7
Digital SmartRelay – Time zone control
SimonsVoss in the United States primarily sells the Advanced version
(SREL.ADV) of the SmartRelay. If you make arrangements to purchase the
Standard version (SREL) this feature is not included.
A time zone plan can be loaded, and the transponders will then be authorized and
blocked in accordance with their time zone groups.
If a SmartRelay Advanced is being run in time switching mode (Group 5) and
in conjunction with SmartOutput Modules (relay extension), then make sure
crosses are placed next to the SmartOutput Modules affected by the time
switching, and next to associated SmartRelay Advanced components.
4.8
Digital SmartRelay – Overlay
Replacement transponders can overwrite their predecessor transponders. When the
replacement transponder is used for the first time, the transponder previously
assigned to that individual is blocked.
4.9
Digital SmartRelay – Flip-flop
Pulse mode (the default setting) is deactivated, and the length of the pulse is no
longer relevant. When Flip-flop mode is on, the SmartRelay changes its status every
time a transponder is pressed, from ON to OFF or vice versa. This mode is
recommended for switching lights, machines and so on.
With installations of this type, ensure that the power supply and door openers
are also suitable for continuous current operation.
4.10
Digital SmartRelay – Repeater
The SmartRelay receives a transponder signal and sends it, amplified, to other locks.
In this way the SmartRelay can be used to bridge larger radio transmission distances.
The distance between SmartRelays can be up to 6½ feet.
4.11
Digital SmartRelay – OMRON
SimonsVoss in the United States primarily sells the Advanced version
(SREL.ADV) of the SmartRelay. If you make arrangements to purchase the
Standard version (SREL) this feature is not included.
Many access control and time recording systems have serial ports for interfacing card
readers. A SmartRelay can also be connected to this port, enabling you to use
SimonsVoss transponders in other types of systems .
51
Manual – LDB 1.5
Page 52
If you would like the SmartRelay to transmit transponder data to a non-SimonsVoss
system and upon authorization from that system open a lock, then select this option
for both the SmartRelay and the lock.
Define the type of external system under ‘Interfaces’.
4.12
Advanced Properties
SimonsVoss in the United States primarily sells the Advanced version
(SREL.ADV) of the SmartRelay. If you make arrangements to purchase the
Standard version (SREL) this feature is not included.
4.12.1 Digital SmartRelay – Pulse length
This is where you specify the length of the switching pulse, in seconds. This figure
can be between 0.1 and 25.5 seconds. If you enter 3 seconds, for instance, then a
door opener will be released for three seconds before locking again.
4.12.2 Digital SmartRelay – Time switching
When time switching is active, a time zone plan must be loaded which enables the
general authorization of the SmartRelay during the times marked (in Group 5). For
example, a door can be left unlocked for everyone during the day, but can only be
opened with a transponder during the night.
Warning:
With installations of this type, ensure that the power supply and
door openers are also suitable for continuous current operation.
If time switching is selected, the following options will be activated in the Timecontrolled relay switching area (multiple selections possible):
Manual lock
The door is not automatically locked at the defined time, but only when it records
an authorized transponder after that time.
Automatic lock (default setting)
The door is locked at the time defined in the time zone plan.
Manual unlock (default setting)
The door is not automatically unlocked after the defined time, but only when it
records an authorized transponder after that time.
Automatic unlock
The door is unlocked at the time defined in the time zone plan regardless of any
transponder activity.
Transponder active
Only when locked (default setting)
In this mode, the transponder has no effect during the unlocked period.
Always
52
Manual – LDB 1.5
Page 53
Normally, a transponder cannot be used during the unlocked period (day). However, if
you want to enable the door to be locked if necessary (when everyone has left the
building, for example), then select this option.
4.12.3
Digital SmartRelay – Limited range
If you select this option, the detection range between the transponder and
SmartRelay is reduced from approx. 59” to approximately 15”. This option can be
used in situations involving more than one SmartRelay in near proximity, and certain
transponders with authorization for more than one SmartRelay. It is not available for
an external antenna.
4.12.4 Digital SmartRelay – Logging unauthorized access attempts
Under normal circumstances, only authorized transponder actions are logged. If you
would like to record attempts to open a door using unauthorized transponders from
the same Lock System, then select this option.
4.13
Advanced Functions
SimonsVoss in the United States primarily sells the Advanced version
(SREL.ADV) of the SmartRelay. If you make arrangements to purchase the
Standard version (SREL) the following connections are not included.
4.13.1 Digital SmartRelay – Number of extension modules
This is where you specify the number of external modules connected to the
SmartRelay. These modules are connected to the RS-485 COM, RS-485 A and RS485 B terminals. For more information please refer to the documentation of the
modules involved.
4.13.2
Digital SmartRelay – Interface
For operation as a serial port, this is where you define the type of card reader which
the SmartRelay is to simulate. The following options are available:
Wiegand 33 Bit
Wiegand 26 Bit
Primion
Siemens
Kaba Benzing
Gantner Legic
Isgus
You will find wiring details in the section entitled ‘Using the SmartRelay as a serial
port’.
For some external systems it is necessary to select the ‘CLS’ option; this should be
checked by the manufacturer of the external system or the system integrator.
53
Manual – LDB 1.5
Page 54
4.13.3 No acoustic programming confirmations
If you do not want the connected buzzer / beeper to respond when the SmartRelay is
programmed, then check this box.
4.14
Replace control unit with SmartRelay
If you need to replace a control unit with a SmartRelay, then observe the
following:
1. Reset the current status of the lock in the Lock System (see Chapter 8 of the
Software Manual).
2. Change the type from control unit to SmartRelay.
3. Reprogram the SmartRelay.
4. Adjust the configuration if necessary.
It is generally not possible to program locks that differ in terms of hardware and
software.
4.15
SmartOutput Modules (SOM) – Extension modules
Setting up SmartOutput Modules
If SmartOutput Modules are to be used in your Lock System (for controlling an
elevator, for example), then you will have to create a new lock in the software and
define it as a SmartRelay, since the Modules can only be run in conjunction with a
SmartRelay Advanced.
54
Manual – LDB 1.5
Page 55
In the SmartRelay’s configuration screen, you can define the number of SmartOutput
Modules. A maximum of 16 SmartOutput Modules can be entered in the configuration
screen of each SmartRelay Advanced. Depending on the configuration you then
define (with/without signalling), you will therefore have available to you a maximum of
64 outputs (with signalling) or 127 outputs (without signalling) plus 1 output on the
SmartRelay.
The newly created lock will then appear in the Lock System together with the
associated SmartOutput Modules. The SmartOutput Modules are always given a
unique allocation (i.e., Lift main building_Mod#0_Out#1).
Elevator main building
→
Mod#0
Out#1
→
→
Name of the lock (of the SmartRelay belonging to the
SmartOutput Module)
Address of the SmartOutput Module in HEX format (0-F)
Address of the output of the SmartOutput Module (1–8)
55
Manual – LDB 1.5
Page 56
In the above example it is therefore the first output of the first SmartOutput Module. A
maximum of 16 SmartOutput Modules, each with 8 outputs, can be configured in this
way.
Assigning names to SmartOutput Modules
If the function and therefore the name of the lock changes (i.e. Elevator main building
→ Elevator admin building), then this change should be made in the Lock properties
box, which you access via the ‘Name’ screen of the appropriate SmartRelay.
56
Manual – LDB 1.5
Page 57
This automatically changes all of the names of the SmartOutput Modules
linked to the SmartRelay.
SmartOutput Module with signalling (flash function)
If you would like the user to be given particular information via the outputs of the
Output Module – to display the floors for which he is authorized, for example – then
this can be done using additional visual signalling (floor buttons flashing).
57
Manual – LDB 1.5
Page 58
The time an elevator button is lit can be set as the pulse length of the Output Module
concerned, whereas the flashing frequency of authorized buttons is fixed.
If the outputs are connected correctly, then the floor buttons will flash to show the
user which floors are allowed for access using his transponder. If, within the
predefined time, he presses a floor button to select a floor, then that button will light
up without flashing to show the chosen floor.
The number of usable outputs per Output Module drops from 8 to 4 when
used this way; outputs 1–4 respond to the transponder and outputs 5–8
perform the function of a flasher relay.
Outputs 1 & 5, 2 & 6, 3 & 7 and 4 & 8 are permanently assigned to one
another in signalling mode.
The signalling mode and the pulse length always apply to the whole Module.
If authorized, users can also select more than one floor.
The signalling mode is indicated by the last four outputs of each Module having new
names in the Lock System (i.e. Elevator main building_Mod#0_Out#5_Sig#1
58
Manual – LDB 1.5
Page 59
Elevator main building
→
Mod#0
Out#5
Sig#1
→
→
→
Name of the lock of the SmartRelay belonging to the Output
Module
Address of the SmartOutput Module
Address of the output of the SmartOutput Module
Signaling mode active, the output shows the status of output 1
by flashing
SmartOutput Module – Inverting outputs
Since the outputs of the SmartOutput Module are not available as changeover
contacts from a hardware point of view, the software offers you the possibility to
configure the inversion of the Module’s outputs. By checking or un-checking the Invert
outputs box, the output can be defined as a NC or a NO contact.
The relay outputs of the SmartOutput Module are always NC contacts in terms
of their hardware.
Inverting the outputs always applies to the entire Output Module.
Increasing the number of SmartOutput Modules
If you need to add more SmartOutput Modules to your Lock System, then these
should also be assigned to the corresponding SmartRelay type lock.
59
Manual – LDB 1.5
Page 60
In the Lock properties of the SmartRelay (i.e. for the Admin building lift), choose
Configuration > Advanced functions to enter the total number of extension modules
(max. 16).
The software uses the number entered there to automatically generate the
appropriate locks (outputs) on the Module along with the associated Module address
(i.e. Lift admin building_Mod#2_Out#1 to Out#8).
Reducing the number of SmartOutput Modules
60
Manual – LDB 1.5
Page 61
If you need to reduce the number of existing SmartOutput Modules in your Lock
System, you can change the total number of extension modules (max. 16) in the Lock
properties of the SmartRelay (i.e. for the Admin building elevator) under Configuration
> Advanced functions.
If the number of modules is changed, then modules that have already been
programmed may require programming again. The associated lock IDs (LIDs)
may also change too.
The software automatically deletes the corresponding locks (outputs) in the module
with the associated module address (i.e. Lift admin building_Mod#2_Out#1 to Out#8).
61
Manual – LDB 1.5
Page 62
Moving a SmartRelay with SmartOutput Modules
If you want to move the SmartOutput Modules within a Lock System – for example to
another area – then you must always move all of the SmartOutput Modules along with
the associated SmartRelay, since these components form a single unit from the point
of view of the software.
Deleting the SmartRelay with SmartOutput Modules
If you need to remove a SmartRelay from the Lock System, then all of the
SmartOutput Modules that are allocated to this SmartRelay will also be automatically
deleted.
Unlike the deletion of a normal lock, this action can always be undone.
Programming the SmartOutput Modules
The SmartOutput Modules can only be programmed via the associated SmartRelay
(only the SmartRelay has the radio communication interface needed). To ensure that
all of the changes from the Lock System are transmitted to the various Modules, you
should always select the ‘Program all module outputs on the SmartRelay’ option
when programming the SmartRelay.
This procedure can take quite a long time, depending on the number of Output
Modules, since all of the locks (outputs) must be programmed one after the
other in one single programming operation.
62
Manual – LDB 1.5
Page 63
If the Output Modules are programmed using a PDA, then those modules are
not offered when exporting the data to the PDA. They are only exported as a
unit together with the SmartRelay.
SmartOutput Modules in a network
If the SmartRelay and associated Output Modules are to be integrated into a
SimonsVoss network, then all of the module outputs must always be assigned to the
same Lock Node.
The software generally attempts to do this automatically. Should this fail to
happen, then you will have to update the affected nodes and locks. Contact an
authorized SimonsVoss representative to request assistance with this.
Replacing a defective SmartOutput Module
Should you need to replace a defective SmartOutput Module at any stage, you will
have to reset the data associated with that SmartOutput Module in your Lock System.
To do this, go to the Lock properties of the lock (output) of the associated module
and, in the Data tab, click the button labelled ‘Lock has been reset’.
Resetting the module causes a programming flash to appear behind the locks
associated with the module, and the authorization crosses appear ‘thin’.
63
Manual – LDB 1.5
Page 64
The target and current data remain unchanged when you click this button (the
current data is not set to ‘zero’).
Once the data has been reset, the newly installed module must be completely
reprogrammed; otherwise unwanted authorizations may remain in the
memory.
4.16
Furniture lock
When you create a new lock, choose Furniture lock as its type. Please refer to the
operating instructions of the furniture lock for the meanings of the configuration
settings.
64
Manual – LDB 1.5
Page 65
5.0
Master level
5.1
Setting up a master level
A master locking level has to be set up if you want a transponder to operate in more
than three Lock Systems.
Instead of having the transponder learn more and more passwords (the password of
the 3rd Lock System is the limit of its capacity), the way it is done is to teach all of the
locks (US Locks, SmartRelays, etc.) – no matter which Lock System they belong to –
another password: the password of a ‘master level’.
Take the fire department’s password as an example:
A fire department transponder which has been programmed with this password, and
the appropriate authorization, can operate all of the locks that have been
programmed with this additional fire department password and authorization –
regardless of which Lock System the locks belong to (assuming the Lock Systems’
owners have agreed to this).
To program a master locking level, please proceed as follows:
Choose New > Master level.
Enter the name of the master level (i.e. fire department). The ‘fire department’ must
now enter its personal password twice (i.e. fire)
The password is shown in asterisks for security reasons
A lock can differentiate between up to three master levels (symbolically green,
blue and red). All of the transponders within a master level have the same
rights.
Now select a level: green, blue or red (i.e. Red).
Click OK & Continue if you would like
to create more levels, otherwise click
OK & Finish.
65
Manual – LDB 1.5
Page 66
5.2
Setting up a master transponder
Choose New > Transponder. Enter the name of the owner. (i.e. Brian Wiberg)
Under Type, click on Transponder for master level and select the master level in the
drop-down list box. (i.e. Fire Department)
If you would like to set up more transponders, click on OK & Continue, otherwise
click OK & Finish.
Under Authorize > Open Lock System, open all of the Lock Systems. Assign the
authorizations using the mouse.
A warning always appears whenever you change authorizations within the master red
level:
This note is intended to inform the user that his change may affect the fire
department’s access authorization.
You can now set up other levels (max three per lock) along the same lines. The
crosses will appear in green, blue or red, depending on level.
A lock cannot differentiate between two levels of the same color, so if there
are two you will have to opt for one of them.
66
Manual – LDB 1.5
Page 67
You can also program a master transponder as a normal transponder in two
other Lock Systems.
A transponder can only ever contain a maximum of one master locking level.
5.3
Programming master transponders
Click on the user of the master transponder (i.e. Brian Wiberg) so that he is
highlighted. Choose Programming > Master transponder. Next, enter the password
for the master level (i.e. fire - the word is shown in asterisks for security reasons)
Confirm with OK, and then press the transponder button briefly. The master
transponder is now programmed. Confirm the message with OK, and then close the
subsequent window with Cancel.
Choose Authorize > Approve Lock System. Select each Lock System in turn, and
enter its password.
67
Manual – LDB 1.5
Page 68
Finally, program the locks that require programming.
5.4
Deleting a level
You can obtain an overview of the master levels by choosing View > Master levels.
The authorization of the transponder must be deleted for all locks before you can
delete a master level. Open the Lock Systems using the passwords, and remove the
crosses. Approve the Lock System again and program all of the locks that have been
affected. You then select the master transponder (i.e. Brian Wiberg) and remove it
using Edit > Cut.
You can delete the master level at View > Master level by clicking Delete.
68
Manual – LDB 1.5
Page 69
Close the window with Exit.
5.5
Changing the password
Choose View > Master locking levels. Select the locking level whose password you
would like to change.
Click Password... enter the old password. Press the Tab key and enter the new
password.
69
Manual – LDB 1.5
Page 70
Confirm the new one by entering it a second time, then click OK.
Finally, close the Master levels window by clicking OK.
70
Manual – LDB 1.5
Page 71
6.0
Retrieving data from a component
6.1
Retrieving data from a lock
Position the lock in front of the Configuration tool. Choose Programming > Read
Unknown Lock. You will be given the following information:
Lock System ID
Name and ID number of the Lock System
Lock ID
Name and ID number of the lock
Software version
Software version of the lock
Status
Battery status of the lock
Data errors
Backup battery active
Emergency release active
Deactivated (if alarm system is armed)
Flip-flop on
Configuration
Configuration of lock
When retrieving data from a known lock, it is simultaneously marked in the
Lock Plan.
71
Manual – LDB 1.5
Page 72
6.2
Retrieving transponder lists
This shows you the authorized transponders. Position the Configuration tool in front of
the lock and click on the Transponder list button.
You will be given a list of the authorized persons, including the ID numbers of their
transponders.
Confirm with OK.
6.3
Retrieving Access Lists
To assist in monitoring your building, you can use the Configuration tool to obtain
information about the 1024 most recent accesses to components with integrated
access logging.
Position the Configuration tool in front of the lock and click Access List.
You will be given a list of the dates, the times, and the names of the transponder
owners and their transponder ID numbers.
You can save and print this list.
72
Manual – LDB 1.5
Page 73
Unauthorized, unsuccessful access attempts can also be logged (see section 4.1).
They appear in the list with the comment ‘Access not allowed’.
6.4
Organizing Access Lists
You can obtain an overview of accesses to a lock in its Properties dialog box. Select
the lock. Choose Edit > Properties.
Use the left-hand mouse button to click on the Transponder tab, and then the Access
List button.
73
Manual – LDB 1.5
Page 74
This will give you an overview of the most recent access events. You can set the
number of saved accesses between 0 and 10000 by entering the amount in
memorize last and clicking Save. You can save or print out this list. To close the
window, click Exit.
This list will update itself automatically whenever an Access List is retrieved.
6.5
Retrieving data from transponders
You can also retrieve data from a transponder. Position the transponder in front of the
Configuration tool. Choose Programming > Read transponder. When requested,
briefly press the transponder button.
You will be given information about the number of data sets (i.e. how many Lock
Systems the transponder is authorized to operate in). If the current Lock Plan is open,
the name of the Lock System and the name of the transponder and its time zone
group will also be displayed. The status of the transponder battery and the
transponder’s software version will be shown at the bottom left. If you would like to
retrieve data from more transponders, click on the Read button, otherwise click Exit.
When retrieving data from a transponder, it is simultaneously marked in the
Lock Plan.
74
Manual – LDB 1.5
Page 75
Transponders with validity periods contain the following additional data:
Activation date, if set – when the transponder is valid.
Deactivation date, if set – when the transponder is valid until.
For example: Activation date May 6 2006 at approx. 8 am, deactivation on June 17
2006 around 5 pm.
Click Exit.
Transponders with validity periods can only be programmed in one single Lock
System.
75
Manual – LDB 1.5
Page 76
7.0
Passwords
7.1
Changing the Lock System password
Open the Lock System. Click on the bar containing the name of the Lock System so
that it is highlighted. Choose Edit > Properties. In the window which opens, click on
the Password tab. Enter your old and new passwords (+ confirmation). Confirm your
entries by clicking OK.
Whenever you change the password of the Lock System, you then have to reprogram
all of the locks and transponders. For this reason you should only make this change if
absolutely necessary, for example, if the password has become known to others.
If you are using a password transponder, then this also has to be
reprogrammed if the password is changed. Choose Programming >
Password transponder. Enter your new password and then click OK.
Warning: Do not reset the password transponder beforehand. If you reset a
password transponder, it automatically becomes a normal transponder.
76
Manual – LDB 1.5
Page 77
7.2
Password for access monitoring
For data protection reasons, certain people are often not permitted to obtain access
audit information. In such cases, a second password can be given to people such as
HR or security supervisors, so that access audit logs can only be retrieved when this
second password is provided.
Open the Lock System. Click on the bar containing the name of the Lock System so
that it is highlighted. Choose Edit > Properties. In the window which opens, click the
Access logging tab. Check the Access logging with password box. If a password has
already been allocated, then enter it under Old password. If not, simply enter the
New password. Confirm it and click OK.
Thereafter, whenever you retrieve audit data from a component, the software will
automatically ask for this password when you click the Access List button. Not until
the password is entered correctly will the Access List be retrieved.
7.3
Changing the file password
Choose File > File password....
Enter the Old password, if there is one. If the Lock System has been saved without
a password, then simply enter the New password and confirm it.
77
Manual – LDB 1.5
Page 78
Click OK.
78
Manual – LDB 1.5
Page 79
8.0
Replacing a component
8.1
Replacing a lock
If you replace a lock that cannot be reset, then the software will not be able to
program the new lock at first. First you have to reset the lock in the Lock System:
Open your Lock System for modification. Click on the lock (i.e. Main entrance) which
you would like to replace so that it is highlighted in the Lock System. Choose Edit >
Properties. Select the Data tab, and then click on the button entitled Lock has been
reset.
The current figures will return to 0 in the Lock System. Confirm with OK. You do not
need to perform this operation (nor should you) if the ‘old’ lock you are replacing can
be reset; after resetting, the new lock can be programmed immediately. Approve the
Lock System and program the lock.
8.2
Resetting a lock
Position the Configuration tool in front of the lock concerned. Choose Programming
> Reset lock. The lock’s data is retrieved to begin with, and a window opens
containing its information. Enter your password (i.e. test) for the Lock System. The
password is shown as asterisks when entered so it can not be seen by anyone
looking over your shoulder.
79
Manual – LDB 1.5
Page 80
If you would also like to delete the access audit log, then check Delete Access List.
Click on Reset. The programming is deleted, and the component is now in the state
in which it was originally supplied and is available for reprogramming. In the Lock
Plan, the yellow programming symbol reappears and the crosses showing selected
transponders are changed from bold to thin. If you would like to remove the lock from
the Lock Plan, then click on it and choose Edit > Cut.
8.3
Copying a transponder
You can make multiple copies of a transponder. Select the transponder you would
like to copy so that it is highlighted. Choose Programming > Transponder. Confirm
the transponder programming if necessary. Next, click the Program button, and
briefly press the button on the transponder.
The locks do not need to be reprogrammed after this.
The number of copies to be set up can be defined in the transponder’s Properties
dialog box. Select the transponder and choose Edit > Properties. Select the Lock
Systems tab. The number of copies can be entered near the bottom of the box.
80
Manual – LDB 1.5
Page 81
8.4
If a transponder is lost
Normally a new transponder is created and the lost transponder blocked. Open your
Lock System. Click on the name of the transponder (i.e. 12012 Karin Lewis) which
you would like to replace so that it is highlighted.
Choose New > Spare transponder. You will be asked to confirm. If you have chosen
the wrong name, you can change it using the Transponder drop-down box. Otherwise
simply confirm with OK. The crosses in the column of the transponder you have
removed will appear in grey. The new transponder is given the same name but with
the extension -0001.
You can change the name afterwards if required.
81
Manual – LDB 1.5
Page 82
Approve your Lock System.
Click on the spare transponder so that it is highlighted. Choose Programming >
Transponder. The Program transponder window will open. If the name of the Lock
System appears beneath the Authorize button, then the programming of the
transponder will have to be approved once again.
In the window, click Authorize and enter the password for your Lock System. Click
the OK & Continue button, and then confirm the message with OK. Position the
transponder in front of the Configuration tool and click Program. Briefly press the
transponder button.
82
Manual – LDB 1.5
Page 83
Once successfully programmed, the window can be closed by clicking OK and then
Exit.
What you do from there depends on whether your Lock System is operated
in Overlay Mode or not.
If the Lock System is operated in Overlay Mode, you can conduct programming using
the spare transponder. Take it to the locks which the lost transponder was authorized
to operate. In this example this includes Main entrance, barrier, entrance building 402
1st floor, Office 101, Office 102, Entrance to building and 402 2nd floor.
At each lock, press the transponder button so that the lock responds. The data of the
replacement transponder will be transmitted to the lock, and the lost transponder
automatically deleted.
In the Lock Plan, the programming symbol remains until the lock is programmed or
data (the transponder list) is retrieved from it using the SmartCD configuration tool.
If the System is not being operated in Overlay Mode, then reprogramming can only be
performed using the configuration tool. Go to the locks that require programming.
Again, in this example this includes Main entrance, barrier, entrance building 402 1st
floor, Office 101, Office 102, Entrance to building and 402 2nd floor.
Click on the lock concerned so that it is highlighted.
Choose Programming and Lock. Position the configuration tool in front of the lock
and click OK. Program the other locks in the same way. To close the window, click
the Exit button.
83
Manual – LDB 1.5
Page 84
8.5
Resetting a transponder
Choose Programming > reset transponder.
Hold the transponder in front of the configuration tool and click Reset.
Briefly press the transponder button. The transponder data is now completely deleted,
and the transponder is available for a new user.
The transponder does not actually reset entirely to its original state. This
transponder no longer works with a new or reset lock. Not until both
components have been reprogrammed will the lock respond to the
transponder again.
Confirm the message with OK. To close the window, press Finish.
84
Manual – LDB 1.5
Page 85
9.0
Block lock components
9.1
Arming unit (SSM and SSS)
The arming unit is used to arm the alarm system. If you would like to add the block
lock components at a later stage, open your Lock System using the password.
Otherwise, create a new Lock Plan.
Choose New > Lock. Assign a name for the arming unit (i.e. Alarm system).
In the Type box, select Control unit. Click OK & Exit, or OK & Next if you would like
to set up more arming units.
To avoid mutual interference, place the arming unit in a separate Lock Plan
(does not apply to VdS components).
In the Lock Plan, place a cross by the member of staff who is authorized to switch the
alarm system on and off.
Note: In such cases, the transponders do not require reprogramming.
Authorize your Lock System and program the arming unit under Programming >
Lock.
85
Manual – LDB 1.5
Page 86
The arming unit requires a power supply for programming, which can, for
example, be provided using a 9 Volt battery. Arming unit(s) and deactivation
units are separated from one another for programming. Block lock
components are not wired together until successfully programmed.
9.2
Deactivation unit
When the alarm system is armed, the deactivation unit ensures that a door of the
secured area cannot be opened accidentally, even with an authorized transponder. It
thus prevents false alarms.
Click on the row in the Lock Plan above which you would like to insert a deactivation
unit. Choose New > Lock. Assign a name to the deactivation unit (i.e. Deactivation
unit, main entrance).
In the Type box, select Control unit. Click OK & Exit. If you would like to set up more
deactivation units, repeat these steps.
We recommend inserting each deactivation unit above its associated digital
US Lock in the Lock Plan, in order to keep a clear overview of the deactivation
units.
Deactivation units do not need authorization, so crosses do not have to be placed
alongside them. Authorize your Lock System and program the deactivation units
under Programming > Lock.
The deactivation unit requires a power supply for programming, which can, for
example, be provided using a 9 Volt battery. Arming unit(s) and deactivation
units are separated from one another for programming. The components are
not wired together until successfully programmed.
86
Manual – LDB 1.5
Page 87
Retrieve the data from the block lock components: Programming > Read unknown
lock. The type of the component is displayed (deactivation unit or arming unit). Slave
units respond as control units with pulse control.
WARNING: Changing the configuration manually will cause the block lock component
to malfunction.
87
Manual – LDB 1.5
Page 88
10.0 Opening, saving, printing . . .
10.1
Opening a file
Choose File > Open. Files are normally saved in the following folder: Hard drive
C:\Program Files\Simons & Voss\System3060. If you have saved your files in a
different folder, select it in the Look in: drop-down list box. You will then see a list of
the Lock Systems that have been saved (i.e. Sampleson.ls).
Click on the Lock System you would like to open so that it is highlighted. Click the
Open button.
Enter the file password to open the Lock Plan, if there is one.
Click on OK and the Lock Plan will open.
88
Manual – LDB 1.5
Page 89
10.2
Saving a file
Approve your Lock System. Choose File and Save as....
In Save as:, select the folder in which you would like to save the file. Files are
normally stored in the following folder:
Hard drive C:\Program Files\Simons & Voss\System3060. Under File name, enter the
name you would like to give the file, then click Save.
If you are using a desktop computer to manage your Lock Plan and a laptop
for programming, we strongly recommend that you do not save your Lock Plan
on the laptop’s hard drive. If you do there is a risk that, after programming a
lock, you will forget to upload the updated Lock Plan to your desktop and you
will continue to use the old Plan instead.
Warning: Always create a backup copy of your Lock Plan, preferably somewhere
other than the hard drive used to store the original.
If you are saving the file for the very first time, you will automatically be asked for a
password. This is the password which you will later use to open the file. The file
password and Lock System password can be identical.
Enter a password and press the Tab key. Confirm the file password and click OK.
89
Manual – LDB 1.5
Page 90
Once you have saved the file with a password, you will not be asked for it the
next time. You can change it at any time under File > File password.
We recommend that you secure your files using passwords.
10.3
Printing out a Lock Plan
You can obtain a view of the printout under File > Print Preview. From there you can
perform the following actions:
Print...
Next
Previous
One page / two pages
Zoom in
Zoom out
Close
Prints the current Lock Plan.
Shows the next page
Shows the previous page
Shows one page or two next to one another
Enlarges the view
Reduces the view
Closes the window
However, as with other conventional Windows applications, you can also print the
Lock Plan using the standard File > Print dialog box.
90
Manual – LDB 1.5
Page 91
You can change the layout of the Lock Plan by choosing Options and Printer.... In
the window that opens you can adjust the following settings:
Top margin
Comment
A margin of ... mm is inserted along the top edge
A comment is inserted at the top of the Lock Plan on the printout
Print name on every The comment is printed on every page / only on the first page
page
You can also define the length and height of the label boxes in the Lock Plan
(transponders and locks). To activate these settings, you first have to uncheck the
two boxes entitled ‘Adjust length/height to font’. Under Select printer font... you can
set up the printer in the usual manner for Windows.
10.4
Printing statistics
The statistics show you how many locks you have set up in the Lock Plan. US Locks
are sorted by installed length and other properties. SmartRelays, control units and
furniture locks are listed according to their properties. Open the Lock System by
choosing Authorize > Open Lock System.
Click on the first lock so that it is highlighted. Choose Edit > Properties.
Click on the Specifications tab and enter the specifications of the digital US Lock, of
the digital control unit.
91
Manual – LDB 1.5
Page 92
If you have already programmed the lock, then you will see the data which the
software has retrieved from it, such as product type, serial number and
installed length (for European-profile cylinders).
If it is not a digital lock but another kind of lock, click first on the Name tab.
Click on the appropriate lock type.
Then click Apply, followed by the Features tab. Next, enter the details of the lock.
Repeat these steps until you have entered the details of all the locks.
Choose File > Print statistics.
92
Manual – LDB 1.5
Page 93
10.5
Printing labels
You can print labels bearing the names of the locks and transponders, which can be
used, for instance, to label the packages in which locks and transponders are kept.
Choose File > Print lock labels or File > Print transponder labels.
Under Lock System, select the System you require. If you would like to print out all of
the labels, then click OK. If you only want to print out certain labels, then uncheck the
All locks box and select the ones you want to print.
Finally, confirm with OK.
93
Manual – LDB 1.5
Page 94
Define the format of the labels:
64.6 mm x 33.8 mm
48.5 mm x 25.4 mm
88.9 mm x 35.7 mm
Page start
Corrects the printer setting if labels are being printed too far to
the side or too high up.
Begin with no.
The labels are numbered in sequence from left to right, top to
bottom. If, for example, the first five labels are missing from a
sheet, then begin with no. 6.
Confirm with OK.
94
Manual – LDB 1.5
Page 95
11.0 Additional functions
11.1
Find and move
You can look for Lock Systems, locks and transponders using Edit > Find. Select
the action you require and enter the name of the component you are looking for (i.e.
Poke).
Start the searching with Next. Click Cancel to finish.
It is usually sufficient to enter only part of the word you are looking for, since
the program searches for matches in the whole box.
As is usual in Windows, you can move transponders and locks around. For instance,
click on a transponder you would like to move, so that it is highlighted. Hold down the
left-hand mouse button and drag the mouse to the position where you would like to
insert the transponder, and then release the mouse button.
11.2
Sorting transponders and locks
Choose View > Sort transponders. You can sort transponders according to name,
ID number, time zone group, transponder group and programming requirement.
Divider bars are also taken into account if required. You can also sort between
particular divider bars. Select the name of the divider bar after which you would like to
perform the sorting function. Under Order, define whether you would like to sort the
transponders in Ascending order (A to Z) or Descending order (Z to A), then confirm
with OK:
The first entered letter is always used for sorting.
The same function exists for locks, which you can sort by name, ID number, network
address or programming requirement. Choose View > Sort locks and select the Lock
System you require.
95
Manual – LDB 1.5
Page 96
11.3
Changing names
Open your Lock System with Authorize > Open Lock System. Click on the lock or
transponder whose name you would like to change. It will appear in blue.
Choose Edit Æ Properties. You can now change the name (i.e. 12012 Karin Lewis0001: change to 12012 Karin Lewis)
Finally, confirm with OK.
96
Manual – LDB 1.5
Page 97
11.4
Performing emergency opening
If there is no authorized transponder available, you can perform an emergency
opening using the Configuration tool and your password. To do this, choose
Programming > Emergency Unlock.
Enter your password for the Lock System and click Unlock.
The password for a lock that has not been programmed is 0x0 (zero, lowercase x, zero). Please note that locks cannot be emergency-unlocked in
Storage Mode.
If the data you enter is not accepted, check your password, making sure you
enter the correct upper and lower case letters.
11.5
Setting the time
If the time recorded by a lock is not the same as the actual time, you can reset it.
You should reset the time in the locks at least once a year in order to
guarantee accurate times. The holiday list for the next 127 weeks is also
regenerated.
Approve the Lock System using the password. Click the lock concerned so that it is
highlighted. Choose Programming > Set clock in lock. You can then change the
Lock System and/or lock in the window which opens. Position the Configuration tool
in front of the lock, and then click OK.
The computer’s time is always used, so you should check to make sure its
date and time are correct.
97
Manual – LDB 1.5
Page 98
11.6
Deactivate Storage Mode
Digital US Locks containing software version 10.0 and higher are delivered in an
energy-saving mode known as Storage Mode. This is automatically deactivated the
first time the lock is programmed. For test purposes you can also deactivate it under
Programming > Special functions > TN3: deactivate Storage Mode.
98
Manual – LDB 1.5
Page 99
12.0 Importing and exporting
12.1
Exporting and importing to and from Palm & Pocket PC databases
You will find a detailed description of these procedures in the manuals of the
PalmLDB and SmartLSM software products.
12.2
Importing locks and transponders
Instead of entering the names of the locks and transponders manually into the Lock
Plan, it is also possible to import them from an existing (customer’s) file. This file
might for example be an Excel spreadsheet which contains the names of the locks in
column A and the names of the employees (transponders) in column B. Save this file
in CSV format (i.e. Sampleson ltd.)
You can use the file ‘Sampleson ltd’ to create a new Lock Plan, or you can add it to
an existing Lock Plan.
99
Manual – LDB 1.5
Page 100
Before importing, you first have to set up a new Lock System in LDB (in this case for
Sampleson Ltd.), along with a password. After that, choose File > Import > Lock
System.
Open the file that contains the names of the locks and transponders (i.e. Sampleson
ltd.csv)
Define whether you want to import the Locks or Transponders. You must also define
the kind of separator used in the .csv file to divide the data entries (Semi-colon, Tab,
Comma).
In our examples, the locks are listed in the first column. This you specify under
Orientation. Confirm with Continue.
In the window which then opens, select the Lock System into which you would like to
import the names.
The software will then set up the locks.
After that, import the transponders in the same way. Assign the authorizations, and
program the components.
100
Manual – LDB 1.5
Page 101
12.3
Importing a complete Lock Plan
You can also import a Lock Plan created by a customer – one set up in Excel, for
example. Save it first in CSV format.
Set up a new Lock System. Choose File > Import > Lock System. Next, open the
file containing the Lock Plan.
101
Manual – LDB 1.5
Page 102
In the Import window, select the function ‘Lock Plan’ then define the Separator
(semi-colon, tab, comma) used to divide up the entries in the file. Under Orientation,
specify the columns or rows in which the locks and transponders are located. In
Symbol for access authorization, enter the letter or digit used in Excel to signify
access authorization.
Confirm your entries with Continue and then select the Lock System. The complete
Lock Plan is then imported.
102
Manual – LDB 1.5
Page 103
12.4
Overview of lock properties
You can obtain a precise listing of the lock and transponder data using the export
function. Choose File > Export > Locks.
Select the Lock System. If you would like a listing of particular locks, uncheck the All
locks box and select the lock or locks you want to list.
103
Manual – LDB 1.5
Page 104
You can select several locks at once using the Ctrl key.
Confirm with OK.
Place a check alongside the lock properties you would like to export, then confirm
with OK.
104
Manual – LDB 1.5
Page 105
The Save as window will open. Name the file (i.e. Sampleson.csv), and then save it in
CSV format.
Open Windows Explorer. Select the path under which you have saved the file. Open
the file by double-clicking the file name. This file can be opened and edited in a
program such as Microsoft Excel.
105
Manual – LDB 1.5
Page 106
12.5
Overview of transponder properties
You can enter additional data on every transponder, such as private addresses. To
do this, open the Lock Plan and click on the name you want to add information to (i.e.
12010 Toni Curtis).
Enter the details – such as address, telephone and so on – and confirm with OK.
Repeat the steps for the other transponders.
106
Manual – LDB 1.5
Page 107
When entering the address, you will need to press Ctrl and Enter in order to
move down a line.
Choose File > Export > Transponder.
If you would like a listing of only particular transponders, uncheck the All
transponders box and select the transponders you want to list.
107
Manual – LDB 1.5
Page 108
You can select several transponders at once using the Ctrl key.
Confirm with OK. The Transponder properties window will then open automatically.
Place a check alongside the transponder properties you would like to export, then
confirm with OK.
The Save as window will open. Name the file and save it in CSV format. Confirm with
OK.
Open Windows Explorer. Select the path under which you have saved the file. This
file can be opened and edited in a program such as Microsoft Excel.
108
Manual – LDB 1.5
Page 109
12.6
Exporting a complete Lock Plan
You can export a complete Lock Plan into a program such as Excel, make changes to
it, then import it again.
Choose File > Export > Lock System. Select the path under which you would like to
save the file. Give the file a name with the file extension .csv and click Save.
In the Export window which then opens, define the format of the separator (Semicolon, Tab, Comma).
Excel requires a semi-colon as a separator.
109
Manual – LDB 1.5
Page 110
Assign the character which is to be used to signify access authorization in Microsoft
Excel. Click on Continue and select the Lock System which you would like to export.
Confirm with OK.
Start up the program (such as Microsoft Excel) and open the CSV file. You can then
make changes and assign authorizations, and set up new transponders and locks.
Note: Do not change the names of existing locks or transponders.
Save the file and import the new Lock Plan (see ‘Importing a complete Lock Plan’,
section 12.3).
The LDB Lock Plan software will automatically incorporate your changes.
110
Manual – LDB 1.5
Page 111
13.0 Views
13.1
Cross-hairs, label boxes, ID numbers
Cross-hairs
The cross-hairs make it easier to check whether a transponder is authorized for a
particular lock. You can switch the cross-hairs on and off using View > Crosshair.
Enlarge label boxes
You can adjust the size of the columns and rows using Options > View when the
height and width of the SimonsVoss logo changes, the label boxes for the
transponders and locks automatically change too.
ID numbers
Click on the Lock System so that it is highlighted. Choose Edit > Properties, then the
Locks or Transponders tab, and you will obtain a list of the existing locks or
transponders, including the ID numbers.
111
Manual – LDB 1.5
Page 112
13.2
Installed lock lengths
You can display the installed lengths of the locks behind each lock name.
Choose View > US Lock length.
European-profile locks have an inside and outside length as measured from the latch
connection to the stated side of the door. US locks are not measured this way but
this version of the software still has these measurements which can be used in any
way you wish. These values have no affect on operation.
You can enter installed lengths as follows:
Select the locks and choose Edit > Properties. Select the Features tab. Enter the
lock lengths.
13.3
Authorization for a transponder
You can create a list of all the locks which a specified employee (transponder) is
authorized to operate. Click on the name of the transponder (i.e. 12012 Karin Lewis)
so that it is highlighted.
Choose Edit Æ Properties. In the window which opens, click the Locks tab.
112
Manual – LDB 1.5
Page 113
If required, press the Print
button.
Click OK to close the
window.
Another way of printing out a list of authorized locks is while you are programming the
transponder. Click on the name of the transponder (i.e. 12012 Karin Lewis) so that it
is highlighted.
Choose Programming > Transponder. At the bottom of the window, click Print. You
will see a list of authorized locks.
Click Finish to close the window.
113
Manual – LDB 1.5
Page 114
13.4
Authorizations for a lock
You can obtain a list of the people authorized to operate a particular lock as follows:
click on the lock (i.e. Office 103) so that it is highlighted.
Choose Edit > Properties. Then select the Transponders tab. A list of all the
authorized transponders appears.
This list can also be printed out. Click OK to close the window.
114
Manual – LDB 1.5
Page 115
13.5
Transponder groups
You
can
see
which
transponder
group
a
transponder belongs to in the
Transponder
properties
window.
Choose
the
Transponder group tab.
You can obtain information
about which Transponder
groups locks belong to in the
same way (Lock properties).
115
Manual – LDB 1.5
Page 116
14.0 Special transponders
14.1
Password transponders
Instead of entering the password via the keyboard, you can program a password
transponder. Then, whenever you want to open or approve the Lock System, you
simply press the password transponder in front of the Configuration tool. The
password transponder transmits the password by radio. You cannot create a
password transponder using a normal transponder; a special password transponder
is required.
Choose Programming > Password transponder. Enter the password of your Lock
System (i.e. test). The password letters are shown as asterisks so that the password
can not be read by someone looking over your shoulder.
Confirm the password with OK, and briefly press the push-button on the transponder.
If you want to use the transponder to enter the password from now on, you must
make the following settings:
Click on the Lock System so that it is highlighted. Choose Edit > Properties and then
Authorize with password transponder. Confirm with OK.
116
Manual – LDB 1.5
Page 117
You can also enter the
password manually to open
and approve the Lock
System. To do this, when
authorizing
the
Lock
System, click Password
Input in the Password
confirmation area. You can
then enter your password
manually.
14.2
Activation transponder
This transponder is used in an emergency to activate digital US Locks if they have
been deactivated by arming the alarm system while using the block lock function.
You can use a standard transponder for this purpose. Choose Programming >
Special functions > Activating transponder.
In the window which opens, select the Lock System.
Confirm with OK.
Briefly press the transponder’s push-button.
An activation transponder will not open a lock.
Activation can also be performed using a red level transponder (i.e. for the fire
department).
117
Manual – LDB 1.5
Page 118
14.3
Creating a CD transponder (not compatible with SmartCD)
PalmCDs can also be used as transponders in your Lock System, with the HotSync
button acting as the push-button. In LDB, set up the PalmCD as a new transponder or
select an existing transponder which you would like to replace with the PalmCD.
Using the cable supplied with the PalmCD, connect it to a free serial port on your
computer. The Configuration tool must contain batteries.
Choose Programming > Special functions > Create CD transponder. Approve the
transponder programming if necessary, and click the Programming button.
The CD transponder’s data is retrieved using Programming > Special functions >
Retrieve data from CD transponder; you can reset the CD transponder in the same
window.
118
Manual – LDB 1.5
Page 119
15.0 Setting up a network
15.1
Setting up a CentralNode
Connect the CentralNode to a free serial port on your PC (i.e. COM1). Choose
Options > Comport.... Select the appropriate port for the CentralNode. If the Config
Device and CentralNode are to be used alternately on a shared port, then you have to
set the current device in this window (i.e. Central Node on COM1 port)
If you have another serial port available for the Config Device, then check that COM
port beneath Config Device.
Confirm with OK.
Choose Programming > Check Programming Interface. The Central Node will
report its current software version.
119
Manual – LDB 1.5
Page 120
15.2
Network Setup
The Network setup function is used to configure the network. Changing these settings
can cause some network components to stop working properly, which is why this
configuration should only be performed by appropriately trained staff.
Choose Options > Network setup. Enter the password ‘3060’ for Network Setup.
Under Setup password,
please assign a new
password to protect your
setup against unauthorized
modification.
120
Manual – LDB 1.5
Page 121
15.3
Registering a network node
You must tell the software which nodes are installed in the network. Lock Nodes all
belong to particular groups. For example, all of the nodes on the first floor belong to
Group 001, and those on the second floor to Group 002. The Lock Nodes also have a
‘Member ID’. Both numbers are printed on the Lock Nodes.
Click the Manage network nodes button. Next to Network group, select the relevant
group. Under Add new nodes to area:, enter the Member IDs. In the case of individual
numbers, enter the same number in the from: and to: boxes; otherwise, enter the
numbers of the area concerned. Click Add, until you have registered all of the
network nodes. Once you have entered all of the nodes in all of the groups, confirm
with Exit.
Network nodes that are not registered cannot be contacted.
New nodes can be added at any time.
15.4
Testing Lock Nodes
Next, test the Lock Nodes by pressing the Test Network Nodes button. You can
make the following settings:
Test individual nodes:
Enter their Group and Member ID and click OK.
All of the nodes in a group: Enter the group concerned and click All nodes, then click
the OK button.
All of the nodes in a network:Click All groups and All nodes, followed by the OK
button.
121
Manual – LDB 1.5
Page 122
Select the action you would like to perform.
Next you will receive a list of all the Lock Nodes that have been successfully tested. If
a Lock Node did not respond, it will appear in the Error List on the right. Test such
network nodes again individually. If it fails to respond again, then check whether the
Lock Node batteries voltage is correct (approximately 41 V).
You can print out the Successful and Error lists by clicking on the appropriate Print
button.
You cannot proceed with the next steps until all of the network nodes have responded
successfully.
Click Exit, then once again on Exit.
122
Manual – LDB 1.5
Page 123
15.5
Assigning/changing the network password
Data communication between the software and the individual nodes can be encoded
using a network password. If you change this password, you must inform all of the
network nodes that you have done so. Click the Network password button. If you
have not assigned a password yet, then simply leave the upper box empty. Enter your
new password (i.e. NET) and confirm it. The characters of the password are shown
as asterisks so that someone looking over your shoulder can not read it.
Confirm your entry with OK. The password will be sent to all of the network nodes.
This programming procedure must not be interrupted, otherwise it will no
longer be possible to communicate with parts of the network.
15.6
Configuring network nodes
The Lock Nodes are configured to the associated locks. If the locks have already
been programmed, then you can choose All groups and All nodes, then click
Automatic configuration. The network nodes will retrieve the data from their locks,
and automatically assign themselves to them.
A simpler and quicker way is to program the Lock System beforehand using
the Configuration tool.
123
Manual – LDB 1.5
Page 124
Check the Successful list carefully. If, even though the System has already been
programmed, an ‘unknown lock’ appears there, you can assume that it has either not
been programmed yet, or that the lock has already been programmed in a different
Lock System. If a network node appears in the Errors list, then there is a problem in
the radio transmission between the Lock Node and the lock. Either the door is open,
or the distance between the lock and the node is too great.
Intermediate step if the Lock System is not yet programmed:
Mark the lock that you have networked. Choose Options > Network setup and then
click the Configure Network Nodes button.
Enter the Group and Member ID of the associated network node, and click the
Manual configuration button.
You will be asked if it is the right lock. If it is not, then select the right one. Confirm
with OK.
Repeat these steps for the other network nodes. You can now program and retrieve
data from the locks.
A blue N appears to symbolize every networked lock in the Lock Plan. If the color of
this symbol changes, then there is a fault:
124
Manual – LDB 1.5
Page 125
Yellow Problem in the radio connection between Lock Node and lock (caused by an
open door, for example).
Red
Connection between PC and Lock Node interrupted. In this case, check the
batteries in the network node.
You can obtain a list of the network addresses of all the locks under View >
Network addresses.
15.7
Adding network nodes
Click Manage network nodes. Choose the group concerned, and enter the Member
IDs of the Lock Nodes. Click Add. Network nodes that have not been registered
cannot be contacted. You can only add new Lock Nodes that have not been
programmed.
Once you have registered all of the Lock Nodes, click Exit. In Network Setup, click
the Implementing new nodes button. The software will transmit the network
password. You can then configure the Lock Nodes.
125
Manual – LDB 1.5
Page 126
15.8
Removing network nodes
Select the lock whose network node you would like to remove. Choose Options >
Network setup, then click the Configure Network Nodes button. Enter a zero (0)
next to Group ID and Member ID, then click Manual configuration. Confirm the
security message with OK. The software will then delete the network node.
15.9
Configuring attenuation
If structural circumstances mean that the Lock Node is installed less than the
minimum distance away from the digital lock, then the Lock Node’s transmission
output can be reduced so that it does not overload the lock.
In Network setup, click the Configure attenuation button. The Lock Node will
normally set itself to the distance which exists. However, if you continue to receive
transmission errors, select manual adjustment. Set the attenuation factor. 0
represents no attenuation and 7 the highest possible reduction. Enter the Lock Node
at which the transmission output is to be reduced.
Then click Run.
126
Manual – LDB 1.5
Page 127
15.10 Input/output
This is where you can adjust the inputs and outputs of the Lock Node.
If you would like to activate the output, check Set output, and to deactivate it check
Reset output. If you change this setting, you have to subsequently reprogram the
Lock Node. To do this, click the Program button.
If you would like the network node to constantly check its inputs, then check React to
inputs, and program the Lock Node.
15.11 Messages
This is where you obtain information about the status of the Lock Node’s inputs and
outputs.
You must program the network nodes so that they can respond to inputs.
If the table contains the message Input status change; Input 1 or Input status change;
Input 2, then that network node input is closed. If the message Input status change
appears, then the contact is open again.
This list is not updated automatically; you must always click the Update button
before reading it.
To delete a message, select it and press Delete.
You can use the Filter to define which network nodes are shown in the list and which
are not:
127
Manual – LDB 1.5
Page 128
SId
LId
GId
MId
ID number of the Lock System
ID number of the lock
Group ID of the network node
Member ID of the network node
In the window shown below, as an example, only network nodes will be listed whose
Group ID is less than three.
You can also set the number of most recent messages (in this case 6).
128
Manual – LDB 1.5
Page 129
Make the changes you require and confirm with OK.
15.12 Configuring SMS messages
Choose Options > Unified messaging. In the Message Systems box, click the SMS
button.
Select the telephone entry of the person concerned, and click Edit. If you would like
to add a new person to the telephone directory, click New. Enter the name and select
the service provider of the mobile phone to which the message is to be sent. Enter
the mobile phone number under Telephone number. Choose whether the connection
to the provider is to be established using ISDN or modem. Next, click Configuration,
where one of the settings you can make is whether the number is an extension. The
protocol setting (TAP/UCP) is determined by the provider. Enter your message text,
and test to see if a connection can be made. Confirm your entries by clicking OK.
Under Timeout, enter the duration for which the software should attempt to establish
a connection. In the example below, the software will stop trying after 30 seconds.
Confirm your entries by clicking OK.
129
Manual – LDB 1.5
Page 130
15.13 Configuring e-mail
Choose Options > Unified messaging. In the Message Systems box, click the Email button.
In the Settings area, enter the sender name, the sender’s address and the SMTP
server.
Under Timeout, enter the duration for which the software should attempt to establish
a connection. In the example below, the software will stop trying after 15 seconds.
130
Manual – LDB 1.5
Page 131
Click the New button.
Enter the address to which the message is to be sent (i.e. [email protected])
Enter the Subject line and compose the message that is to be sent.
Test to see if a connection is established. Confirm your entries by clicking OK.
15.14 Creating a log file
In the Unified messaging configuration window you can create a log file. This CSV file
provides you with an overview of all the SMS and e-mail reports, including a) the
message recipient and b) whether the connection was free of errors.
131
Manual – LDB 1.5
Page 132
You can change the path by clicking the Log file button. Confirm your entries by
clicking OK.
All events should be written to the file specified by SimonsVoss, because it
makes investigation easier should a fault occur.
132
Manual – LDB 1.5
Page 133
16.0 Organizing a network
16.1
Assigning a Network Administrator password
The administration of a network can be secured using a separate password. To do
this, choose Network > Administrator password. Enter the password and confirm it.
You can change this password at any time without the need for any subsequent
programming.
The characters of the password are shown as asterisks so that it can not be seen by
someone looking over your shoulder.
Confirm with OK. To go to the Network menu, choose Network > Allow
Management. Enter your password and confirm it with OK.
You can now control one or more locks simultaneously from your central computer.
16.2
Testing Lock Nodes
You can also use this menu to test one or more network nodes. Choose Network >
Test Lock Node. You can adjust the following settings:
Test individual nodes:
Enter their Group and Member ID and click OK.
All of the nodes in a group: Enter the group concerned and click All nodes, then click
the OK button.
133
Manual – LDB 1.5
Page 134
All of the nodes in a network:Click All groups and All nodes, followed by the OK
button.
Select the action you would like to perform.
16.3
Activating locks
Choose Network > Activate lock. Enter the password for the Lock System (not the
network password).
You can now choose from the following actions:
Perform remote opening
Deactivate lock
Activate lock
The networked lock concerned is engaged or
responding.
The lock is not responding to authorized transponders.
Undoes deactivation.
Select the action and click the Run button. To close the window, click Cancel.
134
Manual – LDB 1.5
Page 135
16.4
Program Lock System
Open your Lock System using the password and make the changes you require –
such as changing authorizations. After that, authorize your Lock System again.
The programming symbol will appear next to locks whose authorizations have
changed.
a.) Programming a single lock:
Select the lock concerned and click Programming > Lock, then click the OK button.
b.) Programming more than one lock:
Choose Network > Lock System.
Select the Lock System. A list of networked locks requiring programming will appear.
Select the locks you would like to program.
You can select more than one lock using the Ctrl key.
135
Manual – LDB 1.5
Page 136
Press the Programming button. The locks will then be programmed one after the
other.
16.5
Retrieving individual Access Lists
You can retrieve data from any lock individually. Select the lock from which you want
to retrieve data, and choose Programming > Read lock.
Confirm the name of the lock (i.e. Entrance building 402 1st floor) with OK.
You will then receive information about the lock. You can also retrieve a
Transponder list or an Access List, by clicking the respective button.
136
Manual – LDB 1.5
Page 137
16.6
Retrieving multiple Access Lists simultaneously
You can retrieve the Access Lists from several locks at the same time. Choose
Network > Read List of Accesses.
Select the Lock System. If you would like to retrieve the Access Lists from all the
locks, leave the All locks box checked. Otherwise uncheck it and select the locks from
which you would like to retrieve data. Confirm your entry with OK.
137
Manual – LDB 1.5
Page 138
The Successful window will contain all the locks from which data has been
successfully retrieved. If an Error has occurred, click Repeat failed reports.
Close the window by clicking OK.
Next, select one of the locks from which you have just retrieved data. Choose Edit >
Properties. Click on the Transponder tab followed by the Access List button.
138
Manual – LDB 1.5
Page 139
You will receive a list of the most recent accesses. The number of accesses saved
can be set between 0 and 10,000.
Click Save, then Exit.
16.7
Synchronizing the time
If the time stored in the locks does not correspond with the actual time, you can use
this command to reset the time in the locks. Choose Network > Clock Adjustment.
Select the Lock System. If you would like to set the time in all the locks, click OK.
Otherwise, uncheck the All locks box then select the locks you want to set and
confirm with OK.
You can select multiple locks using the Ctrl key.
139
Manual – LDB 1.5
Page 140
The software will use the date and time stored in your computer, so you
should check these before synchronizing.
16.8
Task Manager
You can use the Task Manager to plan certain network tasks.
For example:
1. Activate the main entrance locks at 9AM every morning and deactivate them at
7PM each evening.
2. Program the Lock System at 8PM each evening.
3. Continuously retrieve the Access Lists from the relevant doors.
For these functions to work, the computer (operating system: Windows NT/2000/XP)
on which the Lock Plan software is installed must be permanently turned on. The
screen saver can be active, but the Lock Plan must be open for modification.
Choose Network > Task Manager and when it opens, click New. The following tasks
are available: set output, reset output, perform remote opening, test Lock Node,
activate lock, deactivate lock, emergency release, program locks and retrieve Access
Lists. Choose the task you require (next to Type:).
140
Manual – LDB 1.5
Page 141
Assign a name to this task (i.e.Retrieve Access Lists). If you would like to activate the
task at a later stage, uncheck the Activated box; however, if you do this you will have
to return to this window later and check the box again. You can have the task
performed as a one-off or continuously at regular intervals. Another way of
programming the task is to configure it as a response to a particular event (see Event
Manager). If you have activated Repetition intervals, then you must set the starting
time and date, and the interval at which the task is to be executed (the repetition
interval).
In this example the repeat interval: starts on February 5, 2006 at 1AM. The Access
Lists will be retrieved every 10 minutes.
The task will be repeated on the subsequent days.
141
Manual – LDB 1.5
Page 142
Remember that a task can take several minutes, so you should plan your
tasks carefully so as not to overburden your network.
Click the Edit button. Select the locks to which this task is to apply, and confirm twice
with OK.
142
Manual – LDB 1.5
Page 143
Clicking the Stop button will halt the Task Manager, and clicking Start will make it
start up again. You can plan other tasks by clicking New. If you would like to delete a
task, select it and click the Delete button.
You can Pause a selected task (to program the Lock System, for example), and
Continue it again later. Clicking the Properties button takes you back to the Task
window, where you can make settings such as changing the start date or interval. If
you would like to find out how far a selected task has progressed, click the Status
button.
143
Manual – LDB 1.5
Page 144
You can obtain an overview of all your tasks by creating a Log file. This text file can
be opened and evaluated using a program such as Microsoft Excel.
144
Manual – LDB 1.5
Page 145
17.0 Event Manager
17.1
Definition
This function is used to create logical links between an event and a response. The
Lock Plan software can initiate a defined response to particular events (a door
opening, for instance) – such as sending an SMS. By entering the day of the week
and the time, you can also define the period of time during which an event should be
responded to.
Examples:
1.)
The doorman presses a combination of keys on the computer, and the
entrance door is opened as a result.
2.)
A door remains open for too long, and an SMS is sent to the watchman’s
mobile phone.
3.)
The alarm system is disarmed, which activates the locks.
4.)
An employee at a company registers in the morning using a SmartRelay. This
information can be sent to any computer in the network so that (for example)
Reception can maintain a list of the people present in the building.
Since the computer has to remain switched on all the time, we
recommend using a PC running Windows XP Professional. The Lock
Plan must also be running. You can use a screen saver.
17.2
Procedure
To begin with you set up the response(s) and configure it/them. The following
responses are available to choose from:
Run a file
Launch an executable program
E-mail
Send an e-mail to a particular e-mail address (person or group)
Network task
Edit locks, activate Lock Node output
Network message
Transmit a message to a network computer using Event Agent
SMS
Send an SMS to a mobile phone
Log file
Create a log file
You then set up an event. When you configure this event, you also set up the link to
the reaction or reactions which you want it to initiate.
145
Manual – LDB 1.5
Page 146
Overview of events:
17.3
Input event
The input signal changes at a network node
Key
combination
Two keys are pressed on a computer
Time interval
You can use this function to define a time period during which
events are to be ignored. The response is not initiated until this
period has lapsed.
Access
If the Access Lists are being retrieved continuously, then you can
use this function to set a response if:
1. a particular transponder is pressed or
2. any authorized transponder is pressed
Defining reactions
Choose Network > Event Manager. To begin with you set up reactions to events
which you will define later. To set them up, click the New button in the Reactions
area.
There are a range of available reactions. The pages that follow tell you how to define
and configure them. More than one reaction can be defined for an event.
Assign a Name to the reaction (i.e. ME open – Reaction execute file). You can also
add a comment in the Description box if required.
Select the reaction (i.e. Execute file). This response is then configured by clicking the
Configure reaction button. If you would like the reaction to take place later, then
uncheck the Activated box. Confirm your entries by clicking OK.
146
Manual – LDB 1.5
Page 147
17.4
Run file
This response launches an executable program.
Examples:
a.)
You can write a program (batch file) which causes an e-mail to be sent if a
particular event occurs.
b.)
A program (such as Microsoft Word) is opened, and a file is automatically
opened containing important telephone numbers.
Enter the path of this file in the configuration.
17.5
Send e-mail
This function allows an e-mail to be sent to a particular e-mail address. Select E-mail
as the type. Click on the Configure reaction button and then on New.
Enter the e-mail address (i.e. [email protected])
Enter the text that is to appear in the e-mail.
You can use the Test button to see if the e-mail is sent successfully. Confirm your
entries by clicking OK.
147
Manual – LDB 1.5
Page 148
Some settings must first be made under Options > Unified Messaging > Email in order for e-mails to be sent.
17.6
Configuring network tasks
This you can use to execute a particular network task. The following tasks are
available:
Set/reset output, perform remote opening, test Lock Nodes,
activate/deactivate/program locks, retrieve Access Lists.
Choose Network task as the type. Click Configure reaction.
Assign a name (i.e. Activate main entrance door buzzer) and select the network task
(i.e. Remote opening)
148
Manual – LDB 1.5
Page 149
Click the Edit button and select the lock(s) involved. Confirm your entries by clicking
OK.
149
Manual – LDB 1.5
Page 150
17.7
Configuring network messages
A message is sent to a network computer which is displayed in a special SimonsVoss
program called the Event Agent. For example, if you would like to inform Factory
Security that a door is open, this can be done automatically.
Computer requirements:
1.
Operating system Windows NT/2000/XP
2.
The computer must be connected to the internal Windows NT/2000/XP
network
3.
The Event Agent must be installed and started (see separate manual)
Assign a name to the reaction and select Network message as its type. Click
Configure reaction and enter the name of the computer on which the message is to
appear.
150
Manual – LDB 1.5
Page 151
Confirm your entries by clicking OK.
17.8
Send SMS
You can send an SMS to a mobile phone. Select SMS as the type. The SMS window
will open. In the telephone entry box, select the person concerned and click Edit. If
you would like to add a new person to the telephone directory, click New.
Enter a name for the response and select the service provider of the mobile phone on
which the message is to appear.
Under Telephone number, enter the mobile phone number. Choose whether the
connection to the provider is to be established using ISDN or modem. Next, click
Configuration, where one of the settings you can make is whether the number is an
extension. The protocol setting (TAP/UCP) is determined by the provider.
Enter your message text, and test to see if a connection can be made. Confirm your
entries by clicking OK.
151
Manual – LDB 1.5
Page 152
17.9
Creating a log file
This file displays the events. Events are recorded in a table and can be edited using a
text editor such as Excel or Access.
We recommend logging all events in a single file in order to retain a better overview.
If you would like to change the path of this file, click Configure reaction and enter
the new path.
17.10 Configuring events
Once you have entered the responses, you can configure the events that are to
initiate these responses. Open the Event Manager and click the New button in the
Events area.
Assign a name and description (optional) to the event. The text you enter under
Message will appear later in the message list.
If you would like to initiate the event at a later stage, uncheck the Activated box.
The events are categorized according to Alarm levels. If you are working with the
Event Agent, you can set it up to display warnings only, or all alarm levels.
152
Manual – LDB 1.5
Page 153
You can set a time limit to the initiation of a reaction to an event. For example, it is
often only important if a door is open or closed after the working day has finished.
If you would like to configure a time limit, click the Configure times button. Uncheck
the Always available box. Mark the days of the week and define the times during
which you want the reaction to occur.
Confirm with OK.
153
Manual – LDB 1.5
Page 154
Now all you have to do is select the event and configure it. There are four types of
events available, and the pages that follow describe them and their configuration.
17.11 Configuring input events
You can connect door contacts and bolt contacts to the network nodes. If the status of
a contact changes the Lock Node will inform the software of this change. Of course,
the Lock Node must be configured to check its inputs constantly (section 15.10).
Select Input event as the event type, and click Configure event. Specify whether
you want the event to relate to Input 1, Input 2, or Input 3.
Choose whether the event is to be that the input closes (from 0 to 1), that it opens
(from 1 to 0), or that the input changes in either way.
154
Manual – LDB 1.5
Page 155
Select the associated lock, and configure the time if necessary. Select the action and
confirm with OK.
17.12 Configuring keyboard combinations
You can initiate a response by pressing two keys.
Example:
The moment the A and S keys are pressed together, the network nodes deactivate
the digital US Locks.
Choose Keyboard combination as the type and click Configure event.
Enter the keyboard combination and confirm with OK.
155
Manual – LDB 1.5
Page 156
Select the associated lock, and configure the time if necessary. Select the action and
confirm with OK.
17.13 Setting up a time interval
This function can be used to specify a period of time during which events are to be
ignored. The reaction is not initiated until after the period has lapsed.
Example:
The door at the entrance to the Research Department it opened. This activates a
timer. If the door closes within the specified time period, there is no reaction. If the
door remains open for longer, a message is produced by the software.
Choose Time interval as the type and click Configure event. Enter the time interval
in minutes and confirm your entry twice with OK.
The event ‘Main entrance time exceeded’ will now appear in the Events list. The
software also creates two entries in the Reaction list: ‘Main entrance time exceeded
arm’ and ‘Main entrance time exceeded disarm’.
Next you must set up two more events. One serves to activate the timer, the other to
deactivate it.
Example:
The entrance door is fitted with a door contact which is connected to the input (i.e.
Input 1) of the network node. As soon as the door opens, the status of the Lock Node
input changes, and the timer is activated.
In this case you choose Input event as the type and click Configure event. In this
example, specify that Input 1 of the Lock Node changes from 0 to 1 when the door
opens. Confirm with OK.
Select the associated lock, and configure the time if necessary.
In the table, choose Time exceeded arm as the associated action. Confirm your
entries by clicking OK.
156
Manual – LDB 1.5
Page 157
Make the same settings to deactivate the timer, since you only want a response if the
door remains open and the stipulated time is exceeded.
Again, select Input event and configure Input 1 from 1 to 0 (door contact closes
again).
Select the associated lock and configure the time if necessary. Choose Time
exceeded disarm as the associated action. Confirm your entries by clicking OK.
157
Manual – LDB 1.5
Page 158
17.14 Entry event
You can only define a reaction to an access event if you have set the software to
continuously retrieve the Access List, which you do using the Task Manager.
A reaction is only initiated by a new access. An access is considered new if:
1.
2.
The access has not yet been saved in the Lock Plan, i.e. it has not been
retrieved before, and
A pre-defined time has not yet lapsed. You can define this time period when
configuring this event.
If the Access List is not being continuously retrieved, and no time period is
defined, then all 3,000 accesses will be treated as new and a response will
therefore be initiated for all of them. If you only want to consider accesses
that occur after setting up this event, you will first have to retrieve the Access List, and
then set up the event.
Choose Entry as the type and click Configure event.
Specify whether the program should react to all transponders, or only a particular
one.
If you would like it to respond to all accesses, regardless of time period, then check
the Regard all accesses box.
Confirm with OK. Select the associated lock, and configure the time if necessary.
Select the action and confirm with OK.
158