1
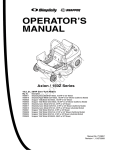
Axion / 150Z Series
Initial setup
This Dealer Setup Instruction covers the following products:
Model. No.
7800360
7800380
7800269
7800392
7800374
7800381
7800386
7800393
7800375
7800382
7800387
7800394
Description
Simplicity Axion Model ZT18533, 18.5HP w/ 33” Mower
Simplicity Axion Model CZT18533, 18.5HP w/ 33” Mower (California Model)
Snapper 150Z Model SC18533, 18.5HP w/ 33” Mower
Snapper 150Z Model CSC18533, 18.5HP w/ 33” Mower (California Model)
Simplicity Axion Model ZT2142, 21HP w/ 42” Mower
Simplicity Axion Model CZT2142, 21HP w/ 42” Mower (California Model)
Snapper 150Z Model SC2142, 21HP w/ 42” Mower
Snapper 150Z Model CSC2142, 21HP w/ 42” Mower (California Model)
Simplicity Axion Model ZT2650, 26HP w/ 50” Mower
Simplicity Axion Model CZT2650, 26HP w/ 50” Mower (California Model)
Snapper 150Z Model SC2650, 26HP w/ 50” Mower
Snapper 150Z Model CSC2650, 26HP w/ 50” Mower (California Model)
Briggs & Stratton Yard Power Products Group
Copyright © 2008 Briggs & Stratton Corporation
Milwaukee, WI USA. All Rights Reserved
8/2008
Form No. 7102754
1
TP 300-5412---ZT-SN
Axion / 150Z Series
TABLE OF CONTENTS:
SAFETY RULES .................................................................3
SETUP PROCEDURES
Quick Setup List ................................................................6
Uncrating ............................................................................7
Battery Activation & Installation ......................................8
Installing the Seat ..............................................................9
Setting up the Ground Speed Control Levers...............11
Torque Mower Blade Hardware ......................................12
Check Fluid levels ...........................................................14
Fill and Check Engine Oil...............................................14
Reduce and Check Tire Pressure ..................................14
Lubrication .......................................................................15
Burnish PTO Clutch ........................................................16
Check Rider Safety System ............................................16
TP 300-5412---ZT-SN
2
8/2008
Axion / 150Z Series
SAFETY RULES
Read these safety rules and follow them closely. Failure to obey these rules could result in loss of control
of unit, severe personal injury or death to you, or bystanders, or damage to property or equipment.
This mowing deck is capable of amputating hands and feet and throwing objects.
The triangle
in text signifies important cautions or warnings which must be followed.
GENERAL OPERATION
19. Follow the manufacturer’s recommendations for
wheel weights or counterweights.
20. Keep in mind the operator is responsible for accidents
occurring to other people or property.
21. All drivers should seek and obtain professional and
practical instruction.
22. Always wear substantial footwear and trousers.
Never operate when barefoot or wearing sandals.
23. Before using, always visually check that the blades
and blade hardware are present, intact, and secure.
Replace worn or damaged parts.
24. Disengage attachments before: refueling, removing
an attachment, making adjustments (unless the
adjustment can be made from the operator’s position).
25. When the machine is parked, stored, or left unattended, lower the cutting means unless a positive
mechanical lock is used.
26. Before leaving the operator’s position for any reason,
engage the parking brake, disengage the blades
(PTO), stop the engine, and remove the key.
27. To reduce fire hazard, keep the unit free of grass,
leaves, & excess oil. Do not stop or park over dry
leaves, grass, or combustible materials.
28. It is a violation of California Public Resource Code
Section 4442 to use or operate the engine on or near
any forest-covered, brush-covered, or grass-covered
land unless the exhaust system is equipped with a
spark arrester meeting any applicable local or state
laws. Other states or federal areas may have similar
laws.
29. OSHA regulations may require the use of hearing
protection when exposed to sound levels greater than
85 dBA for an 8 hour time period.
1. Read, understand, and follow all instructions in the
manual and on the unit before starting.
2. Do not put hands or feet near rotating parts or under
the machine. Keep clear of the discharge opening at
all times.
3. Only allow responsible adults, who are familiar with
the instructions, to operate the unit (local regulations
can restrict operator age).
4. Clear the area of objects such as rocks, toys, wire,
etc., which could be picked up and thrown by the
blade(s).
5. Be sure the area is clear of other people before mowing. Stop the unit if anyone enters the area.
6. Never carry passengers.
7. Do not mow in reverse unless absolutely necessary.
Always look down and behind before and while travelling in reverse.
8. Never direct discharge material toward anyone.
Avoid discharging material against a wall or obstruction. Material may ricochet back toward the operator.
Stop the blade(s) when crossing gravel surfaces.
9. Do not operate the machine without the entire grass
catcher, discharge guard (deflector), or other safety
devices in place and operational.
10. Slow down before turning.
11. Never leave a running unit unattended. Always disengage the blades (PTO), set parking brake, stop
engine, and remove keys before dismounting.
12. Disengage blades (PTO) when not mowing. Shut off
engine and wait for all parts to come to a complete
stop before cleaning the machine, removing the grass
catcher, or unclogging the discharge guard.
13. Operate the machine only in daylight or good artificial
light.
14. Do not operate the unit while under the influence of
alcohol or drugs.
15 Watch for traffic when operating near or crossing
roadways.
16. Use extra care when loading or unloading the unit
into a trailer or truck.
17. Always wear eye protection when operating this unit.
18. Data indicates that operators, age 60 years and
above, are involved in a large percentage of power
equipment-related injuries. These operators should
evaluate their ability to operate the equipment safely
enough to protect themselves and others from injury.
CAUTION
This machine produces sound levels in
excess of 85 dBA at the operator’s ear
and can cause hearing loss though
extended periods of exposure.
Wear hearing protection when operating this
machine.
TRANSPORTING AND STORAGE
1. When transporting the unit on an open trailer, make
sure it is facing forward, in the direction of travel. If
the unit is facing backwards, wind lift could damage
the unit.
2. Always observe safe refueling and fuel handling practices when refueling the unit after transportation or
storage.
8/2008
3. Never store the unit (with fuel) in an enclosed poorly
ventilated structure. Fuel vapors can travel to an
ignition source (such as a furnace, water heater, etc.)
and cause an explosion. Fuel vapor is also toxic to
humans and animals.
4. Never store the unit or fuel container inside where
there is an open flame or pilot light, such as near a
water heater. Allow unit to cool before storing.
3
TP 300-5412---ZT-SN
Axion / 150Z Series
SLOPE OPERATION
WARNING
Slopes are a major factor related to loss-of-control and tipover accidents, which can result in severe injury or death.
Operation on all slopes requires extra caution. If you cannot back up the slope or if you feel uneasy on it, do not
operate on it.
Control of a walk-behind or ride-on machine sliding on a
slope will not be regained by the application of the brake.
The main reasons for loss of control are: insufficient tire
grip on the ground, speed too fast, inadequate braking, the
type of machine is unsuitable for its task, lack of awareness
of the ground conditions, incorrect hitching and load distribution.
1. Mow up and down the face of slopes, not across.
2. Watch for holes, ruts, or bumps. Uneven terrain could
overturn the unit. Tall grass can hide obstacles.
3. Choose a slow speed so that you will not have to
stop or change speeds while on the slope.
4. Do not mow on wet grass. Tires may loose traction.
5. Avoid starting, stopping, or turning on a slope. If tires
lose traction (i.e. machine stops forward motion on a
slope), disengage the blade(s) (PTO) and drive slowly off the slope.
6. Keep all movement on slopes slow and gradual. Do
not make sudden changes in speed or direction,
which could cause the machine to rollover.
7. Use extra care while operating machines with grass
catchers or other attachments; they can affect the
stability of the unit. Do not use on steeps slopes.
8. Do not try to stabilize the machine by putting your
foot on the ground (ride-on units).
9. Do not mow near drop-offs, ditches, or embankments. The mower could suddenly turn over if a
wheel is over the edge of a cliff or ditch, or if an edge
caves in.
10. Do not use grass catchers on steep slopes.
11. Do not mow slopes if you cannot back up them.
12. See your authorized dealer/retailer for recommendations of wheel weights or counterweights to improve
stability.
13. Remove obstacles such as rocks, tree limbs, etc.
14. Use slow speed. Tires may lose traction on slopes
even through the brakes are functioning properly.
15. Do not turn on slopes unless necessary, and then,
turn slowly and gradually uphill, if possible. Never
mow down slopes.
Never operate on slopes greater than 17.6 percent
(10°) which is a rise of 3-1/2 feet (106 cm) vertically in
20 feet (607 cm) horizontally.
Select slow ground speed before driving onto slope.
Use extra caution when operating on slopes with
rear-mounted grass catchers.
Mow up and down the face of slopes, not across.
Use caution when changing directions and DO NOT
START OR STOP ON SLOPE.
CHILDREN
Tragic accidents can occur if the operator is not alert to the
presence of children. Children are often attracted to the
unit and the mowing activity. Never assume that children
will remain where you last saw them.
1. Keep children out of the mowing area and under the
watchful care of another responsible adult.
2. Be alert and turn unit off if children enter the area.
3. Before and during reverse operation, look behind and
down for small children.
4. Never carry children, even with the blade(s) off. They
may fall off and be seriously injured or interfere with
safe unit operation. Children who have been given
rides in the past may suddenly appear in the mowing
area for another ride and be run over or backed over
by the machine.
5. Never allow children to operate the unit.
6. Use extra care when approaching blind corners,
shrubs, trees, or other objects that may obscure
vision.
EMISSIONS
1. Engine exhaust from this product contains chemicals
known, in certain quantities, to cause cancer, birth
defects, or other reproductive harm.
2. Look for the relevant Emissions Durability Period and
Air Index information on the engine emissions label.
TOWED EQUIPMENT (RIDE-ON UNITS)
IGNITION SYSTEM
1. Tow only with a machine that has a hitch designed
for towing. Do not attach towed equipment except at
the hitch point.
2. Follow the manufacturer’s recommendations for
weight limit for towed equipment and towing on
slopes. See attaching a trailer under OPERATION.
3. Never allow children or others in or on towed equipment.
4. On slopes, the weight of the towed equipment may
cause loss of traction and loss of control.
5. Travel slowly and allow extra distance to stop.
6. Do not shift to neutral and coast down hill.
TP 300-5412---ZT-SN
1. This spark ignition system complies with Canadian
ICES-002.
4
8/2008
Axion / 150Z Series
SERVICE AND MAINTENANCE
13. If the fuel tank must be drained, it should be drained
outdoors.
14. Replace faulty silencers/mufflers.
15. Maintain or replace safety and instruction labels as
necessary.
16. Use only authorized replacement parts when making
repairs.
17. Always comply with factory specifications on all settings and adjustments.
18. Only authorized service locations should be utilized
for major service and repair requirements.
19. Never attempt to make major repairs on this unit
unless you have been properly trained. Improper service procedures can result in hazardous operation,
equipment damage and voiding of manufacturer’s
warranty.
20. On multiple blade mowers, take care as rotating one
blade can cause other blades to rotate.
21. Do not change engine governor settings or overspeed the engine. Operating the engine at excessive
speed can increase the hazard of personal injury.
22. Disengage drive attachments, stop the engine,
remove the key, and disconnect the spark plug
wire(s) before: clearing attachment blockages and
chutes, performing service work, striking an object, or
if the unit vibrates abnormally. After striking an
object, inspect the machine for damage and make
repairs before restarting and operating the equipment.
23. Never place hands near the moving parts, such as a
hydro pump cooling fan, when the tractor is running.
(Hydro pump cooling fans are typically located on top
of the transaxle).
24. Units with hydraulic pumps, hoses, or motors: WARNING: Hydraulic fluid escaping under pressure may
have sufficient force to penetrate skin and cause serious injury. If foreign fluid is injected into the skin it
must be surgically removed within a few hours by a
doctor familiar with this form of injury or gangrene
may result. Keep body and hands away from pin
holes or nozzles that eject hydraulic fluid under high
pressure. Use paper or cardboard, and not hands, to
search for leaks. Make sure all hydraulic fluid connections are tight and all hydraulic hoses and lines
are in good condition before applying pressure to the
system. If leaks occur, have the unit serviced immediately by your authorized service center.
25. WARNING: Stored energy device. Improper release
of springs can result in serious personal injury.
Springs should be removed by an authorized technician.
Safe Handling of Gasoline
1. Extinguish all cigarettes, cigars, pipes, and other
sources of ignition.
2. Use only approved gasoline containers.
3. Never remove the gas cap or add fuel with the engine
running. Allow the engine to cool before refueling.
4. Never fuel the machine indoors.
5. Never store the machine or fuel container where
there is an open flame, spark, or pilot light such as
near a water heater or other appliance.
6. Never fill containers inside a vehicle or on a truck bed
with a plastic bed liner. Always place containers on
the ground away from your vehicle before filling.
7. Remove gas-powered equipment from the truck or
trailer and refuel it on the ground. If this is not possible, then refuel such equipment on a trailer with a
portable container, rather than from a gasoline dispenser nozzle.
8. Keep nozzle in contact with the rim of the fuel tank or
container opening at all times until fueling is complete. Do not use a nozzle lock-open device.
9. If fuel is spilled on clothing, change clothing immediately.
10. Never over-fill the fuel tank. Replace gas cap and
tighten securely.
11. Use extra care in handling gasoline and other fuels.
They are flammable and vapors are explosive.
12. If fuel is spilled, do not attempt to start the engine but
move the machine away from the area of spillage and
avoid creating any source of ignition until fuel vapors
have dissipated.
13. Replace all fuel tank caps and fuel container caps
securely.
Service & Maintenance
1. Never run the unit in an enclosed area where carbon
monoxide fumes may collect.
2. Keep nuts and bolts, especially blade attachment
bolts, tight and keep equipment in good condition.
3. Never tamper with safety devices. Check their proper
operation regularly and make necessary repairs if
they are not functioning properly.
4. Keep unit free of grass, leaves, or other debris buildup. Clean up oil or fuel spillage. and remove any fuelsoaked debris. Allow machine to cool before storage.
5. If you strike an object, stop and inspect the machine.
Repair, if necessary, before restarting.
6. Never make adjustments or repairs with the engine
running.
7. Check grass catcher components and the discharge
guard frequently and replace with manufacturer’s recommended parts, when necessary.
8. Mower blades are sharp. Wrap the blade or wear
gloves, and use extra caution when servicing them.
9. Check brake operation frequently. Adjust and service
as required.
10. Maintain or replace safety and instructions labels, as
necessary.
11. Do not remove the fuel filter when the engine is hot
as spilled gasoline may ignite. Do not spread fuel line
clamps further than necessary. Ensure clamps grip
hoses firmly over the filter after installation.
12. Do not use gasoline containing METHANOL, gasohol
containing more than 10% ETHANOL, gasoline additives, or white gas because engine/fuel system damage could result.
8/2008
5
TP 300-5412---ZT-SN
Axion / 150Z Series
Quick Setup List
Page
Setup Procedure
Steps to Perform
7
Uncrating
❏ Remove crate & banding.
❏ Place transmissions in ROLL RELEASE position & roll off
skid.
8
Battery Activation &
Installation
❏ Charge the battery (Note: proceed with other setup steps
while battery is charging).
❏ Install & secure battery.
Mower Assembly
❏
❏
❏
❏
14
Check Fluid Levels
❏ Fill & check Engine oil level.
❏ Reduce & check tire pressures
(Front tires 18-20 psi, rear tires 10-12 psi).
15
Lubrication
❏ Lubricate all grease & oil points.
16
Burnish PTO Clutch
❏ Burnish PTO clutch (run for 15 seconds, repeat 10 times).
16
SAFETY CHECKS
❏ Perform SAFETY INTERLOCK SYSTEM CHECK.
❏ Perform MOWER BLADE STOPPING CHECK.
(Blade must stop within 5 seconds!)
9-13
TP 300-5412---ZT-SN
Install the seat.
Install the seat safety switch.
Set up the ground speed control levers.
Torque the mower blade hardware.
6
8/2008
Axion / 150Z Series
3. Locate the transmission release levers (C, Figure 1)
at the rear of the unit.
Uncrating
4. Pull both levers back and down to release the transmissions (position B, Figure 1).
1. Using a reciprocating utility saw or equivalent, cut
crate away from bottom skid. Remove crate. Remove
plastic wrap.
5. Pull the ground speed control levers in to their DRIVE
positions, and disengage the parking brake.
2. Cut any banding securing the unit.
The rider can now be pushed by hand.
6. After moving the rider, set the ground speed control
levers to START/PARK, engage the parking brake,
and push both transmission release levers forward to
re-engage the transmissions (position A, Figure 1).
IMPORTANT NOTE
When cutting crate from bottom skid,
use caution around tires and mower
rollers.
DO NOT TOW RIDER
Towing the unit will cause transmission damage. Do not use another vehicle to push or
pull this unit. Do not use this unit to push or
pull another vehicle or object.
A
B
C
Figure 1. Pushing the rider
8/2008
7
TP 300-5412---ZT-SN
Axion / 150Z Series
Battery Activation &
Installation
Install Battery
1. Install and secure the battery in the battery compartment (Figure 3).
Charge Battery
2. Connect the red positive battery cable (A, Figure 4) to
the positive battery terminal, then cover the positive
battery terminal with the terminal cover.
1. Tip the seat forward to access the battery.
2. Remove the battery from the battery compartment,
and place the battery on a level, non-concrete surface.
3. Connect the black negative battery cable (B) to the
negative battery terminal.
Note: When removing the battery cables from the battery, always remove the negative (-) cable first.
3. To charge the battery, follow the instructions provided
by the battery charger manufacturer as well as all
warnings included in the safety rules section of this
document. Charge the battery at 6-10 amps for 1
hour. Do not charge at a rate higher than 10 amps.
See Figure 2.
Figure 3. Installing the battery
B
Figure 2. Charging the battery
WARNING
Corrosion hazard.
A
Batteries contain acid. Always keep the
battery upright and do not spill the
electrolyte. Avoid contact with skin and
eyes.
Figure 4. Installing the battery cables
Explosion hazard.
Changing the battery produces explosive
hydrogen gas. Only charge the battery in a
well ventilated area, away from any ignition
source such as a water heater, electric
motor, or a lit cigarette.
Wear Protective Equipment
Always wear gloves and safety glasses
when handling the battery and battery
cables.
TP 300-5412---ZT-SN
8
8/2008
Axion / 150Z Series
Installing the Seat
1. Raise the seat base.
2. Align the holes in the seat bottom with the holes in the
seat base.
3. Secure the seat to the seat base with four 5/16-18 x
3/4” bolts. Torque to 14-19 ft. lbs. (19-25 N.m.) See
Figure 5.
19-25 N.m.
14-19 ft. lbs.
5/16-18 x 3/4
Figure 5. Installing the seat
8/2008
9
TP 300-5412---ZT-SN
Axion / 150Z Series
Installing the Seat
Safety Switch
1. Squeeze the side clips of the safety switch (A, Figure
6), and insert the switch into the slot (B) in the seat
bottom. Be sure to slide the switch fully forward.
2. Connect the harness terminal housing (C) to the seat
switch.
3. Loop the wire tie (D) around both the switch body and
the terminal housing.
B
B
D
A
A
C
C
Figure 6. Installing the seat safety switch
TP 300-5412---ZT-SN
10
8/2008
Axion / 150Z Series
Setting Up the Ground
Speed Control Levers
3. Install the noted hardware as shown in Figure 7.
Tighten all hardware. Torque to 15-17 ft. lbs. (20-23
N.m.).
1. Loosen (do not remove) the hardware securing the
ground speed control levers to the lever bases.
Note: Ground speed control levers must be adjusted
prior to use. Refer to the Section ‘Ground Speed
Control Lever Adjustment’ in the Operator’s Manual.
2. Raise the levers, aligning the upper hole in each lever
with the upper slotted hole in the lever base.
A
5/16-18
B
5/16-18
x 1-3/4
C
A
B
20-23 N.m.
15-17 ft. lbs.
C
Figure 7. Setting up the ground speed levers
8/2008
11
TP 300-5412---ZT-SN
Axion / 150Z Series
Torque Mower
Blade Hardware
1. Check to see that the blade and hardware are
installed according to the diagram shown (A,
Figures 8-10).
2. Torque the blade hardware to the noted
torque (B):
Note: Use a wooden block to prevent blade
rotation.
A
B
41-54 N.m.
30-40 ft. lbs.
Figure 8. Torquing the mower blade hardware (33” Deck)
TP 300-5412---ZT-SN
12
8/2008
Axion / 150Z Series
A
B
108-122 N.m.
80-90 ft. lbs.
Figure 9. Torquing the mower blade hardware (42” Deck)
A
B
61-75 N.m.
45-55 ft. lbs.
Figure 10. Torquing the mower blade hardware (50” Deck)
8/2008
13
TP 300-5412---ZT-SN
Axion / 150Z Series
Check
Fluid Levels
Fill & Check Engine Oil
Removing the rear cover to gain access to the
engine, use the dipstick (Figure 11) to check the
engine oil level. If necessary add engine oil. Check
engine manufacturer’s owner’s manual for oil
recommendations.
Figure 11. Checking the fluid levels
Reduce & Check Tire
Pressures
The tires are over-inflated for shipping purposes. Inflate
to the pressures shown (Figure 12). Note that these
pressures may differ slightly from the “Max Inflation”
stamped on the side-wall of the tires. The pressures
shown provide proper traction, improve cut quality, and
extend tire life.
Size
PSI
bar
Front
Rear
18-20
10-12
1,24-1,38
,69-,83
Figure 12. Checking the tire pressure
TP 300-5412---ZT-SN
14
8/2008
Axion / 150Z Series
Lubrication
Lubricate the unit at the following lubrication points as
well as those shown in Figures 13-15.
Grease:
• front caster wheel axles
• front caster spindle bosses
• front axle center pivot
• mower deck arbors (blade spindles)*
• mower deck idler arm
Oil:
• ground speed control lever pivot points
• discharge chute hinge
• deck lift pivot points
Generally, all moving metal parts should be oiled where
contact is made with other parts. Keep oil and grease off
belts and pulleys. Remember to wipe fittings and surfaces clean both before and after lubrication. Use grease
fittings when present. Disassemble parts to apply grease
to moving parts when grease fittings are not installed.
Figure 14. Lubrication (ground speed control levers)
Not all greases are compatible. Use automotive-type
lithium grease.
* Some deck arbors have grease fittings above the
mower deck, while others have grease fittings below the
deck.
42” Deck shown,
all decks similar
Figure 13. Lubrication (deck)
8/2008
Figure 15. Lubrication (chassis and wheels)
15
TP 300-5412---ZT-SN
Axion / 150Z Series
CHECK RIDER SAFETY
SYSTEM
Burnish PTO Clutch
1. Engage the parking brake, start the tractor, and set
engine speed to full throttle.
Service Interval: Every 100 hours, every spring/fall,
and after storage of 30 days or longer.
2. Engage the PTO switch for fifteen seconds, then
disengage it and wait for the mower blades to stop.
This unit is equipped with safety interlock switches.
These safety systems are present for your safety. Do
not attempt to bypass safety switches, and never
tamper with safety devices. Check their operation
regularly.
3. Repeat step 2 ten times taking note of mower blade
stopping time. (Stopping time must be five seconds or
less.) If the unit fails this test, perform the PTO clutch
adjustment found in the “Regular Maintenance”
section or replace the clutch.
Operational SAFETY Checks
TEST 1 — ENGINE SHOULD NOT CRANK IF:
• Mower blades switch is ON, OR
• Ground speed control levers are not in their
START/PARK positions, OR
• Parking brake lever is in DISENGAGE position.
TEST 2 — ENGINE SHOULD CRANK IF:
• Mower blade switch is OFF, AND
• Ground speed control levers are in their
START/PARK positions, AND
• Parking brake lever is in ENGAGE position.
TEST 3 — ENGINE SHOULD SHUT OFF IF:
• Operator rises off seat with the mower blade switch
ON, OR
• Operator rises off seat with the ground speed
levers in DRIVE positions, OR
• Operator rises off seat with the parking brake in
DISENGAGE position, OR
• Operator moves the left and/or right ground speed
control lever out of its START/PARK position with
the parking brake lever in ENGAGE position.
TEST 4 — BLADE BRAKE CHECK
The mower blades and mower drive belt should come
to a complete stop within five seconds after the mower
blade switch is turned OFF. If mower drive belt does
not stop within five seconds, contact your local authorized dealer.
NOTE: Once the engine has stopped, the mower blade
switch must be turned OFF, the ground speed control
levers must be locked in their START/PARK positions,
and the parking brake lever must be in the ENGAGE
position in order to start the engine.
WARNING
If the unit does not pass a safety test, do not
operate it. See your local authorized dealer.
Under no circumstance should you attempt to
defeat the purpose of the safety interlock
system.
TP 300-5412---ZT-SN
16
8/2008