1
CORVUS SYSTEMS
USER
GUIDE
CP/M®
Table of Contents
Chapter 1. Introduction ....................................
1
Chapter 2. Reviewing Some Basic Points About Your System .
Start-Up of Your Computer System ...............
How to List a Directory. . . . . . . . . . . . . . . . . . . . . . . . ..
How to Run a Program..........................
How to Save a File ..............................
How to Copy a File .............................
3
3
4
4
5
5
Chapter 3. Backing Up Your Drive with the Mirror® ..........
Description of the Corvus Mirror .................
General Tips ...................................
Hardware Installation of the Corvus Mirror ........
The Mirror Menu ...............................
The RETRY Function ............................
Exiting the Mirror Program ......................
Using the Mirror to Back Up Your Entire
Corvus Disk ....................................
How to Back Up Single Virtual Drives on
the Corvus Disk ................................
How to Use the Verify Option on the Mirror .......
How to Use the Identify Option on the Mirror
How to Use the Restore Option on the Mirror .....
7
7
7
7
8
9
10
13
16
17
19
Chapter 4. Printing Multiple Files ...........................
How to Create a Pipes Area .....................
How to Send a File to a Pipe ....................
Sending a File from a Pipe to a Printer ...........
How to Clear the Pipes Area .....................
How to Clear a Single Pipe ......................
What Is in the Pipes? ...........................
21
21
23
25
27
28
29
10
Chapter 5. Troubleshooting Your Corvus Drive .............. 31
Chapter 6. Diagnostic Utilities for Your Corvus Drive ......... 37
How to Load the CDIAGNOS Program ........... 37
A Brief Description of the CDIAGNOS MENU ..... 38
~PPENDIX
~PPENDIX
~PPENDIX
~PPENDI~
~PPENDIX
A.
B.
C.
D.
E.
List of Common CP/M Extensions ............
Corvus Disk Error Codes ....................
Description of CDIAGNOS Program ..........
Description of Corvus Utilities Programs ......
Supplemental VCR Information ...............
ii
45
47
49
53
57
Chapter 1
Introduction
The CORVUS SYSTEMS CP/M USER GUIDE provides you wit~
a general introduction to the Corvus hard disk system, the Mirrol
option for backup of data, the pipes and spooling features for movin~
files between computers and peripherals, trouble-shooting procedures, and diagnostic programs. Your Corvus hard disk system
should already be installed and configured for a single user. Please
retain your installation guide for future reference.
The CORVUS SYSTEMS CP/M USER GUIDE is used with the
following computers:
- TRS-80TM Model" (under CP/M)
-XEROX 820™
-Zenith Z-89 or Z-90
-Intertec SuperBrainTM
-NEC PC-8001, PC-8001A or PC-8800
-S-100 Bus Systems, for example:
• Cromemco™ (under CP/M)
• CCS (California Computer Systems)
• Dynabyte
• North Star™
• Vector Graphics
as well as other systems. Consult with your dealer if you wish infor~
mation about a specific computer system or a particular model.
This guide and other Corvus manuals do not take the place of
the operating system and language manuals provided by the manufacturer of your computer. It is presumed that you have a working
knowledge of your computer system hardware and software.
For more detailed information on Corvus software, refer to the
CORVUS SYSTEMS CP/M PROGRAMMER'S REFERENCE GUIDE.
For information on mUlti-user configurations, refer to the CORVUS
SYSTEMS MULTIPLEXER INSTALLATION GUIDEforyourcomputer.
CP/M is a registered trademark of Digital Research, Inc.
Corvus Mirror® is a registered trademark of Corvus Systems, Inc.
TRS-80 is a trademark of Tandy Corporation.
XEROX and 820 are registered trademarks of XEROX Corporation.
Cromemco is a trademark of Cromemco, Inc.
North Star is a trademark of North Star Computers, Inc.
2
Chapter 2
Reviewing Some Basic Points
About Your System
Your Corvus hard disk system should be installed and configure
at this pOint, following the ·directions provided in the installatio
guide for your computer. The standard configuration makes th
Corvus 6 MB and 10 MB~·drives appear as two extra-large flopp
drives to your compu'ter system (Drives C and D) and a Corvus 20 MI
drive appear as three extra-large floppies (C, D and E). These pseud
floppies are called virtual drives. The entire Corvus disk is called
physical drive. If your system only has a single floppy diskette drivE
you should have this single physical drive appear as two virtual drive
(for example, the TRS-80 Model" has a program called ONEDRIVI
to do this).
Start-Up of Your Computer System
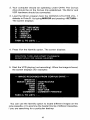
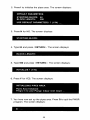
Insert the CP/M boot diskette into Drive A:. The screen display
the initial boot instructions and information on the CP/M versiol
(you should have version 2.2 or later), and then a prompt, similar to
CP/M VER. 2.2
CORP.
A>
COPYRIGHT DIGITAL RESEARCH
_
Insert a CORVUS UTILITIES VOL. 1 diskette into Drive B:.
Type B: and press < RETURN >. The screen displays:
3
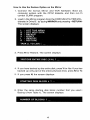
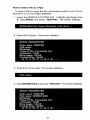
Type the appropriate CLINK program, for example: CLlNK2TN
and press < RETURN >. The screen displays:
--- CORVUS LINK INSTALLED --8>
_
Remember, you must run the correct CLINK program before you
can use your Corvus drive.
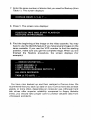
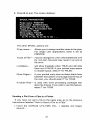
How to List a Directory
To list a directory for the one of the virtual drives on the Corvus,
follow the same procedure you use for a floppy drive. For example,
type D:DIR and press <RETURN>. The screen displays the directory
in a manner similar to:
0:
0:
0:
0:
INDEX
CLlNK2TN
CLlNK7TW
MIRROR
8>
DOC:
COM:
COM:
COM:
CERROR
DOC: PUTGET
COM: CLlNK2FV COM
CLlNK2TW COM: CLlNK7FV COM: CLlNK7TN COM
CDIAGNOS COM: CDIAGNOS DOC: CORVB173 eLR
SEMA4
COM:
_
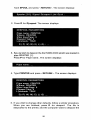
How to Run a Program
Files that have a "DOC" extension are text files, rather than
programs. To examine the contents of a DOC file named INDEX.DOC
on Drive C: of the Corvus disk, type D:TYPE INDEX.DOC and press
<RETURN>. The contents of the file will scroll up the screen. To stop
at any point, hold the control key down and press S «CNTL>S). To
restart, hold the control key down and press Q «CNTL>Q). If you
wish to return to the main CP/M program, hold down the control key
and press C «CNTL>C).
CP/M finds files by filename. Each file also has a three-letter
extension. For example, "COM" indicates that the file is a command
program (also known as a "system program") that you can run. See
Appendix A of this guide for a list of the different types of extensions.
It is not necessary to type the extension for COM files.
4
Your Corvus drive should already be configured and linked. To rur
the program TANGENT (as an example) on Drive D of the Corvu~
disk drive, type D:TANGENT and press <RETURN>. The computel
goes to Drive D:, finds TANGENT, and runs the program.
How to Save a File
Once a Corvus drive has been linked to your computer systerr
with one of the CLINK programs, it works just like a giant floppy dis~
drive, and CP/M programs work in the usual manner. Save files or
a Corvus drive just as you would on a floppy, specifying the drive anc
file name, plus the extension (optional).
How to Copy a File
Files are copied from one drive (either physical or virtual) tc
another drive, using the PIP program in CP/M. Since one physica
Corvus drive is made to look like either two or three floppy drive~
(virtual drives), you can have duplicate files on the Corvus, ortransfel
material from the floppy drives to the Corvus and vice-versa. Tc
move the TEXT.TXT file (as an example) from Drive C: on the Corvu~
disk to Drive B: on the floppy drive, first make sure the CP/M bool
diskette is in Drive A:. Type A:PIP and press <RETURN>. This load~
the PIP program. The screen displays:
Type B:=C:TEST.TXT and press <RETURN>. The screen displays:
Type <CNTL>C to exit the PIP program and return to the main
CP/M program. You have now copied the TEST.TXT file from the
Corvus hard disk to a floppy diskette.
5
6
Chapter 3
Backing Up Your Drive
with the Mirror
This chapter is for those users who have a Corvus Mirror (eithe
built-in or add-on) with their Corvus Disk System.
Description of the Corvus Mirror
Corvus Systems has developed a unique system for providin!
effective, low-cost backup for its hard disk drive, known as the Corvu
Mirror, using a video cassette recorder (VCR) and video cassette~
The Mirror creates an "image", or copy, of either virtual drives or thl
entire physical drive on the video cassette. The Corvus drive i
configured to appear as several (either two or three, depending 01
size) virtual drives to your computer.
The Mirror hardware can be ordered built into Corvus Dis
Systems, or it can be purchased as an add-on option. Mirrorsoftwarl
is included on the CORVUS UTILITIES diskettes which accompan:
the Corvus disk drive.
General Tips
Use the same VCR whenever possible for backing up your Corvu
drive. The VCR should be set at the standard play speed, and thl
highest quality tape should be used to prevent errors. It i
recommended that VCRs without the color enhancement feature bl
used, or that this feature be disabled when using the VCR with i
Mirror.
See Appendix E for the capacity of different-sized cassettes and thl
time required to backup 6,10 and 20 MB drives. You should be familia
with the operation of your VCR before using it with the Mirror.
Hardware Installation of the Corvus Mirror
Your drive must already be configured for the number of virtUe
drives before using the Mirror. Turn off all power before making an
connections.
If you have a drive with a Mirror already installed, theserial numbe
and the drive size should both end with an "Mil. Insert one end of thl
phono connector cable into the VIDEO out jack on the VCR, and thl
7
)ther end into the VIDEO IN jack on the back panel of the Corvus
::frive. Connect one end of the other phono connector cable into the
JIDEO IN jack on the VCR and the other end into the VIDEO OUT
ack of the Corvus drive.
'
If you have an add-on Mirror, see the CORVUS SYSTEMS MIRROR
NSTALLATION GUIDE supplied with the·· add-on Mirror for
nstructions on hardware set-up.
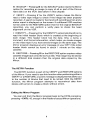
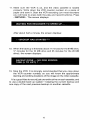
rhe Mirror· Menu
This is the Mirror menu, which allows you to pick which subrogram of the Mirror program you wish. Simply press the letter for
le option you wish.
L: LIST THIS MENU - Pressing L for this option allows you to see a
display of the Mirror menu, as shown above.
H: LIST HELP DATA-If you press H for this option, HELP DATA
will display a brief description of the BACKUP, IDENTIFY and
RESTORE options, in addition to a brief overall description of the
Mirror utility program running under CP/M.
8
B: BACKUP-Pressing B for the BACKUP option starts the Mirror
option for recording an image (a copy of all or part of the Corvus
hard disk) on the VCR. See below in this chapter.
V: VERIFY-Pressing V for the VERIFY option makes the Mirror
read a video tape image to check if the image has been properly
recorded. A search is made for hard and soft recording errors and a
status report is displayed on the screen. If a different VCR machine
will be used for the RESTORE option than for the original BACKUP
recording, you can perform a verify pass to check the head
alignment on the VCR.
I: IDENTIFY -Pressing I for the IDENTIFY option tells the Mirrorto
read the initial header block which is created at the beginning of
each image. This header block has the date, time, a name, a
comment, and format information, which helps you locate images
on the video tape if you have several images on the same tape. The
Mirror program displays an error message on your CRT if the initial
header block cannot be found in about 1 minute on the video
cassette.
R: RESTORE-Pressing R for the RESTORE option copies a video
cassette image back onto the Corvus disk. This image may be stored
in a different disk location than the original data copied by the
Mirror.
The RETRY Function
The RETRY function is part of the VERIFY and RESTORE options
of the Mirror. If you need to use this function after performing either a
VERIFY or a RESTORE, a screen message is displayed that alerts you
to the number of blocks that need to be retried. With the RETRY
function, the Mirror program attempts to reconstruct data from
blocks with errors to create a block without errors.
Exiting the Mirror Program
You can exit from the Mirror program back to the CP/M prompt by
preSSing <CNTL> C, except in the middle of actual Mirror operations.
9
Using the Mirror to Backup Your Entire Corvus Disk
1. First, make sure the Corvus Mirror and the VCR are properly
connected. Boot your computer system with the CPIM boot
diskette. Run the correct CLINK program.
2. Load the Mirror program from the CORVUS UTILITIES VOL. 1
diskette in Drive B: by typing MIRROR and pressing < RETURN>.
The screen displays the~irror menu:
3. Press B for Backup. The screen displays:
BACKUP ENTIRE CORVUS DISK (YIN) ? _
L Press Y for Yes. The screen displays:
CORVUS DRIVE # (1-4) ? _
5. Press 1 (unless you have added on another Corvus physical
drive). The screen displays:
--- ENTER TAPE FILE HEADER INFORMATION --DATE _
10
6. It is strongly recommended that you complete the tape header
information. The tape header is information that is written at the
beginning of the backup image to help you identify the image.
Here is a sample tape file header. Type MAY 9, 1982 and press
<RETURN>. The screen displays:
TIME _
7. Type 12:00 A.M. and press <RETURN>. The screen displays:
NAME _
.-
8. Enter the name you wish to use on your tape header.
Type TEST ONE and press <RETURN>. The screen displays:
COMMENT _
9. Type COMMENT COMPLETED and press <RETURN>. ThE
comment is optional. If you do not want a comment, just pres~
<RETURN>. The screen displays:
NORMAL OR FAST FORMAT (N/F) ? _
10. Press N for Normal. The screen then displays:
START UP RECORDER AND PRESS RETURN
11
11. Make sure the VCR is on, and the video cassette is loaded
properly. Write down the VCR counter number on a piece of
paper and save it. Start the VCR recording (on most recorders
you will have to press both the play and record buttons). Press
<RETURN>. The screen displays:
WAITING FOR RECORDER TO SPEED UP ...
After about half a minute, the screen displays:
»BACKUP HAS STARTED<"<=:
12. When the backup is finished (about 11 minutesforthe6 MBdrive,
17 minutes for the 10 MB drive and 35 minutes for the 20 MB
drive), the screen displays:
BACKUP DONE --- NO DISK ERRORS
TASK (L TO LIST) ? _
13. Stop the VCR. It is strongly recommended that you copy down
the VCR counter number, so you will know the approximate
starting and ending locations of the image on the video cassette.
It is a good idea to record just one entire drive on each cassette, and
to use a double back-up system- keeping the current backup and
one copy of the next previous backup on another cassette.
12
How to Backup Single Virtual Drives on the Corvus Disk
1. Boot your computer system with the CP/M diskette, and thenrun
the correct CLINK program.
2. Load the Mirror program on the CORVUS UTILITIES VOL. 1
diskette in Drive B: by typing MIRROR and pressing < RETURN>.
The screen displays the Mirror menu:
3. Press B for Backup. The screen displays:
BACKUP ENTIRE CORVUS DISK (YIN) ? _
4. Press N for No. The screen now displays:
STARTING DISK BLOCK # ? _
5. This starting disk block number is for an internal address of the
Corvus drive, which is calculated in terms of 512-byte sectors
(four 128-byte sectors). See Table 1 below forthe correct starting
disk block number. For example, on a 6 MB drive, the starting disk
block number for Drive D is 5908.
13
TABLE 1- REFERENCE TABLE FOR BLOCK NUMBER/
LENGTH
6 MB Drive with CLlNK2 Program
Drive
Starting
Disk
Block #
Number
of Blocks
in Drive
580
5908
5312
5312
C:
D:
10 MB Drive with CLlNK2 Program
Drive
Starting
Disk
Block #
Number
of Blocks
in Drive
C:
D:
579
10907
10304
10304
20 MB Drive with CLlNK2 Program
Drive
C:
0:
E:
Starting
Disk
Block #
Number
of Blocks
in Drive
580
13212
25844
12608
12608
12608
Type 5908 and press <RETURN>. The screen displays:
NUMBER OF BLOCKS
?
6. Table 1 shows that for a 6 MB drive (CLlNK2) the number of
blocks in a virtual drive is 5312.
Type 5312 and press <RETURN>.
14
7. The Mirror now requests the information for the header block
The screen displays:
I
--- ENTER TAPE FILE HEADER INFORMATION --DATE: __
8. Type 4/18/82 and press <RETURN>. The screen displays:
TIME:
,
9. Type 2:30 p.m. and press < RETURN >. The screen displays:
NAME:
10. The name cannot be more than 16 characters long. Type TES·
FILE and press <RETURN>. The screen displays:
I
COMMENT:
11. Type COMMENT FINISHED and press < RETURN >, or just pres
<RETURN> if you have no comment. The screen displays:
NORMAL OR FAST FORMAT (N/F) ? --
12. Press N for Normal. The screen displays:
START UP RECORDER AND PRESS RETURN
15
13. Make sure the VCR is on, and the video cassette is loaded
properly. Write down the VCR counter number on a piece of
paper .and save it. Start the VCR recording (on most recorders
you will have to press both the play and record buttons). Press
<RETURN>. The screen displays:
WAITING FOR RECORDER TO SPEED UP ...
After about a half a minute, the screen displays:
>
-BACKUP HAS STARTED
14. When Backup is finished, the screen displays:
BACKUP DONE- NO DISK ERROR,S
TASK (L TO LIST) : _
15. Now stop the VCR and copy down the VCR counter number. If
you do record more than one image on a cassette, it is recommended that a gap be left between different virtual drives, so that
the initial header blocks can be located easier.
How to Use the Verify Option on the Mirror
1. Rewind the video cassette to the start of the tape, or to the location on the cassette you copied down earlier.
2. Your computer should be operating under CP/M. The Corvus
drive should be on and the Corvus link established. The Mirror
and VCR hardware should be connected.
16
3. Load the Mirror program from the CORVUS UTILITIES VOL. 1
diskette in Drive B by typing MIRROR and pressing <RETURN>.
The screen displays:
4. Press V for Verify option. The screen displays:
START RECORDER AT BEGINNING IF IMAGE
VERIFY IN PROGRESS
5. Start the VCR playing (not recording). When the Verify procedure
is finished, the screen displays (for example):
--- ERROR STATISTICS ---
# SOFT ERRORS : 3
# DISK ERRORS : 0
# OF BLOCKS NEEDING RETRYS : 0
( ALL DATA RECEIVED
Sometimes soft errors will appear. However, this is no problem
since all data is recorded four times.
How to Use the Identify Option on the Mirror
1. Rewind the video cassette to the start of the tape, or to the location on the cassette you copied down earlier. Since the Identify
option searches for the very first characters of the header block,
it is important to rewind the video cassette completely to avoid
missing the header.
17
2. Your computer should be operating under CP/M. The Corvus
drive should be on the Corvus link established. The Mirror and
VCR hardware should be connected.
3. Load the Mirror program from the CORVUS UTILITIES VOL. 1
diskette in Drive B: by typing MIRROR and pressing <RETURN>.
The screen displays:
4. Press I for the Identify option. The screen displays:
.
POSITION TAPE AND START PLAYBACK
SEARCHING FOR IMAGE HEADER ..
5. Start the VCR playing (not recording). When the image is found,
the screen displays (for example):
--- IMAGE RECORDED FROM CORVUS DRIVE --IMAGE ID :
IMAGE LENGTH:
SYSTEM:
DATE :
TIME:
NAME :
COMMENT :
11220 BLo"CKS
CP/M
4/12/82
2:18 p.m.
TEST ONE
COMMENT FINISHED
TASK (L TO LIST) : _
You can use the Identify option to locate different images on the
,arne cassette, or to examine the header blocks of different cassettes,
f you are searching for a particular backup.
18
How to Use the Restore Option on the Mirror
1. Connect the Corvus Mirror and VCR hardware. Boot YOl
computer system with the CPIM diskette, and then run th
correct CLINK program.
2. Load in the Mirror program from the CORVUS UTILITIES VOL.
diskette in Drive B: by typing MIRROR and pressing <RETURN::
The screen displays:
3. Press R for Restore. The screen displays:
. ::IESTORE
ENTI~E
DISC (YIN) ? _
4. If you have backed up the entire disk, press Y for Yes. If you hav
backed up only part of the entire physical drive, press N for N(
5. If you press N, the screen displays:
STARTING DISK BLOCK # ? _
6. Enter the same starting disk block number that you used i
Backup (from Table 1). The screen displays:
NUMBER OF BLOCKS? _
19
7. Enter the same number of blocks that you used for Backup (from
Table 1). The screen displays:
CORVUS DRIVE # (1-4) ? _
8. Press 1. The screen now displays:
POSITION TAPE AND START PLAYBACK
RESTORE IN PROGRESS ...
9.· Find the beginning of the image on the video cassette. You may
.have to use the Identify feature if you have several images on the
same cassette. If you use the VCR counter to find the starting
position, make sure you get the complete image. When you are
finished the Restore procedure, the screen displays (for
example):
--- ERROR STATISTICS --# SOFT ERRORS: 0
# DISC ERRORS: 0
# OF BLOCKS NEEDING RETRYS: 0
ALL DATA RECEIVED
TASK(L TO LIST) : _
You have now backed up and then restored a Corvus drive. We
'ecommend that you back up data on your Corvus hard disc at least
Neekly, or more often, depending on computer use. Although hard
jisk drives offer superior reliability compared to floppy diskette
jrives, you should take proper care to protect valuable data from
Jnforeseen accidents.
20
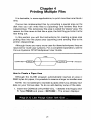
Chapter 4
Printing Multiple Files
It is desirable, in some applications, to print more than one file at a
time.
Corvus has implemented this by providing a special area on thE
disk that you can write files to (spooling) and retrieve files from
(despooling). This temporary file area is called the "pipes" area. ThE
reason for this name is that like a pipe, the first thing put into it is thE
first thing out.
In this section you will find instructions for creating a pipes area
putting files into the pipes area (spooling) and sending files to thE
printer (despooling).
Although there are many more uses for these techniques, they arE
reserved for multi-user systems. For a complete explanation, see thE
Corvus Systems CP/M Multiplexer User Guide.
PIPE
COMPUTER~1(~-J-t----)--1-1I[J02!UITTfJPUgjTDr---. PRINTER
How to Create a Pipes Area
Although the CLINK program automatically reserves an area 01
256K bytes for pipes, it is possible to reserve a larger or smaller area
NOTE: Do not attempt to recreate a pipes area if you already haVE
data on your Corvus disk. To do so will destroy some of the data.
1. Insert the CORVUS UTILITIES VOL. 1 diskette into'floppy drivE
B. Type PMGR and press <RETURN>. T/'Jescreen displays:
Pmgr [1.1] L)ist P)urge C)lear I)nit Q)uit _
21
2. Press I to initialize the pipes area. The screen displays:
DEFAULT PARAMETERS
STARTING BLOCK:
BLOCK LENGTH:
64
500
USE DEFAULT PARAMETERS? (YIN) _
3. Press N for NO. The screen displays:
STARTING BLOCK:
4. Type 64 and press <RETURN>. The screen displays:
BLOCK LENGTH:
5. Type 600 and press <RETURN>. The screen displays:
INITIALIZE? (YIN)
6. Press V for YES. The screen displays:
INITIALIZING PIPES AREA
Pipes Area Initialized
Pmgr [1.1] L)ist P)urge C)lear I)nit Q)uit _
7. You have now set up the pipes area. Press
program. The screen displays:
-
8-> _
22
a to quit the PMGR
How to Send a File to a Pipe
To send a file to a pipe, the file must already exist on your Corvw
disk drive, or on the floppy diskettes.
1. Insert the CORVUS UTILITIES VOL. 1 diskette into floppy drivE
B. Type SPOOL and press ...:RETURN>. The screen displays:
SPOOLER [2.0]: S(pool D(espool L(ist O(uit _
2. Press S for S( pool. The screen displays:
SPOOL PARAMETERS
P(ipe name: PRINTER
F(ile name:
M(essage:
T(ype of File: F(ormatted Text
L(inefeeds: TRUE
N(ew pages: FALSE
I(nclude Files: FALSE
S( P( F( M( T{ L( N{ I( O{ : _
3. Press F for F( ile name. The screen displays:
F(ile name:
4. Type B:INDEX.DOC and press <RETURN>. The screen displays
SPOOL PARAMETERS
P(ipe name: PRINTER
F(ile name: B:INDEX.DOC
MCessage:
T(ype of File: F{ormatted Text
L{inefeeds: TRUE
N{ew pages: FALSE
I(nclude Files: FALSE
S( P( F{ M{ T{ L{ N{ I( O( : _
23
INDEX.DOC is the name of the file you want to send. B: is the
drive It resides on.
5. Press M for message. The screen displays:
M(essage:
6. Type, This
is a
test file. 'and press <RETURN>. The screen
displays:
SPOOL PARAMETERS
P(ipe name: PRINTER
F(ile name: B:INDEX.Doc
M( essage:This is a test file.
T(ype of File: F(ormatted Text
L(inefeeds: TRUE
N(ew pages: FALSE
I (nclude Files: FALSE
S( P( F( M( T( l( N( I( Q( : _
The message option allows you to make comments about a file
without having them included in it. When printed, this message
will appear on a separate page from the text.
7. Press S to send the file. The screen displays:
Spooling file to pipe. PRINTER [1] ......... .
10 blocks y!ritten to .pipe PRINTER [1]
The number in brackets is the pipe's number. There can beup to
62 pipes named PRINTER.
24
8. Press
a to quit. The screen displays:
SPOOL PARAMETERS
P(ipe name: PRINTER
F(ile name:B:INDEX.DOC
M (essage: This is a test file.
T(ype of File: F(ormatted Text
L(inefeeds: TRUE
N (ew pages: .FALS E
I(nelude Files: FALSE
S( P( F(Me T( LC N( I( Q( : -
The other SPOOL options are:
P( ipe name-
Allows you to assign another name to the pipe.
For single user applications, leave it set as
PRINTER.
T(ype of File- may be changed to U for unformatted text or N
for non-text. Non-text may result in an end of
file error.
L(inefeed-
will allow Iinefeeds when TRUE and will strip
them out if FALSE. If your printed copy seems
to double-space, select F for FALSE.
N (ew Pages-
if your printed copy does not leave blank lines
between the bottom of one page and the top of
the next, you should select T for TRUE.
I(nclude Files- is used with word proceSSing packages that
allow file linking. If you wish to use this feature,
select T for TRU E.
Sending a File From a Pipe to a Printer
If you have not sent a file to the pipes area, go to the previous
instructions labelled "How to Send a File to a Pipe."
1. Insert the CORVUS UTILITIES VOL. 1 diskette into floppy
drive B:.
25
Type SPOOL and press <RETURN>. The screen displays:
Spooler [2.0]: S(pool D(espool L(ist Q(uit:
_
2. Press D for DC espool. The screen displciys:
3. Say we-wish to des pool the file INDEX.DOC which was loaded in
pipe PRINTER [1].
Press P for P)ipe name:. The screen displays:
P)ipe name: _
4. Type PRINTER and press <RETURN>. The screen displays:
DESPOOL PARAMETERS
P)ipe name: PRINTER
W)here: PRINTER
M )ax Lines/Page: 8
E)xpand Tabs: 8
L)inefeeds: TRUE
D) P) W) M) E) L) Q) _
5. If you wish to change other defaults, follow a similar procedure.
When you are finished, press D for despool. The file is
despooled to the printer, and the computer waits to despool the
26
next pipe. The screen displays:
This procedure will print all pipes named PRINTER.
6.
When you press any key, the computer returns to the start of the
Spool program and the screen displays:
Spooler [2.0]: S(pool D(espool L(ist Q(uit : _
7. Continue despooling files until you are finished. Press a forQ(uit.
The screen displays:
B> _
How to Clear the Pipes Area
1. Insert the CORVUS UTILITIES VOL. 1 diskette into floppy drive B.
Type PMGR and press [RETURN]. The screen displays:
Pmgr [1.1] L(ist P(urge C(lear I(nit Q(uit : _
27
2. Press C for Clear. The screen displays:
Clearing Pipes area:
Starting Block: 0
Block Length: 500
Continue? (YIN) _
3. Press Y. The screen displays:
Pipes Area Cleared
(au have just cleared the entire pipes area of files.
-low to Clear a Single Pipe
1. Insert the CORVUS UTILITIES VOL. 1 diskette into floppy drive B.
Type PMGR and press [RETURN]. The screen displays:
Pmgr [1.1] L(ist P(urge C(lear I(nit Q(uit : _
2. Press P for purge. The screen displays:
~,urge
which pipe (enter pipe number)?
3. Type 1 and press [RETURN]. The screen displays:
PIPE ERROR -12
Pipe does not exist.
'ipe number 1 did not have any data in it because the pipes area was
,I ready cleared.
28
What Is In the Pipes?
It is possible to find out what pipes you have spooled to in the
following way:
1. Insert the CORVUS UTILITIES VOL. 1 diskette into floppy
drive B.
Type PMGR and press [RETURN]. The screen displays:
Pmgr [1.1] L(ist P(urge C(lear I(nit Q(uit : ___
2. Press L for list. The screen displays something like:
Active Pipes are:
1. PENPLOT
2. PRINTER
Closed
Closed
-------
Contains Data
Contains Data
A pipe is open only while spooling or despooling. If a pipe does
not contain data, it will not be listed.
3. To quit, press Q. The screen displays:
29
30
Chapter 5
Troubleshooting Your Corvus Drive
The Corvus disk system is designed to provide years of problem·
free use. At times, however, it may experience a hardware or software
problem. If your drive is not performing properly, consult the follow·
ing table for recommended actions.
Corvus Systems suggests that you take two simple steps when YOL
first set up your system:
• Make copies of the Corvus Utilities Program diskettes.
• Copy down on paper the spared track and virtual drive offse1
tables. See page 00 of this manual.
PROBLEM
A.
OPERATION TO FIX
NO FRONT PANEL
INDICATOR LIGHTS .ON.
31
PROBLE~
1.
Make sure power switch isor
2.
Check power cord connec
.tions to drive and wall socket
3.
Inspect fuse- replace witt
proper fuse if blown (see thE
Installation Guide for you
computer).
4.
Check the Voltage Circui
Board for correct voltage anc
installation (see the Installation Guide foryourcomputer)
5.
Listen to the drive and heal
if fan is spinning. If fan is no
operating, repeat Steps 1-4
then call your Corvus ServicE
Center for further instructions
If fan operating, go Step 7.
6.
Toggle Reset Switch (right·
most switch on front panel)
If front panel lights remain of
(and fan is operating), cal
your Corvus Service Centel
for further instructions.
B. FAULT AND BUSY
LIGHTS COME ON AFTER
POWER UP SEQUENCE.
BUSY LIGHT FLASHES
FOR A WHILE, THEN
BOTH LIGHTS STAY ON.
7.
Toggle Reset Switch on front
panel.
8.
Check all front panel switches
for proper position.
9.
Check flat interface cable connections.
10. Unplug processor flat cable
and video connections (if you
are using the Mirror). Toggle
Reset Switch. If drive becomes
ready, reconnect interface
cable (and video connections
if using Mirror), and repeat
the installation sequence,
making sure cqrrect software
programs are used. (See the
Installation Guide for your
computer for instructions).
11. If drive does not become
ready after Step 10, turn format switch on and reset drive.
If the drive becomes ready,
refer to Section 6 of this User
Guide. Go to Step 12.
If your drive still does not
become ready, call your Corvus Service Center.
12. You will now update the controller code on the drive (refer
to Section 6 of this User
Guide). Power drive down.
Turn format switch to the
right before proceeding.
Power drive up. Run the
CDIAGNOS program from
the floppy drive. Select .option #6. Update with controller
32
code program from directoll
(see Step 13 above). Afte
updating controller code, tun
format switch off (to the left)
. See Section 6 of this manua
for examples of this operation
Toggle Reset Switch. If drivl
does not become ready afte
1 to 2 minutes, the final steJ
is to reformat the drive (SteJ
#15).
13. First, read the section or
,reformatting the Corvus drivi
(refer to Section 6 of thi:
User Guide).
WARNING
REFORMATTING THE
DRIVE WILL DESTROY All
DATA ON DRIVE. BACK
UP DATA IF AT ALL POSSIBLE. COpy DOWN SPARE
TRACK TABLE AND
VIRTUAL DRIVE OFFSET
TABLE AS WELL.
Power the Corvus drive down
Flip the Format Switch (sec
ond switch from right) to thl
right. Power drive up.
Run CDIAGNOS progran
from floppy drive. Select op
tion #6. Type the contro"e
code (CORVXX. XXX) witt
an .FMT extension, example
CORVB173.FMT
Answer the questions as the~
appear on the screen. ThE
busy light wi" flicker rapidl~
for about one minute an(
33
then the screen displays a
long message indicating formatting is finished, and the
new controller code has been
written out. You should then
restore the old values to the
Virtual Drive Offset Table
(VDO Table) and spare track
table. Turn format switch off
and toggle Reset Switch.
Repeat Step 13 to check controller code. If the system
does not become ready after
toggling reset, call the Service Center for further information.
C. BACKUP OR RESTORE
FUNCTION SHOWS
DISK ERROR.
14. This is usually caused by bad
sectors on the drive. Run
CDIAGNOS program and do
the Format Check (Option 2).
You should back drive up
(ignoring disk errors), spare
out bad tracks, and then
restore data.
D. VERIFY FUNCTION
INDICATES BLOCK(S)
NEEDING RETRY.
15. Possible causes are bad tape,
faulty connections, VCR
tracking out of adjustment,
VCR play speed out of adjustment. I{none of the above,
you may have hardware problems in the VCR or Mirror.
E. RESTORE FUNCTION
16. Probable causes same as #15
above. Do a retry pass. If
problem persists, check hardware.
INDICATES BLOCK(S)
NEEDING RETRY.
F.
WHEN TRYING A RESTORE, ERROR
MESSAGE "IMAGE SIZE
MISMATCH" OR "MIRROR
ERROR 4" DISPLAYS.
17. Probable cause is wrong block
size or starting address was
used. Use IDENTIFY option
of Mirror program to determine correct image size and
repeat RESTORE.
3'1
G. WHEN TRYING A
RESTORE, VERIFY OR
IDENTIFY OPTION ON
THE MIRROR PROGRAM,
THE ERROR MESSAGE
"IMAGE NOT FOUND" OR
"MIRROR ERROR 7"
DISPLAYS.
18. Video cassette not rewound
to beginning or VCR conections faulty. First, check video
connections and VCR line
input/output switches (these
switches should be set to
either line or VCR, depending
on your machine- not TV).
Rewind video cassette to correct starting position and repeat function.
If problem persists, call your
Corvus Service Center.
H. CORVUS I/O DR IVER OR
CORVUS UTILITY PROGRAM ISSUES ERROR
MESSAGE IN THE FORM:
**DISC RIW ERROR #XXH*
22. Look up error code in Appendix B of this guide for an
indication of the error type.
If it is a bad sector (indicated
by error codes AAH, ASH,
ESH, or ECH), try to fix it by
using Option 2 of the CDIAGNOS Program.
35
36
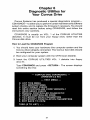
Chapter 6
Diagnostic Utilities for
Your Corvus Drive
Corvus Systems has produced a special diagnostics programCDIAGNOS - to allow you to perform certain hardware and software
system checks, and to replace the firmware if necessary. You should
read this entire section before using CDIAGNOS, and follow the
instructions very carefully.
CDIAGNOS is usually on VOL. 1 of the CORVUS UTILITIES
diskettes. It must be run from your floppy drive, rather than the
Corvus disk drive.
How to Load the CDIAGNOS Program
1. You should have your hardware (the computer system and the
Corvus drive) already connected. The Corvus hard disk should
be configured for your system.
2. Boot your computer system with the CP/M boot diskette.
3. Insert the CORVUS UTILITIES VOL. 1 diskette into floppy
drive B:.
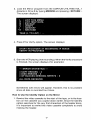
Type CDIAGNOS and press <RETURN>. The screen displays
something like this:
--- CORVUS DISC DIAGNOSTIC --(VERSION 2.2 XE)
--- TEST MENU --0.
1.
2.
3.
4.
5.
6.
7.
8.
9.
LIST THIS MENU
LIST INSTRUCTIONS
DISC FORMAT CHECK
READ CONTROLLER CODE VERSION #
HEAD SERVO CHECK
MANUAL CONTROLLER DIAGNOSTIC
UPDATE CONTROLLER CODE
LIST/MODIFY DRIVE PARAMETERS
LIST/MODIFY CONSTLLATION PARAMETERS
EXIT BACK TO CP/M
TASK (0 TO LIST) : _
37
4. To use CDIAGNOS, press the number for the task and follow the
directions. If you wish to exit CDIAGNOS and return to CP/M,
press Q when prompted for a task, or hold the control key and
press C «CNTL> C).
A Brief Description of the CDIAGNOS Menu
0. LIST THIS MENU
Press 0 and the menu displays.
1. LIST INSTRUCTIONS
Press 1 and the screen displays:
TO CONSERVE SPACE, THE INSTRUCTIONS HAVE
BEEN REMOVED AND PLACED IN A SEPARATE
FILE: CDIAGNOS.DOC. TO READ THEM JUST TYPE
.
THE FILE.
To see this file, press 9 to exit, and then type TYPE
CDIAGNOS.DOC and press < RETURN >. A summarization of
these instructions is also found in Appendix C of this guide.
2. DISK FORMAT CHECK
Press 2 and the screen displays:
CORVUS DRIVE # (1-4) ? _
Press 1 (unless you have multiple Corvus physical drives). The
screen displays:
DISK FORMAT CHECK IN PROGRESS ...
38
A check of the Corvus disk is performed. After several minutes,
the screen displays:
NO BAD SECTORS FOUND!!
TASK (0 TO LIST) : _
If the Disk Format Check test found any bad sectors, it would
display them in this fashion:
-- BAD SECTORS RE-WRITTEN -SURFACE CYLINDER
#
#
XX
SECTOR
#
TRACK
#
XX
XX
XX
LIST DATA AGAIN (YIN) ? _
Copy this table down on a piece of paper. The" fourth column,
TRACK #, contains the information you will need to spare tracks
out, which we will discuss later in this section.
3. READ CONTROLLER CODE VERSION NUMBER
Press 3. The screen displays:
CORVUS DRIVE # (1-4) ? _
Press 1 (or the number of the Corvus drive if you have added on
more physical Corvus drives). The screen displays:
V17.3 CORVUS SYSTEMS 20-NOV-81 REVISION #35
CONTROLLER ROM VERSION #57
TASK (0 TO LIST) : _
39
NOTE: You may have different numbers, but the controller code
version should be 17.3 or later.
4. HEAD SERVO CHECK
Press 4 and the screen displays:
CORVUS DRIVE # (1-4) ? _
Press 1 (or the drive number, in case of add-on physical Corvus
drives). The read/write heads of the Corvus disk will rapidly move
from the outer edge to the center of the disk, producing a whirring
sound. This test verifies that the disk reads data and that the disk
heads move properly.
NOTE: This test continues indefinitely until stopped by holding
down the control key and pressing C «CNTL>C). Approximately one minute of this test should be enough to check the
disk.
5. MANUAL CONTROLLER DIAGNOSTIC
Press 5 and the screen displays:
WARNING
THIS· TEST CAN CAUSE LOSS OF USER DATA _
(IF USED IMPROPERLY)
THE COMMAND FORMAT IS:
R - READ A BYTE FROM THE CONTROLLER
WXX - WRITE HEX BYTE TO CONTROLLER
S - READ CONTROLLER STATUS
E - EXIT TEST
NOTE: This test should be performed ONLY under the direction
of qualified Corvus Systems Customer Service representatives.
6. UPDATE CONTROLLER CODE
Press 6 and the screen displays:
CONTROLLER CODE FILE NAME (COVBXX.CLR) :
40
Type the controller code file name listed in the Directory of thl
CORVUS UTILITIES diskettes; for example, type CORVB173.CLF
and press <RETURN>. This starts the procedure for updatin~
the controller code on the Corvus drive, which is contained if
protected tracks of the hard disk. Normally, this code cannot bl
written to or read by the user (even accidentally). However, i
can be made accessible, for writing, by turning on the forma
switch. To use this option, follow this procedure:
1. Power the drive up. Turn on the format switch (the secone
switch from the right under the front bezel of the drive), ane
depress the reset switch (the first switch from the right).
2. Run the proper CLINK program to establish the Corvw
link.
3. Run the CDIAGNOS program from the floppy diskette
drive. Select the update option, number 6.
4. Type the controller code file name. For example, type
CORVB173.CLR and press <RETURN>.
5. Turn off the format switch and reset the drive by either usin£
the reset switch (the rightmost switch under the front beze
of the drive), or by powering the drive down and bac~
up again, and re-running the CLINK program.
7. LIST/MODIFY DRIVE PARAMETERS
Press 7 and the screen displays:
CORVUS DRIVE # (1-4) ? _
Press 1. The screen displays (as an example):
41
Press < RETURN >. The screen displays:
SECTOR INTERLEAVING SPEC. =- 12
PRESS RETURN TO CONTINUE
NOTE: The Sector Interleaving Spec{ification) is12 for 6 MB
drives, and 9 for the 10 and 20 MB drives. CORVUS SYSTEMS
STRONGLY RECOMMENDS THAT YOU DO NOT CHANGE IT.
Press <RETURN>. The screen displays:
--- VIRTUAL DRIVE TRACK --OFFSET TABLE
DRIVE
TRACK
1
o
WARNING
CHANGING ANY OF THE FOLLOWING PARAMETERS
CAN MAKE ANY USER DATA STORED ON THE DISC
UNUSABLE
DO YOU WISH TO CONTINUE (YIN) ?
NOTE: Changing these specifications can make your data
totally inaccessible, because the directory pointers are changed
from the actual disk locations. Before altering drive parameters,
you should back up the entire Corvus disk.
Press Y for Yes (if you wish to continue). The screen displays:
DRIVE PARAM MENU
S
I
V
E
:
:
:
:
CHANGE SPARED TRACK TABLE
CHANGE SECTOR INTERLEAVING
CHANGE VIRTUAL DRIVE OFFSETS
EXIT BACK TO MAIN MENU
TASK? _
42
Press S if you wish to change the spared track table. Spared
tracks are tracks automatically skipped by the drive- any data on
them is lost if not backed up first; and other data may be disturbed. Add or delete tracks by typing the track numbers, and
then press < RETURN >.
It is not recommended that you change the sector interleaving
spec or the virtual drive offsets.
8. LIST/MODIFY CONSTELLATION PARAMETERS
This is discussed in the CORVUS SYSTEMS CP/M MULTIPLEXER GUIDE.
9. EXIT BACK TO CP/M
If you wish to return to the main menu, press option 9.
43
44
Appendix A. List of Common CP/M Extensions
Extension
Explanation
.ASM
.BAK
.BAS
.OAT
.OOC
.FOR
.HEX
.LlB
MAC
Assembly language source file
Backup file
BASIC program source file
Data file
Text (Document) file
Microsoft FORTRAN source file
Intel HEX format object code file
Extension for a Library file
Source code for some Microsoft MACRO
assemblers.
Machine code (Object code)
Pascal source file
Sorcin Pascal run-tim module
Relocatable machine code program
Source file for CPIM User's Group
Command file for a submit run
Text file
Temporary file or an improperly saved, unusable file
.OBJ
.PAS
.PCO
.REL
.SRC
.SUB
.TXT
.$$$
45
46
Appendix B. Corvus Disk Error Codes
(text of CERROR.DOC file from
CORVUS UTILITIES DISKETTE VOL. 1)
Corvus Disk Error Codes
The Corvus controller has a number of error codes that may be
issued if either an illegal command is given, or the controller is
out of synchronization, or there is a hardware malfunction. A number
of the utilities and disk interface programs can list these error codes
(in hex) if such an error occurs. For example, PUTGET.COM may
list the code as:
** DISK R/W ERROR # XXH **
where XX is the error code. You can demonstrate this by trying to
read a sector (with PUTGET) from drive 4 (unless you have four
drivers). This will give error code A7H. The upper 3 bits of the error
code have the following significance:
BIT 5 Set if there was a recoverable error (as in a re-try
or read or write).
BIT 6 Set if an error occurred on a re-read (verification)
following a disk write.
BIT 7 Set if any fatal error has occurred.
NOTE: Most of the programs will not list the error
unless bit 7 is set.
The lower 5 bits have the following significance:
BITS 0-4
o
1
2
3
4
5
6
7
8
MEANING
Disk Header Fault
Seek Ti meout
Seek Fault
Seek Error
Header CRC Error
Re-zero (Head) Fault
Re-zero Timeout
Drive Not On Line
Write Fault
47
9
A
B
C
D
E
F
10
11
12
13
14
15
16
17
18
19
1A
1B
1C
1D
Read Data Fault
Data CRC Error
Sector Locate Error
Write Protected
Illegal Sector Address
Illegal Command
Drive Not Acknowledged
Acknowledge Stuck Active
Timeout
Fault
CRC
Seek
Verification
Drive Speed Error
Drive Illegal Address Error
Drive R/W Fault Error
Drive Servo Error
Drive Guard Band
Drive PLO (Phase Lockout) Error
Drive R/W Unsafe
48
Appendix C
Description of CDIAGNOS Program
CDIAGNOS.DOC
The CP/M version of the Corvus Disk Diagnostic (CDIAGNOS.
COM) provides some relatively "safe" disk tests along with the ability
to list and/or change some parameters within the controller code.
The functions available in this version are:
1. DISK FORMAT CHECK
The controller tries to read each 512 byte sector to verify that
it is "good" (has a correct CRC). If it gets a bad CRC after twenty
read attempts, it will re-write the sector to reset the CRC. This
usually takes 1-2 minutes. NOTE: on Rev. A controllers, this
function is not available with Version 0 controller code.
2. READ THE CONTROLLER CODE VERSION #
This option will return some information about the controller
code on your drive. Rev B drives can return more detailed
information than Rev A drives.
3. HEAD SERVO TEST
This test alternately reads 128 byte sectors at disk address 0
and 1000 sectors in from the maximum. This test is mainly useful
to verify that the drive will actually read data and move its head.
4. MANUAL CONTROLLER DIAGNOSTIC
This option allows one to read or "write directly to the Corvus
controller I/O ports as well as read the status lines. It is mainly
useful for Corvus service personnel when attempting to diagnose a drive problem over the phone.
WARNING
THIS TEST CAN CAUSE THE USER DATA ON THE DISK TO
BE OVERWRITTEN. IF USED ON A REV A DRIVE WITH THE
FORMAT JUMPER IN PLACE, IT CAN EVEN CAUSE THE
DISK TO BE REFORMATTED.
49
5. UPDATE CONTROLLER CODE
This option allows one to update or initially install controller
code on the Corvus drive. This code resides on protected tracks
of the hard disk. Normally this code cannot be written to or
read by the user (even accidentally). However, it can be made
accessible (to writing) by turning on the format switch (or by
adding a jumper to the drive backplane). This option replaces
the separate program: CCODE.COM that had similar capabilities.
WARNING
ON REV A DRIVES, DO NOT ATTEMPTTOWRITETHE CODE
OUT TO THE DRIVE WITHOUT TURNING ON THE FORMAT
SWITCH (OR INSTALLING THE FORMAT JUMPER. IF YOU
DO, IT WILL BE WRITTEN OUT TO THE USER AREA OF THE
DISK-OVERLAYING POSSIBLY VALUABLE USER PROGRAMS OR DATA!
To use this option:
A. Power the drive down. If your drive has a format switch
(under the front bezel or on the back of the drive), turn it
on and proceed to step D.
B. On drives without a format switch, remove the plastic cover
over the backplane pins (on the back of the drive where the
computer cable is attached).
C. Connect a jumper between pins:
037 and 038 (for Rev A drives)
C2 and C12 (for Rev B drives)
D. Power the drive back up.
E. Run the CDIAGNOS program from your floppy disk based
CP/M and select the update option.
F. After the code is written out, turn off the format switch (or
remove the jumper) and. reset the drive by either using the
reset switch or by powering the drive down and up again.
50
6. LIST/MODIFY DRIVE PARAMETERS
This option allows you to examine and/or change the:
A. The Spared Track Table
This table specifies physical track numbers which are
to be skipped over when the controller accesses data on
the drive. This allows one to hide the existence of media
defects from the external user (the data service will look
perfect to him).
B. The Sector Interleaving Spec
The defaults used here have been optimized for small
computers like Apple II's. Typically, we have selected a
value of:
9 for 10 and 20 MB drives
12 for 6 MB drives
C. The Virtual Drive Offset Table
This table allows one drive to behave as if it were several
smaller drives daisy-chained together. The table entries
specify the track number at which these virtual drives start.
Normally, one would not have occasion to disturb these
parameters unless the drive has been re-formatted or a bad
track develops.
7. LIST/MODIFY CONSTELLATION PARAMETERS
This option allows one to examine and/or modify the:
A. Master Multiplexer Connection Table
(Le.-specify what is connected to it) This table is usually
set to assume all the slots have a mux on them.
B. Constellation Polling Constants
These numbers determine certain aspects of the Constellation polling environment.
51
52
. Appendix D
Description of Corvus Utilities Programs
1. INDEX.DOC
This is the disk index document file.
2. CERROR.DOC
This is a short document file listing the
controller error codes.
3. PUTGET.COM
This is a disk utility that can be used under
CP/M to read and write from memory to the
Corvus drive as well as fill various sections
of the disk with data. The routine has its own
disk drivers and is mainly useful as a
SYSGEN routine to write a configured
CP/M 2.X system out to the drive, and to
initialize a drive directory.
4. CLlNK2FV.COM
CLlNK2TN.COM
CLINK2TW.COM
CLlNK7FV.COM
CLlNK7TN.COM
CLlNK7TW.COM
These are several versions of the Corvus
link program. You should choose the one
that best meets your needs, and ignore
the others. Consult the CORVUS SYSTEMS
CP/M USERS GUIDE for descriptions of
each program. This program contains the
Corvus disk drivers that are linked into
CP/M. These programs will only work with
CP/M version 2.0 or later.
5. CDIAGNOS.COM
CDIAGNOS.DOC
A disk diagnostic that can be used to verify
correct drive operation as well as to update
the controller code and change other drive
parameters.
6. CORVB173.CLR
This is a controller code file for use with
CDIAGNOS.COM. This is a copy of version
17.3 of the controller code for the REV 8
controller.
7. MIRROR.COM
This program is the control program for the
Corvus Mirror disk backup system. It will
not work under Version 0 of the controller
code (REV A drives).
8. SEMA4.COM
This is an example program designed to
illustrate how to access the semaphores
supported on the Corvus drive.
53
9. PMGR.COM
This is a program that allows the user to
manage the pipes area of the drive. It allows
the user to initialize the pipes and clear the
pipes area, purge as pipe, and list the
current pipes and their status.
10. SPOOl.COM
This is a program that use the pipes facilities
on the Corvus drive. It transfers files to
and from an area of the drive that is accessible by any user and/or system through
pipe commands. Examples of its usage are:
(1) Send text files to a shared printer; and
(2) Transfer files between different systems
(CPM <--> APPLE).
11. DRIVEl.COM
This is a program that helps you configure
your Corvus drive, if you choose not to use
one of the default CLlNK.COM's provided.
Based on your input, it creates a file containing the equates that need to be changed
in the CLlNK2.ASM program to set up your
drive. Also in this file is the start and
directory addresses for the pseudo drives
being set up. These addresses are used
with the PUTGET and MIRROR programs.
12. LlNKASM.COM
LlNKASM.DOC
This is an assembler that uses the standard
Intel mnemonics and is upward compatible
with the assembler supplied by Digital
Research (but unfortunately not also provided by XEROX with their version of CP/M).
This program was written by Ward Christensen and was extracted from CP/M Users
Group disk #36. If necessary, you can use
this assembler to assemble any of the .ASM
files on these disks. NOTE: This assembler
is only supplied forthe XEROX 820 or Vector
Graphics computers.
The following source programs are provided for those of you who
wish to modify the Corvus interface or utility programs:
13. CLlNK2.ASM
Source for the Corvus link program which
may be modified if the default versions do
54
not meet your needs. Consult the CORVUS
SYSTEMS CP/M PROGRAMMER'S GUIDE
for instructions on how to modify
CLlNK2.ASM.
14. SEMA4.ASM
SPOOLGEN.SUB
SPOOL.SRC
SPOOL.DEF
SPOOL.PAS
SPOOLM.PAS
PIPEGEN.SUB
PIPES.SRC
PIPED.PAS
PIPEC.PAS
PIPES.PAS
CPMIO.MAC
Sources for the SEMA4 and SPOOL programs. These sources are provided as
examples of how to use the Semaphore
and pipe features of the Corvus drive.
15. CLOADR.ASM
This is a short boot loader program to be
used with CP/M 2.X. It can be used under
a floppy-based CPIM to boot in CP/M from
the hard-disk once it is put there, or it can
be used to make a ROM-based loader.
16. CBOOT.ASM
This is a cold boot loader for CP/M 2.X. It
is brought in by CLOADER. CBOOT then
brings in the CP/M sy~tem.
17. BIOSC.ASM
BIOSCT.ASM
One of these two files should be on your
set of diskettes. Both of these files contain
the source for the Corvus Basic 110 System
(BIOS) to configure the Corvus drive into
one to seven pseudo drives, as well as allow
for the control of two floppy drives. The
BIOSC.ASM file contains dummy floppy
and console I/O drivers. These dummy
drivers should be replaced with the floppy
and console should be replaced with the
floppy and console 1/0 drivers for your
computer. The BIOSCT.ASM file contains
floppy and console 1/0 drivers for a typical
S-100 system using a single density floppy
diskette drive controller.
NOTE: The spool program is written in
Pascal, and requires you to have PASCALI
MT and the MBO Assembler in order to
modify it.
55
NOTE 1: Source for the programs PUTGET, CDIAGNOS, and
MIRROR is available by special order.
NOTE 2: All of the disk utilities contain their own Corvus disk
drivers. They can be run from floppy-based CP/M systems
that are not yet linked to the Corvus drive.
NOTE 3: Support for pre-2.0 versions of CP/M. has been discontinued. The last release of pre-2.0 software, dated
7-May-81, is available by special order.
56
Appendix E
Supplemental VCR Information
Corvus Systems recommends that you purchase a VHS-type video
cassette recorder (VCR). The following VCR models have been used
with the Corvus Mirror:
Grundig VCR 4000 (PAL Format)
Hitachi VT 5000 (PAL Format)
National NV 7000
Panasonic
Panasonic
Panasonic
Panasonic
Panasonic
RCA
RCA
RCA
RCA
RCA
RCA
VHS 1000
VHS 1500
NV 3810
NV 8200
NV 1200
VDP 150
VET 180
VCT 201
VET 250
VDT 350
VDT 501
Sony Betamax SL 5600 (Beta Format)
Technicolor 212 (limited to 30 minute cassette)
Zenith vL 9700 (Beta Format)
When used in the normal quad recording format of the Corvus
Mirror, video cassettes have the storage capacities listed below:
30
60
90
120
minute
minute
minute
minute
cassette-18
cassette-36
cassette-55
cassette-73
MB
MB
MB
MB
57
maximum
maximum
maximum
maximum
storage capacity
storage capacity
storage capacity
storage capacity