1
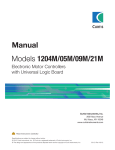
Manual
Model 1313
Handheld Programmer
Curtis Instruments, Inc.
200 Kisco Avenue
Mt. Kisco, NY 10549
www.curtisinstruments.com
Read Instructions Carefully!
Specifications are subject to change without notice.
© 2013 Curtis Instruments, Inc. ® Curtis is a registered trademark of Curtis Instruments, Inc.
© The design and appearance of the products depicted herein are the copyright of Curtis Instruments, Inc.
38798, Rev A 4/13
CONTENTS
CONTENTS
1.
OVERVIEW ................................................................................... 1
2.
PROGRAMMER OPERATION ..................................................... 3
Connections ....................................................................................... 3
Powering Up the Programmer ............................................................ 4
Display Format ................................................................................... 5
Key Functions ..................................................................................... 6
3.
MENU ORGANIZATION .............................................................. 8
Menu Structure .................................................................................. 8
Types of Menu Items .......................................................................... 9
The Nine Menus ............................................................................... 10
4.
SYSTEM INFO MENU ............................................................... 11
5.
PARAMETERS MENU ............................................................... 12
6.
MONITOR MENU ....................................................................... 15
7.
DIAGNOSTICS MENU ............................................................... 16
8.
PROGRAMMING MENU ............................................................ 18
“Save CPF File” ................................................................................. 18
“Restore CPF File” ............................................................................ 22
9.
FAVORITES MENU .................................................................... 24
10.
HHP SETTINGS MENU ............................................................. 27
11.
FILE MANAGER ........................................................................ 31
12.
PLOT & LOG .............................................................................. 33
13.
USING THE KEYBOARD ........................................................... 35
14.
TAKING SCREENSHOTS .......................................................... 36
15.
WORKING OFFLINE ................................................................. 37
16.
UPDATING THE PROGRAMMER’S SOFTWARE ..................... 39
APPENDIX A:
APPENDIX B
1313 Handheld Programmer Manual, Rev. A
File Types
1313 Programmer Specifications
iii
1 — OVERVIEW
1
OVERVIEW
The Curtis 1313 handheld programmer is used to configure Curtis motor control systems. With the programmer, you can adjust and save parameter settings,
monitor real-time data, and perform diagnostics and troubleshooting.
Model 1313
handheld programmer.
High-resolution color LCD display . . .
Bright 45×60mm screen is easy to read, providing information at a glance. In
addition to menu-specific content, it continuously shows time/date, connection
status, and access level.
Easy navigation . . .
Screen displays and the programmer’s key layout are designed to work together
to provide intuitive navigation.
Convenient parameter adjustment . . .
You can easily adjust a wide range of parameters to customize vehicle performance.
These settings can then be saved as a unique .cpf file and stored. Multiple .cpf
files can be stored and restored as needed.
Real-time monitoring . . .
Values of monitored data variables are displayed in easy-to-read formats.
Diagnostics and troubleshooting . . .
Existing faults as well as all the accumulated faults in the system’s fault history file are listed in clear language. Suggestions for clearing each fault are also
provided.
1313 Handheld Programmer Manual, Rev. A
1
1 — OVERVIEW
Plot and Log . . .
The plot and log programs allow you to look at variables over time, either in
graphical format or as data files you can upload in a spreadsheet program, such
as Excel.
Softkeys . . .
Three versatile softkeys provide multiple functions, depending on context.
Help function . . .
Help screens give descriptions of adjustable parameters, monitored variables,
and faults.
PC interface . . .
Files can be downloaded from a PC (onto an SD card or into the programmer
directly through its USB connector) for installation into the controller.
Update . . .
The handheld programmer can update its own software.
SD-card support . . .
An SD card provides additional memory capacity. This is where any screenshots
you take will be stored. SD cards can be used to deliver software upgrades, and
can be used in multiple programmers to install identical software.
Batteries . . .
Two AA batteries provide power for use without a connected system; they also
ensure that the programmer’s real-time clock keeps running.
Favorites . . .
The Favorites function allows you to create shortcuts to your frequently-used
adjustable parameters and monitor variables.
!
2
WARNING The control system can affect speed, acceleration, deceleration, dynamic stability, and
braking. If the control system is programmed incorrectly or outside the safe limits as determined
by the vehicle manufacturer, it can create a dangerous situation. Only the vehicle manufacturer
or an authorized service agent or dealer should program the control system.
1313 Handheld Programmer Manual, Rev. A
2 — OPERATION
2
PROGRAMMER OPERATION
This section describes how to use the handheld programmer.
Connections
The programmer has two connectors, one for communicating with the motor
controller and one for interfacing with a PC. It also has a battery compartment
and a memory card slot.
SD memory card slot
battery compartment
(located on
underside)
?
USB connector–
–system connector
connectors
END VIEW
System connector
Use this connector with the supplied cable to connect the programmer to the
motor controller.
USB connector
Use this connector with a USB cable to connect the programmer to a PC.
Batteries
A compartment on the underside of the unit holds two AA batteries. Power is
supplied to the programmer by the controller. The batteries in the programmer
keep its real-time clock running.
SD card
SD cards provide additional memory, and are a convenient interface between a PC and the programmer.
Note that the SD card must be inserted into the
programmer face down.
1313 Handheld Programmer Manual, Rev. A
✓
➡
3
2 — OPERATION
Powering up the programmer
Connect the handheld programmer into the control system by plugging it into
the controller’s charger/programmer port.
The programmer automatically powers up, and displays this screen while
it loads information from the controller.
Once the programmer has uploaded the information from the controller, it
displays the Main Menu.
If the controller is not turned on when the programmer is connected, you can
power up the programmer by pressing the Power key; the message “No System
detected” will be displayed.
4
1313 Handheld Programmer Manual, Rev. A
2 — OPERATION
Display format
The high-resolution clarity of the LCD screen allows a wealth of information
to be displayed at once.
— green circle ( ) indicating connection to system;
red slash ( ) when not connected
— icon indicating access level
— (optional) 1313 battery
state-of-charge
time and date
content area
(this example shows
the Main Menu,
which consists of
nine individual
menu icons)
additional text line
softkey text line
➜
To perform an action suggested in the
softkey text, press the blank softkey
located directly below it.
In this example, pressing the “Select” softkey will open the System Info menu,
which is highlighted. The “Select” softkey opens whichever menu is highlighted.
Pressing the “Offline” softkey allows you to use the programmer when it is not
connected to a controller; see Section 15.
Access level
The handheld programmer is available in four access levels: OEM, Dealer,
Service, and User. Each programmer can access data at its own level and the
levels below it.
OEM
Dealer
Service
User
1313 Handheld Programmer Manual, Rev. A
5
2 — OPERATION
Key functions
The pushbutton keys on the programmer’s keypad allow you to navigate easily
through the menus.
softkeys
+/- keys
arrow keys
power
favorites
?
help
main menu
Softkeys
These three keys are blank, because their function is context-specific. At any
given time, their function is shown directly above them on the LCD screen.
The symbol “»” indicates more options; pressing the softkey under the “»” will
scroll to another set of options.
Arrow keys
?
6
With these four keys you can scroll up and down, and right and left, within
the display. In the Main Menu, you can use the arrow keys to highlight one of
the menus; you then open the highlighted menu using the “Select” softkey.
Within menus (other than the Main Menu), the left-arrow key is used
to navigate backwards.
?
Within menus (other than the Main Menu), the right-arrow key is used
to navigate forwards—that is, to open highlighted submenus or items.
1313 Handheld Programmer Manual, Rev. A
2 — OPERATION
+/- keys
These two keys allow you to increase or decrease the value of parameter settings. They also are used as “+ = Yes” and “- = No” buttons. In some cases,
they are used to scroll through several options (as in selecting an access level,
or selecting a language).
?
Power ?
It is not necessary to use the Power key to turn on the programmer when you
plug it into an active control system; it will turn on automatically.
To turn off the programmer, press and hold the Power key for a few seconds. You will then be asked whether you want to power off the programmer,
and the softkey text will offer you the choices “Yes” and “No.”
If you have turned off the programmer, or if it has timed out and shut
itself off, pressing the Power key will turn it on again.
Favorites
?
This key is an alternate way to bring up the Favorites menu. You can access
the Favorites menu by selecting its icon in the Main Menu, or by using the
Favorites key. See the Favorites menu section for more information.
Screenshots
?
By pressing the Power key and then the Favorites key, you can take a screenshot
of the LCD display; see Section 13.
? Main Menu
This key will return you directly to the Main Menu, from wherever you are.
When the Main Menu is displayed, you can also use this key to cycle through
the individual menus. You can use either this key or the arrow keys to navigate
within the Main Menu, whichever you prefer.
?
Help
This key is used to display context-specific Help texts. It is a toggle key; you
can press it again to close the Help text window. You can also close Help text
windows with the “Exit” softkey or by pressing the left-arrow key.
1313 Handheld Programmer Manual, Rev. A
7
3 — MENU ORGANIZATION
3
MENU ORGANIZATION
The Main Menu contains nine menus, each identified by a menu-specific icon.
Items are arranged hierarchically within menus.
Some menus may contain just one level of information, but most contain
multiple levels. Items marked with a folder open as new submenus. Items marked
with a grid open into tables. Items marked with a dialogue balloon open into a
set of instructions for performing a procedure, such as calibration. At any point,
you can use the left-arrow key ( ) to navigate back to the previous screen. (It
is possible to limit this left-arrow key function using the “Exit menus with left
arrow” item in the HHP Settings menu; see Section 10.)
Menu structure
Each of the nine root menus displays the menu name in bold type at the top
of the screen, beside the menu icon. As you move within a hierarchical menu,
the text at the top of the screen shows the path you have taken. Note that when
This is the root level of the Parameters menu,
as indicated by the bold text heading. ➞
These lines of text show the
path to the selected item within
the Parameters menu. ➞
Parameters menu
—1 - Speed Mode
—Speed Controllerl
—Acc Feedforward
—Build Rate
8
1313 Handheld Programmer Manual, Rev. A
3 — MENU ORGANIZATION
the Speed Mode folder is highlighted, the “×10” and “×100” softkeys are grayed
out (indicating they do not apply)—but when Build Rate is highlighted, these
softkeys are available.
When you exit a menu and then later return, the menu will open either
at the place where you left it or at the root level—depending on the setting
of “Remember Last View” in the HHP Settings menu. So, in this example, if
“Remember Last View” is set to “On,” the next time you select the Parameters
menu it will open at Build Rate (assuming you exited the menu immediately
after looking at this parameter).
Types of menu items
Each item within a menu has a symbol in front of it, to indicate what type of
item it is.
?
These are read-only items, providing detailed information; this symbol
also appears on pop-up screens.
Folders indicate submenus; pressing the right-arrow key opens the folder.
Often there are submenus nested within submenus. Remember, you
can use the left-arrow key to navigate back out of nested menus.
?
?
These items are settings that you can adjust with the “+” and “-” keys.
They may be numerical values, or yes/no choices, or even multiple
choices, with the “+” and “-” keys used to cycle through the options.
These items open up a dialogue to guide you through a procedure, such
as autocalibrating a throttle.
?
?
These items open up into tables. You can adjust values within the table’s
cells. Use the arrow keys to select cells, and the “+” and “-” keys to
increase/decrease values. A text line located below the table (just above
the softkey text line) shows the name of the cell and its present value.
?
These are read-only Monitor values.
?
This symbol indicates a file the programmer cannot recognize; it is also
used for .hps (programmer settings) files.
These are system faults.
These are .cpf (parameter settings) files.
1313 Handheld Programmer Manual, Rev. A
9
3 — MENU ORGANIZATION
The nine menus
As shown on the Main Menu screen, the 1313 programmer organizes its dataset
into nine menus.
System Info
Parameters
Monitor
Diagnostics
Programming
Favorites
HHP Settings
File Manager
Plot & Log
The next nine sections of the manual describe these nine menus.
10
1313 Handheld Programmer Manual, Rev. A
4 — SYSTEM INFO MENU
4
SYSTEM INFO MENU
In the Main Menu, highlight the System Info icon and press the “Select” softkey
to go to the System Info menu. You can return to the Main Menu by pressing
the Main Menu key ( ).
The System Info menu opens directly to a detail screen providing information about the motor controller to which the programmer is connected:
One of one
(1/1) detail
screens
scrollbar
The sliding bar at the right of the screen indicates there are more items than
those shown. Use the down-arrow key ( ) to scroll down to see the rest of
the list.
the rest
of the items
1313 Handheld Programmer Manual, Rev. A
11
5 — PARAMETERS MENU
5
PARAMETERS MENU
In the Main Menu, highlight the Parameters icon and press the “Select” softkey
to go to the Parameters menu. You can return to the Main Menu at any time
by pressing the Main Menu key ( ).
The Parameters menu is likely to be the menu you use most often. This is
where you can adjust the settings of the control system’s adjustable parameters.
You navigate through this complex menu using the arrow keys, +/- keys, and
softkeys, as described in Section 2.
The parameters shown depend on the controller model and on the access
level of your handheld programmer.
The Help function provides concise information about each parameter.
To access the Help function, press the Help key ( ? ). Refer to your controller
manual for additional information about the various parameters.
With some “+\-” parameters, the item can be expanded to show a bar graph
indicating where the setting lies within the available range.
Here is a parameter called Forward Max, as it first appears:
12
1313 Handheld Programmer Manual, Rev. A
5 — PARAMETERS MENU
And here it is expanded, by pressing the right-arrow key (
):
Note that the “+\-” symbol is repeated on this screen, to remind you of the
type of item this is.
Softkeys available in Parameters menu
“Add to” is available for each adjustable parameter. This softkey takes you to a
screen where you choose where to add the parameter: you can add it to your
Favorites collection, or you can place it in the Plot or Log programs.
The “×10” or “×100” softkey, when pressed together with the “+” or “-” key
(
), allows you to change values rapidly—in increments of ten or a hundred
times the parameter’s step-size. For example, the Forward Max parameter shown
above has a range of 0.00 to 5.00 volts, in 0.01V increments. With the “×10”
softkey you can change the setting from 4.50 to 4.40 in one jump instead of
ten, or with the “×100” softkey you can change the setting from 4.50 to 3.50
in one jump instead of a hundred jumps. For parameters with narrow ranges
(for example, a parameter that can be set to 1 through 5), the “×” softkeys allow
you to jump to the extreme high or low end of the range in one step.
The “Exit” option appears on expanded items, such as the Forward Max bargraph shown above. The “×10” and “×100” softkeys are still available when
you are looking at the expanded item. The “Exit” option also appears when a
Help screen is displayed.
The “OK” and “Cancel” options appear on the screens guiding you through
procedures, such as calibrating a throttle, or whenever changing a value will
put the system into idle mode.
1313 Handheld Programmer Manual, Rev. A
13
5 — PARAMETERS MENU
Be aware that as you change parameter settings, the new values replace the earlier
values. If you make adjustments that you don’t like, and wish you could return
to the earlier values, you cannot do this—unless you have written down those
earlier settings (which is unlikely) or unless you have saved them.
To save your parameter settings, use the “Save .cpf File” function in the
Programming menu; see Section 8. Your parameter settings will then be saved
in a .cpf file.
You can save as many .cpf files as you desire, and you can create unique
names for them. If you prefer, each .cpf can automatically be given a name
consisting of the date and time when it was created; see the “Text for save as”
item in the HHP menu (Section 10).
For information on creating names, see Section 13: Using the Keyboard.
14
1313 Handheld Programmer Manual, Rev. A
6 — MONITOR MENU
6
MONITOR MENU
In the Main Menu, highlight the Monitor icon and press the “Select” softkey
to go to the Monitor menu. You can return to the Main Menu at any time by
pressing the Main Menu key ( ).
The Monitor menu provides real-time data from the control system,
especially useful in testing and troubleshooting.
You can press the Help key ( ? ) for a brief description of any monitored value, if you are unclear about what is being measured. Refer to your
controller’s technical manual for additional information about the various
monitored variables.
As in the Parameters menu, you can highlight an item and use the rightarrow key ( ) to see an expanded item screen, typically a bar graph indicating
where the present value of that item lies within its range.
Softkeys available in Monitor menu
“Add to” is available for each monitored item. This softkey takes you to a screen
where you choose where to add the item: you can add it to your Favorites collection, or you can place it in the Plot or Log programs.
The “Exit” option appears on expanded item screens. This option is also available when a Help screen is displayed. Alternatively, you can use the left-arrow
key ( ) to exit these screens.
1313 Handheld Programmer Manual, Rev. A
15
7 — DIAGNOSTICS MENU
7
DIAGNOSTICS MENU
In the Main Menu, highlight the Diagnostics icon and press the “Select” softkey
to go to the Diagnostics menu. You can return to the Main Menu at any time
by pressing the Main Menu key ( ).
The Diagnostics menu contains two folders: Present Errors and Fault
History.
Note: Sometimes the fault circuits catch a temporary event that is not a true
fault in the system; it is always a good idea to turn the control system off and
back on again to see whether the fault clears by itself.
16
1313 Handheld Programmer Manual, Rev. A
7 — DIAGNOSTICS MENU
Present Errors folder
All existing faults are listed here, in chronological order. An item in this folder
can only be removed be remedying the fault. As long as the fault exists, it will
be included in the Present Errors folder. The “1/3” in the upper right corner of
the screen indicates that Missing Contactor is the first of three present faults.
Fault History folder
This folder lists all the faults encountered since the Fault History was last
cleared. You can clear the entire contents of this folder to allow a fresh Fault
History to be started.
Softkey available in Diagnostics menu
“Clear All” is used to empty the Fault History folder. This softkey appears
only when the Fault History folder (or one of the faults within that folder) is
highlighted.
1313 Handheld Programmer Manual, Rev. A
17
8 — PROGRAMMING MENU
8
PROGRAMMING MENU
In the Main Menu, highlight the Programming icon and press the “Select”
softkey to go to the Programming menu. You can return to the Main Menu at
any time by pressing the Main Menu key ( ).
Through the Programming menu, you can save and restore your parameter
settings files (.cpf files).
The Programming root menu looks like this:
There are no softkeys on this screen. To choose whether you want to Save or
Restore a .cpf file, open the folder for the operation you want to perform.
“Save .cpf File”
When you adjust parameter values (using the Parameters menu) each value you
set becomes that parameter’s new value, overwriting its previous set value.
Using the Save .cpf File function in the Programming menu, you can make
a backup of your present parameter settings. If you adjust the parameter values
18
1313 Handheld Programmer Manual, Rev. A
8 — PROGRAMMING MENU: Save .cpf File
again, you can use “Save .cpf File” again to save that new collection of settings.
You can have as many .cpf files as you’d like, each with a unique file name.
After you open the “Save .cpf File” folder in the root menu, you will see
a screen identifying the controller whose parameter settings you are saving:
When you press the “Save CPF” softkey, this pop-up message appears:
After selecting “OK,” you are given your choice of which memory to use:
1313 Handheld Programmer Manual, Rev. A
19
8 — PROGRAMMING MENU: Save .cpf File
To select the memory, highlight it and open its folder. You will then see a list
of the present contents of that memory, which might look like this:
Regardless of which memory you choose (internal or SD card) you have several
options about where to position your new .cpf file.
If you select “Save as ..” at this point, your new .cpf file will be an additional
item in the list of items in that memory.
If instead you select an existing folder and press the right-arrow key ( ),
you will see a list of the files in that folder. If you select “Save as ..” at this point,
your new .cpf file will be added to the list of files in that folder.
Or, you can select “New Folder” to create a new folder in which to place
your new .cpf file.
If instead you highlight an existing .cpf file, you will be offered an additional
softkey, allowing you to select “Save” rather than “Save as ..”:
If you select “Save,” the highlighted file will be replaced (overwritten) by the
new one you are saving, using the existing filename.
Whenever you select “Save as ..”, the screen will show a keyboard. Above the
keyboard, is the field for the file name. The initial contents of this field depend
on the setting of the “Save as text” item in the HHP Settings menu. If “Save
as text” is set to “No text,” the field will be blank. If “Save as text” is set to
“Date/Time,” the field will contain an automatically assigned name that is the
date and time in this format:
YYYY_MM_DD_HHMM,
with the 2-digit hour using a 24-hour clock. You either can press the “OK”
20
1313 Handheld Programmer Manual, Rev. A
8 — PROGRAMMING MENU: Save .cpf File
softkey at this point, to accept the automatic file name, or you can use the
keyboard to give the file a new name. See Section 13 for more information
about using the keyboard.
If you start the saving procedure by selecting “New Folder”, first you will be
shown the keyboard screen and given the opportunity to accept the automatically assigned name (“Folder”) or to create a new name. When you are finished,
press the “OK” softkey.
Next, when you press the “Save as ..” softkey, you will see the keyboard
screen again and this time you will be naming the .cpf file that will be saved
inside the new folder.
While the new .cpf file is being saved, you will see progress bars; in this example,
the “2/6” above the right end of the bar means this is the second of six bars.
This screen will inform you when the save is complete:
Note: You cannot delete .cpf files while in the Programming menu. To delete
a .cpf file, use the File Manager menu; see Section 11.
1313 Handheld Programmer Manual, Rev. A
21
8 — PROGRAMMING MENU: Restore .cpf File
“Restore .cpf File”
The “Restore .cpf File” function allows you to select an earlier saved .cpf file
to use in place of the present one.
You will first choose whether to restore a file from the programmer’s
internal memory or from its SD card.
After selecting which memory to use, you then select the .cpf file you
want to restore by highlighting it. In this example, the desired file is in a folder
named “CPF files” on the SD card.
After you highlight a .cpf file and choose “Restore,” a pop-up screen will ask
whether you want to enable Advanced Cloning (“yes”/“no”). This screen does
not appear on User-level and Service-level programmers.
Without Advanced Cloning (if you select “No”), a Dealer-level programmer
will restore only those parameters up to and including Dealer level.
Advanced Cloning (“Yes”) restores all parameters, including those at a
higher level. This makes a true clone, copying even those parameters that cannot be seen at the Dealer level or even at the OEM level.
It is recommended that you enable Advanced Cloning.
22
1313 Handheld Programmer Manual, Rev. A
8 — PROGRAMMING MENU: Restore .cpf File
You will be asked to confirm that you want to continue (“OK”/“Cancel”), and
reminded not to turn off the system or disconnect the programmer during the
restore process.
Finally, you will see a progress bar during the restore process:
There may be a series of these progress bars. Above the right end of the progress
bar you will see a number; in this example, the number “2/14” is telling you
this is the second of fourteen progress bars.
When the restore process is complete, a pop-up screen will let you know
that you must now power cycle the system.
1313 Handheld Programmer Manual, Rev. A
23
9 — FAVORITES MENU
9
FAVORITES MENU
In the Main Menu, highlight the Favorites icon and press the “Select” softkey
to go to the Favorites menu. You can also go to this menu by pressing the
Favorites key ( ). You can return to the Main Menu at any time by pressing
the Main Menu key ( ).
The Favorites menu consists of the custom set of items you have created.
Typically, you will want to include the parameters you most frequently adjust,
along with the monitor items you most frequently check. This way you can
go directly to these items more easily than by navigating through the entire
Parameters and Monitor menus.
You can add any item or folder in the Parameters or Monitor menu to
your Favorites collection. You can then rename the item or folder you have
added to your Favorites collection, or you can leave the original name.
When you add a ready-made folder from the Parameters or Monitor
menu, the folder icon will appear in the Favorites menu with a star on it, like
this:
. Although you can rename a ready-made folder, you are not allowed
to rename any of the items within that folder.
You can also create folders of your own to hold specific sets of items; these
folders will be indicated with the usual folder icon: . You may want to create
a folder for each type of vehicle or application, or for each customer.
24
1313 Handheld Programmer Manual, Rev. A
9 — FAVORITES MENU
Softkeys available in Favorites menu
The softkeys are somewhat different when you reach the Favorites menu through
the “Add to” function than when you go directly to the Favorites menu by
selecting it in the Main Menu or by using the Favorites key.
Using “Add to” in Parameters menu or Monitor menu
When you press the “Add to” softkey, you are offered three choices for the
destination of the item. (If the highlighted item is a folder rather than a single
item, you are not shown the Plot and Log options.)
Highlight Favorites and press the “Select” softkey to go to the Favorites menu,
where a new set of softkeys appears:
The “Add” softkey adds the new item to your Favorites collection. If you have
changed your mind, use the “Cancel” softkey to return to the item you just
came from, within the Parameters or Monitor menu.
The “New Folder” softkey allows you to create a new folder in which to
put the item you are adding to your collection. You will first go the keyboard
(see Section 13), where you can either “OK” the default name (“Folder”) or
create a new name. After you select “OK,” you will see the new folder in the
Favorites menu. To place your new favorite item into this folder, “open” the
folder by pressing the right-arrow key ( ) and then press the “Add” softkey.
Your new item will then appear in the new folder.
The “Rename” softkey enables you to change the name of the new item
before it is added to your Favorites collection. When you press the “Rename”
softkey, a keyboard screen appears; see Section 13 for information on how to
use the keyboard. When you select “OK,” the new item, with its new name,
appears in your Favorites collection.
1313 Handheld Programmer Manual, Rev. A
25
9 — FAVORITES MENU
After you have pressed the “Add” softkey (or the “OK” softkey on the keyboard
screen) you will see your new item in the Favorites menu.
This new set of softkeys appears:
You are given an opportunity again to create a new folder, to delete or rename
an item, or to rearrange the order in which items are displayed in the Favorites
menu (“Move Down” and “Move Up”).
“Finish” automatically returns you to where you were within the Parameters or
Monitor menu, when you first pressed the “Add to” softkey.
Accessing Favorites using Main Menu or Favorites key
The “Cancel,” “Add,” and “Finish” softkeys do not appear when you go directly
to the Favorites menu.
You can change the settings of your Favorite parameters while you are in the
Favorites menu; it is not necessary to be in the Parameters menu to do this.
The “×10” or “×100” softkey, pressed together with the “+” or “-” key, allows
you to change values rapidly.
The “Move Down,” “Move Up,” “Delete,” “Rename,” “New Folder”
softkeys function as described above when accessing the Favorites menu through
the “Add to” softkey.
The “Add to” softkey enables you to put a Favorite item into the Plot or
Log program.
The “Import Fav” and “Export Fav” softkeys enable you to save a Favorites
collection as an .hfc file that you can export, and to restore (import) a previously saved .hfc file. This feature is a convenient way for an OEM to provide a
ready-made Favorites collection for their customers. Note: In order to be able
to export a Favorites collection, you must have first created a new folder for the
collection; see description of “New Folder” softkey on previous page.
26
1313 Handheld Programmer Manual, Rev. A
10 — HHP SETTINGS MENU
10
HHP SETTINGS MENU
In the Main Menu, highlight the HHP Settings icon and press the “Select”
softkey to go to the HHP Settings menu. You can return to the Main Menu
at any time by pressing the Main Menu key ( ).
This menu allows you to adjust the appearance of the screen displays and
also several aspects of the handheld programmer’s functionality.
A slider on the right-hand side of the screen indicates there are more items
in this menu than can fit on the screen. When you reach the last item shown,
continue pressing the down-arrow key ( ) to view the rest of the items.
1313 Handheld Programmer Manual, Rev. A
27
10 — HHP SETTINGS MENU
Access Level
The Access Level of the programmer can be set to its own level or to any lower
level: OEM, Dealer, Service, User.
Setting the Access Level to a lower level allows you to see what a person
with that level programmer would see. For example, a dealer could set the Access
Level to User, to see what a person with a User-level programmer would see.
Language
You can select English, Deutsch, Français, Italiano, or Español for the screen
text.
Left Handed Soft Keys
Selecting “Yes” for Left Handed Soft Keys reverses the position of items in the
softkey text line, to make the keys more convenient for left-handed people.
Backlight
Here you can set the brightness of the programmer’s LCD display—from 100%
to 20%, in 5% increments.
Keytone
You can choose between several tones to sound each time you press a key, or
you can turn the keytone Off for silent programmer operation.
Auto Poweroff (battery)
You can set the idle time before the programmer will automatically power off
when it is powered by its own batteries (i.e., when the control system is not
running, or when the programmer is not connected to the control system).
Auto Poweroff (ext)
You can set the idle time before the programmer will automatically power off
when it is being powered by the controller.
Exit menus with left arrow
The left-arrow key ( ) is used to navigate backwards within menus.
When set to Yes, you can use the left-arrow key to leave the presently
displayed screen and return to the next higher (i.e., previous) screen; using the
left-arrow key will eventually return you to the Main Menu.
When set to No, you must use the appropriate softkeys (Exit, Cancel) and
the Main Menu key ( ) to leave the present screen and reach the Main Menu.
You may find this setting preferable if you use the table screens frequently, as
it eliminates any possible confusion caused by the left-arrow key having two
functions: moving one cell to the left, and exiting the table altogether.
28
1313 Handheld Programmer Manual, Rev. A
10 — HHP SETTINGS MENU
Enable Screenshot
The Yes/No setting of this item determines whether the programmer will allow
screenshots to be taken; see Section 14 for a description of this function.
When set to “No,” if you attempt to take a screenshot—by pressing the
Power key ( ) followed by the Favorites key ( )—the power command is
ignored and the screen jumps to the Favorites menu in response to the Favorites
key command.
Show only empty battery
A battery icon showing the state-of-charge of the programmer’s battery can be
displayed in the upper right corner of the screen. If you do not want the icon to
be displayed except as a warning when the battery is empty, set this to “Yes.”
Text for save as
When you create a new .cpf file, the field at the top of the keyboard screen is
either blank (“No text”) or is automatically filled with the date and time in this
format: YYYY_MM_DD_HHMM (“Date/Time”).
Keyboard help text
When set to On, every time you enter the keyboard screen a pop-up explains
how to use the keyboard.
When set to Off, no pop-up appears as you enter the keyboard screen, but you
can still use the Help key ( ? ) at any time.
Remember Last View
When set to On, when you select a menu from the Main Menu screen, you will
be returned to the screen you were on before you last exited that menu.
When set to Off, each time you select a menu from the Main Menu
screen, you will go to the selected root menu. It does not matter what you did
the last time you used that menu.
Delete Cache File
This item is different from the other HHP items, because it is a procedure
instead of an adjustable setting.
The first time you connect the programmer to a system, menu cache files
are created. If you encounter problems when connecting, you can delete the
cache files and retry connecting. To delete the cache files, select this item and
press the right-arrow key ( ).
1313 Handheld Programmer Manual, Rev. A
29
10 — HHP SETTINGS MENU
Date & Time
This folder contains eight items.
Show Date/Time in header. The date and time are typically displayed
at the top of the Main Menu screen. However, if you do not use batteries in
the handheld programmer and there is no real-time clock in the connected
control system, you can set this item to “Off,” since it would not provide accurate information.
12h/24h. Here you can select the format used to display the time.
Date Format. Several options are available: the year appearing first or
last, and the month appearing before the day or the day appearing before the
month.
Year, Month, Day, Hour, and Minute allow you to set the date and the
time for your time zone.
About
This folder contains information about the programmer similar to what is shown
in the System Info menu for each of the modules in the control system: model
number, software version, hardware version, serial number, etc.
Softkeys available in HHP Settings menu
The “Save” softkey allows you to save your settings to a new .hps (handheld
programmer settings) file. If there is an SD card in the programmer, the settings will be saved to the SD card; if there is no SD card, the settings will be
saved to the programmer’s memory. The new .hps file overwrites the previously
saved .hps file.
After you save your settings to a new .hps file, you can then copy them
to another 1313 programmer.
When you adjust HHP settings without saving to a new .hps file, those
new settings are in effect unless you select “Restore.”
“Restore” allows you to restore the previously saved .hps file.
30
1313 Handheld Programmer Manual, Rev. A
11 — FILE MANAGER
11
FILE MANAGER
In the Main Menu, highlight the File Manager icon and press the “Select”
softkey to go to the File Manager menu. You can return to the Main Menu at
any time by pressing the Main Menu key ( ).
With File Manager, you can:
• Create new folders.
• Delete files and folders.
• Rename files and folders.
You can also rearrange your files and folders:
• Copy and paste files and folders. Highlight the item
you would like to copy, press the “Copy” softkey, then
highlight the location where you want to place this
copy and press the “Paste” softkey.
If the destination location is a folder, you must
open the folder (right-arrow key ( ) before inserting
the copied item.
• Move files and folders. Highlight the item you would
like to move, press the “Move” softkey, then highlight
the location where you want to place this item and
press the “Insert” softkey. This is a convenient way to
nest your folders.
If the destination location is a folder, you must open
the folder (right-arrow key ( ) before inserting the
item you are moving.
Note that any time you are in a File Manager screen you can press the rightarrow key ( ) to see the full name. This enables you to see long file names
in their entirety.
1313 Handheld Programmer Manual, Rev. A
31
11 — FILE MANAGER
Softkeys available in File Manager menu
“Copy” allows you to copy a highlighted file or folder. After you press this
softkey, you will be given the options of “Paste” or “Cancel.”
“Move” allows you to move a highlighted file or folder. After you press this
softkey, you will be given the options of “Insert” or “Cancel.”
Note that in order to paste or insert a file or folder into a folder, you must first
open the destination folder, using the right-arrow key ( ).
“Delete” allows you to delete a highlighted file or folder.
“Rename” allows you to change the name of a highlighted file or folder; after
you press this softkey, you will see the “Rename, Create” keyboard.
“New Folder” creates a new folder and takes you to the “Rename, Create”
keyboard where you can type a new name to replace the generic name “Folder”
that was automatically assigned.
32
1313 Handheld Programmer Manual, Rev. A
12 — PLOT & LOG
12
PLOT & LOG
In the Main Menu, highlight the Plot & Log icon and press the “Select” softkey
to go to the Plot & Log menu. You can return to the Main Menu at any time
by pressing the Main Menu key ( ).
Through the Plot & Log menu, you can use the Plot program to plot real-time
variables, or use the Log program to create a log of variable values to view later
in a spreadsheet program on your PC.
The first step is to add the desired items to the Plot Variable List or the Log
Variable List. In the Monitor menu or Parameters menu, highlight an item and
press the “Add to” softkey. In the next screen, highlight Plot or Log and press
the “Select” softkey to view the list. To add the item to the list, press the “Add”
softkey followed by the “Finish” softkey; you can include up to five items. To
remove an item from a Variable List, select it and press the “Delete” softkey.
Log
To create a log of the items in your Log Variable List, highlight Log and press the
right-arrow key ( ). Then in the “Start Logging” window, press the “OK” soft1313 Handheld Programmer Manual, Rev. A
33
12 — PLOT & LOG
key. Select the location where you want to save the XLS file, and after pressing
the “Save As” softkey and naming the XLS file, press the “OK” softkey. You will
now see the Plot & Log menu with a flashing red dot next to Log, indicating
that logging is in progress. To stop logging, press the right-arrow key ( ), and
then in the “Stop Logging” screen, press the “OK” softkey.
Plot
In the Plot Variables list, a colored circle beside each item shows the color that
will be used for that item in the plot. The colors are in a fixed order; if you
want to use specific colors for specific items, use the “Move Down” and “Move
Up” softkeys to achieve the desired combinations. Use the left-arrow key ( )
to return to the Plot & Log menu.
Highlight Plot and press the right-arrow key ( ) to open the plotting program.
The vertical axis is always used for the variables being plotted, and the horizontal axis is always used for time. For On/Off items, On=1 and Off=0 on the
plot. Press the “Start” softkey to begin plotting data. Press the “Stop” softkey
to stop plotting data and freeze the plot. You have the option of pressing the
“Start” softkey to resume the plot.
34
1313 Handheld Programmer Manual, Rev. A
13 — USING THE KEYBOARD
13
USING THE KEYBOARD
In the Programming, Favorites, and File Manager menus, you have opportunities to rename items or to create new names for items. When you press the
“Rename” or “New Folder” softkey, the keyboard screen appears:
Use the four arrow keys to move around the keyboard—up, down, right, and
left. In the text line, use the “+” key ( ) to move the highlight one space to
the right, and the “-” key ( ) to move the highlight one space to the left.
When the keyboard first appears, the first letter in the original name is
highlighted, and so is the corresponding letter on the keyboard. As you move
around on the keyboard, this letter is replaced by whichever letter is highlighted
on the keyboard. When the letter you want is shown, use the “+” key to move
on to the next letter.
Softkeys available when keyboard is displayed
“ABC->abc” is a toggle; press this softkey to change it to “abc->ABC.” The letters on the keyboard display will change correspondingly, between uppercase
and lowercase letters.
“Delete” deletes the highlighted letter. “Insert space” inserts a blank space to
the left of the highlighted letter.
“Cancel” aborts the renaming process. Press the “OK” softkey when the new
name is completed; you will be returned to the menu you were in when you
decided to create a new name.
1313 Handheld Programmer Manual, Rev. A
35
14 — TAKING SCREENSHOTS
14
TAKING SCREENSHOTS
To take a screenshot, first press and release the Power key ( ) and then press
and release the Favorites key ( ). After a few seconds, you will see a message
confirming that a screenshot was taken. Use the “OK” softkey to close the
confirmation screen.
Screenshots are numbered sequentially, from 0001 to 9999, and are stored on
the SD memory card.
You can take a screenshot of any display screen. If you take a screenshot
of a screen that is asking you to make a choice (such as yes/no), you may not
see the confirmation that the screenshot was taken until after you make the
requested choice.
You can rename your screenshots after you load them into a PC. You can
delete them from the SD card if you want; the automatic sequential numbering
will continue where it left off.
Note: Screenshots can be taken only if that function is enabled in the
HHP Settings menu; see Section 10.
36
1313 Handheld Programmer Manual, Rev. A
15 — WORKING OFFLINE
15
WORKING OFFLINE
It is possible to perform various functions with the programmer independent
of the control system. Working offline, you can:
• Load a .cpf file, adjust its parameter settings, and save
these into the same or a new .cpf file that can be restored
into a controller when the programmer is online again.
• Delete files and folders, create new folders, and rename
and rearrange files and folders using the File Manager
menu.
• Adjust programmer settings and save them to a new
.hps file using the HHP Settings menu.
While you are working offline, the green circle in the upper right-hand corner
, indicating that the programof the screen is replaced by a red slash:
mer is not connected to a control system.
You can work offline with the programmer unconnected, with the programmer
connected to a control system that is turned off, or with the programmer connected to a control system that is turned on. Each works a little differently.
Programmer unconnected
To work offline with the programmer unconnected, the programmer must
have batteries.
Turn on the programmer using the power key ( ). When the programmer powers up, the screen will display the red slash indicating that no system
is connected. Press the “Go Offline” softkey.
You must first choose whether to work within the programmer’s internal
memory or its SD card; highlight whichever you prefer and then press the
right-arrow key ( ).
Typically offline mode is used to adjust parameter settings within a .cpf
file. To select a .cpf file, highlight it and press the “Open” softkey. When the
programmer has finished loading the information in the .cpf file, you will see
the Main Menu screen. Select the Parameters menu and make the desired parameter adjustments. Select the Programming menu to save these changes; you
can save them in the same .cpf file or save them as a new .cpf file. If you want
to make changes in a different .cpf file, return to the Programming menu and
open the desired .cpf file.
When working offline, you can also select the File Manager menu to
manage your files and folders, or select the HHP Settings menu to create a new
.hps file of programmer settings.
When you are finished working offline, there is no “Go Online” softkey
to allow you to change to online mode—because you are not connected to a
system.
1313 Handheld Programmer Manual, Rev. A
37
15 — WORKING OFFLINE
If the programmer is on when you connect it to a control system, the Main
Menu screen will display a “Go Online” softkey. If you turn off the programmer
before connecting it to the control system, it will power up in online mode.
Programmer connected to a system that is not running
To work offline with the programmer connected to a system that is not running, turn on the programmer using the power key ( ). When the programmer powers up, the screen will display the red slash indicating that no system
is connected. A “Wait for System” message appears briefly; you can press the
“Go Offline” softkey at this point. If you don’t press it quickly enough, you
will see a warning screen announcing that no system has been found and suggesting that you switch on the system. Instead, press the “Cancel” softkey; after
you do this, the “Go Offline” softkey becomes available again. Press the “Go
Offline” softkey.
Once you are offline, you choose whether to work within the programmer’s
internal memory or its SD card and then proceed to select, edit, and save .cpf
files; manage your files and folders; or adjust the programmer’s settings, as
described above for an unconnected programmer.
When you are finished working offline, press the “Go Online” softkey in
the Main Menu. A pop-up screen asks you to confirm that you want to change
to online mode. Press the “OK” softkey, and you then see the “Wait for System”
message. Switch on the system, and you will be in online mode.
If you switch on the control system before pressing the “Go Online”
softkey, you will still be in offline mode. You can press the “Go Online” softkey
now, and then confirm that you want to be in online mode (“OK” softkey).
Programmer connected to a running control system
To work offline with the programmer connected to a system that is running,
press the “Go Offline” softkey shown in the Main Menu screen. The change
to offline mode is not made immediately. You will notice that the green “connected” circle is still displayed in the upper right corner of the screen.
You will next see the screen asking you to choose whether to work within
the programmer’s internal memory or its SD card. Select whichever you prefer, and press the right-arrow key ( ). Select a .cpf file and press the “Open”
softkey. It is only at this point that the green “connected” circle changes to the
red “unconnected” slash. You can then edit and save the .cpf file as described
above for an unconnected programmer. Note that when the programmer is
connected to a running control system, working with .cpf files is the only offline function available.
When you are finished working offline, press the “Go Online” softkey
in the Main Menu, and then confirm that you want to change to online mode
(“OK” softkey).
38
1313 Handheld Programmer Manual, Rev. A
16 — UPDATING THE HANDHELD PROGRAMMER SOFTWARE
16
UPDATING THE SOFTWARE
IN THE HANDHELD PROGRAMMER
The software in the 1313 handheld programmer is easily updated. As software
updates become available, they may be installed into the programmer via the
USB connector or via an SD card.
There will be application files for various access-level programmers. There
may also be additional files (Firmware Manager and Resource files) that are not
access-level dependent; these files are marked 1313-xxxx.
For example,
1313-4401_Application_01000900.hap
is an OEM-level file; 4401 is the model number of the OEM programmer.
1313-xxxx_FWManager_01000000.hfm
is used by all the programmers.
Copying new firmware onto the programmer
If the new files arrived via an email link, first you will need to copy them onto
your PC. You can then copy the files from the PC onto your programmer’s
internal memory or onto its removable SD card. If you plug the programmer into the PC using the USB cable, the PC will recognize both drives: the
programmer’s internal memory and the SD card. You can copy the new files
onto either of these drives. Alternatively, if you prefer, you can insert the SD
card directly into the PC’s SD-card slot and copy the new files onto it.
It doesn’t matter if you copy the extra access-level files, because only the
files appropriate for your programmer’s own access level will be installed.
Note: In order for the programmer to access the new files, they must not
be inside a folder.
Installing new firmware into the system
If the new firmware is on an SD card
Insert the SD card into the programmer, and plug the programmer into
the controller. The programmer only looks for new software on power-up, so if
the programmer is already on, you will need to turn it off and back on again.
If there are any files on the SD card that duplicate those already installed,
or that are for different access-level programmers, a series of pop-up screens
(one for each extraneous file) will ask whether you want to delete (yes/no). You
do not need to delete these files; if you think you might want them for some
other programmer later, you may choose to leave them on the card. However,
in most cases you will want to delete them so that you won’t be bothered by
these questions over and over each time the programmer powers up.
A pop-up screen will then announce that new software has been found
and ask whether you want to perform the update. The screen will list the existing version and the newer version.
1313 Handheld Programmer Manual, Rev. A
39
16 — UPDATING THE HANDHELD PROGRAMMER SOFTWARE
Note that you do not need to install each version. For example, if the present
Application software is version 01-01-02-00, you can install the newer version
01-04-00-00 without installing interim versions such as 01-02-00-00.
When you press the “Yes” softkey, the Firmware Manager appears and a
progress bar shows the application and then the data being installed.
After the update has been completed, you will be asked whether you want
to remove that application file from the SD card. In most cases, you would
select “Yes.” However, if you are planning to make the identical update to a
group of programmers, you could select “No” and then transfer the SD card
from programmer to programmer.
If there is a new Resource file, it will be copied automatically after the
Application upgrade. Do not remove the SD card during the Resource file
transfer.
If the new firmware is in the programmer’s internal memory
Unplug the programmer from the PC and plug it in again to install the
new Application file.
Then unplug it from the PC, remove the USB cable, insert the programmer cable, and plug it into the controller.
The Resource file (if there is a new one) will then be installed. Do not
unplug the programmer or turn it off during the Resource file transfer.
40
1313 Handheld Programmer Manual, Rev. A
Appendix A — FILE TYPES
APPENDIX A
FILE TYPES
Several types of files are handled by the 1313 handheld programmer. Here they
are listed alphabetically, by their extensions.
.cpf
Parameter settings files.
These files contain the settings for the adjustable parameters. You can create .cpf files containing your customized
settings for the adjustable parameters, using the Parameters
menu.
.csv
Internal error log files.
These files record internal errors.
.dcf
Cache files.
The first time you connect the programmer to a system,
menu cache files are created.
.hap
Programmer software files.
These files contain the application software for the handheld programmer.
.hfc
Favorites files.
These files contain customized Favorites collections.
.hfm
Firmware Manager files.
These files manage how new handheld programmer software is installed.
.hps
Programmer settings file.
This file contains the handheld programmer settings you
have chosen and saved, using the HHP Settings menu.
.hrc
Resource files.
These files contain the text displays (in five languages) and
information about how data is displayed by the handheld
programmer.
1313 Handheld Programmer Manual, Rev. A
A-1
41
Appendix B — SPECIFICATIONS
APPENDIX B
SPECIFICATIONS:
1313 HANDHELD PROGRAMMER
Model numbers (four access levels)
1313-4401 OEM programmer
1313-3301 Dealer programmer
1313-2201 Service programmer
1313-1101 User programmer
Operating ambient temp. range
-20°C to 50°C (-4°F to 122°F)
Storage ambient temperature range
-40°C to 85°C (-40°F to 185°F)
Package environmental rating
IP53 (with programmer cable plugged
in and SD-card cover closed)
Weight
0.27 kg (0.6 lb)
Dimensions (L×W×H)
190 × 100 × 36 mm (7.5" × 3.9" × 1.4")
Regulatory compliance
42
B-1
/ RoHS
1313 Handheld Programmer Manual, Rev. A