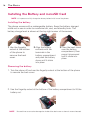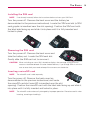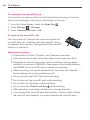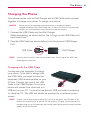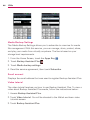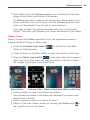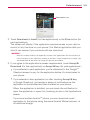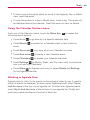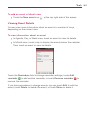
1
P/N:
(1.0) H
G
P/N:MFL67378201
MFL67202801(1.0)
GUÍA DEL
USUARIO
USER GUIDE
USER
GUIDE
This booklet is made from 60% post-consumer recycled paper.
This booklet is printed with soy ink.
Printed in Mexico
Copyright©2012 LG Electronics, Inc. All rights reserved.
LG and the LG logo are registered trademarks of LG Group
and its related entities. Lucid is a trademark of LG
Electronics, Inc. All other trademarks are the property of
their respective owners.
Important Customer Information
When using this product, the safety precautions below must be taken to
avoid possible legal liabilities and damages.
Retain and follow all product safety and operating instructions. Observe all
warnings in the product operating instructions. To reduce the risk of bodily
injury, electric shock, fire, and damage to the equipment, observe the
following precautions.
ELECTRICAL SAFETY
This product is intended for use when supplied with power from the
designated battery or power supply unit. Other usage may be dangerous
and will invalidate any approval given to this product.
SAFETY PRECAUTIONS FOR PROPER GROUNDING
INSTALLATION
CAUTION: Connecting to improperly grounded equipment can result in an
electric shock to your device. This product is equipped with a USB cable
for connecting to a desktop or notebook computer. Be sure your computer
is properly grounded (earthed) before connecting this product to the
computer. The power supply cord of a desktop or notebook computer has
an equipment-grounding conductor and a grounding plug. The plug must be
plugged into an appropriate outlet which is properly installed and grounded
in accordance with all local codes and ordinances.
SAFETY PRECAUTIONS FOR POWER SUPPLY UNIT
Use the correct external power source
A product should be operated only from the type of power source indicated
on the electrical ratings label. If you are not sure of the type of power
source required, consult your authorized service provider or local power
company. For a product that operates from battery power or other sources,
refer to the operating instructions that are included with the product.
1
2
Important Customer Information
Handle battery packs carefully
This product contains a Li-ion battery. There is a risk of fire and burns if
the battery pack is handled improperly. Do not attempt to open or service
the battery pack. Do not disassemble, crush, puncture, short external
contacts or circuits, dispose of in fire or water, or expose a battery pack to
temperatures higher than 60°C (140°F).
WARNING: Danger of explosion if battery is incorrectly replaced. To
reduce risk of fire or burns, do not disassemble, crush, puncture, short
external contacts, expose to temperature above 60°C (140°F), or dispose
of in fire or water. Replace only with specified batteries. Recycle or
dispose of used batteries according to the local regulations or reference
guide supplied with your product.
Take extra precautions
O
Keep the battery or device dry and away from water or any liquid as it
may cause a short circuit.
O
Keep metal objects away so they don’t come in contact with the battery
or its connectors as it may lead to short circuit during operation.
O
The phone should be only connected to products that bear the USB-IF
logo or have completed the USB-IF compliance program.
O
Do not use a battery that appears damaged, deformed, or discolored, or
one that has any rust on its casing, overheats, or emits a foul odor.
O
Always keep the battery out of the reach of babies and small children,
to avoid swallowing of the battery. Consult a doctor immediately if the
battery is swallowed.
O
Only use the battery with a charging system that has been qualified with
the system per this standard, IEEE-Std-1725-200x. Use of an unqualified
battery or charger may present a risk of fire, explosion, leakage or other
hazard.
O
Replace the battery only with another battery that has been qualified with
the system per this standard, IEEE-Std-1725-200x. Use of an unqualified
battery may present a risk of fire, explosion, leakage or other hazard.
Important Customer Information
O
Avoid dropping the phone or battery. If the phone or battery is dropped,
especially on a hard surface, and the user suspects damage, take it to a
service center for inspection.
O
If the battery leaks:
Do not allow the leaking fluid to come in contact with skin or clothing. If
contact occurs, flush the affected area immediately with clean water and
seek medical advice.
Do not allow the leaking fluid to come in contact with eyes. If contact
occurs, DO NOT rub; rinse with clean water immediately and seek
medical advice.
Take extra precautions to keep a leaking battery away from fire as there
is a danger of ignition or explosion.
SAFETY PRECAUTIONS FOR DIRECT SUNLIGHT
Keep this product away from excessive moisture and extreme
temperatures. Do not leave the product or its battery inside a vehicle or in
places where the temperature may exceed 140°F (60°C), such as on a car
dashboard, window sill, or behind glass that is exposed to direct sunlight or
strong ultraviolet light for extended periods of time. This may damage the
product, overheat the battery, or pose a risk to the vehicle.
PREVENTION OF HEARING LOSS
CAUTION: Permanent hearing loss may occur if earphones or headphones
are used at high volume for prolonged periods of time.
SAFETY IN AIRCRAFT
Due to the possible interference caused by this product to an aircraft’s
navigation system and its communications network, using this device’s
phone function on board an airplane is against the law in most countries. If
you want to use this device when its use is restricted on board an aircraft,
remember to switch to Airplane Mode which turns off RF functions that
could cause interference.
3
4
Important Customer Information
ENVIRONMENT RESTRICTIONS
Do not use this product in gas stations, fuel depots, chemical plants or
where blasting operations are in progress, or in potentially explosive
atmospheres such as fueling areas, fuel storehouses, below deck on
boats, chemical plants, fuel or chemical transfer or storage facilities, and
areas where the air contains chemicals or particles, such as grain, dust, or
metal powders. Please be aware that sparks in such areas could cause an
explosion or fire resulting in bodily injury or even death.
EXPLOSIVE ATMOSPHERES
When in any area with a potentially explosive atmosphere or where
flammable materials exist, the product should be turned off and the user
should obey all signs and instructions. Sparks in such areas could cause an
explosion or fire resulting in bodily injury or even death. Users are advised
not to use the equipment at refueling points such as service or gas stations,
and are reminded of the need to observe restrictions on the use of radio
equipment in fuel depots, chemical plants, or where blasting operations
are in progress. Areas with a potentially explosive atmosphere are often,
but not always, clearly marked. These include fueling areas, below deck on
boats, fuel or chemical transfer or storage facilities, and areas where the air
contains chemicals or particles, such as grain, dust, or metal powders.
ROAD SAFETY
Vehicle drivers in motion are not permitted to use communication services
with handheld devices, except in the case of emergency. In some countries,
using hands-free devices as an alternative is allowed.
Important Customer Information
SAFETY PRECAUTIONS FOR RF EXPOSURE
O
Avoid using your phone near metal structures (for example, the steel
frame of a building).
O
Avoid using your phone near strong electromagnetic sources, such as
microwave ovens, sound speakers, TV and radio.
O
Use only original manufacturer-approved accessories, or accessories that
do not contain any metal.
O
Use of non-original manufacturer-approved accessories may violate your
local RF exposure guidelines and should be avoided.
INTERFERENCE WITH MEDICAL EQUIPMENT FUNCTIONS
This product may cause medical equipment to malfunction. The use of this
device is prohibited in most hospitals and medical clinics.
If you use any personal medical device(s), consult the manufacturer of
your device(s) to determine if the device(s) are adequately shielded from
external RF energy. Your physician may be able to assist you in obtaining
this information. Turn your phone OFF in health care facilities when any
regulations posted in these areas instruct you to do so. Hospitals or health
care facilities may be using equipment that could be sensitive to external
RF energy.
HEARING AIDS
Some digital wireless phones may interfere with some hearing aids. In the
event of such interference, you may want to consult your service provider,
or call the customer service line to discuss alternatives.
5
6
Important Customer Information
NON-IONIZING RADIATION
Your device has an internal antenna. This product should be operated in its
normal-use position to ensure the radiative performance and safety from
interference. As with other mobile radio transmitting equipment, users are
advised that for satisfactory operation of the equipment and for personal
safety, it is recommended that no part of the human body be allowed to
come too close to the antenna during operation of the equipment. Use
only the supplied internal antenna. Use of unauthorized or modified antennas
may impair call quality and damage the phone, causing loss of performance
and SAR levels exceeding the recommended limits as well as result in noncompliance with local regulatory requirements in your country. To assure
optimal phone performance and ensure human exposure to RF energy is
within the guidelines set forth in the relevant standards, always use your
device only in its normal-use position. Contact with the antenna area may
impair call quality and cause your device to operate at a higher power level
than needed. Avoiding contact with the antenna area when the phone is IN
USE optimizes the antenna performance and the battery life.
HAC
This phone has been tested and rated for use with hearing aids for some
of the wireless technologies that it uses. However, there may be some
newer wireless technologies used in this phone that have not been tested
yet for use with hearing aids. It is important to try the different features of
this phone thoroughly and in different locations, using your hearing aid or
cochlear implant, to determine if you hear any interfering noise. Consult
your service provider or the manufacturer of this phone for information on
hearing aid compatibility. If you have questions about return or exchange
policies, consult your service provider or phone retailer.
Table of Contents
Important Customer Information...........................................................1
Table of Contents ................................................................................... 7
Technical Details ................................................................................... 10
The Basics ............................................................................................. 15
Phone Overview ..................................................................................................................15
Installing the Battery and microSD Card .........................................................................18
Charging the Phone ...........................................................................................................21
Optimizing Battery Life .....................................................................................................22
Turning the Phone On and Off ........................................................................................23
Guided Tours.......................................................................................................................27
SmartShare ........................................................................................................................27
Phone’s Status Icons .........................................................................................................28
Getting to Know the Home Screen ................................................................................. 30
Mini canvas view ................................................................................................................31
Touchscreen........................................................................................................................32
Applications: How to View, Open and Switch .................................................................35
Working With Menus ........................................................................................................ 40
Managing Notifications ......................................................................................................41
Searching Your Phone and the Web ................................................................................43
Locking the Screen ............................................................................................................44
Customizing the Home Screen ........................................................................................47
Connecting Quickly With Your Contacts ........................................................................ 50
Connecting to Networks and Devices ................................................ 51
Connecting to Wi-Fi Networks ..........................................................................................51
Make Your Device a Mobile Hotspot ................................................................................57
microSD Card .......................................................................................59
Calls ........................................................................................................61
Placing and Ending Calls ...................................................................................................61
Answering or Rejecting Calls............................................................................................64
Working with the Call Log.................................................................................................66
Calling Your Contacts ........................................................................................................68
Voice Dialer.........................................................................................................................69
7
8
Table of Contents
Options During a Call ........................................................................................................69
Managing Multiple Calls ...................................................................................................70
Listening to Your Voicemail ...............................................................................................72
Web ........................................................................................................73
Browser ...............................................................................................................................73
Maps....................................................................................................................................79
Checking the Weather ........................................................................................................81
Changing Weather Settings..............................................................................................82
Backup Assistant Plus .......................................................................................................83
Communication ....................................................................................87
Contacts..............................................................................................................................87
Email ...................................................................................................................................97
Voicemail ..........................................................................................................................100
Gmail ..................................................................................................................................101
Talk ..................................................................................................................................... 115
The Phone Application.................................................................................................... 123
Voice Dialer....................................................................................................................... 125
Camera ............................................................................................................................. 126
Video Camera...................................................................................................................130
Gallery ............................................................................................................................... 132
Video Producer ................................................................................................................ 142
Market ............................................................................................................................... 144
Music .................................................................................................................................148
SmartShare ...................................................................................................................... 155
Video Player ..................................................................................................................... 157
YouTubeTM ......................................................................................................................... 158
Voice Recorder .................................................................................................................160
Tools ..................................................................................................... 162
Calendar ........................................................................................................................... 162
Calculator ......................................................................................................................... 170
Alarm/Clock ...................................................................................................................... 171
Polaris Office.................................................................................................................... 173
ShareGenie ........................................................................................................................174
Settings ............................................................................................... 176
Table of Contents
Safety................................................................................................... 193
TIA Safety Information.................................................................................................... 193
Safety Information ........................................................................................................... 197
Caution: Avoid potential hearing loss. ..........................................................................200
FDA Consumer Update .................................................................................................. 203
10 Driver Safety Tips .......................................................................................................210
Consumer Information on SAR ...................................................................................... 212
FCC Hearing-Aid Compatibility (HAC) Regulations for Wireless Devices ................ 214
Specifications ..................................................................................... 216
FAQ ...................................................................................................... 217
LIMITED WARRANTY STATEMENT ............................................... 224
Index ................................................................................................... 227
9
10
Technical Details
Technical Details
CDMA
Standard
Basic Air
Interface
Network
Service
Designator
Description
TIA/EIA-95A
CDMA Dual-Mode Air Interface
TSB-74
14.4kbps Radio Link Protocol and Inter-band
Operations
ANSI J-STD-008
TIA/EIA-IS2000
IS-95 Adapted for PCS Frequency Band
CDMA2000 1xRTT Air Interface
TIA/EIA/IS-634
MAS-BS
TIA/EIA/IS-651
PCSC-RS
TIA/EIA/IS-41-C
Intersystem Operations
TIA/EIA/IS-124
Non-Signaling Data Communications
TIA/EIA/IS-96-B
Speech CODEC
TIA/EIA/IS-637
Short Message Service
TIA/EIA/IS-657
Packet Data
IS-801
Position Determination Service (gpsOne)
TIA/EIA/IS-707-A
High Speed Packet Data
CDMA2000 High Rate Packet Data Air
Interface
TIA/EIA/IS-856
1x EV-DO
Related
Interface
TIA/EIA/IS-878
TIA/EIA/IS-866
TIA/EIA/IS-890
1x EV-DO Inter-Operability Specification for
HRPD Access Network Interfaces
Recommended Minimum Performance
Standards for HRPD High Rate Packet Data
Access Terminal
Test Application Specification (TAS) for High
Rate Packet Data Air Interface
Technical Details
LTE Standard
Designator
Description
Evolved Universal Terrestrial Radio
Access (E-UTRA);
TS 36.101
User Equipment (UE) radio
transmission and reception
TS 36.104
Evolved Universal Terrestrial Radio
Access (E-UTRA);
Basic
Air Interface
Base Station (BS) radio transmission
and reception
Evolved Universal Terrestrial Radio
Access (E-UTRA);
User Equipment (UE) conformance
specification;
Radio transmission and reception;
Part 1: Conformance testing
Evolved Universal Terrestrial Radio
Access (E-UTRA);
Conformance
Test
TS 36.521-1
User Equipment (UE) conformance
specification;
TS 36.521-2
Radio transmission and reception;
TS 36.521-3
Part 2: Implementation Conformance
Statement (ICS)
Evolved Universal Terrestrial Radio
Access (E-UTRA);
User Equipment (UE) conformance
specification;
Radio transmission and reception;
Part 3: Radio Resource Management
(RRM) conformance testing
11
12
Technical Details
FCC RF Exposure Information
WARNING! Read this information before operating the phone.
In August 1996, the Federal Communications Commission (FCC) of the
United States, with its action in Report and Order FCC 96-326, adopted
an updated safety standard for human exposure to Radio Frequency (RF)
electromagnetic energy emitted by FCC regulated transmitters. Those
guidelines are consistent with the safety standard previously set by both U.S.
and international standards bodies. The design of this phone complies with
the FCC guidelines and those international standards.
Bodily Contact During Operation
This device was tested for typical use with the back of the phone kept
0.39 inches (1.0 cm) from the body. To comply with FCC RF exposure
requirements, a minimum separation distance of 0.39 inches (1.0 cm)
must be maintained between the user’s body and the back of the
phone, including the antenna. Third-party belt-clips, holsters, and similar
accessories containing metallic components should not be used. Avoid
the use of accessories that cannot maintain 0.39 inches (1.0 cm) distance
between the user’s body and the back of the phone and have not been
tested for compliance with FCC RF exposure limits.
Vehicle-Mounted External Antenna
(Optional, if available.)
To satisfy FCC RF exposure requirements, keep 8 inches (20 cm) between
the user / bystander and vehicle-mounted external antenna. For more
information about RF exposure, visit the FCC website at www.fcc.gov.
Technical Details
FCC Notice and Cautions
This device and its accessories comply with part 15 of FCC rules.
Operation is subject to the following two conditions: (1) This device and its
accessories may not cause harmful interference, and (2) this device and its
accessories must accept any interference received, including interference
that causes undesired operation.
Any changes or modifications not expressly approved in this user guide
could void your warranty for this equipment. Use only the supplied antenna.
Use of unauthorized antennas (or modifications to the antenna) could
impair call quality, damage the phone, void your warranty and/or violate FCC
regulations.
Don’t use the phone with a damaged antenna. A damaged antenna could
cause a minor skin burn. Contact your local dealer for a replacement
antenna.
Part 15.19 statement
This device and its accessories comply with part15 of FCC rules. Operation
is subject to the following two conditions:
(1) This device & its accessories may not cause harmful interference.
(2) This device & its accessories must accept any interference received,
including interference that may cause undesired operation.
Part 15.21 statement
Changes or modifications that are not expressly approved by the
manufacturer could void the user’s authority to operate the equipment.
Part 15.105 statement
This equipment has been tested and found to comply with the limits for a
class B digital device, pursuant to Part 15 of the FCC rules. These limits are
designed to provide reasonable protection against harmful interference in
a residential installation. This equipment generates, uses, and can radiate
radio frequency energy and, if not installed and used in accordance with
the instructions, may cause harmful interference to radio communications.
However, there is no guarantee that interference will not occur in a
13
14
Technical Details
particular installation. If you experience interference with reception (e.g.,
television), determine if this equipment is causing the harmful interference
by turning the equipment off and then back on to see if the interference is
affected. If necessary, try correcting the interference by one or more of the
following measures:
- Reorient or relocate the receiving antenna.
- Increase the separation between the equipment and receiver.
- Connect the equipment into an outlet on a circuit different from that to
which the receiver is connected.
- Consult the dealer or an experienced radio/TV technician for help.
The phone operates on Verizon’s 4G network, based on Long Term
Evolution (LTE) technology and Mobile Broadband 4G networks in the
United States*.
Now you can connect easily at high speeds to the Internet, your corporate
Intranet, and your email while you’re away from the office.
* Service not available everywhere. Visit website (verizonwireless.com/4G) for a
complete list of available areas.
* Information subject to change.
Cautions
㻌 The user interface of Google applications (Google Search, Google
Maps, Navigation, etc.) can vary depending on its software version.
㻌 Locations are inaccurate when GPS and WIFI are not set.
㻌 With the Android operating system, some available Market
applications only operate correctly with phones that have a specific
screen resolution.
Please be advised that some of the applications on the Android
Market may not be available for your phone due to LCD resolution
requirement that does not match your phone. In addition, please be
aware that 3rd party applications with programming defects may
cause issues with your phone, including lock ups and resets.
The Basics
Phone Overview
Front View
Earpiece
Front Camera
Lens
Proximity
Sensor
Home screen
Quick Keys
- Phone Key
- Contacts Key
- Messaging Key
- Apps Key
Menu Key
Home Key
NOTES
Search Key
Back Key
Microphone
O
All screen shots in this guide are simulated. Actual displays may vary.
O
Instructions to perform tasks in this guide are based on the default phone settings and
may change depending on the software version on your phone.
1. Earpiece Lets you hear callers and automated prompts.
2. Quick Keys
- Phone Key Opens the Phone application for access to the dialpad, Call
log, Contacts list, and Groups.
- Contacts Key Opens the Contacts application.
- Messaging Key Opens the Messaging application.
- Apps Key Opens the Applications screen, where you can view all of
your installed applications.
3. Menu Key Opens an Options menu with options that affect the current
screen or application.
4. Home Key Returns to the Home screen. If you’re already viewing one
of the Home screen extension canvases, it navigates you to the central
Home screen canvas. Touch and hold to view the most recently used
applications.
15
16
The Basics
5. Microphone Transmits your voice to the other caller and for
voice-activated functions.
6. Back Key Returns to the previous screen. Also closes pop-up display
items, such as menus, dialog boxes, and the on-screen keyboard.
7. Search Key Opens the Quick Search BoxTM from the Home screen to
search the phone and the web.
8. Home screen Displays all of the information needed to operate your
phone, such as applications, call status, date, time, signal status, and
battery strength.
9. Proximity Sensor Senses proximity toward other objects (such as your
head) so that touch commands are not accidentally activated during a call.
NOTES
O
Do not block the sensor or near the sensor to avoid problems with the touch
operations.
O
The use of a film cover produced by manufacturers other than LG can cause a
disturbance in touch operations, the display, etc.
10. Front Camera Lens Use for taking pictures and recording videos of
yourself. You can also use this for video chatting. Keep it clean for
optimal performance.
Rear View
LED Flash
Rear Camera
Lens
Back Cover
Speaker
11. LED Flash This would brighten the image up when you turn on the
flash.
The Basics
12. Rear Camera Lens Use for taking pictures and recording videos. Keep
it clean for optimal performance.
13. Back Cover Encloses the battery compartment.
14. Speaker Sound comes from the rear speaker instead of the earpiece
(e.g., the speakerphone function, music player function, etc.).
Top View and Side Views
3.5mm
Headset Jack
Power/
Lock Key
Volume Keys
USB/Charger
Port
15. 3.5mm Headset Jack Allows you to plug in an optional headset for
convenient, hands-free conversations. You can also plug in headphones
to listen to music.
16. Volume Keys Allow you to adjust the ringer, media volumes, or the incall volume during a call.
17. USB/Charger Port Allows you to connect the phone charger, USB
Cable, or other compatible accessories.
18. Power/Lock Key Press and hold to power the phone on or off. If your
screen turns off, press the Power/Lock Key to turn in back on.
17
18
The Basics
Installing the Battery and microSD Card
NOTE It is important to fully charge the battery before initial use of the phone.
Installing the battery
The phone comes with a rechargeable battery. Keep the battery charged
while not in use in order to maximize talk, use, and standby time. The
battery charge level is shown at the top right corner of the screen.
1 Use the fingertip
cutout at the bottom
of the phone to
remove the back
cover.
2 Align the battery
contacts with the
terminals in the
battery compartment
and push the battery
down until it clicks
into place.
3 Place the back cover
over the battery
compartment, then
press it downward
until it clicks into
place.
Removing the battery
1. Turn the phone off and use the fingertip cutout at the bottom of the phone
to remove the back cover.
2. Use the fingertip cutout at the bottom of the battery compartment to lift the
battery out.
NOTE
Be careful not to scratch or damage the inside of the back cover as there is antenna located.
The Basics
Installing the SIM card
NOTE
If not already inserted, follow the instructions below to insert your SIM Card.
Turn the power off. Remove the back cover and the battery (as
demonstrated in the previous instructions). Locate the SIM card slot (a SIM
card graphic is inscribed near the slot opening). Position the SIM card with
the label side facing up and slide it into place until it is fully inserted and
locked in place.
Removing the SIM card
Turn the power off. Remove the back cover and
take the battery out. Locate the SIM card slot.
Gently slide the SIM card out to remove it.
CAUTION
When switching to a new SIM, the device displays the message saying all e-mail
accounts would be deleted. On other Android devices, if you change SIMs it asks the
user to enter their password to keep all the accounts on the device.
Inserting a microSD card
NOTE
The microSD card is sold separately.
Turn the power off. Remove the back cover (as
demonstrated in the previous instructions) and locate
the microSD card slot (microSD is inscribed near the slot
opening). Position the microSD card with the label side facing up and slide it
into place until it is fully inserted and locked in place.
NOTE
The microSD card can be easily damaged by improper operation. Please be careful when
inserting, removing or handling it.
19
20
The Basics
To unmount the microSD card
It is important to unmount the microSD card before removing it from the
slot to avoid damage to the card or data saved on the card.
1. From the Home Screen, touch the Apps Key
2. Touch Settings
.
> Storage.
3. Touch Unmount SD card > OK.
To remove the microSD card
Turn the power off. Remove the cover and locate the
microSD card slot. Carefully push the microSD card in
to release it from the slot, then gently pull the microSD
card out to remove it.
Memory encryption
㻌 Internal data for Email, Contacts, and Calendar is encoded.
㻌 Data cannot be encoded when the battery level is less than 50%.
㻌 Encoding can only be done when there is sufficient storage space
available; a minimum of 650MB of free space in the internal memory
and 500MB in the microSD card is needed for encoding.
㻌 While encoding, you cannot access Email, Contacts, and Calendar.
Some settings will not be available as well.
㻌 Do not connect the USB Cable while encoding.
㻌 Do not take out the microSD card while encoding.
㻌 Do not take out the battery while encoding.
㻌 Do not press the Power/Lock Key while encoding.
㻌 After encoding, your phone will reboot to arrange the data.
㻌 If you encode the microSD card then perform a factory reset without
the microSD card inserted, you cannot decode the microSD card.
The Basics
Charging the Phone
Your phone comes with an Wall Charger and a USB Cable which connect
together to charge your phone. To charge your phone:
NOTICE
Please use only an approved charging accessory to charge your phone.
Improper handling of the USB/Charger Port, as well as the use of an incompatible
charger, may cause damage to your phone and void the warranty.
1. Connect the USB Cable into the Wall Charger.
When connecting, as shown below, the LG logo on the USB Cable will
face toward you.
2. Plug the USB Cable (as shown below) into the phone’s USB/Charger
Port.
USB Cable
NOTE
Wall Charger
Correctly orient the USB Cable with the phone's port. The 'B' side of the USB Cable
should be facing upwards.
Charging with the USB Cable
You can use your computer to charge
your phone. To be able to charge with
the USB Cable, you need to have the
necessary USB drivers installed on your
PC first. Connect one end of the USB
Cable to the USB/Charger Port on your
phone and connect the other end to a
USB port on your PC. It is best to use the rear USB port when connecting
to a desktop PC. The USB hub should be powered by an external power
source.
NOTE
If there is not enough charge in the battery to turn on the phone, the LED lights at the
bottom of the keypad flash to indicate that the battery is charging. Once the battery has
enough charge to turn the phone on, the flashing stops and the battery charge animation
appears on the touchscreen.
21
22
The Basics
Optimizing Battery Life
You can extend your battery’s life between charges by turning off features
that run in the background. You can also monitor how applications and
system resources consume battery power.
Tips to extend the life of your battery
㻌 Turn off radio communications that you aren’t using. If you aren’t
using Wi-Fi, Bluetooth, or GPS, use the Settings menu to turn them
off (Note that the GPS receiver is only turned on when you’re using an
application that makes use of it).
㻌 Turn down screen brightness and set a shorter screen timeout.
㻌 Turn off automatic syncing for Gmail, Calendar, Contacts, and other
applications if you don’t need it.
㻌 Use the Power Saver in the Settings menu or the Power Control widget
to control the wireless connections, GPS connection, Bluetooth power,
display brightness, and syncing activity.
To check the battery charge level
㻌 From the Home Screen, touch the Apps Key
> Settings
> About
phone > Battery.
The battery status (Charging or Discharging) and level (as a percentage
of fully charged) will be displayed at the top of the screen.
To monitor and control what uses the battery
The Battery use screen allows you to see which applications are consuming
the most battery power. Information on this screen allows you to identify
downloaded applications you may want to turn off when not being used, so
you can get the most out of your battery power.
㻌 From the Home Screen, touch the Apps Key
> Settings
>
About phone > Battery > Battery use. This screen displays battery
usage times. It lists all of the applications or services using battery
power from the greatest amount of energy used to the least amount.
The Basics
㻌 Touch an application or service in the Battery use screen to see the
details about its power consumption, including either how long since
last connected to a power source or how long you were last running
on battery power. Different applications or services offer different
kinds of information, and they may even include options to modify the
settings so you can reduce power consumption by that application.
Power Saver mode
If the battery charge level drops to low levels, the phone automatically
activates Power Saver mode to conserve battery power until you can
recharge it. You can set the phone to activate Power Saver mode at 10%,
30%, 50%, 70%, or Never. From the Home Screen, touch the Apps
Key
> Settings
> Power Saver. When the battery charge is low, a
notification is displayed prompting you to turn on Power Saver.
Power Control Widget
The Power Control widget helps users to conserve battery life easier.
㻌 Easy to control battery usage when battery life is low.
㻌 The Turn off all option disables all the setting items on the Power
control widget to save battery life.
㻌 The Power Saver option launches the Power Saver application.
To access the Power Control widget, touch and hold an empty space on a
Home screen canvas. With Widgets
selected, touch Power Control .
Tap the screen to add the widget to the display canvas.
Turning the Phone On and Off
Turning the phone on
㻌 Press and hold the Power/Lock Key
the screen turns on.
for a couple of seconds until
Turning the phone off
1. Press and hold the Power/Lock Key
appears.
until the Phone options menu
23
24
The Basics
2. Touch Power off in the dialog box that appears.
3. Touch OK to confirm that you want to turn off the phone.
Restarting the phone
1. Press and hold the Power/Lock Key
until the Phone options menu appears.
2. Touch Restart in the dialog box that appears.
3. Touch OK to confirm that you want to restart the phone.
To unlock the phone
If you don’t use the phone for a while, the screen and
backlight will shut off to conserve battery power. To
unlock the phone:
1. Press the Power/Lock Key
appear.
. Your Lock Screen will
2. Slide the screen up to unlock it. The last screen you
were working on opens.
NOTE The default Lock Screen simply locks the screen to prevent
unintentional actions. For more security to guard against
unauthorized use, you can set a pattern, PIN, or password that
will need to be entered to unlock it.
Shortcuts on the lock screen
There are four icons in the center of your lock screen
that you can use for quick access to the Phone
application, the Messaging application, the Voicemail
application, and the Camera application. Touch and
drag any of these icons downward to immediately
open and use its application. There’s no need to unlock
the screen or touch any other keys.
TIP
Four frequently used shortcut icons are provided on the lock screen. Slide the icon
you want to use downwards to unlock the screen and provide the direct access to the
chosen application.
To turn the phone sounds off
If you’re in a place where your phone sounds may disturb others, you can
quickly silence your phone from the Home screen.
The Basics
1. Press and hold the Power/Lock Key
appears.
until the Phone options menu
2. Touch Silent mode.
OR
1. Press the down Volume Key
all sounds are turned off.
on the side of the phone until
NOTE You can also use these keys to quickly turn the phone sounds back on. Press and hold
the Power/Lock Key , then touch Silent mode to toggle between on and off. While
once to activate Vibration mode
in Silent mode, press the up Volume Key
and twice to turn on phone sounds (continue pressing to increase volume).
Setting Up Your Device
When you turn on your wireless device for the first time, you have the
option to quickly set up various accounts. Simply follow the on-screen
instructions to complete the initial setup of your wireless device.
To set up your device, follow the steps below:
1. Select your language and touch Next.
2. Your SIM card will be activated now (if necessary). Otherwise, touch
Start the Setup Wizard.
3. Read the Welcome message and touch Continue.
4. Select whether to Skip or Start the Backup Assistant Plus application.
5. Set up your email accounts or touch Skip.
6. Read the Verizon backup information and touch Next to continue or Skip.
7. Select whether to Skip or Start the Google Account setup. With a
Google Account, Google applications are automatically synced between
your phone and computer regardless of where you make an update.
8. Read the Privacy caution and touch Next. Then set your Location
settings (VZW Location Services/ Standalone GPS Services/ Google
Location Services) and touch Next.
NOTE After successfully setting up your device, you can choose to view options that teach you
about your new phone including Watch & Learn / My Verizon Mobile Video / Guided
tours / Go to My Verizon. These options can be viewed later by accessing the Tools
section of the Applications screen.
25
26
The Basics
9. Touch Finish to start using the phone.
For more information on how to set up your email, visit smartphones.
verizonwireless.com/. Hover over the Support tab and under Get Help
With Your click on Device. Then search for your phone.
Setting up your Google Account
1. At the setup screen, touch Create or Sign in.
2. Enter your username and password or any other necessary information (if
creating an account).
NOTE Touch the Back Key
to close the keyboard.
3. Touch Sign in to sign in to your account.
Now your Gmail, Google Contacts, and Google Calendar events will all be
loaded to your phone automatically.
NOTE This is automatic for the first Google account added. When adding additional Google
accounts, you have to select which options to synchronize.
You can use the area below to record your Google Account information for
future reference.
Username:[email protected]
Password:____________________________________________
Your Google Account
You must sign into a Google Account to use Gmail, Google Talk, Google
Calendar, and other Google Applications; to download applications from
Android Market; to back up your settings to Google servers; and to take
advantage of other Google services on your phone.
IMPORTANT
O
If you want to restore your settings to this phone, from another phone that was
running Android release 2.0 or later, you must sign into your Google Account now,
during setup. If you wait until after setup is complete, your settings are not restored.
O
If you don’t have a Google Account, you’re prompted to create one.
O
If you have an enterprise account through your company or other organization, your IT
department may have special instructions on how to sign into that account.
O
When you sign in, your contacts, Gmail messages, Calendar events, and other
The Basics
information from these applications and services on the web are synchronized with
your phone.
O
If you don’t sign into a Google Account during setup, you are prompted to sign in or to
create a Google Account the first time you start an application that requires one, such
as Gmail or Android Market.
O
When you sign in, you’re prompted to enter your username and password using the
on-screen keyboard.
Guided Tours
The Guided Tours application allows you to quickly view information about
your phone, including the user guide and video tutorials.
To access Guided Tours, From the Home Screen, touch the Apps Key
Guided Tours
.
>
SmartShare
SmartShare uses DLNA (Digital Living Network Alliance) technology to
share digital content through a wireless network. Both devices must be
DLNA certified to support this feature.
To share your media files using SmartShare, From the Home Screen, touch
the Apps Key
> SmartShare .
SmartShare Tips
SmartShare requires a Wi-Fi or Wi-Fi Direct network connection. Please
connect device to network you want to share content.
Touch to select the device from
the content library list, such as
another phone or PC.
Touch to select the device
from the renderer device
list, such as a TV.
Select an item to share.
27
28
The Basics
Phone’s Status Icons
The Status Bar appears at the top of every screen. It displays icons
indicating that you’ve received notifications (on the left) and icons indicating
the phone’s status (on the right), along with the current time.
Notification icons
Status icons
If you have more notifications than can fit in the Status Bar, a plus icon
prompts you to open the Notifications panel to view them all. To open the
Notifications panel, touch and drag the Status Bar down.
The following icons indicate the status of your phone.
Call icons
Microphone muted during a call
Missed call
In call
In call using Bluetooth device
Speaker is on
Privacy call
Calendar & Alarm icons
Calendar event notification
An alarm is set
Alarm notification
Memo reminder alert
Email and Messaging icons
Others Email event received
Sending Others Email failed
New message received
High priority message received
Sending message failed
New Voicemail received
New Visual Voicemail
received
Playing Visual Voicemail in
background
Google Talk message received
Sound icons
Music currently playing
Silent mode is on
Vibrate mode is on
Wired headset connected
The Basics
Network icons
4G network connected
4G network is in use
Download through 4G network
Upload through 4G network
3G network connected
3G network is in use
Download through 3G data
network
Upload through 3G data
network
Downloading data
Uploading data
Acquiring GPS access
GPS is on
No service
Weak network signal
Strong network signal
Connected to Network
extender service
Airplane mode is on
Roaming
Location service is on
Location service is off
Connectivity icons
Wifi connection detected
No Wi-Fi signal
Strong Wi-Fi signal
Android Debugger connected
USB connected
Bluetooth is on
Bluetooth device connected
USB tethering is on
Wifi Direct on
System icons
More notifications
CarHome mode
System secured
System Alert
SD card inserted
Preparing the SD card to use
Memory processing error
No SIM card
Unknown SIM card
Google sync started
Google sync error
Battery empty
Battery full
Battery Charging
Battery status unknown (error)
29
30
The Basics
Getting to Know the Home Screen
The Home screen is your starting point to access all of the features on your
phone. It displays application shortcuts, icons, widgets, and other features.
Status Bar
Shows device status information,
including the time, signal strength, battery
status, and notification icons.
Application Icon
Touch an icon (application, folder, etc.) to
open the application and use it.
Quick Keys
Provide easy, one-touch access to the
phone functions used most often.
Quick Keys
The Quick Keys are located at the bottom of the Home screen and the
Applications screen.
: Opens the Phone application which displays a dial pad so you can
dial an unsaved number.You can also make calls using your Call log,
Contacts, and Groups by touching the tabs across the top of the screen.
TIP
The Dial Pad and your Contacts provide easy access to a flick-able list of 12 frequently
reached contacts.
: Opens the Contacts application and displays your Contact list. You
can also access the Phone application, Call log, and your Groups by
touching the tabs across the top of the screen.
: Opens the Messaging application. You can send text messages or
multimedia messages, which can contain pictures, videos, audio,
maps of your location, slideshows, and vCard files.
: Opens the Applications screen which displays phone options and
applications.
The Basics
To return to the Home screen
㻌 Touch the Home Key
at any time, from any application.
To view other Home screen canvases
㻌 Slide your finger left or right across the Home screen. The Home
screen spans up to seven screen widths, allowing more space for
icons, widgets, shortcuts, and other items.
Home Screen Canvas Indicator
The dots near the top of the screen indicate which Home screen canvas you are viewing.
Pinch in on the Home screen to
display the mini canvas view, then
touch the Home screen canvas
you want to view. Touch Add
to add additional Home screen
canvases.
Mini canvas view
Mini canvas view allows direct access to any of the canvases and also
allows you to manage your Home screen canvases. You can add up to two
additional Home screen canvases (from 5 screens to 7 screens), delete
canvases, and even rearrange canvas order to suit your needs.
Pinch in on any of the Home screen canvases to change from full screen view
to mini canvas view. From mini canvas view you have the following options:
㻌 To go directly to any Home screen canvas, simply touch the one you
want.
㻌 To add another Home screen canvas, touch Add
canvas space.
on an empty
31
32
The Basics
㻌 To delete a Home screen canvas, touch and hold the canvas to delete,
at the bottom of the screen. When the
then drag it to Remove
Remove icon turns red, lift your finger.
㻌 To rearrange your canvases, touch and hold the canvas to move, drag
it on top of the canvas position where you want it, then lift your finger.
The canvases swap places.
Touchscreen
Your touchscreen provides an excellent way to interact with and use your
Android phone. With the touch of your finger, you can download and use
available applications, make menu selections, and access data saved to
your phone.
The following terms are used for describing the different available actions
using the touchscreen:
Touch or tap A single finger touch selects an item. For example, touch
an icon (e.g., application or menu item), touch words (e.g., menu selection
or to answer an on-screen question), or touch letters and numbers to type.
Touch and hold Touch and hold an item on the screen by touching it
and not lifting your finger until an action occurs. For example, to open a
Context menu for customizing the Home screen, touch an empty area on
the Home screen until the Context menu appears.
Drag Touch and hold an item for a moment and then, without lifting your
finger, move your finger on the screen until you reach the target position.
You can drag items on the Home screen to reposition them and drag the
Status Bar downward to open the Notifications panel.
Swipe or slide Move your finger quickly across the surface of the
screen, without pausing when you first touch it (so you don’t drag an item
instead). For example, you can slide the screen up or down to scroll a list,
or browse through the different Home screens by swiping from left to
right (and vice versa).
Double-tap Double-tap to zoom a web page or a map. For example,
quickly double-tap a section of a web page to zoom in or out on that
section to fit the width of the screen. You can also double-tap to control
the zoom in Maps and in other applications.
The Basics
Pinch-to-Zoom Use your index finger and thumb in a pinch or spread
motion to zoom in or out when using the Browser, a map, or pictures.
This motion can also be used to expand or compress the Applications
screen items. It also changes the Home screen to mini canvas view.
Rotate the screen From many applications, the orientation of the screen
rotates with the phone as you turn it from upright to sideways and back again.
Rotate the phone sideways for
landscape orientation.
Rotate the phone upright for portrait
orientation.
Text Input Methods
On-screen Keyboard
You can easily enter text using the on-screen keyboard. The on-screen
keyboard displays automatically when you need to enter text. To manually
display the keyboard, simply touch a text field where you want to enter
text.
Toggles between
different languages.
Toggles from 123/SYM
mode to ABC mode.
33
34
The Basics
Typing tips
From the numbers keyboard, touch the
Symbols Key . Touch the Numbers Key
to exit from the symbols
or the Letters Key
keyboard.
Enter one capital letter
Touch the Shift Key .
twice.
Touch the Shift Key
Enter all capital letters
Touch again to revert to lowercase.
Double-tap a word to highlight it. To highlight a
range of text, double-tap the screen, then drag
Highlight text
the blue highlight markers to highlight the text
you want.
Touch and hold the highlighted text, then touch
Cut or copy selected text
Cut or Copy in the Context menu.
Touch and hold the location to paste the text,
Paste cut or copied text
then touch Paste in the Context menu.
Delete a character
Touch the Delete Key .
Touch and hold the Language Key
to open
a menu to set alternate languages. Then while
Language toggle
typing, simply touch the Language Key
to
toggle between your language keyboards.
Enter other characters
Text input settings
To change your text entry settings and see the dictionary of terms you’ve
used, from the Home Screen, touch the Apps Key
> Settings
>
Language & keyboard.
㻌 To change the default language, touch Select language, then touch
the language you want to use.
NOTE
See page 113 to access information about the Swype keyboard for reference.
The Basics
Applications: How to View, Open and Switch
Home screen
From the Home Screen
touch the Apps Key
to open the
Applications screen.
Applications screen
Slide the screen up or down
to bring more icons into view.
Touch an application icon
to open the application.
Quick Keys (
,
,
,
)
Touch the Home Key
to close the Applications screen.
All of the applications on your phone, including any applications that you
downloaded and installed from Android MarketTM or other sources, are
grouped together on the Applications screen, which you access from your
Home screen. If you have more applications than can fit on the Applications
screen, you can slide the screen up or down to view more.
35
36
The Basics
Opening and Closing the Applications screen
Opening the Applications screen
It’s easy to access the Applications screen no matter what feature you’re
currently using. Simply touch the Home Key
, then touch the Apps Key
.
Closing the Applications screen
To manually close the Applications screen, touch the Home Key
touch the Home Key .
or
NOTE The Applications screen closes automatically when you touch an icon to open its application.
Dragging an icon onto your Home screen also closes the Applications screen automatically.
Customizing the Applications screen
The phone includes a wide variety of applications and you can download
even more applications to your device. You can customize these items on
the Applications screen for faster access (less scrolling) to the applications
you use most often.
The application items on the Applications screen are listed alphabetically
within each application category, but you can customize the screen to
optimize how you use it. For example, you can condense or expand the
application categories, display in an alphabetical list, move application
icons to more convenient positions, and even add additional categories to
organize your files.
Condensing and expanding the application categories
1. From the Home Screen, touch the Apps Key
.
2. Place your thumb and index finger on the screen and move them
together in a pinch motion.
3. The screen condenses displaying the application categories in a bar
format that lists the number of items within it.
Simply touch the category you want to access.
NOTE
To return to the expanded view, place your thumb and index finger on the screen and
spread them apart.
The Basics
Displaying applications by category or in an alphabetical list
1. From the Home Screen, touch the Apps Key
.
, then touch Layout
.
2. Touch the Menu Key
3. Touch Category or List.
Moving application positions (Category layout only)
1. From the Home Screen, touch the Apps Key
2. Touch the Menu Key
> Manage apps
.
.
3. Touch and hold the application icon and drag it to the position you want,
then lift your finger. Application icons to the right of the position shift
accordingly.
Adding a category
1. From the Home Screen, touch the Apps Key
2. Touch the Menu Key
> Manage category
.
> Add.
3. Enter the category name, then touch Save.
4. Touch the application(s) or service(s) you want to move into your newly
created category, then touch Move.
Opening and Switching Applications
Multi-tasking is easy with AndroidTM because open applications keep
running even when you open another application. There’s no need to quit an
application before opening another. You can use and switch among several
open applications. Android manages each application, stopping and starting
them as needed, to ensure that idle applications don’t consume resources
unnecessarily.
Opening an application
Open an application simply by touching its icon on the screen.
TIP
You can customize your Home screen with the application icons you use most often.
Applications are located on the Applications screen, but you can copy any application icon
to your Home screen for faster access. No matter where the icon is, on the Applications
screen or your Home screen, just touch it to open and use it.
37
38
The Basics
Opening multiple applications
1. Touch an application icon to open it.
2. Touch the Home Key
.
NOTE If the application icon you want is on your Home screen, simply touch the icon to open
and use it.
3. From the Home Screen, touch the Apps Key
.
4. Touch the icon for the other application you want to open.
Switching between multiple applications
1. Touch and hold the Home Key
. A screen with the icons of
applications that you’ve used recently will appear.
2. Touch the application icon you want to open or touch the Back Key
to return to the current screen.
Touch an icon to open an application
you’ve used recently.
Adding application icons to the Home screen
Customize your Home screen with the applications you use most often.
1. Open the Applications screen.
2. Touch and hold the application icon you want to add to your Home
screen. Your Applications screen will close so that you can place the icon
on the Home screen.
3. Lift your finger to place it or drag the icon to where you want it on the
screen, then lift your finger.
The Basics
Moving applications to other Home screens
You can place application icons on any of the Home screen canvases.
Simply touch and hold, then drag the icon to the left or right edge of
the screen to advance to the other screen canvases before lifting your
finger.
The Relocate item option must be enabled under the Gesture
settings. From the Home Screen, touch the Menu Key
> Settings
> Gesture and then checkmark Relocate item under the Home
screen section. Touch and hold the icon to move, then tip the device
in the direction of the canvas you want. The Home screen canvases
slide in the tipped direction. Lift your finger to drop it on the canvas
you want.
Setting the Theme
Four different themes are provided, which come with a dedicated Home
screen wallpaper, Lock screen and applications list per theme. To change
your theme, touch the Menu Key
from the Home screen and touch
Theme. Select from the following themes: Optimus, Playworld, Opart,
and Cozywall.
39
40
The Basics
Working With Menus
There are two kinds of Android menus: Options menus and Context menus.
Options menus
Options menus contain tools that apply to the activities of the current
screen or application, not to any specific item on the screen. To open the
available Options menu, touch the Menu Key
. Not all applications have
Options menus; if you touch the Menu Key
on a screen that has no
Options menu, nothing will happen.
Some applications have more Options menu items than can fit in the
Options menu. To view the additional menu items, touch More .
Touch More
to view additional Options menu items.
Context menus
Context menus contain options that apply to a specific item on the screen.
To open a Context menu, touch and hold an item on the screen. Not all
items have Context menus. If you touch and hold an item that has no
Context menu, nothing will happen.
When you touch and
hold certain items on
a screen, a Context
menu opens.
The Basics
Managing Notifications
Notification icons report the arrival of new messages, calendar events,
alarms, as well as ongoing events, such as when you are on a call.
When you receive a notification, the notification icon will be displayed in the
Status Bar. You can open the Notifications panel to view a list of all recent
notifications. Depending on your settings, you may hear a notification sound
and/or the phone may vibrate.
To open the Notifications panel
Touch and drag the Status Bar to the bottom of the screen.
OR
> Notifications.
From the Home Screen, touch the Menu Key
The Notifications panel displays your wireless provider and a list of
your current notifications, organized into ongoing and event-based
notifications.
NOTE The Status Bar is sensitive to the drag motion so just beginning the downward drag will
open the Notifications panel.
Touch to edit which icons
are displayed on the
Notifications panel. You can
add up to seven icons.
Touch a notification to
open it.
To respond to a notification
1. Open the Notifications panel. Your current notifications are listed in the
panel, each with a brief description.
2. Touch a notification to view it.
The Notifications panel will close and the application that corresponds to
your response will open. For example, new voicemail notifications dial
your voicemail box, and Gmail notifications open the Gmail application
so you can read your new messages.
41
42
The Basics
To clear all notifications
1. Open the Notifications panel.
2. Touch Clear.
All event-based notifications will be cleared; ongoing notifications will
remain in the list.
To close the Notifications panel
Touch and drag the tab at the bottom of the Notifications panel to the top of
the screen or just touch the Back Key
.
The panel will also close when you touch a notification.
NOTE The Notifications tab at the bottom of screen is sensitive to the drag motion so just
beginning the upward drag will close the panel.
Quick settings on the Notifications panel
The top of the Notifications panel includes Quick Settings. These icons
allow quick and easy access to set modes including Sound, Bluetooth, GPS,
Airplane and Data. Touch Edit
to open a dialog box to customize your
Quick Settings by checking the items you want to appear and then touching
Save.
Tap any of the Quick Settingss to toggle through the available settings:
Sound
, Vibrate
Bluetooth On
GPS On
and GPS Off
Airplane mode On
Data On
, and Silent
and Bluetooth Off
.
.
.
and Airplane mode Off
and Data Off
.
.
NOTE If necessary, scroll horizontally to see all of the available icons.
The Basics
Searching Your Phone and the Web
You can search for information on your phone and on the web using the
Search application. Some applications, such as Gmail, Contacts, and Browser
have the ability to search contents within those specific applications.
You can conduct the search by typing in the search terms or saying what you’re
looking for. Typing can be useful because the search application can provide
suggestions so you don’t necessarily have to type out your full request.
Phone and Web search using text entry
1. Touch the Search Key
on the Home screen or in the other
applications that support this feature. The Quick Search Box will open
automatically.
Voice Search
Touch to search by voice.
Search results
Provides a one-touch shortcut to
matching search items and past
searches.
2. Enter the text you’re searching for in the Quick Search Box.
The Voice search icon changes to the Go icon
as soon as you begin entering text.
As you type, search results from your phone,
previous search terms, and web search
suggestions appear. Touch an item to activate
that search result.
43
44
The Basics
You can use the Search preferences to configure some aspects of web
search (for example, whether it makes suggestions below the Quick
Search Box as you type), and what phone features you want to include
in searches. To access these settings,touch the Search Key
to open
the Search application and touch the Menu Key
> Search Settings
.
3. Touch the Enter Key
on the keyboard or the Go icon
search box to search for the entered terms.
TIP
next to the
You can touch the Google icon
in the top left
corner to select where to conduct the search.
Choices include All, Web, Applications, and
Contacts. You can touch the Settings icon to select
additional search locations, such as Messaging and
Music.
Locking the Screen
Your phone automatically uses a default Lock Screen to simply prevent
unintentional function activation. You can choose to secure your phone so
that only you can unlock it to make calls, access your data, buy applications,
and so on. For added security to guard against unauthorized use, you can
set a pattern, PIN, or password that will need to be entered to unlock.
Setting an Unlock Pattern, PIN, or Password
Follow these steps to set an unlock sequence for the first time or after you
disable a previously set unlock sequence.
1. From the Home Screen, touch the Apps Key
Security.
> Settings
>
2. Touch Set up screen lock (under the Screen unlock section of the
Security settings).
NOTE
If you already have a set sequence, you have to touch Change screen lock.
3. Touch Pattern, PIN, or Password.
Pattern: Locks the screen using a pattern you draw with your finger.
The first time you set an unlock pattern, you will see a tutorial with
instructions on how to create it. Read the tutorial and touch Next (twice).
Draw your pattern (connect at least 4 dots) and touch Continue. Then
redraw your pattern and touch Confirm.
The Basics
PIN: Locks the screen with a number sequence. Enter a PIN (at least 4
digits) and touch Continue. Reenter your PIN and touch OK to confirm it.
Password: Locks the screen with an alphanumeric sequence. Enter
a password (at least 4 characters) and touch Continue. Reenter your
password and touch OK to confirm it.
From then on, any time you want to turn the phone on or unlock the
screen, you will need to draw your unlock pattern or enter your PIN or
password to unlock the screen.
Disabling the lock sequence
If you change your mind about using a lock sequence to secure your phone,
you can disable it.
1. From the Home Screen, touch the Apps Key
Security.
> Settings
>
2. Touch Change screen lock (under the Screen unlock section).
3. Draw your current pattern or enter your current PIN or password.
4. Touch Slide up to disable the previously set lock security.
Changing Your Unlock Pattern
1. From the Home Screen, touch the Apps Key
Security.
> Settings
>
2. Touch Change screen lock (under the Screen unlock section).
3. Draw your current unlock pattern.
4. Touch Pattern to change it (or touch Slide up to disable it).
5. You’re prompted to draw and redraw your new pattern.
Changing your PIN or Password to Lock the Screen
1. From the Home Screen, touch the Apps Key
Security.
> Settings
2. Touch Change screen lock (under the Screen unlock section).
3. Enter your current lock sequence, then touch Continue.
>
45
46
The Basics
4. Touch PIN to change your number lock sequence, touch Password to
change your alphanumeric lock sequence, or touch Slide up to disable
the lock sequence.
5. You’re prompted to enter and reenter your new lock sequence.
From then on, you will need to enter the sequence and touch OK to
unlock the screen.
You have 5 opportunities to enter your unlock pattern, PIN or password. If you used
all of opportunities, you can try again after 30 seconds.
NOTES
O
If you have set up a Microsoft Exchange account, you are only allowed to set up a
password.
O When you can’t recall your unlock pattern:
- If you’ve created a Google Account on the phone, touch Forgot pattern?. Then
you are required to sign in with your Google Account to unlock your phone.
O
Security lock timer
If a security lock is enabled, touch Security lock timer in the Screen unlock
section to set the amount of time before the screen automatically locks due
to inactivity.
To adjust the Security lock timer, touch the Menu Key
from the Home
Screen. Then touch Settings then Security. If you touch
next to
Security lock timer, you can select the time.
The Basics
Customizing the Home Screen
You can personalize your Home screen by adding application icons,
shortcuts, widgets, and other items to any Home screen canvas. You can
also change the wallpaper.
To add an item to the Home screen
1. Go to the Home screen canvas where you want to add the item.
2. Touch the Menu Key
then touch Add
empty spot on the Home screen canvas.
. Or, just touch and hold an
will not be
NOTE If space is not available on a particular Home screen canvas, Add
available; you must delete or remove an item before you can add another item. Or,
switch to another Home screen canvas.
3. In the menu that opens, touch the type of item to add.
You can add the following types of items to the Home screen:
Shortcuts Add shortcuts to applications, a bookmarked web page, a
favorite contact, a destination in Maps, a Gmail label, a music playlist, and
more. The shortcuts available depend on the applications you have installed.
Widgets Add any of a variety of widget applications to your Home Screen.
Choose from any widgets available or download new widgets from the
Android MarketTM.
Folders Add a folder where you can organize other Home screen shortcuts
and icons. Your folders’ contents are kept up-to-date automatically.
To move an item on the Home screen
1. Touch and hold the item.
2. Drag the item to a new location on the screen.
Pause at the left or right edge of the screen to drag the item onto the
next available Home screen canvas.
3. When the item is where you want it, lift your finger.
NOTE If Relocate item is enabled in the Gesture settings, simply tilt the device in the direction
you want to move the item to one of the canvases.
47
48
The Basics
To remove an item from the Home screen
1. Touch and hold the item (note that the Quick Keys are replaced by an
icon of a trash can).
2. Drag the item to the Remove icon
.
3. When the icon and the item to be removed turn red, lift your finger.
To change the Home screen wallpaper
1.From the Home Screen, touch the Menu Key
> Wallpaper .
You can also touch and hold an empty spot on the Home screen and
then touch Wallpapers in the menu that opens.
2.Touch Charging wallpapers, Gallery, Live wallpapers, or Wallpapers.
#Touch Charging wallpapers to choose the wallpaper you want to be
displayed when you charge your phone.
#Touch Gallery to use a picture you’ve taken with your camera as the
wallpaper. You can crop the picture before setting it as your wallpaper.
#Touch Live Wallpapers to choose from animated wallpapers installed
on your phone.
Live wallpapers can change according to the time of day, respond to
touching the screen, tell the time, or offer other information.
#Touch Wallpapers to choose from picturesque static images to apply
to your device.
3.Touch Set wallpaper or Save (if necessary).
To change the Home screen Theme
Four different themes are provided, which come with a dedicated Home
screen wallpaper, Lock screen and applications list per theme.
1.From the Home Screen, touch the Menu Key
and select Theme.
The Basics
2.Swipe to the left and right to choose from Optimus, Playworld, Opart,
and Cozywall.
To rename a folder
1.Touch the folder icon to open it.
2. Touch and hold the folder window’s title bar.
3. Enter the new folder name.
4.Touch OK.
To reposition Home screen canvases
1.Pinch in on the Home screen to display the mini canvas view.
2.Touch and hold the canvas you want to move, then drag it to the new
position and lift your finger. If the position has an existing canvas, the
canvases swap places.
To add additional Home screen canvases
There is enough space for up to seven Home screen canvases. While in the
mini canvas view, touch the Add icon
on an empty Home screen canvas
to add an additional canvas to that spot.
NOTE The Add icon
is only available when one or more canvases have been deleted.
To remove Home screen canvases
While in the mini canvas view, touch and hold the canvas that you want
removed. Drag the canvas to the Remove icon
and lift your finger when
the canvas and the icon turn red.
49
50
The Basics
Connecting Quickly With Your Contacts
As you build up your list of contacts on your phone, you can use Quick
Contact for Android to quickly chat, email, text message, place a call, or
locate your contacts. Quick Contact for Android is a special set of icons that
you can use to quickly and easily connect to a contact.
.
Open your Contacts list and touch the contact’s picture
Touching the contact’s picture opens a Quick Contact bubble displayed
directly above the contact’s name. This bubble displays icons for all of
the ways you can communicate with that contact. The available icons
depend on the information you have saved for that contact.
Touch a Quick Contact icon to communicate with the contact.
Depending on the icon you’ve touched, a different application will
open.
TIP
Adding a shortcut for a contact to your Home screen allows you to open Quick Contact
for that contact without opening the Contacts application.
Connecting to Networks and Devices
Connecting to Wi-Fi Networks
Wi-Fi is a wireless networking technology that can provide Internet access
at distances of up to 100 meters, depending on the Wi-Fi router and your
surroundings.
To use Wi-Fi on your phone, you must connect to a wireless access point,
or “hotspot.” Some access points are open and you can simply connect to
them. Others are hidden or implement other security features, so you must
configure your phone so it can connect to them.
Turn off Wi-Fi when you’re not using it, to extend the life of your battery.
The following Status Bar icon indicates your Wi-Fi status.
Connected to a Wi-Fi network (waves indicate connection strength)
When you connect to a Wi-Fi network, the phone obtains a network
address and other information it needs from the network, using the
DHCP protocol. To configure the phone with a static IP address and other
advanced settings, from the Wi-Fi settings screen touch the Menu Key
> Advanced .
To turn Wi-Fi on and connect to a Wi-Fi network
1. From the Home Screen, touch the Apps Key
Wireless & networks > Wi-Fi settings.
> Settings
>
2. If the Wi-Fi box is not checkmarked, touch Wi-Fi to turn it on and scan
for available Wi-Fi networks.
3. Touch a network to connect to it.
O
If the network is open, you will be prompted to confirm that you want
to connect to that network by touching Connect.
O
If the network is secured, you will be prompted to enter a password
(Ask your network administrator for details).
O
When you’re connected to a network, you can touch the network
name in the Wi-Fi settings screen for details about the speed, security,
address, and related settings.
51
52
Connecting to Networks and Devices
New network detection and notification
Checkmark the Notify me checkbox in the Wi-Fi settings screen to be
notified when new networks are detected.
When Wi-Fi is on and the user launches an application that uses Wi-Fi,
a dialog box will appear when new networks are detected.
When Wi-Fi is off and the user launches an application that uses WiFi, the device will turn on Wi-Fi and display a dialog box when new
networks are detected.
If the Notify me checkbox is not marked and Wi-Fi is off, the device
will not display a dialog box when new networks are detected.
Optimizing Wi-Fi usage
Touch Optimize Wi-Fi usage in the Wi-Fi settings screen to customize the
following settings.
Checkmark the box for Automatically turn on Wi-Fi while charging
phone to set the device to automatically turn on Wi-Fi when
connected to a power supply. If not checkmarked, Wi-Fi will not be
turned on while charging. Touch Save to activate the setting.
Checkmark the box for When launching applications, connect
to known Wi-Fi networks when WI-Fi is off to set the device
to automatically turn on and connect Wi-Fi when applications are
launched. This setting is helpful for frequently used internet capable
applications. Touch Save to activate the setting.
To add a Wi-Fi network
You can add a Wi-Fi network so the phone will remember it, along with any
security credentials, and connect to it automatically when it is in range. You
can also add a Wi-Fi network manually if it does not broadcast its name
(SSID) or if you want to add a Wi-Fi network when you are out of its range.
To add a secured network, you need to contact the network’s administrator
to obtain the password or other required security credentials.
1. Turn on Wi-Fi, if it’s not already on.
Connecting to Networks and Devices
2. From the Wi-Fi settings screen, touch Add Wi-Fi network.
3. Enter the Network SSID (name) of the network.
If the network is secured, touch the Security dropdown menu
touch the type of security deployed on the network.
and
4. Enter the required passwords and security credentials.
5.Touch Save.
The phone will connect to the wireless network. Any credentials that you
entered are saved, so you’re connected automatically the next time you
come within range of this network.
To forget a Wi-Fi network
You can make the phone forget about the details of a Wi-Fi network that
you added. For example, if you don’t want the phone to connect to it
automatically or if it’s a network that you no longer use.
1. Turn on Wi-Fi, if it’s not already on.
2. In the Wi-Fi settings screen, touch and hold the name of the network
that you want to forget.
3. Touch Forget network in the Context menu that appears.
Wi-Fi Direct connection
You can make a connection directly with Wi-Fi devices without any access
point. Your device can create a group connection or individual connection.
1. From the Home Screen, touch the Apps Key
Wireless & networks.
> Settings
>
2. Touch Wi-Fi Direct settings to set up your Wi-Fi Direct connection
settings.
Checkmark the Wi-Fi Direct checkbox to turn it on. A pop-up screen
with instructions on how to connect with Wi-Fi Direct and Wi-Fi
devices appears after checking the Wi-Fi Direct checkbox.
Touch Device name to open a dialog box to enter a name for your device.
Touch Password to set or change your password for Wi-Fi direction
connection.
53
54
Connecting to Networks and Devices
Touch Discoverable mode to make your device discoverable on other
Wi-Fi devices.
Connecting Your Device to Your Computer
Before using your device’s mass storage capabilities, you need to prepare
your device’s data services to synchronize with your desktop or laptop
computer. Once you have connected the device to the computer, you can
transfer your data to or from the device memory.
To connect your device to a computer via USB:
1. Use the USB Cable that came with your phone to connect the phone to
a USB port on your computer.
2. Open the Notifications panel and touch USB connected.
3. Touch the connection mode you want to use to connect to the PC.
Choose from the following options: Charge only, Mass storage, or
Internet connection.
USB Autorun
USB Autorun is a feature that allows your phone to connect to a PC using a
USB Cable and set it up on that PC without a physical CD-ROM.
Automatically installs the LG USB Modem driver.
Allows the phone to be used as mass storage when a microSD card is
present in the phone. It allows transfer of unprotected content from the
phone to the PC and vice versa.
NOTE User content such as photos, videos, and voice recordings can be stored on a removable
microSD card that is inserted in your phone.
To select USB mode for Autorun
1. From the Home Screen, touch the Apps Key
Connectivity > Default connection mode.
> Settings
>
2. Touch Mass storage to connect to the PC for Autorun.
Touch Charge only to use only the charging function and not the USB
function.
Touch Internet connection to use the ethernet function and not the
Connecting to Networks and Devices
default USB function.
NOTES
O
USB Autorun only works with Windows® XP, Windows® Vista, and Windows® 7
operating systems.
O
Log on to the PC as Administrator. Non-Administrator accounts have insufficient
privilege to install the USB Modem driver and don’t run the Autorun feature.
O
Do not unplug the USB Cable during Autorun.
O
If Autorun doesn't function properly, unplug and plug the USB Cable to set Mass
storage mode.
Autorun automatically installs the USB device driver for every USB mode.
Internet connection mode
Autorun may automatically use Internet connection mode in certain
circumstances.
Autorun automatically switches to Internet connection mode if the
connection fails while syncing or connecting.
You can share your phone’s internet connection with your PC using a USB
Cable. After connecting with a USB Cable, set the USB connection mode to
Internet connection. Then select either Ethernet or Modem.
Ethernet This mode changes the phone to USB tethering mode from
the PC. From the Home Screen, touch the Apps Key
> Settings
>
Wireless & networks > Tethering > Mobile Broadband Connection.
NOTE
This mode can only be used by a Tethering registered user.
Modem This mode changes the phone to Modem mode from the PC.
Always ask
You can choose to be asked to confirm the USB connection when
connecting to a computer.
When Always ask is checkmarked, the USB selection window is displayed
when the USB Cable is connected.
Autorun is not available when:
Phone is booting (powering up).
PC operating system is not set to Autorun (automatic execute command).
55
56
Connecting to Networks and Devices
To change the Connection mode settings while Autorun is running:
You can change the settings while Autorun is running. From the Home
Screen, touch the Apps Key
> Settings
> Connectivity > Default
connection mode > Mass storage.
NOTE
Be sure to checkmark the box Always ask if you want to be asked to confirm the USB
connection mode when the phone is connected to a computer.
Using the Status Bar to change the settings
The Status Bar shows the current USB connection mode so you can easily
open the Status Bar and change the settings as needed.
When connected via USB, the current USB connection mode also appears
on the Notifications panel. Touch the connection setting to display a screen
where you can change the USB connection mode.
NOTE
If the Always ask checkbox is marked, the screen is only provided during USB
connection, but is not provided in the notification area.
Step 1. Connecting the phone to a PC
Connect your phone to your PC with a compatible USB Cable
(supplied). LG Autorun starts automatically.
Click ‘I accept the terms in the agreement’ then ‘Yes’.
NOTES
O
Autorun is only supported for Windows® XP, Windows® Vista, and Windows®7.
O
The USB Autorun feature works only under an Administrator account. The installer has
insufficient privileges under a Non-Administrator account. Log on as Administrator. The
device is switched back to the user set mode within 30 seconds.
Connecting to Networks and Devices
Step 2. Downloading the LG USB Modem Driver.
NOTES
O
If a previous version of the LG USB Modem driver is installed in the computer, it will
automatically be updated to the recent version.
O
If a recent version of the LG USB Modem driver is installed in the computer, LG
Autorun skips ‘Step 2.’
Step 3. Installing the LG USB Modem Driver.
Step 4. Installing the Utility Application.
Make Your Device a Mobile Hotspot
The Mobile Hotspot application can share the phone’s 4G data connection
with any Wi-Fi capable devices.
WARNING!
There are security risks associated with creating a Wi-Fi network open to the public. It is
highly recommended that you take steps to protect your Wi-Fi network from unauthorized
access. To add encryption to your Wi-Fi Hotspot:
1. From the Home Screen, touch the Apps Key
> Mobile Hotspot
2. Touch the Mobile Hotspot checkbox to enable this feature.
3. Read the disclaimers and Help information, then touch OK.
.
57
58
Connecting to Networks and Devices
4. Your portable Wi-Fi Hotspot is now created.
You can use this menu to enable and disable the connection. Once the
connection is active, go to the device you want to connect and configure
its wireless connection to the Network SSID for your Android device
and input the password (if you are using WPA2 PSK). You will now have
wireless access on your device.
NOTE
WEP is highly vulnerable to hacking. WPA2 is recommended by the IEEE.
The following Status Bar icon indicates your Wi-Fi Hotspot status.
Portable Wi-Fi Hotspot is active
microSD Card
59
microSD Card
NOTE
The microSD card is sold separately.
Unmounting and removing the microSD Card
To safely remove the microSD card from your device, you must first
unmount it before removing it from the phone.
1. From the Home Screen, touch the Apps Key
> Settings
> Storage
> Unmount SD card > OK. Now you can safely remove the microSD card.
2. Turn off the phone and remove the back cover.
3. Carefully push the edge of the microSD card in to release it from the slot,
then gently pull it out of the slot.
NOTE You can easily damage the microSD card and its adapter by improper operation. Please
be careful when inserting, removing, or handling them.
microSD Card Settings
Viewing Memory in the microSD Card
1. From the Home Screen, touch the Apps Key
Storage.
> Settings
>
2. Review the available information.
The storage page is divided into six sections: Backup Assistant Plus
Storage, SD card, Internal memory, System memory, Backup and
restore, and Personal data.
Formatting the microSD Card
Formatting a microSD card permanently removes all files stored on the card.
1. From the Home Screen, touch the Apps Key
Storage.
> Settings
>
2. Touch Unmount SD card to release the microSD card from device use.
An icon appears within the Notifications panel to indicate an unmounted
microSD card.
3. Once released, touch Erase SD card > Erase SD card > Erase
everything.
60
microSD Card
Once completely formatted, the card is automatically re-mounted
(reconnected for use by the device).
NOTE The formatting procedure erases all of the data on the microSD card, after which the files
CANNOT be retrieved. To prevent the loss of important data, please check (and backup,
if necessary) the contents before you format the card.
Using Mass storage mode
When you connect the phone and PC using a USB Cable and set your
device’s USB connection mode to Mass storage, you will see two
removable disks on the PC. You can copy files to/from the removable
microSD card.
Calls
61
Placing and Ending Calls
You place calls using the Phone application. Calls can be manually dialed
using the Dial tab. You can also dial from your phone’s memory using the
Call log tab, the Contacts tab, or the Groups tab.
To open the Phone application
From the Home Screen, touch the Phone Key
bar.
in the Quick Keys
To place a call by dialing
1. Open the Phone application.
Dial tab
Touch the Delete Key to erase a digit. Touch
and hold to erase the entire number.
to
Touch the Call Key
dial the number that you
entered.
To dial an international number, touch and
hold the 0 Key to enter the plus ( + ) symbol.
Then, enter the international prefix for the
country; followed by the full phone number.
Touch the Message Key to send a message.
Touch the Voice Dialer
Key to dial by saying the
number.
Touch the Voicemail Key to access your
voicemail feature.
2. Touch the keys on the dialpad to manually enter a phone number.
If you enter a wrong number, touch the Delete Key
one by one.
to erase digits
To erase the entire number, touch and hold the Delete Key
.
Key to enter the
To dial an international number, touch and hold the
plus ( + ) symbol. Then, enter the international prefix for the country;
followed by the full phone number.
3. Touch the Call Key
to dial the number that you entered.
62
Calls
You can use other phone features while the call is underway. If you
open another application, the Call icon
appears in the Status Bar for
the duration of the call.
Press the Volume Keys to adjust the call volume.
Use the on-screen buttons to enter additional numbers, place the
call on hold and take an incoming call, add another call, use the
speakerphone, end the call, and other options.
NOTE If you opened other applications while on a call, you'll need to return to the Call screen
and touch End call
to end the call. You can touch the Home Key
, then the Phone
Key (in the Quick Keys bar) or touch the Contact's name or number at the top left
corner of the Home screen. You can also drag the Notifications panel down and touch
the Current call icon .
Instant List
Instant list is displayed on the Dial tab to help you to use the information
stored in your Contacts list and Call log without needing to open and search
those application first. Once you enter three or more numbers you want
to dial, Instant list displays entries from your Contacts list or Call log that
match the sequence that you entered.
Sequence matches
The device searches for the entered sequence anywhere in the number,
beginning, end, or anywhere in-between. The matching number sequence
is displayed within the number in orange text. The name associated with
the number is displayed above the number and the number type (mobile,
home, etc) is displayed before the number, if known. When there are
multiple matches, touch the Instant list dropdown icon
to view more
matching entries.
Calls
Selecting an Instant list entry
Touch an entry in the Instant list to insert it on the dialpad and touch the
Call Key
to dial it.
Instant List
Instant list Icon
Touch to view more of the Instant list.
Frequent List
The Frequent list is displayed on the Dial tab above the dialpad. It displays
your outgoing call phone numbers. Unlike the Sent calls list in the Call log,
entries are only listed once, no matter how many times they have been
called. If a name is associated with the number, the name is displayed
instead of the phone number.
NOTE Only the 12 frequently called numbers are displayed.
Selecting a Frequent list entry
Swipe left and right to scroll though the list. Touch an entry in the Frequent
list to insert it on the dialpad and touch the Call Key
to dial it.
Frequent List
63
64
Calls
Airplane mode
Some locations may require you to turn off your phone’s wireless
connections by placing your phone in Airplane mode.
1. Press and hold the Power/Lock Key
.
2. Touch Airplane mode.
NOTE The Wireless & networks setting also has a checkbox to enable or disable Airplane mode
and the Notifications panel has an Airplane mode icon which toggles it on or off.
Answering or Rejecting Calls
When you receive a phone call, the Incoming call screen opens with the
caller ID and any additional information about the caller that you have saved
in the Contacts list. All incoming calls are recorded in the Call log.
To answer a call
If the screen is unlocked, simply touch the Answer Key
.
If the screen is locked, slide the screen up to answer (enter the
pattern, PIN, or password if necessary).
If you were already on a call, touch the Answer Key
first call on hold while you answer the new call.
NOTE To silence the incoming call ringer, press the Volume Keys.
to place the
Calls
Unlocked Screen
Locked Screen
Touch the
Answer Key
to answer the
call.
To decline a call and divert it to voicemail
.
If the screen is unlocked, touch the Ignore Key
to the left.
If the screen is locked, drag the Ignore icon
The caller is sent directly to your voicemail box to leave a message.
Unlocked Screen
Touch the
Send msg
Key to send a
quick message
to the caller
and forward
them to your
voicemail.
Locked Screen
Drag the Send
msg icon to the
right to send a
quick message
to the caller
and forward
them to your
voicemail.
Touch the Ignore Key to decline the
call and send the caller directly to your
voicemail box to leave a message.
NOTE To silence the ringer, press the Volume Keys.
Drag the
Ignore icon
to the left
to ignore
the call and
forward the
caller to your
voicemail.
65
66
Calls
To decline a call and send a text message
1. When you receive an incoming call and the screen is unlocked, touch the
Send msg Key
. If the screen is locked, drag the Send msg icon
to the right.
2. Touch the text message you want to send in place of answering the call.
NOTE This feature can only be used to send a message to another mobile phone. It is not
applicable to incoming landline calls.
Working with the Call Log
The Call log is a list of all of the calls you’ve dialed, received, or missed. It
offers a convenient way to redial a number, return a call, or add a number to
your Contacts list.
To open the Call log
(in the Quick Keys bar) and then the Call log
Touch the Phone Key
tab
at the top of the screen.
All calls (sent, received, and missed) are listed in the Call log tab. The
most recent calls are located at the top of the list. Scroll down to see
older entries.
To dial a number in the Call log
at the right of the call entry.
From the Call log, touch the Call Key
You can also touch and hold the entry to open a Context menu with
more options to communicate with that contact in other ways.
Calls
To add an entry’s number to your Contacts
1. Touch and hold the call entry.
2. Touch Add to contacts in the Context menu.
3. Touch Create new contact and enter the Contact information or touch
Update contact and choose an existing contact to add the new number
to.
To take other actions on a Call log entry
Touch a Call log entry to open a screen where you can call the contact,
send the contact a message, add the number to your Contacts list (or
view contact information), delete the call from the log, and learn more
about the original call.
Touch and hold a Call log entry to open a Context menu where you
can call the contact, view contact information, edit the number before
you redial, and more.
To clear the Call log
Clearing the Call log all at once
1. Touch the Phone Key
(in the Quick Keys bar), then the Call log tab
at the top of the screen.
2. Touch the Menu Key
3. Touch Clear all
.
> OK.
Selectively clearing the Call log
1. Touch the Phone Key
(in the Quick Keys bar), then the Call log tab
at the top of the screen.
2. Touch the Menu Key
3. Touch Clear
.
and then checkmark the call entries you want to delete.
4. Touch Delete > OK .
NOTE You can also selectively delete by touching and holding a Call log entry, then touch
Remove from call log > OK.
67
68
Calls
Filtering Call log entries
1. Touch the Phone Key
(in the Quick Keys bar), then the Call log tab
at the top of the screen.
2. Touch the Menu Key
> Filter
.
3. Touch Received calls only, Sent calls only, or Missed calls only.
NOTE You can also access advanced filters by touching Advanced filtering, selecting your
criteria, then touching Apply.
Calling Your Contacts
Instead of manually dialing phone numbers using the dial pad, you can use
your Contacts list to dial quickly and easily.
You can also quickly call a contact using Quick Contact.
If you have contacts on the web, you can choose whether to synchronize
with your phone when you first set up your GoogleTM Account.
To call a contact
1. Touch the Contacts Key
in the Quick Keys bar.
2. Touch the contact you want to call.
3. Touch the contact’s phone number you want to call.
To call a favorite contact
1. Touch the Contacts Key
in the Quick Keys bar, then touch the
Groups tab
at the top of the screen.
2. Touch Favorites and then touch the contact you want to call.
3. Touch the contact’s phone number you want to call at the top of the
screen.
Calls
Voice Dialer
You can use the Voice Dialer application to place a phone call by speaking
the name of a contact or a phone number.
To place a call by speaking
1. Touch Voice Dialer
in the Applications screen.
If you have a Bluetooth device that supports "voice-recognition" or "voice
dialing" you may be able to open Voice Dialer by pressing your headset’s
main button or in some other way, and dial by voice using your headset.
For details, see the documentation that came with your headset.
2. Say "Call" followed by the name of the contact or say "Dial" followed by a
phone number.
Options During a Call
Touch Speaker
to turn the speakerphone on or off. The
light bar on the Speaker button illuminates blue to indicate that
the speakerphone is on.
WARNING!
To avoid damage to your hearing, do not hold the phone
against your ear when the speakerphone is turned on.
to mute the microphone during a call. The
Touch Mute
light bar on the Mute button illuminates blue to indicate that
the microphone is muted.
switch between a Bluetooth
Touch to Bluetooth
device and the phone. The light bar on the Bluetooth button
illuminates blue to indicate that the call is using a Bluetooth
device. This button is greyed out when there is no Bluetooth
device available.
To mute the microphone during a call
.
Touch Mute
The light bar on the Mute button illuminates blue to indicate that the
microphone is muted. The Mute icon
will appear in the Status Bar
to remind you that the microphone is turned off.
While viewing the in-call screen, you can unmute the microphone by
touching Mute again.
The microphone is unmuted automatically when the call ends.
69
70
Calls
To turn the speakerphone on or off
Touch Speaker
.
The light bar on the Speaker button illuminates blue to indicate that
will appear in the
the speakerphone is on. The Speaker icon
Status Bar and the sound from your call is played through the phone’s
speaker on the back of the device.
While viewing the in-call screen, you can turn the speakerphone off by
touching Speaker again.
The speaker is turned off automatically when the call ends.
WARNING!
To avoid damage to your hearing, do not hold the phone against your ear when the
speakerphone is turned on.
To switch between a Bluetooth device and the phone
When a Bluetooth device is paired and connected to your phone, you can
conduct calls on it for hands-free conversations. During a call, you can easily
switch between using the Bluetooth device and your phone.
When using the Bluetooth device during a call, the Ongoing Call notification
icon is blue in the Status Bar (the icon is green when using the phone).
Touch Bluetooth
phone, or vice versa.
to switch the call from the headset to the
Managing Multiple Calls
Contact your wireless service provider to learn whether they support
conference calls and how many participants you can include.
To switch between current calls
Touch Swap
.
The current call will be placed on hold and you will be connected with
the other call.
Calls
To set up a conference call
Contact your wireless service provider to learn whether they support
conference calls and how many participants you can include.
1. Place a call to the first participant.
2. When you’re connected, touch Add call
.
3. The Phone application opens. Enter a phone number, then touch the Call
Key .
Touch the keys on the dialpad to manually enter a phone number.
Touch the Contacts tab
to select a number from your Contacts list.
Touch the Call log tab
to select an entry in your Call log.
Touch the Groups tab
to select one of your Favorites.
Touch a Frequent list entry to enter it.
4. After you’re connected, touch Merge calls
to the conference call.
. The participant is added
71
72
Calls
Listening to Your Voicemail
When you have a new voicemail message, the Voicemail notification icon
appears in the Status Bar. If you have not set up your voicemail number,
or if you need to change it, you can do that in the Call settings.
To listen to your Voicemail
Open the Notifications panel and touch New voicemail.
OR
Touch the Voicemail icon
on the Home screen.
OR
in the Quick Keys bar, then touch the
Touch the Phone Key
Voicemail Key
. Typically, your carrier’s voicemail system guides
you through the process of listening to and managing your voicemail.
The first time you call your voicemail, it also guides you through the
process of recording greetings, setting a password, etc.
To set up your Voicemail
1. Touch the Phone Key
in the Quick Keys bar on the Home screen. (The
Phone application can also be accessed from the Applications screen.)
2. Touch the Voicemail Key
to dial your voice mailbox.
3. If you hear a system greeting, touch the Pound Key
applicable.
to interrupt it, if
4. Follow the setup tutorial.
5. Select a password.
6. Record a voice signature and greetings for your voice mailbox.
To access your voicemail from your wireless device
1. Touch the Phone Key
in the Quick Keys bar on the Home screen.
to dial your voice mailbox. If you hear
2. Touch the Voicemail Key
a system greeting or your own greeting, touch the Pound Key
immediately to interrupt the system greeting and follow the prompts.
3. Follow the prompts to enter your password and retrieve your messages.
Web
73
Browser
The Browser application allows you to access the internet from your
Verizon Wireless device. Access and selections within this feature are
dependent upon your service provider. For specific information on Browser
access through your phone, contact your service provider.
Browse web pages
1. From the Home Screen, touch the Apps Key
> Browser
or touch
the Browser icon
directly from Home screen. To access a specific web
page, touch the URL input field, enter the web address (URL) of the web
page, then touch the Go Icon
.
URL Input Field
Touch here to enter a web
address for the web page
you want to access.
Go Icon
Touch to go to the web page of
the URL you entered.
2. While browsing the web page, navigate using the following options:
To zoom in or out, double-tap the screen. You can also use the pinchto-zoom method. Place your two fingers on the screen and slowly
pinch or spread them apart.
. The
To reload the current web page, touch the Refresh Icon
Refresh Icon reappears after the web page finishes loading. If the
Refresh icon is not displayed, touch the Menu Key
to quickly
display it.
74
Web
To stop loading a web page, touch the Stop Icon .
The Stop Icon appears while a web page is loading. If the Stop icon is
not displayed, touch the Menu Key
to quickly display it.
next to the URL
To view the list of bookmarks, touch Bookmarks
field. You can also add, edit, or delete a bookmark from the Bookmarks
screen.
> Add .
To bookmark the current web page, touch Bookmarks
Enter an identifying name for the bookmark and touch OK.
To go to the previous page, touch the Menu Key
touch the Back Key
.
To go to a next page in history, touch the Menu Key
> Back
or
> Forward
.
>
To view the currently active windows, touch the Menu Key
Windows . Swipe left or right to easily switch back and forth
between multiple open pages.
> New window
To open a new window, touch the Menu Key
>
To
customize
the
Browser
settings,
touch
the
Menu
Key
Settings .
To mark and save web pages to read later, touch the Menu Key
More
> Read it later.
.
>
When a web page finishes loading, the RSS Indicator will appear if
> More
> Add
an RSS feed is available. Touch the Menu Key
RSS feed and select the feed you want to save.
To send the web address (URL) of the web page to others, touch the
> More
> Share page.
Menu Key
Web
To search for text on the web page, touch the Menu Key
> Find on page.
> More
> More
To select text on the web page, touch the Menu Key
> Select text. Use your finger to highlight the text you want to select.
Touching the screen displays begin and end markers. Move the
markers to highlight the text you want, then tap the highlighted text
to copy it. The highlighted text is copied to the clipboard and you can
paste it anywhere that allows text to be entered.
To add a shortcut of this web page to your Home screen, touch the
> More
> Add shortcut to home.
Menu Key
To view the web page details, touch the Menu Key
Page info.
> More
>
NOTE When you are in a secure page, touch View certificate on the Page info. screen to see
the certificate for the current page.
To view the download history, touch the Menu Key
Downloads.
> More
>
Internet
Learn to access and bookmark your favorite web pages.
NOTES s You may incur additional charges for accessing the web and downloading media. For
details, contact your service provider.
s Available icons may vary depending on your region.
Bookmark your favorite web pages
If you know the web address of the web page, you can manually add a
bookmark. To add a bookmark:
1. From the Home Screen, touch the Apps Key
2. Touch Bookmarks
> Browser
.
next to the URL field.
3. Touch Add .
4. Enter a page title and a web address (URL).
5. Touch OK.
From the bookmarks list, touch and hold a bookmark to use the following
options:
75
76
Web
To open the web page in the current window, touch Open.
To open the web page in a new window, touch Open in new window.
To edit the bookmark details, touch Edit bookmark.
To add the bookmark as a shortcut to one of the Home screen
canvases, touch Add shortcut to home.
To send the web address (URL) of the web page to others, touch
Share link.
To copy the web address (URL) of the web page, touch Copy link URL.
To delete a bookmark you have created, touch Delete bookmark. This
option is not available for pre-configured bookmarks.
To use the web page as your Browser homepage, touch Set as
homepage.
From the Bookmarks screen, touch the Menu Key
List view
and use the following options:
Shows the bookmarks in list format.
Displays bookmark thumbnails with an X button
on
Edit mode
the top right corner of each bookmark. Touch it to delete the bookmark
then touch OK to confirm.
Changing Browser settings
You can configure a number of Browser settings, including how you view
and use pages as well as allowing you to manage your privacy.
To open the Browser settings screen, touch the Menu Key
the Browser and then touch Settings .
from
Web
Page content settings
Text size Opens a dialog box where you can increase or decrease the size
of the text that the Browser uses when displaying web pages.
Default zoom Opens a dialog box where you can increase or decrease the
magnification level that the Browser uses when first opening a web page.
Open pages in overview Checkmark to open web pages zoomed out, in
an overview. Uncheckmark to open web pages at 100% size, displaying
the top-left corner of the page.
Text encoding Opens a dialog box where you can change the characterencoding standard that the Browser uses when displaying text on a web
page.
Block pop-up windows Checkmark to prevent websites from opening
windows unless you request it.
Load images Remove the checkmark to omit images when the Browser
displays a web page. This speeds the web page loading, which can be
useful if you have a slow connection.
Auto-fit pages Checkmark to have the Browser optimize the presentation
of text and other elements of web pages to fit your phone’s screen.
Checkmarking this option also causes the Browser to reflow a column of
text to fit the screen if you double-tap the screen directly after zooming
with your fingers. Remove the checkmark to view pages as designed for a
computer screen so that double-tapping simply switches between zoomedin and default view.
Landscape-only display Checkmark to display pages in landscape (horizontal)
orientation on your screen, regardless of how you are holding the phone.
Enable javascript Remove the checkmark to prevent JavaScript from
running on web pages. Many web pages function correctly only if they
can run JavaScript features on your phone.
Enable plug-ins Opens a dialog box to select when to enable plug-ins
from web pages.
Open in background Checkmark to open new windows in the background
when you touch and hold a link, then touch Open in new window. This
77
78
Web
is useful when you are working with windows that take a long time to
download and display. Touch the Menu Key
> Windows and then
select the window to view it. Remove the checkmark if you prefer new
windows that you open in this way to open in place of the current window.
Set home page Opens a dialog box where you can enter the URL of
a page that you want to access whenever you open a new Browser
window. If you prefer to open new Browser windows more quickly, by not
opening any page by default, leave the dialog box blank.
Privacy settings
Clear cache Allows you to clear locally cached content and databases.
Clear history Allows you to clear the Browser history.
Accept cookies Checkmark to allow websites to save and read cookie data.
Clear all cookie data Allows you to clear all of the Browser cookie data.
Remember form data Checkmark to allow the Browser to remember
data entered into forms for later use.
Clear form data Allows you to clear all saved form data.
Enable location Checkmark to allow sites to request access to your location.
Clear location access Allows you to clear location access for all websites.
Security settings
Remember passwords Checkmark to allow the Browser to save user
names and passwords for websites.
Clear passwords Allows you to clear all saved passwords.
Show security warnings Checkmark to show a warning if there is a
problem with a site’s security.
Advanced settings
Set search engine Allows you to set the default search engine.
Website settings Allows you to manage advanced settings for individual
websites.
Web
Download storage Opens a dialog box to select location (internal memory
or microSD card) for downloaded data.
Reset to default Allows you to restore the Browser settings to the
default.
Maps
To search for a location
NOTE
A pop-up appears upon initial use. Read the information and touch OK to continue.
1. From the Home Screen, touch the Apps Key
> Maps
.
2. Touch the search box at the top of the screen.
3. In the search box, enter the place you’re looking for. You can enter an
address, a city, or a type of business or establishment. For example,
"theater in New York".
4. Touch the Search Icon
Key on the keyboard).
to the right of the search box (or the Search
Red markers indicate search matches on the map.
You can touch a marker to open a balloon that contains a label. Touch the
balloon to open a screen with more information about the location, as
well as options for obtaining directions.
To get directions
1. From the Home Screen, touch the Apps Key
2. Touch the Menu Key
> Directions
> Maps
.
.
3. Enter a starting point in the first text box and your destination in the
second text box. You can also select an address from your Favorites,
Contacts list, or Contacts History tab.
NOTE When you search for a location in the Maps application, the Directions function
automatically enters your location as the starting point and the last red marker you
touched as the destination.
4. Touch the Car icon
for driving directions, the Transit icon
for
transit directions, or the Walking icon
for walking directions.
79
80
Web
5. Touch Get directions.
6. Your route is displayed on a map.
Touch an orange marker on the map to see direction change
indicators.
to display each direction instruction
Touch the arrow icon
sequentially in a bubble at each juncture. You can touch the arrow icon
to step backward through the direction instructions.
To view the directions in text format, tap the destination box at the top
at the bottom left
of the screen. You can also touch the List view
corner of the screen.
Touch the Layers icon
layers.
Touch the Back Key
to open a dialog box to display different map
to return to map view.
NOTE To reverse directions, touch the Menu Key
> Reverse Start & End
.
Switching between common features
The Maps application has a toolbar at the top of the screen for easy access
to many common features used when searching for the places you want to
go.
in the top left corner of the screen to
Touch the Maps menu icon
access Map, Places, Navigation, Latitude, Location history and My
Places.
near the top right of the screen to access
Touch the Layers icon
Traffic, Satellite, Terrain, Transit Lines, Latitude, My Maps, Bicycling,
Wikipedia, Search, and your search history.
in the top right corner of the screen to
Touch the My Location icon
display your current location on the map.
Web
Checking the Weather
The Weather application provides weather forecasts. You can place a
Weather widget on your Home screen for a summary of your local weather.
Access the Weather application for more detailed weather information.
To get details about the weather
Touch the Weather widget on the Home screen to open the Weather
application to view summarized and detailed weather information.
Weather Widget
Weather
Application
Swipe right or left to scroll through the weather information for each
of the cities in your list.
in the lower left corner of the Weather
Touch the Refresh Icon
application screen to update the current weather of the city displayed
on the weather application screen.
in the lower right corner of the Weather
Touch the Yahoo! Icon
application screen to view current local information for the city
displayed on the weather screen.
To update or add city
The City list screen allows you to manage a list of cities that you want to
monitor. Touch the City list icon
in the lower left-hand corner of the
Weather application screen.
Touch Current at the top of the screen to update your current location.
at the bottom of the screen to add a city, then enter the
Touch
name of the city.
81
82
Web
at the bottom of the screen to remove a city from your
Touch
list of cities, touch the checkbox(es) for the city (or cities) to remove,
then touch Remove to confirm.
Touch a city in the list to display the weather information for that city.
Changing Weather Settings
You can configure a number of settings for the Weather application.
The location and related settings also affect the display of the Weather
widget application.
To open the Weather settings screen, touch the Menu Key
.
> Settings
List Settings
City list Manages the list of cities you monitor. Touch Add at the bottom of
the screen to add a new city to your list. To remove a city, touch Remove at
the bottom of the screen. To rearrange the order of the cities viewed when
you swipe across the Weather application screen, touch
on the right
side of the screen and drag it to where you want it in the list.
General settings
These settings control how frequently the information on the Weather
widget is updated and the temperature unit to use.
Refresh interval Allows you to set how often to update (Manual, Every 1
hour, Every 3 hours, Every 6 hours, Every 12 hours, Daily) the weather.
Web
More frequent updates trade the convenience of current information for
increased data use and decreased battery life between charges.
Temperature unit Allows you to set it to display degrees in Fahrenheit or
Celsius.
NOTE
Google Location Services must be checkmarked to update the current weather. From the
> Settings
> Location > Google location
Home Screen, touch the Apps Key
services.
Backup Assistant Plus
How to Access and Register Contacts backup settings from
Backup Assistant Plus
If you didn’t set up Backup Assistant Plus when you turned on your phone
for the first time, you can enable it in the Settings application.
1. Touch Backup Assistant Plus
directly from the Applications screen.
2. Read the information provided on the screen and touch Start.
3. Enter your PIN code and confirm it, then touch Submit .
4. The Registration complete screen appears and your first back-up process
begins. Touch Next > Done .
Backup Assistant Plus can be accessed directly from the Contacts
application
1. Open the Contacts application.
2. Touch the Menu Key
> Backup now.
If you’ve already registered your Backup Assistant Plus account, a
background backup will be performed. If not, the Backup Assistant Plus
registration screen will be displayed for you to complete registration then
back up your files.
83
84
Web
How to Access and Register Media backup settings from Backup
Assistant Plus
1. Open the Backup Assistant Plus application.
2. Touch Media backup settings.
3. Select the storage amount and touch Subscribe.
4. Touch OK when the pop-up appears.
5. You can insert your email account by touching Email account.
TIP.
Touch Video tutorial if you need instructions.
Backup Assistant Plus can be accessed directly from the various
multimedia applications
From Music , use the Backup Assistant Plus to upload the files
from your device, to download the file from the server and for the file
streaming from the server.
From the Gallery , use Backup Assistant Plus to upload the files
from your device, to download the file from the server and to open the
file from the server.
From the Camera
Assistant Plus.
, you can upload the captured image to Backup
From the Video Player
Assistant Plus.
, touch Menu > Storage > Backup
Using Backup Assistant Plus
On the schedule you selected, the Backup Assistant Plus application
checks the phone’s address book to see if any changes have occurred since
the last Backup. If changes are detected, the application will launch and the
Backup process will start. If no changes are detected, Backup Assistant
Plus sleeps until the next daily automatic backup is triggered.
Web
Manually backing up your contacts
1. From the Home Screen, touch the Apps Key
2. Touch Backup Assistant Plus
.
.
3. Touch Contacts backup settings for Contacts backup settings.
4. Touch Media backup settings to set the backup settings for media.
Changing the backup schedule
1. From the Home Screen, touch the Apps Key
2. Touch Backup Assistant Plus
.
.
3. Touch Contacts backup settings and edit the contact backup time. Then
touch Media backup settings to edit media backup time.
4. Touch Backup time, then touch the timeframe you want. For example,
Every late night (12am-6am).
Change your PIN code
1. From the Home Screen, touch the Apps Key
2. Touch Backup Assistant Plus
.
.
3. Touch Contacts backup settings.
4. Touch Change PIN code on the Backup Assistant Plus settings screen.
5. Enter your current PIN and touch Next.
6. Enter your new PIN. Then reenter it for confirmation and touch Next.
85
86
Web
Media Backup Settings
The Media Backup Settings allows you to subscribe to a service for media
file management. With this service, you can manage, store, protect, share,
and play your media from virtually anywhere. The fee is based on your
storage level requirements.
1. From the Home Screen, touch the Apps Key
2. Touch Backup Assistant Plus
.
.
3. Touch Media backup settings.
4. Read the service agreement, then touch Subscribe.
Email account
Displays the email address that was used to register Backup Assistant Plus.
Video tutorial
The video tutorial teaches you how to use Backup Assistant Plus. To view a
video about Backup Assistant Plus media, follow the instructions below:
1. Access Backup Assistant Plus.
2. Touch Video tutorial. You will be directed to the Watch and learn video
tutorials screen.
3. Touch Backup Assistant Plus.
Communication
87
Contacts
The Contacts application allows you to store names, phone numbers and
other information in your phone’s memory.
Using Your Contacts
Use the Contacts application to add, view, and communicate with your
friends and acquaintances.
To open your Contacts application
From the Home Screen, touch the Apps Key
> Contacts
.
OR
Touch the Contacts Key
in the Quick Keys bar.
All of your contacts are displayed alphabetically in a list. If you have a
new phone and haven’t added any contacts yet, the Contacts application
will display hints on how to start adding contacts to your phone.
To open a list of your favorite contacts
Open your Contacts application and touch the Groups tab
top of the screen, then touch Favorites.
at the
Favorites lists the contacts you’ve added to the list, followed by a list
of your most frequently called contacts.
88
Communication
To view details about a contact
1. Open your Contacts application.
2. Touch the contact whose details you want to view.
Contacts synced from a social
networking application will
display their photo albums in the
Photo tab.
3. The Contact Info tab displays by default. Touch an icon to call, message,
or open other applications.
places a call to the number.
The Dial icon
starts a message.
The
Message
icon
The Mail icon
The Chat icon
starts an email.
starts a chat.
Touch the Menu Key
for the following menu options: Edit contact,
Share, Delete contact, Add to homescreen, Options (Ringtone and
Incoming calls), and More (Export and Set speed dial).
Contact History Tab
By default when you open a Contacts entry, the Contact Info tab is
displayed so you can see all of the details you stored. You can also view
your history of communication with the contact, including calls, messages,
email, etc. Simply touch the Contact History tab at the top of the Contact
entry screen.
Photo Tab
The Photo tab displays your Contact’s photo albums if their contact
information is synced with their profile from a social networking application.
Communication
Adding Contacts
You can add contacts on your phone and synchronize them with the
contacts in your GoogleTM Account, Microsoft Exchange account, or other
accounts that support syncing contacts.
Since your contacts can come from a variety of sources, the Contacts
application attempts to join new information with existing similar contact
entries, to create a single entry. You can also manage that process manually
by joining or splitting entries.
To add a new contact
1. Open the Contacts application.
2. Touch the Menu Key
NOTE
> New contact
You can also touch the New contact icon
contact entry.
.
to the left of the Search box to start a new
3. If you have more than one account with contacts, touch Contact type at
the top of the screen and choose the account to which you want to add
the contact.
4. Enter the contact’s name.
5. Touch a category of contact information, such as phone number or email
address, to enter that kind of information about your contact.
to add more than one entry for that
6. Touch a category’s plus icon
category. For example, in the phone number category, enter a work
number and add a home number. Touch the label button to the left of the
entered information to open a dialog box of preset labels. For example,
Work or Home for a phone number.
to select a picture to display next to the
7. Touch the Picture frame icon
name in your list of contacts and in other applications.
8. When you’re finished, touch Save.
Importing, Exporting, and Sharing Contacts
If you have contacts stored in vCard format on a microSD card you can
import them into your Contacts application on your phone. You can also
export contacts in vCard format onto a microSD card. Exporting your
contacts to a microSD card allows you to back them up to a computer or
other device. It also allows you to send the contact via email.
89
90
Communication
To import contacts from your microSD card
You can copy contacts, in vCard format, onto your microSD card then
import them into your phone.
1. Insert the microSD card (that contains the vCard files) into your phone.
2. Open the Contacts application.
3. Touch the Menu Key
> More
> Import/Export.
4. Touch Import from SD card.
5. When the dialog box appears, select the storage type.
6. If you have more than one account on your phone, touch the account
into which you want to import the contacts.
7. Touch the contacts you want to import from the microSD card. Then
touch Import and OK to confirm.
To export contacts to your microSD card
You can export all of the contacts on your phone to your microSD card, as
vCard files. You can then copy this file to a computer or another device that
is compatible with this format, such as an address book application.
1. Open the Contacts application.
2. Touch the Menu Key
> More
> Import/Export.
3. Touch Export to SD card.
4. When the dialog box appears, select the storage type.
5. Touch the contacts you want to export to the microSD card. To export all
of the contacts, touch the Select all checkbox in the top left corner of
the screen.
6. Then touch Export and OK.
To share a contact
You can share a contact with someone by sending it to them as a vCard file.
1. Open the Contacts application.
2. Touch the contact you want to share to view its details.
3. Touch the Menu Key
> Share
.
Communication
4. Choose the method for sending.
5. Enter the necessary information and share it.
Adding a Contact to Your Favorites
The Groups tab
contains a short list of the contacts you communicate
with most often, including your list of Favorites.
To add a contact to your Favorites list
1. Open the Contacts application.
2. Touch a contact to view its details.
3. Touch the star to the right of the contact’s name.
When the contact is added to your Favorites list, the star will be bluecolored.
To remove a contact from your Favorites list
1. Open the Contacts application.
2. Touch the contact to view its details.
TIP
If you have a long list of contacts, it may be faster to touch the Groups tab
Favorites, then touch the contact entry to view its details.
>
3. Touch the blue star to the right of the contact’s name.
The grey-colored star indicates that the contact was removed from your
Favorites list.
Searching for a Contact
It’s easy to search for a contact by name.
To search for a contact
1. Open the Contacts application.
2. Touch the search box or touch the Search Key
.
3. Start entering the name of the contact you’re searching for. As you type,
contacts with matching names will appear below the search box.
4. Touch a matching contact in the list to view its details.
91
92
Communication
You can also search by nickname, email, organization and number.
NOTE
The pinch-to-zoom gesture can be used in your Contacts list. Pinch in to compress the
entries into horizontal alphabetical bars, then simply touch the bar with the desired letter
to open the entries that begin with that letter.
Editing Contact Details
You can change or add details saved in your contact entries. You can also
set specific ringtones to specific contacts or determine whether calls from
specific contacts are diverted to your voicemail.
Some contact entries contain information from multiple sources:
information that you added manually, information that Contacts joined from
multiple accounts to consolidate duplicates, etc.
If you find duplicate entries in Contacts, you can join them into a single entry.
Changes made to information from one source do not automatically change
the information on the other sources. For example, if you have information
about a contact from a Google Account and an Exchange account and both
are configured to sync contacts, changes to the contact from the Google
Account are synced to that account on the web, but the information from
the Exchange account will remain unchanged.
To edit contact details
1. Open the Contacts application.
2. Touch and hold the contact whose details you want to edit. In the
Context menu that opens, touch Edit contact.
3. Edit the contact information.
4. Touch Save to save the changes.
To change a contact’s default phone number
The default phone number is used when you initiate a call or send a text
message using the Context menu that opens when you touch and hold the
contact’s entry.
1. Open the Contacts application.
2. Touch the name of a contact in the list to view its details.
Communication
3. Touch and hold the phone number to use as the contact’s default phone
number.
4. Touch Make default number in the dialog box that opens.
The default phone number is indicated by a checkmark.
To divert calls from a contact to your voicemail
1. Open the Contacts application.
2. Touch the name of a contact in the list to view its details.
3. Touch the Menu Key
> Options
.
4. Touch Incoming calls to checkmark the option and enable it.
5. Touch the Back Key
.
When this contact calls you, your phone will not ring and the caller will
be forwarded directly to your voicemail.
To set a ringtone for a contact
1. Open the Contacts application.
2. Touch the name of a contact in the list to view its details.
3. Touch the Menu Key
> Options
.
4. Touch Ringtone then touch a ringtone from the dialog box to preview
and select it.
5. Touch OK to save the ringtone for the contact.
To delete a contact
1. Open your Contacts list or Favorites list.
2. Touch the name of a contact in the list to view its details.
3. Touch the Menu Key
> Delete contact
.
If you delete a contact from Google Contacts (or another account with
editable contacts), the contact is also deleted from Contacts on the
web the next time you sync your phone.
93
94
Communication
If the contact contains information from both editable accounts (such
as Contacts) and from a read-only account, a dialog box informs you
that the information from the read-only account will be hidden, not
deleted.
4. Touch OK to confirm that you want to delete the contact.
Communicating with Your Contacts
From the Contacts or Groups tab, you can quickly call or send a text (SMS)
or multimedia (MMS) message to a contact’s default phone number. You can
also open a list of all of the ways you can communicate with that contact.
This section describes ways to initiate communication when viewing your
list of contacts. The Contacts application shares your contacts with many
other applications, such as GmailTM and Messaging.
To connect using Quick Contact for AndroidTM
1. Touch a contact’s picture to open Quick Contact for Android.
Quick Contact
Touch a contact's picture.
2. Touch the icon corresponding to the type of communication you want to
start.
The communication icons displayed in Quick Contact depend on the
types of information you saved in the contact information.
To communicate with a contact
1. Open the Contacts application.
2. Touch the contact with whom you want to communicate.
Communication
3. In the contact’s details screen, touch the way to start communicating
with the contact.
The Dial icon
places a call to the number.
The Message icon
starts a message.
The Mail icon
starts an email.
The Chat icon
starts a chat.
NOTE Anytime you see the Dial icon
next to a number, such as in your Favorites or Call log,
just touch it to call that number.
To call a contact’s default number
1. Open the Contacts application.
2. Touch and hold the contact you want to call.
3. Touch Call contact in the Context menu that opens.
To send a text or multimedia message to a contact’s default number
1. Open the Contacts application.
2. Touch and hold the contact you want to message.
3. Touch Text contact in the Context menu that opens.
Selecting Which Contacts are Displayed
You can hide contacts that don’t have phone numbers. You can also
configure which groups of contacts you want to display in the Contacts list.
To set whether contacts without phone numbers are displayed
If you use your list of contacts only to call people, you can hide any contacts
that don’t have phone numbers.
1. Open the Contacts application.
2. Touch the Menu Key
> More
> Display options.
3. Touch Only contacts with phones to select or deselect this option.
When selected, a checkmark will appear.
4. Touch Apply to save your settings.
95
96
Communication
NOTES s You can sort the Contact list by First name or Last name.
s You can also view contact names with the first name first or the last name first.
To change which groups are displayed
1. Open the Contacts application.
2. Touch the Menu Key
> More
> Display options.
3. Touch an account to display its list of available groups.
4. Touch each group whose contacts you want to view in your Contacts
application. Contact types with a checkmark will appear in your Contacts
list. This action affects only which contacts are displayed. Your sync
settings will not be affected.
5. Touch Apply to save your settings.
Joining Contacts
When you add an account or add contacts in other ways, such as by
exchanging emails, the Contacts application attempts to avoid duplication by
joining contact information automatically. You can also join contacts manually.
To join contacts
1. Open the Contacts application.
2. Touch the contact entry to which you want to add information. The
contact name for this entry will remain unchanged after you join it with
another contact.
Communication
3. Touch the Menu Key
> Edit contact
4. Touch the Menu Key
> Join
.
.
5. Touch the contact whose information you want to join with the first
contact. The information from the two contacts will be merged and
displayed under the name from the first contact.
6. Touch Save to confirm you want to join the entries. The contact
information will be displayed in one contact entry.
Separating Contact Information
Each contact entry on your phone may contain ‘joined’ information from a
variety of sources.
If contact information from different sources was joined in error, you can
separate the information back into individual contact entries on your phone.
To separate contact information
1. Open the Contacts application.
2. Touch the contact entry whose information you want to separate.
3. Touch the Menu Key
> Edit contact
4. Touch the Menu Key
> Separate
.
.
5. Touch OK to confirm you want to separate the entries. The contact
information will separated into individual contact entries in the Contacts
list.
Email
NOTE
AOL, Yahoo and Hotmail icons only appear when the SIM card is inserted.
Email icons
New Exchange mail
message received or sending
succeeded
Exchange mail message
sending or receiving failed
AOL mail message received
or sending succeeded
AOL mail message sending or
receiving failed
97
98
Communication
Yahoo mail message received
or sending succeeded
Yahoo mail message sending
or receiving failed
Gmail message received or
sending succeeded
Gmail message sending or
receiving failed
Hot mail received or sending
succeeded
Hot mail message sending or
receiving failed
Verizon.net mail received or
sending succeeded
Verizon.net mail message
sending or receiving failed
Other mail received or sending
succeeded
Other mail message sending
or receiving failed
Opening Email and the Accounts Screen
You can use the Email application to read email from services other than
GmailTM. The Email application supports the following account types:
Microsoft Exchange, Windows Live Hotmail, Yahoo! Mail, Gmail, AOL Mail,
Verizon and other accounts.
To open the Email application
From the Home Screen, touch the Apps Key
the Email icon
directly from Home screen.
> Email
or touch
The first time you open the Email application, a setup wizard opens to
help you add an email account. After the initial setup, the Email application
displays the contents of your Inbox.
The Accounts screen
The Accounts screen lists all of your accounts.
Open the Email application. If you’re not on the Accounts screen,
> More
> Accounts.
touch the Menu Key
Each account on the Accounts screen displays the number of unread
mail.
You can touch an account to view its Inbox.
The account from which you send email by default is indicated with a
checkmark.
Communication
Reading Your mail
You can read mail from the Inbox, or from other folders within each
individual account.
To read a mail
From the Accounts screen, simply touch any account to display that
account’s folders and contents.
You can also go to the folder list of the account by touching the Menu Key
> Folders
from the Inbox.
NOTE
When new email arrives, a notification appears in the Status Bar. Drag the Notifications
panel downward and touch the email notification.
Email settings
To access the Email account settings, touch the Menu Key
Settings from the Inbox.
> More >
Accounts
Touch an account to access settings specific to that email account.
General settings
Touch Set default account to open a dialog box to select which email
account to designate as your default account.
Touch Roaming to checkmark this setting to automatically retrieve
email while roaming outside your home network. Data fee will be
charged.
Notification
Touch New email notification to set whether you want to be notified
of new email notifications.
Touch Notification sound to open a dialog box to set the sound when
you receive a new email notification.
Touch Vibration to open a dialog box to set a vibration when you
receive a new email notification.
99
100
Communication
Misc.
Touch Ask before deleting to checkmark this setting if you want to
be asked before deleting mail.
Touch Show image to open a dialog box to set when to show images.
Touch Conversational view to checkmark this setting if you want
your email Inbox to display your email messages by conversation
threads.
Touch Mail preview to open a dialog box to set how many lines of
email text to download for previewing on your device.
Touch Exchange server policy to view this information if you use an
exchange server email account.
Touch Save attachment to to open a dialog box to select where
attachments are saved.
Voicemail
The Voicemail application allows the management of voicemail directly from
the device rather than accessing voicemail via traditional methods.
Voicemail displays a list of your messages and allows you to choose which
message(s) to listen to or delete, without having to dial into your mailbox
and listen to voice instructions or prior messages.
To be able to use Voicemail
1. From the Home Screen, touch the Apps Key
> Voicemail
.
NOTE Listening to voicemail and setting up the voicemail service depends if you are subscribed
to the visual mail service.
If the you are not subscribed to the visual mail service and you press the Voicemail Key,
then you will be dialed into your traditional voicemail box. But if you are subscribed to
Visual voicemail, then on touching the Voicemail Key, visual voicemail application will be
launched.
2. The first time you access it, you will have to subscribe to Voicemail to
use it.
3. After subscription, you are required to enter the password. You are only
allowed to change the password by calling voicemail (dial *86).
Communication
4. After entering the password, you are allowed to see voicemail entries in
your Inbox.
While viewing the voicemail list, you can select an entry (see step 5). For
additional options, touch the Menu Key
> New, Delete, Save as, Set
as Heard, Sort by, or More (Saved messages, Refresh, Settings, Search,
Logout).
5. Touch a voicemail entry to listen to it. Then you can touch Call back,
Save, or Delete. To forward or reply to a message, touch the Menu Key
> Forward
or Reply
.
6. If you decide to reply with a voicemail or forward it, record a message.
The keys at the bottom of the screen allow you to record, stop,
re-record, or cancel the message.
NOTE To send a voice message to a number in your Contacts list, use the To: field to search for it.
Gmail
Opening Gmail and Your Inbox
When you open the Gmail application, the most recent conversations are
displayed in your Inbox.
To open the Gmail application
From the Home Screen, touch the Apps Key
> Gmail
.
All of your conversations are displayed in your Inbox unless you delete,
archive, or filter them.
The current Google Account is displayed at the top right of the Inbox. If
you have more than one account, you can switch accounts to view the
messages in each Inbox.
Conversations with new messages are displayed with bold subject lines.
To read a message in a conversation, touch its subject line text.
indicates that this message was sent directly to you.
indicates that you were CC’d on this message.
No indicator indicates that this message was sent to a group that
includes you.
101
102
Communication
To open your Inbox when Gmail is running
If you are viewing a message or another label, touch the Back Key
you return to your Inbox.
until
OR
While reading a message, touch the Menu Key
OR
> Go to inbox
While viewing a list of labeled conversations, touch the Menu Key
> More
> Go to inbox .
To switch accounts
Gmail displays conversations and messages from one Google Account at
a time. If you have more than one account, you can open the Accounts
screen to view how many unread messages you have in each account and
to switch accounts.
1. From your Gmail Inbox, touch the Menu Key
> Accounts
.
2. Touch the account that contains the email you want to read.
Reading Your Messages
While viewing a list of conversations in your Inbox or in any list of labeled
conversations, you can open a conversation to read its messages.
.
Communication
To read a message
Touch a conversation that contains the message you want to read.
The conversation opens to the first new (unread) message, or to the
first starred message, if you’ve previously starred a message in the
conversation.
The Google Talk online status will appear next to the name of the
sender of each message if the sender has a Google Account. Touch
the contact’s picture to open Quick Contact.
While reading messages in a conversation, you can use the keys at
the bottom of the screen to archive the entire conversation or delete
it. After you delete a conversation, you can touch Undo in the green
bar that appears at the top of the screen to undo the last action and
restore the message to its previous location.
You can also touch the arrow keys /
at the bottom of the screen
to read the next, oldest, unread message in a conversation in your
Inbox (or the conversation list you’re working in).
Touch the message actions icon
on the message header to access
message actions options which include
to mark it as important,
to reply to the sender,
to reply to all addressees, and
to forward
the message to someone else.
To reread a message
When you open a conversation, messages that you’ve already read are
minimized into a tab that indicates the number of hidden messages.
103
104
Communication
1. From the Home Screen, touch the Apps Key
touch the conversation you want to view.
> Gmail
. Then
2. Touch the contact name to open that message.
> Mark
While reading a message you can touch the Menu Key
unread
to return a read message to the unread state. For example, to
remind yourself to read it again later.
Composing and Sending a Message
You can compose and send a message to people or groups with Gmail
addresses or other email addresses.
To compose and send a message
1. From the Home Screen, touch the Apps Key
Key
> Compose
.
2. Enter a recipient’s address.
> Gmail
> Menu
Communication
As you enter text, matching addresses are offered from your Contacts
list. You can touch a suggested address or continue entering text to enter
a new one.
> Add Cc/Bcc
3. Touch the Menu Key
status) recipients, if necessary.
to copy (normal or blind
4. Enter a subject for the message in the Subject field.
5. Continue into the next field to enter your email message.
6. Touch the Menu Key
7. Touch Send
> Attach to add an attachment to the email.
at the top of the screen to send your message.
at the top of
If you’re not ready to send the message, touch Drafts
the screen to save the message as a Draft. You can read your drafts by
opening messages with the Draft label.
> Discard
To erase the message, touch the Menu Key
any saved drafts).
(including
If you aren’t connected to a network, for example, if you’re working in
Airplane mode, the messages that you send are stored on your phone
with the Outbox label until you connect to a network again.
Replying to or Forwarding a Message
You can continue an email conversation by replying to a message or by
forwarding it.
To reply to or forward a message
1. Touch the message actions icon
action options for the message.
2. Touch Reply
, Reply all
on the message header to access
, or Forward
.
Replying to or forwarding messages without changing the subject adds
your reply to the current conversation.
Changing the subject starts a new conversation.
The message will open in a new screen where you can add or remove
addresses, edit the subject, and add or remove text or attachments.
You can add one or more people to an ongoing conversation by replying
105
106
Communication
to all and then adding the new person’s address(es) to the reply.
Note that the conversation text and previous messages are also included
in your reply (or forward).
3. Touch Send
at the top of the screen to send your message.
Messaging
To open Messaging
Touch the Home Key
Quick Keys bar.
, then touch the Messaging Key
in the
The Messaging screen will open, where you can create a new
message or open an ongoing message thread.
Touch New message to start a new text or multimedia message.
Touch an existing message thread to open it.
TIP
QUICK REPLY
When a New Message notification pops up, choose to reply quickly without accessing
the Messaging application by touching the Text field in the notification to respond with a
text message, or touch Call to dial the contact or Delete to delete the message.
To delete a message thread from the Messaging window
1. Touch and hold the message thread.
2. Touch Delete thread in the Context menu that opens.
3. Touch OK to confirm you want to delete the message thread.
Communication
Exchanging Messages
You can send text messages (SMS) of up to 160 characters to another
mobile phone. If you type more than the allotted text amount (up to 7 pages
of 153 characters), the message is delivered as a series of messages (EMS).
If you keep typing after the limit, your message is delivered as Multimedia
messages (MMS).
Multimedia messages (MMS) can contain text and a picture, location, a
recorded voice, an audio file, a video, or a picture slideshow.
The Messaging application automatically converts a message into a
multimedia message if you add a subject or attach a media file.
To send a text message
1. On the Messaging screen, touch New message.
2. Enter a mobile phone number in the To field.
As you enter the mobile phone number, matching contacts appear. You
can touch a suggested recipient or continue entering the phone number.
3. Touch the text field to start entering your message.
Character counter
Displays number of characters
entered and amount remaining.
107
108
Communication
A counter is displayed in the top right corner of the text field to tell you
how many characters are left and the number of pages.
If you touch the Back Key
while composing a message, it’s saved
as a draft in your Messaging application. Touch the message to resume
composing it.
4. Touch Send to send the message.
Your message is displayed and responses appear in the same window,
creating a message thread with that contact.
To create and send a multimedia message
1. On the Messaging screen, touch New message.
2. Enter a mobile phone number or email address in the To field. As you
type, matching contacts appear. You can touch a suggested contact or
continue typing.
3. Touch the text field to start entering your message.
4. Touch the Menu Key
> Add subject
to add a message subject.
to open a dialog box where you can
5. Touch the Attachment icon
choose the type of media file to attach to the message.
If you touch Pictures, you’re prompted to select a picture from your
Gallery.
If you touch Capture picture, the Camera application opens so you
can take a picture and attach it.
If you touch Videos, you’re prompted to select a video from your Gallery.
Communication
If you touch Capture video, the Camcorder application opens so you
can record a video and attach it.
If you touch Audio, you’re prompted to select an audio file from your
microSD card.
If you touch Record audio, the voice recording function opens and
allows you to record an audio message and attach it.
If you touch Location, you can attach My current location, Places of
Interests, Enter Address, Contacts and From geotagged media.
If you touch Slideshow, a dialog box opens and allows you to
assemble photos, audios, videos, texts into a slideshow (up to 10
slides) to attach to the message. Use the buttons in the slideshow
screen to preview the message, replace or add a picture, or remove a
slide. Touch Done when you finish editing the slideshow.
If you touch Contact (vCard), you’re prompted to select the contact(s)
you want to send as vCard file(s).
If you select a particular address or location from the Maps application
and touch Attach, you can send the location by MMS.
6. Touch Send MMS to send the message.
To attach a location in a message
1. Create a new message and add a recipient.
2. Touch the Attachment icon
and touch Location.
3. Select a location and touch Attach.
4. Type in the message and touch Send.
To send a group message.
1. On the Messaging screen, touch New message.
2. Add the recipient(s).
3. If more than one recipient is entered, you will be asked to choose
between a group conversation and an individual message.
109
110
Communication
Touch Group Conversation to allow all of the recipients to be
viewed by each other so they can respond to you and the group. The
message is sent as as a multimedia message (MMS).
Touch Individual Message, so that none of the recipients can see the
other recipients (similiar to BCC). Each individual can only respond to you.
To respond to messages you receive
If you receive a new message while you’re working in a message window,
the new message is displayed. If not, you’ll receive a new message
notification and the new message icon
appears in the Status Bar. When
you touch the new message notification, the Message screen opens where
you can reply to the message. The new message notification also appears
on the screen, where you can quickly reply to the message, call the person,
or delete the message.
If Auto-retrieve is uncheckmarked, you must touch Download to view the
message.
If the message contains a media file, touch Play
to view, watch, or listen
to it. Touch and hold the media file to open a Context menu with additional
options.
To view details about a message
1. Touch and hold a message in the message window.
2. Touch View message details in the Context menu that opens.
Changing Messaging Settings
You can change a number of Messaging settings.
To change your Messaging settings, open the Messaging application,
> Settings
.
touch the Menu Key
Storage settings
Delete old messages Checkmark this setting to allow the phone to delete
older messages in a thread when the Text message limit or Multimedia.
Communication
message limit is reached. Remove the checkmark to keep all of your
messages.
Text message limit Touch to set the number of text messages to save per
thread.
Multimedia message limit Touch to set the number of multimedia
messages to save per thread.
Signature Opens a dialog box to enter a signature to automatically send
with your messages. Checkmark appears after a signature is entered.
Callback number Opens a dialog box to view or edit the callback number
sent with your messages. Checkmark appears after the dialog box is closed.
Text message (SMS) settings
Delivery reports Checkmark this setting to allow your phone to receive
delivery reports for the text messages you send.
Set priority Opens a dialog box that allows you to set the default priority
for your text messages.
Multimedia message (MMS) settings
Delivery reports Checkmark this setting to allow your phone to receive
delivery reports for the multimedia messages you send.
Auto-retrieve Remove the checkmark to download only the heading
of multimedia messages, allowing you to manually download the whole
message when you’re ready. This is useful for controlling how much data
you download.
Roaming auto-retreive Checkmark this setting to allow messages to be
received even if you are roaming outside of the network.
Set priority Opens a dialog box that allows you to set the default priority
for your multimedia messages.
Group conversation settings
Group conversation Checkmark this setting so that message recipients
can see who received the message and reply to them.
111
112
Communication
Help Displays a pop-up with information describing the Group Messaging
feature.
Notification settings
Notifications Checkmark this setting to allow your phone to receive a
notification in the Status Bar whenever you receive a new message.
Notification sound Opens a dialog box where you can select the sound
when you receive new message notifications.
Vibrate Opens a dialog box to set the phone vibration setting when you
receive a new message notification.
New message popup Checkmark this setting to enable a dialog box to
alert you to new message arrival(s).
Receive emergency alerts
Presidential alert Checkmark this setting to allow presidential alerts to be
always presented.
Extreme threat alert Checkmark this setting to allow Extreme alerts to be
always presented.
Severe threat alert Checkmark this setting to allow Severe alerts to be
always presented.
AMBER alert Checkmark this setting to allow AMBER alerts to be always
presented.
Alert reminder Opens a dialog box to set how often to be reminded.
Communication
How to select the type of keyboard to use for messaging
1. Touch and hold a text field.
2. Touch Input method in the Context menu that appears.
3. Choose between LG Keyboard and Swype.
You will now be able to enter text using the new keyboard.
LG Keyboard
Touch and hold the
composing area.
Swype Keyboard
Touch Input method.
Choose the type of
keyboard you want.
113
114
Communication
To change the LG keyboard layout
1. Touch and hold the Numbers/Symbols Key
.
2. Touch Keyboard layout.
3. Touch QWERTY or 3x4 keypad.
Touch and hold the
Numbers/Symbols
Key
Touch Keyboard
layout.
Choose the type of
keyboard you want.
.
Using the Swype Keyboard
The Swype™ keyboard uses error correcting algorithms and also includes a
predictive text system.
Swype Text Entry Tips
You can access Swype tips and watch a tutorial on using Swype. You can
also use the following Swype text entry tips.
Communication
Put your finger on the first letter of the word and draw a path from
letter to letter, lifting your finger up after the final letter.
Create a squiggle (like an S shape) to create a double letter (such as
pp in apple).
Touch and hold a key to enter the alternate letter or symbol located at
the top right corner of the key.
Move your finger over the apostrophe to enter contractions.
Double-tap the word you want to change or correct a misspelled word.
to erase one character. Touch and hold the
Touch the Delete Key
Delete Key
to erase an entire word.
Talk
To open Google Talk and sign in
From the Home Screen, touch the Apps Key
> Talk
.
When you first open Google Talk, your Friends list will be displayed.
This list includes all of the friends you’ve added by using Google Talk
on the web or on the phone.
115
116
Communication
To return to your Friends list
You can return to your Friends list while chatting with a friend so that you
can invite another friend to chat, add a friend, etc.
Touch the Menu Key
> Friends list
.
To sign out of Google Talk
You can sign out of Google Talk. For example, if you want to limit Google
Talk conversations to your computer. Also, signing out can extend your
battery life.
From your Friends list, touch the Menu Key
> Sign out
.
You will no longer receive chat notifications or see others’ Google Talk
status in other applications, such as GmailTM.
Chatting with Friends
To chat with a friend
1. From the Home Screen, touch the Apps Key
> Talk .
If you’re already chatting with someone, you can touch the Menu Key
> Friends list to return to the Friends list.
2. Touch the friend you want to chat with.
3. Enter your message then touch Send.
The messages that you exchange are displayed on the screen and include
information about the chat, such as whether it’s on-the-record, the time a
message was sent (if there’s no response after a short while), etc.
Communication
To enter an emoticon (smiley), just touch the Menu Key
> Insert smiley to open a list of emoticons.
> More
Your chat session will remain open until you end it.
Friends you’re chatting with are displayed at the top of your Friends list,
with the most recent message displayed in a black-on-white balloon.
To accept an invitation to chat
When a friend sends you a Google Talk message, you will receive a notification.
The friend’s name in the Friends list turns white and displays the message.
Touch the name of the person in your Friends list.
OR
Open the Notifications panel then touch the chat notification.
A chat window will open where you can exchange messages with
your friend.
To switch between active chats
If you have more than one chat going, you can switch between chats.
From the Friends list, touch the name of the person you want to chat
with.
OR
> Switch chats
and
From a chat screen, touch the Menu Key
then the friend you want to chat with.
OR
While chatting with a friend, swipe left or right across the screen.
To invite a friend to join a group chat
While you’re chatting, you can invite additional friends to join a group chat.
1. On a chat screen, touch the Menu Key
> Add to chat
.
2. Touch the name of the friend to invite.
The friend you invited and the current participants will receive an invitation
to a group chat. Each one who accepts the invitation will join the group
chat. In a group chat, everyone can see everyone else’s messages. Group
chats appear at the top of your Friends list, with a group chat icon.
117
118
Communication
To chat on or off-the-record
Your Google Talk messages are stored, so you can review them later and
even search for them, in the Chats folder in Gmail. If you’d rather not store
the messages in a chat, you can chat off-the-record.
While chatting, touch the Menu Key
> Chat off record
To return to on-the-record chatting, touch the Menu Key
on record
.
.
> Chat
To end a chat
When you’ve finished your conversation, it’s easy to end a chat session.
From your Friends list, touch and hold the friend you want to stop
chatting with. In the Context menu that opens, touch End chat .
OR
From a chat screen, touch the Menu Key
> End chat
.
Changing and Monitoring Online Status
Google Talk allows you to change how you appear to others; you can
change your online status and status messages, as well as the picture that
appears next to your name on your friends’ list.
To change your online status
1. From the Home Screen, touch the Apps Key
> Talk
.
2. Touch your email address at the top of your Friends list.
3. In the Set status screen that opens, touch your current status, then touch
the new status you want to set.
NOTE Touch the checkbox to indicate whether you are available for video/voice chat.
4. Touch Done.
Your status and any message you’ve entered appear in your Friends' lists
and in other locations where your status or status message are displayed.
Communication
Status Icons
Icons in Google Talk, Gmail, and other applications indicate the Google Talk
status for you and your friends.
Available: Signed into Google Talk and available to chat
Away: Signed into Google Talk but not active
Busy: Signed into Google Talk but too busy to chat
Signed out of Google Talk
Invisible: Signed into Google Talk but appear signed out to others
Video Chat: Video chat is available
Voice Chat: Voice chat is available
To change your status message
In addition to the standard status icons described in the table above, you
can also enter a status description to go with your status.
1. From the Home Screen, touch the Apps Key
> Talk
.
2. Touch your email address at the top of your Friends list.
3. Touch the message text field and enter the text you want displayed with
your status.
4. Touch Done.
NOTE
Any status descriptions that you've entered previously are added to your status message
list at the bottom of the screen, so you can easily touch them to set them in the future
without retyping. To clear your list and start over, touch the Menu Key
custom messages
.
> Clear
To change your picture
1. Touch your email address at the top of your Friends list.
2. Touch your picture at the top left of the screen.
3. Touch Change to change your picture. (Or, touch Remove to simply
remove it.)
4. Choose an image from your Gallery.
5. Crop the picture and touch Save.
119
120
Communication
Managing Your Friends List
Your Google Talk Friends list contains the friends you’ve invited to become
friends or whose invitations you’ve accepted in Google Talk. Friends can
invite each other to chat in Google Talk and see each others’ online status
in Google Talk and other applications, such as in Gmail.
The Google Talk Friends list is sorted by your friends’ online status: active
chats, online, busy, away, and offline. Within each grouping, friends are
listed alphabetically.
To add a friend to your Friends list
You can invite anyone with a Google Account to become your friend in
Google Talk, so you can chat with each other and stay up-to-date with each
others’ online status.
1. From the Friends list, touch the Menu Key
> Add friend
.
2. Enter your friend’s Gmail address then touch Send invitation.
To view and accept an invitation to become a friend
When a contact invites you to become a friend in Google Talk, you receive a
notification in the Status Bar and the invitation appears in your Friends list.
1. Touch the invitation from either the Status Bar or the Friends list.
2. Touch Accept to chat with the contact, or Cancel if you don’t want to
chat with and share your Google Talk status with the sender.
To view a list of pending invitations to friends
From the Friends list, touch the Menu Key
> More
> Invites.
All the friends to whom you’ve extended invitations to become friends on
Google Talk appear in the list until they accept or cancel your invitation.
To view all friends or only those most popular with you
By default, only the friends that you frequently chat with (the most popular)
are shown in the Friends list. But you can view all friends instead.
In the Friends list, touch the Menu Key
> All friends
.
Communication
To switch back to just the friends with whom you chat most
frequently, touch Most popular in the Options menu.
To add a friend to the ‘Most popular’ group
You can set a friend to always appear in your Most popular Friends list.
1. From the Friends list, touch and hold a friend’s name.
If you don’t see the friend’s name, touch the Menu Key
.
> All friends
2. Touch Always show friend in the Context menu that opens.
To remove a friend from this list, touch and hold the friend’s name from
the Friends list. In the Context menu that opens, touch Hide friend.
To block a friend
You can block a friend from sending you messages. When blocked, your
friend will be removed from your Friends list.
1. From the Friends list, touch and hold the friend’s name.
> All friends
If you don’t see the friend, touch the Menu Key
.
2. Touch Block friend in the Context menu that opens.
You can view a list of your blocked friends by opening your Friends list
> More
> Blocked. You can unblock
and touching the Menu Key
a friend by touching the friend’s name in the blocked list then touching
OK in the dialog box that opens.
Changing Google Talk Settings
You can configure Google Talk to send you a notification with the contents
of each message that you receive in a chat, and also to sound a ringtone or
vibrate the phone.
You can also configure Google Talk to sign you in automatically when
you turn on your phone, and you can set whether the mobile indicator is
displayed next to your name in other people’s Friends lists.
121
122
Communication
To configure notifications for new Google Talk messages
1. From the Friends list, touch the Menu Key
> Settings
.
2. Checkmark Invitation notifications to receive a notification in the Status
Bar when friend invitation(s) are received.
3. Touch Notifications in the Text chat settings and Voice & video chat
settings sections to receive a notification in the Status Bar when a new
chat message arrives.
4. Touch Ringtone in the Text chat settings and Voice & video chat settings
sections to open a list of the ringtones that will ring to notify you of a
new chat.
5. Touch Vibrate in the Text chat settings and Voice & video chat settings
sections to choose the vibration setting when you receive notification of
a new chat.
To show or hide the mobile indicator to friends
1. From the Friends list, touch the Menu Key
> Settings
.
2. Checkmark Mobile indicator (or remove the checkmark).
If Mobile indicator is checkmarked, your friends see an outline of an
AndroidTM next to your name in their Friends list when you’re signed into
Google Talk on an Android phone.
To set whether you sign into Google Talk automatically
1. From the Friends list, touch the Menu Key
> Settings
.
2. Checkmark Sign in automatically (or remove the checkmark).
When Sign in automatically is checkmarked, you are signed into
Google Talk when you turn on your phone.
To set Google Talk to change your status
1. From the Friends list, touch the Menu Key
> Settings
.
2. Checkmark Automatic away status (or remove the checkmark).
When Automatic away status is checkmarked, your status will
when the screen is turned off.
automatically be changed to Away
Communication
The Phone Application
The phone features of your device include many ways to make calls.
and then the Phone Key
Touch the Home Key
Keys bar at the bottom of the screen.
in the Quick
The Phone application has four tabs across the top of the screen:
Dial, Call log, Contacts, and Groups. Using these tabs, you can dial
manually or make calls automatically from information you’ve stored in
your phone.
Dial
This tab allows you to dial a phone number manually using the dial keypad.
You can also call voicemail or call with the Voice dial feature using this
keypad and even use the voice dialing feature.
Call log
This tab displays the history of all of your calls. From here you can call or
contact any of the entries. To delete an entry, touch and hold the entry and
then touch Remove from call log in the Context menu that appears, then
touch OK. To delete your Call log, touch the Menu Key
> Clear all
>
OK.
NOTE
You can also selectively delete entries from the Call log. Touch the Menu Key
>
> touch the checkboxes to the left of the entries to delete > Delete > OK.
Clear
Contacts
This tab displays your Contacts list. From here you can call or contact any
of the entries based on the saved information or manage your Contacts list.
Touch the Menu Key
to open an Options menu to select New contact
, Delete
, Send
, Share
, Backup now
, or More
(Display
options, Speed dials, Accounts, Import/Export, My profile).
123
124
Communication
Groups
This tab displays your contacts by group for each account type you have
set up, starting with Favorites, followed by a list of recent frequent contact.
From here you can call or contact any of the entries based on the saved
information or manage your list. For additional options, touch the Menu Key
to open an Options menu to select New group , Send , Share ,
or Delete
.
To add a Contact to your list of favorites:
1. Touch the Contacts tab and then the Contact entry you want to add to
your Favorites.
2. Touch the grey star next to the Contact’s name. The star turns blue and
the entry is added to your Favorites.
To remove a Favorite, touch the blue star in either the Contacts list or Favorites
list. The star turns grey and the entry is removed from your Favorites.
Frequent list
The Phone application generates a list of the phone numbers called
most frequently from your phone. This dialing shortcut list is displayed
horizontally below the Phone application tab. Touch any of the entries to
prepend it on the dial pad, then touch the Call Key
to call it.
Communication
Voice Dialer
Call a Contact by Voice Dialing
You can call numbers directly by saying the contact’s name or number.
1. From the Home Screen, touch the Apps Key
> Voice Dialer
.
2. Say "Call" or "Dial" then a name or a phone number.
Or, you can say "Redial" to redial the last number dialed.
3. If a list of results is displayed, touch the one you want to use.
NOTE
You can also access this feature by touching the Voice Dialer Key
application dial pad.
on the Phone
Open an Application using Voice Dialer
1. From the Home Screen, touch the Apps Key
> Voice Dialer
.
2. Say "Open" and then an application name.
3. If a list of results is displayed, touch the one you want to use.
The device opens the corresponding application.
125
126
Entertainment
Camera
To open the Camera application, from the Home Screen touch the Apps Key
> Camera .
TIP
If you haven't locked your phone with a security lock sequence, from the locked screen,
, then drag the Camera icon
downward.
simply press the Power/Lock Key
Getting to know the viewfinder
Brightness – Defines and controls of the amount of light entering the lens. Slide the
brightness indicator along the bar, toward “-” for a lower brightness image, or toward “+” for
a higher brightness image.
Zoom – Zoom in or zoom out. The Volume Keys will also adjust the zoom.
Swap Lens – Allows you to swap between the rear camera lens and the front camera lens.
Mode Switch – Allows you to switch between
Camera mode and Video mode. Slide this icon down
for Video mode and up for Camera mode.
Capture – Touch to take a photo.
Gallery – Accesses your saved photos from within
Camera mode. Simply touch this icon and your Gallery
will appear on the screen. Touch the Camera icon
in the upper right corner to return to Camera mode.
Settings – Opens the Camera settings menu. See Photo options.
Flash Mode – Allows you to set the flash mode.
NOTE The default resolution is 5M (2560x1920).
Photo options
You can make adjustments to optimize your shot. The following options are
available when you touch Settings
on the viewfinder screen:
Focus
: Allows you to change the Focus mode to Auto or Face tracking.
: Allows you to change the image size to
Image size
5M(2560x1920), 3M(2048x1536), W3M(2240x1344), 2M(1600x1200),
1M(1280x960), W1M(1280x768), VGA(640x480), or QVGA(320x240).
: Adjusts for better image capture in different
Scene mode
environments. Choose from Normal, Portrait, Landscape, Sports,
Sunset, and Night.
: Controls the camera’s sensitivity to light. Choose from Auto,
ISO
400, 200 and 100.
Entertainment
: Improves color qualities under different lighting
White balance
conditions. Choose from Auto, Incandescent, Sunny, Fluorescent, and
Cloudy.
: Applies artistic effects to pictures. Choose from
Color effect
None, Mono, Sepia and Negative.
: Allows you to set a delay timer for the camera. This is ideal if
Timer
you want to be in the picture. Choose from Off, 3 sec, 5 sec, or 10 sec.
: Allows you to select the Shot mode for the picture.
Shot mode
Choose from Normal, Continuous shot, or Panorama.
: Allows you to select the Shutter sound for the
Sutter sound
Camera. Choose from Tone 1, Tone 2, Tone 3, or Tone 4.
: Allows you to briefly view the picture after taking it.
Auto review
Choose from Off, on On, 2 sec, or 5 sec.
: Allows you to add location information to the
Tag location
picture. This is ideal for geotagging purposes. Choose from Off or On.
: Allows you to select where to store your pictures.
Storage
Choose from Internal memory or SD card.
TIP
You can close all of the setting icons to give a clearer viewfinder screen. Just touch the
center of the viewfinder once. To recall the options, touch the screen again.
Using the focus mode
You can select from the following focus options:
Auto sets the camera to focus automatically on the object you touch
on the screen before touching Capture .
Face tracking sets the camera to automatically detect and focus on
human faces. When Face tracking is set, touching the screen does
not activate the focus box.
127
128
Entertainment
Taking a quick photo
1. Open the Camera application.
2. Holding the phone horizontally, point the lens toward the subject you
want to photograph.
3. Touch the subject on the screen and a focus box will appear in the
viewfinder.
4. When the focus box turns green, the camera has focused on your subject.
5. Touch Capture
to take the picture.
Once you’ve taken the photo
If Auto review is set to On, your captured photo will appear on the screen
until you touch an option or icon to proceed.
NOTE
Simply touch the screen to redisplay photo options if they recede from the screen.
The following options are available after taking a photo if Auto review is set to
On.
NOTE
If Auto review is set to Off, these options can be accessed while viewing the photo in
the Gallery application.
Share
Touch to share your photo using SmartShare, Backup Assistant+,
Bluetooth, Email, Gmail, Google+, Messaging, Picasa,
Social+, or any other application you’ve downloaded that
supports this feature. Choose one of the Share options, then
complete as necessary.
Set as
Touch to use the image as a Contact icon or Wallpaper. Then
complete as necessary.
Rename
Touch to edit the name of the selected picture. Enter the name,
then touch OK.
Touch to delete the image, then touch OK to confirm.
Touch to take another photo immediately. Your current
photo will be saved to your Gallery.
Touch to view the Gallery of your saved photos.
Entertainment
Viewing your saved photos
You can access your saved photos from Camera mode. Just touch the
image thumbnail at the bottom right corner of the Camera screen.
TIP
Slide your finger left or right to view other photos or videos.
While viewing a photo, touch the screen to access the following options:
Zoom Touch the zoom icons to zoom in
and out
.
Touch to open a dialog box to select which application to use to
Share
share the photo.
Delete
Touch to delete the photo, then touch Confirm Delete.
Touch to open an Options menu that includes the following
More
additional options.
NOTE
Touching the Menu Key
displays and closes the photo options icons.
Slide Show Touch to see your photos played in a slideshow.
Rename Touch to open the keyboard to rename the photo for easy
identification.
Details Touch to display information about the photo (e.g., file type,
file size, etc.).
Set as Touch to set the photo as the icon identifying a contact or set
it as your phone wallpaper.
Crop Touch to open a cropping box tool that allows you to manually
crop the photo. Use your finger to move or resize the cropping box
to encompass only the part of the photo you want to see, then touch
Save.
Rotate Left Touch to rotate the photo counter-clockwise.
Rotate Right Touch to rotate the photo clockwise.
129
130
Entertainment
Video Camera
To open the Video Camera application, from the Home Screen touch the Apps
Key
> Camera . Slide the Mode Switch icon down for Video mode.
Getting to know the viewfinder
Brightness – Defines and controls of the amount of light entering the lens. Slide the
brightness indicator along the bar, toward “-” for a lower brightness video, or toward “+” for
a higher brightness video.
Zoom – Zoom in or zoom out. The Volume Keys will also set the zoom. Set the zoom before
starting a video. You cannot change the zoom setting during recording.
Swap Lens – Allows you to swap between the rear camera lens and the front camera lens.
Mode Switch – Allows you to switch between Camera
mode and Video mode. Slide down for Video mode and
up for Camera mode.
Capture – Touch to start recording video.
Gallery – Accesses your saved photos and videos from
Video camera mode.
Settings – Opens the Video settings menu. See Video options.
Flash Mode – Allows you to set the flash mode.
Video options
You can make adjustments to optimize your video. The following options are
available when you touch Settings
on the viewfinder screen:
: Allows you to select the video size for the video.
Video size
Choose from Full HD (1920x1080), HD (1280x720), TV (720x480), VGA
(640x480), QVGA (320x240) (MMS), QCIF (176x144) (MMS)
: Improves color qualities under different lighting
White balance
conditions. Choose from Auto, Incandescent, Sunny, Florescent, and Cloudy.
: Applies artistic effects to videos. Choose from None,
Color effect
Mono, Sepia, and Negative.
: Allows you to select if you want to record audio
Audio recording
for the video. Choose from On or Mute.
: Allows you to briefly view the video after taking it.
Auto review
Choose from Off, On, 2 sec, or 5 sec.
Entertainment
: Allows you to select where to store your videos. Choose
Storage
from Internal memory or SD card.
Recording a quick video
1. Open the Camera application.
down to change to Video mode. The
2. Slide the Mode Switch icon
camera Mode Switch icon changes to
and Capture changes to .
3. The Video camera’s viewfinder will appear on the screen.
4. Hold the phone horizontally and point the lens toward the subject of the
video.
5. Touch Capture
once to start recording.
6. The record dot at the bottom of the viewfinder turns red and the video
length timer begins counting.
7. Touch
on the screen to stop recording.
After recording a video
If Auto review is set to On, a still image representing your video will appear
on the screen until you touch an option or icon to proceed.
NOTE
Simply touch the screen to redisplay the video options if they recede from the screen.
The following options are available if Auto review is set to On.
NOTE
If Auto review is set to Off, these options can be accessed while viewing the video in
the Gallery application.
Play Touch to play the video you just recorded.
Share Touch to share your video using SmartShare, Backup Assistant+,
Bluetooth, Email, Gmail, Messaging or YouTube. Choose one of the
Share options, then complete as necessary.
Rename Touch to edit the name of the selected video. Enter the name,
then touch OK.
131
132
Entertainment
Touch to delete the video you just made, and confirm
by touching OK. The viewfinder will reappear.
Touch to shoot another video right away. Your current
video will be saved in your Gallery.
Touch to view the Gallery of your saved videos.
Watching your saved videos
1. In the viewfinder, touch the image thumbnail at the bottom right corner
of the Camera screen.
2. Your video will appear on the screen.
3. Touch the play icon to play it automatically.
Your Photos and Videos
Adjusting the volume when viewing a video
To adjust the volume of a video while it is playing, use the Volume Keys on
the left side of the phone.
Setting a photo as wallpaper
1. Touch the photo you want to set as wallpaper to open it.
2. Touch More
> Set as > Wallpaper.
3. Crop the photo, if necessary, then touch Save.
Gallery
Opening Gallery and Viewing Your Albums
Open the Gallery application to view albums of your pictures and videos.
To open Gallery and view your albums
From the Home Screen, touch the Apps Key
OR
> Gallery
.
Entertainment
Open Gallery from the Camera application by touching the thumbnail
image at the bottom right corner of the screen.
The Gallery application presents the pictures and videos saved in your
phone, including those you’ve taken with the Camera application and
those you downloaded from the web or other locations.
If you have a PicasaTM account synchronized with one of your phone’s
GoogleTM Accounts, you’ll also see your Picasa web albums in your Gallery.
Gallery Views
When you open the Gallery application from the applications screen, it
displays the Main Gallery in Album view.
Touch the Calendar view switch
Gallery to Calendar view.
to switch from the Main
Touch an album in the Main Gallery to open that album in Grid view.
to the right return the images to
Drag the Album view switch
stack view (from Grid view) and drag the switch to the left to return
the images to grid view (from Stack view).
Main Gallery
Calendar View Album in Stack View Album in Grid View
Touch an album to open it and view its contents.
The pictures and videos in the album are displayed in random order
(except from Camera).
Touch a picture or video in an album to view it.
at
Return to the main Gallery screen by touching the Gallery icon
the top left corner or the screen.
133
134
Entertainment
Working with Albums
Albums are groups of images and videos in folders on your microSD card
and in Picasa web albums.
To open an album and view its contents
> Gallery
From the Home Screen, touch the Apps Key
touch the album whose contents you want to view.
Album in Grid View
and
Album in Stack View
In Album grid view, use the slider bar at the bottom of the screen to
scroll horizontally through your pictures and videos.
In Album grid view, you can also scroll through an album by swiping
the screen left or right.
In Album stack view, the date of the images in view is displayed, so
you can scroll by date.
In Album stack view, you can use the spread gesture to quickly cycle
the images in the stack between your two fingertips.
To change how the contents of an album are displayed
You can view the images and videos in your albums in a random grid (except
from Camera) or in stacks, sorted by the date and the location where they
were taken. You can switch album views with the Album view switch
at the top right of the screen.
Entertainment
Drag the Album view switch
the album in stacks.
Album in Grid View
to the right to view the contents of
Album in Stack View
to the left to view the album
Drag the Album view switch
contents in a chronological grid (except from Camera) again.
Pinch peek
While browsing your images in stacks (in the Main Gallery view or Album
stack view), you can use a spread gesture to open up the contents of an
image stack. Photos contained within that stack are then smoothly cycled
between your two fingertips.
To switch to calendar view
Calendar view displays a calender with your thumbnail images displayed on
the date(s) you took pictures making it quick and easy to find pictures taken
on a specific day (e.g., a holiday).
You can switch to calendar view from the Main Gallery view by touching the
Calendar view switch
.
135
136
Entertainment
Slide your finger left or right on the screen to scroll sequentially month
by month.
Touch the Month tab at the top of the screen to go to a specific date.
Use the Date wheel to scroll to the month and year you want, then
touch Set.
To Work with Batches of Pictures or Videos
In addition to working with whole albums and with individual pictures, you can
select one or more pictures or videos in an album to work on them in batches.
For example, to send a few pictures from an album to a friend.
1. From the Home Screen, touch the Apps Key
> Gallery
.
2. Open the album that contains the pictures and videos you want to work
with as a batch.
3. Touch the Menu Key
.
4. Touch the pictures you want to work with to checkmark them. Touch a
checkmarked item to remove the checkmark.
You can checkmark all items or remove all checkmarks, by touching
Select All or Deselect All at the top of the screen.
5. Touch Share
or Delete
, then complete as necessary.
To share an album
You can share the entire contents of one or more albums or individual
images or videos from an album.
1. From the Home Screen, touch the Apps Key
2. Touch the Menu Key
> Gallery
.
.
3. Checkmark or uncheckmark the album(s) you want to share.
at the bottom left corner of the screen and touch the
4. Touch Share
application you would like to use to share the selected albums.
5. Enter the necessary information and share it.
Entertainment
To get details about an album
1. From the Home Screen, touch the Apps Key
2. Touch the Menu Key
> Gallery
.
.
3. Checkmark or uncheckmark the album(s) you want to see details about.
at the bottom right corner of the screen, then touch
4. Touch More
Details in the dialog box.
To delete an album
You can delete an album and its contents from your microSD card.
1. From the Home Screen, touch the Apps Key
2. Touch the Menu Key
> Gallery
.
.
3. Checkmark or uncheckmark the album(s) you want to delete.
4. Touch Delete
at the bottom center of the screen. Touch Confirm
Delete in the dialog box.
Working with Pictures
Use the Gallery application to view pictures that you’ve taken with the
Camera application, downloaded, copied onto your microSD card or that
are stored in Picasa web albums.
To view and browse pictures
1. From the Home Screen, touch the Apps Key
> Gallery
.
2. Open an album, then touch a picture.
Turn the phone to view the picture in vertical (portrait) or horizontal
(landscape) orientation. The picture is displayed (but not saved) in the
new orientation.
137
138
Entertainment
Touch the picture to view navigation, zoom, and other control buttons.
To zoom, touch a zoom icon (+ or -), use the pinch-to-zoom method, or
just double-tap the screen.
When the picture is zoomed in, you can drag the picture to view parts
that are not in view.
When the picture is zoomed to fit in the window, drag left or right to
view the next or previous picture in the album.
To watch a slideshow of your pictures
While viewing a picture, touch the screen to view the control buttons
> Slide show.
then touch More
Touch the screen, or touch the Back Key
, to end the slideshow.
To rotate a picture
1. Touch a picture you want to rotate.
2. Touch More
picture.
. A dialog box opens with tools for working with the
3. Touch Rotate Left or Rotate Right.
The picture is saved with the new orientation.
To use a picture as a contact icon or as Home screen wallpaper
1. Touch the picture you want to use.
2. Touch More
picture.
. A dialog box opens with tools for working with the
Entertainment
3. Touch Set as.
4. Touch Contact icon to set the picture to identify a Contact entry or touch
Wallpaper to set the picture as your wallpaper.
If you choose to set the selected picture as a contact icon, the
Contacts application will open. Touch the Contact that you want to
identify with the picture, then touch Save.
If you decide to set the picture as your wallpaper, crop it, if necessary,
then touch Save.
To crop a picture
You can crop and save pictures that are stored on your microSD card.
1. Touch the picture you want to crop.
2. Touch More
picture.
. A dialog box opens with tools for working with the
3. Touch Crop.
The cropping box appears on top of the picture.
4. Use the cropping box to select the portion of the picture to keep; the
rest of the photo will be discarded.
Drag from the inside of the cropping box to move it.
Drag an edge of the cropping box to resize it to any proportion.
Drag a corner of the cropping box to resize it with fixed proportions.
139
140
Entertainment
5. Touch Save to save a copy of the picture as you cropped it. The original
uncropped version remains in your phone’s memory.
To get details about a picture
1. Touch the picture you want.
2. Touch More
picture.
. A dialog box opens with tools for working with the
3. Touch Details.
To delete a picture
You can delete a picture from your microSD card.
1. Touch the picture you want to delete.
2. Touch Delete
opens.
, then touch Confirm Delete in the dialog box that
Working with Videos
Use the Gallery application to play videos that you’ve taken with the
Camera application and to share them with friends.
To play videos
Open a Gallery album then touch a video.
The video plays in the orientation you recorded it in.
Touch the screen while the video is playing to view the playback
controls.
Entertainment
To share a video
You can share your videos in a variety of ways, including sending it by email
or multimedia message (MMS), or via SmartShare, or a Bluetooth device.
You even have the option to share your videos publicly by uploading it to the
YouTubeTM website.
1. From the Home Screen, touch the Apps Key
touch an album.
2. While viewing an album, touch the Menu Key
> Gallery
, then
.
3. Touch to checkmark the video(s) you want to share.
4. Touch Share
at the bottom left corner of the screen.
5. In the dialog box that opens, touch the application you would like to use
to share the selected videos.
6. Enter the necessary information and share it.
To delete a video
1. From the Home Screen, touch the Apps Key
touch an album.
2. While viewing an album, touch the Menu Key
> Gallery
.
3. Touch to checkmark the video(s) you want to delete.
4. Touch Delete
at the bottom center of the screen.
5. Touch Confirm Delete.
, then
141
142
Entertainment
Video Producer
You can make your own movie using your images/video and music.
1. From the Home Screen, touch the Apps Key
> Video Producer
.
2. Select the desired options to create a movie.
Add Media
Touch this icon add images and/or video to your movie.
Touch Images to add images, then touch the image(s) you want to
add.
Touch Videos to add video footage, then touch the video(s) you want
to add.
Touch Done
Delete Media
or video(s).
to exit after all of the media files have been added.
Touch this icon to remove the selected image(s) and/
Touch an image or video in the added media contents section, touch
Delete Media , then touch Delete selected (or Delete all).
Add Style Touch this icon to select the desired movie style.
Touch the up or down arrow to scroll through and select the style you
want.
Added Contents Displays all of the selected image(s) and/or video(s)
for your movie.
Swipe left and right to scroll through all of the files you’ve added.
Save
Touch this icon to save the movie file.
Entertainment
Edit
Touch this icon to edit the movie file.
Swipe left and right to select the footage to edit.
to insert text.
Touch the Overlay Text icon
Touch the Overlay Image icon
Touch the Trim Video icon
footage.
Touch the Done icon
to insert selected graphic(s).
to trim segments from your video
to exit when you’re finished editing.
Add Music Touch this button to set the background music.
Preview
Touch this icon to play your movie.
Help
Touch this icon to view information on how to use the Video
Producer application.
143
144
Entertainment
Market
Opening Android Market and Finding Applications
Open the Android Market application to browse and search for free and
paid applications.
To open the Android Market application
From the Home Screen, touch the Apps Key
the Market icon
from the Home screen.
> Market
or touch
When you open the Android Market application for the first time, you
must read and accept the terms of service to continue.
To get help with Android Market
Android Market Help web pages are available from all of the Android Market
screens.
Touch the Menu Key
> Help
.
The Browser application opens to the Android Market Help page, with
links to many help topics.
Entertainment
To browse for applications
You can browse applications by category and sort them in different ways.
1. On the Android Market homepage, touch a category along the left side
of the screen, which include Apps, Music, Books, and Movies. The
Games category is displayed to the right of these categories.
2. Swipe horizontally across the screen. The subcategories bar is displayed
near the top of the screen to identify the content. Scroll through the
choices, then touch the one you want to explore.
Touch the right or left side of the
subcategories bar to scroll the
screen.
3. Touch an application to open its details screen.
145
146
Entertainment
To open a screen with details about an application
At any time while browsing through Android Market, touch an
application to open its details screen.
The Application details screens include a description, ratings, comments,
and related information about the application. From this screen, you can
download, install, uninstall, rate the application, and more.
To search for applications
1. Touch the Search Icon
Search Key
.
at the top right of the screen or touch the
2. Enter all or part of an application’s name or description, or the developer’s
next to the search
name you want to search for, then touch Search
box or touch the Search button on the keypad.
3. Touch a search result to open that application’s details screen.
To return to the Android Market home page
You can return directly to the Android Market homepage from most other
screens in Android Market.
Touch the Market icon
at the top left corner of the screen.
Downloading and Installing Applications
When you find an application you want, you can install it on your phone.
To download and install an application
NOTE
Before you can download a paid application, you must set up a billing arrangement.
1. Find an application you want and open its details screen.
In the application’s details screen, you can read more about the
application, including its cost, overall rating, and comments by users.
Scroll down to the Developer Info section to view more applications by
this developer, visit the developer’s website, or send the developer an
email message.
Entertainment
Download button
2. Touch Download or Install (for free applications) or the Price button (for
paid applications).
The screen will display if the application requires access to your data or
control of any functions on your phone. The Market application tells you
what it can access if you continue with the download.
WARNING!
Read this screen carefully. Be especially cautious with applications that have access to
many functions or to a significant amount of your data. Once accept on this screen, you
are responsible for the results of using this item on your phone.
3. If you agree to the application’s access requirements, touch Accept &
Download (for free applications) or Accept & buy (for paid applications.)
TM
If you selected a paid application, you’re redirected to the Google
Checkout screen to pay for the application before it’s downloaded to
your phone.
If you selected a free application (or after touching Accept & buy
in Google Checkout), you receive a series of notifications as the
application is downloaded and then installed on your phone.
When the application is installed, you can touch the notification to
open the application or open it by touching its icon in the Applications
screen.
If you have another AndroidTM phone, you can download a paid
application to that phone using the same Android Market account, at
no additional charge.
147
148
Entertainment
To create a Google Checkout account
You must have a Google Checkout account associated with your Google
Account to purchase items from Android Market.
On your computer, go to http://checkout.google.com to establish a
Google Checkout account.
OR
The first time you use your phone to buy an item from Android
Market, you’re prompted to enter your billing information to set up a
Google Checkout account.
WARNING!
After you’ve used Google Checkout once to purchase an application from Android
Market, the phone remembers your password, so you don’t need to enter it the next
time. For this reason, you should secure your phone to prevent others from using it
without your permission.
Music
Transferring Music Files to Your Phone
The Music application plays audio files that are stored on your phone’s
microSD card. Copy audio files from your computer onto the microSD card
before you open the Music application.
NOTE The LG USB driver needs to be installed on your PC before connecting your phone to
transfer music.
To copy music files onto the phone’s microSD card
1. Connect the phone to your computer with a USB Cable. If the default
connection mode is not set to Mass storage, open the Notifications
panel and touch USB connected > Mass storage. Your computer will
prompt you with different actions to take. Choose to open the folder to
view files.
Use the computer to organize your audio files, then create a music
folder at the top level of the microSD card.
2. Use the computer to copy music and other audio files into the folder that
you created on the microSD card.
Entertainment
You can use subfolders on the microSD card to organize your music
files or you can simply copy the audio files to the top level of the
microSD card.
3. Open the Notifications panel and touch USB connected > Charge only.
Then disconnect the USB Cable from the phone.
Opening Music and Working with Your Library
After you’ve copied some music onto your microSD card you can open the
Music application and view your library of music files, sorted in one of six
ways.
To open Music and view your music library
From the Home Screen, touch the Apps Key
> Music Player
.
The Music Player application searches the microSD card for music
files you copied to your card, then builds a catalog of your music
based on the information contained in each music file. This can take
from a few seconds to several minutes, depending on how many files
you have copied onto the microSD card.
When the catalog is complete, the Music library screen opens with
tabs at the top of the screen that you can touch to view your music
library organized by Songs, Albums, Artists, Playlists, or Folders.
149
150
Entertainment
To search for music in your library
1. Open the main Library screen then touch the Search Key
.
2. Start typing the name of the artist, album, or track you’re looking for.
Matching songs are displayed in the list below the search box.
3. Touch a matching song to play it or touch a matching album or artist to
view a list of associated songs.
To delete a song from the microSD card
You can delete music from the storage card.
Touch and hold a song in a Library list. In the Context menu that
opens, touch Delete.
OR
On the Playback screen, touch the Menu Key
> Delete
.
You can also delete music files from the microSD card when your
phone is connected to the computer. To do this, browse for the music
files you want to delete and delete them from the folder.
Playing Music
You can listen to music using the phone’s built-in speaker, through a wired
headset, or through a wireless Bluetooth stereo headset that supports the
A2DP profile.
To play music
Touch a song in your library to listen to it.
OR
While viewing a list of tracks in an album, touch the Menu Key
Play all .
>
The Playback screen opens and the song you touched or the first song
in the album or other playlist starts to play. Your music continues to play
even when you switch applications or receive a phone call. The tracks
in the current playlist play in order until it reaches the end, then stops. If
you choose a repeat option, playback only stops when you stop it.
Entertainment
You can return to the Playback screen from most other screens in the
Music Player application by touching the currently playing song at the
bottom of the screen.
You can return to the Playback screen from any other application
by opening the Notifications panel and touching the ongoing music
notification.
To control playback
The Playback screen contains several icons that you can touch to control the
playback of songs, albums, and playlists:
Touch to pause playback.
Touch to resume playback.
Touch to skip to the next track in the album, playlist, or shuffle.
Opens the Volume window to control the Media volume.
Touch to restart the current track or skip to the previous track in the album, playlist, or
shuffle.
Touch to open the current playlist.
Touch to play the current playlist in shuffle mode (tracks are played in random order).
Touch to set repeat mode to repeating all songs, repeat current song, or repeat off.
Touch to set the Dolby Mobile setting, which enhances your music listening.
151
152
Entertainment
To control playback volume
In addition to the techniques for setting media volume, you can control the
volume of music in the Music Player application.
Press the phone’s up/down Volume Keys.
A panel opens to show the current media volume.
Some headsets include their own volume controls or ways to pause
and resume playback or to skip tracks.
To play your tracks in a party shuffle
When you turn on Party shuffle, the Music Player application plays tracks
from your microSD card in random order until Party shuffle is turned off.
In a Library screen, touch the Menu Key
> Party shuffle
.
The Music Player application creates a playlist of tracks selected
randomly from your microSD card and starts playing them.
View the current playlist that Party Shuffle is playing by touching the
on the Playback screen.
Playlist icon
Add a track to the end of the Party Shuffle playlist by touching and
holding the name of a track in your library. In the Context menu that
opens, touch Add to playlist > Current playlist.
To stop Party Shuffle, touch the Menu Key
> Party shuffle off
.
To customize settings in the Playback or a Library screen
Touch the Menu Key
> More
> Settings in a Playback. Touch the
Menu Key
> Settings
in a Library screen.
Show notification Shows the controller on the Notification Bar.
Sleep timer Turns off the player automatically. Touch the following
options to apply sleep timer: Off, After 10 minutes, After 20 minutes,
After 30 minutes, After 1 hour, After 2 hours
Dolby Mobile Applies the following sound effect (Dolby) options:
Off, Neutral, Expansive, Bass Boost, Treble Boost, Vocal Boost.
NOTE
This is only available when an ear jack is plugged in.
Entertainment
Landscape view
When holding the phone in landscape orientation, the Music Player
application screen changes to fit the screen as shown below:
Flick left or right to
view music
Volume control
Play
Album lists
To use a song as a ringtone
You can set a song to be used as your phone ringtone in place of one of the
ringtones that come with the phone.
Touch and hold a song in a Library list. In the Context menu that
opens, touch Use as ringtone.
OR
On the Playback screen, touch the Menu Key
as ringtone.
NOTE
> More
> Use
This adds the song to your ringtone list. Access the Contacts application to set it for a
specific Contact entry.
Working with Playlists
You can create playlists to organize your music files into sets of songs,
which you can play in the order you set or in a shuffle.
To create a playlist
1. Open the Music Player application and touch the Playlists tab
2. Touch New playlist.
3. Enter a name for the playlist and touch Save.
The new playlist is added to the Playlist library.
153
154
Entertainment
To add a song to a playlist
1. While viewing a list of tracks in the Library, touch and hold a song to
display a Context menu.
2. Touch Add to playlist.
3. Touch the name of the playlist to add the song to.
You can also add the song that is playing in the Playback screen to a
playlist by touching the Menu Key
> Add to playlist
or touching
> Save as playlist to save all the songs in the current playlist as a
playlist.
To remove a song from a playlist
1. Open a playlist.
2. Touch and hold the song you want to remove then touch Delete in the
Context menu that appears.
To delete or rename a playlist
1. Open the Playlist library.
2. Touch and hold the playlist to display a Context menu.
3. Touch Delete > OK or Rename > enter new name > Save.
Entertainment
SmartShare
To turn SmartShare on and allow sharing contents
1. From the Home Screen, touch the Apps Key
2. Touch the Menu Key
> Settings
> SmartShare
.
.
3. Mark the settings checkbox(es) as necessary.
Touch the Discoverable checkbox to enable (checkmark) the setting
to allow your device to be visible to other devices.
Touch the Always accept request checkbox to enable (checkmark)
the setting to automatically accept sharing requests from other
devices.
Touch the Receive files checkbox to enable (checkmark) the setting
to automatically allow upload files to your phone from other devices.
4. Under the My shared contents section, touch to checkmark the types of
content you would like to share. Choose from Pictures, Videos, and Music.
5. SmartShare is now activated and ready to share contents.
To share contents from the remote content library to other devices
Allows your renderer device (e.g., TV) play multimedia contents from your
remote content library (e.g., PC).
NOTE
Make sure that the DLNA functionality of your devices is properly configured (e.g., TV
and PC).
1. From the Home Screen, touch the Apps Key
> SmartShare
.
2. Touch To
at the top right of the screen and select the device from the
renderer device list.
3. Touch From
at the top left of the screen and select the device from
the remote content library.
4. You can browse the content library.
5. Touch a content thumbnail or touch the Menu Key
> Play
.
155
156
Entertainment
To share contents from your phone to your renderer device (e.g., TV)
NOTE
Make sure that your renderer device is properly configured.
1. While browsing your pictures or videos using the Gallery application,
touch and hold a file to enable multiple file selection, then checkmark
each file you want to share.
2. Touch Share
, then touch SmartShare.
3. SmartShare is automatically launched with the selected files.
4. Select the device from renderer device list to play the files.
NOTE
The procedure steps are the same regardless of the application source or file type. Follow
the same steps to share music files using the Music Player, to share pictures from the
Gallery, and to share video files using the Video Player.
NOTICE s Check that your device is connected with your home network using a Wi-Fi
connection to use this application.
s Some DLNA enabled devices (e.g., TV) support only the DMP feature of DLNA and
will not appear in the renderer device list.
s Your device might not be able to play some contents.
To download contents from the remote content library
1. From the Home Screen, touch the Apps Key
> SmartShare
.
2. Touch From
at the top left of the screen and select the device from the
remote content library.
3. You can browse the content library.
4. Touch and hold a content thumbnail, then touch Download in the Context
menu.
NOTICE Not all content types are supported.
To upload contents from the remote content library
NOTE
Make sure that the microSD card is correctly mounted and the Receive files checkbox is
marked in the SmartShare settings menu.
1. From the Home Screen, touch the Apps Key
> SmartShare
.
2. Touch From
at the top left of the screen and select My phone in the
remote content library.
3. You can browse the content library.
4. Touch and hold a content thumbnail and touch Upload in the Context
menu.
Entertainment
5. Select a remote content library device to upload the selected content.
NOTICE Some DLNA enabled devices do not support DMS upload functionality and will not be
uploaded. Not all content types are supported.
Video Player
You can play a wide variety of videos using the Video Player. The Video
Player supports the following file formats: 3gp/3g2, mp4/m4v, avi, wmv,
mov, mkv, flv, asf, divx (Codec: MPEG4, H.263, Sorenson H.263, H.264,
VC-1, DivX/XviD).
Supported file formats are dependent on the software version of the
phone.
To open the Video Player application
1. From the Home Screen, touch the Apps Key
> Video Player
.
2. Touch the video you want to play.
Playback controls
Touch the screen to display the playback controls. The following options
allow you to control the video playback:
Pause playback.
Play a video file.
Touch and hold to fast-forward playback.
Touch to start playing the video from the beginning. Touch and hold to rewind playback.
Touch to activate or deactivate the Dolby Mobile setting, which enhances your music listening.
Touch to display a slider bar to increase or decrease the media volume.
Touch to lock the Video Player screen so that the video playback controls are not displayed
when the screen is touched.
NOTE
s You can also flip the device over to pause the video playing. This is only available when
the Pause option is checked in the Gestures menu.
157
158
Entertainment
Video Player list options
The following options are available from the Video Player list screen:
> Storage
Storage Touch the Menu Key
Backup Assistant Plus or Device.
, then select
> Delete , then touch each video
Delete Touch the Menu Key
to delete. When all files to be deleted have been checkmarked, touch
Delete > OK to confirm.
> DivX(R) VOD Register DivX
DivX VOD Touch the Menu Key
before using this video on demand feature.
YouTubeTM
Opening YouTube and Watching Videos
You can browse, search for, view, upload, and rank YouTube videos on your
phone with the YouTube application.
To open the YouTube application
From the Home Screen, touch the Apps Key
> YouTube
Touch a video to watch it or touch the Menu Key
actions on the video.
.
to take other
Entertainment
To watch and interact with YouTube videos
Touch a video to play it.
Touch the screen to view the Playback controls. You can pause and
play the video or drag the slider to the point in the video you want to
watch.
Touch the Back Key
to stop playback and return to the videos list.
for the following options: Home, Browse,
Touch the Menu Key
Search, My Channel, Upload, and Settings.
For details about these features, visit the YouTube website.
To search for videos
1. Touch the Search icon
at the top of the YouTube screen, touch the
Search Key
, or touch the Menu Key
, then touch Search.
2. Enter the text to search for or touch the Microphone Icon
voice.
to search by
3. Touch a suggestion below the search box or touch the Search Icon
.
4. Scroll through the search results and touch a video to watch it.
To share your videos on YouTube
You can record and share a video using the YouTube application. First, you
must create a YouTube account and sign into it on your phone.
You can also share the videos you record with the Camera application by
uploading them to YouTube.
1. Touch the Record video icon
at the top right of main YouTube screen.
159
160
Entertainment
2. If you want to set any configurations manually, touch the screen to open
the video camera settings.
3. Point the lens to frame the scene where you want to start.
4. Touch the Record icon
to start recording.
to stop recording.
5. Touch the Stop icon
6. Touch the Upload icon
.
The YouTube Upload details screen is displayed.
7. Enter a title, description, and tags for your video.
8. If you want to share the video with everyone, touch the Privacy field and
then touch Public. If not, touch Private.
9. Touch Upload.
Voice Recorder
The Voice Recorder application records audible files for you to use in a
variety of ways. Use your recordings to simply remind you about something
you don’t want to forget (like a grocery list) or record sound effects that you
can attach to a message or set as a ringtone for calls.
Record a Voice Memo
1. From the Home Screen, touch the Apps Key
2. Touch Record
recording.
> Voice Recorder
at the bottom center of the screen to start
3. Speak into the microphone.
4. When you’re finished, touch Stop
screen.
at the bottom right of the
The recording is automatically saved to your recordings list.
Touch Play
recording.
at the bottom right of the screen to listen to your
Touch Record
new voice memo.
at the bottom center of the screen to record a
.
Entertainment
Touch List
recordings.
NOTE
at the bottom left of the screen to view your list of
Touch the Menu Key
on the Voice Record screen, then touch Storage to designate
where the audio file will be stored or touch MMS mode (or General Mode) to set the
audio file size mode.
Play a Voice Memo
1. From the Home Screen, touch the Apps Key
2. Touch List
> Voice Recorder
.
at the bottom left of the screen.
3. Touch the voice memo you want to play.
NOTE
You can send the voice memo to others by touching and holding a voice memo and
touching Share.
Managing your Voice Memos
1. From the Home Screen, touch the Apps Key
2. Touch List
> Voice Recorder
.
at the bottom left of the screen.
3. Touch the Menu Key
Touch Sort by
by name.
for the following options.
to choose how to display the list, either by date or
to send via Backup Assistant+, Bluetooth, Email,
Touch Share
Gmail, Messaging, or other compatible applications you have
downloaded.
to delete voice memo(s). Touch the voice memo(s)
Touch Delete
to delete and then touch Delete > OK.
to delete all of the voice memos in the list and
Touch Delete all
touch OK to confirm.
161
162
Tools
Calendar
Viewing Your Calendar and Events
Open the Calendar application to view events you’ve created or that others
have invited you to.
When you first set up your phone, you configured it to use an existing
Google Account or you created a new account. The first time you open the
Calendar application on your phone, it displays any existing calendar events
from your Google Account on the web.
You can add additional accounts with Google Calendar or Microsoft Exchange
calendars to your phone, and configure them to display in Calendar.
When you first set up the Calendar application to synchronize events on
your phone, it includes events from the previous month through one year
in the future. Subsequently, Calendar keeps a year’s worth of future events
synchronized between your phone and the web, plus any later events that
you add to your calendar using Calendar on your phone.
NOTE If you have a lot of entries in your Calendar, you can use the Pinch-to-zoom gesture in
Agenda view to compress your calendar entries into task bars to get an overall view. Use
the spread gesture to expand your calendar entries to the normal view.
To open the Calendar application
From the Home Screen, touch the Apps Key
> Calendar
.
Events from each account you’ve added to your phone and configured
to synchronize calendars is displayed in Calendar.
Events from each calendar account are displayed in a different color.
To change your calendar view
Touch the the Month tab , the Week tab
Agenda tab
above the calendar.
, the Day tab
or the
Each view displays the events in your calendar for the period of time
specified.
Tools
To view more information about an event in the Agenda, Day, or Week
view, touch the event.
To view the events of a day in Month view, touch a day. The event will
be displayed below the calendar. Touch the event to view its details.
Using the Calendar Options menu
From any of the Calender views, touch the Menu Key
following menu options:
Touch Go to
to access the
to go directly to a specific calendar date.
Touch Search
event.
to search for a Calendar event or text within an
Touch Sync now
to to sync all of your Calendar accounts.
Touch New event
to create a new Calendar event.
Touch Calendars
to access your Calendar accounts.
(in Month, Week, and Day view only) to customize
Touch Settings
how you use your Calendars.
(in Agenda view only) to select Delete and Settings
Touch More
for the Agenda calendar.
Working in Agenda View
Agenda view is a list of your events in chronological order by day. A week’s
worth of events is displayed. To show earlier Agenda events, touch Tap to
look for more at the top of your agenda list. To show later Agenda events
touch Tap to look for more at the bottom of your agenda list. All-day and
multi-day events are listed at the start of each day.
163
164
Tools
To switch to Agenda view
Touch the Agenda tab above the calendar.
Today
New event
Touch to return
to the current
day in Agenda
view.
Touch to create
a new event in
Agenda view.
To learn more about events in Agenda view
Touch an event.
A screen with details about the event opens.
Working in Day View
Day view displays a list of the events of one day, in a table of one-hour
rows. The current time will be designated as a horizontal red line. If it’s a
day of commemoration (e.g., a holiday) it is listed below the current date.
All-day and multi-day events are displayed at the top. Part of the title of each
event is displayed in the row that corresponds to when it occurs.
To switch to Day view
Touch the Day tab above the calendar.
Today
New event
Touch to return
to the current
day in Day view.
Touch to create a
new event in Day
view.
Tools
To learn more about events in Day view
Touch an event to view its details.
Touch and hold an event to open a Context menu to view, edit, delete,
or copy the event. Also allows you to create another new event in the
same time slot for juggling multiple events.
To add an event in Day view
Touch and hold an empty spot or an event in the day to open a
Context menu then touch New event to create a new event at that
time.
Touch the New event icon
at the top right side of the screen.
Working in Week View
Week view displays a chart of the events of one week. All-day and
multi-day events are displayed at the top. The current time is designated as
a horizontal red line. Commemoration days (e.g., holidays) are listed below
the day and date.
To switch to Week view
Touch the Week tab above the calendar.
Today
New event
Touch to return to
the current day in
Week view.
Touch to create
a new event in
Week view.
165
166
Tools
To learn more about events in Week view
Touch an event to view its details.
Touch and hold an event to open a Context menu to view, edit, or
delete the event. Also allows you to create another new event in the
same time slot for juggling multiple events.
To add an event in Week view
Touch and hold an empty spot or an event in the week to open a
Context menu then touch New event to create a new event at that
time.
Touch the New event icon
at the top right side of the screen.
Working in Month View
Month view displays a chart of the events of the month. Segments of each
day with scheduled events are green in the day’s vertical bar.
To switch to Month view
Touch the Month tab above the calendar.
Today
New event
Touch to return
to the current
day in Month
view.
Touch to create
a new event in
Month view.
To view more information about events in Month view
Touch a day to display the events below the calendar. You can then
touch the event to view more information about it.
Tools
To add an event in Month view
Touch the New event icon
at the top right side of the screen.
Viewing Event Details
You can view more information about an event in a number of ways,
depending on the current view.
To view information about an event
In Agenda, Day, or Week view, touch an event to view its details.
In Month view, touch a day to display the events below the calendar.
Then touch an event to view its details.
Touch the Reminders field to change reminder settings, touch Add
reminder
to add another reminder, or touch Remove reminder
remove the reminder.
to
If you have permission to change events, you can touch Edit to edit the
event, touch Delete to delete the event, or touch Share to share it.
167
168
Tools
Creating an Event
You can use the Calendar application on your phone to create events that
appear on your phone and in Google Calendar on the web.
To create an event
1. In any Calendar view, touch the Menu Key
an Event details screen for a new event.
> New event
to open
You can also touch and hold a spot in Day or Week view. In the Context
menu that opens, touch New event to open the Event details screen
with that day and time already entered.
2. Add details about the event.
Enter a name, time, and optional additional details about the event.
If you have more than one calendar, you can choose the calendar to
which to add the event.
Touch Add reminder
to add more reminders.
3. Invite guests to the event.
In the Guests field, enter the email addresses of everyone you want to
invite to the event. Separate multiple addresses with commas ( , ). If the
people to whom you send invitations use Google Calendar, they’ll receive
an invitation in Calendar and by email.
4. Touch the Menu Key
the event.
> Show extra options
5. Touch Save to save the event.
The event is added to your calendar.
to add details about
Tools
Editing or deleting an event
You can edit or delete an event that you created on the phone or on the
web. You can also edit or delete events created by others, if they have
given you permission.
To edit an event
1. Touch an event to view its details.
2. Touch Edit.
The Event Details screen opens.
3. Touch the Menu Key
> Show extra options
additional event details.
to add or edit
4. Make your changes to the event.
5. Touch Save to save the event.
To delete an event
There are a number of ways to delete an event.
In Agenda view, touch an event to view its details. Touch Delete > OK.
In Day, Week, or Month view, touch and hold the event > Delete
event > OK.
If the event repeats, you’re asked whether you want to delete just
that occurrence, this and all future occurrences, or all past and future
occurrences in your Calendar.
Setting an Event Reminder
You can set one or more reminders for an event, whether or not you
created the event or have permission to edit its other details.
To set an event reminder
1. Touch an event to view its details.
2. If no reminder is set, touch Add reminder
reminder for 10 minutes before the event.
to automatically add a
169
170
Tools
If a reminder is already set, touch Add reminder
reminders for the event.
to set more
3. In the dialog box that opens, touch the length of time before the event
that you want to be reminded of it.
When the time comes, you receive a notification about the event.
You can use Google Calendar on the web to configure additional
reminder settings.
To delete an event reminder
1. Touch an event to view its details.
2. Touch Remove reminder
next to the reminder field.
Calculator
Allows you to perform simple mathematical calculations.
To open and use the Calculator
From the Home Screen, touch the Apps Key
Basic Panel
> Calculator
.
Advanced Panel
Enter numbers and arithmetic operators on the Basic panel.
Drag the Basic panel to the left to open the Advanced panel.
Touch and hold the Calculator’s display to open a Context menu where
you can copy what you’ve entered and access other tools.
Tools
Touch Clear to delete the last number or operator you entered. Touch
and hold Clear to delete all of the entered information.
Alarm/Clock
You use the Alarm/Clock application to access the Alarm, Timer, World
Clock, and Stopwatch functions. These functions are access through the
tabs across the top of the screen.
To open the Clock application
From the Home Screen, touch the Apps Key
> Alarm/Clock
.
Touch the Alarm tab at the top of the screen if necessary.
Setting Alarms
You can set an alarm by modifying an existing alarm or by adding a new one.
To set an alarm
1. Touch New alarm or touch an existing alarm to modify it.
2. Scroll the time wheel to set the alarm time.
Enter the alarm time manually by scrolling the hour (or minutes) field.
Scroll to AM or PM to set for morning or afternoon.
3. Touch the day(s) when you want the alarm to sound in the Repeat field.
If you don’t touch the Repeat setting, the alarm sounds only the one day
you set it.
4. Touch Snooze duration to open a dialog box to set the amount of time
171
172
Tools
5.
6.
7.
8.
9.
to wait before sounding the alarm again if it is not dismissed. You can set
the alarm to ring repeatedly from 5 minutes up to 1 hour.
Touch Vibration to checkmark the setting and have the phone vibrate, in
addition to playing the ringtone.
Touch Alarm tone to select a ringtone for the alarm, then touch OK. The
ringtone plays briefly when you select it.
Touch Puzzle lock to checkmark the setting, which requires you to wake
up enough to solve a simple puzzle to dismiss the alarm.
Touch Memo to enter a name for the alarm.
When you’re finished, touch Save.
When the alarm sounds
Touch Stop or use the gesture feature of simply flipping the device
over to stop the alarm.
Touch Snooze to stop the alarm for the snooze duration you set.
NOTE
If Puzzle lock is set to On, using the gesture feature of flipping the device over will
snooze the alarm instead of turning it off
Setting the Timer
The Timer application can be used to alert you with an audible signal when
a set amount of time has passed.
1. Open the Alarm/Clock application and touch the Timer tab.
2. Set the time by scrolling Hour, Minute and/or Second on the time wheel.
3. Touch Vibrate to checkmark the setting and have the phone vibrate
when the set time expires.
4. Touch Alert Tone to select an alert tone for the timer, then touch OK.
5. Touch Start to begin the time countdown.
6. Once the alarm sounds, touch Stop to stop the timer.
Tools
Setting the World Clock
This feature allows you to set up a list of cities to easily check current times
in other time zones with a quick glance.
1. Open the Alarm/Clock application and touch the World Clock tab.
2. Touch New City and search through the available cities for the one you
want.
Using Menu Options
Touch the Menu Key
Touch New city
Touch Delete
Touch Delete all
to select the World Clock menu options.
to select another city for your list.
to select a city to delete from your list.
to remove all cities from your list.
Using the Stopwatch
This feature allows you to use your phone as a Stopwatch.
1. Open the Alarm/Clock application and touch the Stopwatch tab.
2. Touch Start to start timing and touch Stop to stop the time.
You can use the Lap function by touching Lap to record lap times.
3. Touch Reset to reset the Stopwatch or Resume to resume it.
Polaris Office
Polaris Office 3.0 is a professional Mobile Office Solution which enables
users to conveniently view or edit various types of office documents
including Word, Excel, and PowerPoint file extensions anywhere, anytime,
using their mobile device.
To access this application, from the Home Screen touch the Apps Key
then touch Polaris Office .
,
173
174
Tools
Managing Files
Polaris Office 3.0 provides mobile users with the convenience of managing
files including copying, moving, and deleting files and folders right on the
device. Local folders are displayed on the main screen for easy access and
file selection.
Viewing Files
Mobile users now have the convenience of being able to view a wide
variety of file types including Microsoft Office documents, Adobe PDF and
images right on their mobile device. When viewing these documents using
Polaris Office 3.0, the objects and layout remain unchanged from their
original documents.
Editing Microsoft Office Files
Mobile users also have the convenience of being able to create, edit, and
save Word, Excel and PowerPoint documents on their mobile device. Saved
Documents generated or modified using Polaris Office 3.0, are not distorted
from the originals.
ShareGenie
ShareGenie allows you to view, edit, and share files easily. You can send
images, videos, music, and documents (including APK files) between other
Lucid devices.
Images You can share image files with ShareGenie using the Gallery
application.
Videos You can watch the videos you’ve recorded.
Music Displays the music files you’ve downloaded in your phone
and allows you to listen to them using the applications you choose.
Documents You can view and edit your documents (Windows Office
files including doc, ppt, and xls).
NOTE
ShareGenie needs to be On to send and receive files. Wireless networks need to be
turned Off while ShareGenie is On.
Tools
To open the ShareGenie application
1. From the Home Screen, touch the Apps Key
> ShareGenie
.
2. Touch file type you want to work with in ShareGenie.
Gallery
for images.
Video
for video files.
Music
for music.
Folder
for documents.
3. Select the file(s) to send.
Touch each file to checkmark and select individually.
at the upper right corner of the screen to
Touch Select multiple
display buttons to Select all or Deselect all.
4. Touch the Menu Key
to choose the action to take.
Touch Send to select the receiver for the selected file(s).
Touch Delete to delete the selected file(s).
Touch More to view the file details or adjust the settings.
175
176
Settings
Settings
The Settings application contains most of the tools for customizing and
configuring your phone. All of the settings in the Settings application are
described in this section. For settings specific to the Browser application,
see the Browser section.
To open the Settings application
From the Home Screen, touch the Menu Key
> Settings
.
OR
From the Home Screen, touch the Apps Key
> Settings
.
Wireless & networks
The Wireless & networks settings allow you to configure and manage
wireless radio communications. These settings include Airplane mode.
Airplane mode Checkmark indicates all wireless radio communications
are turned off.
Wi-Fi Checkmark to turn on Wi-Fi functionality to connect to available
Wi-Fi networks.
Wi-Fi settings
Wi-Fi settings
These settings allow you to set up and manage wireless access points.
Wi-Fi Checkmark to turn on Wi-Fi so you can connect to Wi-Fi
networks.
Notify Me Notifies you when Wi-Fi is available when launching
applications.
Push button request Touch to configure new wireless networks
automatically.
Optimize Wi-Fi usage Touch to set Automatically turn on Wi-Fi
while charging phone to set the device to automatically turn on WiFi when connected to a power supply When launching applications,
Settings
connect to known Wi-Fi networks when WI-Fi is off to set the
device to automatically turn on and connect Wi-Fi when applications
are launched.
Wi-Fi networks
Add Wi-Fi network Allows you to add a Wi-Fi network by entering its
Network SSID (the name it broadcasts) and security type.
Wi-Fi Direct settings
Wi-Fi Direct settings
Wi-Fi Direct Turn on Wi-Fi Direct
Device Name Allows you to change your device name.
Password Allows you to set the password for the connection with
Wi-Fi devices.
Discoverable mode Checkmark to make your device discoverable on
other Wi-Fi devices.
Wi-Fi Direct devices Displays the available devices on Wi-Fi Direct.
Bluetooth Checkmark to turn on Bluetooth functionality to connect to
Bluetooth devices.
Bluetooth settings
Bluetooth settings
Bluetooth Checkmark to turn on Bluetooth so you can connect to
Bluetooth devices.
Device name Allows you to view and edit the name your phone
displays to other Bluetooth devices when trying to pair.
Discoverable Checkmark to make your phone discoverable to other
Bluetooth devices for 120 seconds.
Scan for devices Touch to search for and display information about
nearby Bluetooth devices.
177
178
Settings
Bluetooth devices
Displays a list of Bluetooth devices that you’ve previously configured
and those detected when the phone last scanned for Bluetooth
devices.
Tethering Allows you to configure your phone’s mobile data connection to
share it via USB.
VPN settings
VPN settings
Add VPN Allows you to add different types of Virtual Private Networks
(VPNs).
VPNs Displays the list of VPNs that you’ve previously configured.
Mobile networks
Mobile networks settings
System select Change the network mode and CDMA roaming mode.
Data Settings
Data enabled Checkmark to enable data access over the Mobile
network. Remove the checkmark to prevent your phone from
transmitting data on any mobile network. This is useful if you are
traveling in an area where you do not have a mobile data plan and
want to avoid charges for data use on the local carriers’ mobile
network(s). Disabling this setting does not prevent your phone
from transmitting data on other wireless networks, such as Wi-Fi or
Bluetooth.
Global data roaming access Allows you to set up data services while
roaming.
Network type and strength Allows you to see the current network
type and the signal strength.
Access Point Name Allows you to view and manage your Access
Points.
Settings
Call settings
Use Call settings to configure phone call settings.
Voicemail
Voicemail service Allows you to select your carrier’s voicemail service
or another service, such as Google VoiceTM.
Voicemail settings If you are using your carrier’s voicemail service,
this option allows you to enter the phone number to use for listening
to and managing your voicemail. You can enter a comma (,) to insert a
pause into the number. For example, to add a password after the phone
number. If you are using Google Voice, this opens a screen where you
can view the Google Voice number or sign out of Google Voice.
Other call settings
Call forwarding Allows you to enable and disable call forwarding and
enter the phone number you want to forward calls to.
Quick text Checkmark to enable or disable the Quick text messages
used when you want to ignore a call and send the caller a specified text
message response instead.
Quick text settings Allows you to edit, add, and delete the Quick text
messages used in place of answering a call.
Show dialpad Allows you to select which type of calls will automatically
display the dialpad.
Auto retry Opens a dialog box to enable or disable Auto Retry mode.
You can configure the phone to automatically redial a number after a
certain amount of time.
TTY mode Opens a dialog box to set TTY mode to communicate with
other TTY devices.
Hearing aids Checkmark enables hearing aid compatibility.
DTMF tones Opens a dialog box to set the length of DTMF tones.
Voice privacy Checkmark enables enhanced privacy mode.
Assisted dialing Allows you to configure the Assisted dialing options
when you are traveling outside your home country.
Auto answer Checkmark enables Auto Answer with Handsfree.
179
180
Settings
Sound
Use the Sound settings to configure how and at what volume the phone
rings and vibrates when the phone rings, you receive a notification, an alarm
sounds, or when you play music or other media with audio, as well as other
related settings.
General
Silent mode Checkmark to silence all sounds (including call and
notification ringtones) except the audio from music, videos, and other
media and any alarms you have set. (You must silence media and alarms
in their own applications.)
Volume Opens a dialog box where you can set the volume of ringtones
that sound when you receive a phone call or notification, media (music,
videos, and so on), and alarms. If you uncheckmark the option to use the
same volume for both calls and notifications, you can set the notification
ringtone volume independently.
Quiet time Allows you to turn off all sounds except alarms and media
between certain periods of time and on desired days.
Incoming calls
Phone ringtone Opens a dialog box where you can select the ringtone
to sound when you receive a phone call. Touch a ringtone to listen to it.
Notifications
Notification sound Opens a dialog box where you can select the ringtone
to sound when you receive a notification. Touch a ringtone to listen to it.
Ringtone with vibration Allows you to set vibration feedback for calls
and notifications.
ERI Sound Checkmark to enable ERI Alert sound.
Feedback
Audible touch tones Checkmark to hear tones when you use the
dialpad to dial a number.
Audible selection Checkmark to play a sound when you touch buttons,
icons, and other on-screen items that react to your touch.
Settings
Screen lock sounds Checkmark to play a sound when the screen is
locked or unlocked.
Haptic feedback Checkmark to have the phone vibrate briefly when you
touch on-screen buttons and perform other actions.
Emergency tone Opens a dialog box where you can configure how the
phone reacts when you place an emergency call.
Display
Use the Display settings to configure brightness and other screen settings.
Brightness Opens a dialog box for adjusting the brightness of the
screen. For the best battery performance, use the dimmest comfortable
brightness.
Auto-rotate screen Checkmark to automatically switch the orientation of
the screen as you turn the phone sideways.
Animation Opens a dialog box where you can set whether you want to
enjoy animated transitions for some effects (such as opening menus), for
all supported effects (including when navigating from screen to screen),
or to use the phone without any optional animation effects (this setting
does not control animation in all applications).
Screen timeout Opens a dialog box to set how long to wait after you
touch the screen or press a key before the screen darkens. For the best
battery performance, use the shortest convenient timeout.
Front key power save Deactivate frount key backlight when screen is
touched.
Sensor settings
Motion sensor calibration Reset calibration for motion sensor.
Power Saver
Turn Power Saver on Select the level you want to turn on the Power Saver.
Power Saver tips Touch to access some tips for Power Saver.
Power Saving items
Wi-Fi Turn off WiFi
181
182
Settings
Bluetooth Turn off Bluetooth
GPS Turn off GPS
Animation effect Turn off Animation effect
Battery
Battery use Touch to see the amount of battery used.
Gesture
Gesture settings
Help Displays a guide on using the Gesture feature of your device.
Home screen
Relocation item Press and hold an item and tilt the device to move it to
other Home screens.
Incoming call
Mute Flip the device to mute the incoming call.
Alarm
Snooze Flip the device to snooze the alarm.
Video Player
Pause Flip the device to pause the video.
Gallery
Previous/next item Tap on left or right side of the device to move to
other items.
Text input field
Move cursor Tap on any side of the device to move the cursor while
typing.
Location
Use the Location settings to set your preferences for using and sharing
your location when you search for information and use location-based
applications, such as Maps.
Settings
My location
E911 E911 Location cannot be turned off on any mobile phone. Intended
for personal safety in urgent situations, this setting cannot be altered by
the user.
Verizon Location Services Checkmark to enable Verizon Wireless and
third party authenticated and validated location services to access certain
location information available through this and/or the network.
Standalone GPS Services Checkmark to enable your phone’s standalone
global positioning system (GPS) satellite receiver to pinpoint your location
to within an accuracy as close as several meters (“street level”). Actual
GPS accuracy depends on a clear view of the sky and other factors.
Google location services Checkmark to use information from Wi-Fi and
mobile networks to determine your approximate location, used while
searching in Google Maps and other applications. When you checkmark
this option, you’re asked whether you consent to sharing your location
anonymously with Google’s location service.
Security
Use the Security settings to configure how to help secure your phone and
its data.
Screen unlock
Set up screen lock Opens a set of screens that guides you through
drawing a screen unlock pattern or setting a PIN or password.
Security lock timer Opens a dialog box to set the delay before the
security lock automatically turns on.
SIM card lock
Set up SIM card lock Opens a screen to set if you want to require a PIN
to use the And, if set, allows you to change the PIN.
Passwords
Visible passwords Checkmark to briefly show each character of
passwords as you enter them so that you can see what you enter.
183
184
Settings
Device administration
Device administrators Add or remove device administrators.
Credential storage
Use secure credentials Checkmark to allow applications to access your
phone’s encrypted store of secure certificates and related passwords
and other credentials. You use credential storage to establish some kinds
of VPN and Wi-Fi connections. If you have not set a password for the
secure credential storage, this setting is dimmed.
Install from SD card Touch to install a secure certificate from a microSD
card.
Set password Opens a dialog box where you can set or change the
password for your secure credential storage. Your password must have
at least 8 characters.
Clear storage Deletes all secure certificates and related credentials
and erases the secure storage's own password, after prompting you to
confirm that you want to do this.
Encryption
Data Encryption Opens a screen that encrypts data on the device for
security.
Applications
You use the Applications settings menu to view details about the
applications installed on your phone, manage their data, force them to stop,
and to set whether you want to permit installation of applications that you
obtain from websites and email.
Unknown sources Checkmark to permit installation of applications that
you obtain from websites, email, or other locations other than Android
MarketTM.
WARNING!
To protect your phone and personal data, download applications only from trusted
sources, such as Android Market.
Manage applications Opens a list of all the applications and other
software installed on your phone, along with their sizes. Touch the Menu
Key
and touch Sort by size to display applications in order by size.
Settings
Touch an application to open its Application Info screen.
Running services Allows you to view and control currently running
services and applications. This option displays which processes each
running service needs and how much memory it’s using.
Storage use View storage used by applications.
Battery use Opens the list of items that have been using the battery.
Development Allows you to set options for application development.
Development screen
The Development screen contains settings that are useful for
developing AndroidTM applications. For full information, including
documentation of the Android APIs and development tools, see the
Android developer website (http://developer.android.com).
USB debugging Checkmark to permit debugging tools on a computer
to communicate with your phone via a USB connection.
Stay awake Checkmark to prevent the screen from dimming and
locking when it is connected to a charger or to a USB device that
provides power. Don’t use this setting with a static image on the phone
for long periods of time, or the screen may be marked with that image.
Allow mock locations Checkmark to permit a development tool on
a computer to control where the phone believes it is located, rather
than using the phone’s own internal tools for this purpose.
Accounts & sync
Use the Accounts & sync settings menu to add, remove, and manage your
GoogleTM and other supported accounts. You also use these settings to control
how and whether all applications send, receive, and sync data on their own
schedules and whether all applications can synchronize user data automatically.
GmailTM, Calendar, and other applications may also have their own
settings to control how they synchronize data; see the sections on those
applications for details.
General sync settings
Background data Checkmark to permit applications to synchronize
data in the background, whether or not you’re actively working in them.
185
186
Settings
Removing the checkmark can save battery power and lowers (but does
not eliminate) data use.
Auto-sync Checkmark to permit applications to synchronize, send, and
receive data on their own schedule. If you remove the checkmark, you
must touch an account in the list on this screen and touch the Menu Key
> Sync now to synchronize data for that account. Synchronizing data
automatically is disabled if Background data is uncheckmarked.
Backup Assistant Plus Allows you to manage the Backup Assistant Plus
settings.
Manage accounts
List of all Google Accounts and other accounts you’ve added to the
phone. If you touch an account in this screen, its account screen opens.
Storage
Use the Storage settings to monitor the used and available space on your
phone and on your microSD card, to manage your microSD card, and if
necessary, to reset the phone, erasing all of your personal information.
Backup Assistant Plus Storage
Total space Lists the total amount of space on Backup Assistant Plus
Storage.
Available space Lists the amount of space you have available on
Backup Assistant Plus Storage.
Subscribe now Touch to subscribe for Backup Assistant Plus Storage.
SD card
Total space Lists the total amount of space on any microSD card
installed in your phone.
Available space Lists the amount of space you have available on any
microSD card installed in your phone.
Unmount SD card Unmounts the microSD card from your phone so
that you can format the card or safely remove. This setting is dimmed
if there’s no microSD card installed, if you've already unmounted it, or if
you’ve mounted the microSD card on your computer.
Erase SD card Permanently erases everything on the microSD card and
Settings
prepares it for use with your phone. You must unmount the microSD
card before you can format it.
Internal Memory
Total space Lists the total amount of space on any internal memory
installed in your phone.
Available space Lists the amount of internal phone storage available.
Erase internal memory Erase all data on the phone's internal memory,
such as music and photos.
System Memory
Available space Lists the amount of space you have available on the
system memory.
Backup and restore
Back up my data Back up application data, Wi-Fi passwords, and other
settings to Google servers.
Automatic restore If you reinstall an application, this setting restores
backed up settings or other data.
Personal data
Factory data reset Erases all data on phone.
Language & keyboard
Use the Language & keyboard settings to select the language for the text
on your phone and for configuring the on-screen keyboard, including words
that you’ve added to its dictionary.
Select language Opens a dialog box to choose a language to use on
your phone.
Input method Opens a dialog box to choose the text input method.
Swype Opens the Swype settings.
How to Swype Opens a dialog box to view on-screen tutorial help.
Personal dictionary Opens a dialog box to enter words for your
personal Swype dictionary.
187
188
Settings
Preferences View and modify Swype options.
Audio feedback Checkmark to enable Swype sounds.
Vibrate on keypress Checkmark to vibrate each time you touch the
keyboard.
Show tips Checkmark to display tips for using the Swype input method.
Auto-spacing Checkmark to enable automatic spacing when you
pause briefly between words.
Auto-capitalization Checkmark to enable automatic capital letters for
the first letter in sentences.
Show complete trace Checkmark to show the Swype path.
Word suggestion Opens a dialog box to enable Word prediction, Auto
correction, and Show suggested word.
Speed vs. accuracy Opens a dialog box to set whether you want a
speedier response or more accuracy.
Reset Swype’s dictionary Checkmark to reset the Swype dictionary
back to the default.
Version Displays the Swype software version.
Language Options Opens a dialog box to choose a language to use
on your phone.
LG Keyboard
The LG Keyboard settings apply to the on-screen keyboard. The
correction and capitalization features affect only the English version of
the keyboard.
Keyboard layout
Keyboard layout Opens a dialog box to choose the default type of
keyboard.
Writing language Opens a dialog box to choose one or more
languages to use on your phone.
Word suggestion
QWERTY
Settings
Prediction Checkmark to enable word predictions while typing.
Spell correction Checkmark to check spelling before suggesting
words.
Auto correction Checkmark to correct the spelling automatically
when tapping on the space button.
3x4 keypad
Prediction Checkmark to enable word predictions while typing.
Spell correction Checkmark to check spelling before suggesting
words.
Auto correction Checkmark to correct the spelling automatically
when tapping on the space button.
Common settings
Auto punctuation Checkmark to automatically insert a period
when the space key is tapped twice.
Voice Input Checkmark to enable the text by voice device function.
Touch feedback
Sound feedback Checkmark to enable the phone to play a brief
sound each time you touch a key on the on-screen keyboard.
Vibrate feedback Checkmark to enable vibration when keys are
touched.
User dictionary Allows you to view and edit your user dictionary.
User dictionary Allows you to view, add, and remove words from your
user dictionary. Touch a word to edit or delete it. Touch the Menu Key
> Add to add a word.
Voice input & output
Voice input
Voice recognizer settings
Language Displays a dialog box to select the voice synthesizer
language. The default is English (US).
SafeSearch Opens a dialog box to select the level of filtering to be
used in Google search by voice.
189
190
Settings
Block offensive words Checkmark to allow the device to
automatically hide recognized offensive voice results.
Personalized recognition Checkmark to improve speech recognition
accuracy.
Google Account dashboard Opens the Google Account web page
to manage your collected data.
Voice output
Text-to-speech settings
You use the Text-to-speech settings to configure the Android text-tospeech synthesizer for applications that can take advantage of it, such
as TalkBack. If you don’t have speech synthesizer data installed, only
the Install voice data setting is available.
Listen to an example Plays a brief sample of the speech synthesizer,
using your current settings.
Always use my settings Allows the phone to use your default
settings and override the application settings.
Default settings
Default Engine Allows you to set the default speech synthesis engine
to be used for spoken text.
Install voice data If your phone does not have speech synthesizer
data installed, this option connects to Android Market and guides
you through the process of downloading and installing the data. This
setting is not available if the data is already installed.
Speech rate Allows you to select how quickly you want the
synthesizer to speak.
Language Allows you to select the language of the text you want the
synthesizer to read. This is particularly useful in combination with the
Always use my settings option to ensure that text is spoken correctly
in a variety of applications.
Engines
Pico TTS Allows you to view and configure the settings for the Pico
TTS engine.
Settings
Connectivity
USB connection mode
Default connection mode Opens a dialog box to choose the default
connection mode when connecting your phone to a PC via USB. Choose
from Charge Only, Mass Storage, or Internet Connection.
Always ask Checkmark to have the phone ask you to choose which USB
connection mode it should connect with to a PC.
Auto-launch
Car Home Automatically start Car Home when the phone is mounted on
car cradle.
Desk Home Automatically start Desk Home when the phone is mounted
on desk cradle.
Accessibility
You use the Accessibility settings menu to configure any accessibility plugins you have installed on your phone.
Accessibility Allows you to enable all installed accessibility plug-ins.
Date & time
Use the Date & time settings menu to set your preferences for how dates
are displayed.
Automatic Use network-provided values.
Set date If you do not use the Automatic setting, you can set your own
date.
Select time zone If you do not use the Automatic setting, you can set
your own time zone.
Set time If you do not use the Automatic setting, you can set your own time.
Use 24-hour format Checkmark to display the time using 24-hour time
format - for example, 13:00 rather than 1:00 pm.
Select date format Opens a dialog box to select the format for
displaying dates.
191
192
Settings
About phone
About phone includes information about your phone.
Software update Allows you to check for Android system software
updates.
Network Displays current network information including your network
carrier, network type and strength, service state, mobile network state,
and IMS registration status.
Phone identity Displays the phone’s identity information including model
number, phone number, PRL version, ERI version, IMEI, ICC ID, lifetime
call counter, and warranty date code.
Battery Provides access to battery functionality.
Battery status Displays the battery status as Charging or Discharging.
Battery level Displays the battery level as a percentage of fully charged.
Battery use Opens a list of the applications and operating system
components that have used and are currently using battery power.
Touch an application in the list to view details about its power use and,
if available, touch an on-screen button to open a settings or information
screen for that component or application.
Up time Displays the length of time since the phone was currently
turned on.
Hardware information Displays the Wi-Fi MAC address and Bluetooth
address.
Software information Displays the software information, including
Android version, Baseband version, Kernel version, Build version, and SW
version.
Legal information Allows you to view legal information about the
software included with your phone.
Safety
TIA Safety Information
The following is the complete TIA Safety Information for wireless handheld
phones.
Exposure to Radio Frequency Signal
Your wireless handheld portable phone is a low power radio transmitter and
receiver. When ON, it receives and sends out Radio Frequency (RF) signals.
In August, 1996, the Federal Communications Commissions (FCC) adopted
RF exposure guidelines with safety levels for handheld wireless phones.
Those guidelines are consistent with the safety standards previously set by
both U.S. and international standards bodies:
ANSI C95.1 (1992) *
NCRP Report 86 (1986)
ICNIRP (1996)
*American National Standards Institute; National Council on Radiation
Protection and Measurements; International Commission on NonIonizing Radiation Protection
Those standards were based on comprehensive and periodic evaluations
of the relevant scientific literature. For example, over 120 scientists,
engineers, and physicians from universities, government health agencies,
and industry reviewed the available body of research to develop the ANSI
Standard (C95.1).
The design of your phone complies with the FCC guidelines (and those
standards).
Antenna Care
Use only the supplied or an approved replacement antenna. Unauthorized
antennas, modifications, or attachments could damage the phone and may
violate FCC regulations.
193
194
Safety
Phone Operation
NORMAL POSITION: Hold the phone as you would any other telephone
with the antenna pointed up and over your shoulder.
Tips on Efficient Operation
For your phone to operate most efficiently:
Don’t touch the antenna unnecessarily when the phone is in use. Contact
with the antenna affects call quality and may cause the phone to operate at
a higher power level than otherwise needed.
Driving
Check the laws and regulations on the use of wireless phones in the areas
where you drive and always obey them. Also, if using your phone while
driving, please observe the following:
O
Give full attention to driving -- driving safely is your first responsibility;
O
Use hands-free operation, if available;
O
Pull off the road and park before making or answering a call if driving
conditions or the law require it.
Electronic Devices
Most modern electronic equipment is shielded from RF signals. However,
certain electronic equipment may not be shielded against the RF signals
from your wireless phone.
Pacemakers
The Health Industry Manufacturers Association recommends that a
minimum separation of six (6) inches be maintained between a handheld
wireless phone and a pacemaker to avoid potential interference with the
pacemaker. These recommendations are consistent with the independent
research by and recommendations of Wireless Technology Research.
Safety
Persons with pacemakers:
O
Should ALWAYS keep the phone more than six (6) inches from their
pacemaker when the phone is turned ON;
O
Should not carry the phone in a breast pocket;
O
Should use the ear opposite the pacemaker to minimize the potential for
interference;
O
Should turn the phone OFF immediately if there is any reason to suspect
that interference is taking place.
Hearing Aids
Some digital wireless phones may interfere with some hearing aids. In the
event of such interference, you may want to consult your service provider (or
call the customer service line to discuss alternatives).
Other Medical Devices
If you use any other personal medical device, consult the manufacturer
of your device to determine if it is adequately shielded from external
RF energy. Your physician may be able to assist you in obtaining this
information.
Health Care Facilities
Turn your phone OFF in health care facilities when any regulations posted in
these areas instruct you to do so. Hospitals or health care facilities may use
equipment that could be sensitive to external RF energy.
Vehicles
RF signals may affect improperly installed or inadequately shielded
electronic systems in motor vehicles. Check with the manufacturer or
its representative regarding your vehicle. You should also consult the
manufacturer of any equipment that has been added to your vehicle.
Posted Facilities
Turn your phone OFF in any facility where posted notices so require.
195
196
Safety
Aircraft
FCC regulations prohibit using your phone while in the air. Switch OFF your
phone before boarding an aircraft.
Blasting Areas
To avoid interfering with blasting operations, turn your phone OFF when in a
“blasting area” or in areas posted: “Turn off two-way radio”. Obey all signs
and instructions.
Potentially Explosive Atmosphere
Turn your phone OFF when in any area with a potentially explosive
atmosphere and obey all signs and instructions. Sparks in such areas could
cause an explosion or fire resulting in bodily injury or even death.
Areas with a potentially explosive atmosphere are often, but not always
marked clearly. Potential areas may include: fueling areas (such as gasoline
stations); below deck on boats; fuel or chemical transfer or storage facilities;
vehicles using liquefied petroleum gas (such as propane or butane); areas
where the air contains chemicals or particles (such as grain, dust, or metal
powders); and any other area where you would normally be advised to turn
off your vehicle engine.
For Vehicles Equipped with an Air Bag
An air bag inflates with great force. DO NOT place objects, including either
installed or portable wireless equipment, in the area over the air bag or in
the air bag deployment area. If in-vehicle wireless equipment is improperly
installed and the air bag inflates, serious injury could result.
Safety
Safety Information
Please read and observe the following information for safe and proper use
of your phone and to prevent damage. Also, keep the user guide in an
accessible place at all times after reading it.
Violation of the instructions may cause minor or serious damage
to the product.
O
Do not disassemble or open crush, bend or deform, puncture or shred.
O
Do not modify or remanufacture, attempt to insert foreign objects into
the battery, immerse or expose to water or other liquids, expose to fire,
explosion or other hazard.
O
Only use the battery for the system for which it is specified.
O
Only use the battery with a charging system that has been qualified with
the system per this standard. Use of an unqualified battery or charger
may present a risk of fire, explosion, leakage, or other hazard.
O
Do not short circuit a battery or allow metallic conductive objects to
contact battery terminals.
O
Replace the battery only with another battery that has been qualified with
the system per this standard, IEEE-Std-1725-200x. Use of an unqualified
battery may present a risk of fire, explosion, leakage or other hazard.
O
Promptly dispose of used batteries in accordance with local regulations.
O
Battery usage by children should be supervised.
O
Avoid dropping the phone or battery. If the phone or battery is dropped,
especially on a hard surface, and the user suspects damage, take it to a
service center for inspection.
O
Improper battery use may result in a fire, explosion or other hazard.
O
For those host devices that utilize a USB port as a charging source,
check the host device’s user manual for the USB-IF logo or some other
means to ensure that it has completed the USB-IF compliance program.
O
Do not use your device for long periods of time while a part of your
body is making direct contact with it. The temperature of the product
may increase during normal operation and this may result in harming or
burning your skin.
197
198
Safety
O
Your phone is an electronic device that generates heat during normal
operation. Extremely prolonged, direct skin contact in the absence of
adequate ventilation may result in discomfort or minor burns. Therefore,
use care when handling your phone during or immediately after operation.
Charger and Adapter Safety
O
The charger and adapter are intended for indoor use only.
O
Insert the battery pack charger vertically into the wall power socket.
O
Only use the approved battery charger. Otherwise, you may cause
serious damage to your phone.
O
Use the correct adapter for your phone when using the battery pack
charger abroad.
Battery Information and Care
O
Please dispose of your battery properly or take it to your local wireless
carrier for recycling.
O
The battery doesn’t need to be empty before recharging.
O
Use only LG-approved chargers specific to your phone model since they
are designed to maximize battery life.
O
Do not disassemble or short-circuit the battery.
O
Keep the battery’s metal contacts clean.
O
Replace the battery when it no longer provides acceptable performance.
The battery can be recharged several hundred times before replacement.
O
Recharge the battery after long periods of non-use to maximize battery
life.
O
Battery life will vary due to usage patterns and environmental conditions.
O
Use of extended backlighting, Browser, and data connectivity kits affect
battery life and talk/ standby times.
O
The self-protection function of the battery cuts the power of the phone
when its operation is in an abnormal state. In this case, remove the
battery from the phone, reinstall it, and turn the phone on.
Safety
Explosion, Shock, and Fire Hazards
O
Do not put your phone in a place subject to excessive dust and keep the
minimum required distance between the power cord and heat sources.
O
Unplug the power cord prior to cleaning your phone, and clean the power
plug pin when it’s dirty.
O
When using the power plug, ensure that it’s firmly connected. If not, it
may cause excessive heat or fire.
O
If you put your phone in a pocket or bag without covering the receptacle
of the phone (power plug pin), metallic articles (such as a coin, paperclip
or pen) may short-circuit the phone. Always cover the receptacle when
not in use.
O
Don’t short-circuit the battery. Metallic articles such as a coin, paperclip
or pen in your pocket or bag may short-circuit the + and – terminals of
the battery (metal strips on the battery) upon moving. Short-circuit of the
terminal may damage the battery and cause an explosion.
General Notice
O
Using a damaged battery or placing a battery in your mouth may cause
serious injury.
O
Do not place items containing magnetic components such as a credit
card, phone card, bank book, or subway ticket near your phone. The
magnetism of the phone may damage the data stored in the magnetic
strip.
O
Talking on your phone for a long period of time may reduce call quality
due to heat generated during use.
O
When the phone is not used for a long period time, store it in a safe
place with the power cord unplugged.
O
Using the phone in proximity to receiving equipment (i.e., TV or radio)
may cause interference to the phone.
O
Do not use the phone if the antenna is damaged. If a damaged
antenna contacts skin, it may cause a slight burn. Please contact an LG
Authorized Service Center to replace the damaged antenna.
199
200
Safety
O
Do not immerse your phone in water. If this happens, turn it off
immediately and remove the battery. If the phone does not work, take it
to an LG Authorized Service Center.
O
Do not paint your phone.
O
The data saved in your phone might be deleted due to careless use,
repair of the phone, or upgrade of the software. Please backup your
important phone numbers. (Ringtones, text messages, voice messages,
pictures, and videos could also be deleted.) The manufacturer is not
liable for damage due to the loss of data.
O
When you use the phone in public places, set the ringtone to vibration so
you don’t disturb others.
O
Do not turn your phone on or off when putting it to your ear.
O
Use accessories, such as earphones and headsets, with caution.
Ensure that cables are tucked away safely and do not touch the antenna
unnecessarily.
Caution: Avoid potential hearing loss.
Prolonged exposure to loud sounds (including music) is the most common
cause of preventable hearing loss. Some scientific research suggests
that using portable audio devices, such as portable music players and
cellular telephones, at high volume settings for long durations may lead to
permanent noise induced hearing loss. This includes the use of headphones
(including headsets, earbuds and Bluetooth® or other wireless devices).
Exposure to very loud sound has also been associated in some studies
with tinnitus (a ringing in the ear), hypersensitivity to sound and distorted
hearing. Individual susceptibility to noise-induced hearing loss and other
potential hearing problems varies.
The amount of sound produced by a portable audio device varies depending
on the nature of the sound, the device, the device settings and the
headphones. You should follow some commonsense recommendations
when using any portable audio device:
Safety
O
Set the volume in a quiet environment and select the lowest volume at
which you can hear adequately.
O
When using headphones, turn the volume down if you cannot hear the
people speaking near you or if the person sitting next to you can hear
what you are listening to.
O
Do not turn the volume up to block out noisy surroundings. If you choose
to listen to your portable device in a noisy environment, use noisecancelling headphones to block out background environmental noise.
O
Limit the amount of time you listen. As the volume increases, less time
is required before your hearing could be affected.
O
Avoid using headphones after exposure to extremely loud noises, such
as rock concerts, that might cause temporary hearing loss. Temporary
hearing loss might cause unsafe volumes to sound normal.
O
Do not listen at any volume that causes you discomfort. If you
experience ringing in your ears, hear muffled speech or experience any
temporary hearing difficulty after listening to your portable audio device,
discontinue use and consult your doctor.
You can obtain additional information on this subject from the following sources:
201
202
Safety
American Academy of Audiology
11730 Plaza American Drive, Suite 300
Reston, VA 20190
Voice: (800) 222-2336
Email: [email protected]
Internet: www.audiology.org
National Institute on Deafness and Other Communication
Disorders
National Institutes of Health
31 Center Drive, MSC 2320
Bethesda, MD USA 20892-2320
Voice: (301) 496-7243
Email: [email protected]
Internet: http://www.nidcd.nih.gov/health/hearing
National Institute for Occupational Safety and Health
Hubert H. Humphrey Bldg.
200 Independence Ave., SW
Washington, DC 20201
Voice: 1-800-35-NIOSH (1-800-356-4674)
Internet:
http://www.cdc.gov/niosh/topics/noise/default.html
Safety
FDA Consumer Update
The U.S. Food and Drug Administration’s Center for Devices
and Radiological Health Consumer Update on Mobile Phones:
1. Do wireless phones pose a health hazard?
The available scientific evidence does not show that any health problems are
associated with using wireless phones. There is no proof, however, that wireless
phones are absolutely safe. Wireless phones emit low levels of Radio Frequency
(RF) energy in the microwave range while being used. They also emit very low
levels of RF when in standby mode. Whereas high levels of RF can produce
health effects (by heating tissue), exposure to low level RF that does not
produce heating effects causes no known adverse health effects. Many studies
of low level RF exposures have not found any biological effects. Some studies
have suggested that some biological effects may occur, but such findings have
not been confirmed by additional research. In some cases, other researchers
have had difficulty in reproducing those studies, or in determining the reasons
for inconsistent results.
2. What is the FDA’s role concerning the safety of wireless phones?
Under the law, the FDA does not review the safety of radiation-emitting
consumer products such as wireless phones before they can be sold, as it
does with new drugs or medical devices. However, the agency has authority
to take action if wireless phones are shown to emit Radio Frequency (RF)
energy at a level that is hazardous to the user. In such a case, the FDA could
require the manufacturers of wireless phones to notify users of the health
hazard and to repair, replace, or recall the phones so that the hazard no
longer exists.
Although the existing scientific data does not justify FDA regulatory actions,
the FDA has urged the wireless phone industry to take a number of steps,
including the following:
O
Support needed research into possible biological effects of RF of the
type emitted by wireless phones;
203
204
Safety
O
Design wireless phones in a way that minimizes any RF exposure to the
user that is not necessary for device function; and
O
Cooperate in providing users of wireless phones with the best possible
information on possible effects of wireless phone use on human health.
The FDA belongs to an interagency working group of the federal agencies
that have responsibility for different aspects of RF safety to ensure
coordinated efforts at the federal level. The following agencies belong to
this working group:
O
National Institute for Occupational Safety and Health
O
Environmental Protection Agency
O
Occupational Safety and Health Administration
O
National Telecommunications and Information Administration
The National Institutes of Health participates in some interagency working
group activities, as well.
The FDA shares regulatory responsibilities for wireless phones with the
Federal Communications Commission (FCC). All phones that are sold in
the United States must comply with FCC safety guidelines that limit RF
exposure. The FCC relies on the FDA and other health agencies for safety
questions about wireless phones.
The FCC also regulates the base stations that the wireless phone networks
rely upon. While these base stations operate at higher power than do the
wireless phones themselves, the RF exposures that people get from these
base stations are typically thousands of times lower than those they can
get from wireless phones. Base stations are thus not the subject of the
safety questions discussed in this document.
3. What kinds of phones are the subject of this update?
The term “wireless phone” refers here to handheld wireless phones
with built-in antennas, often called “cell”, “mobile”, or “PCS” phones.
These types of wireless phones can expose the user to measurable Radio
Frequency (RF) energy because of the short distance between the phone
and the user’s head.
Safety
These RF exposures are limited by FCC safety guidelines that were
developed with the advice of the FDA and other federal health and safety
agencies. When the phone is located at greater distances from the user,
the exposure to RF is drastically lower because a person’s RF exposure
decreases rapidly with increasing distance from the source. The so-called
“cordless phones,” which have a base unit connected to the telephone
wiring in a house, typically operate at far lower power levels, and thus
produce RF exposures far below the FCC safety limits.
4. What are the results of the research done already?
The research done thus far has produced conflicting results, and many
studies have suffered from flaws in their research methods. Animal
experiments investigating the effects of Radio Frequency (RF) energy
exposures characteristic of wireless phones have yielded conflicting
results that often cannot be repeated in other laboratories. A few animal
studies, however, have suggested that low levels of RF could accelerate
the development of cancer in laboratory animals. However, many of the
studies that showed increased tumor development used animals that had
been genetically engineered or treated with cancer-causing chemicals so
as to be pre-disposed to develop cancer in the absence of RF exposure.
Other studies exposed the animals to RF for up to 22 hours per day. These
conditions are not similar to the conditions under which people use wireless
phones, so we do not know with certainty what the results of such studies
mean for human health. Three large epidemiology studies have been
published since December 2000. Between them, the studies investigated
any possible association between the use of wireless phones and primary
brain cancer, glioma, meningioma, or acoustic neuroma, tumors of the
brain or salivary gland, leukemia, or other cancers. None of the studies
demonstrated the existence of any harmful health effects from wireless
phone RF exposures. However, none of the studies can answer questions
about long-term exposures, since the average period of phone use in these
studies was around three years.
5. What research is needed to decide whether RF exposure from
wireless phones poses a health risk?
205
206
Safety
A combination of laboratory studies and epidemiological studies of people
actually using wireless phones would provide some of the data that are
needed. Lifetime animal exposure studies could be completed in a few
years. However, very large numbers of animals would be needed to provide
reliable proof of a cancer promoting effect, if one exists. Epidemiological
studies can provide data that is directly applicable to human populations,
but ten or more years follow-up may be needed to provide answers about
some health effects, such as cancer. This is because the interval between
the time of exposure to a cancer-causing agent and the time tumors
develop - if they do - may be many, many years. The interpretation of
epidemiological studies is hampered by difficulties in measuring actual RF
exposure during day-to-day use of wireless phones. Many factors affect
this measurement, such as the angle at which the phone is held, or which
model of phone is used.
6. What is the FDA doing to find out more about the possible
health effects of wireless phone RF?
The FDA is working with the U.S. National Toxicology Program and with
groups of investigators around the world to ensure that high priority animal
studies are conducted to address important questions about the effects of
exposure to Radio Frequency (RF) energy.
The FDA has been a leading participant in the World Health Organization
International Electro Magnetic Fields (EMF) Project since its inception in
1996. An influential result of this work has been the development of a
detailed agenda of research needs that has driven the establishment of new
research programs around the world. The project has also helped develop a
series of public information documents on EMF issues.
The FDA and the Cellular Telecommunications & Internet Association
(CTIA) have a formal Cooperative Research And Development Agreement
(CRADA) to do research on wireless phone safety. The FDA provides the
scientific oversight, obtaining input from experts in government, industry,
and academic organizations. CTIA-funded research is conducted through
contracts with independent investigators. The initial research will include
both laboratory studies and studies of wireless phone users. The CRADA
Safety
will also include a broad assessment of additional research needs in the
context of the latest research developments around the world.
7. How can I find out how much Radio Frequency energy exposure
I can get by using my wireless phone?
All phones sold in the United States must comply with Federal
Communications Commission (FCC) guidelines that limit Radio Frequency
(RF) energy exposures. The FCC established these guidelines in
consultation with the FDA and the other federal health and safety agencies.
The FCC limit for RF exposure from wireless phones is set at a Specific
Absorption Rate (SAR) of 1.6 watts per kilogram (1.6 W/kg). The FCC limit is
consistent with the safety standards developed by the Institute of Electrical
and Electronic Engineering (IEEE) and the National Council on Radiation
Protection and Measurement. The exposure limit takes into consideration
the body’s ability to remove heat from the tissues that absorb energy from
the wireless phone and is set well below levels known to have effects.
Manufacturers of wireless phones must report the RF exposure level for
each model of phone to the FCC. The FCC website (http://www.fcc.gov/
cgb/cellular.html) gives directions for locating the FCC identification number
on your phone so you can find your phone’s RF exposure level in the online
listing.
8. What has the FDA done to measure the Radio Frequency energy
coming from wireless phones?
The Institute of Electrical and Electronic Engineers (IEEE) is developing a
technical standard for measuring the Radio Frequency (RF) energy exposure
from wireless phones and other wireless handsets with the participation and
leadership of FDA scientists and engineers. The standard, “Recommended
Practice for Determining the Spatial-Peak Specific Absorption Rate (SAR) in
the Human Body Due to Wireless Communications Devices: Experimental
Techniques”, sets forth the first consistent test methodology for measuring
the rate at which RF is deposited in the heads of wireless phone users.
The test method uses a tissue-simulating model of the human head.
Standardized SAR test methodology is expected to greatly improve the
consistency of measurements made at different laboratories on the same
207
208
Safety
phone. SAR is the measurement of the amount of energy absorbed in
tissue, either by the whole body or a small part of the body. It is measured
in watts/kg (or milliwatts/g) of matter. This measurement is used to
determine whether a wireless phone complies with safety guidelines.
9. What steps can I take to reduce my exposure to Radio Frequency
energy from my wireless phone?
If there is a risk from these products - and at this point we do not know that
there is - it is probably very small. But if you are concerned about avoiding even
potential risks, you can take a few simple steps to minimize your exposure to
Radio Frequency (RF) energy. Since time is a key factor in how much exposure a
person receives, reducing the amount of time spent using a wireless phone will
reduce RF exposure. If you must conduct extended conversations by wireless
phone every day, you could place more distance between your body and the
source of the RF, since the exposure level drops off dramatically with distance.
For example, you could use a headset and carry the wireless phone away from
your body or use a wireless phone connected to a remote antenna. Again, the
scientific data does not demonstrate that wireless phones are harmful. But if
you are concerned about the RF exposure from these products, you can use
measures like those described above to reduce your RF exposure from wireless
phone use.
10. What about children using wireless phones?
The scientific evidence does not show a danger to users of wireless
phones, including children and teenagers. If you want to take steps to lower
exposure to Radio Frequency (RF) energy, the measures described above
would apply to children and teenagers using wireless phones. Reducing the
time of wireless phone use and increasing the distance between the user
and the RF source will reduce RF exposure.
Some groups sponsored by other national governments have advised that
children be discouraged from using wireless phones at all. For example,
the government in the United Kingdom distributed leaflets containing
such a recommendation in December 2000. They noted that no evidence
exists that using a wireless phone causes brain tumors or other ill effects.
Their recommendation to limit wireless phone use by children was strictly
Safety
precautionary; it was not based on scientific evidence that any health hazard
exists.
11. What about wireless phone interference with medical
equipment?
Radio Frequency (RF) energy from wireless phones can interact with some
electronic devices. For this reason, the FDA helped develop a detailed
test method to measure Electro Magnetic Interference (EMI) of implanted
cardiac pacemakers and defibrillators from wireless telephones. This test
method is now part of a standard sponsored by the Association for the
Advancement of Medical Instrumentation (AAMI). The final draft, a joint
effort by the FDA, medical device manufacturers, and many other groups,
was completed in late 2000. This standard will allow manufacturers to
ensure that cardiac pacemakers and defibrillators are safe from wireless
phone EMI.
The FDA has tested hearing aids for interference from handheld wireless
phones and helped develop a voluntary standard sponsored by the Institute
of Electrical and Electronic Engineers (IEEE). This standard specifies test
methods and performance requirements for hearing aids and wireless
phones so that no interference occurs when a person uses a “compatible”
phone and a “compatible” hearing aid at the same time. This standard was
approved by the IEEE in 2000.
The FDA continues to monitor the use of wireless phones for possible
interactions with other medical devices. Should harmful interference be
found to occur, the FDA will conduct testing to assess the interference and
work to resolve the problem.
12. Where can I find additional information?
For additional information, please refer to the following resources:
FDA web page on wireless phones (http://www.fda.gov), under “C” in the
subject index, select Cell Phones > Research.
Federal Communications Commission (FCC) RF Safety Program (http://
www.fcc.gov/oet/rfsafety/)
209
210
Safety
International Commission on Nonlonizing Radiation Protection (http://www.
icnirp.de)
World Health Organization (WHO) International EMF Project (http://www.
who.int/emf)
Health Protection Agency (http://www.hpa.org.uk/)
10 Driver Safety Tips
Your wireless phone gives you the powerful ability to communicate by voice
almost anywhere, anytime. An important responsibility accompanies the
benefits of wireless phones, one that every user must uphold.
When operating a car, driving is your first responsibility. When using your
wireless phone behind the wheel of a car, practice good common sense
and remember the following tips:
1. Get to know your wireless phone and its features such as speed dial and
redial. Carefully read your instruction manual and learn to take advantage
of valuable features most phones offer, including automatic redial and
memory. Also, work to memorize the phone keypad so you can use the
speed dial function without taking your attention off the road.
2. When available, use a hands-free device. A number of hands-free
wireless phone accessories are readily available today. Whether you
choose an installed mounted device for your wireless phone or a speaker
phone accessory, take advantage of these devices if available to you.
3. Make sure you place your wireless phone within easy reach and where
you can reach it without removing your eyes from the road. If you get
an incoming call at an inconvenient time, if possible, let your voicemail
answer it for you.
4. Suspend conversations during hazardous driving conditions or situations.
Let the person you are speaking with know you are driving; if necessary,
suspend the call in heavy traffic or hazardous weather conditions. Rain,
sleet, snow, and ice can be hazardous, but so is heavy traffic. As a driver,
your first responsibility is to pay attention to the road.
5. Don’t take notes or look up phone numbers while driving. If you are
Safety
reading an address book or business card, or writing a “to-do” list while
driving a car, you are not watching where you are going. It is common
sense. Do not get caught in a dangerous situation because you are
reading or writing and not paying attention to the road or nearby vehicles.
6. Dial sensibly and assess the traffic; if possible, place calls when you are
not moving or before pulling into traffic. Try to plan your calls before you
begin your trip or attempt to coincide your calls with times you may be
stopped at a stop sign, red light, or otherwise stationary. But if you need
to dial while driving, follow this simple tip - dial only a few numbers,
check the road and your mirrors, then continue.
7. Do not engage in stressful or emotional conversations that may be
distracting. Stressful or emotional conversations and driving do not mix;
they are distracting and even dangerous when you are behind the wheel
of a car. Make people you are talking with aware you are driving and if
necessary, suspend conversations which have the potential to divert
your attention from the road.
8. Use your wireless phone to call for help. Your wireless phone is one of
the greatest tools you can own to protect yourself and your family in
dangerous situations -- with your phone at your side, help is only three
numbers away. Dial 911 or other local emergency number in the case of
fire, traffic accident, road hazard, or medical emergency. Remember, it’s
a free call on your wireless phone!
9. Use your wireless phone to help others in emergencies. Your wireless
phone provides you a perfect opportunity to be a “Good Samaritan” in
your community. If you see an auto accident, crime in progress or other
serious emergency where lives are in danger, call 911 or other local
emergency number, as you would want others to do for you.
10. Call roadside assistance or a special wireless non-emergency assistance
number when necessary. Certain situations you encounter while driving
may require attention, but are not urgent enough to merit a call for
emergency services. But you can still use your wireless phone to lend
a hand. If you see a broken-down vehicle posing no serious hazard,
a broken traffic signal, a minor traffic accident where no one appears
injured or a vehicle you know to be stolen, call roadside assistance or
other special non-emergency wireless number.
211
212
Safety
The above tips are meant as general guidelines. Before deciding to use
your mobile device while operating a vehicle, it is recommended that
you consult your applicable jurisdiction’s local laws or other regulations
regarding such use. Such laws or other regulations may prohibit or
otherwise restrict the manner in which a driver may use his or her phone
while operating a vehicle.
Consumer Information on SAR
(Specific Absorption Rate)
This model phone meets the Government’s requirements for exposure
to radio waves. Your wireless phone is a radio transmitter and receiver.
It is designed and manufactured not to exceed the emission limits for
exposure to radiofrequency (RF) energy set by the Federal Communications
Commission (FCC) of the U.S. Government. These FCC exposure limits
are derived from the recommendations of two expert organizations, the
National Counsel on Radiation Protection and Measurement (NCRP) and the
Institute of Electrical and Electronics Engineers (IEEE). In both cases, the
recommendations were developed by scientific and engineering experts
drawn from industry, government, and academia after extensive reviews of
the scientific literature related to the biological effects of RF energy.
The exposure limit for wireless mobile phones employs a unit of measurement
known as the Specific Absorption Rate, or SAR. The SAR is a measure of the
rate of absorption of RF energy by the human body expressed in units of watts
per kilogram (W/kg). The FCC requires wireless phones to comply with a safety
limit of 1.6 watts per kilogram (1.6 W/kg). The FCC exposure limit incorporates
a substantial margin of safety to give additional protection to the public and to
account for any variations in measurements.
Tests for SAR are conducted using standard operating positions specified
by the FCC with the phone transmitting at its highest certified power level
in all tested frequency bands. Although SAR is determined at the highest
certified power level, the actual SAR level of the phone while operating
can be well below the maximum value. Because the phone is designed to
operate at multiple power levels to use only the power required to reach
the network, in general, the closer you are to a wireless base station
Safety
antenna, the lower the power output.
Before a phone model is available for sale to the public, it must be tested
and certified to the FCC that it does not exceed the limit established by
the government adopted requirement for safe exposure. The tests are
performed in positions and locations (e.g., at the ear and worn on the body)
as required by the FCC for each model.
The FCC has granted an Equipment Authorization for this model phone
with all reported SAR levels evaluated as in compliance with the FCC RF
emission guidelines.
The highest SAR value for this model phone when tested for use at the
ear is 1.14 W/kg and when worn on the body, as described in this user’s
manual, is 1.17 W/kg. While there may be differences between SAR levels
of various phones and at various positions, they all meet the government
requirement for safe exposure.
SAR information on this model phone is on file with the FCC and can be
found under the Display Grant section of http://www.fcc.gov/oet/ea/fccid/
after searching on FCC ID ZNFVS840.
To find information that pertains to a particular model phone, this site uses
the phone FCC ID number which is usually printed somewhere on the
case of the phone. Sometimes it may be necessary to remove the battery
pack to find the number. Once you have the FCC ID number for a particular
phone, follow the instructions on the website and it should provide values
for typical or maximum SAR for a particular phone.
Additional information on Specific Absorption Rates (SAR) can be found
on the Cellular Telecommunications Industry Association (CTIA) website at
http://www.ctia.org/
*In the United States and Canada, the SAR limit for mobile phones used
by the public is 1.6 watts/kg (W/kg) averaged over one gram of tissue.
The standard incorporates a substantial margin of safety to give additional
protection for the public and to account for any variations in measurements.
213
214
Safety
FCC Hearing-Aid Compatibility (HAC) Regulations
for Wireless Devices
On July 10, 2003, the U.S. Federal Communications Commission (FCC)
Report and Order in WT Docket 01-309 modified the exception of wireless
phones under the Hearing Aid Compatibility Act of 1988 (HAC Act) to
require digital wireless phones be compatible with hearing-aids. The intent
of the HAC Act is to ensure reasonable access to telecommunications
services for persons with hearing disabilities.
While some wireless phones are used near some hearing devices (hearing
aids and cochlear implants), users may detect a buzzing, humming, or
whining noise. Some hearing devices are more immune than others to this
interference noise, and phones also vary in the amount of interference they
generate.
The wireless telephone industry has developed a rating system for
wireless phones, to assist hearing device users to find phones that may
be compatible with their hearing devices. Not all phones have been rated.
Phones that are rated have the rating on their box or a label located on the
box.
The ratings are not guarantees. Results will vary depending on the user’s
hearing device and hearing loss. If your hearing device happens to be
vulnerable to interference, you may not be able to use a rated phone
successfully. Trying out the phone with your hearing device is the best way
to evaluate it for your personal needs.
M-Ratings: Phones rated M3 or M4 meet FCC requirements and are likely
to generate less interference to hearing devices than phones that are not
labeled. M4 is the better/higher of the two ratings.
Hearing devices may also be rated. Your hearing device manufacturer or
hearing health professional may help you find this rating. Higher ratings
mean that the hearing device is relatively immune to interference noise.
The hearing aid and wireless phone rating values are then added together. A
sum of 5 is considered acceptable for normal use. A sum of 6 is considered
for best use.
Safety
In the example to the left, if a hearing aid meets the M2 level
rating and the wireless phone meets the M3 level rating, the
sum of the two values equal M5. This should provide the
hearing aid user with “normal usage” while using their
hearing aid with the particular wireless phone. “Normal usage” in this
context is defined as a signal quality that’s acceptable for normal operation.
The M mark is intended to be synonymous with the U mark. The T mark
is intended to be synonymous with the UT mark. The M and T marks are
recommended by the Alliance for Telecommunications Industries Solutions
(ATIS). The U and UT marks are referenced in Section 20.19 of the FCC
Rules. The HAC rating and measurement procedure are described in the
American National Standards Institute (ANSI) C63.19 standard.
When you’re talking on a cell phone, it’s recommended that you turn the BT
(Bluetooth) mode off for HAC.
According to HAC policy(KDB 285076), we state this handset has not been
rated for hearing aid compatibility with respect to the WiFi capability.
For information about hearing aids and digital wireless phones
Wireless Phones and Hearing Aid Accessibility
http://www.accesswireless.org/Home.aspx
FCC Hearing Aid Compatibility and Volume Control
http://www.fcc.gov/cgb/consumerfacts/hac_wireless.html
215
216
Specifications
DivX Mobile
ABOUT DIVX VIDEO: DivX® is a digital video format created by DivX, LLC, a
subsidiary of Rovi Corporation. This is an official DivX Certified® device that
plays DivX video. Visit divx.com for more information and software tools to
convert your files into DivX videos.
ABOUT DIVX VIDEO-ON-DEMAND: This DivX Certified® device must be
registered in order to play purchased DivX Video-on-Demand (VOD) movies.
To obtain your registration code, locate the DivX VOD section in your device
setup menu. Go to vod.divx. com for more information on how to complete
your registration.
DivX Certified® to play DivX® video up to HD 720p, including premium
content.
DivX®, DivX Certified® and associated logos are trademarks of Rovi
Corporation or its subsidiaries and are used under license.
Dolby Mobile License notice
Manufactured under license from Dolby Laboratories. Dolby and the
double-D symbol are trademarks of Dolby Laboratories.
FAQ
Please check to see if any problems you have encountered with your phone
are described in this section before taking the phone in for service or calling
a service representative.
Category Sub-Category
BT
BT
Data
Data
Data
Data
GoogleTM
Service
Bluetooth
Devices
Question
What are the functions
available via Bluetooth?
If my Bluetooth device
is connected, can I listen
to my music through
my 3.5mm wired
headphones?
Contacts
How can I back up
Backup
Contacts?
Is it possible to set up oneSynchronization
way-sync with Gmail?
Is it possible to
Synchronization synchronize all the Email
folders?
Bluetooth
device
Synchronization
Is it possible to transfer
Contacts data from a
feature phone to an
AndroidTM phone?
Should I have to log into
Gmail Log-In Gmail whenever I want to
access Gmail?
Answer
Connecting to Stereo/Mono Headset,
Car Kit, FTP server is possible. When it’s
connected to another phone via Bluetooth,
you can receive Contacts data.
When a Bluetooth device is connected, all
system sounds are played over the headset.
As a result, you will not be able to listen to
music through your wired headphones.
The Contacts data can be synchronized
between your phone and GmailTM.
Only two-way synchronization is available.
The Inbox is automatically synchronized.
You can view other folders by touching the
and selecting Folders.
Menu Key
Yes, if your contacts can be extracted into
a .CSV file.
How to transfer:
1. Create “.CSV” file with the contacts on
your current phone (you may be able to use
the PC suite software provided by LGE).
2. Log into Gmail with your PC.
3. Click Contacts.
4. Click Import.
5. Attach the “.CSV” file.
6. Your contacts will then be synchronized
between your Android phone and Gmail.
Once you log into Gmail, you don’t need to
log in Gmail again.
Google
Service
Google
Account
Is it possible to filter
emails?
No, email filtering is not supported via the
phone.
Phone
Function
YouTubeTM
Is it possible to play
YouTube videos?
Yes, YouTube videos are supported but may
have to be viewed through the YouTube
application (and not the Browser).
217
218
FAQ
Category Sub-Category
Phone
Function
Email
Phone
Function
Ringtone
Phone
Function
Message
Time
Question
What happens when
I execute another
application while writing
an email?
Is there a file size limitation
for when I want to use an
.MP3 file as a ringtone?
My phone does not display
the time of receipt for
messages older than 24
hours. How can I change
this?
Answer
Your email will automatically be saved as
a draft.
There is no file size limitation.
You will only be able to see the times for
messages received the same day.
Some applications can be saved to the
microSD card.
Is it possible to save
Phone
microSD Card applications to the
Function
microSD card?
1. From the Home Screen, touch the Menu
> Settings > Applications >
Key
Manage applications.
2. Touch an application > Move to SD card.
What is the maximum
Phone
microSD Card supported size for a
Function
memory card?
Phone
Function
Navigation
Is it possible to install
another navigation
application on my phone?
Is it possible to
Phone
synchronize my contacts
Synchronization
Function
from all my email
accounts?
32GB memory cards are compatible.
Any application that is available on Android
MarketTM and is compatible with the
hardware can be installed and used.
Only Gmail and MS Exchange server
(Company Email Server) contacts can be
synchronized.
If you transferred a contact with the Wait
& Pause functions saved into the number,
those functions will not be recognized. You
will need to re-save each number.
How to re-save numbers with Wait and Pause:
Phone
Function
Wait and
Pause
Is it possible to save a
contact with Wait and
Pause in the numbers?
1. From the Home Screen, touch the Phone
Key
(in the Quick Keys bar).
2. Dial the number, then touch the Menu
Key
.
3. Touch Add 2-sec pause or Add wait.
4. Enter the remaining number(s) and
continue saving the number as necessary.
FAQ
Category Sub-Category
Question
Answer
You are able to set the phone to require
the entry of an unlock sequence (pattern,
PIN, or password) before the phone can be
accessed or used.
Phone
Function
Security
What are the phone’s
security functions?
Phone
Function
Unlock
Pattern
After attempting the Unlock Pattern 5 times,
What should I do if I forget you can touch the Forget Pattern? option
my Unlock Pattern?
and use your Google Account information to
unlock your phone.
Without entering the Unlock Pattern, you
will not be able to access your phone.
Caution: If you perform a factory reset, all user
applications and user data will be deleted.
Please remember to back up any important
data before performing a factory reset.
How to perform a factory reset:
1. Turn the power off.
2. Touch and hold the following keys at the
same time for 12 seconds: Power/Lock
+ the down Volume Key.
Key
Phone
Function
Unlock
Pattern
What should I do if I forgot
3. Release the keys when you see the
the Unlock Pattern and
screen message "Permanently Erase
I didn’t create a Google
User Data & Reset Settings?, press the
Account on the phone?
Power Key to confirm and any other key
to cancel."
to confirm
4. Press the Power/Lock Key
(or press any other key to cancel).
When you press the Power/Lock Key
to confirm, a pop-up appears asking
"Are you sure you want to continue with
erase?".
and your
5. Press the Power/Lock Key
phone will be restored to the factory
settings. To cancel, press any other key.
219
220
FAQ
Category Sub-Category
Question
Answer
1. From the Home Screen, touch the Menu
.
Key
2. Touch Settings > Security.
Phone
Function
Unlock
Pattern
How do I create the
Unlock Pattern?
3. Touch Set up screen lock (under the
Screen unlock section of the settings).
4. Touch Pattern. The first time you do this,
a short tutorial about creating an unlock
pattern appears.
5. Set up by drawing your pattern once >
Continue, draw again > Confirm.
Yes. You can set Speed Dials as well as save
a contact directly on your Home screen.
To set a Speed Dial:
Phone
Function
Speed Dial
Is Speed Dialing
supported?
1. Open the Contacts application, then
touch the contact you want.
> More >
2. Touch the Menu Key
Speed dials.
3. Touch the phone number you want, then
touch the Speed Dial to set.
To set a Direct Dial shortcut to your Home
screen:
1. From the Home Screen, touch the Menu
> Add.
Key
2. Touch Shortcuts > Direct Dial.
3. Select a contact from your Contacts List.
Phone
Function
Memory
Is it possible to save a
picture to the internal
memory while taking a
picture?
Phone
Function
Memory
Will I know when my
memory is full?
Pictures, along with Music and Video files,
cannot be saved to the internal memory.
They are saved to your microSD card.
Yes, you will receive a notification.
The phone has multi-lingual capabilities.
Phone
Function
Language
Support
To change the language:
1. From the Home Screen, touch the Menu
Is it possible to change the Key
> Settings.
language?
2. Touch Language & keyboard > Select
language.
3. Touch the desired language.
FAQ
Category Sub-Category
Phone
Function
Phone
Function
Phone
Function
Phone
Function
Language
Support
VPN
Question
Answer
Which languages are
supported when using
Android Market?
The Market application supports English and
Spanish. Third party applications may not
support all languages.
How do I set up a VPN?
VPN access configuration is different
according to each company. To configure
VPN access from your phone, you must
obtain the details from your company’s
network administrator.
1. From the Home Screen, touch the Menu
My screen turns off after
.
Key
only 15 seconds. How can
2. Touch Settings > Display > Screen
Screen time
I change the amount of
timeout.
out
time for the backlight to
3. Touch the preferred screen backlight
turn off?
timeout time.
Wi-Fi & 4G
When Wi-Fi and 4G are
both available, which
service will my phone use?
When using data, your phone may default
to the Wi-Fi connection (if Wi-Fi connectivity
on your phone is set to On). However, there
will be no notification when your phone
switches from one to the other.
To know which data connection is being
used, use the 4G or Wi-Fi icon at the top of
your screen.
Yes. Just touch and hold the icon until the
Is it possible to remove an
Phone
trash can icon appears at the bottom-center
Home screen application from the Home
Function
of the screen. Then, without lifting your
screen?
finger, drag the icon to the trash can.
Phone
Function
Application
I downloaded an
application and it causes
a lot of errors. How do I
remove it?
1. From the Home Screen, touch the Menu
.
Key
2. Touch Settings > Applications >
Manage applications.
3. Touch the application > Uninstall.
221
222
FAQ
Category Sub-Category
Phone
Function
Camera
Question
My phone’s camera does
not take pictures and says
“No SD Card or SD card is
not ready!”. Why doesn’t
it work?
Answer
A microSD card must be inserted in order to
use the phone’s camera.
Verify that the microSD card is mounted on
the device.
> Settings >
Touch the Menu Key
Storage > Mount SD card
Yes. After saving a music file as a ringtone,
you can use it for your alarm.
Phone
Function
Alarm
O
Touch and hold a song in a library list. In
the Context menu that opens, touch Use
as phone ringtone.
O
In an alarm clock setting screen, select the
music as a ringtone.
Can I use music files for
my alarm?
Phone
Function
Alarm
Will my alarm be audible or
will it go off if the phone is No, this is not supported.
turned off?
Phone
Function
Alarm
If my Ringer Volume is
Your alarm is programmed to be audible
set to Off or Vibrate, will I
even in these scenarios.
hear my alarm?
Phone
Spec
Battery Time
Phone
Spec
Band
What is the maximum
amount of time my phone’s Talk time : Approx. 455 mins
battery will last before I
Standby : Approx. 20 days
need to recharge it?
Which wireless bands are
supported by the phone?
Your phone is able to operate on the
800Mhz and 1900MHz bands.
FAQ
Category Sub-Category
Question
Answer
1. From the Home Screen, touch the Menu
.
Key
2. Touch Settings > Privacy > Factory
data reset.
NOTE Touch the checkbox to also erase
all contents from your microSD card
when the phone is reset.
Recovery
How do I perform a factory
3. Read the warning and touch Reset
Factory Reset
Solution
reset?
phone.
4. Touch Erase everything.
Attention:
If a factory reset is performed, all installed
application and user data will be erased. Please
remember to back up any important data before
performing a factory reset.
How to perform a factory reset:
1. Turn the power off.
2. Touch and hold the following keys at the
same time for 12 seconds: Power/Lock
+ the down Volume Key.
Key
3. Release the keys when you see the
screen message "Permanently Erase
User Data & Reset Settings?, press the
Power Key to confirm and any other key
to cancel."
to confirm
4. Press the Power/Lock Key
How can I perform a
(or press any other key to cancel).
Recovery
factory reset if I can’t
Factory Reset
When you press the Power/Lock Key
Solution
access the phone’s setting
to confirm, a pop-up appears asking
menu?
“Are you sure you want to continue with
erase?”.
and your
5. Press the Power/Lock Key
phone will be restored to the factory
settings. To cancel, press any other key.
Attention:
If a factory reset is performed, all installed
applications and user data will be erased.
Please remember to back up any important
data before performing a factory reset.
223
224
LIMITED WARRANTY STATEMENT
1. WHAT THIS WARRANTY COVERS:
LG offers you a limited warranty that the enclosed subscriber unit
and its enclosed accessories will be free from defects in material and
workmanship, according to the following terms and conditions:
(1) The limited warranty for the product extends for TWELVE (12) MONTHS
beginning on the date of purchase of the product with valid proof of
purchase, or absent valid proof of purchase, FIFTEEN (15) MONTHS
from date of manufacture as determined by the unit’s manufacture date
code.
(2) The limited warranty extends only to the original purchaser of the product
and is not assignable or transferable to any subsequent purchaser/end
user.
(3) This warranty is good only to the original purchaser of the product during
the warranty period as long as it is in the U.S., including Alaska, Hawaii,
U.S. Territories and Canada.
(4) The external housing and cosmetic parts shall be free of defects at the
time of shipment and, therefore, shall not be covered under these limited
warranty terms.
(5) Upon request from LG, the consumer must provide information to
reasonably prove the date of purchase.
(6) The customer shall bear the cost of shipping the product to the
Customer Service Department of LG. LG shall bear the cost of shipping
the product back to the consumer after the completion of service under
this limited warranty.
2. WHAT THIS WARRANTY DOES NOT COVER:
(1) Defects or damages resulting from use of the product in other than its
normal and customary manner.
(2) Defects or damages from abnormal use, abnormal conditions, improper
storage, exposure to moisture or dampness, unauthorized modifications,
unauthorized connections, unauthorized repair, misuse, neglect, abuse,
accident, alteration, improper installation, or other acts which are not the
fault of LG, including damage caused by shipping, blown fuses, spills of
food or liquid.
(3) Breakage or damage to antennas unless caused directly by defects in
material or workmanship.
(4) That the Customer Service Department at LG was not notified by
consumer of the alleged defect or malfunction of the product during the
applicable limited warranty period.
LIMITED WARRANTY STATEMENT
(5) Products which have had the serial number removed or made illegible.
(6) This limited warranty is in lieu of all other warranties, express or implied
either in fact or by operations of law, statutory or otherwise, including,
but not limited to any implied warranty of marketability or fitness for a
particular use.
(7) Damage resulting from use of non LG approved accessories.
(8) All plastic surfaces and all other externally exposed parts that are
scratched or damaged due to normal customer use.
(9) Products operated outside published maximum ratings.
(10) Products used or obtained in a rental program.
(11) Consumables (such as fuses).
3. WHAT LG WILL DO:
LG will, at its sole option, either repair, replace or refund the purchase price
of any unit that does not conform to this limited warranty. LG may choose
at its option to use functionally equivalent re-conditioned, refurbished or
new units or parts or any units. In addition, LG will not re-install or back-up
any data, applications or software that you have added to your phone. It is
therefore recommended that you back-up any such data or information prior
to sending the unit to LG to avoid the permanent loss of such information.
4. STATE LAW RIGHTS:
No other express warranty is applicable to this product. THE DURATION
OF ANY IMPLIED WARRANTIES, INCLUDING THE IMPLIED WARRANTY
OF MARKETABILITY OR MERCHANTABILITY OR FITNESS FOR A
PARTICULAR PURPOSE, IS LIMITED TO THE DURATION OF THE
EXPRESS WARRANTY HEREIN. LG SHALL NOT BE LIABLE FOR THE
LOSS OF THE USE OF THE PRODUCT, INCONVENIENCE, LOSS OR ANY
OTHER DAMAGES, DIRECT OR CONSEQUENTIAL, ARISING OUT OF THE
USE OF, OR INABILITY TO USE, THIS PRODUCT OR FOR ANY BREACH
OF ANY EXPRESS OR IMPLIED WARRANTY, INCLUDING THE IMPLIED
WARRANTY OF MARKETABILITY OR MERCHANTABILITY OR FITNESS
FOR A PARTICULAR PURPOSE APPLICABLE TO THIS PRODUCT.
225
226
LIMITED WARRANTY STATEMENT
Some states do not allow the exclusive limitation of incidental or
consequential damages or limitations on how long an implied warranty
lasts; so these limitations or exclusions may not apply to you. This warranty
gives you specific legal rights and you may also have other rights which
vary from state to state.
5. HOW TO GET WARRANTY SERVICE:
If you experience any problems with either the Bluetooth headset or the
mobile handset, in each case as may be covered by this limited warranty,
you need only return the affected device. For example, if a problem exists
with the Bluetooth headset, please DO NOT return your mobile handset
with the headset. Likewise, if a problem exists with the mobile handset,
please DO NOT return the Bluetooth Headset with the handset.
To obtain warranty service, please call or fax to the following telephone
numbers from anywhere in the continental United States:
Tel. 1-800-793-8896 or Fax. 1-800-448-4026
Or visit http://us.lgservice.com. Correspondence may also be mailed to:
LG Electronics Service- Mobile Handsets, P.O. Box 240007, Huntsville, AL
35824
DO NOT RETURN YOUR PRODUCT TO THE ABOVE ADDRESS.
Please call or write for the location of the LG authorized service center
nearest you and for the procedures for obtaining warranty claims.
Index
123
10 Driver Safety Tips 210
Changing and Monitoring
Online Status 118
A
Changing Browser settings
76
Adding a Contact to Your
Favorites 91
Changing Google Talk
Settings 121
Adding application icons to
the Home screen 38
Changing Messaging
Settings 110
Adding Contacts 89
Changing Weather Settings
82
Airplane mode 64
D
DivX Mobile 216
Dolby Mobile License notice
216
Downloading and Installing
Applications 146
E
Editing Contact Details 92
Charging the Phone 21
Editing or deleting an event
169
Charging with USB 21
Email 97
Chatting with Friends 116
Checking the Weather 80
Email and Messaging icons
28
Applications 34, 35
Communication 87
Entertainment 126
Exchanging Messages 107
B
Composing and Sending a
Message 104
Alarm/Clock 171
and Sharing Contacts 89
Answering or Rejecting
Calls 64
Backup Assistant Plus 83
Bookmark 75
Connecting Quickly With
Your Contacts 50
Browser 73
Connecting to Networks
and Devices 51
C
Connecting to Wi-Fi
Networks 51
Calculator 170
Calendar 162
Connectivity icons 29
Exporting 89
F
FAQ 217
FCC Hearing-Aid
Compatibility (HAC)
Regulations for Wireless
Devices 214
Consumer Information on
SAR 212
FDA Consumer Update 203
Calendar & Alarm icons 28
Call a Contact by Voice
Dialing 125
Contact History Tab 88
Front View 15
Call icons 28
Calling Your Contacts 68
Call log 123
Frequent List 63
Contacts 87, 123
Context menus 40
Creating an Event 168
Camera 126
Customizing the
Applications screen 36
Caution: Avoid potential
hearing loss. 200
Customizing the Home
Screen 46, 47
G
Gallery 132
Getting answers about how
to use phone 27
Getting Answers About
How to Use the Phone 27
227
228
Index
Getting to Know the Home
Screen 30
Gmail 101
Google Account 26
Groups 123
M
Optimizing Battery Life 22
Managing Multiple Calls 70
Options During a Call 69
Managing Notifications 41
Options menus 40
Maps 79
Market 144
H
Messaging 106
Home screen 31
microSD Card 59
Home screen canvases 31
microSD Card Settings 59
Mini canvas view 31
P
Page content settings 77
Phone 123
Phone Overview 15
Phone’s Status Icons 28
Photo options 126
I
Mobile Hotspot 57
Important Customer
Information 1
Music 148
Importing 89
N
Placing and Ending Calls 61
Index 227
Network icons 29
Playing Music 150
Installing the Battery and
microSD Card 18
O
Instant List 62
Open an Application using
Voice Dialer 125
Internet 75
J
Photo Tab 88
Pinch peek 135
Polaris Office 173
open Google Talk and sign
in 115
Q
Quick Keys 30
R
Joining Contacts 96
Opening and Closing the
Applications screen 36
L
Opening Android Market
and Finding Applications
144
Replying to or Forwarding a
Message 105
Opening and Switching
Applications 37
S
Opening Email and the
Accounts Screen 97
Safety Information 197
Landscape view 153
LIMITED WARRANTY
STATEMENT 224
Listening to Your Voicemail
72
Locking the Screen 44
Opening Gallery and
Viewing Your Albums 132
Opening Gmail and Your
Inbox 101
Opening Music and Working
with Your Library 149
Reading Your Messages 99
Rear View 16
Safety 193
Searching for a Contact 91
Searching Your Phone and
the Web 42, 43
Selecting an Instant list
entry 63
Index
Selecting Which Contacts
are Displayed 95
Separating Contact
Information 97
Touchscreen 32
Working with Pictures 137
Transferring Music Files to
Your Phone 148
Working with Playlists 153
Turning the phone off 23
Working with the Call Log
66
Sequence matches 62
Turning the phone on 23
Working with Videos 140
Setting Alarms 171
Turning the Phone On and
Off 23
Work with Batches of
Pictures or Videos 136
Setting an Event Reminder
169
Writing Your Messages 99
Settings 176
U
Setting the Timer 172
USB Autorun 54
Y
Setting the World Clock
173
Using the Swype Keyboard
114
Your Photos and Videos
132
Setting Up Your Device 25
ShareGenie 174
Smart Movie HD 142
SmartShare 27, 155
Sound icons 28
Specifications 216
YouTubeTM 158
V
Video Camera 130
Video options 130
Video player 157
Viewing Event Details 167
Stopwatch 173
Viewing Your Calendar and
Events 162
Swype Text Entry Tips 114
Voice Dialer 68, 69, 124
System icons 29
Voice Mail 100
T
Voice Recorder 160
Table of Contents 7
W
Talk 115
Wi-Fi Direct connection 53
Technical Details 10
Working in Day View 164
Text Input Methods 33
The Basics 15
Working in Month View
166
The Phone application 123
Working in Week View 165
TIA Safety Information 193
Working with Albums 134
Tools 162
Working with Conversations
in Batches 106
Top View and Side Views
17
Working with Menus 40
229