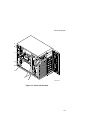
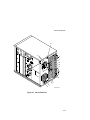
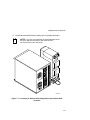
1
DIGITAL Server 5220 Series System Reference Part Number: ER-J2BWW-UA. A01 Digital Equipment Corporation June 1998 The information in this document is subject to change without notice and should not be construed as a commitment by Digital Equipment Corporation. Digital Equipment Corporation assumes no responsibility for any errors that might appear in this document. The software, if any, described in this document is furnished under a license and may be used or copied only in accordance with the terms of such license. No responsibility is assumed for the use or reliability of software or equipment that is not supplied by Digital Equipment Corporation or its affiliated companies. Restricted Rights: Use, duplication, or disclosure by the U.S. Government is subject to restrictions as set forth in subparagraph (c) (1) (ii) of the Rights in Technical Data and Computer Software clause at DFARS 252.227-7013. DIGITAL Server 5220 Series System Reference © 1998 Digital Equipment Corporation. All Rights Reserved. DEC, DIGITAL, ServerWORKS, and the DIGITAL logo are trademarks of Digital Equipment Corporation. Intel, Pentium Pro, and Pentium II are registered trademarks of Intel Corporation. Microsoft, Windows NT, and Windows 95 are registered trademarks of Microsoft Corporation. Novell and NetWare are U.S. registered trademarks of Novell Inc. OS/2 and PS/2 are registered trademarks of International Business Machines Corporation. PhoenixBIOS is a trademark of Phoenix Technologies Ltd. Symbios is a trademark of Symbios, Inc. SCO UNIX is a trademark of The Santa Cruz Operation, Inc. UNIX is a trademark of The Open Group. All other trademarks and registered trademarks are the property of their respective holders. Regulatory Compliance Statements The following statements of compliance are required by the respective governmental regulatory agencies. FCC Notice — U.S.A. This equipment has been tested and found to comply with the limits for a Class B digital device, pursuant to Part 15 of the FCC rules. These limits are designed to provide reasonable protection against harmful interference in a residential installation. This equipment generates, uses, and can radiate radio frequency energy and, if not installed and used in accordance with the instructions, may cause harmful interference to radio communications. However, there is no guarantee that interference will not occur in a particular installation. If this equipment does cause harmful interference to radio or television reception, which can be determined by turning the equipment off and on, the user is encouraged to try to correct the interference by one or more of the following measures: • Reorient or relocate the receiving antenna. • Increase the separation between the equipment and receiver. • Connect the equipment into an outlet on a circuit different from that to which the receiver is connected. • Consult the dealer or an experienced radio/TV technician for help. All external cables connecting to this basic unit need to be shielded. For cables connecting to option boards, see the option manual or installation instructions. CSA — Canada This digital apparatus does not exceed the Class B limits for radio noise emissions established in the radio interference regulations of the Canadian Department of Communications. VCCI — Japan This equipment is a Class II product based on the standard of the Voluntary Control Council for Interference Technology Equipment (VCCI). If it is used near a radio or television receiver in a domestic environment, it may cause radio interference. Install and use the equipment according to the instruction manual. Ergonomics — Germany This equipment meets or exceeds the ergonomic requirements of ZH1/618, TÜV, Rheinland, Germany. Safety Requirements This equipment meets or exceeds safety requirements in the U.S. (UL 1950), Canada (CSA C22.2 No. 950), and Europe (IEC 950 and TÜV EN60950/A3: 1995). The product is certified to bear the GS-Mark (Geprüfte Sicherheit) and CB certification. Laser Safety Notice All CD-ROM drives included in DIGITAL servers are classified as Class 1 laser products and comply with safety standards as set by U.S. government and applicable European agencies. No hazardous radiation is emitted from this CD-ROM drive; the laser beam is completely enclosed in the CD-ROM subassembly during all customer operations and maintenance. In the event that repair or service of the CD-ROM subassembly is required, only authorized Digital service personnel should perform such repairs. Contents Preface Introduction ..................................................................................................... Audience ......................................................................................................... Support Information......................................................................................... Organization.................................................................................................... Conventions .................................................................................................... Abbreviations .................................................................................................. Special Notices................................................................................................ ix ix x xi xiii xiv xvii 1 Introduction Reliability/Availability................................................................................. Server Expansion ..................................................................................... Server Management and Security............................................................. Server Software and Documentation ............................................................... Diagnostic Software......................................................................................... Server Utilities and Technical Support.............................................................. 1-1 1-2 1-4 1-5 1-6 1-7 2 Server Software and Utilities Introduction ..................................................................................................... ServerWORKS Quick Launch.......................................................................... BIOS Setup Utility............................................................................................ Accessing the BIOS Setup Utility .............................................................. Helpful Hints ............................................................................................. Changing Your Server’s Configuration ............................................................. Changing Time and Date .......................................................................... Changing I/O Port Settings ....................................................................... Assigning IRQs ............................................................................................... Advanced ................................................................................................. Setting Up Security................................................................................... Changing the Boot Sequence ................................................................... 2-1 2-2 2-2 2-4 2-5 2-6 2-6 2-7 2-8 2-8 2-9 2-13 i Contents Speeding up the Boot Process.................................................................. Checking System Management Parameters ............................................. BIOS Upgrade Utility ....................................................................................... SCSI Configuration Utility ................................................................................ Determining Devices Attached to Each SCSI Channel............................... RAID Configuration Utility ................................................................................ Diagnostics ..................................................................................................... 2-14 2-15 2-16 2-17 2-18 2-19 2-19 3 Server Components Introduction ..................................................................................................... Disconnecting External Devices and Power ..................................................... Removing and Installing the Side Panels ......................................................... Server Front View............................................................................................ Server Left Side View ...................................................................................... Server Right Side View.................................................................................... Server Rear View ............................................................................................ Main Logic Board Connectors.......................................................................... Main Logic Board Components........................................................................ Processor Module Components....................................................................... Video/Ethernet Daughter Card Connectors and Indicators ............................... Tools Needed.................................................................................................. Static Electricity............................................................................................... Replacing the Real Time Clock (RTC) Battery.................................................. Adding a Second Power Supply....................................................................... 3-1 3-2 3-3 3-6 3-8 3-10 3-12 3-14 3-16 3-18 3-19 3-20 3-20 3-21 3-23 4 Server Management Introduction ..................................................................................................... Managing Your Server..................................................................................... Obtaining Information about Your Server ......................................................... Obtaining Information Using the BIOS Setup Utility ................................... Obtaining Information Using Server Management Software....................... Displaying Server Status Using the Hardware .................................................. ii 4-1 4-1 4-2 4-4 4-4 4-6 Contents 5 Processor Upgrades Introduction ..................................................................................................... Processor Configuration Guidelines ................................................................. Removing the Processor Module ..................................................................... Removing the Terminator Card........................................................................ Installing a Second Processor.......................................................................... Installing the Processor Module ....................................................................... Run the System ID Configuration Utility ........................................................... 5-1 5-1 5-2 5-4 5-5 5-6 5-8 6 Installing Additional Memory Introduction ..................................................................................................... Server DIMM Requirements ............................................................................ Memory Configuration Guidelines .................................................................... Memory Configurations............................................................................. Installing DIMMs on the Processor Module ...................................................... Memory Troubleshooting ................................................................................. 6-1 6-2 6-2 6-4 6-5 6-7 7 Installing Disk and Tape Drives Introduction ..................................................................................................... Storage Configuration Guidelines .................................................................... SCSI Configuration Guidelines......................................................................... Tape Drive Configuration Guidelines................................................................ Hot Swap Drive Configuration Guidelines......................................................... RAID Configuration Guidelines ........................................................................ Storage Backplane .......................................................................................... Cables............................................................................................................. Installing Optional Drives ................................................................................. Installing a Half-Height 5¼-Inch Device into the Top-Right Drive Bay ........ Installing a Full-Height 5¼-Inch Device into the Top-Right Drive Bay......... Hot-Swap Drive Bay ................................................................................. External Storage ............................................................................................. Connecting an External Device to the Onboard SCSI Controller ................ 7-1 7-1 7-2 7-3 7-3 7-4 7-5 7-7 7-8 7-9 7-11 7-14 7-17 7-17 iii Contents 8 Installing Expansion Boards Introduction ..................................................................................................... ISA Expansion Board Configuration Guidelines................................................ PCI Expansion Board Configuration Guidelines................................................ Configuring PCI Expansion Boards Using the BIOS Setup Utility...................... Boot Devices ............................................................................................ Server Boot Sequence.............................................................................. Server Scan Sequence ............................................................................. PCI Scan Sequence ................................................................................. Installing Expansion Boards............................................................................. 8-1 8-1 8-3 8-3 8-4 8-4 8-5 8-6 8-8 9 Connecting Storage Devices Introduction ..................................................................................................... SCSI Cable Configurations .............................................................................. Single Backplane Configuration ................................................................ Split Backplane Configuration (SCSI)........................................................ Split Backplane Configuration (RAID)............................................................... 9-1 9-1 9-2 9-5 9-8 10 Server Security Features Introduction ..................................................................................................... Left and Right Door Security Lock ................................................................... Left and Right Side Panel Lock........................................................................ Supervisor Password....................................................................................... If You Forget Your Password........................................................................... 10-1 10-2 10-3 10-4 10-4 11 Troubleshooting Introduction ..................................................................................................... Initial Troubleshooting...................................................................................... When to Use the Diagnostics........................................................................... Running the Diagnostics ........................................................................... Running Quick Tests or Groups of Tests................................................... Running DIGITAL Vendor Extended Tests ................................................ Running the Diagnostics Tests from the Server’s Hard Disk Drive ............. Server Troubleshooting ................................................................................... Disk Drive Troubleshooting.............................................................................. iv 11-1 11-2 11-3 11-4 11-4 11-5 11-5 11-6 11-10 Contents Hot Swap Drive Troubleshooting...................................................................... Tape Drive Troubleshooting............................................................................. Monitor Troubleshooting .................................................................................. CD-ROM Troubleshooting ............................................................................... Diskette Drive Troubleshooting ........................................................................ RAID Troubleshooting ..................................................................................... Flash BIOS Troubleshooting............................................................................ 11-14 11-15 11-16 11-17 11-18 11-19 11-20 A Technical Specifications Introduction ..................................................................................................... Server Specifications....................................................................................... Performance Specifications ...................................................................... Server Dimensions ................................................................................... Environmental Specifications .................................................................... ISA Expansion Slots ........................................................................................ PCI Expansion Slots........................................................................................ Power Supply Input Power Requirements ........................................................ Power Supply Output Specifications ................................................................ Power Cord Requirements............................................................................... Environmental Features................................................................................... Acoustic Levels ............................................................................................... Main Logic Board Switch Settings.................................................................... Processor Module Switch Settings................................................................... Server Status Messages........................................................................... POST OCP Messages..................................................................................... OCP Messages ............................................................................................... OCP Status and Error Messages .............................................................. Processor Module Voltage and Temperature Ranges ...................................... Processor Voltage Range ......................................................................... Processor Voltage Range (Vccp) .............................................................. Processor Temperature Sensing............................................................... A-1 A-2 A-2 A-3 A-3 A-4 A-4 A-4 A-5 A-5 A-6 A-7 A-8 A-10 A-12 A-14 A-18 A-19 A-21 A-21 A-22 A-23 v Contents B Device Mapping Introduction ..................................................................................................... Processor Memory Address Map .............................................................. I/O Address Map ...................................................................................... Server Interrupt Levels ............................................................................. PCI Configuration Space Address Map ..................................................... B-1 B-2 B-3 B-4 B-5 C BIOS Setup Utility Features Introduction ..................................................................................................... BIOS Setup (F2).............................................................................................. Main ......................................................................................................... Advanced ................................................................................................. Security Options ....................................................................................... Boot ......................................................................................................... System Management (F3) ............................................................................... C-1 C-2 C-2 C-7 C-13 C-15 C-16 D Caring For Your Server Introduction ..................................................................................................... Cleaning the Server......................................................................................... Cleaning the Screen ........................................................................................ Cleaning the Mouse......................................................................................... Moving the Server ........................................................................................... Packing the Server ................................................................................... Installing the Server at a New Location ..................................................... D-1 D-2 D-2 D-2 D-3 D-3 D-4 Index .................................................................................................................. IN-1 vi Contents Figures Typical DIGITAL Server 5220 ............................................................................................xviii 2-1. Typical BIOS Setup Utility Screen..............................................................................2-3 2-2. Typical BIOS Setup Utility Screen..............................................................................2-17 3-1. Server Brake ..............................................................................................................3-2 3-2. Unlocking and Removing the Side Panels .................................................................3-4 3-3. Installing the Side Panels ...........................................................................................3-5 3-4. Server Front View ......................................................................................................3-7 3-5. Server Left Side View.................................................................................................3-9 3-6. Server Right Side View ..............................................................................................3-11 3-7. Server Rear View.......................................................................................................3-13 3-8. Main Logic Board Connectors....................................................................................3-15 3-9. Main Logic Board Components..................................................................................3-17 3-10. Processor Module Component Locations ................................................................3-18 3-11. Video/Ethernet Daughter Card Connectors .............................................................3-19 3-12. Replacing the Server Battery/RTC...........................................................................3-22 3-13. Adding A Second Power Supply ..............................................................................3-24 4-1. DIGITAL Server Component Information...................................................................4-3 5-1. Removing the Processor Module...............................................................................5-3 5-2. Removing the Terminator Module..............................................................................5-4 5-3. Installing the Second Processor.................................................................................5-5 5-4. Installing the Processor Module .................................................................................5-7 6-1. DIMM Socket Locations.............................................................................................6-3 6-2. Installing a DIMM .......................................................................................................6-6 7-1. Storage Backplane.....................................................................................................7-6 7-2. Installing a Half-Height 5¼-Inch Device Into Top-Right Drive Bay .............................7-10 7-3. Installing a Full-Height 5¼-Inch Device Into Top-Right Drive Bay..............................7-12 7-4. Installing Expansion Brackets ....................................................................................7-13 7-5. Installing a Device Into the Hot-Swap Drive Bay........................................................7-15 7-6. Cable Connections.....................................................................................................7-18 7-7. Connecting an External SCSI Storage Box to the Onboard SCSI Controller.............7-19 8-1. Expansion Board Slot Locations ................................................................................8-2 8-2. Removing a Metal Filler Plate ....................................................................................8-9 8-3. Installing an Expansion Board....................................................................................8-10 9-1. Single Backplane Configuration Using an Onboard SCSI Controller .........................9-4 9-2. Split Backplane Configuration Using Onboard SCSI Controllers.................................9-7 9-3. Split Backplane Configuration Using Two Channel RAID Adapter.............................9-10 10-1. Front Panel Security Doors Lock .............................................................................10-2 10-2. Left and Right Side Panel Lock................................................................................10-3 A-1. Main Logic Board Switch Locations............................................................................A-9 A-2. Processor Module Switch Settings .............................................................................A-11 vii Preface Introduction P This System Reference describes how to operate, upgrade, configure, and troubleshoot your DIGITAL Server 5220 Series. This System Reference will also help to familiarize you with all aspects of the server and provide a reference tool for questions you might have in the future. If you are initially setting up your server, refer to the DIGITAL Server 5220 Series Installation Guide. The Installation Guide identifies all the components that were shipped from the factory as well as how to connect the mouse, keyboard, monitor, and ac power. The Installation Guide shows how to turn your server on for the first time and access the ServerWORKS Quick Launch program. You must run the ServerWORKS Quick Launch program to initially configure your server, create utility and device driver diskettes, and install an operating system. Audience This System Reference is written specifically for anyone responsible for operating, configuring, and expanding the DIGITAL Server 5220 Series. ix Preface Support Information A variety of support information is available to help you set up, configure, and operate your DIGITAL Server. This information comes in the form of README information, on-line help, electronic books, or as printed material. If you want to... Refer to the... Set up your server Installation Guide to unpack, install internal components, connect external devices and power, and access the ServerWORKS Quick Launch program. Load the supplied ServerWORKS Quick Launch software ServerWORKS Quick Launch Getting Started guide. Locate the major internal components of your server Quick Reference labels on the inside of your server’s right and left side panels. Upgrade and configure your server after installing optional components (for example, a processor module, memory, mass storage devices, SCSI or RAID adapters, etc.) Information supplied in this System Reference. Run diagnostics README information contained on the ServerWORKS Quick Launch CD-ROM discs. Supplied SCSI, RAID, and other options documentation. These are supplied as either printed manuals or as electronic books on the Quick Launch CD-ROM discs. ServerWORKS Quick Launch Getting Started guide and the Quick Launch program on the supplied CDROM discs. Supplied diagnostics documentation which is on the Quick Launch CD-ROM discs. x Preface Organization This System Reference contains the following: • Chapter 1: Introduction—Provides information about your server such as: features, server software and documentation, diagnostic software, server utilities, and technical support. • Chapter 2: Server Software and Utilities—Describes the server software and utilities that are supplied with your server. • Chapter 3: Server Components—Provides information about the server’s components and associated procedures such as removing the side panels. • Chapter 4: Server Management —Describes how to manage your server using a network manager, specifically DIGITAL ServerWORKS Manager. • Chapter 5: Processor Upgrades—Describes how to upgrade your server with higher-performance processor modules. • Chapter 6: Installing Additional Memory—Describes how to install additional memory on a processor module. • Chapter 7: Installing Disk and Tape Drives—Describes how to install optional disk drives, tape drives, and an external storage box. • Chapter 8: Installing Expansion Boards—Describes how to install ISA and PCI expansion boards. xi Preface xii • Chapter 9: Connecting Storage Devices—Describes how to connect SCSI, RAID, and IDE devices to the onboard controllers and to supported SCSI and RAID adapters. • Chapter 10: Server Security Features—Describes the various security features that are available to prevent server or data theft. • Chapter 11: Troubleshooting—Describes initial and advanced troubleshooting solutions. • Appendix A: Technical Specifications—Lists server operating specifications. Also included is switch information on the main logic board and processor module. It also provides a list and description of error messages that might display and error codes that might sound if a failure occurs. • Appendix B: Device Mapping—Provides a series of tables listing mapping and address information related to server memory and various main logic board devices (keyboard controller, interrupt controller, Direct Memory Access (DMA) controller, etc.). • Appendix C: BIOS Setup Utility Features—Lists the available resource and configuration options. • Appendix D: Caring For Your Server—Provides suggestions for cleaning and moving your server. Preface Conventions Convention Example Description Installation Guide Italics are typically used for titles, comments, and references to other sections of this document or other documents. C:\windows> Monospaced text indicates information that your server or software displays. For example, a directory path or error message. SCU.BAT Monospaced text can also indicate a command that you need to enter to run an application or utility. [Enter] Square brackets surrounding text represents a keyboard key. [Ctrl]+[Alt]+[Del] A plus sign indicates that the keys shown should be pressed at the same time. xiii Preface Abbreviations Abbreviation Meaning ACPI Advanced configuration and power management interface APIC Advanced programmable interrupt controller ATAPI AT attachment packet interface BIOS Basic input/output system DIMM Dual in-line memory module DMA Direct memory access DRAM Dynamic random access memory ECC Error correction code ECP Extended capabilities port EPP Enhanced parallel port FDD Floppy disk drive FRU Field replaceable unit GB Gigabyte GUI Graphical user interface h An h suffix to a numerical value denotes hexadecimal numbers. For example, 0F8h equals 0F8 hexadecimal. HDD I2C Hard disk drive IDE Intelligent drive electronics I/O Input/output IOAPIC Input/output advanced programmable interrupt controller Inter-integrated circuit continued xiv Preface Abbreviation Meaning IRQ Interrupt requests ISA Industry standard architecture JBOD Just a bunch of disks KBC Keyboard controller LCD Liquid crystal display LPT Line printer (parallel port) LVD Low voltage differential MB Megabyte MMX Multimedia enhancement technology MS-DOS Microsoft disk operating system NIC Network interface card NOS Network operating system NVRAM Non-volatile random access memory OCP Operator control panel PCI Peripheral component interconnect POST Power-on self test PPB PCI-to-PCI bridge RAID Redundant array of independent disks RAM Random access memory ROM Read only memory RSM Remote server manager RTC Real-time clock SBB Storage building block SCSI Small computer system interface continued xv Preface xvi Abbreviation Meaning SDRAM Synchronous dynamic random access memory SEC Single edge contact SNMP Simple network management protocol SMI System management interrupt SVGA Super-video graphics array USB Universal serial bus VGA Video graphics array V-NET Video-network Windows NT Microsoft Windows NT operating system software XD-bus Utility bus for flashing BIOS and RTC ZIF Zero insertion force Preface Special Notices Three kinds of special notices are used in this System Reference to emphasize specific information. WARNING: Indicates the presence of a hazard that can cause personal injury if the hazard is not avoided. CAUTION: Indicates the presence of a hazard that might cause damage to hardware or that might corrupt software. NOTES: Used to provide additional information. xvii Preface DEC00421 Typical DIGITAL Server 5220 NOTE: Your monitor, keyboard, and mouse might look different. xviii 1 Introduction 1 The DIGITAL Server 5220 is a high-performance, highly-scaleable network and application server featuring the latest in modular processor, memory and storage technology. The DIGITAL Server provides support for the following features: Reliability/Availability Processor Module Support for one or two processors with 512 KB L2 cache. Dual-Channel SCSI Controller Onboard dual-channel SCSI controller with wide Ultra internal signaling and wide Ultra2 for external signaling on SCSI channel 2. Super I/O Controllers Diskette drive, 2 serial ports, an ECP/EPP parallel port, 2-channel DMA, and IDE CD-ROM. Dual-Channel Storage Redundant disk subsystems using integrated SCSI controllers or expansion storage controllers. Backplane Power Supply The DIGITAL Server ships with one power supply for normal operation. An optional second power supply can be purchased to provide redundant power. continued 1-1 Introduction Flexible Memory Architecture Server memory can be upgraded from 64 MB to a maximum of 1 GB using 64 MB, 128 MB, or 256 MB registered SDRAM DIMMs. SDRAM DIMMs 168-pin registered SDRAM DIMMs, 10 ns or faster, with 100 MHz bus speed. Variable Fan Speed Automatically adjusts fan speed according to ambient temperature. Internal Sensors Monitors internal server temperatures, fan operation, and voltages for the main logic board and processor module. Clusters Supports DIGITAL Clusters for Windows NT and Microsoft Cluster Server (part of Microsoft Windows NT Server, Enterprise Edition) for database and file services failover. Server Expansion Expansion Slots Nine PCI expansion slots, one shared PCI/ISA slot, and one dedicated ISA slot. Internal Storage Devices Accommodates one IDE CD-ROM drive (standard), seven 3½-inch half-height hot swap drives in the form of Storage Building Blocks (SBBs), and two half-height, 5¼-inch devices or one full-height 5¼-inch device (CD-ROMs or tape drives). continued 1-2 Introduction Hot Swap Disk Capability Supports up to seven hot swap drives that can be replaced while the server is operating. External SCSI Ports Your server can be cabled to a rear panel SCSI knockout to provide a connection to an external storage expansion box. Universal Serial Bus (USB) Two integrated USB ports. External I/O Ports Two serial ports and one Extended Capabilities Port (ECP)/ Enhanced Parallel Port (EPP) to support external options, such as a printer, modem, or local terminal. Integrated Video and Network Controllers Combined SVGA Video and network v-net daughter card on the main logic board provides a video port for connecting to an integrated S3 Trio64V2 video controller and one 10/100 Base-T (10/100 Mb/s) Ethernet port (RJ45) for connecting to a DIGITAL 21143 network controller. 1-3 Introduction Server Management and Security 1-4 Server Diagnostics Allows local and remote diagnosis of server problems. Hardware Configuration Allows local and remote server configuration. Unique Asset Management Unique server identifier in non-volatile memory provides easy asset management. BIOS Setup Utility Allows configuration of your server’s factory-default settings. BIOS and Firmware Upgrade Utility Upgrades the BIOS and firmware versions. Operator Control Panel (OCP) Back-lit, 16-character display for diagnostic and error messages. Hot Swap Drive Indicator Lights Provides immediate status information on hot swap drive activity or failure. Key Lock Limits access to the server’s internal components. Interlock Sensor Switches Automatically turns off server power if either side panel is removed when the server power is on. Introduction Server Software and Documentation The following software and documentation are supplied with your server: • ServerWORKS Manageability Suite contains ServerWORKS Quick Launch, DIGITAL ServerWORKS Manager, and licenses. − ServerWORKS Quick Launch consists of a bootable CD-ROM disc, a companion CD-ROM, and Getting Started guide. The Quick Launch program steps you through the initial server setup and operating system installation process. Refer to the ServerWORKS Quick Launch Getting Started Guide and the README.TXT file, which is located on the Quick Launch CD-ROM. − DIGITAL ServerWORKS Manager consists of two CD-ROMs, an Installation and User's Guide, and supporting documentation. Refer to the DIGITAL ServerWORKS software kit for more information. • Server documentation box contains this System Reference, an Installation Guide, a Documentation Overview, Warranty information, and Registration Card. NOTE: You might have ordered additional options, such as disk drives or modems, that have been installed in your server. The documentation and any related software for these options have also been provided. Save this material for future reference. 1-5 Introduction Diagnostic Software Diagnostic software is shipped with every DIGITAL Server on the Quick Launch CDROM. This software contains an advanced set of diagnostic utilities for identifying and correcting problems with the server. The diagnostic software can be used to verify proper hardware installation and isolate intermittent problems that are not detected by the Power-On Self Test (POST). The diagnostic program is a stand-alone MS-DOS package that can be run from diskettes or from the DOS partition on the server’s hard disk drive. The diagnostic software includes: • AMIDiag base diagnostic (processors, memory, and main logic board components tests) from American Megatrends, Inc. • DIGITAL vendor extended tests (SCSI, network, IDE, and RAID) • Extensive on-line help and the AMIDiag User’s Guide Refer to Chapter 2, “Server Software and Utilities” for information on creating diagnostic diskettes from the Quick Launch CD-ROM. For additional information on “When to Use the Diagnostics” and “Running the Diagnostics,” refer to Chapter 11. Also refer to the AMIDiag User’s Guide, located on the Quick Launch CD-ROM and to the README.TXT file on the diagnostics diskettes. 1-6 Introduction Server Utilities and Technical Support Current server utilities and technical support information is available on the Quick Launch CD-ROM discs and on the Internet. For product information, use the address: http://www.windows.digital.com For technical support, use the address: http://www.windows.digital.com/support/support.asp For access directly to the software library for BIOS and driver updates, use the address: http://www.windows.digital.com/~ftp/00-index.stm If you need additional information, access “Service Information” located in the ServerWORKS Quick Launch program that is on your CD-ROM discs. 1-7 2 Server Software and Utilities Introduction 2 This chapter describes the utilities supplied with your server. Server utilities include: • ServerWORKS Quick Launch This software is used to install a network operating system onto the server. The CD-ROM also contains various device drivers and on-line documentation. • BIOS Setup Utility This utility allows you to configure your server after installing additional options and when changing your server’s factory-default settings. The BIOS Setup utility is available each time you boot your server. • BIOS Upgrade Utility This utility allows you to update or restore your server’s BIOS. The BIOS Upgrade utility is available on the Internet. • SCSI Configuration Utility This utility allows you to configure and view settings of the onboard SCSI controllers and SCSI devices. The SCSI configuration utility is available each time you boot your server. • RAID Configuration Utility This utility is available for RAID-ready servers only. This utility allows you to configure your RAID array and is available each time you boot your server. • Diagnostics Diagnostics are used to verify server operation. The diagnostics are available on the Quick Launch CD-ROM discs. 2-1 Server Software and Utilities ServerWORKS Quick Launch ServerWORKS Quick Launch is used to install the server’s Network Operating System (NOS). In addition to providing quick and seamless NOS installation, Quick Launch also provides device drivers, documentation, and the ability to make diskettes of utilities such as diagnostics. For more information, refer to the Quick Launch Getting Started guide. BIOS Setup Utility The BIOS Setup utility enables you to select and store information about your server’s hardware and software in the battery-backed memory of the CMOS RAM. This information takes effect each time the server boots and can be changed any time you run setup. You should use the BIOS Setup utility each time you need to reconfigure or expand your server. The following is an example of a BIOS Setup utility screen. CAUTION: Your server was setup for normal operation at the factory and will operate properly without additional configuring. It is important for you to read carefully and understand this section before attempting to modify your server’s factory settings. Changing some settings might cause your server to operate improperly. 2-2 Server Software and Utilities Main Advanced Security System Time: System Date: [13:11:10] [10/29/1997] Diskette A: [1.44 MB,3½"] >Primary Master >Secondary Master [CD-ROM] [None] Video System: Monitor Type: >Cache and Shadow >Keyboard Features [EGA/VGA] [Color] Boot Exit Item Specific Help System Memory: 640 KB Extended Memory: 80896 KB At Bus Space: [Disabled] Extended Memory Report: [Compatibility] DEC01706 Figure 2-1. Typical BIOS Setup Utility Screen 2-3 Server Software and Utilities Use the BIOS Setup utility to: • Set time and date • Change I/O port settings • Set security options • Change the boot sequence • Check system management parameters The remainder of this section explains how to run the BIOS Setup utility, maneuver through the options, and perform specific tasks. Accessing the BIOS Setup Utility To access the BIOS Setup utility: 1. Turn on your server and allow the Power-On Self Test (POST) to complete. 2. Make a note of any configuration errors listed, and then press [F2] to display the Main menu. 3. Follow the instructions on your monitor screen and any on-line help pop-up screens to configure your server. 2-4 Server Software and Utilities Helpful Hints When using the System Setup (F2) in the BIOS Setup utility: • Several keyboard keys are assigned to help you select menus and submenus, options, change option values, and display help information. These keys are displayed at the bottom of all menus as follows: Key Function F1 Help (provides a general help screen) Esc Exit (Exits the Setup utility and exits sub menus within the Setup utility) ↑↓ arrow keys Select Item ← → arrow keys Select Menu -/+ or spacebar Change Values Enter Select > Sub-Menu F9 Setup Defaults (Restore all current Setup screen values to their factory default settings) F10 Save and Exit • Item-specific help is available anytime during the setup process and appears at the right of the setup screen when an option is highlighted. 2-5 Server Software and Utilities • Choosing the “Exit” menu allows you to: − Select “Save Changes & Exit” to save all Setup values and exit Setup. − Select “Exit Without Saving Changes” to exit Setup without recording any changes. − Select “Get Default Values” to set all setup options to their factory default values. − Select “Load Previous Values” to restore all setup values from the last session. − Select “Save Changes” to save all setup selections without exiting Setup. Changing Your Server’s Configuration The following sections provide detailed information on changing your server’s factory configuration. Before changing any setting, make sure you fully read and understand the information provided and view any on-line help for a selected setting. Changing Time and Date To change the time and date: 1. Reboot the server. 2. Press <F2> when the DIGITAL logo screen appears. 3. In the Main menu, using the cursor keys and [Tab], select (highlight) the System Time or System Date field you want to change. 4. Use [+] or [-] to change the field to the desired value. You can also enter the desired date and time by typing the required numbers. 5. Press [Esc] then [Enter] twice to exit the BIOS Setup utility and to reboot the server so changes immediately take effect. 2-6 Server Software and Utilities Changing I/O Port Settings The following list shows the settings that can be made to the I/O ports via the Advanced section of the BIOS Setup utility. • PS/2 mouse • COM1 • COM2 • Parallel port • Parallel port mode • Floppy disk controller • Integrated PCI Ethernet • Integrated PCI SCSI • Integrated IDE controller For more information on changing I/O port settings, refer to Appendix C, “BIOS Setup Utility Features.” To change the I/O port settings: 1. Reboot the server 2. Press <F2> when the DIGITAL logo screen appears. 3. Select Advanced. 4. Select Integrated Peripherals. 5. Select the port(s) you wish to change. 6. Use the +/- keys to change values. 7. Press [Esc] then [Enter] twice to exit the BIOS Setup utility and to reboot the server so changes immediately take effect. 2-7 Server Software and Utilities Assigning IRQs The following information is important for managing server IRQ assignments. The default setting for PCI expansion boards is Auto Select, which automatically assigns IRQs to PCI expansion boards. If you have ISA expansion boards or you wish to manually control PCI IRQ assignments, you must do the following to assign IRQs to expansion slots. 1. Reboot the server and press <F2> when the DIGITAL logo screen appears. 2. Select Advanced at the top of the screen menu. 3. Select PCI Configuration. The following table shows the menu selections. Advanced Menu Fields Settings Comments PCI Configuration: [submenu] PCI IRQ line # Disabled Disables the specific IRQ Line number. Auto select(1) Automatically assigns IRQs to PCI slots. 3 4 5 7 9 10 11 12 14 15 PCI/PNP ISA UMB Region Exclusion Select a number to assign to the PCI IRQ line. If the IRQ number is already in use, an asterick (*) appears to the left of the line. PCI/PNP ISA IRQ Resource Exclusion Use this selection to reserve IRQ numbers for ISA adapters. Press [Enter] to display IRQs. (1) Factory default 2-8 Use this selection to reserve a specific block of upper memory for ISA adapters. Press [Enter] to display memory addresses available. Server Software and Utilities Setting Up Security The following sections describe the security features available and how to use them. Setting Supervisor and User Passwords Your server has password protections that can be set to prevent unauthorized access to the BIOS Setup utility. If a supervisor password is set, the server prompts you to enter a password before accessing the BIOS Setup utility. If "Password On Boot" is enabled, and both the supervisor and user passwords have been set, you need to enter either the supervisor or user password to use the server. The following list provides more information about setting passwords. • You must enable the password during boot. • Setting the supervisor password allows you to make changes to the boot process. • Setting the user password allows a lower level user to access files. NOTE: A supervisor password must be set before you can set a user password. If the supervisor password is later deleted, the user password is automatically removed. 2-9 Server Software and Utilities Perform the following steps to set a supervisor password: 1. Reboot the server and enter Setup. 2. Highlight the “Security” menu. 3. Highlight “Set Supervisor Password” and press [Enter]. 4. Type in a seven (7) digit alpha-numeric supervisor password and then press [Enter]. 5. Retype your password as instructed and press [Enter]. (Notice that “Supervisor Password Is” field now indicates Enabled.) If desired, set a user password as follows: 1. Highlight “Set User Password” and press [Enter]. 2. Type in a seven (7) digit alpha-numeric user password and then press [Enter]. 3. To confirm, retype the user password as instructed and press [Enter]. (Notice that “User Password Is” field now indicates Enabled.) 4. Press [Esc] then [Enter] twice to exit the BIOS Setup utility and to reboot the server so changes immediately take effect. The server runs the POST and then asks for the password, which has just been set. 2-10 Server Software and Utilities Enabling Password On Boot When “Password On Boot” is enabled, a screen appears after POST. The screen asks you to enter your supervisor or user password to allow your server to finish the boot process. Perform the following steps to set “Password On Boot”: 1. Reboot the server and enter Setup. 2. Highlight the “Security” menu. 3. Highlight “Password On Boot.” 4. Press the [+] key. (Pressing the [+] key again reverses your action.) 5. Press [Esc] then [Enter] twice to exit the BIOS Setup utility and to reboot the server so changes immediately take effect. Eliminating User and Supervisor Passwords To eliminate your server’s password(s): 1. Reboot the server and enter Setup. 2. Enter the supervisor password and press [Enter]. 3. Do you wish to eliminate the User Password or the Supervisor Password? If User Password, select “Set User Password.” If Supervisor Password, select “Set Supervisor Password.” 4. Press [Enter] three times. You have cleared the old password and are returned to the “Security” menu. Verify that the appropriate password is disabled by checking “User Password is” or the “Supervisor Password is” field, whichever is relevant. 5. Press [Esc] then [Enter] twice to exit the BIOS Setup utility and to reboot the server so changes immediately take effect. 2-11 Server Software and Utilities Other Security Options These options can provide further security for your server under certain conditions: • If “Password On Boot” is enabled and “Diskette Access” is set to “Supervisor,” entering the supervisor password at boot allows access to a diskette. Entering the user password at boot, however, prevents the server from accessing a diskette. CAUTION: Consider your security needs carefully before using the Password on Boot option. While this option is enabled, the contents of the hard disk drive cannot be backed up to diskettes and the server cannot be booted from a diskette drive. 2-12 • Diskette Access While enabled, this option prevents the server from accessing a diskette. • Network Server Locks the keyboard and mouse to prevent tampering during network operation. You must enter a supervisor password to unlock the keyboard and mouse. • System BIOS Flash When disabled, prevents the server’s BIOS from being flashed (rewritten). • System Backup Reminder Displays reminder message at boot. Set to st daily, weekly or 1 of the month. • Virus Check Reminder Displays reminder message at boot. Set to daily, st weekly or 1 of the month. Server Software and Utilities Changing the Boot Sequence It is sometimes necessary to change your server’s boot sequence. Follow your network manual’s instructions to determine the correct boot sequence. To change the boot sequence, proceed as follows: 1. Reboot the server and enter the BIOS Setup utility. 2. Highlight the “Boot” menu. If the CD-ROM drive is listed as the first boot device in the BIOS, the server will boot from the CD-ROM drive. Otherwise, the server can be booted from the diskette drive (drive A) or the hard drive (drive C). If the diskette drive (drive A) then the hard drive (drive C) is selected, the server searches the diskette drive (drive A) first to boot the operating system. When no diskette is in the diskette drive (drive A), the server then tries to boot from the hard drive (drive C). 3. Use the [↑] and [↓] arrows to locate the field you want to change. Then use the [+] to raise the order and [-] to lower it. 4. Press [Esc] twice then [Enter] twice to exit the BIOS Setup utility and to reboot the server so changes immediately take effect. Following is a typical boot sequence: • CD-ROM • Diskette drive (drive A) • Hard drive (drive C) For more information, refer to the “Server Scan Sequence” section in Chapter 8. 2-13 Server Software and Utilities Speeding up the Boot Process There are four options for speeding up the boot process which, in essence, eliminate or replace displays or checks. To make these changes, proceed as follows: 1. Reboot the server and enter Setup. 2. Highlight the Boot menu. The following table lists and describes the items displayed. 3. Field Description Floppy check Verifies the diskette boot drive. Setup prompt Displays the Setup prompt message during the boot sequence. If disabled, the Setup prompt message will not be displayed; however, you can still access the BIOS Setup utility by pressing <F2> before POST completes. POST errors Pauses and displays the Setup prompt or Resume boot prompt, if an error occurs during the boot sequence. If disabled, the server always attempts to boot. Sign-on banner When enabled, displays the DIGITAL logo during POST. Select the item(s) you wish to change and use the [+] or [-] as follows: Field Speed Up Boot Selection Floppy check Disable Setup prompt Enable POST errors Disable Sign-on banner Disable 4. Press [Esc] twice then [Enter] twice to exit the BIOS Setup utility and to reboot the server so changes immediately take effect. 2-14 Server Software and Utilities Checking System Management Parameters These screens allow you to see an overview of your server's system and environment parameters, and details of the system assets (environment, memory, POST system, processor module, main logic board, and PCI IRQ assignment). To manage the system: 1. Reboot the server and press <F3> when the DIGITAL logo screen appears. 2. The "Summary” menu appears. Use the [←] and [→] arrows to select the parameter you want to view or change. 3. In screens that are editable, use the [↑] and [↓] arrows to select the field you want to change. Enter the new parameter(s) and then press [Enter] to accept the changes. 4. Press [Esc] then [Enter] to exit System Management and reboot the server so changes immediately take effect. 2-15 Server Software and Utilities BIOS Upgrade Utility All servers have BIOS software in a flash (ROM) chip located on the main logic board. This BIOS initializes hardware and boots the operating system when the server is turned on. The BIOS also provides access to other services such as a keyboard and disk drives. You can upgrade your server's BIOS to future releases by executing the BIOS upgrade utility (PHLASH.EXE) located in the BIOS upgrade kit. PHLASH.EXE and BIOS upgrades are available on the Internet. For technical support, use the address: http://www.windows.digital.com/support/support.asp For access to the software library for BIOS and driver upgrades, use the address: http://www.windows.digital/com/~ftp/00-index.stm CAUTION: A crisis recovery diskette should be created before upgrading the server BIOS. Also, when upgrading the BIOS, you must remove any video expansion boards and enable the onboard VGA. In the rare event that you might need to use the Crisis Recovery Diskette, the server will require that the onboard VGA be used in this mode. Two switches and one BIOS option affect the result of executing the PHLASH.EXE program: 1. BIOS Protection (SW1-1) — This switch, located on the main logic board, must be set to Normal (Off) before you can upgrade the server’s BIOS. 2. Recovery Mode Switch (SW1-2) — This switch, located on the main logic board, must be set to Recovery so the server BIOS can enter “Recovery Mode.” 3. System BIOS Flash (BIOS option) — This BIOS option must be set to Enabled before you can upgrade the server’s BIOS. If you are having trouble flashing your server’s BIOS, refer to Chapter 11, “Troubleshooting.” 2-16 Server Software and Utilities SCSI Configuration Utility Your DIGITAL Server comes with an onboard, dual channel SYMBIOS 896 SCSI controller and a SCSI Configuration utility. This utility, located within the server BIOS, allows you to change SCSI controller settings without opening the server. Use the SCSI Configuration Utility to: • Check global factory default settings for each SCSI channel and devices connected to it. • Change factory default settings for individual SCSI devices. • Change the device boot order. To start the SCSI Configuration utility: Press [Ctrl] + [C] when the following message appears during the boot process: Press Ctrl-C to start Symbios Configuration Utility… This message stays on the screen for about five seconds. If you invoke the Configuration utility, the Main Menu of the Symbios SCSI Configuration utility is displayed. Main Menu Port Num Irq---------Status-----------NVRAM Level SYM53C896 SYM53C896 9000 9400 9 9 Current On On Next-Boot Found On On Yes Yes Change Adapter Status Adapter Boot Order Additional Adapter Configuration Display Mode = Verbose Mono/Color Language Help Quit Figure 2-2. Typical BIOS Setup Utility Screen 2-17 Server Software and Utilities The Main menu fields are described in the table that follows. Menu Fields Allows you to… SYM port number Change adapter setup specifications and device selections. Change adapter status Activate or deactivate an onboard or external SCSI channel and all devices attached to it. The changes take place after a reboot. Adapter boot order Change the boot sequence of the adapters in the server. Additional adapter configuration Select adapters other than those displayed on the first screen. Display mode Select a Verbose or a Terse text. Mono/Color Change the screen instantly between Mono and Color. Language Select a language for this utility. (1) Factory default Determining Devices Attached to Each SCSI Channel To check the devices connected to each channel, use the following procedure: 1. Start the Symbios SCSI Configuration utility to display the Main menu. 2. Use the arrow keys to select the SYM port number and press [Return]. The following menu items are displayed: Adapter Setup Device Selections Help Exit this menu 3. Choose Device Selections to display the SCSI devices attached to this port. 4. Press the [Esc] key to exit from this menu. For additional information, refer to the Symbios User’s Manual on the Quick Launch CD-ROM discs. Select your server model, then“User Documentation”. Click on Ädditional Documentation”to view the Symbios User’s manual. 2-18 Server Software and Utilities RAID Configuration Utility If a RAID adapter is installed in the server, the RAID configuration utility appears when you boot your server. If desired, you can skip this utility, or use this utility to configure your RAID array during initial setup. Refer to the RAID User’s Manual on the Quick Launch CD-ROM discs. Select the “User Documentation” button. Diagnostics Diagnostic software is shipped with every DIGITAL Server on the Quick Launch CDROM discs. This software contains an advanced set of diagnostic utilities for identifying and correcting problems with the server. The diagnostic software can be used to verify proper hardware installation and isolate intermittent problems that are not detected by the Power-On Self Test (POST). The diagnostic program is a stand-alone MS-DOS package that can be run from diskettes or from the DOS partition on the server’s hard disk drive. To access the supplied diagnostic software: • During your server installation process, the diagnostic software will be automatically copied to a subdirectory on the Quick Launch MS-DOS partition (only if you selected the option to create a partition). This allows you to run the diagnostic software from the MS-DOS partition you created. • Using the Quick Launch CD-ROM, you can create bootable diagnostic software diskettes. This allows you to run the diagnostic software using the diskettes you created. NOTE: DIGITAL strongly recommends that you copy the diagnostics to diskettes and then use these diskettes to run the diagnostics on your server. 2-19 Server Software and Utilities To run the diagnostics from the DOS partition, perform the following: 1. At the MS-DOS prompt, type: C:\diag\diagnose.bat 2. After the server boots, choose MS-DOS from the boot selection. 3. Once the diagnostics begin, the main screen appears. To create the diagnostic diskettes from the Quick Launch CD-ROM, perform the following: 1. Insert the Quick Launch CD-ROM into the drive and boot the server; or from a PC or workstation, use Windows File Manager or Explorer and run: <cd-rom>:\QLAUNCH.EXE. 2. From the Quick Launch main menu, select Installations & Utilities. 3. Select the Utilities tab and then select the server model. 4. Insert a blank MS-DOS formatted diskette into drive A and select Diagnostics. 5. Select Continue. Afterwards, remove the diskette for safekeeping. 6. Choose the next diagnostic diskette from the list and then select Continue. Create all the diskettes labeled “Diagnostics.” Refer to Chapter 11, “Troubleshooting,” for more information on using the diagnostics software. 2-20 3 Server Components Introduction 3 This chapter shows the location of the DIGITAL Server’s internal components and procedures for unlocking and removing the side panels. Procedures for installing a new server battery/Real-Time Clock (RTC) and a second or redundant power supply are also included. 3-1 Server Components Disconnecting External Devices and Power Before removing the side panels, perform the following: 1. Secure the server using the brake (see Figure 3-1). 2. Shut down any applications that are currently running, then shut down the operating system. 3. Turn off power to all external devices connected to the server. 4. Turn the server off. 5. Unplug the power cord from the wall outlet. 6. Disconnect the monitor’s power cord from the external ac outlet and the data cable from the server. DEC00831 Figure 3-1. Server Brake 3-2 Server Components Removing and Installing the Side Panels To remove the side panels, perform the following: 1. Unlock the side panels. 2. Slide the panels to the rear of the server. WARNING: Removing the side panels activates two interlock switches located at the top-left and top-right of your server. These switches inhibit power to your server when activated. You might injure yourself or damage your server if you attempt to bypass these switches. 3-3 Server Components DEC01639-2 Figure 3-2. Unlocking and Removing the Side Panels 3-4 Server Components To install the side panels. 1. Slide the panels to the front of the server. 2. Lock the side panels. DEC01639-3 Figure 3-3. Installing the Side Panels 3-5 Server Components Server Front View 3-6 Figure Legend Component A IDE CD-ROM drive B 3½-inch diskette drive C Front access 5¼-inch or 3½-inch half-height drive bays D 3-way security lock E Integral hot-swap device bay for hot swap drives F Power, OCP, and reset buttons G Brake H Operator control panel (OCP) I Power indicator Server Components A B C D E F G I H DEC01635-2 Figure 3-4. Server Front View 3-7 Server Components Server Left Side View Figure Legend Component A Power switch interlock B Upper expansion board slots C Main logic board D(1) Processor and memory module E Lower expansion board slots F Casters (4) G Primary cooling fans (1 and 3) H Secondary cooling fans (2 and 4) (1) 3-8 The video/Ethernet daughter card is installed in the proprietary slot (under the processor module). Server Components A B C D E F G H DEC01635-3 Figure 3-5. Server Left Side View 3-9 Server Components Server Right Side View Figure Legend Component A Wide SCSI 68-pin connector B Power plug C Jumper cable D Storage backplane E SCSI address jumpers (J181) F Storage backplane SCSI terminator G Power supply H Power interlock switch I Rear fan (fan 5) NOTE: If installing a second or redundant power supply you must remove the rear fan, item I, and disconnect it from the main logic board. 3-10 Server Components A B C D E F G I H DEC01636-2 Figure 3-6. Server Right Side View 3-11 Server Components Server Rear View Figure Legend 3-12 Component A SCSI knockouts (back panel) B Keylock C Keyboard and mouse ports D Parallel port E Serial ports F USB ports G Network activity and link LEDs H 10/100Base-T port connector (RJ45) I Video port J ac power plug K ac power out/monitor plug Server Components B A A C D E F A G I K H J DEC01636-3 Figure 3-7. Server Rear View 3-13 Server Components Main Logic Board Connectors (1) 3-14 Figure Legend Connector A Dedicated ISA expansion slot (slot 2) B Shared PCI/ISA expansion slots (PCI slot 6; ISA slot 1) C PCI expansion slots (slots 1-6) D(1) Proprietary slot E USB ports F Two serial ports and one parallel port G Mouse and keyboard ports H PCI expansion slots (7-10) I Diskette drive connector J Fan 5 connector K Power supply connectors L Power on/off and OCP display connector M Primary IDE connector N Secondary IDE connector O Fan 2 connector P Fan 1 connector Q Processor and memory module connector R Remote Server Management (RSM) S Fan 4 connector T Speaker connector U 68-pin SCSI connector (channel 1) V Fan 3 connector W 68-pin SCSI connector (channel 2) The video/Ethernet daughter card must be installed in the proprietary slot. Server Components I J K L 7 M 8 H N 9 10 O G P F Q R E D 1 2 C S 3 T 4 5 B U 6 1 V 2 W A DEC01637-2 Figure 3-8. Main Logic Board Connectors 3-15 Server Components Main Logic Board Components 3-16 Figure Legend Component A Real-time clock/server battery B Switch block C BIOS flash ROM D SCSI controller Server Components B 7 8 C 9 A 10 1 2 3 4 5 6 1 2 D DEC01637-3 Figure 3-9. Main Logic Board Components 3-17 Server Components Processor Module Components Figure Legend Component/Connector A Processor 1 B Processor 2 slot or terminator card C Switch for processor clock speed settings D Four DIMM sockets 1 2 D C A B DEC01638-3 Figure 3-10. Processor Module Component Locations 3-18 Server Components Video/Ethernet Daughter Card Connectors and Indicators Figure Legend Connector A Video graphics port B Network link indicator (green) C Network activity indicator (yellow) D 10/100Base-T connector (RJ45) D A B C DEC01625-2 Figure 3-11. Video/Ethernet Daughter Card Connectors 3-19 Server Components Tools Needed Prior to installing an option, have the following available: • A Phillips screwdriver • An antistatic wrist strap Static Electricity Static electricity collects on non-conductors such as paper, cloth, or plastic. A static discharge can be damaging even though you often cannot see or feel it. To prevent damage to circuit boards and/or components: 3-20 • Before touching any circuit board or component, put on a properly-grounded, anti-static wrist strap. • Keep circuit boards and components away from non-conductors. • Keep clothing away from circuit boards and components. • Keep circuit boards in anti-static bags. Server Components Replacing the Real Time Clock (RTC) Battery Your server’s battery runs the server Real Time Clock (RTC) and retains any setup information when it is turned off. If your server ever fails to retain the correct date, time, or configuration settings when it is turned on, you need to replace your server’s RTC battery. Also, make sure you replace the battery with either a DIGITAL part number 12-41474-05, Toshiba (P/N CR2032), or equivalent 3 V dc Lithium battery. This part can be obtained through your DIGITAL service provider. WARNING: There is a danger of battery explosion if a lithium battery is incorrectly replaced. To prevent damage to your server, be sure the + side faces up when installing a new battery. Depending on your locality, your server’s battery might be considered hazardous waste. Make sure you follow any state or local statute to properly dispose of the old battery. To replace the battery/RTC, perform the following: 1. If you have not already done so, record server configuration settings using the BIOS Setup utility. 2. Turn off your server. 3. Disconnect external devices (if any), ac power, and monitor power. 4. Unlock and remove the left side panel. 5. Lift the retaining clip slightly and push on the battery from the side to slide it out (see Figure 3-12). 6. Install the new battery/RTC (Figure 3-12). When installing the new battery, make sure the “+” side faces up. 7. Replace and lock the left side panel. 8. Connect external devices and restore power. 3-21 Server Components 9. Reboot and then run the BIOS Setup utility to configure your server. Refer to Chapter 2, “Server Software and Utilities,” for information on using the BIOS Setup utility. 7 8 9 10 1 2 3 4 5 6 1 2 DEC01637-4 Figure 3-12. Replacing the Server Battery/RTC 3-22 Server Components Adding a Second Power Supply The DIGITAL Server 5220 Series ships with one power supply for normal operation. An optional second power supply can be purchased to provide redundant power for simple configurations or additional power for optimum configurations. 1. Turn off the server. 2. Remove the ac power cord and monitor cables, if necessary. 3. Unlock and remove the right side panel. 4. Disconnect the power supply wire harness from the existing power supply if necessary. 5. Remove the rear fan (if present) and disconnect it from the main logic board (see item I, Figure 3-6 and item J, Figure 3-8). 6. Slide the second power supply part way into the chassis atop the existing power supply. 7. Attach the unused connectors of the power supply wire harness to the second power supply. 8. Slide the power supply fully into the chassis and align with the screw holes at the rear of the chassis. 9. Attach the power supply with the supplied screws through the rear of the chassis. 3-23 Server Components DEC01640 Figure 3-13. Adding A Second Power Supply 3-24 4 Server Management Introduction 4 The DIGITAL Server 5220 Series is configured with hardware that supports server 2 management, including an 8031 processor with multiple I C busses for server status reporting. Managing Your Server The server allows you to perform the following management functions: • Monitor main logic board voltage and cooling fan status • Monitor processor module voltage, temperature and status • Detect and automatically correct single-bit ECC errors The DIGITAL Server 5220 Series allows you to manage your server and its main components by: 1. Obtaining information about the main logic board and the processor module. 2. Notifying you of any changes to the main logic board or processor module on your server. Information can be obtained either through the BIOS Setup utility or through system management software such as the DIGITAL ServerWORKS Manager. 4-1 Server Management Obtaining Information about Your Server The DIGITAL Server provides the following system information for the main logic board and the processor module configured on your server: • Asset number User-definable field for tracking these components • Part number DIGITAL part number • Revision number Board assembly revision number • Serial number Serial number of the board assembly • Artwork number Revision of the printed circuit board The System ID is also located on the main logic board and processor module. The System ID contains the following information: 4-2 • Model number Server model number • Serial number Server serial number • System asset number User-definable field for tracking the system Server Management The main logic board and processor module each contain memory where specific information and System ID information is stored. The main logic board also stores the server’s System Asset number (see Figure 4-1). Information is available for the server’s main logic board and processor module (such as part numbers, revisions, serial numbers, etc.). You can also assign Asset numbers to these components. In addition, the software can detect when you change your server configuration by adding or removing either component. You can obtain information about your server’s configuration by running the BIOS Setup utility or by using the ServerWORKS management software. Asset# Part# Revision# Serial# Artwork# System ID DIGITAL 5220 Series Server (System ID) Processor Module Asset# Part# Revision# Serial# Artwork# System System ID Main Logic Board DEC0103 Figure 4-1. DIGITAL Server Component Information 4-3 Server Management Obtaining Information Using the BIOS Setup Utility You can use the BIOS Setup utility to check the Serial number, Revision number, and Asset number for the main logic board and processor module configured in the server. For example, if you change the main logic board or processor module in your server, you must run the BIOS Setup utility to re-synchronize the System ID (server model number and serial number) in the main logic board or processor module’s memory. The BIOS Setup utility will check the new main logic board or processor module and will then detect the System ID mismatch. You can view the details for the main logic board or processor module by pressing <F3> and then selecting the SYS option. The BIOS Setup utility lists the server model number and server serial number information stored on the main logic board or processor module. You can then confirm the correct model number and serial number. This data is available on the label located on the server’s back panel. Refer to Appendix C, “BIOS Setup Utility Features,” for more detailed information about the BIOS Setup utility. Obtaining Information Using Server Management Software Your DIGITAL Server is shipped with DIGITAL ServerWORKS Manager software. ServerWORKS Manager is a workgroup and server management product for DIGITAL’s family of servers. ServerWORKS Manager utilizes the Simple Network Management Protocol (SNMP) environment to assist the Network or Server administrator by constantly monitoring the network for problems. DIGITAL ServerWORKS Manager is based on an open architecture that enables seamless integration and interoperability with popular enterprise management software packages such as Computer Associates’ POLYCENTER Manager/NetView, Hewlett-Packard’s OpenView UX for Windows, and IBM’s Netview/6200 AIX. Also included with the DIGITAL ServerWORKS Manager are Network Operating System (NOS) Agents for Windows NT V4.x, Novell NetWare V3.12, V3.2, and V4.x, and SCO UNIX V5.x. The OS/2 NOS includes its own agent and can also be managed from ServerWORKS Manager. 4-4 Server Management DIGITAL ServerWORKS Manager allows the Network or Server Administrator to perform the following functions on your server: • Manage DIGITAL PC print, file, and application servers supported by DIGITAL Servers using a Windows-based graphical user interface (GUI) for point and click simplicity. • Display server component information that provides critical information such as processor and file system utilization and information about the network interface. • Automatically build a database of the network by Autodiscovering all SNMP network resources and display the nodes discovered during Autodiscovery on a color-coded topological map. • Poll all network devices at intervals defined by the administrator. • Perform an in-depth network analysis to continuously monitor the status of the network. • Set alarms and alerts for specified events on all network devices, as well as the network itself, to spot problems early and avoid costly downtime. Refer to the DIGITAL ServerWORKS Manager Installation and User’s Guide for more information on how to use ServerWORKS Manager to view and be notified of events on the server. You can also manage the DIGITAL Server with other SNMP-based managers. Refer to the DIGITAL ServerWORKS Manager Installation and User’s Guide for more information. 4-5 Server Management Displaying Server Status Using the Hardware There are two types of information displayed when your DIGITAL Server is operating: • Normal status messages • Error messages During normal operation, Power On Self Test (POST) and boot messages are displayed on the monitor. Some POST messages are also displayed on the OCP panel. When an error occurs, an error message is displayed on both the monitor and OCP panel and a beep is sounded from the server’s speaker. Messages displayed on the OCP panel can also be seen by using the DIGITAL ServerWORKS Manager. Refer to Appendix A for server status, OCP and POST messages. 4-6 5 5 Processor Upgrades Introduction Installing a second processor increases the capabilities of your DIGITAL Server 5220 Series. This chapter describes the configuration guidelines that must be followed prior to upgrading your server as well as detailed procedures on removing and installing a processor module. Processor Configuration Guidelines To upgrade to a dual processor configuration you must purchase and install a processor upgrade kit. Contact your authorized DIGITAL sales representative for more information. Apply the following guidelines to your processor upgrade: • Single processor modules must be installed in the primary processor socket (CPU1) and have a termination card installed in the second processor socket (CPU2). The termination card must be removed prior to installing a second processor. • If two processor are installed, they must be the same speed. • DIGITAL recommends that dual processor configurations use processors with identical stepping (manufacturing revision). Processors with different stepping might not function properly. You can use the processor ID number that appears during the Power-On Self Test (POST) for each processor to help you determine stepping. This information is found in the README files on the Quick Launch CD-ROM discs. • Use only DIGITAL-supplied processor modules and DIMMs. 5-1 Processor Upgrades • Use an anti-static wrist strap when servicing any part of the server. Refer to Appendix A, “Technical Specifications” for specific POST messages. Please refer to the README file on the ServerWORKS Quick Launch CD-ROM to view the latest processor compatibility information. Also, contact your DIGITAL sales representative or reseller for future processor upgrades and BIOS revisions. Removing the Processor Module To remove the processor module: 1. Power down the server. 2. Disconnect all external devices (if any), ac power, and monitor power. 3. Remove the side panel to gain access to the processor module. 4. Place the antistatic wrist strap on your wrist and connect the grounding clip to a non-painted metal surface of the server’s chassis. 5. Loosen the screw (A, Figure 5-1) and then remove the retainer. 6. Pull the processor module straight out of its socket. 5-2 Processor Upgrades A DEC01641-2 Figure 5-1. Removing the Processor Module 5-3 Processor Upgrades Removing the Terminator Card To remove the terminator card from the processor module, grasp the terminator by each end and pull up (see Figure 5-2). DEC01638-4 Figure 5-2. Removing the Terminator Module 5-4 Processor Upgrades Installing a Second Processor 1. Remove the processor from its shipping container. 2. Insert the processor into this slot (see Figure 5-3). 3. Press down on the processor so the two plastic tabs at each side lock it securely in the socket. DEC01638-5 Figure 5-3. Installing the Second Processor 5-5 Processor Upgrades Installing the Processor Module 1. If you are changing processor speeds, set all appropriate switch settings on the processor module. Otherwise, current switch settings apply. Refer to Appendix A, “Technical Specifications,” for switch locations. 2. If you are installing additional memory as part of this procedure, refer to Chapter 6, “Installing Additional Memory,” for more information. 3. Install the processor module. 4. Install the retainer and then tighten the screw (A, Figure 5-4). 5. Replace the side panel. 6. 5-6 Connect all external devices and restore power. Afterwards, your server automatically recognizes both processors. Processor Upgrades A DEC01641-3 Figure 5-4. Installing the Processor Module 5-7 Processor Upgrades Run the System ID Configuration Utility If you upgraded your server with a new processor, you need to run the System ID utility (SIDUTIL) to store the new model information in your server memory. To run the SIDUTIL: 1. Insert the bootable Quick Launch CD-ROM disc in the CD-ROM drive. 2. Select the Installation and Utilities button on the main screen. 3. Select the Utilities tab. 4. Insert a blank formatted diskette into drive A. 5. Select the System Identification Utility and then select Continue. 6. After creating the diskette, exit Quick Launch. 7. From drive A, run SIDUTIL. Example: A:\>SIDUTIL 8. Using the arrow keys, highlight the correct server model name/part number/description for your server. Match the processor type and cache size with the line items displayed to select the new DIGITAL Server model. The System ID Configuration Utility appears on your monitor screen. The description of the System ID information currently on the main logic board appears at the first line in the following format: 5-8 Processor Upgrades Example: DIGITAL Server 5220 FR-J2BAW-AA where 5220 is the model name and FR-J2BAW-AA is the part number. The following is description example: 400/512 PII 64 MB. 9. After selecting the correct description, press [Enter]. A new System ID is stored in the main logic board memory. The changed model name and part numbers appear at the top of the menu in the current field. 10. To exit SIDUTIL, press [Esc]. 5-9 6 Installing Additional Memory Introduction 6 Your server supports 168-pin DIMM memory modules that use registered Synchronous Dynamic Random Access Memory (SDRAM) technology. Your server requires at least 64 MB of memory. Adding more memory enables your server to run larger, more complicated software and run it more quickly. Registered SDRAM DIMMS are available in 64 MB, 128 MB and 256 MB sizes to expand your server memory up to 1GB. Server memory is installed using the four DIMM sockets located on the processor module, as shown in Figure 6-1. When adding memory, make sure you reference the memory configuration table and follow the memory expansion guidelines. CAUTION: DIMMs must be ordered separately. Only install DIMMs supported by Digital Equipment Corporation. DIGITAL does not support server performance, product warranty, or service calls resulting from installing non-qualified DIMMs. 6-1 Installing Additional Memory Server DIMM Requirements • Supported DIMMs: 168-pin registered SDRAM with ECC. • DIMMs should have an access time of 10 ns or faster. • Supported densities: SDRAM DIMMs are available in 64 MB, 128 MB, and 256 MB of ECC protected memory. • Maximum memory: 1 GB. Memory Configuration Guidelines The memory configuration guidelines for the DIGITAL Server 5220 Series are as follows: 6-2 • Each memory bank on the processor module accommodates one DIMM. • Install DIMMs starting with Bank 0. See Figure 6-1 for Bank locations. • DIMM capacities can be mixed. • Use only registered SDRAM DIMMs supported by Digital Equipment Corporation. Installing Additional Memory Bank 3 Bank 2 Bank 1 Bank 0 DEC01638-6 Figure 6-1. DIMM Socket Locations 6-3 Installing Additional Memory Memory Configurations The following table lists examples of memory configurations and the mixing of memory sizes. Bank 0 Bank 1 Bank 2 Bank 3 64 MB 64 MB 64 MB 64 MB 128 MB 64 MB 64 MB 64 MB 64 MB 64 MB 64 MB 192 MB 64 MB 128 MB 256 MB 128 MB 128 MB 64 MB 192 MB 128 MB 128 MB 256 MB 128 MB 128 MB 64 MB 128 MB 128 MB 64 MB 128 MB 128 MB 128 MB 128 MB 128 MB 128 MB 64MB 448 MB 128 MB 128 MB 128 MB 128 MB 512 MB 320 MB 64 MB 384 MB 384 MB 256 MB 256 MB 256 MB 64 MB 320 MB 256 MB 128 MB 384 MB 256 MB 256 MB 512 MB 256 MB 256 MB 64 MB 576 MB 256 MB 256 MB 128 MB 640 MB 256 MB 256 MB 128 MB 256 MB 256 MB 256 MB 256 MB 256 MB 256 MB 64 MB 832 MB 256 MB 256 MB 256 MB 128 MB 896 MB 256 MB 256 MB 256 MB 256 MB 1 GB Table does not list all possible configurations 6-4 Total Memory 64 MB 704 MB 768 MB Installing Additional Memory Installing DIMMs on the Processor Module Use the following procedure to install DIMMs: CAUTION: To avoid possible damage to the components, place the antistatic wrist strap on your wrist and connect the grounding clip to a non-painted metal surface of the server’s chassis. 1. Power down your server. 2. Unlock and remove the left side panel. Refer to Chapter 3, “Server Components,” for more information. 3. Remove the processor module. 4. Unpack the DIMMs. Refer to “Memory Configurations” described earlier in this section for information on the supported memory configurations. 5. Install DIMMs starting with the next available Bank on the processor module, orient the DIMM so that the two notches at the bottom edge of the DIMM are aligned with the keyed socket (see Figure 6-2). 6-5 Installing Additional Memory DEC01638-7 Figure 6-2. Installing a DIMM 6. Insert the DIMM straight down into its socket. Apply equal pressure to both ends of the DIMM until it fully seats in the socket. The plastic hold-down/ejector tabs snap into place when the DIMM is inserted correctly. 7. Continue installing DIMMs to complete your memory upgrade. 6-6 Installing Additional Memory 8. Replace the processor module. 9. Replace and lock the left side panel. Refer to Chapter 3, “Server Components,” for more information. 10. Connect all external devices and restore power. 11. Reboot the server to configure it for the additional memory. For more information, refer to Chapter 2, “Server Software and Utilities,” for information on using the BIOS Setup utility. Memory Troubleshooting Your DIGITAL Server’s Power-On Self Test (POST) can detect memory errors when it boots. The error can be isolated to a single DIMM on the processor module. The memory error message format is: <Type of error>: <Location> This indicates that an error occurred while reading the memory configuration. The problem is either the DIMM or the processor module. In both cases, the server halts when this error occurs. Where: <Correctable Error>: <Jxx xxMB SDRAM DIMM> If the error is correctable when the server boots, the BIOS displays the following: Press <F1> to resume Press the <F1> key to continue booting the server. The memory error is automatically corrected. <Uncorrectable Error>: <Jxx xxMB SDRAM DIMM> If the error is uncorrectable, the server halts after the memory test. <Configuration Error>: <Jxx xxMB SDRAM DIMM> If an uncorrectable error occurs, the server halts after the memory test and the faulty DIMM must be replaced immediately. 6-7 7 Installing Disk and Tape Drives Introduction 7 Your DIGITAL Server 5220 supports wide Ultra SCSI disk drives. The following sections describe the SCSI configuration guidelines that must be adhered to so your server operates correctly after installing and connecting SCSI devices. The server supports two SCSI channels. Channel 1 is used to connect internal SCSI devices. Channel 2 is used to connect external SCSI devices. Storage Configuration Guidelines • The server supports up to nine internal storage devices, including two 5¼inch drives and seven hot swap drives. • The server has two enhanced IDE drive interface connectors labeled primary and secondary which are located on the main logic board. The CD-ROM drive is attached to the primary IDE connector. • The CD-ROM drive is scanned first when the server boots. If a bootable CD-ROM disc is placed in the CD-ROM drive, it will boot in place of drive A or drive C. • The BIOS boot settings determine the boot order of storage devices. 7-1 Installing Disk and Tape Drives SCSI Configuration Guidelines The SCSI controller has two buses, Channel 1 and Channel 2, which are typically used as follows: 7-2 Location Mode SCSI type Bus Speed Max. Devices Max. Bus Length Internal (Channel 1) Singleended Wide Ultra SCSI 40 Mbytes/s 8 1.5 m External (Channel 2) LVD Wide Ultra2 SCSI 80 Mbytes/s 16 devices 12 m • Both ends of each SCSI bus must be terminated. The main logic board termination is set automatically. The other termination on Channel 1 is set on the storage backplane. • External SCSI connections must be to the second SCSI bus (Channel 2). Use the SCSI knockouts at the rear of the server and the supplied SCSI cable. • The Channel 2 bus length is measured from the main logic board Channel 2 connector to the end of the external bus. • All devices on a SCSI bus require a unique SCSI ID. SCSI ID 7 is assigned to the SCSI controller. • If a single-ended device is added to a bus with LVD devices, the bus becomes single-ended. Installing Disk and Tape Drives Tape Drive Configuration Guidelines • Tape drives should be installed in the upper 5¼-inch drive bays. • A full-height tape drive occupies two half-height 5¼-inch drive bays. • Use the secondary IDE controller to connect an IDE tape drive and observe the following guidelines. 1. Attach the supplied IDE cable and configure the drive for ”master” operation. 2. Change the “Local bus IDE adapter” field in the BIOS Setup Utility to BOTH to enable the secondary connector. • Use a SCSI controller card to connect to a SCSI tape drive. Hot Swap Drive Configuration Guidelines • A maximum of seven hot swap drives can be installed and configured in the server. • Hot swap drives must only be installed in the hot swap drive bay. • A SCSI ID for each hot swap drive is assigned by the jumper settings on the storage backplane. Refer to the Single/Dual SCSI Bus Target ID Settings table in the Storage Backplane section. • The storage backplane is factory-defaulted as a single channel on a wide Ultra SCSI bus. Split the backplane by removing the jumper cable between hot swap drives four and five. Properly terminate both sides of the backplane, and then connect the spare SCSI cable from channel 2 on the main logic board to the storage backplane. 7-3 Installing Disk and Tape Drives RAID Configuration Guidelines • Fault management must be supported and enabled by an optional RAID adapter for disk drive hot swapping. • When adding a RAID adapter to a server that does not have RAID installed, use the RAID software to configure your server for RAID operation. • Select the disk drives in the hot swap drive bays for hot-swap support in a RAID server. • Use the same capacity drives in a RAID group; otherwise, the difference in drive capacity will be lost. • Using external storage, the maximum number of logical drives in a RAID group is 32. • To maximize the I/O performance of your multi-channel RAID subsystem with external storage, connect each disk drive in a RAID group on a separate SCSI channel. This enables the RAID adapter concurrent access to all hot swap drives. • Supported RAID levels include: 0, 1, 0+1, 5, and RAID 7 (JBOD). RAID Description Drives Per RAID Group 0 Striping - no redundancy 2-8 1 Mirroring 2 0+1 Striping and mirroring 3-8 5 Striping with parity 3-8 7 Single disk - no redundancy (factory default) 1 Note: Each RAID server comes configured as RAID 7 or JBOD (Just a Bunch of Disks) 7-4 Installing Disk and Tape Drives Storage Backplane Your storage backplane supports seven hot-swap drives split between two SCSI bus sections: SCSI Channel 1 and SCSI Channel 2 (see Figure 7-1). SCSI Channel 1 is the upper bus section and consists of four SCSI device connections. SCSI Channel 2 is the lower bus section and consists of three SCSI device connections. These channels can be configured as two independent SCSI buses or as one SCSI bus (factory default) by installing a wide SCSI jumper cable. The following table lists the SCSI ID settings for the storage backplane. Single/Dual SCSI Bus Target ID Settings (J181 on Storage Backplane) Jumpers Set None W1(1) W2 W3 W1+W2 W1+W3 W2+W3 W1+W2+W3 0 1 2 3 0 1 2 3 8 9 10 11 0 1 2 3 8 9 10 11 0 1 2 3 8 9 10 11 8 9 10 11 0 1 2 4 5 6 0 1 2 8 9 10 4 5 6 12 13 14 8 9 10 12 13 14 SCSI Bus 1 Slot0 ID= Slot1 ID= Slot2 ID= Slot3 ID= SCSI Bus 2 or Jumper Cable Slot4 ID= Slot5 ID= Slot6 ID= (1) Factory default settings Refer to Figure 7-1 for the listed connector locations. Figure Legend Description A Wide SCSI connectors (68-pin) B(1) Narrow SCSI connectors (50-pin) C Power connectors J181 (W1, W2, and W3) SCSI ID jumper block (1) Not supported 7-5 Installing Disk and Tape Drives A B C B A B C B J181 A W1 W2 W3 DEC00581 Figure 7-1. Storage Backplane 7-6 Installing Disk and Tape Drives Cables Your server comes with the following cabling arrangements: • Two IDE cables One IDE cable is installed and connected to the factoryinstalled CD-ROM drive. The second IDE cable is supplied in the server accessories kit for installing an optional IDE device. • Two wide SCSI cables and terminators One SCSI cable and terminator are installed for a single SCSI channel configuration. The second SCSI cable and terminator are supplied for dual SCSI channel configurations. • One jumper cable The jumper cable is used to connect the two storage backplane segments together. This cable is installed for a single channel configuration. • External SCSI cable and terminator The external SCSI cable and terminator are supplied in the server accessories kit for connecting SCSI channel 2 on the main logic board to an external storage device. Use the supplied terminator if no storage device is attached to the SCSI cable. Refer to Chapter 9, “Connecting Storage Devices,” for cabling diagrams. 7-7 Installing Disk and Tape Drives Installing Optional Drives Your server has three drive bay areas. Optional drives such as SCSI disk drives, CD-ROM drives, and tape drives can be installed in these drive bay areas. The three drive bay areas are: 7-8 • Left-front access drive bay area—This area has one 5¼-inch IDE CD-ROM drive and one diskette drive (standard on the DIGITAL Server 5220 Series). • Top-right front access drive bay area—This area has room for two 5¼-inch halfheight SCSI/IDE devices or one full-height, 5¼-inch device. • Lower-right front access drive bay area—This area has room for seven 3½-inch wide Ultra SCSI hot-swap drives. Installing Disk and Tape Drives Installing a Half-Height 5¼-Inch Device into the Top-Right Drive Bay To install a half-height 5¼-inch device into one of the top-right drive bay slots, perform the following: 1. Turn off your server. 2. Disconnect all external devices, ac power, and monitor power. 3. Unlock and remove the side panels. 4. Unlock and open the door. 5. Remove the plastic filler panel by pushing it out from inside the server. 6. Remove the bracket from the drive bay (inside, left) and attach it to device. 7. Insert the device into the drive bay slot from the front. 8. Secure the device to the slot using the supplied mounting screws. 9. If applicable, replace the plastic filler panel. 7-9 Installing Disk and Tape Drives D EC 00409-2 Figure 7-2. Installing a Half-Height 5¼-Inch Device Into Top-Right Drive Bay 7-10 Installing Disk and Tape Drives Installing a Full-Height 5¼-Inch Device into the Top-Right Drive Bay To install a full-height 5¼-inch device into the top-right drive bay slots, perform the following: 1. Turn off your server. 2. Disconnect all external devices, ac power, and monitor power. 3. Unlock and remove the side panels. 4. Unlock and open the door. 5. Remove both plastic filler panels by pushing them out from inside the server. 6. Remove the bottom brackets from the inside of the drive bay and attach them to device. 7. Remove the divider bracket (A, Figure 7-3) from the right side of the drive bay. 8. Insert the device into the drive bay from the front. 9. Secure the device using the four supplied mounting screws. 10. If applicable, replace the plastic filler panels. 7-11 Installing Disk and Tape Drives A D E C 0 0 6 3 4-2 Figure 7-3. Installing a Full-Height 5¼-Inch Device Into Top-Right Drive Bay 7-12 Installing Disk and Tape Drives Expansion Brackets You can install 3½-inch half-height devices in the top-right drive bay. If you plan to install a 3½-inch device in a 5¼-inch drive bay slot, you must first install brackets onto the device (see Figure 7-4). Expansion brackets are either supplied with the device or can be purchased from DIGITAL. Contact your local authorized DIGITAL reseller for additional information. DEC01447 Figure 7-4. Installing Expansion Brackets 7-13 Installing Disk and Tape Drives Hot-Swap Drive Bay Hot-swapping allows you to remove or install a hot swap drive while the server remains on-line and active but not accessing the device being swapped. This eliminates interference with the server’s operation. For hot swap drives, you can use the “hot swapping” method to replace a drive providing that the device is not active (green activity LED is off). NOTE: You might need to reconfigure your server to recognize the devices you installed. Use the following procedure to install or replace a hot swap drive: 1. Unlock and open the right front door. 2. Grasp the filler panel or drive by pressing in and holding the handle in the middle of the extractor tool (see Figure 7-5). 3. Using the extractor tool, pull the drive or filler panel out. 4. Insert the new drive into the guide slots and push it in until it is fully seated and the mounting tabs engage the shelf. 5. Close and lock the door. 7-14 Installing Disk and Tape Drives DEC01401-2 Figure 7-5. Installing a Device Into the Hot-Swap Drive Bay 7-15 Installing Disk and Tape Drives Hot Swap Drive Status Indicators The hot-swap backplane monitors the hot swap drives to identify error conditions or failures. This status is displayed on the LEDs. The left LED displays the device activity status. The right LED is the fault LED. • Activity Status the left LED (green) is on or flashing when the hot swap drive is active. CAUTION: For non-RAID adapters, removing a hot swap drive when the left LED is on or flashing can cause the loss or corruption of data. • Fault LED for RAID adapters, the right LED (amber) is the hot swap drive fault LED and indicates an error condition when it is either on or flashing. Hot Swap Drive Status LEDs 7-16 Green Activity Status LED Amber Fault LED Indication On Off Device is operating properly. Flashing Off Device is operating properly. Off Off Device is inactive and operating normally. There is no fault. On On Fault: Device is hung. Replace drive. Off On Fault: Device is inactive and spun down. Replace drive. On Flashing Fault: Device is active and spinning down due to a fault. Installing Disk and Tape Drives External Storage You can use additional SCSI cables and/or controllers to connect external SCSI devices to your server. Consult your local authorized DIGITAL reseller for information on SCSI options and cables. Connecting an External Device to the Onboard SCSI Controller To connect an external SCSI bus to the onboard SCSI controller: 1. Power down the server. 2. Unlock and remove the left side panel. 3. Using a screwdriver, gently pry away one of the SCSI knockouts located at the rear of the server (A, Figure 3-7). 4. Connect the 68-pin unshielded SCSI cable connector to the SCSI channel 2 connector on main logic board (A, Figure 7-6). 5. Screw the external shielded connector to the selected knockout (B, Figure 7-6). 7-17 Installing Disk and Tape Drives B A DEC01642-2 Figure 7-6. Cable Connections 7-18 Installing Disk and Tape Drives 6. Connect the external SCSI device making sure it is properly terminated. NOTE: If you are not connecting an external storage box at this time, attach a terminator to the external SCSI connector at the rear of the server. DEC01643 Figure 7-7. Connecting an External SCSI Storage Box to the Onboard SCSI Controller 7-19 8 Installing Expansion Boards Introduction 8 This chapter contains the configuration guidelines that must be followed prior to installing ISA or PCI expansion boards as well as detailed installation procedures. The BIOS detects ISA and PCI boot devices and expansion boards. ISA devices have jumpers or switches that determine their bus address. PCI devices have their addresses assigned dynamically by the BIOS, in ascending order beginning with the first available address (the lower the address, the higher the priority of the device). ISA Expansion Board Configuration Guidelines • The two ISA slots support industry-standard 16-bit ISA expansion boards. • Quick Launch detects PCI, SCSI, and RAID devices; it does not detect ISA devices. 8-1 Installing Expansion Boards PCI Slot 7 PCI Slot 8 7 PCI Slot 9 PCI Slot 10 9 8 10 Proprietary Slot PCI Slot 1 1 PCI Slot 2 2 PCI Slot 3 3 PCI Slot 4 PCI Slot 5 4 PCI Slot 6 6 5 1 ISA Slot 1 ISA Slot 2 2 DEC01637-5 (1) The video/Ethernet daughter card must be installed in the proprietary slot. (2) PCI slot 6 and ISA slot 1 share an expansion slot at the rear of the server. Only one expansion board can be installed in either one of these slots at any one time. Figure 8-1. Expansion Board Slot Locations 8-2 Installing Expansion Boards PCI Expansion Board Configuration Guidelines • All PCI slots support bus mastering. • PCI expansion boards should be installed starting in PCI slot 1. Install a PCI expansion board in the “shared PCI slot” (slot 6) last. • The assignment for the boot device depends on which boot device occurs first on the bus. • The BIOS assigns addresses starting with the first available address. • The lower the address, the higher the priority that is assigned to the device. NOTE: If you want a PCI device to be the bootable device, do not set the address jumpers or switches for an ISA device to address C8000h. Configuring PCI Expansion Boards Using the BIOS Setup Utility When installing PCI expansion boards in your server, the BIOS Setup utility must be run to configure these boards. The BIOS Setup utility then will automatically detect any expansion board during a server boot. The ROM addresses for these PCI expansion boards will be assigned based on the PCI scan order and address availability. 8-3 Installing Expansion Boards Boot Devices The BIOS Setup utility allows you to define the boot device location as: • Onboard SCSI controller • PCI expansion slot (default) • ISA expansion slot The BIOS assigns addresses beginning at the first available address the lower the address, the higher the priority assigned to that device. Server Boot Sequence The server boot sequence is as follows: 1. If the CD-ROM drive is listed as the first boot device in the BIOS, the server boots from the CD-ROM drive. 2. If a bootable CD-ROM is not present, the operating system can boot from either the diskette drive (drive A) or the hard drive (drive C) using the BIOS Setup utility as follows: a. If the diskette drive (drive A) is selected first and then the hard drive (drive C), the server searches the diskette drive (drive A) first to boot the operating system. If a diskette is not present in the diskette drive (drive A), the server attempts to boot from the hard drive (drive C). b. If the hard drive (drive C) is selected first and then the diskette drive (drive A), the server searches the hard drive (drive C) first to boot the operating system. If the hard drive (drive C) does not contain the boot information, the server attempts to boot from the diskette drive (drive A). The hard drive (drive C) can be attached to the onboard SCSI controller, an ISA expansion board, or a PCI expansion board. The location of the hard drive (drive C) is determined by the server scan sequence described next. 8-4 Installing Expansion Boards Server Scan Sequence If the boot device is neither the CD-ROM drive or the diskette drive, then the operating system will be found on drive C. The location of drive C can be determined as follows: 1. The search for a bootable device begins from a low ROM address to a high ROM address (starting at C8000h through EFFFFh). The boot device with the lower address is assigned higher priority (this is drive C). 2. When the server BIOS detects PCI expansion boards with ROMs installed in PCI slots, it copies all the ROMs of the expansion boards to C8000 - DFFFF areas in ascending order. The first scanned PCI expansion board occupies the address area starting from the first available point. This could be C8000 if C8000 is available. The second scanned PCI expansion board occupies the second available address area behind C8000, and so forth. 3. If a bootable ISA expansion board is configured to occupy the C8000 region, the server BIOS puts the existing PCI devices behind that region. When the ISA expansion board is configured to occupy the C8000 address, PCI bootable devices are not the first bootable device drive C. 8-5 Installing Expansion Boards PCI Scan Sequence The server PCI slot sequence is listed in the following table: Priority Slot Number 1 Proprietary slot (Bus 0 - VGA: Device 12h) 2 SCSI controller (Bus N+2, Device 0Eh) 3 Slot 1 (BUS 0, Device 0Eh) 4 Slot 2 (BUS 0, Device 0Dh) 5 Proprietary slot (Bus 0 - ENET: Device 0Fh) 6 Slot 10 (BUS N+1, Device 08h) 7 Slot 9 (BUS N+1, Device 09h) 8 Slot 8 (BUS N+1, Device 0Bh) 9 Slot 7 (BUS N+1, Device 0Ah) 10 Slot 3 (BUS N+2, Device 08h) 11 Slot 4 (BUS N+2, Device 09h) 12 Slot 5 (BUS N+2, Device 0Ah) 13 Slot 6 (BUS N+2, Device 0Bh) NOTE: If you want a PCI device to be the bootable device, do not set the address jumpers or switches for an ISA device to address C8000h. 8-6 Installing Expansion Boards • The bus scanning process is in a recursive loop. The following explains this loop: − If the server BIOS detects a PCI-to-PCI bridge chip (PPB) on the current Bus N, the bus number of the PPB is assigned as N + 1. The server BIOS does not scan the next device or slot on the current bus (Bus N). Instead, it scans the first device of Bus N + 1 and, if the first device is not PPB, it then scans the second device of Bus N + 1. − If the first device of Bus N + 1 is PPB, the bus number of the PPB on Bus N + 1 is assigned as Bus N + 2. Once a PPB is found, the scan path goes to that PPB until no PPB is found again. Afterwards, it moves to the next device. − The bus scanning process is recursive until no additional PPB devices are found. The server BIOS then scans the other devices on the last found PPB, and then goes back to the upper level bus and continues to scan other devices. Being recursive, the server BIOS returns to Bus N. 8-7 Installing Expansion Boards Installing Expansion Boards The following sections describe how to install ISA and PCI expansion boards. 1. Turn off your server. 2. Remove the left side panel. NOTE: Read and fully understand your optional expansion board's documentation before installing it. 3. Unscrew and remove the metal filler plate from the desired PCI or ISA expansion slot. 4. Discard the filler plate, but retain the screw. 8-8 Installing Expansion Boards DEC01642-3 Figure 8-2. Removing a Metal Filler Plate 5. Insert the new expansion board into the socket from which the filler plate has been removed, and push the board firmly into place. 6. Secure the expansion board with the screw removed from the filler plate. 7. Replace the left side panel. 8. Restore power and reboot the server. For information on assigning IRQs, refer to Chapter 2, “Server Software and Utilities,” 8-9 Installing Expansion Boards DEC01642-4 Figure 8-3. Installing an Expansion Board 8-10 9 Connecting Storage Devices Introduction 9 This chapter contains the cabling configurations that must be followed when connecting storage devices. Refer to Chapter 7, “Installing Disk and Tape Drives,” for detailed information on SCSI configuration guidelines. SCSI Cable Configurations The following sections describe the available SCSI cable configurations for your DIGITAL Server: • Single backplane configuration using an onboard SCSI controller • Split backplane configuration using onboard SCSI controllers • Split backplane configuration using a two channel RAID adapter In all configurations, an IDE CD-ROM must be connected to the primary IDE connector on the main logic board. 9-1 Connecting Storage Devices Single Backplane Configuration To connect SCSI devices to a single SCSI channel, perform the following: 1. Power down the server. 2. Disconnect all peripheral devices from the server. 3. Unlock and remove the server side panels. 4. Connect the cables as shown in Figure 9-1. 5. If using the top 5¼-inch drive bay, connect the appropriate power cable to the device. 6. Replace and lock the side panels. 7. Connect all external devices and then power on your server. 8. Run the SCSI Configuration Utility to configure your server. Refer to Chapter 2, “Server Software and Utilities,” and to your SCSI documentation for additional configuration information. 9-2 Connecting Storage Devices Figure 9-1 Legend Component A IDE tape drive B C D IDE CD-ROM drive Primary IDE connector Secondary IDE connector E SCSI channel 1 connector F SCSI channel 2 connector G 68-pin SCSI cable to SCSI knockout H External terminator I 68-pin SCSI connector to storage backplane (SCSI channel 1) J Jumper cable K 68-pin SCSI terminator L Storage backplane 9-3 Connecting Storage Devices A L B K D J C E I F G H DEC01644-2 Figure 9-1. Single Backplane Configuration Using an Onboard SCSI Controller 9-4 Connecting Storage Devices Split Backplane Configuration (SCSI) To connect SCSI devices using a split backplane and two SCSI channels, perform the following: 1. Power down the server. 2. Disconnect all peripheral devices from the server. 3. Unlock and remove the server side panels. 4. Connect the cables as shown in Figure 9-2. 5. If using the top 5¼-inch drive bay, connect the appropriate power cable to the device. 6. Replace and lock the side panels. 7. Connect all external devices and then power on your server. 8. Run the SCSI Configuration utility to configure your server. Refer to Chapter 2, “Server Software and Utilities,” and to your SCSI documentation for additional configuration information. 9-5 Connecting Storage Devices 9-6 Figure 9-2 Legend Component A IDE tape drive B C D IDE CD-ROM drive Primary IDE connector Secondary IDE connector E SCSI channel 1 connector F SCSI channel 2 connector G 68-pin SCSI connector to storage backplane (SCSI channel 2) H Terminator (SCSI channel 2) I 68-pin SCSI connector to storage backplane (SCSI channel 1) J Terminator (SCSI channel 1) K Storage backplane Connecting Storage Devices A K B J I D H C E G F DEC01645-2 Figure 9-2. Split Backplane Configuration Using Onboard SCSI Controllers 9-7 Connecting Storage Devices Split Backplane Configuration (RAID) To connect SCSI devices using a split backplane and two separate RAID channels, perform the following: 1. Power down the server. 2. Disconnect all peripheral devices from the server. 3. Unlock and remove the server side panels. 4. Connect the cables as shown in Figure 9-3. 5. If using the top 5¼-inch drive bay, connect the appropriate power cable to the device. 6. Replace and lock the side panels. 7. Connect all external devices and then power on your server. 8. Run the SCSI Configuration Utility or the RAID Configuration Utility to configure your server. Refer to Chapter 2, “Server Software and Utilities,” and to your RAID and SCSI documentation for additional configuration information. 9-8 Connecting Storage Devices Figure 9-3 Legend Component A IDE tape drive B C IDE CD-ROM drive Secondary IDE connector D E Primary IDE connector Two channel RAID adapter F SCSI channel 1 connector G SCSI channel 2 connector H RAID connector adapter channel 1 I RAID connector adapter channel 0 J External RAID connector adapter channel 0 K External RAID connector adapter channel 1 L 68-pin SCSI connector to storage backplane (RAID channel 1) M Terminator (RAID channel 1) N Terminator (RAID channel 0) O 68-pin SCSI connector to storage backplane (RAID channel 0) P Storage backplane 9-9 Connecting Storage Devices A P B O D C N E M F G L H I K J DEC01646-2 Figure 9-3. Split Backplane Configuration Using Two Channel RAID Adapter 9-10 10 Server Security Features Introduction 10 Server security is important to prevent theft or accidental loss of software and hardware. The DIGITAL Server provides the following levels of protection: • Left and right security door lock—located at the front of your server. • Left and right side panel lock—located at the rear of your server. • Supervisor password. • Additional security features. 10-1 Server Security Features Left and Right Door Security Lock Your server has a three-way keylock used to prevent unauthorized access to the leftand right-front security doors. To open the left-front security door, insert the key into the keylock at the bottom position and then turn the key clockwise to the first unlock position. To open the right-front security door, continue to turn the key clockwise to the second unlock position. Note that your server keys fit both the front keylock and rear chassis keylock. Figure 10-1. Front Panel Security Doors Lock 10-2 Server Security Features Left and Right Side Panel Lock Your server has a chassis keylock used to prevent unauthorized removal of the left and right side panels. To release the left and right side panels, insert the key as shown and then turn to the right. Note that your server keys fit both the front keylock and rear chassis lock. CAUTION: Be careful not to lose your server keys. Losing these keys prevents you from removing the side panels and opening the front security doors. Contact your authorized service provider or authorized dealer for information on replacing lost keys. Figure 10-2. Left and Right Side Panel Lock 10-3 Server Security Features Supervisor Password Your server has password protection that you can set to prevent unauthorized access to your server files. If you set a supervisor password, you will be prompted to enter it prior to accessing the BIOS Setup utility. If “Password On Boot” is enabled, you will be prompted to enter a password before your operating system boots. Refer to Chapter 2, “Server Software and Utilities,” for more information. If You Forget Your Password Use the following procedure to erase a password from your server. 1. Turn off your server and remove the left side panel. 2. Make sure switch SW1-3 is set to Password Clear (switch on). Refer to Appendix A, “Technical Specifications,” Main Logic Board Switch Settings, and Figure A-1 for additional information. 3. Reconnect your server and turn it on. Booting your server with this switch in the down position erases the existing password(s). 4. Turn off your server and remove the left side panel. 5. Change switch SW1-3 to Normal Mode (switch down). 6. Reconnect your server and turn it on. 7. Using the BIOS Setup utility, assign a new password. Refer to Appendix C, “BIOS Setup Utility Features,” for more information. 10-4 11 Troubleshooting Introduction 11 This chapter provides initial troubleshooting procedures. The tables that follow list specific problems, probable causes, and recommended actions to take if your server fails. Tables include: • Server Troubleshooting • Disk Drive Troubleshooting • Hot Swap Drive Troubleshooting • Tape Drive Troubleshooting • Monitor Troubleshooting • CD-ROM Troubleshooting • Diskette Drive Troubleshooting • RAID Troubleshooting Refer to Appendix A, “Technical Specifications,” for a list of messages that might display. Refer to the documentation supplied with additional options if you are experiencing problems with specific options that you have installed. 11-1 Troubleshooting Initial Troubleshooting Follow these general procedures to troubleshoot your DIGITAL Server. • Record all configuration information and have it readily available. • Turn off your server, wait until all disk drives completely spin down, and then turn it back on. • Refer to Appendix A, “Technical Specifications,” if the POST detects an error. • Ensure that all cables and connections are secure. • Make sure all necessary video, printer, and application device drivers are properly installed. • Try not to troubleshoot more than one problem at a time. • Try to duplicate the problem. • Run the diagnostic software. Refer to the next section “When to Use the Diagnostics.” • Run the SCSI configuration utility if you have problems after connecting devices. • Run the BIOS Setup utility (F2). • Run the System Management utility (F3) to check IRQ settings. Refer to Chapter 2, “Server Software and Utilities,” to ensure the server is correctly configured for all installed hardware and software. 11-2 Troubleshooting • Run the SCSI or RAID configuration utility if you have problems after connecting devices. Refer to Chapter 2, “Server Software and Utilities,” for additional information. • Contact DIGITAL Services for software or hardware related problems. NOTE: If you need to return a failed component, pack it in its original container and return it to DIGITAL for service. If you are a self-maintenance customer, call your authorized DIGITAL service provider for assistance and recommendations. Refer to the “Service Information” on the Quick Launch CD-ROM for the phone numbers in your area or to the Warranty Information booklet supplied with your DIGITAL Server documentation. When to Use the Diagnostics The diagnostic software is a versatile tool for verifying proper hardware installation and isolating intermittent problems that are not detected by the Power-On Self Test (POST). You should run the diagnostic software if: • The server fails to boot or load the operating system software. • The server fails to boot or load the operating system software after you add additional hardware such as additional memory, processors, SCSI devices, or expansion boards. • The operating system hangs repeatedly and no changes have been recently added to the software such as service packs or a new application. • You suspect a server hardware failure. • You want to validate server operation. • An intermittent hardware problem exists. 11-3 Troubleshooting Running the Diagnostics To run the AMIDiag base package (Emergency Mode diskette) from a diskette, follow this procedure: 1. Insert the diskette labeled “For Emergency Use” in drive A and then boot the server. 2. Use the arrow keys to highlight the desired test. 3. Press [Enter]. For additional troubleshooting information refer to the AMIDiag User’s Guide, located on the Quick Launch CD-ROM. Running Quick Tests or Groups of Tests Function keys can be used to select and run groups of tests. A list of function keys is available by pressing the F9 key. The following list includes examples of how to run Quick Tests or Groups of Tests. 11-4 • To run Quick Test, press F8 to select tests, then F10 to run all the selected tests. • To run all Memory tests, press F6 to select tests listed on the menu, then press F10 to run all the selected tests. • To run all tests from all menus, press F7 to select all tests, then press F10 to run all the selected tests. Troubleshooting Running DIGITAL Vendor Extended Tests To run DIGITAL Vendor Extended Tests from a diskette: 1. Insert the DIGITAL Vendor Extended Tests diskette for the selected device and then boot the server or type A:\DMENU. 2. Select the desired test. Each diskette has a README.TXT file with a list of devices that can be tested and additional information about each diagnostic. Running the Diagnostics Tests from the Server’s Hard Disk Drive To run diagnostic tests from the server’s hard disk drive, perform the following: 1. Boot the system and select Programs, then the MS-DOS Prompt from the Start menu. 2. At the C:\> prompt, type: \DIAG\DIAGNOSE.BAT This will setup the CONFIG.SYS and AUTOEXEC.BAT files to run the diagnostics and then reboot the server to load the AMIDiag program. Note that the original CONFIG.SYS and AUTOEXEC.BAT are restored before the diagnostics load. 3. Select the test or group of tests using the arrow keys and function keys previously defined. DIGITAL Vendor Extended Tests can also be run from the User menu. 11-5 Troubleshooting Server Troubleshooting Problem Possible Cause Action No response when the server is turned on. Server is not plugged in. Turn off the server, plug it in, and then turn it back on again. No power at the wall outlet. Use another wall outlet. Main logic board failed. Contact your authorized service representative. Main logic board switches incorrectly set. Set all appropriate switches. Processor module has failed. Reseat the processor module. Processor module switches incorrectly set. Make sure all switches are correctly set. Side panels removed. Install side panels. Power supply failed. Contact your authorized service representative. continued 11-6 Troubleshooting Problem Possible Cause Action Power is on, but there is no screen display. Brightness and contrast controls are not correctly set. Adjust the brightness and contrast controls. Monitor is off. Turn on the monitor. Monitor cable is incorrectly installed. Check all monitor connections. Incorrect video drivers installed. Install the correct video drivers. Video controller has failed. Contact your authorized service representative. Monitor has failed. Replace monitor or contact your authorized service representative. CD-ROM drive is not connected to the IDE controller. Connect the CD-ROM to the IDE connector located on the main logic board. Refer to Chapter 9. CD-ROM disc is not bootable. Insert a bootable CD-ROM disc. Processor module installed incorrectly. Reinstall processor module. BIOS Setup utility indicates an error after installing a processor module. Replace the terminator and reboot. If server boots without errors, replace processor module. Mismatched stepping. Check processor stepping information. Refer to Chapter 5. Server does not boot from CD-ROM drive. Server operates incorrectly after installing a processor module. continued 11-7 Troubleshooting Problem Possible Cause Action Server operates incorrectly after installing optional expansion board. Expansion board installed incorrectly. Remove expansion board and reinstall. IRQ conflict. Run System Management <F3> to check <PCI> status of IRQ assignments. Refer to Chapter 2 and Appendix C. Expansion board has failed. Remove expansion board and reboot. If server boots without errors, replace expansion board. Memory configured incorrectly. Reboot the server and check for any boot message to identify faulty DIMM(s). Server operates incorrectly after installing memory DIMMs. Check that the memory configuration is according to the memory guidelines explained Chapter 6 “Installing Additional Memory.” DIMMs installed incorrectly Remove DIMMs and reinstall. DIMMs have failed. Replace DIMMs. Processor module installed incorrectly. Reinstall processor module. Processor module failed. Replace processor module. continued 11-8 Troubleshooting Problem Possible Cause Action No response to keyboard commands. Keyboard might be password Enter the keyboard password. protected by a local or remote control program. Keyboard is not connected. Power down the server and connect the keyboard. Keyboard is connected to the Power down the server and connect mouse port. the keyboard to the keyboard port. Keyboard failed. Replace keyboard or contact your authorized service representative. No response to mouse Mouse might be password Enter the keyboard and mouse commands. protected by a local or password. remote control program. Mouse is not connected. Power down the server and connect the mouse. Mouse is connected to the Power down the server and connect keyboard port. the mouse to the mouse port. Mouse driver not installed. Install the appropriate mouse driver. Mouse trackball dirty. Clean trackball. Mouse failed. Replace mouse or contact your authorized service representative. Server operates correctly but Application software installed Refer to your application software application software does not. incorrectly. documentation. Having external cache Run the BIOS Setup utility and enabled causes conflict with disable external cache. Refer to application software. Chapter 2 and Appendix C. 11-9 Troubleshooting Disk Drive Troubleshooting Problem Possible Cause Action Server does not recognize an internal SCSI device. SCSI device jumpers incorrectly set Refer to the supplied kit installation instructions. SCSI ID conflicts. Refer to the supplied kit installation instructions and to the storage backplane jumper configuration in Chapter 7. Termination not removed from the SCSI device. Remove termination. Refer to the supplied kit installation instructions. SCSI controller has failed. Contact your authorized service representative. Loose SCSI cable. Secure all cable connections. SCSI cable incorrectly installed between SCSI controller, SCSI device or backplane. Refer to Chapter 9 for cabling information. SCSI device has failed. Replace SCSI device. continued 11-10 Troubleshooting Problem Possible Cause Action Server does not recognize an external SCSI device. SCSI device jumpers incorrectly set. Refer to the supplied kit installation instructions. SCSI ID conflicts. Refer to the supplied kit installation instructions and to the storage backplane jumper configuration in Chapter 7. Termination not removed from the SCSI device. Remove termination. Refer to the supplied kit installation instructions. SCSI controller has failed. Contact your authorized service representative. Loose SCSI cable. Secure all cable connections. SCSI cable incorrectly installed between SCSI controller and rear panel connector or external SCSI device and rear panel connector. Refer to Chapter 9 for cabling information. SCSI device has failed. Replace SCSI device. continued 11-11 Troubleshooting Problem Possible Cause Action Server does not boot from an internal SCSI hard disk drive. Boot device not attached to the SCSI controller at the lowest ROM address. Run the BIOS Setup utility to define the server boot device. PCI/ISA scanning order incorrect. Refer to the bus scanning examples in Chapter 8. SCSI boot hard disk drive not formatted. Format the SCSI hard disk drive. SCSI device drivers not installed or incorrectly installed on SCSI boot hard disk drive. Properly install all required SCSI device drivers. Refer to Chapter 2. Operating system software is not installed on the SCSI boot hard disk drive. Install the appropriate operating system. Requested partition does not exist. Partition the SCSI hard disk drive and then reload the operating software. SCSI boot hard disk drive at wrong SCSI address. Set SCSI boot hard disk drive to lowest “primary” SCSI address. SCSI device has failed. Replace SCSI device. CAUTION: Formatting the SCSI hard disk drive will destroy all the data on the drive. continued 11-12 Troubleshooting Problem Possible Cause Action SCSI hard disk drive cannot read or write information. Incorrect disk drive jumper settings. Refer to the supplied kit installation instructions. Loose or incorrectly installed cables. Make sure all cables are correctly installed. SCSI hard disk drive is not correctly formatted or partitioned. Format and partition as required using the supplied operating system. Check hot swap drive status LEDs for a failure indication. Refer to Chapter 7 for additional information. Hot swap drive failure. 11-13 Troubleshooting Hot Swap Drive Troubleshooting 11-14 Problem Possible Cause Action Drive fault LED lit. Drive failed. Replace drive. Drive activity and fault LEDs lit. Drive is hung or has failed. Replace drive. Drive fault LED flashing. Drive is in recovery mode or has failed and is spinning down. Allow the drive array to build or fully spin down. Drive fault status LED is either on or off; fault status LED flashing. Drive is active and spinning down due to a fault. Correct the fault or replace the drive. Troubleshooting Tape Drive Troubleshooting Problem Possible Cause Action Tape will not load. Tape inserted incorrectly. Insert the tape with the arrow on the cassette pointing towards the drive. Cannot write data to a tape. Tape write-protected. Slide the write-protect tab on the cassette to the closed position. Tape will not eject. Tape jammed in drive. Using a small screwdriver, rotate the motor shaft clockwise to bring threading mechanism to the initial loading position. If necessary, press the ratchet mechanism to tighten the tape before ejecting. Continue to turn the motor shaft clockwise until the tape can be lifted out of the drive mechanism and ejected from the drive. 11-15 Troubleshooting Monitor Troubleshooting Problem Possible Cause Action Monitor power indicator is not on. Monitor is turned off. Turn on the monitor. Power cord is not connected. Connect the power cord to the server. No power at wall outlet. Use another outlet. Power indicator is defective. Contact your authorized service representative. Monitor brightness and contrast controls are incorrectly set. Adjust the monitor brightness and contrast controls. Monitor has failed. Replace monitor, or contact your authorized service representative. Monitor incorrectly adjusted. Adjust accordingly. Monitor signal cable incorrectly installed. Straighten any bent connector pins and then reconnect. Color monitor displaying monochrome. Server was turned on before the monitor was turned on. Turn off the server, turn on the monitor, then turn the server back on. Monitor fails to switch to high-resolution mode. Appropriate high-resolution video drivers are not installed or incorrectly installed. Correctly install all appropriate high-resolution video drivers. Refer to the documentation supplied with your monitor. No screen display. Distorted, rolling, or flickering screen display, or wrong/uneven color. 11-16 Troubleshooting CD-ROM Troubleshooting Problem Possible Cause Action Cannot access the CDROM drive. Error message reading drive x. Device drivers not installed. Install correct device drivers. No disc in the CD-ROM drive. Insert a disc. On the CD-ROM drive, slave jumper selected instead of master Change master/slave switch jumper to master. IDE cable disconnected. Properly connect the IDE cable. Refer to Chapter 9. Tray open. Close the tray. No disc or tray is open. Insert a disc and close the tray. Check cable connections. Make sure cables are correctly connected. Application software not running. Run application software. Power is on but indicator shows no activity. Disc is spinning but drive is idle. 11-17 Troubleshooting Diskette Drive Troubleshooting Problem Possible Cause Action Target diskette drive cannot read or write information. Diskette is not formatted. Format the diskette. Diskette is worn or damaged. Try another diskette. Server does not boot from a target diskette drive. Diskette is write-protected. Slide the write-protect switch so the hole is not visible. Diskette drive is empty. Insert a diskette. Diskette write protection enabled. Run the BIOS Setup utility and set the Diskette Write Protection option to “Disabled.” Disabled in BIOS Setup utility. Run the BIOS Setup utility and enable the diskette drive. Diskette drive not enabled. Run the BIOS Setup utility and enable the diskette drive. Diskette boot option disabled. Run the BIOS Setup utility and set boot option to A then C. Diskette does not contain start-up files. Insert a diskette with the correct start-up files. Diskette drive is empty. Insert a diskette that contains an operating system. Diskette is worn or damaged. Try another diskette. Cannot write to target diskette drive. 11-18 Loose cables. Secure all cable connections. Diskette drive write protected. Run the BIOS Setup utility and disable the diskette write protection option. Troubleshooting RAID Troubleshooting Problem Possible Cause Action Replaced drive does not spin up to speed. Drive not seen by RAID host adapter. Manually rebuild the drive. Multiple drives have failed. No power available. Restore power, run the RAID configuration utility and change the state of any failed (FLD) drive to optimal (OPT). Remove the drive, wait 20 seconds, reinsert drive. Wait one minute and then rebuild the drive. Run the RAID configuration utility and check for bad blocks on the drives. Repair any bad blocks. Drive not seen by RAID adapter. SCSI cable not connected. Check all SCSI connections. Incorrect SCSI termination. Properly terminate the SCSI bus. Duplicate SCSI IDs on the bus. Check drive SCSI ID settings. Defective drive. Replace drive. Drive improperly inserted. Reinsert drive. Defective RAID adapter. Replace the RAID adapter or contact your authorized service provider. 11-19 Troubleshooting Flash BIOS Troubleshooting 11-20 Problem Possible Cause Action Cannot flash the server’s BIOS Main logic board switch settings incorrectly set. Make sure main logic board switch SW1-2 “Recovery Mode” is set to Recovery and SW1-1 “BIOS Protection” is set to Off. Refer to Appendix A for switch locations. BIOS Setup utility switch setting incorrectly set. Make sure the “System BIOS Flash” option in the BIOS Setup utility is set to Enabled. Refer to Chapter 2 for more information. A Technical Specifications Introduction A This appendix provides the following technical characteristics for your server: • Server specifications • ISA expansion slots • PCI expansion slots • Power supply input power requirements • Power supply output specifications • Power cord requirements • Environmental features • Main logic board switch settings • Processor module switch settings • Server status messages • POST OCP messages • OCP messages • Processor module voltage and temperature ranges A-1 Technical Specifications Server Specifications The following sections list the server performance, dimensions and environmental specifications. Performance Specifications Attributes Specification Bus clock ISA PCI 8.33 MHz 33 MHz Data I/O ISA PCI 8-bit and 16-bit 32-bit Memory(1) 168-pin, 72-bit registered SDRAM DIMMs with 100 MHz bus speed. 64 MB to 1 GB memory capacity System flash ROM BIOS 8 Megabit (1) A-2 Refer to Chapter 6 for additional memory information Technical Specifications Server Dimensions Dimension Specification Width 371.94 mm (14.6 in.) Length 589.33 mm (23.2 in.) Height 513.87 mm (20.23 in.) Weight 24.5 kg (54.02 lb.) Environmental Specifications Attributes Specification Operating temperature 10°C to 35°C (50°F to 95°F) Storage temperature -20°C to 65°C (-4°F to 149°F) Operating humidity (noncondensing) 20% to 80% relative humidity, maximum wet bulb 35°C (95°F) Storage humidity (noncondensing) 10% to 90% relative humidity, maximum wet bulb 65°C (149°F) Altitude Operating Nonoperating 2,438 m (8,000 ft) maximum 4,876 m (16,000 ft) maximum Shipping vibration IAW Federal Standard 101, method 5019 Nonoperating shock 30 G, 25 ms halfsine A-3 Technical Specifications ISA Expansion Slots The main logic board contains one dedicated ISA expansion slot and one shared ISA expansion slot. These slots support +5 V dc expansion boards. PCI Expansion Slots The main logic board contains nine dedicated PCI expansion slots and one shared PCI expansion slot. These slots support: • 5 V dc 32-bit PCI connector type • 5/3.3 V dc universal PCI connector types • Bus mastering NOTE: PCI expansion slots 1 through 3 do not support 3.3 V dc. If your PCI expansion board needs 3.3 V dc, use PCI expansion slots 4 through 8. Power Supply Input Power Requirements The 450 W auto-sensing power supply provides five dc voltages: +12 V dc, -12 V dc, +5 V dc, -5 V dc, and 3.3 V dc. These voltages are used by the various components within the server. The following table lists the input power requirements. Rated Voltage Range Maximum Range Rated Input Current(1) Operating Frequency Range 100 V ac - 120 V ac 90 V ac - 135 V ac 9.5 A 47 Hz - 63 Hz 220 V ac - 240 V ac 180 V ac - 265 V ac 5A 47 Hz - 63 Hz (1) Includes outlet current A-4 Technical Specifications Power Supply Output Specifications Your server’s power supply provides the following output ratings: • +5 V dc 2.5 A min, 52 A max. • +3.3 V dc 0 A min, 37.4 A max. • +12 V dc 0.5 A min, 11 A max. • -12 V dc 0 A min, 0.5 A max. • -5 V dc 0 A min, 0.2 A max. +5 V dc and +3.3 V dc maximum total output: 355 W. +5 V dc and +3.3 V dc and +12 V dc maximum total output: 420 W. Power supply total output: 450 W maximum. Power Cord Requirements The power cord used with this server must meet the following criteria: • UL and CSA Certified cordage rated for use at 250 V ac with a current rating that is at least 125% of the current rating of the product. In Europe, the cordage must have the <HAR> mark. • The ac plug is terminated in a grounding-type male plug designed for use in the region. It must also have marks showing certification by an agency acceptable in the region. • The connector at the server end is an IEC type CEE-22 female connector. • The maximum length is 4.5 meters (14.5 feet). • One power cord is required for each installed power supply. A-5 Technical Specifications Environmental Features This product has been designed with several features intended to reduce environmental impact in manufacturing, use, and end-of-life disposition. A-6 Ozone Depleting Substances (ODS) This product and its shipping package do not contain nor are they manufactured with Class I ODS, as defined in Title VI, section 611 of the clean air act amendments of 1990. Use of asbestos Digital Equipment Corporation does not use asbestos in any form in the manufacturing of its products. Recycled paper in documentation User documentation is printed on paper with a post-consumer recycled content of between 10 and 60%. Use of PVC in enclosure pieces Polyvinylchloride (PVC) is not used in plastic enclosure pieces. Design for disassembly/recycling This product has been designed for ease of disassembly so that materials can be easily separated for recycling at the end of the product's useful life. One type of fastener is generally used to minimize tools required to disassemble. Plastic components have been marked with standard identification symbols to facilitate separation for recycling. Snap fit fastening techniques have been used, where possible, to reduce disassembly effort. Fastening of dissimilar materials can be disconnected, allowing materials to be separated for recycling. Environmental packaging features The outer container on this product is made from unbleached, natural Kraft corrugated fiberboard which can be readily recycled in most areas. Protective cushioning pieces are made from expandable polypropylene which is more efficient than other foams and requires less material to provide equivalent protection, thereby reducing packaging waste. The cushioning pieces are marked with the Society of the Plastics Industry (SPI) material identification symbol for polypropylene to facilitate recycling. Technical Specifications Acoustic Levels Declared values as per ISO 9296 and ISO 7779: Sound Power Level L WAd , B Sound Pressure Level L pAm , dBA Idle Operate (Bystander positions) Idle Operate with 0 x HDD 5.6 5.6 37 37 with 3 x HDD 5.8 5.9 40 42 Product DIGITAL Server 5220 Current values for specific configurations are available from DIGITAL representatives. 1 B = 10 dBA A-7 Technical Specifications Main Logic Board Switch Settings The following table lists the main logic board switch settings and factory-default settings. Figure A-1 shows the switch locations. CAUTION: Do not touch any electronic component unless you are safely grounded. Wear a grounded wrist strap or touch an exposed metal part of the server chassis. A static discharge from your fingers can result in permanent damage to electronic components. Feature Function Setting Description BIOS Protection Normal(1) SW1-1, off(1) BIOS protection SW1-1, on Set this switch to BIOS Protection (ON) to prevent unauthorized personnel from loading a new server BIOS. Recovery mode Normal(1) Recovery mode SW1-2, off(1) SW1-2, on If your BIOS upgrade failed, refer to the README.TXT file that came with the BIOS upgrade. Password clear Normal mode(1) Password clear SW1-3, off(1) SW1-3, on If you forget your password, set this switch to the Password Clear (ON) position and then restart your server. Refer to Chapter 10 for more information. CMOS clear Normal(1) CMOS clear SW1-4, off(1) SW1-4, on This switch is set to Normal (OFF) at the factory. CMOS clear erases all data in CMOS such as passwords, date, and configuration settings. The BIOS will then use the default configuration. (1) Factory default setting ON = switch up; OFF = switch down A-8 Technical Specifications ON 7 8 1 2 3 4 OFF 9 SW1 10 1 2 3 4 5 6 1 2 DEC01637-6 Figure A-1. Main Logic Board Switch Locations A-9 Technical Specifications Processor Module Switch Settings The following table lists the switch settings of various processor speeds and does not indicate processor availability. The switches are set correctly for the processor that came with the server you purchased. You only need to change the processor switch settings, that is SW1, should you upgrade to another processor. Figure A-2 shows the switch locations. CAUTION: Do not touch any electronic component unless you are safely grounded. Wear a grounded wrist strap or touch an exposed metal part of the server chassis. A static discharge from your fingers can result in permanent damage to electronic components. Processor Speed SW1-1 SW1-2 SW1-3 350 MHz OFF OFF ON ON 400 MHz ON ON OFF ON 450 MHz OFF ON OFF ON ON = switch down; OFF = switch up A-10 SW1-4 Technical Specifications 1 OFF 1 2 3 4 ON SW1 2 DEC01638-2 Figure A-2. Processor Module Switch Settings A-11 Technical Specifications Server Status Messages Component Possible Failures Result Main logic board voltages: +12, +5, +3.3, and -12V The voltages are outside of the power good range. An error message displays and a warning beep sounds. The voltage exceeds the upper limit. The server will shutdown after 5 minutes. The voltage falls below the lower limit. A warning message displays and a warning beep sounds. The primary fans (fans 1 and 3) fail. The redundant fans will activate. The primary fans (fans 1 and 3) and redundant fans (fans 2 and 4) do not operate. The server will shutdown after 10 minutes. Fan 5 The rear fan fails. A message displays and a warning beep sounds. CPU module voltages The voltages are outside of the power good range. A message displays and a warning beep sounds. The voltage exceeds the upper limit. A warning message displays and a warning beep sounds. The voltage falls below the lower limit. A warning message displays and a warning beep sounds. Internal An error message displays and a warning beep sounds. Over temperature Usually caused by a fan failure and the result is that the server shuts down. The incorrect number of CPUs are present in the server. A message displays indicating the number of CPUs present in the server. Fans 1, 2, 3, 4 CPU failure CPUs present continued A-12 Technical Specifications Component Possible Failures Result CPU temperature sensing The temperature exceeds 72 °C (161.6°F). Backup fans activate without warning. If the temperature drops below 70 °C the backup fans are turned off. The temperature exceeds the warning level (>75 °C; >167°F). A warning message appears and a warning beep sounds. If the temperature exceeds the warning level for more than five minutes, the server automatically shuts down. The temperature exceeds the upper limit (>80 °C; >176°F). The server automatically shuts down. Power supplies present The incorrect number of power supplies are present with good status in the server. A message displays indicating the number of power supplies present in the server. Power supply failure The temperature exceeds the upper limit or the voltages are out of range. Power supply shuts down, an error message displays, and a beep sounds. A-13 Technical Specifications POST OCP Messages For the processor, the following table lists the messages, both normal and error, that will display on the server’s OCP panel during POST and any beeps that might sound when an error occurs. NOTE: To disable the speaker, press the middle button located below the OCP once after a beep sounds. To enable it, press the button again. POST/Boot Codes POST Code Descriptions Count Down Code(1) Normal OCP Display OCP Error Display Beep Codes BIOS ROM checksum 1-2-2-3 Test DRAM refresh 1-3-1-1 Test 8742 keyboard controller 1-3-1-3 RAM failure on address line xxxx 1-3-4-1 RAM failure on data bits xxxx of low byte of memory bus 1-3-4-3 RAM failure on data bits xxxx of high byte of memory bus 1-4-1-1 Check ROM copyright notice 2-1-2-3 (1) Count down codes are displayed on your server’s monitor. continued A-14 Technical Specifications POST Code Descriptions Count Down Code(1) Normal OCP Display Unexpected interrupts test 230 Unexpected int Shadow ROMs 220 Shadow ROMs test Test DRAM refresh 512K and 640K 210 512-640K DRAM OCP Error Display 2-2-3-1 Extended memory test 200 Ext. mem test Set cache registers 190 Set cache regs. Cache configuration 180 Cache config. Cache fail Real-time clock test 170 Real time clock RTC fail RTC dead battery CMOS chksum bad Keyboard test 160 Keyboard test KBC-8042 fail Keyboard fail Initial hardware interrupt 150 Init HW int Co-processor test 140 Co-processor test Serial ports test 130 Ser. Ports test Parallel ports test 120 Par. Ports test Initiate onboard SIO 110 Init super I/O Mouse test 100 Mouse test Testing diskette drives 90 Floppy disk test Testing hard disk drives 80 Hard disk test (1) Beep Codes Memory test fail FDD A or B error Count down codes are displayed on your server’s monitor. continued A-15 Technical Specifications POST Code Descriptions Count Down Code(1) Normal OCP Display CPU search 50 Search other CPU Search for option ROMs Scan option ROM Enable IRQs 20 Enable IRQs Setting time of day 10 Set time of day One short beep before boot (1) Count down codes are displayed on your server’s monitor. A-16 OCP Error Display Beep Codes OPROM chksum bad 1-2 1 Technical Specifications The following table lists the messages that appear during POST in support of the processor module. POST Message Description PROC 01 present (Speed:xxx, ID:xxxx, L2:xxxKB) Indicates 1 or 2 processor(s) found. PROC 02 present (Speed:xxx, ID:xxxx, L2:xxxKB) The ID is the processor ID value that indicates the stepping of the processor. Like stepping chips should be installed on any given processor module. PROC 01 present(Speed:xxx, ID:xxxx, L2:xxxKB) Indicates processor 1 or 2 found, but has failed. PROC 02 present (Speed:xxx, ID:xxxx, L2:xxxKB) The PROC slot terminator card is not installed Indicates that for a single processor module the second bus is not terminated with a terminator card. Halts system after message prints. Processor module failed Indicates that there may be a problem with the processor module itself (not the processor). Halts system after message prints. A-17 Technical Specifications OCP Messages During certain failure conditions, including out-of-range conditions, an error message is displayed on the OCP panel and a corresponding error code sounds from the server’s speaker. NOTE: To disable the speaker, press the middle button located below the OCP once after a beep sounds. To enable it, press the button again. Hot keys are defined in BIOS as [CTRL] + [ALT] +[1] and enable toggling of the OCP display status messages just as though the OCP button were pressed. NOTE: Hot keys do not work during POST or during host server request service from the OCP. If you do not press keys or buttons for some time, the LCD back light will be disabled until you press a key. The time is set by the host server. You can examine the server status messages by pressing the OCP switch located on the front panel repeatedly to sequence through the status list. The OCP switch is disabled during POST, during host request service from the 8031, or if an error is detected. The following table lists and describes the status messages and the error messages that appear on the server’s OCP panel. Also included are possible actions to take if a problem persists. If this action does not alleviate the problem, contact your authorized service provider. A-18 Technical Specifications OCP Status and Error Messages Status Normal OCP Display OCP Error Display Description of Error Display/Action CPU ambient temperature PROC1 temp=XXX C PROC 1 overheat Temperature of Processor 1 is out of range. PROC 2 overheat Temperature of Processor 2 is out of range. PROC2 temp=XXX C Action: Verify fans are operational. Power supply status P/S1 OK Fan status Sys fans OK P/S1 fail Power supply 1 is not working. Action: Check that power supply cables and connectors are connected correctly. Sys fan 1 fail Sys fan 2 fail Sys fan 3 fail Sys fan 4 fail Sys fan 5 fail Fan 1 is not working. Fan 2 is not working. Fan 3 is not working. Fan 4 is not working. Fan 5 is not working. Action: Check that fan connectors are connected correctly. CPU status PROC 1 failure Internal defect of Processor 1 or internal temperature exceeds the upper limit . PROC 2 failure Internal defect of Processor 1 or internal temperature exceeds the upper limit . No PROC detected No processor(s) present in the server. PROC module fail Processor module failed. continued A-19 Technical Specifications Status Normal OCP Display OCP Error Display Description of Error Display/Action System voltages PROC voltages OK GTL1 1.5V =x.xxV Most likely a processor module failure. CPU voltages OK VRM1 y.yyV=x.xxV Voltage regulator 1 should be y.yy volts and is being measured at x.xx volts. VRM2 y.yyV=x.xxV Voltage regulator 2 should be y.yy volts and is being measured at x.xx volts. CPU voltages IO VOL 25V = x.xxV Action: Diagnose whether the CPU module is bad. Memory size information xxxxxMB System BIOS revision BIOS Vx.yy x = main version yy = sub-version 8031 BIOS revision 8031 Vx.yy x = main version yy = sub-version System date/time yyyy/mm/dd hh:mm yyyy = year mm = month dd = day hh = hour mm = minute A-20 Technical Specifications Processor Module Voltage and Temperature Ranges The following tables list the operating voltage and temperature ranges for the processor module. Processor Voltage Range Normal Error Range Error Based Voltage Range Power Good Voltage Shutdown Voltage Value Bad Voltage Value CPU I/O voltage 2.5V ± 5% +2.375 ≈ 2.625V +2.2 ~ 2.8V > +3.0V < +1.85V Vtt of GTL 1.5V ± 10% +1.35 ≈ 1.65V +1.32 ~ 1.68V > +1.8V < +1.10V A-21 Technical Specifications Processor Voltage Range (Vccp) A-22 Vccp ± 7% Power Good Range +10% Shutdown Value -10% Hardware Bad Value 1.80V 1.6740 ~ 1.9260V > +1.980V < +1.620V 1.85V 1.7205 ~ 1.9795V > +2.035V < +1.665V 1.90V 1.7670 ~ 2.0330V > +2.090V < +1.710V 1.95V 1.8135 ~ 2.0865V > +2.145V < +1.755V 2.00V 1.8600 ~ 2.1400V > +2.200V < +1.800V 2.05V 1.9065 ~ 2.1935V > +2.255V < +1.845V 2.10V 1.9530 ~ 2.2470V > +2.310V < +1.890V 2.20V 2.0460 ~ 2.3540V > +2.420V < +1.980V 2.30V 2.1390 ~ 2.4610V > +2.530V < +2.070V 2.40V 2.2320 ~ 2.5680V > +2.640V < +2.160V 2.50V 2.3250 ~ 2.6750V > +2.750V < +2.250V 2.60V 2.4180 ~ 2.7820V > +2.860V < +2.340V 2.70V 2.5110 ~ 2.8890V > +2.970V < +2.430V 2.80V 2.6040 ~ 2.9960V > +3.080V < +2.520V 2.90V 2.6970 ~ 3.1030V > +3.190V < +2.610V 3.00V 2.7900 ~ 3.2100V > +3.300V < +2.700V 3.10V 2.8830 ~ 3.3170V > +3.410V < +2.790V 3.20V 2.9760 ~ 3.4240V > +3.520V < +2.880V 3.30V 3.0690 ~ 3.5310V > +3.630V < +2.970V 3.40V 3.1620 ~ 3.6380V > +3.740V < +3.060V 3.50V 3.2550 ~ 3.7450V > +3.850V > +3.150V Technical Specifications Processor Temperature Sensing Description Possible Failures Result Temperature The temperature exceeds 85 °C (185 °F) Displays an error message and warning beep. Server shuts down after five minutes. The temperature exceeds 90 °C (194 °F) Server immediately shuts down. A-23 B Device Mapping Introduction B This appendix provides a series of tables listing map and address information related to server memory and various main logic board devices (such as keyboard controller and interrupt controller). Server memory and address locations are allocated at the factory to operate within a standard environment. However, due to the number of optional devices and/or expansion boards that are available, sometimes memory and address locations need to be changed. For example, some expansion boards require a specific memory location. If that location is already allocated, a memory conflict results and the expansion board will not operate as expected. Note that some memory, I/O and interrupt locations can be changed using the BIOS Setup utility. CAUTION: Before changing any memory or address location, refer to the documentation supplied with the optional device, expansion board, or software application and make sure adequate information is available. If not, contact the option or software manufacturer for further information. B-1 Device Mapping Processor Memory Address Map B-2 Address Range Function Size 00000 to 9FFFF Main memory 640 KB A0000 to BFFFF PCI/ISA video buffer memory 128 KB C0000 to C7FFF Video memory BIOS 32 KB C8000 to DFFFF PCI/ISA expansion board BIOS and buffer memory 96 KB E0000 to EFFFF ISA adapter RAM 64 KB F0000 to FFFFF System BIOS memory 64 KB Device Mapping I/O Address Map Range (hexadecimal) Function 060 to 064 Keyboard/mouse controller 0F0 to 0FF Math co-processor 1F0 to 1F7 IDE controller (if enabled) 278 to 27F LPT2 (if enabled) 2E8 COM4 (if enabled) 2F8 COM2 (if enabled) 378 to 37F LPT1 (if enabled) 3BC to 3BE LPT3 (if enabled) 3E8 COM3 (if enabled) 3F0 to 3F7 Diskette controller (if enabled) 3F8 COM1 (if enabled) B-3 Device Mapping Server Interrupt Levels B-4 Interrupt Number Interrupt Source IRQ1 Keyboard controller IRQ3 COM2, COM4 (if enabled) IRQ4 COM1, COM3 (if enabled) IRQ6 Diskette controller (if enabled) IRQ7 LPT1, LPT2, LPT3 (if enabled) IRQ12 Mouse interrupt IRQ13 Math co-processor Device Mapping PCI Configuration Space Address Map PCI Bus No. Device No. (Address No.) Device 0 07h (AD18) PIIX4 0 0Dh (AD24) PCI slot 2 0 0Eh (AD25) PCI slot 1 0 0Fh (AD26) Ethernet controller 0 10h (AD27) PPB 0 0 11h (AD28) PPB 1 0 12h (AD29) PCI VGA controller 1 08h (S0SAD24) PCI slot 10 1 09h (S0SAD25) PCI slot 9 1 0Ah (S0SAD26) PCI slot 7 1 0Bh (S0SAD27) PCI slot 8 2 08h (S1SAD24) PCI slot 3 2 09h (S1SAD25) PCI slot 4 2 0Ah (S1SAD26) PCI slot 5 2 0Bh (S1SAD27) PCI slot 6 2 0Eh (S1SAD30) SCSI controller (Symbois 896) B-5 C BIOS Setup Utility Features Introduction C After entering the BIOS Setup utility, you can edit a variety of resources and configure your server for the most optimized condition. The menu items in the BIOS Setup utility, listed as menu pages below, provide the necessary options to configure your server. C-1 BIOS Setup Utility Features BIOS Setup (F2) This section provides example tables and displays for the BIOS Setup utility. Main Menu Fields Settings Comments System time Current time Displays the current time. System date Current date Displays the current date. Diskette A 1.44 MB, 3½(1) Sets the size and density of the diskette drive. 2.88 MB, 3½ Disabled 360 KB, 5¼ 1.2 MB, 5¼ 720 KB, 3½ None(1) Auto CD-ROM User Determines which device will be the primary or secondary bus master. Press [Enter] to display fields. Video system EGA / VGA(1) CGA 80x25 Monochrome Sets the video controller type. Monitor type Sets the monitor type. Cache and Shadow Color(1) Monochrome [submenu] Keyboard Features [submenu] Press [Enter] to display fields. System memory Not user selectable Displays the amount of base (conventional) memory each time the server boots. Extended memory Not user selectable Displays the amount of extended memory each time the server boots. AT bus space Disabled(1) Memory hole not available; upper memory is contiguous. Primary Master Secondary Master (1) Press [Enter] to display fields. Factory default continued C-2 BIOS Setup Utility Features Menu Fields Extended memory report Settings Comments F00000h, 512 KB Sets the memory hole at address F00000 with 512 KB memory available. Compatibility(1) Non-compatibility Select the BIOS report mechanism for the amount of external memory. Select Compatibility when using a conventional operating system. Select Non-compatibility for extended memory above 64 MB under Windows NT. Primary Master: [submenu] Automatically determines the hard device installed in the system. AUTO Multi-sector transfers Disabled Not selectable. LBA mode control Disabled Not selectable. 32-bit I/O Enabled Disabled(1) Enables or disables 32-bit IDE. Transfer mode standard Standard(1) Not selectable. Allows you to select the CD-ROM as the primary bus master. CD-ROM Multi-sector transfers (1) 2,4,8,16 Disabled(1) Specifies the number of sectors per block for multiple sector transfers. Factory default continued C-3 BIOS Setup Utility Features (1) Menu Fields Settings Comments LBA mode control Enabled Disabled(1) Enables the use of Logic Block Addressing instead of cylinders, heads, and sectors. 32-bit I/O Enabled Disabled(1) Enables 32-bit IDE. Transfer mode standard Standard(1) Fast PIO 1 Fast PIO 2 Fast PIO 3 Fast PIO 4 FPIO 3/DMA 1 FPIO 4/DMA 2 Select the method for optium data transfer. Allows you to enter the installed disk drive parameters from the manufacturer’s specifications for cylinders, heads, and sectors. USER Cylinders Heads Sectors 0 - 65535 1 - 16 0 - 63 Maximum capacity Not selectable The maximum capacity of the disk drive is displayed. Multi-sector transfers 2,4,8,16 Disabled(1) Specifies the number of sectors per block for multiple sector transfers. LBA mode control Enabled Disabled(1) Enables the use of Logic Block Addressing instead of cylinders, heads, and sectors. 32-bit I/O Enabled Disabled(1) Enables 32-bit IDE. Transfer mode standard Standard(1) Fast PIO 1 Fast PIO 2 Fast PIO 3 Fast PIO 4 FPIO 3/DMA 1 FPIO 4/DMA 2 Select the method for optium data transfer. Factory default continued C-4 BIOS Setup Utility Features Menu Fields Settings Comments Cache and Shadow: [submenu] L1 cache Enabled(1) Always set to Enabled. Not user selectable. L2 cache Enabled(1) Enables the processor's internal L2 cache. Disabled System BIOS shadow Enabled(1) Always set to Enabled. Not user selectable. System BIOS cache Enabled(1) Enables the server BIOS to be cached in the internal cache to increase server performance, because BIOS instructions are executed in cache instead of RAM. Disabled Video BIOS shadow Enabled(1) Disabled Copies the video BIOS to shadow RAM for improved performance. Shadow 16 KB at C800 - CBFF: CC00 - CFFF: D000 - D3FF: D400 - D7FF: D800 - DBFF: DC00 - DFFF: Enabled Disabled(1) Enables or disables shadowing of individual segments of ROM to increase server performance. (1) CAUTION: Some option ROMs do not operate properly when shadowed. Factory default continued C-5 BIOS Setup Utility Features Menu Fields Settings Comments Keyboard Features: [submenu] NumLock Auto(1) On Off Turns NumLock on or off each time the server boots. If Auto is selected, the server will turn on NumLock if it detects a numeric keypad. Key click Disabled(1) Enabled Enables or disables the audible key click feature. Keyboard auto-repeat rate 2/sec 6/sec 10/sec 13.3/sec 18.5/sec 21.8/sec 26.7/sec 30/sec(1) Sets the number of times a second to repeat a keystroke while the key is held down. Keyboard auto-repeat delay 1/4 sec 1/2 sec(1) 3/4 sec 1 sec Sets the delay time after a key is held down before it begins to repeat a keystroke. (1) Factory default continued C-6 BIOS Setup Utility Features Advanced Menu Fields Settings Comments Integrated Peripherals [submenu] Press [Enter] to display fields. Advanced Chipset Control [submenu] Press [Enter] to display fields. PCI Configuration [submenu] Press [Enter] to display fields. Plug & Play O/S No(1) Select Yes if using a Plug & Play operating system. Otherwise, select No. Yes Reset configuration data Yes No(1) Select Yes to clear the system configuration data if it is suspected to be corrupted, which sometimes occurs after a power outage. This option also clears the Plug and Play databases. After entering the correct settings (or accepting the default settings), the computer switches this setting back to No. If it is not necessary to clear system configuration data, leave the setting at No. Onboard SCSI BIOS Enabled(1) Disabled Enables or disables the onboard SCSI BIOS. Set to disabled when installing a new adapter board with a later BIOS revision. Legacy USB support Enabled(1) Disabled Enables support for Legacy Universal Serial Bus (1) Factory default continued C-7 BIOS Setup Utility Features Menu Fields Settings Comments System monitoring warning beep Enabled(1) Disabled Enables or disables the 8031 warning beep. Integrated Peripherals: [submenu] PS/2 mouse Disabled Enabled Auto detect(1) Enables, disables, or auto detects the mouse port. Local bus IDE adapter Disabled Both Primary(1) Secondary Enables or disables the local bus IDE adapter. Both enables both the primary and secondary adapters. Primary enables only the primary adapter and Secondary enables only the secondary adapter. Serial port A Disabled Enabled Auto(1) Enables, disables, or auto detects the onboard serial port A at the specified address. Select Auto unless interrupts IRQ4 and/or IRQ3 are allocated as a server resource. Two devices cannot share the same IRQ. Choosing Disabled makes serial port A unusable. Choosing Auto automatically configures COM1 to address = 3F8h and IRQ = 4 if they are available. If Enabled is selected, the information at the right will appear. Base I/O address 3F8(1) 2F8 3E8 2E8 Interrupt IRQ3 IRQ4(1) IRQ10 IRQ11 (1) Factory default continued C-8 BIOS Setup Utility Features Menu Fields Settings Comments Serial port B Disabled Enabled Auto(1) Enables, disables, or auto detects the onboard serial port B at the specified address. Select Auto unless interrupts IRQ4 and/or IRQ3 are allocated as a server resource. Choosing Disabled makes serial port B unusable. Choosing Auto automatically configures COM2 to address = 2F8h and IRQ = 3 if they are available. If Enabled is selected, the information at the right will appear. Base I/O address 3F8 2F8(1) 3E8 2E8 Interrupt IRQ3(1) IRQ4 IRQ10 IRQ11 Parallel port Disabled Enabled Auto(1) Enables, disables, or auto detects the onboard port at the specified address. Auto is the recommended setting. Mode: Bi-directional EPP ECP Output only (1) Factory default continued C-9 BIOS Setup Utility Features Menu Fields Settings Comments If Enabled is selected, the information at the right will appear. Base I/O address: 378(1) 278 3BC Interrupt: IRQ5 IRQ7(1) Parallel port mode Sets the onboard parallel port mode for the Enable and Auto settings. Choose a mode that the parallel port device (such as a printer) supports. Check the parallel port device documentation for this information. If this information cannot be located, use the default setting. Floppy disk controller Base I/O address (1) Output only Standard printer connection. Bi-directional(1) PS/2 compatible mode to transmit and to receive at the same time. EPP Enhanced parallel port mode. ECP Extended capabilities port mode. Enabled(1) Disabled Auto Enables, disables, or auto detects the onboard diskette controller. If Enabled is selected, the information at the right will appear. Base I/O address Primary(1) Secondary Primary(1) Secondary Sets the base I/O address for the diskette drive controller Factory default continued C-10 BIOS Setup Utility Features Menu Fields Settings Comments Diskette write protection Enabled Disabled(1) Enables or disables the selected diskette drive’s write protect option. Integrated PCI Ethernet Enabled(1) Disabled Enables or disables the onboard Ethernet controller. Integrated PCI SCSI Enabled(1) Disabled Enables or disables the onboard SCSI controller. Advanced Chipset Control: [submenu] APIC & MP table Error correction code Disabled 1.1 1.4(1) Configures the MP specification revision level. Enabled(1) Disabled Enables or disables the Error Correction Code (ECC). PCI Configuration: [submenu] Disabled Auto select(1) 3 4 5 7 9 10 11 12 14 15 PCI/PNP ISA UMB Region Exclusion Press [Enter] to display addresses. PCI/PNP ISA IRQ Resource Exclusion Press [Enter] to display IRQs. PCI IRQ line # (1) Assigns IRQs to PCI slots. An asterick (*) appears to the left of the line if the IRQ is in use. Factory default continued C-11 BIOS Setup Utility Features Menu Fields Settings Comments PCI/PNP ISA UMB Region Exclusion: [submenu] C800 - CBFF CC00 - CFFF D000 - D3FF D400 - D7FF D800 - DBFF DC00 - DFFF Available(1) Reserved Reserves a specific block of upper memory for use by legacy ISA devices. PCI/PNP ISA IRQ Resource Exclusion: [submenu] IRQ 3 IRQ 4 IRQ 5 IRQ 7 IRQ 9 IRQ 10 IRQ 11 IRQ 12 (1) Factory default C-12 Available(1) Reserved Reserves the specified IRQ for use by a legacy ISA device. BIOS Setup Utility Features Security Options Menu Fields Settings Set supervisor password Press [Enter]. Comments Allows a supervisor password to be set. The supervisor password must be set if a user password is to be used. NOTE: Entering Setup with a supervisor password provides full access to all BIOS Setup utility menus. Set user password Press [Enter]. Allows a user password to be set. This password can be set only if a supervisor password is entered. When the user has entered his or her name but the supervisor is not logged in, only the folllowing information is accessible: Supervisor password in Enabled. User password in Enabled. Set user password press [enter] to enter a user password. Password on boot Enabled/Disabled (which ever is in effect). This option is not allowed to change. Password on boot (1) Enabled Disabled(1) Enables or disables the enter password on boot option. If you enable this option, a user or supervisor password must be entered in order for the boot process to complete. If a user or supervisor password is not entered, the operating system cannot be accessed. Factory default continued C-13 BIOS Setup Utility Features Menu Fields Settings Comments Diskette access Supervisor User(1) Controls who might have access to diskette drives. If Supervisor is selected, access to the diskette drive is limited to the supervisor, who must enter a password. If User is selected, the diskette drive is accessed by entering either the supervisor or the user password. Whatever setting is chosen, it only becomes functional if both a Supervisor Password and a User Password have been set (if the User setting is chosen). Network server Enabled Disabled(1) When enabled, the system is secured at boot to prevent tampering during network operation. System backup reminder Disabled(1) Daily Weekly Monthly When enabled, displays a backup reminder message at boot, daily, every Monday, or the 1st of each month. Virus check reminder Disabled(1) Daily Weekly Monthly When enabled, displays a reminder message to check for virses at boot, daily, every Monday, or the 1st of each month. System BIOS flash Enabled Disabled(1) When enabled, allows the server BIOS in the flash ROM to update. (1) Factory default C-14 BIOS Setup Utility Features Boot Menu Fields Settings Comments Floppy check Enabled Disabled(1) Enabled permits verification of FDD type at boot. Disabled prevents FDD verification and speeds up the boot process. Setup prompt Enabled(1) Disabled Enables or disables the <F2> setup prompt each time the server boots. Disables the prompt "Press <F2> to enter Setup". Setup can still be entered by pressing <F2> before POST completes. POST errors Enabled(1) Disabled Enabling this option causes the server to pause and display a setup entry or resume the boot prompt if an error occurs at boot. Disabling this option causes the server to always attempt to boot regardless of a setup entry or error. Sign-on banner Enabled(1) Disabled Enabling this option causes the DIGITAL logo to appear during POST. Boot device priority 1. ATAPI CD-ROM drive Allows you to select the boot drive options. 2. Diskette drive 3. Hard drive Hard drive 1. Bootable add-in cards 2. Onboard SCSI controller (1) Selects the ROM scan sequence to determine which device will be the boot device. The first device encountered with bootable media will be the boot device. Factory default C-15 BIOS Setup Utility Features System Management (F3) This section provides example tables and displays for each System Management utility. Summary System Summary Menu Fields Settings Comments Processor 1 350 MHz PII, L1/L2=, ID= Indicates processor speed, installed status, cache size, and ID number. Processor 2 Co-processor 350 MHz PII, L1/L2=, ID= Installed Internal component of processor. System RAM 64 MB RAM size. System BIOS 1.0 BIOS version being used. PS/2 mouse Installed Mouse installed Diskette A 1.44 MB 3½" Size and availability. Parallel port Bi-directional, 0378, IRQ7 Parallel port mode selected and availability and assigned IRQ. Serial port 1 Serial port 2 03F8, IRQ4 02F8, IRQ3 Availability and assigned IRQ. Availability and assigned IRQ. E-net address 0000F87AA3E9 Ethernet address. C-16 BIOS Setup Utility Features Environment Environment Monitoring and Summary Menu Fields Settings Comments Processor 1 status OK No problem. Processor 2 status OK No problem. Processor 1 temperature 43 °C Actual temperature. Processor 2 temperature 34 °C Actual temperature. Processor 1 VRM 3.3 V 3.3 V VRM voltage. Processor 2 VRM 3.3 V 3.3 V VRM voltage. Processor GTL 1. 5 V 1.5 V Gunning transistor logic. Processor IO 2.5 V 2.5 V Sys 12 V 11.8 V Sys 5 V 5.06 V Server 5 V voltage rating. Sys 3.4 V 3.32 V Server 3.4 V voltage rating. Sys −12 V −12.10 V Server −12 V voltage rating. P/S 1 status OK Power supplu status OK. P/S 2 status Server 12 V voltage rating. Not installed. P/S 3 status Not installed. Fan 1 status OK Fan 1 status OK. Fan 2 status OK Fan 2 status OK (model 3220) Fan 3 status OK Fan 3 status OK. Fan 4 status OK Fan 4 status OK. Fan 5 status OK Fan 5 status OK. C-17 BIOS Setup Utility Features Memory Memory Slots Information Slot Type Size Speed Status Bank 0 SDRAM 64M 100 MHz OK Bank 1 SDRAM 64M 100 MHz OK Bank 2 SDRAM 64M 100 MHz ECC(1 Bank 3 SDRAM 64M 100 MHz OK DEC01593 (1) C-18 ECC here indicates that one bit error correction occurred. BIOS Setup Utility Features POST POST Error Summary Contains a POST error summary if post fails. SYS System Asset Number and I/O Management You can only change the Asset# in the following display. Enter Required Parameters For The Selected Items: Assembly Asset# System System ID Model# Serial# System IDs Of Each Assembly Assembly Main Logic Board Processor Module Model# Serial# DEC01703 MLB Main Logic Board Asset Number Management Enter Required Parameters For The Selected Items: Assembly: Asset#: Part#: Revision#: Serial#: Artwork#: Main Logic Board DEC01704 C-19 BIOS Setup Utility Features CPU Processor Module Asset Number Management Assembly: Asset#: Part#: Revision#: Serial#: Artwork#: Processor Module DEC01701 PCI PCI IRQ Assignment Status The following display is only an example. Integrated Integrated Integrated Universal Serial Bus (USB) [IRQ][Enable] SCSI Bus Controller [IRQ][Enable] SCSI Bus Controller [IRQ][Enable] PCI Slot 1 PCI Slot 2 PCI Slot 3 PCI Slot 4 PCI Slot 5 PCI Slot 6 PCI Slot 7 PCI Slot 8 PCI Slot 9 PCI Slot 10 Proprietary Empty Empty Empty Raid Controller [IRQ15][Enable] Empty Empty Empty Empty Empty Empty Slot-Ethernet Controller [IRQ11][Enable] VGA-CompatibleController[Not Required] DEC01702 C-20 D Caring For Your Server Introduction D This appendix describes how to: • Clean the outside of the server • Clean the monitor screen • Clean the mouse • Pack and move the server CAUTION: Make sure you turn off the server and disconnect any external devices before doing any cleaning. When using a moistened cloth for cleaning, do not allow any excess fluid to leak into the server, keyboard, or monitor. Wait until the server is completely dry before applying power. D-1 Caring For Your Server Cleaning the Server Clean the outside of the server periodically with a soft cloth. Use a cloth lightly moistened with a mild detergent solution. Do not use solvents or abrasive cleaners. Cleaning the Screen If the monitor screen gets dirty, clean it with a sponge or chamois cloth lightly dampened with a glass cleaning solution. Do not use solvents or abrasive cleaners. Cleaning the Mouse If your mouse cursor moves erratically across the screen, the ball on the bottom of the mouse is probably dirty. Perform the following steps to clean a mouse ball: 1. Turn the mouse over and release the ball cover. 2. Place the mouse cover and ball on a clean surface. 3. Lightly dampen a cotton swab with a mild detergent, and clean the ball and the inside of the mouse. 4. Replace the ball and mouse ball cover. D-2 Caring For Your Server Moving the Server Perform the following steps before shipping or moving the server: 1. Back up all files stored on all hard disk drives. 2. Turn off the server (the monitor automatically shuts off). 3. Disconnect the power cord from the wall outlet, then from the back of the server. 4. Disconnect the monitor cable from the back of the server. 5. Disconnect the keyboard cable from the back of the server. 6. Disconnect the mouse cable from the back of the server. 7. Disconnect any other external peripheral devices, such as printers and modems. 8. Insert a drive protection card in the 3½-inch diskette drive. If you do not have a drive protection card, use a blank diskette. 9. Package the server as described in the following section, "Packing the Server." Packing the Server If you are moving the server a short distance (from one room to another in the same building), you do not have to pack the server. If you are shipping the server or moving it by vehicle, pack the server to avoid damage. Pack the server in the original packing material and containers. If you did not save the boxes and packing material, use a sturdy carton and cushion the server well to avoid damage. D-3 Caring For Your Server Installing the Server at a New Location After moving the server to a new location, follow the instructions in the Installation Guide to unpack and install it. D-4 Index A audience · xi B BIOS setup utility · 2-2 accessing · 2-4 changing boot sequence · 2-13 changing time and date · 2-6 eliminating passwords · 2-11 enabling password on boot · 2-11 executing · 2-4 helpful hints · 2-5 navigating · 2-6 other security options · 2-12 setting passwords · 2-9 speed up boot · 2-13 BIOS setup utility menu fields · C-1 advanced · C-7 boot · C-15 main · C-2 security options · C-13 BIOS upgrade utility · 2-16 boot devices server · 8-4 boot sequence server · 8-4 brake securing server · 3-2 C caring for your server · D-1 changing I/O port settings · 2-7 Checking System Management Parameters · 2-15 cleaning monitor screen · D-2 server · D-2 cleaning the mouse · D-2 clock speed switch settings processor · A-9 configuration guidelines ISA/EISA expansion boards · 8-1 PCI expansion boards · 8-3 Pentium II processor module · 5-1 tape drive · 7-3 configuration utility RAID · 2-19 SCSISelect · 2-17 connecting RAID adapters configuration guidelines · 7-4 connecting single backplane SCSI configuration · 9-2 connecting split backplane using onboard SCSI controllers · 9-5 connecting split backplane using two-channel RAID controller · 9-8 CPU module switch locations · A-9 CPU voltage and temperature ranges IN-1 Index server (Pentium II) · A-20 current limitation expansion slots · A-4 PCI bus (local bus) expansion slots · A-4 current requirements · A-5 installing · 7-17 external SCSI storage box installing · 7-17 F D device expansion brackets installing · 7-13 device mapping · B-1 CPU memory address · B-2 I/O address · B-3 PCI configuration space address · B-5 diagnostics running · 11-3 diagnostics utility · 2-19 DIMM requirements · 6-2 document abbreviations · xvi E environmental features · A-6 error messages · 4-6 POST OCP · A-13 server status · 4-6 ethernet daughter card components and connectors · 3-19 executing the BIOS Setup utility · 2-4 expanding your server tools needed · 3-20 expansion boards installing · 8-8 expansion slots maximum current limitation · A-4 external devices disconnecting · 3-2 external SCSI devices IN-2 features environmental · A-6 forgetting your password · 10-4 front view server · 3-6 H hot-swap devices SBB LED indicators · 7-16 I I/O port settings changing · 2-7 initial troubleshooting · 11-2 input power requirements · A-4 installing expansion boards · 8-8 external SCSI devices · 7-17 external SCSI storage box · 7-17 optional drives · 7-8 optional power supply · 3-23 Pentium II processor · 5-2 server side panels · 3-5 installing devices expansion brackets · 7-13 hot-swap drive bay · 7-14 top-right drive bay · 7-9 top-right drive bay (full-height) · 7-11 installing server at a new location · D-4 interrupt levels Index server · B-4 ISA/EISA expansion boards configuration guidelines · 8-1 ISA/PCI expansion boards removing metal filler plate · 8-9 L left and right door security lock · 10-2 left and right side panel lock · 10-3 left side view server · 3-8 M main logic board components server · 3-16 managing your server · 4-1 mass storage devices installing · 7-8 memory DIMM requirements · 6-2 messages OCP · A-17 monitor screen cleaning · D-2 mouse cleaning · D-2 moving your server · D-3 O obtaining information using server management · 4-2, 4-4 OCP messages · A-17 optional power supply installing · 3-23 P packing server · D-3 password if your forget · 10-4 supervisor · 10-4 PCI bus (local bus) expansion slots maximum current limitation · A-4 PCI expansion boards configuration guidelines · 8-3 PCI scan sequence server · 8-6 Pentium II processor installing · 5-2 Pentium II processor module configuration guidelines · 5-1 POST OCP error messages · A-13 power cord requirements · A-5 preventing component damage · 3-20 problem solving · 11-1 processor clock speed switch settings · A-9 N Q navigating the BIOS setup utility · 2-6 Quick Launch purpose · 2-2 IN-3 Index R RAID configuration guidelines when connecting RAID adapters · 7-4 rear view server · 3-12 replacing server battery/(RTC) · 3-21 right side view server · 3-10 running diagnostics · 11-3 S SBB LED status indicators · 7-16 scan sequence server · 8-5 SCSI cables supplied · 7-7 SCSI configurations connecting external SCSI devices · 7-17 connecting external SCSI storage box · 717 SCSI devices connecting to storage backplane · 7-5 SCSI drive IDs settings · 7-5 security lock left and right door · 10-2 left and right side panel · 10-3 server boot devices · 8-4 boot sequence · 8-4 cleaning · D-2 components · 3-1 CPU voltage and temperature ranges for Pentium II · A-20 current requirements · A-5 disconnecting external devices · 3-2 ethernet daughter card components and connectors · 3-19 IN-4 front view · 3-6 initial troubleshooting · 11-2 installing at a new location · D-4 installing expansion boards · 8-8 installing optional drives · 7-8 installing side panels · 3-5 left side view) · 3-8 main logic board components · 3-16 main logic board switches/jumpers · A-7 moving · D-3 packing · D-3 PCI scan sequence · 8-6 power cord requirements · A-5 rear view · 3-12 removing side panels · 3-3 replacing battery · 3-21 right side view · 3-10 scan sequence · 8-5 security · 10-1 server status messages · A-22 setting the brake · 3-2 side panel lock · 10-1 technical specifications · A-1 server battery installing · 3-21 server components · 3-1 server management · 4-1 obtaining information · 4-2, 4-4 server performance specifications · A-2 server status messages server · A-22 side panel lock · 10-1 side panels installing · 3-5 removing · 3-3 single backplane SCSI configuration connecting · 9-2 specifications environmental · A-3 server · A-2 server dimensions · A-3 Index server performance · A-2 split backplane using onboard SCSI controllers connecting · 9-5 split backplane using two-channel RAID controller connecting · 9-8 static electricity · 3-20 status indicatiors SBB LEDs · 7-16 storage backplane connecting SCSI devices to · 7-5 supervisor password · 10-4 supplied SCSI cables · 7-7 system management menu fields environment · C-17 memory · C-18 MLB · C-19 PCI IRQ assignment · C-20 POST · C-19 riser · C-20 summary · C-16 sys · C-19 System Management Parameters Checking · 2-15 T tape drive configuration guidelines · 7-3 technical specifications · A-1 troubleshooting · 11-1 CD-ROM · 11-17 disk drive · 11-10 diskette drive · 11-18 Flash BIOS · 11-20 initial · 11-2 monitor · 11-16 RAID · 11-19 SBB · 11-14 server · 11-6 tape drive · 11-15 U utilities BIOS setup · 2-2 BIOS upgrade · 2-16 diagnostics · 2-19 RAID configuration utility · 2-19 SCSISelect configuration utility · 2-17 IN-5