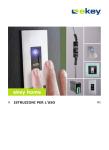
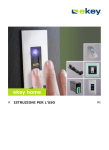
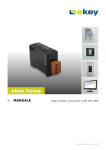
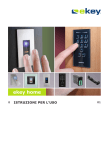
Download eKey Fingerscan Access Control System Operating instructions
Transcript
ekey home
en
Operating instructiOns
01
English
Translation of the original instructions – ID132/221/0/140
Table of contents
General ......................................................................................... 2
Note ......................................................................................... 2
Product liability and limitation of liability ........................................ 2
Warranty and manufacturer's warranty .......................................... 2
Notices, symbols and abbreviations .............................................. 2
Safety information ........................................................................ 3
Life-threatening danger resulting from electricity ............................ 3
Safety against tampering............................................................. 3
Product description ...................................................................... 4
System overview ........................................................................ 4
Scope of delivery........................................................................ 4
Proper use and areas of application ............................................... 4
Finger scanner ........................................................................... 5
Control panels ........................................................................... 7
Technical specifications ................................................................ 8
Installation ................................................................................... 9
Implementation ............................................................................ 9
Implementing the devices............................................................ 9
Storing administrator fingers and configuring normal mode ............ 10
Saving user fingers ................................................................... 10
Use ..............................................................................................11
Opening a door ........................................................................ 11
Deleting user fingers ................................................................. 11
Deleting all user fingers............................................................. 12
Resetting the system to default settings ...................................... 13
Updating the software ............................................................... 14
Error displays and troubleshooting ..............................................14
Maintenance ................................................................................15
Dismantling and disposal .............................................................15
Declaration of conformity ............................................................15
Copyright .....................................................................................15
en│1
General
ekey biometric systems GmbH operates a quality management system in
compliance with EN ISO 9001:2008 and is certified accordingly.
Note
This manual forms a component of the product. Ensure that it is stored in
a safe place. Please contact your dealer for further information about the
product.
Product
liability and
limitation of
liability
Safe operation and function of the machine can be impaired in the
following situations. Liability due to malfunctioning is transferred to the
operator/user in such cases:
□
□
□
The system devices are not installed, used, maintained and
cleaned in accordance with the instructions.
The system devices are not used within the scope of proper use.
Unauthorised modifications are carried out on the system
devices by the operator.
These operating instructions are not subject to updating. Subject to
optical and technical modifications, any liability for errors and misprints
excluded.
Warranty and
manufacturer's
warranty
Our general terms and conditions apply as valid at the date of purchase.
See http://www.ekey.net.
ekey biometric systems GmbH provides a 24-month warranty for material
or processing defects. This warranty is only valid in the country where the
product was purchased. The product may only be used with original ekey
spare parts and accessories.
Notices, symbols and abbreviations
NOTICE
Denotes additional information and useful tips.
DANGER
Denotes imminent danger which could lead to death or serious
injuries.
ATTENTION
Denotes possible property damage which cannot result in injuries.
2│en
Symbols:
1.
Step-by-step instructions
Reference to sections of this manual
Reference to the mounting instructions
Reference to the wiring diagram
□
Listing without specified order, 1. level
ekey home FS UP
Product names
Abbreviations:
AP
Wall-mounted
FAR
False Acceptance Rate
FRR
False Rejection Rate
FS
Finger scanner
IN
integra
SE
Control panel
UP
Outlet-mounted
Safety information
DANGER
All ekey home devices are to be operated with safety extra-low
voltage (SELV). Only use power supplies rated protection class 2
according to VDE 0140-1.
Failure to do so will result in life-threatening danger due to
electric shock.
Only certified electricians are authorised to carry out the electrical
installation!
Lifethreatening
danger
resulting from
electricity
Mount the control panel in a safe internal area. This prevents tampering
from the outside.
Safety against
tampering
en│3
Product description
System
overview
Fig. 1:
Overview of the system
1
2
3
4
5
6
7
Scope of
delivery
Proper use
and areas of
application
□
□
□
□
Finger scanner
Power supply
Control panel
Distributor
Motorised lock
Cable transfer
Connecting cable
Finger scanner;
Control panel;
Operating instructions, mounting instructions, wiring diagram;
Optional: matching accessories (cable transfer, power supply,
connecting cable, covers, etc.).
This product is a finger scan access control system. The system is
comprised of a finger scanner and control panel. It is available in various
makeups and component combinations. It detects the characteristics of
the fingerprint contours, compares them to the stored fingerprint image
and opens in the event of a match.
The system is primarily designed for opening house doors, apartment
doors and garage doors in homes, businesses and limited industrial areas.
4│en
Function of the finger scanner
Finger scanner
1 Front phalanx
2 Fingerprint
Fig. 2:
Fingerprint
The finger scanner detects the fingerprint by means of a line sensor and
subsequently processes it. It then compares the result with the stored
fingerprint image. The finger scanner only works correctly and reliably
with the front phalanx print. Draw your finger steadily and evenly over
the sensor in the correct position.
Finger scanner controls
Controls
Function
Finger swiping
Take fingerprints by 'swiping the finger' evenly
downwards over the sensor.
Sensor
System programming by 'finger touch', a short, rapid
touch of the sensor with the finger.
Table 1:
Finger scanner controls
1 Right guiding edge
2 Sensor
3 Left guiding edge
Fig. 3:
Finger swiping
Correct operation of the finger scanner
Incorrect operation will impair the function of the finger scanner.
'Swiping the finger':
Step
1.
Figure
Description
Hold your finger straight,
place it centrally between
the guiding edges. Do not
twist the finger.
en│5
Step
Figure
Description
2.
Place the joint of the front
phalanx directly onto the
sensor. Place your finger
flat onto the finger guide.
3.
Stretch out the
neighbouring fingers.
4.
Move your finger evenly
downwards over the
sensor. Move the whole
hand simultaneously. Draw
the front phalanx fully over
the sensor in order to
achieve optimal results.
The movement takes
approx. 1 second.
'Finger Touch':
Step
Figure
Description
Briefly touch the sensor
with your finger.
1.
General hints for achieving a good-quality fingerprint image:
□
□
□
The index, middle and ring fingers work best. The thumb and
little finger work marginally or not at all.
If the fingers are frequently wet, save the images with wet
fingers.
Children's fingerprints work from approx. 5 years of age.
Optical signals on the finger scanner
There are 2 types of LEDs:
□
□
Status LED for operating status;
Function LED for indicating the function of the overall system.
1 Status LED
2 Function LEDs
Fig. 4:
6│en
Optical signals on the finger scanner
Control panels are available in 2 makeups. You can only operate a single
finger scanner per control panel. Any finger scanner works with every
control panel.
Product
name
ekey home CP mini 1
ekey home CP micro 1
Top hat rail mounting
1 relay, 1 input
Integration into doors
1 relay.
Control panels
Figure
Mounting
types
Table 2:
Control panel makeups
Function of the control panel
The control panel is the actuator of the system. It serves to switch one or
more relays.
Controls and optical signals of the control panel
1 Status LEDs
2 Button
Fig. 5:
Overview of the ekey home CP mini 1
The upper status LED indicates if the control panel is connected to the
finger scanner. The lower status LED indicates when the relay switches.
Button operation
Function
Press and hold button for 1 sec.
Coupling control panel/finger scanner.
Press and hold button for 4
secs.
Reset to default settings.
Table 3:
Button operation for ekey home CP mini 1
The ekey home CP micro 1 has no controls or optical signals.
en│7
Technical specifications
Description
Unit
Value
Supply
VAC/VDC
8-24
Power input
W
Heating off: 1
Heating on: 3
Temperature range
°C
WM, IN:-25 to +70
OM:-20 to +70
Memory
Fingerprints
99
Safety
FAR
FRR
1:10,000,000
1:100
Protection class
IP
WM, IN: 54 (front side)
OM: 33/43/64 (depending on
installation)
Speed
s
1-4
Operational
lifetime
Finger scans
approx. 10 million
Table 4:
Technical specifications: ekey home finger scanners
Designation
Value
ekey home CP
mini 1
ekey home CP
micro 1
Supply
VAC/VDC
8-24
-/8-24
Power input
W
approx. 1
approx. 1
Relays
Quantity
1
1
Switching capacity
VDC/A
VAC/A
42/2
42/2
Temperature range
°C
-20 to+70
-25 to +60
Protection class
IP
20
20
Digital inputs (only
potential-free
contacts may be
connected)
Quantity
1
-
Table 5:
8│en
Unit
Technical specifications: ekey home control panel mini and ekey home
control panel micro
Installation
ATTENTION
Mount and cable the product correctly before connecting power.
Possible property damage!
Do not connect the power supply beforehand!
Mount the system in accordance with the supplied mounting instructions.
Cable the system in accordance with the supplied wiring diagram.
Step
Action
Display
1.
Ensure safe installation
of the devices. Close
the covers.
-
2.
Connect the power
supply to the mains.
Only for ekey home CP mini 1:
The upper status LED on the control
panel flashes red: default setting.
3.
No action required.
The status LED on the finger scanner
lights up orange, the function LEDs
flash green: default setting.
4.
If the LEDs fail to light
up, check the wiring
and power supply.
-
Implementation
Implementing the devices enables storage of the administrator fingers.
The administrator fingers serve exclusively for programming the system.
In contrast to the user fingers, they cannot be used to open doors. The
following steps apply to the ekey home CP mini 1 only. These steps are
carried out automatically for the ekey home CP micro 1.
Step
Action
Display
Press and hold the button with the
operating rod for 1 sec. The upper status
LED flashes green.
1.
2.
Description
Implementing
the devices
No action
required.
The status LED lights up orange, the
function LEDs flash green:
The finger scanner is ready to record the administrator fingers.
en│9
Storing
administrator
fingers and
configuring
normal mode
You must store 4 administrator fingers. You cannot use administrator
fingers as user fingers. Use fingers that are not intended to be used for
opening doors as administrator fingers. We recommend storing 2 fingers
of 2 different people for this purpose.
Step
Action
Description
Display
Draw administrator finger
1 over the sensor in order
to record it.
1.
Status LED lights
up green, the
function LED
lights up green.
Status LED lights
up red.
Administrator finger 1
was not stored. Draw the
finger over the sensor
again.
2.
No action
required.
3.
-
-
-
Status LED lights
up orange, the
function LEDs
flash green.
Carry out step 1 for
administrator fingers 2, 3
and 4, in order to store
administrator fingers 2, 3
and 4.
Status LED lights
up blue.
All administrator fingers were successfully stored. The system is in normal
mode.
Saving user
fingers
The system enables the enrolment of maximum 99 user fingers.
A user finger is any finger which is used for triggering an action on the
control panel, e.g. opening a door. We recommend storing 2 fingers in
each case.
The system is in normal mode.
Step
1.
Action
Description
Display
Draw any administrator
the finger over the
sensor.
Status LED lights
up blue, the
function LEDs
flash green.
Status LED lights
up red.
The administrator finger
was not recognised. Draw
the finger over the sensor
again.
2.
10│en
Carry out a 'finger touch'
on the sensor within 5
seconds.
-
-
Status LED lights
up orange, the
function LEDs
light up green.
Step
Action
Description
Display
Draw the user finger over
the sensor.
3.
Status LED and
function LED light
up green.
Status LED lights
up red.
The user finger was not
accepted. Repeat the
procedure beginning at
step 1.
4.
No action
required.
-
-
-
Status LED lights
up blue.
The user finger was stored. The system is in normal mode.
Use
The primary purpose the product is to open doors. The system is in
normal mode.
Step
Action
Description
Display
Draw a stored user finger
over the sensor.
1.
Opening a
door
Status LED lights
up green.
Status LED lights
up red.
The user finger was not
recognised. Repeat step
1.
2.
No action
required.
The door opens.
-
-
Status LED lights
up blue.
The system is in normal mode.
NOTICE
You can also open the door using the digital input (PIN 7, 8) on the ekey
home CP mini 1.
You can only delete individual fingers of a user if the person is present.
The system is in normal mode.
Deleting user
fingers
en│11
Step
Action
Description
Display
Draw any administrator
the finger over the
sensor.
1.
Status LED lights
up blue, the
function LEDs
flash green.
Status LED lights
up red.
The administrator finger
was not recognised.
Repeat step 1.
-
-
2.
Wait for 5 seconds.
Status LED lights
up blue, the
function LEDs
flash red/green.
3.
Carry out a 'finger touch'
on the sensor.
Status LED lights
up blue, the
function LEDs
flash left red,
right green.
4.
Draw the user finger to
be deleted over the
sensor.
Status LED
flashes red, the
function LEDs
flash left red,
right green.
-
Status LED lights
up blue.
5.
No action
required.
The user finger was deleted. The system is in normal mode.
Deleting all
user fingers
All user fingers in the system will be deleted. The administrator fingers
are retained.
The system is in normal mode.
Step
1.
Action
Description
Display
Draw any administrator
finger over the sensor.
Status LED lights
up blue, the
function LEDs
flash green.
Status LED lights
up red.
The administrator finger
was not recognised.
Repeat step 1.
12│en
-
-
2.
Wait for 5 seconds.
Status LED lights
up blue, the
function LEDs
flash red/green.
3.
Carry out a 'finger touch'
on the sensor.
Status LED lights
up blue, the
function LEDs
flash left red,
Step
Action
Description
Display
right green.
4.
5.
No action
required.
6.
7.
No action
required.
Draw the same
administrator finger over
the sensor as in step 1.
Status LED
flashes red, the
function LEDs
flash green.
-
Status LED lights
up blue.
Draw any user finger over
the sensor in order to
verify. No finger should
now be able to gain
access.
Status LED lights
up red.
-
Status LED lights
up blue.
All user fingers were deleted. The system is in normal mode.
You can reset the system to its default settings either via the finger
scanner or using the control panel. Use whichever device is most easily
accessible.
Via the finger scanner
Resetting the
system to
default
settings
The finger scanner will be reset to its default settings. All user and
administrator fingers will be irrecoverably deleted.
The system is in normal mode.
Step
1.
Action
Description
Display
Draw any administrator
finger over the sensor.
Status LED lights
up blue, the
function LEDs
flash green.
Status LED lights
up red.
The administrator finger
was not recognised.
Repeat step 1.
-
-
2.
Wait for 5 seconds.
Status LED lights
up blue, the
function LEDs
flash red/green.
3.
Carry out a 'finger touch'
on the sensor.
Status LED lights
up blue, the
function LEDs
flash left red,
right green.
4.
Draw a different
administrator finger over
the sensor than was used
Status LED
flashes green,
the function
LEDs flash red.
en│13
Step
Action
Description
Display
in step 2.
5.
6.
No action
required.
Wait for 5 seconds.
Status LED lights
up orange, the
function LEDs
flash green.
-
The upper status
LED flashes
green.
The finger scanner has been reset to its default settings. You can now
recommission the system.
Via the control panel
Resetting to the default settings is only possible with the ekey home CP
mini 1 and is initiated via the control panel. This can only be undertaken
for the ekey home CP micro 1 at the factory.
Step
Action
2.
Description
Display
Press and hold the button
with the operating rod for
at least 4 seconds.
1.
No action
required.
-
Status LED
flashes red.
Status LED lights
up orange, the
function LEDs
flash green.
The control panel has been reset to its default settings. You can now
recommission the system.
See Implementing the devices page 9.
Updating the
software
We are working to constantly improve our products and add new
functionalities. Correspondingly, updates are made available for the finger
scanner and control panel software. More information about this can be
obtained from your dealer.
Error displays and troubleshooting
Display
Meaning
Remedy
Status LED
lights up red.
The finger was not
recognised
Draw the finger over
the sensor again.
Status LED
lights up red.
The finger scanner lights
up red immediately. No
fingerprints are stored.
Store a minimum of
one fingerprint.
If these suggestions fail to solve the problem, the system must be
returned to ekey biometric systems GmbH for repair. Please ship the
14│en
equipment in suitable packaging. Improper packaging can lead to the
warranty being voided.
Maintenance
The system is largely maintenance-free. The sensor surface is essentially
self-cleaning due to repeated use (swiping of fingers). However, if the
finger scanner becomes soiled, clean it with a damp (not wet), nonabrasive cloth. Use clean water without adding detergent. Treat the
sensor surface with care.
Dismantling and disposal
Pursuant to Directive 2002/96/EC of the European Parliament and Council
of 27 January 2003 on the sale, return and environmentally friendly
disposal of electrical and electronic equipment (WEEE) supplied after
13/08/2005, electrical and electronic equipment is to be recycled and may
not be disposed of with household waste. As disposal regulations within
the EU can differ from country to country, please contact your dealer for
further information as necessary.
Declaration of conformity
ekey biometric systems GmbH hereby declares that the product conforms
to the relevant provisions of the Electromagnetic Compatibility Directive
2004/108/EC of the European Union. The complete text of the declaration
of conformity can be downloaded from http://www.ekey.net/downloads.
Copyright
Copyright © 2013 ekey biometric systems GmbH.
All content, artwork and any ideas contained in these operating
instructions are subject to applicable copyright laws. Any transmission,
relinquishment or transfer of this content or parts thereof to any third
party requires the prior written consent of ekey biometric systems GmbH.
Translated documentation.
en│15
austria
ekey biometric systems GmbH
Lunzerstraße 89, A-4030 Linz
Tel.: +43 732 890 500 2500
offi[email protected]
germany
ekey biometric systems Deutschland GmbH
Liebigstraße 18, D-61130 Nidderau
Tel.: +49 6187 906 960
[email protected]
switzerland & Liechtenstein
ekey biometric systems Est.
Landstrasse 79, FL-9490 Vaduz
Tel.: +41 71 560 54 80
offi[email protected]
eastern adriatic region
ekey biometric systems d.o.o.
Vodovodna cesta 99, SLO-1000 Ljubljana
Tel.: +386 1 530 94 89
[email protected]
italy
ekey biometric systems Srl.
Via del Vigneto, 35/A, I-39100 Bolzano
Tel.: +39 0471 922 712
[email protected]
ID 132/221/0/140: Version 1, 27.09.2013
www.ekey.net
Made in Austria


