1
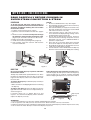
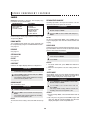
CLEANING AND CARE
Door Gasket
Reservoir and Reservoir Lid
The door gasket is essential for a good seal. Always
keep the gasket clean to prevent any damage. If water
condenses inside the door gasket, wipe dry with a soft
cloth. Polish with another soft cloth. Do not use a
chemical or abrasive cleaner on these surfaces. Care
should be taken not to rub, damage, pull or move the
gasket. Before cooking, always check that door gasket
is lying smooth and flat. If not, steam will leak from the
door. Do not use SuperSteam Oven if it has a damaged
door gasket as steam would not be contained in the
oven. Consult a Sharp Authorized Service.
After cooking, wash in a mild soap or detergent solution
with a soft damp cloth or sponge, rinse and polish dry.
Do not wash in the dishwasher. Note the filter in the
rear bottom of the reservoir. Use a very soft brush to
remove any build-up in the filter. The filter cannot be
removed nor replaced so special care should be taken
not to tear the mesh of the filter when cleaning it. Do
not use harsh cleaners, sharp metal scrapers or stiff
brushes on the reservoir, reservoir lid and reservoir filter.
Do not use a torn filter. Order replacement. See inside
front cover.
Baking Tray / High Rack / Low Rack / Steam
Basket
Drip Tray and Drip Tray Lid
Empty drip tray after cooking, wash in a mild soap or
detergent solution with a soft damp cloth or sponge,
rinse, polish dry and replace below the oven front. Do
not wash in the dishwasher.
Wash baking tray, high rack, low rack and steam basket
after cooking with a mild soap or detergent solution,
rinsing and polishing dry. Do not use harsh cleaners,
sharp metal scrapers or stiff brushes to prevent damage
to the easy clean surface. All the accessories can be
washed in the dishwasher. Place them on the top rack
in the dishwasher.
Descaling within the Oven’s Steam Parts
During steam production, scale may form in the steam
generator. To remove scale, carry out descale function
when DESCALING IS NECESSARY. is shown in the
display. See page 15 for complete instructions.
37