1
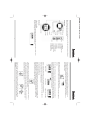
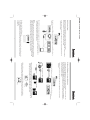
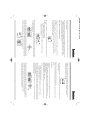
Hama GmbH & Co KG
Postfach 80
86651 Monheim/Germany
Tel. + 49 (0) 90 91 / 5 02-0
Fax + 49 (0) 90 91 / 5 02-2 74
[email protected]
www.hama.de
www.hama.de
00055103-02.05
Mobile DataSafe OTG
00055103
l Benutzerhandbuch
Inhaltsverzeichnis
Einführung
Systemvoraussetzungen
3
3
Produktüberblick
4
4
5
4
3
Inbetriebnahme
So laden Sie den Akku
So stellen Sie Datum und Uhrzeit ein
6
Lieferumfang
Anschließen an den Computer
Technische Daten
Kompatibilitätsliste für Digitalkameras
Informationen
Verfügbarer Festplattenspeicher
Softwareversion
Datum und Uhrzeit einstellen
Dateien löschen
Bestimmte Dateien von USB-Geräten kopieren
Bestimmte Dateien auf USB-Geräte kopieren
12
12
11
10
10
10
10
9
8
8
Alle Dateien von Digitalkameras oder externen Geräten kopieren 7
Häufig gestellte Fragen (FAQ)
2
EINFÜHRUNG
Wir gratulieren Ihnen zum Kauf unseres Produkts.
Lesen Sie sich das Handbuch vor der Inbetriebnahme des Produkts sorgfältig durch.
Die Angaben in diesem Handbuch erfolgen vorbehaltlich von Änderungen im Zuge der Produktoptimierung.
Wir bitten um Verständnis für mögliche Unannehmlichkeiten.
Benutzerhandbuch
Ledertasche
1,8-Zoll-Festplattenlaufwerk mit 20 GB zum Speichern von bis zu 20.000 Fotos mit 3 Megapixel
Unterstützt den USB OTG-Standard und direkte Verbindungen mit Digitalkameras, Kartenlesern,
MP3-Spielern und Pen-Laufwerken. Es wird kein Computer benötigt.
Sie ersparen sich die Kosten für zusätzliche Speicherkarten.
Aktuelles integriertes und kompaktes Design - 79 x 69 x 22 mm.
Eingebauter Lithium-Ionen-Akku für ca. 20-maliges Kopieren des Inhalts einer 256 MB-Speicherkarte.
OLED-Display mit blauer Hintergrundbeleuchtung zur Anzeige der Festplattenkapazität, Dateinamen,
des Lade- und Übertragungsstatus und von Fehlermeldungen.
Benutzer können einzelne Dateien oder Ordner kopieren oder löschen.
Automatische Erstellung von neuen Ordnern mit aktuellen Datumsangaben.
Anschluss als externe Festplatte an einen Computer möglich. Unterstützt Windows und Mac OS.
Unterstützt Highspeed-USB 2.0 (480 MBit/s).
Integriertes USB-Kabel zum direkten Anschluss an einen Computer.
Aluminium-Metallgehäuse mit guter Wärmeableitung für höchste Zuverlässigkeit.
Produktmerkmale
•
•
•
•
•
•
•
•
•
•
•
•
Systemvoraussetzungen
Hardware-Voraussetzungen:
Desktop- oder Notebook-Computer mit freiem USB-Anschluss.
Betriebssystem:
Netzadapter
Windows 2000, Windows ME, Windows XP, Mac 9.2 und 10.2
Lieferumfang
Gehäuse
Netzadapter
Benutzerhandbuch
Ledertasche
Gehäuse
3
1.
2.
3.
4.
5.
6.
7.
8.
9.
10.
11.
12.
OLED-Display
Nach links / Abbrechen
Nach rechts
Nach oben
Nach unten
Auswählen
OK / Kopieren
Festplattenkapazität
Gleichstromanschluss
Netzschalter
USB-Anschluss
USB-Kabel (für PC)
Hinweis: Vergewissern Sie sich vor der Inbetriebnahme, dass alle Produkte im Lieferumfang enthalten sind.
Wenden Sie sich andernfalls an Ihren Händler.
Produktüberblick
Uhrzeit
Ladestatus
Funktion
1. OLED-Display (Hauptmenü)
Inbetriebnahme
So laden Sie den Akku
Das Gerät enthält einen leistungsfähigen Lithium-Ionen-Akku. Um den Akku zu laden, schließen Sie den
mitgelieferten Netzadapter an den Gleichstromeingang des Geräts an.
4
Während des Ladevorgangs zeigt das Batteriesymbol auf dem OLED-Display den aktuellen Status an.
In der Regel dauert es ca. 2 Stunden, bis der Akku vollständig geladen ist. Nach Abschluss des
Ladevorgangs zeigt das Batteriesymbol auf dem OLED-Display an, das der Akku vollständig geladen ist.
Akku vollständig geladen
Wenn der Akku zu schwach wird, schaltet sich das Gerät automatisch aus.
Das Gerät weist Sie durch zwei Signaltöne darauf hin. Diese Funktion dient dem Schutz der Festplatte und
des Akkus.
Gerät einschalten
Adapter wieder anschließen
Um die Festplatte und Ihre Inhalte vor Spannungsspitzen zu schützen, schalten Sie das Gerät während
des Ladevorgangs nicht ein. Falls Sie es dennoch verwenden möchten, müssen Sie die Stromversorgung
unterbrechen. Trennen Sie den Adapter vom Netz, bevor Sie das Gerät einschalten. Anschließend können
Sie den Adapter wieder anschließen. Das Gerät wird wie gewohnt geladen.
Adapter trennen
Hinweis 1: Es wird empfohlen, den Akku vor der ersten Verwendung vollständig zu laden.
Hinweis 2: Verwenden Sie nur den mitgelieferten Akku und Netzadapter. Wenn Sie sonstige Akkus oder
Netzgeräte verwenden, kann es zu Fehlfunktionen kommen.
So stellen Sie Datum und Uhrzeit ein
Wenn Sie das Gerät zum ersten Mal einschalten, fordert Sie das System auf, das aktuelle Datum und die
Uhrzeit einzugeben. Das Gerät verfügt über eine integrierte Uhr. Wenn Sie Dateien von Digitalkameras,
MP3-Spielern, Kartenlesern oder anderen USB-Massenspeichergeräten kopieren, erstellt das System
automatisch einen neuen Ordner mit dem entsprechenden Datum.
1. Mit den Tasten „Nach oben“ und „Nach unten“ können Sie die Einträge auswählen, mit den Tasten „Nach
links“ und „Nach rechts“ können Sie den gewünschten Wert einstellen.
2. Nachdem Sie alle Einstellungen vorgenommen haben, drücken Sie die Taste „OK“. Das System fordert Sie
auf, den Vorgang zu bestätigen. Drücken Sie „OK“, um den Vorgang zu bestätigen, oder drücken Sie die
Taste „Nach links“, um den Vorgang abzubrechen.
Hinweis: Sie können das Datum und die Uhrzeit jederzeit einstellen. Wechseln Sie im Hauptmenü zum
Eintrag „Information“, und wählen Sie den Eintrag „Set Time“ (Zeit einstellen), um die Einstellungen
vorzunehmen.
5
Das Gerät kann als externe USB-Festplatte an einen Computer angeschlossen werden.
Bitte beachten Sie die folgenden Anweisungen. Wenn Ihr Computer unter Windows 98 arbeitet, installieren
Sie zuerst den Treiber, bevor Sie das Gerät mit Ihrem Computer verbinden.
Anschließen an den Computer
Alle Dateien von Digitalkameras oder externen Geräten kopieren
Digitalkamera anschließen
MP3-Spieler anschließen
Pen-Laufwerk anschließen
7
USB-Anschluss
4. Während der Übertragung erscheint auf dem OLED-Display eine Leiste, die den Fortschritt der
Übertragung anzeigt. Um den Backup-Vorgang abzubrechen, drücken Sie die Taste „Nach links“.
3. Wenn Sie alle Dateien von dem angeschlossenen Gerät kopieren möchten, wählen Sie im Hauptmenü
den Eintrag „Back Up“. Das System fordert Sie auf, den Vorgang zu bestätigen. Drücken Sie „OK“, um
den Backup-Vorgang zu bestätigen. Das System beginnt mit dem Kopieren der Daten.
Kartenleser anschließen
2. Schließen Sie die Digitalkamera, den MP3-Spieler, das Pen-Laufwerk oder den Kartenleser an.
1. Stellen Sie sicher, dass das Gerät eingeschaltet ist, bevor Sie eine Digitalkamera oder ein USB-Gerät
anschließen.
Sie können alle Dateien von Digitalkameras oder externen USB-Geräten wie MP3-Spielern, Pen-Laufwerken
oder Kartenlesern kopieren. Bitte beachten Sie die folgenden Anweisungen.
Beachten Sie die Kamera-Kompatibilitätsliste im Handbuch oder der Verpackung. Wenn Ihre Digitalkamera
nicht in der Liste enthalten ist, probieren Sie das Gerät aus, bevor Sie es erwerben. Sie können Ihre Kamera
auch über einen Kartenleser anschließen.
1. Stellen Sie sicher, dass das Gerät ausgeschaltet ist, bevor Sie das integrierte USB-Kabel mit einem PC
oder Notebook verbinden.
2. Ziehen Sie das integrierte USB-Kabel aus dem Gerät, und schließen Sie an einen USB-Anschluss des
Computers an.
3. Das Gerät wird von Ihrem Computer automatisch erkannt. Unter „Arbeitsplatz“ wird ein neues
Festplattensymbol angezeigt. Auf dem OLED-Display des Geräts wird die Meldung „Connect to PC“
(Mit PC verbinden) angezeigt. Das Gerät ist betriebsbereit.
Hinweis:
Wenn das Gerät mit einem Computer verbunden ist, erfolgt die Stromversorgung über den Computer. Einige
Computer verfügen nicht über eine ausreichende Stromversorgung, um externe USB-Festplatten verwenden
zu können. In diesem Fall arbeitet das Gerät nicht wie vorgesehen. Sie können den Fehler beheben, indem
Sie den Netzadapter an das Gerät anschließen, bevor Sie es mit dem Computer verbinden.
Adapter anschließen
4. Installieren Sie die Treiber für Windows 98.
Wenn Ihr Computer unter Windows 98 arbeitet, müssen Sie zunächst einen Treiber installieren, bevor Sie
das Gerät mit Ihrem Computer verbinden. Die Treiber für Windows 98 können Sie von unserer Website
herunterladen.
www.hama.de
6
5. Das System gibt einen Signalton aus, wenn der Backup-Vorgang abgeschlossen ist. Das System wechselt
zurück zum Hauptmenü.
6. Das Gerät erstellt automatisch einen neuen Ordner mit aktuellen Datumsangaben. Beispiel: Sie haben am
25. Dezember 2004 einen Backup von Ihrer Digitalkamera ausgeführt, für den der Ordner „12250400“
erstellt wurde. In diesem Ordner werden beim ersten Backup die Dateien im Unterordner „DSK00000“
abgelegt, beim zweiten Backup im Ordner „DSK00001“ usw.
Bestimmte Dateien von bzw. auf USB-Geräte kopieren
1. Stellen Sie sicher, dass das Gerät eingeschaltet ist, bevor Sie eine Digitalkamera oder ein USB-Gerät
anschließen.
2. Schließen Sie die Digitalkamera, den MP3-Spieler, das Pen-Laufwerk oder den Kartenleser an.
3. Wenn Sie bestimmte Dateien von dem angeschlossenen Gerät kopieren möchten, wählen Sie im
Hauptmenü den Eintrag „Copy“ (Kopieren).
4. Das System zeigt ein Menü an, in dem Sie das Gerät auswählen können, von dem Sie die Daten kopieren
möchten.
Wählen Sie als Quelle „USB Device“ (USB-Gerät).
Local HDD: interne Festplatte des Systems
USB Device: Die mit dem System verbundene Digitalkamera, bzw. der MP3-Spieler, das
Pen-Laufwerk oder der Kartenleser.
5. Mit den Tasten „Nach oben“, „Nach unten“, „Nach links“ und „Nach rechts“ können Sie das Verzeichnis
wechseln oder andere Dateien auswählen. Wählen Sie anschließend die zu kopierenden Dateien mit der
Taste „Select“ (Auswählen) aus.
6. Sie können mehrere Dateien oder Ordner auswählen. Drücken Sie „OK“, um die Auswahl zu bestätigen.
7. Das System wechselt direkt zur lokalen Festplatte, damit Sie den Zielordner auswählen können. Mit den
Tasten „Nach oben“, „Nach unten“, „Nach links“ und „Nach rechts“ können Sie den Ordner wechseln.
Wählen Sie anschließend den Zielordner mit der Taste „Select“ (Auswählen) aus.
8
8. Drücken Sie „OK“, um den Kopiervorgang zu starten. Während der Übertragung erscheint auf dem
OLED-Display eine Leiste, die den Fortschritt der Übertragung anzeigt. Um den Kopiervorgang
abzubrechen, drücken Sie die Taste „Nach links“.
9. Das System gibt einen Signalton aus, wenn der Kopiervorgang abgeschlossen ist. Das System wechselt
zurück zum Hauptmenü.
Hinweis: Es können bis zu 42 Dateien oder Ordner kopiert werden.
Hinweis: Das Gerät unterstützt keine Kopiervorgänge innerhalb der Festplatte oder zwischen zwei USBGeräten.
Dateien löschen
1. Stellen Sie sicher, dass das Gerät eingeschaltet ist, bevor Sie eine Digitalkamera oder ein USB-Gerät
anschließen.
2. Schließen Sie die Digitalkamera, den MP3-Spieler, das Pen-Laufwerk oder den Kartenleser an.
(Wenn Sie nur Dateien auf der lokalen Festplatte löschen möchten, können Sie diesen Schritt übergehen
und mit Schritt 3 beginnen).
3. Wählen Sie im Hauptmenü den Eintrag „Delete“.
4. Das System zeigt ein Menü an, in dem Sie das Gerät auswählen können, auf dem Sie Dateien löschen
möchten.
Local HDD: interne Festplatte des Systems
USB Device: Die mit dem System verbundene Digitalkamera, bzw. der MP3-Spieler, das
Pen-Laufwerk oder der Kartenleser.
5. Mit den Tasten „Nach oben“, „Nach unten“, „Nach links“ und „Nach rechts“ können Sie das Verzeichnis
wechseln oder andere Dateien auswählen. Wählen Sie anschließend die zu kopierenden Dateien mit der
Taste „Select“ (Auswählen) aus.
6. Sie können mehrere Dateien oder Ordner löschen. Drücken Sie „OK“, um die Auswahl abzuschließen und
den Löschvorgang zu starten.
7. Das System fordert Sie auf, den Vorgang zu bestätigen. Drücken Sie „OK“, um den Löschvorgang zu
bestätigen, oder drücken Sie die Taste „Nach links“, um den Vorgang abzubrechen. Mit der Taste
„Nach links“ können Sie den Löschvorgang auch während der Ausführung abbrechen.
8. Das System gibt einen Signalton aus, wenn der Löschvorgang abgeschlossen ist.
(Hinweis: Es können bis zu 42 Dateien oder Ordner gelöscht werden.)
9
Informationen
Kompatibilitätsliste für Digitalkameras
Epson
Fujifilm
Epson L-410
Fujifilm S20 Pro
Fujifilm A340
Fujifilm S7000
Fujifilm S5000
Fujifilm F420
Fujifilm A210
Fujifilm A310
Fujifilm F700
Fujifilm M603
Fujifilm F601
Fujifilm S602
Fujifilm F410
Fujifilm S304
Fujifilm F401
FinePix 2650
Fujifilm Q 1
Fujifilm 3800
Fujifilm F440
Fujifilm F450
Alle
Kodak DX340
Kodak LS743
Kodak DX7630
Kodak DX 6490
Kodak LS633
Konica KD-400Z
Konica KD-410Z
Marke
AipTek
BenQ
Casio
Canon
Inovix
Kodak
Konica
Konica Konica KD-500Z
Konica KD-310Z
Kyocera Kyocera SL300R
Kyocera S3L
Kyocera S5R
Minolta Minolta A2,
Minolta Z2,
Minolta A1,
Minolta Z1,
Minolta X2D,
Minolta Xt,
Minolta F200,
Minolta F300,
Minolta DiMAGE XI,
Minolta DiMAGE 7Hi,
Minolta DiMAGE 5
Mustek DV 3032,
DV 4000,
DV 5000,
DV 5500,
MDC 4000,
MDC 5000,
MDC 5500Z
Nikon
Nikon 8700,
Nikon 5700,
Nikon 5200,
Nikon 3200,
Nikon 4200
11
Nikon
Nikon 3700,
Nikon SQ,
Nikon 3100,
Nikon 4100,
Nikon 4300,
Nikon 4500,
Nikon 5000,
Nikon D100,
Nikon D70
Olympus Alle
Panasonic Panasonic FX1,
Panasonic FX7,
Panasonic Lumix FZ1,
Panasonic NV65
Pontax
Pentax Optio S
Premier DS 4330,
DS 3080S
Sanyo
Alle
Sony
Alle
Samsung Samsung Digimax V5,
Samsung Digimax V3,
Samsung Digimax 202,
Samsung Digimax XT
Toshiba 3310,
AstraPix 610
Toshiba
Umax
Hinweis: Wenn Ihre Digitalkamera nicht unterstützt wird, können Sie sie über einen Kartenleser mit dem
Gerät verbinden.
Hinweis: Die Kompatibilität weiterer digitaler Kamerasysteme wird geprüft. Die neueste Version der Kompatibilitätsliste finden Sie auf unserer Website.
Modellnr.:
Alle
DC 140
DC C40
DC 2410
DC 5330
DC 2310
DC 2300
Casio EX-Z40
Casio EX-Z55
Canon Pro1
Canon S1 IS
Canon IXUS 430
Canon IXUS 500
Canon A75
Canon IXUS I
Canon A80
Canon A95
Canon G5
Canon G6
Canon A70
Canon A60
Canon A300
Canon S50
Canon IXUS Ils
Canon IXUS 40
Canon IXUS 400
Canon S60
Canon A400
Das Gerät zeigt nützliche Informationen zum aktuellen Betriebsstatus an. Sie können den verfügbaren Speicherplatz abrufen, Datum und Uhrzeit einstellen, die Softwareversion Ihres Geräts abfragen und eine Sprache auswählen.
Wählen Sie im Hauptmenü den Eintrag „Information“.
Wählen Sie im Untermenü den Eintrag „Free Space“ (Verfügbarer Speicherplatz).
Der verfügbare Speicherplatz auf der Festplatte und den angeschlossenen USB-Geräten wird angezeigt.
Drücken Sie „OK“, um zum Hauptmenü zurückzukehren.
Verfügbarer Festplattenspeicher
1.
2.
3.
4.
Wählen Sie im Hauptmenü den Eintrag „Information“.
Wählen Sie im Untermenü den Eintrag „Version“.
Die Softwareversion Ihres Geräts wird angezeigt.
Drücken Sie „OK“, um zum Hauptmenü zurückzukehren.
Softwareversion
1.
2.
3.
4.
Datum und Uhrzeit einstellen
1. Wählen Sie im Hauptmenü den Eintrag „Information“.
2. Wählen Sie im Untermenü den Eintrag „Set Time“ (Zeit einstellen).
3. Mit den Tasten „Nach oben“ und „Nach unten“ können Sie die Einträge auswählen, mit den Tasten „Nach
links“ und „Nach rechts“ können Sie den gewünschten Wert einstellen.
4. Nachdem Sie alle Einstellungen vorgenommen haben, drücken Sie die Taste „OK“. Das System fordert Sie
auf, den Vorgang zu bestätigen. Drücken Sie „OK“, um den Vorgang zu bestätigen, oder drücken Sie die
Taste „Nach links“, um den Vorgang abzubrechen.
Wählen Sie im Hauptmenü den Eintrag „Information“.
Wählen Sie im Untermenü den Eintrag „Language“ (Sprache).
Die verfügbaren Sprachen werden angezeigt. Wählen Sie die gewünschte Sprache.
Drücken Sie „OK“, um zum Hauptmenü zurückzukehren.
Language (Sprache)
1.
2.
3.
4.
10
Technische Daten
Hardware
Akku
Lithium-Ionen-Akku
3,6 Volt
750 mAh
Abmessungen: 79 mm x 69 mm x 22 mm
Anschlüsse
1x USB A-Anschluss,
1 x Netzschalter,
1 x 5-V-Gleichstromeingang,
1 x USB-Kabel mit A-Typ-Stecker
USB 2.0
Highspeed (480 MBit/s)
Massenspeichergerät (MSD)-Unterstützung
OTG (On-The-Go)-Unterstützung
Kompatible Dateisysteme:
- FAT16
- FAT32
Adapter
Netzspannung: 100 - 240 Volt
Ausgang: 5 V / 2,5 A
Ladedauer: 2 Stunden
Gewicht: 150 g
LCD und Taste
1-Zoll-OLED-Display
Blaue Hintergrundbeleuchtung mit hohem Kontrast
6 Tasten (Nach oben, Nach unten, Nach links,
Nach rechts, Auswählen und OK)
USB 1.1
Fullspeed (12 MBit/s)
Massenspeichergerät (MSD)-Unterstützung
OTG (On-The-Go)-Unterstützung
Festplatte: Hitachi 1,8-Zoll, 20 GB, 4200 U/min
Software
Kompatible Betriebssysteme:
- Windows XP/ME/2000
- Mac 9.2/10.2
Normen
CE, FCC, BSMI, VCCI, C-Tick, CCC
Zubehör
Gehäuse, Ladegerät und Ledertasche
Häufig gestellte Fragen (FAQ )
Wenn bei der Verwendung des Geräts Probleme auftreten, beachten Sie die nachstehenden Hinweise.
Wenn sich das Problem mithilfe dieser Informationen nicht beheben lässt, wenden Sie sich an unseren Kundendienst.
Frage 1: Können gleichzeitig USB-Host- und Client-Funktionen ausgeführt werden?
A:
Beide Funktionen können nicht gleichzeitig ausgeführt werden. Wenn Sie das Gerät einschalten,
ist die USB-Host-Funktion aktiviert. Wenn Sie das Gerät ausschalten, ist die Client-Funktion
aktiviert.
Frage 2: Warum schaltet sich das Gerät nach einiger Zeit automatisch aus?
A:
Das Gerät verfügt über eine Energiesparfunktion. Es schaltet automatisch aus, wenn länger als
5 Minuten keine Eingabe erfolgt.
12
Frage 3: Warum funktioniert das Gerät nicht, wenn es an einen PC oder ein Notebook angeschlossen ist?
A:
Einige Computer verfügen nicht über eine ausreichende Stromversorgung, um externe
USB-Festplatten verwenden zu können. Schließen Sie das Gerät an den Netzadapter an.
Frage 4: Warum funktioniert der Netzschalter beim Laden nicht wie gewohnt?
A:
Um die Festplatte und Ihre Inhalte vor Spannungsspitzen zu schützen, schalten Sie das Gerät
während des Ladevorgangs nicht ein. Falls Sie es dennoch verwenden möchten, müssen Sie die
Stromversorgung unterbrechen. Trennen Sie den Adapter vom Netz, bevor Sie das Gerät
einschalten. Anschließend können Sie den Adapter wieder anschließen. Das Gerät wird wie
gewohnt geladen.
Frage 5: Was muss ich tun, um die Dateien auf der lokalen Festplatte oder einem USB-Gerät anzuzeigen?
Ich möchte die Dateien weder kopieren noch löschen, sondern lediglich aufrufen.
A:
Sie können beispielsweise im Hauptmenü die Funktion „Delete“ auswählen. Wählen Sie
anschließend das Laufwerk (lokale Festplatte oder USB-Gerät), das Sie überprüfen möchten.
Mit den Tasten „Nach oben“, „Nach unten“, „Nach links“ und „Nach rechts“ können Sie Ordner
und Dateien durchsuchen. Wenn Sie nicht die Taste „Select“ (Auswählen) betätigen, werden keine
Dateien gelöscht.
Frage 6: Mein Computer erkennt neue Hardware, kann jedoch die darauf befindlichen Daten nicht
anzeigen. Was muss ich tun?
Stellen Sie sicher, dass das Gerät formatiert wurde, oder wenden Sie sich an unseren
Kundendienst.
A:
Frage 7: Warum zeigt das Gerät eine Fehlermeldung an, wenn ich es an meine Digitalkamera anschließe?
A: (1)
This device has been formatted to other FAT format (Das Gerät wurde für ein anderes FAT-System
formatiert): Wenn das Gerät für FAT 16 oder NTFS formatiert ist, können bei der Verbindung mit
Digitalkameras Probleme auftreten.
(2)
Please upgrade new firmware (Aktualisieren Sie die Firmware): Besuchen Sie unsere Website,
um sicherzustellen, dass die Digitalkamera von dem Gerät unterstützt wird.
Wenn die Firmware auf Ihrem Gerät veraltet ist, können Sie sie aktualisieren.
(3)
Wrong format of memory card (Ungültiges Speicherkartenformat): Legen Sie die Speicherkarte in
die Digitalkamera ein, um sie zu formatieren.
Sie können die Speicherkarte auch in einen Kartenleser einlegen, um sie auf einem Computer für
das FAT32-Dateisystem zu formatieren. Danach sollte die Datenübertragung mit dem Gerät möglich
sein.
(4)
A broken-down USB cable (USB-Kabel defekt): Überprüfen Sie die Funktion des USB-Kabels.
Schließen Sie Ihre Kamera an den Computer an. Wenn die Verbindung über das USB-Kabel nicht
möglich ist, tauschen Sie es aus, und verbinden Sie die Kamera erneut mit dem Computer. Wenn
die Kamera Bilder an den Computer überträgt, jedoch keine Verbindung mit dem Gerät herstellen
kann, wenden Sie sich an den Kundendienst.
Frage 8: Kann ich Bilder von meiner Digitalkamera auf das Gerät übertragen, während ich Fotos aufnehme?
A:
Das Gerät kann keine Daten übertragen, während Bild- oder Video-Daten aufgezeichnet werden.
Wenn Sie eine Verbindung mit dem Gerät herstellen möchten, müssen Sie Ihre Digitalkamera in
den Vorschaumodus schalten, um die Daten übertragen zu können.
13
Frage 9: Meine Digitalkamera kann nicht dem Gerät verbunden werden, obwohl dies zuvor problemlos
möglich war. Was muss ich tun?
A: (1)
Das Gerät wurde formatiert. Das Gerät ist standardmäßig für das FAT32-System formatiert, kann
jedoch auch für das NTFS-System konfiguriert werden. In diesem Fall ist das Gerät nicht mehr
vollständig mit Ihrer Digitalkamera kompatibel. (Alle Digitalkameras verwenden das FAT32-System.)
(2)
Ungültiges Speicherkartenformat. Legen Sie die Speicherkarte in die Digitalkamera ein, um sie zu
formatieren. (Alle Digitalkameras verwenden das FAT32-System). Sie können die Speicherkarte
auch in einen Kartenleser einlegen, um sie auf einem Computer für das FAT32-Dateisystem zu
formatieren. Danach sollte die Datenübertragung mit dem Gerät möglich sein.
Frage 10: Bei der Verwendung des Geräts sind ungewöhnliche Geräusche zu hören. Was muss ich tun?
A:
Prüfen Sie, ob das Gerät durch Schläge oder Stöße beschädigt wurde. Das Festplattenlaufwerk
sollte ohne auffällige Geräusche laufen. Wenden Sie sich an den Kundendienst. Bei Bedarf
überprüfen wir das Festplattenlaufwerk, um den Fehler zu beheben.
Frage 11: Kann das Gerät als Startlaufwerk verwendet werden?
A:
Verwenden Sie eine Sicherungssoftware wie „Norton Ghost“, um Ihre Festplatte oder Ihr System
zu sichern. Erstellen Sie eine Startdiskette oder CD, wenn Sie eine Festplatten- oder
Systemsicherung durchführen möchten. Das Booten von Festplattenlaufwerken wird nicht von
allen Rechnern unterstützt. Wenn Ihr Rechner das Booten von Festplattenlaufwerken nicht
unterstützt, können Sie die Boot-Datei den Festplatten- oder Systemsicherungsdateien hinzufügen.
Dadurch können Sie Ihre wichtigen Daten vor Ausfällen schützen.
Frage 12: Wie kann ich rasch meinen Computer sichern?
A:
Sie können beispielsweise die Festplatte Ihres Computers in C: und D: aufteilen. Anschließend
installieren Sie das Betriebssystem und Anwendungen auf Laufwerk C: (z.B. Windows, Office und
Adobe, usw.), und speichern Sie Ihre weiteren Daten unter D: (.doc, .xls, .ppt, usw.). Dadurch
können Sie Ihre Dateien und Anwendungsdaten optimal sichern.
Frage 13: Wenn mein Computer von einem Virus befallen ist, kann dieser auf das Gerät überspringen?
A:
Dies ist grundsätzlich unwahrscheinlich. Die meisten Viren befallen nur Dateien mit den
Endungen .dll, .com, .exe usw. Die meisten Viren verursachen einen Systemausfall. Wenn Sie
Dateien der Typen .doc, .xls, .ppt, .jpg, usw. übertragen, wirkt sich das auf das Gerät nicht aus.
Frage 14: Warum arbeitet die Hostfunktion nicht, obwohl das Festplattenlaufwerk formatiert wurde?
(Das Festplattenlaufwerk wurde ab Werk für das FAT32-System formatiert. Schäden, die bei der
Formatierung durch den Benutzer auftreten, sind von der Gewährleistung nicht gedeckt.)
A:
Wenn die Festplatte des Geräts formatiert wird, werden alle Systeminformationen gelöscht. Wenn
Sie die Host-Funktion verwenden möchten, müssen Sie 40 Sekunden abwarten, bis die Systemin
formationen wiederhergestellt sind. Sie können auch von Ihrem Computer aus auf das Gerät
zugreifen, um die Systeminformationen wiederherzustellen.
14
L USER MANUAL
Specifications
Compatibility list of digital camera
Information
Free disk space
Software version
Set Date & Time
Delete files
Partially copy files from USB devices
Partially copy files to USB devices
Copy all files from digital camera or other devices
Connecting to computers
Start to use
How to charge the battery
How to Set Date & Time
Product overview
Package contents
Introduction
System requirements
26
25
24
23
23
23
23
22
21
21
20
19
17
17
18
17
16
16
16
Table of Contents
FAQ
15
INTRODUCTION
Thank you for purchasing.
Please read this manual carefully before using this product.
This user manual is subject to change without prior notice fort he purpose of product improvement.
Please understand if changed unexpectedly.
1.8''HDD - 20 GB Capacity can store up to 20,000 photos at 3Mega-pixel.
Support USB OTG standard, directly connect to a Digital Camera, a card reader, a MP3 Player, or a
Pen-drive. No need computers.
You save much money for extra memory cards.
State-of-the-art ID design & Smallest form factor - 79x69x22 mm.
Built-in Li-Ion Battery supports the device copying 256MB memory card about 20 times.
OLED display with Blue Backlight shows disk space, file names, battery status, transmission status,
and error message.
Users can select partial files or folders to be copied or deleted.
Automatically creates a new folder with current date information.
Becomes an external HDD when connects to a computer. Support Windows & Mac OS.
Supports high speed USB 2.0 (480Mbps).
Embedded USB cable makes it possible that the device is directly connected to a computer.
Aluminium metal case can dissipate heat very well to provide better stability.
Product Features
•
•
•
•
•
•
•
•
•
•
•
•
System Requirements
Hardware requirements:
A Desktop or Notebook computer with free USB port.
1.
2.
3.
4.
5.
6.
7.
8.
9.
10.
11.
12.
OLED display
Left/ Cancel
Right
Up
Down
Select
OK/ Copy
HDD Capacity
DC-in Jack
Power switch
USB Connector
USB Cable (for PC)
Note: Before using the product, please check the fittings in the package compliant with the above. If not,
please contact the local dealers.
Product Overview
Current time
Battery status
Function
1. OLED-Display (Main-Menu)
Start to use
How to charge the Battery
Operation system:
Leather Pouch
Windows 2000, Windows ME, Windows XP, Mac 9.2 & 10.2
User Manual
The device contains a high capacity Lithium-Ion rechargeable battery. To charge this battery, please plug the
AC adapter (bundled in the box) into the DC-In Jack of the main body.
Battery Charger
17
Package Contents
Main body
Battery Charger
User Manual
Leather Pouch
Body
16
While the battery is charging, the Battery Icon of OLED display will show the status.
Normally, it takes about 2 hours to recharge this battery completely. When the charging is finished, the
battery icon will become battery full status.
If the battery level is too low, the device will detect this situation and will automatically shutdown.
Meanwhile, the device will beep twice to inform you. This design can protect HDD and battery.
Switch the power
Plug-in the adapter again
To protect HDD and contents from transient power change, please “don not switch the power during
charging”. If you still want to, switch it. Please un-plug the adapter before switching the power. After
having switched the power, you can plug-in the adapter again. The device can be charged in the ordinary
way.
Un-plug the adapter
Note 1: We recommend you charging the battery fully for the first time.
Note 2: Only use bundled battery and adapter. Using other batteries and chargers could be dangerous.
How to Set Date & Time
When you turn-on the device for the first time, it will ash you to enter current date and time. The device
builds in an internal clock and automatically creates a new folder by date every time you copy files from
digital cameras, MP3 players, card readers, or any other USB mass storage devices.
1. You can use “up” and “down” keys to charge the value and use “left” and “right” to move the position to
set the value.
2. After having finished all settings, please press “OK” button. System will double confirm with you. Press
“OK” to confirm or press “left” to cancel.
Note: You can change date or time after the first setting. Select “Information” item at Main Menu, then
select “Set Time” item to repeat setting.
18
Connecting to computers
The device can work as a standard external USB HDD when connecting to computers.
Please read the following instructions to do it correctly. If your computer has the Windows 98 system, please
install driver first before connecting the device to your computer.
1. Please be sure to TURN PFF before inserting the embedded USB cable to PC/Notebook.
2. Pull out the embedded USB cable and connect to the USB port of your computer.
3. Your computer will automatically detect the device and show up a new HDD icon at My Computer Menu.
The device will show a message “Connect to PC” on OLED display. Now it is ready to use.
Note:
When the device connects to the computer, it gets power from the computer. Very few models of computers
cannot provide enough power to use external USB HDD. You will find some strange behaviours of the device.
In these cases, we recommend you plugging the AC adapter into the device when connecting to your
computer.
Plug-in the adapter
4. Install drivers for Windows 98.
If your computer is using Windows 98, you need to install a driver before connecting to your computer.
You can go to our website in order to download drivers for Windows 98.
www.hama.de
19
Copy all files from Digital Camera or other devices
USB Connector
This product can copy all files from digital camera or other USB devices, like MP3 players, Pen-Drives or
Card Readers. Please read the following instructions to do it correctly.
Please refer to the compatible DSC list in the manual or box. If your DSC is not included in this list, please try
it before buying it. Or you can buy a card reader to use together with our product.
Connect card reader
1. Please make sure to TURN ON power before plugging-in any DSC or USB devices.
2. Connect DSC/MP3 player/Pendrive/Card reader.
Connect DSC
Connect MP3 player
Connect pendrive
3. If you would like to copy all data of your DSC/MP3 player/Pen-drive/card reader, select the “BACK UP”
item at the Main-Menu. System will pop up a message to confirm with you. Press “OK” to confirm the
BACK UP action. Then system will start copying all data or files.
4. During the transmission, OLED display will show up a transmission bar to inform you about the current
progress. If you want to cancel this action, pressing “LEFT” key and abort BACK UP action.
20
5. System will beep once to inform you when the “BACK UP” action is finished. System will go back to
Main-Menu.
6. The device will automatically create a new folder with current data information. For example: You did
“Back up” from DSC on December 25th of year 2004, a new folder “12250400” will be created. Inside this
folder, the first time back-up will put all files under the folder of “DSK00000” and the second time back-up
will put files under the folder of “DSK00001”.
Partial Copy Files from / to USB Device.
1. Please make sure to TURN ON before plugging-in any DSCC or USB devices.
2. Connect DSC/MP3 player/Pen-drive/Card reader.
3. If you would like to copy partial files from your DSC/MP3 player/Pen-drive/card reader, select the “COPY”
item at the Main-Menu.
4. System will show up a menu where you can select which device the source of copy action is
Select USB Device as the source..
Local HDD: internal hard disk of system
USB Device: your DSC/MP3 player/Pen-drive/Card reader connected to system
5. You can use UP, DOWN, LEFT, RIGHT keys to change directory or files. Then press SELECT key to select
files you would like to copy.
6. You can select multiple files or folders to copy. Press “OK” key to finish your selection.
7. System will directly change to the local HDD directory to let you select destination folders. Use UP,
DOWN, LEFT, RIGHT keys to change folders. Then press SELECT key to select folders you would like to be
the destination.
21
8. Press “OK” to start “COPY” action. During the transmission, OLED display will show up a transmission bar
to inform you about the current progress. If you want to cancel this action, pressing “LEFT” key can abort
COPY action.
9. System will beep once to inform you that the “COPY” action is finished. System will go back to
Main-Menu.
Note: Maximally 42 files or folders can be copied.
Note: The device does not support copy files from local HDD to local HDD, or from USB device to USB
device.
Delete Files
1. Please make sure to TURN ON power before you plugging-in any DSCC or USB devices.
2. Connect DSC/MP3 player/Pen-drive/Card reader. (If you only want to delete local HDD files, you can skip
this step and start from step 3)
3. Select the “DELETE” item at the Main-Menu.
4. System will show up a menu where you can select which devices you want to delete files.
- Local HDD: internal hard disk of system
- USB Device: your digital camera/MP3 player/pen-drive/Card reader connected to system.
5. You can use UP, DOWN, LEFT, RIGHT keys to change directory or files. Then press SELECT key to select
files you would like to copy.
6. You can select multiple files or folders to delete. Press “OK” key to finish your selection and start to
“DELETE” action.
7. System will prompt a message to confirm with you. Press “OK” to confirm with you. Press “OK” to confirm
the DELETE action. Or press “LEFT” key to cancel this action. If you want to cancel this action during the
“DELETE” action, press “LEFT” key can abort DELETE action.
8. System will beep once to inform you the “DELETE” action is finished.
(Note: The maximum files or folders can be deleted are 42.)
22
Information
The device also provides many kinds of useful information to let you know more about current status. You
can know how many disk space is available, to set Date and Time, to know software version of your device,
and to change the language.
Select “INFORMATION” item at Main-menu to enter.
Select “Free Space” item at Information-submenu.
Free Disk Space of the internal HDD and connected USB devices will be shown on the display.
Press “OK” to get back to Main-menu
Free Disk Space
1.
2.
3.
4.
Select “INFORMATION” item at Main-menu to enter.
Select “Version” item at Information-submenu.
The software version of your device will be shown on the display.
Press “OK” to get back to Main-menu.
Software Version
1.
2.
3.
4.
Set Date & Time
1. Select “INFORMATION” item at Main-menu to enter.
2. Select “Set Time” item at Information-submenu.
3. You can use “UP” and “DOWN” keys to change the value and use “LEFT” and “RIGHT” to move the position to set the value.
4. After having finished all settings, please press “OK” button. System will double confirm with you. Press
“OK” to confirm or press “LEFT” to cancel.
Select “INFORMATION” item at Main-menu to enter.
Select “Language” item at Information-submenu.
The available languages will be shown on the display. You can select the desired language.
Press “OK” to get back to Main-menu.
Language
1.
2.
3.
4.
23
Epson
Fujifilm
Inovix
Kodak
Konica
Epson L-410
Fujifilm S20 Pro
Fujifilm A340
Fujifilm S7000
Fujifilm S5000
Fujifilm F420
Fujifilm A210
Fujifilm A310
Fujifilm F700
Fujifilm M603
Fujifilm F601
Fujifilm S602
Fujifilm F410
Fujifilm S304
Fujifilm F401
FinePix 2650
Fujifilm Q 1
Fujifilm 3800
Fujifilm F440
Fujifilm F450
Alle
Kodak DX340
Kodak LS743
Kodak DX7630
Kodak DX 6490
Kodak LS633
Konica KD-400Z
Konica KD-410Z
Compatibility List of Digital Camera
Brand
AipTek
BenQ
Casio
Canon
Model No.
Alle
DC 140
DC C40
DC 2410
DC 5330
DC 2310
DC 2300
Casio EX-Z40
Casio EX-Z55
Canon Pro1
Canon S1 IS
Canon IXUS 430
Canon IXUS 500
Canon A75
Canon IXUS I
Canon A80
Canon A95
Canon G5
Canon G6
Canon A70
Canon A60
Canon A300
Canon S50
Canon IXUS Ils
Canon IXUS 40
Canon IXUS 400
Canon S60
Canon A400
Konica Konica KD-500Z
Konica KD-310Z
Kyocera Kyocera SL300R
Kyocera S3L
Kyocera S5R
Minolta Minolta A2,
Minolta Z2,
Minolta A1,
Minolta Z1,
Minolta X2D,
Minolta Xt,
Minolta F200,
Minolta F300,
Minolta DiMAGE XI,
Minolta DiMAGE 7Hi,
Minolta DiMAGE 5
Mustek DV 3032,
DV 4000,
DV 5000,
DV 5500,
MDC 4000,
MDC 5000,
MDC 5500Z
Nikon
Nikon 8700,
Nikon 5700,
Nikon 5200,
Nikon 3200,
Nikon 4200
Nikon
Nikon 3700,
Nikon SQ,
Nikon 3100,
Nikon 4100,
Nikon 4300,
Nikon 4500,
Nikon 5000,
Nikon D100,
Nikon D70
Olympus Alle
Panasonic Panasonic FX1,
Panasonic FX7,
Panasonic Lumix FZ1,
Panasonic NV65
Pontax
Pentax Optio S
Premier DS 4330,
DS 3080S
Sanyo
Alle
Sony
Alle
Samsung Samsung Digimax V5,
Samsung Digimax V3,
Samsung Digimax 202,
Samsung Digimax XT
Toshiba 3310,
AstraPix 610
Toshiba
Umax
Note: More DSCs are under compatibility testing. For latest DSC list, please visit our website.
Note: If your DSC is not compatible, you can buy a card reader to connect with the device.
24
Specifications
Hardware
Battery
Li-Ion rechargeable
3.6 Volts
750mAh
Dimension: 79mm x 69mm x 22 mm
Connectors
1x USB A type port,
1x Power switch,
1x DC 5V input,
1x USB cable with A-type connector.
USB 2.0
High Speed (480 Mbps)
MSD (Mass Storage Device) Support
OTG (On-The-Go) Support
Compatible File System:
- FAT16
- FAT32
Adapter
Input: 100 - 240 Volts
Output: 5 V / 2,5 A
Charge Hour: 2 Hours
Weight: 150g
LCD & Button
1 inch OLED display,
Blue Back-light with high contrast
6 Buttons (Up, Down, Left, Right, Select, & OK)
USB 1.1
Full Speed (12 Mbps)
MSD (Mass Storage Device) Support
OTG (On-The-Go) Support
HDD: Hitachi 1.8 inch 20GB 4200 RPM
Software
Compatible Operation System:
- Windows XP/ME/2000
- Mac 9.2/10.2
Certificate
CE, FCC, BSMI, VCCI, C-Tick, CCC
Accessory
User Manual, Battery Charger, & Leather Pouch
FAQ
Q1:
A:
Why will my device automatically shutdown after a while?
This is a special design for power saving. The device will automatically shutdown 5 minutes later
if no action from end users.
What happens when you use USB host and client functions at the same time?
Both functions could not be activated at the same time, it is decided by On/Off switch, when the
switch is “ON”, it is USB host function, on the other hand, “OFF” will be USB client function.
When having problems using the device, you can check it following the suggestions below. If the suggestions still cannot resolve your problems, please contact our Customer Service Center, we shall by all means
provide you our best Service.
Q2:
A:
25
Q7:
A: (1)
Q6:
A:
A:
Q5:
Q4:
A:
Q3:
A:
My computer can find “New Hardware” but cannot read any data in this device?
Please check if the device has been formatted or contact our Customer Service Center.
What should I do if I only want to check the file inside local HDD or USB device? I don´t want to
copy or delete, just check.
You can select “DELETE” function at Main-Menu. Then select the disk (Local HDD or USB device)
you want to check. Just use “Up”, “Down”, “Left”, & “Right” keys to browse the folders and files.
If you do not press “Select” key, not any files will be deleted.
Why can power switch sometimes not work normally during charging?
To protect HDD and content from transient power change, please “do not switch the power during
charging”. If you still want to switch it. Please un-plug the adapter before switching the power.
After you having switched the power, you can plug-in the adapter again. The device can be
charged normally.
Why can the device not work with PC/Notebook computer?
There are few models of computers which cannot provide enough USB power. We suggest you to
plug AC adapter into the device.
Q8:
A:
Can I transmit my DSC pictures to this device when taking pictures?
The device cannot do the transmission when taking pictures or doing video recording. While you
want to connect to the device, you have to switch your DSC to the preview mode so that you can
transmit the data to the device.
(4)
(3)
(2)
Why does the device show error message when being connected with DSC?
This device has been formatted to other FAT format - If you format the device to FAT 16 or NTFS, it
will have problems connecting with DSC.
Please upgrade new firmware - Please visit this website to make sure that your DSC is compatible
with the device; you may upgrade your firmware to the latest version if your current firmware of
the device is still the old one.
Wrong format of memory card - Please put your memory card into DSC to execute format, format it
to FAT32 or put it into a card reader and connect the card reader to your computer; format your
memory card to FAT 32. After that it should transmit data to the device well.
A broken-down USB cable - Please check whether your USB cable can work normally or not: You
may connect your DSC with your computer; if your DSC cannot connect with your computer via
USB cable, please change an USB cable and connect to computer again; if your DSC can transmit
pictures to your computer with the USB cable but it still cannot connect with the device, please
contact our Customer Service Center.
Q9:
A: (1)
(2)
My DSC used to work well with the device but now not anymore?
The format of this device is different - the format of the device is FAT32 originally, but some people
will format it to NTFS; it will cause the incompatibility problems about the device and your DSC.
(Your DSC is FAT 32 as well)
Wrong format of memory card - Please put your memory card into DSC to execute format (because
all DSCs use FAT32), format it to FAT32 or put it into a card reader and connect the card reader to
your computer; format your memory card to FAT32 so that it can transmit data to the device well.
26
Q14:
Q13:
A:
Q12:
A:
Q11:
A:
Q10:
A:
If my computer has computer viruses, will the viruses affect this device?
In most cases, it will not happen as most of the viruses can only affect files like .dll, .com, .exe, etc.
the purpose of the current viruses is mostly used to crash your system, so if your data are stored
in .doc, .xls, .ppt, .jpg, etc…, the data transmission from your computer to this device should be
harmless.
How do I quickly backup my computer?
We suggest you can split the HDD of your computer into C: and D:; then install your computer
system and application into C: (like Windows, Office and Adobe, etc.) and put other data into
D: (.doc, .xls, .ppt, etc.). This will help you backup your data and system smoothly.
Can this device be used as booting disk?
We suppose that you are using backup software like “Norton Ghost” to do your HDD or system
backup since you have this question. We suggest that you should still make a booting disk or CD
when doing HDD or system backup as not every computer supports HDD booting. If your computer
does support HDD booting, you may make the boot file in your HDD or system backup files, so you
can reserve your important data when your computer gets troubles.
This device has some weird sounds (sounds like da..da..da..) after being used for a period of time?
Please examine if this device has been dropped or struck heavily; normally the HDD of the device
should not have this kind of sounds when operating. Please contact our Customer Service Center.
We are willing to do the HDD analysis and provide you our best service.
A:
Why does the host function not work although the HDD has just been formatted?
(The HDD has been formatted to FAT32 before ex-work, if users format the HDD by themselves
causing any damages, it will not be included in our free after-sales service and QA)
While this device`s HDD has just been formatted the system information will be deleted. If you
want to use the host function, 40 seconds are needed to rebuild the system information, and
please pay a little patient for it or you can access some files on this device from PC, it can also
rebuild the system information by this way.
27
¬ Manuel d'utilisation
Sommaire
Liste de compatibilités pour appareils photos numériques
Informations
Espace disque disponible
Version du logiciel
Régler le jour et l'heure
Effacement de fichiers
Copier des fichiers spécifiques de périphériques USB
Charger des fichiers spécifiques sur des périphériques USB
Copier tous les fichiers d'un appareil photo numérique
ou d'autres périphériques
Branchement à l'ordinateur
Mise en service
Chargement de la batterie
Réglage du jour et de l'heure
Aperçu du produit
Matériel livré
38
37
36
36
36
36
35
34
34
33
32
30
30
31
30
29
29
29
Caractéristiques techniques
38
Introduction
Configuration système requise
Forum aux questions (FAQ)
28
INTRODUCTION
Nous vous remercions d'avoir acheté notre produit.
Lisez attentivement le présent mode d'emploi avant d'utiliser l'appareil.
Les informations dans le présent mode d'emploi peuvent être modifiées en fonction du progrès technique.
Nous vous remercions de votre compréhension.
étui en cuir
Lecteur de disque dur 1,8 pouces avec une capacité de 20 Go permettant d'enregistrer jusqu'à
20.000 photos avec 3 méga pixels
Support la norme USB OTG et la connexion directe avec des appareils de photos numériques, lecteurs de
cartes, lecteurs MP3 et des clés USB. Aucun ordinateur n'est nécessaire.
Vous ne devez pas acheter de cartes de mémoires additionnelles.
Design intégré moderne et compact - 79 x 69 x 22 mm.
Batterie lithium-ion rechargeable permettant de copier env. 20 fois le contenu d'une carte de mémoire
256 Mo.
Ecran OLED avec éclairage d'arrière-plan bleu pour l'affichage de l'espace disque disponible, des noms
de fichiers, de l'état de chargement et de transmission ainsi que des messages d'erreur.
Possibilité de copie de fichiers et d'effacer des dossiers individuels.
Création automatique de nouveau dossier avec la date actuelle.
Branchement à l'ordinateur comme disque dur externe possible. Supporte Windows et Mac OS.
Supporte Highspeed USB 2.0 (480 MBit/s)
Câble USB intégré permettant le branchement direct à un ordinateur.
Boîtier métallique en aluminium avec dissipation de chaleur efficace pour une stabilité supérieure.
Caractéristiques du produit
•
•
•
•
•
•
•
•
•
•
•
•
Configuration système requise
Matériel requis:
manuel d'utilisation
Poste de travail ou ordinateur portable avec un port USB libre
Système d'exploitation:
chargeur
Windows 2000, Windows ME, Windows XP, Mac 9.2 et 10.2
Matériel livré
Boîtier
chargeur
Manuel d'utilisation
Etui en cuir
Boîtier
29
1.
2.
3.
4.
5.
6.
7.
8.
9.
10.
11.
12.
Ecran OLED
Touche Flèche gauche / Annuler
Touche Flèche droite
Touche Flèche vers le haut
Touche Flèche vers le bas
Sélectionner
OK / Copier
Disque dur disponible
Connexion électrique (CC)
Commutateur marche-arrêt
Connexion USB
Câble USB (pour ordinateur)
Remarque: Veuillez vérifiez le contenu de la livraison avant la mise en marche du produit. En cas de pièces
manquantes, veuillez contacter votre revendeur spécialisé.
Aperçu du produit
Heure
Etat de charge
Fonction
1.Ecran OLED (menu principal)
Mise en service
Chargement de la batterie
L'appareil est doté d'une batterie lithium-ion puissante. Afin de charger la batterie, branchez l'adaptateur
secteur fourni à la prise électrique de l'appareil.
30
Le symbole de batterie indique l'état de charge actuel sur l'écran OLED pendant le chargement.
La recharge complète de la batterie dure env. 2 heures en général. A la fin du processus de recharge, le
symbole de batterie sur l'écran OLED indique que la batterie est entièrement rechargée.
Batterie entièrement rechargée
L'appareil se met automatiquement hors tension lorsque la batterie devient trop faible.
L'appareil émet deux sons pour indiquer la mise hors service. Cette fonction protége le disque dur et la batterie.
Allumer l'appareil
Rebrancher l'adaptateur
Afin de protéger le disque dur et vos données des pointes de tension, n'allumez pas l'appareil pendant que
le processus de chargement est en cours. Si vous désirez utiliser l'appareil, vous devez d'abord interrompre
l'alimentation. Débranchez l'adaptateur avant d'allumer l'appareil. Vous pouvez ensuite rebrancher l'adaptateur. Le chargement s'effectue de manière habituelle.
Débrancher l'adaptateur
Remarque 1 : Il est recommandé de recharger la batterie entièrement avant la première utilisation.
Remarque 2 : Seul la batterie et le bloc d'alimentation fournies doivent être utilisés ! L'utilisation d'autres
batteries ou bloc d'alimentations peut entraîner un mauvais fonctionnement de l'appareil.
Réglage du jour et de l'heure
Lorsque vous mettez en marche l'appareil pour la première fois, le système vous demande de régler le jour
et l'heure actuels. L'appareil est doté d'une horloge intégrée. Si vous copiez des fichiers d'un appareil photo
numérique, lecteur de cartes, lecteur MP3 ou d'autres périphériques, le système crée un dossier avec la
date correspondante automatiquement.
1. Sélectionnez l'option de menu désirée avec les touches « Flèche droite » et « Flèche gauche ». Réglez la
valeur avec les touches « Flèche vers le haut » et « Flèche vers le bas ».
2. Appuyez sur la touche « OK » après avoir effectué tous les réglages. Le système vous invitera à confirmer
l'opération. Appuyez sur « OK » afin de confirmer les réglages, ou appuyez sur la touche « Flèche gauche »
afin d'annuler l'opération.
Remarque : Vous pouvez régler le jour et l'heure à tout moment. Passez à l'option « Information » dans le
menu principal, et sélectionnez l'entrée « Set Time » (Régler l'heure) afin d'effectuer le réglage.
31
L'appareil peut être utilisé comme disque dur externe avec un ordinateur.
Suivez les consignes suivantes. Si votre ordinateur travaille sous Windows 98, vous devez installer le pilote
avant de brancher l'appareil à l'ordinateur.
Branchement à l'ordinateur
Copier tous les fichiers d'un appareil photo numérique ou d'autres périphériques
Brancher le lecteur de cartes
2. Branchez l'appareil photo numérique, le lecteur MP3, la clé USB ou le lecteur de cartes.
Brancher l'appareil photo
numérique
Brancher le lecteur MP3
Brancher la clé USB
33
4. Pendant la transmission, une barre indiquant le progrès de l'opération apparaît sur l'écran OLED.
Appuyez sur la touche « Flèche gauche », afin d'annuler l'opération de sauvegarde.
3. Afin de sélectionner tous les fichiers du périphérique branché, sélectionné l'option « Back up » dans le
menu principal. Le système vous invitera à confirmer l'opération. Appuyez sur la touche « OK » afin de
confirmer l'opération de sauvegarde. Le système commence à copier les données.
Connexion USB
1. Assurez-vous que l'appareil est sous tension lorsque vous branchez un appareil photo numérique ou un
périphérique USB.
Vous pouvez copier tous les fichiers d'un appareil photo numérique ou d'un périphérique USB externe
comme un lecteur MP3, une clé USB ou un lecteur de cartes. Suivez les consignes suivantes.
Consultez la liste de compatibilité d'appareils photo dans le présent manuel ou sur l'emballage. Si votre
appareil photo numérique n'apparaît pas dans la liste, testez l'appareil avant l'achat. Vous pouvez aussi
connecter votre appareil photo via un lecteur de carte.
1. Assurez-vous que l'appareil est hors tension avant de brancher le câble USB intégré à un ordinateur ou
un ordinateur portable.
2. Retirez le câble USB intégré de l'appareil, et connectez-le à un port USB de votre ordinateur.
3. L'appareil est reconnu et installé automatiquement. Une nouvelle icône de disque dur apparaît dans votre
« Poste de travail ». L'écran OLED de l'appareil affiche le message « Connect to PC » (Connecter à
l'ordinateur). L'appareil est alors prêt à fonctionner
Remarque :
Lorsque l'appareil est branché à un ordinateur, l'alimentation en courant se fait par l'ordinateur. Certains
ordinateurs ne produisent pas assez d'énergie pour pouvoir utiliser des disque durs USB externes. Dans ce
cas, l'appareil ne fonctionne pas correctement. Afin de résoudre le problème, branchez le bloc d'alimentation à l'appareil avant de le raccorder à l'ordinateur.
Brancher l'adaptateur
4. Installez les pilotes pour Windows 98.
Si votre ordinateur travaille sous Windows 98, vous devez installer le pilote avant de brancher l'appareil à
l'ordinateur. Vous pouvez télécharger les pilotes pour Windows 98 de notre site Web.
www.hama.de
32
5. Le système émet un son dés que l'opération de sauvegarde est terminée. Le système retourne au menu
principal.
6. L'appareil crée automatiquement un nouveau dossier avec la date actuelle. Exemple : Vous avez
sauvegardé les fichiers de votre appareil photo numérique le 25 décembre 2004. Les fichiers ont été
enregistré dans le dossier « 12250400 ». Dans ce dossier, les fichiers sont enregistrés dans le dossier
« DSK00000 » lors de la première sauvegarde, dans le dossier « DSK00001 » lors de la deuxième
sauvegarde, etc.
9. Le système émet un son dés que l'opération de transmission est terminée. Le système retourne au menu
principal.
8. Appuyez sur la touche « OK » afin de confirmer la transmission. Pendant la transmission, une barre
indiquant le progrès de l'opération apparaît sur l'écran OLED. Appuyez sur la touche « Flèche gauche »
afin d'annuler l'opération de transmission.
35
7. Le système vous invitera à confirmer l'opération. Appuyez sur « OK » afin de confirmer l'effacement, ou
appuyez sur la touche « Flèche gauche » pour annuler l'opération. La touche « Flèche gauche » permet
d'annuler l'effacement en cours.
8. Le système émet un son dés que l'opération d'effacement est terminée.
(Remarque : Vous pouvez copier jusqu'à 42 fichiers ou dossiers.)
1. Assurez-vous que l'appareil est sous tension lorsque vous branchez un appareil photo numérique ou un
périphérique USB.
2. Branchez l'appareil photo numérique, le lecteur MP3, la clé USB ou le lecteur de cartes. (Si vous désirez
effacer uniquement des fichiers enregistrées sur le disque dur local, vous pouvez ignorer cet étape et
passer à l'étape 3).
3. Sélectionnez l'entrée « Delete » (Effacer) dans le menu principal.
4. Un menu apparaît, dans lequel vous pouvez sélectionner le périphérique sur lequel vous souhaitez effacer
des fichiers.
Local HDD : disque dur interne du système
USB Device : L'appareil photo numérique, le lecteur MP3, la clé USB ou le lecteur de cartes
connecté(e) au système.
5. Sélectionnez le dossier ou les fichiers désirés avec les touches « Flèche droite », « Flèche gauche »,
« Flèche vers le haut » et « Flèche vers le bas ». Sélectionnez ensuite les fichiers que vous désirez copier
avec la touche « Select » (Sélectionner).
6. Vous pouvez effacer plusieurs fichiers ou dossiers. Appuyez sur la touche « OK » afin de confirmer votre
sélection et de démarrer l'effacement.
Effacement de fichiers
Remarque : Vous pouvez copier jusqu'à 42 fichiers ou dossiers.
Remarque : Il n'est pas possible de copier des données enregistrées sur le disque dur ou entre deux périphériques USB.
Copier des fichiers spécifiques de / sur un périphérique USB
1. Assurez-vous que l'appareil est sous tension lorsque vous branchez un appareil photo numérique ou un
périphérique USB.
2. Branchez l'appareil photo numérique, le lecteur MP3, la clé USB ou le lecteur de cartes.
3. Afin de sélectionner les fichiers que vous désirez copier du périphérique branché, sélectionné l'option
« Copy » (Copier) dans le menu principal.
4. Un menu apparaît, dans lequel vous pouvez sélectionner le périphérique duquel vous souhaitez copier les
fichiers.
Sélectionnez « USB Device » (Périphérique USB) comme source.
Local HDD : disque dur interne du système
USB Device : L'appareil photo numérique, le lecteur MP3, la clé USB ou le lecteur de cartes
connecté(e) au système.
5. Sélectionnez le dossier ou les fichiers désirés avec les touches « Flèche droite », « Flèche gauche »,
« Flèche vers le haut » et « Flèche vers le bas ». Sélectionnez ensuite les fichiers que vous désirez copier
avec la touche « Select » (Sélectionner).
6. Vous pouvez sélectionner plusieurs fichiers ou dossiers. Appuyez sur la touche « OK » afin de confirmer
la sélection.
7. Le système passe directement au disque dur local pour vous permettre de sélectionner un dossier cible.
Changez de dossier avec les touches « Flèche droite », « Flèche gauche », « Flèche vers le haut » et
« Flèche vers le bas ». Sélectionnez ensuite le dossier cible avec la touche « Select » (Sélectionner).
34
Informations
Liste de compatibilités pour appareils photos numériques
Epson
Fujifilm
Inovix
Kodak
Konica
Konica Konica KD-500Z
Konica KD-310Z
Kyocera Kyocera SL300R
Kyocera S3L
Kyocera S5R
Minolta Minolta A2,
Minolta Z2,
Minolta A1,
Minolta Z1,
Minolta X2D,
Minolta Xt,
Minolta F200,
Minolta F300,
Minolta DiMAGE XI,
Minolta DiMAGE 7Hi,
Minolta DiMAGE 5
Mustek DV 3032,
DV 4000,
DV 5000,
DV 5500,
MDC 4000,
MDC 5000,
MDC 5500Z
Nikon
Nikon 8700,
Nikon 5700,
Nikon 5200,
Nikon 3200,
Nikon 4200
L'appareil affiche des informations utiles sur l'état d'opération actuel. Vous pouvez afficher l'espace disque
disponible, régler l'heure et le jour, vérifier la version du logiciel et sélectionner une langue.
Sélectionnez l'entrée « Information » dans le menu principal.
Sélectionnez l'option « Free Space » (Espace disponible) dans le sous-menu.
L'appareil affiche l'espace disponible sur le disque dur et les périphériques USB branchés.
Appuyez sur « OK » afin de retourner au menu principal.
Espace disque disponible
1.
2.
3.
4.
Sélectionnez l'entrée « Information » dans le menu principal.
Sélectionnez l'entrée « Version » dans le sous-menu.
Le système affiche la version du logiciel de votre appareil.
Appuyez sur « OK » afin de retourner au menu principal.
Version du logiciel
1.
2.
3.
4.
Régler le jour et l'heure
1. Sélectionnez l'entrée « Information » dans le menu principal.
2. Sélectionnez l'option « Set Time » (Régler l'heure) dans le sous-menu.
3. Sélectionnez l'option de menu désirée avec les touches « Flèche droite » et « Flèche gauche ». Réglez la
valeur avec les touches « Flèche vers le haut » et « Flèche vers le bas ».
4. Appuyez sur la touche « OK » après avoir effectué tous les réglages. Le système vous invitera à confirmer
l'opération. Appuyez sur « OK » afin de confirmer les réglages, ou appuyez sur la touche « Flèche gauche »
pour annuler l'opération.
Language (Langue)
Sélectionnez l'entrée « Information » dans le menu principal.
Sélectionnez l'option « Language » dans le sous-menu.
Les langues disponibles apparaissent. Sélectionnez la langue désirée.
Appuyez sur « OK » afin de retourner au menu principal.
37
Nikon
Nikon 3700,
Nikon SQ,
Nikon 3100,
Nikon 4100,
Nikon 4300,
Nikon 4500,
Nikon 5000,
Nikon D100,
Nikon D70
Olympus Alle
Panasonic Panasonic FX1,
Panasonic FX7,
Panasonic Lumix FZ1,
Panasonic NV65
Pontax
Pentax Optio S
Premier DS 4330,
DS 3080S
Sanyo
Alle
Sony
Alle
Samsung Samsung Digimax V5,
Samsung Digimax V3,
Samsung Digimax 202,
Samsung Digimax XT
Toshiba 3310,
AstraPix 610
Toshiba
Umax
Remarque : Si votre appareil photo numérique n'est pas supporté, vous pouvez le connecter à l'appareil via
un lecteur de carte.
Remarque : La compatibilité d'autres appareils photo numériques est en cours d'étude. Vous trouverez la
dernière version de la liste de compatibilité sur notre site Web.
Epson L-410
Fujifilm S20 Pro
Fujifilm A340
Fujifilm S7000
Fujifilm S5000
Fujifilm F420
Fujifilm A210
Fujifilm A310
Fujifilm F700
Fujifilm M603
Fujifilm F601
Fujifilm S602
Fujifilm F410
Fujifilm S304
Fujifilm F401
FinePix 2650
Fujifilm Q 1
Fujifilm 3800
Fujifilm F440
Fujifilm F450
Alle
Kodak DX340
Kodak LS743
Kodak DX7630
Kodak DX 6490
Kodak LS633
Konica KD-400Z
Konica KD-410Z
Marque Modèle:
AipTek Alle
BenQ
DC 140
DC C40
DC 2410
DC 5330
DC 2310
DC 2300
Casio
Casio EX-Z40
Casio EX-Z55
Canon Canon Pro1
Canon S1 IS
Canon IXUS 430
Canon IXUS 500
Canon A75
Canon IXUS I
Canon A80
Canon A95
Canon G5
Canon G6
Canon A70
Canon A60
Canon A300
Canon S50
Canon IXUS Ils
Canon IXUS 40
Canon IXUS 400
Canon S60
Canon A400
1.
2.
3.
4.
36
Caractéristiques techniques
Matériel
Batterie
Batterie lithium-ion
3,6 Volt
750 mAh
Dimensions : 79 mm x 69 mm x 22 mm
Connexions
1 x port USB
1 x commutateur marche-arrêt
1 x prise de courant 5 V
1 x câble USB avec connecteur type A
USB 2.0
Highspeed (480 MBit/s)
Support pour Périphérique
de stockage de masse (MSD)
Supporte la norme OTG (On-The-Go)
Kompatible Dateisysteme:
- FAT16
- FAT32
Adaptateur
Tension secteur : 100 - 240 Volt
Sortie : 5 V / 2,5 A
Durée de charge : 2 heures
Poids : 150 g
Ecran LCD et touches
Ecran OLED 1 pouce
Eclairage d'arrière-plan bleu au contraste élevé
6 touches (Flèche droite, Flèche gauche, Flèche vers
le haut, Flèche vers le bas, Sélectionner et OK)
USB 1.1
Fullspeed (12 MBit/s)
Support pour Périphérique de
stockage de masse (MSD)
Supporte la norme OTG (On-The-Go)
Disque dur : Hitachi 1,8 pouces, 20 Go, 4200 tr/min
Logiciel
Systèmes d'exploitation compatibles:
- Windows XP/ME/2000
- Mac 9.2/10.2
Normes
CE, FCC, BSMI, VCCI, C-Tick, CCC
Accessoires
Boîtier, chargeur et étui en cuir
Forum aux questions (FAQ)
En cas de problèmes durant l'opération de l'appareil, référez-vous aux consignes suivantes. Si ces informations ne permettent pas de résoudre le problème, consultez notre service après-vente.
Question 1 : Est-il possible d'exécuter les fonctions d'hôte USB et de client USB simultanément ?
A:
Il n'est pas possible d'exécuter les deux fonctions simultanément. La fonction hôte USB est
activée lorsque vous mettez l'appareil sous tension. Lorsque vous mettez l'appareil hors
tension, la fonction client est activée.
Question 2 : Pourquoi l'appareil se met-il automatiquement hors tension après un certain temps ?
A:
L'appareil est doté d'une fonction d'économie d'énergie. Il se met automatiquement hors
tension après une interruption d'activité de plus de 5 minutes.
38
Question 3 : Pourquoi l'appareil ne fonctionne-t-il pas lorsqu'il est branché à un ordinateur ou un ordinateur
portable ?
Certains ordinateurs ne produisent pas assez d'énergie pour pouvoir utiliser des disque durs
USB externes. Raccordez l'appareil à l'adaptateur secteur.
A:
Question 4 : Pourquoi est-ce que le commutateur marche/arrêt ne fonctionne pas comme d'habitude
pendant le chargement ?
A:
Pour protéger le disque dur et vos données des pointes de tension, n'allumez pas l'appareil
pendant que le processus de chargement est en cours. Si vous désirez utiliser l'appareil, vous
devez d'abord interrompre l'alimentation. Débranchez l'adaptateur avant d'allumer l'appareil.
Vous pouvez ensuite rebrancher l'adaptateur. Le chargement s'effectue de manière habituelle.
Question 5 : Comment faire pour afficher les fichiers sur le disque dur local ou un périphérique USB ? Je ne
veux pas copier ni effacer les fichiers, mais uniquement les afficher.
A:
Vous pouvez par exemple sélectionner l'option « Delete » (Effacer) dans le menu principal.
Sélectionner ensuite le lecteur (disque dur local ou périphérique USB) dont vous désirez
afficher le continu. Vous pouvez parcourir les dossiers et les fichiers avec les touches « Flèche
droite », « Flèche gauche », « Flèche vers le haut » et « Flèche vers le bas ». Si vous n'appuyez
pas sur la touche « Select » (Sélectionner), vous n'effacez pas de fichiers.
Question 6 : Mon ordinateur reconnaît du nouveau matériel mais n'affiche pas de données. Que faire ?
A:
Vérifiez que le lecteur est formaté ou consultez notre service après-vente.
Question 7 : Pourquoi l'appareil affiche-t-il un message d'erreur lorsque je branche mon appareil photo
numérique ?
A : (1)
This device has been formatted to other FAT format (L'appareil a été formaté pour un autre
système FAT) : Si le périphérique est formaté pour FAT 16 ou NTFS, vous rencontrerez
éventuellement des problèmes lors de la connexion d'un appareil photo numérique.
(2)
Please upgrade new firmware (Actualisez le Firmware) : Consultez notre site Web
pour vous assurer que le système supporte votre appareil photo numérique.
Vous pouvez actualiser le Firmware de votre système si nécessaire.
(3)
Wrong format of memory card (Format de carte de mémoire non incorrect) : Insérez la carte
dans un appareil photo numérique pour la formater. Vous pouvez aussi insérer la carte mémoire
dans un lecteur de carte afin de la formater pour le système de fichiers FAT32 sur un
ordinateur. L'ordinateur devrait ensuit pouvoir transmettre les données du périphérique.
(4)
A broken-down USB cable (Câble USB défectueux) : Vérifiez que le câble USB fonctionne
correctement. Branchez votre caméra à l'ordinateur. S'il n'est pas possible d'établir la
connexion avec le câble USB, remplacez-le et branchez de nouveau la caméra à l'ordinateur.
Si la caméra transmet des images sur l'ordinateur mais ne peut pas établir de connexion avec
le système, consulter le service après-vente.
Question 8 : Est-il possible de transmettre des images de mon appareil photo numérique pendant que je
prends des photos ?
A:
Le système ne peut pas transmettre de données pendant l'enregistrement de fichiers images
ou vidéo. Vous devez activer le mode aperçu de votre appareil photo numérique afin d'établir
une connexion avec le système.
39
Question 9 : Je ne peux plus raccorder ma caméra au système. Que faire ?
A : (1)
L'appareil a été formaté. L'appareil est formaté pour le système FAT32 par défaut mais peut
également être formaté pour le système NTFS. Dans ce cas, l'appareil n'est plus entièrement
compatible avec votre appareil photo numérique. (Tous les appareils photos numériques
utilisent le système FAT32).
(2)
Format de carte de mémoire non supporté. Insérez la carte dans un appareil photo numérique
pour la formater. (Tous les appareils photos numériques utilisent le système FAT32). Vous
pouvez aussi insérer la carte mémoire dans un lecteur de carte afin de la formater pour le
système de fichiers FAT32 sur un ordinateur. L'ordinateur devrait ensuit pouvoir transmettre les
données du périphérique.
Question 10: L'appareil produit des sons inhabituels lors de l'utilisation. Que faire ?
A:
Vérifiez si l'appareil a été endommagé par des chocs. Le lecteur de disque dur doit fonctionner
sans bruits inhabituels. Consultez notre service après-vente. Nous vérifions le lecteur de
disque dur pour résoudre le problème.
Question 11: Est-il possible d'utiliser l'appareil comme lecteur amorçable ?
A:
Utilisez un logiciel de sauvegarde comme Norton Ghost pour sauvegarder votre disque dur ou
votre système. Créez une disquette ou un CD-ROM de démarrage avant d'effectuer la
sauvegarde de votre disque dur ou votre système. Les opérations de sauvegarde sur un disque
dur externe ne sont pas supportées par tous les ordinateurs. Si votre ordinateur ne supporte
pas le démarrage à partir d'un disque dur externe, vous pouvez ajouter le fichier de démarrage
aux fichiers de sauvegarde du disque dur ou du système. Vous pouvez ainsi protéger vos
données importantes.
Question 12: Comment faire pour rapidement sauvegarder un ordinateur ?
A:
Vous pouvez par exemple diviser le disque dur de votre ordinateur en C : et D :. Installez ensuite
le système d'exploitation et vos application sur le lecteur C : (p.ex. Windows,
Office et Adobe, etc.), et enregistrer vos données sous D : (.doc, .xls, .ppt, etc.). Vous pouvez
ainsi protéger vos fichiers et vos données d'application.
Question 13: Si mon ordinateur est infecté par un virus, l'appareil peut-être affecté par le virus ?
A:
Normalement non. La plupart des virus n'affecte que les fichiers .dll, .com, .exe, etc. Il
produisent des blocages du système. Si vous transmettez des documents du type .doc, .
xls, .ppt, .jpg, etc., cela n'affecte pas l'appareil.
Question 14: Pourquoi la fonction hôte n'est pas disponible bien que le lecteur de disque dur ait été
formaté ?
(Le lecteur de disque dur est formaté pour le système FAT32 par défaut. Les dommages
provoqués par un formatage de la part de l'utilisateur ne sont pas pris en charge par la
garantie.)
A:
Lors du formatage du disque dur de l'appareil, toutes les données systèmes sont effacées. Afin
de pouvoir utiliser la fonction hôte, vous devez attendre environ 40 secondes jusqu'à ce que les
données systèmes soit rétablies. Vous pouvez également accéder à l'appareil à partir de votre
ordinateur afin de rétablir les données systèmes.
40
41