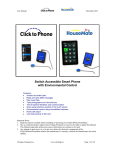
1
User Manual February 2014 ClickToPhone/HouseMate the Smart way to control your world Software version 90 Features:Answer and make calls Read and write SMS messages Play music files Take photographs and view pictures Text-to-speech feedback and communication Scan using switches, joystick or the touch screen Environmental control using HouseMate hardware Call bell output User data backup to SD card Important Notes: 1. This manual assumes that you are familiar with the operation of an Android SmartPhone and should be read in conjunction with its user manual. 2. Read this manual carefully before installing or operating your ClickToPhone/HouseMate. 3. Due to continuous product improvement Unique Perspectives reserves the right to update this Manual. This Manual supersedes all previous issues which must not continue to be used. 4. Any attempt to gain access to or in any way abuse the electronic components of the ClickToPhone/HouseMate renders the manufacturer’s warranty void and the Manufacturer free from liability. ©Unique Perspectives www.click2go.ie Page 1 of 185 User Manual February 2014 Contents Page 5 Introduction 1. Getting Started 1.1 Downloading the software 1.2 Installation Wizard 1.3 Installing the ClickToPhone apk bundle 1.4 Setup Wizard 1.5 Pairing the HID 1.6 Optmising your phone’s settings 1.7 Normal operating procedure 1.8 Disabling the phone’s Home key 1.9 Choosing Stand alone mode 1.10 Reconfiguring the HID 11 11 11 13 14 19 20 20 21 22 22 2. Homepage 2.1 Selecting a user level 2.2 Homepage options 2.3 Editing the homepage 2.4 Appearance Options 24 24 25 27 29 3. Basic Operation & Scanning Methods 3.1 Selecting a Scanning Method 3.2 Other Scanning Options 31 31 35 4. Contacts 4.1 Dialing a Contact 4.2 Writing a Text 4.3 Phrasebook 4.4 Managing Contacts 39 41 42 44 47 5. Messages 5.1 Viewing SMS messages 5.2 Conversations 5.3 Deleting an SMS 5.4 Re-Sending a Draft 5.5 Adding to contacts 5.6 Forwarding a message 51 51 55 56 57 58 58 6. Phone 6.1 Dialing a Number 6.2 Call History 60 60 61 7. Emergency Alarns 63 8. Reminders 8.1 Using Reminders 8.2 Managing Reminders 8.3 Selecting a reminder photo 67 67 70 72 ©Unique Perspectives www.click2go.ie Page 2 of 185 User Manual February 2014 8.4 Selecting a sound 72 9. Text to speech 9.1 Using text to speech 9.2 Using a 3rd party Aac app 9.3 Using an external Aac device 74 74 75 76 10. Music 78 11. Photo Album 82 12. Camera 85 13. Clock 87 14. Applications 14.1 Launching another Application 14.2 Numeric and Text keyboards 89 89 15. Mouse Pointer mode 15.1 Mouse pointer mode 15.2 Keyboard mode 15.3 Virtual mouse pointer 15.4 Automatic pointer mode 94 94 96 98 101 16. Favorites 103 17. Internet 17.1 Browsing the internet 17.2 Moving the mouse pointer 17.3 Creating bookmarks and entering URLs 105 105 106 108 18. Phone Settings 18.1 Phone Settings 18.2 Go to sleep 18.3 Editing your settings 18.4 Restoring backups 110 110 111 113 114 19. HouseMate 19.1 Using HouseMate 19.2 Editing a Cell 19.3 Editing a Grid 19.4 Creating and populating a new grid 19.4.1 Importing a grid template 19.4.2 Using the wizard 19.4.3 Populating a grid one cell at a time 19.4.4 Difference between commands and InfraRed signals 19.5 Recording an InfraRed signal 19.5.1 Recording a toggle signal 19.5.2 Recording a macro 116 117 117 121 124 125 126 127 128 128 131 133 ©Unique Perspectives www.click2go.ie Page 3 of 185 User Manual February 2014 19.5.3 Recording a macro with OK command 19.5.4 Recording a push button code 19.6 Using the signal databases 19.7 Examining the InfraRed Macros 19.7 Erasing InfraRed signals 19.8 Advanced Settings 19.9 EasyWave 19.10 Z-Wave 19.11 Alarms 135 136 137 139 140 141 145 147 153 20. Hardware Settings 20.1 ClickToPhone hardware settings 20.2 HouseMate hardware settings 155 156 158 21. Backup & Restore & Factory Reset 21.1 Backing up your project 21.2 Restoring a backup 21.3 Advanced backup management 21.4 Factory reset 21.5 Recreating the word prediction file 21.6 Recreating the Phrasebook 160 160 162 162 163 163 163 22. Status Reporting 22.1 Report frequency and timeout 22.2 SMS reports 165 165 166 23. Connections 23.1 ClickToPhone connections & battery 23.2 HouseMate & HouseMate+ connections 23.3 HouseMatePro connections 168 169 171 173 24. Hardware specifications 175 25. Intended use, Safety and Misuse Warnings 176 26. Maintenance 178 27. CE Marking 179 28. Warranty & Sales and Service Information 180 29. Annex 1: Quick Guide 181 ©Unique Perspectives www.click2go.ie Page 4 of 185 User Manual February 2014 Introduction Imagine being able to do everything from one device: Turn on your room lights and close the curtains. Change channels on your TV and turn up the heating. Answer a phone call and send some texts. Browse the Internet, play some music or watch YouTube. HouseMate hardware in combination with the ClickToPhone App enables you to do this and much more. Read on and discover why this solution, together with an Android smart-phone or tablet is the smart way to control your world. HOW DOES IT WORK? HouseMate/ClickToPhone is a combined hardware/app solution that enables a switch user to fully control their Android smart-phone or tablet and use it to operate other equipment in their home or work environment using InfraRed, EasyWave or Z-Wave signals. TELL ME ABOUT THE HARDWARE The hardware is controlled using the built-in switch or by connecting an external switch or joystick. It can also be interfaced to R-Net, DX and Curtis wheelchair control systems. It is powered by a rechargeable Li-Ion battery and contains a powerful omnidirectional InfraRed transmitter and a Bluetooth radio module. The hardware communicates the switch presses to the app on the smart-phone. The app, called ClickToPhone, uses intuitive scanning techniques and a rich graphical interface to present different options to the user. If the user chooses an environmental control option then ClickToPhone will instruct the HouseMate hardware to transmit the corresponding InfraRed code. The Bluetooth connection between the phone and HouseMate is reliable and fast. When the user presses their switch the phone wakes up immediately and is ready for use. HouseMate can be fitted with a radio frequency Nurse call pager. This alarm can be activated at anytime by pressing the switch for a defined period of time. Importantly this feature is independent of the SmartPhone and Bluetooth connection. ©Unique Perspectives www.click2go.ie Page 5 of 185 User Manual February 2014 A further possibility is the control of EasyWave or Z-wave devices. HouseMate can be fitted with an EasyWave transmitter on request. Z-wave requires the installation of a Z-wave enabled router such as a Vera 3 and Z-wave appliances such as sockets, light switches, thermostats etc. The phone communicates with the Vera using Wifi which in turn communicates with the appliances using Zwave. ©Unique Perspectives www.click2go.ie Page 6 of 185 User Manual February 2014 TELL ME ABOUT THE APP ClickToPhone is an Android app that has been specially designed for switch access and can be downloaded free from Google play. It will run on any device running Android 2.2 or higher. ClickToPhone is a comprehensive user interface that simplifies and integrates the functions of a SmartPhone together with environmental control seamlessly into one package. With a single switch a user can make calls, send and receive texts, view pictures, play music, access the internet and much more. USE IT AS A MOBILE PHONE... Wake up the phone, answer and make calls, send and receive SMS text Messages. Manage and edit contacts. View missed calls and check your voice Mail. USE IT AS AN ENVIRONMENTAL CONTROL... 16 grids fully customizable for size and content. Comprehensive set of 600+ symbols with ability to import photographs and other pictures. 250 IR codes can be recorded into HouseMate or choose from a database of commonly used codes. ©Unique Perspectives www.click2go.ie Page 7 of 185 User Manual February 2014 USE IT FOR VOICE OUTPUT... ClickToPhone can be used to speak a message using the text-to-speech feature. A variety of voices in different languages are available from Google play and voice output can also be used for auditory scanning and prompts USE IT FOR SECURITY... Besides HouseMate’s ability to activate a nurse call system, ClickToPhone offers additional security by being able to send an SMS to a pre-defined number with a link to a Google map showing the user’s last known location. USE IT AS A PERSONAL ORGANISER... The Reminders feature can be used to remind a user of upcoming events using symbols, photos and text. Reminders can be scheduled to go off at intervals before an event to ensure that a user has plenty of time to plan and prepare. ©Unique Perspectives www.click2go.ie Page 8 of 185 User Manual February 2014 USE IT FOR FUN AND ENJOYMENT... Switch accessible MP3 player? Switch accessible camera? Switch accessible Internet? Yes, yes and yes! And if there is something you can’t do within ClickToPhone you can download and control any app thanks to HouseMate’s support of Android’s HID profile. WHAT ARE THE KEY FEATURES? Hardware features Control of any device that can be operated by InfraRed signals including light switches, power sockets, bed controls and door openers. Powerful InfraRed learn/transmit hardware. Single codes, toggle codes, macros and safety codes can be recorded. Pre-recorded database of common InfraRed signals including GEWA, Possum, Siemens KNX, FellerBeamIt, UPC and SKY. Control of EasyWave devices with a built-in 32 channel RF transmitter. Control of Z-wave devices over Wifi using a Vera Z-wave router. Can be fitted with an internal radio frequency nurse call pager. Single switch, two switch and joystick inputs. Interface cables for R-Net and DX wheelchair control systems. Direct wireless control from a compatible Curtis Instruments joystick. Long-life rechargeable Li-Ion battery with mini USB charger. Audible low battery warning, Bluetooth connection, InfraRed transmit and charging status LEDs. Control of an external device using relay output. Software features Primary functions: Wake-up, answer/make calls, send/receive texts, environmental control. Secondary functions: Music player, photo album, camera, internet, reminders, location. Scanning options: Automatic, short click, two switch, adjustable scanning speed, acceptance time, ©Unique Perspectives www.click2go.ie Page 9 of 185 User Manual February 2014 Auditory scanning and many other programmable options. Voice output for text-to-speech, auditory scanning and read-out of SMS messages. Voice recognition for environmental control. Word prediction and word anticipation. Localized into different languages. Control over all Apps on Google Play guaranteed using HouseMate’s HID mouse and an Android device supporting the HID (Human Interface Device) profile. ClickToPhone can be downloaded free from Google play with automatic updating as new versions become available. Can be installed on any device running Android 2.2 or higher including TV dongles. This allows the use of large HDMI screens for people with visual impairments. ©Unique Perspectives www.click2go.ie Page 10 of 185 User Manual 1 February 2014 Getting started Note: If you have purchased a complete system from your supplier, including a phone, then the steps below have probably already been carried out. In this case all you need to do is confirm that your Bluetooth hardware connects with your phone when you press your switch or joystick. See section 1.7 “Normal Operating procedure” below. 1.1 Downloading the software Install ClickToPhone from the Android Market. Search for ClickToPhone and click the install button. Alternatively you can install from our website. Launch a browser on your phone and follow the instructions at http://www.click2go.ie/resources/manuals/clicktophone-android-app/ 1.2 Installation Wizard Now, open the application and let the Installation wizard guide you through the following steps: Installation Wizard Step 1: Input Method Check ClickToPhone is a soft-keyboard app. Ensure that ClickToPhone is enabled as and input method and then press the Back key. ©Unique Perspectives www.click2go.ie Page 11 of 185 User Manual February 2014 Installation Step 2: Activate as Device Administrator ClickToPhone needs Device Administrator privileges in order to turn off the screen. Click on the Activate button. Installation Step 3: Disable Screen Lock For reliable wake-up using your switch or joystick across all Android devices and versions we recommend that you disable the screen lock. Click on the Continue button. Then choose Screen Lock and the ensure that it is set to none. When you are finished press the Back key. ©Unique Perspectives www.click2go.ie Page 12 of 185 User Manual February 2014 Installation Step 4: Select Input Method Now, to start the main ClickToPhone application, you must select it as the current input method. Click on the Continue button and then choose ClickToPhone from the input method picker dialog. After a moment ClickToPhone should begin. 1.3 Installing the ClickToPhone bundle of Apps Now you should be prompted as to whether or not you want to install the apk bundle. ClickToPhone has been optimized to work with a set of default apps. Click on the Yes button to start the installation process. ©Unique Perspectives www.click2go.ie Page 13 of 185 User Manual February 2014 Android Music In Expert mode ClickToPhone uses this app for playing music files. Click OK to install it. When the installation is finished click Done (not Open) to move onto the next app. QuickPic In Expert mode ClickToPhone uses this app for looking at pictures. Click OK to install it. When the installation is finished click Done to move onto the next app. QuickSnap ClickToPhone uses this app to take pictures. Click OK to install it. DeskClockPlus ClickToPhone uses this app to show you the time. Click OK to install it. OperaMini In Expert mode ClickToPhone uses this app to browse the Internet. Mood ICS This is an optional live wallpaper that you can use as a background. 1.4 Setup Wizard After the apk bundle has been installed you should be prompted to run the setup wizard. Click Yes. ©Unique Perspectives www.click2go.ie Page 14 of 185 User Manual February 2014 Setup Wizard Step 1: Choose a user level Four different user levels are available. Choose the one that is most suitable. You can always change this again at a later stage as you become more competent with the software. Setup Wizard Step 2: Choose the homepage contents Depending on the user level you selected a set of possible homepage items will be displayed. Choose the items you want to be in the homepage by clicking on them. ©Unique Perspectives www.click2go.ie Page 15 of 185 User Manual February 2014 Setup Wizard Step 3: Choose the homepage style The homepage can be styled as a grid or a list. Choose the style you prefer. Setup Wizard Step 4: Choose the App theme The appearance of the ClickToPhone app is highly customizable. Four example themes are available to get started with. You can change the colors and font sizes and other settings at a later stage under Project Settings->Preferences->Appearance. For now, choose the theme you prefer. ©Unique Perspectives www.click2go.ie Page 16 of 185 User Manual February 2014 Setup Wizard Step 5: Choose a scanning method The scanning method is how you are going to control the app. Choose the scanning method that best suits your ability and input device. If you choose Automatic scanning you will be prompted to choose a scanning speed also. Setup Wizard Step 6: Pairing your hardware The final step is to pair your hardware with the phone. Click on the Continue button to be brought to the phone’s Bluetooth settings. ©Unique Perspectives www.click2go.ie Page 17 of 185 User Manual February 2014 Follow these steps: 1. Ensure that Bluetooth is switched on. 2. Turn on your HouseMate or ClickToPhone hardware by pressing a connected switch 3. Click on the Scan for devices option 4. After a moment you should see your device appear in the list of available devices. 5. Click on the device. The PIN code will be entered automatically, you will be brought back to the ClickToPhone homepage, and your hardware should connect automatically. Note 1: On some devices (Android 4.3 and 4.4) the PIN code may not enter automatically. In this case type “1234” manually, and after the pairing has been made, press the back key to return to ClickToPhone. Note 2: It is critical that you have charged your HouseMate device for at least 1 hour before you attempt to make your first pairing. Note 3: You can re-run the Setup Wizard at any time by pressing the menu key and then choosing Project Settings->Setup Wizard. Further options are available under Preferences. If the pairing and connection was successful the ClickToPhone status should have change from Connecting to Hardware… to Connected. Press your switch and confirm that software starts scanning down through the list items. ©Unique Perspectives www.click2go.ie Page 18 of 185 User Manual February 2014 Note that the hardware will automatically disconnect after a period of time if you have made no switch presses. This is completely normal behavior and should not be confused with a fault condition. 1.5 Pairing the HID (Human Interface Device) If you wish to use Expert mode and access all Apps then there is a second Bluetooth pairing to be made. HouseMatePro contains a second Bluetooth module called a HID that gives you full control over the Android mouse pointer, thereby allowing you to manipulate any app installed on your phone. Ensure that HouseMate is on and connected. Then press the menu key and then choose Project Settings->Preferences->Bluetooth Setup->Bluetooth settings to be brought back to the phone’s Bluetooth settings. Click on the Scan for devices option and after a moment you should see a new available device called HouseMate HID Mouse. Click on this item and after a moment it should automatically pair. On some devices this may take 2 or even 3 attempts and a fully charged battery is critical for this discover/pairing process to work smoothly. ©Unique Perspectives www.click2go.ie Page 19 of 185 User Manual February 2014 If successful, the Bluetooth icon in the status bar will either turn blue or have 2 horizontal lines either side of it. Click the Back key to return to ClickToPhone. Your HID is now ready for use and you will be able to move a crosshairs on the screen and perform gestures and clicks. When your hardware turns off the HID will automatically re-connect when it is turned on again. This is confirmed by a flash of the two Bluetooth LEDs on your HouseMatePro hardware. Note: The HID functions are only available when the user level is set to Expert and that the Android Mouse pointer function is only available on tablets and premium phones running 3.0 or higher. 1.6 Optimising your phone settings Go to SettingsPower and then UNCHECK Enable power saver. Go to SettingsSound and then UNCHECK Touch sounds. Go to SettingsDisplay->Screen timeout and then select 1 minute. Go to SettingsSecurity and ensure that the SIM card lock is DISABLED. 1.7 Normal operating procedure While your Bluetooth hardware is off, the ClickToPhone status will constantly switch between Connecting to Hardware… and No Hardware found as the software continually checks to see if you have turned on your Bluetooth hardware or not. Once you have turned on your hardware, by pressing your switch, the connection should be made within 4 seconds, the phone should wake up and the ©Unique Perspectives www.click2go.ie Page 20 of 185 User Manual February 2014 ClickToPhone status should change from Connecting to Hardware… to Connected. The normal procedure to start using ClickToPhone is as follows: 1. Turn on your Bluetooth hardware by pressing your switch or joystick. After a moment the ClickToPhone status should change from Connecting to Hardware… to Connected and you should hear the Bluetooth connected sound. On ClickToPhone hardware the orange status light will go out. On HouseMatePro hardware the two Bluetooth LEDs should light up. If you have paired the HID these LEDs will flash again after approximately 2 seconds when the HID module has also connected. Finally, if Automatic Scanning is enabled, a scan of the symbols in the homepage will begin. 2. If the phone fails to find the hardware you will get a No Hardware found message in the notification area. 3. After you have connected, the hardware will automatically disconnect after a period of time if you have made no switch presses. This is completely normal behavior and should not be confused with a fault condition. The powerdown time varies between devices. For ClickToPhone it can be set to between 30 seconds and 2 minutes. For HouseMatePro it can be set to 1 minute, 5 mins and Never. See the chapter 20 for further details on this and other hardware options. 1.7 Disabling the phone’s Home key In normal circumstances the ClickToPhone application will remain in the foreground. However if the phone’s home key is pressed then it will disappear. To restart ClickToPhone simply press your switch and it will reappear after a moment. Alternatively you can enable ClickToPhone to be the phone’s Launcher app, effectively disabling the home key. Go to Project Settings->Preferences>Behavior preferences->Soft keys->Home Key. Follow the instructions on the screen to disable the home key. ©Unique Perspectives www.click2go.ie Page 21 of 185 User Manual February 2014 1.8 Choosing Stand alone mode If you are not using any hardware you can set the software to stand alone mode by choosing Stand alone mode from the menu options in the ClickToPhone homepage. The software will no longer try to connect to hardware and will consequently save battery power. It is important to avoid entering stand alone mode by accident as the user will not be able to connect to the phone when in this mode. To return to normal operation choose Connect to hardware from the menu options. If you are concerned that stand alone mode might be selected inadvertently then you might consider disabling the menu key. Choose Project Settings>Preferences->Behavior preferences->Soft keys->Disable Menu key. Once disabled, you can only re-enable the menu key temporarily by holding the back key for 10 seconds. Alternatively go to the phone’s settings app and choosing Language and input->ClickToPhone settings. 1.9 Reconfiguring the HID module Some Android versions (pre ICS and post JB) support the HID in Combi mode. Combi means combination indicating that the HID module acts as a keyboard and a mouse. This mode is useful for controlling popup menus and system dialogs with genuine keyboard keys which otherwise have no effect on these windows. If you wish to use the HID in Combi mode follow the instructions below to change it from a HID Mouse only to a HID Combi. Reconfiguring the HID as a Combi device ©Unique Perspectives www.click2go.ie Page 22 of 185 User Manual February 2014 1. First unpair the HID Mouse. Choose Project Settings->Preferences>Bluetooth Setup->Bluetooth settings. Click on the HouseMate HID Mouse entry (if any) and then choose unpair. 2. Restart your phone. 3. Turn on your HouseMatePro hardware and ensure that it is connected. Then choose Project Settings from the menu option of the ClickToPhone homepage and then choose Preferences->HID preferences->Advanced setup options. 4. Set the HID mode to Mouse/Keyboard Combi. Then select Initialize HID and enter the password “4321”. You should hear a long beep from your HouseMate hardware as the Bluetooth module is re-initialised. 5. Restart your phone again. 6. When ClickToPhone starts again and your hardware has connected choose Preferences->Bluetooth Setup->Bluetooth settings. 4. The phone’s Bluetooth settings window will appear. Choose scan, and, after a moment, if your hardware is on and connected, the HouseMate HID Combi entry will appear. Continue as in section 1.5 previously and make a pairing. Important preferences for this chapter Project Settings->Setup Wizard Project Settings->Preferences->User level Project Settings->Preferences->Appearance preferences Project Settings->Preferences->Behavior preferences->Soft keys Project Settings->Preferences->HID preferences->Advanced setup options Project Settings->Preferences->Bluetooth preferences ©Unique Perspectives www.click2go.ie Page 23 of 185 User Manual 2 February 2014 ClickToPhone Homepage The ClickToPhone homepage is the starting point for all your interactions with your Android SmartPhone. The ClickToPhone homepage is essentially a list of applications that you can select and subsequently control using the ClickToPhone soft keyboards or soft keys. Which applications are listed in the homepage will vary greatly from user to user and depend principally upon the user level setting but also some other preferences. Chapters 4 – 18 explain how to use each of the 15 applications. The image below is a screen shot from a Samsung SII in portrait mode showing all 15 possible homepage items plus 3 application shortcuts. You can use the wizard to choose the user level and the default homepage items. In technician mode you can edit the homepage directly and insert and remove items. To enable technician mode choose Project Settings->Enable Technician Mode. To edit, insert or remove an item make a long click on the item until the Edit homepage popup appears. See section 2.3 below for more details on editing the homepage. 2.1 Selecting a User Level As already discussed, there are four different user levels possible within ClickToPhone. Each user level has a different level of complexity and functionality and the ClickToPhone homepage will change accordingly. It is ©Unique Perspectives www.click2go.ie Page 24 of 185 User Manual February 2014 important to set the user level to match your needs and abilities. You can always change the user level at a later stage as you become used to ClickToPhone and add more complexity. To choose a user level select Project Settings from the ClickToPhone menu options. Then select Preferences->User Level. Select the user level you desire from the following list of options. 2.2 Homepage Options The ClickToPhone homepage can be customized to suit a user’s needs and abilities by including and excluding different applications. The table below shows you which applications are available for each of the four user level settings. Note that the Reminders, Text my location, Text To Speech, HouseMate and Go to sleep/Phone Settings options are available in every user level but will only appear if selected to. The simplest possible setup, for example, is a Beginner with only the Contacts entry in the Homepage. Beginner Intermediate Advanced Expert Contacts Starred ©Unique Perspectives www.click2go.ie Page 25 of 185 User Manual February 2014 Messages Phone Emergency Alarm Reminders Text To Speech HouseMate Internet Music Gallery Camera Clock Favorites Applications Go to sleep Phone Settings By far the simplest way to choose the Homepage content is to run the Setup Wizard and choose Finish Now after you have chosen the homepage options. See section 1.4 for further details. ©Unique Perspectives www.click2go.ie Page 26 of 185 User Manual 2.3 February 2014 Editing the Homepage Before you can edit the homepage you must enable technician mode. Choose Project Settings->Enable Technician Mode. Then you can make a long click on any homepage item until the Edit homepage dialog appears. This dialog allows you to edit the contents of the homepage and quickly access the preferences relating to any homepage item. It is the primary method of configuring your project and it is important that you become familiar with its content. Edit homepage options Setup Wizard launches the setup wizard. This is the easiest way to choose the user level and the homepage items. Note that if you have re-ordered the homepage items, running the wizard may re-arrange items to the default order. See section 1.4 for more details on using the Setup Wizard. Appearance brings you to the appearance preferences related to the Homepage and the entire application. See section 2.4 below. Re-order items allows you to re-order the homepage items two at a time. Simply press the item you want to move and then press where you want to move it to. The two items are swapped. When you are finished press the menu key to exit re-order mode and be able to select homepage items normally. Remove item removes the currently selected item. Insert new item allows you to insert a new item, at the current location, from the list of available items into the homepage. Note that the list of available items will ©Unique Perspectives www.click2go.ie Page 27 of 185 User Manual February 2014 vary depending on which user level you have selected. Click on the item you want to insert. Insert an App allows you to insert a shortcut to an app that is installed on your phone. This option is only available in the expert user level. When you select it the list of apps installed on your phone will be displayed. Choose the one you want and it will be inserted at the current location. Then when you choose the app in the homepage, and if you are connected to your hardware, ClickToPhone will automatically start Mouse pointer mode so that you can control the app. See Chapter 15 for more details on Mouse pointer mode. Edit item preferences will bring you to the list of preferences related to the item you selected. For example if you make a long click on the Dialer icon and then choose Edit item preferences from the Edit homepage dialog then the Telephony preferences will be shown (as in the screen shot below). ©Unique Perspectives www.click2go.ie Page 28 of 185 User Manual February 2014 If you cannot find the preference you are looking for or are more familiar with the older method of changing options then go to Project Settings->Preferences for the full list of preferences. The preferences relating to the different homepage items are discussed in the following chapters. More preferences will bring you to remaining preferences, not covered by the above action. 2.3 Appearance Options There are lots of customization options that allow you to personalize the look of the ClickToPhone app. To personalize ClickToPhone choose Appearance from the Edit homepage dialog or choose Project Settings->Preferences>Appearance preferences.. Appearance options Homepage style sets the style of the homepage to a list or a grid. Font Size sets the size of the font to be used throughout the whole ClickToPhone application. This also effects the size of the icons in lists. Font colors sets the color of the font. There are two colors. One for when the text is displayed normally and another contrasting color when scanning. Highlight color sets the color of the keys and list items when you are scanning. Background color sets the background color of lists, text boxes, buttons and other screen objects. Decor color sets the color between screen objects and is normally set the same as the background color, but can be different in order to highlight the screen objects. If wallpaper is enabled this setting has no effect. Icons sets the color of the soft keyboard symbols to either grayscale or full color. Key background sets the background style of keyboard keys including the cells of the HouseMate grid. If you are using a wallpaper then try setting the key background style to semi-transparent or transparent. Keyboard background sets the background color of the soft keyboard (between the keys). If you are using a Décor color try setting the keyboard background color the same for best effect. ©Unique Perspectives www.click2go.ie Page 29 of 185 User Manual February 2014 Wallpaper sets the background of the ClickToPhone windows to the system wallpaper setting. Try using a dark live wallpaper and semi-transparent keys for a visually stunning effect! Note that Wallpaper will only work on Android ICS and higher. Set wallpaper brings you to the system wallpaper picker. Try using the Mood ICS wallpaper supplied in the ClickToPhone app bundle. Hide title bar hides the ClickToPhone title bar to make more of the screen available for lists and content. Disable status bar hides the notification bar at the top of the phone’s screen. This simplifies the look and appearance of ClickToPhone and removes information that could otherwise be confusing for certain users. Disable notifications prevents the popup notification Connecting to hardware… etc from appearing when Disable status bar is enabled. Crosshairs sets the color and thickness of the mouse crosshairs. Virtual soft keys displays a set of soft keys on the right hand side of the screen for Home, Menu, Back and Refresh. Enable this option if you are a touch screen user, or if you use a Bluetooth mouse or Point-It joystick. See section 3.2.6 for details. Display Settings brings you to the system’s display settings screen where you can set screen timeouts, rotation etc. Important preferences for this chapter Project Settings->Enable Technician Mode Enable technician mode so that you can make edits to the homepage. Project Settings->Preferences->Appearance preferences Appearance of the application. ©Unique Perspectives www.click2go.ie Page 30 of 185 User Manual February 2014 3 Basic Operation & Scanning Methods ClickToPhone is designed primarily for switch users and is intended to be operated by one, two or five (joystick) suitable external switches using different scanning techniques. How you operate ClickToPhone will depend principally on the scanning method but also some other settings that have been chosen. Scanning refers to the process of highlighting, one after the other, a number of options and then making a selection when the desired option is highlighted. In Automatic Scanning mode the options are scanned automatically whilst in Two Switch or Joystick mode the scanning is under your control. You can, of course, operate ClickToPhone through the touch screen and there are some preferences specifically designed to help you with this. If you wish to use scanning, but not with and external switch, the touch screen can also be setup as one big switch by setting the Scanning Method preference to Tap the screen. You can also use Able Net’s Blue 2 switch interface or connect a switch to the headset switch input on the phone’s headset socket. The remainder of this chapter describes the different scanning methods and options and assumes that you have already paired your switch interface hardware (ClickToPhone or HouseMate hardware) with your phone and that the Bluetooth connection is made. For details on how to carry out this procedure see chapter 1. 3.1 Selecting a Scanning Method To choose a scanning method select More preferences->Scanning preferences from the Edit Homepage dialog or choose Project Settings>Preferences->Scanning preferences->Scanning Method. Select the scanning method you desire from the following list of options. ©Unique Perspectives www.click2go.ie Page 31 of 185 User Manual February 2014 3.1.1 Automatic Scanning Automatic scanning is the most common type of scanning and involves just one switch. Once the ClickToPhone or HouseMate hardware connects to your phone press your switch once to start scanning and then press it a second time to make a selection. If you are scanning a keyboard with more than one row then the rows are scanned one by one first. When you make a selection the current row is selected and the individual keys of the row are then scanned. Then, when you press your switch a second time an individual key is selected. ©Unique Perspectives www.click2go.ie Page 32 of 185 User Manual February 2014 Row/Column scanning in the phone dialer application to dial a ‘0’ 3.1.2 Short Click Scanning Short click scanning is also a single switch scanning method but gives you control over both the scanning and the selection. The scan is advanced by making short clicks or taps on your switch. Then when you are at the right key or list item make a long press of your switch to make a selection. Short click scanning overcomes the anxiety of using automatic scanning by giving you control over the scanning. It does, however, require a greater amount of switch activations. 3.1.3 Two Switch Two switch scanning gives you greater control over both the scanning and the selection. One switch is used to advance the scan whilst the other is used to make a selection. Though similar to Short Click Scanning, cognitively, Two Switch scanning is easier to understand. It does, however, require that you target two separate switches. Note: To connect two switches to your HouseMate hardware you need a adapter lead that converts a stereo jack into two mono jack sockets. For further details on connections see Chapter 23 3.1.4 Joystick When you are using Joystick scanning you are in full control of the scanning in all directions. You can scroll up and down through the lists and navigate keyboards using the Left, Right, Up and Down deflections of your joystick. To make a selection press the select button. This is usually a dedicated button on your wheelchair control or in the case of a switched joystick, a fifth switch. If you do not have a fifth switch you can use a flick of your joystick as the select method. To enable this option go to Project Settings->Preferences>Scanning preferences->Wheelchair Interfacing You can interface HouseMatePro to any wheelchair that has switch outputs available. These outputs usually require the addition of a switch output module to your wheelchair. Switch output modules are readily available from DX, R-Net, other wheelchair electronic suppliers and interface cables are available for these brands. Contact the supplier of your wheelchair for details. The joystick switch outputs, usually on a 9 pin D connector, connect to the 5 switch input of HouseMatePro using an interface cable and may vary depending on the make of your powered wheelchair. For a suitable interface cable contact [email protected] or your ClickToPhone agent for ordering information. ©Unique Perspectives www.click2go.ie Page 33 of 185 User Manual February 2014 You can also connect a standard switched joystick to HouseMatePro such as a TASH mini joystick or a Piko Button switch. See chapter 23 for more details on connections and other wheelchair interfacing options. 3.1.5 Tap the screen If you do not wish to use an external switch but cannot target the touch screen for direct access you can use the entire screen as one big switch. This is Tap the screen mode. The functionality is the same as Automatic Scanning but instead of pressing an external switch you press anywhere on the touch screen. 3.1.6 Headset switch This method is intended for demonstration purposes but can also be used in certain situations where you are using a Beginner or Intermediate user level. Use the switch on your headset to control automatic scanning. If you wish to use an ordinary switch connect it to the sleeve and the second ring of the headset i/p. 3.1.7 Using AbleNet’s Blue 2 You can use AbleNet’s Blue 2 switch interface to control ClickToPhone in both automatic scanning and two switch scanning modes. To use the Blue 2 device follow the AbleNet’s instructions on how to pair it with your smartphone. Then, within ClickToPhone, select Blue 2 as the scanning method by going to Project Settings->Preferences->Scanning preferences>Scanning Method. Note: In Android Jellybean (4.1, 4.2 and 4.3) it is necessary to restart ClickToPhone each time you turn on and connect your Blue 2 device. This issue has been resolved in Android KitKat (4.4). Note: It you are using a Headset switch or the Blue 2 device then it is not possible to control the Android mouse pointer. This requires HouseMatePro or HouseMate+ hardware that contains a dedicated HID module. We recommend, therefore, that you use these two scanning methods for Beginner, Intermediate and Advanced user levels only. 3.1.6 Direct Access Whilst not listed as a scanning method Direct Access is when you wish to directly access your phone using the touch screen. In this situation you will only require external hardware if you wish to have environmental control function – i.e. HouseMate. The HouseMate button is useful nonetheless both for turning on the phone (which can be difficult depending on the phone’s on/off button configuration) and for answering or hanging up a call. ©Unique Perspectives www.click2go.ie Page 34 of 185 User Manual February 2014 3.2 Other Scanning Options There are several preferences that enable you to optimize the type of scanning you are using. To edit the scanning preferences select More preferences>Scanning preferences from the Edit Homepage dialog or choose Project Settings->Preferences->Scanning preferences->Scanning Method. 3.2.1 Scanning Speed In Automatic Scanning the Scanning Speed is the rate at which the scan advances. In Short Click scanning it is the length of time that distinguishes a short click from a long click. Note that if the scanning method is less than 1 second scanning beeps are disabled. 3.2.2 Scanning Duration The scanning duration is how long automatic scanning persists for before stopping. If you set the HouseMate hardware setting Powerdown Time to Never then you need to also specify a maximum scanning duration otherwise the scanning will continue indefinitely until you make a selection. ©Unique Perspectives www.click2go.ie Page 35 of 185 User Manual February 2014 3.2.3 Acceptance Time The acceptance time is the length of time an external switch or joystick deflection must be held for before it is recognised and acted upon. This option helps to overcome involuntary presses of the switch. When set to 1 second, for example, you must press and then hold your switch for 1 second before the scanning will start or a selection is made. Note that if you are scanning, then the scanning will pause when the switch is pressed but a selection will only be made after the acceptance time has elapsed. If you let go your switch before the acceptance time has elapsed then the scanning will resume from the current position. ©Unique Perspectives www.click2go.ie Page 36 of 185 User Manual February 2014 3.2.4 Scanning Beeps You can disable the beeps when scanning. This option also disables the notification sounds you hear when you connect or disconnect with the hardware. 3.2.5 Auditory Scanning ClickToPhone can read out the text and labels of the items you are scanning instead of making a beep. This can be set to the HouseMate grid only or for the entire application. Auditory scanning uses the android text-to-speech engine and there are many voices available in different languages on the Play Store. SVOX is a good brand to choose from. Tip: Use this option for training yourself on what the different softkeys do. Then when you are familiar with them turn it off. 3.2.6 Touch Screen/Mouse features If you are using the touch screen, a usb pointing device or a Bluetooth mouse then you need to set the scanning method to Direct access and ensure that the software is in Stand alone mode. ClickToPhone incorporates many features to assist you in controlling your device using these input methods. Enable Appearance preferences->Virtual soft keys to display a set of softkeys on the right hand side of the screen for controlling the Home, Menu and Back softkeys. ©Unique Perspectives www.click2go.ie Page 37 of 185 User Manual February 2014 Enable Project Settings->Preferences->Touchscreen preferences->Touch Screen Filter to ignore accidentally touching the screen more than once. When this is enabled the software will only accept one touch screen event and then ignore subsequent touch screen events for ½ second. This helps to prevent mistakes being made due to a shaky finger for example. Enable Project Settings->Preferences-> Touchscreen preferences>Disable Scrolling to disable the scrolling feature of lists. This prevents a user from accidently sliding off a chosen list item once they place their finger on it. This feature only works within the ClickToPhone app. Important preferences for this chapter Project Settings->Preferences->Scanning preferences Project Settings->Preferences->Touchscreen preferences Project Settings->Preferences->Appearance preferences->Virtual soft keys ©Unique Perspectives www.click2go.ie Page 38 of 185 User Manual February 2014 4 Contacts The Contacts application allows you to select a contact, dial a contact, text a contact and manage your contacts. The options available depend upon what user level you have selected. With the user level set to Beginner it is only possible to dial a contact, whereas with the user level set to Expert it is possible to add and delete contacts. After you select Contacts in the Homepage the contact window appears. Press your switch, joystick or the touch screen to start scanning down through the contacts. When you select a contact the contacts soft keys will appear giving you different options to choose from. The contacts application with the user level set to Advanced and the contacts soft-keyboard visible. Soft-Keyboard options Dial contact Dial the selected contact. If the speaker phone option is enabled it will automatically be turned on. Write a text Opens the text editor window and qwerty keyboard so that you can write a text message. Send a phrase ©Unique Perspectives www.click2go.ie Page 39 of 185 User Manual February 2014 Choose from a categorized list of phrases to send to the chosen contact. Send an email If an email is defined for this contact the default email app is launched to write an email to this contact. Manage contact Opens up the Contact Manager soft-keyboard so that you can edit or delete the chosen contact, add a new contact or add the current contact to the starred list. Page up Go up a page of contacts. Page down Go down a page of contacts. Search Contacts In Advanced and Expert mode you can search for a contact alphabetically rather than using page up and page down. Go back Return to the ClickToPhone homepage Contacts Soft-Keyboards in the 4 different user levels Beginner Intermediate Advanced Expert ©Unique Perspectives www.click2go.ie Page 40 of 185 User Manual 4.1 February 2014 Dialing a Contact After you select the dial contact key ClickToPhone launches the Android dialer application and automatically turns on the speaker phone if enabled. To end a call press either your switch or the select button on your joystick. These act as the phone’s hook function when a call is in progress. If you have the Project settings->Preferences->Telephony preferences>Telephony keypad option enabled or if you are using the touch screen as a switch (set scanning method preference to tap the screen) then a telephone keypad is displayed. ©Unique Perspectives www.click2go.ie Page 41 of 185 User Manual February 2014 The telephony keypad allows you to enter numbers during a call, for example to top up your phone credit or to access your voice mail. To end a call when the telephony keypad is visible select the end-call key . 4.2 Writing a text After you select the write a text key ClickToPhone opens a text editor window and a text entry soft-keyboard. The text entry soft-keyboard includes a 4 word prediction list in the top row. If the Preferences->Text preferences->Word prediction option is enabled these keys will contain predictions for the current word you are typing and for the next word you are likely to type. The words you type are remembered so that over time ClickToPhone can predict words from your own vocabulary. Other options under Text preferences include setting the Keyboard Style to either QWERTY or ABC and setting the Key Repeat Interval. When you have finished typing the text choose the next key .The text preview window will appear giving you an opportunity to go back and add more text, add the message to the phrase book, add a recipient, insert a contact card, ©Unique Perspectives www.click2go.ie Page 42 of 185 User Manual February 2014 send the message or cancel the message. Options related to writing sms texts can be found under Preferences->Sms preferences. Text preview soft-keyboard options Send SMS Send the SMS message to the contact and return to the contacts window. Continue writing Re-open the keyboard and continue writing. Voice input If you have Voice Input enabled use the Android voice recognition to write your message. Phrase book Open the phrase book to insert a text into the sms. In expert user level it is possible to add what you have written to the phrasebook, and edit the phrasebook categories and content. Insert contact card In expert user level it is possible to insert a contact’s name and phone number Add recipient In expert user level it is possible to add up to 9 recipients that will also receive the text. Arrow keys In expert user level you can use the arrow keys to move the cursor to a particular point within the text. Cancel SMS Cancel the SMS and go back to the contacts window. The text you were composing is not saved. After you have sent a text message a notification will indicate whether the text was sent successfully or not. If the SMS was not sent it will be added to the draft’s folder. The drafts folder is only accessible when the user level is set to advanced or expert. SMS notifications SMS sent The SMS was sent successfully. ©Unique Perspectives www.click2go.ie Page 43 of 185 User Manual February 2014 SMS delivered The SMS was delivered to the recipient successfully. SMS failed The SMS was not sent and has been added to the drafts folder. 4.3 Phrase book ClickToPhone contains a phrasebook of commonly used texts. You can send these phrases as complete sms messages or insert them into the text you are writing. The phrases are categorized and selecting a phrase involves first choosing the category and then choosing the phrase. In expert mode the phrase book can be edited. Open the phrase book by choosing the key. The list of categories appears. Choose a category and then choose a phrase. The following soft keys appear when you are choosing a phrase in Beginner, Intermediate or Advanced user levels: Open category Open the selected category Select Insert the chosen phrase into the text ©Unique Perspectives www.click2go.ie Page 44 of 185 User Manual February 2014 Go back Go back to the previous screen. In expert user level the following additional soft keys appear to enable you to edit the phrase book: Edit phrasebook soft-keyboard options Insert phrase Choose a phrase from the phrasebook to insert into the text editor window Add phrase Add the current text you have written to the phrasebook. You will be first asked to choose a category. Edit phrasebook Edit the phrasebook Create category Create a new category Create phrase Create a new phrase within the selected category Edit Edit the selected phrase or category name and icon. ©Unique Perspectives www.click2go.ie Page 45 of 185 User Manual February 2014 Delete Delete the selected phrase or category. You will be asked to confirm this. When you are creating or editing a category or phrase the following additional soft keys will appear: Edit category or phrase soft-keyboard options Open keyboard Open the soft keyboard to edit the category name or phrase. Photo Choose a photo from your phone’s gallery to use as the icon for this phrase or category. Icons Choose a icon from the built in icon set. Save Accept and save the changes Cancel Cancel the edits and go back to the phrase book Reseting the Phrasebook You can reset the phrasebook to its factory content by choosing Project Settings->Reset Phrasebook. If you are installing over an older version of ClickToPhone that does not have the phrasebook feature then you will need to carry out this procedure. ©Unique Perspectives www.click2go.ie Page 46 of 185 User Manual 4.4 February 2014 Manage contact After you select the Manage contact key ClickToPhone opens the manage contact soft-keyboard. This gives you different options for managing the chosen contact. Manage contact soft-keyboard options New contact Create a new contact Edit contact Edit the current contact Star contact Add the current contact to the list of starred contacts. Delete contact Delete the current contact. Back Go back to the contacts window. After you select the New contact or Edit contact key ClickToPhone opens the contact manager window and soft-keyboard. The contact manager window allows you to specify the name, number, phonetype, email and thumbnail photo for a new or existing contact. Note that the manage contact option is only available when the user level preference is set to expert. ©Unique Perspectives www.click2go.ie Page 47 of 185 User Manual February 2014 Contact manager window with contact manager soft-keyboard and qwerty text keyboard options. Contact manager options Open keyboard Open a text or numeric soft-keyboard to enter text or numbers. Select photo Select a photo for the contact to be displayed alongside the contact name. Save contact Save the contact details to the system contacts and return to the contacts window. Cancel Cancel any changes and go back to the contacts window. Tab down Tab on to the next input field. Changes the focus from the contact name to the contact number to the phone type and so on. Next Hide the text or numeric soft-keyboard and return to the main contact manager soft keys to save or cancel the current edits. ©Unique Perspectives www.click2go.ie Page 48 of 185 User Manual 4.4.1 February 2014 Selecting a contact photo After you select the Select photo key ClickToPhone launches the picture gallery application. When you do this for the first time, however, you will be asked to specify what picture gallery application to use. To prevent this dialog from appearing in the future check the ‘Default App’ or ‘Always’ option before you choose the gallery of your choice. The stock Gallery app and ClickToPhone photo picker soft-keyboard. Use the ClickToPhone photo picker soft keys to navigate to the photo of your choice. Photo picker soft-keyboard options Up/Down/Left/Right Cursor controls that allow you to navigate the picture gallery albums and photographs Select Select the current photo or open the current picture folder. Back Back to the previous page of the picture gallery or back to the contact manager ©Unique Perspectives www.click2go.ie Page 49 of 185 User Manual February 2014 Important preferences for this chapter Project Settings->User level Project Settings->Preferences->Homepage preferences->Phone Functions Project Settings->Preferences->Telephony preferences Project Settings->Preferences->Text preferences ©Unique Perspectives www.click2go.ie Page 50 of 185 User Manual February 2014 5 Messages The Messages application allows you to view your SMS messages, reply to messages, call the sender of a message, add the sender of an SMS to the address book and so on. Note that the Messages application is not available when the user level is set to Beginner. The options available depend upon what user level you have selected. With the user level set to Intermediate it is only possible to read and reply to messages in the Inbox whilst in expert mode it is possible to select between the different folders (Inbox, Draft, Sent) and to delete messages. 5.1 Viewing SMS messages Intermediate User Level After you select Messages in the Homepage the messages window and the messages soft keys appear. The message displayed is the most recently received SMS message. At the top of the screen is the name of the sender, the contact image and the date received. Below that is the body of the message. Depending on the scanning method, press your switch, joystick or the touch screen to start scanning the messages soft keys. ©Unique Perspectives www.click2go.ie Page 51 of 185 User Manual February 2014 Messages soft keys in Intermediate user level Dial sender Call the sender of the message. Reply Opens the text editor window and qwerty keyboard so that you can reply to the sender with a new text message. See section 4.2 on how to write a text message. Reply with a phrase Open the phrasebook and choose from a categorized list of “phrases” to send a quick reply to the sender. See section 4.3 on how to choose and edit phrases. Previous Open the previous message. Down Use this soft key to scroll down through long messages. Next Open the next message. Back Go back to the ClickToPhone homepage.. ©Unique Perspectives www.click2go.ie Page 52 of 185 User Manual February 2014 Advanced and Expert User Level In advanced and expert modes it is possible to view the SMS messages in 3 different ways: Received messages only, By Conversation and Select Folder First. To set this option, long click on the Messages icon in the ClickToPhone homepage and choose Edit item preferences from the Edit homepage dialog OR go to Preferences->SMS Preferences->Sms messages. When Received messages only is chosen it is only possible to view and reply to messages in the Inbox. This is the same functionality as in Intermediate user level. When By Conversation is chosen it is possible to view the SMS messages by the conversation thread. When Select folder first is chosen you must choose the SMS folder each time. ©Unique Perspectives www.click2go.ie Page 53 of 185 User Manual February 2014 Depending on the scanning method, press your switch, joystick or the touch screen to start scanning down through the folders. Press your switch again to choose a folder. Two soft keys will appear allowing you to either open the chosen folder or return to the home page. Message Folders soft keys Open Folder Open the folder to view the SMS messages. Back Go back to the ClickToPhone homepage.. ©Unique Perspectives www.click2go.ie Page 54 of 185 User Manual 5.2 February 2014 Conversations When the user level is set to Advanced or Expert you can view SMS messages by their conversation thread. This means that you can view all the messages sent to and received from a particular contact including any drafts that may have been saved. Furthermore when you open the Conversation window the messages displayed in the list of conversation threads are the most recently received messages. The number in brackets after the contact name is the total amount of messages for that contact. Conversation soft keys Open Conversation Open the messages window to view the SMS messages for that conversation. SMS Send a text to this contact. Page up Go up a page of conversations. Page down Go down a page of conversations. Back Go back to the ClickToPhone homepage.. ©Unique Perspectives www.click2go.ie Page 55 of 185 User Manual February 2014 When you open a conversation the messages window is opened as described in section 5.1. The soft key options depend on whether you are in advanced or expert mode. Advanced Expert 5.3 Deleting and SMS In Expert mode it is possible to delete SMS messages. To delete an SMS open the message and then select the Delete SMS soft key. Confirm that you want to delete the SMS by selecting the Delete SMS soft key a second time or cancel. ©Unique Perspectives www.click2go.ie Page 56 of 185 User Manual February 2014 Confirm Delete soft keys Confirm Delete Delete this message from the current folder. Cancel Delete Go back the message soft keys. 5.4 Re-Sending a Draft In Advanced and Expert mode it is possible to re-send or re-write a draft message. If a message fails to send due to insufficient credit or a network error it is automatically added to the drafts folder. You can view the draft messages in the draft folder or by conversation thread. If you want to re-send a draft first open the message. Then, when you select the SMS soft key, the text editor window is opened with the draft message inserted into the body. ©Unique Perspectives www.click2go.ie Page 57 of 185 User Manual 5.5 February 2014 Adding to Contacts In Expert mode it is possible to add the sender of an SMS message to the list of contacts. Open the message and then select the Add to Contacts soft key. If the sender is not already in your contact list then the Manage contacts window is opened with the phone number of the sender inserted into the Contact Number field. See section 4.4 for further details on how to complete the Add to Contact process. 5.6 Forwarding a message Also, in Expert mode, it is possible to forward an SMS you have received or written to another contact. When you choose this key the contacts list will be displayed. Forward SMS soft keys Ok Forward the message to the selected contact Search Search for a contact alphabetically. ©Unique Perspectives www.click2go.ie Page 58 of 185 User Manual February 2014 Cancel Cancel forwarding the SMS Important preferences for this chapter Project Settings->Preferences->Sms preferences Project Settings->Preferences->Homepage preferences->Phone Functions ©Unique Perspectives www.click2go.ie Page 59 of 185 User Manual February 2014 6 Phone The Phone application allows you to dial specific numbers, send a text to a specific number and view the call history. Note that the Phone application is not available when the user level is set to Beginner and that the Call History option is not available when the user level is set to Intermediate. 6.1 Dialing a number After you select Phone from the ClickToPhone homepage the phone window and soft keyboard will appear. At the top of the window is a text field where the number you type will appear. The rest of the screen is taken up with the phone soft keyboard. Phone soft keys 0-9, *, # Digits 0 – 9, * and #. If you type 00 a ‘+’ symbol is automatically inserted for international calls. Dial Number Dial the number. See section 4.1 for further information on dialing a number and using the telephone keypad. ©Unique Perspectives www.click2go.ie Page 60 of 185 User Manual February 2014 Send a text. Opens the text editor window and qwerty keyboard so that you can send a text to the number. See section 4.2 on how to write a text message. Call History View the call history of outgoing, incoming and missed calls. Backspace Delete the last character typed. Back Go back to the ClickToPhone homepage.. 6.2 Call History In Advanced and Expert modes it is possible to examine the call history. After you select the call history soft key the call history window and call history soft keyboard will appear. The list shows incoming calls, outgoing calls, missed calls and the time and date of each call. Call history symbols Incoming call This was a call to your phone from another person that you answered. ©Unique Perspectives www.click2go.ie Page 61 of 185 User Manual February 2014 Missed call A call to your phone that you did not answer. Outgoing call An outgoing call that you made. Does not indicate whether it was answered or not. When you choose a call the call history soft keys are displayed giving you different options to choose from. Call History soft keys Dial number Call the number/contact Send a text Send a text to the number/contact. See section 4.2 on how to write a text message. Reply with a phrase Open the phrasebook and choose from a categorized list of “phrases” to send a quick reply to the contact. See section 4.3 on how to choose phrases. Add to Contacts Open the contact manager window to add the number to the contact list. See section 4.4 for further details on how to complete the Add to Contact process. Page up Go up a page of calls. Page down Go down a page of calls. Back Go back to the ClickToPhone homepage.. Important preferences for this chapter Project Settings->Preferences->Telephony preferences ©Unique Perspectives www.click2go.ie Page 62 of 185 User Manual February 2014 7 Emergency Alarm You can trigger various types of alarms, both hardware and software, using ClickToPhone and HouseMatePro. There are 6 types of alarms that can be used. External nurse call Connect HouseMatePro to an external nurse call through it’s relay output and trigger at any time, regardless of whether you are connected to your phone, by holding your Switch for a defined period of time. See Chapter 20 on how to enable and connect this hardware feature. Internal EasyWave signal HouseMatePro can be supplied with a 32 channel EasyWave RF transmitter. The first channel is reserved for alarm function and can be triggered at any time by holding your switch for a defined period of time. See Chapter 20 on how to enable this hardware feature. Internal STT Condigi signal As above. A single RF nurse call transmitter from STT Condigi fitted internally. InfraRed alarm InfraRed command 1, so long as it has been recorded, is always transmitted whenever an alarm is made. See Chapter 19 for details on how to record InfraRed codes. Emergency Telephone Call You need to be connected to your phone to make this alarm. It can be made by holding your switch for a defined period of time or by selecting the Emergency Call symbol from the HomePage. You are given a 10 second countdown during which time you can cancel the alarm. When the timer has elapsed the predefined telephone number is called. ©Unique Perspectives www.click2go.ie Page 63 of 185 User Manual February 2014 SMS Alert You need to be connected to your phone to make this alert. It can be made by holding your switch for a defined period of time or by selecting the SMS alert from the HomePage. You are given a 10 second countdown during which time you can cancel the alert. When the timer has elapsed the SMS is sent to a preselected mobile telephone number. You can define more than one telephone number and ClickToPhone will try each of the three numbers until the SMS is delivered. Furthermore, using Google’s location service it is possible to include the http link to a google map with your current location. ©Unique Perspectives www.click2go.ie Page 64 of 185 User Manual February 2014 Note: The SMS alert feature is not intended to be used as a patient alarm. It is simply a convenient way of alerting a friend or P.A. as to one’s whereabouts rather than making a phone call. It is not failsafe for the following reasons: 1. The phone may be out of credit 2. The phone battery may be flat 3. The GSM signal may be poor 4. The HouseMate or ClickToPhone battery may be flat. If you require a safer alarm system consider purchasing a HouseMatePro fitted with an EasyWave or STT Condigi transmitter. These alarms are RF based and can be activated even when the phone is switched off. Alarm options Options related to the Emergency alarms can be found by making a long click on the Emergency Alarm icon in the homepage and choosing Edit item preferences from the Edit homepage dialog OR go to Project settings>Preferences->Alert preferences Activate on long click sets the length of time that the switch must be held in order to activate either the Emergency Call or SMS alert. This should not be used if you have a hardware alarm fitted. The length of time to activate the hardware alarm is set under Hardware settings. See page 155 for further details. Include in homepage Sets whether or not the Emergency Call or SMS alert can be activated from the Homepage. If you just want to use the above long click then this can be disabled. Enable countdown Sets whether or not a 10 second countdown is displayed during which time you can cancel the alarm by pressing your switch again. Emergency call Sets whether or not to call a telephone number Transmit IR signal If you are connected to HouseMate then activate the relay output and transmit infrared command 1. Notification Sound Select a sound that your device will play when the alarm is activated. Auto-answer on next call ©Unique Perspectives www.click2go.ie Page 65 of 185 User Manual February 2014 Automatically answer the next call after an SMS alert has been raised. Auto respond If an SMS beginning with a ‘?’ is received, then reply with the last known position so that the sender can locate you. The sender will receive a http link to a google map of your location. Telephone Numbers The telephone numbers to send the Sms alert to, separated by commas. If the SMS is not delivered to the first number within 60 seconds then it is re-sent to the second number and so on. Keep sending Keep sending the SMS until a delivery notification is received. WARNING! Depending on your network, multiple charges may apply. Request confirmation Instead of a delivery notification wait 5 minutes for the receiver to respond with an SMS before sending the alert to the next phone number. Message The message to send. This will be followed by the time and coordinates if available. Important preferences for this chapter Project Settings->Preferences->Alert preferences ©Unique Perspectives www.click2go.ie Page 66 of 185 User Manual February 2014 8 Reminders The Reminders application allows you to set any number of reminders or alarms to remind you of upcoming events. It is possible to set once-off, daily, weekly, monthly and yearly reminders and to choose a sound or music file to play when the reminder falls due. You can also set options to trigger the reminder 15 minutes, 30 minutes, 1 hour and 2 hours before the event takes place. This allows you to schedule your day whilst giving you enough time to prepare for the next event. Although the Reminder application is accessible in any user level a switch user can only add reminders when the user level is set to expert. You can also create and edit reminders through the menu options in any user level. 8.1 Using Reminders After you select Reminders from the ClickToPhone homepage the Reminders window will appear. The reminders are displayed in a list with a picture, a name, the date and time of the reminder and a clock symbol representing whether the reminder has elapsed or when it is due according to the table below. Reminder clock symbols ©Unique Perspectives www.click2go.ie Page 67 of 185 User Manual February 2014 Reminder is in the past A white clock symbol with an exclamation mark indicates that the reminder is in the past. The date and time when the reminder elapsed is below the name of the reminder. Reminder has elapsed A red clock on the hour indicates that the event has just elapsed. 15 minutes An orange clock indicates that the event is due to take place in less than 15 minutes. 30 minutes A yellow clock indicates that the event is due to take place in less than 30 minutes. 45 minutes A light green clock indicates that the event is due to take place in less than 45 minutes. 1 hour A dark green clock indicates that the event is due to take place in less than 1 hour. Today A blue clock indicates that the event is due to take place today. In the future A dark gray clock indicates that the event is due to take place sometime in the future. Depending on what reminder preferences have been chosen the phone will ring, vibrate and/or play a music track or sound file when the reminder is due. If the phone is asleep it will wake up and a pop-up window will display the reminder. You must cancel the reminder to stop the sound playing and return to normal operation. After you cancel the reminder it is automatically rescheduled if it is a recurring reminder or deleted if it is a once-off reminder and the Delete once off reminders preference is enabled. ©Unique Perspectives www.click2go.ie Page 68 of 185 User Manual February 2014 The pop-up window when a reminder has elapsed Within the reminder preferences it is possible to set whether or not you get a reminder before the event is due. For example you can have a reminder 30 minutes beforehand and/or when the event is due. The purpose of this feature is to allow you to prepare for the forthcoming event and give you some fore-warning that it is about to occur. In the example screen shot below it is 30 minutes until the nurse arrives. Note that, even when choose Done, the notification will go off again at the appointed time, i.e. in 30 minutes in the above example. ©Unique Perspectives www.click2go.ie Page 69 of 185 User Manual 8.2 February 2014 Managing Reminders When you select a reminder the reminder soft keys will appear. These give you different options for editing and creating the reminders. Note that the user level needs to be set to expert in order to edit or create reminders using a switch and scanning. If you are not in expert mode and wish to add or edit a reminder then use the menu options. Reminder soft keys New reminder Create a new reminder. Edit reminder Edit the currently selected reminder. Delete reminder Delete the currently selected reminder. Page up Go up a page of reminders. Page down Go down a page of reminders. ©Unique Perspectives www.click2go.ie Page 70 of 185 User Manual February 2014 Back Go back to the ClickToPhone homepage.. After you select the New reminder or Edit reminder soft key ClickToPhone opens the reminder editor window and soft-keyboard. Reminder editor window soft keys and numeric keyboard options. Reminder Editor options Open keyboard Open a text or numeric soft-keyboard to enter text or numbers. Select photo Select a photo for the reminder to be displayed alongside the reminder name. Select Track/Sound file Select a music track or sound file that will be played when a reminder is due. Icons Choose a icon from the built in icon set. Save reminder Save the reminder details and return to the reminders window. ©Unique Perspectives www.click2go.ie Page 71 of 185 User Manual February 2014 Next Tab on to the next input field. Changes the focus from the reminder name to the reminder time to the reminder date and so on. Continue Hide the text or numeric soft-keyboard and display the edit reminder soft keys to save or cancel the current edits. Back Cancel any changes and go back to the reminders window. 8.3 Selecting a reminder photo After you select the Select photo key ClickToPhone launches the picture gallery application. The procedure for selecting a photo is the same as when you select a contact photo. See section 4.4.1 for more details. 8.4 Selecting a Sound After you select the Select a Sound soft key ClickToPhone launches the music player application in ‘picker’ mode so that you can choose a sound file or music track. When you do this for the first time, however, you will be asked to specify what music player application to use. To prevent this dialog from appearing in the future check the ‘Default App’ option before you choose the music player of your choice. Useful Tip: It is possible to record your own voice reminders using the Voice Recorder application and then use these as the reminder sounds ©Unique Perspectives www.click2go.ie Page 72 of 185 User Manual February 2014 Sound picker soft keys Up/Down/Left/Right Cursor controls that allow you to navigate the sound picker application and choose a sound file. Select Select a sound track or select the OK button (once it has the focus) and return to the edit reminder window. Back Cancel the sound picker and go back to the edit reminder window. Important preferences for this chapter Project Settings->Preferences->Reminders preferences ©Unique Perspectives www.click2go.ie Page 73 of 185 User Manual February 2014 9 Text To Speech & AAC The Text To Speech application allows you write a text and then speak it using the installed Android text to speech engine. The Text To Speech application is not intended to be a fully featured communication device but can provide a means of communicating a message in certain circumstances. To use text to speech you must have a text to speech engine installed on your phone or tablet. In the phone’s settings choose Voice Input & Output->Textto-speech settings. You can also visit the Android market for a list of text to speech engines. SVOX have a good range of voices in different languages and styles. 9.1 Using text to speech After you select Text To Speech from the ClickToPhone homepage the text-tospeech window and soft keys will appear. Initially there is no text, only the softkeys. Text-to-speech soft keys Speak the text Speaks the written text Write a text Opens up a text editor window so that you can write a text to speak. Open the phrasebook Open the phrasebook and choose from a categorized list of “phrases” to speak. See section 4.3 on how to choose a phrase Edit the phrasebook You can edit the categories and phrases in the phrasebook. See section 4.3 for details. Expert user level only. Add to phrasebook You can add the text you have just written to the phrasebook. Expert user level only. Back Go back to the ClickToPhone homepage.. ©Unique Perspectives www.click2go.ie Page 74 of 185 User Manual February 2014 After you select the write a text soft key ClickToPhone opens a text editor window and a text entry soft-keyboard. The text entry soft-keyboard includes a 4 word prediction list in the top row. If the word prediction preference is enabled these keys will contain predictions for the current word you are typing and for the next word you are likely to type. The words you type are remembered so that over time ClickToPhone can predict words from your own vocabulary. When you have finished typing the text choose the speak key . The text-tospeech soft keys will re-appear giving you an opportunity to review the text and add edit it before you choose to speak it. 9.2 Using a third party AAC app. Instead of using ClickToPhone’s built in Text-to-speech app you can control a third party app such as Predictable. If you are using scanning it must be possible to set the third party app to “Tap the screen scanning” mode. Then when you choose AAC app from the ClickToPhone homepage you can control it from your switch. Each time you press your switch a touch screen event is sent to the app. To choose the app you wish to use make a long click on the Text-to-speech icon in the homepage and choose Edit item preferences from the Edit homepage dialog OR go to Project Settings->Preferences->Homepage preferences>Speech output. Then set the Speech output preference to Aac app. Select ©Unique Perspectives www.click2go.ie Page 75 of 185 User Manual February 2014 the Aac app preference to choose the app from the list of applications installed on your device. To regain control of ClickToPhone there are two programmable options. Press your switch 3 times in a row Hold your switch for a long time To set the method of exiting the Aac app make a long click on the Text-to-speech icon in the homepage and choose More preferences->Behaviour preferences->App control from the Edit homepage dialog OR go to Project Settings->Preferences-> Behaviour preferences->App control. Then set the Escape method as required. Note: You need HouseMatePro or HouseMate+ hardware to be able to generate the mouse click event that controls the third party app in it’s “Tap the screen” mode. 9.3 Using an external AAC device If you are using HouseMatePro hardware then you can use a dedicated external Aac device connected to your hardware’s switch output connector. When you choose Aac device from the ClickToPhone homepage the software enters a special mode whereby switch presses activate the output relay in your hardware and thereby control the external device. ©Unique Perspectives www.click2go.ie Page 76 of 185 User Manual February 2014 To use an external Aac device set the Speech output preference to Aac devicie. Follow the instructions for setting the exit method in the previous section 9.2 Important preferences for this chapter Project Settings->Preferences->Homepage preferences->Speech output Project Settings->Preferences->Behavior preferences->App Control ©Unique Perspectives www.click2go.ie Page 77 of 185 User Manual February 2014 10 Music Player The Music Player application allows you to play the music files stored on your SD card. When you select Music from the ClickToPhone homepage the music player will appear. The music stored on your phone is sorted into three categories, Songs, Albums and Artists. First select a category and then select a song within that category. After you have selected a song a soft-keyboard will appear to allow you to play the song you have selected. ©Unique Perspectives www.click2go.ie Page 78 of 185 User Manual February 2014 The music player soft keys are displayed at the bottom of the screen. When you choose Play a progress bar indicates the position within the song. If you leave the Music Player it will stop. Music player soft keys Play/Pause Play or pause the currently selected music track. Volume Up Equivalent to pressing the volume up key on your phone. Volume Down Equivalent to pressing the volume down key on your phone. Back Go back to the ClickToPhone homepage.. The music player app within ClickToPhone is intentionally simplified. However, if you wish, it is possible to control a different music player app if you require more functions. To use an app installed on your phone make a long click on the Music icon in the ClickToPhone homepage and then choose Edit Item preferences OR go to Preferences->Homepage preferences->Music and Gallery. Then enable Use 3rd party Music app and select Choose a Music app. Choose the app you want from the list of apps on your device. We recommend using the Android music player and this is supplied in the ClickToPhone app bundle on your SD card. The music player soft-keyboard is optimized for this app. Now when you launch the music player from the clicktophone home page the Android Music app will appear. ©Unique Perspectives www.click2go.ie Page 79 of 185 User Manual February 2014 Music player soft keys when using a third party app Play/Pause Play or pause the currently selected music track. Previous track Go back to the start of the previous track. Next track Advance to the start of the next track. Volume Up Equivalent to pressing the volume up key on your phone. Volume Down Equivalent to pressing the volume down key on your phone. Return to ClickToPhone Return to the ClickToPhone application. Note that this is different from using the back key which is now processed by the Music app and may not return you to ClickToPhone. The refresh symbol is used whenever you are controlling third party apps and will always return you to ClickToPhone. Select Make a selection on whatever screen object has the focus, a track, play button etc. ©Unique Perspectives www.click2go.ie Page 80 of 185 User Manual February 2014 Left Equivalent to pressing the left arrow key. Right Equivalent to pressing the right arrow key. Up Equivalent to pressing the up arrow key. Down Equivalent to pressing the down arrow key. Back Equivalent to pressing the back key. Note: We recommend using the Android Music Player app which is installed with ClickToPhone under sdcard\clicktophone\extras\bundle or available to download free at www.click2go.ie Important preferences for this chapter Project Settings->Preferences->Homepage preferences->Music ©Unique Perspectives www.click2go.ie Page 81 of 185 User Manual February 2014 11 Photo Album The Photo Album application allows you to view the photographs and images stored on your SD card. When you select Gallery from the ClickToPhone homepage the gallery will appear. The photographs are shown on a “last taken” basis. Use the left right arrow keys to navigate through your photos. Gallery soft keys Previous photo Next photo Zoom in Back Go back to the ClickToPhone homepage.. The Gallery app within ClickToPhone is intentionally simplified. However, if you wish, it is possible to control a Gallery app if you require more functions. To use an app installed on your phone make a long click on the Gallery icon in the ClickToPhone homepage and then choose Edit Item preferences OR go to Preferences->Homepage preferences->Music and Gallery then enable ©Unique Perspectives www.click2go.ie Page 82 of 185 User Manual February 2014 Use 3rd party Gallery app and select Choose a Gallery app. Choose the app you want from the list of apps on your device. We recommend using the QuickPic app that is supplied in the ClickToPhone app bundle on your SD card. The Gallery soft-keyboard is optimized for this app and it is also possible to play video recordings with it. Now when you launch the Gallery from the clicktophone home page the QuickPic app will appear. Gallery soft keys when using a third party app Select Make a selection on whatever screen object has the focus.. Left Equivalent to pressing the left arrow key. Right Equivalent to pressing the right arrow key. Return to ClickToPhone Return to the ClickToPhone application. Note that this is different from using the back key which is now processed by the Gallery app and may not return you to ClickToPhone. The refresh symbol is used whenever you are controlling third party apps and will always return you to ClickToPhone. Back Equivalent to pressing the back key. ©Unique Perspectives www.click2go.ie Page 83 of 185 User Manual February 2014 Up Equivalent to pressing the up arrow key. Down Equivalent to pressing the down arrow key. Hide keyboard Hide the soft keys so that you can view the full picture. The soft keyboard will reappear when you press your switch or joystick or automatically in Tap the Screen mode. Note: We recommend using the QuickPic photo album app which is installed with ClickToPhone under sdcard\clicktophone\extras\bundle or available to download free at www.click2go.ie Important preferences for this chapter Project Settings->Preferences->Homepage preferences->Gallery ©Unique Perspectives www.click2go.ie Page 84 of 185 User Manual February 2014 12 Camera The Camera application allows you to take photographs. When you select Camera from the ClickToPhone homepage the phone’s camera application is launched. Two soft keys allow you to either take a picture or return to the ClickToPhone homepage. You can take more than one picture before returning to the ClickToPhone homepage. To view the photos you have taken open the Gallery application from the ClickToPhone homepage. Camera soft keys Shoot Take a picture and store it on the SD card. Return to ClickToPhone Go back to the ClickToPhone homepage.. Note: We recommend using the QuickPic photo album app which is installed with ClickToPhone under sdcard\clicktophone\extras\bundle or available to download free at www.click2go.ie . ClickToPhone will search for this app after installation and use it by default if it is found. If you wish to specify a different app to use when taking pictures go to Preferences->Homepage preferences>Music, Gallery, Camera and Clock->Camera. ©Unique Perspectives www.click2go.ie Page 85 of 185 User Manual February 2014 Important preferences for this chapter Project Settings->Preferences->Homepage preferences->Camera ©Unique Perspectives www.click2go.ie Page 86 of 185 User Manual February 2014 13 Clock The Clock application allows you to view the time. When you select Clock from the ClickToPhone homepage the phone’s clock application is launched. Note that there are no soft keys associated with the Clock application. It is intended to give you a simple way of reading the time. If you wish to control some of the Clock applications features you can launch it from the Applications window in expert mode. See Chapter 14 for further details. To return to the ClickToPhone homepage press your switch or joystick. In touch screen mode, when the scanning method preference is set to Tap-the-screen, ClickToPhone will automatically re-appear after 10 seconds. We recommend using the DeskTopPlus app which is installed with ClickToPhone under sdcard\clicktophone\extras\bundle or available to download free at www.click2go.ie . ClickToPhone will search for this app after installation and use it by default if it is found. Tip: If you wish to launch a voice input app specify it as the clock app. Then when you press your switch you will return you to ClickToPhone after you have completed your voice input task. Specify the app by going to Preferences>Homepage preferences->Music, Gallery, Camera and Clock->Clock. ©Unique Perspectives www.click2go.ie Page 87 of 185 User Manual February 2014 Important preferences for this chapter Project Settings->Preferences->Homepage preferences->Clock ©Unique Perspectives www.click2go.ie Page 88 of 185 User Manual February 2014 14 Applications The Applications “launcher” app allows you to select, launch and control the features of the other applications installed on your phone. The ClickToPhone app achieves this by displaying a set of carefully chosen soft keys that allow you to simulate pressing keys, for example the up, down and ok soft keys. If you are using HouseMatePro or HouseMate+ hardware then the HID module within it ensures that you can have complete control over any app using the Android mouse pointer. It is important to understand that, unless you are using HouseMatePro or HouseMate+ hardware, it is not possible to fully control all the features of other applications through ClickToPhone. This is because most applications require some level of touch screen input to support certain features. That said, it is still possible to control lots of applications adequately. Android Music, QuickPic, YouTube, Facebook, Aldiko (book reader) to name but a few. 14.1 Launching another application After you select Applications from the ClickToPhone homepage the Applications window will appear. After you select an application from the list the application soft keys will appear. ©Unique Perspectives www.click2go.ie Page 89 of 185 User Manual February 2014 Application soft keys Launch Application Launch the application along with the expert soft keyboard. Page up Go up a page of applications. Page down Go down a page of applications. Search Search for an app using an alphabetical keyboard. Add to Favorites Add the application to the list of favorites. Back Go back to the ClickToPhone homepage.. After you select the application will be launched and a set of expert soft keys will appear. You use these keys to control the application. ©Unique Perspectives www.click2go.ie Page 90 of 185 User Manual February 2014 Several views of using YouTube application. The up/down arrow keys are used to highlight the search button and enter a search query. Then Mouse mode is launched to be able to select a video from the list. Expert soft keys Select Make a selection on whatever screen object has the focus. Left/Right/Up/Down Equivalent to pressing the arrow keys and can be used on many applications to highlight a screen object. If a screen object does not receive the focus in this way or it is difficult to see which object is highlighted then enter Mouse pointer mode and use the cross-hairs to make a click on the object. Return to ClickToPhone Return to the ClickToPhone application. Back Equivalent to pressing the back key. Mouse Pointer mode See below for more details. Numeric keypad Open the numeric keypad to enter numbers Text keyboard Opens up a text keyboard so that you can enter text. ©Unique Perspectives www.click2go.ie Page 91 of 185 User Manual February 2014 Scan Allows you to implement a scan of left/right/up or down keys to move quickly to a particular screen object. Very useful for navigating the objects on a web page. Press your switch a second time to stop the scanning. Hide keyboard Hide the soft keys so that you can view the entire screen. The soft keyboard will reappear when you press your switch or joystick or automatically in Tap the Screen mode. You can expand the set of keys that are provided in the expert keyboard to include a third row shown below. These are primarily chosen to be able to enter text using the Android text-to-speech engine. Enable Preferences->Behavior preferences->Soft keys->Expand Expert Keyboard Extra soft keys in expert keyboard Volume Up Equivalent to pressing the volume up key on your phone. When controlling book reader applications this usually advances the page. Volume Down Equivalent to pressing the volume down key on your phone. When controlling book reader applications this usually goes back a page. Voice Input Allows you to enter some text into the currently selected screen object using Android’s voice recognition. Backspace Equivalent to pressing the backspace soft key. You will need this function when using Voice input to remove unwanted text. Space Equivalent to pressing the space soft key. You will need this function to separate text entered by Voice input. ©Unique Perspectives www.click2go.ie Page 92 of 185 User Manual February 2014 Home Equivalent to pressing the home key on your phone. Brings you to the phone’s home screen. 14.2 Numeric and Text keyboards The numeric and text soft keyboards for entering text into other applications. Use the arrow keys in the expert keyboard to navigate to the text input or search field. The following soft key appears on the numeric and text keyboards to allow you to return to the expert soft keyboard. Expert keyboard Return to the expert keyboard from the text, numeric or scan keyboards. This symbol is used throughout the application to allow an expert to return to the expert keyboard. The Expert keyboard is the root keyboard when you are controlling another application. ©Unique Perspectives www.click2go.ie Page 93 of 185 User Manual February 2014 15 Mouse Pointer mode Mouse pointer mode, or mouse/keyboard mode, to be more accurate is a different type of expert mode whereby key functions for manipulating other applications are displayed one at a time in a small square frame at the top of the screen. When you press your switch a series of symbols are displayed and when you press your switch again the function represented by the currently displayed symbol is carried out. Mouse pointer mode is useful when you want to control dialog boxes and/or do not require a full soft keyboard to be visible. Using Mouse Pointer mode When you select the symbol from the expert keyboard mouse pointer mode is started. The soft-keyboard will disappear and a small frame and symbol will appear at the top of the screen. You can also start mouse pointer mode by choosing the Home Screen option from the ClickToPhone homepage as in the example below. Selecting the Home Screen option within ClickToPhone to start Mouse pointer mode. 14.4.1 Mouse pointer mode Below is the list of symbols and their meaning when you are using Mouse Pointer mode. Mouse Pointer mode symbols and meaning ©Unique Perspectives www.click2go.ie Page 94 of 185 User Manual February 2014 Mouse pointer mode, switch to keyboard mode Indicates that you are in Mouse pointer mode. Press your switch when this symbol is visible to switch to Keyboard mode. Home Equivalent to pressing the phone’s Home key. Menu Equivalent to pressing the phone’s Menu key Move mouse pointer up and right Use a cross-hairs to move the mouse pointer up and to the right. . Move mouse pointer down and right Move mouse pointer down and left Move mouse pointer up and left Mouse click/Drag mode Equivalent to clicking on the screen at the location of the mouse pointer. If you hold your switch for 1 second when you select this symbol you can make the equivalent of a long click at the pointer location. If you keep holding it longer you can implement a drag lock. Your hardware will beep to indicate that you are in drag lock mode. Now you can move the pointer and drag objects using the above functions. When you want to release the drag select this symbol again. Swipe Menu A menu of swipe functions for implementing gestures. Swipe left Implement a swipe on the screen to the left. Use this to change home screens. Swipe Right Implement a swipe on the screen to the right. ©Unique Perspectives www.click2go.ie Page 95 of 185 User Manual February 2014 Swipe Up Implement a swipe on the screen upwards. Use this to scroll through lists. Swipe Down Implement a swipe on the screen downwards. Click Lock A special function that locks the software in this mode until you either make a long click of your switch or press it 3 times. Use this mode if you are using a Bluetooth pointing device such as a head mouse and are using a switch also to control scanning and making clicks. Then you can stay locked into this mode whereby the head mouse is controlling the pointer and the switch is making clicks. Go to Preferences->HID preferences->Click lock and Behavior preferences->App control for these advanced options. Back Equivalent to pressing the phone’s Back key. Exit mouse pointer mode Exit mouse pointer mode. When you exit mouse pointer mode the following keyboard is displayed: This keyboard allows you to launch the text keyboard, restart mouse pointer mode or return to the ClickToPhone application. 14.4.2 Setting the Mouse and Swipe speeds There are three speed settings relating to both Mouse and Swipe speeds. The overall speed is controlled by the phone’s “Pointer Speed” setting and this can be found under Settings->Language & Input->Pointer speed. Then, within ClickToPhone there are a further two preferences for adjusting the mouse and swipe speeds separately. Go to Project Settings->Preferences>HID preferences to adjust these speeds. Note: If your device does not have a Pointer speed preference under Language & Input then it does not support the Android mouse pointer function. 14.4.2 Keyboard mode ©Unique Perspectives www.click2go.ie Page 96 of 185 User Manual February 2014 Below is the list of symbols and their meaning when you are using Keyboard mode. Keyboard mode symbols and meaning Keyboard mode, switch to Mouse pointer mode Indicates that you are in Keyboard mode. Press your switch when this symbol is visible to switch to Mouse pointer mode. If you are connected to ClickToPhone hardware or an earlier unit without a HID then it is only possible to use Keyboard mode. Home Equivalent to pressing the phone’s Home key. Menu Equivalent to pressing the phone’s menu soft key Up Equivalent to pressing the Up soft key. Tip: Instead of using the crosshairs it is very often easier to switch to keyboard mode and use the arrows to highlight the screen object you want to select. This is especially true of scrolling through lists. Using keyboard mode to navigate the app icons on the Home screen. This can be easier than using the cross hairs. Right Equivalent to pressing the Right soft key ©Unique Perspectives www.click2go.ie Page 97 of 185 User Manual February 2014 Down Equivalent to pressing the Down soft key Left Equivalent to pressing the Left soft key Enter Equivalent to pressing the enter soft key and will select a highlighted list item or screen object. Back Equivalent to pressing the phone’s Back key. Exit mouse pointer mode Exit mouse pointer mode and return to the Expert keyboard. 14.4.3 Virtual pointer mode If you are using ClickToPhone or an earlier version of HouseMate or your phone does not support the Android mouse pointer then you can use a “Virtual” mouse pointer to perform mouse operations. This function is limited to use within the ClickToPhone application and is intended to be used for changing settings, configuring the HouseMate grids and using ClickToPhone’s web browser. Virtual pointer mode symbols and meaning ©Unique Perspectives www.click2go.ie Page 98 of 185 User Manual February 2014 Mouse Pointer mode, switch to Keyboard mode You can toggle between a mouse and a keyboard mode. Mouse mode enables you to move the mouse pointer and make clicks. Keyboard mode enables you to send up/down/left/right and enter key events. Keyboard mode, switch to Mouse Pointer mode Switch back to mouse pointer mode. Home Equivalent to pressing the phone’s Home key. Menu Equivalent to pressing the phone’s menu soft key Move mouse pointer up Select to move the mouse pointer up. Press your switch again to stop the mouse pointer moving. Move mouse pointer right Move mouse pointer down Move mouse pointer left Mouse click/Drag mode Equivalent to clicking on the screen at the location of the mouse pointer. If you keep holding your switch when you select this symbol the mouse pointer will change to a mouse drag symbol and you are in drag lock mode. Then you can release your switch and use the arrows to drag on the screen – for example to scroll a list upwards. To release the drag lock select this symbol again. ©Unique Perspectives www.click2go.ie Page 99 of 185 User Manual February 2014 Up Equivalent to pressing the Up soft key. Right Equivalent to pressing the Right soft key Down Equivalent to pressing the Down soft key Left Equivalent to pressing the Left soft key Enter Equivalent to pressing the enter soft key and will select a highlighted list item or screen object. Back Equivalent to pressing the phone’s Back key. Exit Virtual pointer mode Exit virtual pointer mode and return to the ClickToPhone. 14.4.2.1 Setting the Virtual mouse speed The speed of the virtual mouse is different to that of the Android mouse pointer. To set the speed go to Project settings->Preferences->Behaviour preferences->Virtual Mouse pointer->Mouse Speed. Set the Drag lock time preferences to adjust the length of time that you must hold your switch before drag lock is enabled. ©Unique Perspectives www.click2go.ie Page 100 of 185 User Manual February 2014 14.4.3 Automatic Pointer mode Sometimes when you are controlling another application the soft-keyboard can become obscured by either a modal dialog or a pop-up menu. If the Automatic Pointer preference is enabled, then, once you start scanning ClickToPhone will detect that the soft keys are hidden behind the popup and automatically enter mouse pointer mode to allow you to cancel or control the dialog or menu. These screen images show the Expert keyboard hidden behind the popup menu. When scanning starts ClickToPhone detects this and automatically starts pointer mode. If Automatic Pointer preference is disabled then there are two options depending on what hardware you are using: 1. ClickToPhone and HouseMate hardware Make a long press of your switch to go back to the ClickToPhone app. 2. HouseMate+ and HouseMatePro hardware Make a long press of your switch to start Mouse Pointer mode. Note: You cannot control modal dialogs (for example system messages such as low battery) or menus if you are using earlier ClickToPhone or HouseMate hardware because they do not contain a HID module. However the automatic pointer mode should enable you to cancel the popup by selecting the Home soft key or return to the ClickToPhone app. ©Unique Perspectives www.click2go.ie Page 101 of 185 User Manual February 2014 Important preferences for this chapter Project Settings->Preferences->Homepage preferences->Other Applications Project Settings->Preferences->HID preferences Project Settings->Preferences->Behavior preferences->Pointer mode Project Settings->Preferences->Behavior preferences->Virtual Mouse Pointer Project Settings->Preferences->Behavior preferences->Soft keys->Expand Expert keyboard ©Unique Perspectives www.click2go.ie Page 102 of 185 User Manual February 2014 16 Favorites The Favorites application allows you to select, launch and then control your favorite applications. The applications listed under favorites are selected from within the Applications app. See Chapter 14 for details. The process by which you select, launch and control an application is the same as that described in chapter 14. Favorite soft keys Launch Application Launch the application along with the expert soft keyboard. Page up Go up a page of favorites. Page down Go down a page of favorites. Remove to Favorites Remove the application from the list of favorites. Back Go back to the ClickToPhone homepage.. ©Unique Perspectives www.click2go.ie Page 103 of 185 User Manual February 2014 Important preferences for this chapter Homepage preferences->Other Applications->Favorites ©Unique Perspectives www.click2go.ie Page 104 of 185 User Manual February 2014 17 Internet The Internet application allows you to browse the internet using your switch, joystick or by tapping the screen. When you select Internet from the ClickToPhone homepage the Internet window and Internet soft keys appear. In order to be able to navigate a web page ClickToPhone displays the virtual mouse pointer. When you have moved the pointer to the place you want you can then make a selection - exactly as if you had touched the screen. Furthermore it is possible to zoom in and out, launch a search engine and manage bookmarks. 17.1 Browsing the Internet Internet soft keys Mouse Click Make a mouse click at the current mouse pointer position. Same as touching the screen at that point. Mouse Move Mouse the mouse pointer to a specific position. The direction of the arrows specifies which quadrant of the screen you want to move the mouse to. ©Unique Perspectives www.click2go.ie Page 105 of 185 User Manual February 2014 Return to ClickToPhone Go back to the ClickToPhone homepage.. Expert keyboard Open the expert soft keyboard. From there you can implement scans, open the numeric and text soft keyboards if you want to enter a text. See Chapter 14 for further details on using the Expert keyboard. Zoom in Zoom in. Make the text and images bigger. Zoom out Zoom out. Make the text and images smaller. Search Open the default search engine. This can be specified in preferences. Previous page Go back to the previous internet page in the history stack or back to ClickToPhone if you are at the top of the stack. Bookmarks Open the bookmarks to create a new bookmark, go to a bookmark or enter a URL. 17.2 Moving the mouse pointer The mouse pointer is moved with the aid of a horizontal and vertical line that form a cross-hairs on the screen. When you have moved the mouse pointer to the desired position you can simulate touching the screen at that position. To move the mouse pointer first choose one of the four mouse move keys. The arrows indicate which corner of the screen the mouse will move towards. Then, the mouse pointer will disappear and the cross-hairs will appear. The horizontal line moves first either up or down the screen until you press your switch, joystick or tap the screen. Then the vertical line moves either left or right across the screen until you press your switch, joystick or tap the screen. If you do not make a selection the mouse pointer will return to it’s original position. Note that ClickToPhone enters touch screen mode temporarily when the virtual mouse pointer is displayed. It is not possible, therefore, to use the touch screen normally unless you switch to expert keyboard mode by selecting the ©Unique Perspectives www.click2go.ie key. Page 106 of 185 User Manual February 2014 A series of screen shots showing how to move the mouse pointer to a specific point on the screen and perform a selection, then move to another point and repeat. ©Unique Perspectives www.click2go.ie Page 107 of 185 User Manual 17.3 February 2014 Creating Bookmarks and entering URLs Opening a specific web-site involves a number of steps that are briefly explained below. . First launch bookmarks by choosing the symbol. Open the keyboard and type the URL of the web-site you are looking for. You can choose to add this to your list of bookmarks if required. Select the internet icon to open the new page. Using the bookmarks feature to enter a new URL to open a specific web page. ©Unique Perspectives www.click2go.ie Page 108 of 185 User Manual February 2014 Bookmark soft keys Open keyboard Open the text keyboard to type a url. Open web page Open the web page of the currently selected url Create bookmark Add the url entered in the text filed to the list of bookmarks Delete bookmark Delete the currently selected bookmark Page down Page down through the list of bookmarks Page up Page up through the list of bookmarks Back Back to the browser Important preferences for this chapter Project Settings->Preferences->Homepage preferences->Internet Project Settings->Preferences->Behavior preferences->Virtual Mouse Pointer ©Unique Perspectives www.click2go.ie Page 109 of 185 User Manual February 2014 18 Phone Settings Phone settings gives you control over some of the phone’s settings such as brightness, ringer mode and so on. It also allows you to explicitly turn off the phone rather than waiting for your hardware to switch off and the screen to go to sleep. In expert mode you can edit your project settings and restore project backups. 18.1 Phone Settings After you select Phone Settings from the ClickToPhone homepage the Phone Settings window will appear. The contents of the phone settings window will vary depending on what user level you have selected. An expert user can access all the options, restore backups and even edit their own preference settings. Phone settings options Increase Brightness Disables the auto brightness and increases the brightness. Reduce Brightness Disables the auto brightness and reduces the brightness. ©Unique Perspectives www.click2go.ie Page 110 of 185 User Manual February 2014 Volume Up Increase the media volume. Volume Down Decrease the media volume Wifi On/Off Turn on or off the wifi. Check notification area for current state. Ringer Mode Toggles the ringer mode between normal and silent. Speakerphone On/Off Toggles the Telephony preferences->Use Speaker-phone option. Use this if you occasionally do not want the software to automatically turn on the speaker phone. Go to sleep Shuts down the hardware if connected and sends the phone to sleep. Requires device administration access to function. See 18.2 below. My Settings Edit the preferences using a virtual mouse pointer. Backups Select a backup to restore. Notifications You can open the notification window by selecting this option rather than dragging down the status bar. This is only available on certain Android versions. Toggle Input Allows you to toggle between a single switch input and a joystick input. This is intended to be used if you are using two input methods, for example a wheelchair joystick during the day but a single switch at nighttime. 18.2 Go to sleep The Go to sleep option is a special case and requires you to give the ClickToPhone device administration privileges. This is normally requested during the installation process. ©Unique Perspectives www.click2go.ie Page 111 of 185 User Manual February 2014 It is intended to be used when the hardware setting Powerdown setting is set to Never when connected. Use this combination if you want to be in control of turning off the phone, rather than waiting for it to go to sleep after the screen time-out time. It is also useful if you are a touch screen user but cannot manage the on/off button on your phone. Use a switch or the HouseMate button to wake up the phone but select Go-to sleep from the Phone Settings window to turn it off. Note that if you set the Phone Settings preference to Go to sleep only then only the Go to sleep option will appear in the ClickToPhone homepage as in the example below. In order to use the Go to sleep function it is necessary to enable the ClickToPhone application as a device administrator. When you select Go to sleep for the first time the Activate security policies dialog will be displayed. Once ClickToPhone is enabled as an administrator this dialog will not appear when you select Go to sleep a second again. Note: You must disable ClickToPhone as a device administrator before you can uninstall the application. Go to Settings->Security->Select device administrators and uncheck ClickToPhone. ©Unique Perspectives www.click2go.ie Page 112 of 185 User Manual 18.3 February 2014 Editing your settings My Settings enables an expert user to edit their own preference settings and HouseMate grids using a virtual mouse pointer. When you select My Settings the preferences window. At the bottom of the screen the expert keyboard allows you to navigate the settings and make changes. You can start the virtual mouse pointer by selecting the ©Unique Perspectives www.click2go.ie key. Page 113 of 185 User Manual February 2014 You are now in Mouse Pointer mode. When you press your switch the mouse pointer symbol will scan through a series of symbols. When the symbol you require is visible press your switch to select it. See Chapter 15 for more on mouse pointer mode. 16.4 Restoring a backup An expert user is able to restore their own backups. This can be a very simple way to switch between different projects. When you select backups the list of backups stored on the SD card is presented. When you select a backup the Backup & Restore soft-keyboard will appear. Backup & Restore soft keys Restore preferences Restores everything except the InfraRed signals. Restore preferences and InfraRed signals Restores everything including the infrared signals. This can be used if a user has two different HouseMate setups – for two different locations for example. When you select a restore option a second soft-keyboard will appear to confirm that you want to go ahead or you can cancel and return to the ClickToPhone homepage. ©Unique Perspectives www.click2go.ie Page 114 of 185 User Manual February 2014 Important preferences for this chapter Project Settings->Preferences->Homepage preferences->Phone Functions->Phone Settings Project Settings->Preferences->Behavior preferences->Virtual Mouse Pointer ©Unique Perspectives www.click2go.ie Page 115 of 185 User Manual February 2014 19 HouseMate In conjunction with HouseMate hardware the Housemate application allows you to control devices in your environment including lights, curtains, door openers, television, CD player, intercom system and so on. HouseMate hardware contains a powerful InfraRed transmitter and receiver that can record the signals from other remote controls. Virtually any electronic device that can already be controlled from a remote control can therefore be controlled from your smart phone. HouseMatePro hardware can be supplied with a 32 channel EasyWave transmitter fitted internally. This enables you to directly control EasyWave sockets, relays and other appliances using radio frequency. A third option is the control of Z-wave devices over Wifi by connecting the phone to a Z-wave enabled router such as a Vera. When you launch HouseMate for the first time a set of default grids and icons are generated. These grids can be edited in technician mode and you can backup your grids to the SD card. The grids can be inter-linked so that you can create a tree like structure with one grid leading to the next. The bottom left cell of every grid is always a back key bringing you back to the previous grid or back to the ClickToPhone homepage. As a rule of thumb, and for ease of use, it is recommended not to create a grid structure more than 3-4 levels deep. The top-level grid and the music player grid. ©Unique Perspectives www.click2go.ie Page 116 of 185 User Manual 19.1 February 2014 Using HouseMate Assuming that you have already recorded infra-red signals, transmitting an infrared code is simply a matter of scanning to the desired key and selecting it. A progress dialog will appear while the signal is being transmitted. If you are a switch user the signal will be repeated as long as you keep your switch pressed. Tip: The bell symbol in this default grid is InfraRed command 1, and as such will trigger the output relay in your HouseMate hardware. You can copy this command to the homepage and use it to generate an RF alarm.See Chapter 20 for further details on hardware related alarms. 19.2 Editing a Cell Note: Before you can make changes to the grids or edit the cells you must enable Technician Mode Go to Project Settings->Enable Technician Mode. To edit a cell press and hold on the cell for a moment until a popup window appears. A different popup window will appear depending on whether you are editing a blank cell, a link to another grid or an InfraRed command. In the example below we are editing the cell that links to the Music grid. ©Unique Perspectives www.click2go.ie Page 117 of 185 User Manual February 2014 Changing the Image You can change the image for the grid by either importing a picture or photo from your picture gallery or by choosing an icon from the predefined list of icons. Changing the Name and Label You can change the name or cell label of the grid. The cell label appears under the chosen picture. The grid name is the name that is used to identify the grid when reconfiguring a cell. In many cases they will be the same. ©Unique Perspectives www.click2go.ie Page 118 of 185 User Manual February 2014 Text-to-speech The Text-to-speech field serves two purposes. When auditory scanning is enabled the text-to-speech text is the text that is spoken out using the installed voice synthesizer. When voice input is enabled (HouseMate preferences->Voice Input) the text-to-speech text is the text that the Android voice recognizer will identify as the word or phrase to select this cell. Clear Cell Clear cell erases the contents of a cell so that the cell can be reconfigured for a different action. Note that if the cell is linked to a grid it does not delete that grid. Similarly if the cell is linked to an InfraRed code it does not immediately delete the InfraRed code but marks it for reuse when a new code is created. Reconfigure Cell When Reconfigure Cell is chosen the Configure Cell popup is shown. This allows you to either link to another grid, use the wizard to create a new InfraRed command or choose from the list of existing InfraRed commands defined within your project. ©Unique Perspectives www.click2go.ie Page 119 of 185 User Manual February 2014 You can also define a cell as a back key or an exit key. Back will bring you back to the previous grid. Exit will quit the HouseMate application. Use these options if you wish to locate the back key in a different position and disable HouseMate preferences->Back keys to remove the default back key from the bottom left corner. ©Unique Perspectives www.click2go.ie Page 120 of 185 User Manual 19.3 February 2014 Editing a Grid To edit a grid, first navigate to the grid in question and then press the menu soft key. The popup menu provides several tools for populating and editing grids. 19.3.1 Reorder You can re-order or re-position the cells in a grid two at a time. Simply press on the cell you want to move and then press on the position you want to move it to. The two cells will be swapped. Keep swapping cells in this way and when you are finished press the phone’s menu key to exit ‘Reorder’ mode. 19.3.2 Grid Templates A number of grid templates are included in the software. To import a predefined grid template choose Grid Templates from the menu option. The following popup dialog will appear: ©Unique Perspectives www.click2go.ie Page 121 of 185 User Manual February 2014 Then select the template you require. You will be prompted as whether you wish to continue as this action will replace the current grid and unless you have made a backup there is no undo. 19.3.3 Operations You can apply a number of “batch” operations to the current grid which help speed up the configuration process. Choose Operations from the menu option. The following popup dialog will appear: Batch recording Very useful for recording all the codes for a particular grid one after the other, rather than individually one cell at a time. Copy names to labels ©Unique Perspectives www.click2go.ie Page 122 of 185 User Manual February 2014 If a cell is linked to a grid or infrared command then the name of that grid or infrared command is used as the cell label. Applies to all cells in the grid. Copy labels to text Copies the label of each cell to the text-to-speech text of each cell. Clear labels Clears every cell label in the current grid. Clear text-to-speech texts Clears every text-to-speech text in the current grid. Clear grid Clears the entire contents of the current grid giving you a blank grid to configure. Change grid size Choose from the list of grid sizes the size you want for the current grid. Note that if you have a fully populated grid and you reduce its size the cells that are no longer visible are NOT deleted. This can be helpful if you wish to expand the grid size at a later date without having to reprogram any commands etc. In the example below the cells of the Home grid have been repositioned and the grid size has been reduced to 2x2. ©Unique Perspectives www.click2go.ie Page 123 of 185 User Manual 19.4 February 2014 Creating and populating a new grid If none of the grid templates suit your requirements you can create a new grid yourself. First reconfigure a cell in the Homepage to link to a blank grid. Click on a cell and choose Reconfigure Cell from the popup dialog. Then choose the Open another grid option. 16 grids can be defined within HouseMate. Eight grids are pre-defined within the example project but if you create a new project you can define all 16 yourself. For now choose one of the unused grids, “Grid 9”, for example. An empty 3x4 grid will be assigned to the chosen cell. Click on the cell to open the empty grid. ©Unique Perspectives www.click2go.ie Page 124 of 185 User Manual February 2014 Now we want to populate the grid with InfraRed commands. There are three ways to do this: 1. Importing a grid template. 2. Using the wizard 3. Populating each cell one at a time 19.4.1 Importing a Grid template A number of grid templates are included in the software. To import a predefined grid template choose Grid Templates from the menu option. The following popup dialog will appear: Then select the template you require. You will be prompted as whether you wish to continue as this action will replace the current grid and unless you have made a backup there is no undo. ©Unique Perspectives www.click2go.ie Page 125 of 185 User Manual February 2014 19.4.2 Using the wizard Choose Wizard from the menu options. First choose a category, then choose some commands within that category and then choose how you want these commands to populate your grid. This last option is useful if you want to add more commands at a later stage from the same or another category. After the final step the grid will be populated with the commands you have chosen. ©Unique Perspectives www.click2go.ie Page 126 of 185 User Manual February 2014 Note that the wizard tool in this section is making command suggestions from a small sub-set of the complete icon list. To access the complete icon list it is necessary to populate each cell one at a time as described in the next section. 19.4.3 Populating each cell one at a time Make a long click on a cell and then choose Use the wizard to create a new command from the popup dialog. Again there are three steps to the wizard. First select the icon category, then the icon for the command and finally a name for the new command. You can optionally choose to use the command name as the cell label during this final step. When you are done the new command will appear in the grid. ©Unique Perspectives www.click2go.ie Page 127 of 185 User Manual February 2014 19.4.4 Difference between InfraRed commands and InfraRed signals Note that there are no InfraRed signals associated with any of these commands at this stage. All that has been specified so far is the icon, the name and the cell label. In this way there is a distinction between InfraRed commands and InfraRed signals. An InfraRed command is stored in the phone’s memory and simply consists of a name, icon and an assigned memory location within your HouseMate hardware which will contain the InfraRed signal data. An InfraRed signal is a data record stored in the flash memory of your HouseMate hardware which is transmitted by IR when the InfraRed command is selected. 19.5 Recording an InfraRed signal Before you start, make, sure that you have the Infra-red controls of the devices you want to control and that they have new batteries. Position the Infra-red control facing into the left hand side of the HouseMatePro as in the picture below, at least one foot apart. ©Unique Perspectives www.click2go.ie Page 128 of 185 User Manual February 2014 Warning: Some fluorescent lights emit Infra-red radiation. When you are recording Infra-red signals be sure that you are not directly under fluorescent lighting. Note: When recording infrared signals it is helpful to set the powerdown time of your HouseMate hardware to 5 minutes Never to prevent the unit from turning off whilst you are preparing to record. See chapter 20 for details. To record an InfraRed signal Turn on HouseMate and wait until it connects. Then navigate to the grid that contains the InfraRed command that you want to record a signal for. Make a long click on the cell until the popup dialog for that command appears. This is called the Command dialog. Then choose Record signal. There are four options associated with recording infrared signals. Record single code, Record macro, Record toggle and Record push button code. For now ©Unique Perspectives www.click2go.ie Page 129 of 185 User Manual February 2014 choose Record single code. You will be prompted to check the brand of remote control you are recording from. In many cases it is not necessary to check the brand and the generic brand will suffice. However by specifying the exact brand HouseMate can reproduce a stronger more powerful signal. If the brand name of your remote is not listed choose group 1. After you have chosen the brand the Record single code dialog will appear. First test that the HouseMate hardware is receiving an InfraRed signal by pressing a button on the remote control. You should see the red InfraRed LED on the HouseMate hardware light up. Next press and hold the button on the HouseMate hardware. When you are ready make a short press of the button on the remote control whose signal you want to record and then release the HouseMate button. ©Unique Perspectives www.click2go.ie Page 130 of 185 User Manual February 2014 During this process you will see the following message: Note that the actual recording of data does not begin until HouseMate starts receiving an InfraRed signal. Therefore there is no rush to press the remote button after you have pressed the HouseMate button. In fact you can keep the HouseMate button pressed for as long as you want. However it is important to keep the button press on the remote as short as possible AND then release the HouseMate button quickly after that. This will use up the least amount of memory. When you are finished, test the recording by clicking on the InfraRed command. The HouseMate hardware should beep and you should see the Transmitting InfraRed… popup message. That’s it! You can record signals for all the commands in your grid using this method. However at some stage you will come up against toggle signals and may wish to record macros. These are discussed in the following sections. 19.5.1 Recording a toggle signal Some remotes have a toggle function on single codes whereby the code is different if you press the same button two times in a row. Philips controls are noted for this and in this case it is necessary to use the method described below which records both copies of the code. If you used the Record single code method you would notice that the code, say Program Up, would work the first time you pressed it, but not the second or third time. Another reason to use this ©Unique Perspectives www.click2go.ie Page 131 of 185 User Manual February 2014 method is to conserve Macro memory because it forces you to use the single code memory space. To record a toggle signal 1. Make sure that you are connected to the HouseMate hardware. Make a long click on the command you want to record and then choose Record signal>Record toggle signal from the list of options. 2. Check the remote brand and change if required. Then the record toggle signal dialog will appear and the HouseMate hardware should be beeping regularly. 3. First test that the HouseMate hardware is receiving the InfraRed signal by pressing the button on the remote control. You should see the red InfraRed LED on the HouseMate hardware blink every time you press the button. 4. Now press and hold the button on the HouseMate hardware. When you are ready make a short press of the button on the remote control whose signal you want to record and then release the HouseMate button. While you are doing this the dialog text should change to just “Recording Primary InfraRed Signal…” and HouseMate should beep more rapidly. 5. If HouseMate did not detect any InfraRed signal the record operation will be canceled. Otherwise the following dialog should appear. 6. Now HouseMate is ready to record a second copy, or alternate, of the signal. This is how HouseMate records the toggle codes described earlier. As before press and hold the button on the HouseMate hardware. Then make a short press of the button on the remote control whose signal you want to record and then release the HouseMate button. While you are doing this the dialog ©Unique Perspectives www.click2go.ie Page 132 of 185 User Manual February 2014 text should change to “Recording alternate InfraRed signal…” and HouseMate should beep more rapidly. 7. If the procedure has been successful HouseMate will stop beeping. You can test the recording by clicking on the InfraRed command. The HouseMate hardware should beep and you should see the Transmitting InfraRed… popup message. Do this twice to test both copies of the toggle signal. A common mistake when recording toggle codes is to hold the button on the remote control for too long or to leave too long a gap between releasing the button on the remote control and then releasing the HouseMate button.. A quick press of the remote control button immediately followed by releasing the HouseMate button is all that is required. The memory size for recording toggle signals is only 2 seconds per signals. If you hold the button on the remote control for longer than this or leave too long a gap before releasing the HouseMate button, then the recording will fail, the following dialog will appear and HouseMate will beep continuously until you let go all buttons. Another mistake is to press the HouseMate button and the remote control button at the same time. It is important to press and hold the HouseMate button before you press the remote control button so as to capture all the signal. You can leave as long as you want between pressing the HouseMate button and pressing the remote control button with no fear of using up memory because HouseMate only starts the recording process when it starts to receive an InfraRed signal. 19.5.2 Recording a Macro Note: You can record up to 32 macros, each up to 15 seconds long. However if you record a macro that is less than 4 seconds it will not be stored in the Macro memory but in the memory for single codes and will not use up a Macro memory slot. HouseMate allows you to record a series of Infra-red codes from the same or different remote controls on a single cell. HouseMate records in real-time meaning that the Infra-red signals and the pauses in-between them are recorded ©Unique Perspectives www.click2go.ie Page 133 of 185 User Manual February 2014 into memory. Each macro can be approximately 15 seconds long and this makes it possible to create long sequences of commands. A good use of this feature is to record a series of Volume Up commands. When you select the Volume Up cell HouseMate begins transmitting the sequence of Volume Up commands. You stop the sequence by pressing your switch or joystick a second time. To record a Macro 1. Make sure that you are connected to the HouseMate hardware. Make a long click on the command you want to record and then choose Record signal>Record macro from the list of options. 2. Check the remote brand and change if required. Then the record macro signal or macro dialog will appear and the HouseMate hardware should be beeping regularly. 3. First test that the HouseMate hardware is receiving the InfraRed signal by pressing the button on the remote control. You should see the red InfraRed LED on the HouseMate hardware blink every-time you press the button. 4. Now press and hold the button on the HouseMate hardware and then press, one after the other, the buttons on the remote control that you want to record (whilst continuing to hold the HouseMate button). Notice how the red InfraRed LED will light up every time you press a button on the remote control. While you are doing this the dialog text should change to “Recording InfraRed signals…” and HouseMate should beep more rapidly. 5. You can record approximately 15 seconds of InfraRed signal. When you have finished release the HouseMate button. ©Unique Perspectives www.click2go.ie Page 134 of 185 User Manual February 2014 6. If the procedure has been successful HouseMate will stop beeping. You can test the recording by clicking the InfraRed command. Tip: Before you record a sequence of commands try it out on the original remote first so that you can determine the pace at which you should press the buttons. 19.5.3 Recording a Macro with an OK command Often, after transmitting a series of codes, the next code you would like to transmit is an OK or SELECT code. A good example would be a series of PROGRAM+ codes. In this case what you want to happen when you press your switch is not only to stop the PROGRAM+ series but to also transmit a new code, in this case, the OK code. HouseMate allows you to do this by recording two series of codes. In the example above the first series would be the PROGRAM+ codes and the second series, or “OK command”, would of course be just the OK code itself. To record a series of Infra-red signals followed by an “OK” command. 1. Make sure that you are connected to the HouseMate hardware. Make a long click on the command you want to record and then choose Record macro from the list of options. 2. Check the remote brand and change if required. Then the Record macro dialog will appear and the HouseMate hardware should be beeping regularly. 3. First test that the HouseMate hardware is receiving the InfraRed signal by pressing the button on the remote control. You should see the red InfraRed LED on the HouseMate hardware blink every-time you press the button. 4. Now press and hold the button on the HouseMate hardware and then press, one after the other, the buttons on the remote control that you want to record – in this example a series of Program+ commands. ©Unique Perspectives www.click2go.ie Page 135 of 185 User Manual February 2014 While you are doing this the dialog text should change to just “Recording InfraRed Signals…” and HouseMate should beep more rapidly. 5. When you have recorded enough Program+ codes release the HouseMate button but then immediately press it again before the “Recording InfraRed Signals…” dialog disappears. This action tells HouseMate to record a second series of codes that, more often than not, will be just a single code – the OK command. Note that there is no visual indication on the phone that you are recording an OK command. It is purely a feature of the HouseMate hardware, and therefore cannot be used by touch screen users. 6. Now press the OK button on your remote control and then release the HouseMate button. 7. If the procedure has been successful HouseMate will stop beeping. Note that you can only test the first series of codes when you click the command on the touch screen. To test the OK command you must select the cell using your switch. Select once to start the sequence and then press your switch a second time to stop the sequence and transmit the OK command. Tip: A good use of this function is to create a scan of your favorite sky channels. Record the following series of commands from a Sky remote: GUIDE>FAVOURITES-> DOWN-> DOWN-> DOWN-> DOWN-> DOWN-> DOWN> DOWN-> DOWN. For the end command record the OK command. Now when the you select the cell with your switch an automatic scan of your favorite channels will take place on the TV. When you press your switch a second time the highlighted channel will be selected. 19.5.2 Recording a Push button code A push button code, sometimes called a safety code, is only transmitted when the switch is kept pressed. It is useful for controlling a safety critical device such as the tilt on a bed. The signal will be transmitted only as long as the switch is pressed. When it is released it will stop. ©Unique Perspectives www.click2go.ie Page 136 of 185 User Manual February 2014 A push button code is recorded in exactly the same way as a macro but when it is transmitted the macro will be stopped when you release your switch. Simply follow the instructions above and record 10-15 seconds of the same code, say Tilt up. Then when you select that code with your switch it will only transmit when you have the switch pressed. Notes: 1. Use push button codes sparingly, since being long macros they take up a lot of memory and backups will take a long time. 2. Push button codes can only be used when you are using a switch. i.e. they will not work from the touch screen. Tip: Push button codes are also useful for dimming lights. The light will keep dimming or brightening so long as you keep your switch pressed. 19.6 Using the signal database HouseMate is supplied with a number of InfraRed signal databases pre-installed. You can also create your own. The databases include SKY, UPC and GEWA and others and will be expanded over time to include other generic brands. You can download these signals into your HouseMate hardware as an alternative to recording them. 19.6.1 Downloading signals from a signal database To open the signal databases choose Signals from the menu option. The Select a signal database dialog will appear. After you choose a database the Import and download signals dialog will appear. ©Unique Perspectives www.click2go.ie Page 137 of 185 User Manual February 2014 The left-hand list contains the signals stored within the database and the righthand list contains the commands defined within the current grid. Pair the signal you want to download with the chosen command in the grid. In the example below we have paired the Info signal in the SKY remote database with the Info command in Grid 10. You can make more than 1 pairing and after you have done so choose Download Signals from the menu options. The InfraRed signal data will be transferred into the HouseMate memory. When the transfer has completed you can test the commands by clicking on them. 19.6.2 Importing a signal database You can import a signal database as a grid template and download the signals it contains to your HouseMate hardware in one operation. First open the signal databases by choosing Signals from the menu option. The Select a signal database dialog will appear. After you choose a database the Import and download signals dialog will appear. Instead of making pairings as before simply choose Wizard from the menu options. The following dialog will appear: ©Unique Perspectives www.click2go.ie Page 138 of 185 User Manual February 2014 Be aware that this action will replace the current grid completely and, depending on the database size, may take several minutes to complete as the signal data is transferred into the HouseMate hardware. The complete SKY signal database imported as a grids and downloaded to the hardware in one action. 19.7 Examining the InfraRed Macros Within HouseMate the InfraRed signals are stored in two 16Mbit flash memories. One is used for the 250 single InfraRed signals and the other is used for the 32 Macros. Sometimes it is helpful to examine the contents of the Macro memory to ©Unique Perspectives www.click2go.ie Page 139 of 185 User Manual February 2014 determine how many Macro slots you have used up and by which InfraRed codes. Remember that if you record a macro that is less than 4 seconds long it will be stored in the single InfraRed code memory and will not appear in this list. To examine the Macro memory, make sure you are connected to the HouseMate hardware and then choose More->Advanced from the menu options. The HouseMate Advanced Settings window will appear. Choose InfraRed Macros and a progress bar will be displayed as the Macro information is retrieved from the HouseMate hardware. Followed by a list of the 32 Macros and which InfraRed commands they are assigned to. 19.8 Erasing InfraRed signals You can erase infrared signals individually by choosing the Erase signal option from the Command dialog or you can erase all the InfraRed signals and Macros using the Advanced settings. To erase all infra red signals and macros ©Unique Perspectives www.click2go.ie Page 140 of 185 User Manual February 2014 From the HouseMate Advanced Settings dialog choose the Erase all InfraRed signals option. A dialog box will appear requesting the password which is simply “1234”. After you have entered the password a progress bar will display the erase process. First the 250 single InfraRed signals are erased (these are stored in 8K blocks). Then the 32 InfraRed macros are erased (these are stored in 64K blocks). There is no Undo when you erase InfraRed signals. See chapter 21 on how to backup your data to the SD card before you carry out any erase actions. 19.9 Advanced Settings Besides the Remote Control Brands, InfraRed Macros and Erase all InfraRed signals options already discussed the HouseMate Advanced Settings window gives you access to the following additional options. 19.9.1 New Project & Open Example Project ©Unique Perspectives www.click2go.ie Page 141 of 185 User Manual February 2014 New Project will give you a new set of 16 empty grids. Open Example project will open the default HouseMate project with 8 grids pre-defined. You will be asked to confirm this action because unless you have made a backup there is no undo. 19.9.2 Create a grid template If you like a particular grid that you have designed and use it regularly then you can save it as a grid template. The template must only contain InfraRed commands and not links to other grids. The template files are saved to a folder on the SD card and will be available to you in all future projects you create. Furthermore you can copy the template folder from the SD card to other phones. To create a grid template navigate into the grid you have designed and then choose the Create a grid template option from the HouseMate Advanced Settings dialog. You will be asked to enter a filename for the template. This is the name that will appear when you choose Grid Templates from the HouseMate menu option and is also the name of the new folder that will be created on the SD card. For example sdcard/clicktophone/templates/my template. 19.9.3 Create a signal database Creating a signal database is done in exactly the same way as creating a grid template except that the InfraRed signals that have been recorded/assigned for the commands in the chosen grid are uploaded from the HouseMate hardware and saved with the grid data to the SD card. In this way you can not only save a favorite grid layout but also the InfraRed codes that go along with it. To create a signal database navigate into the grid that contains the signals you want and then choose the Create a signal database option from the HouseMate Advanced Settings dialog. ©Unique Perspectives www.click2go.ie Page 142 of 185 User Manual February 2014 You will be asked to enter a filename for the database and to confirm this action as it may take several minutes to upload the signal data from the HouseMate hardware. To use the signals and/or grid at a later stage in another project choose Signals from the HouseMate menu option and then select the newly created signal database. 19.9.4 Creating and removing Shortcuts You can create shortcuts to InfraRed commands and EasyWave signals in the ClickToPhone homepage. To create a shortcut, make a long click on a cell and then choose the Add shortcut option from the popup Command dialog. To remove shortcuts choose Remove Shortcuts from the HouseMate Advanced Settings window. To remove an individual shortcut make a long click on it in the ClickToPhone homepage and then choose the Remove Item option from the Edit homepage popup. Note that it is not possible to activate a Z-wave signal from the ClickToPhone homepage. 19.9.5 Project Commands Choose Project Commands to see a complete list of InfraRed commands that have been defined within your project. ©Unique Perspectives www.click2go.ie Page 143 of 185 User Manual February 2014 Commands with a tick mark are in use. Commands with a question mark are in use but are not visible because the grid that contains them has been reduced in size. Commands with an exclamation mark are in use by more than one grid. Finally, commands with no mark are no longer in use and will be recycled when a new command is created. 19.9.6 Disable hardware Beeps When you transmit an InfraRed signal, by default, the hardware will issue a beep. If this is a nuisance then check this option to disable the beeps. 19.9.2 Set-Top Mode Set-Top mode is intended for individuals who can fully manipulate the phone and are using the HouseMate hardware purely as a convenience for controlling their TV or entertainment system. The HouseMate hardware acts as a type of “set-top” box. Normal switch inputs and scanning are disabled and the HouseMate button is used only to turn on or off the hardware. The phone is allowed to go to sleep normally. To enable Set-Top mode choose Set-Top mode from the Powerdown Time option in Hardware Settings and then click the Update button. See Chapter 20 for more details on this and other hardware settings. Note: When using Set-top mode and you are not in range of the HouseMate hardware you should set ClickToPhone to stand alone mode to save battery. Choose Stand Alone Mode from the menu options in the ClickToPhone homepage. ©Unique Perspectives www.click2go.ie Page 144 of 185 User Manual 19.9 February 2014 Easy-Wave HouseMatePro can be fitted with a 32 channel EasyWave transmitter module. This allows you to control up to 32 RF devices such as light switches, sockets and relays. Visit www.eldat.de for more details on EasyWave and where to purchase EasyWave devices. To program a cell for EasyWave simply select EasyWave signal from the Command popup dialog. Then choose the EasyWave signal you want for that devices. You will be warned if your HouseMatePro device does not have the EasyWave module fitted or if it is faulty. Contact your supplier if this is the case. Now, when you press that cell, the EasyWave signal will be transmitted. Follow the instructions on your EasyWave sockets and relays to program them to receive your new signals. Notes: 1. The RF signals, or “Telegrams” are unique to each HouseMatePro device. So, for example, Channel 0 Button B, will be a different EasyWave Telegram on every HouseMatePro device. The reason for this is that they are intended to be used as security signals for opening doors and raising alarms. 2. It is not possible to backup EasyWave signals to the SD card. If you need to replace a faulty HouseMatePro device you will need to either swap out the internal EasyWave transmitter or reprogram the system. ©Unique Perspectives www.click2go.ie Page 145 of 185 User Manual 3. February 2014 EasyWave signal Channel 0 Button A is reserved as the Alarm signal and will be transmitted if you make a hardware alarm, even if HouseMatePro is not connected to your Smartphone at the time. ©Unique Perspectives www.click2go.ie Page 146 of 185 User Manual 19.9 February 2014 Z-Wave It is possible to control Z-wave devices using HouseMate and a MiCasaVerde Vera home controller. The Vera home controller is available from www.micaseverde.com and is essentially a wifi router with Z-wave capabilities. The Z-wave enabled appliances within your home must first be paired with your Vera unit. Then, once your phone is connected to the Vera unit over wifi it is possible to control these Z-wave devices from within HouseMate. Before you start programming HouseMate you must pair your Z-wave devices with your Vera unit. For basic devices such as sockets this is a simple procedure. Put the Vera unit into pairing mode by pressing the Z-wave button at the rear of the unit and then press the corresponding button on the socket. It is beyond the scope of this document to go into more detail, such as naming devices and creating scenes and it is assumed that you have already carried out these configuration tasks. Refer to the Vera documentation for further details. 19.9.1 Pairing you phone with your Vera unit 1. Make a long click on the HouseMate icon in the ClickToPhone homepage and then choose Edit item preferences from the Edit homepage dialog or choose Project Settings->Preferences->HouseMate preferences. Then choose Z-Wave setup->Enable Z-wave 2. If you are connecting directly to your Vera unit, click on Vera Local IP address and ensure that the IP address is set to 192.168.81.1. This is Vera’s static IP address and does not change from unit to unit. It is beyond the scope of this document to explain how to connect to your Vera unit over a domestic router. 3. Now click on Wifi settings. Turn on your Wifi and click Scan. If your Vera unit is switched on you should see it appear in the list. ©Unique Perspectives www.click2go.ie Page 147 of 185 User Manual February 2014 4. The number after the name is the serial number of your unit. Click on the entry and you will be prompted to enter a password. This is normally located on a label on the underside of your Vera unit beside the serial number. Enter the password, click Connect and after a moment your phone should connect to the Vera wifi router. 5. Click the phone’s back key until you return to the ClickToPhone homepage. Note: For reliable operation it is recommend to “forget” any other Wifi routers that you might have paired with and disable the system Network notification option to prevent any inadvertent connections to other wifi routers. ©Unique Perspectives www.click2go.ie Page 148 of 185 User Manual February 2014 19.9.2 Controlling a Z-wave device 1. Open HouseMate and confirm that you see two popup messages. First Connecting to Z-wave network, which, if successful, will be followed by Connection successful. Getting Device info. 2. Now navigate to the grid where you want to control your Z-wave devices. 3. Make a long click on the command you want to use. The familiar Command dialog will appear allowing you to edit the cell and record infrared signals etc. with two additional entries to allow you to control your Z-wave devices: Control Z-wave device and Run Z-wave scene. ©Unique Perspectives www.click2go.ie Page 149 of 185 User Manual February 2014 4. Choose Control Z-wave device. A second popup dialog will appear containing a list of Z-wave devices that are paired with your Vera unit. 5. Choose the device you want to control. The Select an action dialog will appear containing a list of possible actions that you can perform with the chosen device. This list will vary depending on what Z-wave category the device belongs to. ©Unique Perspectives www.click2go.ie Page 150 of 185 User Manual February 2014 6. Choose an action. After you have chosen it confirm that it operates as required by clicking the command. A short popup dialog should confirm the action that is being performed on the device. Note: ClickToPhone only supports two Z-wave devices types directly. Appliance modules (including light switches and relays) and Dimmer modules. If you want to control a device belonging to another device category then you must first create a scene that turns it on or off. Then you can run the scene as described in the following section to turn on or off the device. ©Unique Perspectives www.click2go.ie Page 151 of 185 User Manual February 2014 19.9.3 Running a Z-wave scene The major benefit of Z-wave is the ability to run scenes. Scenes reduces the complexity of the HouseMate grids and lowers the cognitive demands on the user. A scene is simply a set of devices and associated actions to perform on them. For example an “Evening-time” scene might draw the curtains, turn on some lights and turn on the heating. A “bedtime” scene might turn off all the lights except the landing light and set the heating timer to come on in the morning. With only two commands a user can perform these otherwise complex tasks. Scenes are created by connecting your Vera unit to a browser and using the vera’s “dashboard” configuration utility (this can even be done on the phone’s browser). However, it is beyond the scope of this manual to cover this topic and it is assumed that you have previously created some scenes. In the example below there is an “All on” and an “All off” scene that have been previously created. To run a Z-wave scene: 1. Make a long click on the command you want to use. Choose Run Z-wave scene from the popup dialog. The Pick a Scene dialog will appear with a list containing all the scenes that have been programmed into the Vera unit. 2. Choose a scene to run. To test, click on the command. You should get a popup confirmation that the scene is running. 19.9.4 Erasing a Z-wave command ©Unique Perspectives www.click2go.ie Page 152 of 185 User Manual February 2014 To erase a Z-wave command simply make a long click on the command and then choose the Erase command option from the popup list. Note that this is the same option you use to erase individual Infrared signals. Notes: 1. You may experience some delay when controlling Z-wave devices using the touch screen if the hardware is disconnected and you are not in stand alone mode. This is because the radio modules are busy searching for your HouseMate hardware. If you are not using any set ClickToPhone to Stand Alone mode 2. You may find that dimmers take longer to respond than switched appliances. 3. If a Z-wave device is unplugged then you may experience delays running scenes that contain that device. 19.10 Alarms HouseMatePro contains different methods for generating alarms. Relays There are two relays within housemate. One can be connected internally to an STT Condigi TX4 radio frequency module. The other is available on a 3.5mm jack socket and is typically connected to a wireless call bell system. If the STT module is fitted the external relay is available for other purposes, such as controlling a third party communication aid or other device. EasyWave HouseMatePro can be fitted with a 32 channel EasyWave module. When you make an alarm the first EasyWave telegram is transmitted by default. This can be paired with an EasyWave relay or call bell. InfraRed When you make an alarm the InfraRed signal associated with the first InfraRed command is transmitted. This is the Bell symbol in the default grid. Record an infrared signal for this code that will activate an alarm. There are three methods of triggering the alarm. Software only ©Unique Perspectives www.click2go.ie Page 153 of 185 User Manual February 2014 This requires you to be connected to your device. When you select the Bell symbol (in the default grid) three things occur: The relay is activated for 4 seconds (external relay if internal relay not connected) InfraRed signal 1 is transmitted (if recorded) EasyWave telegram is transmitted (Channel 0 Button A) Hardware only You can activate each of the above alarms by holding your switch for a defined number of seconds. This is independent of the phone which can be switched off. Programming the hardware alarm is discussed in section 19.2. Software & Hardware It is possible to have both types of alarms as discussed above. Important preferences for this chapter Project Settings->Enable Technician mode HouseMate->More->Advanced HouseMate preferences Project Settings->Hardware Settings Project Settings->Preferences->HouseMate preferences Project Settings->Preferences->HouseMate preferences->Z-Wave setup ©Unique Perspectives www.click2go.ie Page 154 of 185 User Manual February 2014 20 Hardware Settings The hardware settings dialog allows you to set two options which control the power down and switch output (or relay output) functions of the ClickToPhone or HouseMate hardware. These options are different from the normal preferences because they affect the behavior of the hardware units even when they are not connected to your phone. Because of this, the settings are stored within the flash memory of the hardware and not in your phone’s memory. To change either of these options you must connect to the hardware, change the setting and then press the Update button. If you do not press the Update button the changes are not saved. To open the Hardware Settings dialog 1. From the ClickToPhone homepage choose Project Settings from the Menu options and then choose Hardware Settings. The Hardware settings dialog will appear. The HouseMate hardware settings dialog. Note that the Update button will only appear after you make a change. 2. When the Hardware settings dialog is opened and you are connected the hardware should beep constantly. This prevents the hardware from powering down when you are making a change. ©Unique Perspectives www.click2go.ie Page 155 of 185 User Manual 20.1 February 2014 ClickToPhone Hardware Settings Although they are almost identical there are subtle differences between the settings of the ClickToPhone and HouseMate hardware units that warrant a separate explanation. In this section we explain the use of the ClickToPhone hardware settings. 20.1.1 Powerdown Setting The ClickToPhone’s Powerdown Setting can be set to between 30 seconds and 2 minutes. This is the length of time after which the unit will power down and thus disconnect from your phone if you do not press your switch. In other-words if ClickToPhone detects no switch presses for the powerdown time then it assumes that you no longer want to control your phone and disconnects. This allows the phone to turn off, the screen and go to sleep and prolongs battery life of both the phone and the hardware. 20.1.2 Switch Output Settings The ClickToPhone has a solid state relay output (see chapter 23 for connection details). This allows you to connect ClickToPhone to another device, for example a communication aid, and then switch between using your phone and the other device by making a long press on your switch. The length of time you have to hold your switch before control switches between devices is determined by this setting. ©Unique Perspectives www.click2go.ie Page 156 of 185 User Manual February 2014 When you are controlling another device it is not possible to control your phone. Furthermore if you let ClickToPhone powerdown it remembers that it is in Switch Output mode, and, when you turn it on again it will be controlling the other device, not your phone. You can identify if ClickToPhone is in switch output mode when you turn it on. Firstly you will hear one beep if it is not in switch output mode and two beeps if it is in switch output mode. Secondly a pop-up message will appear on your phone’s display warning you if you are in switch output mode. To regain control of your phone press and hold your switch for the switch output time. Note: If Switch output mode is enabled ClickToPhone will automatically switch to switch output mode after you turn it on if it does not make a connection with your phone after 30 seconds. ©Unique Perspectives www.click2go.ie Page 157 of 185 User Manual 20.2 February 2014 HouseMate Hardware Settings 20.2.1 Powerdown Setting The HouseMate powerdown time can be set to 1minute, 5 minutes, Never when connected or Set-Top mode. When set to 1 or 5 minutes the HouseMate hardware will automatically switch off if you have not made any switch presses for the chosen time. This allows the phone to turn off the screen and go to sleep and conserves the battery life of both units. Never when connected This option prevents the hardware from automatically powering down and is intended to be used in conjunction with the Go to sleep preference. To turn off the phone/hardware you have to select the Go to sleep option from the ClickToPhone homepage. See chapter 18 for further details on the Go to sleep option. Although this option can be used with any switch scanning method it is primarily intended for users who require environmental control and can touch the screen but find it difficult to operate the phone’s on/off button. In this case the HouseMate button, or connected switch, is used primarily to turn wake up the phone and as a convenient way to answer or hang-up a call. Set top mode In Set-Top mode the HouseMate hardware functions like a remote infra-red transmitter. It is intended to be placed in a fixed position in your living room and ©Unique Perspectives www.click2go.ie Page 158 of 185 User Manual February 2014 used as a convenience for controlling your entertainment equipment through your smart phone. Once you are connected to HouseMate you can use ClickToPhone software to control your equipment through the touch screen. In Set-top mode the HouseMate button functions purely as an on/off button and all scanning is disabled. When the software connects with the hardware it remains connected for as long as the phone is on and in range. The phone can go to sleep normally after the screen’s timeout time has elapsed. Set-Top mode is intended to be used by persons who can fully use the phone, including the on/off button, and require InfraRed control. See chapter 19 for further details on recording InfraRed codes and setting up the HouseMate grids. 20.2.2 Relay output HouseMate contains relays that can be used to activate radio frequency alarms. See Chapter 7 for more details on different alarm types. To activate the relay you can press and hold your switch for a defined length of time. To set the length of time go to Hardware Settings->Switch Output and choose the period you want. Note: The relay will function even if you are not connected to your smart phone. This means that even if the battery in your phone is flat you can activate an alarm by pressing your switch for the chosen period of time. ©Unique Perspectives www.click2go.ie Page 159 of 185 User Manual February 2014 21 Backup & Restore ClickToPhone allows you to back up and restore all user data to and from your phone’s SD card. You can then copy the data from your SD card onto your computer to have a permanent backup of your all your settings. Note: You must have an SD card installed in your phone before you can use this function. 21.1 Backing up your project To backup your data to the SD card 1. From the ClickToPhone homepage choose Project Settings from the Menu options and then choose Backups. The Project backup options dialog will appear. 2. Choose Backup your project. The Existing backups dialog will appear. You can backup over an existing backup or you can create a new one. ©Unique Perspectives www.click2go.ie Page 160 of 185 User Manual February 2014 3. Once you have selected OK a series of progress windows will appear as the user data is saved to the SD card. 4. Finally you will be prompted as to whether you want to save the infrared signals stored in the HouseMate hardware. You can choose to do this now or postpone for a later stage. Note that backing up Infrared signal data can take a long time depending on how may signals you have recorded. 5. If everything was saved successfully you will get the following message. ©Unique Perspectives www.click2go.ie Page 161 of 185 User Manual February 2014 21.2 Restoring a project To restore your data from the SD card 1. Repeat the procedure for a backup but choose the Restore a project backup option from the Project backup options. 2. Choose the backup to want to restore. Then you will get the same series of progress bars as the data is copied from the SD card. When this is finished you will be prompted as to whether you want to restore the InfraRed signal data from the SD card to the HouseMate hardware. 21.3 Advanced Backup The Advanced project management tool allows you to backup and restore selected files or settings. For example you may only wish to restore the HouseMate grids but not the user preferences. Another use is to copy a certain backup file, say the dictionary, between different backups. Advanced backup should be used with caution and is intended for technicians and experts only. To open the advanced backup dialog 1. Repeat the procedure for a backup but choose the Advanced option from the Project backup options. The advanced project management dialog will be displayed. ©Unique Perspectives www.click2go.ie Page 162 of 185 User Manual February 2014 2. Select the files you want and then choose whether you want to back them up or restore them. 21.4 Factory Reset It is possible to completely reset your project to factory default. This action resets all the preferences to their default values and sets the HouseMate grids to the example project. It does not recreate the dictionary or erase the InfraRed signals in your HouseMate hardware. To reset your project settings From the ClickToPhone homepage choose Project Settings from the Menu options and then choose Reset Project. You will be asked to enter the password “1234” to confirm this action. 21.5 Recreating the word prediction file It is possible to reset the word prediction file and remove any words that you have added to it . To recreate the word prediction file. To recreate the dictionary choose Project Settings from the Menu options and then choose Recreate Dictionary. 21.6 Recreating the Phrasebook ©Unique Perspectives www.click2go.ie Page 163 of 185 User Manual February 2014 It is possible to re-create the phrase book and set it to the factory content. If you have installed ClickToPhone over an earlier version that did not support the phrase book feature then you will need to carry out this procedure. To recreate the phrase book. To recreate the phrasebook choose Project Settings from the Menu options and then choose Recreate Phrasebook. Note: If you change the phone’s language it is necessary to recreate the dictionary to install the new words. At time of writing dictionary files exist for Dutch, Danish, French, Finish, German and Italian languages Tip: It is possible to remotely examine the contents of an SD card using the Remote Web Desktop application available free from the Android market and at www.click2go.ie. This means that your support engineer can copy data from your SD card, make changes, and then load the new settings back on to your phone. Contact your supplier for further details. ©Unique Perspectives www.click2go.ie Page 164 of 185 User Manual February 2014 22 Status Reporting Status reports record system and user events that affect the performance of ClickToPhone. They can be used as a diagnostic tool and to monitor a user’s usage of the software. They are not intended to be used as a patient alarm. To view the status reports choose Project Settings from the menu option on the ClickToPhone homepage and then choose Status Reports. The ClickToPhone status reports dialog will appear. Choose Open All from the menu option to see the content of the reports. The following types of events are recorded in the log file. 1. Standard Reports contain information such as Battery level, GSM signal strength, Bluetooth status, ClickToPhone mode, last connection and last switch press. 2. Bluetooth status change & low battery warnings 3. User intervention – such as the project settings being opened or a change in the ClickToPhone mode. 22.1 Report frequency & Timeout time ©Unique Perspectives www.click2go.ie Page 165 of 185 User Manual February 2014 You can change how often a standard report is made and set the timeout period for triggering a once off report. Once off reports are triggered when there is no user action (switch press) for the defined period of time. To change the reporting frequency or timeout time 1. Choose Preferences from the menu option of the ClickToPhone Status Reports window. Then choose Report Frequency or Timeout time as required. 22.2 SMS reporting Reports can be sent by SMS to a predefined mobile telephone number. To set up SMS reporting. 1. Within the ClickToPhone Status Reports preference page first check the Enable SMS reporting option. 2. Then choose the telephone number to send the report to and an optional message to be included at the front of the report. “UserName=Brian” for example. 3. Finally specify the content of the report. Choose Reports and then check the options you require. ©Unique Perspectives www.click2go.ie Page 166 of 185 User Manual February 2014 Warning: SMS reports are sent at the Report Frequency which can be as frequent as every 2 hours. Before you enable SMS reporting ensure that the user is happy to accept these SMS charges. You might also contact your network provider as they sometimes offer concessions for sending SMS messages to a frequently used number. ©Unique Perspectives www.click2go.ie Page 167 of 185 User Manual 23 February 2014 Connections & Wheelchair Interfacing There are five different types of hardware that can be used to operate ClickToPhone with an external switch. Some of the features of the ClickToPhone app apply only to certain hardware. Be sure of what type of hardware you are using as you read this manual. ClickToPhone hardware Primarily for Beginner, Intermediate, and Advanced user levels. Some level of control over other apps in Expert user level. Does not contain a HID module or InfraRed transmitter. HouseMate Primarily for Beginner, Intermediate, and Advanced user levels. Some level of control over other apps in Expert user level. Does not contain a HID module. HouseMate+ Fully featured hardware. Contains HID module. HouseMatePro. Fully featured hardware. Contains HID module. Can be fitted with EasyWave transmitter or RF nurse call. ©Unique Perspectives www.click2go.ie Page 168 of 185 User Manual 23.1 February 2014 ClickToPhone connections & battery Switch input Standard 3.5mm jack socket for connection of a standard switch. Switch output. Switch output for connection to another device such as a communication aid 5 Switch input 6 pin Mini Din for connection of a switched joystick or for interfacing to a wheelchair. Status LED Blinks when the hardware is trying to establish a connection with the phone. NOTE: The switch output of the ClickToPhone must never be connected to a wheelchair control system. This is because under certain circumstances the relay could latch on. To integrate a ClickToPhone with a wheelchair take the switch output from the wheelchair control and plug it into the ClickToPhone, in otherwords use the wheelchair control as the master device rather than the ClickToPhone. Switch Input Connection & Relay output Mono 3.5mm Jack I/P Pin Signal Sleeve Switch common Tip Switch 1 Mono Jack O/P (isolated) Pin Signal Sleeve Relay contact 1 Tip Relay contact 2 ©Unique Perspectives www.click2go.ie Page 169 of 185 User Manual February 2014 5 Switch Input 6 pin Mini DIN Socket (Front view) Connector Pin Signal 1 Switch common 2 Joystick Left 1 2 3 Joystick Right 4 Joystick Down 3 4 5 Joystick Up 5 6 6 Joystick Switch A 6pin DIN to D9 cable is available for interfacing 5 switch devices (such as a TASH mini joystick) or connecting to a DX or R-Net wheelchair system. A 6pin DIN to 2 3.5mm jack sockets for Two switch scanning is also available. Replacing the battery When the battery is low the ClickToPhone hardware will emit a beep at regular intervals. In addition the ClickToPhone software will display a “low battery” message when connected. The battery type is 9V PP3. However, because Bluetooth uses a significant amount of power we recommend that you purchase two rechargeable 9v batteries and an external charger. The battery compartment is located at the back of the ClickToPhone hardware. To replace the battery gently remove the belt clip followed by the battery cover. Lift out the battery with the aid of a non-metallic item and insert the new battery according to the diagram below making sure that the orientation is correct. 9V PP3 Alkaline + ©Unique Perspectives www.click2go.ie Page 170 of 185 User Manual 23.2 February 2014 HouseMate & HouseMate+ connections Battery Charging Illuminates when the battery is charging Bluetooth Status Illuminates when the hardware has successfully connected to the phone. IR and Wake-up status Has two functions. See text below for details. HouseMate button Exactly the same as Switch 1 the HouseMate button can be used to control ClickToPhone and during setup. Charger Input Charger input. Mini USB or circular connector. +5v, centre pin positive. Switch input Stereo jack input for connection of 1 or 2 switches. On versions with a 5 switch input this is a 6 pin Mini Din. Relay Output Mono jack output for connection to a call bell system. IR Status LED The IR status LED has two functions. 1. InfraRed Status LED illuminates when InfraRed is being transmitted or received. 2. Wake up and Power down status During powerup the IR LED remains lit until the hardware has connected to the phone. During normal operation the IR LED will blink every so often to indicate that it is switch on. Not to be confused with transmission of an IR signal. Switch Input Connections & Relay output ©Unique Perspectives www.click2go.ie Page 171 of 185 User Manual February 2014 Stereo Jack I/P Pin Sleeve Tip Ring Signal Switch common Switch 1 Switch 2 Mono Jack O/P (isolated) Pin Signal Sleeve Relay contact 1 Tip Relay contact 2 5 Switch Input (5 switch version only) 6 pin Mini DIN. Connector 1 2 3 4 5 6 Pin 1 2 3 4 5 6 Signal Switch common Joystick Left Joystick Right Joystick Down Joystick Up Joystick Switch Charging the battery HouseMate hardware contains a 2.6Ah Li-Ion battery. When the battery is low the HouseMate hardware will beep continuously and when you connect with your phone a message will appear on the screen warning you that the battery is running low. If your hardware unit has a Mini USB connector you can recharge it by connecting it to the USB socket of your computer or any suitable USB charger. If your hardware has a circular DC connector then you must you use the charger that was supplied. This is 750mA +5v with a positive center pin. Although the device is polarity protected and over-voltage protected connection of a different charger may damage the unit. ©Unique Perspectives www.click2go.ie Page 172 of 185 User Manual 23.3 February 2014 HouseMatePro connections Bluetooth Status Illuminates when the hardware has successfully connected to the phone. InfraRed and Wake-up status Has two functions. See text below for details. HouseMate button Exactly the same as the Switch i/p. the HouseMate button can be used to control ClickToPhone and during setup. Battery Charging Illuminates orange when the battery is charging. Blinks when battery low. 5 Switch input 6 pin Mini Din for connection of a switched joystick or for interfacing to a wheelchair. Charger Input Mini USB 5v charger input. Switch input Stereo jack input for connection of 1 or 2 switches. Relay Output Mono jack output for connection to a call bell system. IR Status LED The IR status LED has two functions. 3. InfraRed Status LED illuminates when InfraRed is being transmitted or received. 4. Wake up and Power down status During powerup the IR LED remains lit until the hardware has connected to the phone. During normal operation the IR LED will blink every so often to indicate that it is switch on. Not to be confused with transmission of an IR signal. Switch Input Connections & Relay output ©Unique Perspectives www.click2go.ie Page 173 of 185 User Manual February 2014 Stereo Jack I/P Pin Sleeve Tip Ring Signal Switch common Switch 1 Switch 2 Mono Jack O/P (isolated) Pin Signal Sleeve Relay contact 1 Tip Relay contact 2 5 Switch Input 6 pin Mini DIN. Connector 1 2 3 4 5 6 Pin 1 2 3 4 5 6 Signal Switch common Joystick Left Joystick Right Joystick Down Joystick Up Joystick Switch Charging the battery HouseMate hardware contains a 2.1Ah Li-Ion battery. When the battery is low the HouseMate hardware will beep continuously and when you connect with your phone a message will appear on the screen warning you that the battery is running low. If your hardware unit has a Mini USB connector you can recharge it by connecting it to the USB socket of your computer or any suitable USB charger. ©Unique Perspectives www.click2go.ie Page 174 of 185 User Manual 24 February 2014 Hardware Specifications Electrical Power Supply Quiescent Current ClickToPhone 1 x 9V PP3 HouseMate 1 x 3.7v Li-Ion rechargeable battery 20mA Mechanical Weight Case material Approx. 250grams Black ABS plastic. Environmental Operating ambient temperature range Storage temperature range Operating and storage humidity Min Max Units -25 -25 0 50 70 90 ºC ºC %RH HouseMate and ClickToPhone are not designed for outdoor use. ©Unique Perspectives www.click2go.ie Page 175 of 185 User Manual February 2014 25 Intended use, Safety and Misuse Warnings Intended Use ClickToPhone is a switch adapter designed to enable those individuals who cannot use a standard mobile phone to operate an Android Smartphone. HouseMate performs the same function as ClickToPhone but with the added ability of acting as an Infra-red remote control or Environmental Control system. It is designed to enable those individuals who cannot use a standard remote control the ability to operate television, lights, door openers, curtains and other equipment in their home or place of work/study. If you are controlling such environmental control equipment ensure that it has been fitted correctly, that you are using it for it’s intended purpose and that it is safe to use and operate. The SMS Alert and Status Reporting features of ClickToPhone are not intended to be used as a patient alarm for the reasons outlined on page 52. The SMS alert function is intended to be used as a convenient way to notify another person of your location. Status reporting is intended to be used as a diagnostic tool. HouseMate and ClickToPhone are for indoor use only. Safety and Misuse warning HouseMate can be operated directly or by connecting an appropriate switch. ClickToPhone can be operated by connecting one or more switches. Do not install, maintain or operate your switch interface without reading, understanding and following the proper instructions and manuals, otherwise injury or damage may result. Do not operate the switch interface if it behaves erratically, or shows abnormal response, heating, smoke or arcing. Turn the unit off, disconnect all cables, and consult your service agent. Ensure the switch interface is turned off when not in use and remove the batteries if it is not going to be used for an extended period. No connector pins should be touched, as contamination or damage due to electrostatic discharge may result. ©Unique Perspectives www.click2go.ie Page 176 of 185 User Manual February 2014 ClickToPhone and HouseMate are not designed to resist water penetration. If a spillage occurs Turn the unit off, disconnect all cables, and consult your service agent. Once turned off any spillage over the switch interface should be wiped dry without delay. The switch interface may not be used outdoors in damp or wet conditions. Most electronic equipment is influenced by Radio Frequency Interference (RFI). Caution should be exercised with regard to the use of portable communications equipment in the area around such equipment. While the manufacturer has made every effort to ensure that RFI does not cause problems, very strong signals could still cause a problem. Report any malfunctions immediately to your Service Agent. ©Unique Perspectives www.click2go.ie Page 177 of 185 User Manual February 2014 26 Maintenance Your switch interface hardware (ClickToPhone or HouseMate) should be regularly checked for integrity. Loose, damaged or corroded connectors or terminals, or damaged cabling should be reported to your Service Centre and be replaced immediately. The PP3 & Li-Ion batteries should be regularly checked for corrosion or leakage. Occasionally remove the back cover and check for leakages, corrosion and evidence of over-heating. If you are not using your switch interface hardware for an extended period disconnect the battery. All switches connected to your switch interface hardware should be regularly tested to ensure that they function correctly. Your switch interface hardware should be kept free of dust, dirt and liquids. If necessary wipe with a cloth dampened with warm water or alcohol. Do not use solvents or abrasive cleaners. Where any doubt exists, consult your nearest Service Centre or Agent. There are no user-serviceable parts within your switch interface hardware. Do not attempt to open the case. In accordance with the requirements of CE marking of this device and the Company’s policy, it is requested that re-occurring faults or defects be reported back to Unique Perspectives Ltd. Warning !! If your switch interface is damaged in any way, or if internal damage may have occurred (for example by being dropped), have it checked by qualified personnel before operating. ©Unique Perspectives www.click2go.ie Page 178 of 185 User Manual 27 February 2014 CE Marking HouseMate is marketed as a technical aid for people with disabilities and satisfies the requirements of the Medical Device Directive 2007/47/EC. This includes conformity with essential requirements of Council Directive 2004/108/EC of 15th December 2004 concerning electromagnetic compatibility. The following international standards have been applied: I.S. EN ISO 16201:2006 – Technical aids for disabled persons – Environmental Control Systems for Daily living. I.S. EN ISO 14971L2012 – Medical devices – Application of risk management to medical devices. EN60601-1-2: 2011 EN 55016-2-3 (2010) & A1 (2010) - Emissions EN61000-4-2 (2009) – Electrostatic discharge EN61000-4-3 (2006) – Immunity R&TTE Directive 1999/5/EC ©Unique Perspectives www.click2go.ie Page 179 of 185 User Manual 28 February 2014 Warranty & Sales and Service Information All equipment supplied by Unique Perspectives Ltd. is warranted by the company to be free from faulty materials or workmanship. If any defect is found within the warranty period of 12 months, the company will repair the equipment, or at its discretion, replace the equipment without charge for materials and labor. The warranty is subject to the conditions that the equipment: Has been used solely in accordance with this manual and for its intended purpose. Has not been subjected to misuse or accident, or been modified or repaired by any person other than someone authorized by Unique Perspectives Ltd. Has been used solely for the use of interfacing to an Android smart phone. For Sales and Service advice, or in case of any difficulty, please contact: Unique Perspectives Ltd. Ballyclovan Callan Kilkenny Ireland Telephone: Fax: +353 56 7725913 +353 56 7725936 WEB: www.click2go.ie EMAIL: [email protected] NOTE: The ClickToPhone or HouseMate switch interface should be clearly labeled with the manufacturer’s service agent’s telephone number. ©Unique Perspectives www.click2go.ie Page 180 of 185 User Manual February 2014 ANNEX 1: Quick Guide This reference guide briefly explains the purpose of each icon and soft key that appear throughout the ClickToPhone application for each of the four user levels. The right hand column indicates the user level requirement for the particular soft key to be available. For example the Delete Contact soft key is only available in Expert user level ‘E’. B+ = Beginner and higher, I+ = Intermediate and higher, A+ = advances and higher, E = Expert. B+ Contacts Dial contact Dial the selected contact. If the speaker phone option is enabled it will automatically be turned on. Write a text Opens the text editor window and qwerty keyboard so that you can write a text message. B+ I+ Send SMS Send the SMS message to the contact and return to the contacts window. I+ Continue writing Go back to the text editor window and continue writing. I+ Phrasebook Insert a phrase, add a phrase or edit the phrasebook (E). E Insert contact card Insert a contacts name and phone number E Add a recipient Send the text to another contact E Cancel SMS Cancel the SMS and go back to the contacts window. Send a phrase Choose between a pre-defined list of “phrases” to send to the chosen contact. I+ Open category The phrase book is divided into different categories. I+ Send phrase Send the phrase to the contact and return to the contacts window. I+ Exit phrasebook Cancel the SMS and go back to the contacts window. Send email If an email is defined for the current contact then launch the gmail app to write an email. E Manage contact Opens up the Contact Manager so that you can edit or delete the chosen contact or add a new contact. E New contact Open the contact editor to create a new contact E Edit contact Open the contact editor to edit the current contact E Delete contact Delete the current contact. E ©Unique Perspectives www.click2go.ie Page 181 of 185 User Manual February 2014 Page up Go up a page of contacts. I Page down Go down a page of contacts. I Search Contacts Search for a contacts alphabetically. New Contact A+ Edit Contact Open keyboard Open a text or numeric soft-keyboard to enter text or numbers. E Next Tab on to the next input field. Changes the focus from the contact name to the contact number to the phone type and so on. Contact manager Hide the text or numeric soft-keyboard and display the contact manager soft keys to save or cancel the current edits. Select photo Select a photo for the contact, to be displayed alongside the contact name. E Save contact Save the contact details to the system contacts and return to previous page E E E Send SMS notifications SMS sent The SMS was sent successfully. SMS delivered The SMS was delivered to the recipient successfully. SMS failed The SMS was not sent and has been added to the drafts folder. Messages Open Folder/Conversation Open the selected folder or conversation thread to view the SMS messages. A+ Dial sender Call the sender of the message. I+ Reply Opens the text editor window and qwerty keyboard so that you can reply to the sender with a new text message. I+ Reply with a phrase Open the phrasebook and send a phrase to the sender. I+ Forward Forward this SMS to another contact E Delete SMS Delete the current SMS. E ©Unique Perspectives www.click2go.ie Page 182 of 185 User Manual February 2014 Add sender to contacts Open the contact editor to add the sender to the contacts list E Previous Open the previous message. I+ Down Use this soft key to scroll down through long messages I+ Next Open the next message. I+ I+ Phone 0-9, *, # Digits 0 – 9, * and #. If you type 00 a ‘+’ symbol is automatically inserted for international calls. Dial Number Dial the number. I+ Send a text. Opens the text editor window and qwerty keyboard so that you can send a text to the number. A+ Call History View the call history of outgoing, incoming and missed calls A+ I+ Incoming call This was a call to your phone from another person that you answered. Missed call A call to your phone that you did not answer. Outgoing call An outgoing call that you made. Does not indicate whether it was answered or not. I+ Backspace B+ Text to speech Write a text Opens up a text editor window so that you can write a text to speak. Speak the text Speaks the written text Phrasebook Open the phrasebook and select a phrase to speak Edit Phrasebook Edit the phrasebook E Add to phrasebook Add the current text to the phrasebook E ©Unique Perspectives www.click2go.ie Page 183 of 185 User Manual February 2014 A+ Music Player Play/Pause Play or pause the currently selected music track. Volume Up Equivalent to pressing the volume up key on your phone. Volume Down Equivalent to pressing the volume down key on your phone. Home Go back to the ClickToPhone homepage. A+ Gallery Left, Right, to select pictures etc Zoom in Zoom in on the current picture Home Go back to the ClickToPhone homepage. A+ Camera Shoot Take a picture and store it on the SD card. Home Go back to the ClickToPhone homepage. A+ Internet Click Make a mouse click at the current pointer position Mouse Move Mouse the mouse pointer to a specific position. The direction of the arrows specifies which quadrant of the screen you want to move the mouse to. Home Go back to the ClickToPhone homepage. Expert keyboard Open the expert soft keyboard. From there you can open the numeric and text soft keyboards if you want to enter a text. Zoom in Zoom in. Make the text and images bigger. Zoom out Zoom out. Make the text and images smaller Search Open the default search engine. ©Unique Perspectives www.click2go.ie Page 184 of 185 User Manual February 2014 Previous page Go back to the previous page. Bookmarks Open the bookmarks Mouse keyboard Open the mouse soft keyboard. This soft key appears in the expert keyboard when you are using the Internet application and allows you to return to the mouse keyboard after entering some text or using the arrow keys. E Mouse Pointer mode Mouse pointer mode, switch to keyboard mode Indicates that you are in Mouse pointer mode. Press your switch when this symbol is visible to switch to Keyboard mode. Keyboard mode, switch to Mouse pointer mode Indicates that you are in Keyboard mode. Press your switch when this symbol is visible to switch to Mouse pointer mode. If you are connected to ClickToPhone hardware or an earlier unit without a HID then it is only possible to use Keyboard mode. Home Equivalent to pressing the phone’s Home key. Menu Equivalent to pressing the phone’s Menu key Move mouse pointer up and right Use a cross-hairs to move the mouse pointer up and to the right. Mouse click/Drag mode Equivalent to clicking on the screen at the location of the mouse pointer. Swipe Menu A menu of swipe functions for implementing gestures. Swipe left Implement a swipe on the screen to the left. Use this to change home screens. Swipe Right Implement a swipe on the screen to the right. Swipe Up Implement a swipe on the screen upwards. Use this to scroll through lists. Swipe Down Implement a swipe on the screen downwards. Click Lock A special function that locks the software in this mode until you either make a long click of your switch or press it 3 times. Up Equivalent to pressing the Up soft key. Enter Equivalent to pressing the enter soft key and will select a highlighted list item or screen object. Back Equivalent to pressing the phone’s Back key. Exit mouse pointer mode Exit mouse pointer mode. ©Unique Perspectives www.click2go.ie Page 185 of 185