1
Self-Cleaning
Oven
rhank you for buying a
Whirlpool appliance. Please
zomplete and mail the Owner
Registration Card provided
lvith this product. Then
zomplete the form below. Have
his information ready if you
reed service or call with a
Juestion.
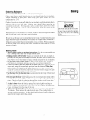
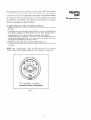
1Copy model and serial
numheru from plate (located as
shown) and purchase date from
sales slip.
1Keep this book, the Cooking
Guide and sales slip together in
a handy place.
Model Number
ierial Number
Purchase Date
Service Company Phone Number
l
l
You are responsible for:
) Installing and leveling the
range on a floor strong enough
to support its weight, and
where it is protected from the
elements. (See the Installation
Instructions.)
1 Making sure the range is not
used by anyone unable to
operate it properly.
1Properly maintaining the
range
Using the range only for jobs
expected of a home range.
Making sure the range is
secured by properly installed
anti-tip bracket, Mith rear
leveling legs positioned under
bracket.
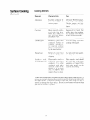
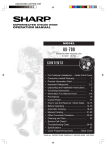
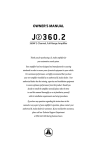
Record in the space provided below the Model No. and Serial No. of this
appliance. The serial plate is located on the right-hand vertical surface of
front frame in the storage area.
Model No.
Serial No.
Record these numbers for future use.
IMPORTANT:
Keep a copy of your bill of sale. The date on the bill
establishes the warranty period should service be required. If service is
performed, it is in your best interest to obtain and keep all receipts.
PLEASE DO THIS NOW!
The self-addressed PRODUCT REGISTRATION CARD should be filled in
completely. signed. and returned.
This information will register your product and help us to serve you quickly
in the future if the occasion should demand.
Important Safeguards.. ................................................................................. 3-6
Grounding Instructions .................................................................................. .6
Energy-Saving Ideas ....................................................................................... 7
Surface Cooking ........................................................................................ 8- 11
Using The Oven ....................................................................................... 12- 14
Baking.. .................................................................................................... 1516
Roasting ........................................................................................................ 17
Braising.. ....................................................................................................... 17
Broiling ......................................................................................................... 18
Cleaning.. ................................................................................................. 19-2 1
Self-Cleaning Instructions.. ..................................................................... 22-24
Adjusting Oven Temperature ........................................................................ 25
Anti-Tip Bracket Installation Instructions .................................................... 26
Avoid Service Checklist .......................................................................... 27-28
If You Need Service.. .................................................................................... 28
Warranty.. ...................................................................................................... 32
FOR YOUR SAFETY
If you smell gas:
Open windows.
Don’t touch electrical switches.
Extinguish any open flame.
Immediately call your gas supplier.
l
l
l
l
FOR YOUR SAFETY
Do not store or use gasoline or other flammable vapors
and liquids in the vicinity of this or any other appliance.
READTHE IMPORTANT
SAFEGUARDS IMPORTANT
AND ALL INSTRUCTIONSBEFORE SAFEGUARDS
USINGTHEAPPLIANCE.
Remove all tape and packaging wrap before using the oven. If any glue
remains. touch the residue with the sticky side of the tape already removed.
Or. use a cloth soaked with rubbing alcohol. Use caution because rubbing
alcohol is flammable. Rinse with warm water and wipe dry.
Base of Range
Improper installation. adjustment, alteration, service or
maintenancecan causeinjury or property damage.Refer to
your manual and to your installation instructions provided
with the oven. For assistanceor additional information
consult a qualified technician. service agency. manufacturer, dealeror gassupplier.
IMPORTANT
SAFETY NOTICE.
WARNING: Gas fuels and their use in appliances can cause minor exposures
to benzene, formaldehyde. carbon monoxide and soot, primarily from
incomplete combustion. Significant exposure to these substances can cause
canct'r
OI-n-productive harm. Properly adjusted burners with a blue. rather
than a ),ellow flame. u ill minimize incomplete combustion. Venting with a
hood or a11 open windo\ u ill 1‘urtherminimize exposure.
Be safety conscious. The preparation of food in an oven requires
temperatures that could cause severe burns. Before using this new appliance.
carcl‘ully read a11dfollow the safer instructions below.
I
I
Do not allow children to climb or
play around the range. The weight
of a child on an open oven door
may cause the range to tip.
resulting in serious burns or other
injury.
‘The following situations may cause serious bodily
harm, death or property damage.
l
Habe the range properly installed and grounded in accordance with
local codes by a qualified technician to prevent any shock hazard and
assure stability during operation. Install only per installation
instructions included in the literature packet. Be sure leveling legs are in
place at bottom corners of the ranse.
AI;k your dealer to recommend a qualified technician and an authorized
repair service. Have the technician familiarize you with the locations of
the manual pas shut off val\,e and gas meter in the event it is necessary to
(hut off gas supply to the unit during an emergency.
l
l
l
l
Never leave children alone or unattended in the area where an
appliance is in use. They should never be allowed to sit or stand on any
part of the appliance. Never leave the oven door open when the oven is
unattended.
CAUTION: Do not store items of interest to children in the cabinets
above a range or on the backguard of a range. Children climbing on
the range to reach the items could be seriously in.jured.
Do not repair or replace any part of the appliance unless it is
specifically recommended in this owner’s guide. To prevent personal
injury and damage to the range. servicing should be done only by a
qualified technician.
Do not store flammable materials in the oven, near the surface
burners or in the storage drawer.
3
TO REDUCE THE RISK OF
TIPPING OF THE RANGE.
THE RANGE MUST BE
SECURED BY PROPERLY
INSTALLED ANTI-TIP
BRACKET(S) PROVIDED
WITH THE RANGE. TO
CHECK IF THE BRACKET(S)
IS INSTALLED PROPERLY,
REMOVE THE LOWER
PANEL OR STORAGE
DRAWER AND VERIFY THAT
THE ANTI-TIP BRACKET(S)
IS ENGAGED. REFER TO THE
INSTALLATION INSTRUCTIONS OR THIS MANUAL
FOR PROPER ANTI-TIP
BRACKET(S) INSTALLATION.
IMPORTANT
SAFEGUARDS
. Destroy the carton and plastic bags after the oven is unpacked. Children
might use them for play. Cartons covered with rugs. bedcpreads or plastic
sheets can become airtight chambers. Remove all staples from the carton.
Staple\ can cause aeve]-ecuts and destroy finishes il‘ they come in contact
with other appliances or furniture.
(Contfnued)
. Remove the oven door from any unused range if it is to be stored or
discarded.
m
The following situations could cause bodily injury or property damage.
Never use the range to warm or heat the room. Ll\ins youl- range without
utenils or pans to &orb the burner’\ heat risks damaging the surface and the
controls.
l
Wear proper apparel Hhen operating the range. Loose fitting or hanging
gxirnients should nevci- be worn I\ hilt using the appliance. Be careful not to
let clothing ot- other Ilammable materials contact surface burners. areas near
burners. or interior SUI-facesof the oven until they have had sufficient time to
cool.
l
Ne\er modify or alter the construction of the range such ~14removal of
leveling Icg. pancI5. wire covers or an!’ other permanent part of the product.
l
Do not use water or flour on grease fires. Smother the fire with a pan Ild.
or uje baking Ida. ;t dr) chemical or foam-type extinguisher.
l
l
l
l
l
l
Use dry potholdew WCI or damp potholder\ on hot \u~-facescould result in
burns f~-omsteam. Do not let the potholder touch hot heating areas,. Do
not USCa tohel or other bulky cloth instead of a potholder.
Do not use aluminum foil to line the oven bottom or completely cover an
oven rack with foil. Improper use of aluminum toil may interfere with heat
circulation and damage the range.
Stand to the side of the o\en Fvhen opening the oven door. Slowly open
the door to alloa hot air or steam lo escape before removing or replacing
I‘ood.
Do not heat unopened food containers. Ruilcl-up of pressure may cause the
container to bui-sl and re\uIt in iil,jur>,
Keep the oven lent unobstructed. It is located along the center back edge
of the cooktop. Touchin, (7the surt‘ace~in thi$ arca when the oven is being
operated ma)’ c3u~c ~3 erc bui-ns.
The I-ange require I‘rrsh ail- for pl-oper bul-ner combustion. Do not block
the tlou 01‘air around the bae or beneath the lower front panel of‘ the range.
Know which knob controls which burner. Place a prm of food on the burner
before turning it on. and turn the burner off bcforc removing the pan.
l
Al~l’ays turn to the full LITE position when igniting top burners. Then adjust
the flame size so it does not extend beyond the edge of the utensil.
Turn utensil handles inward, but not extending over other surface
burners. This will minimize the possibility of burns, ignition of flammable
materials. and spillage due to accidental contact with the utensil.
l
Never leave the range unattended while the surface burners are on.
Roilovers may cause smoking, greasy spillovers may catch fire. or a pan
which has boiled dry may melt.
l
Always place an oven rack in the desired location while the oven is cool.
If a rack must be moved when the oven is hot. use potholders and grasp the
rack with both hands to reposition. Do not let potholders contact hot oven
walls.
l
Do not use the broiler pan without its insert. The broiler pan and its insert
allow dripping fat to drain and be kept au’ay from the high heat of the broiler.
Do not cover the insert with foil. Exposed fat could ignite.
l
Do not touch a hot oven light bulb with a damp cloth. Doing so could cause
the bulb to break. Disconnect the electrical service cord or shut off the
power to the oven bcforc removin g and replacing the bulb.
l
Allow parts to cool to room temperature before touching or removing
them from the range. When a surface burner is first turned off. the burner
and
grate are still hot enough to C;IUQZbums.
l
l
l
l
l
(:lean the range regularly to keep all parts free of grease which could
catch fire. Pay particular attention to the area underneath each surface
burner. Exhaust fan ventilating hoods and grease filters should be kept
clean. Do not allow grease to accumulate. Greasy deposits in the fan could
catch fire. When preparing flaming foods under a hood, turn the fan off. The
fan, if operating, could spread the flame. Refer to the hood manufacturer’s
instructions for cleaning.
When heating fat or grease, watch it closely. It may catch fire if allowed
to become too hot.
Use the automatic timer (some models) to cook cured or frozen meats and
most fruits and vegetables. Foods that can spoil, such as milk, fish, poultry,
or pork, should be chilled in the refrigerator first. Even when chilled, they
should not stand in the oven for more than one hour before cooking begins.
Do not use glass, earthenware or other ceramic-type cooking utensils
for rangetop cooking unless recommended by the utensil manufacturer. Uten
sils of this type may break with sudden heat chanses; most are designed to bc
used only in the oven.
IMPORTANT
SAFEGUARDS
l
IMPORTANT
SAFEGUARDS
(Contiinued)
The instructions
appearing in this owner’s guide
are not meant to cover every
possible condition and situation
that may occur. Common sense
and caution must be practiced
when operating and maintaining any appliance.
l
NOTE:
l
l
l
Do not use plastic salt and pepper shakers, spoon holders or plastic
wrappings on top of the range when it is in use. These items could melt
or ignite. Potholders, towels or wooden spoons could catch fire if placed too
close to the flame.
Do not use a wok if it is equipped M,ith a round metal ring that extends
beyond the burner grate. Because this ring kaps heat, the burner and
grate could be damaged. Also. the burner may not work properly, creating
a carbon monoxide level above current health standards.
Before self-cleaning the oyen, remove tic broiler pan and any utensils stored
in the oven. Clean in the self-cleaning cycle only the parts of the oven listed
in this owner’s guide.
Do not clean the oven door gasket. The door gasket is essential for a good
seal. Care should be taken not to rub. damage or move the gasket.
Do not use oven cleaners. No commercial oven cleaner or oven liner protective coating of any kind should be used in or around any part of the selfcleaning oven.
SAVETHESEINSTRUCTIONS
Grounding
Instructions
IMPORTANT:
FULLY.
READ
AND SAVE
THESE
INSTRUCTIONS
CARE-
For personal safety, this oven must be proper11 grounded. The range power
cord i\ equipped with a three-prong (qounding) plug which mates to a IS amp
(minimum) three-prong (grounding) wall receptacle tominimi/e the possibility
of electrical shock hazard.
For maximum safety, the plug must be plugged into a 120V-60Hz outlet
(IS amp minimum) that is correctly polarized and properly grounded.
If a tuo-prong wall receptacle i\ the only available outlet. it is the personal
responsibility of the consumer to ha\,c it replaced with a properly grounded
three-prong u,all receptacle installed bl, a qualified electrician.
For personal safet!, this appliance must be grounded at all times. DO NOT
LiNDER .4NY CIRCL’MSTANCES. CUT OR REMOVE THE THIRD
ROUND GROUNDING PRONG FROM THE POWER CORD PLUG OR
SERIOUS INJURI’ TO THE USER MAY RESULT.
Do not operate the range using a twvprong
adaptor.
Do not operate the range using an extension cord.
6
Surface
Cooking
loking. A lid traps {team and uses It to speed up the
Use lids when surface CC
cooking process. If you have a pressure cooker or vegetable steamer, use it.
You’ll uaste fewer vitamins. save time and cut cnerg)’ costs.
Use medium weight, flat bottomed pans. Pick
ducts heat well.
pans
made of a metal that con-
Thau, I’roLen foods before cooking.
! Never use the range to heat the kitchen. UsinS your range
without utensils or pans to absorb the burner’s heat risks
damaging the xurface and the controls.
~ACAUTION~
Oven Cooking
Preheat the oven onI>, when a recipe tells you. Put roast{ and casseroles into a
cold oven. then. turn the oven on.
Glance through the L indou in the oven door to check on foods. Opening the
oven door frequentl~~to chech on foods waste\ energy.
U\e the oven to prepare complctc meals. For instance. $tart a roast. add
vcgctable$ when the meat IS half cooked. then ~4arm rolls or dessert after the
main dishes are coohed.
Make It ;I habit t:~ LUI-II
off
the oven before
1’0~1
remove cx~okedfood.
7
Energy Saving
Ideas
Surface Cooking
Setting The Controls
Each burner lights automatically from an electronic ignitor. For your sal’ety.
al%.ayshave a utensil on the grate before turnins on the burner.
To operate the surface burner:
1. Push in and turn the surface control to LITE.
2. After the burner lights. turn the control to the desired flame size.
The controls do not have to be set at a particular mark. Use the marks as a
guide and adjust the flamm as needed.
The surface burners can be lit manually during an electrical power outage.
To light a surface burner, hold a lit match to the burner head, then slowlq
turn the surface control to LITE. Use caution when lighting surface
burners manually.
Flame Size
Never extend the flame beyond the outer edge of the utensil. A higher flame
simply wastes heat and energy.
Correct flame size is determined by utensil size and material, what you are
cooking, and whether or not you are cooking with liquid.
Start most cooking on a high flame, then turn to a lower one to complete the
process.
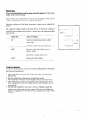
The suggested settings found in the chart below are based on cooking in
medium-weight aluminum pans with lids. Settings may vary when using other
types of pans.
Flame Size
Type of Cooking
HI
Start most foods; bring water to a boil;
pan broiling
Continue a rapid boil; fry; deep fat fry
MED
Maintain a slow boil; thicken sauces,
gravies; steam
Keep foods cooking; poach; stew
LOW
Cooking
Keep warm; melt; simmer
Utensils
For- best reslrlts und errc~~-gy
c.otlser.~~atiorl. choose cooking utensils which have
the following characteristics:
1. Pans should haveJut bottoms that make good contact with the entire
burner grate.
2. Pan sizes should match the amount of food being cooked.
3. Pans should be tilell-balmwed so that handles do not cause them to tilt.
4. Pans should have tight-fitting lids to hold steam within the pans and reduce cooking time. Lower heat settings may be used when pans are covered with lids.
5. Pan materials should have good heut c~orldwtiorl. Medium-weight aluminum gives good results for most cooking. The chart on the following
pagegives suggestions for best results when cooking with a variety of pan
materials.
Surface Cooking
Cooking
Utensils
(Continued)
Material
Characteristics
Uses
Aluminum
Excellcn~ conductor of
heat. Available
in
>
\‘;ll’loll4
gaugt\.
All foods. With thin gauge.
cooh with some liquid.
Thicker Lpauges are suggcsted for frying. candy.
r;auces.
Heats uncvenlj ~mle\\
used u ith IOU heat.
Holds heat. SubJect to
ru4t. Used for \hlllet\
and Dutch o\ ens.
Suggeytcd for foods that
require long, slow cooking.
Use medium OI-IOU heat to
preheat and hi-own foods.
Rclati\,el>
USC for long. low-heat
cooking with liquids.
Cat
iron
conductoi-.
chipping.
for
uIlle\\
rangctop
poor- heat
Subject to
Do not use
coohlllf
I-ccolllmend~d
b!, the manui‘acturer.
Stainle5\
steel.
clad aid inner core
Relati\rcl>’ poor heat
conductor. Subject to
chipping.
Use only with larfc quantities of liquid.
Plain \tainle\\ steel i\ a
poolheat
relati\‘elj
conductor. It I\ often
combined \I ilh other
material\. either- on the
boltoni or in an inner
core. IO impro\ e heat
trunjfer. Ea\>, to clo:m.
Plain stainIt‘{\ steel should
be used onl! with large
quantities of liquid. Pans
ti,itli otheimetal4 can be
uvzd for all cooking.
To prelent discoloring or crazing of the porcelain enamel range surface. do
not u\e an extremely large pan that extend\ beyond the hurncr grate and touchex
the range 4111~l‘acc.
Long-term coohing at high heat when using thi\ type of
utensil cm damage the range surface. Do not LIW two burners to heat one Inrge
pan \uch a\ ;i roaster or griddle.
IO
Fluorescent
Light (Some Models)
A switch on the control panel turns the cooktop lamp on and off
Some models have a cooktop lamp that is located below the control panel. This
lamp must be replaced by a service repreaentativne.
On models with a lamp and canopy above the control panel. the lamp may be
replaced from the front of the range.
To replace the lamp:
I. Turn power off at the main source or unplug the range.
2. Tilt back the hinged lamp cover above the control panel.
3. Remove the lamp by,rolling up and bath. Install the nevvone by sliding down
into place.
3. Lower the hinged lamp cover.
Oven Light (Some Models)
The ov’cn light (some models) automatically tut-ns on when the door is opened.
Use the switch located on the control panel IO turn the light on when the door is
closed. The oven light is located at the rear of the oven and is covered with a glass
shield. The glass shicid must be in place whenev,er the ov’en is in use.
To replace the light:
I. Turn power off at the main source or unplug the range
~ACAUTION~
1 Be sure the oven is COOL. Wear a leather fxed glove for proI tection against possible broken glass.
2. Press wire holder to one side to release the glass shield.
3. Replace bulb with a 10 watt appliance bulb.
4. Replace glass shield in socket and snap wire holder into place.
Be sure that all burners are
off and cool before replacing the
oven light. Be sure that the
range top is cool before replacing the fluorescent bulb.
Using The Oven
Setting
Oven Controls
Before using the oven. arrange the oven rach(s) according to the food being
coohed.
Some model> have two o\‘en controls -a selector and a temperature control.
Both must be xet to operate the oven. Set the wlector to the drbired operation
such as BAKE or BROIL. Set the temperature control to the desired temperature. When cooking is finished. turn both the selector and temperature controls
to OFF.
SELECTOR
TEMPERATURE
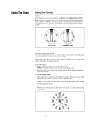
Clock and Minute Timer
The clock and minute timer are set Mith the sme
control. Refer LOthe following
set of instructions to bet the cloth on your range.
The minute timer does not start or \top cooking. It simply serves as a timer that
buzzes when the set time has run out.
To set the clock:
1. Push in and turn control A to set the time ot‘day.
NOTE: The minute timer hand will turn as the clock is set.
2. After the clock is set. release the control and return the minute timer hand
to the off position,
To set the minute timer:
1. Turn control A to set the dssil-ed number ofminutc\. For best accuracy. turn
the minute timer hand hc~~~rrlI/ICI.\rrri/~,q.then back to it.
NOTE: Do not push in on the control when setting the minute timer. Doing
so will change the clock.
2. When the set time has passed. the buzzer will hound. Turn the control to the
off position.
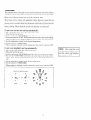
Timed Bake
The automatic timer, will turn the oven on and offat the times you choose. Before
tirllc of’h~~
setting the oven for timed bake. hr .SIII’Ctllr c,loc~X
.\/IOLI..S
tl~c c’orrcc,t
Refer- to the follow ins instructions to set the automatic timer.
Most foods can be cooked with automatic timing. However. foods that can
{pail. {uch as milk. eggs. fish. poultry or meat. should be chilled in the refrigerator first. Even when chilled. they should not stand in the oven more than one
hour before cooking starts. Foods which are frozen can be held for longer time\
before cooking. Foods should be served soon after the oven shuts off.
To start oven at a later time and stop automatically:
1. Be sure that the clock shows the correct time of day.
7. Place the food in the oven.
3. Push in and turn the STOP TIME knob to the time you want to stop cooking.
3. Pu\h in and turn the STARTTIME knob to the time you w’ant to start cooking.
There must be at least a half hour difference between the stop and start times.
5. Set the temperature control to the desired temperature.
6. Set the selector to TIME BAKE.
7. When cooking is finished. turn the temperature and selector controls to OFF.
To start oven immediately and stop automatically:
1. Be sure the clock shows the correct time of day.
2. Place the food in the oven.
3. Push in and turn the STOP TIME knob to the time you want to stop cooking.
3. Be sure the START TIME knob shows the \ame time as the cloth on the
range. It’ not. turn the knob to the time on the clock. The knob will then pop
OLIC.
5. Set the temperature control to the desired temperature,
6. Set the selector to TIME BAKE.
7. When cooking is fmished. turn the temperature and .relector control\ to OFF.
PUSH
.
TO SET
6
STOP
.
TIMER
FUNCTIONS
6
START
.
4
.
//
NOTE: After using the oven
with automatic timing. be sure to
turn the selector and temperature controls to OFF.
Using The Oven
Oven Vent
1
The oven is irented through the center back edge of the cooktop. When the oven
is on, warm air is released through the vent. Thitr venting is necessary for proper
air circulation in the oven and food baking results.
Arranging
Oven Racks
Always arrange the oven racks while the oven is cool. To remove the rack. ~~111
forward until it stopx. Lift up the front and slide out. To replace. fit the rack onto
the guides on the oven walls. Tilt the front of the rack upward and slide back
into place.
To bake on one rach. place rach on the second or third guide from the bottom
of the oven. To bake on tw’o rachs (some models). place racks on the second and
fourth rack positions from the bottom.
IACAUTIONI
The oven cannot be used in the
1event of illairuroulrgc.
If 31
power outage occur\. turn the
controls to the OFF position.
I-l
Selecting
Baking
Bakeware
To enswe good baking results, LISCthe PI-cqxr baking pan.
Cake. meat loaves. quick breads. pies or yeast bl-cads bake be\t in mediumweight aluminum or glass pans. When axing glas\ pans. reduce the oven
temperature by 35°F.
Cook~ej. biscuits or cream puffs bake best on medium-wright aluminum sh2ets
with no side< OI- verv low sides. Baking pans should allow I-oom for air
circulation on all hidss. For large pans. such ;I\ cookie sheets, allow two to four
inche\. For small pans. such a\ cake or muffin pans. allow two inches on all
sides.
Darkened pan\ XC not suitable. Tin-coated. atainlesb (tee1and warped or dented
pans do not heat evenly and cau~ uneven baking.
Be sure to use the pan size recommended in th2 recipe. A batter baked m a pan
larger than the recipe recommends will usually be crispier- than it should beif baked in a pan smaller than recommended. it may overflow. When using pans
of ~~nusualshape. fill to the top with wntcr. m2asur2 the water and use l/3 that
amount of batter.
Baking
Hints
1. Always follow recipe or package instructions. Use the recommended pan
size. Cooking times may vary in high-altitude areas.
3. Baking results will be better if pans are centered on the rack a< much as
possible. Be sure pans do not touch each other. the door. sides or back of the
ovt’n. Allo\\ t\vo to four inches of space around each pan for air circulatioll.
3. Do not place large cookie sheets or pans on the bottom rack. Doing so
will block air circulation and may cause the oven to heat improperly.
3. When two cakes or pies are baked at the same time, place both pans on the
same rack. using the second rack position from the bottom. When four
cakes or pies are baked at the same time, place two pans on each rack.
using the second and fourth rack positions t‘~-omthe bottom. Stagger the pans
so one is not directly under or over the oth2r.
5. Set the timer for the shortest time recommended in the recipe. Check food.
If it is not done. allow more time.
6. I)o not open the door while baking since the oven temperature drops whenever the door is opened. This could cause poor results and lenghen baking
times. Check on foods by glancing through the window in the uven door
(some models) and turning on the oven light.
7. A cake is done when the surface springs back after lightly touching or
when ;I toothpick inserted in the cake comes out clean. There should be little.
if any. shrinkage from the edge of the pan.
8. After removing from the oven. allow the cake to cool on a rach for 10 to
15 minutes. Then remove the cake from the pan. This cooling helps to
pre\Jent cracking or tearing. A cake should not be frosted (unless oth2rwise
stated in the recipe) until it has cooled.
1
I
IACAUTIONI I
I
I
DO NOT LOCK the oven door
at any time except when preparing the oven for a self-cleaning
cycle.
Baking Problems
and Solutions
3aking Problems
Causes
Corrections
Zookies and biscuits burn on the
lottom.
Coohics and biscuits put into the
oven before preheating time is corn
pl2ted; oven rack ov,ercrowded: dark
pan absorbs heat too fast.
.Allovv over1to preheat to the selected
temperature before placing food in
oven. Choose pan sizes that u ill
permit tuo to four inches of air spac2
on all sides when placed in the oven.
Us2 a medium-weight aluminum
bahing sheet.
Zakes too dark on top or bottom.
Oven too hot; caheaput into th2 oven
before preheating time is complet2d;
rack position too high or low.
Set oven temperature 25” lower than
recommended. Allovv oven to preheat to the selected temperature
before placing food in the oven. Us2
propel- rack position for baking
needs. The best baking results are
obtained from using shiny pans.
Cakes not done in the center.
Oven too hot: incorrect pan size; pan
not ccntcred in oven.
Set oven temperature 3.5” lower than
recommended temperature. Use pan
size suggested in the recipe. Us2
rack position two or three and place
pan so there is two Inches of space on
all sides of pan.
Cakes not level.
Range not level: pan too close to
oven wall or rack overcrowded: pan
warped.
Place a marked glass measuring cup
filled with some water on the center
of the oven rack. If the water level is
uneven. refer to the installation
instructions for leveling the oven.
Bc sum to allow two inches of clearance on all sides of each pan in the
oven. Do not use pans that are dented
or warped. Check oven rack for
tlatness and proper positioning.
Foods not done when cooking time
is up.
Oven too cool: oven crowded: oven
door opened too frequently.
Set ov’en temperature 35’ higher than
suggested and bake for the recommended time. Be sure to remove all
pans from the oven except the ones to
be used for baking. Open oven door
onI>, after shortest recommended
baking time.
I !l
Roasting
Hints
Roasting
Roasting is a dry heat methcxl
l’orcoohing ler~dercuts ot‘mest and poultq. Place
roasts fat side LIP on a rack in a \hallol~. LIIICO\ ered pan. US the bottom 01’ nextto-bottom rack position. Set the oven temperature for 335°F. Basting i\ not
necessary.
1. II.sc II n~wl ~/lc’,nlonlc’/c/.to judge the degree ot’donene~~.
Inwt into the thickest part of meat. The tip should not be in contact
with bone. gristle or fat.
For stuffed poultry. insert into the center of stuffing. For unstul’t’cd tL1rheJ.s.
insert into the inner side of the thigh.
2. FIY~Z~I~‘ocl~t.s
may be cooked without thauing. Allow an additional 20 minutes per pound cooking time. Use a meat thermometer. as described above.
to judge the degree of doneness. Insert the thermometer after the roast has
thawed. ususlly about half-way thl-ough the total coohing time.
3. For cc/sic/- c,c/n,i/l,q, allow roast or poultry to stand 20 mmutcs uftcr coohing
is completed.
Braising
Braising is a moist heat method for cooking less tender cuts ofmeat. First brow
meat in an uncovered pan on top of a range. C’SCJ
off/\ c’,~or/,ql~
,fb/ to />wl‘c’rlt
.sricXirl,y. Then, place browned meat in a pan b ith a tight-fitting cover. Add a
small amount of liquid. cover and place in a 300°F to 335°F oven until tender.
Braised meat is cooked until well done to tenderize it. Braising usuall~~requires
2 to 3 or more hours depending on the type and size of meat.
Braising
Broiling
Broiling
Broiling is a method ofcoohillg foods by direct heat under the upper broil burnerof the oven. Results and cooking time\ v, ill depend on the distance between the
food arid the burner.
The broiler p;m and it.4 grid allou dripping fat to drain and be kept away from
the high heat of the broiler. Do not USC the pan V.ithout its grid. Do not co\‘er
the grid with foil. The exposed fat could ignite.
To broil:
1. Place the rsck in the desired position. close to the top of the overt. Position
the rack closer to the broil burner for rare steahs. For- well-done foods such
as chicken. lobster tails. lamb or pork chops and fish. position the rack
further from the broil burner.
2. Place the grid m the broiler pan. Place the meat on the grid. For best broiling
I-csults center the broiler pan on the rack and close the oven door.
3. Turn the temper-atureand <elector controls to BROIL. The burner will rgnitc
in 3 feu seconds.
4. Broil on one side until food is browned: turn and broil on the second side.
Season
and serve.
Broiling
Hints
Meats:
Select meat that is tender and h;~ssome marbling of l’;\t.
For best results. steahs and chops should be Lit least I inch thich.
To keep meat from curlin,.(7 slit I‘;ltt\,
_ edge in several placcx. Do not cut into
l
l
l
lean.
Trim outer layer of fat from steaks and chops to reduce spattering.
Turn steshs and chops only once.
L’se tone to turn meat to control loss of juices.
. To test l?>rdoneness, cut ;i slit in the steak near the bone and chech the inside
color.
l
l
l
#
Poultrv. Fish:
Brusjichicken and fish u,ith butter se\,eral times uhrle broiling. Other foods
may
4so be brushed with butter Ltnd se:isoninfs for flavor and better
browning.
When broiling fish. grease the broiler grid to pi-e\‘cnt sticking or place fish on
;I small piece of aluminum foil. Or. LISA ;I cooking spray to lightly coat the grid
before broiling. DO NOT COVCI- the broiler grid with foil.
Fish should be placed skrn side cioun. Thin fillets should not be mimed. Thicher fish steaks should be turned once.
l
Should a broiler fire occur.
close the broiler door and turn
off the controls. If the fire
continues, throw baking sod3
on the fire. DO NOT PUT
l
l
FIRE. Flour may be explosive.
l
Precooked vegetables and fruit may be broiled. Add during second half of.
broil time. Brush with melted butter or mar~“rme.
Broiler Clean-Up Tips:
To make cleaning easier. line the bottom of the broiler pan with aluminum
foil. DO NOT cover the broiler grid with foil.
To prevent grease from baking on. remove the broiler pan from the oven :IS
soon ~1s
cooking is completed. Pour off grease. Soak pan in HOT. sudsy water.
Clean the broiler pan ;ISsoon ;is possible after each use. If necessary, use soapfilled steel wool pads. Heavy scouring may scratch the grid.
l
l
l
IX
General
Cleaning,
cloth
;untl
4lld~J
Clean the range after each use to pre\‘cnt ioil builcl-up. Use ;I mlsture ofmrld
detergent and hot uatrr to remove light soil. Rinse with ;I damp cloth and M’I~C
dry. Be sure to wring excess moistur-e from the cloth before LIiping any range
surface. especially- &hen uipin, (7around control\. E\cc\s u ater in or a~-oundthe
controls may c;iList’ damage to lhc applixnc~.
Different yurf‘ace\ require special cleanin,(1 Lo renio\c hea\ \ wil. FolloLi Ihe
instructions belob,.
ALUMINUM-Use
detergent on a damp cloth to clean range trim picccs. Z1o
not scour or u4e all-pui-pose cleaners. ;uniiioiii;l. poMder-cd clearlscl-s 01~conlmercial oven clcantm. The!, can xratch and diwolor aluminum.
GLASS, PAINT AND PLASTIC-Thaw
materials arc u\cd in ;\reu\ where
soiling should not be sa’ere. For built-up grease. mahc a dcteryent and uater
paste. Apply to soil for 30 to 60 mlnutcs. Rinse with ;I danlp cloth and d1.1.
PORCELAIN ENAMEI>-Gentle
scouring \t,ith ;I waph \couring pad u,ill
remove most stubborn \potj. Ifncceswr~. CO\C’I-spot\ with an arllmonin-~oah~d
paper to\vol for 70-10 minutes. Rub gently Mlth ;I mlp-i‘illcd scouring pad a11d
rinse with II mixture of clew water and vinegal-. U’ipc dry. Remove all cleaners
or the porcelain may become damaged during future heating. DO NOT LIP
spray oven clcancr4 on the range top.
STAINLESS STEEL, CHROME-Cover
stubborn spot\ LIith an ;unmoni;tsoahed paper towel t’ol-30 to30 minutc’$. A so~~l~~filledscouring pad ma> be uwd
carei‘ully. but not on ;I chrome finish. Clcanc~-4made especiall>’ for stainless
\tccl. chrome or copper al-e reconmended. Bluish \tnin\ on thcw materials art
caused by overheating and cannot be ~remo\,cd.
Control
Cleaning
Outside
Remove spillovers and stains as the>, occur LI\II~,(’ ;I SOfL
water.
Knobs
Control knobs are r-emovablc. With ~hccontrol\ 111
the OFF position. pull each
knob straight off the shaft. Clean the control panel with ;I hot. sud\!, cloth; then
dr), Be jure to uring excess u’ater from the cloth bcforc wiping the panel.
especrally u hen wiping around contr-olj. Exce\\ \vater in or around the controls
may cause damage to the appliance.
To /-r/jl~/t C. lint LIPthe flat bides of both the hnob and the shaft. Then push the
knob into plscc.
Before cleaning any part of the
turned OFF and the range I\
NOTE:
The burner grates are
washed in the dishwasher-.
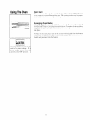
Cleaning
Cleaning
and Removing
Burners
The burners should bc routinely removed and cleaned. Always clean the
burners al‘ter ;I spillover. Keepin,(7 the burners clean will prevent improper
Ignition and an uneven flame.
(Continued)
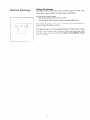
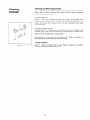
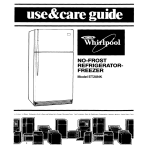
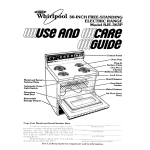
To remove burners:
Figure I - Two screw4 hold each burner pair in place to keep them from
moving around during shipment. Remove and discard shipping screws. Lift
burners up and out. This separates them from the mounting bracket under
each burner pair.
To remove burned-on food:
Soak the bul-ners in a vinegar and water solution for 20 to 30 minutes. For
stubborn stains. scrub with soap and water or a mild abrasive cleanser and a
damp cloth. Do not put burners in dishwasher.
Place burner4 in a warm oven for 30 minute5 to dry. Make sure burners are
thoroughly dried before replacing them on cooktop.
1
]
Figure 1
To replace burners:
Figure 1 - Place each burner pair in range. Make sure burners are properly
seated on mounting bracket and are level.
Removing
Oven Door
The oven door may be I-emo\,ed to make
cleanins in\icle the oven easier.
Open the door to the fully opcned position. Remo\,e s;crea\ (reference A)
on cxh side of the o\‘en dool-. Then. cln<e the door about three quarters of
the ua~‘. Lift the door LIP and oft’ of the Ilinger.
To clean oven door:
Wash with hot. soapy water. For \tubbol-n spot\
and water. Do not immerse door 111water.
LW
a solution of mmonia
To replace the door:
I. Be sure the hinge am\ are in the open position. Be careful it’ pulling
the
hinges open bq’ hand. Hingch may 5nap back against the o\ cn frame and
could pinch fingers.
2. Hold the door at the sides near the top. Insert hinge arms into {IOIUat the
bottom of the door.
3. Hinge arms must go into the range slots evenI),. The hinge arms should
be inxrted into the bottom corners of‘ the door 21sfar a\ they can go.
1. If the door is not in line with the oven frame. remove it and repeat the
above steps.
5. Be jure to replace the screw.\ on the oven door,
Self-Cleaning
Instructions
A self-cleaning oven heats to a verq‘ high temperature to burn off baked-on
spatters. Read the following instructions carefully. Allow about 3 to 4 hours
for the complete self-cleaning process.
Precleaning
DO... preclean as directed in the
instructions.
DON’T... use commercial oven
cleaners.
DON’T... clean the oven door
easket.
A certain amount of precleaning is necessary before setting the oven for the sell‘cleaning cycle. The oven door may be removed to make precleaning easier (see
instructions). Use caution ti,hen removing the oven door-it is very heavy.
Do not LISAcommercial oven cleaners or oven protective coatings in or around
any part of the self-cleaning oven. Do not use aluminum foil to line the oven
bottom.
Before se!f-cleaning:
I. Remove the broiler pan and al I utensils from the oven.
2. Remove any items that are near the vent opening since heat and vapor are
vented through this area during the $elf-cleaning cycle. The oven vents along
the center back edge of the cooktop.
3. Wipe up excess grease and spillo\er5 from the oven bottom.
4. Use 1101.\udsy water to remo\e any light soil from the oven frame and door
liner (area outside the oven seal). These surfaces are not cleaned during the
self-cleaning cycle. but become very hot. To prevent {patters I-rom being
bahed on during the self-clean cycle. remove an). 4oil BEFORE selfcleaning.
lf’~~o/-~ltl~c~/.ol~;;I~
c./rtr,ri/~,qi.\ II(JP~Iv~I.
\cl-ub the oven liner surface with a nea
scouring pad or n) Ion net scrubber. llsc ;I nongrittj cleaner. Rinse well after
cleaning.
5. Clean the inside I+indou (some models onl>p)with hot. sudsy water and a
nylon net scrubber. Rinse and dry.
6. Remo\e oven racks and c,/~cl,rh!, lrl//l~l $>.olr ~‘(//lt fo XPP/I~/IPHI.\/7777~. If not.
place the racks in upper glides and 1eab.ein the oven during self-cleaning.
However-. thoy will become dull and blue-gray due to exposure to high heat.
the self-cleaning oven interior.
To help racks slide more easily after cleaning. wipe the edges with a light
coating of cooking oil.
What to Expect
During
Cleaning
While the cycle is in operation. the oven heats to temperatures higher than those
used in normal cooking. Sounds of metal expansion and contracrion are normal.
Odor is also normal as the food soil is being cleaned. Smoke may appear through
the oven vent.
If heavy spillovers are not wiped up before cleaning. they may flame and cause
more smoke and odor than usual. This IS normal and safe and should not cause
alarm. ~f’~rl~riloblc. use ~17 r.vl7uir.st,fil77
ilir~-ir7~q
tl7c
.vt~!f'c,lcilt7it7g
c,yc,lc.
During the self-cleanin g cycle. the outside OF the range can
become very hot to the touch. Do not leave small children
unattended near the appliance.
Setting
the Controls
He sure to remove everything from the oven and complete the suggested
precleaning steps before setting the controls.
To set the controls for the self-cleaning cycle to start immediatelJj and stop
automatically:
1. Close the oven door.
2. Be sure that the clock shows the correct time ol‘da~,
3. Push in and turn the STOP TIME knob to \et the stop time for 3 to 1 hours
past the start time.
EXAMPLE: If the c;tart time and clock t-cad I :OO.4e1the slop tlmc l‘ol
3:00 pm. or S:OOp.m.
4. Turn the temperature and selector control\ to CLEAN.
5. Be sure the START TIME knob is set ~OI- 111e smt
time a4 the cloth. If not.
turn the knob to the time of the clock. The knob will then pop out.
6. Move the latch lever at the top of the oven door from the left to the riFht. The
clean signal light will come on and the cleaninc c\,cle \+ill beyin.
PUSH
*
.
TO SET
12
6
STOP
TIMER
FUNCTIONS
.
.
.
.
.
.
.
12
.
6
.
START
//6\\
The oben will heat until it reaches ;I very high temperature. Soil and 4pillober.s
will bum off the oven surfaces. When the OVC’II I-cachesthe cleaning temperature.
the lock light will come on. indicating that the oven door i4 now locked and cannot be opened until the oven temperature cool\ bclo\s 550 F.
DO NOT try to move the latch lever when the loch light i\
011
When the cleaning time ha\ elapsed. the STOP TIME hnob will automatically
pop out. The oval must now COOL FOR ABOUT 1 HOLIR or until the interior
temperature has dropped bclo~ S50cF. The loch light u,ill remain on until the
_ _
oven cools belou 530°F. Only then can the door bc unloched. The loch lever
cannot be movd
to opal the door until the oven hax cooled.
To set controls for a delayed cleaning cycle to start and stop automatically:
1. Close the oven door.
2. Be sure that the clock shows the correct ~jme ol’day.
3. Push in and turn the START TIME knob to bet the desired start time.
NOTE: The stop time should bc xet 3 to 4 houi-\ past the stal-t time.
4. Push in and turn the STOP TIME hnob to xet the desired stop time.
5. Turn the selector and tcmpcrature controls to CLEAN.
6. Move the latch lever at the top of the oven door l‘rom the 1ef1to the right. The
clean signal light will come on and the cleaning cycle u,itl begin.
When the clock reaches the set htart time. the cleaning cycle will begin automatically.
NOTE: Be sure to turn the
selector and temperature controts to OFF when the clean
cycle is completed.
Self-Cleaning
Instructions
(Conttnuedl
Stopping
a Self-Clean
Cycle
If it is necessary to interrupt or cancel the self-clean cycle:
1. Turn the STOP TIME knob to the time of day. The knob will then pop out
and the self-cleaning cycle will stop.
3. If the lock tight stays on. the oven is too hot to unlock the door. Wait until
the oven has cooled and the lock light goes out, then move the latch lever
from right to left to unlock the door.
NOTE: Do not force the door or latch lever to open. The lock light ma)’
not c20 off immediately 2s the door is locked or unlocked. If the latch lever
will not move after the lock light goes out. wait ;1few minutes, then try to
move the lever again.
3. Tuln the selector and temperature controls to OFF.
When the Self-Clean
Cycle is Completed
1. When the stop time is reached; the stop time knob will automatically pop out.
2. When the oven coots below approximately 550°F. the lock light will go out.
The door can be unlocked and opened. Move the latch lever from right to left.
1. Turn the selector and temperature controls toOFF. The clean signal light will
go out.
3. Open door. Use caution. The oven may still be very hot. A light or dark
powdery ash will bc found wherel’er there was heavy soil in the oven. This
ash may be u,iped up with a damp cloth when the oven is cool.
If the oven was not cleaned adequateI),. reset the controls and repeat the selfcleaning cycle. NOTE: This procebs may need to be completed if the selfcleaning cycle was not set for a long enough period of time initially.
It is nol-ma1for some {oil to Iremain at the bottom front and corner4 of the oven.
This remaining soil is difficult to remo\e because it was exposed to high heat.
To remove, scrub with a neb steel wool pad. Rubbing with a paste made ofwater
and a mild cleanser can also be helpful in remo\-ing this soil.
Excess Smoke
Some light smoking can be expected durin? the first half hour of the selfcleaning cycle.
because OFtoo much grease or a utensil being left
If excessive smoking occurs
in the oven. DO NOT TRY TO FORCE OVEN DOOR OPEN, but follow these
steps:
I. Turn the STOP TIME knob to the time of dab. The knob will then pop out
and the cleaning cycle will stop.
7. Turn the temperature and selector controls to OFF.
3. Open windows and doors to rid the room of smoke.
1. Allow oven to COOL AT LEAST ONE HOUR before moving locker level
to the left to open the oven door.
5. Correct the condition which caused the smoking and start the self-cleaning
operation again.
24
The temperature in the oven has been set at the factory. When first usin? the
oven. be sure to follow recipe times and temperatures. Then. if you think the oven
is too hot or too cool. the temperature control knob can be adjusted. Before
adjusting the knob. test ;Lrecipe by using a temperature set higher or lower than
the temperature recommended. The baking rexults should help you to decide
how much of an adjustment is needed. The hnob can be adjusted in increments
of 10°F as indicated on the back of the knob.
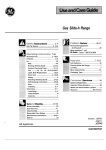
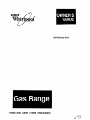
To adjust temperature control on knob back (Figure 1):
1. With the temperature control in the OFF position. pull the knob htl-aight off
the shaft.
2. Loosen the two screws at back of knob. There arc ;I wries of {mall indicator
Iines directly opposite the OFF position. One of these indicator lines is
positioned next to a tiny pointer. Note the position of the pointer.
3. Adjust temperature accordingly. To increase or decrease temperature. move
the pointer in the direction of”H”or”L”
to raise or lower. The knob \vill click
into place on each notch as the dial is tul-ned.
4. When the desired adjustment is reached. tighten both scl-ew.
5. To replace knob. line up the fiat sides of both the knob and shaft. Push knob
into place.
NOTE: Once an adjustment is made. the OFF position will \#a~-y from the
reference mark on the backguard dependin 2 on the amount of adjLlstment.
Note position of pointer
to marks before adjustment
Figure 1
Adjusting
Oven
Temperature
Anti-Tip
Bracket
Installation
Imons
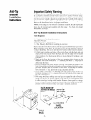
Important
Safety Warning
To reduce the risk of tipping of the range. the range must be secured to the Hoor
by a properly installed anti-tip bracket and screws packed with the range.
Failure to install the anti-tip bracket could allow the range to accidentally tip
over if excessive weight is placed on an open door or if a child climbs upon it.
Serious injury might result from spilled hot liquids or from the range itself.
Refer to the instructions below for proper installation.
NOTE: If the range is ever moved to a different location. the anti-tip bracket
must also be moved and installed with the range. To check for proper
installation. see step 5.
Anti-Tip
Bracket
Installation
Instructions
Tools Required:
i/~~,”Nutdriver or Flat Head Screwdriver
Adjustable Wrench
Electric Drill & ‘/lb” Dia. Drill Bit
‘/lb” Dia. Masonry Drill Bit (if installing in concrete)
Brachet attaches to the floor at the back of the range to hold both rear leg levelers.
When fastening to the floor, be sure that screws do not penetrate electrical
u iring or plumbing. The screw\ provided will work in either wood OI-concrete.
I. Unfold paper template and place it flat on the floor with the back and jidc
edges positioned exactly M,herethe back and \ides of range will be located
when installed. (LI\c the diagram belou, to locate bracket if template is not
available.)
2. Mark on the floor the location of the two mounting holes shown on the
template. For easier installation. ‘/Ic,” diameter pilot holes ‘/?‘I deep can be
drilled into the tloor.
3. Remove template and place brnckct on floor with turned up flange to the
front. Line up holes in bracket ulith marks on floor and attach with two screw\
provided. Bracket must be secured to solid floor-. If attaching to concrete
floor. first drill ‘/IO” dia. pilot holes using a masonry drill bit.
4. Level range if necessary. by adJusting four leg levelers with wrench. (A
minimum clearance of ‘ix” is required between the bottom of the range and
the rear leveling feet.)
5. Slide range into place making sure rear leg\ are trapped by ends of bracket.
Range may need to be shifted slightly to one side as it is being pushed back
to allow rear legs to align with bracket. Remove lower pane1 or storage
drawer to inspect bracket or grasp the top rear edge of the range and carefull!
attempt to tilt it forward to make sure range i\ properly anchored.
BACK EDGE OF
RANGE OR
WALL
ANT-LAP
BRACI$ET
LOCATION
SLIDE
BACK
26
If You Need Service Or Assistance . . .
We suggest you follow these steps:
1. Before calling for assistance...
Performance problems often result from little things
you can find and fix without tools of any kind.
If nothing operates:
Is the gas turned on?
Is the power supply cord plugged into a live
circuit with the proper voltage? (See Installation
Instructions.)
. Have you checked your home’s main fuses or
circuit breaker box?
Have instructions in this book been followed?
Is the control knob set in the correct position?
Is the flow of combustion and/or ventilation air to
the unit obstructed? Do not obstruct air flow to
and around unit.
Recheck suspected defect.
l
l
l
l
l
l
If the oven will not operate:
Are the controls set correctly? See pages 12- 13.
Have you programmed a delay start time?
l
l
If burner fails to light:
Is the range connected to electrical power?
Have you checked you home’s main fuses or
circuit breaker box?
Are burner ports clogged? See page 20.
l
l
l
If burner flames are uneven:
Are burner ports clogged? See page 20.
l
If burner flames lift off ports, are yellow, or are
noisy when turned off:
The air/gas mixture may be incorrect. (Call for
service.)
l
If the burner makes a popping noise when ON:
Is the burner wet from washing? Let dry.
l
If control knob(s) will not turn:
Did you push in before trying to turn?
l
If the Self-Cleaning cycle will not operate:
Does the clock show the right time of day?
Is the Lock Lever all the way to the right?
Have you set a delay start time?
l
l
l
If cooking results are not what you expected:
. Is the range level?
. Does the oven temperature seem too low or too
high? See page 25.
. If needed, have you preheated the oven as the
recipe calls for?
. Does the flame size fit the cooking utensil being
used? (See the Cooking Guide.)
. If broiling, have you completely closed the oven
door? Broiler provides best cooking results with
the oven door closed.
. Are you following a tested recipe from a reliable
source?
. Are you using pans recommended in the Cooking
Guide.
. If baking, have you allowed 1 l/2 to 2 inches (4-5
cm) on all sides of the pans for air circulation?
. Are the pans the size called for in the recipe?
. Do the cooking utensils have smooth, flat bottoms
and fit the surface burners being used?
See the Cooking Guide for more information on
cooking problems and how to solve them.
2. If you need assistance*. . .
Call Whirlpool COOL-LINE”
service assistance
telephone number. Dial free from anywhere in
the U.S.:
l-800-253-1301
and talk with one of our trained consultants. The
consultant can instruct you in how to obtain
satisfactory operation from your appliance or, if
service is necessary, recommend a qualified service
company in your area.
If you prefer, write to:
Mr. Donald Skinner
Director of Consumer Relations
Whirlpool Corporation
2000 M-63
Benton Harbor, MI 49022
Please include a daytime phone number in your
correspondence.
3. If you need service*...
Whirlpool has a nationwide
network of authorized
Whirlpool”’ service companies.
Whirlpool service technicians are
trained to fulfill the product
warranty and provide after-warranty service.
anywhere in the United States. To locate the
authorized Whirlpool service company in your
area, call our COOL-LINE” service assistance
telephone number (see Step 2) or look in your
telephone directory Yellow Pages under:
5. If you are not satisfied with how the problem
was solved*...
Contact the Major Appliance Consumer Action
Panel (MACAP). MACAP is a group of
independent consumer experts that voices
consumer views at the highest levels of the
major appliance industry.
Contact MACAP only when the dealer.
authorized servicer or Whirlpool have tailed to
resolve your problem.
Major Appliance Consumer Action Panel
20 North Wacker Drive
Chicago, IL 60606
MACAP will in turn inform us of your action.
*When requesting assistance. please provide: model
number. serial number. date of purchase, and a
complete description of the problem. This
information is needed in order to better respond to
l
l
APPLIANCES
- HOUSEHOLD MAJOR - SERVICE 8 REPAIR
ELECTRICAL
APPLIANCESMAJOR - REPAIRING & PARTS
OR
WASHING MACHINES, DRYERS
& IRONERS - SERVICING
WHIRLPOOL APPLIANCES
AUTHORIZED WHIRLPOOL SERVICE
SERVKE
XYZ SERVICE CO
123 Maple
l
COMPANIES
999-9999
your request.
4. If you need FSP” replacement parts*...
FSP is a registered trademark of Whirlpool
Corporation for quality parts. Look for this
symbol of quality whenever you need a
replacement part for your Whirlpool appliance,
FSP replacement parts will fit right and work
right, because they are made to the same exacting
specifications used to build every new Whirlpool
appliance.
To locate FSP replacement parts in your area.
refer to Step 3 above or call the Whirlpool COOLLINE service assistance number in Step 2.
28
Notes
Notes
Notes
WHIRLPOOL@
Gas CookingProductWarranty
GR002
LENGTH OF WARRANTY
1
I
FULL ONE-YEAR WARRANTY
From Date of Purchase
WHIRLPOOL
WHIRLPOOL
WILL PAY FOR
FSP” replacement parts and repair labor to correct defects in
materials or workmanship. Service must be provided by an
authorized WhirlpoolSM service company.
WILL NOT PAY FOR
A. Service calls to:
1. Correct the installation of the cooking product.
2. Instruct you how to use the cooking product.
3. Replace house fuses or correct house wiring or plumbing.
4. Replace owner accessible light bulbs.
B. Repairs when the cooking product is used in other than normal, single-family household use.
C. Pick-up and delivery. This product is designed to be repaired in the home.
D. Damage to the cooking product caused by accident, misuse, fire, flood, acts of God or use of
products not approved by Whirlpool.
WHIRLPOOL CORPORATION SHALL NOT BE LIABLE FOR INCIDENTAL OR CONSEQUENTIAL
DAMAGES. Some states do not allow the exclusion or limitation of incidental or consequential damages
so this limitation or exclusion may not apply to you. This warranty gives you specific legal rights, and you
may also have other rights which vary from state to state.
Outside the United States, a different warranty may apply. For details, please contact your authorized
Whirlpool distributor or military exchange.
If you need service, first see the “Service and Assistance” section of this book. After checking “Service
and Assistance,” additional help can be found by calling our COOL-LINE@ service assistance telephone
number, l-800-253-1301,
from anywhere in the U.S.
8 Registered Trademark / TM Trademark / SM Service Mark of Whirlpool Corporation
Part No.
0 1990 V\lhlrlpOOl
316000713/4371146
Corporatron
Printed in U.S.A.