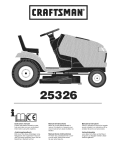
1
HMEC 300/302/305
305-C/306/322/400
HMDC 322
Bedienungsanleitung
Inhalt
Ein Wort zu Ihrer Sicherheit ..... ............ ............ ............ ........... ............ ............ ............ ........... ............ ..... 3
Leistungsmerkmale der Headsets ..... ............ ............ ........... ............ ............ ............ ........... ............ ..... 4
Produktvarianten . ............ ........... ............ ............ ............ ........... ............ ............ ............ ........... ............ ..... 5
Lieferumfang .......... ............ ........... ............ ............ ............ ........... ............ ............ ............ ........... ............ ..... 8
Empfohlenes Zubehör ..... ........... ............ ............ ............ ........... ............ ............ ............ ........... ............ ..... 9
Headsets anschließen ..... ........... ............ ............ ............ ........... ............ ............ ............ ........... ............ ... 10
Die Anschlusskabel der Headsets ...... ............ ............ ........... ............ ............ ............ ........... ............ ... 10
Pinbelegung der Stecker ......... ............ ............ ............ ........... ............ ............ ............ ........... ............ ... 12
Anschlussmöglichkeiten ......... ............ ............ ............ ........... ............ ............ ............ ........... ............ ... 13
Headset für den Gebrauch vorbereiten ...... ............ ........... ............ ............ ............ ........... ............ ... 19
Kopfhörerbügel einstellen ...... ............ ............ ............ ........... ............ ............ ............ ........... ............ ... 19
Mikrofon positionieren . ........... ............ ............ ............ ........... ............ ............ ............ ........... ............ ... 20
Zusatzinformation für den Helikopterbetrieb des Headsets HMEC 322 .......... ........... ............ ... 22
Der tägliche Betrieb ......... ........... ............ ............ ............ ........... ............ ............ ............ ........... ............ ... 23
NoiseGard™ ein- und ausschalten ..... ............ ............ ........... ............ ............ ............ ........... ............ ... 23
Mono-/Stereo-Umschaltung (außer HMEC 305, HMEC 305-C, HMEC 322 und HMDC 322) . ... 23
Lautstärke einstellen .... ........... ............ ............ ............ ........... ............ ............ ............ ........... ............ ... 23
Kabelklammer anbringen ....... ............ ............ ............ ........... ............ ............ ............ ........... ............ ... 24
Kopfhörer zusammenklappen ........... ............ ............ ........... ............ ............ ............ ........... ............ ... 24
Ersatzteile .... ............ ............ ........... ............ ............ ............ ........... ............ ............ ............ ........... ............ ... 25
Wissenswertes zum Nachlesen .......... ............ ............ ........... ............ ............ ............ ........... ............ ... 27
Wenn Störungen auftreten ...... ............ ............ ............ ........... ............ ............ ............ ........... ............ ... 30
Technische Daten .. ............ ........... ............ ............ ............ ........... ............ ............ ............ ........... ............ ... 32
2
Die Headsets NoiseGard™ HMEC 300, HMEC 302, HMEC 305, HMEC 305-C, HMEC 306,
HMEC 322, HMEC 400 und HMDC 322 sind Pilotenheadsets mit aktiver Lärmkompensation
in geschlossener Bauform zum Einsatz in Helikoptern, Propeller- und Turboprop-Flugzeugen.
Ein Wort zu Ihrer Sicherheit
• Mit eingeschalteter Lärmkompensation NoiseGard™ können sich für Ihr Flugzeug
oder Ihren Helikopter typische Geräusche (z. B. Motoren-, Propellerklang, Warnsignale usw.) anders anhören. Machen Sie sich daher vor dem Start bei eingeschalteter
Lärmkompensation mit allen wichtigen Geräuschen vertraut. Stellen Sie die Lautstärke so ein, dass Sie alle wichtigen Geräusche, Alarme oder Geräusche, die durch
Fehlfunktionen entstehen, hören können.
• Versuchen Sie nicht, das Headset selbst zu reparieren, sondern wenden Sie sich bei
Problemen an Ihren Sennheiser-Vertriebspartner.
• Wechseln Sie nur die Teile aus, deren Austausch in dieser Bedienungsanleitung
beschrieben ist. Alle anderen Teile tauscht Ihnen Ihr Sennheiser-Vertriebspartner
aus.
• Tauchen Sie das Headset zum Reinigen nicht in Wasser. Fragen zur Reinigung des
Headsets besprechen Sie mit Ihrem Sennheiser-Vertriebspartner.
3
Leistungsmerkmale der Headsets
Headset NoiseGard™ HMEC 300
• Neues, aktives Headset mit guter Dämpfung des Außenlärms über den gesamten
Frequenzbereich durch aktive Lärmkompensation NoiseGard™
• Aktive Lärmkompensation NoiseGard™ ermöglicht klare Kommunikation auch in lautester Umgebung
• Hervorragende Trageeigenschaften mit viel Bewegungsfreiheit durch geringes
Gewicht, angenehme Ohrpolster, gepolsterten Kopfhörerbügel und einseitig geführtes Kabel
• Kopfhörerbügel mit Klappmechanismus ermöglicht platzsparendenTransport
• Klare Kommunikation über das Elektret-Mikrofon MKE 45 mit einstellbarer Empfindlichkeit
• Mikrofon durch flexiblen Mikrofonarm mit Schnellarretierung optimal positionierbar
und beidseitig zu tragen
• Optimale Verständigung durch breitbandiges Hörersystem
• Integrierter Lautstärkesteller für gute Lautstärkeanpassung
• Anpassung an das Intercom-System durch Mono-/Stereo-Umschalter
• Lärmkompensation NoiseGard™ für den Gebrauch als herkömmliches Headset
abschaltbar
4
• Spannungsversorgung des NoiseGard™-Systems über Bordnetz, Zigarettenanzünder
oder Batteriepack
• Fail-Safe-Operation bei Ausfall der Stromversorgung
• Anpassung der Spannung für das NoiseGard™-System über die In-Line-Elektronik im
Anschlusskabel
• Made in Germany mit 5 Jahren Garantie (HMEC 400: 10 Jahre Garantie)
Produktvarianten
Headset NoiseGard™ HMEC 302
Das Headset HMEC 302 unterscheidet sich vom HMEC 300 in folgenden Merkmalen:
• Anschluss von Mikrofon und Spannungsversorgung der NoiseGard™-Elektronik über
Klinkenstecker PJ-068
Headset NoiseGard™ HMEC 305
Das Headset HMEC 305 unterscheidet sich vom HMEC 300 in folgenden Merkmalen:
• Kein Mono-/Stereo-Umschalter
• Anschluss von Kopfhörer, Mikrofon und Spannungsversorgung der NoiseGard™-Elektronik an das Bordnetz (12–35 V DC) über XLR-5-Stecker
5
Headset NoiseGard™ HMEC 305-C
Das Headset HMEC 305-C unterscheidet sich vom HMEC 300 in folgenden Merkmalen:
• Kein Mono-/Stereo-Umschalter
• Anschluss von Kopfhörer und Mikrofon über XLR-5-Stecker
• Anschluss der Spannungsversorgung der NoiseGard™-Elektronik über XLR-3-Stecker
Headset NoiseGard™ HMEC 306
Das Headset HMEC 306 unterscheidet sich vom HMEC 300 in folgenden Merkmalen:
• Anschluss von Kopfhörer, Mikrofon und Spannungsversorgung der NoiseGard™-Elektronik an das Bordnetz (12–35 V DC) über einen 6-PIN-Redel-Stecker
Headset NoiseGard™ HMEC 322
Das Headset HMEC 322 unterscheidet sich vom HMEC 300 in folgenden Merkmalen:
• Kein Mono-/Stereo-Umschalter
• Spiralkabel
• Anschluss von Kopfhörer und Mikrofon über Klinkenstecker U-174/U an eine hochohmige Schnittstelle im Helikopter
6
Headset NoiseGard™ HMEC 400
Das Headset HMEC 400 unterscheidet sich vom HMEC 300 in folgenden Merkmalen:
• Silberne Ohrmuscheln
• Leder-Ohrpolster
• Kopfbügelband zum Knöpfen
Headset NoiseGard™ HMDC 322
Das Headset HMDC 322 unterscheidet sich vom HMEC 300 in folgenden Merkmalen:
•
•
•
•
Kein Mono-/Stereo-Umschalter
Spiralkabel
Dynamisches Mikrofon M-87/AIC und niederohmiger Hörer
Anschluss von Kopfhörer und Mikrofon über Klinkenstecker U-174/U an eine niederohmige Schnittstelle im Helikopter
7
Lieferumfang
Headset HMEC 300, HMEC 305-C, HMEC 322, HMEC 400 und HMDC 322
• Headset
• Dreipolige XLR-Einbaubuchse zum Anschluss an das Bordnetz
• Gepolsterte Trage- und Aufbewahrungstasche mit Schulterriemen für Headset und
Zubehör
• Windschutz für das Mikrofon (nicht bei HMDC 322)
• Kabelklammer MZQ 2002-1 (Art.-Nr. 44740)
Headset HMEC 302, HMEC 305 und HMEC 306
• Headset
• Gepolsterte Trage- und Aufbewahrungstasche mit Schulterriemen für Headset und
Zubehör
• Windschutz für das Mikrofon
• Kabelklammer MZQ 2002-1 (Art.-Nr. 44740)
8
Empfohlenes Zubehör
Austauschbare Gel-Ohrpolster (Art.-Nr. 83140)
Batteriepack BP-03 (nicht für HMEC 302, HMEC 305 und HMEC 306)
Batteriepack mit XLR-3-Kupplung zur Spannungsversorgung der NoiseGard™-Elektronik
der Headsets HMEC 300, HMEC 305-C, HMEC 322, HMEC 400 und HMDC 322. Vier 1,5-VMignon-Batterien (Typ LR 6, Alkali-Mangan, nicht im Lieferumfang enthalten) sorgen für
eine Betriebszeit von ca. 15 Stunden. Länge des Anschlusskabels: 0,9 m.
Adapterkabel (nicht für HMEC 302, HMEC 305 und HMEC 306)
ACX -1
ACX-2
Für die Headsets HMEC 300, HMEC 305-C, HMEC 322, HMEC 400 und HMDC 322 gibt es spezielle Adapterkabel, mit denen Sie die NoiseGard™-Elektronik über den Zigarettenanzünder an das Bordnetz anschließen können:
• ACX-1 Adapterkabel zur Spannungsversorgung eines Headsets
• ACX-2 Adapterkabel zur Spannungsversorgung von zwei Headsets
Die Adapterkabel werden auch mit einem komfortablen Winkelstecker angeboten, der mit
einer 7,5-A-Flachsicherung und einer grünen Kontroll-LED ausgerüstet ist:
ACX -11
ACX-22
• ACX-11 Adapterkabel zur Spannungsversorgung eines Headsets
• ACX-22 Adapterkabel zur Spannungsversorgung von zwei Headsets
9
Headsets anschließen
Die Anschlusskabel der Headsets
Headset HMEC 300 und HMEC 400:
1 6,35-mm-Stereo-Klinkenstecker zum Anschluss des Kopfhörers
1 Klinkenstecker PJ-068 zum Anschluss des Mikrofons
1 XLR-3-Stecker zum Anschluss der Stromversorgung für die NoiseGard™-Elektronik
Anschlusskabel
HMEC 300 und HMEC 400
Headset HMEC 302:
1 6,35-mm-Stereo-Klinkenstecker zum Anschluss des Kopfhörers
1 Klinkenstecker PJ-068 zum Anschluss von Mikrofon und Stromversorgung für die
NoiseGard™-Elektronik
Anschlusskabel
HMEC 302
Headset HMEC 305:
1 XLR-5-Stecker zum Anschluss von Kopfhörer, Mikrofon und Stromversorgung für die
NoiseGard™-Elektronik
Anschlusskabel
HMEC 305
10
Headset HMEC 305-C:
1 XLR-5-Stecker zum Anschluss von Kopfhörer und Mikrofon
1 XLR-3-Stecker zum Anschluss der Stromversorgung für die NoiseGard™-Elektronik
Anschlusskabel
HMEC 305-C
Headset HMEC 306:
1 6-PIN-Redel-Stecker zum Anschluss von Kopfhörer, Mikrofon und Stromversorgung
für die NoiseGard™-Elektronik
Anschlusskabel
HMEC 306
Headset HMEC 322 und HMDC 322:
1 Klinkenstecker U-174/U zum Anschluss von Kopfhörer und Mikrofon
1 XLR-3-Stecker zum Anschluss der Stromversorgung für die NoiseGard™-Elektronik
Anschlusskabel
HMEC 322 und HMD C 322
11
Pinbelegung der Stecker
Redel-Stecker (NoiseGard™)
1 Stromvers. NoiseGard™ (DC+)
2 Audio Lo / DC –
3 Audio Hi links
4 Audio Hi rechts
5 Mikrofon Hi
6 Mikrofon Lo
XLR-3-Stecker (NoiseGard™)
1 Stromvers. NoiseGard™ (DC+)
2 Masse
3 Nicht anschließen!
XLR-5-Stecker
HMEC 305
1 Audio Hi
2 Audio Lo / DC –
3 Mikrofon Hi
2 Nicht anschließen! (HMEC 305-C) 4 Mikrofon Lo
3 Masse (HMEC 305-C)
5 Stromvers. NoiseGard™ (DC+)
;
HMEC 305-C
1 Audio Hi
2 Audio Lo
3 Mikrofon Hi
4 Mikrofon Lo
5 Nicht belegt!
;;;;;;;;;;;;;
;;;;;;;;;;;;;
;
6,35-mm-Stereo-Klinkenstecker
1 Audio Hi links
2 Audio Hi rechts
3 Audio Lo
12
Klinkenstecker U174/U
1 Mikrofon Lo
2 Audio Hi
3 Mikrofon Hi
4 Audio Lo
Klinkenstecker PJ-068
HMEC 302
HMEC 300
1 Stromvers. NoiseGard™ (DC+) 1 Nicht belegt!
2 Mikrofon Hi
2 Mikrofon Hi
3 Mikrofon Lo / DC –
3 Mikrofon Lo
Anschlussmöglichkeiten
Um die Lärmkompensation NoiseGard™ mit Spannung zu versorgen, haben Sie drei Möglichkeiten:
1. Anschluss an das Bordnetz (12–35 V DC)
2. Anschluss an das Batteriepack BP-03
(Zubehör, außer für HMEC 302, HMEC 305 und HMEC 306)
3. Anschluss an den Zigarettenanzünder (12–35 V DC) über Adapterkabel
(Zubehör, außer für HMEC 302, HMEC 305 und HMEC 306)
Die In-Line-Elektronik im Anschlusskabel bereitet die ankommende Spannung für das
NoiseGard™-System auf.
Kurzschlussgefahr!
Stellen Sie vor Inbetriebnahme sicher, dass die Stromversorgung für die NoiseGard™Elektronik aus dem Bordnetz mit einer 1-A-Sicherung abgesichert ist.
13
1. Headset an das Bordnetz anschließen
Sie können die NoiseGard™-Elektronik an Bordnetze mit einer Spannung zwischen 12 V DC
und 35 V DC anschließen.
Kurzschlussgefahr!
Stellen Sie vor Inbetriebnahme sicher, dass die Stromversorgung für die NoiseGard™Elektronik aus dem Bordnetz mit einer 1-A-Sicherung abgesichert ist.
Stromversorgung
NoiseGard™
Zusammen mit den Headsets HMEC 300, HMEC 305-C, HMEC 322, HMEC 400 und
HMDC 322 erhalten Sie eine XLR-3-Einbaubuchse. Lassen Sie die Buchse von Ihrer Werkstatt einbauen.
Masse
Nicht
anschließen!
XL R-3-Einbaubuchse
14
Headset HMEC 300 und HMEC 400:
왘 Stecken Sie den 6,35-mm-Stereo-Klinkenstecker für den Kopfhörer und den
Klinkenstecker PJ-068 für das Mikrofon in die entsprechenden Klinkenbuchsen Ihres
Intercoms.
왘 Stecken Sie den XLR-3-Stecker in die eingebaute XLR-3-Buchse.
Headset HMEC 302:
왘 Stecken Sie den 6,35-mm-Stereo-Klinkenstecker für den Kopfhörer und den
Klinkenstecker PJ-068 für das Mikrofon in die entsprechenden Klinkenbuchsen Ihres
Intercoms.
Headset HMEC 305:
왘 Stecken Sie den XLR-5-Stecker in die XLR-5-Buchse Ihres Flugzeuges.
Headset HMEC 305-C:
왘 Stecken Sie den XLR-5-Stecker für den Kopfhörer und das Mikrofon in die XLR-5Buchse Ihres Flugzeuges.
왘 Stecken Sie den XLR-3-Stecker in die eingebaute XLR-3-Buchse.
Headset HMEC 306:
왘 Stecken Sie den 6-PIN-Redel-Stecker in die 6-PIN-Buchse Ihres Flugzeuges.
Headset HMEC 322 und HMDC 322:
왘 Stecken Sie den Klinkenstecker U-174/U für den Kopfhörer und das Mikrofon in die
U-174/U-Buchse Ihres Intercoms.
왘 Stecken Sie den XLR-3-Stecker in die eingebaute XLR-3-Buchse.
15
2. Headset an das Batteriepack anschließen
(außer HMEC 302, HMEC 305 und HMEC 306)
Die NoiseGard™-Elektronik der Headsets HMEC 300, HMEC 305-C, HMEC 322, HMEC 400
und HMDC 322 können auch über das Batteriepack BP-03 mit Strom versorgt werden
(siehe „Empfohlenes Zubehör“ auf Seite 9). Das Batteriepack eignet sich für Batterie- und
Akkubetrieb (Batterien bzw. Akkus sind nicht im Lieferumfang enthalten). Für eine
Betriebszeit von ca. 15 Stunden empfehlen wir den Betrieb mit Batterien (Typ LR 6, 1,5 V,
Alkali-Mangan) oder NiMH-Akkus.
Batterien in Batteriepack einsetzen / auswechseln
왘 Öffnen Sie die Abdeckung des Batteriefachs.
왘 Setzen Sie die vier Batterien (Typ LR 6, 1,5 V, Alkali-Mangan) ein. Achten Sie dabei
auf die Polarität.
왘 Schließen Sie das Batteriefach.
Betriebs- und Batterieanzeige des Batteriepacks
Das Batteriepack hat zwei Kontrolleuchten (LED).
Grüne LED leuchtet: Das Batteriepack ist eingeschaltet, die LED zeigt den Betrieb an.
Rote LED leuchtet: Die Leistung der Batterien reicht nur noch für kurze Zeit. Wechseln Sie
die Batterien aus.
16
Headset anschließen, Batteriepack einschalten
왘 Stecken Sie den XLR-3-Stecker am Anschlusskabel des Headsets in die XLR-3Kupplung des Batteriepacks.
왘 Headset HMEC 300 und HMEC 400: Stecken Sie den 6,35-mm-Stereo-Klinkenstecker
für den Kopfhörer und den Klinkenstecker PJ-068 für das Mikrofon in die
entsprechenden Klinkenbuchsen Ihres Intercoms.
Headset HMEC 305-C: Stecken Sie den XLR-5-Stecker für den Kopfhörer und das
Mikrofon in die XLR-5-Buchse Ihres Flugzeuges.
Headset HMEC 322 und HMDC 322: Stecken Sie den Klinkenstecker U-174/U für den
Kopfhörer und das Mikrofon in die U-174/U-Buchse Ihres Intercoms.
왘 Schalten Sie das Batteriepack ein, indem Sie den ON/OFF-Schalter in die Postion „ON“
schieben. Die grüne Betriebs-LED leuchtet.
Hinweis:
Der ON/OFF-Schalter in der Zuleitung zum Headset ist bei der Verwendung des
Batteriepacks außer Funktion.
Batteriepack an der Kleidung befestigen
Mit dem Befestigungsclip läßt sich das Batteriepack an der Kleidung befestigen, Klettband
ist zusätzlich beigelegt.
17
3. Headset über Adapterkabel anschließen
(außer HMEC 302, HMEC 305 und HMEC 306)
Für die Headsets HMEC 300, HMEC 305-C, HMEC 322, HMEC 400 und HMDC 322 gibt es spezielle Adapterkabel mit XLR-3-Kupplung, mit denen Sie die NoiseGard™-Elektronik über
den Zigarettenanzünder an das Bordnetz anschließen können:
ACX -1
ACX-2
• ACX-1 Adapterkabel zur Spannungsversorgung eines Headsets
• ACX-2 Adapterkabel zur Spannungsversorgung von zwei Headsets
Die Adapterkabel werden auch mit einem komfortablen Winkelstecker angeboten, der mit
einer 7,5-A-Flachsicherung und einer grünen Kontroll-LED ausgerüstet ist:
• ACX-11 Adapterkabel zur Spannungsversorgung eines Headsets
• ACX-22 Adapterkabel zur Spannungsversorgung von zwei Headsets
ACX -11
ACX-22
Headset anschließen
왘 Stecken Sie den XLR-3-Stecker am Anschlusskabel des Headsets in die XLR-3Kupplung des Adapterkabels.
왘 Stecken Sie den Stecker bzw. Winkelstecker des Adapterkabels in den
Zigarettenanzünder.
18
Headset für den Gebrauch vorbereiten
Kopfhörerbügel einstellen
Um eine gute Lärmdämpfung und den bestmöglichen Tragekomfort zu erzielen, müssen
Sie das Headset Ihrem Kopf richtig anpassen. Dazu können Sie den Kopfhörerbügel verstellen:
왘 Setzen Sie den Kopfhörer so auf, dass der Kopfhörerbügel über die Kopfmitte verläuft.
왘 Stellen Sie die Länge des Kopfhörers so ein, dass
• die Ohrposter die Ohren ganz umschließen,
• Sie einen leichten Druck um Ihre Ohren herum spüren,
• der Kopfhörerbügel eng am Kopf anliegt.
Hinweis:
Achten Sie darauf, dass Sie beim Einstellen des Kopfhörerbügels die
Verbindungskabel nicht einklemmen, da sie dadurch beschädigt werden können.
왘 Schalten Sie die Lärmkompensation NoiseGard™ ein, indem Sie den ON/OFF-Schalter
in die Position „ON“ schieben (siehe „NoiseGard™ ein- und ausschalten“ auf
Seite 23).
왘 Überprüfen Sie in lauter Umgebung, ob die Ohrposter optimal sitzen.
19
Mikrofon positionieren
Mikrofonarm drehen
Sie können das Mikrofon sowohl am rechten als auch am linken Mundwinkel platzieren.
왘 Lösen Sie die Schnellarretierungsschraube.
왘 Drehen Sie das Mikrofon um 180°.
왘 Schrauben Sie die Schnellarretierungsschraube wieder fest.
Mikrofon zum Mundwinkel hin ausrichten
Die Headsets HMEC 300, HMEC 302, HMEC 305, HMEC 305-C, HMEC 306, HMEC 322 und
HMEC 400 haben einen flexiblen Mikrofonarm. Biegen Sie ihn so, dass das Mikrofon am
Mundwinkel, etwa 2 cm vom Mund entfernt, sitzt.
20
Richten Sie beim Headset HMDC 322 das Mikrofon wie folgt aus:
왘 Stellen Sie die Länge des Mikrofonarms so ein, dass das Mikrofon im Mundwinkel
sitzt. Lösen Sie dazu die Schnellarretierung und verschieben Sie den Mikrofonarm.
왘 Ziehen Sie den mittleren Teil des Mikrofonarms so weit an den Mund heran, dass das
Mikrofon etwa 2 cm vom Mund entfernt ist.
왘 Zur Feinausrichtung können Sie das Mikrofon kippen.
21
Zusatzinformation für den Helikopterbetrieb des Headsets HMEC 322
Die Beschaltung (Polung) des Mikrofonanschlusses in Helikoptern ist weltweit nicht
genormt. Sollte das Mikrofon Ihres Headsetes mit der vorhandenen Beschaltung nicht
funktionieren, können Sie durch einfaches Umdrehen des Mikrofonmoduls die Polung am
Headset tauschen. In diesem Fall gehen Sie bitte nach folgender Anleitung vor:
1. Entfernen Sie den Poppschutz.
2. Lösen Sie die Schrauben mit ca. 1/2 Umdrehung.
3. Ziehen Sie das Mikrofonmodul aus der Halterung.
4. Drehen Sie das Mikrofonmodul um 180°.
5. Stecken Sie das gedrehte Mikrofonmodul wieder in die Halterung.
6. Ziehen Sie die Schrauben nun von der anderen Seite wieder an.
7. Setzen Sie den Poppschutz wieder auf.
Die akustischen Eigenschaften des Mikrofonmoduls ändern sich durch das Umdrehen des
Moduls nicht, da das Mikrofon durch die geräuschdämpfende Charakteristik von beiden
Seiten besprechbar ist.
22
Der tägliche Betrieb
NoiseGard™ ein- und ausschalten
Ist die aktive Lärmkompensation NoiseGard™ ausgeschaltet, können Sie das Headset wie
ein ganz gewöhnliches Headset einsetzen.
Schalten Sie das NoiseGard™-System ein, indem Sie den ON/OFF-Schalter in die Position
„ON“ schieben. Beim Betrieb mit dem Batteriepack BP-03 stellen Sie den Schalter auf „ON“
und nutzen den ON/OFF-Schalter am BP-03.
Mono-/Stereo-Umschaltung (außer HMEC 305, HMEC 305-C, HMEC 322 und HMDC 322)
Üblicherweise empfangen Sie Ihre Tonquelle in Mono und können den Mono-/StereoUmschalter in der Position „Mono“ belassen. Schalten Sie an einem Stereo-Intercom-System den Kopfhörer auf „Stereo“ um.
Lautstärke einstellen
Zu hohe Lautstärke schädigt Ihr Gehör!
Stellen Sie mit dem Lautstärkesteller eine mittlere Lautstärke ein. Sie müssen sicherstellen, dass Sie alle wichtigen Geräusche wie z. B. Warnsignale hören können.
23
Kabelklammer anbringen
Sie können das Kopfhörerkabel zu Ihrer Bequemlichkeit mit der Kabelklammer fixieren.
Führen Sie das Kopfhörerkabel so durch die Kabelklammer, wie nebenstehend abgebildet.
Klemmen Sie die Kabelklammer an die Kleidung und ziehen Sie die Kabelschlaufe soweit
durch die Kabelklammer, dass Sie das Kopfhörerkabel nicht stört.
Kopfhörer zusammenklappen
Um den Kopfhörer platzsparend zu transportieren, können Sie die Hörerkappen zwischen
den Kopfhörerbügel schieben.
Klappen Sie den Kopfhörer wieder auseinander, indem Sie die beiden Hörerkappen fassen
und nach unten aus dem Kopfhörerbügel herausziehen.
24
Ersatzteile
Bei Ihrem Sennheiser-Vertriebspartner erhalten Sie folgende Ersatzteile:
•
•
•
•
•
Windschutz für Elektretmikrofon MKE 45
Ohrpolster
Kopfbügelband
Kabelklammer
Trage- und Aufbewahrungstasche mit Schulterriemen
Windschutz austauschen
Tauschen Sie bei dem Elektretmikrofon den Windschutz aus, wenn er Verschleißerscheinungen wie Risse oder Löcher zeigt. Ziehen Sie den Windschutz vom Mikrofon ab. Schieben Sie vorsichtig den neuen Windschutz auf das Mikrofon. Der Windschutz muss das
gesamte Mikrofon umschließen.
Ohrpolster austauschen
Tauschen Sie die Ohrpolster aus, wenn sie beschädigt sind. Fassen Sie hinter die Ohrpolster
und ziehen Sie sie von den Hörerkappen ab. Schieben Sie die neuen Ohrpolster auf die
Hörerkappen.
25
Kopfbügelband austauschen
Tauschen Sie das Kopfbügelband aus, wenn es beschädigt ist.
왘 Ziehen Sie den Verschluss des Kopfbügelbandes auseinander und nehmen Sie das
verschlissene Kopfbügelband ab.
왘 Legen Sie das neue Kopfbügelband um den Kopfhörerbügel.
왘 Ziehen Sie die beiden Verschlussseiten des Kopfbügelbandes zusammen, bis sie
leicht überlappen.
왘 Drücken Sie den Verschluss zusammen.
Kopfbügelband des Headsets HMEC 400 austauschen
Tauschen Sie das Kopfbügelband aus, wenn es beschädigt ist.
왘 Öffnen Sie die Druckknöpfe und nehmen Sie das verschlissene Kopfbügelband ab.
왘 Legen Sie das neue Kopfbügelband um den Kopfhörerbügel.
왘 Ziehen Sie die beiden Verschlussseiten des Kopfbügelbandes zusammen und
schließen Sie die Druckknöpfe.
26
Wissenswertes zum Nachlesen
Das NoiseGard™-Prinzip
Lärm ist eine der schlimmsten Umweltbelastungen und ein ernstzunehmender Streßfaktor. Untersuchungen haben gezeigt, dass Lärm auf das vegetative Nervensystem wirkt.
Müdigkeit, Konzentrationsmangel, Nervosität und Gereiztheit sind die Folge. Darüber hinaus führt ständige Lärmeinwirkung zu Dauerschäden des Gehörs.
Von diesem Problem betroffen sind insbesondere Piloten. Der Schalldruckpegel im Cockpit
beträgt etwa 80 dB(A) in Jets und zwischen 90 und 97 dB(A) in Propeller-Flugzeugen. Bei
Start und Landung steigt der Lärm noch wesentlich an. Damit der Funksprechverkehr
jedoch gut verstanden werden kann, muss die Lautstärke in den Kopfhörern auf wenigstens 95 dB(A) eingestellt werden. Bei so manchem Piloten wurden deshalb Gehörschäden
festgestellt, die eine vorzeitige Berufsunfähigkeit bedingten bzw. dazu führten, dass Piloten ihre Fluglizenz verloren.
Herkömmliche Gehörschutz-Headsets bieten einen guten Schutz im oberen und mittleren
Audiobereich. Cockpitlärm besteht jedoch hauptsächlich aus mittleren bis tiefen Frequenzen, bei denen herkömmliche Gehörschutz-Headsets nur noch unzureichend schützen.
27
Durch die von Sennheiser entwickelte aktive Lärmkompensation, System NoiseGard™,
kombiniert mit einem hochwertigen passiven Gehörschützer, konnte eine sehr hohe,
gleichmäßige Lärmdämpfung im gesamten Audiobereich realisiert werden. Der Lärmpegel
im Cockpit wird drastisch gesenkt, der Pilot hört nur noch ein natürliches Motoren-Restgeräusch. Das Funksignal kann er entsprechend leiser stellen.
Die aktive Lärmkompensation NoiseGard™ basiert auf dem Prinzip des phaseninversen
Schalls. Dazu wird eine Schallwelle erzeugt, die zum Störschall um 180° phasenverschoben
ist, mit dem Ergebnis, dass sich beide Schallwellen gegenseitig annähernd aufheben.
In beide Hörersysteme des Headsets ist eine Elektret-Mikrofonkapsel, ein Rückkopplungskreis und ein Wandlersystem eingebaut. Der von den Mikrofonen aufgenommene Schall,
bestehend aus Störsignalen und Funksignal, wird verstärkt und das Funksignal herausgefiltert. Der Störschall wird nun von einer elektronischen Schaltung aufbereitet und um
180° phasenverschoben. Dann wird das Funksignal dem Störschall wieder beaufschlagt
und als Summensignal verstärkt auf die Wandlersysteme gegeben. Der Störschall wird
durch die Überlagerung mit gegenphasigem Schall deutlich reduziert. Das Funksignal wird
jedoch unverändert wiedergegeben, da es die Kompensationsschaltung nicht durchlaufen
hat.
28
Die Abbildung zeigt die Lärmkompensation mit NoiseGard™: Passive Gehörschützer
dämpfen den Lärm vor allem im mittleren und oberen Frequenzbereich. Bei Frequenzen
unterhalb 500 Hz schützen sie allerdings nur noch unzureichend. Durch die aktive Lärmkompensation wird jedoch auch der Lärm im Frequenzbereich von 25–500 Hz um ca.
25 dB reduziert. Die Summendämpfung aus aktiver und passiver Lärmkompensation liegt
bei etwa 30 dB über den gesamten Audiobereich.
Eine Lärmreduzierung um 10 dB wird subjektiv als Halbierung der Lautstärke wahrgenommen. Wird der Lärm um weitere 10 dB reduziert, wird dies wiederum als eine Halbierung
der Lautstärke empfunden usw.
29
Wenn Störungen auftreten
Setzen Sie sich bitte mit Ihrem Sennheiser-Vertriebspartner in Verbindung, wenn Störungen auftreten, die nicht in der nachfolgenden Tabelle enthalten sind.
Fehler
Mögliche Ursachen und Abhilfe
Klare Kommunikation aber keine
aktive Lärmkompensation
Die NoiseGard™-Elektronik ist ausgeschaltet.
왘 Überprüfen Sie, ob der Schalter ON/OFF in der Position „ON“ steht.
Der XLR-3-Stecker ist aus der Stromversorgung herausgezogen.
왘 Überprüfen Sie, ob der XLR-3-Stecker richtig an die Stromversorgung angeschlossen
ist.
Beim Anschluss an das Bordnetz: Die Sicherung des Bordnetzes ist defekt.
왘 Überprüfen Sie die Sicherung des Bordnetzes.
Beim Anschluss an das Batteriepack (nicht bei HMEC 302, HMEC 305 und HMEC 306):
Die Batterien sind leer.
왘 Überprüfen Sie, ob die grüne Kontrolleuchte am Batteriepack leuchtet.
Leuchtet die rote Kontrolleuchte, müssen Sie die Batterien austauschen.
30
Fehler
Mögliche Ursachen und Abhilfe
Aktive Lärmkompensation, aber
nur sehr leise Kommunikation
Die Lautstärke ist zu niedrig eingestellt.
왘 Überprüfen Sie die Lautstärkeeinstellung Ihres Headsets.
Der Kopfhöreranschluss ist herausgezogen (außer HMEC 305, HMEC 305-C und
HMEC 306).
왘 Überprüfen Sie, ob der Klinkenstecker des Kopfhörers richtig angeschlossen ist.
Aktive Lärmkompensation, aber
Sie werden schlecht verstanden
Der Mikrofonanschluss ist herausgezogen (außer HMEC 305, HMEC 305-C und
HMEC 306).
왘 Überprüfen Sie, ob der Klinkenstecker des Mikrofons richtig angeschlossen ist.
Kommunikation nur auf einem Ohr Sie benutzen ein Stereo-Intercom-System, haben das Headset auf Mono-Betrieb
(nur bei HMEC 300, HMEC 302,
eingestellt.
HMEC 306 und HMEC 400)
왘 Stellen Sie den Mono-/Stereo-Umschalter auf die Position „Stereo“.
Sie empfangen eine Monoquelle, haben aber das Headset auf Stereo-Betrieb
eingestellt.
왘 Stellen Sie den Mono-/Stereo-Umschalter auf die Position „Mono“.
31
Technische Daten
HMEC 300
HMEC 302
HMEC 306
Kopfhörer
Wandlerprinzip
dy namisch
Ankopplung an das Ohr
circumaural, geschlo ssen
Übertragungsbereich
45–15.000 Hz
Nennimpedanz aktiv/passiv
Lärmdämpfung ( aktiv und passiv)
300/150 Ω, mo no
600/300 Ω, stereo
> 25–40 dB
Max. Schalldruck pegel
120 dB (±5 %)
Andruck kraft
ca. 10 N
Mikrofon inkl. Vorverstärker
Wandlerprinzip
Elektret-Kapsel, geräuschkompensiert, MKE 45
Übertragungsbereich
300–5.000 Hz
Empfindlichkeit
Max. Schalldruck pegel
–
120 dB
Anschlusswiderstand
150 Ω
Ausgangsspannung
400 mV ± 3 dB bei 114 dB (nach RTCA/DO 214)
Versorgungsspannung
typ. 16 V DC ( 8–16 V DC, ca. 8–25 mA, nach RTCA/DO 214)
32
HMEC 400
HMEC 300
HMEC 302
HMEC 306
HMEC 400
6-PIN-Redel-Stecker für
Ko pfhörer, Mikrofon
und NoiseGard™
6,35-mm-Stereo-Klinken stecker für Kopfhörer,
PJ-068 für Mikrofon,
XLR-3-Stecker für
NoiseGard™
Allgemeine Daten
Anschlusskabel
1,5 m, einseitig geführt
Gewicht o hne Kabel
370 g
Betriebsspannung NoiseGard™
12–35 V DC
Stromaufnahme
Sicherung
27 mA (Ruhestrom), max. 80 mA
500 mA Thermo-Sicherung
Stecker
6,35-mm-Stereo-Klinkenstecker für Kopfhörer,
PJ-068 für Mikrofon,
XLR-3-Stecker für
NoiseGard™
Ausstattung
Mo no-/Stereo-Umschalter
Ein-/Ausschalter für No iseGard™
Lautstärkesteller für Kopfhö rer
Tempera turbereich
Betrieb
Aufbewahrung
Betriebszeit Batterieteil
mit Batterien (4 x M ignon, 1,5 V, Alkali-M angan): ca. 15 Stunden
mit NiMH-Akkus: ca. 15 Stunden
6,35-mm-Stereo -Klinken stecker für Kopfhörer,
PJ-068 für Mikrofon
und NoiseGard™
–15 °C ... +55 °C
–55 °C ... +55 °C
33
Technische Daten
HMEC 305
HMEC 305-C
HMEC 322
HMDC 322
Kopfhörer
Wandlerprinzip
dy namisch
Ankopplung an das Ohr
circumaural, geschlo ssen
Übertragungsbereich
45–15.000 Hz
Nennimpedanz aktiv/passiv
Lärmdämpfung ( aktiv und passiv)
300/150 Ω, mo no
> 25–40 dB
Max. Schalldruck pegel
120 dB (±5 %)
Andruck kraft
ca. 10 N
50/35 Ω, mono
Mikrofon inkl. Vorverstärker
Wandlerprinzip
Elektret-Kapsel,
geräuschkompensiert,
MKE 45
dynamisch,
geräuschko mpensiert,
M-87/AIC
Übertragungsbereich
300–5.000 Hz
500–4.000 Hz
Empfindlichkeit
Max. Schalldruck pegel
–
120 dB
1,8–4 µV / 74 dB an 5 Ω
–
Anschlusswiderstand
150 Ω
–
Ausgangsspannung
400 mV ± 3 dB bei 114 dB (nach RTCA/DO 214)
–
Versorgungsspannung
typ. 16 V DC ( 8–16 V DC, ca. 8–25 mA, nach RTCA/DO 214)
–
34
HMEC 305
HMEC 305-C
HMEC 322
HMDC 322
Allgemeine Daten
Spiralka bel, einseitig geführt
Anschlusskabel
1,5 m, einseitig geführt
Gewicht o hne Kabel
370 g
Betriebsspannung NoiseGard™
12–35 V DC
Stromaufnahme
Sicherung
27 mA (Ruhestrom), max. 80 mA
500 mA Thermo-Sicherung
Stecker
XLR-5-Stecker für
Ko pfhörer, M ikro fo n und
NoiseGa rd™
Ausstattung
Ein-/Ausschalter für No iseGard™
Lautstärkesteller für Kopfhö rer
Tempera turbereich
Betrieb
Aufbewahrung
Betriebszeit Batterieteil
mit Batterien (4 x M ignon, 1,5 V, Alkali-M angan): ca. 15 Stunden
mit NiMH-Akkus: ca. 15 Stunden
XLR-5-Stecker für
Kopfhörer und M ikro fo n,
XLR-3-Stecker für
NoiseGard™
U-174/U-Stecker für Kopfhörer und Mikrofon,
XLR-3-S tecker für No iseGard™
–15 °C ... +55 °C
–55 °C ... +55 °C
35
Konformitätserklärung
Sennheiser electronic GmbH & Co. KG erklären, dass dieses Gerät die anwendbaren CE-Normen und Vorschriften
erfüllt.
Garantie-Urkunde
Wir übernehmen für das von Ihnen gekaufte Produkt eine Garantie von 5 Jahren. Ausgenommen hiervon sind dem Produkt
beigefügte Zubehörartikel, Akkus und Batterien; denn diese Produkte haben wegen ihrer Beschaffenheit eine kürzere
Lebensdauer, die zudem im Einzelfall konkret von Ihrer Nutzungsintensität abhängt. Wir stellen hiermit ebenso klar, dass wir
keine sogenannte Beschaffenheitsgarantie im Sinne von §§ 443 und §§ 444 BGB abgeben wollen.
Die Garantie-Zeit beginnt ab Kaufdatum. Zum Nachweis heben Sie bitte unbedingt den Kaufbeleg auf. Ohne diese Nachweise, die
der zuständige Sennheiser-Service-Partner prüft, werden Reparaturen grundsätzlich kostenpflichtig ausgeführt.
Die Garantieleistungen bestehen nach unserer Wahl in der unentgeltlichen Beseitigung von Material- oder Herstellungsfehlern
durch Reparatur, Tausch von Teilen oder des kompletten Geräts. Von der Garantie ausgenommen sind Mängel durch
unsachgemäßen Gebrauch (z. B. Bedienungsfehler, mechanische Beschädigungen, falsche Betriebsspannung), Verschleiß,
aufgrund höherer Gewalt und solche Mängel, die Ihnen beim Kauf bereits bekannt sind. Der Garantieanspruch erlischt bei
Eingriffen in das Produkt durch nicht autorisierte Personen oder Werkstätten.
Im Garantiefall senden Sie das Gerät inklusive Zubehör und Kaufbeleg an den für Sie zuständigen Service-Partner. Zur
Vermeidung von Transportschäden sollte möglichst die Original-Verpackung verwendet werden.
Ihre gesetzlichen Mängelansprüche aus dem Kaufvertrag gegen den Verkäufer werden durch diese Garantie nicht eingeschränkt.
Die Garantie kann weltweit in allen Ländern – außer in den USA – in Anspruch genommen werden, in denen das jeweils nationale
Recht unseren Garantiebestimmungen nicht entgegensteht.
36
HMEC300US.book Se ite 1 Mittwoch, 7. April 2004 3:24 15
HMEC 300/302/305
305-C/306/322/400
HMDC 322
Instructions for use
HMEC300US.book Se ite 2 Mittwoch, 7. April 2004 3:24 15
Contents
Safety tips ... ............ ............ ........... ............ ............ ............ ........... ............ ............ ............ ........... ............ ..... 3
Headset features .. ............ ........... ............ ............ ............ ........... ............ ............ ............ ........... ............ ..... 4
Product variants .... ............ ........... ............ ............ ............ ........... ............ ............ ............ ........... ............ ..... 5
Delivery includes ... ............ ........... ............ ............ ............ ........... ............ ............ ............ ........... ............ ..... 8
Recommended accessories ...... ............ ............ ............ ........... ............ ............ ............ ........... ............ ..... 9
Connecting the headsets .......... ............ ............ ............ ........... ............ ............ ............ ........... ............ ... 10
Connecting cables for headsets ......... ............ ............ ........... ............ ............ ............ ........... ............ ... 10
Connector assignment .. ........... ............ ............ ............ ........... ............ ............ ............ ........... ............ ... 12
Powering options .......... ........... ............ ............ ............ ........... ............ ............ ............ ........... ............ ... 13
Preparing the headsets for use .......... ............ ............ ........... ............ ............ ............ ........... ............ ... 19
Adjusting the headband ......... ............ ............ ............ ........... ............ ............ ............ ........... ............ ... 19
Positioning the microphone ... ............ ............ ............ ........... ............ ............ ............ ........... ............ ... 20
Additional information for helicopter use of the HMEC 322 headset ... ............ ........... ............ ... 22
Using the headsets .......... ........... ............ ............ ............ ........... ............ ............ ............ ........... ............ ... 23
Turning NoiseGard™ on/off .... ............ ............ ............ ........... ............ ............ ............ ........... ............ ... 23
Mono/Stereo selection (except HMEC 305, HMEC 305-C, HMEC 322 and HMDC 322) ......... ... 23
Adjusting the volume ... ........... ............ ............ ............ ........... ............ ............ ............ ........... ............ ... 23
Attaching the cable clip .......... ............ ............ ............ ........... ............ ............ ............ ........... ............ ... 24
Folding up the headphones .... ............ ............ ............ ........... ............ ............ ............ ........... ............ ... 24
Spare parts .. ............ ............ ........... ............ ............ ............ ........... ............ ............ ............ ........... ............ ... 25
Valuable information on NoiseGard™ .......... ............ ........... ............ ............ ............ ........... ............ ... 27
In case of difficulty ........... ........... ............ ............ ............ ........... ............ ............ ............ ........... ............ ... 30
Technical data ........ ............ ........... ............ ............ ............ ........... ............ ............ ............ ........... ............ ... 32
2
HMEC300US.book Se ite 3 Mittwoch, 7. April 2004 3:24 15
The HMEC 300, HMEC 302, HMEC 305, HMEC 305-C, HMEC 306, HMEC 322, HMEC 400 and
HMDC 322 are pilot headsets with closed ear protector headphones and NoiseGard™
active noise compensation for use in helicopters, propeller and turboprop aircraft.
Safety tips
• With the NoiseGard™ active noise compensation turned on, typical aircraft sounds
(for example, those from engines, propellers, warning alarms, etc.) may sound
different to you. Before operating any aircraft, make sure that, with NoiseGard™
turned on, you can hear and recognize these sounds. Set the volume to safe levels
that do not interfere with your ability to hear informational sounds and warning
alarms.
• Do not attempt to repair the headset yourself. If problems occur, contact your
Sennheiser agent for assistance.
• Only replace parts of the headset whose replacement is described in this manual. All
other parts of the headset must be replaced by your Sennheiser agent.
• Do not immerse the headset in water! For information on how to clean the headset,
contact your Sennheiser agent.
3
HMEC300US.book Se ite 4 Mittwoch, 7. April 2004 3:24 15
Headset features
HMEC 300 NoiseGard™ headset
• New active headset with effective attenuation of external noise across the entire
frequency spectrum due to NoiseGard™ active noise compensation
• NoiseGard™ active noise compensation provides clear communications even in the
noisiest environment
• Excellent comfort due to very low weight, soft ear cushions and padded headband as
well as best possible freedom of movement due to unilateral connecting cable
• Foldable headband for easy and space-saving storage
• Clear communications due to MKE 45 electret microphone with adjustable sensitivity
• Microphone can be easily positioned and worn on either left or right side due to
flexible microphone boom with quick-fixing device
• Optimum radio reception due to headphone systems with wide frequency response
• Integrated volume control
• Adaption to the aircraft intercom system via Mono/Stereo switch
• With the NoiseGard™ active noise compensation turned off, the headset can be used
as a conventional headset
4
HMEC300US.book Se ite 5 Mittwoch, 7. April 2004 3:24 15
• Power supply for NoiseGard™ is provided via on-board power supply system,
cigarette lighter socket or battery pack
• Fail safe operation in case of power failure
• Supply voltage for the NoiseGard™ system is processed by the in-line electronics in
the connecting cable
• Made in Germany, 5-year warranty (HMEC 400: 10-year warranty)
Product variants
HMEC 302 NoiseGard™ headset
The HMEC 302 differs from the HMEC 300 in the following features:
• Connection of microphone and NoiseGard™ electronics via PJ-068 plug
HMEC 305 NoiseGard™ headset
The HMEC 305 differs from the HMEC 300 in the following features:
• No Mono/Stereo switch
• Connection of headphones, microphone and NoiseGard™ electronics to the on-board
power supply system (12–35 V DC) via XLR-5 plug
5
HMEC300US.book Se ite 6 Mittwoch, 7. April 2004 3:24 15
HMEC 305-C NoiseGard™ headset
The HMEC 305-C differs from the HMEC 300 in the following features:
• No Mono/Stereo switch
• Connection of headphones and microphone via XLR-5 plug
• Connection of NoiseGard™ electronics via XLR-3 plug
HMEC 306 NoiseGard™ headset
The HMEC 306 differs from the HMEC 300 in the following features:
• Connection of headphones, microphone and NoiseGard™ electronics to the on-board
power supply system (12–35 V DC) via 6-pin Redel plug
HMEC 322 NoiseGard™ headset
The HMEC 322 differs from the HMEC 300 in the following features:
• No Mono/Stereo switch
• Coiled cable
• Connection of headphones and microphone via U-174/U jack plug to a high impedance
interface in the helicopter
6
HMEC300US.book Se ite 7 Mittwoch, 7. April 2004 3:24 15
HMEC 400 NoiseGard™ headset
The HMEC 400 differs from the HMEC 300 in the following features:
• Stylish silver design
• Leatherette ear cushions
• Headband padding can be buttoned
HMDC 322 NoiseGard™ headset
The HMDC 322 differs from the HMEC 300 in the following features:
•
•
•
•
No Mono/Stereo switch
Coiled cable
M-87/AIC dynamic microphone and low impedance headphones
Connection of headphones and microphone via U-174/U jack plug to a low impedance
interface in the helicopter
7
HMEC300US.book Se ite 8 Mittwoch, 7. April 2004 3:24 15
Delivery includes
HMEC 300, HMEC 305-C, HMEC 322, HMEC 400 and HMDC 322 headsets
•
•
•
•
•
Headset
3-pin XLR socket for aircraft panel mounting (power supply via the on-board system)
Padded carry and storage bag with shoulder strap for headset and accessories
Wind screen for microphone (except HMDC 322)
MZQ 2002-1 cable clip (Cat. No. 44740)
HMEC 302, HMEC 305 and HMEC 306 headsets
•
•
•
•
8
Headset
Padded carry and storage bag with shoulder strap for headset and accessories
Wind screen for microphone
MZQ 2002-1 cable clip (Cat. No. 44740)
HMEC300US.book Se ite 9 Mittwoch, 7. April 2004 3:24 15
Recommended accessories
Replaceable gel ear cushions (Cat. No. 83140)
BP-03 battery pack (except for HMEC 302, HMEC 305 and HMEC 306)
Battery pack with XLR-3 socket for powering the NoiseGard™ electronics of the
HMEC 300, HMEC 305-C, HMEC 322, HMEC 400 and HMDC 322 headsets. Four 1.5 V AA
size alkaline manganese batteries (IEC LR 6) ensure approx. 15 hours of reliable
operation (batteries are not included in the delivery). Length of connecting cable: 0.9 m.
Adapter cables (except for HMEC 302, HMEC 305 and HMEC 306)
ACX -1
ACX-2
Sennheiser offers special adapter cables for connecting the NoiseGard™ electronics of
the HMEC 300, HMEC 305-C, HMEC 322, HMEC 400 and HMDC 322 headsets to the onboard power supply via the cigarette lighter socket:
• ACX-1 adapter cable for powering one headset via the cigarette lighter socket
• ACX-2 adapter cable for powering two headsets via the cigarette lighter socket
The adapter cables are also available with a right-angled jack plug featuring a 7.5 A fuse
and a green LED operation indicator:
ACX -11
ACX-22
• ACX-11 adapter cable for powering one headset via the cigarette lighter socket
• ACX-22 adapter cable for powering two headsets via the cigarette lighter socket
9
HMEC300US.book Se ite 10 Mittwoch, 7. April 2004 3:24 15
Connecting the headsets
Connecting cables for headsets
HMEC 300 and HMEC 400 headsets:
1 ¼” (6.35 mm) stereo jack plug for connecting the headphones
1 PJ-068 jack plug for connecting the microphone
1 XLR-3 plug for connecting the power supply for the NoiseGard™ electronics
Connecting cable for
HMEC 300 and HMEC 400
HMEC 302 headset:
1 ¼” (6.35 mm) stereo jack plug for connecting the headphones
1 PJ-068 jack plug for connecting the microphone and the power supply for the
NoiseGard™ electronics
Connecting cable for
HMEC 302
HMEC 305 headset:
1 XLR-5 plug for connecting the headphones, the microphone and the power supply for
the NoiseGard™ electronics
Connecting cable for
HMEC 305
10
HMEC300US.book Se ite 11 Mittwoch, 7. April 2004 3:24 15
HMEC 305-C headset:
1
1
XLR-5 plug for connecting the headphones and the microphone
XLR-3 plug for connecting the power supply for the NoiseGard™ electronics
Connecting cable for
HMEC 305-C
HMEC 306 headset:
1 6-pin Redel plug for connecting the headphones, the microphone and the power
supply for the NoiseGard™ electronics
Connecting cable for
HMEC 306
HMEC 322 and HMDC 322 headsets:
1 U-174/U jack plug for connecting the headphones and the microphone
1 XLR-3 plug for connecting the power supply for the NoiseGard™ electronics
Connecting cable for
HMEC 322 and HMDC 322
11
HMEC300US.book Se ite 12 Mittwoch, 7. April 2004 3:24 15
Connector assignment
Redel connector (NoiseGard™)
1 Power supply NoiseGard™ (DC+)
2 Audio Lo / DC –
3 Audio Hi left
4 Audio Hi right
5 Microphone Hi
6 Microphone Lo
XLR-3 connector (NoiseGard™)
XLR-5 connector
1 Power supply NoiseGard™ (DC+) HMEC 305
2 Ground
1 Audio Hi
3 Do not connect!
2 Audio Lo / DC –
3 Microphone Hi
2 Do not connect! (HMEC 305-C) 4 Microphone Lo
3 Ground (HMEC 305-C)
5 Power supply NoiseGard™ (DC+)
;
HMEC 305-C
1 Audio Hi
2 Audio Lo
3 Microphone Hi
4 Microphone Lo
5 Not assigned!
;;;;;;;;;;;;;
;;;;;;;;;;;;;
;
¼” (6.35 mm) stereo jack plug
1 Audio Hi left
2 Audio Hi right
3 Audio Lo
12
U174/U jack plug
1 Microphone Lo
2 Audio Hi
3 Microphone Hi
4 Audio Lo
PJ-068 jack plug
HMEC 302
1 Power supply NoiseGard™ (DC+)
2 Microphone Hi
3 Microphone Lo / DC –
HMEC 300
1 Not assigned!
2 Microphone Hi
3 Microphone Lo
HMEC300US.book Se ite 13 Mittwoch, 7. April 2004 3:24 15
Powering options
There are three options for powering the NoiseGard™ active noise compensation:
1. Connection to the on-board system (12–35 V DC)
2. Connection to the BP-03 battery pack
(accessory, except for HMEC 302, HMEC 305 and HMEC 306)
3. Connection to the cigarette ligther socket (12–35 V DC) via adapter cable
(accessory, except for HMEC 302, HMEC 305 and HMEC 306)
The supply voltage for the NoiseGard™ system is processed by the in-line electronics in
the connecting cable.
Danger of short circuit!
Before turning on NoiseGard™, ensure that the on-board power supply system is
protected by a 1 A fuse.
13
HMEC300US.book Se ite 14 Mittwoch, 7. April 2004 3:24 15
1. Connecting the headset to the on-board system
The NoiseGard™ electronics can be connected to on-board power supply systems with
operating voltages between 12–35 V DC.
Danger of short circuit!
Before turning on NoiseGard™, ensure that the on-board power supply system is
protected by a 1 A fuse.
Power supply for
NoiseGard™
The HMEC 300, HMEC 305-C, HMEC 322, HMEC 400 and HMDC 322 headsets are supplied
with an XLR-3 socket for panel mounting in the aircraft. The XLR-3 socket must be
mounted by a technician qualified to perform this type of installation.
Ground
Do not connect !
XL R-3 socket
HMEC 300 and HMEC 400 headsets:
왘 Connect the ¼” (6.35 mm) stereo jack plug for the headphones and the PJ-068 jack
plug for the microphone to the corresponding jack sockets of your intercom.
왘 Connect the XLR-3 plug to the XLR-3 socket.
14
HMEC300US.book Se ite 15 Mittwoch, 7. April 2004 3:24 15
HMEC 302 headset:
왘 Connect the ¼” (6.35 mm) stereo jack plug for the headphones and the PJ-068 jack
plug for the microphone to the corresponding jack sockets of your intercom.
HMEC 305 headset:
왘 Connect the XLR-5 plug to the aircraft’s XLR-5 socket.
HMEC 305-C headset:
왘 Connect the XLR-5 plug for the headphones and the microphone to the aircraft’s XLR-5
socket.
왘 Connect the XLR-3 plug to the XLR-3 socket.
HMEC 306 headset:
왘 Connect the 6-pin Redel plug to the corresponding socket in the aircraft.
HMEC 322 and HMDC 322 headsets:
왘 Connect the U-174/U jack plug for the headphones and the microphone to the U-174/U
socket of your intercom.
왘 Connect the XLR-3 plug to the XLR-3 socket.
15
HMEC300US.book Se ite 16 Mittwoch, 7. April 2004 3:24 15
2. Connecting the headset to the battery pack
(except HMEC 302, HMEC 305 and HMEC 306)
The NoiseGard™ electronics of the HMEC 300, HMEC 305-C, HMEC 322, HMEC 400 and
HMDC 322 headsets can also be powered via the BP-03 battery pack (see
“Recommended accessories” on page 9). The battery pack can be operated either on
standard or rechargeable batteries (not included in the delivery). However, to ensure a
longer operating time, we would recommend using standard AA size alkaline
manganese batteries (IEC LR 6) or NiMH rechargeable batteries.
Inserting / replacing the the batteries
왘 Open the cover of the battery compartment.
왘 Insert four AA size alkaline-manganese batteries (IEC LR 6). Observe correct polarity
when inserting the batteries.
왘 Close the cover of the battery compartment.
LED operation and battery status indication
The battery pack has two control LEDs.
Green LED:
Red LED:
16
The battery pack is turned on and the battery capacity is sufficient.
The batteries are low. Replace the batteries.
HMEC300US.book Se ite 17 Mittwoch, 7. April 2004 3:24 15
Connecting the headset, turning on the battery pack
왘 Connect the XLR-3 plug of the headset connecting cable to the XLR-3 socket on the
connecting cable of the battery pack.
왘 HMEC 300 and HMEC 400 headsets: Connect the ¼” (6.35 mm) stereo jack plug for
the headphones and the PJ-068 jack plug for the microphone to the corresponding
jack sockets of your intercom.
HMEC 305-C headset: Connect the XLR-5 plug for the headphones and the
microphone to the aircraft’s XLR-5 socket.
HMEC 322 and HMDC 322 headsets: Connect the U-174/U jack plug for the
headphones and the microphone to the U-174/U socket of your intercom.
왘 Turn on the battery pack by setting the ON/OFF switch to ON. The green LED power
indicator lights up.
Note:
When using the battery pack, the ON/OFF switch integrated into the headset
connecting cable is out of operation.
Attaching the battery pack to clothing
The battery pack can be attached to clothing by means of the supplied attachment clip,
Velcro tape is also supplied.
17
HMEC300US.book Se ite 18 Mittwoch, 7. April 2004 3:24 15
3. Connecting the headset via a cigarette lighter adapter cable
(except HMEC 302, HMEC 305 and HMEC 306)
Sennheiser offers special adapter cables with XLR-3 socket for connecting the NoiseGard™
electronics of the HMEC 300, HMEC 305-C, HMEC 322, HMEC 400 and HMDC 322 headsets
to the on-board power supply via the cigarette lighter socket:
ACX -1
ACX-2
• ACX-1 adapter cable for powering one headset via the cigarette lighter socket
• ACX-2 adapter cable for powering two headsets via the cigarette lighter socket
The adapter cables are also available with a right-angled jack plug featuring a 7.5 A fuse
and a green LED operation indicator:
• ACX-11 adapter cable for powering one headset via the cigarette lighter socket
• ACX-22 adapter cable for powering two headsets via the cigarette lighter socket
ACX -11
ACX-22
Connecting the headset
왘 Connect the XLR-3 plug of the headset connecting cable to the XLR-3 socket of the
adapter cable.
왘 Connect the plug or right-angled jack plug of the adapter cable to the cigarette
lighter socket.
18
HMEC300US.book Se ite 19 Mittwoch, 7. April 2004 3:24 15
Preparing the headsets for use
Adjusting the headband
For good noise attenuation and best possible comfort, the headband has to be adjusted
to properly fit your head:
왘 Wear the headset so that the headband runs over the top of your head.
왘 Adjust the length of the headband so that
• your ears are completely inside the ear cushions,
• you feel even, gentle pressure around your ears,
• a snug fit is ensured.
Note:
Make sure not to squeeze any connecting cable when adjusting the headband.
Squeezing can damage the connecting cables.
왘 Turn on the NoiseGard™ active noise compensation by setting the ON/OFF switch to
“ON” (see “Turning NoiseGard™ on/off” on page 23).
왘 Final adjustment is best made in a noisy environment.
19
HMEC300US.book Se ite 20 Mittwoch, 7. April 2004 3:24 15
Positioning the microphone
Relocating the microphone boom
The microphone boom can be worn on either side of the mouth.
왘 Loosen the quick-fixing device.
왘 Rotate the microphone boom by 180°.
왘 Tighten the quick-fixing device.
Positioning the microphone towards the corner of the mouth
The HMEC 300, HMEC 302, HMEC 305, HMEC 305-C, HMEC 306, HMEC 322 and HMEC 400
headsets feature a flexible microphone boom. Bend the microphone boom so that the
microphone is placed at the corner of the mouth. Maintain a distance of approx. 2 cm
between microphone and mouth.
20
HMEC300US.book Se ite 21 Mittwoch, 7. April 2004 3:24 15
For positioning the microphone of the HMDC 322 headset, proceed as follows:
왘 Adjust the length of the microphone boom so that the microphone is placed at the
corner of the mouth. To do so, loosen the quick-fixing device and adjust the
microphone boom in length.
왘 Pull the middle part of the microphone boom towards the mouth so that the distance
between microphone and mouth is approx. 2 cm.
왘 Tilt the microphone for final positioning.
21
HMEC300US.book Se ite 22 Mittwoch, 7. April 2004 3:24 15
Additional information for helicopter use of the HMEC 322 headset
The polarity of the microphone connection in helicopters is not standardized. If the
microphone of your headset does not work with the existing polarity, you can reverse
the polarity on the headset by simply rotating the microphone module. To do so, please
proceed as follows:
1. Pull the wind screen from the microphone.
2. Loosen the screws by approx. half a turn.
3. Pull the microphone module from the boom-arm.
4. Rotate the microphone module by 180°.
5. Put the rotated microphone module back into the boom-arm.
6. Now tighten the screws from the other side
7. Slide the windscreen over the microphone.
Rotating the microphone module does not change its acoustic properties. Due to its
noise-compensating pick-up pattern, the microphone can be used from either side.
22
HMEC300US.book Se ite 23 Mittwoch, 7. April 2004 3:24 15
Using the headsets
Turning NoiseGard™ on/off
With the NoiseGard™ active noise compensation turned off, the headset can be used as
a conventional headset.
Turn on the NoiseGard™ active noise compensation by setting the ON/OFF switch to
“ON”. When using the BP-03 battery pack, set the NoiseGard™ ON/OFF switch to “ON”
and use the ON/OFF switch on the battery pack.
Mono/Stereo selection (except HMEC 305, HMEC 305-C, HMEC 322 and HMDC 322)
In general, you’ll receive a mono sound source so that the Mono/Stereo switch can
remain set to “Mono”. When using a stereo intercom system, set the Mono/Stereo
switch to “Stereo”.
Adjusting the volume
Exposure to loud sounds can cause hearing damage!
Set the volume control to a medium value. Make sure that you can hear critical sounds
such as warning alarms.
23
HMEC300US.book Se ite 24 Mittwoch, 7. April 2004 3:24 15
Attaching the cable clip
The headphone cable can be fixed by means of the cable clip. Guide the headphone cable
through the metal cable clip as shown in the illustration on the left. Attach the cable clip
to your clothing and then loop the cable through the clip so that the headphone cable
doesn‘t disturb you.
Folding up the headphones
For easy and space-saving transportation, the earcups can be folded up and tucked
between the headband.
Unfold the headphones by grasping both earcups and pulling them down and away from
the headband.
24
HMEC300US.book Se ite 25 Mittwoch, 7. April 2004 3:24 15
Spare parts
The following spare parts are available from your Sennheiser agent:
•
•
•
•
•
Wind screen for MKE 45 electret microphone
Ear cushions
Headband padding
Cable clip
Carry and storage bag with shoulder strap
Replacing the wind screen
If the wind screen for the electret microphone shows signs of wear such as tears or holes,
replace the wind screen. Pull the wind screen from the microphone. Gently slide-on the
new wind screen and ensure that it fits securely over the microphone.
Replacing the ear cushions
Replace the ear cushions if they are damaged. Grasp behind the ear cushions and pull
them up and away from the earcups. Slide the new ear cushions onto the earcups.
For best results replace the ear cushions after 100 hours of use or two years.
25
HMEC300US.book Se ite 26 Mittwoch, 7. April 2004 3:24 15
Replacing the headband padding
Replace the headband padding if it is damaged.
왘 Pull the Ziploc type fastening strips of the headband padding apart and remove the
worn headband padding.
왘 Put the new headband padding around the headband.
왘 Pull the two edges of the headband padding together so that the fastening strips
slightly overlap.
왘 Join the fastening strips.
Replacing the headband padding of the HMEC 400 headset
Replace the headband padding if it is damaged.
왘 Open the snaps on the headband padding and remove the worn headband padding.
왘 Put the new headband padding around the headband.
왘 Pull the two edges of the headband padding together and close the snaps.
26
HMEC300US.book Se ite 27 Mittwoch, 7. April 2004 3:24 15
Valuable information on NoiseGard™
The NoiseGard™ principle
One of the greatest stress factors today is noise. Research has shown that noise affects
the nervous system, and can cause tiredness, poor concentration, irritability and tension.
Of even greater concern is the permanent damage to hearing that can result from noise
at high levels.
This problem concerns pilots in particular. Cockpit noise amounts to about 80 dB(A) in
jets and to 90 up to 97 dB(A) in turboprops. During takeoff and landing, the noise level
is even higher. To be able to understand radio traffic in spite of the noisy environment,
the ATC signal level must be set to at least 95 dB(A). Permanent hearing loss caused by
the continuous noise in aircrafts is the reason why many pilots became prematurely
disabled or lost their pilot´s license.
Circumaural communication headsets provide noise attenuating properties and are
commonly used to address this problem. However, the noise attenuation of these
headsets is uneven. High frequencies are reduced considerably, but low frequency wind
and engine noise, the most prominent noise in many of today's aircrafts, is attenuated
very little.
27
HMEC300US.book Se ite 28 Mittwoch, 7. April 2004 3:24 15
In response to these problems, Sennheiser has developed an active noise compensation
system – NoiseGard™ – which, combined with a high-quality passive hearing protector,
provides consistent noise attenuation over the entire audio range. The overall noise
level is reduced so that the radio volume can be turned down but enough noise still
remains for the pilot to safely monitor the aircraft engines.
NoiseGard™ active noise compensation is achieved by generating a signal identical in
sound pressure level but exactly reversed in phase to the noise signal, the effect being
that the out-of-phase signal cancels most of the noise signal.
Active noise compensation is accomplished in the following manner: Each earcup
includes a microphone, a feedback control circuit, and a transducer to reproduce both
the communication and the noise cancelling signal. The feedback control microphones
sense the total sound pressure within each earcup resulting from both the desired radio
signal from the receiver and the undesired noise that has come through the earcup. The
microphone signal is amplified and the radio signal is subtracted from it. The remaining
signal (noise) is then filtered and inverted and the radio signal is added back in.
Eventually, the entire signal is amplified and fed back to the transducer in each earcup.
Since the noise component of the signal is inverted, it cancels the noise signal coming
through the earcup. The radio signal remains unaffected, as it was not processed
through the cancellation circuits.
28
HMEC300US.book Se ite 29 Mittwoch, 7. April 2004 3:24 15
The diagram on the left shows noise compensation with NoiseGard™: Passive hearing
protectors effectively attenuate noise from the middle and upper frequency range, the
effect decreasing sharply in the lower range. However, active noise compensation with
NoiseGard™ combined with passive hearing protectors results in a reduction of noise of
approx. 25 dB in the 25–500 Hz frequency range. The total attenuation resulting from
active and passive noise compensation is about 30 dB over the entire audio range.
A 10 dB reduction in noise is perceived subjectively as a halving in volume. A further
reduction in noise of 10 dB again results in a decrease in unwanted noise by 50 %.
29
HMEC300US.book Se ite 30 Mittwoch, 7. April 2004 3:24 15
In case of difficulty
If problems occur that are not listed in the below table, please contact your Sennheiser
agent.
Problem
Possible cause and what to do
Clear communication but no
active noise compensation
The NoiseGard™ electronics are turned off.
왘 Check to see if the ON/OFF switch is set to “ON”.
The XLR-3 plug has been pulled out of the power source.
왘 Check to see if the XLR-3 plug is correctly connected to the power source.
If aircraft powered: The aircraft fuse is defective.
왘 Check the aircraft fuse.
If battery powered (except HMEC 302, HMEC 305 and HMEC 306): The batteries are low.
왘 Check to see if the green LED on the battery pack is lit. If the red LED is lit, replace
the batteries.
30
HMEC300US.book Se ite 31 Mittwoch, 7. April 2004 3:24 15
Problem
Possible cause and what to do
Active noise compensation but
very low volume communication
The volume control is set too low.
왘 Check the volume setting of the headset.
The headphone connection has been pulled out (except HMEC 305, HMEC 305-C and
HMEC 306).
왘 Check to see if the headphone jack plug is correctly connected.
Active noise compensation but
reduced intelligibility
The microphone connection has been pulled out (except HMEC 305, HMEC 305-C and
HMEC 306).
왘 Check to see if the microphone jack plug is correctly connected.
Communications in one ear only
(only HMEC 300, HMEC 302,
HMEC 306 and HMEC 306)
You are using a stereo intercom system but the headset is set to mono operation.
왘 Set the Mono/Stereo switch to “Stereo”.
You are receiving a mono source but the headset is set to stereo operation.
왘 Set the Mono/Stereo switch to “Mono”.
31
HMEC300US.book Se ite 32 Mittwoch, 7. April 2004 3:24 15
Technical data
HMEC 300
HMEC 302
HMEC 306
Headphones
Transducer principle
dy namic
Ear coupling
circumaural, clo sed
Frequency respo nse
45–15,000 Hz
Nominal impedance active/passive
Attenuation ( active and passive)
300/150 Ω, mo no
600/300 Ω, stereo
> 25–40 dB
Max. so und pressure level
120 dB (±5 %)
Contact pressure
approx. 10 N
Microphone incl. preamplifier
Transducer principle
electret mic capsule, noise-compensated, M KE 45
Frequency respo nse
300–5,000 Hz
Sensitivity
Max. so und pressure level
–
120 dB
Min. terminating impedance
150 Ω
Output voltage
400 mV ± 3 dB at 114 dB ( as per RTCA /DO 214)
Supply voltage
typ. 16 V DC ( 8–16 V DC, approx. 8–25 mA, as per RTCA/DO 214)
32
HMEC 400
HMEC300US.book Se ite 33 Mittwoch, 7. April 2004 3:24 15
HMEC 300
HMEC 302
HMEC 306
HMEC 400
6-pin Redel plug fo r
headphones, microphone
and NoiseGard™
General data
Connecting cable
1.5 m, unilatera l
Weight without cable
370 g
Po wer supply fo r NoiseGa rd™
12–35 V DC
Current consumption
Fuse
27 mA (zero signal current), ma x. 80 mA
500 mA thermo fuse
Connecto rs
6.35 mm stereo jack plug
for headpho nes,
PJ-068 jack plug for
miropho ne,
XLR-3 for NoiseGard™
Controls
Mo no/Stereo switch
On/off switch for NoiseGa rd™
Volume control for headphones
Tempera ture range
Operation
Storage
Operating time
with batteries (four 1.5 V AA size alkaline-manganese batteries): approx. 15 hours
with NiMH rechargeable batteries: a pprox. 15 hours
Battery pack
6.35 mm stereo jack plug
for headphones,
PJ-068 jack plug for
micropho ne and
NoiseGard™
6.35 mm stereo jack plug
for headphones,
PJ-068 jack plug for
micropho ne,
XLR-3 for NoiseGard™
–15 °C ... +55 °C
–55 °C ... +55 °C
33
HMEC300US.book Se ite 34 Mittwoch, 7. April 2004 3:24 15
Technical data
HMEC 305
HMEC 305-C
HMEC 322
HMDC 322
Headphones
Transducer principle
dy namic
Ear coupling
circumaural, clo sed
Frequency respo nse
45–15,000 Hz
Nominal impedance active/passive
Attenuation ( active and passive)
300/150 Ω, mo no
> 25–40 dB
Max. so und pressure level
120 dB (±5 %)
Contact pressure
approx. 10 N
50/35 Ω, mono
Microphone incl. preamplifier
Transducer principle
electret mic capsule,
no ise-compensated,
MKE 45
dynamic mic capsule,
noise-compensated,
M-87/AIC
Frequency respo nse
300–5,000 Hz
500–4,000 Hz
Sensitivity
Max. so und pressure level
–
120 dB
1.8–4 µV / 74 dB at 5 Ω
–
Min. terminating impedance
150 Ω
–
Output voltage
400 mV ± 3 dB at 114 dB ( as per RTCA /DO 214)
–
Supply voltage
typ. 16 V DC ( 8–16 V DC, approx. 8–25 mA, as per RTCA/DO 214)
–
34
HMEC300US.book Se ite 35 Mittwoch, 7. April 2004 3:24 15
HMEC 305
HMEC 305-C
HMEC 322
HMDC 322
General data
coiled cable, unilateral
Connecting cable
1.5 m, unilatera l
Weight without cable
370 g
Po wer supply fo r NoiseGa rd™
12–35 V DC
Current consumption
Fuse
27 mA (zero signal current), ma x. 80 mA
500 mA thermo fuse
Connecto rs
XLR-5 for headphones,
microphone and
NoiseGa rd™
Controls
On/off switch for NoiseGa rd™
Volume control for headphones
Tempera ture range
Operation
Storage
Operating time
with batteries (four 1.5 V AA size alkaline-manganese batteries): approx. 15 hours
with NiMH rechargeable batteries: a pprox. 15 hours
Battery pack
XLR-5 for headphones
and microphone,
XLR-3 for NoiseGard™
U-174/U jack plug for headpho nes and microphone,
XLR-3 fo r NoiseGa rd™
–15 °C ... +55 °C
–55 °C ... +55 °C
35
HMEC300US.book Se ite 36 Mittwoch, 7. April 2004 3:24 15
Certificate of Conformity
Sennheiser electronic GmbH & Co. KG declare that this device conforms to the applicable CE standards and
regulations.
Guarantee Certificate
The guarantee period for this Sennheiser product is 5 years from the date of purchase. Excluded are accessory items,
rechargeable or disposable batteries that are delivered with the product; due to their characteristics these products have a
shorter service life that is principally dependent on the individual frequency of use.
The guarantee period starts from the date of original purchase. For this reason, we recommend that the sales receipt be
retained as proof of purchase. Without this proof (which is checked by the responsible Sennheiser service partner) you will
not be reimbursed for any repairs that are carried out.
Depending on our choice, guarantee service comprises, free of charge, the removal of material and manufacturing defects
through repair or replacement of either individual parts or the entire device. Inappropriate usage (e.g. operating faults,
mechanical damages, incorrect operating voltage), wear and tear, force majeure and defects which were known at the time
of purchase are excluded from guarantee claims. The guarantee is void if the product is manipulated by non-authorised
persons or repair stations.
In the case of a claim under the terms of this guarantee, send the device, including accessories and sales receipt, to the
responsible service partner. To minimise the risk of transport damage, we recommend that the original packaging is used.
Your legal rights against the seller, resulting from the contract of sale, are not affected by this guarantee.
The guarantee can be claimed in all countries outside the U.S. provided that no national law limits our terms of guarantee.
36
HMEC300US.book Se ite 219 Mittwoch, 7. April 2004 3:24 15
HMEC 300/302/305
305-C/306/322/400
HMDC 322
Notice d’emploi
Sommaire
Conseils et précautions ... ........... ............ ............ ............ ........... ............ ............ ............ ........... ............ ..... 3
Points forts .. ............ ............ ........... ............ ............ ............ ........... ............ ............ ............ ........... ............ ..... 4
Variantes ...... ............ ............ ........... ............ ............ ............ ........... ............ ............ ............ ........... ............ ..... 5
Contenu ........ ............ ............ ........... ............ ............ ............ ........... ............ ............ ............ ........... ............ ..... 8
Accessoires recommandés ....... ............ ............ ............ ........... ............ ............ ............ ........... ............ ..... 9
Raccordement des casques micros ... ............ ............ ........... ............ ............ ............ ........... ............ ... 10
Câbles de raccordement pour casques micros ........ ........... ............ ............ ............ ........... ............ ... 10
Câblage des connecteurs ........ ............ ............ ............ ........... ............ ............ ............ ........... ............ ... 12
Possibilités d’alimentation ..... ............ ............ ............ ........... ............ ............ ............ ........... ............ ... 13
Préparation des casques micros à l’utilisation ..... ........... ............ ............ ............ ........... ............ ... 19
Réglage du serre-tête ... ........... ............ ............ ............ ........... ............ ............ ............ ........... ............ ... 19
Position du microphone .......... ............ ............ ............ ........... ............ ............ ............ ........... ............ ... 20
Information complémentaire pour l’utilisation du HMEC 322 dans un hélicoptère .. ............ ... 23
Utilisation des casques micros ........... ............ ............ ........... ............ ............ ............ ........... ............ ... 24
Commutation Marche/Arrêt du NoiseGard™ .......... ........... ............ ............ ............ ........... ............ ... 24
Commutation Mono/Stéréo (sauf HMEC 305, HMEC 305-C, HMEC 322 et HMDC 322) ........ ... 24
Réglage de volume ........ ........... ............ ............ ............ ........... ............ ............ ............ ........... ............ ... 24
Fixation du clip de câble .......... ............ ............ ............ ........... ............ ............ ............ ........... ............ ... 25
Pliage du casque ............ ........... ............ ............ ............ ........... ............ ............ ............ ........... ........... . ... 25
Pièces de remplacement ........... ............ ............ ............ ........... ............ ............ ............ ........... ............ ... 26
Informations utiles sur le NoiseGard™ ........ ............ ........... ............ ............ ............ ........... ............ ... 28
En cas de difficulté ........... ........... ............ ............ ............ ........... ............ ............ ............ ........... ............ ... 31
Caractéristiques techniques .... ............ ............ ............ ........... ............ ............ ............ ........... ............ ... 33
2
Les HMEC 300, HMEC 302, HMEC 305, HMEC 305-C, HMEC 306, HMEC 322, HMEC 400 et
HMDC 322 sont des casques micros pour pilote. De type clos, ils sont dotés de la
compensation active de bruit NoiseGard™. Ils sont particulièrement recommandés pour
les hélicoptères et tous les avions à hélices ou turbopropulseurs.
Conseils et précautions
• Avec le système de compensation actif de bruit NoiseGard™ en fonction, vous
percevez l’environnement sonore d’une façon différente (moteurs, hélices, alarmes,
etc.). Avant d’utiliser votre appareil, assurez-vous qu’avec le système NoiseGard™
actif, vous pouvez identifier ces sons. Le réglage du volume doit être fait de telle
façon qu’il vous permette une bonne perception des signaux d’alarme.
• Ne tentez pas de réparer vous-même votre casque micro. En cas de problème,
contactez votre distributeur Sennheiser pour qu’il puisse vous porter assistance.
• Les seules pièces que vous pouvez remplacer vous-même sont celles décrites plus
loin dans ce manuel. Toutes les autres pièces de votre casque micro ne peuvent être
remplacées que par votre distributeur Sennheiser.
• Ne pas immerger le casque micro dans l’eau ! Pour savoir comment le nettoyer,
veuillez contacter votre distributeur Sennheiser.
3
Points forts
Casque micro NoiseGard™ HMEC 300
• Nouveau casque micro actif avec atténuation efficace des bruits environnants sur la
totalité du spectre grâce au système de compensation de bruit NoiseGard™
• Le système de compensation actif de bruit NoiseGard™ assure des communications
claires même dans des environnements bruyants
• Excellent confort grâce à un poids réduit, des oreillettes offrant un contact agréable
et un serre-tête réglable. Votre liberté de mouvement est maximum grâce à un câble
de raccordement unilatéral
• Casque repliable pour une facilité de rangement optimale et un transport facilité
• Des communications claires grâce au micro à électret MKE 45 avec sensibilité réglable
• Le micro peut être aisément positionné d’un côté ou de l’autre de la bouche grâce à
un système de fixation rapide du flexible
• Réception radio optimale grâce à une réponse en fréquence étendue
• Contrôle de volume intégré
• Adaptation au système d’intercom du bord via un commutateur mono/stéréo
• Avec le système NoiseGard™ désactivé, le casque micro peut être utilisé comme un
modèle conventionnel
4
• L’alimentation du système NoiseGard™ peut être réalisée via l’alimentation du
tableau de bord, une prise allume-cigare, ou un pack de piles
• Sécurité d’utilisation assurée en cas de défaut d’alimentation
• Tension d’alimentation du NoiseGard™ adaptée par l’électronique intégrée au câble
d’alimentation
• Fabriqué en Allemagne, 5 ans de garantie (HMEC 400 : 10 ans de garantie)
Variantes
Casque micro NoiseGard™ HMEC 302
Le HMEC 302 diffère du HMEC 300 par les caractéristiques suivantes :
• Raccordement microphone et de l’électronique NoiseGard™ via un connecteur jack
PJ-068
Casque micro NoiseGard™ HMEC 305
Le HMEC 305 diffère du HMEC 300 par les caractéristiques suivantes :
• Pas de commutateur mono/stéréo
• Raccordement casque, microphone et de l’électronique NoiseGard™ à l’alimentation
du tableau de bord (12–35 V CC) via un connecteur XLR-5
5
Casque micro NoiseGard™ HMEC 305-C
Le HMEC 305-C diffère du HMEC 300 par les caractéristiques suivantes :
• Pas de commutateur Mono/Stéréo
• Raccordement casque et microphone via un connecteur XLR-5
• Raccordement de l’électronique NoiseGard™ via un connecteur XLR-3
Casque micro NoiseGard™ HMEC 306
Le HMEC 306 diffère du HMEC 300 par les caractéristiques suivantes :
• Raccordement casque, microphone et de l’électronique NoiseGard™ à l’alimentation
du tableau de bord (12–35 V CC) via un connecteur Redel à 6 broches
Casque micro NoiseGard™ HMEC 322
Le HMEC 322 diffère du HMEC 300 par les caractéristiques suivantes :
• Pas de commutateur Mono/Stéréo
• Câble spiralé
• Raccordement casque et microphone via un connecteur jack U-174/U à une interface
haute impédance dans un hélicoptère
6
Casque micro NoiseGard™ HMEC 400
Le HMEC 400 diffère du HMEC 300 par les caractéristiques suivantes :
• Elégant design argent
• Oreillettes simili cuir
• Le rembourrage de l’arceau se boutonne
Casque micro NoiseGard™ HMDC 322
Le HMDC 322 diffère du HMEC 300 par les caractéristiques suivantes:
•
•
•
•
Pas de commutateur Mono/Stéréo
Câble spiralé
Micro dynamique M-87/AIC et casque basse impédance
Raccordement casque et microphone via un connecteur jack U-174/U à une interface
basse impédance dans un hélicoptère
7
Contenu
HMEC 300, HMEC 305-C, HMEC 322, HMEC 400 et HMDC 322
• Casque micro
• Prise XLR-3 pour tableau de bord d’avion (alimentation par système de bord)
• Sac de rangement et de transport avec courroie d’épaule pour casque micro et
accessoires
• Protection anti vent pour micro (sauf HMDC 322)
• Clip de câble MZQ 2002-1 (N° Réf. 44740)
HMEC 302, HMEC 305 et HMEC 306
• Casque micro
• Sac de rangement et de transport avec courroie d’épaule pour casque micro et
accessoires
• Protection anti vent
• Clip de câble MZQ 2002-1 (N° Réf. 44740)
8
Accessoires recommandés
Oreillettes gel, remplaçables (N° Réf. 83140)
Pack de piles BP-03 (sauf HMEC 302, HMEC 305 et HMEC 306)
Pack de piles avec prise XLR-3 pour alimenter l‘électronique NoiseGard™ des casques
micros HMEC 300, HMEC 305-C, HMEC 322, HMEC 400 et HMDC 322. Quatre piles alcalines
1,5 V (IEC LR 6) assurent plus de 15 heures d‘utilisation (les piles ne sont pas inclus).
Longueur du câble de raccordement: 0,9 m.
Câbles adaptateurs (sauf HMEC 302, HMEC 305 et HMEC 306)
ACX -1
ACX-2
Sennheiser propose des câbles adaptateurs spéciaux pour raccorder l‘électronique
NoiseGard™ des HMEC 300, HMEC 305-C, HMEC 322, HMEC 400 et HMDC 322 à
l’alimentation du bord via une prise allume-cigare :
• ACX-1 – Câble adaptateur pour alimenter un casque micro
• ACX-2 – Câble adaptateur pour alimenter deux casques micros
Les câbles adaptateurs sont également disponibles avec un jack coudé doté d’un fusible
7,5 A et d‘un témoin de fonctionnement LED (vert) :
ACX -11
ACX-22
• ACX-11 – Câble adaptateur pour alimenter un casque micro
• ACX-22 – Câble adaptateur pour alimenter deux casques micros
9
Raccordement des casques micros
Câbles de raccordement pour casques micros
HMEC 300 et HMEC 400 :
1 jack stéréo 6,35 mm pour le raccordement du casque
1 jack PJ-068 pour le raccordement du microphone
1 connecteur XLR-3 pour l’alimentation de l’électronique NoiseGard™
Câble de raccordement
pour HMEC 300 / HMEC 400
HMEC 302 :
1 jack stéréo 6,35 mm pour le raccordement du casque
1 jack PJ-068 pour le raccordement de l’alimentation de l’électronique NoiseGard™ et
du microphone
Câble de raccordement
pour HMEC 302
HMEC 305 :
1 connecteur XLR-5 pour le raccordement du casque, de l’alimentation de l’électronique
NoiseGard™ et du microphone
Câble de raccordement
pour HMEC 305
10
HMEC 305-C :
1 jack stéréo 6,35 mm pour le raccordement du casque et du microphone
1 connecteur XLR-3 pour l’alimentation de l’électronique NoiseGard™
Câble de raccordement
pour HMEC 305-C
HMEC 306 :
1 connecteur Redel à 6 broches pour le raccordement du casque, de l’alimentation de
l’électronique NoiseGard™ et du microphone
Câble de raccordement
pour HMEC 306
HMEC 322 et HMDC 322 :
1 jack U-174/U pour le raccordement casque et micro
1 connecteur XLR-3 pour l’alimentation de l’électronique NoiseGard™
Câble de raccordement
pour HMEC 322 / HMDC 322
11
Câblage des connecteurs
Connecteur Redel (NoiseGard™)
1 Alim. NoiseGard™ (CC+)
2 Audio point froid CC –
3 Audio point chaud gauche
4 Audio point chaud droit
5 Micro point chaud
6 Micro point froid
Connecteur XLR-3 (NoiseGard™)
1 Alim. NoiseGard™ (CC+)
2 Masse
3 Ne pas raccorder !
Connecteur XLR-5
HMEC 305
HMEC 305-C
1 Audio point chaud
1 Audio point chaud
2 Audio point froid / CC – 2 Audio point froid
3 Micro point chaud
3 Micro point chaud
2 Ne pas raccorder ! (HMEC 305-C) 4 Micro point froid
4 Micro point froid
3 Masse (HMEC 305-C)
5 Alim. NoiseGard™ (CC+) 5 Non assigné !
;
;;;;;;;;;;;;;
;;;;;;;;;;;;;
;
Jack stéréo 6,35 mm
1 Audio point chaud gauche
2 Audio point chaud droit
3 Audio point froid
12
Jack U174/U
1 Micro point froid
2 Audio point chaud
3 Micro point chaud
4 Audio point froid
Jack PJ-068
HMEC 302
HMEC 300
1 Alim. NoiseGard™ (CC+) 1 Non assigné !
2 Micro point chaud
2 Micro point chaud
3 Micro point froid / CC – 3 Micro pont froid
Possibilités d’alimentation
Il existe trois possibilités d’alimentation du système de compensation active NoiseGard™ :
1. Raccordement au système de bord (12–35 V CC)
2. Raccordement à un pack de piles BP-03
(accessoire, sauf HMEC 302, HMEC 305 et HMEC 306)
3. Raccordement à une prise allume-cigare (12–35 V CC) via un câble adaptateur
(accessoire, sauf HMEC 302, HMEC 305 et HMEC 306)
La tension d’alimentation pour le système NoiseGard™ est adaptée par l’électronique
intégrée au câble de raccordement.
Danger de court-circuit !
Avant de mettre en fonction le NoiseGard™, assurez-vous que le système
d’alimentation du bord est protégé par un fusible de 1 A.
13
1. Raccorder un casque micro au système de bord
L’électronique NoiseGard™ peut être raccordée à l’alimentation du bord pour des
tensions comprises entre 12 et 35 V CC.
Danger de court-circuit !
Avant de mettre en fonction le NoiseGard™, assurez-vous que le système
d’alimentation du bord est protégé par un fusible de 1 A.
Alimentation
NoiseGard™
Les casques micros HMEC 300, HMEC 305-C, HMEC 322, HMEC 400 et HMDC 322 sont
fournis avec une prise XLR-3 destinée à être montée dans le tableau de bord d’un avion.
Ce montage doit être effectué par un technicien qualifié pour ce type d’installation.
Masse
Ne pas
raccorder !
Prise XL R-3
HMEC 300 et HMEC 400 :
왘 Raccorder le jack 6,35 mm pour le casque et le jack PJ-068 pour le micro aux prises
correspondantes de votre système intercom.
왘 Raccorder le connecteur XLR-3 à la prise XLR-3 du bord.
14
HMEC 302 :
왘 Raccorder le jack 6,35 mm pour le casque et le jack PJ-068 pour le micro aux prises
correspondantes de votre système intercom.
HMEC 305 :
왘 Raccorder le connecteur XLR-5 à la prise XLR-5 de votre avion.
HMEC 305-C :
왘 Raccorder le connecteur XLR-5 pour le casque et le micro à la prise XLR-5 de votre
avion.
왘 Raccorder le connecteur XLR-3 à la prise XLR-3 du bord.
HMEC 306 :
왘 Raccorder le connecteur Redel à 6 broches à la prise 6 broches de votre avion.
HMEC 322 et HMDC 322 :
왘 Raccorder le jack U-174/U pour le casque et le micro à la prise U-174/U de votre
intercom.
왘 Raccorder le connecteur XLR-3 à la prise XLR-3 du bord.
15
2. Raccorder un casque micro au pack de piles
(sauf HMEC 302, HMEC 305 et HMEC 306)
L’électronique NoiseGard™ des HMEC 300, HMEC 305-C, HMEC 322, HMEC 400 et
HMDC 322 peut aussi être alimentée via le pack de piles BP-03 (voir “Accessoires
recommandés” à la page 9). Le pack de piles peut être utilisé avec des piles ou des accus
(les piles/accus ne sont pas inclus). Pour profiter d’une autonomie d’env. 15 heures nous
vous recommandons d’utiliser des piles alcalines 1,5 V (IEC LR 6) ou des accus NiMH.
Insertion / remplacement des piles
왘 Ouvrir le couvercle du compartiment des piles.
왘 Insérer quatre piles alcalines de type AA (IEC LR 6). Respecter la polarité lors de la
mise en place des piles.
왘 Refermer le couvercle du compartiment des piles.
LED de fonctionnement et d’état des piles
Le pack de piles dispose de deux LEDs de contrôle.
LED verte allumée : Le pack de piles est en fonction et la capacité des piles et suffisante.
LED rouge allumée : Les piles sont faibles. Remplacez-les.
16
Raccordement du casque micro, mise en fonction du pack de piles
왘 Raccorder le connecteur XLR-3 du câble de raccordement à la prise XLR-3 du câble de
raccordement du pack de piles.
왘 HMEC 300 et HMEC 400 : Raccorder le jack stéréo 6,35 mm pour le casque et le jack
PJ-068 pour le micro aux prises correspondantes de votre intercom.
HMEC 305-C : Raccorder le connecteur XLR-5 pour le casque et le micro à la prise
XLR-5 de votre avion.
HMEC 322 et HMDC 322 : Raccorder le jack U-174/U pour le casque et le micro à la
prise U-174/U de votre intercom.
왘 Mettre en fonction le pack de piles à l’aide du commutateur ON/OFF (position “ON”).
La LED verte doit s’allumer.
Note :
En utilisant le pack de piles, le commuteur ON/OFF intégré au câble de raccordement
du casque micro est hors service.
Fixer le pack de piles à un vêtement
Le pack de piles peut être fixé à un vêtement à l’aide du clip de fixation, une bande Velcro
est également fournie.
17
3. Raccorder un casque micro via un câble adaptateur
(sauf HMEC 302, HMEC 305 et HMEC 306)
Sennheiser propose des câbles adaptateurs spéciaux avec prise XLR-3 pour raccorder
l’électronique NoiseGard™ des HMEC 300, HMEC 305-C, HMEC 322, HMEC 400 et HMDC 322
à l’alimentation du bord via une prise allume-cigare :
ACX -1
ACX-2
• ACX-1 – Câble adaptateur pour alimenter un casque micro
• ACX-2 – Câble adaptateur pour alimenter deux casques micros
Les câbles adaptateurs sont également disponibles avec un jack coudé doté d’un fusible
7,5 A et d’un témoin de fonctionnement LED (vert) :
• ACX-11 – Câble adaptateur pour alimenter un casque micro
• ACX-22 – Câble adaptateur pour alimenter deux casques micros
ACX -11
ACX-22
Raccordement du casque micro
왘 Raccorder le connecteur XLR-3 du câble de raccordement à la prise XLR-3 du câble
adaptateur.
왘 Raccorder le jack ou le jack coudé du câble adaptateur à la prise allume-cigare.
18
Préparation des casques micros à l’utilisation
Réglage du serre-tête
Pour une bonne atténuation des bruits et un confort optimum, le serre-tête doit être
ajusté en fonction de votre tête :
왘 Placer le casque micro, la bande du serre-tête sur le dessus de votre tête.
왘 Ajuster la longueur du serre-tête :
• Vos oreilles doivent être complètement à l’intérieur des oreillettes.
• Vous ne devez ressentir qu’une légère pression sur vos oreilles.
• Un confort optimum est assuré.
Note :
Assurez-vous qu’aucun câble ne vient se prendre dans le serre-tête lorsque vous
l’ajustez. Dans le cas contraire il y a un risque d’endommager le câble.
왘 Mettre en fonction la compensation active NoiseGard™ en plaçant le commutateur
ON/OFF sur “ON” (voir “Commutation Marche/Arrêt du NoiseGard™” à la page 24).
왘 Parfaire le réglage pour une efficacité optimum, surtout en environnement bruyant.
19
Position du microphone
Déplacement du flexible de micro
Le flexible de micro peut être placé d’un côté ou de l’autre de la bouche.
왘 Desserrer le système de fixation rapide.
왘 Tourner le flexible de 180°.
왘 Resserrer le système de fixation rapide.
Positionner le micro devant le coin de votre bouche
Les HMEC 300, HMEC 302, HMEC 305, HMEC 305-C, HMEC 306, HMEC 322 et HMEC 400
sont dotés d’un flexible micro. Pour un rendement optimum, le micro doit être
positionné au coin de la bouche. Maintenir une distance d’env. 2 cm entre le micro et la
bouche.
20
Pour positionner le micro du HMDC 322, procéder de la façon suivante :
왘 Ajuster la longueur du support micro de façon à ce que le micro soit placé au coin de
votre bouche. Pour ce faire, desserrer la fixation rapide et ajuster la longueur du
support micro.
왘 Tirer la partie médiane du support micro vers la bouche jusqu’à ce que la distance
micro/bouche soit d’env. 2 cm.
왘 Orienter le micro pour parfaire le réglage.
21
Information complémentaire pour l’utilisation du HMEC 322 dans un hélicoptère
La polarité de branchement d’un microphone dans les hélicoptères n’est pas
standardisée. Si le microphone de votre casque n’est pas conforme avec la polarité
existante, vous pouvez changer la polarité sur le casque en faisant simplement tourner
le module de microphone. Pour ce faire, procédez comme suit :
1. Retirer la protection antivent du microphone.
2. Déserrer les vis d’environ un demi tour.
3. Opérer une traction sur le module micro par rapport à son bras support.
4. Faire tourner le module micro de 180°.
5. Repousser le module micro en place sur son bras support.
6. Reserrer les vis de l’autre côté.
7. Replacer la protection antivent sur le microphone.
La rotation du module microphone ne change pas ses propriétés acoustiques. En raison
de son système de compensation de bruit, le microphone peut être utilisé de l’un ou
l’autre côté.
22
Utilisation des casques micros
Commutation Marche/Arrêt du NoiseGard™
Avec le système de compensation de bruit NoiseGard™ hors fonction, le casque micro
peut être utilisé comme un modèle conventionnel.
Pour mettre en marche le système NoiseGard™, placez le commutateur ON/OFF sur “ON”.
Quand le pack de piles BP-03 est utilisé, placez le commutateur ON/OFF du NoiseGard™
sur “ON” et utilisez le commutateur ON/OFF du pack de piles.
Commutation Mono/Stéréo (sauf HMEC 305, HMEC 305-C, HMEC 322 et HMDC 322)
En général, vous recevez un son mono. Le commutateur Mono/Stéréo doit alors être
placé sur “Mono”. Lors de l’utilisation d’un système intercom stéréo, placez le
commutateur Mono/Stéréo sur “Stéréo”.
Réglage de volume
L’exposition à des sons de très fort niveau peut être la cause de dommages
irréversibles de l’audition !
Régler le contrôle de volume sur une valeur moyenne. Assurez-vous que vous pouvez
entendre les sons importants comme les signaux d’alarme.
23
Fixation du clip de câble
Le câble du casque peut être fixé au moyen d’un clip. Guidez le câble sur le clip comme
indiqué sur l'illustration ci-contre. Fixez le clip sur les vêtements et ajustez le câble de
façon à ce qu'il ne vous dérange pas.
Pliage du casque
Pour faciliter le rangement et le transport, les oreillettes du casque peuvent être repliées
à l’intérieur du serre-tête.
Pour déplier le casque, saisir les oreillettes et les tirer vers le bas à l’extérieur du serretête.
24
Pièces de remplacement
Les pièces suivantes sont disponibles chez votre distributeur Sennheiser :
•
•
•
•
•
Protection antivent pour microphone électret MKE 45
Coussins d’oreillettes
Rembourrage de l’arceau
Clip pour câble
Sac de rangement et de transport avec courroie d’épaule
Remplacement de la protection antivent
Si la protection antivent du micro électret est endommagée ou présente des trous, vous
devez la remplacer. Retirer la protection antivent du micro. Faites glisser doucement la
nouvelle protection et assurez-vous qu’elle est convenablement mise en place.
Remplacement des coussins d’oreillettes
Remplacer les coussins d’oreillettes dès qu’ils sont endommagés. Saisir l’arrière du
coussin et tirer vers vous de façon à le désolidariser de l’oreillette. Mettre en place un
nouveau coussin sur l’oreillette.
25
Remplacement du rembourrage de l’arceau
Remplacer le rembourrage de l’arceau dès qu’il est endommagé.
왘 Tirer sur la fixation ressemblant à une fermeture Éclair se trouvant sur le
rembourrage, puis enlever le rembourrage usé.
왘 Mettre en place le nouveau rembourrage, tout autour de l’arceau.
왘 Tirer sur les bords du nouveau rembourrage, de façon à ce que les dispositifs de
fixation se retrouvent face à face et débordent légèrement l’un sur l’autre.
왘 Faire se rejoindre les deux bords de cette fermeture Éclair.
Remplacement du rembourrage de l’arceau du HMEC 400
Remplacer le rembourrage de l’arceau dès qu’il est endommagé.
왘 Ouvrir les bouton-pressions du rembourrage et enlever le rembourrage.
왘 Mettre en place le nouveau rembourrage, tout autour de l’arceau.
왘 Tirer sur les deux côtés du rembourrage et refermer les bouton-pressions.
26
Informations utiles sur le NoiseGard™
Le principe NoiseGard™
Aujourd’hui, le bruit est l’un des principaux facteurs de stress. Des recherches ont
montré que le bruit affecte le système nerveux, pouvant entraîner de la fatigue, une
baisse de concentration, de l’irritabilité et de la tension. Lorsque le niveau sonore est très
élevé, il peut survenir des dommages irréversibles de l’audition.
Ce problème concerne particulièrement les pilotes. Dans le cockpit d’un jet, le niveau de
bruit dépasse souvent 80 dB(A) et 90, voir même 97 dB(A) dans les appareils à
turbopropulseurs. Durant le décollage et l’atterrissage, le niveau de bruit est encore plus
élevé. Pour comprendre les communications radio dans ces conditions, il faut monter le
niveau du signal à une valeur de l’ordre de 95 dB(A). Subir en permanence une telle
agression sonore explique que de nombreux pilotes doivent arrêter prématurément leur
activité professionnelle, se voyant même parfois retirer leur licence.
Les casques micro de type fermé (circumaural) assurent une certaine atténuation du
bruit et sont habituellement utilisés pour apporter une solution à ce problème.
Cependant on constate que l’atténuation passive apportée par ces casques n’est pas
suffisante. Les bruits de hautes fréquences sont considérablement atténués, mais les
bruits de basses fréquences comme les bruits d’air, les moteurs, qui sont les bruits
dominants dans les avions actuels, ne sont que très peu atténués.
27
Pour répondre à ce problème, Sennheiser a développé un système de compensation
active du bruit, le NoiseGard™, combinant une excellente protection passive et une
atténuation active très efficace du bruit sur toute l’étendue du spectre audio. Le bruit
est réduit dans son ensemble et le niveau d’écoute des communications radio peut être
abaissé, le pilote pouvant toujours percevoir les sons liés à la sécurité comme les alarmes
ou la sonorité des moteurs de l’avion.
Le système de compensation active du bruit opère selon le principe suivant : un signal
de niveau sonore et de contenu spectral identique au bruit, mais en opposition de phase,
est généré dans le casque. Sachant que deux signaux en opposition de phase s’annulent,
le NoiseGard™ assure de la sorte une très forte atténuation du bruit.
La compensation active du bruit est réalisée en pratique de la façon suivante : chaque
oreillette contient un microphone, un circuit d’analyse et un transducteur pour
reproduire à la fois le signal de communication radio et le signal anti bruit. Les micros
d’analyse captent la totalité du son dans chaque oreillette, à la fois le signal radio et les
bruits indésirables. Le signal micro est amplifié et le signal radio en est soustrait. Le
signal résultant (du bruit) est filtré et inversé en phase et le signal radio est ajouté à
nouveau. Finalement, le signal est amplifié dans son ensemble et réinjecté dans les
oreillettes. Comme seules les composantes de bruit du signal sont inversées, le bruit
ambiant correspondant se trouve annulé dans les oreillettes. Le signal radio n’est pas
affecté car il n’est pas traité par le circuit de compensation.
28
Le schéma ci-contre montre la compensation apportée par le NoiseGard™ : la protection
passive atténue effectivement les bruits dont les composantes se trouvent sur le milieu
et le haut du spectre. L’effet décroît rapidement vers les fréquences basses. Par contre,
compensation active NoiseGard™ et protection passive apportent globalement une
réduction du bruit d’environ 25 dB dans la bande 25–500 Hz. Au total, l’atténuation
procurée par la combinaison de la compensation active et passive atteint 30 dB sur
toute l’étendue du spectre.
Une réduction de 10 dB est perçue subjectivement comme une réduction de moitié du
volume sonore. En conséquence, une réduction de bruit de 10 dB correspond à une
diminution des bruits indésirables de 50 %.
29
En cas de difficulté
Si un problème apparaît, et ne fait pas partie de la liste ci-dessous, veuillez contacter
votre distributeur Sennheiser.
Problème
Causes possibles / Solutions
Communications claires, mais
compensation de bruit inactive
L’électronique NoiseGard™ n’est pas en fonction.
왘 Vérifier que le commutateur ON/OFF est positionné sur “ON”.
Le connecteur XLR-3 est peut-être débranché de sa source d’alimentation.
왘 Vérifier si le connecteur XLR-3 est correctement branché sur sa source
d’alimentation.
Alimentation par l’avion : un fusible est défectueux.
왘 Vérifier les fusibles.
Alimentation par piles (sauf HMEC 302, HMEC 305 et HMEC 306) : les piles sont faibles.
왘 Vérifier que la LED verte du pack de piles est allumée. Si la LED rouge est allumée,
remplacer les piles.
30
Problème
Causes possibles / Solutions
Compensation active du bruit en
fonction, mais communications à
un niveau très faible
Le contrôle de volume est réglé trop bas.
왘 Vérifier le réglage de volume sur le casque.
Compensation active du bruit
mais réduction de l’intelligibilité
La connexion microphone est peut-être débranchée (sauf HMEC 305, HMEC 305-C et
HMEC 306).
왘 Vérifier que le jack du micro est correctement raccordé.
Communications perçues
seulement d’une oreille
(uniquement HMEC 300,
HMEC 302, HMEC 306 et
HMEC 306)
Vous utilisez un système d’intercom stéréo, mais le casque micro est en mode mono.
왘 Vérifiez que le commutateur Mono/Stéréo est bien sur “Stéréo”.
La connexion casque est peut-être débranchée (sauf HMEC 305, HMEC 305-C et
HMEC 306).
왘 Vérifier que le jack du casque est correctement raccordé.
Vous recevez une source mono, mais le casque micro est en mode stéréo.
왘 Vérifiez que le commutateur Mono/Stéréo est bien sur “Mono”.
31
Caractéristiques techniques
HMEC 300
HMEC 302
HMEC 306
Casque
Principe transducteur
dy namique
Couplage oreille
circumaural, fermé
Réponse en fréquence
45–15.000 Hz
Impédance no mina le active/pa ssive
Atténuation active et passive
300/150 Ω, mo no
600/300 Ω, stéréo
> 25–40 dB
Pression acoustique max.
120 dB (±5 %)
Pression de contact
approx. 10 N
Microphone avec préamplificateur
Principe transducteur
capsule mic électret à compensation du bruit, MKE 45
Réponse en fréquence
300–5.000 Hz
Sensibilité
Pression acoustique max.
–
120 dB
Impédance de charge min.
150 Ω
Tensio n de sortie
400 mV ± 3 dB à 114 dB ( selon RTCA/DO 214)
Tensio n d‘alimentation
typ. 16 V CC ( 8–16 V CC, approx. 8–25 mA, selon RTCA/DO 214)
32
HMEC 400
HMEC 300
HMEC 302
HMEC 306
HMEC 400
connecteur Redel à
6 broches po ur casque,
micro et NoiseGard™
Caractéristiques générales
Câble de ra ccordement
1,5 m, unila téral
Po ids sans câble
370 g
Alimentation NoiseGard™
12–35 V CC
Consommation
Fusible
27 mA (hors signal), max. 80 mA
500 mA
Connecteurs
jack stéréo 6,35 mm
pour casque,
jack PJ-068 pour micro,
XLR-3 pour NoiseGard™
Contrôles
co mmutateur Mo no/Stéréo
co mmutateur ON/OFF pour No iseGard™
co ntrôle de volume pour casque
Tempéra ture
utilisation
stockage
Autonomie pack de piles
avec piles alkalines ( 4 x AA, 1,5 V) : approx. 15 heures
avec accus NiMH : approx. 15 heures
jack stéréo 6,35 mm
pour casque,
jack PJ-068 po ur micro
et NoiseGard™
jack stéréo 6,35 mm
pour casque,
jack PJ-068 po ur micro ,
XLR-3 po ur NoiseGard™
–15 °C ... +55 °C
–55 °C ... +55 °C
33
Caractéristiques techniques
HMEC 305
HMEC 305-C
HMEC 322
HMDC 322
Casque
Principe transducteur
dy namique
Couplage oreille
circumaural, fermé
Réponse en fréquence
45–15.000 Hz
Impédance no mina le active/pa ssive
Atténuation active et passive
300/150 Ω, mo no
> 25–40 dB
Pression acoustique max.
120 dB (±5 %)
Pression de contact
approx. 10 N
50/35 Ω, mono
Microphone avec préamplificateur
Principe transducteur
capsule mic électret,
à compensation du bruit,
MKE 45
capsule mic dynamique,
à compensatio n du bruit,
M-87/AIC
Réponse en fréquence
300–5.000 Hz
500–4.000 Hz
Sensibilité
Pression acoustique max.
–
120 dB
1,8–4 µV / 74 dB à 5 Ω
–
Impédance de charge min.
150 Ω
–
Tensio n de sortie
400 mV ± 3 dB à 114 dB ( selon RTCA/DO 214)
–
Supply voltage
typ. 16 V CC ( 8–16 V CC, approx. 8–25 mA, selon RTCA/DO 214)
–
34
HMEC 305
HMEC 305-C
HMEC 322
HMDC 322
Caractéristiques générales
câble spira lé, unila téral
Câble de ra ccordement
1,5 m, unila téral
Po ids sans câble
370 g
Alimentation NoiseGard™
12–35 V CC
Consommation
Fusible
27 mA (hors signal), max. 80 mA
500 mA
Connecteurs
XLR-5 pour casque,
micro et NoiseGard™
Contrôles
co mmutateur ON/OFF pour No iseGard™
co ntrôle de volume pour casque
Tempéra ture
utilisation
stockage
Autonomie pack de piles
avec piles alkalines ( 4 x AA, 1,5 V) : approx. 15 heures
avec accus NiMH : approx. 15 heures
XLR-5 po ur casque
et micro ,
XLR-3 po ur NoiseGard™
jack U-174/U pour casque et micro,
XLR-3 pour NoiseGard™
–15 °C ... +55 °C
–55 °C ... +55 °C
35
Déclaration de Conformité
Sennheiser electronic GmbH & Co. KG déclarons que cet appareil est en conformité avec les normes CE.
Document de Garantie
La période de garantie pour ce produit Sennheiser est de 5 ans à compter de la date d’achat. Sont exclues, les batteries
rechargeables ou jetables livrées avec le produit. En raison de leurs caractéristiques ces produits ont une durée de vie plus
courte liée principalement a la fréquence d’utilisation.
La période de garantie commence à la date de I’achat. Pour cette raison, nous vous recommandons de conserver votre facture
comme preuve d’achat. Sans cette preuve – qui est vérifiée par Sennheiser – aucune prise en compte de la garantie ne pourra
être retenue.
La garantie comprend, gratuitement, la remise en état de fonctionnement du matériel par la réparation ou le remplacement
des pièces défectueuses ou dans le cas où la réparation n’est pas possible, par échange du matériel. L’utilisation inadéquate
(mauvaise utilisation, dégâts mécaniques, tension électrique incorrecte), sont exclus de la garantie. La garantie est invalidée
en cas d’intervention par des personnes non-autorisées ou des stations de réparation non agrées.
Pour faire jouer la garantie, retournez I’appareil et ses accessoires, accompagne de la facture d’achat, a votre distributeur
agrée. Pour éviter des dégâts durant le transport il est recommandé d’utiliser I’emballage d’origine. Votre droit légal de
recours contre le vendeur n’est pas limité par cette garantie.
La garantie peut être revendiquée dans tous les pays à l’extérieur des Etats-Unis à condition qu’aucune loi nationale n’en
invalide les termes.
36
HMEC 300/302/305
305-C/306/322/400
HMDC 322
Istruzioni per l’uso
Indice
Consigli per la Vostra sicurezza .......... ............ ............ ........... ............ ............ ............ ........... ............ ..... 3
Caratteristiche delle cuffie microfoniche .... ............ ........... ............ ............ ............ ........... ............ ..... 4
Varianti del prodotto ....... ........... ............ ............ ............ ........... ............ ............ ............ ........... ............ ..... 5
In dotazione ............ ............ ........... ............ ............ ............ ........... ............ ............ ............ .......... . ............ ..... 8
Accessori consigliati ........ ........... ............ ............ ............ ........... ............ ............ ............ ........... ............ ..... 9
Collegamento della cuffia microfonica ........ ............ ........... ............ ............ ............ ........... ............ ... 10
Cavi di collegamento delle cuffie microfoniche ...... ........... ............ ............ ............ ........... ............ ... 10
Connessioni ......... ............ ........... ............ ............ ............ ........... ............ ............ ............ ........... ............ ... 12
Collegamenti ....... ............ ........... ............ ............ ............ ........... ............ ............ ............ ........... ............ ... 13
Preparazione all’uso della cuffia microfonica ....... ........... ............ ............ ............ ........... ............ ... 19
Regolazione dell’archetto della cuffia .......... ............ ........... ............ ............ ............ ........... ............ ... 19
Posizionamento del microfono .......... ............ ............ ........... ............ ............ ............ ........... ............ ... 20
Ulteriori informazioni per l´uso dal HMEC 322 nell´elicottero ... ............ ............ ........... ............ ... 22
L’utilizzo quotidiano ........ ........... ............ ............ ............ ........... ............ ............ ............ ........... ............ ... 23
Accensione e spegnimento del NoiseGard™ ........... ........... ............ ............ ............ ........... ............ ... 23
Commutazione mono-/stereo (tranne HMEC 305, HMEC 305-C, HMEC 322 e HMDC 322) . ... 23
Regolazione del volume .......... ............ ............ ............ ........... ............ ............ ............ ........... ............ ... 23
Montaggio della clip per il cavo ......... ............ ............ ........... ............ ............ ............ ........... ............ ... 24
Chiusura della cuffia ..... ........... ............ ............ ............ ........... ............ ............ ............ ........... ............ ... 24
Parti di ricambio .... ............ ........... ............ ............ ............ ........... ............ ............ ............ ........... ............ ... 25
Informazioni utili .. ............ ........... ............ ............ ............ ........... ............ ............ ............ ........... ............ ... 27
Quando si presentano disturbi ........... ............ ............ ........... ............ ............ ............ ........... ............ ... 30
Dati tecnici ... ............ ............ ........... ............ ............ ............ ........... ............ ............ ............ ........... ............ ... 32
2
Le cuffie NoiseGard™ HMEC 300, HMEC 302, HMEC 305, HMEC 305-C, HMEC 306,
HMEC 322, HMEC 400 e HMDC 322 sono cuffie microfoniche per uso avionico di tipo chiuso
con compensazione attiva del rumore, utilizzabili su elicotteri, aerei ad elica e a turboelica.
Consigli per la Vostra sicurezza
• Con la compensazione del rumore NoiseGard™ accesa, i rumori tipici del Vostro aereo
o elicottero (p. es. il suono del motore o delle eliche, il segnale d’allarme etc.) possono
risultare diversi. Perciò prima della partenza imparate a riconoscere tutti i rumori più
importanti con la compensazione del rumore accesa. Regolate il volume affinché
possiate sentire tutti i rumori importanti, come gli allarmi o rumori che segnalano
malfunzionamenti.
• Non cercate mai di riparare la cuffia microfonica, per qualunque problema rivolgetevi
al rivenditore o al centro assistenza Sennheiser.
• Sostituite solo le parti per le quali la sostituzione è descritta in queste istruzioni per
l’uso. Tutte le altre parti devono essere sostituite dal rivenditore Sennheiser.
• Non immergete la cuffia microfonica in acqua per lavarla. Se avete domande circa la
pulizia della cuffia microfonica rivolgetevi al rivenditore Sennheiser.
3
Caratteristiche delle cuffie microfoniche
Cuffia microfonica HMEC 300
• Nuova cuffia microfonica attiva, con buona attenuazione dei rumori esterni sull’intera
gamma di frequenza grazie alla compensazione attiva del rumore NoiseGard™
• La compensazione attiva del rumore NoiseGard™ consente una comunicazione chiara
anche negli ambienti più rumorosi
• Estremamente confortevole da indossare garantendo grande libertà di movimento
grazie al peso ridotto, alle comode imbottiture degli auricolari, all’archetto imbottito
e al cavo che scende da un solo lato.
• L’archetto pieghevole consente il trasporto anche in spazzi ridotti
• Comunicazione chiara con il microfono elektret MKE 45 con sensibilità regolabile
• Microfono con braccetto flessibile e dispositivo di bloccaggio veloce, facilmente
posizionabile e utilizzabile da ambo i lati
• Comunicazione ottimale grazie al sistema di ascolto a banda larga
• Regolatore del volume integrato per l’adattamento del volume ottimale
• Adattamento al sistema Intercom grazie alla commutazione mono-/stereo
• Compensazione del rumore NoiseGard™ disinseribile permettendo cosi l’uso come
tradizionale cuffia microfonica
4
• Alimentazione del sistema NoiseGard™ tramite la tensione di rete del velivolo,
accendisigari o batterie
• Fail-Save-Operation in caso di interruzione della corrente d’alimentazione
• Adattamento della tensione di alimentazione del sistema NoiseGard™ mediante
l’elettronica In-Line inserita nel cavo di collegamento
• Made in Germany con 5 anni di garanzia (HMEC 400: 10 anni di garanzia)
Varianti del prodotto
Cuffia microfonica NoiseGard™ HMEC 302
La cuffia microfonica HMEC 302 si distingue dal HMEC 300 per le seguenti caratteristiche:
• Collegamento del microfono ed alimentazione dell’elettronica NoiseGard™ tramite il
connettore jack PJ-068
Cuffia microfonica NoiseGard™ HMEC 305
La cuffia microfonica HMEC 305 si distingue dal HMEC 300 per le seguenti caratteristiche:
• Nessuna commutazione mono-/stereo,
• Collegamento della cuffia, del microfono ed alimentazione dell’elettronica NoiseGard™
tramite la tensione di rete del velivolo (da 12 a 35 V DC) con connettore XLR-5
5
Cuffia microfonica NoiseGard™ HMEC 305-C
La cuffia microfonica HMEC 305-C si distingue dal HMEC 300 per le seguenti caratteristiche:
• Nessuna commutazione mono-/stereo
• Collegamento della cuffia e del microfono tramite il connettore XLR-5
• Collegamento della alimentazione dell’elettronica NoiseGard™ tramite il connettore
XLR-3
Cuffia microfonica NoiseGard™ HMEC 306
La cuffia microfonica HMEC 306 si distingue dal HMEC 300 per le seguenti caratteristiche:
• Collegamento della cuffia, del microfono ed alimentazione NoiseGard™ tramite la
tensione di rete del velivolo (da 12 a 35V DC) con connettore 6-PIN-Redel
Cuffia microfonica NoiseGard™ HMEC 322
La cuffia microfonica HMEC 322 si distingue dal HMEC 300 per le seguenti caratteristiche:
• Nessuna commutazione mono-/stereo
• Cavo spiralato
• Collegamento della cuffia e del microfono tramite il connettore U-174/U (ad una
interfaccia ad alta impedenza nell’elicottero)
6
Cuffia microfonica NoiseGard™ HMEC 400
La cuffia microfonica HMEC 400 si distingue dal HMEC 300 per le seguenti caratteristiche:
• Auricolari color argento
• Imbottiture degli auricolari in pelle
• Imbottitura dell’archetto da abbottonare
Cuffia microfonica NoiseGard™ HMDC 322
La cuffia microfonica HMDC 322 si distingue dal HMEC 300 per le seguenti caratteristiche:
•
•
•
•
Nessuna commutazione mono-/stereo
Cavo spiralato
Microfono dinamico M-87/AIC e cuffia a bassa impedenza
Collegamento della cuffia e del microfono tramite il connettore U-174/U (ad una
interfaccia a bassa impedenza nell’elicottero)
7
In dotazione
Cuffia microfonica HMEC 300, HMEC 305-C, HMEC 322, HMEC 400 e HMDC 322
• Cuffia microfonica
• Presa XLR-3 da pannello per il collegamento alla tensione di rete del velivolo
• Borsa a tracolla imbottita per il trasporto e la custodia della cuffia microfonica e degli
accessori
• Protezione antivento per il microfono (non per HMCD 322)
• Clip per il cavo MZQ 2002-1 (Art. No. 44740)
Cuffia microfonica HMEC 302, HMEC 305 e HMEC 306
• Cuffia microfonica
• Borsa a tracolla imbottita per il trasporto e la custodia della cuffia microfonica e degli
accessori
• Protezione antivento per il microfono (non per HMCD 322)
• Clip per il cavo MZQ 2002-1 (Art. No. 44740)
8
Accessori consigliati
Imbottiture al gel sostituibili per auricolari (Art. No. 83140)
Porta batterie BP-03 (non previsto per HMEC 302, HMEC 305 e HMEC 306)
Porta batterie con connettore XLR-3 per l’alimentazione del sistema NoiseGard™ delle
cuffie microfoniche HMEC 300, HMEC 305-C, HMEC 322, HMEC 400 und HMDC 322.
L‘autonomia di funzionamento con quattro batterie alcaline da 1,5 V (tipo LR6, non in
dotazione) è di circa 15 ore. Lunghezza del cavo di collegamento: 0,9 m.
Cavi adattatori (non previsto per HMEC 302, HMEC 305 e HMEC 306)
ACX -1
ACX-2
Per le cuffie microfoniche HMEC 300, HMEC 305-C, HMEC 322, HMEC 400 e HMDC 322
sono a disposizione speciali cavi adattatori con i quali potete alimentare il sistema
NoiseGard™ utilizzando la presa accendisigari del velivolo:
• ACX-1 cavo adattatore per alimentare una cuffia microfonica
• ACX-2 cavo adattatore per alimentare due cuffie microfoniche
I cavi adattatori sono disponibili anche con una comoda spina ad angolo, equipaggiata
con un fusibile piatto da 7,5 A e un LED verde di controllo:
ACX -11
ACX-22
• ACX-11 cavo adattatore per alimentare una cuffia microfonica
• ACX-22 cavo adattatore per alimentare due cuffie microfoniche
9
Collegamento della cuffia microfonica
Cavi di collegamento delle cuffie microfoniche
Cuffia microfonica HMEC 300 e HMEC 400:
1 connettore jack stereo 6,35 mm per il collegamento della cuffia
1 connettore jack PJ-068 per il collegamento del microfono
1 connettore XLR-3 per alimentare il sistema NoiseGard™
Cavo di collegamento
HMEC 300 e HMEC 400
Cuffia microfonica HMEC 302:
1 connettore jack stereo 6,35 mm per il collegamento della cuffia
1 connettore jack PJ-068 per il collegamento del microfono e alimentazione del sistema
NoiseGard™
Cavo di collegamento
HMEC 302
Cuffia microfonica HMEC 305:
1 connettore XLR-5 per il collegamento di cuffia, microfono e alimentazione del
sistema NoiseGard™
Cavo di collegamento
HMEC 305
10
Cuffia microfonica HMEC 305-C:
1 connettore XLR-5 per il collegamento di cuffia e microfono
1 connettore XLR-3 per alimentare il sistema NoiseGard™
Cavo di collegamento
HMEC 305-C
Cuffia microfonica HMEC 306:
1 connettore 6-PIN-Redel per il collegamento di cuffia, microfono e alimentazione del
sistema NoiseGard™
Cavo di collegamento
HMEC 306
Cuffia microfonica HMEC 322 e HMDC 322:
1 connettore jack U-174/U per il collegamento di cuffia e microfono
1 connettore XLR-3 per alimentare il sistema NoiseGard™
Cavo di collegamento
HMEC 322 e HMD C 322
11
Connessioni
Connettore Redel (NoiseGard™)
1 Alim. NoiseGard™ (DC+)
2 Audio Lo / DC –
3 Audio Hi sinistra
4 Audio Hi destra
5 Microfono Hi
6 Microfono Lo
Connettore XLR-3 (NoiseGard™)
1 Alim. NoiseGard™ (CC+)
2 Massa
3 Non collegare!
2 Non collegare! (HMEC 305-C)
3 Massa (HMEC 305-C)
;
Connettore XLR-5
HMEC 305
HMEC 305-C
1 Audio Hi
1 Audio Hi
2 Audio Lo / DC –
2 Audio Lo
3 Microfono Hi
3 Microfono Hi
4 Microfono Lo
4 Microfono Lo
5 Alim. NoiseGard™ (DC+)
5 Non assegnato
;;;;;;;;;;;;;
;;;;;;;;;;;;;
;
Connettore jack stereo 6,35 mm
1 Audio Hi sinistra
2 Audio Hi destra
3 Audio Lo
12
Connettore jack U174/U
1 Microfono Lo
2 Audio Hi
3 Microfono Hi
4 Audio Lo
Connettore jack PJ-068
HMEC 302
HMEC 300
1 Alim. NoiseGard™ (DC+)
1 Non assegnato
2 Microfono Hi
2 Microfono Hi
3 Microfono Lo / DC –
3 Microfono Lo
Collegamenti
Per alimentare la compensazione del rumore NoiseGard™, avete tre possibilità:
1. Collegamento alla tensione di rete del velivolo (da 12 a 35 V DC)
2. Collegamento al porta batterie BP-03
(optional, tranne per HMEC 302, HMEC 305 e HMEC 306)
3. Collegamento all’accendisigari (da 12 a 35 V DC) tramite cavo adattatore
(optional, tranne per HMEC 302, HMEC 305 e HMEC 306)
L’elettronica In-Line inserita nel cavo di collegamento adatta la tensione di bordo del
velivolo al sistema NoiseGard™.
Pericolo di corto circuito!
Prima della messa in funzione assicuratevi che l’alimentazione del sistema NoiseGard™
proveniente dal velivolo sia protetta con un fusibile da 1 A.
13
1. Collegamento alla tensione di rete del velivolo
Potete collegare il sistema NoiseGard™ ad una tensione compresa tra 12 e 35 V DC.
Pericolo di corto circuito!
Prima della messa in funzione assicuratevi che l’alimentazione del sistema NoiseGard™
proveniente dal velivolo sia protetta con un fusibile da 1 A.
Alimentazione
NoiseGard™
Con le cuffie microfoniche HMEC 300, HMEC 305-C, HMEC 322, HMEC 400 e HMDC 322
viene fornita anche una presa XLR-3 da pannello. Fate montare la presa XLR-3 da
pannello da un installatore competente.
Massa
Non collegare!
Presa XLR-3
Cuffia microfonica HMEC 300 e HMEC 400:
왘 Inserite il connettore jack stereo 6,35 mm per la cuffia ed il connettore jack PJ-068
per il microfono nelle rispettive prese jack dell’Intercom.
왘 Inserite il connettore XLR-3 nella presa XLR-3 da pannello installata sul velivolo.
14
Cuffia microfonica HMEC 302:
왘 Inserite il connettore jack stereo 6,35 mm per la cuffia ed il connettore jack PJ-068
per il microfono nelle rispettive prese jack dell’Intercom.
Cuffia microfonica HMEC 305:
왘 Inserite il connettore XLR-5 nella presa XLR-5 del vostro aereo.
Cuffia microfonica HMEC 305-C:
왘 Inserite il connettore XLR-5 per cuffia e microfono nella presa XLR-5 del vostro aereo.
왘 Inserite il connettore XLR-3 nella presa XLR-3 da pannello installata sul velivolo.
Cuffia microfonica HMEC 306:
왘 Inserite il connettore 6-PIN-Redel nella presa 6-PIN-Redel del vostro aereo.
Cuffia microfonica HMEC 322 e HMDC 322:
왘 Inserite il connettore jack U-174/U per cuffia e microfono nella presa jack U-174/U
dell’Intercom.
왘 Inserite il connettore XLR-3 nella presa XLR-3 da pannello installata sul velivolo.
15
2. Collegamento al porta batterie
(tranne per HMEC 302, HMEC 305 e HMEC 306)
Il sistema NoiseGard™ delle cuffie microfoniche HMEC 300, HMEC 305-C, HMEC 322,
HMEC 400 e HMDC 322 può essere alimentato anche dal porta batterie BP-03 (vedi
“Accessori consigliati” a pagina 9). Il porta batterie è adatto al funzionamento a batteria
ed accumulatore (le batterie o gli accumulatori non sono in dotazione). L‘autonomia di
funzionamento con batterie alcaline (tipo LR6) o con accumulatori NiMH è di circa 15 ore.
Inserimento / sostituzione delle batterie nel porta batterie
왘 Aprite il coperchio dello scomparto per le batterie nel senso della freccia.
왘 Inserite le quattro batterie alcaline da 1,5 V (tipo LR6). Fate attenzione alla polarità.
왘 Chiudete lo scomparto delle batterie.
Indicazioni sul funzionamento e lo stato delle batterie inserite nel porta batterie
Il porta batterie ha due LED di controllo.
Il LED verde è illuminato: Il porta batterie è acceso, il LED verde indica il funzionamento
Il LED rosso è illuminato: La carica delle batterie è sufficiente solo per un breve periodo.
Cambiate le batterie.
16
Collegamento della cuffia microfonica, accensione del porta batterie
왘 Inserite il connettore XLR-3 del cavo di collegamento della cuffia microfonica nel
connettore XLR-3 del porta batterie.
왘 Cuffia microfonica HMEC 300 e HMEC 400: Inserite il connettore jack stereo 6,35 mm
per la cuffia e il connettore jack PJ-068 per il microfono nelle corrispondenti prese
jack dell’Intercom.
Cuffia microfonica HMEC 305-C: Inserite il connettore XLR-5 per cuffia e microfono
nella presa XLR-5 del vostro aereo.
Cuffia microfonica HMEC 322 e HMDC 322: Inserite il connettore jack U-174/U per
cuffia e microfono nella presa U-174/U dell’Intercom.
왘 Accendete il porta batterie portando l’interruttore ON/OFF nella posizione “ON”. Il
LED verde di funzionamento si illumina.
Nota:
In caso di utilizzo delle batterie l’interruttore ON/OFF inserito nel cavo
d’alimentazione della cuffia microfonica non è in funzione.
Fissaggio del porta batterie agli abiti
Con la clip il porta batterie può essere fissato agli abiti, in dotazione anche del nastro
feltrato.
17
3. Collegamento con il cavo adattatore
(tranne per HMEC 302, HMEC 305 e HMEC 306)
Per le cuffie microfoniche HMEC 300, HMEC 305-C, HMEC 322, HMEC 400 e HMDC 322
sono a disposizione speciali cavi adattatori (con connettore XLR-3) con i quali potete
alimentare il sistema NoiseGard™ utilizzando la presa accendisigari del velivolo:
ACX -1
ACX-2
• ACX-1 cavo adattatore per alimentare una cuffia microfonica
• ACX-2 cavo adattatore per alimentare due cuffie microfoniche
I cavi adattatori sono disponibili anche con una comoda spina ad angolo, equipaggiata
con un fusibile piatto da 7,5 A e un LED verde di controllo:
• ACX-11 cavo adattatore per alimentare una cuffia microfonica
• ACX-22 cavo adattatore per alimentare due cuffie microfoniche
ACX -11
ACX-22
Collegamento della cuffia microfonica
왘 Inserite il connettore XLR-3 del cavo di collegamento della cuffia microfonica nel
connettore XLR-3 del cavo adattatore.
왘 Inserite la spina o la spina ad angolo del cavo adattatore nella presa accendisigari.
18
Preparazione all’uso della cuffia microfonica
Regolazione dell’archetto della cuffia
Per ottenere una buona attenuazione del rumore e la migliore comodità indossando la
cuffia, dovete adattare la cuffia microfonica alla Vostra testa. Regolate l’archetto della
cuffia come segue:
왘 Indossate la cuffia in modo tale che l’archetto passi al centro della testa
왘 Regolate la lunghezza dei padiglioni affinché
• gli auricolari coprano tutto l’orecchio,
• percepite una leggera pressione attorno alle orecchie,
• l’archetto della cuffia aderisca alla testa.
Nota:
Fate attenzione affinché durante la regolazione dell’archetto i cavi di collegamento
non siano stretti e quindi danneggiati.
왘 Accendete la compensazione del rumore NoiseGard™ portando l’interruttore ON/OFF
nella posizione “ON” (vedi “Accensione e spegnimento del NoiseGard™” a pagina 23).
왘 Verificate in un ambiente rumoroso se gli auricolari sono posizionati correttamente.
19
Posizionamento del microfono
Spostamento del braccetto del microfono
Potete posizionare il microfono sia nell’angolo destro sia nell’angolo sinistro della bocca.
왘 Allentate la vite del dispositivo di bloccaggio veloce.
왘 Girate il microfono di 180°.
왘 Riavvitate la vite del dispositivo di bloccaggio veloce.
Orientare il microfono verso l’angolo della bocca
Le cuffie microfoniche HMEC 300, HMEC 302, HMEC 305, HMEC 305-C, HMEC 306,
HMEC 322 e HMEC 400 hanno il braccetto del microfono flessibile. Flettetelo finché il
microfono sia ad una distanza dalla bocca di circa 2 cm.
20
L’HMDC 322 offre tre possibilità di regolazione del microfono:
왘 Regolate la lunghezza del microfono affinché arrivi all’angolo della bocca. Per fare ciò
allentate la vite e spostate il braccio del microfono.
왘 Tirate la parte centrale della staffa del microfono verso la bocca affinché il microfono
disti dalla bocca circa 2 cm.
왘 Per la regolazione finale potete inclinare il microfono.
21
Ulteriori informazioni per l´uso dal HMEC 322 nell´elicottero
Il cablaggio (polarizzazione) per il collegamento del microfono all´interno degli elicotteri
non è unificato sul livello internazionale. Se il microfono della vostra cuffia microfonica
non dovesse funzionare potete invertire la polarizzazione semplicemente girando il
modulo del microfono della cuffia. Procedete secondo le seguenti istruzioni:
1. Eliminate la protezione anti-popp.
2. Allentate le viti con circa 1/2 giro.
3. Estraete il modulo del microfono dal supporto.
4. Girate il modulo del microfono di 180°.
5. Inserite il modulo del microfono girato nuovamente nel supporto.
6. Avvitate le viti nuovamente, adesso dall´altra parte.
7. Applicate la protezione anti-popp.
Tale modifica non cambia le caratteristiche acustiche del microfono, perché grazie alla
compensazione del rumore il microfono è in grado di captare la voce da ambedue i lati.
22
L’utilizzo quotidiano
Accensione e spegnimento del NoiseGard™
Quando la compensazione attiva del rumore NoiseGard™ è spenta, potete utilizzare la
cuffia microfonica come una cuffia microfonica tradizionale.
Accendete la compensazione del rumore NoiseGard™ portando l’interruttore ON/OFF
nella posizione “ON”. In caso di funzionamento con il porta batterie BP-03 portate
l’interruttore su “ON” e utilizzate l’interruttore ON/OFF posizionato sul BP-03.
Commutazione mono-/stereo (tranne HMEC 305, HMEC 305-C, HMEC 322 e HMDC 322)
Normalmente ricevete la Vostra fonte acustica in forma mono e potete lasciare il
commutatore Mono-/Stereo nella posizione “Mono”. Commutate la cuffia su “Stereo”
quando utilizzate un sistema Intercom stereo.
Regolazione del volume
Un volume troppo alto danneggia il vostro udito!
Scegliete con il regolatore di volume un volume medio. Dovete assicurarvi di poter
sentire tutti i rumori importanti come per es. i segnali d’allarme.
23
Montaggio della clip per il cavo
Per una vostra comodità potete fissare il cavo della cuffia con la clip. Passate il cavo
arraverso la clip, cosi com’è illustrato a fianco. Fissate la clip agli indumenti e passate il
cavo nella clip in modo che il cavo della cuffia non vi disturbi.
Chiusura della cuffia
Per trasportare la cuffia anche in spazi ridotti, potete spingere gli auricolari dentro
l’archetto.
Per riaprire la cuffia afferrate gli auricolari e tirateli verso il basso fuori dall’archetto.
24
Parti di ricambio
Dal rivenditore Sennheiser sono reperibili le seguenti parti di ricambio:
•
•
•
•
•
Protezione antivento per il microfono elektret MKE 45
Imbottiture per auricolari
Imbottitura per l’archetto
Clip per il cavo
Borsa a tracolla per il trasporto e la custodia
Sustituzione della protezione anitvento
Dovete sostituire la protezione antivento del microfono elektret quando questa mostra
segni di usura come strappi o buchi. Tirate via la protezione dal microfono. Spingete con
prudenza la nuova protezione sopra il microfono. La protezione antivento deve
avvolgere tutto il microfono.
Sustituzione dell’imbottitura degli auricolari
Sostituite le imbottiture degli auricolari quando sono danneggiate. Infilate le dita dietro
le imbottiture e tiratele via dagli auricolari. Spingete le nuove imbottiture sopra gli
auricolari.
25
Sostituzione dell’imbottitura dell’archetto
Sostituite l’imbottitura dell’archetto quando è danneggiata.
왘 Aprite la chiusura dell’imbottitura dell’archetto della cuffia, così come illustrato a
fianco, ed eliminate l’imbottitura danneggiata.
왘 Applicate la nuova imbottitura intorno all’archetto.
왘 Tirate i due lati di chiusura dell’imbottitura dell’archetto finché si sovrappongono
leggermente.
왘 Premete sulla chiusura finché si blocca.
Sostituzione dell’imbottitura dell’archetto dal HMEC 400
Sostituite l’imbottitura dell’archetto quando è danneggiata.
왘 Sganciate i bottoni a pressione dell’archetto ed eliminate l’imbottitura danneggiata.
왘 Applicate la nuova imbottitura intorno all’archetto.
왘 Tirate i due lati di chiusura dell’imbottitura dell’archetto e riagganciate i bottoni a
pressione.
26
Informazioni utili
Il principio di funzionamento NoiseGard™
Il rumore è uno dei peggiori disturbi per l’ambiente ed un fattore di stress da non
sottovalutare. Ricerche hanno dimostrato che il rumore agisce sul sistema neuro
vegetativo. Le conseguenze sono stanchezza, scarsa concentrazione, nervosismo e
irritabilità. Inoltre l’azione continuata del rumore può causare danni permanenti
all’udito.
Questi sono seri problemi per i piloti. Il livello di pressione acustica nella cabina di
pilotaggio è di ca. 80 dB(A) nei jet e tra 90 e 97 dB(A) in aerei ad elica. Durante il decollo
e l’atterraggio il rumore aumenta ancora notevolmente. Affinché il traffico radio
telefonico venga sentito bene, il volume nelle cuffie deve essere regolato minimo a
95 dB(A). Molti piloti hanno cosi subito danni irreversibili all’udito e ciò significa la
perdita del brevetto di volo e la precoce invalidità.
Le cuffie microfoniche tradizionali offrono una buona protezione dal rumore nella
gamma di frequenze media e alta. Il rumore nelle cabine di pilotaggio consiste tuttavia
in frequenze di gamma media e bassa dalle quali le cuffie convenzionali non proteggono
a sufficienza.
27
Grazie alla compensazione attiva del rumore sviluppata da Sennheiser, il sistema
NoiseGard™, in combinazione con una protezione passiva di alta qualità, permette di
ottenere una attenuazione del rumore molto elevata ed uniforme su tutta la gamma di
frequenze audio. Il livello di rumore nella cabina di pilotaggio viene drasticamente
diminuito, il pilota sente solo il “restante” naturale rumore causato dai motori. Il pilota
può cosi abbassare il volume del segnale radio.
La compensazione attiva del rumore NoiseGard™ si basa sul principio della inversione di
fase dei suoni. Per ottenere questo abbattimento viene creato un suono sfasato di 180°
rispetto al suono di disturbo, col risultato che le due onde sonore si compensano
reciprocamente.
In entrambi i padiglioni della cuffia microfonica, è stata inserita una capsula microfonica
elektret, un circuito di retroazione ed un trasduttore. Il suono ricevuto dal microfono,
costituito da segnali di disturbo e da segnali audio, viene rafforzato e viene filtrato il
segnale audio. Il suono di disturbo viene elaborato da un circuito elettronico e sfasato di
180°. In seguito il segnale audio viene aggiunto nuovamente al segnale di disturbo e la
somma dei segnali rafforzati viene inviata ai trasduttori. Il suono di disturbo viene
ridotto notevolmente a causa della sovrapposizione del suono sfasato di 180°. Il segnale
audio viene tuttavia trasmesso invariato poiché non ha oltrepassato la soglia della
compensazione.
28
La figura mostra la compensazione del rumore con NoiseGard™: le normali cuffie
microfoniche attutiscono il rumore soprattutto nelle gamme di frequenze media ed alta.
In caso di frequenze al di sotto di 500 Hz le normali cuffie microfoniche, proteggono in
modo insufficiente. La compensazione attiva del rumore riduce di circa 25 dB il rumore
compreso nella gamma tra 25 e 500 Hz. La somma di attenuazione tra la compensazione
del rumore attiva e passiva è quindi di circa 30 dB sull’intera gamma audio.
Una riduzione del rumore di 10 dB viene soggettivamente percepita come dimezzamento
del volume. Se il rumore diminuisce di altri 10 dB, questo viene nuovamente percepito
come un dimezzamento del volume ecc.
29
Quando si presentano disturbi
In caso di disturbi non elencati nella seguente tabella mettetevi in contatto con il
rivenditore Sennheiser.
Problema
Possibili cause e rimedi
Comunicazione chiara ma nessuna
compensazione attiva del rumore
L’alimentazione dell’elettronica NoiseGard™ è spenta.
왘 Verificate che l’interruttore ON/OFF sia posizionato su “ON”.
Il connettore XLR-3 è disinserito dall’alimentazione.
왘 Verificate che il connettore XLR-3 sia inserito nella presa XLR-3 del velivolo.
In caso di collegamento alla tensione di rete del velivolo: il fusibile del velivolo è
difettoso.
왘 Verificate lo stato del fusibile.
In caso di collegamento al porta batterie (escluso HMEC 302, HMEC 305 e HMEC 306):
le batterie sono scariche
왘 Verificate se il LED verde di controllo del porta batterie è illuminato.
Se dovesse essere di colore rosso dovete sostituire le batterie.
30
Problema
Possibili cause e rimedi
La cuffia microfonica funziona,
ma il volume di comunicazione è
molto basso
Il volume è regolato su un valore troppo basso
왘 Verificate la regolazione del volume della cuffia microfonica.
La cuffia microfonica funziona,
ma la controparte Vi sente male
Il collegamento del microfono è staccato (escluso HMEC 305, HMEC 305-C e HMEC 306).
왘 Verificate se il connettore jack del microfono è correttamente collegato.
Il collegamento della cuffia è staccato (escluso HMEC 305, HMEC 305-C e HMEC 306).
왘 Verificate se il connettore jack della cuffia è correttamente collegato.
Comunicazione solo ad un orecchio Utilizzate un sistema Intercom-stereo ma avete regolata la cuffia microfonica per il
(solo HMEC 300 HMEC 302,
funzionamento mono.
HMEC 306 e HMEC 400)
왘 Posizionate il commutatore mono-stereo sulla posizione “Stereo”.
Ricevete una fonte acustica mono, ma avete regolato la cuffia microfonica per il
funzionamento stereo.
왘 Posizionate il commutatore mono-stereo sulla posizione “Mono”.
31
Dati tecnici
HMEC 300
HMEC 302
HMEC 306
Cuffia
Trasduttore
dinamico
Adattamento all’orecchio
circumaurale, chiuso
Rispo sta in frequenza
45–15.000 Hz
Impedenza nominale attiva/passiva
300/150 Ω, mo no
600/300 Ω, stereo
Attenuazione del rumore attivo e passivo
> 25–40 dB
SPL max.
120 dB (±5 %)
Pressione esercitata dall’archetto
circa 10 N
Microfono e preamplificatore
Trasduttore
capsula elektret con compensazione del rumore MKE 45
Rispo sta in frequenza
Sensibilità
300–5.000 Hz
–
SPL max.
120 dB
Impedenza
150 Ω
Tensio ne in uscita
400 mV ± 3 dB con 114 dB (in base a RTCA/DO 214)
Tensio ne di alimentazione
tip. 16 V DC (8–16 V DC, circa 8–25 mA, in base a RTCA/DO 214)
32
HMEC 400
HMEC 300
HMEC 302
HMEC 306
HMEC 400
co nnettore 6-PIN-Redel
per cuffia, micro fono e
NoiseGard™
connetto re jack stereo da
6,35 mm per cuffia,
connetto re PJ-068 per
microfono , connettore
XLR-3 per NoiseGard™
Dati generali
Cavo di collegamento
1,5 m cavo tondo, liscio scende da un solo lato
Peso senza cavo
370 g
Tensione di funzionamento NoiseGa rd™
12–35 V DC
Corrente assorbita
Fusibile
27 mA (in riposo), max. 80 mA
500 mA termo fusibile
Connettori
co nnettore jack stereo da
6,35 mm per cuffia,
co nnettore PJ-068 per
microfono, connettore
XLR-3 per No iseGard™
Equipaggiato co n
co mmutazione mono-/stereo
accensione/spegnimento per NoiseGard™
regolazione del volume della cuffia
Tempera tura
in funzione
fermo
Tempo di funzio namento
co n batterie alcaline ( 4 x 1,5 V): circa 15 ore
co n accumulatori NiMH: circa 15 ore
connettore jack stereo da
6,35 mm per cuffia,
connettore PJ-068 per
microfono e NoiseGard™
–15 °C fino a 55 °C
–55 °C fino a 55 °C
33
Dati tecnici
HMEC 305
HMEC 305-C
HMEC 322
HMDC 322
Cuffia
Trasduttore
dinamico
Adattamento all’orecchio
circumaurale, chiuso
Rispo sta in frequenza
45–15.000 Hz
Impedenza nominale attiva/passiva
Attenuazione del rumore attivo e passivo
300/150 Ω, mo no
> 25–40 dB
SPL max.
120 dB (±5 %)
Pressione esercitata dall’archetto
circa 10 N
50/35 Ω, mono
Microfono e preamplificatore
Trasduttore
capsula elektret con
co mpensazione del rumo re
MKE 45
dina mico con
compensazione del
rumore M -87/AIC
Rispo sta in frequenza
300–5.000 Hz
500–4.000 Hz
Sensibilità
SPL max.
–
120 dB
1,8–4 µV / 74 dB su 5 Ω
–
Impedenza
150 Ω
–
Tensio ne in uscita
400 mV ± 3 dB con 114 dB (in base a RTCA/DO 214)
–
Tensio ne di alimentazione
tip. 16 V DC (8–16 V DC, circa 8–25 mA, in base a RTCA/DO 214)
–
34
HMEC 305
HMEC 305-C
HMEC 322
HMDC 322
Dati generali
Cavo di collegamento
1,5 m cavo tondo, liscio scende da un solo lato
Peso senza cavo
370 g
Tensione di funzionamento NoiseGa rd™
12–35 V DC
Corrente assorbita
Fusibile
27 mA (in riposo), max. 80 mA
500 mA termo fusibile
Connettori
co nnetto re XLR-5 per
cuffia, microfono e
NoiseGa rd™
Equipaggiato co n
accensione/spegnimento per NoiseGard™
regolazione del volume della cuffia
Tempera tura
in funzione
fermo
Tempo di funzio namento
co n batterie alcaline ( 4 x 1,5 V): circa 15 ore
co n accumulatori NiMH: circa 15 ore
connettore XLR-5 per
cuffia e microfo no,
connettore XLR-3 per
NoiseGard™
cavo spiralato scende da un solo lato
connettore U-174/U per cuffia e microfono ,
connettore XLR-3 perNoiseGard™
–15 °C fino a 55 °C
–55 °C fino a 55 °C
35
Certificazione
Sennheiser electronic GmbH & Co. KG dichiara che questo apparecchio risponde alle normative e alle prescrizioni
CE applicabili.
Certificato di Garanzia
La Sennheiser garantisce il prodotto da voi acquistato per una durata di 5 anni. Sono esclusi da questa garanzia gli accessori
in dotazione con il prodotto, gli accumulatori e le batterie perché questi prodotti hanno un ciclo di vita più breve che dipende
molto dall‘intensità d‘utilizzo. II periodo di garanzia decorre dalla data dell‘acquisto. Fa fede il documento d‘acquisto valido
agli effetti fiscali che deve essere conservato. Senza questo documento, che deve essere controllato dal centro di servizio
Sennheiser, qualsiasi riparazione viene effettuata solo dietro pagamento.
Le prestazioni gratuite di garanzia possono consistere nell‘eliminazione del difetto di materiale o fabbricazione attraverso la
riparazione, la sostituzione di parti o del completo apparecchio, secondo nostro insindacabile giudizio. Sono esclusi dalla
garanzia i guasti derivanti da cattivo uso dell‘apparecchio (p.e. mancata osservanza delle istruzioni all‘uso, danneggiamenti
meccanici, tensione d‘alimentazione errata), dall‘usura, da cause di forza maggiore o da malfunzionamenti già a vostra
conoscenza al momento dell‘acquisto. La garanzia decade inoltre in caso di manomissioni effettuate da persone o centri di
manutenzione non autorizzate. In caso di un reclamo nel periodo di garanzia vogliate inviare I‘apparecchio insierne agli
accessori in dotazione e il documento d‘acquisto al vostro centro servizio autorizzato.
Per evitare danni di trasporto consigliamo di utilizzare I‘imballo originale. In caso di guasto questa garanzia non pregiudica i
vostri diritti derivanti dal contratto d'acquisto verso il negoziante dove è stato acquistato il prodotto.
La garanzia è estesa a tutti i paesi del mondo, tranne agli Stati Uniti, e può essere applicata se la legislazione nazionale lo
permette.
36
HMEC 300/302/305
305-C/306/322/400
HMDC 322
Instruciones para el uso
Indice
Algunas palabras respecto a su seguridad ............ ........... ............ ............ ............ ........... ............ ..... 3
Características del Headset ...... ............ ............ ............ ........... ............ ............ ............ ........... ............ ..... 4
Variantes del producto ... ........... ............ ............ ............ ........... ............ ............ ............ ........... ............ ..... 5
Piezas incluidas en el suministro ....... ............ ............ ........... ............ ............ ............ ........... ............ ..... 8
Accesorios recomendados ........ ............ ............ ............ ........... ............ ............ ............ ........... ............ ..... 9
Conectar los Headsets ..... ........... ............ ............ ............ ........... ............ ............ ............ ........... ............ ... 10
Cables conectores .......... ........... ............ ............ ............ ........... ............ ............ ............ ........... ............ ... 10
Ocupación de terminales en los enchufes ... ............ ........... ............ ............ ............ ........... ............ ... 12
Posibilidades de conexión ....... ............ ............ ............ ........... ............ ............ ............ ........... ............ ... 13
Preparar el Headset para utilizarlo ... ............ ............ ........... ............ ............ ............ ........... ............ ... 19
Ajustar el aro del auricular ..... ............ ............ ............ ........... ............ ............ ............ ........... ............ ... 19
Posicionar el micrófono ........... ............ ............ ............ ........... ............ ............ ............ ........... ............ ... 20
Información adicional para el servicio en helicóptero del HMEC 32 2 .... ............ ........... ............ ... 22
El funcionamiento diario ........... ............ ............ ............ ........... ............ ............ ............ ........... ............ ... 23
Conexión y desconexión del NoiseGard™ ..... ............ ........... ............ ............ ............ ........... ............ ... 23
Conmutación mono/estéreo (excepto HMEC 305, HMEC 305-C, HMEC 322 y HMDC 322) .. ... 23
Ajustar el volumen ........ ........... ............ ............ ............ ........... ............ ............ ............ ........... ............ ... 23
Instalar le clip para cable ........ ............ ............ ............ ........... ............ ............ ............ ........... ............ ... 24
Forma de doblar el casco auricular ... ............ ............ ........... ............ ............ ............ ........... ............ ... 24
Piezas de recambio .......... ........... ............ ............ ............ ........... ............ ............ ............ ........... ............ ... 25
Informaciones importantes que hay que leer ...... ........... ............ ............ ............ ........... ............ ... 27
¿Qué hacer cuando se presentan fallos? .... ............ ........... ............ ............ ............ ........... ............ ... 30
Datos técnicos ........ ............ ........... ............ ............ ............ ........... ............ ............ ............ ........... ............ ... 32
2
Los Headsets (cascos con auriculares) NoiseGard™ HMEC 300, HMEC 302, HMEC 305,
HMEC 305-C, HMEC 306, HMEC 322, HMEC 400 y HMDC 322 son cascos con auriculares
especiales para pilotos, con compensación activa de ruidos, de diseño cerrado, que se
emplean en helicópteros, aviones de hélice y aviones de turbopropulsión.
Algunas palabras respecto a su seguridad
• Al estar conectada la compensación de ruidos NoiseGard™ escuchará usted de
diferente forma los ruidos típicos de su avión o su helicóptero (tales como el sonido
de motores y hélices, las señales de advertencia, etc.). Por eso, antes de emprender
el vuelo, teniendo conectada la compensación de ruidos, familiarícese con todos los
ruidos importantes. Regule el volumen de tal forma que pueda esuchar todos los
ruidos importantes, las alarmas o los ruidos que puedan producirse debido a fallos en
el funcionamiento.
• No intente nunca reparar el Headset Vd. mismo. En caso de problemas, diríjase al
distribuidor Sennheiser que le ha vendido el aparato.
• Cambie sólo las piezas cuyo recambio está prescrito en estas instrucciones para el
uso. Para sustituir todas las demás piezas diríjase al distribuidor Sennheiser que le
ha vendido el aparato.
• No sumerja el Headset en agua para limpiarlo. Si tiene preguntas respecto a la
limpieza del Headset diríjase a su distribuidor Sennheiser.
3
Características del Headset
Headset NoiseGard™ HMEC 300
• Nuevo Headset activo con magnífica atenuación del ruido exterior en toda la gama
de frecuencia por medio de la compensación activa de ruidos NoiseGard™
• NoiseGard™, compensación activa de ruidos, posibilita una clara comunicación incluso
dentro de un entorno donde existen ruidos muy altos
• El casco es sumamente cómodo, ya que permite total libertad de movimiento gracias al
peso tan ligero, las cómodas almohadillas, el aro acolchado y el cable, colocado a un lado
• El aro del auricular cuenta con mecanismo que permite doblarlo; por eso es poco el
espacio requerido para el transporte
• Clara comunicación por medio del micrófono electreto MKE 45 con sensibilidad regulable
• El brazo flexible del micrófono, con enclavamiento rápido, permite posicionarlo
perfectamente y llevarlo a cualquier lado
• Magnífica comprensión gracias al sistema de auriculares de banda ancha
• Dispositivo regulador del volumen integrado, para poder ajustar el volumen según se
requiera
• Adaptación al sistema Intercom gracias al conmutador monofónico/estereofónico
• La alimentación de tensión para el sistema NoiseGard™ se logra por medio de la red
de a bordo, el encendedor de cigarrillos o el bloque de pilas
4
• Funcionamiento Fail-Save-Operation (a prueba de fallos) en caso de corte de corriente
• La adaptación del voltaje para el sistema NoiseGard™ se logra por medio de la
electrónica In-Line en el cable conector
• Made in Germany con 5 años de garantía (HMEC 400: 10 años de garantía)
Variantes del producto
Headset NoiseGard™ HMEC 302
El Headset HMEC 302 difiere del Headset HMEC 300 en las siguientes características:
• Conexión del micrófono y de la alimentación de voltaje para la electrónica del
NoiseGard™ por medio de un enchufe PJ-068
Headset NoiseGard™ HMEC 305
El Headset HMEC 305 difiere del Headset HMEC 300 en las siguientes características:
• No posee conmutador monofónico/estereofónico
• Conexión del auricular, del micrófono y de la alimentación de voltaje para la
electrónica del NoiseGard™ a la red de a bordo (12–35 V CC) por medio de un enchufe
XLR-5
5
Headset NoiseGard™ HMEC 305-C
El Headset HMEC 305-C difiere del Headset HMEC 300 en las siguientes características:
• No posee conmutador monofónico/estereofónico
• Conexión del auricular y del micrófono por medio de un enchufe XLR-5
• Conexión de la alimentación de voltaje para la electrónica del NoiseGard™ por medio
de un enchufe XLR-3
Headset NoiseGard™ HMEC 306
El Headset HMEC 306 difiere del Headset HMEC 300 en las siguientes características:
• Conexión del auricular, del micrófono y de la alimentación de voltaje para la
electrónica del NoiseGard™ a la red de a bordo (12–35 V CC) por medio de un enchufe
Redel de seis polos
Headset NoiseGard™ HMEC 322
El Headset HMEC 322 difiere del Headset HMEC 300 en las siguientes características:
• No posee conmutador monofónico/estereofónico
• Cable de espiral
• Conexión del auricular y del micrófono por medio de un jack U-174/U a una interfase
de alta resistencia en el helicóptero
6
Headset NoiseGard™ HMEC 400
El Headset HMEC 400 difiere del Headset HMEC 300 en las siguientes características:
• Auriculares plateados
• Almohadillas de cuero
• La almohadilla del estribo del auricular puede abotonarse
Headset NoiseGard™ HMDC 322
El Headset HMDC 322 difiere del Headset HMEC 300 en las siguientes características:
•
•
•
•
No posee conmutador monofónico/estereofónico
Cable de espiral
Micrófono dinámico M-87/AIC y auricular de baja resistencia
Conexión del auricular y del micrófono por medio de un jack U-174/U a una interfase
de baja resistencia en el helicóptero
7
Piezas incluidas en el suministro
Headsets HMEC 300, HMEC 305-C, HMEC 322, HMEC 400 y HMDC 322
• Headset
• Enchufe hembra XLR de tres polos para la conexión a la red de a bordo
• Maletín acolchado con correa de hombro, para llevar y guardar el Headset y los
accesorios
• Caperuza paraviento para el micrófono (excepto para HMDC 322)
• Clip para cable MZQ 2002-1 (Artículo núm. 44740)
Headsets HMEC 302, HMEC 305 y HMEC 306
• Headset
• Maletín acolchado con correa de hombro, para llevar y guardar el Headset y los
accesorios
• Caperuza paraviento para el micrófono (excepto para HMDC 322)
• Clip para cable MZQ 2002-1 (Artículo núm. 44740)
8
Accesorios recomendados
Almohadillas de gel para auriculares, recambiables (Artículo núm. 83140)
Bloque de pilas BP-03 (excepto para HMEC 302, HMEC 305 y HMEC 306)
Bloque de pilas con enchufe hembra XLR-3 para la alimentación de la electrónica
NoiseGard™ de los Headsets HMEC 300, HMEC 305-C, HMEC 322, HMEC 400 y HMDC 322.
Gracias a cuatro pilas de 1,5 V (tipo LR 6, álcali-manganeso, no incluidas en el suministro)
se logra un tiempo de servicio de unas 15 horas. Largo del cable conector: 0,9 m.
Cable adaptador (excepto para HMEC 302, HMEC 305 y HMEC 306)
ACX -1
ACX-2
Existen para los Headsets HMEC 300, HMEC 305-C, HMEC 322, HMEC 400 y HMDC 322
cables adaptadores especiales con los cuales, a través del encendedor de cigarrillos,
puede Vd. conectar la electrónica del NoiseGard™ a la red de a bordo:
• ACX-1 Cable adaptador para alimentación de voltaje de un Headset
• ACX-2 Cable adaptador para alimentación de voltaje de dos Headset
Pueden suministrarse también cables adaptadores con un cómodo enchufe acodado
provisto de fusible plano de 7,5 A y un LED verde de control:
ACX -11
ACX-22
• ACX-11 Cable adaptador para alimentación de voltaje de un Headset
• ACX-22 Cable adaptador para alimentación de voltaje de dos Headset
9
Conectar los Headsets
Cables conectores
Headsets HMEC 300 y HMEC 400:
Cable conector
HMEC 300 y HMEC 400
1 jack estereofónico de 6,35 mm para conectar el auricular
1 jack PJ-068 para conectar el micrófono
1 enchufe XLR-3 para conectar la alimentación de corriente para la electrónica del
NoiseGard™
Headset HMEC 302:
1 jack estereofónico de 6,35 mm para conectar el auricular
1 jack PJ-068 para conectar el micrófono y la alimentación de corriente para la
electrónica del NoiseGard™
Cable conector
HMEC 302
Headset HMEC 305:
1 enchufe XLR-5 para conectar el auricular, el micrófono y la alimentación de corriente
para la electrónica del NoiseGard™
Cable conector
HMEC 305
10
Headset HMEC 305-C:
1 enchufe XLR-5 para conectar el auricular y el micrófono
1 enchufe XLR-3 para conectar la alimentación de corriente para la electrónica del
NoiseGard™
Cable conector
HMEC 305-C
Headset HMEC 306:
1 enchufe Redel de seis polos para conectar el auricular, el micrófono y la alimentación
de corriente para la electrónica del NoiseGard™
Cable conector
HMEC 306
Headsets HMEC 322 y HMDC 322:
1 jack U-174/U para conectar el auricular y el micrófono
1 enchufe XLR-3 para la conectar la alimentación de corriente para la electrónica del
NoiseGard™
Cable conector
HMEC 322 y HMDC 322
11
Ocupación de terminales en los enchufes
Enchufe Redel (NoiseGard™)
1 Alim. NoiseGard™ (CC+)
2 Audio Lo / CC –
3 Audio Hi izquierdo
4 Audio Hi derecho
5 Micrófono Hi
6 Micrófono Lo
Enchufe XLR-3 (NoiseGard™)
1 Alim. NoiseGard™ (CC+)
2 Masa
3 ¡Debe quedar libre!
Enchufe XLR-5
HMEC 305
1 Audio Hi
2 Audio Lo / CC –
3 Micrófono Hi
2 ¡Debe quedar libre! (HMEC 305-C) 4 Micrófono Lo
3 Masa (HMEC 305-C)
5 Alim. NoiseGard™ (CC+)
;
HMEC 305-C
1 Audio Hi
2 Audio Lo
3 Micrófono Hi
4 Micrófono Lo
5 Sin ocupar
;;;;;;;;;;;;;
;;;;;;;;;;;;;
;
Jack estereofónico de 6,35 mm
1 Audio Hi izquierdo
2 Audio Hi derecho
3 Audio Lo
12
Jack U174/U
1 Micrófono Lo
2 Audio Hi
3 Micrófono Hi
4 Audio Lo
Jack PJ-068
HMEC 302
1 Alim. NoiseGard™ (CC+)
2 Micrófono Hi
3 Micrófono Lo / CC –
HMEC 300
1 Sin ocupar
2 Micrófono Hi
3 Micrófono Lo
Posibilidades de conexión
Para la alimentación de voltaje a la compensación de ruidos NoiseGard™ existen tres
posibilidades diferentes:
1. Conexión a la red de a bordo (12–35 V CC)
3. Conexión al bloque de pilas BP-03
(accesorio, excepto para HMEC 302, HMEC 305 y HMEC 306)
2. Conexión al encendedor de cigarrillos (12–35 V CC) por medio de un cable adaptador
(accesorio, excepto para HMEC 302, HMEC 305 y HMEC 306)
La electrónica In-Line existente en el cable conector procesa el voltaje entrante para el
sistema NoiseGard™.
¡Peligro de cortocircuito!
Antes de poner el equipo en servicio cerciórese de que la alimentación de corriente
para la electrónica del NoiseGard™ tomada de la red de a bordo esté protegida por un
fusible de 1 amperio.
13
1. Conectar el Headset a la red de a bordo
Puede usted conectar la electrónica del NoiseGard™ a redes de a bordo con tensión entre
12 y 35 V CC.
¡Peligro de cortocircuito!
Antes de poner el equipo en servicio cerciórese de que la alimentación de corriente
para la electrónica del NoiseGard™ tomada de la red de a bordo esté protegida por un
fusible de 1 amperio.
Alimentación
NoiseGard™
Junto con los Headsets HMEC 300, HMEC 305-C, HMEC 322, HMEC 400 y HMDC 322 recibe
Vd. también un enchufe hembra XLR-3 para montaje. Encargue el montaje de dicho
enchufe hembra a su taller.
Masa
¡Debe quedar
libre!
Enchufe hembra XLR-3
14
Headsets HMEC 300 y HMEC 400:
왘 Inserte el jack estereofónico de 6,35 mm para el auricular y el jack PJ-068 para el
micrófono en los respectivos enchufes hembra del Intercom.
왘 Inserte el conector XLR-3 en el enchufe hembra XLR-3 incorporado.
Headset HMEC 302:
왘 Inserte el jack estereofónico de 6,35 mm para el auricular y el jack PJ-068 para el
micrófono en los respectivos enchufes hembra del Intercom.
Headset HMEC 305:
왘 Inserte el conector XLR-5 en el enchufe hembra XLR-5 del avión.
Headset HMEC 305-C:
왘 Inserte el conector XLR-5 para el auricular y el micrófono en el enchufe hembra XLR-5
del avión.
왘 Inserte el conector XLR-3 en el enchufe hembra XLR-3 incorporado.
Headset HMEC 306:
왘 Inserte el conector Redel de seis polos en el enchufe hembra de seis polos del avión.
Headsets HMEC 322 y HMDC 322:
왘 Inserte el jack U-174/U para el auricular y el micrófono en el enchufe hembra U-174/U
del Intercom.
왘 Inserte el conector XLR-3 en el enchufe hembra XLR-3 incorporado.
15
2. Conectar el Headset al bloque de pilas
(excepto para HMEC 302, HMEC 305 y HMEC 306)
La alimentación de la electrónica NoiseGard™ de los Headsets HMEC 300, HMEC 305-C,
HMEC 322, HMEC 400 y HMDC 322 también puede lograrse por medio del bloque de pilas
BP-03 (ver “Accesorios recomendados” en la página 9). El bloque de pilas es adecuado
para servicio por pilas o por acumuladores (las pilas o acumuladores no están incluidos en
el suministro). El tiempo de servicio con pilas de tipo LR 6 (1,5 V, álcali-manganeso) o con
acumuladores NiMH es de unas 15 horas.
Colocar y cambiar las pilas en el bloque de pilas
왘 Abra la tapa del compartimiento de pilas.
왘 Coloque las cuatro pilas de 1,5 V (tipo LR 6, álcali-manganeso). Es importante tener
en cuenta la correcta polaridad.
왘 Cierre el compartimiento de pilas.
Indicación de funcionamiento y de las pilas del bloque
El bloque de pilas cuenta con dos lámparas de control (LED).
LED verde iluminado: El bloque de pilas está conectado; el LED indica el funcionamiento.
LED rojo iluminado: La potencia de las pilas está terminándose. Sustituya las pilas.
16
Empalmar el Headset y conectar el bloque de pilas
왘 Inserte el enchufe XLR-3 del cable conector del Headset en el enchufe hembra XLR-3
del bloque de pilas.
왘 Headsets HMEC 300 y HMEC 400: Inserte el jack estereofónico de 6,35 mm para el
auricular y el jack PJ-068 para el micrófono en los respectivos enchufes hembra que
hay en el Intercom.
Headset HMEC 305-C: Inserte el conector XLR-5 para el auricular y el micrófono en el
enchufe hembra XLR-5 del avión.
Headsets HMEC 322 y HMDC 322: Inserte el jack U-174/U para el auricular y el
micrófono en el enchufe hembra U-174/U que hay en el Intercom.
왘 Conecte el bloque de pilas colocando el interruptor ON/OFF en posición “ON”. El LED
verde se ilumina.
Nota:
El interruptor ON/OFF en la línea de alimentación a los auriculares, está desactivado
al usarse el bloque de pilas.
Fijar el bloque de pilas al vestido
El clip para cable sirve para sujetar el bloque de pilas al vestido; en el suministro se
incluye además cinta velcro.
17
3. Conectar el Headset por medio de un cable adaptador
(excepto para HMEC 302, HMEC 305 y HMEC 306)
Existen para los Headsets HMEC 300, HMEC 305-C, HMEC 322, HMEC 400 y HMDC 322
cables adaptadores especiales con los cuales, a través del encendedor de cigarrillos,
puede Vd. conectar la electrónica del NoiseGard™ a la red de a bordo:
ACX -1
ACX-2
• ACX-1 Cable adaptador para alimentación de voltaje de un Headset
• ACX-2 Cable adaptador para alimentación de voltaje de dos Headsets
Pueden suministrarse también cables adaptadores con un cómodo enchufe acodado
provisto de fusible plano de 7,5 A y un LED verde de control:
• ACX-11 Cable adaptador para alimentación de voltaje de un Headset
• ACX-22 Cable adaptador para alimentación de voltaje de dos Headsets
ACX -11
ACX-22
Empalmar el Headset
왘 Inserte el enchufe XLR-3 del cable conector del Headset en el enchufe hembra XLR-3
del cable adaptador.
왘 Inserte el enchufe o bien el enchufe acodado del cable adaptador en el encendedor
de cigarrillos.
18
Preparar el Headset para utilizarlo
Ajustar el aro del auricular
Para lograr buena atenuación de ruidos y lograr máxima comodidad al usar el aparato es
necesario adaptar correctamente el Headset a la cabeza. El aro del auricular puede
ajustarse en diferentes sentidos:
왘 Póngase el auricular de tal forma que el aro pase sobre la mitad de su cabeza.
왘 Regule el largo del aro de forma
• que las almohadillas cubran completamente el pabellón de la oreja,
• que sienta usted una leve presión en torno a la oreja, y
• que el aro del auricular quede bien ajustado a la cabeza.
Nota:
Al ajustar el aro del auricular tenga cuidado de no aprisionar los cables conectores;
de lo contrario pueden estropearse.
왘 Para conectar la compensación de ruidos NoiseGard™ , coloque el interruptor ON/OFF
en la posición “ON” (ver “Conexión y desconexión del NoiseGard™” en la página 23).
왘 En un entorno donde haya ruidos muy altos compruebe si las almohadillas han
quedado debidamente colocadas.
19
Posicionar el micrófono
Girar el brazo del micrófono
El micrófono puede colocarse en el ángulo derecho o en el ángulo izquierdo de la boca.
왘 Afloje el tornillo de enclavamiento rápido.
왘 Gire el micrófono en 180°.
왘 Vuelva a apretar bien el tornillo de enclavamiento rápido.
Orientar el micrófono hacia el ángulo de la boca
Los Headsets HMEC 300, HMEC 302, HMEC 305, HMEC 305-C, HMEC 306, HMEC 322 y
HMEC 400 están provistos de brazo de micrófono flexible. Dóblelo de tal forma que el
micrófono quede en el ángulo de la boca, a una distancia de unos 2 cm de la boca misma.
20
En el Headset HMDC 322 existen tres diferentes posibilidades para ajustar el micrófono:
왘 Ajuste el largo del brazo de forma que el micrófono quede colocado en el ángulo de
la boca; desenrosque el tornillo y mueva el brazo del micrófono.
왘 Acerque hacia la boca la parte central del aro del micrófono hasta que el micrófono
quede a unos 2 cm de la boca.
왘 Para lograr aún mayor precisión en el ajuste puede usted inclinar el micrófono.
21
Información adicional para el servicio en helicóptero del HMEC 322
La distribución (de los polos) de la toma para micrófono en los helicópteros no está
internacionalmente normada. Si el micrófono de su Headset no funcionara con la
distribución actual, puede cambiar la polaridad en el Headset con sólo invertir
sencillamente el módulo de micrófono. En tal caso, sírvase proceder conforme a las
siguientes instrucciones:
1. Retire la protección contra el aliento.
2. Afloje los tornillos en aprox. 1/2 giro.
3. Saque el módulo de micrófono de su soporte.
4. Gire el módulo de micrófono en 180°.
5. Enchufe de nuevo en el soporte el módulo de micrófono invertido.
6. Apriete ahora los tornillos desde la otra parte.
7. Coloque nuevamente la protección contra el aliento.
La características acústicas del módulo de micrófono no se modifican al invertir el
módulo ya que el micrófono, gracias a la característica de supresión de ruidos, puede
hablarse por ambos laterales.
22
El funcionamiento diario
Conexión y desconexión del NoiseGard™
Cuando la compensación activa de ruidos NoiseGard™ está desconectada puede emplear
Vd. el Headset tal como un casco auricular común y corriente.
Para conectar el sistema NoiseGard™ ponga el interruptor ON/OFF en la posición “ON”.
Al emplear el aparato con el bloque de pilas BP-03 coloque el interruptor en la posición
“ON” y utilice el interruptor ON/OFF existente en el BP-03.
Conmutación mono/estéreo (excepto HMEC 305, HMEC 305-C, HMEC 322 y HMDC 322)
Generalmente recibe Vd. la fuente de sonido en operación monofónica y puede dejar el
conmutador monofónico/estereofónico en la posición “Mono”. En un sistema Intercom
estereofónico conmute el auricular a “Stereo”.
Ajustar el volumen
El volumen sonoro demasiado alto es perjudicial para los oídos.
Con el botón regule un nivel medio del sonido. Cerciórese, eso sí, de poder percibir todos
los ruidos importantes tales como las señales de advertencia, por ejemplo.
23
Instalar le clip para cable
Emplee el clip para cable para fijar el cable del auricular según le sea más cómodo. Pase
le cable del auricular a través del clip, tal como se indica en la ilustración al lado. Sujete
el clip a las prendas de vestir; pase el bucle de cable a través del clip tanto como sea
necesario, para que el cable del auricular no le moleste.
Forma de doblar el casco auricular
Para poder transportar el casco sin que ocupe mucho espacio, puede Vd. colocar las
cubiertas de los auriculares entre el aro mismo.
Para desdoblarlo tire de ambas cubiertas de los auriculares hacia abajo, para sacarlas del
aro.
24
Piezas de recambio
Su distribuidor Sennheiser puede suministrarle las siguientes piezas de recambio:
•
•
•
•
•
Caperuza paraviento para el micrófono electreto MKE 45
Almohadillas
Almohadilla del estribo del auricular
Clip para cable
Maletín con correa para llevar al hombro, para guardar y transportar el equipo
Sustitución de la caperuza paraviento
La caperuza paraviento del micrófono electreto debe sustituirse cuando se notan
señales de desgaste tales como grietas o huecos. Retire la ccaperruza paraviento del
micrófono. Trabajando con cuidado, coloque la caperuza paraviento nueva sobre el
micrófono. La caperuza debe cubrir el micrófono completo.
Sustitución de las almohadillas
Las almohadillas deben sustituirse cuando se han averiado. Agárrelas por la parte
posterior y retírelas de las cubiertas de los auriculares. Coloque las almohadillas nuevas
sobre los auriculares.
25
Sustitución de la almohadilla del estribo del auricular
La almohadilla del estribo del auricular debe sustituirse cuando se ha averiado.
왘 Tirando de él, separe el cierre de la almohadilla del estribo y y retire la almohadilla
deteriorada.
왘 Coloque la almohadilla nueva en torno al estribo.
왘 Presionándolos, junte los dos lados de cierre de la almohadilla del estribo, hasta que
queden ligeramente superpuestos.
왘 Presione el cierre para juntarlo.
Sustitución de la almohadilla del estribo del auricular del Headset HMEC 400
La almohadilla del estribo del auricular debe sustituirse cuando se ha averiado.
왘 Abra los cierres de la almohadilla del estribo y y retire la almohadilla deteriorada.
왘 Coloque la almohadilla nueva en torno al estribo.
왘 Presionándolos, junte los dos extremos de la almohadilla del estribo y fije los cierres.
26
Informaciones importantes que hay que leer
El principio NoiseGard™
El ruido es una de las peores molestias existentes en el medio ambiente y un factor de
estrés que debe tomarse muy en serio. Investigaciones hechas han demostrado que el
ruido afecta el sistema nervioso vegetativo. Los resultados son cansancio, falta de
concentración, nerviosidad e irritabilidad. Además, el efecto del ruido continuo ocasiona
daño permanente del oído.
Este problema afecta sobre todo a los pilotos. El nivel de intensidad sonora existente en
el cabina de pilotaje es de unos 80 dB(A) en Jets y de entre 90 y 97 dB(A) en aviones de
hélice. Además, al decolar y al aterrizar el ruido aumenta considerablemente. Para poder
comprender las informaciones radiofónicas, en los auriculares es necesario regular el
volumen a 95 dB(A), como mínimo. En consecuencia, en algunos pilotos se han detectado
daños auditivos que ocasionaron una incapacidad prematura para el trabajo y, con ello, la
pérdida de la licencia de vuelo.
Los Headsests para protección auditiva habituales proporcionan buena protección en las
gamas superior y media de audiofrecuencia. Sin embargo, el ruido existente en la cabina
de pilotaje se compone principalmente de frecuencias medias hasta bajas, y por eso es
insuficiente la protección que puede lograrse con los Headsets de protección auditiva
habituales.
27
Gracias a la compensación activa de ruidos desarrollada por Sennheiser, es decir el
sistema NoiseGard, combinado con un protector antirruido de alta calidad, se ha logrado
magnífica y uniforme atenuación de ruidos en la gama completa de audiofrecuencia.
Disminuye drásticamente el nivel de ruidos en la cabina de pilotaje y el piloto escucha
únicamente el natural ruido residual de los motores. La señal de audiofrecuencia puede
regularse mucho más baja.
NoiseGard™, la compensación activa de ruidos, se basa en el principio del sonido de
inversión de fases. A tal fin se genera una onda sonora que puede desplazarse en 180°
hasta ruido perturbador. De ello resulta que, por efecto recíproco, ambas ondas sonoras
se suprimen casi completamente.
En cada uno de los sistemas de auriculares del Headset se ha incorporado una cápsula de
micrófono electreto, un circuito de retroacción y un sistema transductor. El sonido
percibido por los micrófonos, consistente en señales parasitarias y señal de
audiofrecuencia, es ampliado. La señal de audiofrecuencia se suprime por filtrado.
Ahora, el sonido perturbador es procesado por un circuito electrónico, y es desplazado
por inversión de fases en 180°. Se aplica entonces de nuevo la señal de audiofrecuencia
al ruido perturbador; ya ampliada como señal de suma es transmitida a los sistemas
transductores. Gracias al solape con el sonido de fase inversa, el ruido perturbador
disminuye considerablemente. Sin embargo, la reproducción de la señal de
audiofrecuencia no se modifica en absoluto, dado que que no pasa por el circuito de
compensación.
28
La ilustración muestra la compensación de ruidos™: Pasivos protectores auditivos
atenúan el ruido sobre todo en las gamas de frecuencia media y alta. En frecuencias
inferiores a 500 Hz, sin embargo, la protección es insuficiente. No obstante, gracias a la
compensación activa de ruidos, en la gama de frecuencias de 25 hasta 500 Hz el ruido
disminuye asimismo en unos 25 dB. La atenuación total obtenida de la amortiguación
activa y pasiva de ruidos asciende a unos 30 dB en la gama completa de audiofrecuencia.
Una disminución del ruido en 10 dB se percibe subjetivamente como una bisección del
volumen. Al lograr otra disminución del ruido en 10 dB, esto se percibe como una
bisección del volumen, etc.
29
¿Qué hacer cuando se presentan fallos?
Si se presentan fallos no incluidos en la tabla relacionada a continuación, diríjase
enseguida a su distribuidor Sennheiser.
Fallo
Posibles causas y soluciones
Comunicación clara pero no hay
compensación activa de ruidos
La alimentación de corriente para la electrónica del NoiseGard™ está desconectada.
왘 Verifique si el interruptor ON/OFF está en “ON”.
El enchufe XLR-3 de la alimentación de corriente se ha soltado.
왘 Verifique si el enchufe XLR-3 está calado en el enchufe hembra XLR-3
de la alimentación de corriente.
Al conectarlo a la red de a bordo: El fusible de la red de a bordo está averiado.
왘 Examine el fusible de la red de a bordo.
Al conectarlo al bloque de pilas (excepto HMEC 302, HMEC 305 y HMEC 306):
Las pilas están descargadas.
왘 Compruebe si la lámpara de control del bloque de pilas se ilumina en verde. Si se
ilumina en rojo es indicación de que deben sustituirse las pilas.
30
Fallo
Posibles causas y soluciones
Compensación de ruidos activa,
pero sólo se logra una
comunicación muy baja
El volumen está regulado demasiado bajo.
왘 Examine la regulación del volumen en su Headset.
Compensación de ruidos activa,
pero se le entiende muy mal
La conexión del micrófono se ha soltado (excepto HMEC 305, HMEC 305-C y
HMEC 306).
왘 Compruebe si el jack del micrófono está correctamente conectado.
Comunicación sólo en un oído
(sólo HMEC 300, HMEC 302,
HMEC 306 y HMEC 400)
Está Vd. utilizando el sistema Intercom estereofónico pero el Headset está regulado
para servicio monofónico.
왘 Coloque el conmutador monofónico/estereofónico en la posición “Stereo”.
La conexión para el auricular se ha soltado (excepto HMEC 305, HMEC 305-C y
HMEC 306).
왘 Compruebe si el jack del auricular está correctamente conectado.
Se recibe una fuente de sonido monofónica aunque el Headset está ajustado para
servicio estereofónico.
왘 Coloque el conmutador monofónico/estereofónico en la posición “Mono”.
31
Datos técnicos
HMEC 300
HMEC 302
HMEC 306
Auricular
Principio transductor
dinámico
Acoplamiento al oído
circumaural, cerrado
Gama de tra nsmisió n
45–15,000 Hz
Impedancia no minal activa/pasiva
Atenuación de ruido s activa y pasiva
300/150 Ω, mo no
600/300 Ω, estéreo
> 25–40 dB
Máx. nivel de intensidad sonora
120 dB (±5 %)
Fuerza de apriete
aprox. 10 N
Micrófono incl. preamplificador
Principio transductor
cápsula electreto, co n comp. de ruidos, MKE 45
Gama de tra nsmisió n
300–5.000 Hz
Sensibilida d
Máx. nivel de intensidad sonora
–
120 dB
Resistencia de enlace
150 Ω
Tensió n de salida
400 mV ± 3 dB a 114 dB ( según RTCA/DO 214)
Tensió n de alimentación
típ. 16 V CC (8–16 V CC, apro x. 8–25 mA, según RTCA/DO 214)
32
HMEC 400
HMEC 300
HMEC 302
HMEC 306
HMEC 400
enchufe Redel de seis
po lo s para auricular,
micrófo no y NoiseGard™
jack estéreo 6,35 mm
para auricular,
PJ-068 para micrófono,
XLR-3 para NoiseGard™
Datos generales
Cable conector
1,5 m, intr.lateralmente
Peso sin cable
370 g
Alimentació n NoiseGard™
12–35 V CC
Consumo de corriente
Fusible
27 mA (corriente en repo so), máx. 80 mA
termofusible 500 mA
Enchufes
jack estéreo 6,35 mm
para auricular,
PJ-068 para micrófono,
XLR-3 para NoiseGard™
Equipamiento
co nmut. mo no/estéreo
interruptor ON/OFF para No iseGard™
regulador de volumen para auricular
Ma rgen de temperatura
servicio
guardar
Tiempo de servicio del blo que de pila s
co n pilas de tipo LR 6 (4 x 1,5 V, álcali-manganeso): aprox. 15 horas
co n acumuladores NiMH: apro x. 15 horas
jack estéreo 6,35 mm
para auricular,
PJ-068 para micrófono
y No iseGard™
–15 °C ... +55 °C
–55 °C ... +55 °C
33
Datos técnicos
HMEC 305
HMEC 305-C
HMEC 322
HMDC 322
Auricular
Principio transductor
dinámico
Acoplamiento al oído
circumaural, cerrado
Gama de tra nsmisió n
45–15.000 Hz
Impedancia no minal activa/pasiva
Atenuación de ruido s activa y pasiva
300/150 Ω, mo no
> 25–40 dB
Máx. nivel de intensidad sonora
120 dB (±5 %)
Fuerza de apriete
aprox. 10 N
50/35 Ω, mono
Micrófono incl. preamplificador
Principio transductor
cápsula electreto,
co n comp. de ruidos,
MKE 45
cápsula dinámico,
con comp. de ruido s,
M-87/AIC
Gama de tra nsmisió n
300–5.000 Hz
500–4.000 Hz
Sensibilida d
Máx. nivel de intensidad sonora
–
120 dB
1,8–4 µV / 74 dB a 5 Ω
–
Resistencia de enlace
150 Ω
–
Tensió n de salida
400 mV ± 3 dB a 114 dB ( según RTCA/DO 214)
–
Tensió n de alimentación
típ. 16 V CC (8–16 V CC, apro x. 8–25 mA, según RTCA/DO 214)
–
34
HMEC 305
HMEC 305-C
HMEC 322
HMDC 322
Datos generales
cable de espiral, intr.lateralmente
Cable conector
1,5 m, intr.lateralmente
Peso sin cable
370 g
Alimentació n NoiseGard™
12–35 V CC
Consumo de corriente
Fusible
27 mA (corriente en repo so), máx. 80 mA
termofusible 500 mA
Enchufes
XLR-5 para auricular,
micrófono y NoiseGard™
Equipamiento
interruptor ON/OFF para No iseGard™
regulador de volumen para auricular
Ma rgen de temperatura
servicio
guardar
Tiempo de servicio del blo que de pila s
co n pilas de tipo LR 6 (4 x 1,5 V, álcali-manganeso): aprox. 15 horas
co n acumuladores NiMH: apro x. 15 horas
XLR-5 para auricular
y micrófono,
XLR-3 para NoiseGa rd™
jack U-174/U para auricular y micrófono ,
XLR-3 para NoiseGard™
–15 °C ... +55 °C
–55 °C ... +55 °C
35
Declaración de Conformidad
Sennheiser electronic GmbH & Co. KG declaramos que este aparato cumple las normas y directrices de la CE
aplicables.
Certificado de Garantía
EI periodo de garantía para este producto es de 5 años desde la fecha de compra. Quedan excluidos los accesorios adjuntos al
producto, acumuladores y baterias dado que, debido a sus caracteristicas, la vida útil de dichos productos es mucho más corta
y, en determinados casos, depende concretamente de la intensidad de utililación. EI periodo de garantía comienza a partir de
la fecha de compra. Por eso le recomendamos que guarde el recibo como prueba de compra. Sin dicha prueba, que será
verificada par el respectivo concesionario Sennheiser, cualquier reparación que sea necesaria será efectuada contra factura.
Según determine el fabricante, las prestationes de garantía consistirán en la eliminación gratuita de defectos de materiales
o fabricatión, por medio de reparación, sustitución de piezas, o bien en la sustitución del aparato completo. La garantía no
tendrá validez en caso de defectos ocasionados par un uso inadecuado (tales como manejo incorrecto daños mecánicos,
tensión de servicio equivocada), desgaste, o bien efectos de fuerza mayor, y desperfectos ya detectados en el momento de
adquirir el producto. La garantía carecerá de validez si el defecto se debe a modificationes y reparaciones hechas en el
producto por personas o talleres no autorizados.
En caso de reclamación sirvase remitir el aparato incluyendo los accesorios y la factura al concesionario Sennheiser encargado
de su zona. A fin de evitar daños durante el transporte se aconseja emplear el envase original. Las pretensiones legales por
defectos y emanadas del contrato de compraventa frente al vendedor, no quedan limitadas por esta garantía.
La garantía esta disponible en todos los paises a excepción de EE.UU., siempre que la legislación nacional aplicable no sea
contraria a nuestras determinaciones de garantía.
36
HMEC 300/302/305
305-C/306/322/400
HMDC 322
Gebruiksaanwijzing
Inhoudsopgave
Voor uw eigen veiligheid .......... ............ ............ ............ ........... ............ ............ ............ ........... ............ ..... 3
Omschrijving van de headsets ........... ............ ............ ........... ............ ............ ............ ........... ............ ..... 4
Afwijkingen bij andere uitvoeringen ........... ............ ........... ............ ............ ............ ........... ............ ..... 5
Inhoud van de verpakking ....... ............ ............ ............ ........... ............ ............ ............ ........... ............ ..... 8
Aanbevolen accessoires . ........... ............ ............ ............ ........... ............ ............ ............ ........... ............ ..... 9
Het aansluiten van de headsets ........ ............ ............ ........... ............ ............ ............ ........... ............ ... 10
De aansluitkabels van de headsets .. ............ ............ ........... ............ ............ ............ ........... ............ ... 10
Indeling van de connectoren .. ............ ............ ............ ........... ............ ............ ............ ........... ............ ... 12
Aansluitingsmogelijkheden .... ............ ............ ............ ........... ............ ............ ............ ........... ............ ... 13
Het gebruiksklaar maken van de headset . ............ ........... ............ ............ ............ ........... ............ ... 19
Het instellen van de draagbeugel ..... ............ ............ ........... ............ ............ ............ ........... ............ ... 19
Het in positie brengen van de microfoon .... ............ ........... ............ ............ ............ ........... ............ ... 20
Aanvullende informatie voor het gebruik van de headset HMEC 322 in helikopters .......... ... 22
De bediening .......... ............ ........... ............ ............ ............ ........... ............ ............ ............ ........... ............ ... 23
Het aan- en uitzetten van de NoiseGard™ .. ............ ........... ............ ............ ............ ........... ............ ... 23
Mono/stereo omschakeling (behalve HMEC 305, HMEC 305-C, HMEC 322 en HMDC 322) . ... 23
Het instellen van het volume . ............ ............ ............ ........... ............ ............ ............ ........... ............ ... 23
Kabelklem vastzetten ... ........... ............ ............ ............ ........... ............ ............ ............ ........... ............ ... 24
Het inklappen van de hoofdtelefoon ............ ............ ........... ............ ............ ............ ........... ............ ... 24
Reserveonderdelen .......... ........... ............ ............ ............ ........... ............ ............ ............ ........... ............ ... 25
Achtergrondinformatie .. ........... ............ ............ ............ ........... ............ ............ ............ ........... ............ ... 27
In geval van storingen .... ........... ............ ............ ............ ........... ............ ............ ............ ........... ............ ... 30
Technische gegevens ....... ........... ............ ............ ............ ........... ............ ............ ............ ........... ............ ... 32
2
De headsets NoiseGard™ HMEC 300, HMEC 302, HMEC 305, HMEC 305-C, HMEC 306,
HMEC 322, HMEC 400 en HMDC 322 met actieve lawaaibestrijding zijn speciaal
vervaardigd voor piloten van helicopters, propellervliegtuigen en turbopropvliegtuigen.
Voor uw eigen veiligheid
• Wanneer het lawaaibestrijdingssysteem NoiseGard™ is ingeschakeld, kunnen tal van
geluiden in uw vliegtuig plotseling anders klinken (bijv. motoren, propellers,
alarmsignalen). Neem voor het opstijgen de tijd om daaraan te wennen. Stel het
volume zo in dat u alle alarmsignalen en andere belangrijke geluiden nog goed kunt
horen.
• Probeer de headset niet zelf te repareren, maar wend u bij problemen tot uw
Sennheiser-leverancier.
• In deze gebruiksaanwijzing staan een aantal onderdelen die u zelf kunt vervangen.
Alle overige onderdelen mogen uitsluitend door uw Sennheiser-leverancier worden
vervangen.
• Leg de headset niet in het water. Informeer bij uw Sennheiser-leverancier naar de
beste reinigingswijze.
3
Omschrijving van de headsets
Headset NoiseGard™ HMEC 300
• Nieuw ontwikkelde headset met het actieve lawaaibestrijdingssysteem NoiseGard™,
werkzaam in het gehele frequentiebereik
• Ook in lawaaiige omgevingen een ongestoorde communicatie dankzij NoiseGard™
• Comfortabele vormgeving en optimale bewegingsvrijheid dankzij lichtgewichtuitvoering, enkele aansluitkabel en zachte bekleding op oorkussens en draagbeugel
• Eenvoudig op te bergen dankzij de inklapbare hoofdtelefoon
• Duidelijke communicatie dankzij de elektret-microfoon MKE 45 met instelbare
gevoeligheid
• Eenvoudig verstelbare microfoon dankzij flexibele microfoonarm en bevestigingsbout,
zowel links als rechts van de mond te plaatsen
• Optimale verstaanbaarheid dankzij breedband-hoofdtelefoon
• Geïntegreerde volumeknop
• Aanpassing aan het communicatiesysteem door mono/stereo-schakelaar
• Ook als reguliere hoofdtelefoon te gebruiken door de mogelijkheid het lawaaibestrijdingssysteem NoiseGard™ uit te schakelen
4
• Spanningsvoorziening van NoiseGard™ via het boordnet, de sigarettenaansteker of
batterijhouder
• Fail save operation bij stroomuitval
• Aanpassing van de spanning voor de NoiseGard™ d.m.v. de in-line-elektronica in de
aansluitkabel
• Duits kwaliteitsproduct met 5 jaar garantie (HMEC 400: 10 jaar garantie)
Afwijkingen bij andere uitvoeringen
Headset NoiseGard™ HMEC 302
De headset HMEC 302 onderscheidt zich op de volgende punten van de HMEC 300:
• Aansluiting van de microfoon en de voedinngsspanning van de NoiseGard™elektronica d.m.v. een PJ-068-jackplug
Headset NoiseGard™ HMEC 305
De headset HMEC 305 onderscheidt zich op de volgende punten van de HMEC 300:
• Geen mono/stereo-schakelaar
• Aansluiting van de hoofdtelefoon, microfoon en de voedinngsspanning van de
NoiseGard™-elektronica op het boordnet (12–35 V DC) d.m.v. een XLR-5-plug
5
Headset NoiseGard™ HMEC 305-C
De headset HMEC 305-C onderscheidt zich op de volgende punten van de HMEC 300:
• Geen mono/stereo-schakelaar
• Aansluiting van de hoofdtelefoon en de microfoon d.m.v. een XLR-5-plug
• Aansluiting van de voedinngsspanning van de NoiseGard™-elektronica d.m.v. een
XLR-3-plug
Headset NoiseGard™ HMEC 306
De headset HMEC 306 onderscheidt zich op de volgende punten van de HMEC 300:
• Aansluiting van de hoofdtelefoon, microfoon en de voedinngsspanning van de
NoiseGard™-elektronica op het boordnet (12–35 V DC) d.m.v. een 6-PIN-Redelconnector
Headset NoiseGard™ HMEC 322
De headset HMEC 322 onderscheidt zich op de volgende punten van de HMEC 300:
• Geen mono/stereo-schakelaar
• Krulsnoer
• Aansluiting van de hoofdtelefoon en de microfoon op een hoogohmige interface in
de helicopter d.m.v. een U-174/U-jackplug
6
Headset NoiseGard™ HMEC 400
De headset HMEC 400 onderscheidt zich op de volgende punten van de HMEC 300:
• Zilveren oorschelpen
• Lederen oorkussens
• Knoopbare hoofdbeugelband
Headset NoiseGard™ HMDC 322
De headset HMDC 322 onderscheidt zich op de volgende punten van de HMEC 300:
•
•
•
•
Geen mono/stereo-schakelaar
Krulsnoer
Dynamische microfoon M-87/AIC en laagohmige hoofdtelefoon
Aansluiting van de hoofdtelefoon en de microfoon op een laagohmige interface in de
helicopter d.m.v. een U-174/U-jackplug
7
Inhoud van de verpakking
Headsets HMEC 300, HMEC 305-C, HMEC 322, HMEC 400 en HMDC 322
•
•
•
•
•
Headset
3-polige XLR-inbouwbus voor aansluiting op het boordnet
Draag- en opbergtas voor de headset en accessoires, met voering en schouderriem
Plopkapje voor de microfoon (geldt niet voor de HMDC 322)
Kabelklem MZQ 2002-1 (art. nr. 44740)
Headsets HMEC 302, HMEC 305 en HMEC 306
•
•
•
•
8
Headset
Draag- en opbergtas voor de headset en accessoires, met voering en schouderriem
Plopkapje voor de microfoon (geldt niet voor de HMDC 322)
Kabelklem MZQ 2002-1 (art. nr. 44740)
Aanbevolen accessoires
Vervangbare gel-oorkussens (art. nr. 83140)
Batterijhouder BP-03 (geldt niet voor de HMEC 302, HMEC 305 en HMEC 306)
Batterijhouder met XLR-3 chassisdeel om de NoiseGard™-elektronica van de headsets
HMEC 300, HMEC 305-C, HMEC 322, HMEC 400 en HMDC 322 te voorzien van
voedingsspanning. Vier 1,5 V penlite-batterijen (type LR 6, alkali-mangaan, niet
inbegrepen) zorgen voor een bedrijfsduur van ca. 15 uur. Aansluitingskabel: 0,9 m.
Câbles adaptateurs (sauf HMEC 302, HMEC 305 et HMEC 306)
ACX -1
ACX-2
Voor de headsets HMEC 300, HMEC 305-C, HMEC 322, HMEC 400 en HMDC 322 worden
speciale adapterkabels geleverd waarmee de NoiseGard™ via de sigaretten-aansteker
op het boordnet kan worden aangesloten:
• ACX-1 adapterkabel voor de aansluiting van een enkele headset
• ACX-2 adapterkabel voor de aansluiting van twee headsets
De adapterkabels worden ook geleverd in een uitvoering met een haakse connector.
Deze is voorzien van een platte zekering (7,5 A) en een groen controlelampje:
ACX -11
ACX-22
• ACX-11 adapterkabel voor de aansluiting van een enkele headset
• ACX-22 adapterkabel voor de aansluiting van twee headsets
9
Het aansluiten van de headsets
De aansluitkabels van de headsets
Headsets HMEC 300 en HMEC 400:
1 jackplug (6,35 mm, stereo) voor de aansluiting van de hoofdtelefoon
1 jackplug (PJ-068) voor de aansluiting van de microfoon
1 XLR-3-connector voor de aansluiting van de NoiseGard™ op de spanningsvoorziening
Aansluitkabel
HMEC 300 en HMEC 400
Headset HMEC 302:
1 jackplug (6,35 mm, stereo) voor de aansluiting van de hoofdtelefoon
1 jackplug (PJ-068) voor de aansluiting van de microfoon en de NoiseGard™
Aansluitkabel
HMEC 302
Headset HMEC 305:
1 XLR-5-connector voor de aansluiting van de hoofdtelefoon, de microfoon en de
NoiseGard™
Aansluitkabel
HMEC 305
10
Headset HMEC 305-C:
1 XLR-5-connector voor de aansluiting van de hoofdtelefoon en de microfoon
1 XLR-3-connector voor de aansluiting van de NoiseGard™ op de spanningsvoorziening
Aansluitkabel
HMEC 305-C
Headset HMEC 306:
1 6-PIN-Redel-connector voor de aansluiting van de hoofdtelefoon, de microfoon en de
NoiseGard™
Aansluitkabel
HMEC 306
Headsets HMEC 322 en HMDC 322:
1 U-174/U-jackplug voor de aansluiting van de hoofdtelefoon en de microfoon
1 XLR-3-connector voor de aansluiting van de NoiseGard™ op de spanningsvoorziening
Aansluitkabel
HMEC 322 en HMDC 322
11
Indeling van de connectoren
Redel-connector (NoiseGard™)
1 Toevoer NoiseGard™ (DC+)
2 Audio Lo DC –
3 Audio Hi links
4 Audio Hi rechts
5 Microfoon Hi
6 Microfoon Lo
XLR-3-connector (NoiseGard™)
1 Toevoer NoiseGard™ (DC+)
2 Massa
3 Niet aansluiten!
2 Niet aansluiten! (HMEC 305-C)
3 Massa (HMEC 305-C)
;
XLR-5-connector
HMEC 305
HMEC 305-C
1 Audio Hi
1 Audio Hi
2 Audio Lo / DC –
2 Audio Lo
3 Microfoon Hi
3 Microfoon Hi
4 Microfoon Lo
4 Microfoon Lo
5 Toevoer NoiseGard™ (DC+) 5 Niet bezet!
;;;;;;;;;;;;;
;;;;;;;;;;;;;
;
Jackplug (6,35 mm, stereo)
1 Audio Hi links
2 Audio Hi rechts
3 Audio Lo
12
U174/U-jackplug
1 Microfoon Lo
2 Audio Hi
3 Microfoon Hi
4 Audio Lo
PJ-068-jackplug
HMEC 302
HMEC 300
1 Toevoer NoiseGard™ (DC+) 1 Niet bezet!
2 Microfoon Hi
2 Microfoon Hi
3 Microfoon Lo / DC –
3 Microfoon Lo
Aansluitingsmogelijkheden
Er zijn drie manieren om het lawaaibestrijdingssysteem NoiseGard™ van spanning te
voorzien:
1. Aansluiting op het boordnet (12–35 V DC)
2. Aansluiting op de batterijhouder BP-03
(zie “Aanbevolen accessoires”, behalve HMEC 302, HMEC 305 en HMEC 306)
3. Aansluiting op de sigarettenaansteker (12–35 V DC) d.m.v. een adapterkabel
(zie “Aanbevolen accessoires”, behalve HMEC 302, HMEC 305 en HMEC 306)
De in-line-elektronica in de aansluitkabel zorgt voor de aanpassing van de spanning
voor de NoiseGard™.
Gevaar voor kortsluiting!
Zorg voordat u de NoiseGard™ aansluit dat er in de betreffende stroomkring een
zekering (1 A) is opgenomen.
13
1. Het aansluiten van de headset op het boordnet
U kunt de headset op het boordnet aansluiten indien dit een spanning levert die tussen
de 12 en 35 V DC ligt.
Gevaar voor kortsluiting!
Zorg voordat u de NoiseGard™ aansluit dat er in de betreffende stroomkring een
zekering (1 A) is opgenomen.
Stroomtoevoer
NoiseGard™
De headsets HMEC 300, HMEC 305-C, HMEC 322, HMEC 400 en HMDC 322 worden
geleverd met een XLR-3-inbouwbus. Laat deze door uw onderhoudsmonteur inbouwen.
Massa
Niet aansluiten!
XL R-3-inbouwbus
Headsets HMEC 300 en HMEC 400:
왘 Steek de hiervoor genoemde jackpluggen van de hoofdtelefoon en de microfoon in
de bussen van het boordcommunicatiesysteem.
왘 Steek de XLR-3-connector in de ingebouwde XLR-3-bus.
14
Headset HMEC 302:
왘 Steek de jackplug (6,35 mm, stereo) van de hoofdtelefoon en de PJ-086-jackplug van
de microfoon in de bussen van het boordcommunicatiesysteem
Headset HMEC 305:
왘 Steek de XLR-5-connector in de XLR-5-bus van het vliegtuig.
Headset HMEC 305-C:
왘 Steek de XLR-5-connector van de hoofdtelefoon en de microfoon in de XLR-5-bus
van het vliegtuig.
왘 Steek de XLR-3-connector in de ingebouwde XLR-3-bus.
Headset HMEC 306:
왘 Steek de 6-PIN-Redel-connector in de 6-PIN-bus van het vliegtuig.
Headsets HMEC 322 en HMDC 322:
왘 Steek de U-174/U-jackplug van de hoofdtelefoon en de microfoon in de U-174/Ubus van het boordcommunicatiesysteem.
왘 Steek de XLR-3-connector in de ingebouwde XLR-3-bus.
15
2. Het aansluiten van de headset op de batterijhouder
(behalve HMEC 302, HMEC 305 en HMEC 306)
De NoiseGard™ van de headsets HMEC 300, HMEC 305-C, HMEC 322, HMEC 400 en
HMDC 322 kan t.b.v. de spanningsvoorziening ook op de batterijhouder BP-03 worden
aangesloten (zie “Aanbevolen accessoires” op pagina 9). De batterijhouder kan ook in
combinatie met accu‘s worden gebruikt (batterijen resp. accu‘s worden niet
meegeleverd). In combinatie met batterijen (type LR6, alkali-mangaan) of NiMH accu‘s
heeft de batterijhouder een gebruiksduur van ca. 15 uur.
Het plaatsen/vervangen van de batterijen
왘 Open het batterijvak door het klepje in de richting van de pijl te bewegen.
왘 Plaats vier batterijen (type LR6, alkali-mangaan) in het batterijvak. Let op de
markeringen voor + en –.
왘 Sluit het batterijvak.
De controlelampjes op de batterijhouder
De batterijhouder is voorzien van twee controlelampjes (zgn. LED’s).
Groene LED brandt: De batterijhouder is in gebruik.
Rode LED brandt: De batterijen zijn bijna leeg en moeten worden vervangen.
16
Het aansluiten van de headset en het inschakelen van de batterijhouder
왘 Steek de XLR-3-connector van de headset in XLR-3 chassisdeel van de
batterijhouder.
왘 Headsets HMEC 300 en HMEC 400: Steek de jackplug (6,35 mm, stereo) van de
hoofdtelefoon en de PJ-086-jackplug van de microfoon in de bussen van het
boordcommunicatiesysteem.
Headsets HMEC 305-C: Steek de XLR-5-connector van de hoofdtelefoon en de
microfoon in de XLR-5-bus van het vliegtuig.
Headsets HMEC 322 en HMDC 322: Steek de U-174/U-jackplug van de hoofdtelefoon en de microfoon in de U-174/U-bus van het boordcommunicatiesysteem.
왘 Schakel de batterijhouder in door de ON/OFF-schakelaar op “ON” te zetten. Het
groene controlelampje gaat branden.
Opmerking:
De ON/OFF-schakelaar in de aanvoerleiding naar de headset is bij het gebruik van de
batterijhouder zonder functie.
De batterijhouder op uw kleding bevestigen
Met de bevestigingsclip kunt u de batterijhouder op uw kleding bevestigen, een
klitteband is extra bijgevoegd.
17
3. Headset m.b.v. adapterkabel aansluiten
(behalve HMEC 302, HMEC 305 en HMEC 306)
Voor de headsets HMEC 300, HMEC 305-C, HMEC 322, HMEC 400 en HMDC 322 worden
speciale adapterkabels met XLR-3 chassisdeel geleverd waarmee de NoiseGard™ via de
sigarettenaansteker op het boordnet kan worden aangesloten:
ACX -1
ACX-2
• ACX-1 adapterkabel voor de aansluiting van een enkele headset
• ACX-2 adapterkabel voor de aansluiting van twee headsets
De adapterkabels worden ook geleverd in een uitvoering met een haakse connector.
Deze is voorzien van een platte zekering (7,5 A) en een groen controlelampje:
• ACX-11 adapterkabel voor de aansluiting van een enkele headset
• ACX-22 adapterkabel voor de aansluiting van twee headsets
ACX -11
ACX-22
Het aansluiten van de headset
왘 Steek de XLR-3-connector op de aansluitingskabel van de headset in het XLR-3
chassisdeel van de adapterkabel.
왘 Steek de connector of haakse connector van de adapterkabel in de sigarettenaansteker.
18
Het gebruiksklaar maken van de headset
Het instellen van de draagbeugel
Voor een goede geluiddemping en een optimaal draagcomfort is een goed passende
headset noodzakelijk. U kunt de hoofdtelefoon d.m.v. de draagbeugel verstellen:
왘 Zet de hoofdtelefoon zo op, dat de draagbeugel over het midden van uw hoofd valt.
왘 Stel de lengte van de hoofdtelefoon zo in, dat
• de oorkussens uw oren geheel omsluiten;
• u een lichte druk rond uw oren voelt;
• de draagbeugel uw hoofd nauw omsluit.
Opmerking:
Zorg dat de verbindingskabels tijdens het verstellen van de hoofdtelefoon niet
bekneld raken. Dit kan beschadigingen tot gevolg hebben.
왘 Schakel het lawaaibestrijdingssysteem NoiseGard™ in door de ON/OFF-schakelaar op
“ON” te zetten (zie “Het aan- en uitzetten van de NoiseGard™” op pagina 23).
왘 Controleer in een lawaaiige omgeving of de oorkussens goed zitten.
19
Het in positie brengen van de microfoon
Het draaien van de microfoonarm
U kunt de microfoon zowel bij de linker als de rechter mondhoek plaatsen.
왘 Draai daartoe de bevestigingsbout los.
왘 Draai de microfoon 180°.
왘 Draai de bevestigingsbout weer vast.
Het buigen van de microfoon naar de mondhoek
De headsets HMEC 300, HMEC 302, HMEC 305, HMEC 305-C, HMEC 306, HMEC 322 en
HMEC 400 zijn voorzien van een flexibele microfoonarm. Buig deze zo, dat de microfoon
zich ca. 2 cm voor de mondhoek bevindt.
20
De microfoon van de headset HMDC 322 kan op drie verschillende manieren in de juiste
positie worden gebracht:
왘 Stel de lengte van de microfoonarm zo in, dat de microfoon zich voor de mondhoek
bevindt. Draai daartoe de bout los en verschuif de microfoonarm.
왘 Trek het middelste deel van de microfoonbeugel zo ver aan, dat de microfoon zich ca.
2 cm voor de mond bevindt.
왘 Voor fijnafstelling kunt u de microfoon kantelen.
21
Aanvullende informatie voor het gebruik van de headset HMEC 322 in helikopters
De schakeling (polatie) van de microfoonaansluiting in helikopters is over de hele wereld
niet genormeerd. Als de microfoon van uw headset niet met den aanwezige schakeling
werkt, kunt u de polatie aan de headset door eenvoudig omdraaien van de microfoonmodule ruilen. In dit geval a.u.b. de volgende aanwijzingen in acht nemen:
1. Verwijder de plopkap.
2. Draai de schroeven om ca. 1/2 omwenteling los.
3. Trek de microfoon-module iut de houder.
4. Draai de microfoon-module om 180°graden.
5. Steek de omgedraaide microfoon-module weer in de houder.
6. Trek de schroeven nu aan de andere kant weer vast.
7. Zet de plopkap weer op.
De akoestische eigenschappen van de microfoon-module worden door het omdraaien
niet gewijzigd, omdat de microfoon door de geluiddempende karakteristiek op beide
zijden kan worden ingesproken.
22
De bediening
Het aan- en uitzetten van de NoiseGard™
Wanneer het lawaaibestrijdingssysteem NoiseGard™ uitstaat, beschikt u over een
gewone headset.
U zet de NoiseGard™ aan door de ON/OFF-schakelaar op “ON” te zetten. Bij het gebruik
met batterijhouder BP-03 zet den schakelaar op “ON”. Gebruik dan de ON/OFF-schakelaar
op de BP-03.
Mono/stereo omschakeling (behalve HMEC 305, HMEC 305-C, HMEC 322 en HMDC 322)
De meeste communicatiesystemen zenden een monosignaal uit. Normaal gesproken
kunt u de mono/stereo-schakelaar dan ook op “mono” laten staan. Zet de schakelaar op
“stereo” wanneer u de headset bij een stereo-communicatiesysteem gebruikt.
Het instellen van het volume
Een te hoog volume kan het gehoor beschadigen!
Zet de volumeknop niet te hoog, maar wel zo hoog, dat u alle alarmsignalen en andere
belangrijke geluiden kunt horen.
23
Kabelklem vastzetten
U kunt de hoofdtelefoonkabel voor uw gemak ook met de kabelklem vastzetten. Leid de
hoofdtelefoonkabel zodanig door de kabelklem, als hiernaast afgebeeld. Bevestig de
kabelklem op uw kleding en trek de kabellus zó ver door de kabelklem, dat zij niet de
hoofdtelefoonkabel belemmert.
Het inklappen van de hoofdtelefoon
Om de hoofdtelefoon te vervoeren kunt u de oorkappen tussen de draagbeugel
schuiven.
U kunt de hoofdtelefoon weer uitklappen door beide oorkappen beet te pakken en naar
beneden tussen de draagbeugel uit te trekken.
24
Reserveonderdelen
De volgende reserveonderdelen zijn bij uw Sennheiser-leverancier verkrijgbaar:
•
•
•
•
•
Plopkapje voor de elektret-microfoon MKE 45
Oorkussens
Hoofdbeugelband
Kabelklem
Draag- en opbergtas met schouderriem
Het vervangen van het plopkapje
Zodra het plopkapje tekenen van slijtage begint te vertonen (scheuren, gaatjes e.d.),
dient u dit te vervangen. Trek het plopkapje daartoe van de microfoon en schuif er een
nieuw plopkapje overheen. Het plopkapje dient de gehele microfoon te omsluiten.
Het vervangen van de oorkussens
Wanneer de oorkussens beschadigd raken, dient u deze te vervangen. Plaats uw vingers
achter het oorkussen, trek het uit de oorkap en breng een nieuw oorkussen aan.
25
Hoofdbeugelband vervangen
Vervang de hoofbeugelband als een beschadiging optreedt.
왘 Trek de sluiting van de hoofdbeugelband uiteen en verwijder de versleten hoofdbeugelband.
왘 Leg de nieuwe hoofdbeugelband om de hoofdbeugel.
왘 Schuif beide sluitzijden van de hoofdbeugelband aaneen totdat ze iets overlappen.
왘 Druk de sluiting samen.
Hoofdbeugelband van de HMEC 400 hoofdset vervangen
Vervang de hoofdbeugelband als een beschadiging optreedt.
왘 Trek de sluiting van de hoofdbeugelband uiteen en verwijder de versleten hoofdbeugelband.
왘 Leg de nieuwe hoofdbeugelband om de hoofdbeugel.
왘 Schuif beide sluitzijden van de hoofdbeugelband aaneen en druk de sluiting samen.
26
Achtergrondinformatie
Het principe van de NoiseGard™
Geluidsoverlast is een van de ergste vormen van milieuvervuiling en een belangrijke
oorzaak van stress. Onderzoek heeft aangetoond dat lawaai het autonome zenuwstelsel
beïnvloedt. Het gevolg is vermoeidheid, concentratiestoornissen, nervositeit en irritatie.
Verder kan aanhoudende blootstelling aan lawaai blijvende schade aan het gehoor tot
gevolg hebben.
Het bovenstaande geldt in het bijzonder voor piloten. Het geluidsniveau in de cockpit
van straalvliegtuigen bedraagt ca. 80 dB(A). Voor propellervliegtuigen is dat zelfs 90 tot
97 dB(A). Tijdens de start en de landing kan de geluidsdruk bovendien nog aanzienlijk
toenemen. Daar komt bij dat een goede verstaanbaarheid vereist dat de
communicatieapparatuur op ten minste 95 dB(A) wordt ingesteld. Geen wonder dat
veel piloten door gehoorbeschadigingen arbeidsongeschikt raken of hun vliegbrevet
verliezen.
Traditionele headsets zijn vaak voorzien van een geluiddempingssysteem dat vooral de
vrij hoge frequenties wegfiltert. Cockpitlawaai bestaat echter vooral uit lagere
frequenties, waartegen de traditionele geluiddempingssystemen onvoldoende
bescherming bieden.
27
Het door Sennheiser ontwikkelde lawaaibestrijdingssysteem NoiseGard™ zorgt in
combinatie met een hoogwaardige passieve gehoorbescherming voor een goede en
gelijkmatige volumereductie op alle frequenties. De geluidsoverlast wordt drastisch
beperkt. Het restgeluid dat de piloot hoort, wordt gevormd door een bescheiden en
natuurlijke motorruis. Hierdoor kan hij ook het volume van de hoofdtelefoon lager
zetten.
Het actieve lawaaibestrijdingssysteem NoiseGard™ is gebaseerd op het principe van
antigeluid. Daarbij wordt een geluidsgolf gecreëerd die qua frequentie identiek is aan
het omgevingsgeluid, maar t.o.v. daarvan een halve fase is verschoven. Hierdoor
ontstaat een spiegelbeeld van het oorspronkelijke signaal, dat dit vrijwel opheft.
Beide weergavesystemen van de headset zijn voorzien van een elektretcondensatormicrofoon, een terugkoppelkring en een modulatorsysteem. Het door de
microfoons opgevangen geluid, bestaande uit omgevingslawaai en het radiosignaal,
wordt versterkt. Vervolgens wordt het radiosignaal weggefilterd, waarna de elektronica
van de NoiseGard™ het resterende signaal (het omgevingslawaai) analyseert en het
corresponderende antigeluid genereert. Daarna wordt het radiosignaal versterkt aan de
modulator doorgegeven. Het omgevingslawaai wordt door dit principe merkbaar
gereduceerd, terwijl het radiosignaal geen enkele bewerking ondergaat en dus
ongewijzigd wordt weergegeven.
28
Bovenstaande grafiek toont de door de NoiseGard™ bewerkstelligde volumereductie:
passieve gehoorbeschermers dempen vooral geluiden met een gemiddelde of hoge
frequentie. Bij frequenties onder de 500 Hz bieden deze onvoldoende bescherming. De
actieve lawaaibestrijding weet ook geluid met een frequentie tussen de 25 en 500 Hz
met ca. 25 dB te reduceren. Door de combinatie van actieve en passieve methoden wordt
het volume over alle frequenties met ca. 30 dB gereduceerd.
Een reductie van het volume met 10 dB wordt subjectief als een halvering van de
geluidssterkte waargenomen. Wordt het volume nogmaals met 10 dB gereduceerd, dan
wordt dat wederom als een halvering ervaren enz.
29
In geval van storingen
In geval van storingen die niet in de onderstaande tabel voorkomen, kunt u zich tot uw
Sennheiser-leverancier wenden.
Storing
Mogelijke oorzaken en remedie
Probleemloze communicatie, maar
geen actieve lawaaibestrijding
De NoiseGard™ is niet ingeschakeld.
왘 Controleer of de ON/OFF-schakelaar op “ON” staat.
De kabel met de XLR-3-connector is losgetrokken.
왘 Controleer of de connector nog in de XLR-3-bus zit.
Bij aansluiting op het boordnet: de zekering van het boordnet is defect.
왘 Controleer de zekering van het boordnet.
Bij aansluiting op de batterijhouder (behalve HMEC 302, HMEC 305 en HMEC 306):
de batterijen zijn leeg.
왘 Controleer of het groene controlelampje op de batterijhouder brandt.
Wanneer het rode lampje brandt, moet u de batterijen vervangen.
30
Storing
Mogelijke oorzaken en remedie
De lawaaibestrijding functioneert,
maar de verstaanbaarheid is
slecht door een te laag volume
Het volume is te laag ingesteld.
왘 Controleer de stand van de volumeknop.
De lawaaibestrijding functioneert,
maar men kan u slecht verstaan
De microfoonkabel is losgetrokken (behalve HMEC 305, HMEC 305-C en HMEC 306).
왘 Controleer of de jackplug van de microfoon nog in de bus zit.
U heeft slechts op één oor
ontvangst (geldt alleen voor de
HMEC 300, HMEC 302, HMEC 306
en HMEC 400)
U gebruikt een stereo-communicatiesysteem, terwijl de mono/stereo-schakelaar van
de headset op “mono” staat.
왘 Zet de mono/stereo-schakelaar op “stereo”.
De hoofdtelefoonkabel is losgetrokken (behalve HMEC 305, HMEC 305-C en
HMEC 306).
왘 Controleer of de jackplug van de hoofdtelefoon nog in de bus zit.
U gebruikt een mono-communicatiesysteem, terwijl de mono/stereo-schakelaar van
de headset op “stereo” staat.
왘 Zet de mono/stereo-schakelaar op “mono”.
31
Technische gegevens
HMEC 300
HMEC 302
HMEC 306
Hoofdtelefoon
Modulatieprincipe
dy namisch
Oorkappen
ooromsluitend, gesloten
Weergavebereik
45–15.000 Hz
Nominale impedantie a ctief/pa ssief
Vo lumereductie actief/passief
300/150 Ω, mo no
600/300 Ω, stereo
> 25–40 dB
Max. volume
120 dB (±5 %)
Drukkracht
ca. 10 N
Microfoon incl. voorversterker
Modulatieprincipe
electret-condensator met ruisonderdrukking MKE 45
Weergavebereik
300–5.000 Hz
Gevoeligheid
Max. volume
–
120 dB
Aansluitweerstand
150 Ω
Uitgangsspanning
400 mV ± 3 dB bij 114 dB (volgens RTCA/DO 214)
Vo edingsspanning
typ. 16 V DC, (8–16 V DC, ca. 8–25 mA , volgens RTCA/DO 214)
32
HMEC 400
HMEC 300
HMEC 302
HMEC 306
HMEC 400
Allgemeen
Aansluitkabel
1,5 m, enkel snoer
Gewicht zonder snoer
370 g
Bedrijfsspanning NoiseGard™
12–35 V DC
Stroo mverbruik
Zekering
27 mA (ruststroom), max. 80 mA
smeltzekering 500 mA
Stecker
jackplug (6,35 mm, stereo)
voor hoofdtelefoon,
PJ-068 voo r micro foo n,
XLR-3 voor NoiseGard™
Bedieningselementen
mono /stereo-schak elaa r
aan/uit-schakela ar No iseGard™
volumeknop voor hoofdtelefoon
Tempera tuur
bij gebruik
bij o pslag
Gebruiksduur batterijhouder
met batterijen (4 x penlite, 1,5 V, alkali-mangaan): ca. 15 uur
met NiMH accu‘s: ca. 15 uur
jackplug (6,35 mm, stereo) 6-PIN-Redel voo r
voor hoofdtelefoon,
hoofdtelefon, microfoon
PJ-068 voor microfoon
en NoiseGard™
en NoiseGard™
jackplug (6,35 mm, stereo)
voor hoofdtelefoo n,
PJ-068 voor microfoon,
XLR-3 voor NoiseGard™
–15 °C tot 55 °C
–55 °C tot 55 °C
33
Technische gegevens
HMEC 305
HMEC 305-C
HMEC 322
HMDC 322
Hoofdtelefoon
Modulatieprincipe
dy namisch
Oorkappen
ooromsluitend, gesloten
Weergavebereik
45–15.000 Hz
Nominale impedantie a ctief/pa ssief
Vo lumereductie actief/passief
300/150 Ω, mo no
> 25–40 dB
Max. volume
120 dB (±5 %)
Drukkracht
ca. 10 N
50/35 Ω, mono
Microfoon incl. voorversterker
Modulatieprincipe
electret-condensator
met ruisonderdrukking,
MKE 45
dynamisch
met ruisonderdrukking,
M-87/AIC
Weergavebereik
300–5.000 Hz
500–4.000 Hz
Gevoeligheid
Max. volume
–
120 dB
1,8–4 µV / 74 dB bij 5 Ω
–
Aansluitweerstand
150 Ω
–
Uitgangsspanning
400 mV ± 3 dB bij 114 dB (volgens RTCA/DO 214)
–
Vo edingsspanning
typ. 16 VDC, (8–16 V DC, ca. 8–25 mA, volgens RTCA/DO 214)
–
34
HMEC 305
HMEC 305-C
HMEC 322
HMDC 322
Allgemeen
krulsno er, enkel snoer
Aansluitkabel
1,5 m, enkel snoer
Gewicht zonder snoer
370 g
Bedrijfsspanning NoiseGard™
12–35 V DC
Stroo mverbruik
Zekering
27 mA (ruststroom), max. 80 mA
smeltzekering 500 mA
Stecker
XLR-5 vo or hoofdtelefoon, XLR-5 voor ho ofdtelefoon U-174/U voor hoofdtelefoon en microfoo n,
microfoon en NoiseGard™ en microfoon,
XLR-3 voor NoiseGard™
XLR-3 voor NoiseGard™ Bedieningselementen
aan/uit-schakela ar No iseGard™
volumeknop voor hoofdtelefoon
Tempera tuur
bij gebruik
bij o pslag
Gebruiksduur batterijhouder
met batterijen (4 x penlite, 1,5 V, alkali-mangaan): ca. 15 uur
met NiMH accu‘s: ca. 15 uur
–15 °C tot 55 °C
–55 °C tot 55 °C
35
Vergunning
Sennheiser electronic GmbH & Co. KG verklaren, dat dit toestel voldoet aan de toepasselijke CE-normen en
voorschriften.
Garantiebewijs
Wij hanteren voor onze producten een garantietermijn gedurende een periode van 60 maanden. Uitgezonderd hiervan zijn
accessoires, accu's en batterijen die aan het product toegevoegd zijn; op grond van hun geaardheid beschikken deze
producten over een kortere levensduur die van geval tot geval van hun gebruiksintensiteit afhangt.
De garantietermijn begint vanaf de aankoopdatum. Daarom dient u de originele aankoopbon goed te bewaren. Zonder dit
bewijs, dat door de Sennheiser servicepartner wordt gecontroleerd, worden reparaties in principe tegen kostenvergoeding
uitgevoerd.
De garantievergoedingen bestaan naar onze keuze uit het kosteloze verhelpen van materiaal- of fabricagefouten op basis
van vervanging (afzonderlijke onderdelen of het complete apparaat) danwel reparatie. De garantie vervalt bij verkeerd
gebruik of onachtzaamheid (bijv. bedieningsfouten, mechanische beschadigingen, onjuiste bedrijfsspanning), slijtage
gevallen van force majeure of gebreken welke u reeds bij de aankoop heeft gekend. Het recht op garantie vervalt indien
reparaties of wijzigingen zijn uitgevoerd door niet bevoegde personen of werkplaatsen. Indien u aanspraak maakt op
garantie dient u het apparaat, inclusief accessoires en aankoopbon, franco aan de bevoegde servicepartner toe te zenden. Om
beschadigingen gedurende het transport te voorkomen adviseren wij de originele verpakking te gebruiken.
Uw wettelijke garantieclaims tegenover de verkoper worden door deze garantie niet beperkt. De garantie kan wereldwijd in
alle landen buiten de VS worden opgevorderd waarin de geldende nationale wetten niet in tegenstelling zijn met onze
garantievoorwaarden.
36
Sennheiser electronic GmbH & Co. KG
30900 Wedemark, Germany
Phone +49 (5130) 600 0
Fax +49 (5130) 600 300
www.sennheiser.com
Printed in Germany
Publ. 04/04
86064 / A04