1
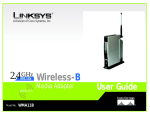
Wireless-B Media
Adapter
Use this guide to install:
WMA11B
User Guide
COPYRIGHT & TRADEMARKS
Specifications are subject to change without notice. Linksys is a registered trademark or
trademark of Cisco Systems, Inc. and/or its affiliates in the U.S. and certain other countries. Copyright © 2003 Cisco Systems, Inc. All rights reserved. Other brands and product names are trademarks or registered trademarks of their respective holders.
LIMITED WARRANTY
Linksys warrants to the original end user purchaser ("You") that, for a period of one year,
(the "Warranty Period") Your Linksys product will be free of defects in materials and workmanship under normal use. Your exclusive remedy and Linksys's entire liability under this
warranty will be for Linksys at its option to repair or replace the product or refund Your
purchase price less any rebates.
If the product proves defective during the Warranty Period call Linksys Technical Support
in order to obtain a Return Authorization Number. BE SURE TO HAVE YOUR PROOF OF
PURCHASE ON HAND WHEN CALLING. When returning a product, mark the Return
Authorization Number clearly on the outside of the package and include a copy of your
original proof of purchase. RETURN REQUESTS CANNOT BE PROCESSED WITHOUT
PROOF OF PURCHASE. You are responsible for shipping defective products to Linksys.
Linksys pays for UPS Ground shipping from Linksys back to You only. Customers located outside of the United States of America and Canada are responsible for all shipping
and handling charges.
ALL IMPLIED WARRANTIES AND CONDITIONS OF MERCHANTABILITY OR FITNESS
FOR A PARTICULAR PURPOSE ARE LIMITED TO THE DURATION OF THE WARRANTY
PERIOD. ALL OTHER EXPRESS OR IMPLIED CONDITIONS, REPRESENTATIONS AND
WARRANTIES, INCLUDING ANY IMPLIED WARRANTY OF NON-INFRINGEMENT, ARE
DISCLAIMED. Some jurisdictions do not allow limitations on how long an implied warranty lasts, so the above limitation may not apply to You. This warranty gives You specific legal rights, and You may also have other rights which vary by jurisdiction.
TO THE EXTENT NOT PROHIBITED BY LAW, IN NO EVENT WILL LINKSYS BE LIABLE
FOR ANY LOST DATA, REVENUE OR PROFIT, OR FOR SPECIAL, INDIRECT, CONSEQUENTIAL, INCIDENTAL OR PUNITIVE DAMAGES, HOWEVER CAUSED REGARDLESS
OF THE THEORY OF LIABILITY, ARISING OUT OF OR RELATED TO THE USE OF OR
INABILITY TO USE THE PRODUCT, EVEN IF LINKSYS HAS BEEN ADVISED OF THE
POSSIBILITY OF SUCH DAMAGES. IN NO EVENT WILL LINKSYS' LIABILITY EXCEED
THE AMOUNT PAID BY YOU FOR THE PRODUCT.
The foregoing limitations will apply even if any warranty or remedy provided under this
Section fails of its essential purpose. Some jurisdictions do not allow the exclusion or limitation of incidental or consequential damages, so the above limitation or exclusion may
not apply to You.
Please direct all inquiries to: Linksys, P.O. Box 18558, Irvine, CA 92623.
SAFETY AND REGULATORY NOTICES
FCC STATEMENT
The Wireless-B Media Adapter has been tested and found to comply with the specifications for a Class B digital device, pursuant to Part 15 of the FCC Rules. Operation is subject to the following two conditions:
(1) This device may not cause harmful interference, and
(2) This device must accept any interference received, including interference that may
cause undesired operation.
These limits are designed to provide reasonable protection against harmful interference
in a residential installation. This equipment generates, uses, and can radiate radio frequency energy and, if not installed and used according to the instructions, may cause
harmful interference to radio communications. However, there is no guarantee that interference will not occur in a particular installation. If this equipment does cause harmful
interference to radio or television reception, which is found by turning the equipment off
and on, the user is encouraged to try to correct the interference by one or more of the
following measures:
•
•
•
•
Reorient or relocate the receiving antenna
Increase the separation between the equipment or devices
Connect the equipment to an outlet other than the receiver's
Consult a dealer or an experienced radio/TV technician for assistance
FCC Caution: Any change or modification to the product not expressly approved by
Linksys could void the user's authority to operate the device.
FCC RF Radiation Exposure Statement
To comply with the FCC and ANSI C95.1 RF exposure limits, the antenna(s) for this
device must comply with the following:
• Access points with 2.4 GHz or 5 GHz integrated antenna must operate with a separation distance of at least 20 cm from all persons using the cable provided and must
not be co-located or operating in conjunction with any other antenna or transmitter.
End-users must be provided with specific operations for satisfying RF exposure compliance.
Note: Dual antennas used for diversity operation are not considered co-located.
INDUSTRY CANADA (CANADA)
This Class B digital apparatus complies with Canadian ICES-003.
Cet appareil numérique de la classe B est conforme à la norme NMB-003 du Canada.
The use of this device in a system operating either partially or completely outdoors may
require the user to obtain a license for the system according to the Canadian regulations.
EC DECLARATION OF CONFORMITY (EUROPE)
Linksys Group declares that the Wireless-B Media Adapter conforms to the specifications listed below, following the provisions of the EMC Directive 89/336/EEC and Low
Voltage Directive 73/23/EEC:
•
•
•
ETS 300-826, 301 489-1 General EMC requirements for Radio equipment.
EN 609 50 Safety
ETS 300-328-2 Technical requirements for Radio equipment.
Note: This equipment is intended to be used in all EU and EFTA countries. Outdoor use
may be restricted to certain frequencies and/or may require a license for operation. For
more details, contact Linksys Corporate Compliance.
Table of Contents
Note: Combinations of power levels and antennas resulting in a radiated power level of
above 100 mW are considered as not compliant with the above mentioned directive and
are not allowed for use within the European community and countries that have adopted
the European R&TTE directive 1999/5/EC and/or the CEPT recommendation Rec 70.03.
For more details on legal combinations of power levels and antennas, contact Linksys
Corporate Compliance.
Chapter 1: Introduction
The Wireless-B Media Adapter
Features
1
1
2
Chapter 2: Planning Your Use of the Wireless-B
Media Adapter
Overview
Using the Adapter as Part of Your Wireless Network
Using the Adapter as Part of Your Wired Network
3
3
3
3
Chapter 3: Getting to Know the Wireless-B Media
Adapter and Its Remote Controller
Front Panel
Back Panel
Remote Controller
4
5
6
7
•
•
•
•
•
•
•
•
•
•
•
Linksys Group vakuuttaa täten että Wireless-B Media Adapter tyyppinen laite on
direktiivin 1999/5/EY, direktiivin 89/336/EEC ja direktiivin 73/23/EEC oleellisten vaatimusten ja sitä koskevien näiden direktiivien muiden ehtojen mukainen.
Linksys Group déclare que le Wireless-B Media Adapter est conforme aux conditions essentielles et aux dispositions relatives à la directive 1999/5/EC, la directive
89/336/EEC, et à la directive 73/23/EEC.
Belgique B L’utilisation en extérieur est autorisé sur le canal 11 (2462 MHz), 12 (2467
MHz), et 13 (2472 MHz). Dans le cas d’une utilisation privée, à l’extérieur d’un bâtiment, au-dessus d’un espace public, aucun enregistrement n’est nécessaire pour
une distance de moins de 300m. Pour une distance supérieure à 300m un enregistrement auprès de l’IBPT est requise. Pour une utilisation publique à l’extérieur de
bâtiments, une licence de l’IBPT est requise. Pour les enregistrements et licences,
veuillez contacter l’IBPT.
France F: Bande de fréquence restreinte: seuls les canaux 10, 11, 12, 13 (2457,
2462, 2467, et 2472 MHz respectivement) doivent être utilisés en France. Toute utilisation, qu'elle soit intérieure ou extérieure, est soumise à autorisation. Vous pouvez
contacter l'Autorité de Régulation des Télécommuniations (http://www.art-telecom.fr)
pour la procédure à suivre.
France F: Restricted frequency band: only channels 10, 11, 12, 13 (2457, 2462,
2467, and 2472 MHz respectively) may be used in France. License required for
every indoor and outdoor installations. Please contact ART for procedure to follow.
Deutschland D: Anmeldung im Outdoor-Bereich notwending, aber nicht genehmigungspflichtig. Bitte mit Händler die Vorgehensweise abstimmen.
Germany D: License required for outdoor installations. Check with reseller for procedure to follow.
Italia I: E' necessaria la concessione ministeriale anche per l'uso interno. Verificare
con i rivenditori la procedura da seguire. L'uso per installazione in esterni non e' permessa.
Italy I: License required for indoor use. Use with outdoor installations not allowed.
the Netherlands NL License required for outdoor installations. Check with reseller for
procedure to follow.
Nederlands NL Licentie verplicht voor gebruik met buitenantennes. Neem contact op
met verkoper voor juiste procedure.
WMA11B-UG-30617B JL
Chapter 4: Connecting the Wireless-B Media
Adapter to Your Network for Setup
Overview
Connection to a Wireless Network for Setup
Connection to a Wired Network for Setup
9
9
9
10
Chapter 5: Setting up the Wireless-B Media Adapter 11
Overview
11
Setup Wizard
11
Chapter 6: Installing and Using the Wireless-B
Media Adapter Utility
Overview
Installing the Adapter’s Utility
Using the Adapter’s Utility
18
18
18
20
Chapter 1: Introduction
Chapter 7: Connecting the Wireless-B Media Adapter
to Your TV and Stereo
23
Overview
23
Connecting to Your TV and Stereo
23
Connecting to Your TV Only
25
Placement Options
26
Using the TV Setup
27
Chapter 8: Using the Media Navigator
Overview
Music Menus
Picture Menus
Help
29
29
30
34
37
Appendix A: Troubleshooting
Common Problems and Solutions
Frequently Asked Questions
38
38
39
Appendix B: Creating a Playlist
42
The Wireless-B Media Adapter
The Linksys Wireless-B Media Adapter lets you bring the digital pictures and
music stored on your computer to your Home Entertainment Center, without
running cables through the house. Using a wireless connection, the Media
Adapter displays your digital photographs on the TV for the whole family to
enjoy. And your digital music collection is finally freed from those little computer speakers and can play in full glory through your stereo system.
The Wireless-B Media Adapter sits by your home stereo and television and connects to them using standard consumer electronics cables. Then it connects to
your home network by Wireless-B (802.11b) wireless networking, or if you prefer, it can be connected via standard 10/100 Ethernet cabling. Using the included remote control and the user-friendly menus on your TV, you can browse
through the digital pictures on your computer by folder, filename, or thumbnail.
You can view pictures one at a time, or watch an automatically created slideshow
of all the pictures in a given folder. The Media Adapter supports four popular
picture formats: JPG, GIF, TIF and BMP. Use the remote control’s Zoom button to get a close-up of the details in your pictures.
Appendix D: Glossary
46
You can also use the remote to browse your MP3 or WMA formatted music collection by title, artist, genre, folder, or playlist. Choose the music you want, and
let the Wireless-B Media Adapter play it through your stereo system. You can
even let music play in the background while you browse your pictures.
Appendix E: Specifications
Environmental
53
54
Let the Linksys Wireless-B Media Adapter bring your digital media out into the
living room for the whole family to enjoy.
Appendix F: Warranty Information
55
Appendix G: Contact Information
56
Appendix C: Setting a Static IP Address on Your PC 43
1
Features
•
•
•
•
•
•
•
•
•
Supports popular audio formats (MP3 and WMA), image formats (JPG,
GIF, TIF and BMP), and playlist formats (M3U and ASX)
S-Video output for best video quality
RCA connectors for left and right stereo audio output and composite video
output
Easy TV setup and convenient Setup Wizard for configuration
User-friendly utility runs on your PC to manage music and picture folders
Wireless security with up to 128-bit WEP encryption
Compatibility with 802.11b (2.4GHz) standard
Up to 11 Mbps, high-speed wireless data transfer rate
RJ-45, 10/100 Mbps Ethernet connection
Chapter 2: Planning Your Use of
the Wireless-B Media Adapter
Overview
Before you set up the Adapter, you need to decide how your Windows XP computer will send digital music or pictures to the Adapter; you have a choice of a
wireless or wired connection. This information is necessary for the proper
setup and configuration of the Adapter.
Note: The Adapter is designed to work only with Windows XP computers.
Using the Adapter as Part of Your Wireless Network
If your wireless-equipped, Windows XP computer connects directly to the
Adapter, or it connects via an access point or wireless router (see Figure 2-1),
then the Adapter is part of your wireless network. If any part of the connection
to the Adapter is wireless, then the overall connection will be considered wireless. The computer that sends the Adapter pictures and music is also referred to
as the host computer. You must install the Adapter’s Utility on this computer.
Computer
Wireless Access Point or
Router (optional)
Wireless-B Media
Adapter
Figure 2-1
Using the Adapter as Part of Your Wired Network
If your wired Windows XP computer connects directly to the Adapter, or it connects via a router or switch (see Figure 2-2), then the Adapter is part of your
wired network. Within a wired network, the devices are connected with cables.
The computer that sends the Adapter pictures and music is also referred to as
the host computer. You must install the Adapter’s Utility on this computer.
2
3
Chapter 3: Getting to Know the
Wireless-B Media Adapter and Its
Remote Controller
Front Panel
Computer
Router or Switch
(optional)
Figure 2-2
Wireless-B Media
Adapter
On the Adapter’s front panel, it has three LEDs to let you know how the Adapter
is functioning. There is also a Power button.
Ready
Green. The Ready LED flashes
when the Adapter is establishing
a connection to the host computer. It stops flashing and stays lit
when the Adapter is connected to
the host computer.
Wireless
Green. The Wireless LED lights
up when there is a connection to a
wireless network. It flashes when
data is transmitted to or received
from the wireless network.
Ethernet
Green. The Ethernet LED lights
up when there is a connection to a
wired network. It flashes when
data is transmitted to or received
from the wired network.
(Power)
The Power button allows you to
power on and off the Adapter.
Figure 3-1
4
5
Back Panel
Remote Controller
On the Adapter’s back panel, it features seven ports and two buttons.
The Adapter includes a Remote Controller, which features several buttons
allowing you to control the Media Navigator. Use the remote to move through
the Navigator’s Music, Pictures, or Help menus on your TV.
To install the batteries, follow these instructions:
1. On the back of the remote, remove the battery panel.
Figure 3-2
2. Insert the included AAA batteries into the battery compartment. Make sure
you align the batteries according to the compartment’s diagrams.
3. Replace the battery panel.
Power
The Power port is where you will connect the power adapter.
LAN
The LAN port is where you will connect the Ethernet network cable.
Here are descriptions of the remote’s various buttons.
If the Adapter is connected to a wired network device, the
Uplink button is what you will push depending on whether
the device is a PC or switch. If the Adapter is connected to a
PC, then the Uplink button should be pushed in. If the
Adapter is connected to a switch, then the Uplink button
should NOT be pushed in.
Uplink
The Video port is where you will connect the video cable.
Video
Left and Right The Left and Right ports are where you will connect the left
and right audio cables.
Menu - Displays the main menu.
Music - Displays the Music menu.
Pictures - Displays the Pictures menu.
Setup - As the Adapter is connecting to
the TV, press this button to view the TV
Setup screen. For more details, refer to
“Chapter 7: Connecting the Wireless-B
Media Adapter to Your TV and Stereo.”
S-Video
The S-Video port is where you will connect the S-video
cable.
Reset
The Reset button is what you will push if you need to reset
the Adapter.
Select and arrows - Use the Select button
to make a selection, like the Enter key on
your computer’s keyboard. Use the arrow
keys to move through menus, songs, or
pictures.
Note: When you reset the Adapter, press the Reset button and hold it
in for 10 seconds.
Page up and down - Use these buttons to
scroll through lists of songs or pictures.
(Antenna)
6
Power - Turns the Adapter on or off.
The Antenna port is where you will attach the antenna.
Figure 3-3
Volume up and down - Press these buttons to control the volume.
7
Zoom in and out - Use these buttons to make on-screen pictures larger or
smaller.
Previous - Press this button to return to the previous screen.
Options - Displays the Music Options menu or the Picture Options menu.
Back - Goes back to the previous song or picture.
Next - Goes to the next song or picture.
Play/Pause - Plays or pauses the song or slideshow.
Stop - Stops the song or slideshow, depending on which menu you are in.
Chapter 4: Connecting the
Wireless-B Media Adapter to Your
Network for Setup
Overview
Connect the Adapter to a network or computer (see Figures 4-1 and 4-2), and
then proceed to the appropriate section for your setup.
If you want to set up the Adapter directly from your TV (without using your
computer), then proceed to “Chapter 7: Connecting the Wireless-B Media
Adapter to Your TV and Stereo.”
Computer
Wireless-B Media
Adapter
Computer
Figure 4-1
Wireless-B Media
Adapter
Figure 4-2
Connection to a Wireless Network for Setup
Note: Your host computer must be using Windows XP Wireless Zero
Configuration so the Setup Wizard will configure the Adapter correctly. If your computer is not using Windows XP Wireless Zero
Configuration, then proceed to the next section, “Connection to a
Wired Network for Setup”, and use a wired connection to the Adapter
instead.
1. Attach the antenna to the Adapter.
2. Connect the included power adapter
to the Power port on the Adapter
(see Figure 4-3).
3. Plug the power adapter into an electrical outlet.
Figure 4-3
8
9
4. Press the Adapter’s power button, which is located on the Adapter’s front
panel.
5. The Wireless LED will light up. If it does not, then power the Adapter off
and back on again.
Chapter 5: Setting up the
Wireless-B Media Adapter
Overview
Proceed to “Chapter 5: Setting up the Wireless-B Media Adapter.”
Connection to a Wired Network for Setup
1. Attach the antenna to the Adapter.
Setup Wizard
2. Connect the included Ethernet network cable to your PC, router, or switch.
3. Connect the other end of the cable to
the LAN port on the Adapter (see
Figure 4-4).
4. Connect the included power adapter
to the Power port on the Adapter
(see Figure 4-5).
The Wireless-B Media Adapter Setup Wizard will guide you through the installation and configuration procedure.
1. Insert the Setup CD-ROM into your CD-ROM drive. The Setup Wizard
should run automatically, and Figure 5-1 should appear. If it does not, click
the Start button and choose Run. In the field that appears, enter
D:\setup.exe (where “D” is the letter of your CD-ROM drive).
Figure 4-4
5. Plug the power adapter into an electrical outlet.
6. Press the Adapter’s power button,
which is located on the Adapter’s
front panel.
Figure 4-5
7. The Ethernet LED will light up. If it does not, then push the Uplink button
on the Adapter’s back panel. Power the Adapter off and back on again. Make
sure the cable connections are secure.
Proceed to “Chapter 5: Setting up the Wireless-B Media Adapter.”
Figure 5-1
Setup - Click the Setup button to begin the installation process.
Install Utility on PC - Click the Install Utility on PC button to install the
Adapter’s Utility on your PC.
User Guide - Click the User Guide button to open the PDF file of this User
Guide.
LINKSYS Web - Click the LINKSYS Web button to visit the Linksys
website, www.linksys.com.
Exit - Click the Exit button to exit the Setup Wizard.
2. To install the Adapter, click the Setup button on the Welcome screen.
10
11
3. When you see the screen shown in Figure 5-2, make sure the Adapter’s
Wireless or Ethernet LED is flashing. This indicates that the Adapter is
properly connected to either a wireless or wired network. Then click the
Next button to continue.
5. On the screen shown in Figure 5-4, choose whether the Adapter will be connected to your wireless or wired network AFTER you have configured it.
If you will use the Adapter as part of a wireless network, then click the Yes
button for the Wireless network choice.
If you will use the Adapter as part of a wired network, then click the Yes
button for the Wired network choice.
Click the Next button.
Figure 5-2
4. The screen shown in Figure 5-3 displays a list of Wireless-B Media
Adapters on your network, along with the settings information for each
Adapter. (If you have only one Adapter on your network, it will be the only
one displayed.) Select the Adapter you are currently installing by clicking
its name in the Adapters Found box. Then click the Next button.
Figure 5-4
Figure 5-3
12
13
6. On the Basic Settings screen, enter a unique name for the Adapter.
If your network has a router or DHCP server, select Automatically for the
Network Setting, and click the Next button. Then go to Step 7.
If the Adapter requires a static IP address, select Static IP for the Network
Setting. Then enter an IP Address and Subnet Mask appropriate for your network. You must specify an IP Address and Subnet Mask for the Adapter on
this screen. Click the Next button, and go to Step 7.
Note: If you set a static IP address on the Adapter, then you may also
need to set a static IP address on your PC. For instructions, go to
“Appendix C: Setting a Static IP Address on Your PC” after you have
set up the Adapter.
7. If you clicked the Yes button for the Wired network choice in Step 5, then
go to Step 9.
If you clicked the Yes button for the Wireless network choice in Step 5, then
the screen shown in Figure 5-6 will appear. The Mode setting shows a
choice of two wireless modes. Select Infrastructure if you want the
Adapter to communicate using an access point or wireless router. Select
Ad-Hoc if you want the Adapter to communicate without using an access
point or wireless router.
In the SSID field, enter your wireless network’s SSID or name. This is the
unique name shared by all devices in a wireless network. The SSID is casesensitive and should have 32 characters or fewer.
Select the channel at which the network broadcasts its wireless signal
(available only if you selected Ad-Hoc for the Mode setting).
Click the Next button.
Figure 5-5
Figure 5-6
14
15
8. The Wireless Security Settings screen, shown in Figure 5-7, appears next. If
you want to enable WEP encryption for greater wireless security, select the
level of WEP encryption, 64-bit or 128-bit, and then enter a Passphrase. If
you want to enter the WEP key manually, then complete the KEY #1 field.
If you want to disable WEP encryption, keep the default, Disabled. Click
the Next button to continue.
9 . Review your settings on the screen shown in Figure 5-8, before the Setup
Wizard starts to copy your files. Click the Save button to continue.
Figure 5-8
11. After the files have been successfully copied, the screen in Figure 5-9 will
appear. Click the Install Utility on PC button to install the Adapter’s Utility
on your PC. This Utility will enable your PC to send digital images and
music files to the Adapter. Click the Exit button if you want to install the
Adapter’s Utility later.
Figure 5-7
Passphrase - Instead of manually entering a WEP key, you can enter a
Passphrase, so a WEP key will be automatically generated after you click
the Next button. The Passphrase is case-sensitive and should have 16
alphanumeric characters or fewer. It must match the passphrase of your
wireless network and is compatible with Linksys wireless products only.
(You will have to enter the WEP key(s) manually on any non-Linksys wireless products.)
KEY #1 - If you are using 64-bit WEP encryption, then the key must consist of exactly 10 hexadecimal characters. If you are using 128-bit WEP
encryption, then the key must consist of exactly 26 hexadecimal characters.
Valid hexadecimal characters are “0”-“9” and “A”-“F”.
Figure 5-9
Proceed to “Chapter 6: Installing and Using the Wireless-B Media
Adapter Utility.”
16
17
Chapter 6: Installing and Using the
Wireless-B Media Adapter Utility
3. The License Agreement screen will appear. If you accept the Agreement,
click the Next button to continue the installation. If you do not accept the
Agreement, click the Cancel button and exit the Utility Wizard.
Overview
This chapter will instruct you on how to install and use the Adapter’s Utility on
your Windows XP PC, which may also be referred to as the host computer. To
use the Adapter, the Utility must be running on your computer. The Utility also
allows you to easily designate folders that hold music and pictures for the
Adapter.
Note: To install the Adapter’s Utility, you must have administrative
rights on your PC.
Installing the Adapter’s Utility
Note: If Windows .NET Framework version 1.0 is not installed on
your PC, then a screen will appear asking you to install it. Click Next
to install .NET Framework version 1.0 and proceed with the installation of the Utility.
1. On the Welcome or Congratulations screen of the Setup Wizard, click the
Install Utility on PC button.
Figure 6-2
4. The Select Music and Pictures Folders screen will appear. To use the music
and pictures held in the default folders, click the Next button. To use a different folder, click the Add button and follow the on-screen directions. To
remove a folder, select it and click the Remove button. When you are finished, click the Next button.
2. The screen shown in Figure 6-1 will appear. Click the Next button.
Figure 6-3
Figure 6-1
18
Note: If your host computer is configured for multiple users and you
have access to their folders, then you can add each user’s folders.
19
5. When you see the Congratulations screen, click the Exit button.
Media Folder Manager
Click Media Folder Manager to open it. The Media Folder Manager screen
will appear and list the current shared media folders (see Figure 6-7).
Figure 6-4
Note: The Utility can be installed on only one PC in your network.
Figure 6-7
Proceed to the next section, “Using the Adapter’s Utility.”
To add a folder:
Using the Adapter’s Utility
1. Click the Add button.
There are two ways to access the Utility, through your PC’s taskbar or through
its Start menu.
Using the Utility’s Icon on Your PC’s Taskbar
To access the Utility, right-click its icon on your PC’s taskbar (see
Figure 6-5
Figure 6-5).
You will see three choices: Media Folder Manager,
About, and Exit (see Figure 6-6). Click Media
Folder Manager to add or remove folders holding
music and pictures. Click About to find out the
version number of the Utility. Click Exit to close
the Utility.
Figure 6-6
Note: If you close the Utility, then the Adapter will not work. If you
need to re-start the Utility, click the Start button. Click All Programs
and Linksys Wireless-B Media Adapter. Click Adapter Utility to
restart the Utility.
20
2. On the Browse for Folder
screen, shown in Figure 68, choose the folder you
want to add, and click the
OK button. To create a new
folder, click the Make New
Folder button and follow
the on-screen instructions.
Click the Cancel button to
return to the Media Folder
Manager screen without
adding a folder.
3. When you are finished,
click the OK button on the
Media Folder Manager
screen.
Figure 6-8
21
To remove a folder:
1. From the list of Selected Media Folders, select the folder you want to
remove.
2. Click the Remove button.
Chapter 7: Connecting the
Wireless-B Media Adapter to Your
TV and Stereo
3. When you are finished, click the OK button.
Overview
Using the Start Menu
To access the Utility, click the Start button. Click All Programs and Linksys
Wireless-B Media Adapter.
You will see three choices: Adapter Utility, Media Folder Manager, and
Uninstall (see Figure 6-9). Click Adapter Utility to restart the Utility. Click
Media Folder Manager to add or remove folders holding music and pictures
(see the “Media Folder Manager” section on the previous page for instructions). Click Uninstall to remove the Utility from your PC.
Figure 6-9
Proceed to “Chapter 7: Connecting the Wireless-B Media Adapter to
Your TV and Stereo.”
22
This chapter will explain how to connect the Adapter to your TV (and stereo, if
you have one). It will also describe how to set up the Adapter from the TV if
you do not wish to run the Setup Wizard on a PC.
If you are using a stereo, go to the “Connecting to Your TV and Stereo” section.
If you are not using a stereo, then you will connect your audio cables to your
TV. Go to the “Connecting to Your TV Only” section.
Connecting to Your TV and Stereo
Figure 7-1
1. Power off the Adapter, and move it to your TV. If you are using a wireless
network, make sure the Adapter’s antenna is pointing straight up in the air.
If you are using a wired network, make sure the cable connections remain
secure.
23
2. Do one of the following:
Connecting to Your TV Only
Connect the S-video cable to the Adapter’s S-video port and the TV’s
S-video in port.
OR
Connect the yellow RCA connectors of the audio/video cable to the
Adapter’s Video port and the TV’s Video in port.
3. Use the color-coded audio/video cable to connect the Adapter’s Left and
Right ports to the stereo’s Audio in ports.
4. On your TV, select the input that matches the connection to the Adapter.
5. On your stereo, select the input that matches the connection to the Adapter.
6. Power on the Adapter. The main menu of the Media Navigator will appear
on your TV.
Figure 7-2
Proceed to the “Placement Options” section.
1. Power off the Adapter, and move it to your TV. If you are using a wireless
network, make sure the Adapter’s antenna is pointing straight up in the air.
If you are using a wired network, make sure the cable connections remain
secure.
2. Do one of the following:
Connect the S-video cable to the Adapter’s S-video port and the TV’s
S-video in port.
OR
Connect the yellow RCA connectors of the audio/video cable to the
Adapter’s Video port and the TV’s Video in port.
3. Use the color-coded audio/video cable to connect the Adapter’s Left and
Right ports to the stereo’s Audio in ports.
4. On your TV, select the input that matches the connection to the Adapter.
5. Power on the Adapter. The main menu of the Media Navigator will appear
on your TV.
Proceed to the “Placement Options” section.
24
25
Placement Options
Using the TV Setup
To protect the cables attached to the Adapter’s back
panel, snap the included cable hood into place. The
dark gray section of the cable hood faces away from
the antenna.
If you haven’t already done so, insert the included AAA batteries into the
Remote Controller. For more information, see “Chapter 3: Getting to Know the
Wireless-B Media Adapter and Its Remote Controller.”
To use the TV Setup to set up the Adapter, follow these instructions:
There are two ways to place the Adapter. The first way
is to place the Adapter horizontally on a surface, so it
sits on four small rubber feet.
The second way is to stand the Adapter vertically on a
surface (see Figure 7-3). To use the stand option, follow these instructions:
1. After you have connected the Adapter to your TV and stereo, connect the
included power adapter to the Power port of the Adapter.
2. Plug the power adapter into an electrical outlet.
Figure 7-3
1. The Adapter includes a base. Insert the end opposite to the antenna into the
base.
3. When the message, “Please Wait”, is displayed on your TV, press the Setup
button on the remote. Then the Media Adapter Setup screen will appear (see
Figure 7-4).
2. Snap the Adapter into the base, so it fits snugly.
3. Place the Adapter in an appropriate location, and if necessary, adjust the
antenna so that it points straight up in the air (see Figure 7-3).
If you have already set up the Adapter using the Setup Wizard, then proceed to “Chapter 8: Using the Media Navigator.”
If you want to set up the Adapter from your TV, then proceed to the next
section, “Using the TV Setup.”
Figure 7-4
You have several settings to configure. To use the on-screen keyboard, press the
Select button on the Remote Controller to move from the settings down to the
keyboard. Then use the arrow buttons to move around the keyboard. To enter a
character, select the character, and press the Select button on the Remote
Controller. When you want to return to the settings, select the on-screen Enter
key, and press the Select button on the Remote Controller.
26
27
When you have finished entering your settings, press the Setup button on the
Remote Controller. The Adapter will save the settings and restart itself.
IP Settings
If the Adapter needs a static IP address, then select Fixed IP, and press the
Select button. If the Adapter will be assigned an IP address automatically by
your network router or other DHCP server, then select DHCP Client, and press
the Select button.
IP Address and Subnet Mask
If you selected Fixed IP, then enter the IP Address and Subnet Mask for the
Adapter in the IP Address and Subnet Mask fields.
Wireless Settings
If your wireless network uses ad-hoc mode, then select Ad-Hoc, and press the
Select button. If your network uses infrastructure mode, then select
Infrastructure, and press the Select button.
SSID
Enter the SSID or network name of your wireless network.
Channel
If your network uses ad-hoc mode, enter the channel setting of your wireless
network.
WEP Encryption
If your network uses 64-bit encryption, then select 64 bits, and press the Select
button. If your network uses 128-bit encryption, then select 128 bits, and press
the Select button. If your network’s WEP encryption is disabled, then select
Disabled, and press the Select button.
WEP Key
If your network uses WEP encryption, then enter its WEP Key. If you are using
64-bit WEP encryption, then the key must consist of exactly 10 hexadecimal
characters. If you are using 128-bit WEP encryption, then the key must consist
of exactly 26 hexadecimal characters. Valid hexadecimal characters are “0”-“9”
and “A”-“F”.
Chapter 8: Using the Media
Navigator
Overview
This chapter explains how to use the Adapter via the Media Navigator. Sample
tasks include:
•
•
•
•
•
Choose Music
Play Music
Choose Pictures
Start a Slideshow
Start a Slideshow with Music
After you have set up the Adapter
and connected it to your TV and
stereo, the main menu will appear
(see Figure 8-1).
The main menu has three choices:
•
•
•
Music
Pictures
Help
If you haven’t already done so,
Figure 8-1
insert the included AAA batteries
into the Remote Controller. For more information, see “Chapter 3: Getting to
Know the Wireless-B Media Adapter and Its Remote Controller.”
To navigate the menus of the Media Navigator, use the directional arrows on
the remote. Press the Select button to make a selection. Press the Menu button
to access the main menu at any time.
When you have finished entering your settings, press the Setup button on the
Remote Controller.
Proceed to “Chapter 8: Using the Media Navigator.”
28
29
Music Menus
At any time, you can use the Music button on the remote to access the Music
menu.
When you select the Music menu,
you see three choices: Choose
Music, Now Playing, and Options.
See Figure 8-2.
Choose Music
The Choose Music screen, shown
in Figure 8-3, lets you select the
music you want to play, using a
variety of sorting methods. Select
music by artist or genre. You can
also select music by folder or
playlist. Depending on your folders and files, you will see additional screens offering the available choices. Press the Select button to make a selection.
Note: To use one of
these sorting methods,
your music files must be
tagged with data such as
artist or genre. If you
need to add or edit tags,
use your media player
software and refer to its
documentation.
Playlists
To play certain songs in a specific
sequence, choose a playlist (see
Figure 8-6). This screen displays
the playlists that you have placed
in your computer’s shared music
folder.
Figure 8-5
Figure 8-2
The Adapter can play lists with the
these two extensions, .M3U and
.ASX.
After you create a playlist, place it
in the shared music folder. See
“Appendix B: Creating a Playlist”
for more information.
Figure 8-3
All Songs
Select All Songs to play every
song in your shared music folder
(see Figure 8-4). This is useful if
you have a small collection of
MP3 and WMA files or if you
want to hear all the songs in your
digital music library.
30
Artists or Genres
If you want to play all the songs by
a certain artist or all the songs of a
certain genre (like jazz or classical), select Artists (see Figure 85) or Genres. If you choose an
artist, then you will be asked to
choose a specific album.
Figure 8-6
Folders
If you sort by Folder, you will see
all the songs in a given folder (see
Figure 8-7). This is useful if you
organize your music by folders on
your computer.
Figure 8-7
Figure 8-4
31
Now Playing
The Now Playing screen, shown in
Figure 8-8, shows the title, artist,
and album of the song that is currently playing. You can switch
songs using the Next or Back buttons on the remote.
Play Music
After you set the options and
select the music you want to hear,
play the music by following these
instructions:
Figure 8-8
1. Select Music.
2. Select the song (or All Songs) to play using the Choose Music menus.
3. Use the Play/Pause and Stop buttons on the remote to control music playback while you view the Now Playing menu on the TV. Use the Next and
Back buttons on the remote to move between songs.
Music Options
You can shuffle the playing order
of songs you have selected and
repeat the selections so that the
music continues to play (see
Figure 8-10). These options are
global. In other words, you set
them once and they remain in
effect until you change the settings. Use the directional arrows
on your remote to scroll through
the settings for these options.
Figure 8-10
Shuffle
Shuffle the songs that you select, whether it is a folder of music, a genre, an
artist, or a playlist. This feature plays the selected group of titles in a random
sequence.
Note: If you select Shuffle, the listing that appears on the TV will not
change; however, the songs will play in a random sequence.
Repeat
This option plays the selected songs repeatedly until you change the selection
or until you stop the Adapter.
4. Press the Options button on
the remote to view the Music
Options screen at any time
(see Figure 8-9). Then you can
shuffle the playing order or
repeat the selected songs.
Back
Select Back to return to the previous screen.
Figure 8-9
32
33
Picture Menus
At any time, you can use the Pictures button on the remote to access the
Pictures menu.
When you select the Pictures
menu, you have three choices:
Choose Pictures, Now Showing,
or Options. See Figure 8-11.
Choose Pictures
The Choose Pictures screen lets
you select the pictures to view (see
Figure 8-12). You can select All
Pictures, which displays all the
pictures in the shared picture folder. You can also sort pictures by
their folder location on the host
computer. After you make your
selection, the Now Showing screen
will automatically appear.
Now Showing
The Now Showing screen, shown
in Figure 8-14, displays thumbnail
sketches of the selected pictures.
Play: slideshow
When you start a slideshow, all of
the images in the selected folder
will appear sequentially on your
TV.
To start a slideshow:
Figure 8-14
1. From the Choose Pictures menu, select a folder to view or select All
Pictures.
Figure 8-11
2. On the Now Showing screen, press the Play/Pause button on the remote.
3. Use the Play/Pause, Stop, Next, and Back buttons on the remote to control
your slideshow.
4. Press the Options button to view the Pictures Options screen at any time.
Then you can shuffle or repeat the slideshow.
All Pictures
Select All Pictures to show every
picture in your shared picture folder (see Figure 8-13). This is useful
if you have a small collection of
images.
To manually run a slideshow, use the left and right arrow buttons on the remote
to change the pictures you are viewing. If a slideshow is running while you do
this, then the word “Pause” appears on the upper left side of the screen.
To start a slideshow with music:
Folders
If you sort by Folder, you will see
all the images in a given folder.
This is useful if you organize your
pictures by folders on your computer.
Figure 8-12
1. Press the Music button on the remote, and select Choose Music.
2. Select the song you want to play from the appropriate music menu.
3. Press the Play button on the remote to start the music.
4. Press the Pictures button on the remote.
5. Select Choose Pictures.
34
Figure 8-13
35
6. From the Choose Pictures menu, select a folder to view or select All
Pictures.
7. On the Now Showing screen, press the Play/Pause button on the remote to
start the slideshow.
Select: view picture
To view a full-screen image, press the Select button when the picture you want
is highlighted. While you are looking at a full-screen image, use the Zoom buttons on the remote to view details of your picture or to zoom out.
Options: change settings
Press the Options button on your remote to change the slideshow settings.
For quick instructions on how to
play your music files, start a
slideshow, or use other features,
select Help from the main menu
(see Figure 8-16).
To move through the Help screens
(one is shown in Figure 8-17), use
the arrow buttons on the remote.
Press the Menu button on the
remote to return to the main menu.
Figure 8-16
Picture Options
You can shuffle the order of selected images, repeat the selections so
that the slideshow continues until
you stop it, and change the length
of time each slide appears during a
slideshow. The directional arrows
on the remote let you scroll
through the settings for these
options. See Figure 8-15.
Shuffle Slideshow
This feature shows the selected
pictures in a random sequence.
Help
Figure 8-15
Figure 8-17
Note: If you select Shuffle, the list that appears on the TV does not
change; however, the pictures will display in a random sequence.
Repeat Slideshow
This option displays the selected pictures repeatedly until you change the selection or until you stop the slideshow.
Slide Duration
You can change how long a slide remains onscreen during a slideshow. The
default value is 5 seconds. Choices include 3, 5, 10, or 15 seconds.
Back
Select Back to return to the previous screen.
36
37
Appendix A: Troubleshooting
This chapter provides solutions to problems that may occur during the installation and operation of the Wireless-B Media Adapter. Read the descriptions
below to solve your problems. If you can’t find an answer here, check the
Linksys website at www.linksys.com.
• Restart the host computer.
• Make sure the network is operating properly. Turn off and on any devices that
are not working properly.
• Check the cable connections between the Adapter and the stereo or TV.
• If you are using a wired configuration, check the other cable connections to
make sure that both ends are securely plugged in.
• If you are using a wireless configuration, check the wireless adapter in the
host computer.
Common Problems and Solutions
1. I have the Adapter connected to my TV, but nothing appears on my TV.
Go through this checklist:
• Check that the power cable is securely connected to both the electrical outlet
and the Adapter.
• Press the Adapter’s Power button to turn it off and on.
• Make sure the video or S-video cable is securely connected to the TV and the
Adapter.
• Make sure that the TV channel matches the video input you selected for the
connection to the Adapter.
2. I see a start-up message on the TV, but the main menu of the Media Navigator
does not appear.
Go through this checklist:
• Reboot your PC.
• Power off the Adapter. Wait a few seconds, and then power on the Adapter.
• Make sure your network is working properly.
• If you are using a wireless connection, make sure the Adapter is within range
of the wireless network. Check the Signal Strength percentage shown at the
bottom of the TV. It should say 40% or higher to ensure successful communication. If the number is too low, consider moving your wireless access
point or router closer to the Adapter.
• If you still encounter problems, check the Adapter’s network settings and
compare them to the settings on your wireless access point or router.
3. On my TV, the Choose Music or Choose Pictures menus are empty.
On your host computer, go to the shared folders that you had selected using
the Utility Wizard. Make sure they contain compatible music files (MP3 or
WMA) and/or image files (JPG, BMP, GIF, or TIF).
4. The music was running, but then it stopped playing.
Go through this checklist:
• Restart the Playlist using the remote and the TV.
• Restart the Adapter.
38
5. The picture won’t change on the TV.
Go through this checklist:
• Press the Play button on the remote to start the slideshow.
• Reset the Adapter by pressing the Reset button and holding it in for 10 seconds.
• Check all cable connections to make sure that both ends are securely plugged
in.
• Make sure the network is operating properly. Turn off and on any devices that
are not working properly.
• Reboot the host computer.
5. When I pause a song, the Media Navigator does not respond. What should I do?
If you pause a song, you cannot move to either the previous or next selection.
You must press the Play button first before making another selection.
Frequently Asked Questions
What types of picture files can I show with the Adapter?
The Adapter supports picture files with the following file extensions: BMP,
GIF, JPG, and TIF. All of these file types are converted to JPG format when
they appear on your TV, so some data loss may occur. This may affect image
quality, so the image quality you see on your TV might not be as good as the
image quality you see on your PC.
What types of music files can I play with the Adapter?
The Adapter supports MP3 and WMA files.
What types of playlist files can I use with the Adapter?
The Adapter supports ASX and M3U files. You can create a playlist with one
of these extensions using software such as Music Match, Winamp, or Windows
Media Player. For more information, see “Appendix B: Creating a Playlist.”
I have multiple user accounts on my host computer. Can files from each user
appear on the TV when I use the Adapter?
39
Yes. Add the media folders for each user to the shared folders list when you run
the Utility Wizard or use the Utility on your host computer. See “Chapter 6:
Installing and Using the Wireless-B Media Adapter Utility.”
Can I play or show files from all the computers on the network using the Adapter?
No. You must move the files to the host computer so that the Adapter’s Utility
can access them.
Can I use a firewall in my configuration?
You might find that the host computer and the Adapter cannot communicate
through a firewall. Please disable your Windows XP firewall on the host computer before you install the Adapter. If you use a third-party firewall on your
home network that is located between the host computer and the Adapter, then
you must either disable it or configure it to accept the Adapter before installation. You might want to install a hardware firewall to protect your home network from Internet intruders before you install the Adapter.
What happens when I set up shared media folders with lots of data to share?
Sharing a large shared media folder may take some time, depending on the
speed of the host computer. You can access whatever media that is already
shared while you wait.
Why are the songs playing in a different order than what I see on the TV menu?
If you select the Shuffle option for a playlist, the Adapter shuffles the songs as
it plays them. However, the playlist that appears on the TV menu does not
reflect the shuffle. Instead, it continues to show the original playlist order.
What happens if the connection between the Adapter and the host computer is
lost?
If the connection is completely lost, then the pictures or music stop after the 20second buffer finishes playing.
What is the best image file type to use for quick performance?
Using the JPG file type will give you the quickest playback.
What is the IEEE 802.11b standard?
It is one of the IEEE standards for wireless networks. The 802.11b standard
allows wireless networking hardware from different manufacturers to communicate, provided that the hardware complies with the 802.11b standard. The
802.11b standard states a maximum data transfer rate of 11Mbps and an operating frequency of 2.4GHz.
What IEEE 802.11b features are supported?
The product supports the following IEEE 802.11b functions:
• CSMA/CA plus Acknowledge protocol
• Multi-Channel Roaming
• Automatic Rate Selection
• RTS/CTS feature
• Fragmentation
• Power Management
What is ad-hoc mode?
When a wireless network is set to ad-hoc mode, the wireless-equipped computers are configured to communicate directly with each other. The ad-hoc
wireless network will not communicate with any wired network.
What is infrastructure mode?
When a wireless network is set to infrastructure mode, the wireless network is
configured to communicate with a wired network through a wireless access
point.
The main menu will appear again when the connection is restored. If it does
not, power the Adapter off and back on again.
What happens if my playlist is extremely long?
If you select more than 1,000 songs to play, it will take a few seconds for the
first song to start playing.
Can I play music from a CD using the Adapter?
Yes, if the CD contains MP3 or WMA files. You cannot play standard audio
CDs through the Adapter.
40
41
Appendix B: Creating a Playlist
A playlist tells the Adapter to play your music files in a specific sequence. You
can use a playlist with either of these file extensions, .M3U and .ASX.
You can use any software that exports a playlist with one of these two extensions. For example, Windows Media Player is included with Windows XP.
Follow these instructions to create a playlist in Windows Media Player:
1. Open Windows Media Player on the host computer.
2. Click Media Library.
3. Click File and then Open to find MP3 files on your computer.
4. Click New Playlist.
5. Enter a name for the Playlist, and click the OK button. The new Playlist
appears on the left.
Appendix C: Setting a Static IP
Address on Your PC
If you need to set a static IP address on your Windows XP computer, then use
the following instructions.
1. If your computer uses the
default interface, then click
the Start button. Click
Connect To and then Show
all connections. See Figure
C-1.
If your computer uses the
Classic interface, then click
the Start button. Click
Settings and then Network
Connections. See Figure C-2.
6. Select the songs you want, and drag them to the Playlist’s name on the left.
Figure C-1
7. Drag and drop the songs to arrange them in the order you want them to play.
Note: You must place any playlist and its music files in a shared
media folder for use by the Adapter.
Follow these instructions to export a playlist to a file:
1. Select Playlist.
2. Click File and then Export Playlist to File.
3. Enter a file name, and click Save.
4. Place the Playlist in a shared folder.
Figure C-2
42
43
2. Right-click the network connection you are using to communicate with the
Adapter. Then click Properties. See Figure C-3.
4. Click the radio button next to Use the
following IP address. Complete the
IP address and Subnet mask fields
with the appropriate information.
Then click the OK button. See Figure
C-5.
5. Click the OK button again. See
Figure C-6.
Figure C-3
Figure C-5
3. On the General tab, select Internet
Protocol (TCP/IP). Then click the
Properties button. See Figure C-4.
Figure C-4
Figure C-6
44
45
Appendix D: Glossary
802.11b - One of the IEEE standards for wireless networking hardware.
Products that adhere to a specific IEEE standard will work with each other,
even if they are manufactured by different companies. The 802.11b standard
specifies a maximum data transfer rate of 11Mbps, an operating frequency of
2.4GHz, and WEP encryption for security. 802.11b networks are also referred
to as Wi-Fi networks.
Adapter - Printed circuit board that plugs into a PC to add to capabilities or
connectivity to a PC. In a networked environment, a network interface card is
the typical adapter that allows the PC or server to connect to the intranet and/or
Internet.
Ad-hoc Network - An ad-hoc network is a group of computers, each with a
wireless adapter, connected as an independent 802.11 wireless LAN. Ad-hoc
wireless computers operate on a peer-to-peer basis, communicating directly
with each other without the use of an access point.
Bandwidth - The transmission capacity of a given facility, in terms of how
much data the facility can transmit in a fixed amount of time; expressed in bits
per second (bps).
Bit - A binary digit. The value—0 or 1—used in the binary numbering system.
Also, the smallest form of data.
DHCP uses the concept of a “lease” or amount of time that a given IP address
will be valid for a computer. The lease time can vary depending on how long a
user is likely to require the Internet connection at a particular location. It's especially useful in education and other environments where users change frequently. Using very short leases, DHCP can dynamically reconfigure networks
in which there are more computers than there are available IP addresses.
DHCP supports static addresses for computers containing Web servers that
need a permanent IP address.
DNS - The domain name system (DNS) is the way that Internet domain name
are located and translated into Internet Protocol (IP) addresses. A domain name
is a meaningful and easy-to-remember “handle” for an Internet address.
CardBus - A high-speed peripherals interface for notebook PCs that delivers
32-bit performance based on PCI bus architecture.
Domain - A subnetwork comprised of a group of clients and servers under the
control of one security database. Dividing LANs into domains improves performance and security.
CSMA/CA (Carrier Sense Multiple Access/Collision Avoidance) - In local
area networking, this is the CSMA technique that combines slotted time-division multiplexing with carrier sense multiple access/collision detection
(CSMA/CD) to avoid having collisions occur a second time.
Driver - A workstation or server software module that provides an interface
between a network interface card and the protocol software running in the computer; it is designed for a specific device, and is installed during the initial
installation of a network-compatible client or server operating system.
CTS (Clear To Send) - An RS-232 signal sent from the receiving station to the
transmitting station that indicates it is ready to accept data.
DSSS (Direct-Sequence Spread Spectrum) - DSSS generates a redundant bit
pattern for all data transmitted. This bit pattern is called a chip (or chipping
code). Even if one or more bits in the chip are damaged during transmission,
statistical techniques embedded in the receiver can recover the original data
without the need for retransmission. To an unintended receiver, DSSS appears
as low power wideband noise and is rejected (ignored) by most narrowband
receivers. However, to an intended receiver (i.e., another wireless LAN end-
Default Gateway - The routing device used to forward all traffic that is not
addressed to a station within the local subnet.
46
DHCP (Dynamic Host Configuration Protocol) - A protocol that lets network
administrators manage centrally and automate the assignment of Internet
Protocol (IP) addresses in an organization's network. Using the Internet's set of
protocol (TCP/IP), each machine that can connect to the Internet needs a
unique IP address. When an organization sets up its computer users with a connection to the Internet, an IP address must be assigned to each machine.
Without DHCP, the IP address must be entered manually at each computer and,
if computers move to another location in another part of the network, a new IP
address must be entered. DHCP lets a network administrator supervise and distribute IP addresses from a central point and automatically sends a new IP
address when a computer is plugged into a different place in the network.
47
point), the DSSS signal is recognized as the only valid signal, and interference
is inherently rejected (ignored).
Encryption - A security method that applies a specific algorithm to data in
order to alter the data's appearance and prevent other devices from reading the
information.
Ethernet - IEEE standard network protocol that specifies how data is placed
on and retrieved from a common transmission medium. Has a transfer rate of
10 Mbps. Forms the underlying transport vehicle used by several upper-level
protocols, including TCP/IP and XNS.
FHSS (Frequency Hopping Spread Spectrum) - FHSS continuously changes
(hops) the carrier frequency of a conventional carrier several times per second
according to a pseudo-random set of channels. Because a fixed frequency is not
used, and only the transmitter and receiver know the hop patterns, interception
of FHSS is extremely difficult.
Fragmentation - Breaking a data into smaller units when transmitting over a
network medium that cannot support the original size of the data.
Gateway - A device that interconnects networks with different, incompatible
communications protocols.
Hardware - Hardware is the physical aspect of computers, telecommunications, and other information technology devices. The term arose as a way to distinguish the “box” and the electronic circuitry and components of a computer
from the program you put in it to make it do things. The program came to be
known as the software.
Hop - The link between two network nodes.
48
Infrastructure Network - An infrastructure network is a group of computers
or other devices, each with a wireless adapter, connected as an 802.11 wireless
LAN. In infrastructure mode, the wireless devices communicate with each
other and to a wired network by first going through an access point. An infrastructure wireless network connected to a wired network is referred to as a
Basic Service Set. A set of two or more BSS in a single network is referred to
as an Extended Service Set. Infrastructure mode is useful at a corporation
scale, or when it is necessary to connect the wired and wireless networks.
IP (Internet Protocol) - The method or protocol by which data is sent from one
computer to another on the Internet. It is a standard set of rules, procedures, or
conventions relating to the format and timing of data transmission between two
computers that they must accept and use to be able to understand each other.
IP Address - In the most widely installed level of the Internet Protocol (IP)
today, an IP address is a 32-binary digit number that identifies each sender or
receiver of information that is sent across the Internet. When you request an
HTML page or send e-mail, the Internet Protocol part of TCP/IP includes your
IP address in the message and sends it to the IP address that is obtained by looking up the domain name in the Uniform Resource Locator you requested or in
the e-mail address you're sending a note to. At the other end, the recipient can
see the IP address of the Web page requestor or the e-mail sender and can
respond by sending another message using the IP address it received.
IRQ (Interrupt ReQuest) - A hardware interrupt on a PC. There are 16 IRQ
lines used to signal the CPU that a peripheral event has started or terminated.
Except for PCI devices, two devices cannot use the same line.
ISM band - The FCC and their counterparts outside of the U.S. have set aside
bandwidth for unlicensed use in the ISM (Industrial, Scientific and Medical)
band. Spectrum in the vicinity of 2.4 GHz, in particular, is being made available worldwide. This presents a truly revolutionary opportunity to place convenient high-speed wireless capabilities in the hands of users around the globe.
IEEE (The Institute of Electrical and Electronics Engineers) - The IEEE
describes itself as “the world’s largest technical professional society, promoting
the development and application of electrotechnology and allied sciences for
the benefit of humanity, the advancement of the profession, and the well-being
of our members.”
ISP (Internet Service Provider) - A company that provides individuals and
companies access to the Internet and other related services such as Web site
building and virtual hosting.
The IEEE fosters the development of standards that often become national and
international standards. The organization publishes a number of journals, has
many local chapters, and several large societies in special areas, such as the
IEEE Computer Society.
LAN (Local Area Network) - A group of computers and associated devices that
share a common communications line and typically share the resources of a
single processor or server within a small geographic area (for example, within
an office building).
49
MAC (Media Access Control) Address - A unique number assigned by the
manufacturer to any Ethernet networking device, such as a network adapter,
that allows the network to identify it at the hardware level.
Mbps (Megabits per second) - One million bits per second; unit of measurement for data transmission.
Network - A system that transmits any combination of voice, video and/or data
between users.
Notebook (PC) - A notebook computer is a battery-powered personal computer generally smaller than a briefcase that can easily be transported and conveniently used in temporary spaces such as on airplanes, in libraries, temporary
offices, and at meetings. A notebook computer, sometimes called a laptop computer, typically weighs less than five pounds and is three inches or less in thickness.
RTS (Request To Send) - An RS-232 signal sent from the transmitting station
to the receiving station requesting permission to transmit.
Server - Any computer whose function in a network is to provide user access
to files, printing, communications, and other services.
Passphrase - Used much like a password, a passphrase simplifies the WEP
encryption process by automatically generating the WEP encryption keys for
Linksys products.
Software - Instructions for the computer. A series of instructions that performs
a particular task is called a “program.” The two major categories of software are
“system software” and “application software.” System software is made up of
control programs such as the operating system and database management system (DBMS). Application software is any program that processes data for the
user.
PC Card - A credit-card sized removable module that contains memory, I/O,
or a hard disk.
A common misconception is that software is data. It is not. Software tells the
hardware how to process the data.
PCI (Peripheral Component Interconnect) - A peripheral bus commonly used
in PCs, Macintoshes and workstations. It was designed primarily by Intel and
first appeared on PCs in late 1993. PCI provides a high-speed data path
between the CPU and peripheral devices (video, disk, network, etc.). There are
typically three or four PCI slots on the motherboard. In a Pentium PC, there is
generally a mix of PCI and ISA slots or PCI and EISA slots. Early on, the PCI
bus was known as a “local bus.”
Spread Spectrum - Spread Spectrum technology is a wideband radio frequency technique developed by the military for use in reliable, secure, mission-critical communications systems. It is designed to trade off bandwidth efficiency
for reliability, integrity, and security. In other words, more bandwidth is consumed than in the case of narrowband transmission, but the trade off produces
a signal that is, in effect, louder and thus easier to detect, provided that the
receiver knows the parameters of the spread-spectrum signal being broadcast.
If a receiver is not tuned to the right frequency, a spread-spectrum signal looks
like background noise. There are two main alternatives, Direct Sequence
Spread Spectrum (DSSS) and Frequency Hopping Spread Spectrum (FHSS).
PCI provides “plug and play” capability, automatically configuring the PCI
cards at startup. When PCI is used with the ISA bus, the only thing that is generally required is to indicate in the CMOS memory which IRQs are already in
use by ISA cards. PCI takes care of the rest.
PCI allows IRQs to be shared, which helps to solve the problem of limited IRQs
available on a PC. For example, if there were only one IRQ left over after ISA
devices were given their required IRQs, all PCI devices could share it. In a PCIonly machine, there cannot be insufficient IRQs, as all can be shared.
50
Roaming - In an infrastructure mode wireless network, this refers to the ability to move out of one access point's range and into another and transparently
reassociate and reauthenticate to the new access point. This reassociation and
reauthentication should occur without user intervention and ideally without
interruption to network connectivity. A typical scenario would be a location
with multiple access points, where users can physically relocate from one area
to another and easily maintain connectivity.
SSID (Service Set IDentifier) - A unique name shared among all points in a
wireless network. The SSID must be identical for each point in the wireless network and is case-sensitive.
Subnet Mask - The method used for splitting IP networks into a series of subgroups, or subnets. The mask is a binary pattern that is matched up with the IP
address to turn part of the host ID address field into a field for subnets.
51
TCP (Transmission Control Protocol) - A method (protocol) used along with
the IP (Internet Protocol) to send data in the form of message units (datagram)
between network devices over a LAN or WAN. While IP takes care of handling
the actual delivery of the data (routing), TCP takes care of keeping track of the
individual units of data (called packets) that a message is divided into for efficient delivery over the network. TCP is known as a “connection oriented” protocol due to requiring the receiver of a packet to return an acknowledgment of
receipt to the sender of the packet resulting in transmission control.
TCP/IP (Transmission Control Protocol/Internet Protocol) - The basic communication language or set of protocols for communications over a network
(developed specifically for the Internet). TCP/IP defines a suite or group of
protocols and not only TCP and IP.
Topology - A network’s topology is a logical characterization of how the
devices on the network are connected and the distances between them. The
most common network devices include hubs, switches, routers, and gateways.
Most large networks contain several levels of interconnection, the most important of which include edge connections, backbone connections, and wide-area
connections.
WAN (Wide Area Network) - A communications network that covers a relatively large geographic area, consisting of two or more LANs. Broadband communication over the WAN is often through public networks such as the telephone (DSL) or cable systems, or through leased lines or satellites. In its most
basic definition, the Internet could be considered a WAN.
WEP (Wired Equivalent Privacy) - A data privacy mechanism based on a 64bit or 128-bit shared key algorithm, as described in the IEEE 802.11 standard.
WLAN (Wireless Local Area Network) - A group of computers and associated devices that communicate with each other wirelessly.
52
Appendix E: Specifications
Standards
IEEE 802.11b, IEEE 802.3, IEEE 802.3u
Ports
1 10/100 RJ-45 Port, Power Port,
S-Video Output, Composite Video Output,
RCA Audio Output
Buttons
Power, Uplink
Channels
802.11b
11 Channels (US, Canada)
13 Channels (Europe)
14 Channels (Japan)
LEDs
Ready, Wireless, Ethernet
Transmitted Power
16 dBm
Receive Sensitivity
(typical)
-82 dBm @ 11Mbps
-85 dBm @ 5.5Mbps
-89 dBm @ 2Mbps
-91 dBm @ 1Mbps
Peak Gain of the
Antenna
1.5 dBi
Security Features
WEP Encryption
WEP Key Bits
64, 128-bit
53
Appendix F: Warranty Information
Environmental
Dimensions
6.30" x 7.48" x 1.97"
(160 mm x 190 mm x 50 mm)
Unit Weight
13.05 oz. (0.37 kg)
Power
External, 5V DC, 2.0 A
Certifications
FCC
Operating Temp.
0°C to 60°C (32°F to 140°F)
Storage Temp.
0°C to 85°C (32°F to 185°F)
Operating Humidity 10% to 85%, Non-Condensing
Storage Humidity
54
5% to 90%, Non-Condensing
BE SURE TO HAVE YOUR PROOF OF PURCHASE AND A BARCODE
FROM THE PRODUCT’S PACKAGING ON HAND WHEN CALLING.
RETURN REQUESTS CANNOT BE PROCESSED WITHOUT PROOF OF
PURCHASE.
IN NO EVENT SHALL LINKSYS’ LIABILITY EXCEED THE PRICE PAID
FOR THE PRODUCT FROM DIRECT, INDIRECT, SPECIAL, INCIDENTAL, OR CONSEQUENTIAL DAMAGES RESULTING FROM THE USE
OF THE PRODUCT, ITS ACCOMPANYING SOFTWARE, OR ITS DOCUMENTATION. LINKSYS DOES NOT OFFER REFUNDS FOR ANY PRODUCT.
LINKSYS OFFERS CROSS SHIPMENTS, A FASTER PROCESS FOR PROCESSING AND RECEIVING YOUR REPLACEMENT. LINKSYS PAYS
FOR UPS GROUND ONLY. ALL CUSTOMERS LOCATED OUTSIDE OF
THE UNITED STATES OF AMERICA AND CANADA SHALL BE HELD
RESPONSIBLE FOR SHIPPING AND HANDLING CHARGES. PLEASE
CALL LINKSYS FOR MORE DETAILS.
55
Appendix G: Contact Information
For help with the installation or operation of the Wireless-B Media Adapter,
contact Linksys Technical Support at one of the phone numbers or Internet
addresses below.
Sales Information
Technical Support
RMA (Return Merchandise
Authorization) Issues
Fax
E-mail
Web
FTP Site
800-546-5797 (LINKSYS)
800-326-7114
www.linksys.com (or call 949-271-5461)
949-265-6655
[email protected]
http://www.linksys.com
ftp.linksys.com
http://www.linksys.com
© Copyright 2003 Cisco Systems, Inc. All rights reserved.
56