1
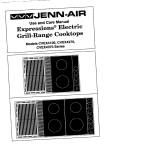
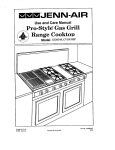
ENN-AIR
Use and Care Manual
Electric
Cooktops
and Downdraft
with Grill
Options
Models CCE1400, CVE1400, CVE4180,
CVE4210, CVE4270, CVE4370
Model CVE1400
Model CVE4270
_iii_
¸i!/_! !
Read before operating your cooktop
All appliances - regardless of the manufacturer- have the potential through
improperor careless use to create safety problems. Therefore the following
safety precautionsshouldbe observed:
1.
2.
3.
4.
5.
6.
7.
8.
9.
10.
11.
12.
13.
Be sure your appliance is properlyinstalledand groundedby a qualified
technician.
Never use your appliance for warming or heating the room.
Childrenshouldnot be leftalone or unattendedin area where appliance is
in use. They shouldnever be allowed to sit or stand on any part of the
appliance.
Wear proper apparel. Loose-fittingor hanginggarments should never be
worn while usingthe appliance.
Do not repair or replace any part of the appliance unless specifically
recommendedin this manual. Allother servicingshouldbe referredto an
authorizedJenn-Air Service Contractor.
Flammable materialsshould not be stored near surface units.
Donotusewaterongreasefires. Smotherfireorflameorusedrychemicai
or foam-type extinguisher.
Use only dry potholders. Moistor damp potholderson hot surfaces may
resultinburnsfromsteam. Do notlet potholdertouch hot heatingelements.
Do not use a towel or other bulky cloth.
Use proper pan size. Many appliances are equipped with one or more
surface units of different size. Select cookware havingflat bottoms large
enoughto cover the surface unitheatingelement. The use of undersized
cookwarewillexposea portionof the heatingelementto directcontactand
may resultinignitionofclothing. Properrelationshipofcookwaretoheating
element will also improveefficiency and performance.
Never leave surface units unattended at high heat settings. Boil over
causes smokingand greasy spillovers that may ignite.
On conventionalelement cooktopsmake sure that drip pans are in place.
Absence of these pans duringcooking may subjectwiringor components
underneathto damage.
Do not use aluminum foil to line surface unit drip pans or grill basin.
Installationof these linersmay result in an electric shock or fire hazard.
Glazed cookware - only certain types of glass, glass-ceramic, ceramic,
earthenware, or other glazed cookware are suitable for cooktop surface
withoutbreakingdue to the suddenchangein temperature. Use onlysuch
cookware as you know has been approvedfor this purpose.
2
14. Cookware handles shouldbe turned inwardand notextend over adjacent
surface heatingelements to avoid burns,ignitionof flammable materials
and spillagedue to unintentionalcontactwith the cookware.
15. Do not soak or immerse removableheating elements in water.
16. CAUTION - Do not store items of interestto children in cabinets above
cooktop-childrenclimbingonthe cooktopto reachitemscouldbeseriously
injured.
17. Do not touch surface unitsor areas near units. Surface unitsor heating
elements may be hot even though they are dark in color. Areas near
surface units may become hot enoughto cause burns. During and after
use,do nottouchor letclothingorotherflammable materialscontactthese
areas until they have had sufficienttime to cool. Other surfaces may
become hot enough to cause burns - among these surfaces are the
cooktop.
18. Do not cook on glass-ceramiccookingsurface if the cooktop is broken.
Cleaning solutionsand spilloversmay penetratethe brokencooktopand
createa shockhazard. Contactan authorizedJenn-AirServiceContractor.
19. Clean glass-ceramiccooktopswithcaution. If wet spongeor cloth isused
to wipespillson a hotcookingarea, becarefulto avoidsteam burns. Some
cleansers can produce noxious fumes if applied to a hot surface.
20. Do not operatewithdamaged cookingelement after any productmalfunction untilproperrepair has been made.
21. Keep all switches"OFF" when unit is not in use.
22. Clean only parts listedin thismanual and use proceduresrecommended.
23. This appliance has been tested for safe performance usingconventional
cookware. Do not use any devicesor accessoriesthatare not specifically
recommendedinthismanual. Do notuseeyelidcoversfor thesurface units
orstovetopgrills. The use of devicesor accessoriesthat are notexpressly
recommendedin this manualcan create serioussafety hazards, resultin
performance problems, and reduce the life of the components of the
appliance.
- SAVE THESE INSTRUCTIONS 3
Congratulationson your choice of a Jenn-Air electric cooktop. The chart below describesthe differencesbetween models.
Model#
CCE1400
CVE1400
CVE4180
CVE 4210
CVE4270
CVE4370
Downdraft
no
yes
yes
yes
yes
yes
Convertible
no
no
left bay
2 bays
2 bays
3 bays
Grill/Elements included
4 coil elements
4 coil elements
1 grill, 2 coil elements
none
1 grill
1 grill
Before you begin cookingwith your new cooktop, please take a few minutesto read
and become familiar with the instructionsin this book. On the followingpages you will
find a wealth of information regarding all aspects of using your new cooktop. By
followingthe instructionscarefully, you will be able to fullyenjoy and properly maintain
your cooktopand achieve excellent results withthe food you prepare.
Shouldyou have any questionsabout usingyourJenn-Aircooktopor need a use and
care manual for your cooktop cartridge,write to us at Jenn-Air Customer Assistance, c/o Maytag Customer Service, P.O. Box 2370, Cleveland, TN U.S.A. 373202370. Be sure to providethe model number for the manual requested.
=.
Accessories ......................
Installing ...................................................................
12
Optional ...................................................................
20
Cartridges ........................ Installing ........... :.........................................................
7
Optional ...................................................................
21
Cleaning ........................... Cooktop Parts ....................................................
17-18
Grill ........................................................................... 16
ConventionalCdil Cooktop ........................................................................... 10-11
Cookwsre ......................... General ............................................................ 8-9, 10
Canning ................................................................ 9,11
Ducting ................................................................................................................ 19
Grill .................................. Cleaning ................................................................... 16
Grill Guide ................................................................ 14
GrillingTips .............................................................. 15
Installing................................................................... 12
Usage ...................................................................... 13
Safety Precautions........................................................................................... 2-3
Service Information............................................................................................. 22
Surface Controls................................................................................................... 6
VentilationSystem................................................................................................ 5
4
The built-in ventilation system removes cookingvapors, odors and smoke from foods
prepared on the cooktop, grill and grill accessories. Regular use of this system will
insure a more comfortable and less humid kitchen which is free of heavy cooking
odors and fumes that normally create a frequent need for cleaning and redecorating.
I Using the Ventilation System I
• To operate the ventilationsystem manually, push the switch located in front of the
air grille.If you push on the left side of the switch,the fan will operate at the Lo
speed. If you push on the right side of the switch, the fan will operate at the Hi
speed. To turn the fan off, the switchshould be returned to the middle (level)
position.
• The ventilationsystemwill operate automatically when the grillelement is in use.
DuringgdllJng,the fan speed is automaticallyset for the Hi settingAND cannot be
changed to Lo speed.
• Use Hi fan speed for capturingsteam. Use Lo fan speed for capturing smoke
when pan frying.
• The fan can be used to removestrongodorsfrom the kitchenas when chopping
onionsnear the fan.
controlthat may turn on the downdraftfan when largecookpotsare used
for extended periodson the large elements. The fan will shut offwhen
cooktophas
down.
(See
p. 10.) designedwith an automatic
I the
NOTE
CVE1400 cooled
OWNERS:
The
cooktopis
I Cleaning the Ventilation System I
Air Grille: The air grilleliftsoffeasily. Wipe cleanorwash in sinkwithmild household
detergents. May be cleaned in dishwasher.
Filter: Turn offventilationsystembeforeremoving.Turnfilter
,
retainer clipto removefilter.The filter is a permanent type and
should be cleaned when soiled. Clean in sink with warm water
IMPORTANT: DO NOT OPERATE SYSTEM WITHOUT
and liquid dishwashing detergent or in dishwasher.
FILTER. Filter should always be placed at an angle. As you
face the front of the cooktop, the top of the filter should rest
against the left side of the vent opening and the bottom of the
filter should rest against the right side of the vent chamber at
the bottom. (NOTE: Iffilter isflat against the fan wall, ventilation
effectiveness is reduced.)
Ventilation Chamber: This area, which houses the filter,
shouldbe cleanedinthe eventof spillsorwheneverit becomes
...........................................
coated witha film of grease. The ventilation chamber maybe
cleaned with paper towel, damp cloth, or sponge and with a
mild householddetergentor cleanser.
5
The infinite surface controls provide flexibility in setting selection when using the cooktop or grill.
J To Set Controls
J
• Since the controls are a push-turn type, they must be pushed down before turning. To set (from the OFF position), push down on control knob and turn in either
direction to desired setting.
• When the control is in any position, other than OFF, it may be turned in any direction without pushing down.
• The red light bar (in front of the control knob area) will glow when any control knob
is ON.
I Control Location s
j
_1.
4.7
3. Rightfront element (frontEnergy-Saver or Standard grill)
2.
1, Leftrearelement(rearEnergy-SaverorStandardgrill)
Left
front
4,
Right
rearelement(front
element (rearEnergy-Saver)
Energy-Saver)
Note: For model CVE4370, the right bay is for
cooktopcartridgesonly.
//I_
/\_i_
_
/ 2.
NOTE: The =Energy-Saver"grillelement (right)isincludedwith some cooktops or may be purchased as an option for most models. This permits
utilizing only half of the grill area, if desired, or using different controlsettings for the front and rear position of the element. When using this element, both cooktop controls,front and rear, must be turned on in order to
use the fullgrill area. For model CVE4180, thestandard grillwas included.
See directions above.
,
_" _
I
I
3.-_
,- .
,I
-I---
I
,. -...- - ,.
II
_ _"
I"q-FF
J Suggested Control Settings for Surface Elements I
The size and type of cookware used and the amount and type of food being cooked will
influence the setting needed for best cooking results. Electrical line voltage may also
vary, which will affect the needed control setting. The setting indicated should serve as
a guide while you become familiar with your cooktop.
Hi
Afast heatto startcookingquickly,to bringliquidstoa boil,to preheatoilfordeep fatfrying.
Usedformostgrilling.
7-10 (MediumHigh)Forfastfryingorbrowningfoods,tomaintainrapidboiloflargeamountsoffood,
to maintainoiltemperaturefordeepfatfrying.
5-6
(Medium)Forfoodscookedinadoubleboiler,saut6ing,slowboiloflargeamountsoffood,and
mostfrying.
3-4
(MediumLo)Tocontinuecookingfoodsstartedonhighersettings.
Lc-2 Maintainingservingtemperaturesoffoods,simmeringfoods,meltingbutterorchocolate.
The controls offer flexibility in setting selection, On settings other than Hi, you may adjust
the controls above or below the numbered setting for best results. This applies to
settings when using cooktop cartridges or when using the grillor any of the accessories.
Suggested settings are provided as general guidelines.
6
I
Cooktop cartridges can be installed in most cooktops. Cartridge options include
conventionalcoil, halogen,radiant, or solid element.
1. If the grillgrates,element, and/or grill-rocksare in place, remove before installing
a cooktopcartridge. Clean basinpan of any grease accumulation. (See page 16
for cleaningrecommendations.)
2. To installanyof the optionalcooktopcartridges,be surecontrols are OFF. Position
the cartridge terminal plug towardsthe terminal receptacle.
3. Slide the cartridge towards the receptacle until the cartridge terminal plug is
completely engaged.
4. Lower the oppositeend of the cartridge intothe cooktop untilit is flush with the
surface. Your cooktopis now ready to use.
I To Remove Cartridges I
1, Controlsmustbe OFF and the cartridge shouldbe cool
2. Liftup on the "tab"located on the cartridgeuntiltop of cartridgeclears the opening
of the cooktopby about2 inches, Liftingthe cartridgetoohighwhile stillengaged
in the receptacle coulddamage the terminal plug.
3. To disengageterminal,hold cartridge by the sides and slideaway fromthe terminal
receptacle. Lift out when fully unplugged.
4. A storagetray, Model A350 is available and can be used for storing a cartridge.
5. Do not stack cartridgeswhere they may fall or be damaged. Never store other
materialson top of a glass-ceramiccartridgessincethis coulddamage or mar the
surface.
Note: Remember to replace the air gdlle before usingthe ventilationsystem.
For best results,canning shouldbe done on the conventionalcoil cartridge/cooktop.
Canningelement accessory, Model A145A, makes it possibleto use large oversized
canners withthe conventionalcoil cartridge/cooktop.
For additiona/ information, refer to use and care manua/ packaged with your cartridge.
To achieve optimum cooking performance, use heavy gauge, f/at, smooth bottom
cookpotsthatconformto the diameterof theelement (nomorethan one inchoverhang).
Propercookpotswillminimizecookingtimes,use lesselectricity,cookfood more evenly
and require less water or oil.
Cookpotswiththin, uneven bottomsdo not adequatelyconduct heat from the element
to the food in the cookpotswhichresultsin hotspots,burnedor underdonefood. Using
bad cookpotsalso requiresmore water, time, and energy to cook food.
I Selecting Proper Cookware I
• Select heavy gauge cookpots. Usually heavy gauge cookpots will not change
shape when heated.
• Use cookpots with flat, smooth bottoms. The twowaysto determineifcookpots
have a flat, smoothbottomare the ruler test and the cookingtest.
I Ruler Test: I
1. Place the edge of ruler acrossthe
bottom of the pot.
2. Hold up to the light.
3. No light should be visible under the
ruler.
-i.,._.,.,.,
I Cooking Test: I
1. Put 1 inch of water intothe cookpot.
2. Place cookpot on the element. Turn
controlto the HI setting.
3. Observethe bubbleformationto determinethe heat distribution.If the bubblesare
uniformacross the cookpot,the cookpotwill performsatisfactorily.If the bubbles
are not uniform,the bubbleswill indicatethe hot spots.
• Match the size of the cookpot to the size of the element. Ideally,the cookpot
will be the same size or slightlylarger.
8
I Improper Cookware J
• Do not use cookware that extends more than 1 inch beyond the edge of the
element.
• Do notusea small cookpotona largeelement. Notonlycan thiscausethe element
to requiremore energyand time, butit can also resultin spilloversburningontothe
element whichcause extra effort in cleaning.
• Do not use nonflatspecialty items that are oversized, uneven or do not meet
proper cookwarespecificationssuch as roundbottomwoks with rings, griddles,
rippledbottom canners,lobsterpots, large pressurecanners, etc.
[ Home Canning I
Acceptable canning pots should not be oversized and must have a flat bottom. Note:
Canning element accessory, A145A, makes it possible to use large oversized, flanged
or rippled bottom canners. (See p 11.) When canners do not meet these standards, the
use of the HI heat setting becomes excessive and may result in damage to the cooktop.
In addition, water may not come to a boil and canners may not reach 10 lb. of pressure.
The acceptable canning procedure uses the HI setting just long enough to bring the
water to a boil, then lower the setting to maintain the water temperature.
I Characteristics of Cookware Materials I
Heavy gauge cookpotswith flat, smooth bottoms will usuallywork in a similarway.
However,there are some differencesin the cookingperformanceof variousmaterials.
• Aluminum cookpotsheat quicklyand evenly. Best suitedfor simmering,braising,
boiling and frying.
• Stainless steel cookpots will evenly distribute heat if constructed of tri-ply or
combined with other metals such as aluminum and copper. Use for cooking
functions similar to aluminum.
• Cast iron cookpots are slow to heat but cook more evenly once temperature is
reached. Use for long term low heat cooking or for browning and frying.
• Glass ceramic, earthenware, heat-proof glass or glazed cookpots can be used if
recommended by the manufacturer for cookpot cooking. Do not use with trivets.
Best used on low to medium control settings.
• Porcelain enamel-on-steel or porcelain enamel-on-cast iron should be used
accordingto manufacturer'sdirections. Do not allow to boil dry.
• For best results,always use recommendedcookware.
• Differentcookpotsand differentamountsof food being prepared will influencethe
controlsettingsneededfor best results. Forfastest cooking,startwiththe surface
controlon Hi for one minute;then turn the controlto the lower desired setting.
Coveringpans, wheneverpossible,speeds cookingand is more energyefficient.
• Do notallow pans to boildry as thiscoulddamage both the cooktopand the pan.
• Do not drop heavy cookwareon the cooktopsurface.
I Selecting Proper Cookware I
• Select cookware with flat bottoms. Flat bottom pans are the fastest and best
conductorsof heat and providethe most consistentand satisfactory results. The
entirebottomof the pan shouldtouchthe heatingelementevenly, Avoidusingpans
withconvex,concave orirregularbottoms. A pan whichisnotfiat receivesthe most
heat at the pointof contact,whichcauses "hotspots"and uneven heat distribution.
Hot spotscan resultin scorchingor burningof the food. Uneven heat distribution
slows the cookingprocessand wastes energy.
• To determineif pan is flat, lay a straightedge ruler againstthe bottom. (See p. 8)
• Do notuse a pan witha turneddownflange aroundthe bottomor a ripplebottom.
• Do not usea pans thatextend morethan 1 inchon eithersideof the element. Use
the correctsize panforthe size of the heatingelement. (See exceptionsforcanners
and stockpotsbelow.)
• Do not use wire trivetsor any kind of heat retardingpad between the pan and
element. Reduce the controlsetting instead.
• Specialcookingequipmentwithoutflat bottoms,such as the Orientalwok, should
not be used on the cooktop. Use the Jenn-Air wok accessory, Mode/A0142, on
the cooktop. It has a flat bottomand is designedto be used on the smallelement.
• Large stockpotsand canners should be used with Jenn-Air's "Big-pot" canning
element only (ModelA145A). The use of large pans on the largeelementon Hi for
extended periodsof time can cause damage to the cooktop,discolorchromedrip
pans,shortenthe life of the element,as wellas trap excessheat insidethe cooktop.
NOTE: CCE1400OWNERS:Sustainedtrappedheatcancausethelargeelements
to cycleoff.Elementswillcyclebackon afterthecooktophascooleddown.
CVE1400OWNERS:Sustainedtrappedheatcancausethedowndraftfan tocycle
on. Downdrafffan willc)/cleoffafterthecooktophascooleddown.
J Large Stockpots
or Canners J
Canning element accessory, Model
A145A,makesitpossibleto uselarge
oversized flanged or rippled bottom
ca.nners.
L J
i
i
RIGHT
10
I Follow These ProceduresWhen Canning J
• Bringwater to boilatHi setting;after boilinghas begun, reduce heat to lowestsetting
that will maintainboiling.
• Make certain cannerfits over center of surfaceunit.
• Flat-bottomedcanners give the best canning results.
• Use canning recipes from a reputable source such as the manufacturerof your
canner and manufacturersof canningjars.
• Remember that canning is a processthat creates large amounts of steam. Be
carefulandfollowequipmentinstructionsto avoidburnsfrom steam or hot canners.
• Rememberthat ifyour area has lowvoltageat times,canningmaytake longerthan
indicatedby the directions.
I Cleaning
the Conventional
Coil Cooklop
I
Be sure all control knobs are in the OFF position before cleaningor removingheating
elements.
Never immerse cartridge in waterto clean. This can damage wiring. A drain holewithin
the cartridgepermitsdrainageof normalspillsintothe porcelainbasin panwhere it will
drainintothe grease container. Bottomof cartridge maybe wipedclean withdetergent
solutionif necessary.
I Heating Elements I
Under normal conditions, mostsoilwill burnoffelements. The heatingelementsunplug
for your conveniencein cleaningthe drip pans. Lift the elements slightlyand pull away
from receptacle. DO NOT IMMERSE ELEMENTS IN WATER. To replace elements,
push completelyintothe receptacle. Make surethe elementsfit flat.
I Drip Pans I
To keep the like-newappearance, olden freouent/v and never allow an_vthinato burn on
twice. Remove soiledpans by first removingcooled heatingelement.
• For light to moderate soil: Clean by wiping with soapy dishclothor Cooktop
Cleaning Creme (Part No. 20000001) and spongeor clean in dishwasher. Rinse
and dry,
• To loosen baked on soils: Place drip pans in pan with 2 quarts of water and boil
for 20 minutes. Remember,all drip pans cannotbe boiledat once because element being used must have a drip pan in place.
• For stubborn stains: Rub lightlywithsoapyS.O.S. padsor nonabrasivecleansers.
Note on Chrome Drip Pans: Do not use abrasivecleansers, steel wool or cleansers
not recommended for use on chrome. A bluing of the drip pans indicatesimproper
cookware selectionand/or usingexcessivelyhigh heat and cannot be removed.
Note on Porcelain Drip Pans: For extremely stubbornstains, use an oven cleaner.
Allow to sit overnight,then rinse. CAUTION: When using an oven cleaner, avoid
spraying other areas.
11
The grillaccessory consistsof two black grill grates, a grillelement and two grill-rocks.
/lllllll/liliJ
I To Install Grill I
1. Before installinggrillcomponents,be certain surface controlsare OFF.
2. Place the two grill-rocksintoan empty basinpan withtheir handlesrunningparallel
to the frontof the cooktop. These grill-rocksmust be used since they supportthe
grillelement.
3. Positionthe grill element with the terminal plug towardsthe terminal receptacle.
Slide the element towards the receptacle until the terminal plug is completely
engaged. The grillelement shouldrest on the handles of the grill-rocks.
4. Place the black grillgrateson the top of the cooktop.
Note: The cookingbay on the extreme right of Model CVE4370 acceptscooktop
cartridges only.
I To Remove Grill I
1. Remove grill componentsonce they are cool. Be sure controlsare OFF.
2. To remove grillelement, pull away from receptacle untilit is unplugged. (Note:
Liftingthe element too highwhile stillengagedin the receptaclecoulddamage the
terminal plug.)
3. A storagetray, Model A350, is availablefor purchaseand can be used for storing
the grill assembly.
I Installing Other Accessories I
1. Remove the two black grill grates from the grill. Now you are ready to use the
optionalgrillaccessories.
2. Reviewthe instructionsfor installingand usingthe accessoriesthat are packaged
with the accessory.
12
¢
I Using the Grill I
• Before the first use, wash your new grill grates in hot soapy water, rinse and dry.
Then "season"the surface by wiping on a thin coating of cookingoil. Remove
excess oil by wiping again with another paper towel. This procedure shouldbe
repeated when either: a) cleaning in the dishwasher since the detergent may
removeseasoning,or b) anytimea surgar-basedmarinade(forexample,barbecue
sauce) is goingto be used.
• Preheatthe grillon Hi for 5 minutes. Preheatingimprovesthe flavor, appearance
of meats andquicklysears the meat to help retainthe juices. The heatingelement
shouldglowa brightcherry red.
• Use nonmetallic spatulas or utensils to prevent damaging the Excalibur ®nonstick
grill grate finish.
• Excessive amounts of fat should be trimmed from meats. Only a normal amount
is necessary to produce the smoke needed for that smoked, =outdoor"flavor.
Excessivefat can create cleaningand flare-up problems.
• Allowing excessive amounts of grease or drippings to constantly flame voids the
warranty on the grill grates. Excessiveflare-upsindicatethateitherthe grillinterior
needs to be cleanedor that excessiveamountsof fat are in the meat or the meat
was not properlytrimmed.
• Grease drippingswill occasionallyigniteto produce harmlesspuffsof flame for a
second or two. This is a normalpart of the cookingprocess.
• NEVER LEAVE GRILL UNA'I-rENDED DURING GRILL OPERATION.
I Should excess grease cause sustained flare-up I
1. Turn on Fan manually.
2. Immediately turn grill control(s) OFF.
3. Remove meat from grill.
IMPORTANT
•
•
•
•
Do not use aluminumfoil insidethe grillarea.
Do not use charcoal or wood chips in the grillarea.
Do not allow grill-rocksto become overloadedwith grease. Clean frequently.
Do not cover gratescompletelywithmeat. Leave air space between each steak,
etc. toallow properventilationas well as preventflare-ups.
13
JGrill Guide I
Preheat grill on Hi, 5 minutes, for best flavor.
Type
Setting
Cooking Time
Hi
Hi
Hi
g to 12 minutes
12 to 19 minutes
16 to 23 minutes
Turnafter5 to 6 minutes.
Tumafter6 to9 minutes.
Tumafter8 to 11 minutes.
Hi
Hi
Hi
10
10 to17 minutes
19 to26 minutes
24to 32 minutes
15 to25 minutes
"rumafter 5 to 8 minutes.
Turnafter9 to 12 minutes.
Turn after12to 16 minutes.
Tum afterhalfthetime.
PorkChops(1/2 - 3/4")
Fully-cooked
SmokedPorkChops
Ham Slices(1/2")
Fully-cookedsausages
HotDogs
Polish
FreshSausage
l.inks
Patties(21/2"
diameter)
ItalianSausage
10
30 to 40 minutes
Turnoccasionally.
Hi
10
10to 15 minutes
15 to20 minutes
Turnonce.
Turnonce.
Hi
Hi
5 to 10 minutes
10to 20 minutes
Turnoccasionally.
Turnonce.
10
10to 15 minutes
Turnoccasionally.
10
10
15to 20 minutes
25 to35 minutes
Tum occasionally.
Piercecasingwitha fork.
Turnonce.
LambChops
10
25to 35 minutes
Tum occasionally.Brushwith
glaze, ifdesired.
Chicken
BonelessBreasts
Bone-in
10
10
25to 35 minutes
45to 60 minutes
Turnoccasionally.
Turn occasionally.Brush
withmarinadeorglazeduring
last10 minutes.
Fish
Steaks (1")
10
20 to 30 minutes
Fillets(1/2")
(with skin on)
10
10to t 5 minutes
Shrimp
(skewered)
10
8 to 12 minutes
Brush withbutter. Turnafter half
thetime,
Start skinside down. Brush
with butter. Turn after half
the time.
Tum and brushwith butteror
marinadefrequently.
Hi
2 to 4 minutes
10
2 to 3 minutes
Steak (1/2- 3/4")
Rare
Medium
Well
Steak (1 - 1 1/4")
Rare
Medium
Well
Hamburgers(3-4 oz.)
GarlicBread
Hot DogBuns
HamburgerBuns
Procedure
Turnafter halfthetime.
Note: Thischartisa suggestedguide.Cookingtimes and controlsettingsare approximatedue
to variationsinmeatsand voltage.
14
JGrilling Tips I
With your Jenn-Air grilland accessories,literallyanyfood you'veconsidered"at itsbest"
when preparedoutdoorscan now be preparedindoorswithless fuss and great flavor.
The followingsuggestionsare good rulestofollowand will increaseyour enjoymentof
the equipment.
• Be sure to followdirectionson page 13 for using the grill.
• Suggestedcookingtimes and controlsettingsare approximatedue to variationsin
meatsand electricalvoltage. Experiencewill quicklyindicatecookingtimesas well
as which settingswork best.
• Use the Energy-Savergrillelement for grillingsmallamountsoffood on half ofthe
gdllorfor keepingcookedfoodswarm or preparingfood requiringdifferentcontrol
settings.
• For best results,buy top grade meat. Meat that is at least 3/4 inchwill grillbetter
than thinnercuts.
• Score fat on edges of steak, but do not cut into meat, to prevent curlingwhite
cooking.
• For the attractive =branded"tookon steaks,be sure grill is preheated. Allow one
sideof meatto cookto desireddoneness,or untiljuicesappearon the top surface,
beforeturning. Turn steaksand hamburgersjust once. Manipulatingfood causes
loss of juices.
• When basting meats or applying sauces to foods, remember that excessive
amounts wind up inside your grill and do not improve the food flavor. Apply sauces
during the last 15 to 20 minutes of cooking time unless recipe specifies otherwise.
Sugar-based sauces, excessively used, will caramelize on the grill-rocks and create
extra cleaning.
• There are many meat marinades which will help tenderize less expensive cuts of
meat for cooking on the grill,
• Certain foods, such as poultry and non-oily fish, may need some extra fat. Brush
with oil or melted butter occasionally while grilling.
• Use tongs with long handles or spatulas for turning meats. Do not use forks as these
pierce the meat, allowing juices to be lost.
• To help retain meat juices, salt after turning meat or after cooking is completed.
• Should grilled foods be prepared and ready before you're ready to serve, turn
control to a low setting and cover meat with a single sheet of foil. Food wiUcontinue
to cook.
15
I Cleaning the Grill
J
Be sure the grill is cool and controlsare OFF.
Grill Grates: These are madefromcastaluminumand are coatedwiththe Excalibur_
nonstickfinish.
• After the grill grates have cooled, wipe off grates witha papertowel. Wash cool
grates (DO NOT IMMERSE HOT GRILL GRATES IN WATER) with soap or
detergentinhotwaterinthesinkorwashthem inthe dishwasher.Besuretoremove
all food residuebeforecookingon the grillgrates again.
• Remove stubbornspotswitha plasticmesh puff or pad. For best results,use only
those cleaningproductswhichstate theyare recommendedfor usewhencleaning
nonstick surfaces.
• If grateswere washed in the dishwasher,seasonwith oil priorto grilling.
• Do not use metal brushes or abrasive scouring pads or other scrubbers intended
to clean outdoor charcoal grills. These will removethe finishas well as scratchthe
grates. Do not clean in self-cleaning oven or use oven cleaners on the grates.
Grill-rocks:
enamel.
These are made from cast-ironwhichhave been coated withporcelain
• The grill-rocksshould be cleaned frequentlyor after any excessive build-up of
grease. To clean lightsoil,use detergentand a plasticscrubber,such as Tufty,or
wash in the dishwasherif burnedon residueis firstremoved. For heavysoil, soak
in hot soapy water to which a cleanser, such as householdammonia, has been
added. Stubbornspots on grill-rocks,such as burned on residue from sauces,
can be scrubbed witha stiffbristlebrush.
• An oven cleaner, such as Easy-Off, can be used for burned on soil. Follow
manufacturer'sdirections:spray on cleaner and let soak overnight. Do not clean
grill-rocks in the self-cleaning oven.
Grill Element: The grillelement shouldnever be immersedin water. Most soilwill
burnoffduringuse. The terminalblockmay be cleanedwithwarm soapywater. Do not
use abrasive cleanersor materials. Dry thoroughlybefore reinsertingin the cooktop.
Porcelain Basin Pan: This area is located under the grill-recksand/or cartridges.
Clean after each heavy use of the grill.
• To removelightsoil,clean withsoapy water or withcleaners such as Fantastikor
409. For easier cleanup, a ) spray with householdcleaner; b) cover with paper
towels;c) add smallamount of water to keep the papertowel moist;d) cover and
wait 15 minutes;and e) wipe clean.
• To remove moderate soil, scrub with Comet, Bon Ami, a soft scrub cleanser or
plasticscrubber.
• To remove stubbornsoil,spray with an oven cleaner, let soak overnight,wipe
clean, rinseand dry.
16
[ Control Knobs I
The knobson the controlpanel can be removed withthe controlsin the OFF position.
Pull each knob straightfrom the shaft. Wash knobs in warm soapy water or dishwasher;do not use abrasivecleansersor materials. To replace each knob,matchflat
part of knobopeningwiththe springon the shaft, returningin OFF position.
I Control Knob Area I
Use mild cleansers, such as soapywater or mildliquidsprays,suchas 409 or Fantastik.
Wipe withsponge,damp clothor papertowel. Do not scrub with S.O.S. pads or abrasive cleansers.
I Stainless Steel Cooktop [
• To clean light soil, wipe with soapy cloth or nonabrasivecleanser, such as Soft
Scrub. Rinse, buffwith softcloth;polishwith glass cleaner if necessary.
• To clean moderatesoilor discolorationof the surface (excessiveheat willcause a
golden discoloration),clean with Zud, Bar Keepers Friend, or Luneta (Jenn-Air
ModelA912, Part No. 712191). With a spongeor cloth,rub cleanserwiththe grain
to avoid streakingthe surface. Rinse well, buff dry; polishwith a glass cleaner if
necessary to remove cleanser residue and smudge marks.
• Heavy soil, such as burned on food soil, can be removed by first cleaning as per the
instructions for moderate soil. Stubborn stains can be removed with a damp
Scotch-Brite scour-pad; rub evenly with the grain to avoid streaking the surface.
Rinse well, buff with dry cloth; polish with glass cleaner if necessary to remove
cleanser residue and smudge marks. Scotch-Brite is also useful in buffing and
removing minor scratches.
• Stubborn food stains may also be removed by spraying with Easy-Off oven cleaner.
Allow to set overnight, then rinse. If stains remain, clean with recommended
cleansers such as Zud, Luneta (Jenn-Air Model A912, Part No. 712191), or ScotchBrite scour-pad. CAUTION: When using Easy-Off, avoid spraying areas other than
the stainless steel such as the air grille and control knob area. Immediately wipe
up any spray from these areas with a damp cloth. Read the manufacturer's
precautions on using oven cleansers. Hint: Easy-Off can be used to clean the
porcelain burner basin area.
17
J PorcelainizedSteel Cooktop I
• Wash cool cooktop with warm soapy water and rinse. Polishwith a dry cloth.
• To clean stubbornspots,clean withCooktopCleaningCreme (Part No. 20000001)
and a sponge. Do not use abrasive or caustic cleaning agents which may
permanentlydamage the finish.
• NEVER WIPE OFF A WARM OR HOT PORCELAIN ENAMEL SURFACE WITH A
DAMP CLOTH.
NOTE:
• The porcelainenamel used on your cooktop is acid resistant,not acid proof.
Therefore, acidfoods(suchas vinegar,tomato, milk,etc.) spilledon the cooktop
shouldbe wiped up immediatelywith a dry cloth.
• Remove sugar spillsimmediately.
I Under Counter
I
Grease Jar: A grease jar is located
beloweachgrillbasin(underthe counter).
Check periodicallyto prevent spillovers.
Unscrew and remove. The grease jar
can be replaced with any heat tempered
jar, such as a canningjar, which has a
standardscrew neck.
Serial Plate: DO NOT CLEAN.
18
r
1
I
I
......
•
i
....
i
Jenn-Air's ventilationsystem is designed to capture both cooking fumes and smoke
while grilling. If the systemdoes not,these are some ductinginstallationsituationsto
check:
• 6" diameter roundor 3 1/4" x 10" rectangularductingshouldbe used. Note: 5"
diameter roundductingmay be used if the duct length is 10' or less.
• No more than three 90° elbows shouldbe used. Distancebetween elbows should
be at least 18".
•
Recommended Jenn-Air wall cap should be used. Make sure damper moves
freely when ventilationsystemis operating.
• There shouldbe a minimumclearanceof 6" for cooktopinstallednear a side wall.
If there is not an obvious improper installation,there may be a concealed problem
suchas a pinchedjoint, obstructionin the pipe, etc. Installationisthe responsibilityof
the installerand questions should be addressedfirst by the installer. The installer
shouldvery carefullycheck the ducting installationinstructions.
19
• i_i'iil _ i _i
•
_,_• _•_•
•
....
_ •
i
IIL i_•_!ii¸I•_!:I_I!U:
_•: • •_
••:
¸_¸¸
!ill
_
_ _ •
•
i
•
i_ _'
_•
B
Griddle
Model A302
Self-draining griddle
makes many favorite
foods easier to fix.
Family-sizedsurfacelets
you cook several
pancakes, hamburgers,
or grilledsandwichesat
a time. Hasa blacknonstickfinish,
Grill Accessory Model
A158
Grill accessory includes
2 grill-rocks, EnergySaver grill element, and
two black nonstick grill
grates. 2800 watt grill
element permits you to
control temperatures
underfrontand rear grills
independently.
Grill Cover
Model A341
Attractivegrillcover
protects grill when
not in use. Textured steel with
molded handles.
11
Cooker-Steamer
Model A335
Ideal for anything you
steam, blanch, poach or
stew. Includesa dual-positionbasketandsee-through
cover. Attractiveblacknonstickfinish,
Rotiss-Kebab
Model A312
Enjoy the great flavor of
rotissed foods indoors all
year around and make parties more fun by serving attractive shish kebabs. Indudes chrome finish motor,
rotiss,shish kebab skewers
and all brackets. Folds for
easy storage.
20
Wok Accessory
Model AO142
Ideal for stir-frying, steaming,
braising, and stewing. Wok has
nonstick finish, wood handles,
cover, steamingrack, rice paddles
and cookingtips. Flat bottom wok
can be used on ALL cartridges,
I Cooktop Cartridges
Conventional
Coil
Conventional
Canning Element
Model A145A
Specialcanningelementplugsinto
conventionaicoilcooktop/cartridge
raisingthe heatingelement above
the cookingsurface. Allowsuseof
oversized utensils and those with
warped or rippled bottoms.
I
Halogen
Radiant
Solid
Element
Coil*
Rated 240 volts...........................
A100B-Black Porcelain
A100S- Stainless Steel
A100W-White Porcelain
Halogen
Rated for 240 volts .........................
A125B-Black
A125W-White
Radiant*
Rated for 240 volts ........................
A121B-Black
A121W-White
Solid Element
Rated for 240 volts ......
_.................
A106B-Black
A106W-White
* To order 208 volt cartridges, add -8 to the model number.
21
Check the followinglist to be sure a servicecell is really necessary. A quickreference
of this manual may prevent an unneededservicecell.
If nothing on the cook'top operates:
• check for a blowncircuitfuse or a tripped main circuitbreaker.
• checkif cooktopis properlyconnectedto electric circuitin house.
If grill heating element or cook'top does not get hot enough:
• check if heatingelement is pluggedin solidly.
• surface controlsmay not be set properly.
• voltageto housemay be low.
If ventilation system is not capturing smoke efficiently:
• check on crossventilationin room or make up air.
• excessive amount of smoke is being created; check instructionsfor grilling,
trimmingmeats. (See p 13.)
• outsidewall cap may be trapped shut.
• cooktopmay be improperlyinstalled;check ductinginformation.(See p 19.)
• air filter may be improperlyinstalled.(See p 5.)
CCE1400 Owners: If larger elements quit during cooking:
• sustainedheat was trapped. (See pp. 10-11 - Large stockpotsor canners.)
CVE1400 Owners: If downdraft fan automatically turns on during
cooking:
• sustainedheat was trapped. (See pp. 10-11 - Large stockpotsor canners.)
Note: If eitherelement of the cooktopcartridgefails to heat--switch the cartridge to
othersideof cooktop. If it operateson that side,then cooktopcontrolswitchmay be at
fault. If it does not heat on either sidc !ndicetionsare that certridge requires service.
In this event, you may speed service by deliveringthe lightweightcartridgeto the
authorizedJenn-Air Service Contractor,thus by-passingthe time requiredfor normal
home-service schedules.
If You Need Service
• cell the dealer fromwhom your appliancewas purchasedor the authorizedJennAir ServiceContractorlistedinthe Yellow Pages. YourJenn-Air Service Contractor can providebetterand fasterservice if you can accuratelydescribe problems
and give model and serial numberof the appliance. Be sure to retain proofof
purchaseto verifywarrantystatus. Refer to WARRANTY for further information
of owner's responsibilitiesfor warranty service.
• if the dealer or service company cannot resolve the problem, write to Jenn-Air
CustomerAssistance,c/o Maytag CustomerService, P.O. Box 2370, Cleveland,
TN 37320-2370, USA, 800-688-1100
• use and care manuals, service manuals, and parts catalogs are available from
Jenn-Air CustomerAssistance,c/o Maytag CustomerService.
All specificationssubjectto change by manufacturerwithoutnotice.
22