1
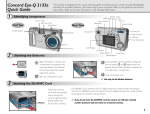
Eye-Q 2133z
User Manual
020810
About this manual
This manual makes using the Eye-Q 2133z as easy as possible.
Information in this document has been carefully checked for accuracy;
however, no guarantee is given to the correctness of the contents. The
information in this document is subject to change without notice.
Copyright
© Copyright 2002
This document contains proprietary information protected by copyright.
All rights are reserved.
Trademarks
All trademarks and registered trademarks are the property of their
respective owners.
Photo Express, DVD PictureShow, Cool 360 and PhotoExplorer,
Copyright 2002, Ulead Systems Inc. All Rights Reserved.
Presto! VideoWorks, Presto! Image Folio and Presto! Mr. Photo,
Copyright 2002, NewSoft Technology Corporation. All Rights Reserved.
Electronic Certification
ii
Table of Contents
Chapter 1 – Getting Started ............................................................. 1
Features ................................................................................... 1
Safety Information .................................................................. 2
Included Components .......................................................... 3
Camera Overview.................................................................. 5
Front View................................................................... 5
Rear View ................................................................... 7
Bottom View............................................................. 10
Install the Memory Card...................................................... 11
Install the Batteries................................................................ 13
Choose a Language ........................................................... 15
Set the Time and Date......................................................... 17
Chapter 2 – Taking Pictures ........................................................... 21
Prepare the Camera ........................................................... 21
Select the Camera Mode................................................... 22
Frame the Shot...................................................................... 22
Zoom and Shoot ................................................................... 23
Turn off the Camera............................................................. 25
Chapter 3 – Reviewing Your Pictures ............................................ 26
Switch to Playback Mode................................................... 26
Full-Screen Review .................................................. 26
Thumbnail Review ................................................... 27
Chapter 4 – Connecting to a Computer ...................................... 28
Installing Software................................................................. 29
Making the Connection ...................................................... 31
iii
Copying Photos to a PC ...................................................... 32
Copying Photos to a Macintosh ........................................ 33
Using as a PC Camera (Windows only) ............................ 34
Chapter 5 – Mode / Operation Guide .......................................... 35
Snapshot Mode .................................................................... 35
Video Mode .......................................................................... 36
Preset Mode .......................................................................... 37
Landscape ............................................................... 38
Portrait....................................................................... 38
Night Scene.............................................................. 38
Self-Timer................................................................... 39
Macro ....................................................................... 39
Playback Mode .................................................................... 40
SET UP Mode.......................................................................... 41
Delete All .................................................................. 42
Format....................................................................... 42
Quality....................................................................... 43
Buzzer ........................................................................ 44
DPOF ......................................................................... 44
Date/Time................................................................. 45
Memory Type ........................................................... 45
Language................................................................. 46
Video Out................................................................. 47
PC Camera Mode................................................................ 48
Chapter 6 – Using the LCD Display................................................ 49
LCD Icon Descriptions.......................................................... 50
Appendix 1 – Button Function Guide ............................................ 52
Appendix 2 – Troubleshooting....................................................... 53
iv
Chapter 1 – Getting Started
Features
•
•
•
•
•
•
•
•
•
•
•
Optical Zoom (3x), Digital Zoom (3x)
1600x1200 resolution (up to 2048x1536 resolution
through interpolation)
Color LCD viewfinder screen
Audio-Video Clip Recording
USB 1.1 interface
Auto exposure, user-defined exposure, auto focus
Flash: Auto / Always On / Auto Flash with Auto
Flash with Red-Eye Reduction / OFF
White Balance Modes: Auto/ Daylight / Shade /
Tungsten / Fluorescent
10-second Timer mode
Full screen or Thumbnail photo review
SD/MMC Card slot
1
Eye-Q 2133z User’s Manual
Safety Information
Do not look at the sun through the viewfinder. Viewing the sun or other
strong light source through the viewfinder could cause permanent visual
impairment.
Do not disassemble the camera. Touching the product’s internal parts
could result in injury. In the event of a malfunction, only a qualified
technician should repair the product. Should the product break open as a
result of a fall or other accident, take the product to an authorized service
center for inspection.
Avoid contact with liquid crystal. Should the LCD display break, care should
be taken to avoid injury due to broken glass and to prevent the liquid
crystal from touching the skin or entering the eyes or mouth.
Do not use in the presence of flammable gas. Using electronic equipment
near flammable gas could result in explosion or fire.
Observe caution when operating the flash. Do not use the flash close to
anyone’s eyes. This can cause temporary damage to eyesight. Particular
care should be observed when photographing infants – keep the flash at a
distance of at least 1 meter from infants’ eyes.
bserve proper precautions when handling batteries. Use only size AA
alkaline batteries. Batteries may leak or explode if handled improperly.
Remove batteries (and memory card) from the camera if you are going to
store the camera for extended periods of time. Ensure the camera is turned
off before inserting or removing batteries. Do not insert batteries backwards
or upside down. Do not disassemble batteries. Do not expose batteries to
flame or excessive heat. Do not immerse batteries in or expose to water.
Discontinue use immediately if you notice any changes in the battery such
as discoloration, deformation or leakage.
2
Included Components
Your Eye-Q 2133z comes equipped with the following
components. Please check to make sure all items are
included.
1.
Eye-Q 2133z
3
Eye-Q 2133z User’s Manual
2.
3.
4.
5.
6.
7.
8.
4
User’s Manual
Quick Reference Guide
USB Cable
Two (2) AA Alkaline Batteries
Installation CD-ROM
Soft Carrying Case
Video Cable
Camera Overview
The front, rear, and bottom views of the Eye-Q 2133z are
shown on the following pages. Please take a moment to
review these illustrations to familiarize yourself with the
terms used in the rest of this manual.
Front View
5
Eye-Q 2133z User’s Manual
1.
2.
3.
4.
5.
6.
7.
6
Shutter Button: Press this button to take pictures, or to
select menu options.
Built-in Flash: The flash allows the camera to take
pictures in low light conditions and can also be used
in bright conditions to remove unwanted shadows.
Self-Timer LED: When the mode dial is set to Preset
and the Self-Timer option is used before pressing the
Shutter Button, this LED will blink for ten seconds
before the camera takes a picture.
Light Sensor: The Eye-Q 2133z automatically detects
ambient light levels and determines whether or not
the flash is needed. Light measurements are made
with this sensor. Take care not to block the sensor
while taking pictures.
Viewfinder: The viewfinder helps you frame a picture.
The actual picture is taken with the lens and not the
viewfinder, however.
Lens: The lens focuses the light onto the digital
image capturing circuitry. For the best picture
quality, care should be taken to ensure it remains
free of dust, fingerprints, and scratches.
Microphone: Records audio when you use the
camera for filming 1-minute movies.
Rear View
1.
Status LED: When power is first turned on, or the
camera is working (and not available to take a
picture), the LED will flash. When the camera is
ready to take a picture or accept user commands,
the LED is a solid green color.
7
Eye-Q 2133z User’s Manual
2.
Viewfinder: The viewfinder is used to frame your
pictures. The actual picture is taken with the lens
and not the viewfinder.
3.
Power Button: Press this button to turn on the
Eye-Q 2133z. Press it again to turn it off.
4.
WB/Delete: Press this button to cycle through
the White Balance presets: Auto, Daylight, Shade,
Tungsten and Fluorescent.
5.
Flash / Copy: Copies pictures during
playback from internal, on-board camera memory
to the SD/MMC Card.
Zoom Out Key: While in Snapshot mode, press
this key to zoom out. If pressed repeatedly during
Playback, Zoom Out switches between thumbnail
and full-screen views. If zooming in on a photo
during Playback mode, pressing this key zooms
back out again.
Zoom In Key: While in Snapshot mode, press this
key to zoom in on your subject. In Playback mode,
use this key to zoom in on a photo.
Shutter Button: Press this button to create a digital
photo.
Power Jack: Plug the AC Adapter into the camera
here to supply it with electricity from an external,
non-battery power source.
6.
7.
8.
9.
8
10. Video Out Jack: Connect your video out cable here
and then the other end to your television set in order
to use the camera as a digital video camera.
11.
USB Port: The USB (Universal Serial Bus) port is
used to connect the camera to a PC as well as for
transferring photos.
12. Hand Strap Loop: Attach the hand strap to this loop
for ease of carrying.
13. Mode Dial: Rotate to select the camera mode:
Video, Preset, Snapshot, Playback, SET UP or PC
Camera.
14.
Down Button: Used to move down through
menus and to cycle in a right-wards direction during
picture Playback.
15.
Up Button: Used to move up through menus and
to cycle in a left-wards direction during picture
Playback.
Display Button: Press to cycle through the various
16.
display options: LCD, backlight and status
information all turned on; LCD and backlight on but
no status information; and LCD off.
17. LCD Display: Use the LCD display to preview photos.
While in the SET UP menu, use the LCD to see
messages and configure the camera.
9
Eye-Q 2133z User’s Manual
Bottom View
1.
2.
3.
4.
10
Tripod Connector: Attaches the camera to a tripod.
This is an optional accessory that can be used to
hold the camera still and is especially useful for low
light night pictures.
Battery / Memory Card Cover: Opens to allow
access to the battery chambers as well as the
memory card slot.
Memory Card Slot: Receives an SD/MMC Card to
store images. For more information on this see the
Storage Media section of this book.
Battery Chamber: Takes two AA alkaline batteries.
Install the Memory Card
To install the memory card:
1.
Turn off the camera.
2.
Open the battery / memory card compartment by
pressing on the cover and sliding in the direction of
the arrow toward the outside edge of the camera.
11
Eye-Q 2133z User’s Manual
3.
Insert the memory card with the notched corner
facing the camera (gold circuitry facing toward
the back of the camera.)
Notch
4.
Close the battery / memory card cover.
Images are not automatically transferred to the
memory card from On-board memory when a
memory card is inserted.
12
Install the Batteries
To install or replace the batteries:
1.
Turn off the camera.
2.
Open the battery compartment on the bottom
of the camera by pressing on the cover and
sliding in the direction of the arrow toward the
outside edge of the camera.
13
Eye-Q 2133z User’s Manual
3.
Insert batteries into the chamber making sure
that the positive
and negative
ends are
properly oriented, as indicated on the
compartment’s interior wall.
4.
14
Close the battery cover.
Choose a Language
The Eye-Q 2133z can display text and messages in
English, French, Spanish, German, Italian and Japanese.
To select a different language:
1.
Rotate the Mode Dial to SET UP mode
2.
Turn the camera on.
.
15
Eye-Q 2133z User’s Manual
16
3.
Use the Down button
to select Language then
press the Display button
to enter this menu.
4.
Use the Up and Down buttons
the language you want to use.
5.
Press the Display button
Menu returns.
/
to select
to set it. The SET UP
Set the Time and Date
When you transfer a photo to a computer and/or print it,
the time and date will show when it was taken.
To set the date display style:
1.
Rotate the Mode Dial to SET UP
2.
Turn on the camera.
3.
Use the Down button
to select Date and then
press the Display button
.
.
17
Eye-Q 2133z User’s Manual
18
4.
Select the Style option. Press the Display button
to enter that menu.
5.
Choose either Month/Day or Day/Month as the
display style for the date.
6.
When the settings are correct, press the Display
to save the changes.
button
To set the date and time:
1. Select Date on the SET UP menu and then press the
Display button
.
2. Select the Clock option. Press the Display Button
to enter that menu.
19
Eye-Q 2133z User’s Manual
3. Use the Up and Down buttons
hour. Press the Flash/Copy
move on to minutes.
4.
/
to adjust the
button to set it and
Next, set the minutes in the same manner. Press the
Flash/Copy button
the next Clock option.
to accept and move on to
5. Once the time has been set, repeat step 3 to set the
year, then the month, and finally the day.
6. When the settings are correct, press the Display
to save the changes.
button
If you make a mistake and need to go back, use
the White Balance/Delete button
20
.
Chapter 2 – Taking Pictures
This chapter shows you how to take pictures with your
Eye-Q 2133z.
Prepare the Camera
To prepare the camera for picture taking:
1.
Press the Power button to turn it on. After a short
pause, the LED will stop flashing, which is the
signal that the camera is ready for use.
Make sure you have installed 2 Alkaline size AA
batteries.
If you want to store your photos on an SD/MMC Card,
make sure it is also installed before you turn on the
camera. If you want to store images directly to the
camera's internal memory, either remove the memory
card, or select Internal from the Storage Media menu.
Using the LCD display consumes more battery power.
To prolong the life of your batteries it is recommended
to keep the LCD display shut off when not in use.
21
Eye-Q 2133z User’s Manual
Select the Camera Mode
There are two modes for taking pictures: Snapshot and
Preset. Snapshot mode is for basic picture taking, while
the Preset mode allows you to take pictures in one of
five preset schemes: Landscape, Portrait, Night Scene,
Self-Timer and Macro.
Rotate the Mode Dial to the mode you wish to use. For
basic “point and click” picture taking, you can use the
.
Snapshot mode indicated by the camera icon
To use the self-timer, rotate the Mode Dial to the Preset
mode and use the Up and Down buttons to select the
Self-Timer mode. When in Self-Timer mode, the left corner
of the LCD screen will display the "Self-Timer" icon .
The camera will take a picture ten seconds after
pressing the Shutter button.
Frame the Shot
To prevent the camera from taking blurry pictures, hold it
steady. Use either the Viewfinder or the LCD display to
frame the picture, according to the needs of your
shooting conditions. Turning off the LCD display and
taking pictures with just the Viewfinder will result in longer
battery life. However, in some conditions it may be more
convenient to use the LCD display.
22
Zoom and Shoot
Zoom in on a particular object
or Zoom Out
buttons
You can use the Zoom In
to narrow or widen the lens’ field of view. Use the LCD
display to preview the effects of the zoom function.
Automatic Image Processing
Pressing the Shutter button half way down initiates the
camera's internal image processing function. The
camera will adjust the photo to compensate for
ambient lighting, and, if in auto-flash mode, detect
whether or not the flash is required.
Shoot the picture
When you are happy with the preview, slowly press the
Shutter button. (Take care not to press the Shutter button
to rapidly or forcefully, otherwise you might shake the
camera and get a blurry picture as a result.)
23
Eye-Q 2133z User’s Manual
About the Optical and Digital Zoom Function
The camera features both optical and digital zoom,
giving you more precision when framing your subject.
Optical zoom is similar to the zoom function on a
traditional camera. Components in the lens move,
reducing the field of view and making the object
appear closer.
With digital zoom, the camera uses interpolation with a
small section of an image (the 'zoomed' portion) to
artificially restore the file to its original size.
When using the zoom function, a red
and white bar appears on the LCD
screen to the left. The bottom section
displays the optical zoom level, while
the top section displays the digital
zoom level. A white square moves up
and down the red and white bar to
indicate the current zoom level.
Digital
zoom
region
Optical
zoom
region
In Snapshot Mode, optical zoom
options are from x1 to x3 in 0.25 increments. Digital zoom
options are from x1.0 to x3.0 in .2 increments.
24
Turn off the Camera
When you are finished taking pictures, press the power
button to turn it off. This conserves battery power and
prevents unnecessary wear and tear on the internal
electronic parts.
25
Eye-Q 2133z User’s Manual
Chapter 3 – Reviewing Your Pictures
One benefit of the Eye-Q 2133z is that you can
immediately check whether or not you like the picture
you just took. After you take a picture you can see what
it looks like and then retake it if you are not happy.
Switch to Playback Mode
To view the pictures that you have stored in internal
memory or on the SD/MMC Card, rotate the Mode Dial
and turn the camera on.
to Playback Mode
.
If the LCD is not turned on, press the Display button
You can cycle through these modes (Full-Screen Review
and Thumbnail Review ) by repeatedly pressing the
button.
Zoom Out
Full-Screen Review
The default Playback method is to show each individual
picture one at a time at full-screen size. For the FullScreen Review method, press the Up and Down buttons
/
26
to cycle through the pictures you’ve taken.
You can also use the Zoom buttons
/
to see
more detail on a particular picture. The default zoom
to increase the zoom
setting is "x1"; Press Zoom In
ratios as follows: x1.0, x1.5, x2.0, x2.5, x3.0, x3.5, x4.0. Press
the Zoom Out button
to decrease zoom ratios (from
x4.0 down to x1.)
Thumbnail Review
If you press the Zoom Out button
when the zoom
ratio is at x1 (default), the camera switches over to
Thumbnail Review
method.
In Thumbnail Review, four pictures are shown on the LCD
simultaneously.
To scroll through the thumbnails:
button.
1. Press the Zoom Out
2. Press the Display
button.
and Down
buttons to scroll up and
3. Use the Up
and Flash/Copy
down and the WB/Delete button
button
to scroll right and left.
4. To view the thumbnail in full size, press either the
button.
Shutter or Zoom Out
27
Eye-Q 2133z User’s Manual
Chapter 4 – Connecting to a Computer
The Eye-Q 2133z stores pictures as digital data rather
than on film. Instead of making a trip to a developer and
printing from negatives, you can simply copy your
pictures to a computer for long-term storage. Once
transferred, your pictures can be viewed, printed, sent to
friends and family via e-mail, or saved to any removable
media device (such as floppy disk or CD-ROM) for
delivery to a photofinisher. After transferring pictures to
your computer, any copies stored on the memory card
or on the camera's internal memory may be deleted to
make way for new pictures.
This chapter explains how to connect your Eye-Q 2133z
to a computer for either downloading pictures to a PC
or for using as a PC Camera. The PC camera function is
available for Windows users only.
Do not connect the camera to your computer before
installing the software. This may cause installation
problems. Please make sure you install the software
from the CD-ROM prior to connecting the camera to
your computer.
28
Installing Software
Follow these instructions to install the Eye-Q 2133z drivers
and software on your system.
Please have your Windows CD-ROM ready
beforehand, as you may be prompted to insert it
during the installation process.
Step 1: TWAIN Driver / Utility Installation
1.
Insert the installation software CD into your CDROM drive. Don’t connect the camera to the PC.
2.
The installation program should start
automatically. If not, double click the My
Computer icon on your desktop, open the CDROM drive, and then run the 'setup.exe' found on
the installation CD-ROM.
3.
Follow the on-screen instructions. All the
necessary software is installed automatically. The
TWAIN drivers and utility program that allow the
camera to 'talk' to the computer via the USB
cable are also installed.
29
Eye-Q 2133z User’s Manual
Step 2: MSD / PC Camera Driver Installation
30
1.
To install the necessary drivers for Mass Storage
Device (MSD) mode and PC Camera mode, first
set the correct operational mode for that
function. For example, set the Mode Dial to PC
Camera mode to install those drivers, and to any
other mode to install Mass Storage Device drivers.
2.
Connect the small connector of the USB cable to
the camera, as shown:
3.
Connect the large head of the USB cable to an
empty USB slot on your computer. To locate USB
.
slots on your computer, look for the USB icon
4.
Make sure the installation CD is in the CD drive
and turn the camera ON. The Windows Add
Hardware Wizard will automatically detect the
camera and lead you through the installation
procedures for the corresponding mode.
You will need to do this once for each mode (PC
Camera and MSD.)
To ensure that the camera works in the correct mode,
unplug the USB cable from the camera and use the
Mode Dial to select either "PC Camera mode" for PC
Camera or any other mode for MSD. Then reconnect the
USB cable and follow the installation procedure
You should reboot your computer before using
camera and software for the first time. Remember to
connect your camera to the PC with the USB cable
before transferring pictures.
Making the Connection
The camera can be used in two different modes when
connected to your computer:
•
•
Mass Storage Device (MSD)
PC Camera
31
Eye-Q 2133z User’s Manual
MSD mode allows you to use the camera just like a
standard storage device where you can copy, delete
and move files to and from the camera just as you
would a normal disk drive.
PC Camera mode allows you to use the camera as a
standard PC video camera like the kind used for video
teleconferencing, security, videophones, and so on.
Both MSD and PC Camera mode may only be used
once you have connected the camera to your PC with
the supplied USB cable.
Copying Photos to a PC
When connected to your computer in MSD mode, the
Eye-Q 2133z behaves exactly like any another disk drive
attached to your computer. This makes copying the
images to your hard drive as easy as copying files from a
floppy disk, zip drive or CD-ROM.
To copy photos to your computer:
32
1.
Connect the Eye-Q 2133z to the computer with
the USB cable.
2.
Turn on the camera.
3.
Open “My Computer”. The contents of your
computer will be displayed, including all your disk
drives, and, if the camera is connected properly,
an extra disk drive representing the camera's
memory called “Removable Disk.”
4.
Select the Eye-Q 2133z drive. The camera’s
photos are listed. Select the photos and drag
and drop them onto your computer’s hard disk.
Copying Photos to a Macintosh
Before you plug the camera into a Mac, ensure that the
Mac OS version is 9.0 or later.
When connected to MAC in MSD mode, the Concord
Eye-Q 2133z behaves exactly like any another disk drive
attached to MAC. The disk drive appears on the desktop.
This makes copying the images to your hard drive as
easy as copying files from a floppy disk, zip drive or CDROM.
To copy photos to your Mac:
1. Connect the Concord Eye-Q 2133z to the
computer with the USB cable.
2. Turn on the camera.
3. Double-click the camera's disk drive icon on the
desktop. The contents of your camera will be
displayed. There is one DCIM subfolder in the
contents. Double-clicking the DCIM folder
displays all subfolders in the DCIM subfolder.
33
Eye-Q 2133z User’s Manual
4. Click the subfolder to display a list of the photos
in the camera.
5. Select the photos and drag and drop them onto
your computer's hard disk.
Using as a PC Camera (Windows only)
To use the camera as a PC Camera, you must put the
camera in PC Camera mode
and then connect it to
the computer via the USB port.
When connected, the camera may be used in
conjunction with any commercially available video
capture software to create your own home videos. Then
you can edit and distribute your video files across the
Internet or save them on CD-ROM for later viewing on
your PC or with a VCD/DVD player.
PC Camera mode can also be used with real-time video
conferencing software such as Microsoft NetMeeting™.
To use the Eye-Q 2133z as a PC Camera you must
set the camera to PC Camera mode.
To use the Eye-Q 2133z in MSD mode, you can use
any of the modes except for the PC Camera mode.
34
Chapter 5 – Mode / Operation Guide
The Eye-Q 2133z has six separate modes of
operation. You can select which mode you want to
use by rotating the Mode Dial to the correct position.
This chapter describes each of these modes and
the different button functions in each mode.
Snapshot Mode
Snapshot mode is used for taking pictures. All the basic
principles of non-digital photography apply here, so the
more you know about it the better your pictures will be.
Snapshot mode’s button functions:
•
Up Button: Increases the camera lens’ exposure
value, which allows in more light.
•
Down Button: Decreases the camera lens’
exposure value, which gradually blocks light.
•
Display Button: Cycles through the following
LCD display settings: LCD, backlight and status
information all turned on; LCD and backlight on
but no status information; and LCD off.
35
Eye-Q 2133z User’s Manual
•
Flash / Copy: Determines how the strobe
light (flash) is used. Pressing the Flash key cycles
through the following settings: Auto, On, Off, and
Auto Flash with Red-Eye Reduction.
Auto Flash has no icon.
•
WB / Delete: Adjusts the White Balance
settings. Pressing the WB key cycles through the
following settings: Auto, Day Light, Shade, Light
Bulb (incandescent light), and Fluorescent Light.
•
Zoom Out: Widens the field framed by the
camera’s lens from x9.0 to x1.0.
•
Zoom In: Narrows the field framed by the
camera’s lens from: x1.0, x1.25, x1.5, x1.75, x2.0,
x2.25, x2.5, x2.75, and x3.0, optically; and x1.2, x1.4,
x1.6, x1.8, x2.0, x2.2, x2.4, x2.6, x2.8, and x3.0,
digitally.
Video Mode
Video mode allows you to record movies up to 28
seconds in length to your camera’s on-board memory or
the SD/MMC card. (If the inserted card is more than
36
16MB, your camera can record up to a maximum of 60
seconds of video.
To record a video clip:
1. Turn the Mode Dial to the Video Clip mode
setting.
2. When the camera’s LCD screen comes on, frame
your shot.
3. Press the Shutter Button to begin recording. To
stop recording, press the Shutter Button
Like Snapshot mode, you may also zoom in and out
when recording videos. The available zoom ratios in
Video Mode are:
Optical:
x1.0, x1.25, x1.5, x1.75, x2.0, x2.25, x2.5,
x2.75, and x3.0
Digital:
x1.0, x1.2, x1.4, x1.6, x1.8, and x2.0
Preset Mode
Preset Mode has five preset settings optimized for taking
specific types of pictures: Landscape, Portrait, Night
Scene, Self-Timer and Macro. Select the Preset option for
37
Eye-Q 2133z User’s Manual
the type of picture you want to take using the Up and
Down
/
buttons, and then press the Shutter button.
Landscape
This preset is optimized for taking landscape pictures,
with the lens focus universally distributed to encompass
everything within the entire frame.
Portrait
This preset is optimized for taking “head shots” of other
people, focusing more on the center of the frame than
the peripheral parts.
Night Scene
This preset is optimized for taking photos at night,
opening the lens aperture wider and longer to gather as
much ambient light as possible. You should hold the
camera perfectly still when taking night shots or place it
upon a stable surface or tripod to minimize incidental
blurring resulting from the longer exposure.
38
Self-Timer
This preset lets you take a photo after a ten second
delay. This gives you the ability to take hands-free photos,
perhaps self-portraits or group photos, for example.
To Take a Group Photo
1.
Position the camera on a stable surface (such as
an optical tripod) and frame the shot.
2.
Rotate the camera’s Mode Dial to Preset mode
3.
Use the Up and Down buttons to select the SelfTimer Preset.
4.
Press the Shutter Button. The 10-second
countdown begins immediately. As soon as the
delay ends, the camera takes the picture.
With the exception of the Shutter button, all of the
camera’s other buttons behave the same as they do in
the other Preset modes.
Macro
This preset optimizes the camera for taking extreme
close up shots of objects or people within a foot or less of
39
Eye-Q 2133z User’s Manual
the camera. When not using this preset, the camera lens
cannot focus as well as normal due to the extremely
short distance between it and the subject matter.
Playback Mode
The Playback mode is used to view the photos stored in
the Eye-Q 2133z’s on-board memory or on the SD/MMC
memory card.
To view the photos, rotate the Mode dial to the Review
button to turn it on.)
mode position. (Press the Display
Playback mode’s button functions:
40
•
Up Button: Move to the next photo.
•
Down Button: Move to the previous photo.
•
Display Button: Cycles through the following
LCD display settings: LCD, backlight and status
information all turned on; LCD and backlight on
but no status information.
•
Flash / Copy: Copies the selected image
from on-board memory to the memory card or
vice versa.
•
WB / Delete: Deletes selected photo.
•
Zoom Out: In Snapshot Mode, widens the field
framed by the camera’s lens from x4.0 to x1.0. If
you zoom out while in Playback mode the camera
switches to Thumbnail mode.
•
Zoom In: Narrows the field framed by the
camera’s lens from x1.0 to x4.0 (x1.0, x1.5, x2.0,
x2.5, x3.0, x3.5, 4.0)
SET UP Mode
SET UP Mode configures the camera. To open the SET UP
menu, rotate the Mode dial to the SET UP position.
The SET UP menu is displayed on the LCD as follows:
41
Eye-Q 2133z User’s Manual
Delete All
To delete images from either the camera's internal
memory or from the SD/MMC Card, select Delete All
from the SET UP menu.
Format
This option completely erases and reformats of the
storage device. It is similar in function to formatting or
defragmenting a PC hard drive. Although Formatting
takes longer than Deleting, be sure to format your
storage device occasionally to ensure the card
continues to function optimally.
42
Quality
Adjust the image quality and resolution by selecting
Quality from the SET UP menu.
There are five different picture resolutions available:
2048 x 1536 (Super)
7 Photos
1600 x 1200 (Fine)
7 Photos
1600 x 1200 (Normal)
16 Photos
800 x 600 (Fine)
33 Photos
800 x 600 (Normal)
66 Photos
The higher the quality, the clearer your picture will be,
but at the same time the image file size will be larger,
and therefore you will be able to store fewer pictures in
memory. Generally, Normal quality (800 x 600) is high
enough quality for most purposes.
43
Eye-Q 2133z User’s Manual
Buzzer
When this feature is turned on, the camera makes a
beep when you push its buttons or rotate its Mode dial.
To activate the beeps, select the Buzzer option from the
menu. On the subsequent screen, select Yes to confirm
and then press the Display button
.
DPOF
The Digital Printer Order Format (DPOF) lets you print
photos directly to a printer that supports this protocol.
Choose Select Image and then select the image you
wish to print or select All Images to print the storage
44
device’s entire contents. After making your selection,
press the Display button
to register the change.
Date/Time
The Eye-Q 2133z marks each picture with a time stamp
displaying the hour, minute and day the photo was
taken. This is useful for organizing and keeping track of
your photo collection.
For more on setting the time and date see page 17.
Memory Type
You can choose whether you want to store photos in the
on-board memory or in the SD/MMC Card.
To set the default storage media:
1.
Rotate the Mode Dial to SET UP
2.
Turn on the camera.
.
45
Eye-Q 2133z User’s Manual
3.
Use the Down button
to select Memory Type
.
and then press the Display button
4.
/
buttons to select
Use the Up and Down
either Internal, for the camera’s on-board
memory, or External, to use an installed SD/MMC
Card.
5.
to confirm your
Press the Display button
selection and return to the main Setup screen.
Language
The Eye-Q 2133z can display menu items in the following
languages: English, French, Spanish, German, Italian and
Japanese.
For more on setting the default language, see page 15.
46
Video Out
If connecting your camera to a television set by means
of A/V cables, you have the option to choose a
transmission format compatible with that of your TV. This
allows you to record video images sent to the TV with a
VCR. The camera supports audio.
Select the Video Out option from the SET UP menu, and
then choose either NTSC or PAL, according to your
hardware and region. Press the Display button
to
confirm your choice.
Connecting to a TV
1. Connect the included video cable to the Video
OUT port of the comera via the mini-jack (the
small pin) and to the Video IN port of the
television via the other mini-jack (the large pin).
2. Turn on the television and set it to the Video IN
mode.
3. Turn on the camera and the pictures you have
taken will be visible on your television monitor.
47
Eye-Q 2133z User’s Manual
PC Camera Mode
The Eye-Q 2133z can be used with any commercially
available video software as a video camera. Simply
connect it to your PC with the supplied USB cable, turn
the Mode dial to PC Camera and then it turn on.
For more on this mode, see page 34.
48
Chapter 6 – Using the LCD Display
When the camera is in any mode other than SET UP
mode, current camera settings such as zoom, icons on
the LCD display indicate quality, etc. This chapter
describes these icons and their meanings.
Preset
Mode
White Balance Mode
Flash
Mode
Pictures
Quality
Zoom
Ratio
Date /
Time
Battery
Status
EV
49
Eye-Q 2133z User’s Manual
LCD Icon Descriptions
Icon
Name
Description
Auto Flash The camera senses whether the flash is needed by
detecting the amount of ambient light.
Flash Off Flash is turned off, regardless of the amount of light
available.
Use the Auto Flash with Red-Eye Reduction function to
Auto Flash
reduce the occurrence of "red-eye" (eyes appear red in
with Redthe pictures due to flash reflection off the eyes’ retinas.)
Eye
This function causes the camera to flash quickly before
Reduction
the picture is taken to reduce red-eye.
Flash On Flash is always on, regardless of light available.
Snapshot Indicates the camera is in Snapshot mode (the standard
Mode
mode for taking pictures.)
Indicates the camera is using the Self-Timer preset.
Self-Timer Pressing the Shutter button will initiate the 10-second
count-down timer before taking a picture.
Playback Indicates the camera is in Playback mode. This mode is
Mode
used to view pictures stored on the camera's internal
memory or on the memory card.
50
Indicates the level of zoom currently applied.
In Video Mode, zoom options are: x1.0, x1.25, x1.5, x1.75,
x2.0, x2.25, x2.5, x2.75, x3.0; digital zoom options are x1.0,
x1.2, x1.4, x1.6, x1.8, x2.0.
Zoom
In Snapshot Mode, optical zoom options are: x1.0, x1.25,
x1.5, x1.75, x2.0, x2.25, x2.5, x2.75, x3.0; digital zoom
options are: x1.0, x1.2, x1.4, x1.6, x1.8, x2.0, x2.2, x2.4, x2.6,
x2.8, x3.0.
In Playback Mode, zoom options are: x1.0, x1.5, x2.0, x2.5,
x3.0, x3.5, x4.0.
Battery Indicates the level of battery power remaining.
Indicator
White
Indicates the current White Balance setting. The default
Balance setting is Auto.
Use this setting when taking pictures in bright daylight, to
Daylight reduce the effect of "whitewashed" pictures.
Shade
Use this setting when taking pictures in shade, or any time
your pictures come out too dark.
Tungsten Use this setting for taking pictures under tungsten or
incandescent light.
Fluorescent
Use this setting for taking pictures under fluorescent light.
51
Eye-Q 2133z User’s Manual
Appendix 1 – Button Function Guide
Mode
Shutter
Up
Down
Display
Flash/
Copy
WB/
Delete
Zoom
Out
Zoom
In
Single
Capture
EV+
EV-
LCD + Light
→
LCD Off
Auto
→
On
→
Off
→
Auto Flash
with RedEye
Reduction
Auto
→
Day light
→
Shade
→
Tungsten
→
Fluorescent
Zoom
Out
Zoom In
Single
Capture
Select
Landsca
pe,
Portrait,
Night
Scent,
SelfTimer or
Macro
Select
Landscape,
Portrait,
Night Scent,
Self-Timer
or Macro
LCD + Light
→
LCD Off
Auto
→
On
→
Off
→
Auto Flash
with RedEye
Reduction
Auto
→
Day light
→
Shade
→
Tungsten
→
Fluorescent
Zoom
Out
Zoom In
Select
Photo
Page Up
Page Down
LCD + Light
→
LCD Off
Copy image
to / from
Internal /
External
Delete
Zoom
Out
Zoom In
Start / Stop
Recording
EV+
EV-
LCD + Light
→
LCD Off
N/A
Auto
→
Day light
→
Shade
→
Tungsten
→
Fluorescent
Zoom
Out
Zoom In
N/A
N/A
N/A
N/A
N/A
N/A
N/A
N/A
Execute
Function
Select
Select
N/A
N/A
N/A
Select
Select
Snapshot
Preset
Playback
Video
PC Camera
SET UP
N/A = Not Available
52
Appendix 2 – Troubleshooting
Problem
Possible cause
The camera
The camera is
has no power. turned off.
The batteries are
discharged.
Solution
Press the power button to turn the camera ON.
Replace the batteries with fresh ones. Refer to
Inserting Batteries.
The batteries are
Check the battery orientation. Refer to Inserting the
inserted incorrectly. Batteries.
The camera
won’t take a
picture.
The flash
doesn’t work.
If the light is flashing, wait until it emits a steady light
Ensure the green
Camera Ready LED before taking a picture. The camera may be waiting
indicator is on and for the flash to charge.
not flashing.
Is the camera
connected to a
computer?
The camera’s buttons are not functional when
connected to a PC. Disconnect the camera to take
more pictures.
Is the flash on?
Ensure the flash is set to auto or always on. Refer to
Setting the Flash.
The batteries may
be weak.
If the batteries are too weak, the flash will be unable
to recharge. Turn the camera off and wait a few
seconds before turning it back on. If this doesn’t
work, replace the batteries.
The images
are blurry.
Hold the camera steady or put it on a tripod to take
The camera or
subject was moving pictures.
when the shot was
taken.
The computer
does not
recognize the
camera
The camera was
connected to a
personal computer
by USB before
installing software.
Connect the camera to the computer with the USB
cable. Select [My computer] > [Control panel] >
[System] > [Device manager]. From [other devices]
delete [Composite USB device] or [unknown device].
Disconnect the camera from the computer, install the
software, and then reconnect the camera.
53
Eye-Q 2133z User’s Manual
Windows ME
and Windows
2000: when
the USB cable
is unplugged
from the PC,
an "Unsafe
Removal
Device
Detected" error
message
appears.
Procedure:
When removing
USB devices, it is
A. Right-click the Unplug or Eject hardware icon at
recommended that
the bottom-right of your computer screen.
users follow the
B. Left-click the Unplug or Eject hardware text box
"Safe Removal of
to open the 'Unplug or Eject Hardware' screen.
USB Device"
C. From the 'Unplug or Eject Hardware' screen,
procedure.
select the device to be disconnected and then
click the Stop button to bring up the 'Stop a
Hardware device' confirmation screen.
D. From the 'Stop a Hardware device' confirmation
screen select the device to be stopped and click
OK to bring up the 'Safe To Remove Hardware'
confirmation.
E. Disconnect the Eye-Q 2133z from your PC.
Images lose
formatting data
during image
capture in "PC
Camera"
mode.
If your hard disk's
DMA setting is
turned off images
may lose formatting
data during image
capture. (Windows
98 and Windows
ME only.)
Please check to make sure your hard drive's DMA
setting is enabled, as follows:
1.
2.
3.
4.
5.
54
From the Windows Start menu, select Settings,
then Control Panel.
In the Control Panel double-click System, then
click the Device Manager tab.
Select your hard drive from the list, then click
Properties.
Click the Settings tab.
Make sure the box marked DMA is checked. If
not, check the box to ensure that your hard drive
will protect image attributes during capture.
The camera is
in PC Camera
mode and is
connected to
the computer.
When an
application
attempts to
capture video
from the
camera, the
application
displays an
error
message.
PC Camera mode Change the color depth of the VGA card to 24is optimized to
bits or higher. Restart the application to capture
work best when
video.
your VGA card's
color depth is set
to 24-bits or
higher. Problems
will occur if the
depth is set to 16bits or less.
55
Technical Support Hot Line:
Toll Free In the USA & Canada
1-866-522-6372
Toll Free In Europe
UK: 0800-169-6482
BELGIUM: 0800-787-57
FRANCE: 0800-917-599
GERMANY: 0800-1800-563
SPAIN: 900-973-195
ITALY: 800-781-883
All Other Countries - Toll
31-53-482-9779