1
Barcode & OCR Package: User's Manual
page 1 / 95
Barcode & OCR Package
User's Manual
- ...
Version: 1.28
Abstract
The "Barcode & OCR Package" contains PCL fonts for OCR text and Barcode printing. This document contains information how to print
OCR text and barcodes using these fonts. Corresponding information is provided for each supported platform, namely SAP (R/3, mySAP
ERP). For each OCR and barcode font included in this product, the font select PCL command sequence and the font character set are
provided. For each device supported, device-specific information related to fonts, HDD, and DIMM or SDcard is included.
Published by
Ricoh Company Ltd.
Barcode & OCR Package: User's Manual
page 2 / 95
Contents
1
Introduction
1.1
1.2
1.3
1.4
2
The "Barcode & OCR Package" (Product specification)
2.1
Printer devices................................................................................................................................................................................ 8
Issuing system................................................................................................................................................................................ 8
BARCODE TYPES SUPPORTED ..............................................................................................................................................8
2.2.1
2.3
2.4
Barcode parameters supported ...................................................................................................................................................... 9
THE MECHANISM (BARCODE PRINTING WITH BOP) ..............................................................................................................10
THE COMPONENTS ...........................................................................................................................................................10
2.4.1
2.5
2.6
2.7
2.8
2.9
The CD-ROM folder structure ....................................................................................................................................................... 11
INSTALLING THE PRODUCT .................................................................................................................................................11
TESTING THE PRODUCT .....................................................................................................................................................11
UNINSTALLING THE PRODUCT.............................................................................................................................................11
USING THE PRODUCT: PRINTING OCR TEXT ........................................................................................................................12
USING THE PRODUCT: PRINTING BARCODES ........................................................................................................................12
2.9.1
2.9.2
2.9.3
2.9.4
2.9.5
2.9.6
2.9.7
2.10
The command sequence .............................................................................................................................................................. 12
Drawing the barcode .................................................................................................................................................................... 13
Sizing the barcode........................................................................................................................................................................ 13
Orienting/Rotating the barcode ..................................................................................................................................................... 14
Positioning the barcode ................................................................................................................................................................ 14
Drawing the CTX explicitly ............................................................................................................................................................ 15
The complete procedure ............................................................................................................................................................... 15
LIMITATIONS ....................................................................................................................................................................16
2.10.1
2.10.2
2.10.3
2.11
2.12
3
Font related limitations ............................................................................................................................................................. 16
Platform related limitations ....................................................................................................................................................... 17
Device related limitations ......................................................................................................................................................... 17
LIMITED WARRANTY ..........................................................................................................................................................17
THE FONTS .....................................................................................................................................................................17
2.12.1
2.12.2
2.12.3
2.12.4
2.12.5
2.12.6
2.13
2.14
OCR fonts ................................................................................................................................................................................ 17
Barcode fonts ........................................................................................................................................................................... 18
Font classification and numbering scheme ............................................................................................................................... 18
How to install the fonts ............................................................................................................................................................. 18
How to test the fonts ................................................................................................................................................................ 19
How to uninstall the fonts ......................................................................................................................................................... 19
THE FONT TEST SHEETS ...................................................................................................................................................20
TROUBLESHOOTING ..........................................................................................................................................................20
The "Barcode & OCR Package for SAP"
3.1
3.2
3.3
3.4
3.5
3.6
The CD-ROM folder structure ....................................................................................................................................................... 23
INSTALLING THE PRODUCT .................................................................................................................................................23
TESTING THE PRODUCT .....................................................................................................................................................23
UNINSTALLING THE PRODUCT.............................................................................................................................................23
USING THE PRODUCT ........................................................................................................................................................24
LIMITATIONS ....................................................................................................................................................................24
3.11.1
3.11.2
3.11.3
3.11.4
3.11.5
3.11.6
3.12
3.13
Device related limitations ......................................................................................................................................................... 24
Font related limitations ............................................................................................................................................................. 24
SAPscript/ABAP related limitations .......................................................................................................................................... 24
BCP-internal limitations ............................................................................................................................................................ 25
Incompatibility of BOP with other approaches .......................................................................................................................... 25
SAP-specific limitations ............................................................................................................................................................ 26
LIMITED WARRANTY ..........................................................................................................................................................26
THE "BARCODE CONVERSION PROGRAM" (BCP) ................................................................................................................26
3.13.1
3.13.2
3.13.3
3.13.4
3.13.5
3.13.6
3.13.7
3.14
21
OVERVIEW .......................................................................................................................................................................21
THE PRODUCT .................................................................................................................................................................21
SYSTEM REQUIREMENTS ...................................................................................................................................................21
BARCODE PARAMETERS SUPPORTED ..................................................................................................................................21
THE MECHANISM ..............................................................................................................................................................22
THE COMPONENTS ...........................................................................................................................................................22
3.6.1
3.7
3.8
3.9
3.10
3.11
8
SYSTEM REQUIREMENTS .....................................................................................................................................................8
2.1.1
2.1.2
2.2
6
FIRST-STEP INFORMATION ...................................................................................................................................................6
THE DOCUMENTATION .........................................................................................................................................................7
TERMINOLOGY AND NOTATION .............................................................................................................................................7
TECHNICAL SUPPORT ..........................................................................................................................................................7
The Parameters ....................................................................................................................................................................... 27
The Mechanism ....................................................................................................................................................................... 28
How to install............................................................................................................................................................................ 30
How to test ............................................................................................................................................................................... 31
How to uninstall........................................................................................................................................................................ 31
How to call the program ........................................................................................................................................................... 31
Using BOP without BCP ........................................................................................................................................................... 32
THE ZA00CVVV DEVICE TYPE (DT) ....................................................................................................................................32
3.14.1
3.14.2
3.14.3
3.14.4
3.14.5
The SAP standard OCR fonts supported .................................................................................................................................. 33
The SAP standard Barcodes supported ................................................................................................................................... 33
The Predefined OCR fonts (table TFO03) ................................................................................................................................ 33
The Predefined Printer barcodes (table TFO06) ....................................................................................................................... 33
The Predefined Print controls (table T022D) ............................................................................................................................ 33
Barcode & OCR Package: User's Manual
3.14.6
3.14.7
3.14.8
3.14.9
3.15
3.16
3.17
4
The command sequence: The implementation under SAP ....................................................................................................... 35
Drawing the barcode ................................................................................................................................................................ 37
Sizing the barcode ................................................................................................................................................................... 37
Orienting/Rotating the barcode................................................................................................................................................. 38
Positioning the barcode............................................................................................................................................................ 38
Drawing the CTX explicitly ....................................................................................................................................................... 39
The complete procedure .......................................................................................................................................................... 39
SYMBOLOGY-SPECIFIC INFORMATION ..................................................................................................................................41
TROUBLESHOOTING ..........................................................................................................................................................41
The Fonts
4.1
Encoding (II): The Character codes .............................................................................................................................................. 44
OCR-B ...........................................................................................................................................................................45
4.2.1
4.3
Encoding (II): The Character codes .............................................................................................................................................. 45
CODE 128 .......................................................................................................................................................................46
4.3.1
4.3.2
4.3.3
4.3.4
4.4
The Font select command sequences .......................................................................................................................................... 46
Encoding (II): The Character codes .............................................................................................................................................. 46
Code construction: The complete procedure (Example)................................................................................................................ 48
Font measurements...................................................................................................................................................................... 49
CODE 39 .........................................................................................................................................................................50
4.4.1
4.4.2
4.4.3
4.4.4
4.5
The Font select command sequences .......................................................................................................................................... 50
Encoding (II): The Character codes .............................................................................................................................................. 50
Code construction: The complete procedure (Example)................................................................................................................ 51
Font measurements...................................................................................................................................................................... 52
CODE 93 .........................................................................................................................................................................53
4.5.1
4.5.2
4.5.3
4.5.4
4.6
The Font select command sequences .......................................................................................................................................... 53
Encoding (II): The Character codes .............................................................................................................................................. 53
Code construction: The complete procedure (Example)................................................................................................................ 54
Font measurements...................................................................................................................................................................... 55
CODABAR ........................................................................................................................................................................56
4.6.1
4.6.2
4.6.3
4.6.4
4.7
The Font select command sequences .......................................................................................................................................... 56
Encoding (II): The Character codes .............................................................................................................................................. 56
Code construction: The complete procedure (Example)................................................................................................................ 57
Font measurements...................................................................................................................................................................... 57
2 OF 5 INTERLEAVED.........................................................................................................................................................58
4.7.1
4.7.2
4.7.3
4.7.4
4.8
The Font select command sequences .......................................................................................................................................... 58
Encoding (II): The Character codes .............................................................................................................................................. 58
Code construction: The complete procedure (Example)................................................................................................................ 59
Font measurements...................................................................................................................................................................... 60
2 OF 5 INDUSTRIAL ...........................................................................................................................................................61
4.8.1
4.8.2
4.8.3
4.8.4
4.9
The Font select command sequences .......................................................................................................................................... 61
Encoding (II): The Character codes .............................................................................................................................................. 61
Code construction: The complete procedure (Example)................................................................................................................ 61
Font measurements...................................................................................................................................................................... 62
2 OF 5 MATRIX .................................................................................................................................................................63
4.9.1
4.9.2
4.9.3
4.9.4
4.10
The Font select command sequences .......................................................................................................................................... 63
Encoding (II): The Character codes .............................................................................................................................................. 63
Code construction: The complete procedure (Example)................................................................................................................ 63
Font measurements...................................................................................................................................................................... 64
MSI ................................................................................................................................................................................65
4.10.1
4.10.2
4.10.3
4.10.4
4.11
The Font select command sequences ...................................................................................................................................... 67
Encoding (II): The Character codes .......................................................................................................................................... 67
Code construction: The complete procedure (Example) ........................................................................................................... 67
Font measurements ................................................................................................................................................................. 68
USPS POSTAL CODES : FIM / ZEBRA ..............................................................................................................................69
4.12.1
4.12.2
4.12.3
4.13
The Font select command sequences ...................................................................................................................................... 65
Encoding (II): The Character codes .......................................................................................................................................... 65
Code construction: The complete procedure (Example) ........................................................................................................... 65
Font measurements ................................................................................................................................................................. 66
USPS POSTAL CODES : POSTNET..................................................................................................................................67
4.11.1
4.11.2
4.11.3
4.11.4
4.12
The Font select command sequences ...................................................................................................................................... 69
Encoding (II): The Character codes .......................................................................................................................................... 69
Font measurements ................................................................................................................................................................. 69
UPC/EAN ......................................................................................................................................................................70
4.13.1
4.13.2
4.13.3
4.13.4
The Font select command sequences ...................................................................................................................................... 70
Encoding (II): The Character codes .......................................................................................................................................... 70
Code construction: The complete procedure (Example) ........................................................................................................... 71
Font measurements ................................................................................................................................................................. 75
Appendices
5.1
5.2
5.2.2
42
OCR-A (OCR-A1) ..........................................................................................................................................................44
4.1.1
4.2
5
The X_PAPER:XBARC action macros ..................................................................................................................................... 34
How to install............................................................................................................................................................................ 34
How to test ............................................................................................................................................................................... 34
How to uninstall........................................................................................................................................................................ 34
ZABSAMPLE -- A SAMPLE SAPSCRIPT DOCUMENT ...........................................................................................................34
USING THE PRODUCT : PRINTING OCR TEXT (FROM SAPSCRIPT) ..........................................................................................34
USING THE PRODUCT : PRINTING BARCODES (FROM SAPSCRIPT) .........................................................................................35
3.17.1
3.17.2
3.17.3
3.17.4
3.17.5
3.17.6
3.17.7
3.18
3.19
page 3 / 95
76
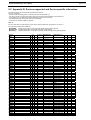
APPENDIX B: BARCODE TYPES SUPPORTED ........................................................................................................................76
APPENDIX D: DEVICES SUPPORTED AND DEVICE-SPECIFIC INFORMATION ...............................................................................77
Appendices DPx: Device: Procedures .......................................................................................................................................... 78
Barcode & OCR Package: User's Manual
5.2.3
5.2.4
5.2.6
5.3
5.3.1
5.3.2
5.4
5.5
5.6
5.7
5.7.1
5.7.2
page 4 / 95
Appendix DPD: (Procedure) Insert the DIMM ............................................................................................................................... 78
Appendix DPF: (Procedure) Print out the PCL Font list and the HDD Directory list ....................................................................... 78
Appendix DPS: (Procedure) Insert the SDcard ............................................................................................................................. 79
APPENDIX F : FONTS INCLUDED .........................................................................................................................................80
Appendix FC: Font and File naming and Font select command sequences .................................................................................. 81
Appendix FT: The Font Test Sheets ............................................................................................................................................. 82
APPENDIX G: GLOSSARY ..................................................................................................................................................83
APPENDICES SX: SAP PLATFORM-SPECIFIC INFORMATION ....................................................................................................84
APPENDIX SB : BARCODE TYPES SUPPORTED .....................................................................................................................84
APPENDIX SD : THE ZA00 SAP DEVICE TYPE ....................................................................................................................90
Appendix SDM: The XBARC action / Macros defined ................................................................................................................... 90
Appendix SDP: Barcode-related Print controls.............................................................................................................................. 92
Barcode & OCR Package: User's Manual
page 5 / 95
This document is only available in English.
Font copyright notice
All fonts of this product are copyright of Paceline GmbH.
Notice
THE MANUFACTURER AND RICOH COMPANY LTD. MAKE NO WARRANTY OF ANY KIND WITH REGARD TO THIS MATERIAL,
INCLUDING, BUT NOT LIMITED TO, THE IMPLIED WARRANTIES OF MERCHANTABILITY AND FITNESS FOR A PARTICULAR PURPOSE.
The manufacturer and Ricoh Company Ltd. shall not be liable for errors contained herein or for incidental or consequential damages in
connection with the furnishing, performance, or use of this material, especially for the DIMM module or SDcard.
This document contains proprietary information which is protected by copyright. All rights are reserved. No part of this document may be
photocopied, reproduced, or translated to another language without the prior written consent of the manufacturer.
Trademarks
Microsoft®, Windows®, Microsoft Windows™, Windows 95™, MS Windows and MS are registered trademarks of Microsoft Corporation in the
United States and/or other countries.
PostScript® is a registered trademark of Adobe Systems, Incorporated.
PCL® is a registered trademark of Hewlett-Packard Company.
All named company names and/or products are trade names or registered trade names of the named companies.
Other product names used herein are for identification purposes only and might be trademarks of their respective companies. We disclaim any
and all rights in those marks.
Important notice
Parts of this document are subject to change without prior notice.
Barcode & OCR Package: User's Manual
page 6 / 95
1 Introduction
Thank you for purchasing the "Barcode & OCR Package" ("BOP", for short).
This product contains (scalable and bitmap) PCL fonts for OCR text and Barcode printing.
The (barcode and OCR) fonts are residing on the printer device (on HDD or DIMM or SDcard).
Besides the fonts primarily recommended and implemented under SAP, there are legacy fonts for compatibility with legacy data streams and
legacy products.
OCR printing requires the presence of an OCR font.
Barcode printing requires a mechanism to process the specifications of the required barcode and eventually to image the barcode. This
solution uses PCL barcode fonts.
The following OCR fonts are contained:
y
OCR-A (OCR-A1) and OCR-B
The following Barcode symbologies and applications are supported. For a full list, refer to Appendix B.
They are supported through corresponding (barcode) fonts, and through this documentation.
y
y
y
y
y
y
y
y
y
y
y
y
y
y
y
y
y
y
Code 128 (A/B/C, autoswitch)
UCC/EAN-128
UPC-128
Code 39 and Code 39 Extended
PZN (Pharma-Zentral-Nummer / German Pharma Number)
Code 93 and Code 93 Extended
Codabar and AIM Codabar
2 of 5 Interleaved
Leit- and Identcode of the Deutsche Post AG
USPS Tray Label and Sack Label
2 of 5 Industrial
2 of 5 Matrix
MSI
USPS POSTNET and FIM/ZEBRA
EAN/UPC family
EAN-13, EAN-8
UPC-A, UPC-E
EAN/UPC 2/5 supplement
Refer to Appendix F for the complete list of fonts included in this product.
The font select PCL command sequences for the fonts and their character sets are provided for each font individually in the corresponding
sections in the chapter "The Fonts" below.
Most barcode fonts (except for Code 128) come with optional readable text ("clear text").
Some barcode fonts come in multiple Narrow-to-Wide ratios.
Most barcode fonts are scalable. By means of HP-GL/2, they can even be scaled independently in vertical and horizontal direction.
Please note that, because of the font mechanism, some solution software has to perform all necessary calculations, such as checksum
calculation, the "Interleaving" like for the symbology "2 of 5 Interleaved", any other code mapping, etc.
The necessary information how to implement this is provided with this documentation.
The supported printer devices are listed in Appendix D.
The supported platforms of the issuing system are:
- SAP (R/3, mySAP ERP)
1.1 First-step information
Installation information
For information on how to install the product and how to test the successful installation, see the section "Installing the product".
Product use information
For information on how to use and configure the product to get barcodes printed, see the section "Using the product".
Product specification information
The specification of the product and its mechanism and components is contained in the next chapter.
Troubleshooting/Support information
Platform-independent troubleshooting information specific to this product can be found in the "Troubleshooting" section below.
How to obtain troubleshooting information specific to the platform of the issuing system, is described in the platform-specific chapter below.
Troubleshooting information specific to our devices are contained in the corresponding Operation Instructions manual of each device.
Generic troubleshooting information for OCR fonts, barcodes, and barcode fonts, are given in the "Technical Reference Manual - Barcode &
OCR Printing".
Barcode & OCR Package: User's Manual
page 7 / 95
Background information
For background information about printer fonts and barcodes, please refer to the "Technical Reference Manual - Barcode & OCR Printing".
Platform-specific information
For information specific to the platform of the issuing system, refer to the platform-specific chapter below.
1.2 The documentation
This product "Barcode & OCR Package" comes with several documents.
The ReadMe file serves only as a first point of access, linking to the appropriate documents.
This "User's Manual" contains all of the information necessary for using this product, i.e. to set up barcode printing in arbitrary PCL-based
environments using the barcode fonts of the "Barcode & OCR Package". It gives information specific to this barcode & OCR text printing
solution, both in general, and specific for each supported platform, i.a. the procedure to compose/construct the correct PCL or HP-GL/2
commands necessary to image a barcode.
It also contains detailed information specific to the OCR and barcode fonts of this product. The specification comprises:
- the PCL command sequence to select each font
- the mapping of the symbology character set to the font character set
- the font ASCII table (mapping the ASCII code to a barcode image)
- font measurement information
The "Technical Reference Manual - Barcode & OCR Printing" is independent of this solution and of the platform of the issuing system, and it
is valid for all supported printer devices. It contains related technical background information about PCL fonts, printer languages (PCL and HPGL/2 programming), and barcodes.
For each barcode symbology or barcode application supported, it contains information about its encoding scheme, alphabet, reference values,
and the checksum algorithms.
For each printer device supported, information about the following procedures is provided:
- printing out the HDD Directory list and the PCL Font list
- DIMM insertion and removal
For general information related to barcoding on a specific platform (operating system, application, etc) of the issuing system, corresponding
separate documentation is provided.
For platform-specific information about this product (i.e. the implementation of this product on a specific platform), refer to the corresponding
chapter below.
1.3 Terminology and Notation
This section defines the terminology and notational conventions which are used throughout this document.
For a full list, refer also to the sections "Terminology and Notation" and the Glossary in Appendix G, in the "Technical Reference Manual Barcode & OCR Printing", and in the platform-specific documentation.
Acronyms
z
z
z
z
z
z
BOP
BOP-HDD
BOP-DIMM
BOP-SDcard
BCP
TRM
=
=
=
=
=
=
"Barcode & OCR Package" (name of this product)
the HDD version of the "Barcode & OCR Package"
the DIMM version of the "Barcode & OCR Package"
the SDcard version of the "Barcode & OCR Package"
"Barcode Conversion Program"
"Technical Reference Manual - Barcode & OCR Printing"
1.4 Technical support
To obtain any technical support, please contact your local representative.
You may obtain technical support in the following cases:
z If you have general questions about barcode printing on our devices. (*1)
z If you have questions related to this product.
z If you have problems with barcode printing on our devices in general. (*1)
z If you have problems with this product.
z If you have questions or problems related to barcode printing on our devices under a supported platform.
z If you need support of
- another symbology or
- another CHK method.
z If you need a font with different font metrics:
- N:W ratio, or
- module width (mil), or pitch (cpi).
z If you need a font with a different CTX style (position, font, size, etc).
z If you want some legacy fonts, such as HP "Barcodes and More".
Note: (*1)
For general questions about or problems with barcode printing on our devices, please refer to the "Technical support" section in the "Technical
Reference Manual - Barcode & OCR Printing".
Barcode & OCR Package: User's Manual
page 8 / 95
2 The "Barcode & OCR Package" (Product specification)
This chapter provides specification information about this product, independent of its implementation on a specific platform of the issuing system.
The "Barcode & OCR Package" ("BOP", for short) is a collection of PCL fonts contained on a DIMM or SDcard or on CD-ROM for HDD
download, together with this documentation, thus allowing to set up printing of OCR text and barcodes.
The current release version is v1.28.
It is only available in English language.
The BOP product is distributed as three separate product versions.
- [BOP-HDD]
= HDD download version
- [BOP-DIMM]
= DIMM version
- [BOP-SDcard]
= SDcard version
The HDD product version [BOP-HDD]
In this version the fonts are contained on the CD-ROM, ready for download to the printer HDD.
The DIMM product version [BOP-DIMM]
In this version the fonts are on a DIMM which fits in a slot on the printer controller board. The CD-ROM does not contain any fonts.
The SDcard product version [BOP-SDcard]
In this version the fonts are on an SDcard which fits in a slot on the printer controller board. The CD-ROM does not contain any fonts.
Below, the components and their usage are described, as well as troubleshooting information.
Distribution
The DIMM or SDcard and the CD-ROM must be obtained as part of this package.
The latest version of this document can be downloaded from the WWW.
Support
For troubleshooting information see the hints in the section "Troubleshooting" below.
For information on how to get and contact technical support, see the section "Technical support" above.
2.1 System requirements
2.1.1 Printer devices
Devices supported
In order to be compatible with and work with this product, a printer device needs to support the printer languages PCL5 (including HP-GL/2),
and it needs to have a font compatible DIMM or SDcard slot, or support font downloading to its internal hard disk.
Please refer to Appendix D for a detailed list of the devices supported. The BOP solution works with any of the printer devices listed there.
It is recommended to always use the latest firmware version. For the minimum required firmware version, please ask technical support. .
2.1.2 Issuing system
Platforms supported
In order to make this product work on a certain platform, the platform needs to provide mechanisms to
- send data to the printer device
- create or intercept and modify the print data stream
- run a program or filter to implement some necessary calculations and data conversion routines
About the system requirements of the issuing system, refer to the "System requirements" section of the platform-specific chapter below.
2.2 Barcode types supported
A "barcode type" is determined by these parameters:
z
Symbology:
This determines the character encoding scheme.
z
Checksum method:
Unless the data already contains a check character, it has to be calculated and appended. Some symbologies have several possibilities.
z
Clear text style:
Clear text (human readable text) can be positioned underneath the barcode in different styles (None, Normal, Fully embedded, Halfembedded, Show Start/Stop).
Barcode & OCR Package: User's Manual
z
page 9 / 95
N:W ratio:
Narrow:Wide element ratio.
The supported symbologies were already listed above in the Introduction chapter.
A barcode type is supported, if a corresponding font exists, and if this document provides information about it.
For the barcode types supported by this product, please see the table in Appendix B.
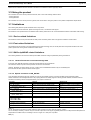
2.2.1 Barcode parameters supported
Barcode parameters need to be implemented through selecting the appropriate barcode font, by applying some conversions to the message
data, and by sending some additional commands. The font selection can be facilitated by defining PCL macros selecting each font. The
conversion requires some mechanism passing the data to a conversion program.
The following table shows for each supported parameter where it can be configured.
Parameter
Message data
(to be barcoded)
z Symbology
z
Supported values
(depends on symbology)
How supported / How to specify
Has to be specified as a parameter for the conversion program.
see Appendix B
Has to be specified as a parameter for the conversion program and the
font macro ID
Has to be specified as a parameter for the conversion program.
Check char. method
(CHK)
Clear text style
(CTX)
Size (Height, Width)
see next section
see Appendix B
scalable
z
Inter-character space
N:W ratio
2.0 | 2.5 | 3.0
z
Rotation
90° | 180° | 270°
z
z
z
z
(depends on symbology)
Has to be specified as a parameter for the conversion program and the
font macro ID .
The size can be specified through the "V" attribute of the PCL font select
sequence; this will change the height and the width proportionally.
Independent scaling of height and width is possible under HP-GL/2
through the SI command.
Possible under HP-GL/2 through the ES command. Should be left at zero.
Implemented as different fonts for each; not all three ratios are supported
by every symbology. See Appendix B.
Through an explicit rotate command.
Under PCL, an <esc>&a#P command can be used.
If HP-GL/2 is used, an RO command needs to be specified.
The following parameters can NOT be supported due to the limitations inherent in the nature of the font mechanism.
z the physical width of each element (bar, space) individually for each different logical width
2.2.1.1
CTX parameters
BOP implements the following clear text parameters.
Parameter
z yes/no
z embedding style
z where / position
z font
z size
2.2.1.2
Implementation
through 2 different versions of the font
through different sets of start/stop characters and guard bars; see the list below
predetermined through the barcode font: normally underneath; for EAN/UPC 2/5-digit supplement on top
predetermined through the barcode font; cannot be changed
predetermined through the barcode font and the currently chosen size
CTX styles
BOP supports the following clear text styles.
They are implemented through different sets of start/stop characters and guard bars.
Tag
--
CTX style
None
_N
Normal
Sample
Barcode & OCR Package: User's Manual
_F
Fully embedded
_H
Half embedded
_S
Show Start/stop character
page 10 / 95
2.3 The Mechanism (Barcode printing with BOP)
The "Barcode & OCR Package" (BOP) works according to the following mechanism.
On the printer (on a DIMM or SDcard or on the HDD) PCL barcode fonts are residing.
On the issuing system the barcode parameters and the message data are specified.
A (platform-specific) "barcode conversion program" converts these into a PCL command sequence compatible with the barcode font.
2.4 The Components
BOP consists of the following platform-independent components. They are explained in detail in subsequent sections.
For platform-specific components, refer to the platform-specific chapter below.
The package contains these hardware components:
z CD-ROM containing the software components and documentation.
There is an HDD variant [BOP-HDD] and a variant for [BOP-DIMM] and [BOP-SDcard].
z DIMM ("Barcode & OCR Font DIMM") [only for BOP-DIMM] or
SDcard ("Barcode & OCR Font SDcard") [only for BOP-SDcard]
z Printed copies of the documentation
The following software components are contained on the CD-ROM.
Component
z
Font test files ("TestPRN")
-- HDD download ready PCL files to print a Test sheet (1
per font)
<folder>\<file name>
Version #
\test\<font name>.PRN
v1.00
=== [BOP-HDD only] ===
z
z
Fonts (Barcode, OCR)
as HDD download-ready Font download files
("DownloadPRN")
Font remove files ("RemovePRN")
-- to remove all fonts from the printer HDD
\fonts\F<vvv>DWN<c>.PRN
(*2)
v1.03
(<vvv>=103)
\fonts\F<vvv>RMV<c>.PRN
(*2)
v1.03
(<vvv>=103)
Note: (*2)
The fonts are provided on DIMM or SDcard, or as one single HDD download file ("DownloadPRN"). Refer to the chapter "The Fonts" below.
The <c> in the file names indicates a tag for the controller type of the printer device. Refer to Appendix D for its meaning. .
The <vvv> in the file names indicates the version number.
The following documents are contained on the CD-ROM (in PDF / Acrobat format).
z
z
z
z
ReadMe
\ReadMe.txt
v1.28
User's Manual (this document)
Technical Reference Manual - Barcode & OCR Printing
(TRM)
\doc\User's Manual .pdf
\doc\Technical Reference Manual .pdf
v1.28
v1.31
DIMM setup procedures
\doc\DIMM\DCxx.pdf
--
Barcode & OCR Package: User's Manual
page 11 / 95
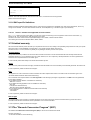
2.4.1 The CD-ROM folder structure
There are two versions of the CD-ROM, one for [BOP-HDD] and one for [BOP-DIMM] or [BOP-SDcard].
The CD-ROM's have the following folder structure:
- ReadMe.txt
- \doc\
User's Manual .pdf
Technical Reference Manual .pdf
...
-- (**) platform-specific documentation
- \doc\DIMM
DCxx.pdf
-- DIMM setup procedures
- \fonts\
-- only [BOP-HDD]
F103DWN1.prn
F103DWN2.prn
F103RMV1.prn
F103RMV2.prn
- \test\
<font name>.PRN
...
- \...\
-- 1 for each font
-- (**) platform-specific test files
-- (**) platform-specific folders
Note: (**)
Besides these, additional platform-specific files and folders may exist. Please refer to the platform-specific chapter below.
2.5 Installing the product
To install the product, the following steps are necessary:
1. Install the Fonts
Inserting the DIMM or SDcard into the printer device
Please see the subsection "How to install" in the section "The Fonts" below.
-- [BOP-DIMM] or [BOP-SDcard]
Download the fonts to HDD
Please see the subsection "How to install" in the section "The Fonts" below.
-- [BOP-HDD]
2. Platform-specific steps
For possible platform-specific steps, refer to the platform-specific chapter below.
2.6 Testing the product
1a. Verify the Fonts are installed correctly
1b. Verify the Fonts produce scannable barcodes
Please see the subsection "How to test" in the section "The Fonts" below.
2. Platform-specific steps
For possible platform-specific steps, refer to the platform-specific chapter below.
2.7 Uninstalling the product
To uninstall the product, the following steps are necessary:
1. Uninstall the Fonts
Uninstall the DIMM module or Unplug the SDcard
Please see the subsection "How to uninstall" in the section "The Fonts" below.
-- [BOP-DIMM] or [BOP-SDcard]
Remove the fonts from HDD
Please see the subsection "How to uninstall" in the section "The Fonts" below.
-- [BOP-HDD]
2. Platform-specific steps
For possible platform-specific steps, refer to the platform-specific chapter below.
Barcode & OCR Package: User's Manual
page 12 / 95
2.8 Using the product: Printing OCR text
To print OCR text, put the correct font select command sequence in front of the text.
Behind the text, switch back to a normal text font by sending the correct command sequence. Alternatively, use the primary/secondary font
mechanism of PCL.
To get the correct font select command sequence for a particular font, look at the Test sheet or the PCL Font list, or refer to the corresponding
section of the chapter "The Fonts" below.
For platform-specific information how to do this, refer to the platform-specific chapter below.
2.9 Using the product: Printing barcodes
This section describes how to print barcodes using BOP, independent of a specific environment.
For the procedures on a specific environment, refer to the platform-specific chapter below.
The following desired parameters influence the required command sequence:
- Symbology
- CHK method
- N:W ratio
- CTX style
- Size (Width, Height)
- Orientation (Rotation)
- Position (horizontal/vertical offset)
Printing a barcode can be configured step-wise in these stages:
- 1. Conversion of message data
- 2. Font selection
- 3. Drawing of a draft barcode (at some default size, without rotation, at the current position)
- 4. Sizing the barcode correctly
- 5. Orienting / Rotating
- 6. Positioning the barcode correctly
- 7. Drawing the CTX explicitly [if necessary]
These determine the entire necessary command sequence.
In the "Technical Reference Manual - Barcode & OCR Printing", it was explained how the necessary command sequence can be constructed.
Implementing this command sequence under a particular environment, involves a series of platform-specific steps. Please refer to the platformspecific chapter below.
For the Barcode & OCR Package, the PCL and HP-GL/2 printer language has to be used.
The following approach is recommended.
<font select>
The recommended method is to define the barcode font as secondary and the normal text font as primary.
<sizing, rotating, positioning>
The command syntax for these parameters are explained at the corresponding chapters for PCL and HP-GL/2 in the "Technical Reference
Manual - Barcode & OCR Printing".
<converted message data>
For the conversion of the message data, please see the "Code construction" sections in the chapter "The Fonts" below for the corresponding
symbology and for the font used.
<font deselect>
Here it is recommended to just switch back to the primary font.
Note: (Clear text)
Drawing clear text can be achieved by a corresponding barcode font, or it can be drawn separately using a normal text font.
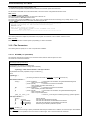
2.9.1 The command sequence
This section describes and explains the command sequence that is recommended for use with printing barcodes.
It uses the HP-GL/2 printer language, which is part of PCL.
Detailed information about the command syntax can be found in the "Technical Reference Manual - Barcode & OCR Printing".
Note: (HP-GL/2 versus PCL)
The main reason why HP-GL/2 is being used is that this language allows independent scalability of width and height of a barcode.
With a pure PCL font select command, the width and height of the output font can only be scaled proportionally; i.e. their ratio always remains
the same.
The HP-GL/2 language offers the possibility to scale a font in both dimensions independently.
This allows you to customize the look of the barcodes to match very closely to those printed with any previously used barcode application.
This ensures continued scannability, and continued fitting in any existing previously designed forms.
Furthermore, the HP-GL/2 command sequence is actually even easier to understand and easier to use than PCL, because it is plain non-binary
ASCII, and because the sizing and positioning parameters can be directly specified in cm, without any conversion into pt.
Barcode & OCR Package: User's Manual
page 13 / 95
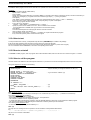
For each barcode to be printed, the command sequence can be split up into two parts:
- an HP-GL/2 re-initialize sequence
- a font-specific sequence
The full command sequence for each barcode to be printed, and the meaning of each command is described here.
...
<esc>*p0P
<esc>%1B
IN;
SP8;
PR;
DT<9F>;
SC0,400,0,400,2;
RO0;
<esc>%0A
...
...
<SO>
<font select command>
<esc>*c99d6F
<esc>%1B
SA
FN99;
SP8;
PU<xoffs>,<yoffs>;
RO<angle>;
SI<width>,<height>;
ES<factor>;
LB<data><9F>;
RO0;
<esc>%0A
<SI>
<esc>*p1P
...
HP-GL/2 re-initialize sequence
-- push color palette
-- enter HP-GL/2 mode
-- initialize
-- set black pen
-- set default plotting mode to relative
-- define text delimiter (any character not used in any symbology)
-- define 1 user-unit as 400 plu = 1 cm
-- cancel rotation
-- exit HP-GL/2 mode
font-specific sequence
-- switch to secondary font
-- normal PCL font select sequence by attributes
-- copy to RAM and assign font ID # 99
-- enter HP-GL/2 mode
-- select alternate/secondary font
-- select secondary font ID # 99
-- re-set black pen
-- (optional) for positioning: specify relative horizontal & vertical offset
-- (optional) for rotation: specify angle
-- specify width and height (in cm)
-- specify inter-character spacing factor
-- print data (terminated by the delimiter <9F>)
-- clear rotation
-- exit HP-GL/2 mode
-- switch to primary font
-- pop color palette
Note: (Syntax)
Semicolons are delimiters for commands, but can be omitted in most cases.
They should be kept for better readability, but can be omitted to save space.
Note: ("SP8")
To draw text in black color, a black pen needs to be selected.
The "SP1" command unfortunately selects a red pen on color printers, due to a redefinition of the color table by the HPL2 OTF driver of SAP.
The "SP8" command works OK with both black-and-white and color printers.
Note: ("99")
It is necessary to assign a temporary font ID to a font under PCL, in order to be able to access it from HP-GL/2.
The choice of "99" was arbitrary. If there is any conflict with other PCL font ID's used, it could be changed.
Note: ("<9F>")
This character is used to delimit text for the LB command. (On an editor it shows as "Ÿ".)
The choice of "<9F>" is arbitrary. It could be changed to any other character, but subject to these restrictions:
- it is never used in the (converted) message data, and
- it is supported by the platform's character set.
Note: ("<esc>*p0/1P": Push/Pop color palette)
These commands are to save/restore the current color palette before/after each command sequence for a barcode, because the HP-GL/2 "IN"
command re-defines and thus overwrites the current palette.
To implement this command sequence, the printing architecture and barcode mechanism of the issuing system has to be taken into account.
Refer to the platform-specific chapter below.
2.9.2 Drawing the barcode
To print a draft barcode, regardless of its size or orientation or position, i.e. with some default size and at the current position, the following
steps are required.
Depending on the desired symbology, CHK method, and CTX style, determine the parameters to be specified.
Depending on the desired symbology, N:W ratio, and CTX style, determine the Font to be used, with the Font ID "xyz".
Once a draft barcode has been successfully printed out, you can turn towards getting the correct sizing, orientation, and positioning.
2.9.3 Sizing the barcode
Barcode & OCR Package: User's Manual
page 14 / 95
If no size command is specified, the size of the last text drawn will remain effective.
Therefore, the size needs to be respecified.
Using HP-GL/2, the desired size can be easily specified through the SI command.
E.g.
... SI0.13,0.95; LB <converted message data> <9F> ...
The 1st parameter specifies the width (of 1 barcode character !), the 2nd the height, in centimeters [cm].
The syntax of the SI command is explained in detail in the "Technical Reference Manual - Barcode & OCR Printing".
Determining the correct parameters
Due to the font design, the measured size will most likely be different from the nominal size specified in this command.
To find out the correct parameters required to yield the desired size, specify some reasonable nominal parameter values (i.e. such that the
resulting barcode will still fit on the page), e.g. SI0.25,1.0, then measure the sizes of the printed result, then use the rule of three to calculate
the required parameter, as follows (separately for width and height) :
(Required parameter) = (Nominal parameter) x (Desired size) / (Measured size)
Example: (here: for "width")
0. Assume you want to have a total width of 8 cm.
1. Print the barcode using "SI 0.25, 1.0".
2. Measure the total width; assume it yields 11.3 cm, hence it is too long.
3. Calculate 8 x 0.25 / 11.3 = 0.177.
4. Printing the barcode using "SI 0.177, 1.0", will yield the desired width.
2.9.4 Orienting/Rotating the barcode
Note that a PCL rotate command (<esc>&a90P) has unfortunately no effect on the HP-GL/2 coordinate system. Therefore, an HP-GL/2 rotate
command needs to be specified additionally.
The desired rotation can be specified using the RO command.
E.g.
... RO90; SI0.13,0.95; LB <converted message data> <9F> ...
Possible angles are only 90°, 180°, or 270°, and 0°.
The syntax of the RO command for the rotation of text is explained in detail in the "Technical Reference Manual - Barcode & OCR Printing".
2.9.5 Positioning the barcode
The issuing system may have its own mechanisms to specify the cursor position for placing text.
However, due to the design of the barcode fonts, the reference point of the font characters may not always coincide with the lower left corner of
the first bar. Therefore, some adjustment of the position may be required.
A relative position offset can be specified using the PU command.
E.g.
... PU-1.0,0.5; RO90; SI0.13,0.95; LB <converted message data> <9F> ...
The 1st parameter specifies the horizontal offset, the 2nd parameter specifies the vertical offset.
Use negative values to shift the position to the left and down.
Due to the "PR" (Plot relative) command sent in the initial sequence, the PU parameters are interpreted as relative offsets instead of absolute
coordinates.
Due to the "SC0,400,0,400,2;" scaling command sent in the initial sequence, which defines a user unit as 400 plu ("plotter units") = 1 cm, the PU
parameters can be specified in centimeters [cm].
The syntax of the PU command is explained in detail in the "Technical Reference Manual - Barcode & OCR Printing".
Note: (Order of PU and RO commands)
The PU command should always precede a RO command, if any. For a PU command is interpreted relative to the current coordinate system,
which is changed by the RO command.
If an RO command is already specified in the prefix Print control, and if the positioning is to be changed directly in the SAPscript document/Form,
then the PU command should be preceded by "RO0;", and the actual RO command should be re-issued after the PU command. I.e. ... RO0;
PU___,___; RO90; ...
Otherwise, the offsets of the PU command would first have to be transformed with respect to the rotated coordinate system.
Note: (Position after drawing the barcode)
The horizontal and vertical position of the cursor after drawing the barcode may depend on the barcode mechanism of the issuing system.
Please refer to the platform-specific chapter below.
Note: (HP-GL/2 Picture Frame)
If a barcode is cut off near the border, then it may lie partially outside the "HP-GL/2 Picture Frame".
The nature of the HP-GL/2 Picture Frame, and how to enlarge it, is explained in the "Technical Reference Manual - Barcode & OCR Printing".
Barcode & OCR Package: User's Manual
page 15 / 95
For how the command sequence can be implemented under a specific environment, please refer to the platform-specific chapter below.
2.9.6 Drawing the CTX explicitly
It may be required that the clear text (CTX) be drawn in a specific fashion (font, size, position) that cannot be achieved with the CTX-integrated
barcode fonts.
In that case a non-CTX font should be used for the barcode, and the CTX should then be drawn explicitly separately at the desired position
using a suitable text font.
Both can be done with HP-GL/2, thus allowing independent and arbitrary positioning, sizing, and inter-character spacing, for the barcode and
the CTX.
Since this requires some sophisticated modification of the command sequence, please contact technical support.
2.9.7 The complete procedure
This section summarizes the discussion of the previous sections, presenting the complete procedure necessary to add support for printing a
new barcode.
2.9.7.1
(Step i) Preparation: Determining the parameters
Determine the Symbology that is required by your barcode environment.
Determine the Check character method (CHK method) that is required by your barcode environment.
Determine the desired Clear text style (CTX style), that you want the barcode to be printed with.
- Do you need clear text or not ?
- If yes, determine the clear text style desired.
Determine the N:W ratio that is most suitable for your barcode environment.
Normally 1:2.0 should be fine.
In case of a small size or enough space or bad reading conditions, a higher ratio may improve readability.
Determine the desired Size (total width and height) of the barcode.
Determine the desired Orientation (rotation) of the barcode.
Determine the desired Position of the barcode.
Determine the naming of all necessary objects.
2.9.7.2
(Step ii) Implementing the parameters
In accordance with the barcode mechanism and the print architecture of the issuing system, implement all portions of the resulting command
sequence at the proper places.
2.9.7.3
(Step iii) Adjusting the print output
Print the document.
If the barcode does not print OK (missing or garbled), refer to the "Troubleshooting" section below.
Otherwise:
Adjusting the size
Measure the total width and height, and calculate the required parameters for the SI command, applying the formula given above.
Specifying rotation
If the barcode needs to be rotated, specify the RO command, as indicated above.
Adjusting the position
If the position needs to be adjusted, insert a PU command specifying the relative horizontal and vertical offset, as indicated above.
2.9.7.4
(Step iv) Drawing the CTX explicitly [if necessary]
In accordance with the barcode mechanism and print architecture of the issuing system, implement the command sequence explained above.
Print the document.
Adjust the size and position of the CTX, if necessary.
Barcode & OCR Package: User's Manual
page 16 / 95
2.10 Limitations
The following limitations exist in this product.
For information how to work around these, please see the hints given below, or contact support.
2.10.1 Font related limitations
The following limitations are generally inherent in the (font-based) approach and technology used, as well as particular to the specific Paceline
fonts of this product.
2.10.1.1 Independent scalability of Width and Height
This is not possible with pure PCL.
However, it is possible by means of HP-GL/2.
2.10.1.2 Individual scaling of the widths of bars and spaces of each thickness
Reason: This is not possible with a font.
Workaround: Different "Narrow : Wide ratios" are implemented as different fonts.
2.10.1.3 Clear text style and placement
Only the 4 variants (N,H,F,S) defined above are currently supported.
For other CTX styles, please contact technical support.
2.10.1.4 Clear text with Code 39/93 Extended
This is not reasonable.
Reason:
Only the escape codes would be shown. E.g. ";" as "%F" or "(%)F".
It is not possible with a font to independently format the clear text.
Workaround:
For the barcode use a non-CTX barcode font.
Then place the clear text data as separate text underneath the barcode, using a normal text font.
2.10.1.5 Clear text with Check characters
If both are specified, any check characters are also displayed with clear text. (This may be unwanted.)
Workaround: Please contact technical support.
2.10.1.6 Special Clear text styles
Some special clear text conventions of some barcode applications are not possible to achieve with a barcode font.
E.g.
- German Post Ident-/Leitcode:
40472.074.006.00 (Leitcode)
- Pharma-Zentral-Nummer (PZN):
PZN-1234567
Reason:
This is due to the limited possibilities of a barcode font.
Workaround:
For the barcode use a non-CTX barcode font.
Then place the clear text data as separate text underneath the barcode, using a normal text font.
2.10.1.7 Clear text with HP-GL/2 SI command
The possibility of independently scaling the width and the height of a barcode, may result in a somewhat distorted appearance of the clear text.
Workaround:
Use a non-CTX barcode font, and draw the clear text separately using a normal text font.
Please refer to the section "Drawing the CTX explicitly" above.
Barcode & OCR Package: User's Manual
page 17 / 95
2.10.2 Platform related limitations
Depending on the platform/environment, additional limitations may exist.
These could affect:
- the max. number of message characters
- the message character set (some preliminary mapping may be needed)
- intermediate character sets involved
Refer to the "Limitations" section of the platform-specific chapter below.
2.10.3 Device related limitations
The following limitations are inherent in the capabilities of the printer device (printer controller, HDD, DIMM, SDcard, etc).
2.10.3.1 The SI command
Using the HP-GL/2 SI command without parameters may fail on some devices.
=> Always specify proper values for the width and height parameters.
2.11 Limited warranty
We cannot warrant that this product will meet your requirements and is error-free, relating to the operability and performance under your specific
platform, and the readability of the barcodes in your specific barcode reading environment.
Therefore we can, in no event, assume any liability for any damages caused by the use of this product.
Fonts
The fonts of this product have been thoroughly checked with several barcode readers as to the scannability of the barcodes generated with
these fonts.
In case of problems, please contact technical support.
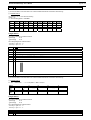
2.12 The Fonts
The fonts are the first crucial element of the "Barcode & OCR Package".
There are 30 fonts provided with this product, 27 Barcode fonts and 2 OCR fonts.
Refer to Appendix F for a detailed list.
See the chapter "The Fonts" below for an exact specification of each font, i.e. for information about their font ID's and naming, their attributes
and character sets, the font select command sequences, and the font measurements.
The font data is the intellectual property of Paceline GmbH.
Note: ("Void marker": Ø)
In most fonts, all unused character codes are initialized with a unique symbol (looking similar to Ø), thus marking it as undefined and therefore
as not to be used.
For how to install, test, and uninstall the fonts, refer to the sections "How to install/test/uninstall the fonts" below.
The fonts are distributed as follows:
=== [BOP-DIMM] ===
On a DIMM.
=== [BOP-SDcard] ===
On an SDcard.
=== [BOP-HDD] ===
There is one single HDD Font download file for each controller type <c> contained in the folder \fonts\ on the CD-ROM.
The files are named F<vvv>DWN<c>.PRN.
2.12.1 OCR fonts
There are 2 OCR fonts provided with this product. For details, refer to Appendix F.
Barcode & OCR Package: User's Manual
page 18 / 95
For background information about OCR fonts and for sample text, refer to the "Technical Reference Manual - Barcode & OCR Printing".
2.12.2 Barcode fonts
For those barcodes that can be realized with fonts, any meta characters (start, stop, intermediate, check characters) need to be already inside
the data stream. Since a barcode has more characteristics than a font, not all of them can be specified through the standard font select
mechanism, e.g. module width, clear text, etc.
For general information about barcodes and symbologies, refer to the chapter "Barcodes (General information)" in the "Technical Reference
Manual - Barcode & OCR Printing".
For further information about the barcode fonts, refer to the chapter "The Fonts" below.
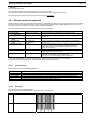
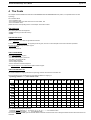
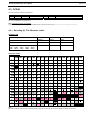
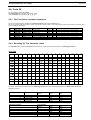
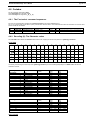
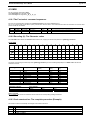
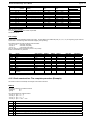
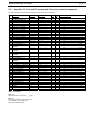
2.12.3 Font classification and numbering scheme
The fonts are arranged and numbered by the following classification and numbering scheme <xyz>.
ID
Symbology Character Set / Alphabet
Length
Examples
0yz
1yz
2yz
3yz
4yz
5yz
6yz
7yz
8yz
9yz
(for currently active font)
alpha-numeric, full ASCII
numeric, alpha uppercase
numeric, special
numeric only
postal
numeric only
(reserved)
(reserved)
(non-barcode fonts)
-variable
variable
variable
variable
variable
fixed
----
-Code128, etc.
Code 39, Code 93, etc.
Codabar, etc.
2/5 Interleaved, 2/5 Industrial, 2/5 Matrix, MSI, etc.
USPS POSTNET, FIM, etc.
EAN/UPC, etc.
--OCR-A/B, etc.
The ID has this meaning:
- The 1st digit, x, indicates the category of the character set.
- The 2nd digit, y, is a sequential number (0..9) within each category.
- The 3rd digit, z, indicates the N:W ratio and the CTX presence of the font, according to the following convention:
CTX:
N:W ratio:
1: 2.0
1: 2.5
1: 3.0
NR ("not readable")
=> even
0
2
4
TX ("with text")
=> odd
1
3
5
The ID can be used for PCL macros or fonts involved.
The full list is given in Appendix FC.
2.12.4 How to install the fonts
=== [BOP-DIMM] ===
Insert the DIMM in the printer device.
Please see the separate documents in the folder \doc\DIMM on the CD-ROM for the exact procedure for the concerned device model.
Be sure to follow all instructions to reduce the risk of damaging the device by static electricity.
=== [BOP-SDcard] ===
Insert the SDcard into the correct slot on the printer device. The device must be switched off !
Please follow the instructions as given in the Operating Instructions manual. In case of problems please contact technical support.
=== [BOP-HDD] ===
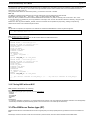
Send the device-specific font download file (F<vvv>DWN<c>.PRN) from the CD-ROM to the printer device, by using lpr or copy /b.
copy /b F<vvv>DWN<c>.PRN LPT1:
or
lpr -S <IP address> -P <PORT1|lp> F<vvv>DWN<c>.PRN
For the value of <c> (controller type = 1 or 2) to use, refer to Appendix D.
For the correct name of the printer queue name (PORT1 or lp) to use for a given device model, refer to Appendix D.
Example:
Note:
lpr
-S 172.17.27.99
-P lp
D:\fonts\F102DWN2.PRN
Barcode & OCR Package: User's Manual
page 19 / 95
Please note that sending the download file to the printer twice, thus overwriting existing HDD fonts with the same names, may lead to unwanted
results. If you need to download the fonts again after the first attempt failed, make sure you apply the uninstall procedure first before you retry.
Note: (lpr)
Please note that the Windows "lpr" command is not available as a standard on Windows 9x, only on Windows NT, 2000, XP, and newer.
Please note that the "lpr" command on Unix systems may have a slightly different syntax.
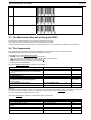
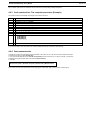
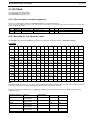
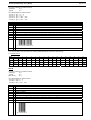
2.12.5 How to test the fonts
There are two levels of testing the correct installation of the fonts.
1. Verify the fonts are installed correctly
There are the following three grades.
1. Print out the PCL Font list, and confirm that the (DIMM or SDcard or HDD) fonts appear correctly.
Refer to Appendix DPF for the exact procedure for a particular device.
2. Further, the HDD Directory list may be printed to see which font files are on the HDD.
Refer to Appendix DPF for the exact procedure for a particular device.
3. Further, a Test sheet may be printed for each font individually, by sending the corresponding test sheet file (\test\<font>.PRN) from the CDROM to the printer device, by using lpr or copy /b. See the section "The Font Test sheets" below. The syntax is:
copy /b <file name>.PRN LPT1:
or
lpr -S <IP address> -P <PORT1|lp> <file name>.PRN
For the correct name of the printer queue name (PORT1 or lp) to use for a given device model, refer to Appendix D.
Example:
lpr
-S 172.17.27.99
-P lp
D:\test\C128_20N.PRN
2. Verify the fonts produce scannable barcodes
For this purpose, the rear side of the Test sheet for each font contains a few samples of scannable barcodes produced with that font.
Note: If the test fails, try re-installing the fonts. If it still fails, contact support.
2.12.6 How to uninstall the fonts
=== [BOP-DIMM] ===
Remove the DIMM from the printer device.
Please see the separate documents in the folder \doc\DIMM on the CD-ROM for the exact procedure for the concerned device model.
=== [BOP-SDcard] ===
Remove the SDcard from the printer device. The device must be switched off !
=== [BOP-HDD] ===
Font Removal
To remove the fonts from the printer's HDD, this can be done by sending a special Font remove file.
There is one remove file per controller type <c> (for the specification refer to Appendix D).
The files are named F<vvv>RMV<c>.PRN.
Send the device-specific font remove file (F<vvv>RMV<c>.PRN) from the CD-ROM to the printer device, by using lpr or copy /b.
The exact syntax is:
copy /b F<vvv>RMV<c>.PRN LPT1:
or
lpr -S <IP address> -P <PORT1|lp> F<vvv>RMV<c>.PRN
For the value of <c> (controller type = 1 or 2) to use, refer to Appendix D.
For the correct name of the printer queue name (PORT1 or lp) to use for a given device model, refer to Appendix D.
Example:
lpr
-S 172.17.27.99
-P lp
D:\fonts\F102RMV2.PRN
Afterwards, you may wish to print out the PCL Font list and/or the HDD Directory list to verify that the (DIMM or HDD) fonts are no longer
appearing.
Barcode & OCR Package: User's Manual
page 20 / 95
Note: The removal of individual font files is NOT supported.
Note: (Procedure for [DC33])
The file F<vvv>RMV2.PRN cannot be used on [DC33] !
Instead, the HDD needs to be re-formatted. Please refer to the Operating instructions manual for the proper procedure.
2.13 The Font Test sheets
There are PCL5-based Font test files (.PRN) that allow you to print out the Font test sheets. They are device-independent and platformindependent.
The test sheets allow you to confirm that the fonts were installed OK and are being recognized correctly, i.e. that the DIMM or SDcard was set
correctly, or that the fonts were downloaded OK.
There is one test sheet file for each font containing this information:
Title
z
Internal Font ID
z
Name of Test file
z
Name of Font
z
Font select command sequence (PCL)
z
ASCII table
z
some scannable sample barcodes (including all characters)
z
The files are named <font name>.PRN and are located in the folder \test\ on the CD.
For the name (\test\<font>.PRN) of the test sheet file for a particular font, please refer to Appendix FC or the information in the chapter of that
font.
The PRN file needs to be sent to the printer using any method (lpr, copy /b, ...).
For a sample, refer to Appendix FT.
The sheets are designed in such a way that they will work with both A4 and LTR paper size.
2.14 Troubleshooting
For generic troubleshooting hints for barcode printing, and for hints specific to barcode fonts, please refer to the section "Troubleshooting" in the
"Technical Reference Manual - Barcode & OCR Printing".
Especially, make sure the barcode fonts work properly.
For issues related to print quality, refer also to the "Technical Reference Manual - Barcode & OCR Printing".
For BOP-specific troubleshooting of barcode printing, please try to understand the underlying mechanism and the data flow between the related
components, and conduct your analysis accordingly.
Refer also to the "Troubleshooting" section in the platform-specific chapter below.
Try to capture the final PCL (& HP-GL/2) data stream into a file, and check the correct appearance of the following items:
- the initial sequence, initializing HP-GL/2 and defining the PCL macros
- the macro call, or the font select command sequence
- the switching between primary and secondary fonts
- the original message data (Does it contain any problematic special characters ?)
- the converted message data (as printed with the barcode font) (Are the remapped font characters correct ? Is the check character correct ?)
- Is the text properly terminated by the delimiter <9F> ?
- Is the "LB" command properly specified in front of the text ?
If the barcode appears cut off near the border, consider enlarging the "HP-GL/2 Picture Frame", as described farther above.
Barcode & OCR Package: User's Manual
page 21 / 95
3 The "Barcode & OCR Package for SAP"
This chapter contains information about Barcode and OCR text printing on our printer devices under SAP (R/3, mySAP ERP) using the
"Barcode & OCR Package" (BOP), i.e. the implementation of barcode printing under SAP based upon the barcode fonts of the "Barcode &
OCR Package".
Under SAP, defining an additional font and implementing a barcode solution has to be done in conjunction with the SAP printing and barcoding
architecture.
In addition to the barcode fonts residing on the printer, there is an ABAP/4 "barcode conversion" program to parse the barcode specification
and convert the data into those compatible with the font. It is designed to work with our ZA00 v005+ device type.
3.1 Overview
The "Barcode & OCR Package for SAP" is a solution based on a set of PCL barcode fonts residing on the printer device (on HDD or DIMM or
SDcard), and an ABAP/4 program running on the SAP spool server which performs any computations necessary.
It consists of several components which are described in detail below in this chapter.
The Barcode fonts come on a DIMM or SDcard or need to be downloaded to a HDD from the CD-ROM. The properties of the fonts and their
installation are explained in great detail above.
The "Barcode Conversion Program" (BCP) ZABCP is an ABAP/4 program which needs to be installed on the SAP application server that
acts as the spool server. Its installation is explained below in this chapter.
The "SAP PCL Device Type" (DT) ZA001vvv is an SAP Device type which has been specifically designed to work together with these specific
barcode fonts and the "Barcode Conversion Program". It needs to be installed on the SAP spool server.
The full specification of this product is kept in a separate document: please refer to Volume 2 [ZA0x].
Note:
Any reference to the ZA00 Device type in this document also largely applies to the Device types ZB00 and RC000 and RC100.
Farther below in this chapter, the installation of the product and its components, the testing of the installation, and the uninstallation are
described.
Finally, the usage of the product describes in detail the steps necessary to get a particular barcode printed from SAPscript.
For general background information about the SAP mechanism of fonts (System fonts, Printer fonts, etc.) and barcodes (System barcodes,
Printer barcodes, etc.), refer to "Volume 2B" of the customer documentation.
For information not related to SAP, i.e. general information about printer fonts and barcodes and barcode symbologies, and information about
our printer devices (PCL font list, downloading and managing HDD download fonts (HDD download file list), installing the DIMM, etc.), please
refer to the "Technical Reference Manual - Barcode & OCR Printing".
3.2 The Product
The SAP platform-specific version of the product is named “Barcode & OCR Package for SAP" (also "BOP", for short).
BOP allows you to print barcodes and OCR text under SAP in conjunction with the Latin-1 version of our SAP Device type ZA00, version v005+.
The ZA001vvv Device type and its documentation (newest version) are freely available for download on the WWW.
All other components are bound to this product and can only be obtained as part of this package.
3.3 System requirements
For system requirements not specific to the platform of the issuing system, refer to the "System requirements" section of the platformindependent chapter above.
Issuing system: SAP (R/3, mySAP ERP)
The BOP solution requires the following minimum SAP environment.
SAP Spool server:
SAP release R/3 v3.0 or higher; incl. mySAP ERP etc.
SAP Device type:
ZA00 Latin-1 v005+
or ZA00U v012+ (only if BCP is not used)
3.4 Barcode parameters supported
There are two places at which the SAPscript designer can specify something about the barcode:
z through the parameters for BCP, in the call sequence from the SAPscript document/Form
z through the barcode character format <Bx> (which determines the SAP system barcode and the SBPxx print controls, and thus eventually
the font select sequence)
Barcode & OCR Package: User's Manual
page 22 / 95
The following table shows for each supported parameter where it can be configured.
Parameter
Message data
(to be barcoded)
z
z
z
z
z
z
z
z
Symbology
Check char. method
(CHK)
Clear text style
(CTX)
Size (Height, Width)
Inter-character space
N:W ratio
Rotation
Supported values
(depends on symbology)
see Appendix B
(depends on symbology)
see above
see Appendix B
scalable
2.0 | 2.5 | 3.0
90° | 180° | 270°
How supported / How to specify
Has to be specified as a parameter for BCP.
The converted data is then passed to the print data stream after the font
select command.
Has to be specified as a parameter for BCP and the font macro ID
Has to be specified as a parameter for BCP.
Has to be specified as a parameter for BCP and the font macro ID .
The size can be specified through the "V" attribute of the PCL font select
sequence; this will change the height and the width proportionally.
Independent scaling of height and width is possible under HP-GL/2
through the SI command.
Possible under HP-GL/2 through the ES command. Should be left at zero.
Different fonts for each; not all three supported by every symbology.
This is an attribute of the SAP system barcode.
Under HP-GL/2, an explicit RO command must be specified.
The following parameters can NOT be supported due to the limitations of the Font and ABAP mechanism.
z the width of each element (bar, space) individually for each different thickness
3.5 The Mechanism
BOP implements the imaging through barcode fonts located on the printer's HDD or on a DIMM or SDcard.
This requires remapping the message data characters according to the character set (code page / symbol set) of the font.
This and all other code construction tasks (parsing of specification, checksum calculation, etc.) are implemented in an ABAP/4 program running
on the SAP server, called "Barcode Conversion Program" (BCP).
Some of the barcode specification parameters (incl. the original data) are passed to BCP through an ABAP program call issued from within the
SAPscript document/Form.
BCP converts that to a string which is passed back to SAPscript and eventually "to the barcode font".
The barcode font has to be selected before the string text is output, and deselected afterwards.
BOP implements this by switching between the primary and secondary fonts under PCL or HP-GL/2, using the "Shift-In" / "Shift-Out" commands.
These are contained in Print controls defined in the Device type.
3.6 The Components
BOP consists of the following platform-specific components.
They are explained in detail in subsequent sections.
For platform-independent components, refer to the section "The Components" in the platform-independent chapter above.
The following platform-specific software components are contained on the CD-ROM:
Component
z
ABAP/4-based Barcode Conversion Program (BCP)
z
SAP proprietary Device type (DTx) (*1)
z
Sample SAPscript document
<folder>\<file name>
Version #
\BCP\ZABC0104.txt
v1.04
\DT\ZA001024.PRI \DT\ZA00U024.PRI
\DT\ZA00V024.PRI
\DT\ZB001025.PRI \DT\ZB00U025.PRI
v024.028
\test\ZABSAMPLE.ITF
v1.02
v025.029
The following platform-specific documents are contained on the CD-ROM (in PDF / Acrobat format).
z
Volume 2B
\doc\Volume 2B .pdf
v1.09
z
Volume 1
Volume 2 [ZA0x]
Volume 3 [DCxx] (*)
\doc\Volume 1 .pdf
\doc\Volume 2 [ZA0x] .pdf
\doc\Volume 3 [DCxx] .pdf
v1.39
v1.16
v1.39 & lower
z
z
Note: (*1)
Due to a limitation (see the section "Limitations" below), BOP does not work with the Latin-2 version of the Device type (ZA002).
Therefore, the Latin-2 Device type is NOT included in the BOP package.
The Unicode version ZA00U of the Device type can only be used with BOP if BCP is not involved.
Barcode & OCR Package: User's Manual
page 23 / 95
These 3 components are the crucial elements.
- Fonts
-- imaging
- BCP
-- conversion of data
- Device type
-- assemble command sequence
3.6.1 The CD-ROM folder structure
The CD-ROM's have the following folder structure:
- ...
-- (**) platform-independent
- \doc\
...
Volume 1 .pdf
Volume 2 [ZA0x] .pdf
Volume 3 [DCxx] .pdf
Volume 2B .pdf
-- (**) platform-independent
-- (*)
- \DT\
ZA001024.PRI
ZA00U024.PRI
ZA00V024.PRI
ZB001025.PRI
ZB00U025.PRI
- \BCP\
ZABC0104.txt
- \test\
...
ZABSAMPLE.ITF
-- (**) platform-independent
Note: (*)
The "[DCxx]" (for xx= 04,05,...) indicates the "device class". Refer to Volume 1 for which device model belongs to which device class.
Note: (**)
For the platform-independent components, refer to the platform-independent chapter above.
3.7 Installing the product
To install the product, the following steps are necessary:
1. Platform-independent steps
For the platform-independent steps, refer to the platform-independent chapter above.
2. Install the BCP
Please see the subsection "How to install" in the section "The Barcode Conversion Program (BCP)" below.
3. Install the Device type
Please see the subsection "How to install" in the section "The ZA001vvv Device Type (DT)" below.
3.8 Testing the product
To test the product, i.e. the successful installation of all components and their cooperation, there are 2 possible stages:
1. Platform-independent tests
For the platform-independent tests, refer to the platform-independent chapter above.
2. Verify the BCP works correctly together with the Device type
Please see the subsection "How to test" in the section "The Barcode Conversion Program (BCP)" below.
3.9 Uninstalling the product
To uninstall the product, the following steps are necessary:
1. Platform-independent steps
For the platform-independent steps, refer to the platform-independent chapter above.
2. Uninstall the BCP
Please see the subsection "How to uninstall" in the section "The Barcode Conversion Program (BCP)" below.
3. Uninstall the DT
Barcode & OCR Package: User's Manual
page 24 / 95
Please see the subsection "How to uninstall" in the section "The ZA001vvv Device Type (DT)" below.
3.10 Using the product
For information on how to use the product under SAP, refer to one of the following sections below:
- Printing OCR text
- Printing Barcodes
For information on how to use the product in general, refer to the section "Using the product" in the platform-independent chapter above.
3.11 Limitations
The following SAP platform-specific limitations exist in this product.
For information to work around these, please see the given hints, or contact technical support.
For limitations of this product that are not related to SAP or BOP, please refer to the "Technical Reference Manual - Barcode & OCR Printing".
3.11.1 Device related limitations
For limitations inherent in the printer devices and their printer controllers, please refer to the general "Limitations" section above.
3.11.2 Font related limitations
For limitations that are inherent in the (font-based) approach and technology used, as well as particular to the specific Paceline fonts of this
product, please refer to the general "Limitations" section above.
3.11.3 SAPscript/ABAP related limitations
The following limitations are due to the SAPscript and ABAP character coding and parameter passing mechanisms.
3.11.3.1 Limited # characters in barcode message data
In the best case, max. 80 characters as barcode message data can be processed OK.
This restriction should not pose an actual problem with common 1D barcodes.
However, depending on certain factors, the max. number of accommodatable characters may be considerably less.
If this becomes an issue, please contact technical support.
3.11.3.2 Special characters in &IN_DATA&
Only characters supported by the SAP character set 1100 can be handled correctly. They affect the &IN_DATA& parameter of BCP.
Certain characters in the message data cannot be properly passed to the ABAP program in the &IN_DATA& variable, for different reasons.
Therefore, the following cannot be supported directly, but require a workaround.
Character
Reason
Workaround
z
the "&" character
(ampersand; ASCII <26>)
used to delimit SAPscript variable names
Replace by "<0038>" (only if problem).
(*1)
z
the (') character
(quote; ASCII <27>)
used to delimit values in variable assignments
Duplicate as 2 single quotes: ('').
z
the <SP> character
(space; ASCII <20>)
used in ABAP for delimiting values and padding
See next section.
z
ASCII <00>..<1F> (<NUL>,..,<US>)
ASCII <81>..<9F>
ASCII <A0>, <AD>
not supported by the 1100 character set
Currently none.
message control characters
(e.g. <FNC1> of Code128)
not part of ASCII table
Currently none (*2).
z
z
z
Note (*1):
The "&" (ampersand) can always be safely replaced in &IN_DATA& by the SAP character notation "<0038>".
This is not always necessary, however. Only occurrences of pairs "&<non-empty>&" (regarded pairwise from the left) would be attempted to be
interpreted as a variable name, thus leading to an error. Single "&" or "&&" pose no problem.
Note (*2):
Barcode & OCR Package: User's Manual
page 25 / 95
The Code 128 control characters cannot be specified in the &IN_DATA& as part of the message data, using the ASCII codes of the JetCAPS
convention (see the "Technical Reference Manual - Barcode & OCR Printing"), because these are not supported by SAP character set 1100,
and can therefore not be used under SAPscript. However, partially they are automatically generated for the &OUT_DATA& by the BCP. Please
contact technical support.
3.11.3.3 No trailing spaces possible/allowed in &IN_DATA&
I.e. the last character must not be a space character.
Reason: ABAP/4 treats a space character specially for delimiting and padding.
Relevance: This situation of a trailing space in the message data may actually be rather uncommon in the field.
Workaround: Please contact technical support.
3.11.3.4 Incompatibility of BOP with Latin-2
The parameter passing of BCP from ABAP to SAPscript makes it currently impossible to use the BCP with a Latin-2 device type.
Reason: The value of any parameter passed back to SAPscript is interpreted according to the character set of the Device type used by the
Output device used for printing. Any characters not defined in it will be mapped to a "#" thus invalidating the entire data.
Therefore, only the Latin-1 version of the DT (ZA001vvv) can be used.
Workaround: For a Latin-2 based device type, the BCP would need to return different codes in &OUT_DATA&. Please contact technical support.
Note: (Situations where BOP can be used without modifying the SAPscript document/Form, and thus co-exist with other solutions)
This is only possible under the condition that BCP is not necessary for CHK calculation or character translation.
In that case the start/stop characters have to be manually placed in the prefix and suffix Print controls. I.e. they have to be changed as follows:
- Prefix: XBxxx
--> \e&f22xxxy2X\e%1BSAFN99;SP8;SI__,__;LB<start>
- Suffix: XBS00
--> <stop>\x9F;RO0;\e%0A\x0F
3.11.4 BCP-internal limitations
These limitations are a consequence of the current implementation of BCP.
3.11.4.1 UCC/EAN-128 partial implementation
Only one <FNC1> is prepended in the beginning. Multiple <FNC1> within the same barcode are not supported.
That means that an <AI> with variable length values can only be encoded once, and only as the last <AI>.
If support for multiple <AI> with variable length values is needed, please contact technical support.
3.11.4.2 EAN Velocity requires exactly 6 digits
If your data contains less than 6 digits, you need to pad it with leading zeroes to make &IN_DATA& exactly 6 digits.
If this is not possible, please contact technical support.
3.11.5 Incompatibility of BOP with other approaches
Whenever BOP is used under SAP, it will NOT work simultaneously with other approaches, such as:
- BARCODE.DLL
Reason:
The call to the BCP ABAP/4 program has to be implemented into the SAPscript document or Form, and then it cannot be used with the other
approaches anymore.
Workaround:
The following CASE construct makes it possible to integrate both approaches in the same document, provided the other approach uses a
Device type with a SAPscript OTF driver different from HPL2. (See also SAP note # 0090594.)
...
/:CASE &SAPSCRIPT-DRIVER&
/: WHEN 'HPL2'
...
... -- call to BCP
... <Bx>...LB&OUT_DATA&</>
...
Barcode & OCR Package: User's Manual
page 26 / 95
/: WHEN 'SWIN'
...
... <Bx> ... </>
...
/:ENDCASE
...
However, if the other approach also uses the HPL2 OTF driver, no workaround is currently possible.
Please contact technical support.
3.11.6 SAP-specific limitations
Besides the SAPscript/ABAP-related limitations above, there are issues related to the capabilties of the SAP printing architecture, which may
change across releases. For some older releases of SAP R/3, some adaptation e.g. of the Device type may be necessary.
3.11.6.1 "\x<hh>" notation not supported in Print controls
The "\x<hh>" notation for pairs of hex digits in non-hex Print controls in a Device type is not supported in older versions of SAP R/3, e.g.
release v4.0B. They are just ignored, thus generating empty output.
Therefore, some Print controls need to be specified entirely in Hex notation, instead of ASCII notation.
The following Print controls are affected: SBSxx, XB0xx, XBS0x.
3.12 Limited warranty
We cannot warrant that this product will meet your requirements and is error-free, relating to the operability and performance under your specific
SAP environment, and the readability of the barcodes in your specific barcode reading environment.
Therefore we can, in no event, assume any liability for any damages caused by the use of this product.
Documentation
The general information provided in this document about the SAP mechanism for Fonts and Barcodes has been carefully researched and
assembled. However, it is only intended to serve as a quick reference, it is not to replace any official specification. We cannot guarantee the
correctness and completeness of the information given.
In case of doubt, please refer always to the official documentation by SAP.
Fonts
The fonts of this product have been thoroughly checked with barcode readers as to the scannability of the barcodes generated with these fonts.
In case of problems, please contact technical support.
BCP
The algorithms for Code construction and CHK calculation have been implemented in BCP in accordance with the information given in the
"Technical Reference Manual - Barcode & OCR Printing".
The correctness of the implementation of the CHK algorithms of the following symbologies or applications in the BCP cannot be guaranteed,
for the reason indicated:
- (a compatible barcode reader is not available for verification):
- MSI mod 11 mod 10
- (a compatible decoding application was not available for verification):
- UPC-128
- PZN (Pharma-Zentral-Nummer)
- German Post AG Leitcode / Identcode
- (an inconsistent behaviour of different barcode readers was observed):
- 2 of 5 Industrial
- 2 of 5 Matrix
In case of problems, please contact technical support.
Device type
The implementation of the necessary command sequences into the Actions and Print controls of the ZA00 Device type has been done in
accordance with the SAP mechanisms and the specification of our Fonts and the BCP.
In case of problems, please contact technical support.
3.13 The "Barcode Conversion Program" (BCP)
The ABAP/4-based Barcode Conversion Program (BCP) is the second crucial element of BOP.
The task of the BCP is
- to calculate and add the check character(s),
Barcode & OCR Package: User's Manual
page 27 / 95
- to add start/stop and other control characters, and
- to make the message data compatible with the character set of the SAP system and of the fonts.
For the situation where BOP can be used without BCP, refer to the section "Using BOP without BCP" below.
Note: (Name)
The name of this program is ZABCP.
As a non SAP standard ABAP program, its name has to start with "Z".
The "ABC" stands for "ABAP Barcode Converter".
The name of the program file is ZABC<vvvv>.TXT, where <vvvv> indicates the version numbering (vv.vv), initially "0100" = v1.00.
The version number can be seen in the header of the BCP program file:
REPORT ZABCP.
************************************************************************
* Barcode & OCR Package for SAP: Barcode Conversion Program
* Version: v1.04
* Date of last change: 29.Jun.2005
* COPYRIGHT: RICOH TECHNO SYSTEMS CO.LTD. H.YAMADA: 2001/12/29;
*
EDSC: 2002-2005;
************************************************************************
...
The following subsections explain the parameters of the program, its mechanism, how to install it, and how to use it.
Note: (Unicode)
BCP is not compliant with Unicode systems (compilability) nor with Unicode data.
3.13.1 The Parameters
The following sections specify the "in" and "out" parameters of ZABCP.
3.13.1.1 &TYPE& ("in" parameter)
This parameter indicates the symbology, the checksum method, and the clear text style to be used.
The values are constructed as follows:
Barcode type naming conventions:
All parameters are coded as a single keyword.
The following syntax convention is being used consistently.
<symbology> <CHK method indicator> <CTX style indicator>
The parameters are clearly separated, using an underscore (_),
where:
<symbology> ::=
...
-- (for naming conventions see the list in Appendix B; e.g. E for Enhanced, etc.)
<CHK method indicator> ::=
<empty>
-- (if CHK mandatory):
=> CHK needs to be calculated, using default/standard algorithm
- CHK is not yet in data stream
-- (if CHK optional):
=> CHK does not need to be calculated
- CHK is already included in data stream, or
- no CHK required ()
_W
-- (if CHK mandatory):
=> CHK does not need to be calculated
- CHK is already included in data stream
_X
-- (if CHK optional):
=> CHK needs to be calculated, using default/standard algorithm
- CHK is required (), and
- CHK is not yet in data stream
_AIM | _10 | _1010 | _1110
=> same as _X, but using the indicated (symbology-) specific algorithm
<CTX style indicator> ::=
<empty>
_N
-- (Normal):
_H
-- (Half embedded):
_F
-- (Fully embedded):
_S
-- (Show Start/Stop):
without clear text
with clear text underneath the barcode
with clear text underneath, half embedded in the barcode
with clear text underneath, fully embedded in the barcode
like Normal, plus Start/stop characters printed
Example: CD39E_X_H
Note: (Clear text) It is not enough to specify the desired clear text style indicator here. In addition, the correct font (the "with readable
text" version") has to be specified in the Print control in the Device type. This is due to the BCP call mechanism.
Barcode & OCR Package: User's Manual
Note: (Checks performed on &TYPE&)
See at "The Mechanism" below.
3.13.1.2 &IN_DATA& ("in" parameter)
This parameter contains the message data that is to be barcoded.
Typically it is the contents of a previously defined variable or a link to a table structure field in the database.
Depending on the value of &TYPE&, restrictions apply to the alphabet and length of this data.
These are being checked by the Barcode Conversion Program.
See the &IN_DATA& column of the table in Appendix SB.
Note: (Special characters)
If the message data contains some special characters, passing them to the ABAP program may fail.
Also copying them from a database field to the &IN_DATA& variable may fail.
E.g. the "&" character, <00>..<31> (NUL, ..., US), trailing space, etc.
Please see the section "Limitations" above.
Note: (Code 128 control characters)
Some codes have special characters which are not part of the ASCII table (e.g. <FNC1> of Code128).
For these some substitute notation has to be used. This may be font-dependent or a (JetCAPS-compatible) de-facto standard.
Please see the section "Limitations" above.
Note: (Checks performed on &IN_DATA&)
See at "The Mechanism" below.
Note: (Conversions/Translations performed/applied to &IN_DATA&)
See at "The Mechanism" below.
3.13.1.3 &STATUS& ("out" parameter)
This is the status code returned from the BCP program.
The following codes are defined:
&STATUS&
0
z 1
z 2
z 3
z 4
z 5
z
&OUT_DATA& / Error message text
<start> <converted message data> <check char> <stop>
"(TYPE): Invalid barcode type (<TYPE>)."
"(IN_DATA): Invalid length. Length must be <length: symbology-dependent> characters."
"(IN_DATA): Illegal character. Alphabet is <alphabet: symbology-dependent>."
"(IN_DATA): Character (<char>) unexpected/illegal at position <pos>."
"Invalid SAPscript parameter name (<name>)."
3.13.1.4 &OUT_DATA& ("out" parameter)
If &STATUS& is 0,
this contains the data compatible with the font. Essentially it has this structure:
<start> <converted message data> <check char> <stop>
If &STATUS& is not 0,
this contains the corresponding error message text (see the table above).
3.13.2 The Mechanism
This section describes the mechanism how BCP works and the algorithms employed by BCP.
Logically it can be split up into 7 separate steps.
The actual implementation, however, may combine several steps into one.
Step 1 = "Reading & checking the parameters"
Step 2 = "Translating the message data"
Step 3 = "Code construction (Application level)"
Step 4 = "Code construction (Message level)"
Step 5 = "Calculating the CHK"
Step 6 = "Code construction (Symbology level)"
Step 7 = "Translating data to the Font character set"
page 28 / 95
Barcode & OCR Package: User's Manual
page 29 / 95
General behaviour
BCP employs the following general behaviour.
Note: (Error handling)
If an error occurs, the BCP reacts in this way:
1. The &STATUS& variable is set to a return code > 0.
2. The &OUT_DATA& variable is set to the error message text to be printed.
3. No barcode is printed.
Note: (Treatment of spaces in &IN_DATA&)
If &IN_DATA& contains leading or intermediate space characters, they will always be barcoded.
Trailing spaces are not supported (see -> "Limitations").
If intermediate spaces are not to be barcoded, two separate calls to BCP are needed.
Note: (Treatment of wrong length / too few characters of &IN_DATA&)
For symbologies with fixed-length message data:
If &IN_DATA& contains too few characters => An error message is issued.
Even for numeric symbologies (EAN/UPC, POSTNET), no leading zero is automatically added (padded).
If the data from your database has variable length and you cannot pad it dynamically, please contact technical support.
Note: (Treatment of wrong length / too many characters of &IN_DATA&)
For symbologies with fixed-length message data:
If &IN_DATA& contains too many characters => An error message is issued.
The message is not automatically truncated at its end.
If the data from your database has variable length and you cannot shorten it dynamically, please contact technical support.
Note: (Treatment of length wrong parity of &IN_DATA&)
For numeric symbologies requiring a length of a certain parity (only Code 128C, 2 of 5 Interleaved):
If the length of &IN_DATA& has the wrong parity (odd/even) => An error message is issued.
No leading zero is automatically added (padded).
If the data from your database has variable length and you cannot pad it dynamically, please contact technical support.
Note: (Treatment of &IN_DATA& already containing CHK)
For symbologies with mandatory CHK (only Code 128, Code 93, AIM Codabar, EAN/UPC):
Unless the CHK method indicator _W is specified, it is always assumed that &IN_DATA& does not contain any CHK yet; so it will always be
created.
If the data from your database already contains the CHK, please contact technical support.
Symbology-specific behaviour
For behaviour specific to a particular symbology, please refer to the columns "&IN_DATA&" or "Remarks" in Appendix SB, or refer to the section
"BCP-internal limitations" above.
The steps
The following subsections describe each step of the BCP mechanism in detail.
3.13.2.1 (Step 1): Reading & checking the parameters
First the parameters are read in and evaluated, and checked for compliance with the rules.
If an error is detected, either the data is modified automatically and continues to be processed normally, or an error is issued.
Checks performed on &TYPE&
- parameter name;
- value;
else exit with &STATUS& = 5
else exit with &STATUS& = 1
Checks performed on &IN_DATA&
- parameter name;
- Alphabet;
- Length;
- Character invalid at specific position;
else exit with &STATUS& = 5
else exit with &STATUS& = 3
else exit with &STATUS& = 2
else exit with &STATUS& = 4
Item
- Condition
=>
Reaction
Alphabet/Character
- invalid/illegal
- substitute character (<0038>)
- application control character (<FNC1>, ...)
- message control character (<(%)>, <($)>, <Shift>, <CodeX>, ...)
Issue error &STATUS& = 3.
Issue error &STATUS& = 3.
An automatic replacement is not implemented.
Length of message (Number of characters)
- if too short
- if too long
Issue error &STATUS& = 2.
There is no automatic padding (with leading zeroes).
Barcode & OCR Package: User's Manual
page 30 / 95
- if odd/even: wrong parity
There is no automatic truncation.
Context of characters (Combination, Position, etc.)
- character unexpected at this position
Issue error &STATUS& = 4.
Note:
For checks performed specific to a particular symbology, please see the corresponding remark in Appendix SB in the column labeled
"&IN_DATA&".
Checks performed on &STATUS&
- parameter name ;
else exit with &STATUS& = 5
Checks performed on &OUT_DATA&
- parameter name ;
else exit with &STATUS& = 5
3.13.2.2 (Step 2): Translating the message data
Apply conversions and translations to &IN_DATA&
This includes:
- &IN_DATA& character set translations / replacements (see "Limitations") from the ABAP/SAPscript character set
- automatic padding with leading zeroes, where applicable
- automatic truncation, where applicable
Note: For conversions and translations specific to a particular symbology, please see the corresponding entry in Appendix SB in the columns
labeled "Remarks".
3.13.2.3 (Step 3): "Code construction (Application level)"
Insert application-specific control characters
E.g. <FNCx>, etc.
Calculate application-specific CHK & append to data
3.13.2.4 (Step 4): "Code construction (Message level)"
Insert message control characters
E.g.:
- convert to Extended (Code 39/93) : (<(%)>, <($)>, <(+)>, <(/)>)
- employ auto-switching (Code 128) : (<Shift>, <CodeX>, ...)
3.13.2.5 (Step 5): Calculating the CHK
According to the CHK method tag specified in &TYPE&:
Calculate checksum
For the exact algorithms for each method, please refer to the "Technical Reference Manual - Barcode & OCR Printing".
Append check character(s) to data
3.13.2.6 (Step 6): "Code construction (Symbology level)"
Insert symbology control characters ([start], [stop], [guard], etc.)
3.13.2.7 (Step 7): Translating data to the font character set
Translate to font character set
Apply &OUT_DATA& character set translations.
Return &OUT_DATA&
3.13.3 How to install
Barcode & OCR Package: User's Manual
page 31 / 95
To install an ABAP program, first its source code has to be uploaded, then it has to be saved, compiled ("generated"), and activated.
Procedure:
1.
Launch transaction SE38 ("ABAP Editor").
2.
Specify Name = "ZABCP".
Press "Create".
Specify Title and Program attributes, as necessary. Note: If a "Unicode checks active" checkbox is present, uncheck it. Otherwise you
will get error messages (e.g. "W_INDATA must be a character type object (...)...") during compilation.
Press [Save].
(This "ABAP: Program Attributes" screen can also be re-accessed later through: (menu) -> "Goto" -> "Attributes".)
In the next screen, specify a Development class, and press [Save]. Or press "Local Object".
Now an empty program has been created.
3.
In the main menu, navigate to:
"Utilities" -> "More utilities" -> "Upload/Download" -> "Upload ...".
4.
Specify the path to the file "ZABC<vvvv>.TXT", which is located on the CD-ROM.
(If no CD-ROM drive is available, first copy the file to some convenient place.)
Press [Enter].
This will overwrite/replace the entire program with the contents of that file.
After successful upload, press [Save].
5.
Press [Activate] (or main menu -> "Program" -> "Activate") to compile and activate the program.
If any errors are reported, please contact technical support.
3.13.4 How to test
To verify the BCP works correctly, a sample SAPscript document (ZABSAMPLE) is included in the package.
It will print all SAP standard system barcodes, and thus show that it works well with SAP.
Import it using transaction SO10, then print it using a Device type derived from ZA001vvv (version 005 or higher).
For more information about ZABSAMPLE, refer to the corresponding section below.
3.13.5 How to uninstall
To uninstall an ABAP program, enter its program name under transaction SE38, then from the main menu choose "Program" -> "Delete".
3.13.6 How to call the program
The BCP needs to be called from the SAPscript document/Form, to process and convert the message data, before it is sent to the printer.
The typical sequence to call BCP is the following:
...
/:STYLE <style>
...
/:DEFINE &TYPE& = '<barcode type>'.
/:DEFINE &IN_DATA& := '<message data>'.
/:PERFORM CONVERT IN PROGRAM ZABCP
/:USING &TYPE&
/:USING &IN_DATA&
/:CHANGING &OUT_DATA&
/:CHANGING &STATUS&
/:ENDPERFORM.
...
/:IF &STATUS& <> 0
... ERROR: &OUT_DATA& ...
/:ELSE
... <Bx> <HP-GL/2 cmds> LB &OUT_DATA& </> ...
/:ENDIF
...
-- may be necessary to change the definition of <Bx> (*4)
-- e.g. '&<structure>-<field>&' (*3)
-- (*2)
-- (*4)
Note: (SAPscript syntax)
The first two characters are the SAPscript "format keys" in the 2-character "tag column" (e.g. "/:" precedes a command line).
The following syntax rules are mandatory:
- All keywords need to be written in Uppercase.
- Each USING and CHANGING parameter needs to be on one separate line.
- The variables in USING cannot be replaced by literals.
I.e. literals first need to be assigned to variables, using the DEFINE statement, before they can be passed to an ABAP program.
- The right-hand side value in a DEFINE assignment statement is limited by SAPscript to 60 characters.
The following syntax relaxations exist:
- A command line may (optionally) be terminated by a ".".
Note: (*2)
This way the error message text can be printed. It can be formatted in a freely determinable fashion.
E.g.:
/ ... <FC><ZF><ZK><H0> ***[ERROR: &OUT_DATA&]*** ... </></></></> ...
will print it in font "Courier 10 Bold Italic".
Note: (*3)
Barcode & OCR Package: User's Manual
page 32 / 95
The assignment of values to variables under SAPscript has two different forms which differ in the time of evaluation of other variables possibly
contained in the value. Normally "=" can be used. If the right-hand side contains another variable which has to be evaluated at the time of
assignment, you need to use ":=" !
The right-hand side needs to be enclosed in quotes ('), if it consists of more than 1 variable.
Note: (*4)
The <Bx> is a Character format, defined in the currently active Style, which is mapped to a System barcode.
By standard, SAP reserves <B0>,...,<B9>,<BA>,...,<BV>, on newer systems also <BW>,<BX>.
Since only <Bx> is possible as a name for barcode related Character formats, only these 2 remaining ones can be used: <BY>, <BZ>.
If more than these 4 are needed, they can be (re-)defined in some Style, which can then be switched to wherever necessary, using the syntax
/:STYLE <mystyle>
Between the <Bx> tag and the "LB&OUT_DATA&", HP-GL/2 commands can be specified for proper sizing, rotating, and positioning.
Please see the section "The command sequence" below.
Note:
For the sake of comparison, the sequence to be used with the JetCAPS or BARCODE.DLL solution is just this single line:
...
... <Bx> <message data> </> ...
...
Note: (Multiple barcodes in same line)
If multiple barcodes occur in the same line, all calls to BCP need to be made before this line.
E.g.
...
/:DEFINE &TYPE& = '<barcode type 1>'.
/:DEFINE &IN_DATA& := '<message data 1>'.
/:PERFORM CONVERT IN PROGRAM ZABCP
/:USING &TYPE&
/:USING &IN_DATA&
/:CHANGING &OUT_DATA&
/:CHANGING &STATUS&
/:ENDPERFORM
/:IF &STATUS& <> 0
... ERROR: &OUT_DATA& ...
/:ENDIF
/:DEFINE &OUT_DATA_1& := '&OUT_DATA&'
...
/:DEFINE &TYPE& = '<barcode type 2>'
/:DEFINE &IN_DATA& := '<message data 2>'
/:PERFORM CONVERT IN PROGRAM ZABCP
/:USING &TYPE&
/:USING &IN_DATA&
/:CHANGING &OUT_DATA&
/:CHANGING &STATUS&
/:ENDPERFORM
/:IF &STATUS& <> 0
... ERROR: &OUT_DATA& ...
/:ENDIF
/:DEFINE &OUT_DATA_2& := '&OUT_DATA&'
...
... <Bx> <HP-GL/2 commands> LB &OUT_DATA_1& </> ... <By> <HP-GL/2 commands> LB &OUT_DATA_2&
</> ...
...
3.13.7 Using BOP without BCP
Note: (Situations where BCP is not necessary)
BCP is not necessary in all situations.
The following symbologies (and only these) can work without BCP.
- Code 39
- Codabar
- 2/5 Industrial
- 2/5 Matrix
- MSI
provided that:
- no checksum calculation is required (i.e. no check characters are required, or all check characters are already contained in the message data)
- the start/stop characters are placed manually (either in the Print controls or in the SAPscript document/form)
3.14 The ZA00cvvv Device type (DT)
Besides the barcode fonts and the Barcode Conversion Program (BCP), the SAP proprietary Device type ZA00 is the third crucial element of
BOP.
Essentially it contains all the PCL and HP-GL/2 commands or portions thereof, which are used to assemble the final data stream.
Barcode & OCR Package: User's Manual
page 33 / 95
Here only the information relevant for BOP, i.e. OCR and barcodes is given.
For issues not related to OCR fonts and barcodes, please see Volume 2 [ZA0x].
The device type contains predefined entries to
z
be compatible as much as possible with the existing SAP standard system barcodes (SBP00..29)
z
have sample entries for all fonts and barcodes supported by BOP, which can be used by the SAPscript designer as sample/template for
his modifications or as is
Note: (Unicode)
The information in this section also applies to the ZA00Uvvv Device type; but be aware that it can only be used if BCP is not involved.
Note:
Any reference to the ZA00 Device type in this document also largely applies to the Device types ZB00 and RC000 and RC100.
Note:
The Device types RC000 and RC100 are not distributed as part of the BOP product, but need to be obtained from SAP.
3.14.1 The SAP standard OCR fonts supported
The ZA00 device type contains predefined Printer fonts and Print controls to implement these SAP standard predefined System fonts:
System font
- OCRA 120
- OCRB 120
Definition
OCR-A 12pt / 10cpi
OCR-B 12pt / 10cpi
Print control
SF400
SF500
3.14.2 The SAP standard Barcodes supported
The ZA001vvv device type (version 005 or higher) contains support to implement all SAP standard predefined System barcodes :
- Printer barcodes
- standard Print controls SBPxx / SBSxx
Moreover, it contains non-standard Print controls to support any barcodes for which a barcode font exists.
- Print controls XBxyz / XBS00
Moreover, it contains non-standard Print controls to support rotated barcodes.
- Print controls XBRxx / XBS0R
3.14.3 The Predefined OCR fonts (table TFO03)
There are 3 entries.
Refer to the table in Appendix SDP.
3.14.4 The Predefined Printer barcodes (table TFO06)
These exist for compatibility with the predefined existing SAP standard system barcodes.
See the table in Appendix SDP.
3.14.5 The Predefined Print controls (table T022D)
Since the predefined standard Print controls SBPxx, SBSxx are reserved for SAP, new non-standard Print controls XBxyz were introduced.
Barcode select/prefix Print controls are named XB<font ID>.
Barcode deselect/suffix Print controls are named XBS0<x>.
For the meaning and the definition of the OCR and barcode related Print controls which come predefined in our device type, please refer to the
table in Appendix SDP.
For any other Print controls, see Volume 2 [ZA0x].
Roughly speaking, the following are predefined:
- SBPxx -- barcode select/prefix for SAP standard System barcodes
- SBSxx -- barcode deselect/suffix for SAP standard System barcodes
- XBxyz -- barcode select/prefix for other barcodes
- XB0xx -- prefix for using current font
- XB9xx -- auxiliary for CTX font
- XBRxx -- barcode select/prefix for rotated barcodes
- XBS0x -- barcode deselect/suffix for other barcodes
- XBXxx -- prefix/suffix for drawing CTX explicitly
All Print controls needed are predefined in the Device type, in order to spare you the complicated procedure of defining a new Print control.
Barcode & OCR Package: User's Manual
page 34 / 95
3.14.6 The X_PAPER:XBARC action macros
The XBARC action is defined in the device format X_PAPER.
This action is included in the "Printer initialization" (SETUP) action of every Format of the Device type. (See Volume 2.)
For each barcode font, it defines one PCL macro which re-initializes HP-GL/2, switches to the secondary font, selects that font as secondary,
and assigns to it a temporary font ID of 99.
The macro ID is "22xyz", where "xyz" is the 3-digit font ID of the barcode font.
This macro is then called in every Barcode select/prefix Print control.
It also defines macros 229xx to select CTX fonts, and macros 220xx to facilitate the explicit drawing of CTX.
Note:
This macro mechanism is necessary because of the limited length of Print controls.
For the complete listing of the contents of the XBARC action, please refer to Appendix SDM.
3.14.7 How to install
The Device type needs to be imported and then copied.
Please refer to Appendix 1: "How to import/copy a Device type" in Volume 2.
3.14.8 How to test
To test the Device type (in conjunction with the BCP), import the sample SAPscript document (ZABSAMPLE) using transaction SO10, and print
it using the ZA001vvv device type (version 005 or higher).
3.14.9 How to uninstall
Please refer to Appendix 1: "How to delete an entire device type definition" in Volume 2.
3.15 ZABSAMPLE -- A sample SAPscript document
This SAPscript document is provided for the following purposes:
z as a quick test to confirm that the BCP and the Device type work OK
z as a proof that our product supports all SAP standard system barcodes well
Name = ZABSAMPLE.ITF
Language = EN
Style used = S_TEST
Form used = S_TEST_P (Format = INCH12)
It implements all standard pre-defined SAP system barcodes.
It produces approx. 8 sheets (duplex) of output.
It works with both A4 and LTR paper.
To install it, import it using transaction SO10.
Please note that, if the Style or Form are incorrect, an error message may ensue.
Print it using a Device type derived from ZA001vvv (version 005 or higher).
Prior to this, make sure that all BOP components were installed.
3.16 Using the product : Printing OCR text (from SAPscript)
This section describes how to print OCR text from SAPscript, using BOP.
In the SAPscript document/Form, the text has to be tagged with the corresponding Character format.
These Character formats are predefined:
- for OCR-A 12pt: <FO> ... </>
- for OCR-B 12pt: <FB> ... </>
For information on how to support sizes other than the predefined 12 pt / 10 cpi, please refer to SAP standard literature.
Note: (Special characters (OCR-A only))
To specify these special OCR-A characters under SAPscript, use the SAP character # syntax.
dec
SAP character #
<hook>
= <7E>
hex
(~)
= <126>
<0007>
<fork>
= <5F>
(_)
= <095>
<0008>
Symbol
•²
•~
Barcode & OCR Package: User's Manual
•µ
<chair>
= <60>
(`)
= <096>
page 35 / 95
<0009>
Note: [only for SAP releases R/3 v4.6C and v4.6D]
These 3 characters are accidentally missing in the SAP system character set. Please refer to SAP note # 0326098 for further details.
3.17 Using the product : Printing Barcodes (from SAPscript)
This section describes how to print barcodes from SAPscript, using BOP.
A general description was already given in the section "Using the product: Printing barcodes" in the platform-independent chapter above.
Implementing this command sequence under SAP involves a series of steps. Essentially:
- create/modify a System barcode
- create/modify Print controls in the Device type for barcode select (SBPxx or XBxyz) and deselect (SBSxx or XBS0x)
- create/modify a Printer barcode in the Device type
- create/modify a <Bx> Character format in a SAPscript Style
- modify the SAPscript document/Form:
- barcode specification (assign to variables used by BCP)
- call to BCP (/:PERFORM ... /:ENDPERFORM)
- tag the data returned from BCP with the Character format <Bx> ... </>
- specify positioning & rotation & sizing commands
For the SAPscript syntax to call the program, see the BCP related section above.
The resulting procedure is described below.
3.17.1 The command sequence: The implementation under SAP
The general recommended command sequence was already explained in the platform-independent chapter above.
In SAP syntax, it looks like this:
...
\e*p0P
\e%1B
IN;
SP8;
PR;
DT\x9F;
SC0,400,0,400,2;
RO0;
\e%0A
...
...
\x0E
<font select command>
\e*c99d6F
\e%1B
SA
FN99;
SP8;
PU<xoffs>,<yoffs>;
RO<angle>;
SI<width>,<height>;
ES<factor>;
LB<data>\x9F;
RO0;
\e%0A
\x0F
\e*p1P
...
HP-GL/2 re-initialize sequence
-- push color palette
-- enter HP-GL/2 mode
-- initialize
-- set black pen
-- set default plotting mode to relative
-- define text delimiter (any character not used in any symbology)
-- define 1 user-unit as 400 plu = 1 cm
-- set rotation to 0
-- exit HP-GL/2 mode
font-specific sequence
-- switch to secondary font
-- normal PCL font select sequence by attributes
-- copy to RAM and assign font ID # 99
-- enter HP-GL/2 mode
-- select alternate/secondary font
-- select secondary font ID # 99
-- re-set black pen
-- (optional) for positioning: specify relative horizontal & vertical offset
-- (optional) for rotation: specify angle
-- specify width and height (in cm)
-- inter-character spacing factor
-- print data (terminated by the delimiter <9F>)
-- clear rotation
-- exit HP-GL/2 mode
-- switch to primary font
-- pop color palette
Example: (for system barcode ARTNR, Code 128)
...\e*p0P\e%1BIN;SP8;PR;DT\x9F;SC0,400,0,400,2;RO0;\e%0A...
...\x0E\e)07Y\e)s1p12v0s0b9002T\e*c99d6F\e%1BSAFN99;SP8;SI0.22,0.86;LB<data>\x9F;RO0;\e%0A\x0F\e*p1P ...
Note: ("SP8")
To draw text in black color, a black pen needs to be selected.
The "SP1" command unfortunately selects a red pen on color printers, due to a redefinition of the color table by the HPL2 OTF driver of SAP.
The "SP8" command works OK with both black-and-white and color printers.
Note: ("<9F>")
This character is used to delimit text for the LB command. (On an editor it shows as "Ÿ".)
The choice of "<9F>" was arbitrary. It could be changed to any other character, but subject to these restrictions:
Barcode & OCR Package: User's Manual
page 36 / 95
- it is never returned from BCP in &OUT_DATA&, and
- it is supported by the 1100 SAP character set;
thus from the range <81>..<9F>.
The default of <03> = <ETX> can therefore not be used.
To implement this command sequence under the SAP printing architecture and the SAPscript barcode mechanism, the command sequence is
split up into portions, which are then contained in the Actions and Print controls of the Device type, as shown below.
Essentially, the portion before the <data> has to be implemented in a barcode select/prefix Print control, and
the portion behind the <data> has to be implemented in a barcode deselect/suffix Print control.
However, since the length of a Print control is limited to 52 characters, part of the sequence needs to be assigned to a PCL macro, which is
defined once, as part of the initial sequence, and then called in each barcode select/prefix Print control.
This assignment is done in such a way that the macro only depends on the font and not on any other parameters.
That means that only exactly one macro per barcode font is needed and, therefore, defined.
Refer to Appendix SDM for the definition of these macros.
The initial sequence needs to be implemented in the "Printer initialization" (SETUP) action of every Device format.
This is actually done by putting the sequence into an auxiliary action named XBARC defined in an auxiliary device format named X_PAPER,
and by just specifying an include statement \i<$(DRUCKERTYP):X_PAPER:XBARC> in the "Printer initialization" (SETUP) action of each
SAPscript format.
This can be done this way, because this sequence typically never needs to be modified.
Note: (Macro definitions)
The above-mentioned macro definitions all use size parameter 12v (except FIM); but actually the choice has no influence on the output size,
since it is overwritten by the settings made under HP-GL/2 in the SI command. Thus, the macro definitions should typically never need to be
changed.
The <macro ID> were chosen arbitrarily to be in the range 22000..22999, using the internal Font ID <xyz>, prefixed by "22".
They could be changed, but subject to the restriction that they must not collide with the macro ID's used by the SAP OTF driver, which are in the
3xxxx range.
Using HP-GL/2 commands directly in the SAPscript document
Moreover, instead of configuring the width and height parameters in the Print control in the Device type, thus requiring to have different barcode
prefix Print controls for every barcode to print with a different size, it is possible to rather specify them directly in the SAPscript document/Form
itself.
Thus, in case of many barcodes of the same symbology with only slight differences in size, no longer one system barcode is needed for each,
but just one suffices for all. This means less configuration workload for the SAP administrator or SAPscript designer.
The syntax in the SAPscript document/Form then becomes e.g.:
... <Bx>SI2.13,0.95;LB&OUT_DATA&</>...
To facilitate that, barcode select Print controls XB<xyz> are predefined in the Device type, one for each barcode font with Font ID <xyz>, which
just call the above-mentioned font select macro and then enter HP-GL/2. They can be used "as is" as the barcode select/prefix Print control in a
Printer barcode definition in the Device type.
The same mechanism can be used to specify rotation, and to specify a relative vertical/horizontal offset for positioning adjustment.
That is, the following commands can and should be specified directly in the SAPscript document/Form, between the <Bx> and the
LB&OUT_DATA&</>:
- PU ____ , ____ ;
- RO ____ ;
- SI ____ , ____ ;
The syntax in the SAPscript document/Form then becomes e.g.:
... <Bx>PU-1.0,0.5;RO90;SI2.13,0.95;LB&OUT_DATA&</>...
Thus, there are two possibilities where to specify necessary HP-GL/2 commands, such as the size parameters:
- indirect
= (only) in the Print control
- direct
= (also) in the SAPscript document/Form
While the indirect way is the more SAP classical approach, the direct approach allows for much higher flexibility and ease-of-use.
SAPscript:
Print control (select/Prefix):
Print control (deselect/Suffix):
...<Bx>[<PU/RO/SI HP-GL/2 commands>]LB&OUT_DATA&</> ...
XBxyz = <esc>&f22<macroID>y2X<esc>%1BSAFN99;SP8;
XBS00 = <9F>;RO0;<esc>%0A<SI>
The above discussion results in the following structure of the Device type.
TFO06 (Printer barcodes):
ARTNR
...
BC_93
SBP01SBS01
SBP29SBS29
TSP1D (): Format <any> : Action "Printer initialization" (SETUP):
...
\i<$(DRUCKERTYP):X_PAPER:XBARC>
-- for standard/predefined system barcodes only
Barcode & OCR Package: User's Manual
page 37 / 95
...
TSP1D (): Format X_PAPER : Action XBARC:
For the full list see Appendix SDM.
\e&f22000y0X
\e*p0P\e%1BIN;SP8;PR;DT\x9F;SC0,400,0,400,2;RO0;\e%0A\e&f1X
...
-- define HP-GL/2 re-initialization as macro
\e&f22100y0X
\e&f22000y2X\x0E\e)07Y\e)s1p12v0s0b9002T\e*c99d6F\e&f1X
...
\e&f22601y0X
\e&f22000y2X\x0E\e)08Y\e)s1p12v1s0b9011T\e*c99d6F\e&f1X
-- define macro # 22100
T022D (Print controls):
-- define macro # 22601
For the full list see Appendix SDP.
SBP01 \e&f22100y2X\e%1BSAFN99;SP8;SI0.22,0.86;
...
SBP29 \e&f22212y2X\e%1BSAFN99;SP8;SI0.19,0.79;
-- for standard/predefined system barcodes
(prefix)
SBS01 <9F>;RO0;\e%0A<SI>\e*p1P
...
SBS29 <9F>;RO0;\e%0A<SI>\e*p1P
-- dto
XB100 \e&f22100y2X\e%1BSAFN99;SP8;
...
XB601 \e&f22601y2X\e%1BSAFN99;SP8;
-- for any barcode
(prefix)
(1 per barcode font)
XBS00 <9F>;RO0;\e%0A<SI>\e*p1P
XBS0R <9F>;\e%0A<SI>\e*p1P
...
-- dto
-- dto
(suffix)
(only defined for compatibility;
use XBS00 instead)
(suffix)
(keep current rotation)
The necessary specifications to be made in the SAPscript document/Form are discussed in the following sections.
3.17.2 Drawing the barcode
To print a draft barcode, regardless of its size or orientation or position, i.e. with some default size and at the current position, the following
steps are required.
From Appendix SB:
Depending on the desired symbology, CHK method, and CTX style, determine the &TYPE& parameter for BCP.
Depending on the desired symbology, N:W ratio, and CTX style, determine the Font to be used, with the Font ID "xyz".
Create a System barcode, unless a suitable one already exists, essentially just specifying the maximum width of the barcode.
In the Device type to be used, create a corresponding Printer barcode, and map it to the (existing) pair of Print controls XBxyz and XBS00.
In the SAPscript document/Form enter the BCP call sequence (see the "BCP" section above) using the &TYPE& parameter obtained above.
Then tag the data returned from BCP like this:
... <BZ> SI0.25,1.0; LB &OUT_DATA& </> ...
Make sure that in the currently active Style the Character format <BZ> has been defined and is mapped to the System barcode created above.
Print the SAPscript document to an Output Device that uses the above Device type.
The Barcode select/prefix Print control calls the macro (which selects the correct font at size 12v) and just switches to HP-GL/2.
Therefore, the LB command needs to be explicitly specified yet in front of the &OUT_DATA&.
... <Bx> LB &OUT_DATA& </> ...
The syntax of the LB command is explained in detail in the "Technical Reference Manual - Barcode & OCR Printing".
Furthermore, to yield a well-defined size, specify an SI command with reasonable width and height parameters.
E.g. ... <BZ> SI0.25,1.0; LB &OUT_DATA& </> ...
Once a draft barcode has been successfully printed out, you can turn towards getting the correct sizing, orientation, and positioning.
3.17.3 Sizing the barcode
The desired size can now be easily specified through the SI command.
E.g.
Barcode & OCR Package: User's Manual
page 38 / 95
... <Bx> SI0.13,0.95; LB &OUT_DATA& </> ...
The 1st parameter specifies the width (of 1 barcode character !), the 2nd the height, in centimeters [cm].
The syntax of the SI command is explained in detail in the "Technical Reference Manual - Barcode & OCR Printing".
Determining the correct parameters
Due to the font design, the measured size will most likely be different from the nominal size specified in this command.
To find out the correct parameters required to yield the desired size, specify some reasonable nominal parameter values (i.e. such that the
resulting barcode will still fit on the page), e.g. SI0.25,1.0, then measure the sizes of the printed result, then use the rule of three to calculate
the required parameter, as follows (separately for width and height) :
(Required parameter) = (Nominal parameter) x (Desired size) / (Measured size)
Example: (here: for "width")
0. Assume you want to have a total width of 8 cm.
1. Print the barcode using "SI 0.25, 1.0".
2. Measure the total width; assume it yields 11.3 cm, hence it is too long.
3. Calculate 8 x 0.25 / 11.3 = 0.177.
4. Printing the barcode using "SI 0.177, 1.0", will yield the desired width.
3.17.4 Orienting/Rotating the barcode
The "Rotation" setting in the definition of a System barcode has the effect that the HPL2 OTF driver automatically wraps the barcode in a pair of
PCL rotate commands (<esc>&a90P ... <esc>&a0P).
Unfortunately this has no effect on the HP-GL/2 coordinate system. Therefore, for HP-GL/2 a rotate command needs to be explicitly specified.
The desired rotation can be specified using the RO command.
E.g.
... <Bx> RO90; SI0.13,0.95; LB &OUT_DATA& </> ...
Possible angles are only 90°, 180°, or 270°, and 0°.
The syntax of the RO command for the rotation of text is explained in detail in the "Technical Reference Manual - Barcode & OCR Printing".
XBS00 sends an RO0 command to clear any previous rotation.
Use XBS0R if you want to keep the current rotation for subsequent HP-GL/2 drawing.
3.17.5 Positioning the barcode
SAPscript has its own mechanisms to accurately specify the cursor position for placing text.
However, due to the design of the barcode fonts, the reference point of the font characters does not always coincide with the lower left corner of
the first bar. Therefore, some adjustment of the position may be required.
A relative position offset can be specified using the PU command.
E.g.
... <Bx> PU-1.0,0.5; RO90; SI0.13,0.95; LB &OUT_DATA& </> ...
The 1st parameter specifies the horizontal offset, the 2nd parameter specifies the vertical offset.
Use negative values to shift the position to the left and down.
Due to the "PR" (Plot relative) command sent in the initial sequence, the PU parameters are interpreted as relative offsets instead of absolute
coordinates.
Due to the "SC0,400,0,400,2;" scaling command sent in the initial sequence, which defines a user unit as 400 plu ("plotter units") = 1 cm, the PU
parameters can be specified in centimeters [cm].
The syntax of the PU command is explained in detail in the "Technical Reference Manual - Barcode & OCR Printing".
Note: (Horizontal position after drawing the barcode)
Since the SAPscript Composer does not have any AFM font metrics information of the (partially proportional) barcode fonts, it cannot determine
the width of a barcode, and therefore the cursor position after drawing the barcode, by itself. Therefore, the OTF driver (HPL2) applies the
"Width" setting of the System barcode definition as the relative horizontal offset to be added to the original position (after drawing the barcode).
Note:
If the horizontal cursor position before drawing the barcode, incremented by the amount specified in the Width attribute of the System barcode,
lies outside the logical page, the OTF driver will automatically place the barcode at the left margin in the next line.
Note: (Vertical position after the drawing barcode)
The vertical cursor position is not changed by drawing the barcode.
The Height attribute of the System barcode and the Baseline alignment attribute of the Printer barcode are not used by the HPL2 OTF driver.
See also SAP note # 0090594.
Note: (HP-GL/2 Picture Frame)
Barcode & OCR Package: User's Manual
page 39 / 95
If a barcode is cut off near the border, then it lies most likely partially outside the "HP-GL/2 Picture Frame".
The nature of the HP-GL/2 Picture Frame, and how to enlarge it, is explained in the "Technical Reference Manual - Barcode & OCR Printing".
As a consequence, under SAP, the command sequence has to be specified in the SPORT or SLAND Print control.
To facilitate the configuration, the ZA00 Device type accommodates the necessary command sequences in special Actions ZEDGEDGP and
ZEDGEDGL, respectively, for each of the major SAPscript Formats DINA3, DINA4, DINA5, EXECUTIV, LETTER, LEGAL, and ZLEDGER.
Therefore, to use this in the case of a Portrait document, for the Print control SPORT, the "(o) Action" radio-button has to be activated, and as
value the action name "ZEDGEDGP" has to be typed. Analogously in the case of Landscape.
3.17.6 Drawing the CTX explicitly
It may be required that the clear text (CTX) be drawn in a specific fashion (font, size, position) that cannot be achieved with the CTX-integrated
barcode fonts.
In that case a non-CTX font should be used for the barcode, and the CTX should then be drawn explicitly separately at the desired position
using a suitable text font.
Since this requires some sophisticated modification of the command sequence, please contact technical support.
3.17.7 The complete procedure
This section summarizes the discussion of the previous sections, presenting the complete procedure necessary to add support for printing a
new barcode.
3.17.7.1 (Step 1) Preparation: Determining the parameters
Determine (the name of) the SAPscript document or Form in which you want to integrate the barcode, say MYDOC.
Determine the Message data that you want to be barcoded from your database, say &mystruct-myfield&.
Determine the Symbology that is required by your barcode environment.
Determine the Check character method (CHK method) that is required by your barcode environment.
Determine the desired Clear text style (CTX style), that you want the barcode to be printed with.
- Do you need clear text or not ?
- If yes, determine the clear text style desired.
Determine the N:W ratio that is most suitable for your barcode environment.
Normally 1:2.0 should be fine.
In case of a small size or enough space or bad reading conditions, a higher ratio may improve readability.
In the table in Appendix SB, look up these four parameters, and determine these parameters:
- the &TYPE& parameter to be used for calling BCP, say "CD39_X_F"
- the Font ID of the font to use, say "201"
Determine the desired Size (total width and height) of the barcode.
Determine the desired Orientation (rotation) of the barcode.
Determine the desired Position of the barcode.
3.17.7.2 (Step 2) Setting up a System barcode
Create a new System barcode, say ZMYSB.
Use transaction SE73. This is a standard SAP procedure.
The name may be a maximum of 8 characters long, and it has to start with a "Z".
Specify the following attributes.
Specify the maximum expected width of the barcode. (This setting is used to determine the horizontal cursor position after printing the barcode.)
If the barcode is to be rotated, specify the angle in the Rotation attribute. (Note that this setting is void when using HP-GL/2.)
The other attributes are not used by the HPL2 OTF driver and can therefore be filled arbitrarily or left empty. However, for documentation
purposes you may want to fill in reasonable values.
3.17.7.3 (Step 3) Setting up a Device type
Make a copy of the Device type ZA001vvv to be used for your barcode print jobs, say ZMYDT.
Use transaction SPAD. This is a standard SAP procedure. Refer to Appendix 1 in Volume 2 [ZA0x].
Barcode & OCR Package: User's Manual
Create an Output Device, say ZMYOD, which uses this Device type.
3.17.7.4 (Step 4) Defining Print controls in the Device type
The predefined barcode select/deselect Print controls XBxyz of the Device type can be used as is.
Normally, there should be no modification necessary.
3.17.7.5 (Step 5) Defining a Printer barcode in the Device type
In the Device type ZMYDT, create a Printer barcode for the System barcode ZMYSB created above.
Use transaction SE73. This is a standard SAP procedure.
Specify the following pair of Print controls:
- Prefix = "XBxyz", where "xyz" is the Font ID obtained in Step 1, hence XB201
- Suffix = "XBS00" (To keep the current rotation, use "XBS0R".)
The "Baseline alignment" attribute is not used by the HPL2 OTF driver and can therefore be left empty.
3.17.7.6 (Step 6) SAPscript Style
In the SAPscript Style used by your SAPscript document or Form, create a <Bx> Barcode Character format, say <BZ>.
Use transaction SE72.
Map it to the System barcode defined above, i.e. "ZMYSB".
Activate the Style.
3.17.7.7 (Step 7) Modifying the SAPscript document / Form
In the SAPscript document or Form, specify the BCP call sequence below, with the parameters indicated in bold:
...
/:DEFINE &TYPE& = 'CD39_X_F'
/:DEFINE &IN_DATA& := '&mystruct-myfield&'
/:PERFORM CONVERT IN PROGRAM ZABCP
/:USING &TYPE&
/:USING &IN_DATA&
/:CHANGING &OUT_DATA&
/:CHANGING &STATUS&
/:ENDPERFORM
/:IF &STATUS& <> 0
*** ERROR: [&OUT_DATA&] ***
/:ELSE
... <BZ>SI0.25,1.0;LB&OUT_DATA&</> ...
/:ENDIF
...
3.17.7.8 (Step 8) Adjusting the print output
Print the document, using the Output Device ZMYOD.
If the barcode does not print OK (missing or garbled), refer to the "Troubleshooting" section below.
Otherwise:
Adjusting the size
Measure the total width and height, and calculate the required parameters for the SI command, applying the formula given above.
Specifying rotation
If the barcode needs to be rotated, specify the RO command, as indicated above.
Adjusting the position
If the position needs to be adjusted, insert a PU command specifying the relative horizontal and vertical offset, as indicated above.
page 40 / 95
Barcode & OCR Package: User's Manual
page 41 / 95
3.17.7.9 (Step 9) Drawing, Sizing, and Positioning the CTX
Implement the additional command sequence, as explained above.
Print the document.
Adjust the size and position of the CTX, as necessary.
3.18 Symbology-specific information
For any steps specific to a certain symbology, please refer to information in the "Remarks" column in Appendix SB.
3.19 Troubleshooting
For generic troubleshooting hints for barcode printing, and for hints specific to barcode fonts, please refer to the section "Troubleshooting" in the
"Technical Reference Manual - Barcode & OCR Printing".
Especially, make sure the barcode fonts work properly.
For issues related to print quality, refer also to the "Technical Reference Manual - Barcode & OCR Printing".
For BOP-specific troubleshooting of barcode printing, please try to understand the underlying mechanism and the data flow between the related
components under SAP, and conduct your analysis accordingly.
Try to capture the final PCL (& HP-GL/2) data stream into a file, and check the correct appearance of the following items:
- the initial sequence, initializing HP-GL/2 and defining the PCL macros
- the macro call, or the font select command sequence
- the switching between primary and secondary fonts
- the value of &IN_DATA&, as passed to BCP (Does it contain any problematic special characters ?)
- the value of &OUT_DATA&, as returned by BCP (Are the remapped font characters correct ? Is the check character correct ?)
- Is the text properly terminated by the delimiter <9F> ?
- Is the "LB" command properly specified in front of the text ?
On the SAP system, verify the correctness of these components:
- the Device type used, especially tables T022D (Print controls) (especially SBPxx/XBxyz) and TFO06 (Printer barcodes) => (export them)
- the definition of the System barcode used => (screenshot, or export table TFO05)
- the BCP call sequence in the SAPscript document/Form => (export it)
- the definition of the <Bx> character format done in the SAPscript Style used by the document/Form => (screenshot, or export the style)
If the Output request data looks wrong, but all components look OK, try checking the Spool request data.
The barcode related OTF commands are "BC" and "BS".
In the original SAPscript document/Form, confirm that the "LB" command is properly specified in front of the "&OUT_DATA&", if it is not already
specified in the prefix Print control.
If the compilation of BCP fails with an error message, retry after unchecking the "Unicode" flag.
Barcode & OCR Package: User's Manual
page 42 / 95
4 The Fonts
This chapter contains detailed information about the OCR fonts and each barcode font of this product, in a separate section for each
symbology.
For information about
- how to install the fonts,
- how to test the fonts & information about the Font Test sheets, and
- how to uninstall the fonts,
please refer to the corresponding section of the chapter "The Product" above.
The OCR fonts
The following OCR fonts are supported:
- OCR-A (OCR-A1) (non-Unicode version)
- OCR-B
The Barcode fonts
Refer to Appendix F for a table of supported barcode fonts.
In this chapter, for each symbology, all supporting fonts are given, and one or more examples of the code construction procedure.
For each font, the following information is given:
- the Font attributes
- the Font character set
The Font attributes
These logical attributes are given.
- the Font ID
- the name (and description) of the font
- the name of the Test sheet file
- the N:W ratio (nominal)
- the CTX styles supported
- the PCL font select command sequence
For physical attributes / font measurements please contact support.
The Font character set
This section defines the mapping between the symbology character set and the font character set.
First, the following type of hexadecimal font code table visualizes the mapping of
<symbology character> <--| <font character code>
x0 x1 x2 x3 x4 x5 x6 x7 x8 x9 xA xB xC xD xE xF
...
2x
3x
4x
5x
6x
7x
...
Ex
Fx
Then, the reverse mappings are provided:
<symbology control character> x <CTX style: {_N/_F/_H/_S}> |--> <font character code>
<symbology message character> |--> <font character code>
The section "How to calculate" gives the decimal difference between the ASCII code of the message characters and the ASCII code of the font
characters.
Barcode & OCR Package: User's Manual
page 43 / 95
Note:
• For the mapping to the corresponding ASCII character, please look up the hex position in the ASCII table in Appendix P.
• For the meaning of a symbology character, see the previous chapter at the corresponding symbology.
• For the actual image of each barcode character of a symbology, please refer to a printout of the Test sheet of the corresponding font.
• For a sample image of an entire barcode, please refer to the rear side of the printed Test sheet.
Barcode & OCR Package: User's Manual
page 44 / 95
4.1 OCR-A (OCR-A1)
This font supports the printing of OCR-A text.
Font ID
900
File name
OCRA
Font name Font description
OCR-A
OCR-A
Command sequence
<esc>(0O<esc>(s0p^^^h0s0b104T
This font is scalable and non-proportional.
Note: ("Barcodes and More" compatibility)
To get compatibility with the HP "Barcodes and More" fonts, print the text with 10cpi, i.e. "<esc>(0O<esc>(s0p10h0s0b104T".
4.1.1 Encoding (II): The Character codes
Character set
OCR Character
Font character
(ASCII)
[20] ... [7F]
except:
[hook]
[fork]
[chair]
[belt-buckle]
~
_
`
<DEL>
= European miscellaneous symbols =
(hex)
<20> .. <7F>
(dec)
<7E>
<5F>
<60>
<7F>
<126>
<095>
<096>
<127>
[] dto. with stars
<C0> ... <CA>
<C0>
<C1>
[] logo "Der grüne Punkt" (Recycling symbol)
<C2>
[] dto. ()
[] dto. (condensed)
<C3>
<C4>
<C5>
[] logo "Recycling"
<C6>
[] dto. (inverted)
<C7>
<C8>
<C9>
<CA>
[] EURO currency symbol
[] logo "CE"
[] dto. (inverted)
[] dto. ()
[] electric symbol "Ground"
Character Table
x0 x1 x2 x3 x4 x5 x6 x7 x8 x9 xA xB xC xD xE xF
...
2x
3x
4x
5x
6x
7x
...
0
@
P
µ
p
!
1
A
Q
a
q
"
2
B
R
b
r
#
3
C
S
c
s
$
4
D
T
d
t
%
5
E
U
e
u
&
6
F
V
f
v
'
7
G
W
g
w
(
8
H
X
h
x
)
9
I
Y
i
y
*
:
J
Z
j
z
+
;
K
[
k
{
,
<
L
\
l
|
=
M
]
m
}
.
>
N
^
n
²
/
?
O
~
o
³
Barcode & OCR Package: User's Manual
page 45 / 95
4.2 OCR-B
This font supports the printing of OCR-B text.
Font ID
910
File name Font name
OCRB
OCR-B
Font description
OCR-B
Command sequence
<esc>(1O<esc>(s0p^^^h0s0b110T
This font is scalable and non-proportional.
Note: ("Barcodes and More" compatibility)
To get compatibility with the HP "Barcodes and More" fonts, print the text with 10cpi, i.e. "<esc>(1O<esc>(s0p10h0s0b110T".
4.2.1 Encoding (II): The Character codes
Character set
OCR Character
Font character
(ASCII)
[20]
[21] ... [FF]
(hex)
<20>
<21> .. <FF>
(dec)
except: <9F>, <B9>,
<CA>..<CE>, <D5>, <D9>, <DC>,
<DF>, <E7>, <F2>, <FE>, <FF>
Character Table
x0 x1 x2 x3 x4 x5 x6 x7 x8 x9 xA xB xC xD xE xF
0x
1x
2x
3x
4x
5x
6x
7x
8x
9x
Ax
Bx
Cx
Dx
Ex
Fx
0
@
P
p
Ç
É
á
¿
Ê
Å
-
!
1
A
Q
a
q
ü
æ
í
®
Ë
¡
ß
±
"
2
B
R
b
r
é
Æ
ó
¬
È
Ø
Ô
#
3
C
S
c
s
â
ô
ú
½
Î
Æ
Ò
¾
$
4
D
T
d
t
ä
ö
ñ
¼
Ï
å
õ
¶
%
5
E
U
e
u
à
ò
Â
Á
Í
&
6
F
V
f
v
å
û
ª
Ñ
ã
ø
Õ µ
§ ÷
'
7
G
W
g
w
ç
ù
º
À
Ã
æ
(
8
H
X
h
x
ê
ÿ
©
Ì
Ä
Ú
¸ º
)
9
I
Y
i
y
ë
Ö
*
:
J
Z
j
z
è
Ü
ˆ
¤
+
;
K
[
k
{
ï
ø
,
<
L
\
l
|
î
£
˜
£ ¥
=
M
]
m
}
ì
Ø
.
>
N
^
n
~
Ä
×
«
§ ¥
Ö Ü
¦ ß
Û Ù ý Ý ¯
· 1 3 2
Note:
This table is different from the Font Test Sheet printout, because here a TrueType font with a different character set was used.
/
?
O
_
o
Å
»
¢
¤
Barcode & OCR Package: User's Manual
page 46 / 95
4.3 Code 128
For this symbology there exists 1 font.
These N:W ratios are supported: {1:2.0}.
These CTX styles are supported: none.
4.3.1 The Font select command sequences
For each font, the table below specifies the command sequence to be used to select that font.
The ^^^ is a place-holder for the value to specify a certain size. See the section "Font measurements" below for information on how this value
and the actual size are related.
Font ID File name
100
C128_20N
Font name
COD128 2.0 NR
Font description
Code 128 1:2.0
Ratio
1:2.0
CTX
NR
Command sequence (PCL)
<esc>(7Y<esc>(s1p^^^v0s0b9002T
Note: (CTX)
A version of this font with clear text is not possible, since it has to support all 3 codes (A/B/C).
4.3.2 Encoding (II): The Character codes
The code table below defines the character set of these fonts, mapping the ASCII code positions to symbology characters.
Code table
x0 x1 x2 x3 x4 x5 x6 x7 x8 x9 xA xB xC xD xE xF
...
2x
3x
4x
5x
6x
7x
8x
9x
Ax
Bx
Cx
...
[#01]
[#02]
[#03]
[#04]
[#05]
[#06]
[#07]
[#08]
[#09]
[#10]
[#11]
[#12]
[#13]
[#14]
[#15]
[#16]
[#17]
[#18]
[#19]
[#20]
[#21]
[#22]
[#23]
[#24]
[#25]
[#26]
[#27]
[#28]
[#29]
[#30]
[#31]
[#32]
[#33]
[#34]
[#35]
[#36]
[#37]
[#38]
[#39]
[#40]
[#41]
[#42]
[#43]
[#44]
[#45]
[#46]
[#47]
[#48]
[#49]
[#50]
[#51]
[#52]
[#53]
[#54]
[#55]
[#56]
[#57]
[#58]
[#59]
[#60]
[#61]
[#62]
[#63]
[#64]
[#65]
[#66]
[#67]
[#68]
[#69]
[#70]
[#71]
[#72]
[#73]
[#74]
[#75]
[#76]
[#77]
[#78]
[#79]
[#80]
[#81]
[#82]
[#83]
[#84]
[#85]
[#86]
[#87]
[#88]
[#89]
[#90]
[#91]
[#92]
[#93]
[#94]
[#00]
[#96]
[#95]
[#97]
[#98]
[#99]
[#100]
[#101]
[#102]
[#103]
[#104]
[#105]
[stop]
Conversely, the following two tables map each symbology character (control and message alphabet) to the ASCII code of its barcode
character in the font.
Symbology character
CTX style
[startA] [#103]
[startB] [#104]
[startC] [#105]
[stop]
none
none
none
none
Normal
Fully-embedded
Half-embedded
Show start/stop
Symbology character
[#00]
[#01]..[#94]
Font character
(ASCII)
Font character
(ASCII)
(hex)
<C7>
<C8>
<C9>
<CA>
n/a
n/a
n/a
n/a
(hex)
<B0>
<21> .. <7E>
(dec)
<199>
<200>
<201>
<202>
(dec)
<176>
<033> .. <126>
Barcode & OCR Package: User's Manual
[#95]
[#96]
[#97]
[#98]
[#99]
[#100]
[#101]
[#102]
page 47 / 95
¿
À
Á
Â
Ã
Ä
Å
Æ
<BF>
<C0>
<C1>
<C2>
<C3>
<C4>
<C5>
<C6>
<191>
<192>
<193>
<194>
<195>
<196>
<197>
<198>
How to calculate
The algorithm to apply depends on the current mode Code (A/B/C).
Code A:
Symbology
character
[#00]
[#01]..[#63]
[#64]..[#94]
[#95]
[#96]
[#97]
[#98]
[#99]
[#100]
[#101]
[#102]
Example:
(message char.)
(symbology char.)
(font char.)
Message character
Code A
[SP]
[!]..[_]
[NUL]..[RS]
[US]
[FNC3]
[FNC2]
[Shift]
[CodeC]
[CodeB]
[FNC4]
[FNC1]
Font character
(hex)
<B0>
<21> .. <5F>
<60> .. <7E>
<BF>
<C0>
<C1>
<C2>
<C3>
<C4>
<C5>
<C6>
(dec)
<176>
<033> .. <095>
<096> .. <126>
<191>
<192>
<193>
<194>
<195>
<196>
<197>
<198>
How to
calculate
-+0
+96
+160
+61 (*1)
+63 (*1)
+66 (*1)
+60 (*1)
+62 (*2)
+65 (*2)
+69 (*1)
(dec)
<176>
<033> .. <126>
<191>
<192>
<193>
<194>
<195>
<196>
<197>
<198>
How to
calculate
-+0
+64
+61 (*1)
+63 (*1)
+66 (*1)
+60 (*1)
+64 (*2)
+64 (*2)
+69 (*1)
"<001>" = "<SOH>" -->
[SOH] = [#65]
-->
"a" = <097>
=> add +96 to ASCII code
Code B:
Symbology
character
[#00]
[#01]..[#94]
[#95]
[#96]
[#97]
[#98]
[#99]
[#100]
[#101]
[#102]
Example:
(message char.)
(symbology char.)
(font char.)
Message character
Code B
[SP]
[!]..[~]
[DEL]
[FNC3]
[FNC2]
[Shift]
[CodeC]
[FNC4]
[CodeA]
[FNC1]
<097>" = "a"
[a] = [#65]
"a" = <097>
Font character
(hex)
<B0>
<21> .. <7E>
<BF>
<C0>
<C1>
<C2>
<C3>
<C4>
<C5>
<C6>
-->
-->
=> just print the character as is
Code C:
Symbology
character
[#00]
[#01]..[#94]
[#95]
[#96]
[#97]
[#98]
[#99]
[#100]
[#101]
[#102]
Message character
Code C
[00]
[01]..[94]
[95]
[96]
[97]
[98]
[99]
[CodeB]
[CodeA]
[FNC1]
Example:
(message pair of digits)
(symbology char.)
(font char.)
Note: (*1)
Font character
(hex)
<B0>
<21> .. <7E>
<BF>
<C0>
<C1>
<C2>
<C3>
<C4>
<C5>
<C6>
(dec)
<176>
<033> .. <126>
<191>
<192>
<193>
<194>
<195>
<196>
<197>
<198>
How to
calculate
-+32
+96
+96
+96
+96
+96
+62 (*2)
+64 (*2)
+69 (*1)
"<036><037>" = "65" -->
[65] = [#65]
-->
"a" = <097>
=> add +32 to the value (not to the ASCII codes)
Barcode & OCR Package: User's Manual
page 48 / 95
The calculation of this control character depends on how it is specified in the message.
There is a de-facto standard established by JetCAPS. Refer to the section about the Code 128 symbology above.
Note: (*2)
Same as (*1). In addition to that, it also depends on the mode (A|B|C) in which it is specified.
4.3.3 Code construction: The complete procedure (Example)
This section contains a full example of all stages of the Code construction.
Code 128
Data
C O D E <SP> 1 2 8
-- (*)
<startB> C O D E <SP> 1 2 8
-- (*)
<startB> C O D E <SP> 1 2 8 u
[startB] [C] [O] [D] [E] [SP] [1] [2] [8] [u] [stop]
-- (**)
<C8> C O D E <SP> 1 2 8 u <CA>
ÁCODEß128uÈ
CODE 128
(*) For the calculation of the CHK refer to the "Technical Reference Manual - Barcode & OCR Printing".
(**) Detailed scheme:
byte # 1
2
symb. [startB] [C]
char.
font
<C8> C
char.
3
[O]
4
[D]
5
[E]
6
[SP]
7
[1]
O
D
E
<SP> 1
8
[2]
9
[8]
10
[u]
11
[stop]
2
8
u
<CA>
UCC/EAN 128
Data
Production date = 24 December 2001; Packaging date = 10 January 2002;
(11) 011224 (13) 020110
<startC> <FNC1> 11 01 12 24 13 02 01 10
(*)
[startC] [FNC1] [11] [01] [12] [24] [13] [02] [01] [10] [#75] [stop]
(**)
<C9> <C6> + ! , 8 - " ! * k <CA>
(*) Checksum calculation:
Message character
<startC>
<FNC1>
Reference number
105
102
Weight factor
*1
*1
Product -> Sum
105
+ 102
11
11
*2
+ 22
01
01
*3
+3
12
24
12
24
*4
*5
+ 48 + 120
13
13
*6
+ 78
02
02
*7
+ 14
01
01
*8
+8
10
10
*9
+ 90 = 590 =
5x 10³ + 75
Barcode & OCR Package: User's Manual
(**) Detailed scheme:
byte # 1
2
3
symb. [startC [FNC1 [11]
char. ]
]
font
<C9> <C6> +
char.
page 49 / 95
4
[01]
5
[12]
6
[24]
7
[13]
8
[02]
9
[01]
10
[10]
11
[75]
12
[stop]
!
,
8
-
"
!
*
k
<CA>
UPC 128
Data
Application Identifier: 00
Extension digit: 9
UCC/EAN Company prefix: 0009009
Serial Reference Number: 123456789
(00) 9 0 0 0 9 0 0 9 1 2 3 4 5 6 7 8 9
-- (*)
00900090091234567892
<startC> <FNC1> 00 90 00 90 09 12 34 56 78 92
-- (**)
[startC] [FNC1] [00] [90] [00] [90] [09] [12] [34] [56] [78] [92] [#28] [stop]
<C9> <C6> <B0> z <B0> z ) , B X n <7C> < <CA>
(*) For the calculation of the CHK for UPC-128 refer to the "Technical Reference Manual - Barcode & OCR Printing".
(**) Checksum calculation (Code 128 CHK)
Message character
<startC>
<FNC1>
Reference number
105
102
Weight factor
*1
*1
Product -> Sum
105
+ 102
-->
#CHK = 35x 103 + 28
00
90 00
90
0
90
0
90
*2
*3 *4
*5
+ 0 + 270 + 0 + 450
09
09
*6
+ 54
12
34
56
78
12
34
56
78
*7
*8
*9
*10
+ 84 + 272 + 504 + 780
92
92
*11
+ 1012 = 3633
4.3.4 Font measurements
To obtain the correct size (width and/or height) parameter to be used in a PCL or HP-GL/2 command, follow these steps:
0. Determine the size you want (desired size).
1. Print your barcode data with some nominal size parameters in the command, e.g. 12v (PCL) or SI0.25,1.0 (HP-GL/2).
2. Measure the height and total width of the barcode (measured size).
3. Calculate
(Required size parm) = (Nominal size parm) x (Desired size) / (Measured size)
If you need to have an exact specification of the height [pt] or module width [mil] of a font, please contact support.
Barcode & OCR Package: User's Manual
page 50 / 95
4.4 Code 39
For this symbology there exist 6 fonts.
These N:W ratios are supported: {1:2.0, 1:2.5, 1:3.0}.
These CTX styles are supported: {_N, _F, _H, _S} .
4.4.1 The Font select command sequences
For each font, the table below specifies the command sequence to be used to select that font.
The ^^^ is a place-holder for the value to specify a certain size. See the section "Font measurements" below for information on how this value
and the actual size are related.
Font ID
200
201
202
203
204
205
File name
CD39_20N
CD39_20T
CD39_25N
CD39_25T
CD39_30N
CD39_30T
Font name
COD39 2.0 NR
COD39 2.0 TX
COD39 2.5 NR
COD39 2.5 TX
COD39 3.0 NR
COD39 3.0 TX
Font description
Code 39 1:2.0
Code 39 1:2.0 Readable
Code 39 1:2.5
Code 39 1:2.5 Readable
Code 39 1:3.0
Code 39 1:3.0 Readable
Ratio
1:2.0
1:2.0
1:2.5
1:2.5
1:3.0
1:3.0
CTX
NR
TX
NR
TX
NR
TX
Command sequence (PCL)
<esc>(0Y<esc>(s1p^^^v0s0b9012T
<esc>(0Y<esc>(s1p^^^v1s0b9012T
<esc>(0Y<esc>(s1p^^^v0s0b9013T
<esc>(0Y<esc>(s1p^^^v1s0b9013T
<esc>(0Y<esc>(s1p^^^v0s0b9014T
<esc>(0Y<esc>(s1p^^^v1s0b9014T
4.4.2 Encoding (II): The Character codes
The code table below defines the character set of these fonts, mapping the ASCII code positions to symbology characters.
Code table
x0 x1 x2 x3 x4 x5 x6 x7 x8 x9 xA xB xC xD xE xF
...
2x
3x
4x
5x
6x
7x
...
Bx
...
[SP]
[0]
[P]
[$]
[%]
[start/st
op]:H
[start/st [start/st [start/st
op]:N
op]:F
op]:S
[1]
[2]
[3]
[4]
[5]
[6]
[7]
[8]
[9]
[A]
[B]
[C]
[D]
[E]
[F]
[G]
[H]
[I]
[J]
[Q]
[R]
[S]
[T]
[U]
[V]
[W]
[X]
[Y]
[Z]
[+]
[K]
[L]
[-]
[.]
[/]
[M]
[N]
[O]
[SP]
Conversely, the following two tables map each symbology character (control and message alphabet) to the ASCII code of its barcode
character in the font.
Symbology character
CTX style
[start/stop]
none
Normal
Fully-embedded
Half-embedded
Show start/stop
:N
:F
:H
:S
Symbology character
[SP]
[$]
[%]
[+]
[-]
[.]
Font character
(ASCII)
*
(
)
&
*
(hex)
<2A>
<28>
<29>
<26>
<2A>
(dec)
<042>
<040>
<041>
<038>
<042>
Font character
(ASCII)
"°"
"$"
"%"
"+"
"-"
"."
(hex)
<B0>
<24>
<25>
<2B>
<2D>
<2E>
(dec)
<176>
<036>
<037>
<043>
<045>
<046>
Barcode & OCR Package: User's Manual
[/]
[0] ... [9]
[A] ... [Z]
page 51 / 95
"/"
"0" .. "9"
"A" .. "Z"
<2F>
<30>..<39>
<41>.. <5A>
<047>
<048> .. <057>
<065> .. <090>
Note: The lowercase characters ‘a’ to ‘z’ do not belong to the valid character set, but because of mistakes often made in the data entry, the font
also defines those characters, which are mapped to their uppercase counterparts.
How to calculate
+0: The ASCII codes of the font characters are the same as the corresponding message characters.
4.4.3 Code construction: The complete procedure (Example)
This section contains a full example of all stages of the Code construction.
Code 39
Data
C O D E <SP> 3 9
-- (*)
C O D E <SP> 3 9 R
[start/stop] [C] [O] [D] [E] [SP] [3] [9] [R] [start/stop]
* C O D E <B0> 3 9 R *
*CODEß39R*
CODE 39
(*) For the calculation of the CHK refer to the "Technical Reference Manual - Barcode & OCR Printing".
Code 39 Extended
Here without CHK.
Data
C o d e <SP> 3 9 <SP> e x
C + O + D + E <SP> 3 9 <SP> + E + X
[start/stop] [C] [+] [O] [+] [D] [+] [E] [SP] [3] [9] [SP] [+] [E] [+] [X] [start/stop]
* C + O + D + E <B0> 3 9 <B0> + E + X *
PZN
Data
123456
-- (*)
1234562
-1234562
Barcode & OCR Package: User's Manual
[start] [-] [1] [2] [3] [4] [5] [6] [2] [stop]
* - 1 2 3 4 5 6 2 *
*-1234562G*
PZN-1234562
(*) For the calculation of the CHK refer to the "Technical Reference Manual - Barcode & OCR Printing".
4.4.4 Font measurements
To obtain the correct size (width and/or height) parameter to be used in a PCL or HP-GL/2 command, follow these steps:
0. Determine the size you want (desired size).
1. Print your barcode data with some nominal size parameters in the command, e.g. 12v (PCL) or SI0.25,1.0 (HP-GL/2).
2. Measure the height and total width of the barcode (measured size).
3. Calculate
(Required size parm) = (Nominal size parm) x (Desired size) / (Measured size)
If you need to have an exact specification of the height [pt] or module width [mil] of a font, please contact support.
page 52 / 95
Barcode & OCR Package: User's Manual
page 53 / 95
4.5 Code 93
For this symbology there exist 2 fonts.
These N:W ratios are supported: 1:2.5.
These CTX styles are supported: {_N, _F, _H}.
4.5.1 The Font select command sequences
For each font, the table below specifies the command sequence to be used to select that font.
The ^^^ is a place-holder for the value to specify a certain size. See the section "Font measurements" below for information on how this value
and the actual size are related.
Font ID
212
213
File name
CD93_25N
CD93_25T
Font name
COD93 2.5 NR
COD93 2.5 TX
Font description
Code 93 1:2.5
Code 93 1:2.5 Readable
Ratio
1:2.5
1:2.5
CTX
NR
TX
Command sequence (PCL)
<esc>(9Y<esc>(s1p^^^v0s0b9000T
<esc>(9Y<esc>(s1p^^^v1s0b9000T
4.5.2 Encoding (II): The Character codes
The code table below defines the character set of these fonts, mapping the ASCII code positions to symbology characters.
Code table
x0 x1 x2 x3 x4 x5 x6 x7 x8 x9 xA xB xC xD xE xF
...
2x
3x
4x
5x
6x
...
Bx
...
[start]:H [stop]:H
[0]
[P]
[$]
[%]
[start]:F [stop]:F [start]:N [stop]:N
[+]
[1]
[2]
[3]
[4]
[5]
[6]
[7]
[8]
[9]
[A]
[B]
[C]
[D]
[E]
[F]
[G]
[H]
[I]
[J]
[Q]
[R]
[S]
[T]
[U]
[V]
[W]
[X]
[Y]
[Z]
[($)]
[(%)]
[(/)]
[(+)]
[K]
[L]
[-]
[.]
[/]
[M]
[N]
[O]
[SP]
Conversely, the following two tables map each symbology character (control and message alphabet) to the ASCII code of its barcode
character in the font.
Symbology character
CTX style
[start]
none
Normal
Fully-embedded
Half-embedded
none
Normal
Fully-embedded
Half-embedded
:N
:F
:H
[stop]
:N
:F
:H
Symbology character
[SP]
[$]
[%]
[+]
[-]
[.]
[/]
[0] ... [9]
[A] ... [Z]
[($)]
Font character
(ASCII)
(
(
&
"
)
)
'
#
(hex)
<28>
<28>
<26>
<22>
<29>
<29>
<27>
<23>
(dec)
<040>
<040>
<038>
<034>
<041>
<041>
<039>
<035>
Font character
(ASCII)
°
$
%
+
.
/
0 .. 9
A .. Z
a
(hex)
<B0>
<24>
<25>
<2B>
<2D>
<2E>
<2F>
<30>..<39>
<41>..<5A>
<61>
(dec)
<176>
<036>
<037>
<043>
<045>
<046>
<047>
<048> .. <057>
<065> .. <090>
<097>
Barcode & OCR Package: User's Manual
[(%)]
[(/)]
[(+)]
page 54 / 95
b
c
d
<62>
<63>
<64>
<098>
<099>
<100>
How to calculate
+0: The ASCII codes of the font characters are the same as the corresponding message characters.
4.5.3 Code construction: The complete procedure (Example)
This section contains a full example of all stages of the Code construction.
Code 93
Data
C O D E <SP> 9 3
-- (*)
C O D E <SP> 9 3 E 0
[start] [C] [O] [D] [E] [SP] [9] [3] [E] [0] [stop]
( C O D E <B0> 9 3 E 0 )
(*) For the calculation of the CHK refer to the "Technical Reference Manual - Barcode & OCR Printing".
Code 93 Extended
Data
C o d e <SP> 9 3 <SP> e x
C (+) O (+) D (+) E <SP> 9 3 <SP> (+) E (+) X
-- (*)
C (+) O (+) D (+) E <SP> 9 3 <SP> (+) E (+) X 6 P
[start] [C] [(+)] [O] [(+)] [D] [(+)] [E] [SP] [9] [3] [SP] [(+)] [E] [(+)] [X] [6] [P] [stop]
( C d O d D d E <B0> 9 3 <B0> d E d X 6 P )
(*) Calculations for "CHK-C" and "CHK-K"
Calculation for "CHK-C"
Message
C
(+)
O
(+)
D
(+)
E <SP>
9
character
Reference
12
46
24
46
13
46
14
38
9
number
Weight
*15
*14
*13
*12
*11
*10
*9
*8
*7
factor
Product -> 180 + 644 + 312 + 552 + 143 + 460 + 126 + 304 +63
Sum
-->
#CHK-C = 3343 = 71 x 47 + 6 --> CHK-C = #6 = "6"
Calculation for "CHK-K"
3 <SP>
(+)
E
(+)
X
3
38
46
14
46
33
*6
*5
*4
*3
*2
*1
+18 +190 +184
+42
+92
+33
= 3343
Barcode & OCR Package: User's Manual
Message
C
(+)
O
(+)
D
(+)
E <SP>
9
character
Reference
12
46
24
46
13
46
14
38
9
number
Weight
*1
*15
*14
*13
*12
*11
*10
*9
*8
factor
Product -> 12 + 690 + 336 + 598 + 156 + 506 + 140 + 342 +72
Sum
-->
#CHK-K = 3597 = 76 x 47 + 25 --> CHK-K = #25 = "P"
page 55 / 95
3 <SP>
(+)
E
(+)
X
6
3
38
46
14
46
33
6
*7
*6
*5
*4
*3
*2
*1
+56 +138
+66
+21 +228 +230
4.5.4 Font measurements
To obtain the correct size (width and/or height) parameter to be used in a PCL or HP-GL/2 command, follow these steps:
0. Determine the size you want (desired size).
1. Print your barcode data with some nominal size parameters in the command, e.g. 12v (PCL) or SI0.25,1.0 (HP-GL/2).
2. Measure the height and total width of the barcode (measured size).
3. Calculate
(Required size parm) = (Nominal size parm) x (Desired size) / (Measured size)
If you need to have an exact specification of the height [pt] or module width [mil] of a font, please contact support.
+6 = 3597
Barcode & OCR Package: User's Manual
page 56 / 95
4.6 Codabar
For this symbology there exist 2 fonts.
These N:W ratios are supported: {1:2.5}.
These CTX styles are supported: {_N, _F, _H}.
4.6.1 The Font select command sequences
For each font, the table below specifies the command sequence to be used to select that font.
The ^^^ is a place-holder for the value to specify a certain size. See the section "Font measurements" below for information on how this value
and the actual size are related.
Font ID
302
303
File name
CODA_25N
CODA_25T
Font name
CODABAR 2.5 NR
CODABAR 2.5 TX
Font description
Codabar 1:2.5
Codabar 1:2.5 Readable
Ratio
1:2.5
1:2.5
CTX
NR
TX
Command sequence (PCL)
<esc>(5Y<esc>(s1p^^^v0s0b9001T
<esc>(5Y<esc>(s1p^^^v1s0b9001T
4.6.2 Encoding (II): The Character codes
The code table below defines the character set of these fonts, mapping the ASCII code positions to symbology characters.
Code table
x0 x1 x2 x3 x4 x5 x6 x7 x8 x9 xA xB xC xD xE xF
...
2x
3x
4x
...
[$]
[0]
[1]
[2]
[3]
[4]
[start/st [start/st [start/st [start/st
opA]:N opB]:N opC]:N opD]:N
[+]
[5]
[6]
[7]
[8]
[9]
[-]
[.]
[/]
[:]
[start/st [start/st [start/st [start/st [start/st [start/st [start/st [start/st
opA]:H opB]:H opC]:H opD]:H opA]:F opB]:F opC]:F opD]:F
Conversely, the following two tables map each symbology character (control and message alphabet) to the ASCII code of its barcode
character in the font.
Symbology character
CTX style
[start/stopA]
none
Normal
Fully-embedded
Half-embedded
none
Normal
Fully-embedded
Half-embedded
none
Normal
Fully-embedded
Half-embedded
none
Normal
Fully-embedded
Half-embedded
:N
:F
:H
[start/stopB]
:N
:F
:H
[start/stopC]
:N
:F
:H
[start/stopD]
:N
:F
:H
Symbology character
[$]
[+]
[-]
[.]
[/]
[0] ... [9]
[:]
How to calculate
Font character
(ASCII)
A
A
F
J
B
B
G
K
C
C
H
L
D
D
I
M
(hex)
<41>
<41>
<46>
<4A>
<42>
<42>
<47>
<4B>
<43>
<43>
<48>
<4C>
<44>
<44>
<49>
<4D>
(dec)
<065>
<065>
<070>
<074>
<066>
<066>
<071>
<075>
<067>
<067>
<072>
<076>
<068>
<068>
<073>
<077>
Font character
(ASCII)
$
+
.
/
0 .. 9
:
(hex)
<24>
<2B>
<2D>
<2E>
<2F>
<30> .. <39>
<3A>
(dec)
<036>
<043>
<045>
<046>
<047>
<048> .. <057>
<058>
Barcode & OCR Package: User's Manual
+0: The ASCII codes of the font characters are the same as the corresponding message characters.
4.6.3 Code construction: The complete procedure (Example)
This section contains a full example of all stages of the Code construction.
Data
<startA> 0 1 2 3 4 <stopB>
-- (*)
<startA> 0 1 2 3 4 5 <stopB>
[start/stopA] [0] [1] [2] [3] [4] [5] [start/stopB]
-- here: for Normal CTX style
A 0 1 2 3 4 5 B
A012345B
A 0 1 2 3 4 5 B
(*) For the calculation of the CHK refer to the "Technical Reference Manual - Barcode & OCR Printing".
4.6.4 Font measurements
To obtain the correct size (width and/or height) parameter to be used in a PCL or HP-GL/2 command, follow these steps:
0. Determine the size you want (desired size).
1. Print your barcode data with some nominal size parameters in the command, e.g. 12v (PCL) or SI0.25,1.0 (HP-GL/2).
2. Measure the height and total width of the barcode (measured size).
3. Calculate
(Required size parm) = (Nominal size parm) x (Desired size) / (Measured size)
If you need to have an exact specification of the height [pt] or module width [mil] of a font, please contact support.
page 57 / 95
Barcode & OCR Package: User's Manual
page 58 / 95
4.7 2 of 5 Interleaved
For this symbology there exist 6 fonts.
These N:W ratios are supported: {1:2.0, 1:2.5, 1:3.0}.
These CTX styles are supported: {_N}.
4.7.1 The Font select command sequences
For each font, the table below specifies the command sequence to be used to select that font.
The ^^^ is a place-holder for the value to specify a certain size. See the section "Font measurements" below for information on how this value
and the actual size are related.
Font ID
400
401
402
403
404
405
File name
25LV_20N
25LV_20T
25LV_25N
25LV_25T
25LV_30N
25LV_30T
Font name
25ILV 2.0 NR
25ILV 2.0 TX
25ILV 2.5 NR
25ILV 2.5 TX
25ILV 3.0 NR
25ILV 3.0 TX
Font description
2 of 5 Interleaved 1:2.0
2 of 5 Interleaved 1:2.0 Readable
2 of 5 Interleaved 1:2.5
2 of 5 Interleaved 1:2.5 Readable
2 of 5 Interleaved 1:3.0
2 of 5 Interleaved 1:3.0 Readable
Ratio
1:2.0
1:2.0
1:2.5
1:2.5
1:3.0
1:3.0
CTX
NR
TX
NR
TX
NR
TX
Command sequence (PCL)
<esc>(4Y<esc>(s1p^^^v0s0b9006T
<esc>(4Y<esc>(s1p^^^v1s0b9006T
<esc>(4Y<esc>(s1p^^^v0s0b9005T
<esc>(4Y<esc>(s1p^^^v1s0b9005T
<esc>(4Y<esc>(s1p^^^v0s0b9003T
<esc>(4Y<esc>(s1p^^^v1s0b9003T
4.7.2 Encoding (II): The Character codes
The Interleaving is achieved by providing the barcode characters for all 100 pairs of digits, i.e. [00] ... [99].
The code table below defines the character set of these fonts, mapping the ASCII code positions to symbology characters.
Code table
x0 x1 x2 x3 x4 x5 x6 x7 x8 x9 xA xB xC xD xE xF
...
2x
3x
4x
5x
6x
7x
8x
...
Bx
Cx
...
[start]
[stop]
[00]
[01]
[02]
[03]
[04]
[05]
[06]
[07]
[08]
[09]
[10]
[11]
[12]
[13]
[14]
[15]
[16]
[17]
[18]
[19]
[20]
[21]
[22]
[23]
[24]
[25]
[26]
[27]
[28]
[29]
[30]
[31]
[32]
[33]
[34]
[35]
[36]
[37]
[38]
[39]
[40]
[41]
[42]
[43]
[44]
[45]
[46]
[47]
[48]
[49]
[50]
[51]
[52]
[53]
[54]
[55]
[56]
[57]
[58]
[59]
[60]
[61]
[62]
[63]
[64]
[65]
[66]
[67]
[68]
[69]
[70]
[71]
[72]
[73]
[74]
[75]
[76]
[77]
[78]
[79]
[80]
[81]
[82]
[83]
[84]
[85]
[86]
[87]
[88]
[89]
[90]
[91]
[92]
[93]
[94]
[95]
[96]
[97]
[98]
[99]
Conversely, the following two tables map each symbology character (control and message alphabet) to the ASCII code of its barcode
character in the font.
Symbology character CTX style
[start]
[stop]
Symbology character
[00] ... [91]
[92] ... [99]
none
Normal
none
Normal
Font character
(ASCII)
Font character
(ASCII)
!
(hex)
<21>
(dec)
<033>
"
<22>
<034>
(hex)
<23> ... <7E>
<BF> ... <C6>
(dec)
<035> .. <126>
<191> .. <198>
How to calculate (*)
+ 35
+ 99
Barcode & OCR Package: User's Manual
Note: (*) (How to calculate)
Unfortunately there are 2 ranges with a different term to be added.
For 00..91, simply add 35 to the pairs value.
Example: pair "47" --> 47 + 35 = 82 => ASCII ‘R’
4.7.3 Code construction: The complete procedure (Example)
This section contains a full example of all stages of the Code construction.
2 of 5 Interleaved
Data
1234569
-- (*)
12345694
[start] [12] [34] [56] [94] [stop]
! / E [ <C1> "
‹p"8^›
(*) For the calculation of the CHK refer to the "Technical Reference Manual - Barcode & OCR Printing".
Deutsche Post AG (German Postal) Identcode
Data
98765432101
-- (*)
987654321016
[start] [98] [76] [54] [32] [10] [16] [stop]
! <C5> o Y C - 3 "
‹bL6„nt›
(*) For the calculation of the CHK refer to the "Technical Reference Manual - Barcode & OCR Printing".
USPS 25 Tray label and Sack label
Data
2230034401
-- (*)
[start] [22] [30] [03] [44] [01] [stop]
! 9 A & O $ "
page 59 / 95
Barcode & OCR Package: User's Manual
4.7.4 Font measurements
To obtain the correct size (width and/or height) parameter to be used in a PCL or HP-GL/2 command, follow these steps:
0. Determine the size you want (desired size).
1. Print your barcode data with some nominal size parameters in the command, e.g. 12v (PCL) or SI0.25,1.0 (HP-GL/2).
2. Measure the height and total width of the barcode (measured size).
3. Calculate
(Required size parm) = (Nominal size parm) x (Desired size) / (Measured size)
If you need to have an exact specification of the height [pt] or module width [mil] of a font, please contact support.
page 60 / 95
Barcode & OCR Package: User's Manual
page 61 / 95
4.8 2 of 5 Industrial
For this symbology there exist 2 fonts.
These N:W ratios are supported: {1:2.0}.
These CTX styles are supported: {_N, _F, _H, _S}.
4.8.1 The Font select command sequences
For each font, the table below specifies the command sequence to be used to select that font.
The ^^^ is a place-holder for the value to specify a certain size. See the section "Font measurements" below for information on how this value
and the actual size are related.
Font ID
410
411
File name
25ND_20N
25ND_20T
Font name
25IND 2.0 NR
25IND 2.0 TX
Font description
2 of 5 Industrial 1:2.0
2 of 5 Industrial 1:2.0 Readable
Ratio CTX
1:2.0 NR
1:2.0 TX
Command sequence (PCL)
<esc>(1Y<esc>(s1p^^^v0s0b9007T
<esc>(1Y<esc>(s1p^^^v1s0b9007T
4.8.2 Encoding (II): The Character codes
The code table below defines the character set of these fonts, mapping the ASCII code positions to symbology characters.
Code table
x0 x1 x2 x3 x4 x5 x6 x7 x8 x9 xA xB xC xD xE xF
...
3x
4x
...
[0]
[1]
[2]
[3]
[4]
[5]
[6]
[7]
[8]
[9]
[start]:S [stop]:S [start]:N [stop]:N [start]:H [stop]:H [start]:F [stop]:F
Conversely, the following two tables map each symbology character (control and message alphabet) to the ASCII code of its barcode
character in the font.
Symbology character
CTX style
[start]
none
Normal
Fully-embedded
Half-embedded
Show start/stop
none
Normal
Fully-embedded
Half-embedded
Show start/stop
:N
:F
:H
:S
[stop]
:N
:F
:H
:S
Symbology character
[0] ... [9]
Font character
(ASCII)
0 ... 9
Font character
(ASCII)
A
C
G
E
A
B
D
H
F
B
(hex)
<30> ... <39>
(hex)
<41>
<43>
<47>
<45>
<41>
<42>
<44>
<48>
<46>
<42>
(dec)
<065>
<067>
<071>
<069>
<065>
<066>
<068>
<072>
<070>
<066>
(dec)
<048> ... <057>
How to calculate
+0: The ASCII codes of the font characters are the same as the corresponding message characters.
4.8.3 Code construction: The complete procedure (Example)
This section contains a full example of all stages of the Code construction.
Data
789012
-- (*)
7890123
Barcode & OCR Package: User's Manual
[start] [7] [8] [9] [0] [1] [2] [3] [stop]
A 7 8 9 0 1 2 3 B
(*) For the calculation of the CHK refer to the "Technical Reference Manual - Barcode & OCR Printing".
4.8.4 Font measurements
To obtain the correct size (width and/or height) parameter to be used in a PCL or HP-GL/2 command, follow these steps:
0. Determine the size you want (desired size).
1. Print your barcode data with some nominal size parameters in the command, e.g. 12v (PCL) or SI0.25,1.0 (HP-GL/2).
2. Measure the height and total width of the barcode (measured size).
3. Calculate
(Required size parm) = (Nominal size parm) x (Desired size) / (Measured size)
If you need to have an exact specification of the height [pt] or module width [mil] of a font, please contact support.
page 62 / 95
Barcode & OCR Package: User's Manual
page 63 / 95
4.9 2 of 5 Matrix
For this symbology there exist 2 fonts.
These N:W ratios are supported: {1:3.0}.
These CTX styles are supported: {_N, _F, _H, _S}.
4.9.1 The Font select command sequences
For each font, the table below specifies the command sequence to be used to select that font.
The ^^^ is a place-holder for the value to specify a certain size. See the section "Font measurements" below for information on how this value
and the actual size are related.
Font ID
424
425
File name
25MX_30N
25MX_30T
Font name
25MAT 3.0 NR
25MAT 3.0 TX
Font description
Ratio CTX
2 of 5 Matrix 1:3.0
1:3.0 NR
2 of 5 Matrix 1:3.0 Readable 1:3.0 TX
Command sequence (PCL)
<esc>(2Y<esc>(s1p^^^v0s0b9008T
<esc>(2Y<esc>(s1p^^^v1s0b9008T
4.9.2 Encoding (II): The Character codes
The code table below defines the character set of these fonts, mapping the ASCII code positions to symbology characters.
Code table
x0 x1 x2 x3 x4 x5 x6 x7 x8 x9 xA xB xC xD xE xF
...
3x
4x
...
[0]
[1]
[2]
[start/st
op]:S
[3]
[4]
[start/st
op]:N
[5]
[start/st
op]:H
[6]
[7]
[8]
[9]
[start/st
op]:F
Conversely, the following two tables map each symbology character (control and message alphabet) to the ASCII code of its barcode
character in the font.
Symbology character
CTX style
none
Font character
(ASCII)
A
[start/stop]
(hex)
<41>
(dec)
<065>
:N
Normal
C
<43>
<067>
:F
Fully-embedded
G
<47>
<071>
:H
Half-embedded
E
<45>
<069>
:S
Show start/stop
A
<41>
<065>
Symbology character
[0] ... [9]
Font character
(ASCII)
0 ... 9
(hex)
<30> ... <39>
(dec)
<048> ... <057>
How to calculate
+0: The ASCII codes of the font characters are the same as the corresponding message characters.
4.9.3 Code construction: The complete procedure (Example)
This section contains a full example of all stages of the Code construction.
Data
789012
-- (*)
7890123
Barcode & OCR Package: User's Manual
[start/stop] [7] [8] [9] [0] [1] [2] [3] [start/stop]
A 7 8 9 0 1 2 3 A
(*) For the calculation of the CHK refer to the "Technical Reference Manual - Barcode & OCR Printing".
4.9.4 Font measurements
To obtain the correct size (width and/or height) parameter to be used in a PCL or HP-GL/2 command, follow these steps:
0. Determine the size you want (desired size).
1. Print your barcode data with some nominal size parameters in the command, e.g. 12v (PCL) or SI0.25,1.0 (HP-GL/2).
2. Measure the height and total width of the barcode (measured size).
3. Calculate
(Required size parm) = (Nominal size parm) x (Desired size) / (Measured size)
If you need to have an exact specification of the height [pt] or module width [mil] of a font, please contact support.
page 64 / 95
Barcode & OCR Package: User's Manual
page 65 / 95
4.10 MSI
For this symbology there exist 2 fonts.
These N:W ratios are supported: {1:2.0}.
These CTX styles are supported: {_N, _F, _H, _S}.
4.10.1 The Font select command sequences
For each font, the table below specifies the command sequence to be used to select that font.
The ^^^ is a place-holder for the value to specify a certain size. See the section "Font measurements" below for information on how this value
and the actual size are related.
Font ID
460
461
File name Font name
MSI_20N MSI 2.0 NR
MSI_20T
MSI 2.0 TX
Font description
MSI 1:2.0
MSI 1:2.0 Readable
Ratio
1:2.0
1:2.0
CTX
NR
TX
Command sequence (PCL)
<esc>(6Y<esc>(s1p^^^v0s0b9009T
<esc>(6Y<esc>(s1p^^^v1s0b9009T
4.10.2 Encoding (II): The Character codes
The code table below defines the character set of these fonts, mapping the ASCII code positions to symbology characters.
Code table
x0 x1 x2 x3 x4 x5 x6 x7 x8 x9 xA xB xC xD xE xF
...
3x
4x
...
[0]
[1]
[2]
[3]
[4]
[5]
[6]
[7]
[8]
[9]
[start]: [stop]: [start]: [stop]: [start]: [stop]: [start]: [stop]:
S
S
N
N
H
H
F
F
Conversely, the following two tables map each symbology character (control and message alphabet) to the ASCII code of its barcode
character in the font.
Symbology character
CTX style
[start]
none
Normal
Fully-embedded
Half-embedded
Show start/stop
none
Normal
Fully-embedded
Half-embedded
Show start/stop
:N
:F
:H
:S
[stop]
:N
:F
:H
:S
Symbology character
[0] ... [9]
Font character
(ASCII)
A
C
G
E
A
B
D
H
F
B
Font character
(ASCII)
0 ... 9
(hex)
<30> ... <39>
(hex)
<41>
<43>
<47>
<45>
<41>
<42>
<44>
<48>
<46>
<42>
(dec)
<065>
<067>
<071>
<069>
<065>
<066>
<068>
<072>
<070>
<066>
(dec)
<048> ... <057>
How to calculate
+0: The ASCII codes of the font characters are the same as the corresponding message characters.
4.10.3 Code construction: The complete procedure (Example)
This section contains a full example of all stages of the Code construction.
Data
123456
-- (*)
12345609
Barcode & OCR Package: User's Manual
[start] [1] [2] [3] [4] [5] [6] [0] [9] [stop]
A 1 2 3 4 5 6 0 9 B
(*) For the calculation of the CHK refer to the "Technical Reference Manual - Barcode & OCR Printing"; here: CHK "mod11 mod10".
4.10.4 Font measurements
To obtain the correct size (width and/or height) parameter to be used in a PCL or HP-GL/2 command, follow these steps:
0. Determine the size you want (desired size).
1. Print your barcode data with some nominal size parameters in the command, e.g. 12v (PCL) or SI0.25,1.0 (HP-GL/2).
2. Measure the height and total width of the barcode (measured size).
3. Calculate
(Required size parm) = (Nominal size parm) x (Desired size) / (Measured size)
If you need to have an exact specification of the height [pt] or module width [mil] of a font, please contact support.
page 66 / 95
Barcode & OCR Package: User's Manual
page 67 / 95
4.11 USPS Postal Codes : POSTNET
For this symbology there exists 1 font.
These CTX styles are supported: none.
4.11.1 The Font select command sequences
For each font, the table below specifies the command sequence to be used to select that font.
Font ID
500
File name
POSTNET
Font name
USPS POSTNET
Font description
USPS POSTNET
Ratio
n/a
CTX
NR
Command sequence (PCL)
<esc>(15Y<esc>(s1p12v0s0b0T
4.11.2 Encoding (II): The Character codes
The code table below defines the character set of these fonts, mapping the ASCII code positions to symbology characters.
Code table
x0 x1 x2 x3 x4 x5 x6 x7 x8 x9 xA xB xC xD xE xF
...
2x
3x
...
7x
...
[start/st [start/st [start/st
op]
op]
op]
[0]
[1]
[2]
[3]
[4]
[5]
[6]
[7]
[8]
[9]
[start/st
op]
Conversely, the following two tables map each symbology character (control and message alphabet) to the ASCII code of its barcode
character in the font.
Symbology character
CTX style
[start/stop]
none
Symbology character
[0] ... [9]
Font character
(ASCII)
0 ... 9
Font character
(ASCII)
(
)
*
|
(hex)
<30> ... <39>
(hex)
<28>
<29>
<2A>
<7C>
(dec)
<040>
<041>
<042>
<124>
(dec)
<048> ... <057>
How to calculate
+0: The ASCII codes of the font characters are the same as the corresponding message characters.
4.11.3 Code construction: The complete procedure (Example)
This section contains a full example of all stages of the Code construction.
Data
12349
-- (*)
123491
[start/stop] [1] [2] [3] [4] [9] [1] [start/stop]
* 1 2 3 4 9 1 *
Barcode & OCR Package: User's Manual
(*) For the calculation of the CHK refer to the "Technical Reference Manual - Barcode & OCR Printing".
4.11.4 Font measurements
For this symbology, the size is fixed. The PCL height parameter 12v should be used.
page 68 / 95
Barcode & OCR Package: User's Manual
page 69 / 95
4.12 USPS Postal Codes : FIM / ZEBRA
For this symbology there exists 1 font.
4.12.1 The Font select command sequences
For each font, the table below specifies the command sequence to be used to select that font.
Font ID
510
File name
FIM
Font name
USPS FIM
Font description
USPS FIM
Ratio CTX Command sequence (PCL)
<esc>(15Y<esc>(s1p47v1s0b0T
n/a
NR
or: <esc>(15Y<esc>(s1p12v0s0b0T
4.12.2 Encoding (II): The Character codes
The code table below defines the character set of these fonts, mapping the ASCII code positions to symbology characters.
Code table
x0 x1 x2 x3 x4 x5 x6 x7 x8 x9 xA xB xC xD xE xF
...
2x
3x
4x
...
[_]
[FIMA]
[FIMB]
[FIMC]
[/]
[FIMD]
Conversely, the following table maps each symbology character to the ASCII code of its barcode character in the font.
Symbology character
[FIMA]
[FIMB]
[FIMC]
[FIMD]
[/]
-- for ZEBRA
[_]
Font character
(ASCII)
A
B
C
D
/
#
(hex)
<41>
<42>
<43>
<44>
<2F>
<23>
(dec)
<065>
<066>
<067>
<068>
<047>
<035>
How to calculate
+0: The ASCII codes of the font characters are the same as the corresponding message characters.
4.12.3 Font measurements
For FIM: use 47v
For ZEBRA: use 47v
Barcode & OCR Package: User's Manual
page 70 / 95
4.13 UPC/EAN
For this symbology there exist 2 fonts.
These N:W ratios are supported: {1:2.0}.
These CTX styles are supported: {_F}.
4.13.1 The Font select command sequences
For each font, the table below specifies the command sequence to be used to select that font.
The ^^^ is a place-holder for the value to specify a certain size. See the section "Font measurements" below for information on how this value
and the actual size are related.
Font ID
600
601
File name Font name
EAN_20N EAN/UPC 2.0 NR
EAN_20T EAN/UPC 2.0 TX
Font description
EAN/UPC-x 1:2.0
EAN/UPC-x 1:2.0 Readable
Ratio
1:2.0
1:2.0
CTX
NR
TX
Command sequence (PCL)
<esc>(8Y<esc>(s1p^^^v0s0b9011T
<esc>(8Y<esc>(s1p^^^v1s0b9011T
4.13.2 Encoding (II): The Character codes
The code table below defines the character set of these fonts, mapping the ASCII code positions to symbology characters.
Code table
x0 x1 x2 x3 x4 x5 x6 x7 x8 x9 xA xB xC xD xE xF
...
2x
3x
4x
5x
6x
7x
...
Cx
Dx
Ex
...
[0]:A
[start
supp]
[guard
supp]
[start/st [stop
op]
UPC-E]
[guard]
[1]:A
[2]:A
[3]:A
[4]:A
[5]:A
[6]:A
[7]:A
[8]:A
[9]:A
[0]:C
[1]:C
[2]:C
[3]:C
[4]:C
[5]:C
[6]:C
[7]:C
[8]:C
[9]:C
[0]:E
[1]:E
[2]:E
[4]:E
[5]:E
[6]:E
[7]:E
[8]:E
[9]:E
[0]:B
[1]:B
[2]:B
[3]:B
[4]:B
[5]:B
[6]:B
[7]:B
[8]:B
[9]:B
[0]:F
[1]:F
[2]:F
[3]:F
[4]:F
[5]:F
[6]:F
[7]:F
[8]:F
[9]:F
[0]:D
[1]:D
[2]:D
[3]:D
[4]:D
[5]:D
[6]:D
[7]:D
[8]:D
[9]:D
[SP]:D
(*)
[0]:A'
[1]:A'
[2]:A'
[3]:A'
[4]:A'
[5]:A'
[6]:A'
[7]:A'
[8]:A'
[9]:A'
[0]:C'
[1]:C'
[2]:C'
[3]:C'
[4]:C'
[5]:C'
[6]:C'
[7]:C'
[8]:C'
[9]:C'
[3]:E
Note: (*)
The character [SP]:D at position <CA> is a pseudo pool D character, which implements a blank space having the same width as the other pool
D characters, namely 8X. It is used for separating a 2/5-digit supplement code from the main code.
Conversely, the following two tables map each symbology character (control and message alphabet) to the ASCII code of its barcode
character in the font.
Symbology character
CTX style
[start/stop]
none
Fully-embedded
none
Fully-embedded
none
Fully-embedded
none
Fully-embedded
none
Fully-embedded
[stop UPC-E]
[guard]
[start supp]
[guard supp]
Font character
(ASCII)
(
(hex)
<28>
(dec)
<040>
)
<29>
<041>
-
<2D>
<045>
#
<23>
<035>
$
<24>
<036>
Barcode & OCR Package: User's Manual
page 71 / 95
Symbology character
:<pool>
Font character
(ASCII)
[0] ... [9] :A
[0] ... [9] :A'
[0] ... [9] :E
0 1 2 3 4 5 6 7 8 9
How to calculate (*)
(hex)
(dec)
M N O P Q R S T U V
<30> ... <39>
<D0> ... <D9>
<4D> ... <56>
<048> ... <057>
<208> ... <217>
<077> ... <086>
+0
+ 160
+ 29
[0] ... [9] :B
[0] ... [9] :F
a b c d e f g h i j
m n o p q r s t u v
<61> ... <6A>
<6D> ... <76>
<097> ... <106>
<109> ... <118>
+ 49
+ 61
[0] ... [9] :C
[0] ... [9] :C'
A B C D E F G H I J
<41> ... <4A>
<E0> ... <E9>
<065> ... <074>
<224> ... <233>
+ 17
+ 176
<C0> ... <C9>
<192> ... <201>
+ 144
[0] ... [9] :D
Note: (*) (How to calculate)
Due to the different pools, this is rather complicated.
See the table above.
Pool usage
Besides the symbology-defined encoding pools A,B,C, the fonts define some additional pools (A', E, F, C, C') for supporting proper clear text
representation. The following table shows their usage by each symbology.
The following groups of pools encode the same barcodes:
- Pool A = A' = E -- left-hand, odd parity
- Pool B = F
-- left-hand, even parity
- Pool C = C'
-- right-hand, (even parity)
They only differ by their CTX positions (none / on top / below).
Pool D is no barcode, only clear text.
Pool
Usage
CTX position
EAN-13
EAN-8
UPC-A
UPC-E0/1
2/5 add-on
Pool A
Pool A'
Pool E
for left-hand encoding
dto
for 2/5 add-on
below
none
on top
yes
---
yes
---
yes
yes
--
yes
---
--yes
Pool B
Pool F
for left-hand encoding
for 2/5 add-on
below
on top
yes
--
---
---
yes
--
-yes
Pool C
Pool C'
for right-hand encoding
dto
below
none
yes
--
yes
--
yes
yes
---
---
Pool D
no barcode, only CTX (can be
omitted)
below
yes (#1)
--
yes (#1,CHK)
yes (#1,CHK)
--
4.13.3 Code construction: The complete procedure (Example)
This section contains a full example of all stages of the Code construction.
EAN-13
The control characters are coded as follows:
- [start/stop]
as '(’
- [guard]
as '-’
The message digits are coded as follows:
- Pool A: [0 .. 9]:A = '0’ .. '9’
- Pool B: [0 .. 9]:B = 'a’ .. 'j’
- Pool C: [0 .. 9]:C = 'A’ .. 'J’
- Pool D: [0 .. 9]:D = <C0> .. <C9>
Data
436893290849
-- (*)
4368932908495
-- (**)
[4]:D [start/stop] [3]:A [6]:B [8]:A [9]:A [3]:B [2]:B [guard] [9]:C [0]:C [8]:C [4]:C [9]:C [5]:C [start/stop]
-- (**)
Barcode & OCR Package: User's Manual
<C4> (
3
g
8
page 72 / 95
9
d
c
-
J
A
I
E
J
F
(
4 *ehiods#.-,v.b*
(*) For the calculation of the CHK refer to the "Technical Reference Manual - Barcode & OCR Printing".
(**) Detailed scheme:
1st character = "4" ==> Pool encoding pattern = "ABAABB"
byte #
symb.
char.
char.
pool
font
char.
1
[d#1]
2
[start/
stop]
[4]
:D
<C4>
(
3
[d#2]
4
[d#3]
5
[d#4]
6
[d#5]
7
[d#6]
8
[d#7]
[3]
:A
3
[6]
:B
g
[8]
:A
8
[9]
:A
9
[3]
:B
d
[2]
:B
c
9
10
[guard [d#8]
]
[9]
:C
J
-
11
[d#9]
12
[d#10]
13
[d#11]
14
[d#12]
15
[<CHK
>]
16
[start/
stop]
[0]
:C
A
[8]
:C
I
[4]
:C
E
[9]
:C
J
[5]
:C
F
(
EAN-8
The control characters are coded as follows:
- [start/stop]
as '(’
- [guard]
as '-’
The message digits are coded as follows:
- Pool A: [0 .. 9]:A = '0’ .. '9’
- Pool C: [0 .. 9]:C = 'A’ .. 'J’
Data
4368932
-- (*)
43689323
-- (**)
[start/stop] [4]:A [3]:A [6]:A [8]:A [guard] [9]:C [3]:C [2]:C [3]:C [start/stop]
-- (**)
( 4 3 6 8 - J D C D (
*rezi#.cxc*
(*) For the calculation of the CHK refer to the "Technical Reference Manual - Barcode & OCR Printing".
(**) Detailed scheme:
byte #
symb.
char.
char.
1
[start/sto
p]
pool
font char.
UPC-A
(
2
[<d#1>]
3
[<d#2>]
4
[<d#3>]
5
[<d#4>]
[4]
:A
4
[3]
:A
3
[6]
:A
6
[8]
:A
8
6
[guard]
7
[<d#5>]
8
[<d#6>]
9
[<d#7>]
10
[<CHK>]
-
[9]
:C
J
[3]
:C
D
[2]
:C
C
[3]
:C
D
11
[start/sto
p]
(
Barcode & OCR Package: User's Manual
page 73 / 95
The control characters are coded as follows:
- [start/stop]
as '(’
- [guard]
as '-’
The message digits are coded as follows:
- Pool A: [0 .. 9]:A = '0’ .. '9’
- Pool C: [0 .. 9]:C = 'A’ .. 'J’
- Pool A': [0 .. 9]:A' = <D0> .. <D9>
- Pool C': [0 .. 9]:C' = <E0> .. <E9>
- Pool D: [0 .. 9]:D = <C0> .. <C9>
Data
12345678901
-- (*)
123456789012
-- (**)
[1]:D [start/stop] [1]:A' [2]:A [3]:A [4]:A [5]:A [6]:A [guard] [7]:C [8]:C [9]:C [0]:C [1]:C [2]:C' [start/stop] [2]:D
-- (**)
<C1>
(
<D1>
2
3
4
5
6
-
H
I
J
A
B
<E2>
(
<C2>
1 *Qwertz#m,.-yX*2
(*) For the calculation of the CHK refer to the "Technical Reference Manual - Barcode & OCR Printing".
(**) Detailed scheme:
byte #
symb.
char.
char.
pool
font
char.
1
[d#1]
2
[start/
stop]
4
[d#1]
5
[d#2]
6
[d#3]
7
[d#4]
8
[d#5]
9
[d#6]
[1]
:D
[1]
:A'
[2]
:A
[3]
:A
[4]
:A
[5]
:A
[6]
:A
<C1> (
<D1> 2
3
4
5
6
10
11
[guard [d#7]
]
-
12
[d#8]
13
[d#9]
14
[d#10]
15
[d#11]
16
[CHK]
[7]
:C
[8]
:C
[9]
:C
[0]
:C
[1]
:C
[2]
:C'
[2]
:D
H
I
J
A
B
<E2> (
<C2>
UPC-E
The control characters are coded as follows:
- [start/stop]
as '(’
- [guard]
as '-’
[stop UPC-E]
as ')’.
The message digits are coded as follows:
- Pool A: [0 .. 9]:A = '0’ .. '9’
- Pool B: [0 .. 9]:B = 'a’ .. 'j’
- Pool D: [0 .. 9]:D = <C0> .. <C9>
Data
0123456
-- (*)
01234565
-- (**)
[0]:D [start/stop] [1]:B [2]:A [3]:A [4]:B [5]:B [6]:A [stop UPC-E] [5]:D
-- (**)
<C0> ( B 2 3 E F 6 ) <C5>
0 *awefgz~5
17
[start/
stop]
18
[CHK]
Barcode & OCR Package: User's Manual
page 74 / 95
(*) For the calculation of the CHK refer to the "Technical Reference Manual - Barcode & OCR Printing".
(**) Detailed scheme:
1st character = "0" ==> use UPC-E0 encoding
<CHK> = "5"
==> Pool encoding pattern = "BAABBA"
byte #
symb.
char.
char.
pool
font
char.
1
2
[<d#1>] [start/s
top]
3
4
5
6
7
8
9
[<d#2>] [<d#3>] [<d#4>] [<d#5>] [<d#6>] [<d#7>] [stop
UPC-E]
10
[<CHK
>]
[0]
:D
<C0> (
[1]
:B
B
[5]
:D
<C5>
[2]
:A
2
[3]
:A
3
[4]
:B
E
[5]
:B
F
[6]
:A
6
)
2-digit add-on
The control characters are coded as follows:
- [start supp]
as '#’
- [guard supp]
as '$’
The message digits are coded as follows:
- Pool E: [0 .. 9]:E = 'M’ .. 'V’
- Pool F: [0 .. 9]:F = 'm’ .. 'v’
Data
... 8 9
-- (*) (**)
... [SP]:D [start supp] [8]:E [guard supp] [9]:F
-- (**)
... <CA> # U $ v
...
ÊÈËÙ
(*) For the calculation of the CHK refer to the "Technical Reference Manual - Barcode & OCR Printing".
(**) Detailed scheme:
S = "89" --> Remainder = ... = 1 --> Pool pattern = "E F" or "# E $ F"
byte #
symb.
char.
pool
font
char.
<main code> [SP]
:D
<CA>
...
+1
[start supp]
+2
[8]
+3
[guard supp]
+4
[9]
#
:E
U
$
:F
v
5-digit add-on
The control characters are coded as follows:
- [start supp]
as '#’
- [guard supp]
as '$’
The message digits are coded as follows:
- Pool E: [0 .. 9]:E = 'M’ .. 'V’
- Pool F: [0 .. 9]:F = 'm’ .. 'v’
Data
... 1 2 3 4 5
Barcode & OCR Package: User's Manual
page 75 / 95
-- (*) (**)
... [SP]:D [start supp] [1]:F [guard supp] [2]:E [guard supp] [3]:F [guard supp] [4]:E [guard supp] [5]:E
-- (**)
... <CA>
...
#
n
$
O
$
p
$
Q
$
R
ÊÑËÂËÓËÄËÅ
(*) For the calculation of the CHK refer to the "Technical Reference Manual - Barcode & OCR Printing".
(**) Detailed scheme:
S = "12345" => Remainder = ... = 1 --> Pool pattern = "F E F E E" or "# F $ E $ F $ E $ E"
byte #
symb.
char.
pool
font
char.
<main
code>
...
[SP]
1
[start supp]
2
[1]
:D
<CA>
#
n
3
[guard
supp]
4
[2]
$
O
:F
5
[guard
supp]
:E
6
[3]
7
[guard
supp]
:F
$
p
8
[4]
9
[guard
supp]
:E
$
Q
:E
$
4.13.4 Font measurements
To obtain the correct size (width and/or height) parameter to be used in a PCL or HP-GL/2 command, follow these steps:
0. Determine the size you want (desired size).
1. Print your barcode data with some nominal size parameters in the command, e.g. 12v (PCL) or SI0.25,1.0 (HP-GL/2).
2. Measure the height and total width of the barcode (measured size).
3. Calculate
(Required size parm) = (Nominal size parm) x (Desired size) / (Measured size)
If you need to have an exact specification of the height [pt] or module width [mil] of a font, please contact support.
10
[5]
R
Barcode & OCR Package: User's Manual
5 Appendices
The remainder of this document consists of several Appendices.
Those starting with an "S" are specific to the SAP platform.
5.1 Appendix B: Barcode types supported
Please refer to the table in Appendix SB to determine the Font to be used,
given the Symbology, the CHK method, the CTX style, and the N:W ratio.
page 76 / 95
Barcode & OCR Package: User's Manual
page 77 / 95
5.2 Appendix D: Devices supported and Device-specific information
The table below lists all printer devices supported by this product.
For each, it specifies
- the device class ID [DCxx] (which is used throughout this documentation) (*)
- the name of the lpr port (printer queue/port name) (to send the font download/remove and test files to)
- the controller type <c> (determining the font download or remove file to be used)
- the HDD directory path name (to be used for font download)
- the font source (support of DIMM or SDcard)
Note: (*)
For the model names corresponding to a given device class ID please refer to Appendix D in Volume 1.
The supported printer device models are:
[BOP-DIMM]:
[DC09], [DC11], [DC14], [DC15], [DC18], [DC20], [DC21], [DC22], [DC35];
[BOP-SDcard]: All [DCxx] listed below, from [DC24] and higher, except [DC35].
[BOP-HDD]:
All [DCxx] listed below, except [DC01], [DC02], [DC03], [DC35], [DC46], [DC55], [DC56].
Device
class
<c>
(*)
lpr port HDD directory
Font source (*2)
[DC04]
[DC05]
[DC06]
[DC07]
[DC08]
[DC09]
[DC10]
[DC11]
[DC12]
[DC13]
[DC14]
[DC15]
[DC16]
[DC17]
[DC18]
[DC19]
[DC20]
[DC21]
[DC22]
[DC23]
[DC24]
[DC25]
[DC26]
[DC27]
[DC28]
[DC29]
[DC30]
[DC31]
[DC32]
[DC33]
[DC34]
[DC35]
[DC36]
[DC37]
[DC38]
[DC39]
[DC40]
[DC41]
[DC42]
[DC43]
[DC44]
[DC45]
[DC46]
[DC47]
[DC50]
[DC51]
[DC52]
[DC53]
[DC54]
[DC55]
[DC56]
[DC57]
[DC59]
[DC60]
1
2
2
2
1
2
2
2
2
2
2
2
2
2
2
2
2
2
2
2
2
2
2
2
2
2
2
2
2
2
2
2
2
2
2
2
2
2
2
2
2
2
2
2
2
2
2
2
2
2
2
2
2
2
PORT1
lp
lp
lp
PORT1
lp
lp
lp
lp
lp
lp
lp
lp
lp
lp
lp
lp
lp
lp
lp
lp
lp
lp
lp
lp
lp
lp
lp
lp
lp
lp
lp
lp
lp
lp
lp
lp
lp
lp
lp
lp
lp
lp
lp
lp
lp
lp
lp
lp
lp
lp
lp
lp
lp
-----DIMM
-DIMM
--DIMM
DIMM
--DIMM
-DIMM
DIMM
DIMM
-SDcard Type A
SDcard Type A
SDcard Type A
SDcard Type A
SDcard Type A
SDcard Type A
SDcard Type A
SDcard Type A
SDcard Type A
SDcard Type A
SDcard Type A
DIMM
SDcard Type A
SDcard Type A
SDcard Type A
SDcard Type A
SDcard Type A
SDcard Type A
SDcard Type A
SDcard Type A
SDcard Type A
SDcard Type A
SDcard Type A
SDcard Type A
SDcard Type A
SDcard Type B/C/D
SDcard Type B/C/D
SDcard Type B/C/D
SDcard Type B/C/D
SDcard Type A
SDcard Type A
SDcard Type B/C/D
SDcard Type C/D
SDcard Type B/C/D
0:\fonts
0:\pcl\fonts
0:\pcl\fonts
0:\pcl\fonts
0:\fonts
0:\pcl\fonts
0:\pcl\fonts
0:\pcl\fonts
0:\pcl\fonts
0:\pcl\fonts
0:\pcl\fonts
0:\pcl\fonts
0:\pcl\fonts
0:\pcl\fonts
0:\pcl\fonts
0:\pcl\fonts
0:\pcl\fonts
0:\pcl\fonts
0:\pcl\fonts
0:\pcl\fonts
0:\pcl\fonts
0:\pcl\fonts
0:\pcl\fonts
0:\pcl\fonts
0:\pcl\fonts
0:\pcl\fonts
0:\pcl\fonts
0:\pcl\fonts
0:\pcl\fonts
0:\pcl\fonts
0:\pcl\fonts
-- n/a: no HDD
0:\pcl\fonts
0:\pcl\fonts
0:\pcl\fonts
0:\pcl\fonts
0:\pcl\fonts
0:\pcl\fonts
0:\pcl\fonts
0:\pcl\fonts
0:\pcl\fonts
0:\pcl\fonts
-- n/a: no HDD
0:\pcl\fonts
0:\pcl\fonts
0:\pcl\fonts
0:\pcl\fonts
0:\pcl\fonts
0:\pcl\fonts
-- n/a: no HDD
-- n/a: no HDD
0:\pcl\fonts
0:\pcl\fonts
0:\pcl\fonts
Barcode & OCR Package: User's Manual
[DC61]
[DC62]
[DC63]
[DC64]
[DC68]
[DC69]
[DC70]
[DC72]
[DC73]
[DC76]
[DC77]
[DC78]
[DC79]
[DC80]
[DC81]
[DC82]
[DC83]
[DC84]
[DC85]
[DC87]
[DC88]
[DC89]
[DC91]
[DC92]
[DC93]
[DC94]
[DC95]
[DC96]
[DC98]
[DC99]
[DC100]
[DC101]
[DC102]
[DC103]
[DC108]
[DC109]
2
2
2
2
1
2
2
2
2
2
2
2
2
2
2
2
2
2
2
2
2
2
2
2
2
2
2
2
2
2
2
2
2
2
2
2
page 78 / 95
lp
lp
lp
lp
lp
lp
lp
lp
lp
lp
lp
lp
lp
lp
lp
lp
lp
lp
lp
lp
lp
lp
lp
lp
lp
lp
lp
lp
lp
lp
lp
lp
lp
lp
lp
lp
0:\pcl\fonts
0:\pcl\fonts
0:\pcl\fonts
0:\pcl\fonts
0:\fonts
0:\pcl\fonts
0:\pcl\fonts
0:\pcl\fonts
0:\pcl\fonts
0:\pcl\fonts
0:\pcl\fonts
0:\pcl\fonts
0:\pcl\fonts
0:\pcl\fonts
0:\pcl\fonts
0:\pcl\fonts
0:\pcl\fonts
0:\pcl\fonts
0:\pcl\fonts
0:\pcl\fonts
0:\pcl\fonts
0:\pcl\fonts
0:\pcl\fonts
0:\pcl\fonts
0:\pcl\fonts
0:\pcl\fonts
0:\pcl\fonts
0:\pcl\fonts
0:\pcl\fonts
0:\pcl\fonts
0:\pcl\fonts
0:\pcl\fonts
0:\pcl\fonts
0:\pcl\fonts
0:\pcl\fonts
0:\pcl\fonts
SDcard Type B/C/D
SDcard Type B/C/D
SDcard Type B/C/D
SDcard Type B/C/D
-SDcard Type B/C/D
SDcard Type B/C/D
SDcard Type C/D
SDcard Type B/C/D
SDcard Type B/C/D
SDcard Type B/C/D
SDcard Type C/D
SDcard Type C/D
SDcard Type C/D
SDcard Type C/D
SDcard Type C/D
SDcard Type D
SDcard Type D
SDcard Type D
SDcard Type D
SDcard Type D
SDcard Type D
SDcard Type D
SDcard Type D
SDcard Type D
SDcard Type D
SDcard Type D
SDcard Type D
SDcard Type D
-SDcard Type D
SDcard Type D
SDcard Type D
SDcard Type D
SDcard Type D
SDcard Type D
Note: (*) (Controller type <c>)
The different controllers require a different download syntax, depending on the name of the HDD folder where the font files have to reside.
The HDD font download and remove files (PRN) therefore exist in 2 variants, tagged with "1" and "2".
Tag <c>
Folder
0:\fonts
HDD 1
0:\pcl\fonts
HDD 2
Note: (*2) (SDcard Type B/C)
On "SDcard Type B/C" models, both Type B and Type C SDcards can be used.
Note: (Firmware version)
It is recommended to always use the latest firmware.
For the minimum required firmware version, please contact technical support.
The following section contains the procedures for each device class [DCxx] to:
- Print out the PCL Font list
- Print out the HDD Directory list
5.2.2 Appendices DPx: Device: Procedures
The following appendices contain several model-specific procedures to be performed on the printer device.
5.2.3 Appendix DPD: (Procedure) Insert the DIMM
Please refer to Appendix DPD of the "Technical Reference Manual - Barcode & OCR Printing".
5.2.4 Appendix DPF: (Procedure) Print out the PCL Font list and the HDD Directory list
Please refer to Appendix DPF of the "Technical Reference Manual - Barcode & OCR Printing".
Barcode & OCR Package: User's Manual
5.2.6 Appendix DPS: (Procedure) Insert the SDcard
Please refer to Appendix DPS of the "Technical Reference Manual - Barcode & OCR Printing".
page 79 / 95
Barcode & OCR Package: User's Manual
5.3 Appendix F : Fonts included
Legend:
- Fonts are scalable (Intellifont, Format 10).
- Typefaces: 9000..9015 (except 9004, 9010)
Naming conventions:
- N:W ratio: ratio: 20 = 1:2.0, 25 = 1:2.5, 30 = 1:3.0
- Clear text: NR= w/o clear text (not readable), TX= w/ clear text
Note: (The Font select command sequences)
The symbol set is as per the table below, compliant with the HP PCL5 Comparison Guide.
The typeface ("T" attribute) determines the symbology.
The style ("S" attribute) determines the presence of clear text (the clear text style is determined by different start/stop characters).
The height ("V" attribute) determines the size of the font.
The weight ("B" attribute) indicates the width of the font.
page 80 / 95
Barcode & OCR Package: User's Manual
page 81 / 95
5.3.1 Appendix FC: Font and File naming and Font select command sequences
This table summarizes the font attributes information of the chapter "The Fonts" above.
ID
Font name (long)
File name (*2)
Font name (short)
Ratio CTX
style
1:...
Command sequence (*3)
=== Barcode fonts ===
100
Code 128 1:2.0
C128_20N
COD128 2.0 NR
2.0
NR
<esc>)7Y<esc>)s1p<size>v0s0b9002T
200
201
202
203
204
205
Code 39 1:2.0
Code 39 1:2.0 Readable
Code 39 1:2.5
Code 39 1:2.5 Readable
Code 39 1:3.0
Code 39 1:3.0 Readable
CD39_20N
CD39_20T
CD39_25N
CD39_25T
CD39_30N
CD39_30T
COD39
COD39
COD39
COD39
COD39
COD39
NR
TX
NR
TX
NR
TX
2.0
2.0
2.5
2.5
3.0
3.0
NR
TX
NR
TX
NR
TX
<esc>)0Y<esc>)s1p<size>v0s0b9012T
<esc>)0Y<esc>)s1p<size>v1s0b9012T
<esc>)0Y<esc>)s1p<size>v0s0b9013T
<esc>)0Y<esc>)s1p<size>v1s0b9013T
<esc>)0Y<esc>)s1p<size>v0s0b9014T
<esc>)0Y<esc>)s1p<size>v1s0b9014T
212
213
Code 93 1:2.5
Code 93 1:2.5 Readable
CD93_25N
CD93_25T
COD93 2.5 NR
COD93 2.5 TX
2.5
2.5
NR
<esc>)9Y<esc>)s1p<size>v0s0b9000T
<esc>)9Y<esc>)s1p<size>v1s0b9000T
302
303
Codabar 1:2.5
Codabar 1:2.5 Readable
CODA_25N
CODA_25T
CODABAR 2.5 NR
CODABAR 2.5 TX
2.5
2.5
NR
TX
<esc>)5Y<esc>)s1p<size>v0s0b9001T
<esc>)5Y<esc>)s1p<size>v1s0b9001T
400
401
2 of 5 Interleaved 1:2.0
2 of 5 Interleaved 1:2.0
Readable
2 of 5 Interleaved 1:2.5
2 of 5 Interleaved 1:2.5
Readable
2 of 5 Interleaved 1:3.0
2 of 5 Interleaved 1:3.0
Readable
25LV_20N
25LV_20T
25ILV 2.0 NR
25ILV 2.0 TX
2.0
2.0
NR
TX
<esc>)4Y<esc>)s1p<size>v0s0b9006T
<esc>)4Y<esc>)s1p<size>v1s0b9006T
25LV_25N
25LV_25T
25ILV 2.5 NR
25ILV 2.5 TX
2.5
2.5
NR
TX
<esc>)4Y<esc>)s1p<size>v0s0b9005T
<esc>)4Y<esc>)s1p<size>v1s0b9005T
25LV_30N
25LV_30T
25ILV 3.0 NR
25ILV 3.0 TX
3.0
3.0
NR
TX
<esc>)4Y<esc>)s1p<size>v0s0b9003T
<esc>)4Y<esc>)s1p<size>v1s0b9003T
410
411
2 of 5 Industrial 1:2.0
2 of 5 Industrial 1:2.0
Readable
25ND_20N
25ND_20T
25IND 2.0 NR
25IND 2.0 TX
2.0
2.0
NR
TX
<esc>)1Y<esc>)s1p<size>v0s0b9007T
<esc>)1Y<esc>)s1p<size>v1s0b9007T
424
425
2 of 5 Matrix 1:3.0
2 of 5 Matrix 1:3.0 Readable
25MX_30N
25MX_30T
25MAT 3.0 NR
25MAT 3.0 TX
3.0
3.0
NR
TX
<esc>)2Y<esc>)s1p<size>v0s0b9008T
<esc>)2Y<esc>)s1p<size>v1s0b9008T
460
461
MSI 1:2.0
MSI 1:2.0 Readable
MSI_20N
MSI_20T
MSI 2.0 NR
MSI 2.0 TX
2.0
2.0
NR
TX
<esc>)6Y<esc>)s1p<size>v0s0b9009T
<esc>)6Y<esc>)s1p<size>v1s0b9009T
500
510
USPS POSTNET (*3)
USPS FIM (*3)
POSTNET
FIM
USPS POSTNET
USPS FIM
---
NR
NR
<esc>)15Y<esc>)s1p<size>v0s0b0T
<esc>)15Y<esc>)s1p<size>v1s0b0T
600
601
EAN/UPC-x 1:2.0
EAN/UPC-x 1:2.0 Readable
EAN_20N
EAN_20T
EAN/UPC 2.0 NR
EAN/UPC 2.0 TX
2.0
2.0
NR
<esc>)8Y<esc>)s1p<size>v0s0b9011T
<esc>)8Y<esc>)s1p<size>v1s0b9011T
OCRA
OCRB
OCR-A
OCR-B
---
---
<esc>(0O<esc>(s0p<pitch>h0s0b104T
<esc>(1O<esc>(s0p<pitch>h0s0b110T
402
403
404
405
2.0
2.0
2.5
2.5
3.0
3.0
=== OCR fonts ===
900
910
OCR-A (OCR-A1)
OCR-B
Note: Total of 30 fonts.
Note: (*2)
The file name of the Test sheet is ____.PRN.
Note: (*3)
The <size> parameter can be chosen freely.
For POSTNET, 12v should be used.
For FIM, 47v should be used.
Barcode & OCR Package: User's Manual
page 82 / 95
5.3.2 Appendix FT: The Font Test Sheets
This is the layout of the Font Test Sheets.
============================================================================================================
Barcode & OCR Package : Font Test Sheet
Font ID:
205
Test file name:
CD39_30T.prn
Font name:
COD39 3.0 TX
(version 1.00)
Font description: Code 39, ratio 1:3.0, with readable text
Command sequence: <esc>)0Y<esc>)s1p<size>v1s0b9014T
Code table:
(<size>=16)
---------------------------------- <page break> ------------------------------------Sample barcodes: (<size>=40)
0815
============================================================================================================
Barcode & OCR Package: User's Manual
page 83 / 95
5.4 Appendix G: Glossary
Terminology
The following table contains concise descriptions of general barcode related terminology as well as product-specific terminology.
It is ordered by the logic of keywords.
For terms related to barcoding in general, independent of this product, please refer to the Glossary of the "Technical Reference Manual Barcode & OCR Printing".
Term
Explanation
"Barcode Conversion Program" (BCP) A set of routines that implement the code construction procedure, including checksum
calculation.
=== Acronyms ===
BCP
BOP
BOP-DIMM
BOP-HDD
BOP-SDcard
CHK
CTX
HDD
TRM
"Barcode Conversion Program"; a component of BOP
"Barcode & OCR Package" (name of this product)
DIMM version of BOP
HDD version of BOP
SDcard version of BOP
"checksum" or "check digit" (if clear from context) or "check character" or "checksum method"
"clear text" (human readable text), or "clear text style" (if clear from context)
"hard disk (drive/download)"
"Technical Reference Manual - Barcode & OCR Printing"
Barcode & OCR Package: User's Manual
page 84 / 95
5.5 Appendices Sx: SAP platform-specific information
The following appendices contain platform-specific information for SAP.
- Appendix SB
= barcode types supported
- Appendix SDx
= specification of the ZA00 Device type
5.6 Appendix SB : Barcode types supported
This table is used for the "Barcode & OCR Package for SAP" in (Step 1) to determine the Font ID to use and the &TYPE& parameter to use,
given the Symbology, the CHK method, the CTX style, and the N:W ratio.
Symbology
CHK (*2)
CTX (*3)
N:W ratio (*4)
1:xxx
==> Font to use
Font ID
(22xxx)
Name (*4)
10z
(<ratio> = 1:2.0)
==>
&TYPE&
(BCP parameter)
Remarks (*9)
&IN_DATA& (*8)
[SAP]
[SAP]
=== Code 128 ===
-- always Yes
-- only None
Code 128 Autoswitch
Code 128A
Code 128B
Code 128C
yes
yes
yes
yes
None
None
None
None
2.0
2.0
2.0
2.0
100
100
100
100
COD128
COD128
COD128
COD128
NR
NR
NR
NR
CD128
CD128A
CD128B
CD128C
full ASCII (*7)
(*7)
(*7)
(*7) even # !
(*10)
no autoswitch
no autoswitch
no autoswitch
UCC/EAN-128
UPC-128 / SSCC-18
yes
yes; plus special
CHK
None
None
2.0
2.0
100
100
COD128 <ratio> NR
COD128 <ratio> NR
EAN128
UPC128
"00" + 17 digits
prepend <FNC1>
dto, NB: (*12)
20z
(<ratio> = 1:2.0/2.5/3.0)
=== Code 39 ===
<ratio>
<ratio>
<ratio>
<ratio>
allow a..z, mapped to A..Z
Code 39
Code 39
Code 39
Code 39
Code 39
Code 39
Code 39
Code 39
Code 39
Code 39
none
none
none
none
none
yes
yes
yes
yes
yes
None
Normal
Fully embedded
Half embedded
Start/stop (as '*')
None
Normal
Fully embedded
Half embedded
Start/stop (as '*')
2.0/2.5/3.0
2.0/2.5/3.0
2.0/2.5/3.0
2.0/2.5/3.0
2.0/2.5/3.0
2.0/2.5/3.0
2.0/2.5/3.0
2.0/2.5/3.0
2.0/2.5/3.0
2.0/2.5/3.0
200/2/4
201/3/5
201/3/5
201/3/5
201/3/5
200/2/4
201/3/5
201/3/5
201/3/5
201/3/5
COD39
COD39
COD39
COD39
COD39
COD39
COD39
COD39
COD39
COD39
<ratio>
<ratio>
<ratio>
<ratio>
<ratio>
<ratio>
<ratio>
<ratio>
<ratio>
<ratio>
NR
TX
TX
TX
TX
NR
TX
TX
TX
TX
CD39
CD39_N
CD39_F
CD39_H
CD39_S
CD39_X
CD39_X_N
CD39_X_F
CD39_X_H
CD39_X_S
Code 39 Extended
Code 39 Extended
Code 39 Extended
Code 39 Extended
Code 39 Extended
Code 39 Extended
Code 39 Extended
Code 39 Extended
none
none
none
none
none
yes
yes
yes
None
Normal
Fully embedded
Half embedded
Start/stop (as '*')
None
Normal
Fully embedded
2.0/2.5/3.0
2.0/2.5/3.0
2.0/2.5/3.0
2.0/2.5/3.0
2.0/2.5/3.0
2.0/2.5/3.0
2.0/2.5/3.0
2.0/2.5/3.0
200/2/4
201/3/5
201/3/5
201/3/5
201/3/5
200/2/4
201/3/5
201/3/5
COD39
COD39
COD39
COD39
COD39
COD39
COD39
COD39
<ratio>
<ratio>
<ratio>
<ratio>
<ratio>
<ratio>
<ratio>
<ratio>
NR
TX
TX
TX
TX
NR
TX
TX
CD39E
CD39E_N
CD39E_F
CD39E_H
CD39E_S
CD39E_X
CD39E_X_N
CD39E_X_F
full ASCII (*7)
full ASCII (*7)
full ASCII (*7)
full ASCII (*7)
full ASCII (*7)
full ASCII (*7)
full ASCII (*7)
full ASCII (*7)
Barcode & OCR Package: User's Manual
page 85 / 95
Code 39 Extended
Code 39 Extended
yes
yes
Half embedded
Start/stop (as '*')
2.0/2.5/3.0
2.0/2.5/3.0
201/3/5
201/3/5
COD39 <ratio> TX
COD39 <ratio> TX
CD39E_X_H
CD39E_X_S
full ASCII (*7)
full ASCII (*7)
PZN (Pharma-ZentralNummer)
only special: mod11
(no mod43!)
None
2.0/2.5/3.0
200/2/4
COD39 <ratio> NR
PZN
6 digits
=== Code 93 ===
-- always Yes
21z
(<ratio> = 1:2.5)
Code 93
Code 93
Code 93
Code 93
yes
yes
yes
yes
None
Normal
Fully embedded
Half embedded
2.5
2.5
2.5
2.5
212
213
213
213
COD93
COD93
COD93
COD93
<ratio>
<ratio>
<ratio>
<ratio>
NR
TX
TX
TX
CD93
CD93_N
CD93_F
CD93_H
Code 93 Extended
Code 93 Extended
Code 93 Extended
Code 93 Extended
yes
yes
yes
yes
None
Normal
Fully embedded
Half embedded
2.5
2.5
2.5
2.5
212
213
213
213
COD93
COD93
COD93
COD93
<ratio>
<ratio>
<ratio>
<ratio>
NR
TX
TX
TX
CD93E
CD93E_N
CD93E_F
CD93E_H
30z
(<ratio> = 1:2.5)
=== Codabar ===
none
none
none
none
None
Normal
Fully embedded
Half embedded
2.5
2.5
2.5
2.5
302
303
303
303
CODABAR
CODABAR
CODABAR
CODABAR
<ratio>
<ratio>
<ratio>
<ratio>
NR
TX
TX
TX
CODA
CODA_N
CODA_F
CODA_H
AIM Codabar
AIM Codabar
AIM Codabar
AIM Codabar
AIM spec
AIM spec
AIM spec
AIM spec
None
Normal
Fully embedded
Half embedded
2.5
2.5
2.5
2.5
302
303
303
303
CODABAR
CODABAR
CODABAR
CODABAR
<ratio>
<ratio>
<ratio>
<ratio>
NR
TX
TX
TX
CODA_AIM
CODA_AIM_N
CODA_AIM_F
CODA_AIM_H
40z
(<ratio> = 1:2.0/2.5/3.0)
2 of 5 Interleaved
2 of 5 Interleaved
2 of 5 Interleaved
2 of 5 Interleaved
none
none
yes
yes
None
Normal
None
Normal
2.0/2.5/3.0
2.0/2.5/3.0
2.0/2.5/3.0
2.0/2.5/3.0
400/2/4
401/3/5
400/2/4
401/3/5
25ILV
25ILV
25ILV
25ILV
German Post AG
- Leitcode
- Identcode
USPS 25
- Tray label
- Sack label
only special
(odd*4+even*9)
Normal
2.0/2.5/3.0
401/3/5
25ILV <ratio> TX
- Normal
- Normal / None
3.0
3.0
405
404
25ILV 3.0 TX
25ILV 3.0 NR
41z
(<ratio> = 1:2.0)
410
411
25IND <ratio> NR
25IND <ratio> TX
NR
TX
NR
TX
none
none
none
25INT
25INT
25INT_X
25INT_X
even # !
even # !
odd # !
odd # !
GPAG
11 / 13 digits
NB: (*12), (*14)
- 10 digits
- 8 digits
- CTX mandatory
- CTX optional
25INT
=== 2 of 5 Industrial
===
2 of 5 Industrial
2 of 5 Industrial
<ratio>
<ratio>
<ratio>
<ratio>
full ASCII (*7)
full ASCII (*7)
full ASCII (*7)
full ASCII (*7)
Provide <startX> ... <stopY>
from range {A,B,C,D} !
Codabar
Codabar
Codabar
Codabar
=== 2 of 5 Interleaved
===
NB: (*12), (*14)
None
Normal
2.0
2.0
25IND
25IND_N
Barcode & OCR Package: User's Manual
2 of 5 Industrial
2 of 5 Industrial
2 of 5 Industrial
2 of 5 Industrial
2 of 5 Industrial
2 of 5 Industrial
2 of 5 Industrial
2 of 5 Industrial
none
none
none
yes
yes
yes
yes
yes
page 86 / 95
Fully embedded
Half embedded
Start/stop (as "A/B")
None
Normal
Fully embedded
Half embedded
Start/stop (as "A/B")
2.0
2.0
2.0
2.0
2.0
2.0
2.0
2.0
=== 2 of 5 Matrix ===
2 of 5 Matrix
2 of 5 Matrix
2 of 5 Matrix
2 of 5 Matrix
2 of 5 Matrix
2 of 5 Matrix
2 of 5 Matrix
2 of 5 Matrix
2 of 5 Matrix
2 of 5 Matrix
none
none
none
none
none
yes
yes
yes
yes
yes
None
Normal
Fully embedded
Half embedded
Start/stop (as "A/B")
None
Normal
Fully embedded
Half embedded
Start/stop (as "A/B")
3.0
3.0
3.0
3.0
3.0
3.0
3.0
3.0
3.0
3.0
=== MSI ===
MSI
MSI
MSI
MSI
MSI
MSI
MSI
MSI
MSI
MSI
MSI
MSI
MSI
MSI
MSI
MSI
MSI
MSI
MSI
MSI
none
none
none
none
none
mod 10
mod 10
mod 10
mod 10
mod 10
mod 10 mod 10
mod 10 mod 10
mod 10 mod 10
mod 10 mod 10
mod 10 mod 10
mod 11 mod 10
mod 11 mod 10
mod 11 mod 10
mod 11 mod 10
mod 11 mod 10
None
Normal
Fully embedded
Half embedded
Start/stop (as "A/B")
None
Normal
Fully embedded
Half embedded
Start/stop (as "A/B")
None
Normal
Fully embedded
Half embedded
Start/stop (as "A/B")
None
Normal
Fully embedded
Half embedded
Start/stop (as "A/B")
=== Postal ===
-- always Yes
-- always None
USPS POSTNET 5
USPS POSTNET 9
USPS POSTNET 11
USPS FIM
yes
yes
yes
--
None
None
None
--
2.0
2.0
2.0
2.0
2.0
2.0
2.0
2.0
2.0
2.0
2.0
2.0
2.0
2.0
2.0
2.0
2.0
2.0
2.0
2.0
411
411
411
410
411
411
411
411
25IND
25IND
25IND
25IND
25IND
25IND
25IND
25IND
<ratio>
<ratio>
<ratio>
<ratio>
<ratio>
<ratio>
<ratio>
<ratio>
42z
(<ratio> = 1:3.0)
424
425
425
425
425
424
425
425
425
425
25MAT
25MAT
25MAT
25MAT
25MAT
25MAT
25MAT
25MAT
25MAT
25MAT
46z
(<ratio> = 1:2.0)
460
461
461
461
461
460
461
461
461
461
460
461
461
461
461
460
461
461
461
461
MSI
MSI
MSI
MSI
MSI
MSI
MSI
MSI
MSI
MSI
MSI
MSI
MSI
MSI
MSI
MSI
MSI
MSI
MSI
MSI
<ratio>
<ratio>
<ratio>
<ratio>
<ratio>
<ratio>
<ratio>
<ratio>
<ratio>
<ratio>
<ratio>
<ratio>
<ratio>
<ratio>
<ratio>
<ratio>
<ratio>
<ratio>
<ratio>
<ratio>
<ratio>
<ratio>
<ratio>
<ratio>
<ratio>
<ratio>
<ratio>
<ratio>
<ratio>
<ratio>
TX
TX
TX
NR
TX
TX
TX
TX
25IND_F
25IND_H
25IND_S
25IND_X
25IND_X_N
25IND_X_F
25IND_X_H
25IND_X_S
NB: (*13)
NB: (*13)
NB: (*13)
NB: (*13)
NB: (*13)
NR
TX
TX
TX
TX
NR
TX
TX
TX
TX
25MAT
25MAT_N
25MAT_F
25MAT_H
25MAT_S
25MAT_X
25MAT_X_N
25MAT_X_F
25MAT_X_H
25MAT_X_S
NB: (*13)
NB: (*13)
NB: (*13)
NB: (*13)
NB: (*13)
MSI
MSI_N
MSI_F
MSI_H
MSI_S
MSI_10
MSI_10_N
MSI_10_F
MSI_10_H
MSI_10_S
MSI_1010
MSI_1010_N
MSI_1010_F
MSI_1010_H
MSI_1010_S
MSI_1110
MSI_1110_N
MSI_1110_F
MSI_1110_H
MSI_1110_S
NB: (*12)
NB: (*12)
NB: (*12)
NB: (*12)
NB: (*12)
NR
TX
TX
TX
TX
NR
TX
TX
TX
TX
NR
TX
TX
TX
TX
NR
TX
TX
TX
TX
5yz
-----
500
500
500
510
USPS
USPS
USPS
USPS
POSTNET
POSTNET
POSTNET
FIM
POSTNET5
POSTNET9
POSTNET11
--
5 digits
9 digits
11 digits
one of "A,B,C,D"
use XB500..XBS0P !
(size fixed at 47v)
Barcode & OCR Package: User's Manual
page 87 / 95
USPS ZEBRA
--
--
=== UPC/EAN ===
-- always Yes
EAN-13
EAN-13
EAN-13 plus 2-digit
add-on
EAN-13 plus 2-digit
add-on
EAN-13 plus 5-digit
add-on
EAN-13 plus 5-digit
add-on
yes
yes
yes
None
Normal/Default
None
yes
--
3 slash characters ("///")
510
USPS FIM
60z
(<ratio> = 1:2.0)
2.0
2.0
2.0
600
601
600
EAN/UPC <ratio> NR
EAN/UPC <ratio> TX
EAN/UPC <ratio> NR
EAN13
EAN13
EAN132
Normal/Default
2.0
601
EAN/UPC <ratio> TX
EAN132
yes
None
2.0
600
EAN/UPC <ratio> NR
EAN135
yes
Normal/Default
2.0
601
EAN/UPC <ratio> TX
EAN135
EAN-8
EAN-8
EAN-8 plus 2-digit addon
EAN-8 plus 2-digit addon
EAN-8 plus 5-digit addon
EAN-8 plus 5-digit addon
EAN Velocity
yes
yes
yes
None
Normal/Default
None
2.0
2.0
2.0
600
601
600
EAN/UPC <ratio> NR
EAN/UPC <ratio> TX
EAN/UPC <ratio> NR
EAN8
EAN8
EAN82
yes
Normal/Default
2.0
601
EAN/UPC <ratio> TX
EAN82
yes
None
2.0
600
EAN/UPC <ratio> NR
EAN85
yes
Normal/Default
2.0
601
EAN/UPC <ratio> TX
EAN85
yes
Normal/Default
2.0
601
EAN/UPC <ratio> TX
EANV
exactly 6 digits
UPC-A
UPC-A
UPC-A plus 2-digit addon
UPC-A plus 2-digit addon
UPC-A plus 5-digit addon
UPC-A plus 5-digit addon
yes
yes
yes
Normal/Default
Normal/Default
Normal/Default
2.0
2.0
2.0
600
601
600
EAN/UPC <ratio> TX
EAN/UPC <ratio> TX
EAN/UPC <ratio> TX
UPCA
UPCA
UPCA2
11 digits
dto
13 digits
yes
Normal/Default
2.0
601
EAN/UPC <ratio> TX
UPCA2
yes
Normal/Default
2.0
600
EAN/UPC <ratio> TX
UPCA5
yes
Normal/Default
2.0
601
EAN/UPC <ratio> TX
UPCA5
UPC-E
UPC-E
UPC-E plus 2-digit addon
UPC-E plus 2-digit addon
UPC-E plus 5-digit addon
UPC-E plus 5-digit addon
yes
yes
yes
Normal/Default
Normal/Default
Normal/Default
2.0
2.0
2.0
600
601
600
EAN/UPC <ratio> TX
EAN/UPC <ratio> TX
EAN/UPC <ratio> TX
UPCE
UPCE
UPCE2
yes
Normal/Default
2.0
601
EAN/UPC <ratio> TX
UPCE2
yes
Normal/Default
2.0
600
EAN/UPC <ratio> TX
UPCE5
yes
Normal/Default
2.0
601
EAN/UPC <ratio> TX
UPCE5
Note: (*2) CHK = Check character method
--
(size fixed at 47v)
(*11)
12 digits
dto
14 digits
dto
17 digits
dto
7 digits
dto
9 digits
dto
12 digits
dto
dto
16 digits
dto
7 digits (*6)
dto
9 digits (*6)
dto
12 digits (*6)
dto
Barcode & OCR Package: User's Manual
z
z
z
page 88 / 95
none = The data stream already contains the check character, or no check character is required. No calculation necessary/done by BCP.
yes = The check character is required, and the data stream does not contain it yet. BCP will calculate it (using the standard algorithm).
other = same as "yes", but using the indicated specific algorithm (AIM, mod XX). BCP will calculate it.
Note: (*3) CTX = Clear text style
z
None
z
Default
z _N
Normal
z _H
Half embedded
z _F
Fully embedded
z _S
Start/stop
= no clear text.
= as by convention
= below the barcode, no embedding
= below the barcode, half embedded
= below the barcode, fully embedded
= same as normal, also start/stop displayed as text
Note: (*4)
<ratio> = 1 : 2.0 / 2.5 / 3.0
z
Note: (*6)
The first digit must be "0" (for UPC-E0) or "1" (for UPC-E1).
Note: (*7) (Limitations)
hex <00>..<1E> not supported. (Code 128, Code 39, Code 93)
z Code 128 cannot specify these in &IN_DATA&: <Shift>, <FNC1>, <FNC2>, <FNC3>, <FNC4>, <CodeA>, <CodeB>, <CodeC>
z
Note: (*8)
This column lists the restrictions for &IN_DATA&.
ALL: Max. 60 characters.
For alphabet restrictions and for length restrictions (# even / odd / min / max), see also the "Technical Reference Manual - Barcode & OCR Printing".
Note: (*9)
This column contains information about:
- Checks performed on the message data &IN_DATA&
- Conversions/Translations applied to the message data &IN_DATA&
Note: (*10) (The Code128 Autoswitch algorithm)
Depending on the message data, the symbology characters [Shift], [CodeA], [CodeB], [CodeC] are inserted, in a manner to make the resulting code as short as possible.
This "auto-switch" algorithm is explained in detail in the section about the Code 128 symbology in the "Technical Reference Manual - Barcode & OCR Printing".
Note: (*11)
EAN stands as a synonym for EAN/JAN.
Note: (*12)
Limited support: The correctness of the CHK algorithm for this symbology or application cannot be guaranteed, because a compatible barcode reader or decoding application was not available for verification. In case of
problems, please contact technical support.
Note: (*13)
Limited support: The correctness of the CHK algorithm for this symbology or application cannot be guaranteed, because an inconsistent behaviour of different barcode readers was observed. In case of problems, please
contact technical support.
Note: (*14)
Limitation: For this application the Clear text cannot be placed as by convention when using the barcode font.
Note: ([SAP])
Columns tagged [SAP] are specific to the SAP platform.
Barcode & OCR Package: User's Manual
page 89 / 95
Barcode & OCR Package: User's Manual
page 90 / 95
5.7 Appendix SD : The ZA00 SAP Device type
Note:
Any reference to the ZA00 Device type in this document also largely applies to the Device types ZB00 and RC000 and RC100.
5.7.1 Appendix SDM: The XBARC action / Macros defined
The following table lists the contents of the XBARC action, which is defined in the X_PAPER format of the ZA00 device type, where it is
included in every SETUP action.
It initializes the HP-GL/2 environment and defines one PCL macro for each supported barcode font.
##0000000111111111122222222223333333333444444444455555555556666666666777
##3456789012345678901234567890123456789012345678901234567890123456789012
#
# B a r c o d e
S u p p o r t
#
# -- macro to re-initialize HP-GL/2 environment
\e&f22000y0X\e*p0P\e%1BIN;SP8;PR;DT\x9F;SC0,400,0,400,2;RO0;\e%0A\e&f1X
#
#
# === define macros for case A explicit CTX drawing ====================
#
# Template:
# \e&f220__y0X
-- macro # (use 22011..22099)
#
#
\e&f22___y2X
-- barcode font (from 22100..899)
#
\e%1BSAFN99;SP8;
#
PU__,__;
-- relative position (x,y)
#
RO__;
-- rotation (000,090,180,270)
#
SI__,__;
-- size (horz.,vert.)
#
ES__;
-- inter-character spacing (should be 0)
#
\e%1A
-- 1A = pos. relative to barcode (*)
#
\e&f22001y3X
-- draw
#
#
\e&f229__y2X
-- CTX font (from 22900..999)
#
\e%1BSAFN98;SP8;
#
PU__,__;
-- relative position (x,y) to (*)
#
SI__,__;
-- size (horz.,vert.)
#
ES__;
-- inter-character spacing
#
\e%0A
#
\e&f22001y3X
-- draw
#
# \x0F
# \e&f1X
#
# Entries: (use # 011..099)
#--------------------------------------------------------------# -- #011 (sample: Code 39 rotated)
#
\e&f22011y0X
\e&f22200y2X\e%1BSAFN99;SP8;PU0.8,-2.8;RO090;SI0.207,0.501;ES0;\e%1A
\e&f22001y3X
\e&f22910y2X\e%1BSAFN98;SP8;PU0.5,-0.6;SI0.183,0.245;ES0.11;\e%0A
\e&f22001y3X
\x0F\e&f1X
#
#--------------------------------------------------------------# -- add here
# ...
#--------------------------------------------------------------#
#
# === define macros for barcode font selection ========================
#
# -- Code 128
\e&f22100y0X\e&f22000y2X\x0E\e)07Y\e)s1p12v0s0b9002T\e*c99d6F\e&f1X
#
# -- Code 39
\e&f22200y0X\e&f22000y2X\x0E\e)00Y\e)s1p12v0s0b9012T\e*c99d6F\e&f1X
\e&f22201y0X\e&f22000y2X\x0E\e)00Y\e)s1p12v1s0b9012T\e*c99d6F\e&f1X
\e&f22202y0X\e&f22000y2X\x0E\e)00Y\e)s1p12v0s0b9013T\e*c99d6F\e&f1X
\e&f22203y0X\e&f22000y2X\x0E\e)00Y\e)s1p12v1s0b9013T\e*c99d6F\e&f1X
\e&f22204y0X\e&f22000y2X\x0E\e)00Y\e)s1p12v0s0b9014T\e*c99d6F\e&f1X
\e&f22205y0X\e&f22000y2X\x0E\e)00Y\e)s1p12v1s0b9014T\e*c99d6F\e&f1X
#
# -- Code 93
Barcode & OCR Package: User's Manual
\e&f22212y0X\e&f22000y2X\x0E\e)09Y\e)s1p12v0s0b9000T\e*c99d6F\e&f1X
\e&f22213y0X\e&f22000y2X\x0E\e)09Y\e)s1p12v1s0b9000T\e*c99d6F\e&f1X
#
# -- Codabar
\e&f22302y0X\e&f22000y2X\x0E\e)05Y\e)s1p12v0s0b9001T\e*c99d6F\e&f1X
\e&f22303y0X\e&f22000y2X\x0E\e)05Y\e)s1p12v1s0b9001T\e*c99d6F\e&f1X
#
# -- 2/5 Interleaved
\e&f22400y0X\e&f22000y2X\x0E\e)04Y\e)s1p12v0s0b9006T\e*c99d6F\e&f1X
\e&f22401y0X\e&f22000y2X\x0E\e)04Y\e)s1p12v1s0b9006T\e*c99d6F\e&f1X
\e&f22402y0X\e&f22000y2X\x0E\e)04Y\e)s1p12v0s0b9005T\e*c99d6F\e&f1X
\e&f22403y0X\e&f22000y2X\x0E\e)04Y\e)s1p12v1s0b9005T\e*c99d6F\e&f1X
\e&f22404y0X\e&f22000y2X\x0E\e)04Y\e)s1p12v0s0b9003T\e*c99d6F\e&f1X
\e&f22405y0X\e&f22000y2X\x0E\e)04Y\e)s1p12v1s0b9003T\e*c99d6F\e&f1X
#
# -- 2/5 Industrial
\e&f22410y0X\e&f22000y2X\x0E\e)01Y\e)s1p12v0s0b9007T\e*c99d6F\e&f1X
\e&f22411y0X\e&f22000y2X\x0E\e)01Y\e)s1p12v1s0b9007T\e*c99d6F\e&f1X
#
# -- 2/5 Matrix
\e&f22424y0X\e&f22000y2X\x0E\e)02Y\e)s1p12v0s0b9008T\e*c99d6F\e&f1X
\e&f22425y0X\e&f22000y2X\x0E\e)02Y\e)s1p12v1s0b9008T\e*c99d6F\e&f1X
#
# -- MSI
\e&f22460y0X\e&f22000y2X\x0E\e)06Y\e)s1p12v0s0b9009T\e*c99d6F\e&f1X
\e&f22461y0X\e&f22000y2X\x0E\e)06Y\e)s1p12v1s0b9009T\e*c99d6F\e&f1X
#
# -- USPS
\e&f22500y0X\e&f22000y2X\x0E\e)15Y\e)s1p12v0s0b0000T\e*c99d6F\e&f1X
\e&f22510y0X\e&f22000y2X\x0E\e)15Y\e)s1p47v1s0b0000T\e*c99d6F\e&f1X
#
# -- UPC/EAN
\e&f22600y0X\e&f22000y2X\x0E\e)08Y\e)s1p12v0s0b9011T\e*c99d6F\e&f1X
\e&f22601y0X\e&f22000y2X\x0E\e)08Y\e)s1p12v1s0b9011T\e*c99d6F\e&f1X
#
#
# === define macros for CTX font selection =============================
#
# -- OCR-B
\e&f22910y0X\x0E\e)1O\e)s0p10h0s0b0110T\e*c98d6F\e&f1X
#
# -- Courier
\e&f22980y0X\x0E\e)8U\e)s0p10h0s0b4099T\e*c98d6F\e&f1X
\e&f22981y0X\x0E\e)8U\e)s0p10h0s3b4099T\e*c98d6F\e&f1X
#
# -- Letter Gothic
\e&f22982y0X\x0E\e)8U\e)s0p10h0s0b4102T\e*c98d6F\e&f1X
\e&f22983y0X\x0E\e)8U\e)s0p10h0s3b4102T\e*c98d6F\e&f1X
#
# -- CG Times
\e&f22984y0X\x0E\e)8U\e)s1p12v0s0b4101T\e*c98d6F\e&f1X
\e&f22985y0X\x0E\e)8U\e)s1p12v0s3b4101T\e*c98d6F\e&f1X
#
# -- Univers
\e&f22986y0X\x0E\e)8U\e)s1p12v0s0b4148T\e*c98d6F\e&f1X
\e&f22987y0X\x0E\e)8U\e)s1p12v0s3b4148T\e*c98d6F\e&f1X
#
# -- (end)
#
Note:
All symbol sets (except 9Y = Code 93) are according to HP standard, as of the "HP PCL5 Comparison Guide".
In the macro definitions 22xyz, all v parameters are initially on 12v (except USPS FIM).
page 91 / 95
Barcode & OCR Package: User's Manual
page 92 / 95
5.7.2 Appendix SDP: Barcode-related Print controls
The following table lists the Print controls of the ZA00 device type that are related to Barcode and OCR text printing.
For any other Print controls, please refer to Volume 2 [ZA0x].
Print Implementation / Effect
contro
l
Size
[mm]
=== OCR font select ===
SF400 OCR-A 10 cpi 12pt
SF500 OCR-B 10 cpi 12pt
CHK
Command sequence
Char.
format
(*5)
<esc>(0O<esc>(s0p10h0s0b104T
<esc>(1O<esc>(s0p10h0s0b110T
<FO>
<FB>
CTX
SB___ === Barcode select === (compatibility)
SBPxx System barcode
SBP00
SBP01
SBP02
SBP03
SBP04
SBP05
SBP06
SBP07
SBP08
SBP09
SBP10
SBP11
SBP12
SBP13
SBP14
SBP15
SBP16
SBP17
SBP18
SBP19
SBP20
SBP21
SBP22
SBP23
SBP24
SBP25
SBP26
SBP27
SBP28
SBP29
SBP30
SBP99
BC_ESC
ARTNR
AUFNR
BARCLVS
KUNAUNR
KUNAUPS
MBBARC
MBBARC1
RSNUM
RSPOS
RUECKNR
BC_CD39
BC_EAN8
BC_EAN13
BC_I25C
BC_I25
BC_CD39C
BC_MSI
BC_MSIC
BC_MSIC1
BC_MSIC2
BC_C128B
BC_EANH
BC_PSN5
BC_PSN9
C128A_00
C128B_00
CD39C_00
CD39__00
BC_93
BC_PSN11
(unassigned)
Family
C128B
C128B
CD39
C128B
C128B
C128B
EAN
C128B
C128B
C128B
CD39
EAN8
EAN13
2OF5INT
2OF5INT
CD39
MSI
MSI
MSI
MSI
C128B
12
12
20
12
12
20
12
12
12
12
13
13
13
13
13
13
13
13
13
13
13
13
POSTNET 03
POSTNET 03
05
C128A
05
C128B
05
CD39
05
CD39
13
CD93
POSTNET 03
SBSxx Barcode deselect
SBS00
SBS01
...
SBS29
SBS30
SBS99 (unassigned)
-- reserve SBP00..99 for SAP
-- call macro and specifiy width and height (in cm)
<esc>
no M no <esc>&f22100y2X<esc>%1BSAFN99;SP8;SI0.22,0.86;
no M no <esc>&f22100y2X<esc>%1BSAFN99;SP8;SI0.22,0.86;
no
no <esc>&f22200y2X<esc>%1BSAFN99;SP8;SI0.23,1.11;
no M no <esc>&f22100y2X<esc>%1BSAFN99;SP8;SI0.22,0.86;
no M no <esc>&f22100y2X<esc>%1BSAFN99;SP8;SI0.22,0.86;
no M no <esc>&f22100y2X<esc>%1BSAFN99;SP8;SI0.22,1.43;
no M yes <esc>&f22601y2X<esc>%1BSAFN99;SP8;SI0.75,0.86;
no M no <esc>&f22100y2X<esc>%1BSAFN99;SP8;SI0.22,0.86;
no M no <esc>&f22100y2X<esc>%1BSAFN99;SP8;SI0.22,0.86;
no M no <esc>&f22100y2X<esc>%1BSAFN99;SP8;SI0.22,0.86;
no
no <esc>&f22200y2X<esc>%1BSAFN99;SP8;SI0.24,0.72;
no M no <esc>&f22600y2X<esc>%1BSAFN99;SP8;SI0.76,0.93;
no M no <esc>&f22600y2X<esc>%1BSAFN99;SP8;SI0.76,0.93;
yes
no <esc>&f22400y2X<esc>%1BSAFN99;SP8;SI0.27,0.76;
no
no <esc>&f22400y2X<esc>%1BSAFN99;SP8;SI0.27,0.76;
yes
no <esc>&f22200y2X<esc>%1BSAFN99;SP8;SI0.24,0.72;
no
no <esc>&f22460y2X<esc>%1BSAFN99;SP8;SI0.19,0.63;
10
no <esc>&f22460y2X<esc>%1BSAFN99;SP8;SI0.19,0.63;
1010 no <esc>&f22460y2X<esc>%1BSAFN99;SP8;SI0.19,0.63;
1110 no <esc>&f22460y2X<esc>%1BSAFN99;SP8;SI0.19,0.63;
no M no <esc>&f22100y2X<esc>%1BSAFN99;SP8;SI0.22,0.93;
no M no <esc>&f22100y2X<esc>%1BSAFN99;SP8;SI0.22,0.93;
no M no <esc>&f22500y2X<esc>%1BSAFN99;SP8;SI0.20,0.28;
no M no <esc>&f22500y2X<esc>%1BSAFN99;SP8;SI0.20,0.28;
no M no <esc>&f22100y2X<esc>%1BSAFN99;SP8;SI0.18,0.36;
no M no <esc>&f22100y2X<esc>%1BSAFN99;SP8;SI0.18,0.36;
yes
no <esc>&f22200y2X<esc>%1BSAFN99;SP8;SI0.20,0.28;
no
no <esc>&f22200y2X<esc>%1BSAFN99;SP8;SI0.20,0.28;
no M no <esc>&f22212y2X<esc>%1BSAFN99;SP8;SI0.19,0.79;
no M no <esc>&f22500y2X<esc>%1BSAFN99;SP8;SI0.20,0.28;
<empty>
-- SBS01..29 only for compatibility reasons; use XBS00
(*8)
<9F>;RO0;<esc>%0A<SI><esc>*p1P
<9F>;RO0;<esc>%0A<SI><esc>*p1P
...
<9F>;RO0;<esc>%0A<SI><esc>*p1P
<9F>;RO0;<esc>%0A<SI><esc>*p1P
<empty>
XB___ === Barcode related === (proprietary)
XB0xx === Barcode select Prefix (current
font) ===
XB000 select secondary font (default)
XB00R dto. (use current rotation)
XB00P select secondary font (PCL)
XB0R0 select secondary font (HP-GL/2)
(rotation specified 0°)
XB0R1 dto. (rotation specified 90°)
XB0R2 dto. (rotation specified 180°)
XB0R3 dto. (rotation specified 270°)
XBxyz === Barcode select Prefix (font
(*8)
<SO><esc>%1BSAFN99;SP8;
<SO><esc>%1BSAFN99;SP8;
<SO>
<SO><esc>%1BSAFN99;SP8;RO000;
<SO><esc>%1BSAFN99;SP8;RO090;
<SO><esc>%1BSAFN99;SP8;RO180;
<SO><esc>%1BSAFN99;SP8;RO270;
-- call macro & enter HP-GL/2
<B1>
<B2>
<B3>
<B4>
<B5>
<B6>
<B7>
<B8>
<B9>
<B0>
<BA>
<BB>
<BC>
<BD>
<BE>
<BF>
<BG>
<BH>
<BI>
<BJ>
<BK>
<BL>
<BM>
<BN>
<BO>
<BQ>
<BS>
<BU>
(*9)
(*9)
Barcode & OCR Package: User's Manual
XB100
XB200
XB201
XB202
XB203
XB204
XB205
XB212
XB213
XB302
XB303
XB400
XB401
XB402
XB403
XB404
XB405
XB410
XB411
XB424
XB425
XB460
XB461
XB500
XB510
XB600
XB601
page 93 / 95
specified) (configure direct) (*6)
Code 128 1:2.0 NR
Code 39 1:2.0 NR
Code 39 1:2.0 TX
Code 39 1:2.5 NR
Code 39 1:2.5TX
Code 39 1:3.0 NR
Code 39 1:3.0 TX
Code 93 1:2.5 NR
Code 93 1:2.5 TX
Codabar 1:2.5 NR
Codabar 1:2.5 TX
2 of 5 Interleaved 1:2.0 NR
2 of 5 Interleaved 1:2.0 TX
2 of 5 Interleaved 1:2.5 NR
2 of 5 Interleaved 1:2.5 TX
2 of 5 Interleaved 1:3.0 NR
2 of 5 Interleaved 1:3.0 TX
2 of 5 Industrial 1:2.0 NR
2 of 5 Industrial 1:2.0 TX
2 of 5 Matrix 1:3.0 NR
2 of 5 Matrix 1:3.0 TX
MSI 1:2.0 NR
MSI 1:2.0 TX
USPS POSTNET
USPS FIM
EAN/UPC 1:2.0 NR
EAN/UPC 1:2.0 TX
<esc>&f22100y2X<esc>%1BSAFN99;SP8;RO0;ES0;
<esc>&f22200y2X<esc>%1BSAFN99;SP8;RO0;ES0;
<esc>&f22201y2X<esc>%1BSAFN99;SP8;RO0;ES0;
<esc>&f22202y2X<esc>%1BSAFN99;SP8;RO0;ES0;
<esc>&f22203y2X<esc>%1BSAFN99;SP8;RO0;ES0;
<esc>&f22204y2X<esc>%1BSAFN99;SP8;RO0;ES0;
<esc>&f22205y2X<esc>%1BSAFN99;SP8;RO0;ES0;
<esc>&f22212y2X<esc>%1BSAFN99;SP8;RO0;ES0;
<esc>&f22213y2X<esc>%1BSAFN99;SP8;RO0;ES0;
<esc>&f22302y2X<esc>%1BSAFN99;SP8;RO0;ES0;
<esc>&f22303y2X<esc>%1BSAFN99;SP8;RO0;ES0;
<esc>&f22400y2X<esc>%1BSAFN99;SP8;RO0;ES0;
<esc>&f22401y2X<esc>%1BSAFN99;SP8;RO0;ES0;
<esc>&f22402y2X<esc>%1BSAFN99;SP8;RO0;ES0;
<esc>&f22403y2X<esc>%1BSAFN99;SP8;RO0;ES0;
<esc>&f22404y2X<esc>%1BSAFN99;SP8;RO0;ES0;
<esc>&f22405y2X<esc>%1BSAFN99;SP8;RO0;ES0;
<esc>&f22410y2X<esc>%1BSAFN99;SP8;RO0;ES0;
<esc>&f22411y2X<esc>%1BSAFN99;SP8;RO0;ES0;
<esc>&f22424y2X<esc>%1BSAFN99;SP8;RO0;ES0;
<esc>&f22425y2X<esc>%1BSAFN99;SP8;RO0;ES0;
<esc>&f22460y2X<esc>%1BSAFN99;SP8;RO0;ES0;
<esc>&f22461y2X<esc>%1BSAFN99;SP8;RO0;ES0;
<esc>&f22500y2X<esc>%1BSAFN99;SP8;RO0;ES0;
<esc>&f22510y2X<esc>%1BSAFN99;SP8;RO0;ES0;
<esc>&f22600y2X<esc>%1BSAFN99;SP8;RO0;ES0;
<esc>&f22601y2X<esc>%1BSAFN99;SP8;RO0;ES0;
XB9xx == CTX fonts ==
XB910 OCR-B
<esc>&f22910y2X<esc>&f1S<esc>%1BSAFN98;SP8;ES0
;
<esc>&f22980y2X<esc>&f1S<esc>%1BSAFN98;SP8;ES0
;
<esc>&f22981y2X<esc>&f1S<esc>%1BSAFN98;SP8;ES0
;
<esc>&f22982y2X<esc>&f1S<esc>%1BSAFN98;SP8;ES0
;
<esc>&f22983y2X<esc>&f1S<esc>%1BSAFN98;SP8;ES0
;
<esc>&f22984y2X<esc>&f1S<esc>%1BSAFN98;SP8;ES0
;
<esc>&f22985y2X<esc>&f1S<esc>%1BSAFN98;SP8;ES0
;
<esc>&f22986y2X<esc>&f1S<esc>%1BSAFN98;SP8;ES0
;
<esc>&f22987y2X<esc>&f1S<esc>%1BSAFN98;SP8;ES0
;
XB980 Courier
XB981
dto. Bold
XB982 Letter Gothic
XB983
dto. Bold
XB984 CG Times
XB985
dto. Bold
XB986 Univers
XB987
dto. Bold
XBRxx == same as SBPxx, but with Rotation
90°
XBR25 C128A_01
C128A
05
no
M no
XBR26 C128B_01
C128B
05
no
M no
XBR27 CD39C_01
CD39
05
yes
no
XBR28 CD39__01
CD39
05
no
no
XBS0x == barcode deselect suffix== (*7)
for HP-GL/2 (end current rotation)
(default)
XBS0P for PCL
XBS0R for HP-GL/2 (keep current rotation)
XBS00
XBXxx == Print controls for drawing CTX
explicitly == (*10)
XBX0p -- for case A: prefix (range p = 1..9)
XBX01
XBXss -- dto.: suffix (range ss = 11..99)
XBX11
XBXB0 -- for case B: (CTX pos relative to
original PCL position)
XBXB1 -- dto.: (CTX pos relative to barcode)
XBXBS -- dto.: suffix (*8)
<esc>&f22100y2X<esc>%1BSAFN99;SP8;RO90;SI0.18,
0.36;
<esc>&f22100y2X<esc>%1BSAFN99;SP8;RO90;SI0.18,
0.36;
<esc>&f22200y2X<esc>%1BSAFN99;SP8;RO90;SI0.20,
0.28;
<esc>&f22200y2X<esc>%1BSAFN99;SP8;RO90;SI0.20,
0.28;
-- terminate text & leave HP-GL/2 & switch to primary font
(*8)
<9F>;RO0;<esc>%0A<SI><esc>*p1P
<SI>
<9F>;<esc>%0A<SI><esc>*p1P
<esc>&f22001y0X<esc>%0BDT¦;LB*
*¦;<esc>%0A<esc>&f1X<esc>&f22011y2X<esc>*p1P
<esc>%0A<esc>&f0S<esc>*p0P<esc>%0B
<esc>%1A<esc>&f0S<esc>*p0P<esc>%0B
<9F>;<esc>%0A<SI><esc>*p1P
<BP>
<BR>
<BT>
<BV>
Barcode & OCR Package: User's Manual
page 94 / 95
Note:
The values for the columns Size, CHK, CTX, are as defined per SAP note # 0005196.
In the CHK column, an "M" indicates the CHK is mandatory.
Note: (*5)
The values for the column "Char. format" are as defined in the standard shipped SAPscript Style S_TEST (except <BW>).
Note: (*6) ("XBxyz")
Usage: end by XBS00 or XBS0R
... <Bx>[PU__,__;][RO__;][SI__,__;]LB&OUT_DATA&</>...
The [...] indicate that the entry is optional.
Note: (*7) ("XBS0x")
The usage of each is described in the section "Using the product"
if HP-GL/2
=> end with XBS00
if keep rotation
=> end with XBS0R
if PCL
=> end with XBS0P
Note: (*8)
These Print controls need to be defined in Hex notation, because they contain bytes which cannot be specified in ASCII notation (<SI>,<SO>).
Normally they need not be modified.
Note: (*9) (BC_93, BC_PSN11)
For these two system barcodes, the Character format tag and Print control used depends on the SAP release version as follows.
BC_93
BC_PSN11
- SAP R/3 before v6.x :
= SBP29 <BW>
n/a
- SAP R/3 v6.x & higher:
= SBP29 <BX>
= SBP30 <BW>
Note: (*10) (XBXxx)
These Print controls are to be used when the CTX is to be drawn explicitly.
XBX0p and XBXss are for case A; XBXBx are for case B.
For more information, refer to the corresponding chapter above.
Notation
- <SI>
- <SO>
- <9F>
- <esc>
= hex <0F>
= hex <0E>
= hex <9F>
= hex <1B>
= "Shift In"
= "Shift Out"
=
= "Escape"
= switch to Primary font
= switch to Secondary font
= used as text delimiter
= Escape character
Barcode & OCR Package: User's Manual
(end)
page 95 / 95