1
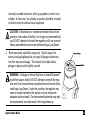
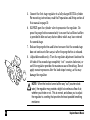
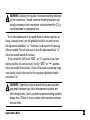
®
Regulator
Owner’s Manual
Copyright Notice
This owner’s manual is copyrighted, all rights reserved. It may not, in whole or in part, be copied, photocopied, reproduced,
translated, or reduced to any electronic medium or machine readable form without prior consent in writing from Aqua Lung
America, Inc.
©1998 Aqua Lung America, Inc.
Regulator Owner’s Manual, P/N 1019-99 — Rev. 4/98
Trademark Notice
Aqua Lung, Conshelf, Titan, Micra, AirMic, Impulse, Calypso, SEA, and Arctic are registered trademarks of Aqua Lung
America, Inc.
Warnings, Cautions and Notes
Pay special attention to information provided in warnings, cautions, and notes, that is accompanied
by these symbols:
A WARNING indicates a procedure or situation that, if not avoided, could result in serious
injury or death to the user.
A CAUTION indicates any situation or technique that could cause damage to the product,
and could subsequently result in injury to the user.
A NOTE is used to emphasize important points, tips, and reminders.
2
Regulator Owner’s Manual
Contents
General Precautions & Warnings ..................... 4
Introduction ....................................................... 6
Regulator Features ........................................... 7
After the Dive ................................................... 22
Removal of the Regulator from the Cylinder Valve
(Yoke Connector) ................................................ 22
Removal of the Regulator from the Cylinder Valve
(DIN Connector) ................................................. 23
External Second Stage Adjustments .................... 7
First Stage Environmental Protection ................... 9
User Care & Maintenance ............................... 24
Preparation and Setup .................................... 10
Dealer Inspection & Service ........................... 28
First Stage Mounting ...................................... 11
Warranty Information ...................................... 29
Yoke Connector .................................................. 11
DIN Connector .................................................... 12
Pre-Dive Checkout .......................................... 14
The Aqua Lung Satisfaction Guarantee™ .......... 29
The Aqua Lung Two-Year Limited Warranty™ .... 29
Restrictions ......................................................... 31
Inspection Checklist ............................................ 14
Returning Your Regulator For Service .......... 32
Diving With an Adjustable Second Stage ..... 18
Contacting Aqua Lung via Electronic Mail ... 32
Cold Water Diving ............................................ 20
Annual Inspection & Service Record ............ 34
Regulator Owner’s Manual
3
General Precautions & Warnings
●
●
●
●
●
●
4
Before using this regulator, you must have successfully received training and
certification in the technique of SCUBA diving from a recognized certification
agency (or any U.S. Military or government operated diving school). Use of this
equipment by a person who is not certified by a recognized agency shall render all
warranties, express or implied, null and void. Use of SCUBA equipment by
uncertified, or untrained persons, is dangerous and can result in serious
injury, or death.
This regulator is not configured for commercial use with surface supplied air.
Always pressurize the regulator gradually by opening the cylinder valve SLOWLY.
NEVER lubricate any part of the regulator or cylinder valve with any lubricant.
Lubrication must only be performed by Aqua Lung trained technician.
DO NOT apply any type of aerosol spray on the regulator. Doing so may cause
permanent damage to certain plastic components, including the second stage
housing.
Factory prescribed service for this regulator must be performed at least once
annually by a factory trained Aqua Lung Service Technician who is employed by
an Authorized Aqua Lung Dealer. Repair, service, disassembly, or first stage
Regulator Owner’s Manual
●
●
●
●
adjustment must not be attempted by persons who are not factory trained and
authorized by Aqua Lung America, Inc.
DO NOT leave a cylinder standing unsecured with the regulator attached to the
valve. Doing so may cause permanent damage to the regulator and cylinder valve
if the cylinder falls over against the first stage.
DO NOT use the regulator first stage as a carrying handle when lifting or transporting the cylinder. Always lift the cylinder by the cylinder valve handle.
When diving in cold water (below 45°F, or 7°C), you must have received training
and certification in the techniques of cold water diving from a recognized training
agency.
This regulator is designed and intended for use only with clean, compressed
atmospheric air (21% oxygen and 79% nitrogen by volume). DO NOT use this
equipment with any other gas or enriched oxygen mixture above 23% oxygen.
Failure to observe this warning may result in serious injury or death due to fire or
explosion.
NOTE: Aqua Lung/ U.S. Divers offers a separate line of regulators which are
designed and manufactured specifically for dedicated use with enriched air. For
information about these models, consult your Authorized Aqua Lung Dealer.
Regulator Owner’s Manual
5
Introduction
®
Congratulations—and thank you—for choosing Aqua Lung. Your new
regulator has been designed and manufactured with pride, according to the
most exacting standards for quality and performance.
Provided that it has been purchased new from an Authorized Aqua Lung
Dealer, your regulator is covered by Aqua Lung’s exclusive 30-Day Satisfaction
Guarantee™ and the Aqua Lung Two-Year Limited Warranty™. Be sure to read
the warranty section of this manual completely and remember to save your
sales receipts. Copies of these receipts must be presented whenever obtaining
warranty service.
Perhaps more than any other piece of diving equipment you will own, your
regulator’s function and performance relies greatly on the care and maintenance it will receive, in addition to regularly scheduled dealer service. Before
you dive with your new Aqua Lung regulator, it is therefore important to read
this manual in its entirety; to become familiar with its features, as well as the
correct procedures for setup, pre-dive inspection, and post-dive maintenance.
Please read on to learn how you can obtain the maximum enjoyment from
your regulator, and maintain its like-new performance for many years to come.
6
Regulator Owner’s Manual
Regulator Features
The Aqua Lung family of regulators consists of many different
models to satisfy a wide range of diving interests; from entry level
sport diving, to advanced diving in more demanding and extreme
conditions. By now, your Authorized Aqua Lung Dealer has already
explained to you the specific features that your particular model
offers, and you have made your purchase after comparing the
benefits of these features to your individual diving needs and interests. Be sure to review this section to learn more about your
model’s features, and how to obtain the maximum benefit from
using them.
V.A.K.
External Second Stage Adjustments
External adjustment features offer you the additional advantage
of adjusting your second stage regulator’s sensitivity to suit your
individual preference as your diving conditions change.
Vane Adjustment Switch (VAS) — The VAS is located on the
top of certain model second stages, in front of the mouthpiece, and
helps to maintain a high flow of air once you have started to take a
breath.
Regulator Owner’s Manual
V.A.S.
7
T
UN
8
C K WISE
)
R R E SIS T
E
LO
TE
C
GR
(C
EA
W
E)
IS
(CO
RESISTAN
C
SS
LE ER-CLOCK E
AN
When the VAS is set to the “MAX” (or “+”) position, the
regulator will provide maximum venturi assistance. This makes
it easier to breathe at deeper depths and increased work loads.
For normal sport diving conditions, the regulator will perform suitably if it is left set to the “MIN” (or “—”) position.
This setting will also help to prevent the second stage from
freeflowing during entry or while swimming on the surface.
Valve Adjustment Knob (VAK) — The VAK, located
opposite of the hose connection on certain model second stages,
adjusts the effort required to start the air flow at the beginning
of the inhalation cycle. As it is turned “in” (clockwise), the
opening effort will increase. This will make the second stage
less sensitive to sudden changes in ambient pressure. Turning
the knob “out” (counter-clockwise) will decrease the opening
effort to make breathing easier.
This adjustment is particularly useful at deeper depths, or in
variable conditions that affect the opening effort of the second
stage, such as strong currents or while using a diver propulsion
vehicle (DPV). You can use the VAK to tune your regulator to
maintain its peak performance throughout the course of your
dive, or you can leave it set in its mid-range position and dive
with as you would any non-adjustable second stage.
Regulator Owner’s Manual
Supreme™ and Dry™ First Stage Environmental Protection
For diving in cold water conditions, or commercial diving in
contaminated water, Aqua Lung offers two different types of
environmental first stage protection kits which seal the ambient
chamber from the environment. This helps to prevent ice from
forming inside the first stage ambient chamber, and effectively
extends the life of the first stage diaphragm for regulators used
in extremely polluted or contaminated water.
The Supreme™ environmental protection kit contains silicone fluid, which fills the ambient chamber and acts as a transfer medium between the diaphragm and the surrounding water.
The Dry™ kit also seals off the ambient chamber, but incorporates a specially designed piston to transfer the surrounding
water pressure to the diaphragm, instead of silicone fluid.
This environmental protection comes with those regulators
which are sold specifically for cold water use, or it can be installed as an add-on option by your Authorized Aqua Lung
Dealer, provided that your regulator has a balanced diaphragm
design first stage.
For more information on diving in cold water, read the section titled Cold Water Diving, on page 20.
Regulator Owner’s Manual
9
Preparation and Setup
Turned in clockwise
Aqua Lung America, Inc. recommends that you bring your
regulator to your Authorized Aqua Lung Dealer for the installation
of any accessory items, including instrumentation, LP quick disconnect hoses, and alternate air sources. Your dealer can also answer
any questions you may have pertaining to the information in this
manual.
1. If present, check the vane adjustment switch on the top of the
second stage to ensure that it is set on “MIN” (or“—”) prior to
connecting your regulator to the tank.
2. (Adjustable models only) If the adjustment knob has been
turned “out” (counter-clockwise), gently turn it “in” (clockwise),
only until it stops. Do not apply excessive pressure.
3. If you are using a standard cylinder with a yoke connector valve,
inspect the cylinder valve O-ring for any wear or damage. If you
Set to “MIN”
are using a high pressure cylinder with a DIN valve, remove the
or “ — ”
protector cap from the first stage to inspect the sealing O-ring of
the DIN connector. If the sealing O-ring is damaged or worn,
replace it before mounting the regulator on the cylinder valve.
10
Regulator Owner’s Manual
Mounting the First Stage Onto the Cylinder Valve (Yoke Connector)
1. Partially unscrew the yoke screw of the first stage regulator so
that the dust cap can be removed from the filter and air inlet.
2. With the cylinder valve facing away from you, release a small
amount of air from the cylinder by turning the handwheel
counter-clockwise to open the valve only slightly. When air is
heard exiting, immediately close the valve. This will clear any
moisture or debris that may be inside the cylinder valve outlet
opening.
3. Place the first stage regulator over the cylinder valve so that the
inlet fitting aligns with the O-ring of the cylinder valve, and the
LP hose of the primary second-stage will be routed over the right
shoulder. While holding the first stage in place, turn the yoke
screw clockwise. Ensure that the yoke screw mates into the small
dimple on the backside of the cylinder valve, and tighten fingertight only.
4. If a submersible pressure gauge is attached to the first stage,
ensure that the gauge is facing away from you. Pressurize the
regulator by slowly turning the cylinder valve handwheel
counter-clockwise. Continue to turn the valve handwheel
Regulator Owner’s Manual
11
counter-clockwise until it is fully open, and then turn it back
clockwise 4-2 turn.
5. Listen near the first stage to check for any leakage. If leakage is
detected, immerse the first stage and cylinder valve while pressurized to determine the source.
6. If leakage has been detected, follow the procedure for removing
the regulator from the cylinder valve on pages 22-23. If air was
leaking between the first stage and cylinder valve, replace or reseat the cylinder valve O-ring as needed and repeat the above
procedure. If leakage persists, return the cylinder and regulator
to an Authorized Aqua Lung Dealer.
Mounting the First Stage Onto the Cylinder Valve (DIN Connector)
1. Remove the protector cap from the cylinder valve. With the
cylinder valve facing away from you, release a small amount of
air from the cylinder by turning the handwheel counter-clockwise to open the valve slightly. When air is heard exiting, immediately close the valve. This will clear any moisture or debris
that may be inside the threaded cylinder valve opening.
2. Position the first stage near the cylinder valve so that the LP
hose of the primary second-stage will be routed over the right
12
Regulator Owner’s Manual
shoulder. Thread the first stage DIN connector into the cylinder
valve and turn the handwheel clockwise by hand until it is
lightly snug. DO NOT use tools to tighten.
3. If a submersible pressure gauge is attached to the first stage,
ensure that the gauge is facing away from you. Pressurize the
regulator by slowly turning the cylinder valve handwheel
counter-clockwise. Continue to turn the cylinder valve
handwheel counter-clockwise until fully open, and then back
clockwise 4-2 turn.
4. Listen near the first stage to check for any leakage. If leakage is
detected, immerse the first stage while pressurized to determine
the source.
5. If leakage has been detected, follow the procedure for removing
the regulator from the cylinder valve on pages 22-23. If air was
leaking between the first stage and cylinder valve, replace or reseat the cylinder valve O-ring as needed and repeat the above
procedure. If leakage persists, return the cylinder and regulator
to an Authorized Aqua Lung Dealer.
Regulator Owner’s Manual
13
Pre-Dive Checkout
Before each use, the regulator must be given a thorough visual inspection
and functional test. NEVER dive with a regulator that shows signs of damage, or provides substandard performance until it has received complete
inspection and service from an Authorized Aqua Lung Dealer.
Inspection Checklist:
1. Carefully inspect all hoses at their fittings to ensure they are securely
connected into their respective ports on the first stage. Inspect the
length of each hose to ensure that the hoses are not blistered, cut, or
otherwise damaged. If hose protectors are present, slide the protectors
back to expose the hose fittings, and inspect the hoses as described above.
2. Visually inspect both the first and second stage regulators for any signs
of external damage.
3. Remove the dust cap and closely inspect the condition of the first stage
filter. It should appear clean and free of any corrosion or discoloration.
If a green residue is visible on the surface of the filter, moisture has
entered the first stage and may have caused corrosion to begin forming
inside which can seriously impair the regulator’s performance. Other
colored residue may indicate that the regulator has been used with an
14
Regulator Owner’s Manual
internally corroded aluminum (white/ gray powder) or steel (rust)
cylinder. In this event, the cylinder in question should be returned
to the dive store for internal visual inspection.
CAUTION: If discoloration or contaminant residue is found to be
present on the surface of the filter, it is strongly recommended that
you DO NOT attempt to dive with the regulator until it has received
factory prescribed service from an Authorized Aqua Lung Dealer.
4. (Environmentally sealed first stage only) Closely inspect the
external sealing diaphragm for any signs of damage or deterioration that may cause leakage. The retainer that holds the diaphragm in place must be tightly secured.
WARNING: If leakage of silicone fluid from a Conshelf Supreme™
model first stage is visible, DO NOT attempt to dive with the regulator until it has received factory prescribed service from an Authorized Aqua Lung Dealer. Under this condition, the regulator may
seem to function normally at the surface, but may not provide
adequate airflow at depth. The environmental protection may also
be compromised, and could result in first stage freeze-up.
Regulator Owner’s Manual
15
T
UN
C K WISE
)
R R E SIS T
E
LO
TE
C
GR
(C
EA
W
E)
IS
(CO
RESISTAN
C
SS
LE ER-CLOCK E
5. Connect the first stage regulator to a fully charged SCUBA cylinder.
For mounting instructions, read the Preparation and Setup section of
this manual on page 10.
6. SLOWLY open the cylinder valve to pressurize the regulator. Depress the purge button momentarily to ensure that sufficient airflow
is provided to blow out any dust or debris which may have entered
the second-stage.
7. Release the purge button and listen to ensure that the second-stage
does not continue to flow any air after the purge button is released.
8. (Adjustable models only) Turn the regulator adjustment knob on the
left side of the second stage completely “out” (counter-clockwise), or
until the regulator provides the maximum ease of breathing. Do not
apply excessive pressure after the knob stops turning, as this may
damage the regulator.
AN
NOTE: When the knob is turned all the way “out” (counter-clockwise), the regulator may provide a slight but continuous flow of air,
whether you inhale or not. This is normal, and allows you to adjust
the regulator to a setting that provides the least possible breathing
resistance.
16
Regulator Owner’s Manual
9. Inhale slowly and deeply from the regulator several times. The
regulator must deliver enough air for you to breathe easily
without noticeable resistance.
10. Check to ensure that the submersible pressure gauge is displaying an accurate measurement of the air pressure inside the
cylinder.
11. Close the cylinder valve and bleed the air from the regulator by
pressing the purge button. Look at the submersible pressure
gauge, or your dive computer if it is air integrated. The air
pressure reading must fall to zero. If you are not certain the
gauge or computer is reading correctly, do not dive with the
system until it has received service from an Authorized Aqua
Lung Dealer.
12. (Adjustable models only) Check to ensure that the vane adjustment switch on the top of the second stage is set to “MIN” (or
“—”) and gently turn the regulator adjustment knob back “in”
(clockwise), only until it stops. Do not apply excessive pressure.
These settings will help to minimize any loss of your air supply
during entry or while making a long surface swim.
13. Before entering the water, turn the cylinder valve completely
open to ensure that the regulator is pressurized.
Regulator Owner’s Manual
17
Diving with an adjustable second stage
When you are ready to submerge, turn the regulator adjustment
knob on the left side of the regulator all the way “out” (counterclockwise). Then, turn the knob back “in” (clockwise) until the
regulator breathes comfortably for you, without being undesirably
sensitive.
CAUTION: For adjustable second stages sold in the United
States, it is normal for the regulator to continuously leak air
when the adjustment knob is turned all the way “out” (counterclockwise). If the adjustment knob is left in this position while
the cylinder valve is open, however, the air supply will be rapidly
depleted.
As you descend, you may want to turn the regulator knob out
further to make breathing easier. This will be particularly true on
deep dives where you are working hard. Remember, however, that
the regulator may continuously leak air if the adjustment knob is
turned all the way “out” (counter-clockwise). This will cause the
air supply to be depleted more rapidly.
18
Regulator Owner’s Manual
WARNING: Adjusting the regulator to increase breathing resistance
will not conserve air. Instead, excessive breathing resistance will
actually increase your air consumption, and may elevate the CO2 in
your bloodstream to a dangerous level.
If you work underwater in an upside down or sideways position, or
facing a strong current, you will probably find that you want to turn
the adjustment knob back “in” (clockwise), to desensitize the opening
effort as needed. You will also want to turn the adjustment back “in”
when you ascend towards the surface.
If you turned the VAS to the “MAX” (or “+”) position at any time
during your dive, be sure to return it to the “MIN” (or “—”) position
when you ascend to the surface. If you will be surface swimming using
your snorkel, check to be sure that the regulator adjustment knob is
also turned “in.”
WARNING: Deep diving requires special training and equipment,
and greatly increases your risk of decompression sickness and
other diving injuries. Aqua Lung does not advocate diving to depths
deeper than 130 feet, or for any duration which exceeds no-decompression limits.
Regulator Owner’s Manual
19
Cold Water Diving
WARNING: SCUBA regulators and other equipment have operational
limits when used in water colder than 45°F (7°C). If you attempt to dive in
cold water without first obtaining the necessary training and preparation of
your equipment, you risk serious personal injury or death.
Before attempting an unsupervised dive in cold water conditions, it is
important to obtain certified training in cold water diving techniques, and to
ensure that your breathing system is properly equipped for this diving specialty. If these precautions are not taken, freeze-up can occur unexpectedly,
especially in fresh water lakes where severe thermoclines may be encountered.
After receiving training, you should bring your regulator to an Authorized
Aqua Lung Dealer for inspection and any service that may be needed. Your
regulator may need the installation of additional parts that will render it more
suitable for cold water use, or you may consider purchasing a current model
that is specially designed for this purpose. It is important to consider that an
environmentally sealed first stage regulator will prevent ice from forming in
the first stage ambient chamber, but will not prevent the second stage from
icing or freezing.
20
Regulator Owner’s Manual
It is possible for icing or freeze-up to occur, even with a regulator that has
been specially designed and/or prepared for cold water use. For this reason, it
is imperative that you must practice the correct cold water diving procedures,
and take special precautions to prevent second-stage icing. This training must
include procedures for dealing with regulator freeze-up, unexpected freeflow,
and emergency out-of-air situations. These procedures are taught in most
recognized certification agencies’ cold water training programs.
Whenever your air cylinder is filled, request verification that the water
vapor content of the supplied air is less than -65°F dewpoint. (Most dive stores
and air stations obtain regular testing and certification to provide evidence of
compliance with pure air standards.) Excess water vapor in the air can cause
moving parts inside your regulator to ice-up and freeze.
Regulator Owner’s Manual
21
After the Dive
NOTE: If fresh water is available, rinse your regulator completely before
depressurizing it. This will help to prevent any contaminants from entering
sealing surfaces inside the regulator.
Removal of the Regulator from the Cylinder Valve (Yoke Connector)
1. Shut off the cylinder air supply by turning the cylinder valve handwheel
clockwise until it stops.
2. While observing the submersible pressure gauge, depress the purge button
of the second-stage. When the gauge reads zero and airflow can no longer
be heard from the second stage, release the purge button.
3. Turn the yoke screw counter-clockwise to loosen and remove the first stage
from the cylinder valve.
4. Dry the dust cap with a towel or other lint-free cloth. While you may use
air from your tank valve to blow the water off the dust cap, you run the
risk of blowing out the dust cap O-ring and losing it.
5. Place the dust cap over the first stage inlet fitting and seal it securely in
place by tightening down the yoke screw.
22
Regulator Owner’s Manual
Removal of the Regulator from the Cylinder Valve (DIN Connector)
1. Turn off the cylinder air supply by turning the cylinder valve handwheel
clockwise until it stops.
2. While observing the submersible pressure gauge, depress the purge button
of the second-stage. When the gauge reads zero and airflow can no longer
be heard from the second stage, release the purge button.
3. Turn the first stage handwheel counter-clockwise to loosen and remove the
first stage from the cylinder valve.
4. Blow out any water inside the protector cap or wipe it out with a clean
towel, and wipe the threads of the first stage connector clean and dry.
Install the cap over the threads of the first stage connector.
NOTE: It is very important to use care when removing the first stage from
the cylinder valve to ensure that moisture does not enter either the inlet
opening of the first stage or the opening of the DIN valve.
5. With the cylinder valve facing away from you, open the valve slightly to
release a short burst of air, and then immediately close the valve. This will
clear any moisture that may have entered the valve opening. Immediately
seal the protector cap securely in place over the opening of the DIN valve
to prevent the entrance of moisture or debris.
Regulator Owner’s Manual
23
User Care & Maintenance
It is important to provide the proper preventative maintenance in
order to ensure the best possible performance and maximum life of your
Aqua Lung Regulator. The following maintenance procedures should be
performed routinely after each use to ensure that the regulator is cleaned,
inspected, and prepared for the next use or for storage.
1. Whenever the regulator is removed from the cylinder valve, it is
important that the dust cap is installed over the regulator inlet fitting.
This is critical to prevent the entrance of moisture into the first stage.
This cap is normally attached to the first stage yoke and may therefore
be wet. Wipe or blow the dust cap completely dry before securing it
over the inlet fitting. Check to ensure that the O-ring is seated securely inside the dust cap.
2. As soon as possible after diving, the regulator should be rinsed thoroughly with fresh water while it is attached to a cylinder and pressurized with air.
3. Rinsing alone, however, will not sufficiently clean the regulator. To
clean the regulator as thoroughly as possible, it is necessary to soak it
in warm (not over 120°F) tap water for at least one hour.
24
Regulator Owner’s Manual
a. The preferred method is to attach the regulator to a charged SCUBA
cylinder, open the cylinder valve to pressurize the regulator, and
thoroughly soak both the first and second-stages. Pressurizing the
regulator will effectively prevent the entrance of moisture and/or
contaminants into the regulator while it soaks.
b. If it is not feasible to soak the regulator while it is attached to a
cylinder, it may be soaked unpressurized - provided that the dust cap
is securely sealed over the inlet with its O-ring intact, and the second
stage purges buttons are not depressed while the regulator is submerged or wet.
NOTE: When soaking or rinsing an adjustable model regulator
unpressurized, check to ensure that the second stage adjustment knob
(VAK) is turned completely “in” (clockwise) to prevent moisture from
entering the valve and LP hose.
CAUTION: DO NOT depress the purge button, loosen the first stage
yoke screw, or turn the second stage adjustment knob all the way “out”
(adjustable models) if the regulator is submerged unpressurized. Doing
so will allow the entrance of moisture, and will require that the regulator
be returned to an Authorized Aqua Lung Dealer for service.
Regulator Owner’s Manual
25
4. While the regulator is soaking, move the vane adjustment switch
on the second stage (if present) back and forth several times
from the “MIN” (or “—”) to the “MAX” (or “+”) settings. You
may also turn the valve adjustment knob (adjustable models)
slightly back and forth—no more than 4 turn. This action will
help to loosen any salt or mineral deposits that may remain
lodged in the second stage.
5. After the regulator has been properly soaked, it is important to
rinse it vigorously by flushing the mainspring cavity of the first
stage regulator (non-environmentally sealed models only), the
second-stage mouthpiece, and the openings in the second-stage
front cover with a pressurized stream of water. This will remove
the deposits of salt and minerals that were loosened during
soaking. If the regulator is not pressurized, do not press the
purge button while submerged. Pushing the purge button at this
time will allow moisture to enter the valves, and will require
that the regulator be returned to an Authorized Aqua Lung
Dealer for service..
6. Wipe the regulator as dry as possible and hang by the first stage
to ensure that all remaining moisture drains from the second
stages.
26
Regulator Owner’s Manual
7. If the regulator is to be stored for a long period, it is good practice to wipe the hoses and rubber gauge boot with a light film of
non-aerosol silicone milk, using a soft cloth.
8. Adjustable models with the VAK feature should be stored with
the knob turned all the way out (counter-clockwise) away from
the regulator body. This will help to extend the life of the low
pressure seat.
9. When the regulator is completely dry, store in a clean equipment
box, or sealed inside a plastic bag. Do not store it where it may
be exposed to extreme heat or an electric motor, which produces
ozone. Prolonged exposure to extreme heat, ozone, chlorine,
and ultraviolet rays can cause premature degradation of rubber
parts and components.
10. Never store the regulator while it is still connected to the cylinder valve.
11. Do not use any type of solvent or petroleum based substances to
clean or lubricate any part of the regulator. Do not expose any
part of the regulator to aerosol spray, as some aerosol propellants attack or degrade rubber and plastic materials.
Regulator Owner’s Manual
27
Dealer Inspection & Service
1. It cannot be assumed that a regulator is in good working order on the basis that it has
received little use since it was last serviced. Remember that prolonged or improper
storage can still result in internal corrosion and/or deterioration of O-ring seals.
2. You must obtain factory prescribed service for your regulator at least once a year from
an Authorized Aqua Lung Dealer, regardless of the amount of use it has received.
Your regulator may require this service more frequently, depending on the amount of
use it receives and the environmental conditions in which it is used.
3. If the regulator is used for rental or training purposes, it will require complete overhaul and factory prescribed service every three to six months. Chlorinated swimming
pool water is an especially damaging environment for SCUBA equipment, due to the
high levels of chlorine and pH balancing chemicals which cause certain components to
rapidly deteriorate.
4. DO NOT attempt to perform any disassembly or service of your regulator. Doing so
may cause the regulator to malfunction, and will render the Aqua Lung warranty null
and void. All service must be performed by an Authorized Aqua Lung Dealer.
OBTAIN SERVICE FOR YOUR REGULATOR AT LEAST ONCE A YEAR, FROM AN
AUTHORIZED AQUA LUNG DEALER. YOUR PERSONAL SAFETY AND THE
MECHANICAL INTEGRITY OF YOUR REGULATOR MAY DEPEND ON IT.
28
Regulator Owner’s Manual
Warranty Information
All warranty transactions must be accompanied by proof of original purchase from
an Authorized Aqua Lung Dealer. Be sure to save your sales receipt, and present it
whenever returning your regulator for warranty service.
The Aqua Lung Satisfaction Guarantee™
If any Aqua Lung product that you have purchased from an Authorized Aqua Lung
Dealer fails to meet your expectations, Aqua Lung America, Inc. will replace or exchange the product free of charge within thirty (30) days of the original purchase.
Exchanges will be made through the same Authorized Dealer for Aqua Lung America,
Inc., for merchandise of equal or lesser value, and will be made only for Aqua Lung
equipment. Aqua Lung America, Inc. makes this guarantee of satisfaction a part of
all product warranties because of the confidence we have in our products.
The Aqua Lung Two-Year Limited Warranty™
Aqua Lung America, Inc. warrants to the original purchaser for a period of two
years from the date of purchase that the product will be free from defects in material and workmanship; provided that it receives normal use, proper care, and
prescribed dealer service subject to those restrictions stated in the following
paragraphs.
Regulator Owner’s Manual
29
This limited warranty is extended only to the original purchaser for
purchases made from an Authorized Aqua Lung Dealer, and is not transferable. This warranty is limited to repair or replacement only at the discretion
of Aqua Lung America, Inc.
WARNING: It may be dangerous for untrained and uncertified persons to
use the equipment covered by this warranty. Use of SCUBA equipment by
anyone who is not a trained or certified diver, or is not currently receiving
training through a recognized certification agency, may lead to serious
injury or death.
ALL WARRANTIES, INCLUDING, BUT NOT LIMITED TO, IMPLIED WARRANTIES OF MERCHANTABILITY AND FITNESS FOR A PARTICULAR PURPOSE ARE LIMITED IN DURATION TO A PERIOD ENDING TWO YEARS
FROM THE DATE OF PURCHASE.
Some states in the U.S. and certain foreign countries do not allow limitations
on the duration of implied warranties, so this may not apply to you.
This warranty gives you specific legal rights. You may have rights which vary
from state to state and country to country.
AQUA LUNG AMERICA, INC. DISCLAIMS AND EXCLUDES ANY LIABILITY
FOR INCIDENTAL OR CONSEQUENTIAL DAMAGES.
30
Regulator Owner’s Manual
Some states in the U.S. and certain foreign countries do not allow exclusions
or limitations of liability for incidental or consequential damages, so this may not
apply to you.
RESTRICTIONS
The following restrictions apply to this warranty:
1. This warranty does not cover normal wear. Factory prescribed service by
an Authorized Aqua Lung Dealer is required at least once annually.
2. This warranty does not extend to damages caused by improper use, improper maintenance, neglect, unauthorized repairs, modifications, accidents, fire, or casualty.
3. Cosmetic damage, such as scratches, dents, and nicks are not covered by
this warranty.
4. This warranty does not extend to equipment used for rental, commercial,
or military purposes.
5. This warranty covers products purchased in the United States. For warranties that may apply elsewhere, please contact your local representative.
6. Failure to meet any of the above requirements will render the warranty
null and void.
Regulator Owner’s Manual
31
RETURNING YOUR REGULATOR FOR SERVICE
Whenever your regulator requires annual service or warranty repair, Aqua Lung
recommends that you bring it to your nearest Authorized Aqua Lung Dealer.
If you need to return products covered by this warranty, follow these steps:
1. Provide the dealer with photocopies of your original sales receipt and receipt from
your last annual service if the product is more than one year old.
2. If you intend to ship directly to Aqua Lung America, Inc. for service, you must
first obtain a Return Merchandise Authorization (RMA) number and the shipping
address by calling the phone number listed on the rear cover of this manual.
3. Write the RMA number on the address label. This is important.
4. Mail photocopies of your original sales and service receipts, along with the product
and a letter detailing the problem as precisely as possible. Include your name,
return address, and daytime telephone number in the letter.
You must prepay all freight charges. We do not accept C.O.D. shipments.
NOTE: Aqua Lung America, Inc. reserves the right to substantiate the validity of
the claim.
Contacting Aqua Lung via Electronic Mail
You can contact Aqua Lung by visiting our website at: www.aqualung.com
32
Regulator Owner’s Manual
IMPORTANT NOTICE ABOUT MAIL ORDER SALES OF
AQUA LUNG/ U.S. DIVERS PRODUCTS:
Beware of any retailer that offers to sell and ship our life supporting
products by mail, for orders placed by phone or the Internet. These
retailers are NOT Authorized Aqua Lung Dealers. All Authorized Aqua
Lung Dealers must execute a Dealer Agreement that does not allow the
sale of Aqua Lung products except "in-store." Many Aqua Lung dealers
advertise on the Internet, but they are not allowed to deliver our products
other than "over-the counter." This is our assurance that you will receive
the proper pre-sale, point-of-sale, and post-sale assistance.
If you obtain our product from one of these retailers, your warranty is
therefore not valid and we cannot offer you the assurances of quality
and satisfaction afforded by the Aqua Lung Warranty Program. If you
would like to verify whether or not a retailer is an Authorized Aqua Lung
Dealer, please call or write to Aqua Lung America, Inc., using the address or phone number provided on the rear cover of this manual. Or,
you can visit our website at: www.usdivers.com
Regulator Owner’s Manual
33
Annual Inspection & Service Record
Serial Number ___________________________
®
Purchase Date ___________________________
Store Name _____________________________
Date
34
Dealer Name & Number
Technician Name
Stamp
Regulator Owner’s Manual
Annual Inspection
vice
& Ser
Record
Date
Regulator Owner’s Manual
Dealer Name & Number
Technician Name
Stamp
35
®
2340 Cousteau Ct.
Vista, CA 92083
Fax (760) 597-4900
Phone (760) 597-5000
www.aqualung.com
Doc. No. 1019-99 — Rev. 4/98
Copyright ©1998