1
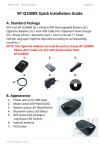
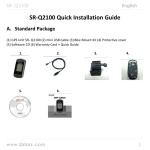
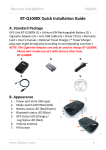
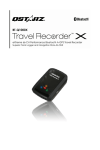
Beyond Navigation English ………………………………………………………………………………………………………………………………………………………………………………………. BT‐Q1300 Quick Installation Guide A. Standard Package GPS Unit BT‐Q1300 (1) + Cigarette Adapter (2) + mini USB Cable (3) + Driver CD (4) + Warranty Card + User’s manual. NOTE 1: The Cigarette Adaptor can only be used to charge BT‐Q1300. Please don’t make use of it with devices other than BT‐Q1300. NOTE 2: Please recharge the battery on a regular interval if the unit is not used for a long time. 1. 2. 3. 4. B. Appearance 1. Power Button (ON/OFF/Enable LOG mode/Disable LOG mode / Push to LOG) 2. Power jack (mini USB type) 3. Battery status LED (Red/Green) 4. Bluetooth status LED (Blue) 5. GPS status LED (Orange) 6. Log status LED (Blue) 7. Internal antenna ………………………………………………………………………………………………………………………………………………………………………………………. www.Qstarz .com
1
English ………………………………………………………………………………………………………………………………………………………………………………………. C. Hardware Function Hardware Function Power Jack Power Button (On) Power Button (Off) Power Button (Enable Log mode) Power Button (Disable Log mode) Power Button (Push to Log) Description Take the power cable and connect it to the power jack (mini USB type) for charging only Press power button and hold for 4 sec to power BT‐Q1300 on. Press power button and hold for 4 sec to power BT‐Q1300 off After power BT‐Q1300 on, press power button and hold for 2 sec to enable log mode. Then BT‐Q1300 would start logging with the blinking LOG status LED (blue). Press power button and hold for 2 sec again to disable log mode. The LOG status LED (blue) would be off, and stop logging. Press power button once to push to log the favorite Point of Interest D. Safety Notice z Charging time is about 1 hour typically for this unit. We suggest disconnecting the unit from the cigarette charger or AC charger after the unit has been fully charged. z Be sure to use the supplied cigarette charger included in package; otherwise excessive voltage may be applied to the unit and may cause smoke, fire, or accident. z When the unit is not in use or not charged, we suggest disconnecting the unit from the cigarette charger. Otherwise battery drain may result. z Note that the built in battery cannot be charged outside the temperature range 0℃ ~ 45℃. ......................................................................................................................................................................................... 2
www.Qstarz.com
Beyond Navigation English ………………………………………………………………………………………………………………………………………………………………………………………. z The charging time might be extended if you use the product while charging z Do not heat or leave the unit in high temperature or direct sunshine for a long period of time as the built‐in battery capacity will deteriorate, or will become unchargeable. E. Charging your battery For the first time using the BT‐Q1300, please charge battery until it is fully charged. Take the power cable and connect it to the power jack (mini USB type) and recharge through USB cable, travel charger or car cigarette adaptor. This will begin to charge the battery. Charging time is 1 hours typically. ‐ When the Power LED is Red, battery power is low status. Please recharge. ‐ When the Power LED is Green, the battery is under charging mode. ‐ When the Power LED is blinking, the battery is fully charged. F. Setup BT‐Q1300 F‐1 Install the USB Driver and software utility (Only support Microsoft Windows XP / Vista) Please insert the Driver CD to your computer, and find the folder “Utility\PC Utility V4\”. Double click “TravelRecorderV4_installer.exe” to install the software utility package. This software package contains USB driver and PC Utility V4 software inside. F‐2 Install Google Earth BT‐Q1300 supports showing your travel path directly on Google Earth. Please go to http://earth.google.com for the free download of Google Earth, and then install it to your computer. ………………………………………………………………………………………………………………………………………………………………………………………. www.Qstarz .com
3
English ………………………………………………………………………………………………………………………………………………………………………………………. G. Start to use G‐1 Fully charge the battery when using at the first time A fully charged battery can last up to 12 hours continuously operation (under optimum conditions). G‐2 Connect BT‐Q1300 with your PC Please connect BT‐Q1300 with your PC by mini USB cable, and then power on BT‐Q1300. G‐3 Start the software utility NOTE 1: PC Utility V4 only supports BT‐Q1300. Any intention to use PC Utility V4 connecting GPS units other than BT‐Q1300 would result in software disconnection automatically. NOTE 2: Qstarz Travel Recorder PC Utility V4 can’t be opened with Qstarz Travel Recorder PC Utility V3 simultaneously. Please execute either one of both or the program may experience unstable status. 1. Click from <Start> / <All Programs> / <Qstarz Travel Recorder V4> / Travel Recorder PC Utility V4 2. <File> \ <Read Log> Download the log data from Travel Recorder. 2.1 Click <File> \ <Read Log> or the quick link icon. 2.2 Users have to input product key at the first time of use. The product key is located on the cover of the driver CD. 2.3
2.4
PC Utility will automatically detect the com port and baud rate and load in the GPS tracks. A track list window will be popped up. Select the tracks to import and tracks will be shown on the Google Map Window. ......................................................................................................................................................................................... 4
www.Qstarz.com
Beyond Navigation English ………………………………………………………………………………………………………………………………………………………………………………………. 3. <File> \ <Clear Log> Clear the data stored in the Travel Recorder. 4. <File> \ <Config GPS> Configure the recording method of the flash memory of Travel Recorder. 4.1 Connection Setting I. Auto Scan GPS Module (Recommended) The program will automatically detect the com port. It is recommended to set to auto scan. II. Manual Setting Users can also manually set the port. Please refer to users’ manual for more detail information. 4.2 GPS Log Setting There are 4 log modes: General mode, vehicle mode, cycling mode, and hiking mode. Users can also change the default setting of these 4 modes. 4.3 Data Log Memory Overwrite: When the memory is full, Travel Recorder will keep logging by overwriting the memory from the earliest point. Stop Log: When the memory is full, Travel Recorder will stop logging. 5. <Photo/Media> \ <Add Media Files> Users can add media files from a file folder, or selected files. 5.1 Add media files from a folder: Select a folder to add media files. Add media files from selected files: Use Ctrl‐Click, or Shift‐Click to select multiple files. 5.2 After photos are added, all photos will be shown on the <Photo View> and <Photo List> window. Under <Photo View> ………………………………………………………………………………………………………………………………………………………………………………………. www.Qstarz .com
5
English ………………………………………………………………………………………………………………………………………………………………………………………. window, Users can click on the “next photo” and “prev photo” buttons to browse photos, add comment to each photo, and rotate, delete photos. PC Utility will automatically match photos and GPS logged waypoints by time. 6. <Photo> \ <Shift Photo Time> will invoke the shift photo time window. All photos will be added (or subtracted) the specified time. The dates are saved in the Exif parts of Jpeg or Tiff file. After the shift, PC Utility will automatically match the photo and track waypoints again. Users can put more than 365 in days. 7. <Photo> \ <Write GPS Info into Photos> will save the latitude, longitude, and altitude information into photo. A progress window will show the writing progress. 8. <File> \ <View in Google Earth> will invoke Google Earth to view the tracks and photos. Please install Google Earth previously in order to activate this feature. H. Navigate as a Bluetooth GPS Receiver with handheld device H‐1 Activate the Bluetooth function in your PDA/Smart phone or PC Before activating the Bluetooth function in your PDA/PC, please power on BT‐Q1300 to pair and check if your device is equipped with Bluetooth function. If not, you may need to acquire an optional CF/SD Bluetooth card or Bluetooth dongle. (The pass code is “0000”) H‐2 Automatically create a shortcut in Bluetooth Manager window After the pairing complete, the system will then find a quick connect device “Qstarz GPS” in Bluetooth Manager. In further use, you just need to click it to connect to this Bluetooth GPS Receiver. ......................................................................................................................................................................................... 6
www.Qstarz.com
Beyond Navigation English ………………………………………………………………………………………………………………………………………………………………………………………. H‐3 Check the Serial Port in Bluetooth Setting After complete pairing with BT‐Q1300, please click “Serial Port” to confirm the assigned COM port. If you use PDA/PC to pair the GPS Receiver, please check “Outbound COM port”. H‐4 Set correct Serial Port in your map software Activate your navigation software and make sure to select the correct “Serial Port”. NOTE 1: In the map software such as TomTom, you might need to change preference and set “Other Bluetooth GPS” according to PDA/phone model. In some case please consult map software company to vary the setting if you have issue on positioning. NOTE 2: There might be specific setting requirement per navigation software. Such as Tomtom, please delete other GPS settings under Tomtom software, and keep one only. H‐5 Switch off the Bluetooth function Switch off GPS function in your PDA/Smart phone/PC, and the Bluetooth connection will be disconnected automatically. Then power off BT‐Q1300. I. Function of Auto On‐Off, Auto Log On‐Off Auto On‐Off (Power saving mode): BT‐Q1300 will automatically enter sleeping mode after the Bluetooth connectivity is turned off, so the Blue LED will turn to flash every 5 seconds. Thus you can always power it on with very low power consumption. Under power saving mode, when detecting Bluetooth is being connected, BT‐Q1300 will auto wake up itself and the blue LED will turn to flash every 2 seconds and GPS Orange LED will be also On. Auto Log On‐Off: Under Log mode, BT‐Q1300 will automatically stop log after the GPS is not fix. However, the LED will not indicate it since it works in background. As long as the GPS is fix again, BT‐Q1300 will ………………………………………………………………………………………………………………………………………………………………………………………. www.Qstarz .com
7
English ………………………………………………………………………………………………………………………………………………………………………………………. start to log. Thus you can save very much memory during your travel. Note: Power saving mode would not function when log is enabled or connected with PC. J. OTHERS J‐1 LED Indicators LED Status Flash ON OFF Power (Red/Green) Low Power (Red) Fully charged (Green) Recharging (Green) Bluetooth (Blue) Flash per 2 sec.: Bluetooth connected and transmitting Mode Flash per 5 sec.: Power saving mode Not connected /Pairing GPS not powered / Log Mode is on Flash per 1 sec.(Orange): GPS position is fixed, Navigation Detecting Satellite, GPS position not fix GPS not powered Log Mode is on Flash per 2 sec.: Low memory Flash 3 times: POI(Point of Interest) is recorded Memory is full Log Mode is off GPS (Orange/ Blue) Log (Blue) J‐2 GPS Features 1. Baud Rate: 115,200 bps / Datum: WGS‐84; Hot/Warm/Cold Start: 1/33/35 sec. (averaged) 2. 66‐channel Bluetooth GPS Receiver with super high sensitivity at ‐165dBm ......................................................................................................................................................................................... 8
www.Qstarz.com
Beyond Navigation English ………………………………………………………………………………………………………………………………………………………………………………………. 3. Bluetooth Version: V1.2 / SPP profile / Class 2 with 15 meters in open space 4. Low power consumption, built‐in rechargeable Lithium battery 5. Size: 62 (L) X 38 (W) X 7 (H) mm K. Trouble Shooting Question Can BT‐Q1300 be used to navigate when travel log is on? I lost my travel charger. Where can I find the replacement? How can I know if my memory is full? Can the logged data be downloaded through Bluetooth? My Q1300 is unable to log anymore. What’s wrong? Answer Yes, you can use BT‐Q1300 to navigate when travel log is on simultaneously. DC Input range of BT‐Q1300 is 4.5~5.5V. You can use a travel charger which support DC output range from 4.5~5.5V. You can also use a common mini USB cable to charge your unit via the laptop. If you see the Log LED is steady lighted up, which means the memory is full. Actually it’s okay for Q1300 to download data via Bluetooth interface. However, since it is not stable and with lower download performance than that of USB interface, we don’t officially admit this feature. Check if your Q1300’s memory is full or the status in PC utility V3 software “Data Log List” appears to be “Error!” or not. Both can be resolved by performing a soft reset at PC Utility software V3 “Data Log List” ‐> “Reset.” ………………………………………………………………………………………………………………………………………………………………………………………. www.Qstarz .com
9
DEUTSH ………………………………………………………………………………………………………………………………………………………………………………………. BT‐Q1300 – Schnellinstallationsanleitung A. Lieferumfang GPS‐Gerät BT‐Q1300 (1) + Zigarettenanzünderadapter (2) + Mini‐USB‐Kabel (3) + Treiber‐CD (4) + Garantiekarte + Bedienungsanleitung. Hinweis 1: Der Zigarettenanzünderadapter ist speziell ausgeführt und kann nur zum Laden des BT‐Q1300 verwendet werden. Bitte versuchen Sie nicht, ihn mit anderen Geräten als dem BT‐Q1300 zu verwenden. Hinweis 2: Bitte laden Sie den Akku von Zeit zu Zeit auf, wenn Sie das Gerät längere Zeit nicht benutzen 1. 2. 3. 4. B. Äußeres 1. Stromschalter (EIN/AUS/LOG‐Modus aktivieren/LOG‐Modus deaktivieren/ OVI‐Taste) 2. Stromanschluss (Mini‐USB) 3. Battery status LED (Red/Green) 4. Bluetooth status LED (Blue) 5. GPS status LED (Orange) 6. Log‐Status‐LED (blau) 7. Internal antenna ......................................................................................................................................................................................... 10
www.Qstarz.com
Beyond Navigation DEUTSH ………………………………………………………………………………………………………………………………………………………………………………………. C. Hardwarefunktion Hardwarefunkt
ion Stromanschluss Stromschalter (Ein) Stromschalter (Aus) Stromschalter (Log‐Modus aktivieren) Stromschalter (Log‐Modus deaktivieren) Stromschalter
(OVI‐Taste)
Beschreibung Mit diesem Anschluss verbinden Sie das Stromkabel (Mini‐USB) zum Aufladen. Halten Sie den Stromschalter für 4 Sekunden gedrückt, um den BT‐Q1300 einzuschalten. Halten Sie den Stromschalter für 4 Sekunden gedrückt, um den BT‐Q1300 auszuschalten. Zum Aktivieren des Logmodus (Protokollierung) halten Sie die Ein‐/Austaste nach dem Einschalten des BT‐Q1300 zwei Sekunden lang gedrückt. Der BT‐Q1300 beginnt nun mit dem Loggen, die LOG‐LED (blau) blinkt. Zum Abschalten des Logmodus halten Sie die Ein‐/Austaste noch einmal zwei Sekunden lang gedrückt. Die blaue LOG‐LED erlischt, das Loggen wird gestoppt. Zum Loggen Ihrer Lieblings‐OVIs drücken Sie die Ein‐/Austaste erneut D. Allgemeine und Sicherheitshinweise z
z
Die Ladezeit beträgt gewöhnlich etwa eine Stunde. Wir empfehlen, das Gerät nach dem Aufladen wieder vom Zigarettenanzünder oder Netzteil zu trennen. Benutzen Sie ausschließlich den mitgelieferten Zigarettenanzünderadapter; andernfalls kann es zu Spannungsspitzen kommen, die das Gerät zerstören, Brände oder sonstige Unfälle auslösen können. ………………………………………………………………………………………………………………………………………………………………………………………. www.Qstarz .com
11
DEUTSH ………………………………………………………………………………………………………………………………………………………………………………………. z
z
z
Bitte beachten Sie, dass der Akku nur bei Außentemperaturen zwischen 0 und 45 °C aufgeladen werden darf. Die Ladezeit verlängert sich, wenn Sie das Gerät beim Aufladen benutzen Erwärmen Sie das Gerät nicht, lassen Sie es nicht an Stellen liegen, an denen hohe Temperaturen herrschen – z. B. nicht im prallen Sonnenlicht. Ansonsten kann der interne Akku Schaden nehmen, seine Kapazität verlieren oder komplett ausfallen. E. Akku aufladen Bevor Sie den BT‐Q1300 zum ersten Mal benutzen, laden Sie den Akku bitte vollständig auf. Verbinden Sie das Stromversorgungskabel mit dem Stromanschluss (Mini‐USB) des Gerätes und laden Sie das Gerät über USB‐Kabel, Reiseladegerät oder Zigarettenanzünderadapter auf. Der Akku wird nun geladen. Die Ladezeit liegt gewöhnlich bei etwa einer Stunde. ‐ Wenn die Betriebsanzeige‐LED rot leuchtet, ist der Akku fast entladen. Bitte aufladen. ‐ Wenn die Betriebsanzeige‐LED grün leuchtet, wird der Akku gerade geladen. ‐ Sobald die Betriebsanzeige‐LED blinkt, ist der Akku komplett aufgeladen. F. BT‐Q1300 einrichten F‐1 USB‐Treiber und Software für installieren (nur unter Microsoft Windows XP / Vista unterstützt) Legen Sie die Treiber‐CD ein und öffnen Sie den Ordner „Utility\PC Utility V4\“. Zur Installation des USB‐Treibers doppelklicken Sie auf die Datei „TravelRecorderV4_installer.exe“. Dieses Softwarepaket enthält USB‐Treiber und PC Utility V4 Software. ......................................................................................................................................................................................... 12
www.Qstarz.com
Beyond Navigation DEUTSH ………………………………………………………………………………………………………………………………………………………………………………………. F‐2 Google Earth installieren Ihr BT‐Q1300 kann Ihre Reiseroute direkt über Google Earth anzeigen. Bitte rufen Sie http://earth.google.com auf. Dort können Sie Google Earth kostenlos herunterladen und auf Ihrem Computer installieren. G. Anwendung G‐1 Akku vor der ersten Benutzung vollständig aufladen Ein komplett geladener Akku sorgt (bei optimalen Bedingungen) für bis zu 12 Stunden ununterbrochenen Betrieb. G‐2 BT‐Q1300 an den PC anschließen Verbinden Sie den BT‐Q1300 über das Mini‐USB‐Kabel mit Ihrem PC. Schalten Sie den BT‐Q1300 ein und aktivieren den Log‐Modus. G‐3 Software‐Dienstprogramm starten HINWEIS 1: Das PC Utility V4 unterstützt ausschließlich den BT‐Q1300. Jeder Versuch, das PC Utility V4 mit anderen GPS‐Geräten als dem BT‐Q1300 zu verbinden, führt zum sofortigen Abbruch der Softwareverbindung. HINWEIS 2: Qstarz Travel Recorder PC Utility V4 kann nicht gleichzeitig mit Qstarz Travel Recorder PC Utility V3 ausgeführt werden. Bitte starten Sie nur eines der Programme, das Programm kann ansonsten instabil werden. 1. Klicken Sie auf <Start> ‐ <Alle Programme> ‐ <Qstarz Travel Recorder> ‐ Travel Recorder PC Utility V4 2. <File> (Datei) \ <Read Log> (Protokoll lesen) Zum Downloaden des Protokolls von TRAVEL RECORDER. 2.1 Klicken Sie <File> (Datei) \ <Read Log> (Protokoll lesen) oder das entsprechende Symbol. ………………………………………………………………………………………………………………………………………………………………………………………. www.Qstarz .com
13
DEUTSH ………………………………………………………………………………………………………………………………………………………………………………………. 2.2
Beim ersten Starten des Programms müssen Sie die Produktseriennummer eingeben. Die Produktserienummer finden Sie auf der Hülle der Treiber‐CD. 2.3 PC Utility erkennt Schnittstelle und Baudrate automatisch und liest die GPS‐Wegdaten. 2.4 Ein Fenster mit einer Liste der GPS‐Wegdaten erscheint. Wählen Sie eine Wegliste und die Wegpunkte werden im Google‐Map Fenster gezeigt. 3. <File> (Datei) \ <Clear Log> (Protokoll löschen) Zum Löschen der Daten im Travel Recorder. 4. <File> (Datei) \ <Config GPS> (GPS konfigurieren) Zum Konfigurieren der Protokolliermethode des Travel Recorder Speichers. 4.1 Verbindungseinstellungen I. Auto Scan GPS Module (empfohlen) Das Programm erkennt den COM‐Port automatisch. Dies ist die empfohlene Einstellung. II. Manuelle Einstellung Sie können den COM‐Port auch manuell einstellen. Siehe Benutzeranleitung für detaillierte Informationen. 4.2 GPS‐Protokolleinstellungen Es stehen 4 Protokollmodi zur Verfügung: General (allgemein), Kraftfahrzeug‐, Fahrrad‐ und Fußgänger‐Modus. Sie können auch die Defaulteinstellungen dieser 4 Modi ändern. 4.3 Datenspeicher Überschreiben: Ist der Speicher voll, führt der Travel Recorder das Protokoll fort, indem frühere Daten überschrieben werden. Protokoll stoppen: Ist der Speicher voll, stoppt der Travel Recorder die ......................................................................................................................................................................................... 14
www.Qstarz.com
Beyond Navigation DEUTSH ………………………………………………………………………………………………………………………………………………………………………………………. Aufzeichnung von weiteren Daten. 5. <Photo/Media> (Foto/Medien) \ <Add Media Files> (Mediendateien hinzufügen) Sie können Mediendateien aus einem Verzeichnis hinzufügen oder Dateien auswählen. 5.1 Mediendateien auf einem Verzeichnis hinzufügen: Wählen Sie ein Verzeichnis, um Mediendateien hinzuzufügen. Mediendateien auswählen: Verwenden Sie Strg – Klicken oder Umschalttaste – Klicken, um mehrere Dateien zu wählen. 5.2 Nachdem Fotos hinzugefügt wurden, erscheinen alle Fotos in den Fenstern <Photo View> (Fotoanzeige) und <Photo List> (Fotoliste). Im Fenster <Photo View> (Fotoanzeige) können Sie die Schaltflächen „next photo” (nächstes Foto) und „prev photo” (voriges Foto) klicken, um die Fotos anzuzeigen, Kommentare zu jedem Foto hinzufügen und sie zu drehen oder zu löschen. PC Utility ordnet die Fotos anhand der Zeitdaten den protokollierten GPS‐Wegpunkten zu. 6. <Photo> (Foto) \ <Shift Photo Time> (Zeit verschieben) Öffnet das Fenster Foto‐Zeit verschieben. Die eingegebene Zeit wird für alle Fotos addiert (oder subtrahiert). Die Zeit wird im EXIF‐Teil der JPEG oder TIFF‐Dateien gespeichert. Nach dem Verschieben ordnet PC Utility Fotos und Wegpunkte automatisch erneut zu. Sie können mehr als 365 Tage eingeben. 7. <Photo> (Foto) \ <Write GPS Info into Photos> (GPS‐Daten in Fotos speichern) Speichert die Daten für Breiten‐ und Längengrad in der Fotodatei. Ein Fenster zeigt den Fortschritt des Schreibvorgangs. 8. <File> (Datei) \ <View in Google Earth> (In Google Earth anzeigen) Öffnet Google Earth zur Anzeige der Wegdaten und Fotos. Bitte installieren Sie Google Earth, bevor Sie diese Funktion ausführen. ………………………………………………………………………………………………………………………………………………………………………………………. www.Qstarz .com
15
DEUTSH ………………………………………………………………………………………………………………………………………………………………………………………. H. Gerät als Bluetooth‐GPS‐Empfänger zur Navigation mit einem Handgerät einsetzen H‐1 Aktivieren Sie die Bluetooth‐Funktionalität Ihres PDAs/Smartphones oder PCs Bevor Sie die Bluetooth‐Funktion auf Ihrem PDA/PC aktivieren, schalten Sie bitte den BT‐Q1300 für die Kopplung ein. Prüfen Sie bitte, ob Ihr Gerät über die Bluetooth‐Funktion verfügt. Wenn nicht, dann müssen Sie eventuell eine CF/SD‐Blueooth‐Karte oder einen Bluetooth‐Dongle beschaffen. (Der Verbindungscode ist "0000".) H‐2 Verknüpfung im Bluetooth Manager‐Fenster automatisch anlegen Nach abgeschlossener Kopplung wird ein Schnellverbindungsgerät „Qstarz GPS“ im Bluetooth Manager angelegt. Beim nächsten Einsatz können Sie zur Verbindung mit Ihrem Bluetooth‐GPS‐Empfänger einfach darauf klicken. H‐3 Seriellen Port in den Bluetooth‐Einstellungen prüfen Nachdem die Kopplung mit dem BT‐Q1300 abgeschlossen wurde, klicken Sie zur Bestätigung des zugewiesenen COM‐Ports bitte auf „Serieller Port“. Wenn Sie den GPS‐Empfänger mit einem PDA oder PC koppeln, markieren/überprüfen Sie bitte „Ausgehender COM‐Port“. H‐4 Richtigen seriellen Port in Ihrer Kartensoftware einstellen Starten Sie Ihre Navigationssoftware und wählen Sie den richtigen „seriellen Port“ aus. HINWEIS 1: Wenn Sie eine Kartensoftware wie TomTom benutzen, müssen Sie eventuell einige Voreinstellungen ändern und je nach PDA‐ oder Telefonmodell „Anderes Bluetooth‐GPS“ wählen. Falls es dennoch zu Problemen bei der Positionsbestimmung kommen sollte, wenden Sie sich bitte an den Hersteller der Kartensoftware. ......................................................................................................................................................................................... 16
www.Qstarz.com
Beyond Navigation DEUTSH ………………………………………………………………………………………………………………………………………………………………………………………. HINWEIS 2: Je nach Navigationssoftware können bestimmte Einstellungen erforderlich sein. Bei TomTom löschen Sie bitte sämtliche anderen GPS‐Einstellungen in der TomTom‐Software bis auf die aktuelle. H‐5 Bluetooth‐Funktionalität abschalten Schalten Sie zunächst die GPS‐Funktion Ihre PDAs, Smartphones oder PCs aus; die Bluetooth‐Verbindung wird automatisch getrennt. Schalten Sie anschließend den BT‐Q1300 aus. I. Automatisches Ein‐ und Ausschalten, Autolog ein/aus Ihr BT‐Q1300 unterstützt automatisches Ein‐ und Ausschalten (Energiesparmodus). Das Gerät kann automatisch in den Ruhezustand wechseln, wenn die Bluetooth‐Verbindung getrennt wird. In diesem Fall blinkt die blaue LED alle 5 Sekunden. In diesem Zustand verbraucht das Gerät nur sehr wenig Energie, kann den Betrieb aber jederzeit wieder aufnehmen. Sobald eine Bluetooth‐Verbindung erkannt wird, aktiviert sich der BT‐Q1300 im Energiesparmodus automatisch; die blaue LED blinkt einmal alle zwei Sekunden, und die orangefarbene GPS‐LED leuchtet auf. Autolog ein/aus: Wenn kein GPS‐Signal ausgewertet werden kann (kein Fix möglich), stoppt der BT‐Q1300 das Loggen automatisch. Dies wird nicht durch die LED angezeigt, da dieser Vorgang im Hintergrund ausgeführt wird. Sobald wieder GPS‐Signale ausgewertet werden können (Fix möglich), setzt der BT‐Q1300 das Loggen fort. Dadurch kann auf Reisen eine Menge Speicherplatz gespart werden. Hinweis: Der Energiesparmodus ist ohne Funktion, wenn sich das Gerät im Logmodus befindet oder mit dem PC verbunden ist ………………………………………………………………………………………………………………………………………………………………………………………. www.Qstarz .com
17
DEUTSH ………………………………………………………………………………………………………………………………………………………………………………………. J. SONSTIGES J‐1 LED‐Anzeigen LED‐Status Betrieb (rot/grün) Bluetooth (blau) GPS (orange/blau) Log (blau) Blinken Rot: Energiestand niedrigGrün: Komplett aufgeladen Einmal in 2 Sekunden: Bluetooth‐Verbindun
g besteht Einmal in 5 Sekunden: Energiesparmodus Einmal pro Sekunde (orange): GPS‐Position bestimmt, Navigation Reiseprotokollierung ist an Einmal in 2 Sekunden: Wenig Speicher 3 x Blinken (blau): OVI (Ort von Interesse) wurde aufgezeichnet Ein Aus Grün: Ladevorgang Nicht verbunden/Kop
peln Kein GPS‐Betrieb / Reiseprotokolli
erung ist an Satellitensuche, GPS‐Position nicht bestimmt Kein GPS‐Betrieb Speicher ist voll Reiseprotokolli
erung ist aus J‐2 GPS‐Merkmale 1. Baudrate: 115.200 bps / Datum: WGS‐84; Heiß‐/Warm‐/Kaltstart: 1/33/35 Sek. (durchschnittlich) 2. Bluetooth‐GPS‐Empfänger, 66 Kanäle, extrem hohe Empfindlichkeit: ‐165 dBm 3. Bluetooth‐Version: V1.2 / SPP‐Profil / Klasse 2, 15 Meter bei freier Sicht 4. Geringer Stromverbrauch, integrierter Lithium‐Akku 5. Abmessungen: 62(L) x 38 (B) x 7 (H) mm ......................................................................................................................................................................................... 18
www.Qstarz.com
Beyond Navigation DEUTSH ………………………………………………………………………………………………………………………………………………………………………………………. K. Problemlösung Frage Antwort Kann der BT‐Q1300 zur Navigation verwendet werden, wenn der Log‐Modus aktiviert ist? Ja, der BT‐Q1300 kann zur Navigation verwendet werden, wenn der Log‐Modus aktiviert ist. Ich habe das Reiseladegerät und den Akku verloren. Wo finde ich Ersatz für die beiden? Der BT‐Q1300 arbeitet mit einer Eingangsspannung von 4,5 bis 5,5 VDC. Sie können ein passendes Reiseladegerät verwenden, das eine Gleichstromspannung von 4,5 bis 5,5 V liefert. Darüber hinaus können Sie auch ein handelsübliches Mini‐USB‐Kabel verwenden, um das Gerät über z.B. ein Notebook aufzuladen. Woran erkenne ich, dass der Speicher voll ist? Können die aufgezeichneten Daten über Bluetooth heruntergeladen werden? Mein Q1300 kann keine Protokolldaten aufzeichnen. Wo liegt das Problem? Leuchtet die Log‐LED konstant, ist der Speicher voll. Die Daten des Q1300 können auch über Bluetooth heruntergeladen werden. Da diese Verbindung jedoch weniger stabil ist und die Datentransferrate deutlich unter der der USB‐Schnittstelle liegt, wird diese Verbindungsmethode nicht offiziell angegeben Prüfen Sie, ob der Speicher Ihres Q1300 voll ist oder ob der Status Ihrer PC Utility V3 Software unter „Data Log List" (Daten‐Protokollliste) als „Error!" (Fehler!) angezeigt wird. Beide Probleme können behoben werden, wenn Sie die einen Soft‐Reset der PC Utility Software V3 durchführen „Data Log List" (Daten‐Protokollliste) ‐> „Reset". ………………………………………………………………………………………………………………………………………………………………………………………. www.Qstarz .com
19
ESPAÑOL ………………………………………………………………………………………………………………………………………………………………………………………. BT‐Q1300 ‐ Guía de instalación rápida A. Paquete estándar Unidad GPS BT‐Q1300 (1) + Adaptador para encendedor (2) + Cable Mini‐USB (3) + CD con los controladores (4) + Tarjeta de garantía + Manual del usuario. NOTA 1: el adaptador para mechero tiene especificaciones especiales y sólo se puede utilizar para cargar el modelo BT‐Q1300. No haga uso del mismo con otros dispositivos que no sean del modelo BT‐Q1300. NOTA 2 : por favor, recargue la batería a intervalos regulares si no piensa utilizar el dispositivo durante un periodo largo de tiempo. 1. 2. 3. 4. B. Appearance 1. Botón de alimentación (ENCENDER/APAGAR/Habilitar modo REGISTRO/Deshabilitar modo REGISTRO/ Botón Punto de interés) 2. Conector de alimentación (tipo Mini‐USB) 3. LED de estado de la batería (verde/rojo) 4. LED de estado Bluetooth (azul) 5. LED de estado GPS (naranja) 6. LED de estado REGISTRO (azul) 7. Antena interna ......................................................................................................................................................................................... 20
www.Qstarz.com
Beyond Navigation ESPAÑOL ………………………………………………………………………………………………………………………………………………………………………………………. C. Función de hardware Función de hardware Conector de alimentación Botón de alimentación (encender) Botón de alimentación (apagar): Descripción Conecte el cable de alimentación al conector de alimentación (tipo Mini‐USB) sólo para cargar Mantenga presionado este botón durante 4 segundos para encender la unidad BT‐Q1300. Mantenga presionado este botón durante 4 segundos para apagar la unidad BT‐Q1300. Botón de alimentación (habilitar el modo Registro) Después de encender el dispositivo BT‐Q1300, mantenga pulsado el botón de encendido durante 2 segundos para activar el modo de registro. El dispositivo BT‐Q1300 comenzará a registrar la posición con el LED de estado LOG intermitente (azul). Botón de alimentación (deshabilitar el modo Registro) Mantenga pulsado de nuevo el botón de encendido durante 2 segundos para desactivar el modo de registro. El LED de estado LOG (azul) se apagará y el dispositivo dejará de registrar la posición. Botón de alimentación (Botón Punto de interés (PDI)) Presione el botón de encendido de nuevo para registrar sus puntos de interés favoritos ………………………………………………………………………………………………………………………………………………………………………………………. www.Qstarz .com
21
ESPAÑOL ………………………………………………………………………………………………………………………………………………………………………………………. D. Advertencia de seguridad z
z
z
z
z
El tiempo de carga es de aproximadamente 1 hora para este dispositivo. Le sugerimos que desconecte el dispositivo del cargador de mechero o el cargador AC después de cargarlo por completo.
Asegúrese de que utilizar el cargador de mechero incluido en la caja; de lo contrario, podría aplicarse un voltaje excesivo al equipo y provocar humo, incendios o accidentes.
Recuerde que la batería integrada no se puede cargar a temperaturas que se encuentren fuera del rango 0 ºC ~ 45 ºC.
El tiempo de carga podría ser mayor si utiliza el producto durante la carga
No caliente ni deje el equipo en entornos de alta temperatura o bajo la luz solar directa durante un periodo largo de tiempo. La capacidad de la batería integrada podría deteriorarse o quedar inutilizada. E. Cargar la batería Cargue completamente la batería cuando vaya a utilizar el dispositivo BT‐Q1300. Enchufe el cable de alimentación al conector de alimentación (tipo mini USB) y realice la recarga a través del cargador de viaje o del adaptador del encendedor de cigarrillos. De este modo la batería comenzará a cargarse. El tiempo de carga es de 1 horas. ‐ Si el color del LED de alimentación es rojo, la carga de la batería es baja. Recárguela. ‐ Si el color del LED de alimentación es verde, la batería se encuentra en el modo de carga. ‐ Si el LED de alimentación parpadea la batería se habrá cargado completamente. ......................................................................................................................................................................................... 22
www.Qstarz.com
Beyond Navigation ESPAÑOL ………………………………………………………………………………………………………………………………………………………………………………………. F. Configurar la unidad BT‐Q1300 F‐1 Instalar el controlador USB y utilidad de software (sólo compatible con Microsoft Windows XP y Vista) Inserte el CD con el controlador y busque la carpeta “Utility\PC Utility V4\”. Haga doble clic en el archivo “TravelRecorderV4_installer.exe.” Este paquete de software contiene un controlador USB y software de Utilidad V4 de PC en el interior. F‐2 Instalar Google Earth La unidad BT‐Q1300 puede mostrar la ruta del viaje directamente en Google Earth. Visite la dirección http://earth.google.com para obtener una descarga gratuita de Google Earth y, a continuación, instálelo en su PC. G. Empezar a usar la unidad G‐1 Cargue completamente la batería cuando la use por primera vez Una batería completamente cargada puede proporcionar una autonomía de hasta 12 horas de funcionamiento continuo (en condiciones óptimas). G‐2 Conecte la unidad BT‐Q1300 a su PC Conecte la unidad BT‐Q1300 a su PC mediante el cable Mini‐USB, conecte la alimentación y encienda dicha unidad para que inicie el registro. G‐3 Iniciar la utilidad de software NOTA 1: PC Utility V4 sólo admite BT‐Q1300. Cualquier intento de utilizar equipos GPS de conexión PC Utility V4 distintos del BT‐Q1300 provocaría la desconexión automática del software. NOTA 2: El Qstarz Travel Recorder PC Utility V4 no puede abrirse ………………………………………………………………………………………………………………………………………………………………………………………. www.Qstarz .com
23
ESPAÑOL ………………………………………………………………………………………………………………………………………………………………………………………. simultáneamente con el Qstarz Travel Recorder PC Utility V3. Por favor, ejecute sólo uno de ellos, ya que si no lo hace así el programa puede experimentar un estado inestable.: 1. Haga clic en <Start> (Inicio) / <All Programs> (Todos los programas) / <Qstarz Travel Recorder> (Grabadora portátil Qstarz) / Travel Recorder PC Utility V4 (Grabadora portátil ‐ Utilidad para PC V4) 2.<File> (Archivo) \ <Read Log> (Lectura de Registro) Descargar datos de registro desde TRAVEL RECORDER. 2.1 Haga clic en <File> (Archivo) \ <Read Log> (Lectura de Registro) o en el icono de enlace rápido. 2.2 Los usuarios deben introducir la clave del producto la primera vez que lo usen. La clave del producto está situada en la portada del CD del controlador. 2.3 La Utilidad de PC detecta automáticamente el puerto Com y la velocidad en baudios y cargar las pistas GPS. 2.4 Se abrirá una ventana de lista de pistas. Seleccione las pistas para importar y aparecerán las pistas en la Ventana de Mapas Google. 3. <File> (Archivo) \ <Clear Log> (Eliminar Registro) Elimina los datos almacenados en el Travel Recorder. 4. <File> (Archivo) \ <Config GPS> (Configurar GPS) Configura el método de grabación de la memoria flash del Travel Recorder. 4.1 Configuración de Conexión I. Módulo GPS de Escaneado Automático (Recomendado) El programa detectará automáticamente el puerto Com. Se recomienda configurarlo como escaneado automático. II. Configuración Manual Los usuarios también pueden configurar el puerto. Por favor, consulte el manual de usuario para una información más detallada. 4.2 Configuración de Registros GPS Hay 4 modos de registros: Modo general, modo vehículo, ......................................................................................................................................................................................... 24
www.Qstarz.com
Beyond Navigation ESPAÑOL ………………………………………………………………………………………………………………………………………………………………………………………. modo ciclismo y modo senderismo. Los usuarios también pueden cambiar las configuraciones por defecto de estos 4 modos. 4.3 Memoria de Registro de Datos Sobrescribir: Cuando la memoria esté llena, el Travel Recorderseguirá realizando registros sobrescribiendo la memoria desde el punto más temprano. Detener Registros: Cuando la memoria está llena, el Travel Recorder detendrá los registros. 5.<Photo/Media> (Foto/Medio)\ <Add Media Files> (Añadir Archivos de Medios) Los usuarios pueden añadir archivos de medios desde una carpeta de archivo o archivos seleccionados. 5.1 Añadir archivos de medios desde una carpeta: Seleccione una carpeta para añadir archivos de medios. Añadir archivos de medios desde archivos seleccionados: Use Control‐Clic, o Mayúsculas‐Clic para seleccionar múltiples archivos. 5.2 Después de añadir fotos, todas las fotos aparecerán en la ventana the <Photo View> (Visualizador de Fotos) y <Photo List> (Lista de Fotos). En la ventana <Photo View> (Visualizador de Fotos), los Usuarios pueden hacer clic en los botones “next photo” (foto siguiente) o en “prev photo”(foto anterior) para explorar las fotos, añadir comentarios a cada foto, rotar o eliminar las fotos. La Utilidad de PC emparejará por tiempo las fotos con los puntos de paso registrados en el GPS. 6. <Photo> ( Foto) \<Shift Photo Time> (Desplazar Tiempo de Foto) abrirá la ventana de desplazamiento de tiempo de foto. Todas las fotos serán añadidas (o eliminadas) al momento especificado. Las ………………………………………………………………………………………………………………………………………………………………………………………. www.Qstarz .com
25
ESPAÑOL ………………………………………………………………………………………………………………………………………………………………………………………. fechas se guardan en las partes Exif de un archivo Jpeg o Tiff. Tras el desplazamiento, la Utilidad de PC emparejará automáticamente de nuevo la foto con los puntos de paso. Los Usuarios pueden poner más de 365 días. 7.<Photo> (Foto)\ <Write GPS Info into Photos> (Escribir Información del GPS en las Fotos) guardará la latitud, longitud y la información de la altura en la foto. Una ventana de progreso mostrará el progreso de la escritura. 8. <File> (Archivo)\ <View in Google Earth> (Ver en Google Earth) abrirá Google Earth para ver las pistas y fotos. Por favor, instale previamente Google Earth para poder activar esta función. H. Navegar como un receptor GPS Bluetooth con un dispositivo de bolsillo H‐1 Activar la función Bluetooth en la unidad PDA, en el teléfono inteligente o en su PC Antes de activar la función Bluetooth en su PDA/PC, proporcione alimentación a la unidad BT‐Q1300 para asociarla y comprobar si el dispositivo cuenta con dicha función. Si no cuenta con es función, tendrá que adquirir la tarjeta Bluetooth CF/SD opcional o la base de conexión Bluetooth. (La contraseña es “0000”) H‐2 Crear automáticamente un acceso directo en la ventana del administrador Bluetooth Una vez realizada la asociación, el sistema buscará un dispositivo de conexión rápida “Qstarz GPS” en el administrador Bluetooth. Para utilizarlo, solamente tendrá que hacer clic en él para conectarse a este receptor GPS Bluetooth. H‐3 Check the Serial Port in Bluetooth Setting Una vez completada la asociación con el receptor, haga clic en “Puerto serie” para confirmar el puerto COM asignado. Si utiliza la unidad PDA o su PC para asociar el receptor GPS, active la opción ......................................................................................................................................................................................... 26
www.Qstarz.com
Beyond Navigation ESPAÑOL ………………………………………………………………………………………………………………………………………………………………………………………. “Puerto COM saliente”. H‐4 Establecer el puerto serie correcto en el software cartográfico Active el software de navegación y asegúrese de seleccionar el puerto serie correcto en “Serial Port” (Puerto serie). NOTA 1: en el software cartográfico (como TomTom) puede que tenga que cambiar las preferencias y establecer la opción “Otro GPS Bluetooth” conforme al modelo de teléfono o la unidad PDA. En cualquier caso, consulte a la compañía del software cartográfico para variar la configuración si tiene problemas con el posicionamiento. NOTA 2: puede haber requisitos de configuración específicos según el software de navegación. En el caso de Tomtom, elimine las configuraciones GPS en el software Tomtom y mantenga solamente una. H‐5 Desactivar la función Bluetooth Desactive la función GPS de la unidad PDA, el teléfono inteligente y su PC. Una vez hecho esto, la conexión Bluetooth se desconectará automáticamente. A continuación, apague la unidad BT‐Q1300. I. Función de apagado automático, Inicio/cierre automático El dispositivo BT‐Q1300 admite la función de apagado automático (modo de ahorro de energía). El dispositivo puede entrar automáticamente en el modo de suspensión cuando la conectividad Bluetooth se desactiva, lo que se indica por medio del LED de color azul que parpadea cada 5 segundos. De este modo, siempre puede encenderlo con un consumo mínimo de energía. En el modo de ahorro de energía, Cuando la detección Bluetooth se active, también lo hará el dispositivo BT‐Q1300 automáticamente y el LED de color azul comenzará a parpadear cada 2 segundos; el LED de color naranja también se encenderá. ………………………………………………………………………………………………………………………………………………………………………………………. www.Qstarz .com
27
ESPAÑOL ………………………………………………………………………………………………………………………………………………………………………………………. Inicio/cierre automático: En el modo de registro, el dispositivo BT‐Q1300 detendrá automáticamente el registro después de que se pierda la posición GPS. Sin embargo, el LED no indicará el estado dado que funciona en segundo plano. Una vez fijada de nuevo la posición GPS, el dispositivo BT‐Q1300 comenzará a registrar la posición. De este modo podrá ahorrar mucho espacio en memoria durante sus viajes. Nota: el modo de ahorro de energía no funcionará si se activa el modo de registro o se conecta el dispositivo a un PC.
J. OTROS J‐1 Indicadores LED Estado del LED Alimentación (rojo/verde) Bluetooth (azul) Parpadeo Carga baja (rojo)Carga total (verde) 2 veces por segundo: conexión Bluetooth y modo de transmisión 5 veces por segundo: modo de ahorro de energía ENCENDIDO
Recargando (verde) APAGADO GPS no alimentado / No conectado/ El registro Asociación de viaje está activado GPS (naranja/azul) 1 vez por segundo (naranja): posición GPS fijada, navegación Detectando el satélite, GPS no posición GPS no alimentado fijada Registro (azul) El registro de viaje está activado 2 veces por segundo: Memoria baja 3 veces (azul): el punto de interés (PDI) se graba La memoria está llena El registro de viaje está desactivado ......................................................................................................................................................................................... 28
www.Qstarz.com
Beyond Navigation ESPAÑOL ………………………………………………………………………………………………………………………………………………………………………………………. J‐2 GPS Features 1. Tasa de baudios: 115.200 bps / Datos: WGS‐84. Inicio en caliente, templado y caliente: 1, 33 y 35 s (promedio) 2. Receptor GPS Bluetooth de 66 canales con sensibilidad superalta a ‐165 dBm 3. Versión Bluetooth: V1.2. Perfil SPP. Clase 2 con un alcance de 15 metros en espacio abierto 4. Bajo consumo de energía, batería de litio recargable integrada 5. Tamaño: 62 (LA) x 38 (AN) x 7(AL) mm. Peso K. Solucionar problemas Pregunta ¿Se puede usar la unidad BT‐Q1300 para navegar cuando el registro de viaje está activado? Perdí el cargador de viaje y la batería. ¿Donde puedo encontrar accesorios de repuesto? Responder Sí, puede usar la unidad BT‐Q1300 para navegar y activar el registro de viaje simultáneamente. El intervalo de entrada de CC de la unidad BT‐Q1300 está comprendido entre 4,5 y 5,5 V. Puede usar el cargador portátil que admite el intervalo de salida de CC comprendido entre 4,5 y 5,5 V. También puede usar un cable Mini‐USB común para cargar la unidad a través del equipo portátil. ………………………………………………………………………………………………………………………………………………………………………………………. www.Qstarz .com
29
ESPAÑOL ………………………………………………………………………………………………………………………………………………………………………………………. ¿Cómo puedo saber si la memoria está llena? ¿Se pueden descargar los datos de registro mediante la tecnología Bluetooth? Mi Q1300 es incapaz de registrar más. ¿Cuál es el problema? Si ve que el LED de Registro está permanentemente encendido, quiere decir que la memoria está llena. En realidad, el Q1300 puede descargar datos a través de un interfaz Bluetooth. Sin embargo, debido a que no es estable y tiene menor rendimiento de descarga que un interfaz USB, no admitimos oficialmente esta función. Compruebe si la memoria de su Q1300 está llena o si el estado de la “Data Log List” (Lista de Registro de Datos) del software V3 de la Utilidad de PC aparece como “Error!” (¡Error!) o no. Ambos pueden resolverse realizando reinicio mediante el programa del software V3 de la Utilidad de PC “Data Log List” (Lista de Registro de Datos) ‐> “Reset” (Reinicio). ......................................................................................................................................................................................... 30
www.Qstarz.com
Beyond Navigation FRANÇAIS ………………………………………………………………………………………………………………………………………………………………………………………. Guide d’installation rapide du BT‐Q1300 A. Emballage standard Unité GPS BT‐Q1300 (1) + adaptateur pour allume‐cigare (2) + câble mini USB (3) + CD des pilotes (4) + carte de garantie + manuel de l’utilisateur. REMARQUE 1: L'adaptateur d'allume cigare auto répond à une spécification particulière et ne peut être utilisé que pour charger le BT‐Q1300. Veuillez ne pas l'utiliser avec d'autres appareils que le BT‐Q1300. REMARQUE 2: Veuillez recharger la batterie à intervalles réguliers si l'appareil n'est pas utilisé pendant une période prolongée. 1. 2. 3. 4. B. Appearance 1. Touche de mise en marche (ON/OFF/Activer le mode LOG/Désactiver le mode LOG/ Bouton POI) 2. Plot (type mini USB) 3. DEL d’état de la batterie (rouge/verte) 4. DEL d’état du Bluetooth (bleue) 5. DEL d’état du GPS (orange) 6. DEL d’état LOG (bleue) 7. Antenne interne ………………………………………………………………………………………………………………………………………………………………………………………. www.Qstarz .com
31
FRANÇAIS ………………………………………………………………………………………………………………………………………………………………………………………. C. Fonction du matériel Fonction du matériel Plot Touche de mise en marche (On) Touche de mise en marche (Off) Touche de mise en marche (activer le mode LOG) Touche de mise en marche (désactiver le mode LOG) Touche de mise en marche (Bouton POI) Description Prendre le câble d’alimentation et le connecter au plot (type mini USB) pour le chargement uniquement. Appuyer sur la touche de mise en marche et la maintenir 4 sec. pour mettre le BT‐Q1300 sous tension. Appuyer sur la touche de mise en marche et la maintenir 4 sec. pour mettre le BT‐Q1300 hors tension. Une fois le BT‐Q1300 en marche, appuyez sur le bouton d'alimentation et maintenez le enfoncé pendant 2 sec pour activer le mode journal. Le BT‐Q1300 commence alors à enregistrer le journal avec la LED d'état JOURNAL clignotante (bleue). Appuyez sur le bouton d'alimentation et maintenez le enfoncé pendant 2 sec de nouveau pour désactiver le mode journal. La LED d'état du JOURNAL (bleue) est éteinte, et l'enregistrement du journal cesse. Appuyez sur le bouton d'alimentation une fois pour forcer l'enregistrement dans le journal du point d'intérêt favori D. Avertissement relatif à la sécurité z
La durée de mise en charge est d'environ 1 heure typiquement pour cet appareil. Nous vous conseillons de débrancher l'appareil de l'allume‐cigare ou du chargeur CA ......................................................................................................................................................................................... 32
www.Qstarz.com
Beyond Navigation FRANÇAIS ………………………………………………………………………………………………………………………………………………………………………………………. z
z
z
z
une fois l'appareil complètement chargé. Assurez‐vous d'utiliser le chargeur pour allume‐cigare fourni, inclus dans l'emballage ; autrement, une tension excessive pourrait être appliquée à l'appareil et provoquer de la fumée, un feu ou un accident. Notez que la batterie intégrée ne peut pas être chargée hors d'une plage de température de 0℃ ~ 45℃. La durée de mise en charge peut être prolongée si vous utilisez le produit pendant la charge Ne chauffez pas et ne laissez pas l'appareil sous une température élevée ni sous la lumière directe du soleil pendant une période prolongée, car la capacité de la batterie intégrée se détériorerait, ou deviendrait non chargeable. E. Chargement de votre batterie Lors de la première utilisation du BT‐Q1300, veuillez charger la batterie complètement. Prenez le cordon d’alimentation et branchez‐le à la prise (type mini USB), puis rechargez la batterie au moyen du chargeur de voyage ou de l’allume‐cigare de la voiture. Cela déclenchera le chargement de la batterie. Le temps de chargement est généralement de 1 heures. ‐ Quand la DEL d’alimentation est rouge, la batterie est faible. Veuillez la recharger. ‐ Quand la DEL d’alimentation est verte, la batterie est en mode chargement. ‐ Quand la DEL d’alimentation clignote, la batterie est complètement chargée. ………………………………………………………………………………………………………………………………………………………………………………………. www.Qstarz .com
33
FRANÇAIS ………………………………………………………………………………………………………………………………………………………………………………………. F. Configuration du BT‐Q1300 F‐1 Installer le pilote USB et un l’utilitaire logiciel (ne prend en charge que Microsoft Windows XP/Vista) Insérez le CD des pilotes et recherchez le dossier “Utility\PC Utility V4\”. Cliquez deux fois sur “TravelRecorderV4_installer.exe” La boîte de ce logiciel contient un lecteur USB et un logiciel PC Utility V4. F‐2 Installer Google Earth Le BT‐Q1300 est capable d’afficher votre itinéraire de voyage directement sur Google Earth. Veuillez visiter le site http://earth.google.com pour obtenir le téléchargement gratuit de Google Earth, puis installez‐le sur votre ordinateur. G. Lancer l’utilisation G‐1 Recharger complètement la batterie lors de la première utilisation Une batterie complètement rechargée peut durer jusqu’à 12 heures sans interruption (dans des conditions optimales). G‐2 Connecter le BT‐Q1300 au PC Veuillez connecter le BT‐Q1300 à votre PC grâce au câble mini USB, puis mettez le BT‐Q1300 sous tension et allumez‐le pour lancer la consignation. G‐3 Lancer l’utilitaire logiciel REMARQUE 1: L'utilitaire PC V4 ne prend en charge que le BT‐Q1300. Toute tentative d'utiliser l'utilitaire PC V4 en branchant des appareils GPS autres que le BT‐Q1300 provoque une déconnexion logicielle automatiquement. REMARQUE 2: Qstarz Travel Recorder PC Utility V4 ne peut être ouvert en même temps que with Qstarz Travel Recorder PC Utility V3. Veuillez utiliser l’un ou l’autre programme, sinon vous pourriez être confronté à des problèmes. ......................................................................................................................................................................................... 34
www.Qstarz.com
Beyond Navigation FRANÇAIS ………………………………………………………………………………………………………………………………………………………………………………………. 1. Cliquez sur <Démarrer>/<Tous les programmes>/<Enregistreur de voyage Qstarz>/ Utilitaire pour PC V4 d’enregistreur de voyage 2. <File> (Fichier) \ <Read Log> (Lire session) Télecharger les informations d’ouverture de session depuis TRAVEL RECORDER. 2.1 Cliquez sur <File> (Fichier) \ <Read Log> (Lire session) ou sur l’icône de lien rapide. 2.2 L’utilisateur doit saisir le code du produit lors de la première utilisation. Le code du produit est situé sur le couvercle du CD pilote. 2.3 PC Utility détectera automatiquement le port de communication et le débit en baud et téléchargera les pistes GPS. 2.4 Une fenêtre de liste de pistes apparaîtra. Sélectionnez les pistes à importer et ces pistes s’afficheront dans la fenêtre Google Map. 3. <File> (Fichier) \ <Clear Log> (Effacer session) Effacez les données enregistrées dans Travel Recorder. 4. <File> (Fichier ) \ <Config GPS> (configurer le GPS) Configurez la méthode d’enregistrement de la mémoire flash de Travel Recorder. 4.1 Configuration de la connexion I. Module GPS de recherche automatique (recommandé) Le programme détectera automatiquement le port de communication. Il est recommandé de programmer la recherche automatique. II. Configuration manuelle L’utilisateur peut aussi configurer manuellement le port. Veuillez consulter le mode d’emploi pour plus de détails. 4.2 Configuration de l’ouverture de session GPS Il y a 4 modes d’ouverture de session : le mode Général, le mode véhicule, le mode cyclisme, et le mode Randonnée. ………………………………………………………………………………………………………………………………………………………………………………………. www.Qstarz .com
35
FRANÇAIS ………………………………………………………………………………………………………………………………………………………………………………………. L’utilisateur peut également changer les réglages par défaut de ces 4 modes. 4.3 Mémoire de données Ecraser : Quand la mémoire est pleine, Travel Recorder continuera à ouvrir des sessions en écrasant la mémoire des données précédentes. Arrêter la session : Quand la mémoire est pleine, Travel Recorder continuera à ouvrir des sessions en écrasant la mémoire des données précédentes. 5. <Photo/Media> (Photo/Média) \ <Add Media Files> (Ajouter des fichiers de média) L’utilisateur peut ajouter des fichiers de média depuis un dossier de fichier, ou des fichiers sélectionnés. 5.1 Ajouter des fichiers de média depuis un dossier : Sélectionnez un dossier pour ajouter des fichiers de média. Ajouter des fichiers de médias sélectionnés : Utilisez Ctrl‐Cliquez sur, ou Shift‐Cliquez sur pour sélectionner plusieurs fichiers. 5.2 Une fois que les photos auront été ajoutées, toutes les photos seront affichées dans les fenêtres <Photo View> (Visualisation des photos) et <Photo List> (Liste des photos). L’utilisateur peut, dans la fenêtre <Photo View> (Visualisation des photos), cliquer sur “next photo” (photo suivante) et sur “prev photo” (photo précédente) pour parcourir les photos, ajouter des commentaires à chaque photo, et faire tourner ou supprimer les photos. PC Utility fera automatiquement correspondre les photos et les points d’itinéraire GPS en fonction de la date et de l’heure. ......................................................................................................................................................................................... 36
www.Qstarz.com
Beyond Navigation FRANÇAIS ………………………………………………………………………………………………………………………………………………………………………………………. 6. <Photo> \ <Shift Photo Time> (Changer la date et l’heure des photos) Fera surgir la fenêtre de changement de la date et de l’heure de la photo. Le temps spécifié sera ajouté (ou retranché) à toutes les photos. Les dates sont sauvegardées dans la partie Exif du fichier Jpeg ou Tiff. Une fois le changement effectué, PC Utility refera automatiquement correspondre les photos et les points d’itinéraire. L’utilisateur peut saisir plus 365 jours. 7. <Photo> \ <Write GPS Info into Photos> (Inscrire les infos GPS dans les photos) Sauvegardera les informations de latitude, de longitude, et d’altitude dans la photo. Une fenêtre de progression indiquera la progression de l’écriture 8. <File> (Fichier) \ <View in Google Earth> (Visualiser dans Google Earth) Fera apparaître le visionnement des pistes et photos dans Google Earth. Veuillez installer Google Earth au préalable afin d’activer cette fonction. H. Naviguer comme récepteur GPS Bluetooth avec périphérique portable H‐1 Activer la fonction Bluetooth dans l’assistant numérique/téléphone intelligent ou PC Avant d’activer la fonction Bluetooth sur votre assistant numérique/PC, veuillez mettre le BT‐Q1300 sous tension pour l’appariement et vérifier si votre appareil est équipé de la fonction Bluetooth. Si ce n’est pas le cas, vous pourriez être amené à acheter une carte Bluetooth CF/SD ou une clé électronique Bluetooth en option. (Le mot de passe est “0000”). ………………………………………………………………………………………………………………………………………………………………………………………. www.Qstarz .com
37
FRANÇAIS ………………………………………………………………………………………………………………………………………………………………………………………. H‐2 Créer automatiquement un raccourci dans la fenêtre du Gestionnaire Bluetooth Une fois l’appariement terminé, le système cherchera ensuite un dispositif de connexion rapide “Qstarz GPS” dans le Gestionnaire Bluetooth. Pour l’utilisation future, il vous suffit de cliquer dessus pour le connecter à ce récepteur GPS Bluetooth. H‐3 Cocher le port série dans la configuration Bluetooth Après appariement complet avec le BT‐Q1300, veuillez cliquer sur “Port série” pour confirmer le port COM assigné. Si vous utilisez le PDA/PC pour apparier le récepteur GPS, veuillez cocher “Port COM de sortie”. H‐4 Définir le bon port série dans le logiciel de cartographie Activez votre logiciel de navigation et assurez‐vous de sélectionner le bon “port série”. REMARQUE 1: Dans le logiciel de mappage tel que TomTom, vous pourriez être amené à modifier la préférence et à définir « Autre GPS Bluetooth » conformément au modèle de PDA/téléphone. Dans ce cas, veuillez consulter le fabricant de logiciels de mappage pour varier la configuration si vous avez des problèmes de positionnement. REMARQUE 2: Il pourrait y avoir des exigences de configuration propres au logiciel de navigation. Dans le cas de TomTom, veuillez supprimer les autres paramètres GPS dans le logiciel TomTom et n’en garder qu’un. H‐5 Désactiver la fonction Bluetooth Désactiver la fonction GPS de votre PDA/téléphone intelligent/PC pour que la connexion Bluetooth soit automatiquement déconnectée. Mettez ensuite le BT‐Q1300 hors tension. ......................................................................................................................................................................................... 38
www.Qstarz.com
Beyond Navigation FRANÇAIS ………………………………………………………………………………………………………………………………………………………………………………………. I. Fonction marche/arrêt automatique, Connexion‐déconnexion auto Le BT‐Q1300 gère la fonction marche/arrêt automatique (mode économie d’énergie). Il peut passer automatiquement en mode veille une fois que la connectivité Bluetooth est désactivée, de sorte que la DEL bleue se mettra à clignoter toutes les 5 secondes. Ainsi, vous pouvez toujours le mettre en marche à une faible consommation d’énergie. En mode d’économie d’énergie,orsque le Bluetooth détecteur est connecté, le BT‐Q1300 se met automatiquement en veille, la DEL bleue se met à clignoter toutes les 2 secondes, et la DEL orange du GPS est aussi allumée. Connexion‐déconnexion auto: En mode Journal, le BT‐Q1300 arrête automatiquement d'enregistrer dans le journal une fois que le GPS n'a plus de fix. Cependant, la LED ne l'indique pas puis que cela fonctionne en fond. A partir du moment où le GPS récupère un fix, le BT‐Q1300 recommence à enregistrer dans le journal. Vous pouvez ainsi économiser beaucoup de mémoire pendant vos voyages. Remarque : Le mode d'économie d'énergie ne fonctionne pas lorsque le journal est activé ni pendant la connexion au PC. J. AUTRES J‐1 Voyants DE Etat de la DEL Alimentation (Rouge/Verte) Flash Alimentation faible (rouge) Chargement complet (verte) ALLUMEE ETEINTE Rechargement (Green) ………………………………………………………………………………………………………………………………………………………………………………………. www.Qstarz .com
39
FRANÇAIS ………………………………………………………………………………………………………………………………………………………………………………………. Bluetooth (Bleue) Clignotement toutes les 2 secondes: Bluetooth connecté et mode transmission Clignotement toutes les 5 secondes: mode économie d’énergie GPS non alimenté Non / La consignation connecté/appa
du voyage est riement activée. GPS (Orange/Bleue) Clignotement par seconde (orange): position GPS fixe, navigation Satellite de détection, position GPS non fixe LOG (bleue) La consignation du voyage est activée Clignotement toutes les 2 secondes : Mémoire faible Clignotement 3 fois (bleu): POI (point d’intérêt) enregistré La mémoire est pleine GPS non alimenté La consignation du voyage est désactivée. J‐2 Caractéristiques du GPS 1. Débit en bauds: 115,200 bits/seconde ; Donnée: WGS‐84; Démarrage chaud/tiède/froid: 1/33/35 sec. (en moyenne) 2. Récepteur GPS Bluetooth 51 canaux avec hypersensibilité à ‐165 dBm 3. Version Bluetooth: V1.2/Profil SPP/Classe 2 avec 15 mètres en espace ouvert 4. Faible consommation d’énergie, batterie au lithium rechargeable intégrée 5. Taille: 62 (L) X 38 (l) X 7 (h) mm ......................................................................................................................................................................................... 40
www.Qstarz.com
Beyond Navigation FRANÇAIS ………………………………………………………………………………………………………………………………………………………………………………………. K. Dépannage Question Le BT‐Q1300 peut‐il être utilisé pour naviguer quand le registre de voyage est activé? J’ai perdu mon chargeur de voyage et ma batterie. Où puis‐je en trouver pour les remplacer? Comment puis‐je savoir que ma mémoire est pleine?
Les données du registre peuvent‐elles être téléchargées par l’intermédiaire de Bluetooth? Mon Q1300 n’est plus capable d’ouvrir une session. Quel est le problème? Réponse Oui, vous pouvez utiliser le BT‐Q1300 pour naviguer lorsque le registre de voyage est activé simultanément. La plage d’alimentation CC du BT‐Q1300 est de 4,5~5,5 V. Vous pouvez utiliser un chargeur de voyage qui prend en charge la plage d’alimentation CC de 4,5~5,5 V. Vous pouvez également utiliser un câble mini USB courant pour charger votre appareil par l’intermédiaire de l’ordinateur portable. Si la DEL d’ouverture de session est allumée, cela signifie que la mémoire est pleine. En fait, le Q1300 peut aussi télécharger des données via l’interface Bluetooth. Cependant, étant donné que ce n’est pas stable et que les performances de téléchargement sont plus faibles qu’avec l’interface USB, nous n’admettons pas officiellement cette fonction. Vérifiez si la mémoire du Q1300 est pleine ou si l’état dans le logiciel PC utility V3 “Data Log List” (Liste de session de données) est marqué du mot “Error!” (Erreur!) ou non. Ces deux problèmes peuvent être résolus en effectuant une réinitialisation de la “Data Log List” (Liste de session de données) du logiciel PC Utility V3 en faisant ‐> “Reset.” ………………………………………………………………………………………………………………………………………………………………………………………. www.Qstarz .com
41
ITALIANO ………………………………………………………………………………………………………………………………………………………………………………………. Guida all'installazione rapida BT‐Q1300 A. Confezione standard Unità GPS BT‐Q1300 (1) + Adattatore per automobile (2) + Cavo USB mini (3) + CD Driver (4) + Scheda garanzia + Manuale d’uso. NOTA 1: L’adattatore da auto per accendisigari è specifico e può essere utilizzato solamente per caricare il BT‐Q1300. Non utilizarlo con dispositivi diversi da BT‐Q1300. NOTA 2: Se l’unità non viene utilizzata per molto tempo, ricaricare la batteria a intervalli regolari. 1. 2. 3. 4. B. Aspetto 1. Interruttore modalità (ON/OFF/Attiva modalità LOG /Disattiva modalità LOG/ Tasto POI) 2. Connettore alimentazione (tipo USB mini) 3. LED di stato batteria (rosso/verde) 4. LED di stato Bluetooth (blue) 5. LED di stato GPS (arancione) / Premere per registrare (blu) 6. LED log di stato LED (Blu) 7. Antenna interna alimentazione ausiliaria) ......................................................................................................................................................................................... 42
www.Qstarz.com
Beyond Navigation ITALIANO ………………………………………………………………………………………………………………………………………………………………………………………. C. Funzionamento dell’hardware Funzionamento dell’hardware Connettore alimentazione Interruttore modalità (On) Interruttore modalità (Off) Interruttore modalità (Attiva la modalità Log) Interruttore modalità (Disattiva la modalità Log) Interruttore modalità (Tasto POI) Descrizione Collegare il cavo d’alimentazione al connettore alimentazione (tipo USB mini) solo per caricare Tenere premuto l’interruttore modalità per 4 secondi per accendere il BT‐Q1300. Tenere premuto l’interruttore modalità per 4 secondi per spegnere il BT‐Q1300 Una volta acceso il BT‐Q1300, tenere premuto il pulsante alimentazione per 2 sec per attivare la modalità log. Il BT‐Q1300 avvia il log e il LED stato LOG lampeggia (blu). Premere nuovamente il pulsante alimentazione per 2 sec per disattivare la modalità log. Il LED stato LOG (blu) si spegne, e viene arrestato il log. Premere una volta il pulsante alimentazione per inserire il log nel punto di interesse preferito D. Considerazioni sulla sicurezza z
z
Il periodo di ricarica per questa unità è generalmente di circa 1 ora. Si consiglia di scollegare l’unità dal caricatore da auto o dal caricatore CA una volta che l’unità è completamente carica. Utilizzare solamente il caricatore da auto incluso nella confezione; in caso contrario potrebbe essere applicata all’unità una tensione eccessiva causando fumo, fuoco o incidenti. ………………………………………………………………………………………………………………………………………………………………………………………. www.Qstarz .com
43
ITALIANO ………………………………………………………………………………………………………………………………………………………………………………………. z
z
z
La batteria integrate non può essere caricata in temperature non comprese tra 0℃ e 45℃. Il periodo di carica potrebbe aumentare nel caso venga utilizzato il prodotto durante la carica. Non scaldare o lasciare l’unità esposta a temperature elevate o alla luce diretta del sole per molto tempo poiché la capacità della batteria interna potrebbe ridursi o la batterie potrebbe non essere più ricaricabile. E. Caricamento della batteria La prima volta che si usa il BT‐Q1300, caricare completamente la batteria. Collegare il cavo di alimentazione all’apposito jack (di tipo mini USB) ed effettuare la ricarica tramite un trasformatore da viaggio o un adattatore per accendisigari. La ricarica in genere richiede 1 ore. ‐ Quando il LED dell’alimentazione è rosso, la batteria è scarica. Ricaricare. ‐ Quando il LED dell’alimentazione è verde, la batteria è in carica. ‐ Quando il LED dell’alimentazione lampeggia, la batteria è completamente carica. F. Configurazione di BT‐Q1300 F‐1 Installare il driver USB e il l’utilità software (supporta solo Microsoft Windows XP / Vista) Inserire il CD Driver e trovare la cartella “Utility\PC Utility V4\”. Fare doppio clic su “TravelRecorderV4_installer.exe.” La confezione del software contiene al suo interno i driver USB e il software PC Utility V4. ......................................................................................................................................................................................... 44
www.Qstarz.com
Beyond Navigation ITALIANO ………………………………………………………………………………………………………………………………………………………………………………………. F‐2 Installare Google Earth BT‐Q1300 supporta la visualizzazione del percorso di viaggio direttamente su Google Erta. Andare al sito http://earth.google.com per scaricare gratuitamente Google Earth, e poi installarlo sul computer. G. Iniziare ad usare G‐1 Caricare completamente la batteria prima dell'uso iniziale Una batteria completamente carica può operare fino a 12 ore continuate (in condizioni ottimali). G‐2 Collegare BT‐Q1300 al PC Collegare il BT‐Q1300 al PC tramite un cavo mini USB, quindi accendere il BT‐Q1300 e impostarlo su avvio registrazione. G‐3 Avviare l’utilità software NOTA 1: L’Utility PC V4 supporta solamente il BT‐Q1300. Qualsiasi tentativo di utilizzare le unità di collegamento GPS Utility PC V4 con dispositivi diversi dal BT‐Q1300 potrebbe causare la disconnessione automatica del software. NOTA 2: Qstarz Travel Recorder PC Utility V4 non può essere aperto in contemporanea a Qstarz Travel Recorder PC Utility V3. Eseguirne solamente uno dei due o il programma potrebbe diventare instabile. 1. Fare clic su <Start> / <All Programs> (Tutti i programmi) / <Qstarz Travel Recorder> (Registratore da viaggio Qstarz)/ Utilità V4 PC Registratore da viaggio 2. <File> \ <Read Log> (Leggi log) Scaricare il log da TRAVEL RECORDER. 2.1 Fare clic su <File> \ <Read Log> o sull’icona di collegamento rapido. ………………………………………………………………………………………………………………………………………………………………………………………. www.Qstarz .com
45
ITALIANO ………………………………………………………………………………………………………………………………………………………………………………………. 2.2
La prima volta che viene utilizzato, l’utente deve inserire la chiave del prodotto. La chiave del prodotto si trova sulla custodia del CD. 2.3 PC Utility rileva automaticamente la porta com e il baud rate e carica i percorsi GPS. 2.4 Viene aperta la finestra con l’elenco dei percorsi. Selezionare il percorso da importare, il percorsi vengono visualizzati nella finestra di Google Map. 3. <File> \ <Clear Log> (Cancella log) Cancella i dati memorizzati in Travel Recorder. 4. <File> \ <Config GPS> Configura il metodo di registrazione della memoria flash di Travel Recorder. 4.1 Impostazione della connessione I. Ricerca automatica modulo GPS (Consigliato) Il programma rileva automaticamente la porta com. Si consiglia di impostare la ricerca automatica. II. Impostazione manuale L’utente può impostare manualmente la porta. Per le informazioni dettagliate fare riferimento al manuale utente. 4.2 Impostazione Log GPS Sono disponibili 4 modalità log: Modalità generale, modalità veicolo, modalità bicicletta, e modalità escursione. Inoltre l’utente può cambiare le impostazioni predefinita delle 4 modalità. 4.3 Memoria registro dati Sovrascrivi: Quando la memoria è piena, Travel Recorder esegue il log sovrascrivendo la memoria dal punto più recente. Interrompi log: Quando la memoria è piena, Travel Recorder ......................................................................................................................................................................................... 46
www.Qstarz.com
Beyond Navigation ITALIANO ………………………………………………………………………………………………………………………………………………………………………………………. interrompe il log. 5. <Photo/Media> (Foto/Multimedia) \ <Add Media Files> (Aggiungi file multimediale) L’utente può aggiungere file multimediali da una cartella, o file selezionati. 5.1 Aggiungere file multimediali da una cartella: Selezionare una cartella per aggiungere file multimediali. Aggiungere file multimediali da file selezionati: Usare Ctrl‐Clic, o Shift‐Clic per selezionare più file. 5.2 Dopo aver aggiunto una foto, tutte le foto verranno visualizzate nelle finestre <Photo View> (Visualizza foto) e <Photo List> (Elenco foto). Nella finestra <Photo View> (Visualizza foto), l’utente può fare clic sui pulsanti “next photo” (foto successiva) e “prev photo” (foto precedente) per sfogliare le foto, aggiungere commenti a ciascuna foto, e ruotare, eliminare le foto. PC Utility abbina automaticamente le foto con la rilevazione del GPS in base all’orario. 6. <Photo> \ <Shift Photo Time> (Cronologia foto) Visualizza la finestra cronologia foto. Tutte le foto vengono aggiunte (o sottratte) all’orario specificato. Le date vengono salvate nella parte Exif del file Jpeg o Tiff. A questo punto, PC Utility abbina nuovamente le foto con la rilevazione dei percorsi. Possono essere aggiunte più di 365 foto al giorno. 7. <Photo> \ <Write GPS Info into Photos> (Scrivi Info GPS nelle foto) Salva le informazioni di latitudine, longitudine, e altitudine nella foto. Il processo di scrittura viene mostrato in una finestra di esecuzione in corso. 8. <File> \ <View in Google Earth> (Visualizza in Google Earth) apre Google Earth per visualizzare i percorsi e le foto. Per attivare la funzione è necessario installare Google Earth. ………………………………………………………………………………………………………………………………………………………………………………………. www.Qstarz .com
47
ITALIANO ………………………………………………………………………………………………………………………………………………………………………………………. H. Navigazione come ricevitore GPS Bluetooth usando un dispositivo palmare H‐1 Attivare la funzione Bluetooth del PDA /Smartphone o PC Prima di attivare la funzione Bluetooth sul PDA/PC, accendere il BT‐Q1300 per associare e verificare se il dispositivo è dotato della funzione Bluetooth. In caso contrario, sarà necessario acquistare un scheda Bluetooth CF/SD o un donale Bluetooth. (Il codice è “0000”) H‐2 Creare automaticamente un collegamento nella finestra Bluetooth Manager (gestione Bluetooth) Al termine dell’accoppiamento, il sistema troverà un dispositivo d connessione rapida “Qstarz GPS” in Bluetooth Manager (gestione Bluetooth). In futuro, basterà fare clic per collegarsi a questo ricevitore GPS Bluetooth. H‐3 Verificare la porta seriale nelle impostazioni Bluetooth Una volta completata l’associazione con il ricevitore, fare clic su “Porta seriale” per confermare la porta COM assegnata. Se per l’associazione si usa un PDA/PC, selezionare “Porta COM in uscita”. H‐4 Impostare la porta seriale corretta sul software mappa Attivare il software di navigazione ed assicurarsi di selezionare la porta seriale “Serial Port” corretta. NOTA 1: Nei software di mappe come TomTom, potrebbe essere necessario cambiare la preferenza e impostare "Altro GPS Bluetooth" in base al modello di PDA/telefono. Se ci sono problemi di posizionamento, in alcuni casi può essere necessario consultare l'azienda produttrice del software delle mappe per cambiare l'impostazione. NOTA 2: Ogni software di navigazione potrebbe avere dei requisiti di impostazione specifici. Ad esempio nel caso del TomTom, bisogna eliminare le impostazioni GPS nel software e lasciarne solo una. ......................................................................................................................................................................................... 48
www.Qstarz.com
Beyond Navigation ITALIANO ………………………………………………………………………………………………………………………………………………………………………………………. H‐5 Disattivazione della funzione Bluetooth Disattivare la funzione Bluetooth su PDA/Smartphone/PC, dopodiché la connessione si interromperà automaticamente. Quindi spegnere il BT‐Q1300. I. Funzione di spegnimento automatico, Log automatico On‐Off BT‐Q1300 supporta lo spegnimento automatico (modalità di risparmio energetico). Il dispositivo può entrare in modalità di sospensione una volta disattivata la connessione Bluetooth, in questo caso il LED blu lampeggerà ogni 5 secondi. Sarà sempre possibile riaccenderlo mantenendo i consumi al minimo. In modalità di risparmio energetico, Quando rileva che il Bluetooth è connesso, BT‐Q1300 si attiva automaticamente e il LED blu inizia a lampeggiare ad intervalli di 2 secondi, mentre anche il LED arancione del GPS sarà acceso. Log automatico On‐Off: in modalità log, il BT‐Q1300 interromper automaticamente il log dopo che il GPS non viene fissato. Tuttavia, il LED non indica lo stato fino a quando funziona in secondo piano. Nel momento in cui il GPS viene fissato nuovamente, il BT‐Q1300 inizia il log. In questo modo è possibile risparmiare molta memoria durante il viaggio. Nota: La modalità di risparmio energetico potrebbe non funzionare quando il log è attivato o collegato al PC J. ALTRO J‐1 Indicatori LED Stato LED ALIMENTAZIONE (rosso/verde) Flash Scarico (rosso)Completamente carico (verde) ON In carica (verde) OFF ………………………………………………………………………………………………………………………………………………………………………………………. www.Qstarz .com
49
ITALIANO ………………………………………………………………………………………………………………………………………………………………………………………. Bluetooth (blu) Lampeggia ogni 2 sec.: Bluetooth collegato e in modalità di trasmissione Lampeggia ogni 5 sec.: modalità risparmio energetico Non collegato/ associazion
e GPS non alimentato / Registrazione del percorso del viaggio attiva GPS (arancione/blu) Lampeggia 1 volta ogni secondo (arancione): La posizione GPS è fissata, navigazione Rilevazione del satellite in corso, posizione GPS non fissata GPS non alimentato Log (Blue) Registrazione del percorso del viaggio attiva Lampeggia ogni 2 sec.: Memoria insufficiente Lampeggia 3 volte (blu): il POI (Points of Interest: punti d'interesse) è stato registrato Memoria piena Registrazione del percorso del viaggio disattiva J‐2 GPS Features 1. Velocità Baud: 115.200 bps / Dato: WGS‐84; Avvio Immediato / Caldo / Freddo: 1/33/35 secondi (media) 2. Ricevitore GPS Bluetooth 66 canali con sensibilità altissima di ‐165dBm 3. Versione Bluetooth: V1.2 / Profilo SPP / Classe 2 con 15 metri in spazio aperto 4. Basso consumo energetico, batteria ricaricabile integrata agli ioni di litio 5. Dimensioni: 62(L) X 38 (P) X 7 (H) mm ......................................................................................................................................................................................... 50
www.Qstarz.com
Beyond Navigation ITALIANO ………………………………………………………………………………………………………………………………………………………………………………………. K. Risoluzione dei problemi Domanda Il BT‐Q1300 può essere utilizzato per navigare quando la registrazione del viaggio è attiva? Ho smarrito il caricatore da auto e la batteria. Dove posso riacquistarli? Come faccio a sapere se la memoria è esaurita? I dati registrati possono essere scaricati tramite Bluetooth? Il mio Q1300 non è in grado di eseguire il log. Quale è il problema? Riposta S’, è possibile utilizzare il BT‐Q1300 per navigare anche quando la registrazione del viaggio è attiva. La portata di corrente CC n ingresso di BT‐Q1300 è 4.5~5.5V. Si può usare un caricatore che supporta la portata di corrente CC in uscita di 4.5~5.5V. Inoltre, si può anche usare un comune cavo USB mini per caricare l’unità usando PC portatile. Se la luce del LED Log è fissa, vuol dire che la memoria è piena. Ad oggi con Q1300 è possibile scaricare i dati tramite l’interfaccia Bluetooth. Tuttavia, poiché è una connessione non stabile e con basse prestazioni di download rispetto all’interfaccia USB, non viene ritenuta una funzione ammissibile. Controllare se la memoria del Q1300 è piena o se viene visualizzato “Error!” (Errore!) in “Data Log List” (Elenco Log) del software PC utility V3. Entrambi i problemi possono essere risolti eseguendo un reset software da “Data Log List” (Elenco Log) ‐>“Reset” (Ripristina) nel software PC Utility V3. ………………………………………………………………………………………………………………………………………………………………………………………. www.Qstarz .com
51
Polski ………………………………………………………………………………………………………………………………………………………………………………………. BT‐Q1300 Instrukcja obsługi A. Zawartość opakowania Odbiornik GPS BT‐Q1300 (1) + ładowarka samochodowa (2) + kabel mini USB (3) + CDROM ze sterownikami i oprogramowaniem (4) + Karta gwarancyjna + instrukcja obsługi. UWAGA 1: Ładowarka samochodowa jest przystosowana wyłącznie do ładowania odbiornika BT‐Q1300 Proszę jej nie używać z żadnymi innymi urządzeniami. UWAGA 2: Jeśli urzadzenie nie będzie długo używane należy w regularnych odstępach czasu ładować baterię. 1. 2. 3. 4. B. Wygląd 1. Przycisk główny (włączanie /wyłączanie trybów LOG i NAV/ Przycisk POI) 2. Gniazdo zasilające i przesyłania danych (typ mini USB) 3. Dioda LED stanu baterii (Czerwona/Zielona) 4. Dioda LED stanu Bluetooth (niebieska) 5. Dioda LED stanu GPS (Pomarańczowa) 6. Dioda LED zapisu trasy(niebieska) 7. Wbudowana antena ......................................................................................................................................................................................... 52
www.Qstarz.com
Beyond Navigation Polski ………………………………………………………………………………………………………………………………………………………………………………………. C. Opis funkcji sprzętowych Funkcja sprzętowa Gniazdo zasilające Przycisk główny (zasilanie włączone) Przycisk główny (zasilanie wyłączone) Przycisk główny (włączanie trybu Log) Przycisk główny (wyłączanie trybu LOG) Przycisk główny (Przycisk POI) Opis Dla ładowania podłącz kabel zasilający (typ mini USB ) Naciśnij przycisk I przytrzymaj 4 sekundy aby włączyć odbiornik BT‐Q1300. Naciśnij i przytrzymaj przycisk przez 4 sekundy, aby wyłączyć odbiornik BT‐Q1300. Po włączeniu zasilania BT‐Q1300, naciśnij przycisk zasilania i przytrzymaj przez 2 sek. w celu włączenia trybu zapisu. Następnie rozpocznie się zapisywanie BT‐Q1300 i miganie wskaźnika LED stanu LOG (Zapis) (niebieski). Ponownie naciśnij przycisk zasilania i przytrzymaj przez 2 sek. w celu wyłączenia trybu zapisywania. Wskaźnik LED stanu LOG (Zapis)(niebieski) zostanie wyłączony i zapisywanie zostanie zatrzymane. Naciśnij raz przycisk zasilania, aby zapisać ulubione punkty zainteresowania D. Uwaga dotycząca bezpieczeństwa z
Typowy czas ładowania dla tego urządzenia wynosi około 1 godziny. Po pełnym naładowaniu urządzenia zalecamy odłączenie go od ładowarki zasilanej z gniazda zapalniczki samochodowej lub ładowarki zasilanej prądem zmiennym. ………………………………………………………………………………………………………………………………………………………………………………………. www.Qstarz .com
53
Polski ………………………………………………………………………………………………………………………………………………………………………………………. z
z
z
z
Należy używać ładowarkę zasilaną z gniazda zapalniczki samochodowej dostarczoną w opakowaniu z urządzeniem; w przeciwnym razie urządzenie może zostać narażone na oddziaływanie zbyt wysokiego napięcia, co może spowodować dym, ogień lub wypadek. Należy pamiętać, że wbudowana bateria może być ładowana w zakresie temperatur 0℃ ~ 45℃. Czas ładowania może zostać wydłużony, jeśli urządzenie będzie używane w trakcie ładowania Nie należy ogrzewać lub pozostawiać urządzenia w wysokiej temperaturze lub w bezpośrednim świetle słonecznym w wydłużonym okresie czasu, ponieważ ulegnie zmniejszeniu pojemność wbudowanej baterii lub bateria utraci możliwość ponownego ładowania. E. Ładowanie baterii Przed pierwszym użyciem BT‐Q1300, należy całkowicie naładować baterię. W celu ładowania należy podłączyć kabel zasilający z jednej strony do wejścia w odbiorniku (typ mini USB) z drugiej zaś albo do ładowarki sieciowej albo do ładowarki samochodowej. Proces ładowania trwa zwykle ok. 1 godzin. Zaleca się jednak by pierwsze ładowanie trwało ok.8 godz. ‐ gdy dioda LED stanu baterii świeci się w kolorze czerwonym, oznacza to, iż bateria rozładowuje się. ‐ gdy dioda LED stanu baterii świeci się na zielono, oznacza to, iż bateria jest ładowana. ‐ gdy dioda LED stanu baterii miga, oznacza to, iż bateria jest naładowana. ......................................................................................................................................................................................... 54
www.Qstarz.com
Beyond Navigation Polski ………………………………………………………………………………………………………………………………………………………………………………………. F. Instalowanie odbiornika BT‐Q1300 w komputerze PC F‐1 Instalacja sterowników USB (działa tylko dla systemu Windows XP / Vista) Włóż płytę CDROM ze sterownikami i wyszukaj folder “Utility\PC Utility V4\”. Kliknij dwukrotnie “TravelRecorderV4_installer.exe.” Niniejszy zestaw zawiera sterowniki USB oraz oprogramowanie Qstarz Travel Recorder Utility V4. F‐2 Instalacja Google Earth BT‐Q1300 pokazuje trasę podróży bezpośrednio na Google Earth. Proszę wejść na stronę http://earth.google.com, aby pobrać darmowe oprogramowanie Google Earth, następnie zainstalować na swoim komputerze. G. Rozpoczęcie użytkowania G‐1 Przed pierwszym użyciem naładuj całkowicie baterię. W pełni naładowana bateria pozwala na korzystanie z odbiornika nieprzerwanie aż do 12 godzin (w optymalnych warunkach). G‐2 Podłączanie BT‐Q1300 do komputera PC Proszę podłączyć BT‐Q1300 do komputera PC za pomocą kabla mini USB, a następnie włączyć BT‐Q1300 i ustawić w tryb LOG (zapis trasy). G‐3 Korzystanie z oprogramowania Qstarz Travel Recorder V4 UWAGA 1: PC Utility V3 obsługuje tylko odbiornik BT‐Q1300. Jakakolwiek próba użycia PC Utility V3 do podłączenia urządzenia GPS innego niż odbiornik BT‐Q1300 spowoduje automatyczne rozłączenie oprogramowania. UWAGA 2: Qstarz Travel Recorder PC V4 nie może być otwarty jednocześnie programem Qstarz Travel Recorder PC V3.W danej chwili Proszę używać tylko jednego z tych dwóch ………………………………………………………………………………………………………………………………………………………………………………………. www.Qstarz .com
55
Polski ………………………………………………………………………………………………………………………………………………………………………………………. programów w przeciwnym razie programy mogą pracować niestabilnie. 1. Naciśnij <Start> / <Wszystkie programy> / <Qstarz Travel Recorder V4> / uruchom Travel Recorder PC Utility V4 2. <File> \ <Read Log> Pobierz z odbiornika BT‐Q1300 zapisaną trasę. 2.1 Naciśnij <File> \ <Read Log> lub ikonę szybkiego połączenia. 2.2 Przy pierwszym uruchomieniu programu należy wpisać klucz produktu. Klucz produktu jest umieszczony na okładce płyty CD z oprogramowaniem 2.3 Oprogramowanie automatycznie wyszuka port COM, ustali prędkość transmisji danych oraz określi listę zapisanych tras GPS. 2.4 Zostanie wyświetlone okno zawierające listę tras. Wybierz trasę/y do pobrania, które zostaną wyświetlone w oknie programu Google Map. 3. <File> \ <Clear Log> Usuń przechowywane dane, wyczyść pamięć odbiornika 4. <File> \ <Config GPS> Skonfiguruj parametry zapisu danych do pamięci odbiornika. 4.1 Ustawienia połączeń I. Auto Scan GPS Module (zalecana) Program automatycznie wykryje port COM. Zaleca się używanie tej opcji. II. Manual Setting Użytkownik może również ustawić port COM ręcznie ( szczegóły w instrukcji obsługi) 4.2 GPS Log Setting Istnieją 4 predefiniowane tryby zapisu trasy: tryb ogólny (General mode),tryb samochodowy (vehicle mode), tryb rowerowy (cycling mode), oraz tryb pieszych wycieczek (hiking mode). Użytkownik może zmieniać ustawienia domyśle dla tych 4 trybów. ......................................................................................................................................................................................... 56
www.Qstarz.com
Beyond Navigation Polski ………………………………………………………………………………………………………………………………………………………………………………………. 4.3 Data Log Memory Overwrite: W chwili zapełnienia się pamięci, odbiornik będzie nadal zapisywał trasę poprzez kasowanie z pamięci najwcześniejszych punktów. Zaprzestanie zapisu: W chwili zapełnienia się pamięci, odbiornik zaprzestanie zapisywania. 5. <Photo/Media> \ <Add Media Files> Użytkownik może dodawać do trasy pliki medialne z folderu lub wybrane inne pliki. 5.1 Dodawanie plików medialnych z folderu: Wybierz folder aby pobrać z niego pliki medialne. Dodawanie wybranych plików spośród plików medialnych: Użyj klawisza Ctrl lub klawisza Shift, aby wskazać wybrane pliki. 5.2 Po dodaniu plików zdjęć, wszystkie zdjęcia będą pokazane w oknie <Photo View> oraz <Photo List>. W oknie <Photo View>, użytkownik może przyciskiem “next photo” oraz “prev photo” przeglądać zdjęcia, obracać zdjęcia, dodawać komentarze do wybranych zdjęć oraz usuwać zdjęcia. Oprogramowanie Qstarz Travel Utlility, poprzez dopasowanie czasowe, automatycznie zsynchronizuje zdjęcia z zapisanymi punktami trasy. 6. <Photo> \ <Shift Photo Time> Przywołane zostanie okno czasowego przesunięcia dla zdjęć. Wszystkie wybrane zdjęcia zostaną dodane do określonego czasu. Dane czasowe przechowywane są w częściach Exif plików JPEG lub TIFF. Po przesunięciu, Qstarz Travel Utlility ponownie automatycznie dopasuje zdjęcie do punktów trasy. 7. <Photo> \ <Write GPS Info into Photos> Do zdjęć zapisane zostaną dane GPS: długość i szerokość geograficzna, oraz wysokość nad poziomem morza.Okno postępu ukazywać będzie postęp zapisu. ………………………………………………………………………………………………………………………………………………………………………………………. www.Qstarz .com
57
Polski ………………………………………………………………………………………………………………………………………………………………………………………. 8. <File> \ <View in Google Earth> Uruchomi okno programu Google Earth, aby przeglądać trasę z naniesionymi zdjęciami. Chcąc korzystać z tej funkcji należy najpierw zainstalować oprogramowanie Google Earth H. Korzystanie z funkcji odbiornika bluetooth GPS dla urządzeń przenośnych H‐1 Uruchom komunikację Bluetooth w PDA/telefonie lub komputerze PC W celu sparowania proszę włączyć odbiornik BT‐Q1300, upewniając się wcześniej czy PDA/telefon lub PC jest wyposażony w komunikację Bluetooth. Jeśli nie, to zaopatrzyć się w stosowny moduł Bluetooth. W zależności od urządzenia albo z interfejsem CF/SD dla PDA albo klucz USB dla PC. (Kod dostępu (hasło) do odbiornika to “0000”). H‐2 Automatycznie utworzony skrót w oknie Menadżera Bluetooth Po dokonaniu parowania, system w Menadżerze Bluetooth znajdzie odbiornik jako “Qstarz GPS”. W celu użycia odbiornika (połączenia z nim) wystarczy kliknąć jego ikonę w Menadżerze. H‐3 Sprawdź numer portu seryjnego w ustawieniach Bluetooth Po sparowaniu, proszę kliknąć “Serial Port” by potwierdzić przyznanie portu COM. Jeśli do parowania z odbiornikiem używany jest PDA/PC to proszę sprawdzić numer wychodzącego portu COM (“Outbound COM port”). H‐4 Ustawienie właściwego portu seryjnego COM w oprogramowaniu nawigacyjnym Należy uruchomić oprogramowanie nawigacyjne oraz sprawdzić w ustawieniach czy wybrany jest właściwy numer portu seryjnego COM “Serial Port”. UWAGA 1:W oprogramowaniu nawigacyjnym takim jak TomTom, zajdzie prawdopodobnie potrzeba zmiany ustawień ......................................................................................................................................................................................... 58
www.Qstarz.com
Beyond Navigation Polski ………………………………………………………………………………………………………………………………………………………………………………………. domyślnych z odbiornika TomTom na inny odbiornik GPS zgodnie z modelem PDA/ telefonu. W niektórych przypadkach konieczny może okazać się kontakt z producentem oprogramowania celem konfiguracji z odbiornikiem. UWAGA 2: W oprogramowaniu nawigacyjnym mogą wystąpić specjalne wymagania co do ustawień odbiornika (np. TomTom dla PDA). H‐5 Wyłącznie funkcji Bluetooth Wyłącz oprogramowanie GPS w PDA/telefonie/PC, wówczas połączenie Bluetooth zostanie rozłączone automatycznie. Następnie wyłącz odbiornik BT‐Q1300. I. Funkcja Auto On‐Off, Automatyczne wyłączenie zapisywania BT‐Q1300 posiada funkcję Auto On‐Off (tryb oszczędzania energii). Odbiornik po 5 sekundach od zerwania łączności bluetooth automatycznie przechodzi w stan czuwania. W trybie czuwania niebieska dioda Bluetooth miga co pięć sekund. Dzięki tej funkcji odbiornik nie rozładowuje się niepotrzebnie. W momencie wykrycia łączności Bluetooth, BT‐1300 włączy się automatycznie i rozpocznie poszukiwanie satelitów GPS. Wówczas niebieska dioda Bluetooth zacznie migać na pomarańczowo w odstępie 2 sekund. Automatyczne wyłączenie zapisywania: W trybie Log (Zapis), BT‐Q1300 automatycznie zatrzymuje zapisywanie, jeśli nie jest nawiązana łączność GPS. Jednakże, wskaźnik LED nie pokazuje tego, ponieważ działa w tle. Po ponownym nawiązaniu łączności GPS, BT‐Q1300 rozpocznie zapis. Umożliwia to oszczędzanie dużej ilości pamięci podczas podróży Uwaga: Tryb oszczędzania energii nie będzie działał po włączeniu trybu zapisu lub połączeniu z komputerem PC. ………………………………………………………………………………………………………………………………………………………………………………………. www.Qstarz .com
59
Polski ………………………………………………………………………………………………………………………………………………………………………………………. J. INNE J‐1 Wskaźniki diodowe LED Dioda LED Zasilanie (Czerwona/ Zielona) Bluetooth (Niebieska) Miga Niski poziom ładowania(Czerwony) 100% naładowany (Zielony) Miga co 2 sek.: połączenie Bluetooth Miga co 5 sek.: tryb oszczędzania energii Włączona Wyłączona W trakcie ładowania (Zielony) Nie podłączony / parowanie Odbiornik wyłączony / Zapis trasy jest włączony GPS (Pomara ńczowa, Niebieska) Miga co 1 sek. (Pomarańczowa): pozycja GPS jest ustalona, nawigacja Szukanie satelitów, nieustalona pozycja GPS Odbiornik wyłączony Log (Niebieski) Zapis trasy jest włączony co 2 sek.: Mała ilość pamięci Mignie 3 razy (nieb.): Punkt użytkownika (Point of Interest) został zapisany
Pamięć pełna Zapis trasy jest wyłączony J‐2 Cechy GPS 1. Prędkość transmisji: 115,200 bps / Datowanie: WGS‐84; Gorący/Ciepły/Zimny Start: 1/33/35 sek. (przeciętnie) 2. 66‐kanałowy odbiornik Bluetooth GPS o ultra wysokiej czułości‐165dBm 3. Wersja Bluetooth: V1.2 / profil SPP / Klasa 2/ zasięg do 15 metrów 4. Niskie zużycie energii, wbudowana bateria litowo‐jonowa 5. Wymiary: 62 (dł.) X 38 (szer.) X 7 (wys.) mm ......................................................................................................................................................................................... 60
www.Qstarz.com
Beyond Navigation Polski ………………………………………………………………………………………………………………………………………………………………………………………. K. Rozwiązywanie problemów Pytanie Czy BT‐Q1300 może być używany do nawigacji gdy funkcja zapisu/ logowania jest włączona? Zgubiłem ładowarkę sieciową i baterię, gdzie mogę znaleźć zamienniki? Jak będę wiedzieć, że pamięć jest pełna? Czy zapisane dane mogą być przesyłane do komputera poprzez Bluetooth? Mój Q1300 nie chce zapisywać trasy. Co jest nie tak? Odpowiedź Tak, można używać BT‐Q1300 do nawigacji równocześnie wraz z funkcją zapisu/ logowania. Zakres prądu DC ładowania dla BT‐Q1300 wynosi 4.5~5.5V. Można użyć ładowarki sieciowej, z zakresem prądu DC na wyjściu 4.5~5.5V. Można użyć ładowarki z zakresem prądu DC wyjścia 4.5~5.5V. Można też użyć załączonego kabla mini USB do ładowania z komputera PC. Jeżeli zauważysz, że dioda LED zapisu trasy jest stale zapalona, oznacza to, że pamięć jest pełna. Obecnie dla Q1300 możliwe jest przesyłanie zapisanych tras poprzez Bluetooth. Jednak, ze względu na niestabilność oraz niższą prędkość od interfejsu USB, oficjalnie nie wspominamy o tej możliwości. Sprawdź czy pamięć Twojego Q1300 nie jest pełna lub czy status w oprogramowaniu PC utility V3 software “Data Log List” nie wskazuje “Error!” (Błąd). Oba problemy mogą zostać usunięte poprzez wykonanie miękkiego resetu przy użyciu oprogramowania PC Utility software V3: “Data Log List” ‐> “Reset.” ………………………………………………………………………………………………………………………………………………………………………………………. www.Qstarz .com
61
繁體中文
………………………………………………………………………………………………………………………………………………………………………………………. BT-Q1300 簡易使用指南
A. 盒裝標準配備 GPS 本體 BT-Q1300 (1) + 車用點煙器式充電器 (2) + mini USB 連接線
(3) + 驅動程式光碟 (4) + 保固說明卡 + 使用者手冊.
注意: 車用點煙器式充電器為BT-Q1300量身訂做的特別規格,所以請勿將
其用來與其它設備搭配使用。
注意: 如果您將有很長一段時間不使用,請每隔一段時間充電一次以延長電
池使用壽命
1. 2. 3. 4. B. 外觀 1. 電源鍵 ( 開 / 關 / 開始旅遊行程記錄 / 停止旅遊行程記錄 / 景點座標記錄)
2. 電源插座 (mini USB)
3. 電源狀態指示燈 (紅/綠)
4. 藍牙連線狀態指示燈 (藍)
5. GPS連線狀態指示燈 (橙)
6. 旅遊行程記錄狀態指示燈 (藍)
7. 內建天線
......................................................................................................................................................................................... 62
www.Qstarz.com
Beyond Navigation 繁體中文 ………………………………………………………………………………………………………………………………………………………………………………………. C. 硬體功能 硬體功能
說明
電源插座
將電源線連接電源插座 (mini USB) 並進行充電
電源鍵 (開啟)
按下電源鍵並壓住超過四秒以啟動 BT-Q1300
電源鍵 (關閉)
按下電源鍵並壓住超過四秒以關閉 BT-Q1300
電源鍵
(開始旅遊行程記錄)
電源鍵
(停止旅遊行程記錄)
開啟BT-Q1300後,按下電源鍵並壓住超過二秒便可
開啟旅遊行程記錄功能,旅遊行程記錄燈(藍)會閃
爍代表BT-Q1300已開始記錄行程
再次按下電源鍵並壓住超過二秒便可停止旅遊行程
記錄功能,旅遊行程記錄燈會停止閃爍代表
BT-Q1300已停止記錄行程
電源鍵
輕壓電源鍵一下便可以對你喜歡的旅遊景點來記錄
(景點座標記錄)
其地理座標位置
D. 安全注意事項 z
正常的充電時間為一個小時,建議完成充電後便移除充電器
z
請使用內附的車用充電器充電,使用其他不合規格的充電器可能會造成
機器的損壞
z
內建電池所適用的充電溫度範圍為 0℃ ~ 45℃.
z
如果您同時使用產品跟充電,充電時間將會延長
z 請勿將機器置於高溫環境或是於太陽直射底下太久的時間,這將會折損
電池的壽命 ………………………………………………………………………………………………………………………………………………………………………………………. www.Qstarz .com
63
繁體中文
………………………………………………………………………………………………………………………………………………………………………………………. E. 為您的電池進行充電 如果您是第一次使用 BT-Q1300,請將電池完
全充電。將電源線連接電源插座並藉由mini
USB線、旅行充電器或車用充電器進行充電。
充電時間約為1小時
- 當電源指示燈為紅色閃爍,電池將耗盡電
源,請進行充電
- 當電源指示燈為綠色恆亮,電池正在進行充電
- 當電源指示燈為綠色閃爍,電池電源已充電完畢.
F. 設定 BT‐Q1300 F-1
安裝USB驅動程式和軟體工具程式 (支援 Microsoft Windows XP /
Vista)
請插入驅動程式光碟,至光碟目錄底下尋找 “Utility\PC Utility V4\”,點
擊 “TravelRecorderV4_installer.exe” 並進行軟體工具程式安裝,此安裝
包含USB驅動程式以及軟體工具程式
F-2
安裝 Google地球
BT-Q1300 可以讓您在 Google地球 上顯示您的旅行軌跡紀錄,請至
http://earth.google.com 免費下載 Google地球 軟體並安裝在您的電腦
上
G. 開始使用 G-1
第一次使用前請將電池完全的充電
完全充電的電池可以讓 BT-Q1300 持續使用達12小時(在最佳的情況下)
......................................................................................................................................................................................... 64
www.Qstarz.com
Beyond Navigation 繁體中文 ………………………………………………………………………………………………………………………………………………………………………………………. G-2
將 BT-Q1300 與電腦連接
請使用 mini USB 連接線將 BT-Q1300 與您的電腦連接,然後開啟電源
G-3
開始使用軟體工具程式
注1: PC Utility V4是為BT-Q1300所設計的專屬軟體,用其它GPS裝置與PC
Utility V4連接將導致軟體自動斷線
注2: Qstarz Travel Recorder PC Utility V4版軟體無法與V3版軟體同時開
啟使用,請勿同時執行兩個軟體否則會造成軟體不穩定的情況發生
1. 請從 <開始> / <所有程式> / <Qstarz Travel Recorder V4> / Travel
Recorder PC Utility V4 執行軟體工具程式
2. <檔案> \ <讀取軌跡記錄>
讀取旅遊記錄器中的軌跡記錄資料
2.1
2.2
請按 <檔案> \ <讀取軌跡記錄> 或快速啟動圖示
第一次使用必須輸入產品金鑰才能啟用本軟體,
產品金鑰位於驅動程式光碟的封套上
2.3
軟體將會自動偵測正確的 com port 和 baud rate 並下載軌跡
資料
2.4
選擇軌跡的視窗將會自動跳出,請選擇想要顯示在 Google Map
上面的軌跡
3. <檔案> \ <清除軌跡記錄>
清除旅遊記錄器中的軌跡記錄
4. <檔案> \ <設定GPS記錄器>
設定旅遊記錄器記憶體記錄的方式
4.1 連接設定
I. 自動掃描GPS記錄器 (建議)
程式將會自動偵測正確的 Com Port
II. 手動設定
………………………………………………………………………………………………………………………………………………………………………………………. www.Qstarz .com
65
繁體中文
………………………………………………………………………………………………………………………………………………………………………………………. 您可以手動設定連接的 Com Port,關於旅遊記錄器所使用的
Com Port 設定,請參照使用者手冊
4.2 GPS記錄器設定
有四種預設記錄的方式: 一般、汽車、自行車、步行。您也可
以自由改變四種預設的記錄方式。
4.3 記錄器儲存空間
覆寫:
當記錄器資料已滿時,旅遊記錄器將會以從頭開始覆寫
記憶體的方式繼續記錄
停止記錄:
當記錄器資料已滿時,旅遊記錄器將會停止記錄
5. <照片> \ <新增照片 / 多媒體檔案>
您可以新增照片/多媒體檔案或是整個資料夾中的照片/多媒體檔案
5.1 從資料夾新增照片/多媒體檔案: 選擇一個資料夾來新增照片/多媒體
檔案
新增照片/多媒體檔案: 使用Ctrl鍵或Shift鍵來多重選擇檔案
5.2 當新增照片之後,所有的照片將會被新增到 <照片輯> 跟 <照片列
表> 中。在<照片輯>視窗,您可以點選”下一張照片”和”上一張
照片”來瀏覽照片,或是為每一張照片編輯註解,甚至旋轉、刪除照
片。程式將會依照時間自動找到相對應的座標並顯示在 Google Map
上
6. <照片> \ <更改照片 / 多媒體檔案時間>
將會跳出更改照片時間的視窗,依照您所設定的數值,所有的照片/多媒體檔
案將會被增加或刪減時間,程式將會依照所改變過的時間設定再同步一次照
片跟路徑資料
7. <照片> \ <寫入GPS資料進照片>
將會把路徑資料包含經緯度、高度寫入照片的EXIF標籤中
......................................................................................................................................................................................... 66
www.Qstarz.com
Beyond Navigation 繁體中文 ………………………………………………………………………………………………………………………………………………………………………………………. 8. <檔案> \ <在Google地球中瀏覽>
將會自動開啟 Google地球 來瀏覽您的路徑和照片,再使用此功能前,請務
必先安裝 Google地球 軟體以避免錯誤發生
H. 使用行動裝置藉由藍牙連線進行導航 H-1
啟動您 PDA/Smart Phone 或 PC 的藍牙連線功能
在啟動您 PDA/PC 的藍牙連線功能前,請先開啟 BT-Q1300 進行配對並檢
查您的裝備是否具備藍牙功能,如果不具備藍牙功能,您可能需要選購
CF/SD Bluetooth card 或 Bluetooth dongle (配對碼為 “0000”)
H-2
自動地在藍牙管理視窗中為藍牙連線建立捷徑
配對完成之後,系統將會在藍牙管理中找到一快速連接設備“Qstarz
GPS”,為了更進一步的使用,請點選與之建立連線
H-3
檢查藍牙設定中的 Serial Port
配對完成之後,請按 “Serial Port” 確認所指定的連接埠 (COM port),
如果您使用 PDA/Phone 進行配對GPS 接收器,請檢查“Outbound
COM port”
H-4
在您的導航軟體中設定正確的 Serial Port
啟動您的導航軟體並確定選擇正確的 “Serial Port”
注 1:導航軟體如 TomTom,您可能需要改變 GPS 偏好,請根據不同型號
的 PDA/Phone 設定 “Other Bluetooth GPS”,在某些無法定位
的特殊情況下您可能需要請教您的導航軟體公司關於設定方面的問題
注 2: 每個導航軟體可能會有特定的設定要求,例如 TOMTOM,請只保留
一個 GPS 設定並刪除其他 GPS 所留下來的設定
H-5
關閉藍牙連線功能
關閉您 PDA/Smart phone/PC 的藍牙連線功能,與 BT-Q1300 的藍牙連
接便會自動停止,接著將 BT-Q1300 關閉
………………………………………………………………………………………………………………………………………………………………………………………. www.Qstarz .com
67
繁體中文
………………………………………………………………………………………………………………………………………………………………………………………. I. 自動開關機睡眠功能, 自動開關景點記錄功能 自動開關機睡眠功能 (省電模式): 如果藍牙連線被關閉 BT-Q1300 將會自
動進入睡眠模式,此時藍色指示燈將會每5秒閃爍一次,因此您可以在非常
省電的狀態下使用 BT-Q1300
在省電模式中,當偵測到藍牙連線時,BT-Q1300 將會被自動喚醒並開啟連
線,而藍色指示燈將會每1秒閃爍一次,GPS 橙色指示燈則會發亮
注意: 在旅遊行程記錄模式之下此功能會被自動關閉
自動景點記錄開關功能: 在旅遊行程記錄模式下,如果GPS無法定位,
BT-Q1300將會自動停止記錄旅遊行程,因為是在背景執行此功能,所以LED
指示燈並不會指示此功能已經啟用。當GPS定位之後,BT-Q1300將會自動
開始記錄旅遊行程。此功能將可以為您省下非常多的記憶體。
J. 其他 J-1
LED 指示燈顯示說明
指示燈狀態
電源 (紅/綠)
符
閃爍
號
低電量指示 (紅)
充電完成 (綠)
開
關
充電中 (綠)
每兩秒閃爍.: 藍牙連
藍牙連線
線中
未連線 / 未
(藍)
每五秒閃爍.: 睡眠省
配對
電模式
電源關閉
/旅遊行程
記錄開啟
......................................................................................................................................................................................... 68
www.Qstarz.com
Beyond Navigation 繁體中文 ………………………………………………………………………………………………………………………………………………………………………………………. 衛星 (橙/藍)
每一秒閃爍(橙): GPS
定位成功, 導航模式
偵測衛星
中,GPS定位
電源關閉
尚未完成
旅遊行程記錄開啟
每兩秒閃爍.: 低記憶
旅遊行程記
體指示
記憶容量耗
旅遊行程
錄 (藍)
閃爍三次 (藍):
盡
記錄關閉
POI(景點座標記錄)
景點紀錄成功
J-2
GPS 特色
1. Baud Rate: 115,200 bps / Datum: WGS-84; 熱/暖/冷 開機: 1/33/35
秒 (平均值)
2. 高感度 -165dBm
66-channel 藍牙 GPS 記錄器
3. 藍牙裝置: V1.2 / SPP profile / Class 2 在開放空間中連線距離可達15公
尺
4. 低電量消耗,內建可充電式鋰電池
5. 外觀大小: 62 (長) X 38 (寬) X 7 (高) mm
………………………………………………………………………………………………………………………………………………………………………………………. www.Qstarz .com
69
繁體中文
………………………………………………………………………………………………………………………………………………………………………………………. K. 疑難排除 問題
解決方法
在使用 BT-Q1300
來導航的時候也可
是的,您可以同時使用 BT-Q1300 來導航並記錄旅
以同時開啟旅遊行
遊行程
程記錄嗎?
我把旅遊家用充電
BT-Q1300 之 DC 輸入範圍為 4.5~5.5V,你也可
器弄丟了,哪裡可
以使用 DC 輸出範圍為 4.5~5.5V 之充電器或是藉
以買到新的?
由 mini USB 插座進行充電。
我如何知道
BT-Q1300 的記憶
體已經滿了?
如果你看到 LOG 指示燈持續亮著,那表示Q1300
的記憶體已經滿了
旅遊行程記錄的檔
事實上BT-Q1300的確支援藍芽下載檔案,只是礙於
案可以透過藍芽下
其效能和穩定度不如USB下載,所以我們並沒有官方
載到電腦嗎?
宣布他可以支援此功能
我的BT-Q1300無
法Log了,是怎麼回
事?
請檢查您的BT-Q1300的記憶體是否已經滿了,或是
至PC Utility V3軟體中的”記錄列表”檢查紀錄器
資訊是否為”錯誤”,以上兩種情況都可以透過位
於”記錄列表”下的”重置”來還原記憶體狀態
......................................................................................................................................................................................... 70
www.Qstarz.com