1
Installation & Maintenance Data
IM 422-4
Group: PTAC
Part No.: 106018561
Date: May 1999
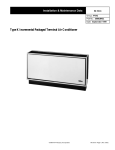
Incremental® Comfort Conditioners
Suite II®
With Top Mounted
Hydronic Heat Section
©1999 AAF–McQuay Incorporated
IM 422-4 / Page 1 (Rev. 5/99)
Table of Contents
Installation . . . . . . . . . . . . . . . . . . . . . . . . . . . . . . . . . . . . . 2
Inspection . . . . . . . . . . . . . . . . . . . . . . . . . . . . . . . . . . . . . 2
Nomenclature . . . . . . . . . . . . . . . . . . . . . . . . . . . . . . . . . . 3
Wall Opening Requirements . . . . . . . . . . . . . . . . . . . . . . 3
Wall Sleeve Installation . . . . . . . . . . . . . . . . . . . . . . . . 4–6
Panel Wall With Factory Louver . . . . . . . . . . . . . . . . . . 4
Panel Wall With Continuous Louver . . . . . . . . . . . . . . . 5
Frame and Brick Construction . . . . . . . . . . . . . . . . . . . 6
Heat Section Installation . . . . . . . . . . . . . . . . . . . . . . . . . . 7
Coil Piping . . . . . . . . . . . . . . . . . . . . . . . . . . . . . . . . . . . . . 7
Steam Coils . . . . . . . . . . . . . . . . . . . . . . . . . . . . . . . . . . 7
Hot Water Coils . . . . . . . . . . . . . . . . . . . . . . . . . . . . . . . 7
Anchoring . . . . . . . . . . . . . . . . . . . . . . . . . . . . . . . . . . . . . 8
Installing Louvers . . . . . . . . . . . . . . . . . . . . . . . . . . . . . . . 8
Installation of Cooling Chassis . . . . . . . . . . . . . . . . . . . . . 8
Adjusting Temperature Limiting Device . . . . . . . . . . . . . . 9
Electrical Service . . . . . . . . . . . . . . . . . . . . . . . . . . . . . . . 9
Installing Room Cabinet . . . . . . . . . . . . . . . . . . . . . . . . . . 9
Equipment Start-up . . . . . . . . . . . . . . . . . . . . . . . . . . . . . 10
Scheduled Maintenance . . . . . . . . . . . . . . . . . . . . . . . . . 10
Recommended Spare Parts . . . . . . . . . . . . . . . . . . . . . . 11
Refrigeration Cycle . . . . . . . . . . . . . . . . . . . . . . . . . . . . . 11
Troubleshooting Chart . . . . . . . . . . . . . . . . . . . . . . . 12–13
Approximate Shipping Weights . . . . . . . . . . . . . . . . . . . 13
Wiring Diagrams . . . . . . . . . . . . . . . . . . . . . . . . . . . . 14–15
Normally Closed Valve (Steam) . . . . . . . . . . . . . . . . . 14
Normally Open Valve (Hot Water) . . . . . . . . . . . . . . . 15
Installation
The installation of this equipment shall be in accordance with the regulations of authorities having jurisdiction and all
applicable codes. It is the responsibility of the installer to determine and follow the applicable codes. Sheet metal parts, selftapping screws, clips, and such items inherently have sharp edges, and it is necessary that the installer exercise caution. This
equipment is to be installed only by an experienced installation company which employs trained personnel.
Inspection
When the equipment is received, all items should be carefully
checked against the bill of lading to be sure all crates and
cartons have been received. All units should be carefully inspected
for damage when received. If any damage is noticed, the carrier
should make the proper notation on the delivery receipt acknowledging the damage. The carrier should also fill out a Carrier
Inspection Report. The AAF–McQuay Incorporated Traffic Department should then be notified.
The unit nameplate should be checked to make sure the
voltage agrees with the power supply available.
This unit is designed and built for through-the-wall installa-
Figure 1. Exploded view of complete unit
IM 422-4 / Page 2 (Rev 5/99)
tion in either new or existing buildings. The self-contained
refrigerant system delivers cooling to the desired space. Heating
is accomplished with a top mounted hydronic heating coil.
Each conditioner consists of the following components:
1. Cooling Chassis — Shipped separate in a single carton.
2. Wall Sleeve — Shipped separate in a single carton or in a
multi-pack of 15.
3. Hydronic Heat Section — Shipped in a separate carton.
4. Outdoor Louver — Shipped in a separate carton.
5. Room Cabinet — Shipped in a separate carton with kickplate
attached.
! WARNING
Residential and institutional cleaning compounds can cause permanent damage to the packaged terminal unit. To avoid
damage to unit controls and heat transfer surfaces, do not spray cleaning compounds onto the discharge grille, return air
opening, or unit controls. Normal cleaning can be accomplished by wiping the unit surface with a damp cloth. When using
cleaning compounds on carpets, floors or walls, turn the unit off to avoid drawing potentially damaging vapors into the
package terminal unit.
Wall Opening Requirements
each opening. The rough opening should measure 161⁄4"
(413mm) high x 421⁄4" (1073mm) wide. The opening must be
a minimum of 3" (76mm) above the finished floor (including
carpeting).
Before installing the unit, check the wall opening to be sure
the wall sleeve will slide into the opening unobstructed. For
masonry walls, a lintel must be used to provide support over
42"
(1069mm)
5"
(127mm)
11⁄4" (32mm)
(Architectural)
Wall Sleeve
31⁄2" (89mm)
1
⁄ 2" (13mm)
Cabinet
Floor Space
For Piping
Rough-in (Typ.
R.H. & L.H.)
52" (1320mm)
11⁄4" RECESS FOR ARCHITECTURAL LOUVER
“A” – IN. (MM)
“B” – IN. (MM)
“C” – IN. (MM)
ROOM CABINET WALL SLEEVE WALL THICKNESS
3
3
3
13 ⁄4 (349)
5 ⁄4–63⁄4 (146–171)
17 ⁄4 (451)
133⁄4 (349)
63⁄4 –73⁄4 (171–197)
163⁄4 (425)
153⁄4 (400)
133⁄4 (349)
73⁄4 –83⁄4 (197–222)
133⁄4 (349)
83⁄4 –93⁄4 (222–248)
143⁄4 (375)
133⁄4 (349)
93⁄4 –103⁄4 (248–273)
133⁄4 (349)
123⁄4 (324)
133⁄4 (349)
103⁄4 –113⁄4 (273–298)
133⁄4 (349)
113⁄4 –123⁄4 (298–324)
113⁄4 (298)
133⁄4 (349)
123⁄4 –133⁄4 (324–349)
103⁄4 (273)
103⁄4 (273)
143⁄4 (375)
133⁄4 –143⁄4 (349–375)
3
3
15 ⁄4 (400)
143⁄4 –153⁄4 (375–400)
10 ⁄4 (273)
163⁄4 (425)
153⁄4 –163⁄4 (400–425)
103⁄4 (273)
103⁄4 (273)
173⁄4 (451)
163⁄4 –173⁄4 (425–451)
2" (51mm)
Removable Cabinet
Front Panel
Standard Size Wall Sleeve
Note: Electrical rough-in should be located behind kickplate
(removable front) and below wall sleeve.
1
1 ⁄2"
(38mm)
“A”
52" (1320mm)
Wall
Thickness
“C”
11⁄4" (32mm)
27⁄8" (67mm)
191⁄2"
(495mm)
91⁄ 8"
(232mm)
Wall Space For Piping Rough-in
(Typ. R.H. & L.H.)
16"
(406mm)
51⁄2"
(140mm)
3"
(76mm) Min.
3"
(76mm)
“B”
7
Kickplate (Removable
Front)
7
⁄8"
(22mm)
15⁄16"
(33mm)
15 ⁄ 8 "
(41mm)
⁄8" (22mm)
3" (76mm) Min.
Kickplate Height
IM 422-4 / Page 3 (Rev. 5/99)
Wall Sleeve Installation — Thin Wall Construction
of the standard wall sleeve. If a subbase is not used, field
support must be provided up to the center of gravity. This
support can be metal, wood or concrete.
The standard wall sleeve is designed to be easily installed in
a variety of wall constructions. For panel wall and thin wall
construction, it is recommended that the optional top angle be
used and the wall sleeve be supplied with a turned down
flange (see Figure 3).
The recommended procedure for installing units in panel
wall and thin wall construction is as follows:
3. Level wall sleeve in all directions and anchor with appropriate fasteners. Use holes provided (see Figure 14, page
8) or drill additional holes as required to secure firmly.
Caution: Do not drill holes in the base of the wall sleeve.
Use shims between the wall and the wall sleeve to prevent
wall sleeve distortion during anchoring.
1. Clean the opening of all debris that may interfere with
installation.
4. Caulk the wall sleeve to the wall opening on both the
inside and outside perimeter. This can be done from the
inside of the building. Be careful not to plug the weep
holes.
2. Recess the wall opening so that the louver is flush with the
exterior of the building (refer to Figure 3). The center of
gravity is approximately 103⁄4" (273mm) from the rear face
C**
133⁄4"
(349mm)
11⁄4" (38mm)
42"
(1069mm)
Y*
Optional
Subbase
Outside
Louver
Wall
Sleeve
Optional
Top Angle
16"
(406mm)
Optional
Top Angel
Turndown
Flange
(See Detail)
16"
(406mm)
B**
Outside
Edge of
Sleeve
Wall Sleeve
3"
(76mm)
Min .
101⁄2"
(267mm)
Max.
Fininish Floor
Including Carpet
37⁄8" (98mm)
Min.
Support
By Others
(2 Req’d).
1"
(25mm)
Caulk
Turndown
Flange
Notes:
** See Figure 2, page 3, for dimensions “B” and “C”.
* Dimension “Y” is field determined or specified. Angle is factory welded at
given dimension when option is designated.
IM 422-4 / Page 4 (Rev 5/99)
Wall Sleeve Installation — Thin Wall Construction
Applications utilizing field supplied louvers require additional
considerations:
1. Clean the opening of all debris that may interfere
with installation.
1. Louvers supplied by others must have 70% free area or a
pressure drop not exceeding 0.05 in. w.g. (12.45 Pa) at
300 fpm (1.524 m/sec) face velocity, and a blade design
that will not cause recirculation of air.
2. Position the wall sleeve into the wall so that it is flush with
the exterior wall. Important: If the wall sleeve has been
installed into a thick wall, make certain the wall sleeve
protrudes into the room a minimum of 11⁄8" (29mm) beyond
the finished wall surface. This is to accommodate the heat
section and room cabinet. The center of gravity is 103⁄4"
(273mm) from the rear face of the standard wall sleeve. If
no subbase is being employed, adequate support for the
wall sleeve up to the center of gravity must be provided at
the job site. This support can be wood, metal or concrete.
2. McQuay does not warrant the rain and water leakage
resistance of its equipment when used with louvers by
others.
3. All louvers by others must be approved by the manufacturer prior to installation.
Figure 4 illustrates a typical installation using a field
supplied, continuous louver. This method is for illustration
purposes only. Other variations may be employed as long as
they meet manufacturer’s louver specifications listed above
and so long as adequate wall support is achieved. All structural supports and fasteners (except the optional top angle
and turned down flange) are field supplied.
Installation of wall sleeves with continuous louvers is very
similar to that of applications with factory furnished louvers.
Assuming the louver meets the manufacturer’s criteria, as
stated previously, proceed to install the wall sleeve as follows:
3. Level wall sleeve in all directions and anchor with appropriate fasteners using holes provided (see Figure 14, page
8), or drill additional holes as required to secure firmly.
Caution: Do not drill holes in the base of the wall sleeve.
Use shims between the wall and the wall sleeve to prevent
wall sleeve distortion during anchoring.
4. Caulk the wall sleeve to the wall opening on both the inside
and outside perimeter. This can be done from the inside of
the building. Be careful not to plug the weep holes.
Figure 4. Wall sleeve installation using top angles and field supplied continuous louver
Wall
Frame
By Others
3
13 ⁄4"
(349mm)
11⁄4"
(38mm)
42"
(1069mm)
Y*
Optional
Subbase
Wall
Sleeve
Resilient
Caulking
Wall
Sleeve
Optional
Top Angle
16"
(406mm)
Insulated
Panel
Turndown
Flange
(See Detail)
Outside Edge
of Sleeve
Optional
Top Angle
16"
(406mm)
Outside Louver
By Others
Wall Sleeve
3"
(76mm)
Min.
101⁄ 2"
(267mm)
Max.
Finished Floor
Including Carpet
Min. 37⁄8"
(98mm)
Supports By Others
(2 Req’d.)
Turndown
Flange
Resilient
Caulking
1"
(25mm)
Notes:
1. Caulk entire perimeter of wall sleeve after installation.
2. Seal area between louver and wall sleeve to prevent condenser air recirculation.
3. Dimensions shown in table on page 3 do not apply to this
application.
*Dimension “Y” is field determined or specified. Angle is factory
welded at given dimension when option is designated.
Insulated
Panel
IM 422-4 / Page 5 (Rev. 5/99)
Wall Sleeve Installation — Thick Wall Construction
A heavy-gauge, corrosion resistant wall sleeve is provided
for each unit. The wall sleeve is either shipped in a separate
carton or shipped in a multi-pack of 15.
Typical installation for masonry walls is shown in Figure 5.
The recommended installation procedure for this type of
construction is as follows:
1. Clean the opening of all debris that may interfere with
installation.
2. Be sure the unit’s center of gravity falls within the load
bearing surface of the wall. The center of gravity for the unit
is approximately 103⁄4" (273mm) from the rear edge of the
wall sleeve. If the center of gravity is not within the load
bearing surface, then additional support such as wood,
metal or concrete must be provided in the field.
3. Place a thin pad of soft mortar on the bottom of the opening. Important: Make certain the wall sleeve protrudes
into the room a minimum of 11⁄8" (29mm) beyond the
finished wall surface to accommodate the heat section and
room cabinet. Be sure to recess the wall sleeve enough to
accommodate outside louver. This recess is 3⁄8" (9.5mm)
for stamped louvers and 11⁄4" (32mm) for architectural
louvers. The louver should be flush to exterior surface
when completed.
4. If a brickstop is employed (as shown in Figure 5), slide the
wall sleeve into the wall until the brickstop contacts the
exterior bricks, as illustrated below. If a brickstop is not
used, slide the wall sleeve in the wall so that it extends into
the room a minimum of 11⁄8" (29mm) beyond the finished
interior wall surface. This allows room to attach the heat
section and room cabinet. The wall sleeve should also be
recessed enough to accommodate the outside louver.
5. After the mortar has dried, remove the masonry support
from the wall sleeve. Note: The wall sleeve is not intended
to replace the lintel.
6. Level wall sleeve in all directions and anchor with appropriate fasteners (as shown in Figure 14, page 8). A 5⁄16"
(8mm) hole is provided on each side, 2" (51mm) down from
the top and 2" (51mm) in from the rear of the wall sleeve.
It may necessary to drill additional holes in the wall sleeve
to firmly secure it . Caution: Do not drill holes in the base
of the wall sleeve. Use shims between the wall and the wall
sleeve to prevent wall sleeve distortion during anchoring.
7. Caulk the wall sleeve to the wall opening on both the
in-side and outside perimeter using a resilient,
nonhardening caulk such as silicone. Be careful not to
plug the weep holes.
Figure 5. Wall sleeve installation using brickstops
C
B
Optional
Brickstops
X
15⁄ 8" (41mm) Min.
[–1⁄2" (13mm)]
Outside
Louver
42" (1067mm)
Optional
Brickstop
16"
(406mm)
Wall
Sleeve
B
16"
(406mm)
Outside Edge
of Sleeve
Wall Sleeve
11⁄4"
(32mm)
37⁄8" (98mm)
Min.
11⁄4"
(32mm)
Finished Floor
Including Carpet
Notes:
1. For dimensions B and C, see table on page 3.
2. Dimension “X” is “as required” and is usually sent to
the factory to be welded during wall sleeve fabrication.
3. Caulk entire perimeter of wall sleeve after installation.
IM 422-4 / Page 6 (Rev 5/99)
Heat Section Installation
The heat section is designed to be “snapped” into the top of the
wall sleeve (see Figure 6). There are four square holes provided
in the wall sleeve, two on each side, for coil attachment. Assembly the heat section to the wall sleeve as follows:
1. Unpack the heat section and inspect for any shipping
damage. Report any damage found to the carrier.
2. Check the heat section against the plans to make certain the
coil supplied has the connections match the specifications.
3. Firmly attach the heat section to the wall sleeve by lining up
the heat section hooks with the square holes supplied in the
wall sleeve. Snap the heat section in place by exerting pressure downward.
4. The valve is always connected to the supply side of the coil.
There are seven possible coil arrangements available. Each
is shown below. Select the illustration below that matches the
coil supplied and pipe it according to the illustration. Install
valve and other accessories including air vents, steam traps,
stop balance valves, etc., as specified by the design engIneer.
5. For valve installed on right side of the unit, make electrical
connection to matching cap extending from the control box.
For left side valve, make electrical connection to cap mounted
to left side of chassis.
Note: When the heating medium is steam, the supply connection should be attached to the uppermost tube and the return to
the lower tube. The coil is pitched in the casing to allow drainage
of condensate.
Hydronic
Heat
Section
Factory
Supplied
Holes (2)
Wall Sleeve
When the heating medium is hot water, the supply connection should be made to the lowermost tube and the return to the
uppermost tube. Hot water coils should be “flooded” to minimize
air entrapment.
Steam Coils
SUPPLY
SUPPLY
RETURN
RETURN
SUPPLY
SUPPLY
RETURN
RETURN
Hot Water Coils
RETURN
RETURN
SUPPLY
SUPPLY
RETURN OR SUPPLY
RETURN OR SUPPLY
IM 422-4 / Page 7 (Rev. 5/99)
Anchoring
Anchoring the wall sleeve in the opening is accomplished as
shown in Figure 14. It is recommended that rubber isolation
washers be used with the fasteners to minimize sound
transmission from the equipment to the wall, at the point of
contact.
A 5⁄16" (8mm) hole is provided on each side, 2" (51mm)
down from the top and 2" (51mm) in from the rear of the wall
sleeve. It may be necessary to drill additional holes in the wall
sleeve to firmly secure it. Caution: Do not drill holes in the
base of the wall sleeve. Use shims between the wall and the
wall sleeve to prevent sleeve distortion during anchoring.
Expansion
Anchor
Molly or
Bolt
Toggle Bolt
Wood
Screw
Cripple Stud
Main Stud
Installation of Louvers
1. Remove louver from its shipping carton which also contains a hardware package for mounting the louver.
2. Remove outside weather plug and weather panel from wall
sleeve.
3. Make a temporary handle by looping a piece of flexible
wire or heavy cord through the louver. This enables the
installer to keep a firm grasp on the louver when installing
from inside the room.
4. Push the louver through the opening at the rear of the wall
box, then pull the louver back to the wall sleeve flange so
that the louver studs pass through the holes in the flange.
5. Attach washers and nuts and secure louver in place.
6. If the cooling chassis is not to be immediately installed,
replace the weather panel.
Installation of Cooling Chassis
Correct installation of the cooling chassis is extremely important to insure the proper operation of the unit. Install the
chassis as follows:
1. Remove outer carton and inspect for any shipping damage. Report any found to the carrier.
Hydronic
Heat
Sect.
2. Check nameplate data on chassis to insure that the
correct job site distribution has been made with respect
to cooling capacities. Generally, corner rooms require
larger capacities.
3. Remove chassis from carton by pulling evenly on substantial portion of unit. Caution: Do not pull on evaporator
fan housing, control box or compressor.
Factory
Supplied
Holes (2)
4. If wall sleeve has been previously installed, remove
temporary weather panel.
5. Check all fasteners to make certain they have not come
loose during shipment. Do not loosen nuts holding down
compressor; they are set at the factory.
Chassis
Wall Sleeve
Damper
Actuator
6. Do not lubricate motors before start-up. Motors are
factory lubricated. Consult “Scheduled Maintenance”
section on page 12 for lubrication instructions.
7. Place Tinnerman clips from bag onto wall sleeve. Clips
and mounting screws are enclosed in a bag attached to
the top of the condenser coil cover.
8. If louver has not been previously installed, connect to
wall sleeve as described above.
9. If louver is supplied by others, as illustrated in Figure 4,
page 5, be sure to install foam type gaskets on all sides
of the condenser coil to prevent recirculation or bypass of
condenser air.
10. Slide chassis into wall sleeve until firmly seated against
weather seals of wall sleeve. Caution: Do not push on
IM 422-4 / Page 8 (Rev 5/99)
coil surface or control box cover. Make sure the compressor tubing does not catch when inserting chassis.
11. Secure chassis to wall sleeve with four (4) sheet metal
screws packaged with the Tinnerman clips.
12. Plug electrical cord into receptacle. Excess cord should
be coiled up neatly and stored in the conditioner.
13. Set the manual damper operator in open or closed
position as desired. On units equipped with the optional
electric fresh air damper, set the “Auto-Off” switch in the
desired position. In “Auto,” the damper is open whenever
the indoor fan motor is running. The “Auto-Off” switch is
located on the bottom front face of the control box.
14. Set cycle switch (located on the bottom front face of the
control box) for constant or cycle indoor fan. With the
switch in “Cycle” position, the indoor fan will shut off when
the thermostat de-energizes cooling or heating.
15. Set the temperature limiting device to the desired range
of thermostat operation. (See page 9 for details on temperature limiting device.)
Optional Adjusting Temperature Limiting Device
As an option, a temperature limiting device can be furnished
to allow the owner to set the minimum and/or maximum
temperature selections. Adjust this device as follows:
1. Remove temperature knob and metal cover plate.
2. Loosen the hold-down screw with Phillips screwdriver.
3. Adjust cams to attain desired rotation limit.
4. Tighten hold-down screw.
5. Replace metal cover and temperature knob.
Once unit is in operation, rotate knob to maximum heat
and/or maximum cool to check temperature limits. Repeat
procedure listed above until desired temperature limitations
are achieved.
Electrical Service
All wiring should be in accordance with all local and National
Electrical Code requirements.
Units are supplied with an attachment cord and plug which
exit from the bottom of the conditioner on the control side. The
cord for 115V, 208V and 230V has a usable length of 72"
(1829mm) from where it exits the conditioner. The use of
extension cords to increase the length of the plug/cord set is
not recommended. Units to operate on 265V are supplied
with a 14" (356mm) cord for connection to a subbase.
The attachment plug size should be used to determine the
circuit ampacity and overcurrent protection. Time delay,
overcurrent protection devices are recommended to prevent
unit damage and to avoid nuisance tripping.
Outlets are generally located beneath the conditioner, on
or recessed in the wall so it is concealed by the conditioner
overhang and kickplate.
Installing Room Cabinet
The room cabinet is the last piece to install. The following
instructions assume all components (wall sleeve, heat section, louver and chassis) have been installed, piped and
anchored. All major room construction should also be complete so as not to damage the room cabinet after it has been
installed. Attaching the room cabinet can be completed as
follows:
1. Remove the two (2) steel mounting brackets and screws
from the bag enclosed and install them to the heat section
(see Figure 16).
2. Adjust the bracket forward or backward so that when the
room cabinet is installed, the discharge grille seals against
the flanges of the heat section. Final adjustment of the
bracket will occur after the room cabinet has been set in
place. There is a 1" (25mm) adjustment in the mounting
brackets to accommodate any variations in the wall.
should be lifted into place.
1. Firmly grasp the room cabinet and lift it over the heat
section. There are notches in the back flanges of the room
cabinet that rest on the wall sleeve to assure it is centered.
2. Align the notches of the room cabinet on the wall sleeve
and firmly push the cabinet downward until it slips behind
the room cabinet mounting brackets and seats on the wall
sleeve (see Figure 17).
3. Push the mounting bracket backward against the room
cabinet flange and securely tighten the hold-down screw.
4. Screw the cabinet to the wall using the screws provided.
There are two (2) screw holes provided on each side
located on the inner flanges of the room cabinet.
5. Loosen the four (4) wing nuts on the kickplate and adjust
the kickplate the required distance to the floor.
3. Finger tighten the hold-down screw on the mounting
bracket against the heat section bracket.
6. Tighten the wing nuts firmly.
4. Repeat procedures 1 through 3 for the opposite side.
7. Wipe any smudges or dirt off the room cabinet using a mild
cleaner and a soft cloth.
After the brackets have been installed, the room cabinet
Figure 16.
Room Cabinet
Mounting Bracket
Insulation
Heating Coil
Hold-down
Screw
Interior Wall
(Gypsum
Mounting
Bracket
Hydronic
Heat
Section
Gasket
Heating Coil
Hydronic
Heat
Section
Lintel
Wall Sleeve
Wall Sleeve
Room
Cabinet
Outdoor Louver
IM 422-4 / Page 9 (Rev. 5/99)
Equipment Start-up
Initial start-up of the Incremental ® conditioners by
experienced personnel is usually the responsibility of the
installing contractor. This start-up consists of inspecting and
operating the equipment for all functions at the time of initial
installation, and making necessary adjustments. It also
includes demonstrating its proper operation to the owner or
the owner’s agent. Note that unless otherwise specifically
agreed to in writing, no field labor, start-up service or the like
is included in the price of the equipment. After the equipment
leaves the factory, it may become damaged or maladjusted
during transportation or on the job. Sometimes wires are
disconnected accidentally, or fan motors move on their bases
due to rough handling, causing fans to strike. The correction
of such conditions is part of the start-up.
Before Starting Equipment, Make Certain That:
1. Correct voltage has been supplied to the equipment.
2. The electrical plug from the control box has been inserted
into the receptacle.
During Start-up (Applies Only to Standard Equipment):
1. Set manual ventilation damper to OPEN or CLOSED
position as required by owner. Set “Auto-Off” switch as
required if unit is equipped with electric fresh air damper.
2. Push HIGH button to preselect fan speed. Push HEAT
button. Move thermostat to the extreme heating position
(counterclockwise). If the “Cycle/Constant” switch is placed
in the “Cycle” position, heat and indoor fan motor should
cycle on and off as the thermostat requires. Push LOW
button. Fan should change to low speed.
3. Push HIGH button to preselect fan speed. Push COOL
button. Move thermostat to the extreme cooling position
(clockwise). Compressor and indoor fan motor should
cycle on and off as the thermostat requires. Push LOW
button. Fan should change to lower speed. Outdoor fan
should be on whenever compressor operates.
4. Push FAN button. Indoor fan should operate at high or low
speed as selected. Neither heater nor compressor should
continue to operate.
5. Push OFF or STBY button. Fan should stop, and neither
heater nor compressor should continue to operate.
Scheduled Maintenance
Incremental conditioners are built to last. With proper care,
the unit should provide uninterrupted service for many years.
Scheduled maintenance of this equipment, as described
below, is the key to the equipment’s longevity.
g. Cover motors and control module with watertight
material and wash evaporator coil, condenser coil and
base pan using hot water and a mild soap. Do not use
a harsh detergent for it may corrode the aluminum fins.
1. Air filters must be cleaned at regular intervals. Twice
annually may be adequate in some areas while twice
monthly may be required in others. Areas with high dirt and
lint content or heavy usage of units require more frequent
filter maintenance than those areas of relatively clean
operating or low usage conditions. Unit malfunction may
occur if air filters are not kept clean.
h. Clean condensate drain and clear weep holes.
2. McQuay recommends that every year the chassis be
removed for a thorough checkup. This should be
completed as follows:
l. Check all fasteners and tighten as required.
®
a. Unplug unit from power source.
b. Remove front panel and unplug valve from control box.
c. Vacuum heating coil to remove any accumulated dust.
d. Remove chassis from cabinet and move it to the
maintenance department. Replace with spare chassis
or weather plate.
i. Dry equipment thoroughly, especially electric parts and
insulation.
j. Clean any rust spots with steel wool and paint with rust
inhibiting paint.
k. Clean insulation or replace if necessary.
m. Clean and oil damper door and linkage.
n. After the first year, oil fan motors. For 8-hour/day
operation, add 8 to 10 drops to each bearing. For 24hour/day operation, add 16 to 20 drops to each bearing.
Use a commercial grade electric motor oil or SAE #10
nondetergent motor oil.
o. Test run chassis before re-installing or returning to
spare parts stock.
e. Check all seals and insulation and repair as required.
f. Check all wiring and controls for hazardous conditions.
! WARNING
Residential and institutional cleaning compounds can cause permanent damage to the packaged terminal unit. To avoid
damage to unit controls and heat transfer surfaces, do not spray cleaning compounds onto the discharge grille, return air
opening, or unit controls. Normal cleaning can be accomplished by wiping the unit surface with a damp cloth. When using
cleaning compounds on carpets, floors or walls, turn the unit off to avoid drawing potentially damaging vapors into the
package terminal unit.
IM 422-4 / Page 10 (Rev 5/99)
Recommended Spare Parts
An inherent advantage of the Incremental system is that
failure of any one part affects only one Incremental conditioner and does not interrupt the operation of the rest of the
system. A further advantage is that a failed part can be quickly
and easily replaced, thus minimizing the inoperative time of
the equipment. This is so, however, only if a replacement part
is quickly available. In order to replace a failed part quickly
and keep all Incremental conditioners in good operating
condition, McQuay recommends that at the time Incremental
conditioners are purchased, owners arrange for a small stock
of replacement parts.
Where an owner carries such a stock, immediate replacement of a defective part is possible. The defective part can
then be returned to McQuay or one of its authorized service
stations. So long as it is still in warranty, it is repaired or
replaced and returned to the owner without cost for shop labor
and material. Thus, the stock of replacement parts is constantly replenished. To the right is listed the kind of parts
which McQuay recommends be carried in stock, together with
the quantity of parts recommended per 100 Incremental
conditioners installed.
Qty. Per
100 Units
Part Name
Cooling Chassis . . . . . . . . . . . . . . . . . . . . . . . . . . . . .
Compressor Overload Device . . . . . . . . . . . . . . . . . .
Compressor Running Capacitor . . . . . . . . . . . . . . . . .
Evaporator Fan Motor . . . . . . . . . . . . . . . . . . . . . . . . .
Condenser Fan Motor . . . . . . . . . . . . . . . . . . . . . . . . .
Pushbutton Switch . . . . . . . . . . . . . . . . . . . . . . . . . . .
Damper Switch . . . . . . . . . . . . . . . . . . . . . . . . . . . . . .
Thermostat . . . . . . . . . . . . . . . . . . . . . . . . . . . . . . . . .
Knob for Thermostat . . . . . . . . . . . . . . . . . . . . . . . . . .
Control Relay (if used) . . . . . . . . . . . . . . . . . . . . . . . .
Damper Motor (if used) . . . . . . . . . . . . . . . . . . . . . . . .
Touch-up Paint (1 pt. spray can) . . . . . . . . . . . . . . . .
Oil for Fan Motors (gallons) . . . . . . . . . . . . . . . . . . . .
1
1
1
1
1
2
2
2
6
1
2
1
1
For the current spare parts list and applicable prices, see your
McQuay representative or write McQuayService, P.O. Box
1551, Minneapolis, MN 55440.
Refrigeration Cycle
Every motor driven refrigeration system operates on the
Carnot cycle. A practical understanding of what goes on at the
various steps in this cycle can be a big help to the troubleshooting mechanic. Figure 18 illustrates the refrigeration
cycle. The diagram shows what occurs in each component of
a hermetically sealed system, as used in all McQuay equipment. The temperatures shown are typical of what they might
be when the air entering the condenser (outdoor temperature) is 95 F (35 C) and the temperature of the conditioned
space is 75 F to 80 F (24 C to 27 C).
Figure 18. Refrigeration cycle
45 F (7 C) R-22
(Liquid & Gas)
To Evaporator
120 F (49 C) Condenser Air
To Outdoors
80 F (27 C) Room Air
To Evaporator
Capillary
Restrictor
Evaporator
Condenser
110 F (43 C)
Liquid R-22
To Capillary
285.3 psia (2059 kPa)
R-22 To Condenser
(Hot Gas)
94 F (35 C) Outdoor Air
To Condenser
60.3 psia (416 kPa) R-22
and 60 F (15.5 C)
To Compressor (Gas)
50 F (15.5 C) Conditioned
Air To Room
Hermetic Compressor
IM 422-4 / Page 11 (Rev. 5/99)
Troubleshooting Chart
These items should be checked by a qualified service techician only.
TROUBLE
1.
2.
Blowers won’t operate
on COOL.
Blowers operate on
COOL but compressor
doesn’t start.
CAUSE
a.
No power.
a.
b.
c.
a.
b.
c.
d.
e.
f.
g.
h.
i.
j.
Faulty pushbutton switch.
Loose connections at pushbutton switch.
Thermostat set too high.
Heat valve is open and heat is on.
Low voltage.
Fault pushbutton switch.
Faulty connection at pushbutton switch.
Defective wiring to thermostat.
Loose connections at compressor terminals.
Wiring to compressor terminals defective.
Loose connections in compressor overload device.
Starting capacitor malfunctions (open circuited, short
circuited or loss of capacity.
Defective compressor motor (short circuited, open
circuited, grounded).
Operation of overload device due to overloading
compressor motor.
b.
c.
a.
b.
c.
d.
e.
f.
g.
h.
i.
j.
Low voltage due to overloaded circuits within building or
throughout the local power system. Due to varying power
demands, this condition might exist only at certain times
during the day or on very hot days.
High voltage due to fluctuations in local power system;
usually occurs at low load periods of the day.
Partial short circuit in compressor motor. Under normal
loading a compressor with a partial short circuit might
appear to be operating all right; increased condensing air
temperature might then cause a short.
Faulty pushbutton switch.
Open circuited blower motor.
Blower rubbing against its housing.
Bearings on blower motor seized.
a.
e.
a.
a.
Loose connection at pushbutton switch.
Operation of the internally connected overload device
due to a short circuit in blower motor.
Windings, rubbing of blower wheel or lack of lubrication
in blower motor bearings.
Grounded electrical circuit.
a.
b.
k.
3.
Blowers run on COOL
and compressor starts
but stops after a short
interval.
a.
4.
Blowers run on COOL
and compressor starts
and runs, but compressor occasionally stops
(on overload device).
a.
b.
c.
5.
Compressor starts and
runs on COOL but
blowers do not run.
6.
Compressor starts and
runs on COOL but
blowers do not run.
7.
8.
Equipment gives
electrical shock.
Insufficient cooling
capacity.
CURE
a.
b.
c.
d.
e.
a.
b.
c.
d.
e.
k.
a.
Check supply line fuses, circuit breakers, and be sure the
power is on. Blown fuses would indicate circuit overloading,
a short circuit, or a grounded condition in the circuit. Voltage
supply to the equipment should be checked. Voltage must
be within 10% of voltage given on data plate.
Replace.
Tighten.
Adjust. Rotate control knob to “Cooler.”
Close heat valve.
Check as above.
Replace.
Tighten.
Replace.
Tighten.
Replace.
Tighten.
Replace.
*Replace cooling chassis prepaid to nearest McQuay
authorized warranty station.
Check voltage supply. Clean condenser inside and out.
Check at outside face of condenser for recirculation of
condenser air. Put air “splitters” in, if missing. Check to
make sure condenser blower/fan is operating properly.
Check compressor for short circuit. If defective, *ship
cooling chassis to nearest McQuay authorized warranty
station.
Run separate electric line to equipment. Consult local
power company.
b.
Consult local power company.
c.
If confirmed, ship cooling chassis prepaid to nearest
McQuay authorized warranty station.
a.
b.
c.
d.
b.
Replace.
Replace.
Adjust blower motor or blower wheel position.
Lubricate motor with SAE No. 10 oil. (It may be necessary
to remove blower assembly to do this.)
Tighten.
Adjust blower/fan wheel on shaft or blower motor mounting.
Lubricate with SAE No. 10 oil (see above).
Adjust blower wheel or motor or replace wheel.
a.
Eliminate ground.
Equipment standing too long without being run.
a.
If the air conditioner is allowed to stand for an extended
length of time without being run on COOL, it is possible for
all the refrigerant to become absorbed in the oil inside the
compressor and refrigeration circuit. If this should happen,
there will be no cooling until the necessary working
pressures have been established. This will take about 5
minutes of continuous running.
Insufficient airflow through condenser due to:
1) Dirty condenser.
2) Obstructed louvers on outer cabinet or wall box.
3) Condenser blower/fan not running.
b.
4) Condenser blower/fan not up to speed.
5) Condenser blower/fan slipping on motor shaft.
6) Recirculation of condenser air.
Insufficient airflow through evaporator due to:
1) Dirty evaporator.
2) Ice on evaporator coils.
3) Dirty air filter.
4) Obstructed discharge grilles.
5) Evaporator blower motor not running.
6) Evaporator blower motor not up to speed.
7) Evaporator blower slipping on motor shaft.
Heat load in room exceeds capacity of equipment.
Windows and doors in room are open.
1) Clean.
2) Remove obstructions.
3) Check same as in the case of malfunctioning
conditioner air blower.
4) Check for correct voltage. Oil blower motor if necessary.
5) Adjust blower position and tighten setscrew.
6) Correct as in No. 3 above.
c.
1)
2)
3)
4)
d.
e.
Clean.
Turn equipment off to let ice melt.
Clean or replace.
Remove obstructions. In case of top discharge
equipment, make sure books, magazines, etc., are kept
off the equipment.
5) Check as in No. 1.
6) Check for correct voltage. Oil motor if necessary.
7) Adjust motor wheel position and tighten setscrew.
Refer to original load calculations; recalculate heat load.
Close therm.
Continued on next page
IM 422-4 / Page 12 (Rev 5/99)
Troubleshooting Chart
These items should be checked by a qualified service techician only.
TROUBLE
8. Insufficient cooling
capacity (continued).
CAUSE
CURE
Compressor not pumping, indicated by:
1) Low wattage.
2) Condenser not warm, evaporator only partially cool or
not at all.
g. Restricted capillary tube or strainer, indicated by:
1) Frost on capillary or strainer.
2) Low wattage.
3) Condenser not warm.
4) Evaporator partially frosted, only partially cool or not at
all.
f.
a. Thermostat set too low.
b. Defective thermostat.
a. Adjust.
b. Replace.
10. “Sweating”
a.
b.
c.
d.
Condensate drain from evaporator to condenser plugged.
Insulating seals on equipment damaged.
Evaporator blower motor not up to speed.
Evaporator blower incorrectly positioned.
a.
b.
c.
d.
See No. 1.
Open heat valve or turn on heating system.
Check for correct voltage. Oil motor if necessary.
Adjust.
11. Blowers won’t operate
on HEAT.
a.
b.
c.
d.
e.
No power.
Heat is off (equipment with heat fan lockout).
Faulty pushbutton switch.
Loose connections at pushbutton switch.
Thermostat set too low.
a.
b.
c.
d.
e.
See No. 1.
Open heat valve or turn on heating system.
Replace.
Tighten.
Adjust. Rotate control knob to “Warmer.”
12. **Equipment is noisy.
a. Blower rubbing against enclosure.
9. Too much cooling.
f.
b. Blower motor bearings are dry.
c. Loose blower hold-down nuts on motor-bracket assembly.
d. Refrigerant absorbed in compressor oil after extended
shutdown.
e. Equipment improperly installed.
f. Damper solenoid hums.
g.
h.
i.
j.
Loose terminal box cover on side of compressor.
Loose electrical components.
Copper tubing vibrating.
Harmonics.
k. Loose sheet metal parts.
13. Insufficient or no heat.
a. No steam or hot water being applied.
b. No power.
c.
d.
e.
f.
g.
h.
Faulty pushbutton switch.
Loose connection at pushbutton switch.
Thermostat set too high.
Thermostat faulty.
No power output on transformer secondary.
Inoperative valve.
1) Steam valve N/C.
2) Hot water valve N/O.
*Ship prepaid to nearest McQuay authorized warranty station.
g. 4) *Ship prepaid to nearest McQuay warranty station.
a. Adjust fan position on motor shaft or reposition fan motor
bracket assembly.
b. Lubricate with SAE No. 10 or replace motor.
c. Align blower assembly and tighten nuts.
d. Noise will disappear after equipment runs awhile.
e. Make necessary adjustments to components.
f. Check for proper adjustment. Apply silicone oil or grease to
gap between solenoid and armature.
g. Tighten.
h. Fasten securely.
i. Adjust by bending or applying tape.
j. Occasionally equipment will have noisy operation for no apparent reason. Inspection has revealed no loose components
that might be the source of the noise. Due to the action of the
compressor, it is possible to have internal noise develop if the
refrigerant tubing has become bent even slightly. To distinguish this condition from the simple rattle producing vibration
caused by loose screws, nuts and other components, grasp
the refrigerant tubing at various points throughout the system
until a point is found where the noise is eliminated or reduced.
Bend the copper tubing very gently until the noise disappears.
k. Tighten.
a. Contact building management.
b. Check power supply line fuses, circuit breakers. Blown fuses
would indicate circuit overloading, a short circuit, or a grounded
condition in the circuit.
c. Replace.
d. Replace wire or tighten.
e. Adjust rotate knob to “Warm.”
f. Replace.
g. Replace.
h.
1) Temporary lock valve open; replace.
2) Replace.
Notes: This guide was prepared with standard equipment in mind. If equipment is special, it may not be entirely applicable.
* If equipment is still in warranty.
** Note: Before trying to correct the noise, determine its cause: conditioned air blower, compressor or condenser blower. Operate the conditioned air blowers only.
If this doesn’t cause the noise, operate on cooling. Then disconnect one compressor lead. If the noise stops, the compressor is the source. If not, it is caused by
the condenser blower.
Approximate Shipping Weights
Chassis:
Size 007 . . . . . . . . . . . . . . . . . . . . . . . . . . .
Size 009 . . . . . . . . . . . . . . . . . . . . . . . . . . .
Size 012 . . . . . . . . . . . . . . . . . . . . . . . . . . .
Size 015 . . . . . . . . . . . . . . . . . . . . . . . . . . .
Hot Water . . . . . . . . . . . . . . . . . . . . . . . . . . . . 12 lbs. (5 kg)
141 lbs. (64 kg)
145 lbs. (66 kg)
149 lbs. (68 kg)
153 lbs. (69 kg)
Wall Sleeve: Uninsulated . . . . . . . . . . . . . . 36 lbs. (16 kg)
Hydronic Heat Section:
Steam . . . . . . . . . . . . . . . . . . . . . . . . . . . . . . . 12 lbs. (5 kg)
Room Cabinets:
Standard 103⁄4" (273mm) depth . . . . . . . . . . 60 lbs. (27 kg)
For each additional inch of room cabinet depth add 4 lbs. (2 kg)
to the standard depth cabinet.
Louvers: Architectural . . . . . . . . . . . . . . . . . . . 8 lbs. (4 kg)
IM 422-4 / Page 13 (Rev. 5/99)
IM 422-4 / Page 14 (Rev 5/99)
Wiring Diagram — Standard Manual Changeover Control
(Hydronic Heat With Normally Open Valve)
IM 422-4 / Page 15 (Rev. 5/99)
Wiring Diagram — Standard Manual Changeover Control
(Hydronic Heat With Normally Closed Valve)
Installation, Service and Warranty Policy
One-Year Warranty of Entire Conditioner
AAF–McQuay Incorporated, hereinafter referred to as the “Company,” warrants to the original owner that each entire Incremental
Comfort Conditioner is free from defects in material and workmanship. Any part or portion thereof which becomes defective
under normal use during the period of this warranty will be repaired or replaced provided the Company’s examination shall
prove to its satisfaction that the part was or became defective
under normal use. This warranty contemplates that first year
maintenance labor was arranged for with the installer or otherwise at the time the conditioner was purchased or installed. The
Company’s examination shall prove to its satisfaction that the
part was or became defective under normal use. This warranty
contemplates that first year maintenance labor was arranged for
with the installer or otherwise at the time the conditioner was
purchased or installed. The Company’s obligations under this
warranty are limited to: (a) repairing the defective part or (b) furnishing a replacement part provided the defective part is returned
to the factory, transportation charges prepaid. No reimbursement
will be made for expenses incurred in making field adjustments
or replacements unless specifically authorized in writing by the
Company.
This warranty constitutes the buyer’s sole remedy. It is
given in lieu of all other warranties. There is no implied warranty of merchantability or fitness for a particular purpose.
In no event and under no circumstance shall the Company
be liable for incidental or consequential damages, whether
the theory be breach of this or any other warranty, negligence, or strict tort.
No person (including any agent, salesman, dealer or
distributor) has authority to expand the Company’s obligation beyond the terms of this express warranty, or to state that the performance of the product is other than that published by the
Company.
One-Year Refrigeration Circuit Warranty
Hermetically sealed motor-compressor assemblies and all
components of refrigeration circuits not readily separable therefrom are warranted to the original owner for one (1) year. Refrigerating circuits consist of the motor-compressor assembly,
evaporator coil, condenser coil and interconnecting tubing.
Repairs under this warranty will be made at the Company’s
expense provided that the refrigeration circuit is delivered, without
shipping damage, transportation prepaid to the factory or to a
factory designated repair station, at the Company’s option. This
one-year warranty does not include any other parts of the
equipment such as filters, capacitors, protective devices, or wiring.
The Company is not obligated under this warranty for field labor
such as service for inspection, removing, packing and/or
re-installing the refrigeration circuit, nor for return transportation
charges.
General Conditions
The above warranties are void if the Company’s equipment has
been damaged, misused, subjected to abnormal use or service
or its serial number has been altered, defaced or removed, or
payment for the equipment is in default. The Company is not
responsible for service to correct conditions due to misapplication,
improper installation, inadequate wiring, incorrect voltage conditions or unauthorized opening of the refrigeration circuit, nor for
consequential damages. In case the Company’s equipment is
installed in conjunction with cabinets, grilles, louvers, controls or
other parts manufactured by others, these warranties shall apply
only to the Company’s manufactured portion of the equipment.
The conditions of the warranty plan are effective for eighteen
(18) months from date of factory shipment. The
Company reserves the right to make a handling and inspection
charge in the case of parts or equipment improperly returned as
defective and/or as being in warranty.
AAF–McQuay Incorporated
4900 Technology Park Boulevard, Auburn, New York 13021-9030 USA (315) 253-2771
Printed on recycled paper containing at least 10% post-consumer recycled material.
IM 422-4 / Page 16 (Rev. 5/99)