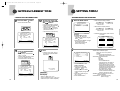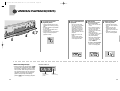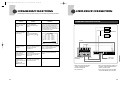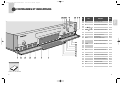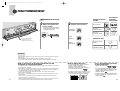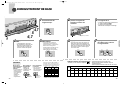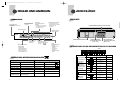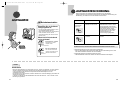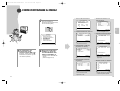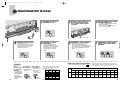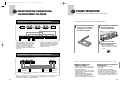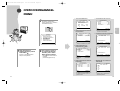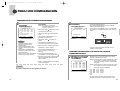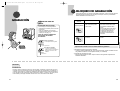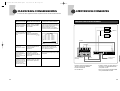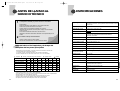
1
01671A SVR-24JP/960JP-E1
12/7/01 4:07 PM
Page 1
SVR-24JP
SVR-960JP
Time Lapse Recorder
Installation and
Operating Instructions
01671A SVR-24JP/960JP-E1
12/7/01 4:07 PM
Page 2
IMPORTANT SAFEGUARDS
1
spill liquid of any kind on the unit.
16. Servicing - Do not attempt to service this unit yourself as opening or
removing covers may expose you to dangerous voltage or other
hazards. Refer all servicing to qualified service personnel.
17. Damage Requiring Service - Unplug the unit from the outlet and
refer servicing to qualified service personnel under the following
conditions:
a. When the power - supply cord. or plug is damaged.
b. If liquid has been spilled, or objects have fallen into the unit.
c. If the unit has been exposed to rain or water.
d. If the unit does not operate normally by following the operating
instructions. Adjust only those controls that are covered by the
operating instructions, as an improper adjustment of other
controls may result in damage and will often required extensive
work by a qualified technician to restore the unit to its normal
operation.
e. If the unit has been dropped or the cabinet has been damaged.
f. When the unit exhibits a distinct change in performance this
indicates a need for service.
18. Replacement Parts - When replacement parts are required, be sure
the service technician has used replacement parts specified by the
manufacturer or have the same characteristics as the original part.
Unauthorized substitutions may result in fire, electric shock or other
hazards.
19. Safety Check - Upon completion of any service or repairs to this
unit, ask the service technician to perform safety checks to
determine that the unit is in proper operating condition.
20. Coax Grounding - If an outside cable system is connected to the
unit, be sure the cable system is grounded. U.S.A models onlySection 810 of the National Electrical Code, ANSI/NFPA No. 701981, provides information with respect to proper grounding of the
mount and supporting structure, grounding of the coax to a
discharge unit, size of grounding conductors, location of discharge
unit, connection to grounding electrodes, and requirements for the
grounding electrode.
21. Lightning - For added protection of this unit during a lightning storm
or when it is left unattended and unused for a long period of time,
unplug power cord form the wall.
FCC & ICES INFORMATION
(U.S.A and Canadian Models Only)
WARNING - This equipment has been tested and found to comply with
the limits for a Class B digital device, pursuant to Part 15 of the FCC
Rules and ICES-003 of Industry Canada. These limits are designed to
provide reasonable protection against harmful interference when the
equipment is operated in a residential installation. This equipment
generates, uses and can radiate radio frequency energy and, if not
installed and used in accordance with the instruction, may cause
harmful interference to radio communications. However, there is no
guarantee that interference will not occur in a particular installation. If
this equipment does cause harmful interference to radio or television
reception, which can be determined by turning the equipment off and
on, the user is encouraged to try to correct the interference by one or
more of the following measures:
– Reorient or relocate the receiving antenna.
– Increase the separation between the equipment and receiver.
– Connect the equipment into an outlet on a circuit different from that to
which the receiver is connected.
– Consult the dealer or an experienced radio/TV technician for help.
Intentional or unintentional changes or modifications not expressly
approved by the party responsible for compliance shall not be made.
Any such changes or modifications could void the user's authority to
operate the equipment.
The user may find the following booklet prepared by the Federal
Communications Commission helpful: "How to Identify and Resolve
Radio-TV Interference Problems". This booklet is available from the
U.S. Government Printing Office, Washington, DC 20402, Stock
No.004-000-00345-4.
Safety Precautions
Securite
CAUTION
ATTENTION
RISK OF ELECTRICK SHOCK
DO NOT OPEN!
RISQUE DE CHOC ELECTRIQUE,
NE PAS OUVRIR.
CONFIGURATION
1. Read Instructions - All the safety and operating instructions should
be read before the unit is operated.
2. Retain Instructions - The safely and operating instructions should be
retained for future reference.
3. Head Warnings - All warnings on the unit and in the operating
instructions should be adhered to.
4. Follow Instructions - All operating and use instructions should be
followed.
5. Cleaning - Unplug the unit from the outlet before cleaning. Do not use
liquid cleaners or aerosol cleaners. Use a damp cloth for cleaning.
6. Attachments - Do not use attachments not recommended by the unit
manufacturer as they may cause hazards.
7. Water and Moisture - Do not use this unit near water-for example,
near a bath tub, wash bowl, kitchen sink, or laundry tub, in a wet
basement, near a swimming pool, in an unprotected outdoor
installation, or any area which is classified as a wet location.
8. Accessories - Do not place this unit on an unstable stand, tripod,
bracket, or mount. The unit may fall, causing serious injury to a
person and serious damage to the unit. Use only with a stand, tripod,
bracket, or mount recommended by the manufacturer, or sold with
the unit. Any mounting of the unit should follow the
manufacturer's instructions, and should use a
mounting accessory recommended by the
manufacturer. An appliance and cart
combination should be moved with care. Quick
stops, excessive force, and uneven surfaces may
cause the appliance and cart combination to
overturn.
9. Ventilation - Operatings in the enclosure, if any, are provided for
ventilation and to ensure reliable operation of the unit and to protect
it from overheating. These openings must not be blocked or covered.
This unit should not be placed in a built-in installation unless proper
ventilation is provided or the manufacturer's instructions have been
adhered to.
10. Power Sources - This unit should be operated only from the type of
power source indicated on the marking label. If you are not sure of
the type of the power supply you plan to use, consult your appliance
dealer or local power company. For units intended to operate from
battery or other sources, refer to the operating instructions.
11. Grounding or Polarization - This unit may be equipped with a
polarized alternating-current line plug (a plug having one blade
wider than the other). This plug will fit into the power outlet only one
way. This is a safety feature. If you are unable to insert the plug fully
into the outlet, try reversing the plug. If the plug should still fail to fit,
contact your electrician to replace your obsolete outlet. Do not
defeat the safety purpose of the polarized plug. Alternately, this unit
may be equipped with a 3-wire grounding-type plug, a plug having a
third (grounding) pin. This plug will only fit into a grounding-type
power outlet. This is a safety feature. If you are unable to insert the
plug into the outlet, contact your electrician to replace your obsolete
outlet. Do not defeat the safety purpose of the grounding-type plug.
12. Power - Cord Protection-Power-supply cords should be routed so
that they are not likely to be walked on or pinched by items placed
upon or against them, paying particular attention to cords and plugs,
convenience receptacles, and the point where they exit from the
appliance.
13. Power Lines - An outdoor system should not be located in the
vicinity of overhead power lines or other electric light or power
circuits, or where it can fall into such power lines or circuits. When
installing an outdoor system, extreme care should be taken to keep
from touching such power lines or circuits as contact with them
might be fatal. U.S.A. models only-refer to the National Electrical
Code Article 820 regarding installation of CATV systems.
14. Overloading - Do not overload outlets and extension cords as this
can result in a risk of fire or electric shock.
15. Object and Liquid Entry - Never push objects of any kind into this
unit through openings as they may touch dangerous voltage points
or short-out parts that could result in a fire or electric shock. Never
CAUTION: TO REDUCE THE RISK OF
ELECTRICAL SHOCK, DO NOT OPEN COVERS.
NO USER SERVICEABLE PARTS INSIDE.
REFER SERVICING TO QUALIFIED SERVICE
PERSONNEL.
Danger: Pour éviter tout risque d'électrocution, ne
pas ouvrir le boîtier. Il n'y a pas de pièces
remplaçables à l'intérieur. Pour toute révision,
s'adresser à un technicien spécialisé.
This label may appear on the bottom of the unit due to
space limitations.
Cet étiquette peut apparaître en dessous de l'appareil
dû aux limitations d'espace.
The lightning flash with an arrowhead
symbol, within an equilateral triangle, is
intended to alert the user to the
presence of uninsulated "dangerous
voltage" within the unit's enclosure that
may be of sufficient magnitude to
constitute a risk of electric shock to
persons.
L'éclair fléché dans un triangle
équilatéral avertit l'utilisateur de la
présence d'une haute tension non
isolée à l'intérieur de l'appareil. Elle peut
être d'une magnitude suffisante pour
constituer un risque d'électrocution.
The exclamation point within an
equilateral triangle is intended to alert
the user to presence of important
operating and maintenance (servicing)
instructions in the literature
accompanying the appliance.
Le point d'exclamation à l'intérieur d'un
triangle équilatéral avertit l'utilisateur de
la présence d'instructions importantes
d'utilisation et de maintenance dans la
documentation accompagnant
l'appareil.
Warning
To prevent fire or shock hazard, do not expose
units not specifically designed for outdoor use to
rain or moisture.
Attention
Pour éviter un incendie ou une électrocution, ne pas
exposer les appareils qui ne sont pas conçus spécifiquement pour usage extérieur à la pluie ou à l'humidité.
Attention: Installation should be
performed by qualified service
personnel only in accordance with the
National Electrical Code or applicable
local codes.
Attention: L'installation doit être
effectuée uniquement par du personnel
de service qualifié conformément à la
réglementation du Code Electrique
National ou à la réglementation locale.
Power Disconnect. Units with or
without ON-OFF switches have power
supplied to the unit whenever the power
cord is inserted into the power source;
however, the unit is operational only
when the ON-OFF switch is in the On
position. The power cord is the main
power disconnect for all units.
Disjonction de l'alimentation.
Les appareils avec ou sans commutateure
ON-OFF sont alimentés à chaque fois que
le cordon d'alimentation est branché à la
source d'alimentation; toutefois, les
appareils disposant de commutateurs ONOFF ne fonctionnent que lorsque le
commutateur ON-OFF est sur la position
ON. Le cordon d'alimentation est la
disjonction d'alimentation principale pour
tous les appareils.
2
Page 4
IMPORTANT SAFEGUARDS
Precauciones De Seguridad
Dieses Zeichen kann aus Platzgründen auf der
Unterseite des Gerätes angebracht sein.
Dieses Zeichen weist den Benutzer auf
die nicht isolierte Hochspannung
innerhalb der Anlage hin. Es besteht die
Gefahr eines Elektroschlages.
Das Ausrufezeichen in dem
gleichseitigen Dreieck ist dazu da, den
Benutzer auf wich-tige Inbetriebnahmeund Instandhaltungs-vorschriften
hinzuweisen, die dem Gerät in Form
einer Broschüre beigelegt sind.
Warnung
Um das Risiko von Feuer oder Elektroschlag zu
vermeiden, darf weder das Gerät selbst, noch das
Netzgerät Regen oder Feuchtigkeit ausgesetzt werden.
Achtung!: Die Installation sollte nur von
qualifiziertem Kundendienstpersonal
gemäß jeweilig zutreffender
Elektrovorschriften ausgeführt werden.
Netzanschluß. Geräte mit oder ohne
Netzschalter haben Spannung am
Gerät anliegen, sobald der Netzstecker
in die Steckdose gesteckt wird. Das
Gerät ist Jedoch nur betriebsbereit,
wenn der Netzschalter (EIN/AUS) auf
EIN steht. Wenn man das Netzkabel
aus der Stekdose zieht, dann ist die
Sapnnungszuführung zum Gerät
vollkommen unterbrochen.
Precaution: Pare Reducir El Riesgo De Choque
Eléctrico, Favor No Abrir La Cubierta. Este Equipo
No consta De Piezas O Partes Que Requieren
Servicio O Mantenimiento. Para Reparaciones
Favor Referirse A Un Técnico Calificado.
Debido a limitaciones de espacio, esta etiqueta puede
aparecer en la parte inferior de la unidad.
El símbolo representado por un relámpago
con punta de flecha dentro de un triángulo
equilátero, se muestra con el objetivo de
alertar al usuario que existen "voltages
peligrosos" sin aislamiento, dentro de la
cubierta de la unidad. Dichos voltages
pueden ser de tal magnitud que constituyen
un riesgo de choque eléctrico a personas.
El símbolo de exclamación dentro de
un triángulo equilátero, se muestra con
el objetivo de alertar al ususario de que
instrucciones de operación y
mantenimiento importantes acompañan
al equipo.
Peligro
Para evitar el peligro de incendio ó choque eléctrico, no
exponga a la lluvia ó humedad, equipos que no han sido
diseñados para uso exterior.
Atención: La instalación de este equipo
debe ser realizada por personal capacitado,
solo en acuerdo, y en cumplimiento de
normas del "National Electric Code" (Código
Eléctrico Nacional) ó las normas del
Gobierno Nacional Local.
Para Desconectdar la Alimentación:
Unidades no equipadas con interruptores
ON/OFF, son alimentadas cuando el cable
de alimentación, es conectado a la corriente
eléctrica. Las unidades equipadas con
interruptores son alimentadas de igual
forma, pero adicionalmente requieren qur el
interruptor esté posicionado en ON. El cable
de alimentación es el medio principal de
desconexión del equipo.
Important Safeguards
Contents
Controls and Indicators
Connectors
Set Up
1
4
5
8
9
MENU
How to Set Menu
Setting Current Time
Setting Menu
11
13
16
PLAYBACK
Operation
Various Playbacks
21
23
RECORDING
Set before Recording
Record Locking
Basic Recording
Series Recording
Alarm Recording
27
28
29
31
32
FUNCTION
Alarm Functions
Convenient Functions
33
35
SERVICE
WARNING: Electrostatic-sensitive device. Use
proper CMOS/MOSFET handling precautions
to avoid electrostatic discharge.
CONFIGURATION
Warnung: Verhindern Sie einen möglichen
Elektroschlag, indem Sie die Abdeckung nicht
entfernen. Wenden Sie sich bei der Wartung an
dafür qualifiziertes Personal.
CONFIGURATION
NOTE: Grounded wrist straps must be worn
and proper ESD safety precautions observed
when handling the electrostatic-sensitive
printed circuit boards.
MENU
RIESGO DE CHOQUE
ELECTRICO INO ABRIRI
DESCRIPTION
The SVR-24JP/SVR-960JP Video Cassette
Recorder offers time-lapse in 3-and 24-hour
selectable speeds for a variety of CCTV
applications.
INSTALLATION
Install the SVR-24JP/SVR-960JP in environments
where the operating temperature is +5°C to +40°C
(+41°F to +104°F) and the relative Humidity is 0% to
80% relative, noncondensing.
CONNECTION
Method of Connection
Series Recording, Alarm Connections
36
37
MAINTENANCE
Maintenance
Troubleshooting
Daily Checks
Before Requesting Service
Specifications
38
39
42
43
44
UNPACKING
Unpack carefully. This is electronic equipment and
should be handled with care.
If an item appears to have been damaged in
shipment, replace it properly in its carton and
notify the shipper. If any items are missing, notify
your Sales Representative or Customer Service.
The shipping carton is the safest container in
which the unit may be transported.
Save it for possible future use.
Note: You may hear the clicking sound when you press key buttons in the front.
It is natural sound caused by “solenoid” which is to enforce the control for the spinning of the capstan
motor. The capstan motor in this VCR is ball bearing type which lasts more than 10,000 hours.
3
PLAYBACK
PRECAUTION
RECORDING
ACHTUNG!
HOCHSPANNUNGSGEFAHR
NICHT ÖFFNEN!
FUNCTION
Sicherheitsvorkenhrungen
CONTENTS
CONNECTION
12/7/01 4:07 PM
MAINTENANCE
01671A SVR-24JP/960JP-E1
4
01671A SVR-24JP/960JP-E1
12/7/01 4:07 PM
Page 6
22 21 20
19
18 17 16
REC
F.F
W
RE
PLAY
ECK
JECT
CK
REC LO
TIMER
REV
AUDIO
UNT
ON CO
CN
CLEAR
T.MEMO
RESET
CK
REC LO
Name
MODE
TIME
ET
KING/S
TRAC
T
SHIF
CK
V-LO
MENU
1
ACCESSORY
2
3
4
5
6
7
Reference
Page
POWER
Push for power on/off
21
2
MENU
Push to display menu display
11
3
SHIFT ❷ , ❿
Push to set menu and clock
11
V-LOCK
Push to adjust jitter of picture
22
,
4
TRACKING/SET
5
TIME MODE
6
REC LOCK LED
,
,
Push to adjust tracking and set menu and clock
22
Push to change time mode on playback
24
Record locking mode on/off indicator
28
7
DISPLAY PANEL
Displays current unit operation settings
7
8
REV
Push to reverse playback
(L3H mode only)
25
9
AUDIO ON
Push to control audio on/off
10
COUNT
Initial: Display tape counter
Once: Push to display alarm counter
Twice: Push to display operating hour
34
33
Initial: Display tape counter
Once: Push to display counter memory
25
ER
POW
15
14
13
12
11
10
9
8
Description
1
P/STILL
REC CH
STOP/E
No
11
CNT. MEMO
Twice: Push to display alarm memory
34
12
CLEAR
Push to clear counter
34
13
RESET
Push to reset this unit
31
14
TIMER
Push to set timer (programmed) recording
20
15
REC LOCK
Use to select record locking mode
28
16
REC CHECK
Push to check recording (short time playback)
during recording
29
17
P/STILL
Push to freeze frame on the playback or to
pause on the record mode
26
18
REC
Push to record
29
19
SHUTTLE
Use to operate tape
22
20
JOG
Turn to advance or reverse a frame by frame
26
21
PLAY
Push to play a tape
22
22
STOP/EJECT
Push to stop/eject tape
22
INSTRUCTION MANUAL
5
6
CONFIGURATION
CONTROLS AND INDICATORS
12/7/01 4:07 PM
Page 8
CONTROLS AND INDICATORS
FRONT SIDE
REAR SIDE
Recording display Reserve timer recording
display
• Lights during
REC LOCK lamp
CONNECTORS
• Lights during record
locking mode.
recording.
• Lights after pressing timer
button for timer recording.
Tape presence and
operation display
Alarm recording display
• Lights during alarm
recording and flickers
upon completion of
recording.
EXTERNAL EQUIPMENT TERMINAL
REC/PLAY Time
mode display.
1 ALARM IN
2 ALARM OUT
6 TAPE END OUT 7 SERIES OUT
1
2
3
4
3 ALARM RESET 4 ERROR OUT
5 TRIGGER OUT
8 GND
10 1 SHOT RECIN
9 SERIES IN
5
6
7
8
9
10
RS-232C
IN
IN
REC LOCK
C.MEMO
A.MEMO
HOUR
REC
FAULT
T-END
AUDIO
Power failure return
display
Alarm/Counter
Memory display
• Counter Memory:
C. MEMO.
• Alarm Memory:
A. MEMO.
• Operating hour
display: HOUR.
• Flashes upon return of
AC power.
• Pressing any button
turns off.
AUDIO IN/OUTPUT JACK
(RCA TYPE)
GND
2
3
4
5
6
TERMINAL NAME
DISPLAY OF OPERATING CONDITIONS
VIL
T
VIH
Playback
Rotates clockwise
Recording
Rotates clockwise
REC
Still
Blinking
Pause
Blinking
REC
Slow Playback
Blinking and rotating clockwise
Timer Recording
Rotates clockwise
REC
Forward Search
Rotates rapidly clockwise
Alarm Recording
Rotates clockwise
REC
Reverse Search
Rotates rapidly counterclockwise
Reverse Playback Rotates counterclockwise
Reverse Slow
Playback
Blinking and rotates slowly
counterclockwise
Rewinding
Fast Forwarding
4 ERROR OUT
5 TRIGGER OUT
Rotates rapidly counterclockwise
Rotates rapidly clockwise
6 TAPE END OUT
7 SERIES OUT
9 SERIES IN
10
TYPE
VIH : 4 ~ 5V
VIL : 0 ~ 0.6 V
T
: More than 0.5 second
INPUT
VIL
T
VIH : 4 ~ 5V
VIL : 0 ~ 0.6 V
T
: More than 0.5 second
VIL
OUTPUT
T
VIH : 4 ~ 5V
VIL : 0 ~ 0.6 V
T
:
VIL
OUTPUT
T
VIH : 4 ~ 5V
VIL : 0 ~ 0.6 V
T
: More than 8m sec
VIL
OUTPUT
T
VIH : 4 ~ 5V
VIL : 0 ~ 0.6 V
T
: During input any button
VIL
OUTPUT
T
VIH : 4 ~ 5V
VIL : 0 ~ 0.6 V
T
: More than 1 second
0V
GND
VIL
VIH : 4 ~ 5V
VIL : 0 ~ 0.6 V
T
: More than 0.5 second
INPUT
VIL
VIH : 4 ~ 5V
VIL : 0 ~ 0.6 V
T
: More than 0.5 second
INPUT
VIH
VIH
VIH
VIH
VIH
T
VIH
T
7
9
VIH : 4 ~ 5V
VIL : 0 ~ 0.6 V
T
: Alarm Recording
VIL
VIH
8 GND
10 1 SHOT REC IN
8
T
2 ALARM OUT
3 ALARM RESET
7
SIGNAL LEVEL
VIH
1 ALARM IN
Display other than playback
VIDEO IN/OUTPUT JACK
(BNC TYPE)
EXTERNAL EQUIPMENT TERMINAL INFORMATION
1
Play back display
VIDEO
H
Counter display
• Operating hour display.
• Lights when VCR
reaches end of tape. • Alarm/Counter memory
display. "
"
OUT
OUT
POWER PLUG SLOT
Tape End display
CONFIGURATION
01671A SVR-24JP/960JP-E1
OUTPUT
INPUT
8
01671A SVR-24JP/960JP-E1
12/7/01 4:07 PM
Page 10
SET UP
• Check the following preparations before using this unit.
• The shape of the real power plug may be different from the shape in the manual.
Make a connection
between the monitor and
this unit.
2
Connect the CCD camera
to this unit.
3
Insert the power plug of
this unit video into the wall
outlet.
• Insert the plug into AC100~240V
working outlet.
4
Turn on the power of the
monitor.
CONFIGURATION
1
• If using a monitor turn on power.
• If using a TV, turn on power and switch
to video input.
• Refer to the operating instructions for
further details on TV.
MONITOR
6
7
8
9
IN
OUT
AC100~240V
VIDEO
1 ALARM IN
2 ALARM OUT
6 TAPE END OUT 7 SERIES OUT
1
2
3
4
3 ALARM RESET 4 ERROR OUT
8 GND
5
9 SERIES IN
6
7
8
9
10
RS-232C
IN
VIDEO INPUT
POWER
5 TRIGGER OUT
10 1 SHOT RECIN
IN
OUT
OUT
AUDIO
VIDEO
1 ALARM IN
2 ALARM OUT
6 TAPE END OUT 7 SERIES OUT
1
2
3
4
3 ALARM RESET 4 ERROR OUT
8 GND
5
9 SERIES IN
6
7
8
5 TRIGGER OUT
10 1 SHOT RECIN
9
10
RS-232C
IN
IN
OUT
OUT
1 ALARM IN
2 ALARM OUT
6 TAPE END OUT 7 SERIES OUT
1
2
3
4
3 ALARM RESET 4 ERROR OUT
5 TRIGGER OUT
8 GND
10 1 SHOT RECIN
5
9 SERIES IN
6
7
8
9
AUDIO
VIDEO
10
RS-232C
IN
IN
OUT
OUT
AUDIO
VIDEO
IN
IN
OUT
CCD CAMERA
OUT
AUDIO
9
VIDEO
10
01671A SVR-24JP/960JP-E1
12/7/01 4:07 PM
Page 12
HOW TO SET MENU
1. CLOCK SET/ADJUST
1
Press the MENU button
(Does not display while in play mode
or until the time has been set.)
CLOCK SET/ADJUST
1 ❿ SUMMER TIME SET (USE)
2 DISPLAY MODE (YY-MM-DD)
3 CLOCK SET/ADJUST
YEAR
2001
DATE
TIME
01/01 MON 12:00
5. VCR MODE SETUP
VCR MODE SETUP
1 ❿ TRIGGER --------------------(1FIELD)
2 V-SYNC ----------------------------(ON)
3 BUZZER ---------------------------(ON)
4 TAPE LENGTH ----------------(E240)
$
END:MENU
2. DISPLAY MODE SETUP
MAIN MENU
1 ❿ CLOCK SET/ADJUST
2 DISPLAY MODE SETUP
3 ALARM REC SETUP/RECALL
4 REC MODE SETUP
5 VCR MODE SETUP
6 PROGRAM SETUP
7 POWER LOSS MEMORY
(❷❿)
END:MENU
DISPLAY MODE SETUP
1 ❿ DATE DISPLAY ------------------(ON)
2 TIME DISPLAY-------------------(ON)
3 POSITION -------------(R-BOTTOM)
(❷❿)
END:MENU
• Set desired time date format and on
screen location.
(❷❿)
END:MENU
MENU
(❷❿/– +)
MENU
• Trigger out timing control and
beeper sound control.
6. PROGRAM SETUP
•
•
•
•
•
•
❿
PROGRAM SETUP1
START STOP DATE
MODE
PROGRAM SETUP2
( ❷❿ /– +,CLEAR)
END:MENU
3. ALARM REC SETUP
2
To select a menu item
press the SHIFT ❷ button
(The "❿" sign will move down once
with each press)
3
After positioning " ❿" sign
to the desired menu item,
press the SHIFT ❿ button
to proceed.
• Displays the selected menu on the
screen.
(Refer to 13~20 page)
ALARM REC SETUP/RECALL
1 ❿ MODE -----------------------------(L3H)
2 DURATION --------------------(AUTO)
3 BUZZER ---------------------------(ON)
4 ALARM RECALL
(❷❿/– +)
END:MENU
• Select Alarm REC Mode.
4. REC MODE SETUP
PROGRAM SETUP2
START STOP DATE
MODE
•❿
•
•
•
• PROGRAM SETUP1
•
( ❷❿ /– +,CLEAR)
• Select the program record.
7. POWER LOSS MEMORY
REC MODE SETUP
1 ❿ REPEAT REC-------------------(OFF)
2 SERIES REC -------------------(OFF)
3 1-SHOT REC--------------------(OFF)
(❷❿)
END:MENU
• Set the repeat record mode. 1-shot
record mode and series record
mode.
11
END:MENU
•
•
•
POWER LOSS MEMORY
YEAR DATE TIME
OFF
ON
OFF
ON
OFF
ON
END:MENU
• Displays power failure and restore
history.
12
01671A SVR-24JP/960JP-E2
12/7/01 4:06 PM
Page 14
SETTING CURRENT TIME
– HOW TO SET THE SUMMER TIME
Example) December 25 . 2002 13:30
Press the MENU button.
• When pressing the MENU button,
2
Press the SHIFT ❿!button.
• When pressing the SHIFT ❿ !button,
CLOCK SET/ADJUST displays.
3
Press the SHIFT ❿!button.
• When pressing the SHIFT ❿ button,
the SUMMER TIME SET displays.
4
• Press the SHIFT ❿ !button to toggle
the MAIN MENU displays.
Press the SHIFT ❷!button.
• Select the SUMMER TIME IN.
the summer time USE or NO USE.
MENU
SHIFT
V-LOCK
SHIFT
V-LOCK
SHIFT
V-LOCK
MAIN MENU
1 ❿ CLOCK SET/ADJUST
2 DISPLAY MODE SETUP
3 ALARM REC SETUP/RECALL
4 REC MODE SETUP
5 VCR MODE SETUP
6 PROGRAM SETUP
7 POWER LOSS MEMORY
(❷❿)
CLOCK SET/ADJUST
1 ❿ SUMMER TIME SET (USE)
2 DISPLAY MODE(YY-MM-DD)
3 CLOCK SET/ADJUST
YEAR
2001
SUMMER TIME SET
1 ❿ SUMMER TIME
(USE)
2 SUMMER TIME IN
3 SUMMER TIME OUT
DATE
TIME
01/01 MON 12:00
$
(❷❿/– +)
END:MENU
IN
OUT
END:MENU
Set the week, day, month
and time using the
TRACKING/ SET
buttons.
• Press the SHIFT ❿ !button after
6
Press the SHIFT ❷!button
and set the SUMMER TIME
OUT.
setting the week, then $ sign will
place under the day.
• The month and time work in the
same way.
SUMMER TIME SET
1 SUMMER TIME
(USE)
2 ❿ SUMMER TIME IN
3 SUMMER TIME OUT
WEEK
MONTH TIME
LAST /FRI
2
9:00
FIRST /SUN 12
12:00
(❷❿/– +)
5
MENU
1
WEEK
MONTH TIME
LAST /FRI 11
14:00
IN
$
(❷❿/– +)
END:MENU
END:MENU
– HOW TO SET THE DISPLAY MODE
7
Press the MENU button.
• Check the week, day, month and
time again and press the MENU
button.
8
Press the SHIFT ❷ button and
press the SHIFT ❿ button.
• Whenever pressing the SHIFT ❿
button, the display mode changes.
• The display changes as following.
(YY-MM-DD) ➝ (DD-MM-YY) ➝
(MM-DD-YY)
MENU
SHIFT
V-LOCK
TRACKING/SET
SUMMER TIME SET
1 SUMMER TIME
(USE)
2 ❿ SUMMER TIME IN
3 SUMMER TIME OUT
IN
WEEK
MONTH TIME
14:00
LAST /FRI 11
$
(❷❿/– +)
13
END:MENU
SHIFT
V-LOCK
SUMMER TIME SET
1 SUMMER TIME
(USE)
2 SUMMER TIME IN
3 ❿ SUMMER TIME OUT
OUT
WEEK
MONTH TIME
12:00
FIRST /SUN 12
$
(❷❿/– +)
CLOCK SET/ADJUST
1 ❿ SUMMER TIME SET (USE)
2 DISPLAY MODE(YY-MM-DD)
3 CLOCK SET/ADJUST
YEAR
2001
DATE
TIME
01/01 MON 12:00
(❷❿/– +)
YEAR
2001
DATE
TIME
01/01 MON 12:00
$
$
END:MENU
CLOCK SET/ADJUST
1 SUMMER TIME SET (USE)
2 ❿ DISPLAY MODE(YY-MM-DD)
3 CLOCK SET/ADJUST
END:MENU
(❷❿/– +)
END:MENU
14
12/7/01 4:06 PM
Page 16
SETTING MENU
SETTING CURRENT TIME
– SETTING DISPLAY AND ALARM REC
– HOW TO SET THE CURRENT TIME
9
Press the SHIFT ❷!button.
• CLOCK SET/ADJUST starts.
10
Set the year, month and
day using the TRACKING/
SET
buttons.
1
DISPLAY MODE SETUP
DISPLAY MODE SETUP
1 ❿ DATE DISPLAY ------------------(ON)
2 TIME DISPLAY-------------------(ON)
3 POSITION -------------(R-BOTTOM)
(In case DISPLAY MODE is YY-MM-DD)
• When pressing TRACKING/SET
button once, “2002” is set.
• Press the SHIFT ❿ !button after
SHIFT
V-LOCK
setting the year, then $ sign will
place under the month.
• The month works in the same way.
CLOCK SET/ADJUST
1 SUMMER TIME SET (USE)
2 DISPLAY MODE (YY-MM-DD)
3 ❿ CLOCK SET/ADJUST
YEAR
2001
END:MENU
YEAR
2002
DATE
12/25 WED
TIME
12:00
$
(❷❿/– +)
11
Set the hour and minute
using the TRACKING/SET
buttons.
• When pressing TRACKING/SET
button, “13” is set.
• Press the SHIFT ❿ !button to place
the $ sign under the minute.
• The minute works in the same way.
12
END:MENU
Press the MENU button
twice.
• Check the year, month, day and
hour again and press the MENU
button twice.
MENU
2
ALARM REC SETUP/RECALL
1 ❿ MODE----------------------------- (L3H)
2 DURATION --------------------(AUTO)
3 BUZZER ---------------------------(ON)
4 ALARM RECALL
( ❷❿ /– +)
YEAR
2002
2002-12-25 WED
13: 30:00 L 3 H
DATE
TIME
12/25 WED 13:30
$
REFERENCE
(❷❿/– +)
END:MENU
Time display
• There is no display of a.m or p.m.
• 1:00 p.m is displayed as 13:00, 11:00 p.m as
23:00 and 12:00 p.m. as 00:00 respectively.
15
2002-12-25 WED
9:16:14 L3H
L-UPPER
L-BOTTOM
2002-12-25 WED
9:16:14 L3H
2002-12-25 WED
9:16:14 L3H
R-UPPER
R-BOTTOM
2002-12-25 WED
9:16:14 L3H
ALARM REC SETUP
END:MENU
TRACKING/SET
CLOCK SET/ADJUST
1 SUMMER TIME SET (USE)
2 DISPLAY MODE (YY-MM-DD)
3 ❿ CLOCK SET/ADJUST
• TIME: Select time display ON/OFF
ON
OFF
2002-12-25 WED 2002-12-25 WED
12:45:30 L3H
• POSITION: Select position of date & time on
the screen.
* To turn the time on or off
1. Place the " ❿ " Sign in the
"TIME DISPLAY" position using the
SHIFT ❷ button.
2. Press the SHIFT ❿ !button to toggle
the time ON and OFF.
(The DATE and POSITION
work in the same way.)
CLOCK SET/ADJUST
1 SUMMER TIME SET (USE)
2 DISPLAY MODE (YY-MM-DD)
3 ❿ CLOCK SET/ADJUST
$
END:MENU
(example)
TRACKING/SET
DATE
TIME
01/01 MON 12:00
(❷❿/– +)
(❷❿)
• DATE: Select date display ON/OFF
ON
OFF
2002-12-25 WED
12:45:30 L3H
12:45:30 L3H
MENU
01671A SVR-24JP/960JP-E2
* To set ALARM REC in L3H
mode for 5 minutes.
1. Place the " ❿ " sign in the
"DURATION" position using
the SHIFT ❷ !button.
2. With each press of the SHIFT ❿
button the display changes "SEL
3 MIN".
3. Select "SEL 5 MIN" using the
SET "+" button.
4. Press the MENU button.
* MODE: Select ALARM REC speed.
Select L3H, L12H, L24H. (L8H is not
available).
OFF: This unit does not Alarm REC
whether Alarm signal comes in or not.
• DURATION: Set ALARM REC time.
AUTO
SEL 3MIN
TAPE END
• To set ALARM REC time.
Adjust the time from SEL 20SEC to
5 MIN using the "set +/–" buttons.
• AUTO: If an alarm signal is received,
ALARM REC will begin and continue
until the alarm signal is interrupted. The
ALARM REC will then stop (It will not
be cancelled within 1 minute).
• TAPE END: If an alarm signal is
received, ALARM REC will begin and
continue to the end of the tape.
• BUZZER: Selects if the beeper sound is on or off
during ALARM REC.
• ALARM RECALL : Check Alarm recording.
(Refer to 33 page)
16
01671A SVR-24JP/960JP-E2
12/7/01 4:06 PM
Page 18
SETTING MENU
– SETTING REC MODE AND VCR MODE
4
REC MODE SETUP
REC MODE SETUP
1 ❿ REPEAT REC-------------------(OFF)
2 SERIES REC -------------------(OFF)
3 1-SHOT REC--------------------(OFF)
( ❷❿ )
END:MENU
SHIFT ❷: MOVE BUTTON
SHIFT ❿: ENTER (SELECT)
BUTTON
* You cannot select Repeat Rec &
Series Rec to ON simultaneously.
• REPEAT REC: Select ON/OFF for repeat
recording
ON: When the tape reaches the end during
recording, it will automatically rewind to
the beginning and the recording will
continue.
OFF: When the tape reaches the end during
recording, it will automatically rewind to
the beginning and it will stop.
• SERIES REC: Series recording is a
convenient function for using two
or more VCRs. The second unit
automatically begins recording
when the tape in the first unit
reaches its end.
– Connect methods Refer to method of series
recording connection. (page 37)
• 1-SHOT REC: Used by selecting 000H on
REC TIME MODE
OFF: Records one frame when the REC
button is pressed once.
1 MIN: Records one frame on one minute
intervals with one press of the REC
button.
2 MIN: Records one frame on two minute
intervals with one press of the REC
button.
3 MIN: Records one frame on three minute
intervals with one press of the REC
button.
17
VCR MODE SETUP
VCR MODE SETUP
1 ❿ TRIGGER --------------------(1FIELD)
2 V-SYNC ----------------------------(ON)
3 BUZZER ---------------------------(ON)
4 TAPE LENGTH ----------------(E240)
( ❷❿ )
MENU
3
END:MENU
SHIFT ❷: MOVE BUTTON
SHIFT ❿: ENTER (SELECT)
BUTTON
• TRIGGER
– Selects how many frames per
camera to be recorded when
connected to a FRAME
SWITCHER
(Refer to the owner's manual for
detailed information)
• V-SYNC
– The jitter of picture may happen
when connecting a particular
FRAME SWITCHER.
Select ON or OFF for the position
unless jitter.
• BUZZER
– Select the beeper sound on or off
(Refer to page 34)
• TAPE LENGTH
– Select the videocassette length.
This information is usually printed
on the tape box.
– According to the tape length
setting, the time mode on the
display changes as following.
E-180
L3H
E-240
L4H
L8H
L12H
L12H
L18H
L24H
L32H
18
01671A SVR-24JP/960JP-E2
12/7/01 4:06 PM
Page 20
SETTING MENU1
– SETTING PROGRAM REC
PROGRAM SETUP 1
•
•
•
•
•
•
PROGRAM SETUP1
START STOP DATE
MODE
L3H
L24H
❿ 13:03 → 13:15 MON
13:03 → 13:15 DAILY
OFF
13:03 → 13:15 MON
PROGRAM SETUP2
( ❷❿ /– +,CLEAR)
L12H
END:MENU
• How to set a PROGRAM REC
example) To set up a programmed recording
from 13:03 to 13:15 on Monday in
the L3H mode.
6
1. Press the SHIFT ❷ button to move the cursor
to the vacant program position.
PROGRAM SETUP 2
•
•
•
•
•
•
2. Press the SHIFT ❿ !button to display the
current time.
3. Press the TRACKING/SET "+" or "–" buttons to
set the hour of the starting time.
❿
PROGRAM SETUP2
START STOP DATE
MODE
• When 5 program is set in the PROGRAM SETUP 1, select
PROGRAM SETUP 2.
• Use the same method for setting PROGRAM REC as in the
PROGRAM SETUP 1.
* When finished with PROGRAM SETUP 1, 2 press MENU to
end and press TIMER to begin standby.
POWER
PROGRAM SETUP1
TIMER
( ❷❿ /– +,CLEAR)
END:MENU
4. Press the SHIFT ❿ !button to move to the
minute.
REC
REC
CAUTION
5. Press the TRACKING/SET "+" or "–" buttons to
set the minute of the starting time.
1. You can use only the POWER or RESET
buttons during PROGRAM REC.
6. By the same methode, set up the ending time
2. During a PROGRAM REC, to
and move to the date.
cancel the recording press the POWER
button.
7. Press the TRACKING/SET "+" or "–" buttons to
3. To cancel a PROGRAM REC, select the
set monday and press SHIFT ❿ !button.
event and press CLEAR button to
display "OFF".
8. Press the TRACKING/SET "+" or "–" buttons to
Pressing the SHIFT ❿ !button again in
set L3H and press SHIFT ❿ !button.
the OFF position to toggles the time set
before.
9. By the same method, set up the NEXT
PROGRAM REC which you may want.
• DAILY : The programmed recording is made at
the same time every day.
REFERENCE
You can set up to 10 programs a week
MENU
5
C.MEMO
* The tape will be ejected and the beeper will sound if the tape
safety tab has been removed.
– CHECKING POWER FAILURE TIME AND DATE.
7
POWER LOSS MEMORY
•
•
•
POWER LOSS MEMORY
YEAR
DATE
TIME
2002
12/25 15:00:00
2002
12/25 15:15:37
2002
12/24 13:25:00
2002
12/24 13:26:00
2002
12/23 17:30:30
2002
12/23 17:40:00
OFF
ON
OFF
ON
OFF
ON
END:MENU
• Displays the memorized time of a power failure and power restore.
* example) If there was a power failure on 17:30:30 12. 23. 2002,
and a power restore on 17:40:00 12. 23. 2002.
(17:30:30= 17 Hours 30 minutes 30 seconds)
* example) If there was a power failure on 13:25:00 12. 24. 2002
and a power restore on 13:26:00 12. 24. 2002,
repeatedly.
1. OFF
ON
2. OFF
ON
3. OFF
ON
2002
2002
2002
2002
12/24
12/24
12/23
12/23
13:25:00
13:26:00
17:30:30
17:40:30
• The screen displays the three most recent events.
The most recent power failure is listed first.
19
20
01671A SVR-24JP/960JP-E2
12/7/01 4:06 PM
Page 22
OPERATION
BASIC PLAYBACK OPERATION
REC
F.F
PLAY
W
RE
P/STILL
CK
REC CHE
AR
O CLE
CNT.MEM
COUNT
K
REC LOC
TIMER
RESET
PLAY
W
RE
PLAY
CK
REC LO
W
RE
POWER
W
RE
For reverse search
MODE
ET
KING/S
SECURITY VIDEO
SHIFT
CK
V-LO
STOP/EJECT
MENU
Insert the tape with the
window facing up.
PLAYBACK
TIME
W
RE
For forward search
PLAYBACK
ER
POW
TRAC
P/STILL
F.F
ON
AUDIO
• When a tape is inserted the VCR is
automatically turned on.
P/STILL
For still
F.F
REV
2
Press the button when
necessary.
F.F
DEO
Y VI
URIT
C
E
S
During normal playback
F.F
ECT
STOP/EJ
1
Press the POWER button
on the VCR and insert the
tape.
To Return to
normal
playback
STOP
W
RE
F.F
W
RE
F.F
EJECT
During stop
For fast forwarding
STOP/EJECT
For fast rewinding
REFERENCE
• Set the time mode to L3H for normal viewing and sound when you playback a rental tape.
• The standard tape may happen some noise in the still mode.
• Slow playback and time mode cannot be set in still mode.
Note the following when playing back the tape recorded in
timelapse mode:
• Although the screen may have no color during picture search, it does not indicate any malfunction or
trouble.
• Although the screen may jitter a little, it is not indicative of malfunction.
• Although the upper part of the screen may appear a little twisted, it does not indicate any malfunction
or trouble.
• Although the screen may jitter a little, it does not indicate any malfunction or trouble.
• Although the sound may not be heard clearly, it does not indicate any malfunction or trouble.
• When playback in L3H mode the tape recorded in L8H/L12H/L24H mode, the recorded picture is
played back at a high speed.
• You cannot hear normal sound when playing back the tape recorded with sound if the recording time
mode is different from the playback time mode.
21
Note the screen adjustment
If the screen shows noise or jitter
• When the tape is inserted, the screen is
automatically adjusted.
• If the screen is not automatically adjusted, adjust
it by pressing the TRACKING
buttons.
• Press
TRACKING/SET
• If the screen is not adjusted using TRACKING
buttons, adjust it by pressing simultaneously the
TRACKING and TRACKING buttons.
,
TRACKING/SET
button.
SHIFT
V-LOCK
• If the screen shows noise during slow
playback, correct by pressing the TRACKING
buttons.
• If the screen shows jitter of a still picture, correct
by pressing the V-LOCK
button.
22
01671A SVR-24JP/960JP-E2
12/7/01 4:06 PM
Page 24
VARIOUS PLAYBACKS
• Insert the tape for playback.
W
P/STILL
CK
REC CHE
1
ECT
STOP/EJ
K
REC LOC
TIMER
REV
AUDIO
NT
ON COU
CNT.ME
AR
MO CLE
RESET
CK
REC LO
Screen search (During
playback)
Turn the SHUTTLE ring clockwise
or counterclockwise.
• The screen will fast forward or fast
rewind.
• The speed is variable by a amount
of turning the SHUTTLE ring.
2
When viewing a slow picture
Press the TIME MODE (
during play back.
,
) button
3
TIME MODE
ER
POW
KING/S
MODE
ET
NU
1 3
W
RE
F.F
TIME
TRAC
SHIFT
V-LOCK
To return to normal playback
• Release the SHUTTLE ring.
W
RE
When viewing special playback pictures
You may not hear normal sound during playback
• Occurrence of noise on the screen does not indicate any trouble.
• The tape recorded by other VCR may show severe noise.
• L3H recording tape
• L8H recording tape
• L12H recording tape
• L24H recording tape
23
• Press the P/STILL button to pause the
picture.
• Turn the JOG dial to view slow reverse
playback or turn the JOG dial to view slow
forward playback.
• Press the PLAY button to view the normal
picture again.
• When the slow play is continued for about
five minutes, the tape is played back
automatically.
– L3H playback ➝ Normal
– L3H playback ➝ Fast
– L8H playback ➝ Normal
– L12H/L24H playback ➝ Slow
– L3H/L8H playback ➝ Fast
– L12H playback ➝ Normal
– L24H playback ➝ Slow
– L3H/L8H/L12H playback ➝ Fast
– L24H playback ➝ Normal
F.F
2
• Then you can not hear the sound.
• When the picture trembles up and down
during slow playback, press the V-LOCK
button. After proper adjustment, view
the slow playback.
• Press the TIME MODE button, and view
the picture at the desired slow speed.
When viewing a forward reverse
slow picture
PLAYBACK
REC
F.F
RE
PLAY
To hear the normal sound
• You can hear the normal sound only
when playing at the recorded speed.
24
01671A SVR-24JP/960JP-E2
12/7/01 4:06 PM
Page 26
VARIOUS PLAYBACK(CONT.)
RE
W
P/STILL
CK
REC CHE
ECT
STOP/EJ
K
REC LOC
TIMER
REV
AUDIO
.ME
NT CNT
ON COU
AR
MO CLE
RESET
CK
REC LO
ER
POW
TIME
TRAC
KING/S
MODE
ET
SHIFT
V-LOCK
4
NU
6,7
4
For viewing a reverse
playback picture
• During normal playback, reverse
playback can be used by pressing
REV.
• Reverse playback is only available
in L3H mode.
• During reverse playback, sound
cannot be heard.
• Press the REV or the PLAY button
during the reverse playback to
playback normally.
5
5
For L12H/L24H hours
playback
• You can not hear sound
from the 12H or 24H mode.
If you want to hear the
sound, press the AUDIO
ON button to let the front
display show L12H/L24H.
• Tape is played back at a
slower speed than the L3H
playback.
• Noise may occur on the
screen.
• To view a clean picture,
choose the L3H playback
or slow playback mode.
REV.
6
Still picture
Press the P/STILL button
to view a still picture
• Then you can not hear the
sound.
• Do not leave the picture in
pause for long periods of
time as it may cause
damage to the video head
and the tape.
• When the picture is
continually paused for about
five minutes, the tape is
played automatically.
• When the picture trembles
up and down, press the
V-LOCK
buttons for
proper adjustment.
7
When viewing still
scene by scene
• Press the P/STILL button.
• Then you can not hear the
sound.
• When turing JOG dial
continually, the picture
moves only one frame at a
time.
• Press the PLAY button to
return to normal playback.
PLAYBACK
REC
F.F
PLAY
To return to normal playback
• Press the PLAY button to
return to normal playback.
TIME MODE
When rewinding the tape
• Set the counter at the original position (
)
by pressing the CLEAR button when starting
the recording or playback. Press the counter
memory button. When turning the SHUTTLE
ring counterclockwise in the stop mode after
completion of recording and progressing of
playback, the tape stops at the starting
position (
) of the recording or playback.
25
SHIFT
V-LOCK
FRONT DISPLAY
C.MEMO
Display of
counter current
position
Display of
counter memory
26
01671A SVR-24JP/960JP-E3
12/7/01 4:06 PM
Page 28
RECORD LOCKING
This unit features a recording safety function and other various recording
functions for multi-purpose applications including monitoring and
observation. You should familiarize yourself with its operation.
RECORDING
Set before Recording
Check to make sure of
current time
• For program recording current time must be
correct.
• If you have not set the current time yet, refer
to the section on setting time and date
(Refer to 13 page).
Is the record safety tab on
the tape in place?
Selecting
method
When you want to
secure recording
Operating
method
Description of
operation
• Press the REC LOCK
button to set "REC
LOCK"
• Pressing the REC LOCK button to
begin REC LOCK mode.
REC LOCK lamp will be on.
• No buttons can be entered in the
REC LOCK mode except the
RESET button.
• The recording continues even
after the power restore.
• Press the REC LOCK
button again.
• REC LOCK lamp will be off.
OFF
REC LOCK
OFF
REC LOCK
RECORDING
With the tab in place
• The tape can be recorded over
again.
Prevention tab
Operations when the tape ends during recording
Without the tab in place
• The tape cannot be recorded
over unless the tab is replaced by
a piece of scotch tape.
Scotch tape
* Repeat record after automatic rewind.
• When REPEAT ON is selected on the menu (However, when even one alarm recording is
made the VCR will eject the tape and power on).
* Power on after tape is ejected
• When reaching the end of tape except repeat recording after automatic rewind.
REFERENCE
Condensation
• If the video is moved from a cool to a warm place suddenly, installed in a humid place or exposed to cold
air from an air conditioner, water drops may be generated on the video head due to the abrupt change in
temperature.
Using the video in this state may cause a malfunction in this product or the tape.
If the video is moved from a cool to a warm place, plug the power cord in, press the power button and
maintain the ON state for 1~2 hours before using.
27
28
01671A SVR-24JP/960JP-E3
12/7/01 4:06 PM
Page 30
BASIC RECORDING
1
REC
F.F
W
P/STILL
CK
REC CHE
Press the VCR power
button
2
Insert the tape with the
erasure prevention tab facing
out
3
Select the recording speed
7
Press the REC or P/STILL button
to record again
ECT
STOP/EJ
K
REC LOC
TIMER
REV
AUDIO
NT
ON COU
CNT.ME
AR
MO CLE
RESET
REC
F.F
RE
PLAY
CK
REC LO
ER
POW
MODE
TIME
TRAC
KING/S
5
6,7
ET
SHIFT
V-LOCK
MENU
1
4
Press the REC button
• Recording starts
• If the erasure prevention tab is missing,
the tape stops, the alarm sounds five
times and the tape is ejected.
W
P/STILL
REC CHECK
4,7
POWER
JECT
STOP/E
TIMER
REV
AUDIO
ON COUNT
CNT.ME
MO CLEAR
REC LOCK
RESET
REC LOCK
ER
POW
TIME
TRAC
MODE
KING/SET
SHIFT
K
V-LOC
MENU
Prevention tab
5
Press the REC CHECK
button
• You can check on the record quality
while recording. The VCR will
playback the video recorded a few
seconds prior to pressing the REC
CHECK button.
REC
6
Press the P/STILL button
• If pausing for more than five minutes, it
playbacks automatically for self-protection of
the video.
If pausing for long periods of time, be sure to
press the STOP button.
REC
P/STILL
REC CHECK
Recording time table
What is an
To protect a
To record again
accidental erasure recording
• Attach scotch tape to
prevention?
• Remove the erasure the area where the
prevention tab.
TIME REC MIN TIME REC MIN
MODE
TIME
MODE
TIME
L3H
5 seconds 72H
3 minutes
L8H 15 seconds 120H
5 minutes
L12H
L24H
36H
Erasure
prevention tab
29
erasure prevention
tab is removed.
Minimum record time from chart below
must be made before REC CHECK will
function.
Erasure
prevention tab
48H
30 seconds 168H
1 minute
240H
1 minute 480H
30 seconds
2 minutes
960H
7 minutes
10 minutes
20 minutes
Tape
type
P/STILL
• This unit is designed for E-180 tapes.
• Whenever possible, use E-180 tapes for typical recording.
• SVR-24JP has only L3H, L8H, L12H and L24H modes.
• Use only the tape marked
REFERENCE
• It is device which
protects the contents
of recording on the
tape or allows to
record over it again.
• Recording speed is selected using
TIME MODE
.
• Recording speed selected is shown on the
display.
Maximum recording time
L3H
L8H
L12H
L24H
36H
48H
72H
120H
168H
240H
480H
960H
E-240 4hours 12hours 20hours 36hours 52hours 68hours 100hours 164hours 228hours 324hours 644hours 1284hours
E-180 3hours
9hours 15hours 27hours 39hours 51hours 75hours 123hours 171hours 243hours 483hours 963hours
40 minutes
*SVR-24JP has only L3H, L8H, L12H
and L24H modes.
30
RECORDING
RE
PLAY
12/7/01 4:06 PM
Page 32
SERIES RECORDING
ALARM RECORDING
This is a convenient function in which when two or more VCRs are
connected the second unit starts recording when the tape on the first unit
reaches the end.
If the VCR is connected to equipment with an alarm output such as a frame switcher,
motion detector or door switch, the VCR will function according to the time and mode
selected on the ALARM REC menu when an alarm is received.
SVR-24JP has only L3H/L12H/L24H mode for ALARM REC.
The below diagram is set L3H mode for ALARM REC.
Connecting
method
Refer to the
connection
method for
series recording
(page 37)
Operating
method
Description
of operation
• Select to No. 4 in the MENU
• Select to "ON" for SERIES
using the SHIFT ❷ !and ❿
button.
• When the tape in the first unit
arrives at its end during
recording, the second unit begins
recording. When the tape in the
second unit arrives at its end and
during recording, the next unit
begins recording if connected.
• When the series recording mode
is selected, the second unit
performs recording even if the
power is turned off.
• As a constant alarm sounding,
you can clear it by only pressing
any key.
L12H~960H
(L12H~L24H)*
mode recording
L3H
mode recording
L12H~960H
(L12H~L24H)*
mode recording
L3H
mode recording
Timelapse recording
Alarm recording
Timelapse recording
Alarm recording
Start of
recording
Enter of
alarm signal
Connecting
method
Connect the alarm
output equipment
as follows;
1 ALARM IN
2 ALARM OUT
6 TAPE END OUT 7 SERIES OUT
1
2
3
4
3 ALARM RESET 4 ERROR OUT
8 GND
5
6
5 TRIGGER OUT
9 SERIES IN
10 1 SHOT RECIN
7
9
8
10
IN
IN
OUT
OUT
AUDIO
VIDEO
OUT
VIDEO
GND
ALARM
OUT
ALARM
RESET
(Refer to page 37)
Enter of alarm reset
or over selected time
Operating
method
• Select to MODE and
DURATION on
ALARM REC SETUP
in setting MENU3.
(Refer to ALARM
REC SETUP, page 16)
• When connecting with
FRAME SWITCHER, it
is convenient, if the
switch is placed in
automatic position.
Enter of
alarm signal
Description of
operating
• AUTO: The alarm recording time is
automatically determined by input of
the alarm signal. (1 minute)
• 20sec~5min: Alarm recording is made
for 20 seconds~5 minutes after input of
the alarm signal.
• TAPE END: Alarm recording is made
up to the end of the tape after input of
the alarm signal.
• When the alarm signal is entered, the
on the front display is turned on.
• When the alarm recording is ended,
the
on the front display flashes.
• When you want to cancel the alarm
during alarm recording, make a
connection between the alarm release
and the alarm grounding for more than
0.5 second, when the alarm release is
entered, the alarm recording is
stopped.
• When an alarm signal is received and
the BUZZER ON is selected in the
menu, the alarm sounds continuously.
To silence the buzzer, press any
button.
REFERENCE
RESET button
When pressing the RESET button
• Use this button when the VCR or
display does not operate normally even
though the power is turned on.
• The RESET button is on the right side of
the Front Panel.
• Press the RESET button using a ball
point pen or a pencil.
• All the entered information such as reserve recording set
time, current time, and alarm information is erased.
• The power is turned off, and there is no picture at all. When
the power is turned on again, 2001-1-1 MON flashes on the
12:00:00 L3H
display of the screen.
• The current time is erased and must be reset.
31
32
RECORDING
01671A SVR-24JP/960JP-E3
01671A SVR-24JP/960JP-E3
12/7/01 4:06 PM
Page 34
ALARM FUNCTIONS
The alarm functions include the alarm recording, alarm checking alarm clear, and alarm
counter memory. (Refer to Alarm Recording, page 32)
ALARM COUNTER MEMORY
CHECKING OF ALARM RECORDING
1
Press the MENU button
1. Place the ❿!sign in the “ALARM
REC SETUP/RECALL” position
using the SHIFT ❷ button.
2. Press the SHIFT ❿ button, then
the “ALARM RECALL” displays.
3. Press the MENU button after
checking.
• When an alarm recording is not
1
Press the CNT. MEMO
• Press the CNT. MEMO button twice, then
the front display indicates "A. MEMO".
2
Turn the SHUTTLE ring
clockwise or counterclockwise
• When turning the shuttle ring the tape
moves forward (backward). When it
arrives at the alarm recording in only
L3H mode encounted first, it pauses for
5 seconds and then stops.
W
RE
F.F
W
RE
CNT MEMO
F.F
made, there is no display on the
screen display.
• The ALARM RECALL screen
displays the “6” most recent
alarm recorded events with the date
and time of each.
• If the alarm is recorded at 12:00,
13:00, 15:00, 17:00 and 19:00 on
December 25, 2001.
A.MEMO
ALARM CLEAR
1
ALARM RECALL
YEAR DATE TIME
2001 12/25 19:00:00
2001 12/25 17:00:00
2001 12/25 15:00:00
2001 12/25 13:00:00
2001 12/25 12:00:00
example) When the alarm recording is made
at No. 12.
Press the COUNTER button
• A-12 is indicated at the counter position
on the front display.
• From "
", the "12" indicates the times
of alarm recording.
• It is possible to display up to "
"
• When the alarm recording is made, the
on " " the front display flashes.
END:MENU
2
Press the CLEAR button
• The counter position on the front display
indicates "
".
• The " " is turned off.
• When pressing the CLEAR button while
the alarm check screen is displayed, all
the data and time in memory are
erased.
FUNCTION
1
2
3
4
5
6
CLEAR
COUNT
REC
F.F
RE
PLAY
W
P/STILL
CK
REC CHE
ECT
STOP/EJ
REC LOCK
TIMER
REV
REC LO
POWE
AUDIO
NT
ON COU
CNT.MEM
R
O CLEA
RESET
CK
R
TIME
TRAC
KING/S
T
SHIF
CK
V-LO
MENU
1
ET
MODE
112 2
REFERENCE
REFERENCE
Display of operating time
The alarm sounds five times in the following cases;
The alarm sounds continuously in the following cases;
• When the front display indicates
, press the
COUNTER button twice.
The operating time is then indicated on the front display.
example) When operated for 11 hours.
• When a tape without an erasure prevention tab is inserted.
– When the series signal is entered. (long sound)
– When the alarm signal is entered.
– When the record button is pressed.
– When pressing TIMER button.
• When pressing the REC button with the tape ejected.
• When the alarm signal is entered during alarm recording.
• When the tape arrives at its end in the recording mode.
• When the alarm signal is entered for alarm recording.
– When the alarm recording is ended the alarm is released.
– The alarm is released when pressing any button
– When the alarm signal is entered with the tape ejected.
(long sound)
HOUR
33
• If the counter button is not entered within 5 seconds
when checking the operating time, the status of the
front display returns to the state prior to checking the
display of operating time.
Auto repeat recording
• When the rewinding is completed after the tape arrives at
its end, recording is restarted.
(The alarm sounds during rewinding only.)
• If alarm recording is made, tape is ejected.
34
01671A SVR-24JP/960JP-E3
12/7/01 4:06 PM
Page 36
CONVENIENT FUNCTIONS
METHOD OF CONNECTION
Understanding the following functions will give you a convenient way of finding information.
When you want to quickly
view the picture from the
location of the alarm
recording.
When you want to know
the alarm recorded time
and day quickly.
Operating
method
Description of
operation
Set the A.MEMO display using
the CNT. MEMO button.
Then, turn the shuttle ring to
rewind.
The position of the alarm recording is
located and the VCR enters pause mode for
5 seconds. The tape is playedback when
pressing the PLAY button. When there is no
button entry within 5 seconds, the tape is
stopped automatically. (It is possible with the
tape recorded at L3H mode.)
Press the MENU button in stop
mode.
Select the ALARM RECALL
using the SHIFT ❷ !and ❿
button.
Connection with Frame Switcher
1
2
1
2
3
4
5
6
ALARM RECALL
YEAR DATE TIME
2001 12/25 19:00:00
2001 12/25 17:00:00
2001 12/25 15:00:00
2001 12/25 13:00:00
2001 12/25 12:00:00
8
ALARM IN
END:MENU
When you want to know
the numbers of alarm
recordings.
GND
TRIGGER OUT
When pressing the COUNT
button once, the alarm counter is
indicated on the display.
Example) A-11
The numerals of the alarm counter indicate
the times of alarm recording. It is possible up
to 99. A-11 (It indicates that the alarm
recording is mode 11 times.)
Connect the trigger output of the
outside equipment.
Refer to the connecting methods
(page 36) Record in the Time
Lapse mode.
This VCR records the input of each camera
frame by frame, field by field and then
switches.
1 ALARM IN
When you want to view the Press the TIME MODE button to
set it in the "L3H*" mode. Then
high speed picture
recorded in the time lapse press the PLAY button.
mode.
[If recorded in the
L8H~960H (L8H~L24H)*
mode]
2 ALARM OUT
6 TAPE END OUT 7 SERIES OUT
1
When you want to switch
over the camera input of
outside equipment
automatically (using the
trigger function).
2
3
4
3 ALARM RESET 4 ERROR OUT
5 TRIGGER OUT
8 GND
9 SERIES IN
10 1 SHOT RECIN
7
9
5
6
8
10
1
2
2 3 4 5 6 7 8 R/T A/O
8
IN
IN
OUT
OUT
AUDIO
CAMERA
PB
IN
REC MONITOR
OUT
OUT GND
VCR
FS-81MA
FRAME
SWITCHER
VIDEO
(Rear of SVR-24JP/
SVR-960JP)
VIDEO OUT
Video input
from monitor
VIDEO IN
• Refer to the owner's manual Frame
switcher for detailed information.
• R/T: REC TRIGGER IN
• A/O: ALARM OUT
35
(Camera)
The monitor screen shows the following.
CONNECTION
Connecting
method
• When connecting with Frame switcher, it is
convenient, if the ALARM DURATION is
placed in "AUTO" position.
• You do not have to connect the ALARM
OUT, ALARM RESET input of the video.
36
01671A SVR-24JP/960JP-E3
12/7/01 4:06 PM
Page 38
SERIES RECORDING, ALARM
CONNECTIONS
Connecting for series recording
IN
OUT
IN
VIDEO
MAINTENANCE
If the picture is not clear on the screen, use the cleaning tape.
If the cleaning tape is playbacked for a long time, it may be harmful for the head.
OUT
IN
VIDEO
1
OUT
VIDEO
(TV or MONITOR)
Drop six to seven drops
of head cleaning solution
on the cleaning tape.
2
Insert the cleaning tape
into your video and press
the PLAY button.
REC
F.F
W
RE
PLAY
P/STILL
REC CHECK
JECT
STOP/E
PE
G TA
ANIN
CLE
REV
1
2
3
4
5
6
7
8
9
10
1
2
3
4
5
6
7
8
9
10
1
2
3
4
5
6
7
8
9
10
CLE
AN
ING
LIQ
AUDIO
ON COUNT
TIMER
CNT.ME
MO CLEAR
REC LOCK
RESET
REC LOCK
UID
ER
POW
TIME
TRAC
MODE
KING/SET
SHIFT
V-LOCK
7 SERIES OUT
8 GND
9 SERIES IN
• Select the SERIES REC ON in the menu.
(Refer to page 17, REC MODE SETUP)
• Connect the first series output to the
second series input, and connect the first
series grounding to the second series
grounding.
MENU
• Connect the second series output to the
next series input, and connect the
second series grounding to the next
series grounding.
CLE
AN
ING
TAP
E
3
After about 15 seconds,
press the STOP button to
stop the operation.
• Use the cleaning tape one more
time when there is no normal
picture.
STOP/EJECT
Connecting for alarm recording
1
2
3
4
5
1 ALARM IN
3 ALARM RESET
6
7
8
9
(Outside unit)
1
10
2 ALARM OUT
8 GND
1 GND
3 ALARM IN
2
3
4
2 ALARM RESET
4 ALARM OUT
(CAUTION) In the case of an outside unit, use connections that are appropriate for the alarm
sensor in use.
• In the case of an outside unit, it is not necessary to make any connection if there is not any alarm
reset output and alarm input.
37
Change the head under the
following conditions
When the screen does not show a
good picture
• The picture is not clear on the screen as the head is
worn due to use of the video for an extended period of
time.
• The head can be worn when using damaged or
defective tapes or using the cleaning tape several times.
• The service life of the head varies depending upon the
environmental conditions for use (temperature, humidity,
dust, etc.). Replace the head when using your unit for
more than 3,000 hours.
1. First press the TRACKING button.
2. Check to see whether the video output is properly
connected.
3. Insert the cleaning tape. When the screen image is not
improved even after repeating the above procedures,
contact your dealer or service center.
38
MAINTENANCE
Rear of SVR-24JP/SVR-960JP
01671A SVR-24JP/960JP-E3
12/7/01 4:06 PM
Page 40
TROUBLESHOOTING
TROUBLESHOOTING(CONT.D)
Check to see whether you contact service center.
• Check to see whether
the power cord is
plugged in.
• Press the RESET butt
on on the front panel.
31
k.
Won't record or playbac
the tape is inserted.
• Check to see whether
, and then insert it
• Pull out the power cord
again.
on on the front
• Press the "RESET" butt
panel.
31
No picture.
the input selection of the
• Check to see whether
ected.
conn
erly
prop
is
itor
mon
the
the video input/output on
• Check to see whether
properly connected.
rear side of the unit are
to
the power is connected
• Check to see whether
the VCR.
39
Won’t record.
• Check to see whether the
safety tab is removed from
the tape.
Use a tape with an attached
safety tab. If the safety tab
has been
removed from the tape, attac
h scotch tape to it for recor
ding.
• Check to see whether the
tape has come to its end.
Replace the tape or rewind
the tape.
• Check to see whether the
P/STILL button has been press
ed.
Release the P/STILL button.
• Make sure time and date
on VCR are set (Refer to Reco
rding)
The picture quality
is poor with a lot of
noise
• Check to see whether
the tape is recorded by
another VCR.
• Check to see whether
the head is dirty.
• Press the "TRACKING
" button on the front pan
el
of the video for adjustme
nt or clean the head
using the cleaning tape.
Won't Eject
eject button after VCR
• Press power button then
first turns on.
g is
the programmed recordin
• Check to see whether
set.
Won't Program
record
rding is set 19~20
• Make sure program reco
properly.
ent time is
13
• Check to see that the curr
.
VCR
the
on
ect
corr
• Check if power is off.
is lit on the front panel.
• Make sure " " indicator
MAINTENANCE
No power.
40
01671A SVR-24JP/960JP-E3
12/7/01 4:06 PM
Page 42
TROUBLESHOOTING (CONT'D)
Trouble
The tape cannot be inserted.
The tape cannot be ejected.
DAILY CHECKS
Checks and adjustments
• Check to see whether the power plug is inserted into
the wall outlet.
• Check to see whether the tape has already been
inserted.
• Insert the tape with the tape window facing up. (Refer to
page 21).
No program recording.
• Check to see whether the program recording input is
properly set.
• Check to see whether the current time is properly set.
• Check to see whether the power is turned off.
• Check to see whether the
is turned on the display.
No editing with other equipment.
• Check to see whether proper connections are made.
The record button does
not function.
• Check for reserved recording. You need to press the
power button only.
• The button cannot be pressed when the REC LOCK
switch is "ON". (If you want to enter the button place the
REC LOCK switch in the "OFF", and then press the
button.
Playback picture is noisy.
• Press the "TRACKING" button for adjustment. If there is
no improvement, clean the head using the cleaning
tape.
• When there is any abnormal operation or
trouble of the VCR during daily checking,
take appropriate actions referring to
"trouble shooting" section on pages 39~41.
• If the abnormal operation or trouble
remains unresolved, pull out the power
cable, and then contact your dealer.
Daily checks
1
2
3
4
Turn on the VCR power
• Check to see whether there is good quality
picture on the TV monitor.
• Check to see whether the time and date
are correct.
W
RE
F.F
• Check the power is turned on. If it is turned off, press
the POWER button, and then press the eject button.
This video is designed for use on
a consistent basis therefore,
please check the VCR condition
before use, daily.
PLAY
Rewind a little of
the tape recorded
on the previous
day.
Press the PLAY
button for playback.
• Check to see whether
there is any problem
during playback.
• Check to see whether the
recorded time and date
are properly set.
TIME MODE
Set the TIME MODE
to "L3H".
• If there is any other problem contact service center.
In the case of too much noise on
the screen.
• Clean the Head using cleaning tape.
MAINTENANCE
5
41
42
01671A SVR-24JP/960JP-E3
12/7/01 4:06 PM
Page 44
BEFORE REQUESTING SERVICE
Careless handling by the user is not covered.
Strong impacts.
Video head damage due to improper cleaning.
Foreign substances entering the unit.
Unauthorized internal modification by the user.
Use in high or low temperature, high humidity, or smoky areas.
Operation other than described in the instructions.
Use of power sources other than specified for the unit.
Recording Type
Rotation head azimuth recording type, luminance signal FM recording type,
color signal down converted direct recording type
Signal Type
PAL type
Tape Speed
23.39 mm/sec (L3H mode; E-180)
Applicable Video Tape
2
Operating Time Counter
Note that it displays a maximum time of 9999.
Refer to Alarm Function for proper operation.
The table of Cleaning Lubrication and replacement time
about principal parts
• This table is for normal temperature and humidity. It is necessary to check more frequently under
extreme conditions.
• The life of the cylinder assembly depends on the operation conditions.
• If you have any questions. Please contact an authorized technician.
▲ : Cleaning
● : Check & replacement as necessary
◆ : Add Oil
1000
2000
3000
4000
5000
6000
8000
10000
TAPE GUIDE POSTS
▲
▲
▲
▲
▲
▲
▲
▲
▲
CYLINDER ASSY
▲
●
●
●
●
●
●
●
PINCH ROLLER
▲
▲
▲
▲
▲
●
●
●
CAPSTAN MOTOR
▲
▲
▲
▲
▲
▲
▲
▲
●
●
●
●
●
●
SOLENOID BRAKE UNIT
Recording Time
L3H/L8H/L12H/L24H/000H : SVR-24JP
L3H/L8H/L12H/L24H/36H/48H/72H/120H/168H/240H/480H/
960H/000H : SVR-960JP
Rewinding Time
Approximately 100 seconds (E-180 tape, In case of rewind time)
Image Input, output
1.0 Vp-p (unbalanced) 75 ohm
Image S/N
Above 42dB (L3H recording)
Sound Input
-8dB (L3H mode)
Sound Output
-8dB (L3H mode)
Sound S/N
Above 40 dB (L3H recording)
Characteristics of
Sound Frequency
100-5,000Hz (L3H recording)
Rated Voltage
AC100~240V
Rated Frequency
50~60Hz
Power Consumption
16W
Ambient Temperature
5˚C ~ 40˚C (41˚F ~ 104˚F)
Installation Conditions
Operating position-Horizontal
Relative humidity: Below 80%
Dimensions
430mm(W) x 97mm (H) x 294mm (D)
Weight
4 Kg
Accessories
User's manual
: Change
500
BELT PULLEY
type video tape
●
●
●
MAINTENANCE
1
SPECIFICATIONS
*Remark
–
–
–
–
–
–
43
The clean the parts, use patch and alcohol(solvent).
After cleaning, use the video tape after alcohol has dired completely.
We recommend to use oil [EP-56] or solvent.
One or two drops of oil should be applied after cleaning with alcohol.
Apply oil periodically (Apply oil after cleaning)
Applying oil excessively may cause malfunction.
44
01671A SVR-24JP/960JP-E3
12/7/01 4:06 PM
Page 46
ELECTRONICS
AC68-01671A (REV.00)
01671A SVR-24JP/960JP-Fra1
12/7/01 4:33 PM
Page 1
SVR-24JP
SVR-960JP
Magnetoscope
Installation et Instructions
Pour le Fonctionnement
01671A SVR-24JP/960JP-Fra1
12/7/01 4:33 PM
Page 2
IMPORTANT SAFEGUARDS
1
spill liquid of any kind on the unit.
16. Servicing - Do not attempt to service this unit yourself as opening or
removing covers may expose you to dangerous voltage or other
hazards. Refer all servicing to qualified service personnel.
17. Damage Requiring Service - Unplug the unit from the outlet and
refer servicing to qualified service personnel under the following
conditions:
a. When the power - supply cord. or plug is damaged.
b. If liquid has been spilled, or objects have fallen into the unit.
c. If the unit has been exposed to rain or water.
d. If the unit does not operate normally by following the operating
instructions. Adjust only those controls that are covered by the
operating instructions, as an improper adjustment of other
controls may result in damage and will often required extensive
work by a qualified technician to restore the unit to its normal
operation.
e. If the unit has been dropped or the cabinet has been damaged.
f. When the unit exhibits a distinct change in performance this
indicates a need for service.
18. Replacement Parts - When replacement parts are required, be sure
the service technician has used replacement parts specified by the
manufacturer or have the same characteristics as the original part.
Unauthorized substitutions may result in fire, electric shock or other
hazards.
19. Safety Check - Upon completion of any service or repairs to this
unit, ask the service technician to perform safety checks to
determine that the unit is in proper operating condition.
20. Coax Grounding - If an outside cable system is connected to the
unit, be sure the cable system is grounded. U.S.A models onlySection 810 of the National Electrical Code, ANSI/NFPA No. 701981, provides information with respect to proper grounding of the
mount and supporting structure, grounding of the coax to a
discharge unit, size of grounding conductors, location of discharge
unit, connection to grounding electrodes, and requirements for the
grounding electrode.
21. Lightning - For added protection of this unit during a lightning storm
or when it is left unattended and unused for a long period of time,
unplug power cord form the wall.
FCC & ICES INFORMATION
(U.S.A and Canadian Models Only)
WARNING - This equipment has been tested and found to comply with
the limits for a Class B digital device, pursuant to Part 15 of the FCC
Rules and ICES-003 of Industry Canada. These limits are designed to
provide reasonable protection against harmful interference when the
equipment is operated in a residential installation. This equipment
generates, uses and can radiate radio frequency energy and, if not
installed and used in accordance with the instruction, may cause
harmful interference to radio communications. However, there is no
guarantee that interference will not occur in a particular installation. If
this equipment does cause harmful interference to radio or television
reception, which can be determined by turning the equipment off and
on, the user is encouraged to try to correct the interference by one or
more of the following measures:
– Reorient or relocate the receiving antenna.
– Increase the separation between the equipment and receiver.
– Connect the equipment into an outlet on a circuit different from that to
which the receiver is connected.
– Consult the dealer or an experienced radio/TV technician for help.
Intentional or unintentional changes or modifications not expressly
approved by the party responsible for compliance shall not be made.
Any such changes or modifications could void the user's authority to
operate the equipment.
The user may find the following booklet prepared by the Federal
Communications Commission helpful: "How to Identify and Resolve
Radio-TV Interference Problems". This booklet is available from the
U.S. Government Printing Office, Washington, DC 20402, Stock
No.004-000-00345-4.
Safety Precautions
Securite
CAUTION
ATTENTION
RISK OF ELECTRICK SHOCK
DO NOT OPEN!
RISQUE DE CHOC ELECTRIQUE,
NE PAS OUVRIR.
CONFIGURATION
1. Read Instructions - All the safety and operating instructions should
be read before the unit is operated.
2. Retain Instructions - The safely and operating instructions should be
retained for future reference.
3. Head Warnings - All warnings on the unit and in the operating
instructions should be adhered to.
4. Follow Instructions - All operating and use instructions should be
followed.
5. Cleaning - Unplug the unit from the outlet before cleaning. Do not use
liquid cleaners or aerosol cleaners. Use a damp cloth for cleaning.
6. Attachments - Do not use attachments not recommended by the unit
manufacturer as they may cause hazards.
7. Water and Moisture - Do not use this unit near water-for example,
near a bath tub, wash bowl, kitchen sink, or laundry tub, in a wet
basement, near a swimming pool, in an unprotected outdoor
installation, or any area which is classified as a wet location.
8. Accessories - Do not place this unit on an unstable stand, tripod,
bracket, or mount. The unit may fall, causing serious injury to a
person and serious damage to the unit. Use only with a stand, tripod,
bracket, or mount recommended by the manufacturer, or sold with
the unit. Any mounting of the unit should follow the
manufacturer's instructions, and should use a
mounting accessory recommended by the
manufacturer. An appliance and cart
combination should be moved with care. Quick
stops, excessive force, and uneven surfaces may
cause the appliance and cart combination to
overturn.
9. Ventilation - Operatings in the enclosure, if any, are provided for
ventilation and to ensure reliable operation of the unit and to protect
it from overheating. These openings must not be blocked or covered.
This unit should not be placed in a built-in installation unless proper
ventilation is provided or the manufacturer's instructions have been
adhered to.
10. Power Sources - This unit should be operated only from the type of
power source indicated on the marking label. If you are not sure of
the type of the power supply you plan to use, consult your appliance
dealer or local power company. For units intended to operate from
battery or other sources, refer to the operating instructions.
11. Grounding or Polarization - This unit may be equipped with a
polarized alternating-current line plug (a plug having one blade
wider than the other). This plug will fit into the power outlet only one
way. This is a safety feature. If you are unable to insert the plug fully
into the outlet, try reversing the plug. If the plug should still fail to fit,
contact your electrician to replace your obsolete outlet. Do not
defeat the safety purpose of the polarized plug. Alternately, this unit
may be equipped with a 3-wire grounding-type plug, a plug having a
third (grounding) pin. This plug will only fit into a grounding-type
power outlet. This is a safety feature. If you are unable to insert the
plug into the outlet, contact your electrician to replace your obsolete
outlet. Do not defeat the safety purpose of the grounding-type plug.
12. Power - Cord Protection-Power-supply cords should be routed so
that they are not likely to be walked on or pinched by items placed
upon or against them, paying particular attention to cords and plugs,
convenience receptacles, and the point where they exit from the
appliance.
13. Power Lines - An outdoor system should not be located in the
vicinity of overhead power lines or other electric light or power
circuits, or where it can fall into such power lines or circuits. When
installing an outdoor system, extreme care should be taken to keep
from touching such power lines or circuits as contact with them
might be fatal. U.S.A. models only-refer to the National Electrical
Code Article 820 regarding installation of CATV systems.
14. Overloading - Do not overload outlets and extension cords as this
can result in a risk of fire or electric shock.
15. Object and Liquid Entry - Never push objects of any kind into this
unit through openings as they may touch dangerous voltage points
or short-out parts that could result in a fire or electric shock. Never
CAUTION: TO REDUCE THE RISK OF
ELECTRICAL SHOCK, DO NOT OPEN COVERS.
NO USER SERVICEABLE PARTS INSIDE.
REFER SERVICING TO QUALIFIED SERVICE
PERSONNEL.
Danger: Pour éviter tout risque d'électrocution, ne
pas ouvrir le boîtier. Il n'y a pas de pièces
remplaçables à l'intérieur. Pour toute révision,
s'adresser à un technicien spécialisé.
This label may appear on the bottom of the unit due to
space limitations.
Cet étiquette peut apparaître en dessous de l'appareil
dû aux limitations d'espace.
The lightning flash with an arrowhead
symbol, within an equilateral triangle, is
intended to alert the user to the
presence of uninsulated "dangerous
voltage" within the unit's enclosure that
may be of sufficient magnitude to
constitute a risk of electric shock to
persons.
L'éclair fléché dans un triangle
équilatéral avertit l'utilisateur de la
présence d'une haute tension non
isolée à l'intérieur de l'appareil. Elle peut
être d'une magnitude suffisante pour
constituer un risque d'électrocution.
The exclamation point within an
equilateral triangle is intended to alert
the user to presence of important
operating and maintenance (servicing)
instructions in the literature
accompanying the appliance.
Le point d'exclamation à l'intérieur d'un
triangle équilatéral avertit l'utilisateur de
la présence d'instructions importantes
d'utilisation et de maintenance dans la
documentation accompagnant
l'appareil.
Warning
To prevent fire or shock hazard, do not expose
units not specifically designed for outdoor use to
rain or moisture.
Attention
Pour éviter un incendie ou une électrocution, ne pas
exposer les appareils qui ne sont pas conçus spécifiquement pour usage extérieur à la pluie ou à l'humidité.
Attention: Installation should be
performed by qualified service
personnel only in accordance with the
National Electrical Code or applicable
local codes.
Attention: L'installation doit être
effectuée uniquement par du personnel
de service qualifié conformément à la
réglementation du Code Electrique
National ou à la réglementation locale.
Power Disconnect. Units with or
without ON-OFF switches have power
supplied to the unit whenever the power
cord is inserted into the power source;
however, the unit is operational only
when the ON-OFF switch is in the On
position. The power cord is the main
power disconnect for all units.
Disjonction de l'alimentation.
Les appareils avec ou sans commutateure
ON-OFF sont alimentés à chaque fois que
le cordon d'alimentation est branché à la
source d'alimentation; toutefois, les
appareils disposant de commutateurs ONOFF ne fonctionnent que lorsque le
commutateur ON-OFF est sur la position
ON. Le cordon d'alimentation est la
disjonction d'alimentation principale pour
tous les appareils.
2
12/7/01 4:33 PM
Page 4
IMPORTANT SAFEGUARDS
Dieses Zeichen kann aus Platzgründen auf der
Unterseite des Gerätes angebracht sein.
Dieses Zeichen weist den Benutzer auf
die nicht isolierte Hochspannung
innerhalb der Anlage hin. Es besteht die
Gefahr eines Elektroschlages.
Das Ausrufezeichen in dem
gleichseitigen Dreieck ist dazu da, den
Benutzer auf wich-tige Inbetriebnahmeund Instandhaltungs-vorschriften
hinzuweisen, die dem Gerät in Form
einer Broschüre beigelegt sind.
Warnung
Um das Risiko von Feuer oder Elektroschlag zu
vermeiden, darf weder das Gerät selbst, noch das
Netzgerät Regen oder Feuchtigkeit ausgesetzt werden.
Achtung!: Die Installation sollte nur von
qualifiziertem Kundendienstpersonal
gemäß jeweilig zutreffender
Elektrovorschriften ausgeführt werden.
Netzanschluß. Geräte mit oder ohne
Netzschalter haben Spannung am
Gerät anliegen, sobald der Netzstecker
in die Steckdose gesteckt wird. Das
Gerät ist Jedoch nur betriebsbereit,
wenn der Netzschalter (EIN/AUS) auf
EIN steht. Wenn man das Netzkabel
aus der Stekdose zieht, dann ist die
Sapnnungszuführung zum Gerät
vollkommen unterbrochen.
3
Debido a limitaciones de espacio, esta etiqueta puede
aparecer en la parte inferior de la unidad.
El símbolo representado por un relámpago
con punta de flecha dentro de un triángulo
equilátero, se muestra con el objetivo de
alertar al usuario que existen "voltages
peligrosos" sin aislamiento, dentro de la
cubierta de la unidad. Dichos voltages
pueden ser de tal magnitud que constituyen
un riesgo de choque eléctrico a personas.
El símbolo de exclamación dentro de
un triángulo equilátero, se muestra con
el objetivo de alertar al ususario de que
instrucciones de operación y
mantenimiento importantes acompañan
al equipo.
Peligro
Para evitar el peligro de incendio ó choque eléctrico, no
exponga a la lluvia ó humedad, equipos que no han sido
diseñados para uso exterior.
Atención: La instalación de este equipo
debe ser realizada por personal capacitado,
solo en acuerdo, y en cumplimiento de
normas del "National Electric Code" (Código
Eléctrico Nacional) ó las normas del
Gobierno Nacional Local.
Para Desconectdar la Alimentación:
Unidades no equipadas con interruptores
ON/OFF, son alimentadas cuando el cable
de alimentación, es conectado a la corriente
eléctrica. Las unidades equipadas con
interruptores son alimentadas de igual
forma, pero adicionalmente requieren qur el
interruptor esté posicionado en ON. El cable
de alimentación es el medio principal de
desconexión del equipo.
Vous entendez le clic lorsque vous appuyez sur les boutons clé à l’avant.
C’est un son naturel causé par le “solénoïde” qui doit enclencher la commande pour faire
tourner le moteur du cabestan. Dans ce VCR, il est de type roulement à billes qui dure plus
de 10,000 heures.
Importantes informations de sécurité
Contenu
Commandes et indicateurs
Connecteurs
Réglage
1
4
5
8
9
MENU
Comment régler le menu
Réglage courant du menu
Réglage du menu
11
13
16
LECTURE
Fonctionnement
Différents modes de lecture
21
23
SERVICE
AVERTISSEMENT: Cet appareil est sensible
à l’électricité statique. Respecter les
consignes de manipulation appropriées
CMOS/MOSFET pour éviter toute décharge
électrostatique.
REMARQUE: Il est nécessaire de porter un
bracelet antistatique mis à la terre et de
respecter les consignes de sécurité ESD
pendant la manipulation de circuits
imprimés sensibles à l’électricité statique.
CONFIGURATION
Precaution: Pare Reducir El Riesgo De Choque
Eléctrico, Favor No Abrir La Cubierta. Este Equipo
No consta De Piezas O Partes Que Requieren
Servicio O Mantenimiento. Para Reparaciones
Favor Referirse A Un Técnico Calificado.
CONFIGURATION
MENU
RIESGO DE CHOQUE
ELECTRICO INO ABRIRI
ENREGISTREMENT
Réglage avant l’enregistrement
Verrouillage d’enregistrement
Enregistrement de base
Enregistrement en série
Enregistrement sur alarme
27
28
29
31
32
FONCTIONS
Fonctions d’alarme
Fonctions de facilitation
33
35
BRANCHEMENT
Méthode de branchement
Enregistrement en série, Branchement des
alarmes
36
37
ENTRETIEN
Entretien
Diagnostic de panne
Contrôles quotidiens
Avant d’appeler l’assistance
Spécifications
DESCRIPTION
Le magnétoscope de série SVR-24JP/
SVR-960JP offre un enregistrement différé
avec sélection de vitesses 3~24 heures pour
une variété d’applications CCTV.
LECTURE
PRECAUTION
INSTALLATION
ENREGIST
REMENT
ACHTUNG!
HOCHSPANNUNGSGEFAHR
NICHT ÖFFNEN!
Warnung: Verhindern Sie einen möglichen
Elektroschlag, indem Sie die Abdeckung nicht
entfernen. Wenden Sie sich bei der Wartung an
dafür qualifiziertes Personal.
Remarque :
Precauciones De Seguridad
Installer le SVR-24JP/SVR-960JP dans un
local où la plage de températures ambiantes
est de + 5°C à + 40°C et l’humidité relative
varie entre 0% et 80% sans condensation.
38
39
42
43
44
FONCTIONS
Sicherheitsvorkenhrungen
TABLE DES MATIERES
MAINTENANCE CONNEXION
01671A SVR-24JP/960JP-Fra1
DEBALLAGE
Déballer l’appareil avec soin. Appareil
électronique devant être manipulé avec soin.
Si un composant semble avoir subi un
dommage en transfert, le replacer avec soin
dans son emballage et aviser l’expéditeur. Si
un des accessoires n’a pas été livré, notifier
immédiatement votre représentant de vente ou
le service de la clientèle.
Le carton d’emballage est le conditionnement
le plus sûr pour le transfert de l’appareil. Le
conserver pour usage ultérieur.
4
01671A SVR-24JP/960JP-Fra1
12/7/01 4:33 PM
Page 6
COMMANDES ET INDICATEURS
19
18 17 16
REC
F.F
PLAY
W
RE
No
ECK
JECT
STOP/E
CK
REC LO
TIMER
RESET
EAR
O CL
CNT.MEM
COUNT
DIO ON
Description
Page
1
POWER
Pousser pour marche / arrêt
21
2
MENU
Appuyer pour afficher le menu d’affichage
11
3
SHIFT ❷ , ❿
Appuyer pour régler le menu et l’horloge
11
V-LOCK
Appuyer pour régler les distorsions de l’image
22
Appuyer pour régler l’alignement et pour régler le menu et l’horloge
22
Appuyer pour changer le mode temps en lecture
24
P/STILL
REC CH
Nom
,
4
TRACKING/SET
5
TIME MODE
,
6
REC LOCK LED
Indicateur de verrouillage d’enregistrement
28
7
DISPLAY PANEL
Affiche les paramètres de fonctionnement sélectionnés
7
8
REV
Pousser pour inverser la lecture
(mode L3H seulement)
25
9
AUDIO ON
Appuyer pour contrôler le volume
10
COUNT
Initial: affiche le compteur de bande
Pousser une fois: affiche l’heure d’entrée d’alarme
Pousser deux fois: affiche la durée de fonctionnement
,
CONFIGURATION
22 21 20
AU
REV
CK
REC LO
ER
POW
TIME
TRAC
KING/S
15
14
13
12
11
10
9
8
MODE
ET
T
SHIF
CK
V-LO
MENU
1
2
ACCESSOIRES
3
4
5
6
7
11
CNT. MEMO
34
33
Initial: affiche le compteur de bande
Pousser une fois: affiche la mémoire du compteur
25
Pousser deux fois: affiche la mémoire de l’alarme
34
12
CLEAR
Appuyer pour remettre à zéro le compteur
34
13
RESET
Pousser pour remettre l’appareil à zéro
31
14
TIMER
Pousser pour régler le programmeur d’enregistrement
20
15
REC LOCK
Utilisé pour sélectionner le mode verrouillage d’enregistrement
28
16
REC CHECK
Pousser pour vérifier l’enregistrement (lecture
d’échantillon) pendant un enregistrement
29
17
P/STILL
Appuyer pour bloquer l’image en lecture ou
pour faire une pause dans l’enregistrement
26
18
REC
Pousser pour lancer l’enregistrement
29
19
SHUTTLE
Pour faire partir la cassette
22
20
JOG
Tourner pour faire avancer ou reculer photogramme par photogramme
26
21
PLAY
Appuyer pour la lecture d’une cassette
22
22
STOP/EJECT
Appuyer pour arrêter/expulser la cassette
22
MANUEL DE L’UTILISATEUR
5
6
01671A SVR-24JP/960JP-Fra1
12/7/01 4:33 PM
Page 8
COMMANDES ET INDICATEURS
CONNECTEURS
Voyant REC LOCK
• Allumé quand l’enregistrement
est verrouillé
FACE ARRIERE
Affichage de
l’enregistrement
• S’allume pendant
l’enregistrement
Affichage d’enregistrement
programmé.
• S’allume quand la touche du
programmeur a été actionnée pour
programmer un enregistrement.
Affichage de présence /
absence de la cassette
Affichage d’enregistrement
sur alarme
• S’allume pendant un
EQUIPEMENT DE
BRANCHEMENT EXTERNE
Enregistrement sur alarme
et clignote lorsque
l’enregistrement est terminé.
Affichage du mode
programmeur
REC / PLAY.
1 ALARM IN
2 ALARM OUT
6 TAPE END OUT 7 SERIES OUT
1
2
3
4
3 ALARM RESET 4 ERROR OUT
5 TRIGGER OUT
8 GND
10 1 SHOT RECIN
5
9 SERIES IN
6
7
8
9
10
RS-232C
IN
REC LOCK
C.MEMO
A.MEMO
HOUR
REC
FAULT
T-END
IN
• Allumé quand le
magnétoscope arrive
Affichage de coupure à la fin de la cassette
AUDIO
H
• Affichage de la durée d’opération
• Affichage de la mémoire Alarme
Affichage de
/ Compteur. "
"
mémoire Alarme /
Compteur
de retour de courant
• Clignote lorsque le
• Mémoire du
compteur C. MEMO.
• Mémoire de
l’alarme. A. MEMO.
• Affichage de la
durée d’opération:
HOUR
courant CA est rétabli.
• Appuyer sur une touche
quelconque l’éteint.
BROCHE FICHE
ALIMENTATION
Affichage de lecture
Tourne dans le sens des aiguilles d’une montre
TERRE
GND
2
ALARME
ALARM IN
1 ENTREE
3
4
5
Tourne dans le sens des aiguilles d’une montre REC
Clignote
Pause
Clignote
Lecture ralentie
Clignote et Tourne dans le sens des aiguilles d’une montre
Timer enregistrement
Tourne dans le sens des aiguilles d’une montre REC
Tourne rapidement dans le sens des aiguilles d’une montre Enregistrement sur alarme
REC
Tourne dans le sens des aiguilles d’une montre REC
SORTIE
4 ERROR
OUT
D’ERREUR
SORTIE
TRIGGER OUT
5 D’ALARME
DEEND
BANDE
6 FIN
TAPE
OUT
Recherche arrière
Tourne rapidement dans le sens inverse des aiguilles d’une montre Rembobinage
Tourne rapidement dans le sens inverse des aiguilles d’une montre
DE
7 SORTIE
SERIES OUT
SERIE
Lecture arrière
Tourne dans le sens inverse des aiguilles d’une montre
Tourne rapidement dans le sens des aiguilles d’une montre
8 MASSE
GND
Lecture arrière
ralentie
Clignote et Tourne dans le sens inverse
des aiguilles d’une montre
Avance rapide
9 ENTREE
SERIESDE
IN SERIE
10 ENREGISTREMENT
1 SHOT REC IN
IMAGE UNIQUE
7
VIL
T
ACQUITTEMENT
3 ALARM
RESET
D’ALARME
7
8
9
10
NIVEAU DU SIGNAL
SORTIE
Pause
Recherche avant
6
VIH
VIH
ALARM OUT
2 ALARME
Affichage autre que la lecture
Enregistrement
PRISE VIDEO
ENTREE/SORTIE
(TYPE BNC)
PRISE AUDIO
ENTREE/SORTIE
(TYPE RCA)
NOM DE LA BORNE
AFFICHAGE DES CONDITIONS D’OPERATION
VIDEO
INFORMATION SUR L’EQUIPEMENT DE BRANCHEMENT EXTERNE
1
Lecture
OUT
OUT
Affichage du compteur
Affichage fin de
cassette
CONFIGURATION
FACE AVANT
VIL
T
VIH
VIL
T
VIH
VIL
T
:
:
:
:
:
:
4 ~ 5V
0 ~ 0,6V
Plus de 0,5 seconde
4 ~ 5V
0 ~ 0,6V
Enregistrement sur l’alarm
TYPE
ENTREE
SORTIE
VIL
VIH : 4 ~ 5V
VIL : 0 ~ 0,6V
T
: Plus de 0,5 seconde
ENTREE
VIL
VIH : 4 ~ 5V
VIL : 0 ~ 0,6V
T
:
SORTIE
T
VIL
SORTIE
T
VIH : 4 ~ 5V
VIL : 0 ~ 0,6V
T
: Plus de 8m seconde
VIL
SORTIE
T
VIH : 4 ~ 5V
VIL : 0 ~ 0,6V
T
: Perdant entrée quiconque
VIL
SORTIE
T
VIH : 4 ~ 5V
VIL : 0 ~ 0,6V
T
: Plus de 1 seconde
VIH
T
VIH
VIH
VIH
VIH
0V
VIH : 4 ~ 5V
VIL : 0 ~ 0,6V
T
: Plus de 0,5 seconde
ENTREE
VIL
VIH : 4 ~ 5V
VIL : 0 ~ 0,6V
T
: Plus de 0,5 seconde
ENTREE
T
VIH
T
MASSE
VIL
VIH
8
01671A SVR-24JP/960JP-Fra1
12/7/01 4:33 PM
Page 10
REGLAGE
• Effectuer les procédures de vérification suivante avant d’utiliser cet appareil.
• La forme de la fiche d’alimentation peut être différence de la forme montrée sur ce
manuel.
Brancher le moniteur sur
l’appareil.
2
Brancher la caméra CCD
sur l’appareil.
3
Insérer la fiche
d’alimentation de ce
magnétoscope dans la
prise murale de secteur.
• Insérer la fiche dans une prise
de secteur de 100-240V CA.
MONITEUR
6
7
8
9
IN
OUT
100~240V CA
VIDEO
1 ALARM IN
2 ALARM OUT
6 TAPE END OUT 7 SERIES OUT
1
2
3
4
3 ALARM RESET 4 ERROR OUT
8 GND
5
9 SERIES IN
6
7
8
RS-232C
IN
OUT
OUT
AUDIO
VIDEO
1 ALARM IN
2 ALARM OUT
6 TAPE END OUT 7 SERIES OUT
1
2
3
4
3 ALARM RESET 4 ERROR OUT
8 GND
5
9 SERIES IN
6
7
8
5 TRIGGER OUT
10 1 SHOT RECIN
9
10
RS-232C
IN
IN
1 ALARM IN
2 ALARM OUT
6 TAPE END OUT 7 SERIES OUT
3 ALARM RESET 4 ERROR OUT
5 TRIGGER OUT
8 GND
10 1 SHOT RECIN
9 SERIES IN
2
3
4
5
6
7
8
9
OUT
OUT
AUDIO
1
• Si vous utilisez un moniteur, mettre
le moniteur sous tension.
• Si vous utilisez un poste de
télévision, mettre le poste de
télévision sous tension et
sélectionner le mode entrée vidéo.
• Se référer au manuel d’utilisation
pour un complément d’information
sur les procédures d’installation de
la télévision.
10
IN
ENTREE VIDEO
Mettre le moniteur en
marche.
POWER
5 TRIGGER OUT
10 1 SHOT RECIN
9
4
CONFIGURATION
1
VIDEO
10
RS-232C
IN
IN
OUT
OUT
AUDIO
VIDEO
IN
IN
OUT
CAMERA CCD
OUT
AUDIO
9
VIDEO
10
01671A SVR-24JP/960JP-Fra1
12/7/01 4:33 PM
Page 12
COMMENT REGLER LE MENU
1. REGLAGE HORLOGE
1
Appuyer sur la touche
MENU.
(Le menu ne s’affiche pas en
mode lecture ou jusqu’à ce que
l’horloge ait été réglée).
CLOCK SET/ADJUST
1 ❿ SUMMER TIME SET (USE)
2 DISPLAY MODE (YY-MM-DD)
3 CLOCK SET/ADJUST
YEAR
2001
DATE
TIME
01/01 MON 12:00
5. CONFIGURATION DU MODE
MAGNETOSCOPE (VCR MODE SET UP)
VCR MODE SETUP
1 ❿ TRIGGER --------------------(1FIELD)
2 V-SYNC ----------------------------(ON)
3 BUZZER ---------------------------(ON)
4 TAPE LENGTH ----------------(E240)
$
END:MENU
2. CONFIGURATION DU MODE
AFFICHAGE (DISPLAY MODE SET UP)
MAIN MENU
1 ❿ CLOCK SET/ADJUST
2 DISPLAY MODE SETUP
3 ALARM REC SETUP/RECALL
4 REC MODE SETUP
5 VCR MODE SETUP
6 PROGRAM SETUP
7 POWER LOSS MEMORY
(❷❿)
END:MENU
DISPLAY MODE SETUP
1 ❿ DATE DISPLAY ------------------(ON)
2 TIME DISPLAY-------------------(ON)
3 POSITION -------------(R-BOTTOM)
(❷❿)
END:MENU
• Configurer à l’écran le format de la date et de
l’heure ainsi que leur position sur l’écran.
(❷❿)
• Configurer le contrôle du
programmeur et le contrôle de la
sonnerie d’alarme.
6. CONFIGURATION DES PROGRAMMES
(PROGRAM SET UP)
PROGRAM SETUP1
START STOP DATE
MODE
•❿
•
•
•
• PROGRAM SETUP2
•
( ❷❿ /– +,CLEAR)
3. CONFIGURATION DE
L’ENREGISTREMENT SUR ALARME
(ALARM REC SET UP)
2
Pour sélectionner une
des options du menu,
appuyer sur le touche
SHIFT ❷.
(Le curseur "❿" se déplace vers le
bas chaque fois que la touche est
actionnée).
3
Après avoir positionné le
signe "❿" sur la rubrique
désirée du menu, appuyer
sur la touche SHIFT ❿
pour continuer.
• Le menu sélectionné s’affiche à
l’écran.
(se référer aux pages 13 à 20).
ALARM REC SETUP/RECALL
1 ❿ MODE -----------------------------(L3H)
2 DURATION --------------------(AUTO)
3 BUZZER ---------------------------(ON)
4 ALARM RECALL
END:MENU
• Configurer le mode REC sur alarme.
4. CONFIGURATION DU MODE
ENREGISTREMENT (REC MODE SET UP)
PROGRAM SETUP2
START STOP DATE
MODE
END:MENU
• Régler le mode répétition
enregistrement, mode enregistrement
image uniqae et mode enregistrement
en série.
END:MENU
• Sélectionner l’enregistrement de
programme.
7. MEMOIRE DE PANNE D’ALIMENTATION
(POWER LOSS MEMORY)
REC MODE SETUP
(❷❿)
END:MENU
•❿
•
•
•
• PROGRAM SETUP1
•
( ❷❿ /– +,CLEAR)
(❷❿/– +)
1 ❿ REPEAT REC-------------------(OFF)
2 SERIES REC -------------------(OFF)
3 1-SHOT REC--------------------(OFF)
11
END:MENU
MENU
(❷❿/– +)
MENU
•
•
•
POWER LOSS MEMORY
YEAR DATE TIME
OFF
ON
OFF
ON
OFF
ON
END:MENU
• Affiche les heures de coupure et de
rétablissement du courant.
12
01671A SVR-24JP/960JP-Fra2
12/7/01 4:33 PM
Page 14
REGLAGE DE L’HORLOGE
– COMMENT METTRE D’HEURE D’ÉTÉ
Exemple) le 25 décembre . 2002 13:30
Appuyer sur la touche MENU
• Quand vous appuyez sur la touche
2
Appuyer sur la touche
SHIFT ❿.
• Quand vous appuyez sur la touche SHIFT
3
❿, c’est le menu CLOCK SET/ADJUST
(REGLAGE HORLOGE) qui s’affiche.
MENU, le MENU PRINCIPAL s’affiche.
MENU
Appuyer sur la touche SHIFT ❿.
• Quand vous appuyez sur la touche
SHIFT ❿, SUMMER TIME SET
s’affiche.
• Appuyer sur la touche SHIFT ❿
pour sélectionner et effacer
SUMMER TIME.
4
Appuyer sur la touche
SHIFT ❷.
• Sélectionne SUMMER TIME IN.
SHIFT
V-LOCK
SHIFT
V-LOCK
SHIFT
V-LOCK
5
MENU
1
MAIN MENU
1 ❿ CLOCK SET/ADJUST
2 DISPLAY MODE SETUP
3 ALARM REC SETUP/RECALL
4 REC MODE SETUP
5 VCR MODE SETUP
6 PROGRAM SETUP
7 POWER LOSS MEMORY
CLOCK SET/ADJUST
1 ❿ SUMMER TIME SET (USE)
2 DISPLAY MODE(YY-MM-DD)
3 CLOCK SET/ADJUST
(❷❿)
(❷❿/– +)
YEAR
2001
TIME
12:00
IN
OUT
$
END:MENU
Régler semaine, jour, mois
et heure en utilisant les
touches de réglage de
l’écran
.
• Appuyer sur la touche SHIFT ❿
DATE
01/01 MON
SUMMER TIME SET
1 ❿ SUMMER TIME
(USE)
2 SUMMER TIME IN
3 SUMMER TIME OUT
6
END:MENU
Appuyer sur la touche
SHIFT ❷!et régler
SUMMER TIME OUT.
après avoir réglé le semaine, une $
marque se déplace sous le jour.
• Intervenir de la même manière pour
le mois et temps.
SUMMER TIME SET
1 SUMMER TIME
(USE)
2 ❿ SUMMER TIME IN
3 SUMMER TIME OUT
WEEK
MONTH TIME
LAST /FRI
2
9:00
12:00
FIRST /SUN 12
(❷❿/– +)
WEEK
MONTH TIME
14:00
LAST /FRI 11
IN
$
(❷❿/– +)
END:MENU
END:MENU
– COMMENT METTRE LE MODE D’AFFCHAGE
7
Appuyer sur la touche
MENU.
• Contrôler de nouveau le semaine, le
jour, le mois et l’heure puis appuyer
sur la touche MENU.
8
Appuyer sur la touche SHIFT ❷et
appuyer sur la touche SHIFT ❿.
• Dès que vous appuyez sur la touche
SHIFT ❿, le mode d’affichage change.
• L’affichage change de la manière
suivante: (YY-MM-DD) ➝ (DD-MMYY) ➝ (MM-DD-YY).
MENU
TRACKING/SET
SUMMER TIME SET
1 SUMMER TIME
(USE)
2 ❿ SUMMER TIME IN
3 SUMMER TIME OUT
SUMMER TIME SET
1 SUMMER TIME
(USE)
2 SUMMER TIME IN
3 ❿ SUMMER TIME OUT
WEEK
MONTH TIME
14:00
LAST /FRI 11
WEEK
MONTH TIME
12:00
FIRST /SUN 12
IN
$
(❷❿/– +)
13
SHIFT
V-LOCK
SHIFT
V-LOCK
END:MENU
OUT
$
(❷❿/– +)
CLOCK SET/ADJUST
1 ❿ SUMMER TIME SET (USE)
2 DISPLAY MODE(YY-MM-DD)
3 CLOCK SET/ADJUST
YEAR
2001
DATE
01/01 MON
TIME
12:00
YEAR
2001
DATE
01/01 MON
TIME
12:00
$
$
(❷❿/– +)
CLOCK SET/ADJUST
1 SUMMER TIME SET (USE)
2 ❿ DISPLAY MODE(YY-MM-DD)
3 CLOCK SET/ADJUST
END:MENU
(❷❿/– +)
END:MENU
END:MENU
14
01671A SVR-24JP/960JP-Fra2
Page 16
REGLAGE DE L’HORLOGE
MENU DE CONFIGURATION
– COMMENT METTRE L’HORLOGE A L’HEURE
– CONFIGURATION DE L’AFFICHAGE ET DE L’ENREGISTREMENT SUR ALARME
Appuyer sur la touche
SHIFT ❷.
10
• Le réglage de l’horloge commence.
Régler l’année, le mois et le
jour en utilisant les touches
de réglage de l’écran
.
1
(Si le mode d’affichage est YY-MM-DD).
• Quand vous appuyez sur la touche
de réglage , vous réglez “2002”.
• Appuyer sur la touche SHIFT ❿
après avoir réglé l’année, une $
marque se déplace sous le mois.
• Intervenir de la même manière pour
le mois.
SHIFT
V-LOCK
CONFIGURATION DU MODE D’AFFICHAGE
(DISPLAY MODE SET UP)
DISPLAY MODE SETUP
1 ❿ DATE DISPLAY ------------------(ON)
2 TIME DISPLAY-------------------(ON)
3 POSITION -------------(R-BOTTOM)
• DATE : Sélectionne l’affichage de date ON/OFF.
ON
OFF
2002-12-25 WED
12:45:30 L3H
12:45:30 L3H
(❷❿)
• TIME : Sélectionne l’affichage de l’heure ON/OFF.
ON
OFF
2002-12-25 WED 2002-12-25 WED
12:45:30 L3H
END:MENU
MENU
9
12/7/01 4:33 PM
• POSITION : Sélectionne la position de la
date et de l’heure à l’écran.
CLOCK SET/ADJUST
1 SUMMER TIME SET (USE)
2 DISPLAY MODE (YY-MM-DD)
3 ❿ CLOCK SET/ADJUST
YEAR
2001
DATE
01/01 MON
TRACKING/SET
TIME
12:00
CLOCK SET/ADJUST
1 SUMMER TIME SET (USE)
2 DISPLAY MODE (YY-MM-DD)
3 ❿ CLOCK SET/ADJUST
$
(❷❿/– +)
END:MENU
YEAR
2002
DATE
12/25 WED
TIME
12:00
$
(❷❿/– +)
11
Régler l’heure et les
minutes à l’aide des
touches SET et .
• Quand vous appuyez sur la touche
, vous réglez “13”.
• Appuyer sur la touche SHIFT ❿ !pour
déplacer la $!marque sous les
minutes.
• Intervenir de la même manière pour
les minutes.
12
Appuyer deux fois sur la
touche MENU.
• Contrôler de nouveau l’année, le
mois, le jour et l’heure puis appuyer
deux fois sur la touche MENU.
DATE
TIME
12/25 WED 13:30
15
END:MENU
2002-12-25 WED
9:16:14 L3H
L-UPPER
L-BOTTOM
2002-12-25 WED
9:16:14 L3H
R-UPPER
R-BOTTOM
2002-12-25 WED
9:16:14 L3H
CONFIGURATION DE L’ENREGISTREMENT SUR ALARME
(ALARM REC SETUP)
ALARM REC SETUP/RAPPEL
1 ❿ MODE -----------------------------(L3H)
2 DURATION --------------------(AUTO)
3 BUZZER----------------------------(ON)
4 ALARM RECALL
( ❷❿ /– +)
2002-12-25 WED
13: 30:00 L 3 H
REFERENCE
$
(❷❿/– +)
2
MENU
CLOCK SET/ADJUST
1 SUMMER TIME SET (USE)
2 DISPLAY MODE (YY-MM-DD)
3 ❿ CLOCK SET/ADJUST
2002-12-25 WED
9:16:14 L3H
END:MENU
TRACKING/SET
YEAR
2002
(Exemple)
Pour sélectionner et effacer l’heure.
1. Placer le curseur " ❿ " dans la position
“TIME DISPLAY” à l’aide de la touche
Shift “❷”.
2. Appuyer sur la touche Shift “❿
❿” pour
basculer entre les modes sélection et
effacement de l’heure.(La DATE et la
POSITION fonctionnent de la même
manière).
Affichage horaire
• Il n’y a pas d’affichage de a.m. et p.m.
• 1:00 p.m est affiché comme 13:00, 11:00 p.m.
comme 23:00 et 12:00 p.m. comme 00:00.
END:MENU
* Pour configurer ALARM REC
en mode L3H sur 5 minutes.
1. Placer le curseur " ❿" sur la
position DURATION à l’aide
de la touche SHIFT ❷.
2. A chaque fois que vous appuyez
sur la touche SHIFT ❿,
l’affichage change “SEL 3 MIN”.
3. Sélectionner “SEL 5 MIN” à
l’aide de la touche SET “+”.
4. Appuyer sur la touche MENU.
* MODE: Sélectionne la vitesse d’enregistrement sur alarme ALARM
REC.
Sélectionne L3H, L12H,L24H. (L8H n’est pas disponible)
OFF: l’appareil n’effectue pas d’enregistrement sur alarme
Alarm REC qu’un signal d’alarme soit présent ou non.
• DURATION: Sélectionne la durée de l’enregistrement sur alarme
ALARM REC.
AUTO
SEL 3 MIN
TAPE END
• Pour régler l’horaire ALARM REC. Régler
l’horaire de SEL 20SEC à 5MIN en utilisant les
touches de réglages +/• AUTO: si un signal d’alarme est reçu, l’enregistrement
sur alarme ALARM REC se déclenche et continue
jusqu’à ce que le signal d’alarme cesse. La fonction
ALARM REC s’arrête alors (elle ne peut pas être
annulée en moins d’une minute).
• TAPE END: si un signal d’alarme est reçu, ALARM
REC se déclenche et continue jusqu’à la fin de la
bande.
• BUZZER (sonnerie): permet de choisir si la fonction sonnerie est
activée ou non pendant ALARM REC.
• ALARM RECALL : Contrôler l’enregistrement sur alarme. (se
référer à la page 33)
16
01671A SVR-24JP/960JP-Fra2
12/7/01 4:33 PM
Page 18
MENU DE CONFIGURATION
– REGLAGE DU MODE ENREGISTREMENT ET DU MODE MAGNETOSCOPE
CONFIGURATION DU MODE ENREGISTREMENT
(REC MODE SET UP)
REC MODE SETUP
1 ❿ REPEAT REC-------------------(OFF)
2 SERIES REC -------------------(OFF)
3 1-SHOT REC--------------------(OFF)
( ❷❿ )
END:MENU
SHIFT ❷: MOVE BUTTON
(Touche de
déplacement à
l’écran)
SHIFT ❿: ENTER (SELECT)
BUTTON (Touche de
validation de
sélection).
* Il n’est pas possible de
sélectionner Repeat Rec &
Series Rec simultanément.
17
• REPEAT REC: permet de basculer entre la
sélection et l’annulation de
l’enregistrement répété
(ON/OFF).
ON: lorsque la fin de la bande est atteinte
avant la fin d’un enregistrement, le
rembobinage de la bande se fait
automatiquement et l’enregistrement
reprend en début de bande.
• SERIES REC: la fonction enregistrement en
série est une fonction utile lors
de l’utilisation de deux ou de
plusieurs magnétoscopes. Le
deuxième appareil commence à
enregistrer dès que le premier
appareil a atteint la fin de sa
bande.
– Pour connaître les méthodes de branchement
en série, se référer à la section Branchement
pour enregistrement en série (Page 37).
• 1 SHOT RECORDING: pour sélectionner ce
mode, sélectionner 000H en REC TIME
MODE.
OFF: Enregistre une seule image quand la
touche REC est actionnée une fois.
1MIN: Enregistre une seule image à un
intervalle de 1 minute quand la touche
REC est actionnée une fois.
2 MIN: Enregistre une seule image à un
intervalle de 2 minutes quand la touche
REC est actionnée une fois.
3 MIN: Enregistre une seule image à un
intervalle de 3 minutes quand la touche
REC est actionnée une fois.
4
CONFIGURATION DU MODE MAGNETOSCOPE
(VCR MODE SETUP)
VCR MODE SETUP
1 ❿ TRIGGER --------------------(1FIELD)
2 V-SYNC ----------------------------(ON)
3 BUZZER ---------------------------(ON)
4 TAPE LENGTH ----------------(E240)
( ❷❿ )
MENU
3
END:MENU
SHIFT ❷: MOVE BUTTON
(Touche de déplacement
à l’écran)
SHIFT ❿: ENTER (SELECT)
BUTTON (Touche de
validation de sélection).
• TRIGGER (PROGRAMMEUR)
– Sélectionne le nombre de
photogrammes qui doivent être
enregistrés quand l’appareil est
branché à un COMMUTATEUR
D’IMAGE. (Faire référence au
manuel pour plus de
renseignements).
• V-SYNC
– L’image peut présenter des
distorsions quand l’appareil est
branché à un COMMUTATEUR
D’IMAGE(FRAME SWITCHER)
particulier. Sélectionner ON ou
OFF pour la position sans
distorsions.
• BUZZER
– Bascule entre la sélection et
l’annulation de la fonction
sonnerie (se référer à la page
34).
• TAPE LENGTH
– Choisissez la longueur de
vidéocassette. Cette information est
habituellement imprimée sur le cadre de
bande.
– Selon la configuration de longueur de
bande, le mode de temps sur les
changements d’affichage comme
suivant.
E-180
L3H
E-240
L4H
L8H
L12H
L12H
L18H
L24H
L32H
18
01671A SVR-24JP/960JP-Fra2
12/7/01 4:33 PM
Page 20
MENU DE CONFIGURATION 1
5
CONFIGURATION DE
PROGRAMME 1
(PROGRAM SETUP 1)
•
•
•
•
•
•
PROGRAM SETUP1
START STOP DATE
MODE
L3H
L24H
❿ 13:03 → 13:15 MON
13:03 → 13:15 DAILY
OFF
13:03 → 13:15 MON
PROGRAM SETUP2
( ❷❿ /– +,CLEAR)
L12H
END:MENU
• Comment régler un enregistrement
Exemple) pour régler un enregistrement
programmé de 13:03 à 13:15 de lundi en
mode L3H.
6
1. Appuyer sur la touche SHIFT ❷!pour déplacer le
curseur sur une position de programme libre.
CONFIGURATION DE
PROGRAMME 2
(PROGRAM SETUP 2)
•
•
•
•
•
•
2. Appuyer sur la touche SHIFT ❿!pour afficher
l’horaire actuel.
3. Appuyer sur les touches TRACKING/SET "+" ou
"–" pour régler l’heure du début de
l’enregistrement.
❿
PROGRAM SETUP2
START STOP DATE
MODE
• Quand 5 programmes sont réglés dans la CONFIGURATION
DE PROGRAMME 1, sélectionner CONFIGURATION DE
PROGRAMME 2.
• Utiliser le même système utilisé pour le réglage dans la
CONFIGURATION DE PROGRAMME 1.
* Lorsque vous avez terminé la programmation en mode
PROGRAM SETUP 1 et 2, appuyez sur la touche MENU
pour terminer la programmation et appuyer sur POWER
pour mettre l’appareil en mode d’attente.
POWER
PROGRAM SETUP1
( ❷❿ /– +,CLEAR)
END:MENU
TIMER
4. Appuyer sur la touche SHIFT ❿!pour se déplacer
sur les minutes.
ATTENTION
1. Vous pouvez utiliser uniquement les
touches POWER ou RESET pendant
l’enregistrement.
2. Pendant l’enregistrement, pour effacer
l’enregistrement appuyer sur la touche
POWER.
3. Pour effacer un enregistrement,
sélectionnez-le et appuyer sur la touche
CLEAR pour afficher OFF.
En appuyant sur la touche SHIFT ❿ de
nouveau en position OFF pour bloquer
l’horaire réglé précédemment.
REC
REC
5. Appuyer sur les touches TRACKING/SET "+" ou
"–" pour régler les minutes du début de
l’enregistrement.
C.MEMO
6. De la même manière, régler l’horaire de la fin de
l’enregistrement et se déplacer sur la date.
* La bande est éjectée et la sonnerie retentit si la languette
de sécurité de la bande a été enlevée.
7. Appuyer sur les touches TRACKING/SET "+" ou
"–" pour régler lundi et appuyer sur la touche
SHIFT ❿.
8. Appuyer sur les touches TRACKING/SET "+" ou
"–" pour régler le mode L3H et appuyer sur la
touche SHIFT ❿.
9. En suivant la même procédure, programmer un
second enregistrement NEXT PROGRAM REC si
vous le désirez.
– VERIFICATION DE LA DATE ET DE L’HEURE D’UNE PANNE D’ALIMENTATION
7
MEMOIRE DE PANNE
D’ALIMENTATION (POWER
LOSS MEMORY)
• DAILY: L’enregistrement programmé s’effectuera à
la même heure chaque jour.
REFERENCE
Vous pouvez programmer 10 programmes par semaine.
•
•
•
POWER LOSS MEMORY
YEAR
DATE
TIME
OFF 2002
12/25 15:00:00
ON
2002
12/25 15:15:37
OFF 2002
12/24 13:25:00
ON
2002
12/24 13:26:00
OFF 2002
12/23 17:30:30
ON
2002
12/23 17:40:00
END:MENU
• Affiche l’heure du début et de la fin de la coupure de
courant.
* Exemple: une panne d’alimentation est intervenue à
17:30:30 le 12,23 2002 et la panne s’est
terminée à 17:40:00 le 12,23 2002 (17:30:30
signifie 17 heures, 30 minutes et 30 secondes).
* Exemple: une panne d’alimentation est intervenue à
13:25:00 le 12,24 2002 et la panne s’est
terminée à 13:26:00 le 12,24 2002 de manière
répétée.
1. OFF
ON
2. OFF
ON
3. OFF
ON
2002
2002
2002
2002
12/24
12/24
12/23
12/23
13:25:00
13:26:00
17:30:30
17:40:30
• L’affichage à l’écran des quatre événements les plus récents.
La panne de courant la plus récente est indiquée la première.
19
20
MENU
– CONFIGURATION DU PROGRAMMEUR D’ENREGISTREMENT
01671A SVR-24JP/960JP-Fra2
12/7/01 4:33 PM
Page 22
FONCTIONNEMENT
W
RE
P/STILL
CK
REC CHE
ON
AUDIO
AR
O CLE
CNT.MEM
COUNT
K
REC LOC
TIMER
RESET
PLAY
W
RE
W
RE
Pour une
recherche arrière
POWER
TIME
MODE
ET
KING/S
W
RE
F.F
CK
REC LO
TRAC
W
RE
Pour une
recherche avant
PLAY
PLAYBACK
(LECTURE)
ER
POW
SECURITY VIDEO
SHIFT
CK
V-LO
P/STILL
F.F
REV
P/STILL
Pour la pause
F.F
DEO
Y VI
URIT
C
E
S
• Lorsqu’une cassette est insérée le
magnétoscope se met en marche
de manière automatique.
2
Appuyer sur la touche
quand c’est nécessaire.
F.F
ECT
STOP/EJ
1
Appuyer sur la touche POWER
(Marche) du magnétoscope et
insérer la cassette.
MENU
STOP
(ARRET)
Pendant un arrêt
W
RE
W
RE
F.F
EJECT
(EJECTION)
STOP/EJECT
F.F
Insérer la cassette dans le
magnétoscope avec la
fenêtre tournée vers le haut.
LECTURE
REC
F.F
PLAY
Pour retourner
au mode de
lecture normal
Pendant une lecture
normale
FONCTIONNEMENT DE LA LECTURE
Pour une avance
rapide
STOP/EJECT
Pour un
rembobinage rapide
REFERENCE
• Régler la vitesse de lecture sur L3H pour une vision et un son normal quand vous lisez une
cassette louée.
• Une cassette standard peut présenter quelques problèmes en mode STILL.
• La lecture au ralenti et la vitesse de lecture ne peuvent pas être réglés en mode STILL.
Noter ce qui suit lors de la lecture d’une bande qui a été
enregistrée en enregistrement différé:
21
• Il se peut que l’écran soit noir pendant la recherche d’image, cela n’indique aucun mauvais
fonctionnement ou problème.
• Il est possible que l’écran tremble un petit peu, mais cela ne signifie pas que l’appareil est défectueux.
• Il est possible que la partie supérieure de l’écran semble un peu déformée, mais cela ne signifie pas
que l’appareil est défectueux ou qu’un problème existe.
• Il se peut que l’écran présente quelques distorsions, cela n’indique aucun mauvais
fonctionnement ou problème.
• Bien que le son ne soit peut-être pas clair, cela ne signifie pas que l’appareil est défectueux ou qu’un
problème existe.
• Lors de la lecture en mode L3H d’une bande enregistrée en mode L8H/L12H/L24H, la lecture de
l’image enregistrée se fait à grande vitesse.
• Il n’est pas possible d’entendre le son normal lors de la lecture d’une bande enregistrée avec le son si
le mode de la vitesse d’enregistrement est différent du mode de la vitesse de lecture.
Noter le réglage de l’écran
• Lors de l’insertion de la cassette, l’écran est
ajusté de manière automatique.
• Si l’écran n’est pas ajusté de manière
automatique, effectuer le réglage à l’aide des
touches de réglage de l’écran “
”.
TRACKING/SET
• Si l’écran n’est pas bien réglé en utilisant les touches
TRACKING, réglez-le en appuyant en même temps
sur les touches TRACKING et TRACKING .
S’il y a des interférences à l’écran
ou que l’image bouge.
• Appuyer sur les touches
.
TRACKING/SET
SHIFT
V-LOCK
• S’il y a des interférences à l’écran ou que
l’image bouge pendant une lecture en ralenti,
l’ajuster en appuyant sur la touche de
réglage de l’écran “
”.
• Si l’écran présente des distorsions de l’image
en pause, corrigez-les en appuyant sur la
touche V-LOCK
.
22
01671A SVR-24JP/960JP-Fra2
12/7/01 4:33 PM
Page 24
DIVERS MODES DE LECTURE
• Insérer la cassette pour initier la lecture.
W
P/STILL
CK
REC CHE
ECT
STOP/EJ
K
REC LOC
TIMER
REV
AUDIO
NT
ON COU
CNT.ME
AR
MO CLE
RESET
CK
REC LO
ER
POW
MODE
TIME
KING/S
ET
Tourner le cadran SHUTTLE dans le
sens des aiguilles d’une montre ou
dans le sens inverse.
• L’appareil effectue un
rembobinage ou une avance
rapide de la bande.
• La vitesse est variable selon
combien vous tournez le cadran.
W
RE
2
Lors de la lecture au ralenti,
appuyer sur les touches TIME
MODE (vitesse de lecture)
“ ” et “ ” pendant la lecture.
TIME MODE
Pour retourner au mode de
lecture normale
• Laisser le cadran.
Lorsque de la lecture d’images en mode spécial.
• Le fait que l’image à l’écran est sujette à des interférences ne signifie pas que l’appareil est
défectueux ou qu’il y a un problème.
• La qualité de l’image d’une bande enregistrée sur d’autres appareils est quelquefois très
mauvaise.
• Il n’est pas alors possible d’entendre le son.
• Quand l’image tremble pendant la lecture
au ralenti, appuyer sur les touches V-LOCK
. Après le réglage, reprendre la
lecture au ralenti.
• Appuyer sur la touche TIME MODE
(vitesse de lecture) et sélectionner la
vitesse de lecture désirée.
Lors de la lecture avant/arrière
de la bande au ralenti.
• Appuyer sur la touche P/STILL pour
obtenir un arrêt sur image.
• Tourner le cadran JOG sur lecture
avant au ralenti ou lecture arrière au
ralenti.
• Appuyer sur la touche de lecture
(PLAY) pour retourner à une lecture
normale.
• Quand la lecture au ralenti s’est faite
pendant une période de 5 minutes
environ, la cassette reprend
automatiquement la lecture.
Il est possible de ne pas entendre le son normal
pendant la lecture.
• Cassette L3H
• Cassette L8H
• Cassette L12H
• Cassette L24H
23
3
– Lecture
– Lecture
– Lecture
– Lecture
– Lecture
– Lecture
– Lecture
– Lecture
– Lecture
L3H ➝ Normale
L3H ➝ Rapide
L8H ➝ Normale
L12H/L24H ➝ Ralenti
L3H/L8H ➝ Rapide
L12H ➝ Normale
L24H ➝ Ralenti
L3H/L8H/L12H ➝ Rapide
L24H ➝ Normale
W
RE
F.F
2
1 3
Recherche de l’écran
(en cours de lecture).
F.F
TRAC
SHIFT
V-LOCK
NU
1
Pour entendre le son normal
• Vous pouvez entendre le son normal
uniquement quand vous effectuez la
lecture à la vitesse d’enregistrement.
24
LECTURE
REC
F.F
RE
PLAY
01671A SVR-24JP/960JP-Fra2
12/7/01 4:33 PM
Page 26
DIVERS MODES DE LECTURE (SUITE)
RE
W
P/STILL
CK
REC CHE
ECT
STOP/EJ
K
REC LOC
TIMER
REV
AUDIO
.ME
NT CNT
ON COU
AR
MO CLE
RESET
CK
REC LO
ER
POW
TIME
TRAC
KING/S
MODE
ET
SHIFT
V-LOCK
4
NU
6,7
5
Pour une lecture arrière
• Pendant une lecture normale,
appuyer sur la touche REV. pour
une lecture arrière.
• La lecture arrière n’est possible
qu’en mode L3H.
• Il n’est pas possible d’entendre
le son pendant une lecture
arrière.
• Appuyer sur la touche REV ou
PLAY pendant la lecture en arrière
pour retourner à la lecture normale.
REV.
5
Pour les lectures
en L12H/L24
heures
• Il n’est pas possible
d’entendre le son sur
des bande 12H ou 24H.
Si vous voulez entendre le
son, appuyer sur la
touche AUDIO ON pour
afficher L12H ou L24H.
• La lecture de la bande
est faite à une vitesse
inférieure à la vitesse
L3H.
• Il est possible que des
interférences
apparaissent à l’écran.
• Pour obtenir une image
claire choisir le mode de
lecture L3H ou le mode
de lecture en ralenti.
6
Arrêt sur image
Appuyer sur la touche
P/STILL pour obtenir un
arrêt sur image.
• En arrêt sur image, il n’est
pas possible d’entendre le
son.
• Ne pas faire durer l’arrêt
sur image trop longtemps
car ceci risque
d’endommager la tête de
lecture et la bande.
• Quand l’arrêt sur image dure
plus de cinq minutes, la
cassette reprend
automatiquement la lecture.
• Quand l’image tremble,
appuyer sur les touches
V-LOCK
pour la
régler.
7
Lors d’une lecture
image par image
• Appuyer sur la touche
P/STILL.
• Il n’est alors pas possible
d’entendre le son.
• Quand vous tournez de
manière continue le
cadran JOG, la lecture se
fait photogramme par
photogramme.
• Appuyer sur la touche de
lecture PLAY pour
retourner à une lecture
normale.
Pour retourner en lecture
normale:
• Appuyer sur la touche de
lecture PLAY pour
retourner à une lecture
normale.
TIME MODE
Lors du rembobinage de la bande
• Régler le compteur sur sa position originale
(
) en appuyant sur la touche CLEAR quand
vous commencez l’enregistrement ou la lecture.
Appuyer sur la touche de mémoire du compteur.
Quand vous tournez le cadran SHUTTLE dans le
sens inverse des aiguilles d’une montre en mode
stop après la fin de l’enregistrement ou pendant la
lecture, la cassette s’arrête à la position de départ
(
) de l’enregistrement ou de la lecture.
25
SHIFT
V-LOCK
AFFICHAGE AVANT
C.MEMO
Affichage de la
position actuelle
du compteur.
Affichage de la
position
mémorisée.
26
LECTURE
4
REC
F.F
PLAY
01671A SVR-24JP/960JP-Fra3
12/7/01 4:33 PM
Page 28
VERROUILLAGE D’ENREGISTREMENT
Cet appareil comprend une fonction de protection de l’enregistrement et d’autres fonctions
d’enregistrement pour des applications polyvalentes, y compris la surveillance et
l’observation. Il est nécessaire que l’utilisateur se familiarise avec leur fonctionnement.
ENREGISTREMENT
Réglage avant l’enregistrement
Vérifier que l’heure indiquée par
l’horloge est bien l’heure exacte.
• Pour l’enregistrement des programmes, il
est impératif que l’horloge soit à l’heure.
• Si vous n’avez pas encore mis l’horloge à
l’heure, se reporter à la section consacrée au
réglage de la date et de l’heure (Page 13).
Méthode
de sélection
Quand vous voulez
verrouiller un
enregistrement.
Méthode
d’utilisation
• Placer le commutateur REC
LOCK (verrouillage
d’enregistrement) en
position REC LOCK.
OFF
REC LOCK
Description
de l’opération
• Quand vous appuyez sur la touche
REC LOCK pour faire partir le mode
REC LOCK, le voyant REC LOCK
s’allume.
• Aucune touche ne fonctionne en mode
REC LOCK sauf la touche RESET.
• L’enregistrement répétée même après
le rétablissement du courant.
La languette de protection de
la cassette est-elle en place?
• Appuyer de nouveau sur la
• Le voyant REC LOCK s’éteint.
touche REC LOCK
OFF
REC LOCK
Languette de protection.
Procédure lorsque la cassette se termine avant la fin de l’enregistrement.
Si la languette n’est pas en place:
• La cassette ne peut pas être
utilisée pour un enregistrement
sauf si la languette est remplacée
par un ruban adhésif.
Ruban Scotch
* Rembobinage automatique de la cassette pour enregistrement répété.
• Quand vous sélectionnez REPEAT ON sur le menu (ou bien quand il y a une alarme
d’enregistrement, le magnétoscope éjecte la cassette).
* Alimentation quand la cassette a été éjectée.
• Quand on arrive à la fin de la cassette sauf avec enregistrement répété après rembobinage
automatique.
REFERENCE
Condensation
• Si le magnétoscope est transporté rapidement d’une pièce froide à une pièce chaude, ou s’il est
entreposé dans un endroit humide ou s’il est exposé à des vents froids ou au flux d’air du dispositif de
climatisation, des gouttelettes d’eau risquent de se former sur le tambour du magnétoscope en raison de
la différence de température.
Si vous utilisez le magnétoscope lorsqu’il est dans cet état, il peut en résulter des dommages pour
l’appareil et la bande.
Si le magnétoscope est dans l’état décrit, appuyer sur la touche de Marche et garder l’appareil sous
tension pendant plus d’une ou deux heures avant de l’utiliser.
27
28
ENREGIST
REMENT
Si la languette est en place:
• La cassette peut être utilisée
pour effectuer des
enregistrements successifs.
01671A SVR-24JP/960JP-Fra3
12/7/01 4:33 PM
Page 30
ENREGISTREMENT DE BASE
1
REC
F.F
W
P/STILL
CK
REC CHE
Appuyer sur la touche
de marche/arrêt du
magnétoscope.
2
ECT
STOP/EJ
Insérer la cassette avec la face
portant la languette de
protection tournée vers
l’extérieur.
3
Sélection de la vitesse
d’enregistrement
7
Appuyer sur la touche REC
ou P/STILL pour relancer
l’enregistrement.
K
REC LOC
TIMER
REV
AUDIO
NT
ON COU
CNT.ME
AR
MO CLE
RESET
REC
F.F
RE
PLAY
CK
REC LO
ER
POW
TIME
TRAC
KING/S
MODE
5
6,7
ET
SHIFT
V-LOCK
MENU
1
4
Appuyer sur la touche
REC.
• L’enregistrement commence.
• Si la languette de protection est
absente, la bande s’arrête, la
sonnerie d’alarme retentit cinq
fois et la cassette est éjectée.
W
P/STILL
REC CHECK
4,7
POWER
JECT
STOP/E
TIMER
REV
AUDIO
ON COUNT
CNT.ME
MO CLEAR
REC LOCK
RESET
REC LOCK
ER
POW
TIME
TRAC
MODE
KING/SET
SHIFT
K
V-LOC
MENU
La languette de protection
5
Appuyer sur la touche
REC CHECK
• Vous pouvez vérifier la qualité de
6
l’enregistrement quand vous êtes en
mode enregistrement. Le magnétoscope
effectue la lecture du programme
enregistré quelques secondes avant que
vous n’appuyiez sur la touche REC
CHECK (vérification d’enregistrement).
REC
Appuyer sur la touche P/STILL
• Si la pause dure plus de cinq minutes, la
bande se fait de manière automatique de
manière à éviter que le magnétoscope ou la
bande ne soit endommagé. Si la pause doit
durer plusieurs minutes, veiller à appuyer
sur la touche arrêt.
REC
P/STILL
REC CHECK
Table des durées d’enregistrement
REFERENCE
Qu’est-ce qu’une
Pour protéger un
languette de protection enregistrement.
• Détacher la
contre l’effacement
languette de
accidentel?
• C’est un dispositif qui
protège le contenu
de l’enregistrement
sur la cassette ou
qui permet
d’effectuer de
nouveaux
enregistrements.
29
protection contre
l’effacement.
Languette de
protection contre
l’effacement.
• La vitesse d’enregistrement est sélectionnée
en utilisant TIME MODE
.
• La vitesse d’enregistrement
sélectionnée est indiquée à l’affichage.
Pour enregistrer
à nouveau.
• Placer une longueur de
ruban adhésif sur la
section de la cassette qui
contenait la languette.
Languette de
protection contre
l’effacement.
Avant que la fonction REC CHECK ne
puisse être lancée, il faut que s’écoule
une durée minimum d’enregistrement qui
est indiquée dans le tableau ci-dessous.
TEMPS
MODE
MODE ENREGISTREM
TEMPS
ENT MIN
TEMPS
L3H 5 secondes
72H
L8H 15 secondes
120H
L12H 30 secondes
168H
L24H
1 minute
240H
36H
1 minute
480H
30 secondes
48H
2 minutes
960H
TEMPS
ENREGISTRE
MENT MIN
3 minutes
5 minutes
7 minutes
10 minutes
20 minutes
• N’utiliser que les cassettes marquées
Type de
bande
ENREGIST
REMENT
RE
PLAY
P/STILL
• Cet appareil fonctionne avec des cassettes E-180.
• Quand c’est possible, utiliser les cassettes E-180 pour un
enregistrement normal.
• SVR-24JP possède seulement les modes L3H, L8H, L12H et L24H.
Durée d’enregistrement maximum
L3H
L8H
L12H
L24H
E-240
4heures
12heures
20heures 36heures
52heures
68heures 100heures 164heures 228heures 324heures 644heures 1284heures
E-180
3heures
9heures
15heures
39heures
51heures
27heures
36H
48H
72H
120H
168H
240H
480H
960H
75heures 123heures 171heures 243heures 483heures 963heures
40 minutes
* SVR-24JP possède seulement les
modes L3H, L8H, L12H et L24H.
30
01671A SVR-24JP/960JP-Fra3
12/7/01 4:33 PM
Page 32
ENREGISTREMENT EN SERIE
ENREGISTREMENT SUR ALARME
Il s’agit d’une fonction commode permettant d’utiliser deux ou plusieurs magnétoscopes
reliés en série de manière à ce que le second magnétoscope commence son
enregistrement quand la bande du premier magnétoscope se termine et ainsi de suite.
Si le magnétoscope est connecté à un appareil doté d’un dispositif de sortie d’alarme
comme un commutateur d’image, un détecteur de mouvement ou un commutateur de
porte, le magnétoscope réagit à la présence d’un message d’alarme en conformité
avec l’heure et les modalités de fonctionnement saisies sur le menu ALARM REC.
SVR-24JP a seulement le mode L3H/L12H/L24H pour ALARM REC.
La diagramme ci-dessous est réglé sur le mode L3H pour ALARM REC.
Méthode
d’utilisation
Description
de l’opération
Se reporter à la
méthode de
branchement pour
l’enregistrement en
série (page 37).
• Sélectionner le No 4 dans
le MENU.
• A l’aide de la touche
SHIFT ❷ !, ❿ !sélectionner
“ON” pour SERIES
(sélection de
l’enregistrement en série).
• Quand la bande utilisée par le premier
magnétoscope arrive à sa fin pendant un
enregistrement, le second magnétoscope
commence son enregistrement. Si un
troisième appareil est branché sur le
second, quand la bande utilisée par le
second magnétoscope arrive à sa fin
pendant l’enregistrement, le troisième
magnétoscope commence son
enregistrement, et ainsi de suite.
• Quand le mode d’enregistrement en série
est sélectionné, le second magnétoscope
effectue son enregistrement même si le
courant de secteur est coupé.
• La sonnerie d’alarme sonne alors de
manière interrompue. Pour acquitter l’état
d’alarme, appuyer sur une touche
quelconque.
L12H~960H
(L12H~L24H)*
Mode
d’enregistrement
L3H
Mode
d’enregistrement
L12H~960H
(L12H~L24H)*
Mode d’enregistrement
L3H
Mode
d’enregistrement
Enregistrement différé
Enregistrement sur alarme
Enregistrement différé
Enregistrement sur alarme
Début de
l’enregistrement
Arrivée du signal
d’alarme
Méthode de
branchement
Brancher le
dispositif de sortie
d’alarme de la
manière suivante:
1 ALARM IN
2 ALARM OUT
6 TAPE END OUT 7 SERIES OUT
1
2
3
4
3 ALARM RESET 4 ERROR OUT
8 GND
5
6
5 TRIGGER OUT
9 SERIES IN
10 1 SHOT RECIN
7
9
8
10
IN
IN
OUT
OUT
AUDIO
VIDEO
OUT
VIDEO
GND
ALARM
RESET
(Voir page 37)
ALARM
OUT
Saisie de l’instruction de
réamorçage d’alarme ou de
durée sélectionnée
Méthode
d’utilisation
• Sélectionner MODE et
DURATION (durée) sur
ALARM REC SETUP
(configuration de
l’enregistrement sur
alarme) dans le MENU 3
(se reporter à ALARM
REC SETUP à la page
16).
• Quand l’appareil est
branché à
COMMUTATEUR
D’IMAGE, il vaut mieux
que le commutateur soit
placé en position
automatique.
Arrivée du
signal d’alarme
Description
de l’opération
• AUTO: l’heure de l’enregistrement sur alarme
est déterminée de manière automatique lors de
l’arrivée du signal d’alarme. (1 min)
• 20 sec- 5 min : L’alarme enregistrement
s’effectue pendant 20 secondes – 5 minutes
après l’entrée en fonction du signal d’alarme.
• TAPE END: une fois le signal d’alarme reçu,
l’enregistrement se poursuit jusqu’à la fin de la
bande.
• Lorsque le signal d’alarme est reçu, la sonnerie
sur l’affichage du panneau avant se
déclenche.
• A la fin du signal d’alarme, la sonnerie
sur
l’affichage du panneau avant clignote.
• Lorsque vous désirez annuler l’état d’alarme
pendant un enregistrement sur alarme, établir
une connexion entre l’acquittement d’alarme et
la mise à la terre de l’alarme pendant plus de
0, 5 seconde, une fois que l’acquittement de
l’alarme est saisie.
• Quand un signal d’alarme est reçu et que la
fonction BUZZER ON est sélectionnée dans le
menu, la sonnerie d’alarme retentit de manière
continue. Pour annuler la sonnerie, appuyer
sur une touche quelconque.
REFERENCE
Touche RESET (réamorçage)
Lorsque vous appuyez sur la touche RESET
• Utiliser cette touche lorsque le
magnétoscope ou l’affichage semble ne
pas fonctionner normalement bien que
l’appareil soit sous tension.
• La touche RESET est située à la droite
du panneau avant.
• Appuyer sur la touche RESET à l’aide
d’un crayon ou d’un stylo bille.
• Toutes les informations mémorisées, comme les heures
de programmation d’enregistrement, l’heure actuelle et
les informations relatives au dispositif d’alarme sont
effacées.
• Le courant est coupé et rien n’apparaît à l’affichage.
Quand le courant est rétabli “ 2001-1-1 MON ” clignote sur
12:00:00 L3H
l’affichage à l’écran.
• L’heure a été effacée et l’horloge doit donc être à
nouveau mise à l’heure.
31
32
ENREGIST
REMENT
Méthode de
branchement
01671A SVR-24JP/960JP-Fra3
12/7/01 4:33 PM
Page 34
FONCTIONS D’ALARME
Les fonctions d’alarme comprennent l’enregistrement sur alarme, l’acquittement de
l’alarme et la mémoire des informations du compteur relatives à l’état d’alarme (Voir
page 32).
MEMOIRE DES INFORMATIONS DU COMPTEUR RELATIVES A L’ETAT
D’ALARME
VERIFICATION DE L’ENREGISTREMENT SUR ALARME
1
Appuyer sur la touche MENU
1. Placer la ❿ marque sur la position
“ALARM REC SETUP/RECALL”
en utilisant la touche SHIFT ❷.
2. Appuyer sur la touche SHIFT ❿,
“ALARM RECALL” s’affiche.
3. Appuyer sur la touche MENU
après le contrôle.
1
• Quand aucun enregistrement
sur alarme n’existe, rien ne
s’affiche à l’écran.
• L’écran de registre d’alarme
ALARM RECALL affiche des
informations sur les huit
derniers états d’alarme avec la
date et l’heure de chacun d’eux.
• Si l’enregistrement de l’alarme
remonte à 12:00, 13:00, 15:00,
17:00 et 19:00 le 25 janvier
2001, l’écran affiche le tableau
suivant:
Appuyer sur CNT. MEMO
• Appuyer sur la touche CNT. MEMO deux
fois, l’affichage indique “A. MENO”.
2
Tourner le cadran SHUTTLE
dans le sens des aiguilles d’une
montre ou dans le sens inverse.
• Quand vous tournez le cadran, la cassette
avance rapidement (ou se rembobine).
Quand elle arrive à l’enregistrement d’alarme
en mode L3H uniquement, elle se met en
pause pendant 5 secondes, puis elle s’arrête.
W
RE
W
RE
F.F
A.MEMO
F.F
CNT MEMO
ACQUITTEMENT DE L’ALARME
1
ALARM RECALL
YEAR DATE TIME
2001 12/25 19:00:00
2001 12/25 17:00:00
2001 12/25 15:00:00
2001 12/25 13:00:00
2001 12/25 12:00:00
Exemple: Quand l’enregistrement sur
alarme a été fait au No 12.
Appuyer sur la touche COUNTER.
• A-12 est affiché au compteur sur le
panneau d’affichage avant.
• Dans "
", le 12 indique la fréquence de
l’enregistrement sur alarme.
• Il est possible d’afficher jusqu’à "
"
• Pendant l’enregistrement sur alarme, le
symbole “ ” sur le panneau d’affichage
avant clignote.
END:MENU
2
Appuyer sur la touche
CLEAR (effacer).
• Le compteur sur le panneau d’affichage
avant affiche "
".
• Le symbole " " s’éteint.
• Si la touche CLEAR est activée lorsque
toutes les informations d’alarme sont
affichées, toutes ces informations sont
effacées de la mémoire.
CLEAR
COUNT
REC
F.F
RE
PLAY
W
P/STILL
CK
REC CHE
ECT
STOP/EJ
REC LOCK
TIMER
REV
REC LO
AUDIO
NT
ON COU
CNT.MEM
R
O CLEA
RESET
CK
R
POWE
TIME
TRAC
KING/S
T
SHIF
CK
V-LO
MENU
1
ET
MODE
112 2
REFERENCE
REFERENCE
Affichage de la durée d’opération.
L’alarme sonne 5 fois dans les cas suivants:
• Quand le panneau d’affichage avant indique
appuyer deux fois sur la touche COUNTER.
La durée d’opération est alors affichée sur le
panneau d’affichage avant.
Exemple) Quand l’opération a duré 11 heures.
,
HOUR
• Si la touche du compteur n’est pas actionnée dans
les 5 secondes lors de la consultation de la durée
d’opération, l’affichage du panneau avant retourne à
son état antérieur à la demande de consultation.
33
• Quand la cassette insérée ne comporte pas de languette de
protection.
- Quand un signal d’enregistrement en série est détecté.
(long son)
- Quand un signal d’alarme est détecté.
- Quand la touche d’enregistrement est activée.
- Quand la touche TIMER (programmeur) est activée.
• Quand la touche REC est activée et que la cassette est
éjectée.
• Quand un signal d’alarme est détecté pendant un
enregistrement sur alarme.
L’alarme retentit de manière continue dans
les cas suivants:
• Quand la bande se termine en cours d’enregistrement.
• Quand un signal d’alarme est détecté qui déclenche un enregistrement
sur alarme.
- Quand l’enregistrement sur alarme se termine, l’état d’alarme prend
fin.
- L’état d’alarme est acquitté en appuyant sur une touche quelconque.
- Lorsqu’un signal d’alarme est détecté et que la cassette est
éjectée.(long son)
Enregistrement répété automatique.
• Quand le rembobinage est complété après que la cassette soit
arrivée en fin de bande, l’enregistrement reprend en début de
bande.
(L’alarme ne retentit que pendant le rembobinage).
• Si une alarme sur enregistrement est en cours, la bande est éjectée.
34
FONCTIONS
1
2
3
4
5
6
01671A SVR-24JP/960JP-Fra3
12/7/01 4:33 PM
Page 36
FONCTIONS DE FACILITATION
METHODE DE BRANCHEMENT
Une bonne compréhension des fonctions qui suivent facilitera votre accès à l’information.
Méthode
d’utilisation
Description
de l’opération
Quand vous désirez
regarder rapidement des
images enregistrées à la
source d’un signal
d’alarme.
Configurer l’affichage
A.MEMO à l’aide de la touche
CNT.MEMO.
La position de l’enregistrement sur alarme
est identifiée sur la bande et le
magnétoscope se met en pause pendant
5 secondes. La lecture de la bande est
lancée en appuyant sur la touche lecture
(play). Si la touche lecture n’est pas
activée dans les 5 secondes, la bande
s’arrête automatiquement.
Quand vous désirez
consulter rapidement
l’heure et la date d’une
alarme.
Appuyer sur la touche MENU
en mode d’arrêt.
Sélectionner ALARM RECALL
en utilisant les touches SHIFT
❷ !et ❿.
Appuyer sur la touche MENU
en mode stop.
Branchement avec Frame Switcher
1
2
L’écran du moniteur affiche les
informations suivantes:
1
2
3
4
5
6
ALARM RECALL
YEAR DATE TIME
2001 12/25 19:00:00
2001 12/25 17:00:00
2001 12/25 15:00:00
2001 12/25 13:00:00
2001 12/25 12:00:00
8
ALARM IN
GND
END:MENU
Quand vous désirez
connaître le nombre
d’enregistrements sur
alarme qui ont eu lieu.
Lorsque la touche COUNT est
activée une fois, le compteur sur
alarme s’affiche sur le panneau
avant. Par exemple A-11.
Quand vous désirez
transférer directement sur
l’arrivée d’images en
provenance d’une caméra
externe (à l’aide de la
fonction TRIGGER).
Connecter la sortie de déclenchement de l’équipement
externe. Se reporter à la
méthode de branchement
(page 36). Enregistrement en
mode différé.
Quand vous désirez regarder
rapidement les images
enregistrées en mode différé
(si l’enregistrement est en
mode L8H-960H
(L8H~L24H)*.
Appuyer sur la touche TIME
MODE pour sélectionner le
mode “L3H”, puis appuyer sur
la touche de lecture.
TRIGGER OUT
Le chiffre sur l’écran du compteur d’alarme
indique la fréquence des enregistrements
d’alarme ayant eu lieu. Le nombre maximum
est 99. A-11. (indique que l’enregistrement
sur alarme s’est déclenché 11 fois).
1 ALARM IN
2 ALARM OUT
6 TAPE END OUT 7 SERIES OUT
1
Ce magnétoscope enregistre les
données de chaque caméra, image par
image, champ après champ, puis il
commute.
2
3
4
3 ALARM RESET 4 ERROR OUT
5 TRIGGER OUT
8 GND
9 SERIES IN
10 1 SHOT RECIN
7
9
5
6
8
10
1
2
2 3 4 5 6 7 8 R/T A/O
8
IN
IN
OUT
OUT
AUDIO
Arrière de
SVR-24JP/
SVR-960JP.
CAMERA
PB
IN
REC MONITOR
OUT
OUT GND
VCR
FS-81MA
VIDEO
VIDEO OUT
VIDEO IN
• Faire référence au manuel pour plus de
détails.
• R/T: REC TRIGGER IN (entrée de signal
de déclenchement d’enregistrement)
• A/O: ALARM OUT (sortie d’alarme)
35
Caméra
Arrivée
magnétoscope de
moniteur
• Quand vous branchez l’appareil avec
Frame switcher, il vaut mieux placer
ALARM DURATION en position AUTO.
• Il n’est pas nécessaire de brancher
l’entrée ALARM OUT, ALARM RESET
du magnétoscope.
36
CONNECTION
Méthode de
branchement
01671A SVR-24JP/960JP-Fra3
12/7/01 4:33 PM
Page 38
ENREGISTREMENT EN SERIE,
BRANCHEMENT DES ALARMES
ENTRETIEN
Si l’image n’est pas claire sur l’écran, utilisez la cassette de nettoyage.
Branchement pour l’enregistrement en série
IN
OUT
IN
VIDEO
OUT
IN
VIDEO
Si la cassette de nettoyage est en lecture pendant un long moment, cela peut
endommager la tête.
1
OUT
VIDEO
(TV or MONITOR)
Placer six ou sept
gouttes de solution de
nettoyage de tête sur la
bande de nettoyage.
2
Introduire la cassette de
nettoyage dans votre
appareil et appuyer sur la
touche PLAY.
REC
F.F
W
RE
PLAY
P/STILL
REC CHECK
JECT
STOP/E
PE
G TA
ANIN
CLE
REV
1
2
3
4
5
6
7
8
9
10
1
2
3
4
5
6
7
8
9
10
1
2
3
4
5
6
7
8
9
10
CLE
AN
ING
LIQ
AUDIO
ON COUNT
TIMER
CNT.ME
MO CLEAR
REC LOCK
RESET
REC LOCK
UID
ER
POW
TIME
TRAC
MODE
KING/SET
SHIFT
V-LOCK
7 SERIES OUT
8 GND
9 SERIES IN
• Sélectionner SERIES REC ON dans le
menu.
(Se reporter à la page 17, REC MODE
SETUP).
• Connecter la sortie du premier appareil sur
l’entrée du second appareil, et brancher les
prises de terre du premier appareil sur la
prise de terre du second appareil.
MENU
• Brancher la sortie du second appareil sur
l’entrée de l’appareil suivant, et brancher la
mise à la terre du second appareil sur la
mise à la terre de l’appareil suivant.
CLE
AN
ING
TAP
E
3
Après environ 15 secondes,
appuyer sur la touche STOP
pour arrêter l’opération.
• Utiliser la cassette de nettoyage
une deuxième fois quand
l’image n’est pas normale.
STOP/EJECT
Branchement pour l’enregistrement sur alarme
1
2
3
4
5
6
7
8
9
(Bloc extérieur)
1
10
2
3
4
Il faut changer la tête dans les
circonstances suivantes:
1 ALARM IN
3 ALARM RESET
2 ALARM OUT
8 GND
1 GND
3 ALARM IN
2 ALARM RESET
4 ALARM OUT
(ATTENTION) En cas d’appareil externe, utilisez les connexions appropriées pour le capteur
d’alarme utilisé.
• En cas d’utilisation d’un appareil externe, il n’est pas nécessaire d’effectuer un
branchement s’il n’existe pas de sortie de réamorçage d’alarme et d’entrée d’alarme.
37
• L’image à l’écran est floue car la tête est usée à
l’issue d’une longue période d’utilisation.
• La tête peut être usée en conséquence de
l’utilisation de bandes endommagées ou
défectueuses ou en conséquence de l’utilisation
répétée de la cassette de nettoyage.
• La longueur de vie de la tête varie en fonction
des circonstances d’utilisation, des conditions
physiques prévalant dans le local d’utilisation
(température, humidité, poussière, etc.).
Cependant, il est dans tous les cas nécessaire
de remplacer la tête après 3000 heures
d’utilisation.
Quand l’image à l’écran se
détériore.
1. Appuyer d’abord sur la touche TRACKING
(centrage de piste).
2. Vérifier que la sortie vidéo du magnétoscope
est correctement connectée.
3. Insérer une cassette de nettoyage. Si la
qualité de l’image n’est pas améliorée à la
suite des mesures ci-dessus, contacter votre
représentant de vente ou votre centre de
révision.
38
MAINTENANCE
Arrière de SVR-24JP/SVR-960JP.
01671A SVR-24JP/960JP-Fra3
12/7/01 4:33 PM
Page 40
DIAGNOSTIC DE PANNE
DIAGNOSTIC DE PANNE (SUITE)
Effectuer les vérifications suivantes pour déterminer s’il est nécessaire de contacter le
service de révision.
• Vérifier pour voir si le cord
on d’alimentation
est bien branché. App
uyer sur la touche.
• RESET (réamorçage)
sur le panneau avant.
31
La lecture ou
ent ne fonctionne pas.
em
istr
l’enreg
cassette est bien
• Vérifier pour voir si la
insérée.
on d’alimentation de
• Extraire la fiche du cord réinsérer.
la
la prise de secteur puis
RESET sur le panneau
• Appuyer sur la touche
avant.
31
.
Pas d’image à l’écran
sélection d’entrée du
• Vérifier pour voir si la
correctement.
tée
nec
con
est
r
iteu
mon
rée/sortie du
l’ent
si
voir
r
pou
ifier
Vér
•
neau arrière de
magnétoscope sur le pan branchée.
t
l’appareil est correctemen
magnétoscope est bien
• Vérifier pour voir si le
mentation de secteur.
connecté à la source d’ali
39
Pas d’enregistrement
.
• Vérifier pour voir si la lang
uette de protection de la
a été enlevée. Utiliser une
cassette
cassette avec une lang
protection intacte. Si la
uette de
languette de protection
a été retirée
de la cassette, placer un
morceau de scotch sur
l’ouverture
dans laquelle se trouvait
• Vérifier pour voir si la cassla languette.
ette est en fin de bande.
cassette et rembobiner la
Réinsérer la
bande.
• Vérifier pour voir si la touch
e P/STILL a été activée.
fonction P/STILL si c’est
Annuler la
• Vérifier que l’heure et le cas.
la date sur l’horloge du
magnétoscope sont corre
cts (se reporter à la sect
Enregistrement).
ion
La qualité de l’image
est mauvaise et il y a beauco
up
d’interférences.
• Vérifier pour voir si la
bande a été
enregistrée sur un autr
e magnétoscope.
• Vérifier pour voir si la
tête est sale.
• Appuyer sur la touche
TRACKING (centrage de
piste) sur le panneau ava
nt du magnétoscope
pour obtenir un meilleu
r régl
tête à l’aide d’une cassett age ou nettoyer la
e de nettoyage.
s
La cassette n’est pa
éjectée.
de marche/arrêt, puis
• Appuyer sur la touche
après que le
sur la touche d’éjection
is sous tension.
magnétoscope a été rem strement est réglé.
regi
l’en
t
men
com
r
trôle
Con
•
Le programmeur
d’enregistrement ne
fonctionne pas.
rammeur 19~20
• Veiller à ce que le prog
réglé.
d’enregistrement soit bien
ure
13
• Vérifier pour voir si l’he
du
indiquée sur l’horloge
exacte.
ure
l’he
est
pe
sco
magnéto
nétoscope est hors
• Vérifier pour voir si le mag
tension.
” est allumé sur le
“
• Vérifier que l’indicateur
panneau avant.
MAINTENANCE
Pas de courant.
40
12/7/01 4:33 PM
Page 42
DIAGNOSTIC DE PANNE (SUITE)
Problème
La cassette ne peut pas être
insérée.
La cassette ne peut pas être
éjectée.
Vérifications et ajustements
• Vérifier pour voir si la fiche du cordon d’alimentation
est bien insérée dans la prise murale.
• Vérifier pour voir si une cassette a déjà été insérée.
• Insérer la cassette avec la fenêtre tournée vers le haut
(se reporter à la page 21).
• Contrôler si l’appareil est allumé.
S’il est allumé, appuyer sur la touche de marche/arrêt
POWER, puis appuyer sur la touche d’éjection.
• Vérifier pour voir si les informations d’enregistrement
de programme ont été saisies de manière correcte.
• Vérifier pour voir si l’horloge du magnétoscope est à l’heure.
• Vérifier pour voir si le magnétoscope est hors tension.
• Vérifier pour voir si le symbole “
” est allumé sur le
panneau d’affichage.
Pas de connexion avec d’autres
équipements.
• Vérifier pour voir si tous les branchements sont corrects.
La touche d’enregistrement ne
fonctionne pas.
• Vérifier pour voir s’il existe une réservation
d’enregistrement. Il suffit d’appuyer sur la touche
marche /arrêt (POWER).
• On ne peut pas appuyer sur la touche quand le
commutateur REC LOCK est ON.
(pour pouvoir activer la touche, placer le commutateur
REC LOCK en position OFF, puis appuyer sur la touche).
L’image à l’écran en mode lecture
est brouillée par des
d’interférences.
• Appuyer sur la touche TRACKING (centrage de piste)
pour obtenir un meilleur réglage. Si la qualité n’est pas
améliorée, nettoyer la tête à l’aide d’une cassette de
nettoyage.
• Si vous rencontrez un problème autre que ceux mentionnés, contactez votre centre de révision.
41
Ce magnétoscope est conçu
pour un usage régulier, veuillez
effectuer une vérification rapide
chaque jour avant de l’utiliser.
• Lorsque la vérification du
magnétoscope fait apparaître une
défaillance ou un vice de
fonctionnement, prendre les mesures
nécessaires en vous référant à la
section Diagnostic de panne, aux
pages 39~41.
• Si la défaillance ou le mauvais
fonctionnement persiste, débrancher le
cordon d’alimentation de votre appareil
et contacter votre vendeur.
Vérifications quotidiennes
1
2
3
Mettre le magnétoscope sous
tension.
• Vérifier que la qualité de l’image à
l’écran est satisfaisante.
• Vérifier que la date et l’heure à l’horloge
du magnétoscope sont corrects.
W
RE
F.F
L’enregistrement de programme ne
fonctionne pas.
VERIFICATIONS QUOTIDIENNES
PLAY
Rembobiner une
partie de la bande
enregistrée la
veille.
Appuyer sur la
touche PLAY pour
initier la lecture.
• Vérifier que la lecture se
fait de manière normale.
• Vérifier que la date et
l’heure de l’horloge sont
exacts.
4
5
TIME MODE
Régler le TIME
MODE sur “L3H”.
S’il y a trop de parasites à
l’écran.
• Nettoyer la tête à l’aide d’une cassette
de nettoyage.
42
MAINTENANCE
01671A SVR-24JP/960JP-Fra3
01671A SVR-24JP/960JP-Fra3
12/7/01 4:33 PM
Page 44
AVANT DE FAIRE APPEL AU
PERSONNEL DE SERVICE
Toute défaillance résultant de la négligence de l’utilisateur n’est
pas couverte par l’assurance, en particulier:
Les impacts.
Le dommage causé à la tête en conséquence d’un nettoyage incorrect.
La pénétration de corps étrangers à l’intérieur de l’appareil.
Toute modification interne non autorisée effectuée par l’utilisateur.
L’entreposage dans des conditions inacceptables (fumée, haute ou basse
température et forte humidité).
Toute procédure d’utilisation autre que celles décrites dans ce manuel.
L’utilisation de sources d’alimentation non conformes aux stipulations de ce
manuel.
2
Type d’enregistrement
Type à rotation de la tête, type d’enregistrement luminance signal
FM, type d’enregistrement signal couleur directement converti.
Type de signal
Type PAL
Vitesse
23,39 mm/sec. (mode L3H; E-180)
Cassette utilisable
L3H/L8H/L12H/L24H/000H : SVR-24JP
L3H/L8H/L12H/L24H/36H/48H/72H/120H/168H/240H/480H/
960H/000H : SVR-960JP
Temps de rembobinage
Approximativement 100 secondes (cassette E-180)
Entrée, sortie image
1,0 Vp-p (non balancé) 75 ohm
Image S/N
Plus de 42dB (enregistrement L3H)
Entrée son
-8dB (mode L3H)
Sortie son
-8dB (mode L3H )
Son S/N
Plus de 40 dB (enregistrement L3H )
Caractéristiques
fréquence du son
100-5.000Hz (enregistrement L3H)
Voltage
AC100~240V
Fréquence
50~60Hz
L’utilisation du compteur
Noter qu’il affiche une valeur maximum de 9999.
Se reporter à la section Fonction de l’alarme pour connaître le mode
d’utilisation.
Le tableau de Nettoyage de la graisse et durée de
rechange pour les pièces principales
• Ce tableau s’applique pour une température et humidité normales. Des vérifications
fréquentes sont requises dans des conditions extrêmes.
• La durée de vie de l’ensemble du cylindre dépend des conditions de fonctionnement.
• En cas de questions. Veuillez contacter un technicien agréé.
▲ : Nettoyage ● : Vérifiez et remplacez, le cas échéant
◆ : Ajouter de l’huile
: Changez
cassette VHS
Temps d’enregistrement
500
1000
2000
3000
4000
5000
6000
8000
10000
Consommation d’énergie
16W
POLES DU GUIDE DE LA BANDE
▲
▲
▲
▲
▲
▲
▲
▲
▲
Température ambiante
5˚C ~ 40˚C (41˚F ~ 104˚F)
ENSEMBLE DU CYLINDRE
▲
●
●
●
●
●
●
●
Conditions d’installation
GALET PRESSEUR
▲
▲
▲
▲
▲
●
●
●
Position de fonctionnement – horizontale
Humidité relative: moins de 80%
MOTEUR DE CABESTAN
▲
▲
▲
▲
▲
▲
▲
▲
Dimensions
430mm(W) x 97mm (H) x 294mm (D)
●
●
●
POULIE A COURROIE
FREIN DE SOLENOIDE
●
●
●
Poids
4 Kg
●
●
●
Accessoires
Manuel de l’utilisateur
MAINTENANCE
1
CARACTERISTIQUES
*Remarque
–
–
–
–
–
–
43
Pour nettoyer les pièces, utilisez du tissu et de l’alcool (solvant).
Après le nettoyage, utilisez la bande vidéo une fois que l’alcool a séché complètement.
Nous recommandons l’utilisation de l’huile [EP-56] ou du solvant.
Une ou deux gouttes d’huile doivent être appliquées après le nettoyage avec l’alcool.
Huilez périodiquement (huilez après le nettoyage)
Un huilage excessif peut entraîner un dysfonctionnement.
44
01671A SVR-24JP/960JP-Ger1
12/7/01 4:35 PM
Page 1
SVR-24JP
SVR-960JP
Zeitrafferrecorder
Installation und
Betrieb
01671A SVR-24JP/960JP-Ger1
12/7/01 4:35 PM
Page 2
IMPORTANT SAFEGUARDS
1
spill liquid of any kind on the unit.
16. Servicing - Do not attempt to service this unit yourself as opening or
removing covers may expose you to dangerous voltage or other
hazards. Refer all servicing to qualified service personnel.
17. Damage Requiring Service - Unplug the unit from the outlet and
refer servicing to qualified service personnel under the following
conditions:
a. When the power - supply cord. or plug is damaged.
b. If liquid has been spilled, or objects have fallen into the unit.
c. If the unit has been exposed to rain or water.
d. If the unit does not operate normally by following the operating
instructions. Adjust only those controls that are covered by the
operating instructions, as an improper adjustment of other
controls may result in damage and will often required extensive
work by a qualified technician to restore the unit to its normal
operation.
e. If the unit has been dropped or the cabinet has been damaged.
f. When the unit exhibits a distinct change in performance this
indicates a need for service.
18. Replacement Parts - When replacement parts are required, be sure
the service technician has used replacement parts specified by the
manufacturer or have the same characteristics as the original part.
Unauthorized substitutions may result in fire, electric shock or other
hazards.
19. Safety Check - Upon completion of any service or repairs to this
unit, ask the service technician to perform safety checks to
determine that the unit is in proper operating condition.
20. Coax Grounding - If an outside cable system is connected to the
unit, be sure the cable system is grounded. U.S.A models onlySection 810 of the National Electrical Code, ANSI/NFPA No. 701981, provides information with respect to proper grounding of the
mount and supporting structure, grounding of the coax to a
discharge unit, size of grounding conductors, location of discharge
unit, connection to grounding electrodes, and requirements for the
grounding electrode.
21. Lightning - For added protection of this unit during a lightning storm
or when it is left unattended and unused for a long period of time,
unplug power cord form the wall.
FCC & ICES INFORMATION
(U.S.A and Canadian Models Only)
WARNING - This equipment has been tested and found to comply with
the limits for a Class B digital device, pursuant to Part 15 of the FCC
Rules and ICES-003 of Industry Canada. These limits are designed to
provide reasonable protection against harmful interference when the
equipment is operated in a residential installation. This equipment
generates, uses and can radiate radio frequency energy and, if not
installed and used in accordance with the instruction, may cause
harmful interference to radio communications. However, there is no
guarantee that interference will not occur in a particular installation. If
this equipment does cause harmful interference to radio or television
reception, which can be determined by turning the equipment off and
on, the user is encouraged to try to correct the interference by one or
more of the following measures:
– Reorient or relocate the receiving antenna.
– Increase the separation between the equipment and receiver.
– Connect the equipment into an outlet on a circuit different from that to
which the receiver is connected.
– Consult the dealer or an experienced radio/TV technician for help.
Intentional or unintentional changes or modifications not expressly
approved by the party responsible for compliance shall not be made.
Any such changes or modifications could void the user's authority to
operate the equipment.
The user may find the following booklet prepared by the Federal
Communications Commission helpful: "How to Identify and Resolve
Radio-TV Interference Problems". This booklet is available from the
U.S. Government Printing Office, Washington, DC 20402, Stock
No.004-000-00345-4.
Safety Precautions
Securite
CAUTION
ATTENTION
RISK OF ELECTRICK SHOCK
DO NOT OPEN!
RISQUE DE CHOC ELECTRIQUE,
NE PAS OUVRIR.
KONFIGURATION
1. Read Instructions - All the safety and operating instructions should
be read before the unit is operated.
2. Retain Instructions - The safely and operating instructions should be
retained for future reference.
3. Head Warnings - All warnings on the unit and in the operating
instructions should be adhered to.
4. Follow Instructions - All operating and use instructions should be
followed.
5. Cleaning - Unplug the unit from the outlet before cleaning. Do not use
liquid cleaners or aerosol cleaners. Use a damp cloth for cleaning.
6. Attachments - Do not use attachments not recommended by the unit
manufacturer as they may cause hazards.
7. Water and Moisture - Do not use this unit near water-for example,
near a bath tub, wash bowl, kitchen sink, or laundry tub, in a wet
basement, near a swimming pool, in an unprotected outdoor
installation, or any area which is classified as a wet location.
8. Accessories - Do not place this unit on an unstable stand, tripod,
bracket, or mount. The unit may fall, causing serious injury to a
person and serious damage to the unit. Use only with a stand, tripod,
bracket, or mount recommended by the manufacturer, or sold with
the unit. Any mounting of the unit should follow the
manufacturer's instructions, and should use a
mounting accessory recommended by the
manufacturer. An appliance and cart
combination should be moved with care. Quick
stops, excessive force, and uneven surfaces may
cause the appliance and cart combination to
overturn.
9. Ventilation - Operatings in the enclosure, if any, are provided for
ventilation and to ensure reliable operation of the unit and to protect
it from overheating. These openings must not be blocked or covered.
This unit should not be placed in a built-in installation unless proper
ventilation is provided or the manufacturer's instructions have been
adhered to.
10. Power Sources - This unit should be operated only from the type of
power source indicated on the marking label. If you are not sure of
the type of the power supply you plan to use, consult your appliance
dealer or local power company. For units intended to operate from
battery or other sources, refer to the operating instructions.
11. Grounding or Polarization - This unit may be equipped with a
polarized alternating-current line plug (a plug having one blade
wider than the other). This plug will fit into the power outlet only one
way. This is a safety feature. If you are unable to insert the plug fully
into the outlet, try reversing the plug. If the plug should still fail to fit,
contact your electrician to replace your obsolete outlet. Do not
defeat the safety purpose of the polarized plug. Alternately, this unit
may be equipped with a 3-wire grounding-type plug, a plug having a
third (grounding) pin. This plug will only fit into a grounding-type
power outlet. This is a safety feature. If you are unable to insert the
plug into the outlet, contact your electrician to replace your obsolete
outlet. Do not defeat the safety purpose of the grounding-type plug.
12. Power - Cord Protection-Power-supply cords should be routed so
that they are not likely to be walked on or pinched by items placed
upon or against them, paying particular attention to cords and plugs,
convenience receptacles, and the point where they exit from the
appliance.
13. Power Lines - An outdoor system should not be located in the
vicinity of overhead power lines or other electric light or power
circuits, or where it can fall into such power lines or circuits. When
installing an outdoor system, extreme care should be taken to keep
from touching such power lines or circuits as contact with them
might be fatal. U.S.A. models only-refer to the National Electrical
Code Article 820 regarding installation of CATV systems.
14. Overloading - Do not overload outlets and extension cords as this
can result in a risk of fire or electric shock.
15. Object and Liquid Entry - Never push objects of any kind into this
unit through openings as they may touch dangerous voltage points
or short-out parts that could result in a fire or electric shock. Never
CAUTION: TO REDUCE THE RISK OF
ELECTRICAL SHOCK, DO NOT OPEN COVERS.
NO USER SERVICEABLE PARTS INSIDE.
REFER SERVICING TO QUALIFIED SERVICE
PERSONNEL.
Danger: Pour éviter tout risque d'électrocution, ne
pas ouvrir le boîtier. Il n'y a pas de pièces
remplaçables à l'intérieur. Pour toute révision,
s'adresser à un technicien spécialisé.
This label may appear on the bottom of the unit due to
space limitations.
Cet étiquette peut apparaître en dessous de l'appareil
dû aux limitations d'espace.
The lightning flash with an arrowhead
symbol, within an equilateral triangle, is
intended to alert the user to the
presence of uninsulated "dangerous
voltage" within the unit's enclosure that
may be of sufficient magnitude to
constitute a risk of electric shock to
persons.
L'éclair fléché dans un triangle
équilatéral avertit l'utilisateur de la
présence d'une haute tension non
isolée à l'intérieur de l'appareil. Elle peut
être d'une magnitude suffisante pour
constituer un risque d'électrocution.
The exclamation point within an
equilateral triangle is intended to alert
the user to presence of important
operating and maintenance (servicing)
instructions in the literature
accompanying the appliance.
Le point d'exclamation à l'intérieur d'un
triangle équilatéral avertit l'utilisateur de
la présence d'instructions importantes
d'utilisation et de maintenance dans la
documentation accompagnant
l'appareil.
Warning
To prevent fire or shock hazard, do not expose
units not specifically designed for outdoor use to
rain or moisture.
Attention
Pour éviter un incendie ou une électrocution, ne pas
exposer les appareils qui ne sont pas conçus spécifiquement pour usage extérieur à la pluie ou à l'humidité.
Attention: Installation should be
performed by qualified service
personnel only in accordance with the
National Electrical Code or applicable
local codes.
Attention: L'installation doit être
effectuée uniquement par du personnel
de service qualifié conformément à la
réglementation du Code Electrique
National ou à la réglementation locale.
Power Disconnect. Units with or
without ON-OFF switches have power
supplied to the unit whenever the power
cord is inserted into the power source;
however, the unit is operational only
when the ON-OFF switch is in the On
position. The power cord is the main
power disconnect for all units.
Disjonction de l'alimentation.
Les appareils avec ou sans commutateure
ON-OFF sont alimentés à chaque fois que
le cordon d'alimentation est branché à la
source d'alimentation; toutefois, les
appareils disposant de commutateurs ONOFF ne fonctionnent que lorsque le
commutateur ON-OFF est sur la position
ON. Le cordon d'alimentation est la
disjonction d'alimentation principale pour
tous les appareils.
2
12/7/01 4:35 PM
Page 4
IMPORTANT SAFEGUARDS
Dieses Zeichen kann aus Platzgründen auf der
Unterseite des Gerätes angebracht sein.
Dieses Zeichen weist den Benutzer auf
die nicht isolierte Hochspannung
innerhalb der Anlage hin. Es besteht die
Gefahr eines Elektroschlages.
Das Ausrufezeichen in dem
gleichseitigen Dreieck ist dazu da, den
Benutzer auf wich-tige Inbetriebnahmeund Instandhaltungs-vorschriften
hinzuweisen, die dem Gerät in Form
einer Broschüre beigelegt sind.
Warnung
Um das Risiko von Feuer oder Elektroschlag zu
vermeiden, darf weder das Gerät selbst, noch das
Netzgerät Regen oder Feuchtigkeit ausgesetzt werden.
Achtung!: Die Installation sollte nur von
qualifiziertem Kundendienstpersonal
gemäß jeweilig zutreffender
Elektrovorschriften ausgeführt werden.
Debido a limitaciones de espacio, esta etiqueta puede
aparecer en la parte inferior de la unidad.
El símbolo representado por un relámpago
con punta de flecha dentro de un triángulo
equilátero, se muestra con el objetivo de
alertar al usuario que existen "voltages
peligrosos" sin aislamiento, dentro de la
cubierta de la unidad. Dichos voltages
pueden ser de tal magnitud que constituyen
un riesgo de choque eléctrico a personas.
El símbolo de exclamación dentro de
un triángulo equilátero, se muestra con
el objetivo de alertar al ususario de que
instrucciones de operación y
mantenimiento importantes acompañan
al equipo.
Peligro
Para evitar el peligro de incendio ó choque eléctrico, no
exponga a la lluvia ó humedad, equipos que no han sido
diseñados para uso exterior.
Atención: La instalación de este equipo
debe ser realizada por personal capacitado,
solo en acuerdo, y en cumplimiento de
normas del "National Electric Code" (Código
Eléctrico Nacional) ó las normas del
Gobierno Nacional Local.
Para Desconectdar la Alimentación:
Unidades no equipadas con interruptores
Netzanschluß. Geräte mit oder ohne
ON/OFF, son alimentadas cuando el cable
Netzschalter haben Spannung am
de alimentación, es conectado a la corriente
Gerät anliegen, sobald der Netzstecker
eléctrica. Las unidades equipadas con
in die Steckdose gesteckt wird. Das
interruptores son alimentadas de igual
Gerät ist Jedoch nur betriebsbereit,
forma, pero adicionalmente requieren qur el
wenn der Netzschalter (EIN/AUS) auf
interruptor esté posicionado en ON. El cable
EIN steht. Wenn man das Netzkabel
de alimentación es el medio principal de
aus der Stekdose zieht, dann ist die
desconexión del equipo.
Sapnnungszuführung zum Gerät
vollkommen unterbrochen.
Anmerkung: Bei Betätigung der Tasten auf der Vorderseite ist ein Klicken zu hören.
Es handelt sich dabei um ein natürliches Geräusch, das durch das Solenoid verursacht wird,
welches die Steuerung des Capstan-Motors verstärken soll. Der Capstan-Motor dieses
Videorekorders verfugt über ein Kugellager und hat eine Lebensdauer von 10.000 Stunden.
11
13
16
21
23
27
28
29
31
32
33
35
ACHTUNG: Elektrostatisch-empfindliches Gerät.
Zur Vermeidung elektrostatischer Entladung
sind die ordnungsgemässen CMOS/MOSFET
Handhabungsvorschriften zu befolgen.
HINWEIS: Bei der Handhabung der
elektrostatisch-empfindlichen Schaltplatten sind
geerdete Handgelenkriemen zu tragen und die
ordnungsgemässen ESDSicherheitsvorschriften zu befolgen.
BESCHREIBUNG
Der SVR-24JP/SVR-960JP Videorekorder bietet
Zeitraffung in wählbarer Geschwindigkeit (3~24
Stunden) für eine Vielzahl von CCTV-Applikationen
INSTALLATION
Der SVR-24JP/SVR-960JP ist in einer Umgebung
zu installieren, wo die Betriebstemperatur +5°C und
+40°C beträgt und die relative Feuchtigkeit
zwischen 0% und 80% liegt, kondensationsfrei.
36
37
38
39
42
43
44
KONFIGURATION
Precaution: Pare Reducir El Riesgo De Choque
Eléctrico, Favor No Abrir La Cubierta. Este Equipo
No consta De Piezas O Partes Que Requieren
Servicio O Mantenimiento. Para Reparaciones
Favor Referirse A Un Técnico Calificado.
SERVICE
MENÜ
RIESGO DE CHOQUE
ELECTRICO INO ABRIRI
1
4
5
8
9
WIEDERGABE
HOCHSPANNUNGSGEFAHR
NICHT ÖFFNEN!
KONFIGURATION
Important Safeguards
Inhalt
Regler und Anzeigen
Anschlüsse
Zusammenbau und Inbetriebnahme
MENÜ
Die Einstellung vom Menü
Die Einstellung der Uhrzeit
Einstellungsmenü
WIEDERGABE
Betrieb
Verschiedene Wiedergabefunktionen
AUFNAHME
Vor der Aufnahme einstellen
Aufnahmesicherung
Einfaches Aufnehmen
Serienaufnahme
Alarmaufnahme
FUNKTION
Alarmfunktionen
Bedienungsfreundliche Funktionen
ANSCHLUSS
Anschlußverfahren
Serienaufnahme, Alarmanschlüsse
WARTUNG
Wartung
Fehlersuche
Tägliche Überprüfungen
Bevor Sie den Techniker rufen
Technische Daten
AUFNAHME
PRECAUTION
FUNKTION
ACHTUNG!
Warnung: Verhindern Sie einen möglichen
Elektroschlag, indem Sie die Abdeckung nicht
entfernen. Wenden Sie sich bei der Wartung an
dafür qualifiziertes Personal.
3
Precauciones De Seguridad
AUSPACKEN
ANSCHLUSS
Sicherheitsvorkenhrungen
INHALT
Beim Auspacken bitte vorsichtig verfahren. Es
handelt sich hierbei um ein elektronisches Gerät,
das mit Sorgfalt behandelt werden sollte.
Wenn ein Gegenstand während des Transports
beschädigt worden zu sein scheint, diesen bitte
sorgfältig wieder in seinem Karton verpacken und
die Transportfirma benachrichtigen. Sollte ein
Gegenstand fehlen, benachrichtigen Sie bitte Ihren
Händler oder Kundendienst.
WARTUNG
01671A SVR-24JP/960JP-Ger1
Der Transportkarton ist der sicherste Behälter, in
dem das Gerät transportiert werden kann. Bitte
bewahren Sie ihn für möglichen späteren Gebrauch
auf.
4
01671A SVR-24JP/960JP-Ger1
12/7/01 4:35 PM
Page 6
22 21 20
19
18 17 16
REC
F.F
PLAY
W
RE
CK
REC LO
TIMER
REV
AUDIO
ON
EAR
O CL
POWER
Aus/Einschalten des Geräts
21
MENU
Drücken um Menü anzeigen zu lassen
11
3
SHIFT ❷ , ❿
Um Menü und Uhr einzustellen
11
V-LOCK
Um Rauschen zu beseitigen
22
,
4
TRACKING/SET
5
TIME MODE
UmSpur, Menü und Uhr einzustellen
22
Zeitmodus der Wiedergabe einstellen
24
6
7
REC LOCK LED
Betriebsanzeige Aufnahme
28
DISPLAY PANEL
Anzeige der aktuellen
Betriebseinstellungen des Geräts
7
RESET
8
REV
Rückwärtswiedergabe
(Nur in L3H Modus)
25
9
AUDIO ON
Um den Ton aus/einzuschalten
10
COUNT
Anzeige: Bandzählwerk
Einmal drücken: Anzeige
der Alarmeingabezeiten
Zweimal drücken: Anzeige
der Betriebszeit
ER
POW
15
14
13
12
11
10
9
8
ET
KING/S
TRAC
T
SHIF
CK
V-LO
MENU
1
ANHANG
2
3
4
5
6
7
Bezugsseite
2
CK
REC LO
MODE
TIME
Beschreibung
,
ECK
JECT
CNT.MEM
COUNT
Bezeichnung
1
P/STILL
REC CH
STOP/E
Nr
11
CNT. MEMO
,
Anzeige: Bandzählwerk
Einmal drücken: Anzeige
des Zählwerkspeichers
Zweimal drücken: Anzeige
des Alarmspeichers
34
33
25
34
12
CLEAR
Um den Zähler auf Null zu stellen
34
13
RESET
Rückstellung dieses Geräts in
die Ausgangslage
31
14
TIMER
Einstellung der Timergesteuerten
Aufnahme
20
15
REC LOCK
Wahl des Aufnahmesicherungsmodus
28
16
REC CHECK
Überprüfung der Aufnahme
(Kurzzeitwiedergabe) während
der Aufnahme
29
17
P/STILL
Stillstehendes Einzelbild oder Pause
bei der Aufnahme
26
18
REC
Aufnahme
29
19
SHUTTLE
Kassette bearbeiten
22
20
JOG
Um die Aufnahme pro Einzelbild weiterlaufen zu lassen
26
21
PLAY
Wiedergabe
22
22
STOP/EJECT
STOP/AUSWURF
22
BEDIENUNGSANLEITUNG
5
6
KONFIGURATION
REGLER UND ANZEIGEN
01671A SVR-24JP/960JP-Ger1
12/7/01 4:35 PM
Page 8
REGLER UND ANZEIGEN
ANSCHLÜSSE
RÜCKSEITE
Aufnahme-Anzeige
Anzeige REC LOCK
• Leuchtet im
Aufnahmesicherungsmodus
• Leuchtet während der
Aufnahme
AufnahmevorprogrammierungsAnzeige
• Leuchtet nach drücken der
Timertaste zur Aufnahme
einer Sendung auf.
Alarmaufnahme-Anzeige
• Leuchtet während der
Alarmaufnahme und blinkt
bei Abschluss der
Aufnahme
Kassettenanzeige
FREMDGERÄTEANSCHLUSS-BUCHSE
REC/PLAY Timermodus-Anzeige
1 ALARM IN
2 ALARM OUT
6 TAPE END OUT 7 SERIES OUT
1
2
3
4
3 ALARM RESET 4 ERROR OUT
5 TRIGGER OUT
8 GND
10 1 SHOT RECIN
5
9 SERIES IN
6
7
8
9
10
RS-232C
IN
IN
REC LOCK
C.MEMO
A.MEMO
HOUR
REC
FAULT
T-END
Anzeige Bandende
• Leuchtet beim
Bandende.
Zählwerk
• Betriebszeit-Anzeige
• Alarm-/ZählwerkspeicherAnzeige "
"
Stromwiederherstellungs-Anzeige
• Leuchtet nach
Wiederherstellung der
Stromversorgung auf.
Taste schaltet sie aus.
AUDIO
NETZSTECKERANSCHLUSS
Alarm/Zählwerkspeicher
-Anzeige
ANZEIGE DER BETRIEBSBEDINGUNGEN
ERDE
GND
2
ALARM IN
1 ALARMEINGANG
3
4
5
6
VIL
T
VIH
Standbild
Drehen in Uhrzeigersinn
Blinkt
Langsame Wiedergabe Blinkt, im Uhrzeigersinn drehen
Aufnahme
Pause
Drehen in Uhrzeigersdinn REC
VIL
Blinkt
REC
Timeraufnahme
Im Uhrzeigresinn drehen REC
Bildsuchlauf vorwärts
Schnell im Uhrzeigersinn drehen
Alarmaufnahme
Im Uhrzeigersinn drehen REC
Bildsuchlauf rückwärts
Schnell entgegen dem Uhrzeigersinn drehen
Rückspulen
Schnell entgegen dem Uhrzeigersinn drehen
Rückwärtswiedergabe
Entgegen dem Uhrzeigersinn drehen
Schnellvorlauf
Schnell im Uhrzeigersinn drehen
Langsame
Blinkt und dreht langsam entgegen
dem Uhrzeigersinn
Rückwärtswiedergabe
T
ALARMRÜCK3 STELLUNG
ALARM RESET
4 ERROR OUT
VIH
VIL
T
VIH
VIL
T
TRIGGER OUT
5 AUSLÖSERAUSGANG(TRIGGER)
6 BANDENDE
TAPE END OUT
7 SERIENAUSGANG
SERIES OUT
VIH
VIL
T
VIH
VIL
T
VIH
VIL
T
8
9 SERIENEINGANG
SERIES IN
10 EINZELBILD1 SHOT REC IN
AUFNAHME
9
10
TYP
VIH
VIL
T
VIH
VIL
T
VIH
VIL
T
:
:
:
:
:
:
:
:
:
4 ~ 5V
0 ~ 0,6 V
Mehr als 0,5 sec.
4 ~ 5V
0 ~ 0,6 V
Alarmaufnahme
4 ~ 5V
0 ~ 0,6 V
Mehr als 0,5 sec.
AUSGANG
VIH
VIL
T
VIH
VIL
T
VIH
VIL
T
VIH
VIL
T
:
:
:
:
:
:
:
:
:
:
:
:
4 ~ 5V
0 ~ 0,6 V
AUSGANG
VIH
VIL
T
VIH
VIL
T
:
:
:
:
:
:
4 ~ 5V
0 ~ 0,6 V
Mehr als 0,5 sec.
4 ~ 5V
0 ~ 0,6 V
Mehr als 0,5 sec.
8 GND
4 ~ 5V
0 ~ 0,6 V
Mehr als 8m sec.
4 ~ 5V
0 ~ 0,6 V
Während Eingabe jeder Taste
4 ~ 5V
0 ~ 0,6 V
Mehr als 1 sec.
0V
VIH
VIL
T
7
7
SIGNAL LEVEL
VIH
ALARM OUT
2 ALARMAUSGANG
Anzeige mit Ausnahme von Wiedergabe
BILD-EINGANG/
AUSGANG-BUCHSE
(BNC-TYP)
AUDIO-EINGANG/
AUSGANG-BUCHSE
(RCA-TYP)
INFORMATIONEN ZU DEN FREMDGERÄTEANSCHLUSS-BUCHSEN
1
Wiedergabe
VIDEO
H
BUCHSENBEZEICHNUNG
Wiedergabe-Anzeige
OUT
OUT
• Zählwerkspeicher:
C.MEMO.
• Alarmspeicher:
A.MEMO.
• Betriebszeitanzeige:
HOUR.
• Drücken irgendeiner
KONFIGURATION
VORDERSEITE
VIH
VIL
T
EINGANG
EINGANG
AUSGANG
AUSGANG
AUSGANG
GND
EINGANG
EINGANG
8
01671A SVR-24JP/960JP-Ger1
12/7/01 4:35 PM
Page 10
ZUSAMMENBAU UND INBETRIEBNAHME
• Überprüfen Sie vor Inbetriebnahme des Geräts die folgenden Vorbereitungen.
• Eventuell kann der Stecker anders aussehen als der abgebildete Stecker.
Schliessen Sie das an
den Monitor/das
Fernsehgerät an.
2
Schliessen Sie die
BetriebsüberwachungsKamera(CCD-Kamera) an
das Gerät an.
3
Schliessen Sie das
Netzkabel dieses Gerät
an der Steckdose an.
• Stöpseln Sie den Stecker in eine
betriebsfähige Steckdose
(AC 100~240V).
FERNSEHGERÄT
6
7
8
9
IN
OUT
VIDEO
1 ALARM IN
2 ALARM OUT
6 TAPE END OUT 7 SERIES OUT
1
2
3
4
3 ALARM RESET 4 ERROR OUT
8 GND
5
9 SERIES IN
6
7
8
VIDEO EINGANG
5 TRIGGER OUT
10 1 SHOT RECIN
9
POWER
10
RS-232C
OUT
AUDIO
VIDEO
2 ALARM OUT
6 TAPE END OUT 7 SERIES OUT
2 ALARM OUT
6 TAPE END OUT 7 SERIES OUT
3 ALARM RESET 4 ERROR OUT
8 GND
9 SERIES IN
3 ALARM RESET 4 ERROR OUT
8 GND
9 SERIES IN
5 TRIGGER OUT
10 1 SHOT RECIN
5 TRIGGER OUT
1
10 1 SHOT RECIN
2
3
4
5
6
7
8
9
10
RS-232C
IN
1
2
3
4
5
6
7
8
9
10
IN
RS-232C
IN
IN
AUDIO
AUDIO
IN
OUT
9
VIDEO
VIDEO
VIDEO
IN
OUT
OUT
OUT
OUT
OUT
AUDIO
• Bei Verwendung eines Monitors:
Schalten Sie diesen ein.
• Bei Verwendung eines Fernsehgeräts:
Schalten Sie diesen ein und auf
Bildeingang über.
• Beziehen Sie sich bzgl. weiterer
Informationen auf die Betriebsanleitung
des Fernsehgeräts.
OUT
1 ALARM IN
1 ALARM IN
Schalten Sie den
Monitor/das Fernsehgerät
ein.
AC100~240V
IN
IN
4
KONFIGURATION
1
Betriebsüberwachungs-Kamera
(CCD-Kamera)
10
01671A SVR-24JP/960JP-Ger1
12/7/01 4:35 PM
Page 12
EINSTELLUNG VOM MENÜ
1. DIE UHR EINSTELLEN/REGELN
1
Drücken Sie die MENU
Taste
(Nicht erscheint während im PLAY
modus oder bis zur Einstellung der Zeit).
CLOCK SET/ADJUST
1 ❿ SUMMER TIME SET (USE)
2 DISPLAY MODE (YY-MM-DD)
3 CLOCK SET/ADJUST
YEAR
2001
DATE
TIME
01/01 MON 12:00
5. VIDEORECORDER-MODUS-EINSTELLUNG
VCR MODE SETUP
1 ❿ TRIGGER --------------------(1FIELD)
2 V-SYNC ----------------------------(ON)
3 BUZZER ---------------------------(ON)
4 TAPE LENGTH ----------------(E240)
$
END:MENU
2. ANZEIGEMODUS-EINSTELLUNG
MAIN MENU
1 ❿ CLOCK SET/ADJUST
2 DISPLAY MODE SETUP
3 ALARM REC SETUP/RECALL
4 REC MODE SETUP
5 VCR MODE SETUP
6 PROGRAM SETUP
7 POWER LOSS MEMORY
(❷❿)
END:MENU
DISPLAY MODE SETUP
1 ❿ DATE DISPLAY ------------------(ON)
2 TIME DISPLAY-------------------(ON)
3 POSITION -------------(R-BOTTOM)
(❷❿)
END:MENU
• Stellen Sie das gewünschte
Zeit/Datum-Format und die Position
auf dem Bildschirm ein.
(❷❿)
END:MENU
MENÜ
(❷❿/– +)
MENU
• Lösen Sie den Zeitmessungsregler
und den Pieptonregler aus.
6. PROGRAMM-EINSTELLUNG
•
•
•
•
•
•
❿
PROGRAM SETUP1
START STOP DATE
MODE
PROGRAM SETUP2
( ❷❿ /– +,CLEAR)
END:MENU
3. ALARMAUFNAHME-EINSTELLUNG
2
Zur Auswahl des Menü
drücken Sie SHIFT ❷
Taste.
(Das “❿” Zeichen bewegt unten
durch Drücken der Taste.).
3
Wenn das Zeichen "❿"
beim entsprechenden
Befehl steht, drücken Sie
die Taste SHIFT ❿ um
weiter zu gehen.
• Das ausgewähltes Menü werde am
ALARM REC SETUP/RECALL
1 ❿ MODE -----------------------------(L3H)
2 DURATION --------------------(AUTO)
3 BUZZER ---------------------------(ON)
4 ALARM RECALL
(❷❿/– +)
END:MENU
• Wählen Sie Alarm REC Modus.
PROGRAM SETUP2
START STOP DATE
MODE
•❿
•
•
•
• PROGRAM SETUP1
•
( ❷❿ /– +,CLEAR)
END:MENU
• Wählen Sie die Programmaufstellung.
Bildschirm angezeigt werden
(Siehe S. 13-20).
4. AUFNAHMEMODUS-EINSTELLUNG
7. STROMAUSFALLSPEICHER
REC MODE SETUP
1 ❿ REPEAT REC-------------------(OFF)
2 SERIES REC -------------------(OFF)
3 1-SHOT REC--------------------(OFF)
(❷❿)
END:MENU
• Einstellung Wiederholung, eine Aufnahme
oder mehrere Aufnahmen
11
•
•
•
POWER LOSS MEMORY
YEAR DATE TIME
OFF
ON
OFF
ON
OFF
ON
END:MENU
• Zeigt das Stromausfall- und
Wiederherstellungsprotokoll an.
12
01671A SVR-24JP/960JP-Ger2
12/7/01 4:35 PM
Page 14
DIE EINSTELLUNG DER UHRZEIT
– EINSTELLEN DER SOMMERZEIT
Beispiel) 25. Dezember . 2002 13:30
Drücken Sie die MENU-Taste.
• Nach dem Drücken der Menütaste
2
Drücken Sie die SHIFT ❿
Taste.
• Nach dem Drücken der Taste SHIFT
3
❿ !wird CLOCK SET/ADJUST
angezeigt.
erscheint das Hauptmenü.
MENU
Drücken Sie die Taste SHIFT ❿.
• Wenn Sie die Taste SHIFT ❿
drücken, um das sommerzeit
anzuzeigen.
• Durch Drücken der SHIFT ❿ !Taste
schalten Sie die Sommerzeit an und
aus.
4
Drücken Sie die Taste SHIFT ❷.
• Wählen SUMMER TIME IN.
SHIFT
V-LOCK
SHIFT
V-LOCK
SHIFT
V-LOCK
MAIN MENU
1 ❿ CLOCK SET/ADJUST
2 DISPLAY MODE SETUP
3 ALARM REC SETUP/RECALL
4 REC MODE SETUP
5 VCR MODE SETUP
6 PROGRAM SETUP
7 POWER LOSS MEMORY
(❷❿)
CLOCK SET/ADJUST
1 ❿ SUMMER TIME SET (USE)
2 DISPLAY MODE(YY-MM-DD)
3 CLOCK SET/ADJUST
YEAR
2001
SUMMER TIME SET
1 ❿ SUMMER TIME
(USE)
2 SUMMER TIME IN
3 SUMMER TIME OUT
DATE
TIME
01/01 MON 12:00
#
(❷❿/– +)
END:MENU
IN
OUT
END:MENU
Einstellung von Woche,
Tag, Monat und Stunde mit
den Tasten TRACKING/
SET
.
• Drücken Sie SHIFT ❿ !einmal,
6
Drücken Sie die Taste
SHIFT ❷ !und
einstellen SUMMER
TIME OUT.
nachdem das Woche eingestellt
wurde, das Zeichen #!erscheint
jetzt unter dem Tag.
• Gehen Sie für den Monat und Stunde
genau so vor.
SUMMER TIME SET
1 SUMMER TIME
(USE)
2 ❿ SUMMER TIME IN
3 SUMMER TIME OUT
WEEK
MONTH TIME
LAST /FRI
2
9:00
12:00
FIRST /SUN 12
(❷❿/– +)
5
MENÜ
1
IN
WEEK
MONTH TIME
14:00
LAST /FRI 11
#
(❷❿/– +)
END:MENU
END:MENU
– EINSTELLEN DER ANZEIGEMODUS
7
Drücken Sie die Taste
MENU.
• Prüfen Sie Woche, Tag, Monat und
Stunde nochmals und drücken die
Menütaste.
8
Drücken Sie die Taste SHIFT ❷
drücken Sie die Taste SHIFT ❿.
• Wenn Sie die Taste SHIFT ❿
drücken, ändert sich die Anzeige.
• Die Anzeige ändert sich von:
(YY-MM-DD) ➝ (DD-MM-YY) ➝
(MM-DD-YY)
MENU
SUMMER TIME SET
1 SUMMER TIME
(USE)
2 ❿ SUMMER TIME IN
3 SUMMER TIME OUT
IN
SHIFT
V-LOCK
SHIFT
V-LOCK
TRACKING/SET
WEEK
MONTH TIME
LAST /FRI 11
14:00
#
SUMMER TIME SET
1 SUMMER TIME
(USE)
2 SUMMER TIME IN
3 ❿ SUMMER TIME OUT
OUT
WEEK
MONTH TIME
12:00
FIRST /SUN 12
#
CLOCK SET/ADJUST
1 ❿ SUMMER TIME SET (USE)
2 DISPLAY MODE(YY-MM-DD)
3 CLOCK SET/ADJUST
YEAR
2001
13
END:MENU
(❷❿/– +)
YEAR
2001
DATE
TIME
01/01 MON 12:00
#
#
(❷❿/– +)
(❷❿/– +)
DATE
TIME
01/01 MON 12:00
CLOCK SET/ADJUST
1 SUMMER TIME SET (USE)
2 ❿ DISPLAY MODE(YY-MM-DD)
3 CLOCK SET/ADJUST
END:MENU
(❷❿/– +)
END:MENU
END:MENU
14
9
12/7/01 4:35 PM
Page 16
DIE EINSTELLUNG DER UHRZEIT
EINSTELLUNGSMENÜ
– EINSTELLEN DER UHRZEIT
– EINSTELLUNGSANZEIGE UND ALARMAUFNAHME
Drücken Sie die Taste SHIFT ❷.
• CLOCK SET/ADJUST startet.
10
Einstellung von Jahr,
Monat, Tag mit den Tasten
TRACKING/ SET
.
1
DISPLAY MODE SETUP
1 ❿ DATE DISPLAY ------------------(ON)
2 TIME DISPLAY-------------------(ON)
3 POSITION -------------(R-BOTTOM)
(Falls ANZEIGEMODUS JJ-MM-TT ist)
• Wenn Sie TRACKING/SET
einmal drücken, wird “2002”
eingestellt.
• Drücken Sie SHIFT ❿ !einmal,
nachdem das Jahr eingestellt
wurde, das Zeichen #!erscheint
jetzt unter dem Monat.
• Gehen Sie für den Monat genau so vor.
SHIFT
V-LOCK
CLOCK SET/ADJUST
1 SUMMER TIME SET (USE)
2 DISPLAY MODE (YY-MM-DD)
3 ❿ CLOCK SET/ADJUST
YEAR
2001
(❷❿/– +)
(❷❿)
END:MENU
YEAR
2002
DATE
12/25 WED
ON
2002-12-25 WED
12:45:30 L3H
END:MENU
Bildschirmposition von Datum &
Uhrzeit.
2002-12-25 WED
9:16:14 L3H
Verwendung der SHIFT ❷ !Taste in
die “TIME” Zeile .
2. Durch Drücken der SHIFT ❿ !Taste
schalten Sie die Zeit an und aus.
(DATE und POSITION funktionieren
genauso.)
L-UPPER
TIME
12:00
L-BOTTOM
2002-12-25 WED
9:16:14 L3H
#
(❷❿/– +)
11
Einstellen der Stunde und
der Minute mit den
TRACKING / SET
Tasten.
• Falls Sie TRACKING/SET
drücken, wird “13” eingestellt.
• Drücken Sie SHIFT ❿ !um das Zeichen
12
Stunde nochmals und drücken die
Menütaste zweimal.
# unter
2
ALARM REC SETUP/RECALL
1 ❿ MODE -----------------------------(L3H)
2 DURATION --------------------(AUTO)
3 BUZZER----------------------------(ON)
4 ALARM RECALL
( ❷❿ /– +)
END:MENU
TRACKING/SET
* Zur Einstellung von ALARM
REC im L3H Modus für 5
Minuten.
YEAR
2002
DATE
TIME
12/25 WED 13:30
#
(❷❿/– +)
END:MENU
2002-12-25 WED
13: 30:00 L 3H
HINWEIS
Zeitangabe
• Vor- oder nachmittags wird nicht angezeigt.
• 1:00 nachmittags ist also 13:00, 11:00 abends
ist 23:00 und 12:00 nachts ist 00:00.
15
R-UPPER
R-BOTTOM
2002-12-25 WED
9:16:14 L3H
ALARMAUFNAHME-EINSTELLUNG
MENU
CLOCK SET/ADJUST
1 SUMMER TIME SET (USE)
2 DISPLAY MODE (YY-MM-DD)
3 ❿ CLOCK SET/ADJUST
2002-12-25 WED
9:16:14 L3H
END:MENU
Drücken Sie die Taste
MENU zweimal.
• Prüfen Sie Jahr, Monat, Tag und
den Minuten erscheinen zu
lassen.
• Machen Sie das gleiche für die Minuten.
OFF
2002-12-25 WED
• POSITION: Wählen Sie die
(Beispiel)
* Ein- und Ausstellen der Zeit
1. Bringen Sie das " ❿ " Zeichen unter
CLOCK SET/ADJUST
1 SUMMER TIME SET (USE)
2 DISPLAY MODE (YY-MM-DD)
3 ❿ CLOCK SET/ADJUST
#
• DATE: Wählen Sie Datumsanzeige ON/OFF
ON
OFF
2002-12-25 WED
12:45:30 L3H
12:45:30 L3H
• TIME: Wählen Sie Zeitanzeige ON/OFF
TRACKING/SET
DATE
TIME
01/01 MON 12:00
ANZEIGEMODUS-EINSTELLUNG
MENÜ
01671A SVR-24JP/960JP-Ger2
1. Bringen Sie das " ❿ " Zeichen
unter Verwendung der SHIFT ❷
Taste in die “DURATION” Zeile.
2. Bei jedem Drücken der Taste SHIFT
❿ ändert sich die Anzeige "SEL 3
MIN".
3. Wählen Sie “SEL 5 MIN” durch
Verwendung der SET “+” Taste.
4. Drücken Sie die MENU Taste.
* MODE: Wählen Sie die ALARM REC
Wählen Sie L3H, L12H, L24H. (L8H ist nicht vorhanden)
OFF: Dieses Gerät führt keine Alarmaufnahme
durch, egal ob ein Alarmsignal eingeht oder
nicht.
• DURATION: Stellen Sie die ALARM REC Zeit ein.
AUTO
SEL 3MIN
TAPE END
• Um die Zeit ALARM REC einzustellen.
Regeln Sie die Zeit von SEL 20SEC in 5 MIN mit den
Tasten "set +/–".
• AUTO: Wenn ein Alarmsignal empfangen wird,
beginnt die ALARM REC und wird bis zur
Unterbrechung des Alarmsignals fortgeführt.
Die ALARM REC wird dann ausgeschaltet.(Sie
wird nicht innerhalb einer Minute gelöscht.)
• TAPE END: Wenn ein Alarmsignal empfangen
wird, beginnt ALARM REC und wird bis zum
Ende des Bandes fortgeführt.
• BUZZER : Wahl, ob der Piepton während der ALARM REC
ein- oder ausgeschaltet ist.
• ALARM RECALL : Um die Alarmmeldungen zu prüfen.
(Siehe Seite 33)
16
01671A SVR-24JP/960JP-Ger2
12/7/01 4:35 PM
Page 18
EINSTELLUNGSMENÜ
– EINSTELLUNG DES AUFNAHMEMODUS UND DES
VIDEORECORDER-MODUS
AUFNAHMEMODUS-EINSTELLUNG
REC MODE SETUP
1 ❿ REPEAT REC-------------------(OFF)
2 SERIES REC -------------------(OFF)
3 1-SHOT REC--------------------(OFF)
( ❷❿ )
END:MENU
SHIFT ❷: UMSTELLTASTE
SHIFT ❿: EINGABE(AUSWAHL-) TASTE
* Es ist nicht möglich,
Wiederholungs-Aufnahme &
Serien-Aufnahme gleichzeitig
auszuwählen.
• REPEAT REC: Schalten Sie die
Wiederholungs-Aufnahme durch ON/OFF
ein oder aus.
ON: Wenn während der Aufnahme das
Ende des Bandes erreicht wird, wird
das Band automatisch zurückgespult
und die Aufnahme fortgesetzt.
• SERIES REC: Die Serien-Aufnahme ist
eine benutzerfreundliche
Funktion zur Verwendung
zweier oder mehrerer
Videorecorder. Das zweite
Gerät beginnt automatisch
mit der Aufnahme, wenn im
ersten Gerät das Ende des
Bandes erreicht wird.
– Anschlussverfahren: Siehe
Anschlussverfahren zur Serien-Aufnahme
(S.37).
• 1-SHOT REC: Wird durch Auswahl von
000H im REC TIME MODE verwendet.
OFF: Ein Einzelbild wird aufgenommen,
wenn die REC Taste einmal
gedrückt wird.
1 MIN:Ein Einzelbild wird in einminütigen
Intervallen aufgenommen, wenn die
REC Taste einmal gedrückt wird.
2 MIN:Ein Einzelbild wird in zweiminütigen
Intervallen aufgenommen, wenn die
REC Taste einmal gedrückt wird.
3 MIN:Ein Einzelbild wird in dreiminütigen
Intervallen aufgenommen, wenn die
REC Taste einmal gedrückt wird.
17
4
VIDEORECORDER-MODUS-EINSTELLUNG
VCR MODE SETUP
1 ❿ TRIGGER --------------------(1FIELD)
2 V-SYNC ----------------------------(ON)
3 BUZZER ---------------------------(ON)
4 TAPE LENGTH ----------------(E240)
( ❷❿ )
MENÜ
3
END:MENU
SHIFT ❷: UMSTELLTASTE
SHIFT ❿: EINGABE-(AUSWAHL-)
TASTE
• TRIGGER
– Wählt, wieviele Bilder pro Kamera
aufgenommen werden, falls das
Gerät mit einem Bildumschalter
verbunden wird.
(Siehe Bedienungsanleitung für
weitere Informationen)
• V-SYNC
– Das Bild kann eventuell Störungen
aufweisen, falls ein bestimmter
BILDUMSCHALTER benutzt wird.
Wählen Sie ON oder OFF um
eine störungsfreie Position zu
finden.
• BUZZER
– Ein- oder Ausschalten des
Pieptons (Siehe S.34)
• TAPE LENGTH
– Wählen Sie die
Videokassettelänge aus. Diese
lnformationen werden
normalerweise auf dem
Bandkasten.
– Entsprechend der Bandlänge
Einstellung gedruckt, der
Zeitmodus auf den
Bildschirmanzeigeänderungen,
wie folgend.
E-180
L3H
E-240
L4H
L8H
L12H
L12H
L18H
L24H
L32H
18
01671A SVR-24JP/960JP-Ger2
12/7/01 4:35 PM
Page 20
EINSTELLUNGSMENÜ1
– EINSTELLUNG DER PROGRAMMAUFNAHME
• Einstellung von PROGRAM REC
Beispiel) Eine Aufnahme programmieren von
13:03 bis 13:15 am Montag in
Betriebsart L3H.
PROGRAMMEINSTELLUNG 1
•
•
•
•
•
•
PROGRAM SETUP1
START STOP DATE
MODE
L3H
L24H
1. Drücken Sie die Taste SHIFT ❷ um den Kursor
auf die erste freie Programmposition zu
plazieren.
OFF
13:03 → 13:15 MON
PROGRAM SETUP2
2. Drücken Sie die Taste SHIFT ❿ !um die Uhrzeit
anzeigen zu lassen.
❿ 13:03 → 13:15 MON
13:03 → 13:15 DAILY
( ❷❿ /– +,CLEAR)
L12H
END:MENU
6
PROGRAMMEINSTELLUNG 2
•
•
•
•
•
•
3. Drücken Sie TRACKING/SET "+" oder "–" um
die Anfangszeit einzustellen.
❿
PROGRAM SETUP2
START STOP DATE
MODE
• Wenn Programm 5 in PROGRAM SETUP 1 eingestellt wurde,
wählen Sie PROGRAM SETUP 2.
• Machen Sie das Gleiche um PROGRAM REC einzustellen wie
bei PROGRAM SETUP 1.
* Wenn Sie mit PROGRAM SETUP 1,2 fertig sind, drücken
Sie zum Abschluss MENU und dann TIMER, um in
Bereitschaftsmodus zu schalten.
POWER
PROGRAM SETUP1
TIMER
( ❷❿ /– +,CLEAR)
END:MENU
4. Drücken Sie die Taste ❿ !um zu Minuten zu
gehen.
REC
REC
ACHTUNG
1. Sie können die Tasten POWER oder
RESET nur benutzen bei PROGRAM
REC.
2. Bei PROGRAM REC drücken Sie die
Taste POWER um die Aufnahme zu
löschen.
3. Um ein PROGRAM REC zu löschen,
wählen Sie den Befehl und drücken die
Taste CLEAR bis "OFF" angezeigt wird.
Falls Sie die Taste SHIFT ❿ !nochmals
drücken in Position OFF, wird die vorhereingestellte Zeit umgeschaltet.
5. Drücken Sie die Tasten TRACKING/SET "+"
oder "–" um die Minuten der Anfangszeit
einzustellen.
C.MEMO
6. Genauso stellen Sie die Endzeit ein und gehen
zum Datum.
7. Drücken Sie die Tasten TRACKING/SET "+"
oder "–" um Montag einzustellen und drücken
Sie die Taste ❿.
8. Drücken Sie die Tasten TRACKING/SET "+"
oder "–" um L3H einzustellen und drücken Sie
die Taste SHIFT ❿.
9. Stellen Sie die nächste gewünschte
* Die Kassette wird ausgeworfen und der Piepton ertönt,
wenn die Löschschutzlasche der Kassette entfernt
worden ist.
– ÜBERPRÜFUNG VON DATUM UND UHRZEIT EINES STROMAUSFALLS
7
STROMAUSFALLSPEICHER
PROGRAM REC mit Hilfe desselben
Verfahrens ein.
• DAILY : Die Programmierung der Aufnahme
wird täglich um die gleiche Uhrzeit ausgeführt.
HINWEIS
Sie können maximal 10 Programme wöchentlich programmieren
•
•
•
POWER LOSS MEMORY
YEAR
DATE
TIME
OFF 2002
12/25 15:00:00
ON
2002
12/25 15:15:37
OFF 2002
12/24 13:25:00
ON
2002
12/24 13:26:00
OFF 2002
12/23 17:30:30
ON
2002
12/23 17:40:00
END:MENU
• Zeigt die gespeicherte Zeit eines Stromausfalls und die der
Wiederherstellung der Stromversorgung an.
* Beispiel) Wenn der Strom um 17:30:30 Uhr am 12.23.2002
ausfiel und die Stromversorgung um 17:40:00 Uhr am
12.23.2002 wiederhergestellt wurde.(17:30:30 = 17
Uhr 30 Minuten 30 Sekunden)
* Beispiel) Wenn der Strom um 13:25:00 Uhr am 12.24.2002
nochmals ausfiel und die Stromversorgung um
13:26:00 Uhr am 12.24.2002 wiederhergestellt wurde.
1. OFF
ON
2. OFF
ON
3. OFF
ON
2002
2002
2002
2002
12/24
12/24
12/23
12/23
13:25:00
13:26:00
17:30:30
17:40:30
• Der Bildschirm zeigt die vier jüngst erfolgten Stromausfälle an.
Der kürzlichste Stromausfall wird zuerst aufgeführt.
19
20
MENÜ
5
01671A SVR-24JP/960JP-Ger2
12/7/01 4:35 PM
Page 22
BETRIEB
WIEDERGABE
W
RE
P/STILL
CK
REC CHE
AR
O CLE
CNT.MEM
COUNT
K
REC LOC
TIMER
RESET
PLAY
W
RE
CK
REC LO
W
RE
Für Bildsuchlauf
rückwärts
POWER
TIME
TRAC
MODE
ET
KING/S
W
RE
Für Bildsuchlauf
vorwärts
PLAY
WIEDERGABE
ER
POW
SECURITY VIDEO
SHIFT
CK
V-LO
W
RE
F.F
ON
AUDIO
P/STILL
F.F
REV
P/STILL
Für stillstand
F.F
DEO
Y VI
URIT
C
E
S
• Wenn eine Kassette eingelegt
wird, schaltet sich der
Videorecorder automatisch ein.
2
Drücken Sie die Taste
wenn erforderlich.
F.F
ECT
STOP/EJ
1
Drücken Sie die POWER
Taste am Videorecorder und
legen Sie die Kassette ein.
STOP/EJECT
MENU
STOPP
W
RE
W
RE
F.F
AUSWURF
Bei stehendem Band
F.F
Die Kassette mit
obenliegendem Sichtfenster
einlegen.
WIEDERGABE
REC
F.F
PLAY
Rückkehr zur
normalen
Wiedergabe
Während der normalen
Wiedergabe
Zum schnellen
Vorlauf
STOP/EJECT
Zum schnellen
Rückspulen
HINWEIS
• Stellen Sie den Modus auf L3H, wenn Sie eine Leihkassette abspielen, damit Ton und Bild normal
angezeigt werden.
• Eine Standardkassette kann auch ohne Ton etwas Geräusch verursachen.
• Slowmotion und Zeitmodus können bei Einzelbildaufnahme nicht eingestellt werden.
Beachten Sie die folgenden Punkte bei der Wiedergabe einer in
Zeitraffung aufgenommenen Kassette:
• Es ist möglich, dass der Bildschirm bei der Bildsuche keine Farbe anzeigt, aber dies ist kein Hinweis
auf eine Fehlfunktion oder Störung.
• Es ist möglich, dass der Bildschirm ein wenig zittert, aber dies ist kein Hinweis auf
eine Fehlfunktion.
• Es ist möglich, dass der obere Teil des Bildschirms ein wenig verzogen erscheint,
aber dies ist kein Hinweis auf eine Fehlfunktion oder Störung.
• Es ist möglich, dass der Bildschirm ein wenig zittert, aber dies ist kein Hinweis auf eine Fehlfunktion.
• Obwohl der Ton eventuell nicht ganz deutlich ist, dies ist kein Hinweis auf eine
Fehlfunktion oder Störung.
• Bei Wiedergabe einer in L8H/L12H/L24H Modus aufgenommenen Kassette in 3H
Modus wird das aufgenommene Bild mit hoher Geschwindigkeit wiedergegeben.
• Es ist bei Wiedergabe einer mit Ton aufgenommenen Kassette nicht möglich, den
normalen Ton zu hören, wenn der Aufnahmezeitmodus nicht dem
Wiedergabezeitmodus entspricht.
21
Hinweis zur Wiedergabebildeinstellung
• Beim Einlegen einer Kassette wird das
Wiedergabebild automatisch eingestellt.
• Wenn die Einstellung des Wiedergabebildes nicht
automatisch erfolgt, können Sie es durch
Drücken der Spurlagereglertasten
einstellen.
• Falls der Bildschirm nicht richtig ausgerichtet ist,
benutzen Sie TRACKING um den Bildschirm
auszurichten. Hierzu drücken Sie gleichzeitig beide
TRACKING-Tasten
.
TRACKING/SET
Wenn das Wiedergabebild verrauscht
ist oder zittert
• Drücken
,
TRACKING/SET
Taste.
SHIFT
V-LOCK
• Wenn das Wiedergabebild während der langsamen
Wiedergabe verrauscht ist, können Sie dies durch
Drücken der Spurlagereglertaste(TRACKING
)
korrigieren.
• Falls das Bild Störungen aufweist oder sich nicht
bewegt, können Sie das mit der Taste V-LOCK
korrigieren.
22
01671A SVR-24JP/960JP-Ger2
12/7/01 4:35 PM
Page 24
VERSCHIEDENE WIEDERGABEFUNKTIONEN
• Legen Sie die abzuspielende Kassette ein.
W
P/STILL
CK
REC CHE
ECT
STOP/EJ
K
REC LOC
TIMER
REV
AUDIO
NT
ON COU
CNT.ME
AR
MO CLE
RESET
CK
REC LO
ER
POW
TIME
KING/S
ET
SHIFT
V-LOCK
NU
Drehen Sie den SHUTTLE im
Uhrzeigersinn oder entgegen dem
Uhrzeigersinn.
• Das Bild läuft schnell vorwärts
oder rückwärts.
• Indem Sie den SHUTTLE mehr
oder weniger drehen, können Sie
die Geschwindigkeit regeln.
W
RE
2
Rückkehr zur normalen
Wiedergabe
• Lassen Sie den SHUTTLE wieder
los.
Betrachten des Bildes unter besonderen Wiedergabefunktionen
• Ein Rauschen des Bildes deutet nicht auf Störungen hin.
• Eine auf anderen Videorecordern aufgenommene Kassette kann starkes Rauschen
aufweisen.
Drücken Sie die TIME MODE (
während der Wiedergabe.
,
) Taste
TIME MODE
• Sie können dann den Ton nicht hören.
• Falls das Bild bei der langsamen
Wiedergabe unstabil ist, drücken Sie die
Taste V-LOCK
. Nachdem diese richtig
eingestellt ist, können Sie Slowmotion
wählen.
• Drücken Sie die TIME MODE Taste und
betrachten Sie das Bild in der
gewünschten langsamen
Geschwindigkeit.
Beim Betrachten eines
Bandes in langsamer
Wiedergabe/Rückwärtswiedergabe
• Drücken Sie die P/STILL Taste, um das
Bild anzuhalten.
• Drehen Sie den JOG-Schalter um langsam
Rückwärtsabspielen zu wählen oder um
langsam Vorwärtsabspielen zu wählen.
• Drücken Sie die PLAY Taste nochmals,
um das normale Bild wieder betrachten
zu können.
• Wenn die langsame Wiedergabe ca.
fünf Minuten lang fortgesetzt wird, wird
die Kassette automatisch
wiedergegeben.
Normale Tonwiedergabe ist bei der Wiedergabe
eventuell nicht möglich
• L3H Kassette
• L8H Kassette
• L12H Kassette
• L24H Kassette
23
3
Beim Betrachten eines
Bandes in langsamer
Wiedergabe
– L3H Wiedergabe → Normal
– L3H Wiedergabe → Schnell
– L8H Wiedergabe → Normal
– L12H/L24H Wiedergabe → Langsam
– L3H/L8H Wiedergabe → Schnell
– L12H Wiedergabe → Normal
– L24H Wiedergabe → Langsam
– L3H/L8H/L12H Wiederg. → Schnell
– L24H Wiedergabe → Normal
W
RE
F.F
2
1 3
Bildsuchlauf (Während
der Wiedergabe)
F.F
TRAC
MODE
1
Für normale
Tonwiedergabe
• Normale Tonwiedergabe bekommen
Sie nur bei Wiedergabe mit der
gleichen Geschwindigkeit wie bei der
Aufnahme.
24
WIEDERGABE
REC
F.F
RE
PLAY
01671A SVR-24JP/960JP-Ger2
12/7/01 4:35 PM
Page 26
VERSCHIEDENE WIEDERGABEFUNKTIONEN (FORTSETZUNG)
RE
W
P/STILL
CK
REC CHE
ECT
STOP/EJ
K
REC LOC
TIMER
REV
AUDIO
.ME
NT CNT
ON COU
AR
MO CLE
RESET
CK
REC LO
ER
POW
TIME
TRAC
KING/S
MODE
ET
SHIFT
V-LOCK
4
NU
6,7
4
Betrachten eines Bildes
in Rückwärtswiedergabe
• Während der normalen Wiedergabe
kann die Rückwärtswiedergabe
durch Drücken von REV. verwendet
werden.
• Rückwärtswiedergabe ist nur in L3H
Modus möglich.
• Während der Rückwärtswiedergabe
ist der Ton nicht zu hören.
• Drücken Sie REV oder PLAY, falls
Sie bei der Rückwärtswiedergabe
wieder auf Normalwiedergabe
schalten wollen.
5
REV.
5
L12H/L24H Stunden
Wiedergabe
• Sie können nicht den Ton
hören der 12H oder Modus
24H. Wenn Sie den Ton
hören möchten, betätigen
Sie den AUDIO ON Taste
zum ket das vordere
Bildschirmanzeigeerscheinen
L12H oder L24H.
• Das Band wird mit
geringerer Geschwindigkeit
als während der L3HWiedergabe abgespielt.
• Auf dem Bildschirm kann
Rauschen auftreten.
• Zur Betrachtung eines
klaren Bildes die L3HWiedergabe oder den
langsamen Wiedergabemodus wählen.
TIME MODE
Beim Zurückspulen des Bandes
• Stellen Sie den Zähler wieder auf Null (
)
durch Drücken der Taste CLEAR beim Start
der Aufnahme oder der Wiedergabe. Drücken
Sie die Speichertaste vom Zähler. Wenn Sie
den SHUTTLE in Betriebsart Stop entgegen
dem Uhrzeigersinn drehen nach der
Aufnahme oder der Wiedergabe, hält die
Kassette an bei der Anfangsposition (
)
der Aufnahme oder der Wiedergabe.
25
6
Standbild
Drücken Sie zur Betrachtung
eines Standbildes die P/STILL
Taste.
• Der Ton ist nicht zu hören.
• Das Standbild nicht über
längeren Zeitraum stehen
lassen, da dies den
Videokopf und das Band
beschädigen könnte.
• Wenn länger als fünf
Minuten pausiert wird, wird
die Kassette automatisch
wiedergegeben.
• Falls das Bild unstabil ist,
und nach oben und unten
flimmert, drücken Sie die
Tasten V-LOCK
um die
richtige Einstellung zu
wählen.
7
Einzelbildschaltung
• Drücken Sie die P/STILL
Taste.
• Der Ton ist nicht zu
hören.
• Wenn Sie JOG dauernd
betätigen, wird jeweils nur
ein Bild angezeigt.
• Drücken Sie die
Wiedergabetaste, um auf
normale Wiedergabe
zurückzuschalten.
WIEDERGABE
REC
F.F
PLAY
Rückschaltung auf
normale Wiedergabe
• Drücken Sie die
Wiedergabetaste, um auf
normale Wiedergabe
zurückzuschalten.
SHIFT
V-LOCK
DISPLAY(VORDERSEITE)
C.MEMO
Anzeige des
augenblicklichen
Zählwerkstands
Anzeige des
Zählwerkspeichers
26
01671A SVR-24JP/960JP-Ger3
12/7/01 4:34 PM
Page 28
AUFNAHMESICHERUNG
Dieses Gerät bietet eine Aufnahmesicherungsfunktion und verschiedene
Aufnahmefunktionen für Mehrzweckanwendungen einschliesslich Überwachung und
Beobachtung. Sie sollten sich mit dem Betrieb vertraut machen.
AUFNAHME
Vor der Aufnahme einstellen
ÜberprÜfen Sie, ob die Uhrzeit
richtig eingestellt ist.
• Für eine programmierte Aufnahme muss
die Uhrzeiteinstellung stimmen
• Wenn Sie die Uhrzeit noch nicht eingestellt
haben, beziehen Sie sich auf den
Abschnitt Einstellung der Uhrzeit und des
Datums (S.13)
Befindet sich die Löschschutzlasche
noch an der Kassette?
Auswahlverfahren
Wenn Sie den
Aufnahmebetrieb
sichern wollen
Betriebsweise
Betriebsbeschreibung
• Stellen Sie den REC LOCK
Schalter auf “REC LOCK”.
• Drücken Sie Taste REC LOCK um
Betriebsart REC LOCK zu starten.
Die Anzeige REC LOCK leuchtet.
• Bei Betriebsart REC LOCK können
keine Tasten gedrückt werden,
ausgenommen die Taste RESET.
• Die Aufnahme wird auch nach
Wiederherstellung der
Stromversorgung fortgesetzt.
• Drücken Sie REC LOCK
nochmals.
• Die Leuchtanzeige REC LOCK
erlischt.
OFF
REC LOCK
OFF
REC LOCK
AUFNAHME
Löschschutzlasche vorhanden
• Das Band kann wieder
bespielt werden
Löschschutzlasche
Funktionen im Fall, dass das Band während der Aufnahme sein Ende erreicht
Ohne Löschschutzlasche
• Zum erneuten Aufnehmen
müssen Sie die Öffnung mit
Klebeband überdecken.
Klebeband
* Wiederholungsaufnahme nach automatischem Rückspulen.
• Wenn im Menü REPEAT ON gewählt wurde (Falls aber eine Alarmmeldung kommt, wird
das Gerät die Kassette auswerfen und sich einschalten).
* Eingeschaltet nachdem die Kassette ausgeworfen wurde
• Falls das Bandende erreicht wird, ausser nach dem automatischen Zurückspulen.
HINWEIS
Kondensation
• Wenn das Gerät plötzlich von einem kühlen an einen warmen Ort gebracht, an einem feuchten
Standort installiert oder direkt der Kühlluft einer Klimaanlage ausgesetzt wird, können sich
manchmal aufgrund des plötzlichen Temperaturwechsels Wassertröpfchen auf der
Videokopftrommel bilden.
Die Benutzung des Videorecorders in diesem Zustand kann eine Beschädigung des Geräts und
des Bandes verursachen.
In diesem Fall drücken Sie die Betriebstaste und lassen das Gerät ca. 1 bis 2 Stunden vor der
Benutzung eingeschaltet.
27
28
01671A SVR-24JP/960JP-Ger3
12/7/01 4:34 PM
Page 30
EINFACHES AUFNEHMEN
1
REC
F.F
W
P/STILL
CK
REC CHE
2
Drücken Sie die
Einschalttaste
Legen Sie die Kassette so ein,
dass die Löschschutzlasche
nach vorn zeigt.
3
Wählen Sie die
Aufnahmegeschwindigkeit
7
Drücken Sie die REC oder
P/STILL Taste, um die
Aufnahme fortzusetzen
ECT
STOP/EJ
K
REC LOC
TIMER
REV
AUDIO
NT
ON COU
CNT.ME
AR
MO CLE
RESET
REC
F.F
RE
PLAY
CK
REC LO
ER
POW
MODE
TIME
TRAC
KING/S
5
6,7
ET
SHIFT
V-LOCK
MENU
1
4
W
P/STILL
REC CHECK
4,7
POWER
JECT
STOP/E
TIMER
REV
AUDIO
ON COUNT
CNT.ME
MO CLEAR
REC LOCK
RESET
REC LOCK
ER
POW
TIME
TRAC
MODE
KING/SET
SHIFT
K
V-LOC
MENU
Löschschutzlasche
5
Drücken Sie die REC
Taste
• Die Aufnahme beginnt
• Wenn die Löschschutzlasche fehlt,
wird das Band gestoppt, der
Alarmton ertönt fünfmal und die
Kassette wird ausgeworfen.
REC
Drücken Sie die REC
CHECK Taste
• Sie können die Aufnahmequalität
im Aufnahmemodus überprüfen.
Der Videorecorder gibt die
Aufnahme wieder, die wenige
Sekunden vor Drücken der REC
CHECK Taste gemacht wurde.
6
Drücken Sie die P/STILL Taste
• Wenn die Pause länger als fünf
Minuten dauert, wird die kassette
automatisch wiedergegeben zum
Selbstschutz.
Wenn die Unterbrechung länger dauert,
drücken Sie bitte die Stopp-Taste.
REC
P/STILL
REC CHECK
Aufnahmezeittabelle
HINWEISE
Was ist der
Zum Schutz
versehentliche einer
Löschschutz? Aufnahme
• Hierbei handelt es
sich um eine
Einrichtung, die
zum Schutz Ihrer
Aufnahmen vor
versehentlichem
Löschen dient oder
erneutes
Aufnehmen erlaubt.
29
Zum erneuten
Aufnehmen
• Überdecken Sie die
• Entfernen Sie die
Löschschutzlasche.
Öffnung mit
Klebeband.
Bevor die REC CHECK Funktion
wirksam wird, muss die
untenstehende Mindestaufnahmezeit
vergangen sein.
ZEITMODUS
L3H
L8H
L12H
L24H
36H
Löschschutzlasche
• Aufnahmegeschwindigkeit wird im
Hauptmenü oder mit TIME MODE
gewählt.
• Die gewählte Aufnahmegeschwindigkeit
wird im Display angezeigt.
Löschschutzlasche
48H
AUFNAHME
RE
PLAY
P/STILL
• Dieses Gerät ist für E-180 Kassetten gedacht.
• Benutzen Sie womöglich immer E-180 Kassetten für die
Aufnahme.
• SVR-24JP hat nur L3H, L8H, L12H und L24H.
• Verwenden Sie nur Kassetten mit dem
Zeichen
Maximale Aufnahmezeit
Kassettentyp
L3H
L8H
L12H
L24H
36H
3 Minuten
5 Minuten
E-240
4Stunden
12stunden
20Stunden
36Stunden
52Stunden
68Stunden 100Stunden 164Stunden 228Stunden 324Stunden 644Stunden 1284Stunden
168H
240H
480H
7 Minuten
10 Minuten
20 Minuten
E-180
3Stunden
9Stunden
15Stunden
27Stunden
39Stunden
51Stunden
960H
40 Minuten
ZEITMODUS
5 Sekunden
72H
15 Sekunden 120H
MINDESTAUFNAHMEZEIT
30 Sekunden
1 Minute
1 Minute
30 Sekunden
2 Minuten
MINDESTAUFNAHMEZEIT
*SVR-24JP hat nur L3H, L8H, L12H
und L24H.
48H
72H
120H
168H
240H
480H
960H
75Stunden 123Stunden 171Stunden 243Stunden 483Stunden 963Stunden
30
12/7/01 4:34 PM
Page 32
SERIENAUFNAHME
ALARMAUFNAHME
Hierbei handelt es sich um eine bedienungsfreundliche Funktion, durch die zwei oder
mehr Videorecorder miteinander verbunden werden. Das zweite Gerät beginnt mit der
Aufnahme, wenn das Band im ersten Gerät zuende ist.
Wenn der Videorecorder an eine Anlage mit Alarmabgabe wie eine Bildumsteuereinrichtung, einen
Bewegungsmelder oder Türschalter angeschlossen wird, arbeitet der Videorecorder bei Eingang des
Alarms entsprechend der Zeit und des Modus, die auf dem ALARM REC Menü gewählt wurden.
SVR-24JP hat nur Betriebsart L3H/L12H/L24H für ALARM REC.
Das untenstehende Diagramm bezieht sich auf L3H für ALARM REC.
Anschlussverfahren
Betriebsweise
Betriebsbeschreibung
Siehe
Anschlussverfahren zur
Serienaufnahme
(S.37)
• Wählen Sie Nr.4 auf dem
MENU
• Wählen Sie “ON” für
SERIES, indem Sie die
SHIFT ❷ !und ❿ !Taste
benutzen.
• Wenn das Band im ersten Gerät
während der Aufnahme sein Ende
erreicht, beginnt das zweite Gerät mit
der Aufnahme. Wenn das Band im
zweiten Gerät während der Aufnahme
sein Ende erreicht, beginnt das
nächste Gerät, soweit angeschlossen,
mit der Aufnahme.
• Wenn der Serienaufnahmemodus
gewählt ist, nimmt das zweite Gerät die
Aufnahme vor, selbst wenn das erste
Gerät ausgeschaltet wird.
• Wenn ein kontinuierlicher Alarmton ertönt,
kann dieser nur durch Drücken einer
Taste gelöscht werden.
Aufnahme im
L12H~960H(L12H~
L24H)* Modus
Aufnahme im
L3H Modus
Aufnahme im
L12H~960H(L12H~
L24H)* Modus
Aufnahme im
L3H Modus
Zeitraffer-Aufnahme
Alarm-Aufnahme
Zeitraffer-Aufnahme
Alarm-Aufnahme
Eingang des
Alarmsignals
Beginn der
Aufnahme
Eingabe der
Alarmrückstellung oder
Überschreiten gewählter Zeit
Eingang des
Alarmsignals
Anschlussverfahren
Betriebsverfahren
Betriebsbeschreibung
Schließen Sie
Alarmabgabegeräte
wie folgt an:
• Wählen Sie MODE und
DURATION auf dem
ALRAM REC SETUP
bei Einstellung von
MENU3 (Siehe
AlarmaufnahmeEinstellung(ALARM
REC SETUP, Seite 16)
• Wenn Sie einen
BILDUMWANDLER
anschliessen, sollte der
Schalter auf AUTO
stehen.
• AUTO: Die Alarmaufnahmezeit wird
automatisch durch Eingang des
Alarmsignals bestimmt. (1 min)
• 20sec~5min: Alarmaufnahme wird 20
Sekunden~5 Minuten nach dem
Alarmsignal gemacht.
• TAPE END: Die Alarmaufnahme läuft nach
Eingang des Alarmsignals bis zum
Bandende.
• Wenn das Alarmsignal eingeht, leuchtet die
auf dem Display auf.
• Wenn die Alarmaufnahme beendet ist,
blinkt die
auf dem Display auf.
• Wenn Sie den Alarm während der
Alarmaufnahme löschen wollen, stellen Sie
für mindestens 0,5 sec. eine Verbindung
zwischen der Alarmlöschung und der
Alarmerdung her. Wenn die Alarmlöschung
eingegeben wird, wird die Alarmaufnahme
abgebrochen.
• Wenn ein Alarmsignal eingeht und
BUZZER ON auf dem Menü gewählt
wurde, ertönt der Alarmsummer
kontinuierlich. Drücken Sie irgendeine
Taste, um den Summer auszuschalten.
1 ALARM IN
2 ALARM OUT
6 TAPE END OUT 7 SERIES OUT
1
2
3
4
3 ALARM RESET 4 ERROR OUT
8 GND
5
6
5 TRIGGER OUT
9 SERIES IN
10 1 SHOT RECIN
7
9
8
10
IN
IN
OUT
OUT
AUDIO
VIDEO
OUT
VIDEO
GND
ALARM
RESET
(Siehe S.37)
ALARM
OUT
HINWEISE
RESET Taste
Wenn Sie die RESET Taste drücken
• Benutzen Sie diese Taste, wenn der
Videorecorder oder das Display nicht
normal funktionieren, selbst wenn das
Gerät eingeschaltet ist.
• Die RESET Taste befindet sich auf der
rechten Seite der Bedienkonsole.
• Drücken Sie die RESET Taste mit einer
Kugelschreiber- oder Bleistiftspitze.
• Werden alle eingegebenen Informationen, wie Einstellzeit einer
Aufnahmevorprogrammierung, Uhrzeit und Alarminformationen,
gelöscht.
• Wird das Gerät ausgeschaltet und es erscheint überhaupt kein
Bild. Wenn das Gerät wieder eingeschaltet wird, blinkt 2001-1-1 MON
12:00:00 L3H
auf der Anzeige des Bildschirms auf.
• Wird die Uhrzeit gelöscht und muss wieder eingestellt werden.
31
32
AUFNAHME
01671A SVR-24JP/960JP-Ger3
01671A SVR-24JP/960JP-Ger3
12/7/01 4:34 PM
Page 34
ALARMFUNKTIONEN
Die Alarmfunktionen sind Aufnahmealarm, Alarm prüfen, Alarm löschen und
Zählerspeicher Alarm. (Siehe Alarmaufnahme auf Seite 32)
ALARMZÄHLWERKSPEICHER
ÜBERPRÜFUNG DER ALARMAUFNAHME
1
Drücken Sie die Taste
MENU
• Wenn keine Alarmaufnahme
1
Drücken Sie CNT.MEMO
• Drücken Sie die Taste CNT. MEMO
zweimal, auf der Vorderseite wird dann "A.
MEMO" angezeigt.
2
Drehen Sie den SHUTTLE im
Uhrzeigersinn oder entgegen
dem Uhrzeigersinn
• Hierdurch wird die Kassette vorwärts
(oder rückwärts) gespult. Bei der ersten
Alarmaufnahme in Betriebsart L3H
macht diese zuerst 5 Sekunden Pause
und bleibt dann stehen
W
RE
W
RE
F.F
A.MEMO
CNT MEMO
F.F
1. Bringen Sie mit der Taste SHIFT
❷ !das Zeichen ❿!in Position
“ALARM REC SETUP/RECALL”.
2. Drücken Sie die Taste SHIFT ❿
und dann wird “ALARM RECALL”
angezeigt.
3. Drücken Sie die Taste MENU,
nachdem Sie die Aufnahme
überprüft haben.
vorgenommen wurde, erscheint
keine Anzeige auf dem
Bildschirmdisplay.
• Der ALARM RECALL Bildschirm
führt die sechs jüngsten unter
Alarm aufgenommenen
Ereignisse mit jeweiliger
Datums- und Zeitangabe auf.
• Wenn am 25. Dezember 2001
ein Alarm um 12:00, 13:00,
15:00, 17:00 und 19:00 Uhr
aufgenommen wurde.
ALARMLÖSCHUNG
1
ALARM RECALL
YEAR DATE TIME
2001 12/25 19:00:00
2001 12/25 17:00:00
2001 12/25 15:00:00
2001 12/25 13:00:00
2001 12/25 12:00:00
Beispiel) Wenn eine Alarmaufnahme
unter Nr. 12 gemacht wird.
Drücken Sie die COUNTER Taste.
• An der zählwerkstelle auf dem Display
wird A-12 angezeigt.
• Von "
", zeigt "12" die Anzahl der
Alarmaufnahmen an.
• Es ist möglich, bis zu “
” anzugeben.
• Wenn die Alarmaufnahme gemacht wird,
END:MENU
blinkt die “
2
Drücken Sie die CLEAR Taste
• Die Zählwerkstelle auf dem Display
gibt “
” an.
• Die “ ” wird augeschaltet.
• Wenn Sie die CLEAR Taste drücken,
während der Alarmprüfbildschirm
gezeigt wird, werden allen Daten und
Zeitangaben im Speicher gelöscht.
” auf dem Display auf.
CLEAR
COUNT
REC
F.F
RE
PLAY
W
P/STILL
CK
REC CHE
ECT
STOP/EJ
REC LOCK
TIMER
REV
REC LO
POWE
AUDIO
NT
ON COU
CNT.MEM
R
O CLEA
RESET
Anzeige der Betriebszeit
CK
R
TIME
TRAC
KING/S
T
SHIF
CK
V-LO
MENU
1
ET
MODE
HINWEIS
HINWEIS
112 2
• Wenn das Display
anzeigt, drücken Sie die
COUNTER Taste zweimal.
Die Betriebszeit wird dann auf dem Display angezeigt.
Beispiel) eine Betriebszeit von 11 Stunden.
HOUR
33
• Wenn die COUNTER Taste bei der Überprhfung der
Betriebszeit nicht innerhalb von 5 Sekunden gedrückt
wird, kehrt das Display wieder in den Zustand vor
Überprüfung der Betriebszeit zurück.
In den folgenden Fällen ertönt der Alarm fünfmal:
In den folgenden Fällen ertönt der Alarm kontinuierlich:
• Wenn eine Kassette ohne Löschschutzlasche eingelegt
wird.
– Wenn das Seriensignal eingegeben wird. (longer Ton)
– Wenn das Alarmsignal eingegeben wird.
– Wenn die Aufnahmetaste gedrückt wird.
– Wenn die TIMER Taste gedrückt wird.
• Wenn die REC Taste bei ausgeworfenem Band gedrückt
wird.
• Wenn das Alarmsignal während einer Alarmaufnahme
eingegeben wird.
• Wenn das Band im Aufnahmemodus sein Ende erreicht.
• Wenn das Alarmsignal zur Alarmaufnahme eingegeben wird.
– Wenn die Alarmaufnahme abgeschlossen ist, wird der
Alarm gelöscht.
– Der Alarm wird durch Drücken irgendeiner Taste gelöscht.
– Wenn das Alarmsignal bei ausgeworfener Kassette
eingegeben wird(longer Ton).
Automatische Wiederholungsaufnahme
• Wenn das Band, nachdem es sein Ende erreicht hat, zurückgespult
worden ist, läuft die Aufnahme wieder an.
(Der Alarm ertönt nur während des Zurückspulens.)
• Wenn eine Alarmaufnahme gemacht wird, wird das Band augeworfen.
34
FUNKTION
1
2
3
4
5
6
01671A SVR-24JP/960JP-Ger3
12/7/01 4:34 PM
Page 36
BEDIENUNGSFREUNDLICHE FUNKTIONEN
ANSCHLUßVERFAHREN
Das Verständnis der folgenden Funktionen ermöglicht Ihnen einfachen Informationszugang.
Betriebsverfahren
Stellen Sie das A.MEMO Display
Wenn Sie schnell das
Band ab der Stelle der
unter Verwendung der
Alarmaufnahme betrachten CNT.MEMO Taste ein.
wollen.
Drehen Sie dann den Shuttle
zum Zurückspulen.
Wenn Sie schnell
Aufnahmetag und -zeit der
Alarmaufnahme erfahren
wollen.
Drücken Sie die Taste MENU in
Betriebsart Stop.
Wählen Sie ALARM RECALL mit
den Tasten SHIFT ❷ !und ❿.
Betriebsbeschreibung
Eine anschliessen
Die Stelle der Alarmaufnahme wird
festgestellt und der Videorecorder stellt sich
für 5 Sekunden auf Pause. Das Band wird
wiedergegeben, wenn die Wiedergabetaste
gedrückt wird. Wird die Taste nicht innerhalb
von 5 Sekunden gedrückt, wird das Band
automatisch gestoppt.
1
2
Der Monitor zeigt das folgende.
1
2
3
4
5
6
ALARM RECALL
YEAR DATE TIME
2001 12/25 19:00:00
2001 12/25 17:00:00
2001 12/25 15:00:00
2001 12/25 13:00:00
2001 12/25 12:00:00
8
Alarmeingang
ALARM IN
END:MENU
Wenn Sie die COUNT Taste
einmal drücken, wird das
Alarmzählwerk auf dem Display
angezeigt.
Beispiel) A-11
Die Ziffern des Alarmzählwerks geben an,
wieviele Alarmaufnahmen gemacht
wurden. Bis zu 99 Aufnahmen sind
möglich. A-11 zeigt an, dass 11.
Alarmaufnahmen gemacht wurden.
Wenn Sie automatisch die
Kameraeingabe von
Fremdgeräten
herüberschalten wollen
(unter Verwendung der
(Auslöser-) Triggerfunktion).
Schliessen Sie den
Triggerausgang (Auslöser) der
Fremdgeräte an. Siehe
Anschlussverfahren (S.36)
Nehmen Sie im Zeitraffermodus
auf.
Dieser Videorecorder nimmt die Eingabe
jeder Kamera von Bild zu Bild, von
Halbbild zu Halbbild auf und schaltet dann
um.
Wenn Sie schnell das in
Zeitraffermodus
aufgenommene Bild
betrachten wollen [Wenn
im L8H~960H(L8H~L24H)*
Modus aufgenommen].
Drücken Sie die TIME MODE
Taste, um auf “3H” Modus
einzustellen. Drücken Sie dann
die Wiedergabetaste.
Wenn Sie die Anzahl der
Alarmaufnahmen wissen
möchten.
Erde
GND
Trigger Ausgang
TRIGGER
OUT
1 ALARM IN
2 ALARM OUT
6 TAPE END OUT 7 SERIES OUT
1
2
3
4
3 ALARM RESET 4 ERROR OUT
5 TRIGGER OUT
8 GND
9 SERIES IN
10 1 SHOT RECIN
7
9
5
6
8
10
1
2
2 3 4 5 6 7 8 R/T A/O
8
IN
IN
OUT
OUT
AUDIO
(Rückseite
SVR-24JP/
SVR-960JP)
CAMERA
PB
IN
REC MONITOR
OUT
OUT GND
VCR
FS-81MA
VIDEO
Videoausgang
VIDEO
OUT
Videoeingang
vom Monitor
Videoeingang
VIDEO IN
• Siehe Bedienungsanleitung für ausführliche
Informationen.
• R/T: Aufnahmeauslöser(REC TRIGGER)Eingang
• A/O: Alarmausgang
35
(Kamera)
CONNECTION
Anschlussverfahren
• Wenn Sie eine anschliessen, sollte ALARM
DURATION auf Position "AUTO" stehen.
• Sie brauchen den ALARM OUT, ALARM
RESET-Eingang des Videos nicht
anzuschliessen.
36
01671A SVR-24JP/960JP-Ger3
12/7/01 4:34 PM
Page 38
WARTUNG
SERIENAUFNAHME,
ALARMANSCHLÜSSE
Falls die Bildanzeige nicht scharf ist, benutzen Sie die Reinigungskassette.
Anschluss zur Serienaufnahme
IN
OUT
IN
VIDEO
OUT
Falls die Reinigungskassette schon zu oft benutzt wurde, ist dies schädlich für den Videokopf.
IN
VIDEO
1
OUT
VIDEO
(TV or MONITOR)
Geben Sie sechs bis
sieben Tropfen der
Videokopfreinigungslösung auf die
Reinigungskassette.
2
Legen Sie die
Reinigungskassette ein und
drücken Sie auf PLAY.
REC
F.F
W
RE
PLAY
P/STILL
REC CHECK
JECT
STOP/E
PE
G TA
ANIN
CLE
REV
1
2
3
4
5
6
7
8
9
10
1
2
3
4
5
6
7
8
9
10
1
2
3
4
5
6
7
8
9
10
CLE
AN
ING
LIQ
AUDIO
ON COUNT
TIMER
CNT.ME
MO CLEAR
REC LOCK
RESET
REC LOCK
UID
ER
POW
TIME
TRAC
MODE
KING/SET
SHIFT
V-LOCK
7
8
SERIEN AUSGANG
ERDE
9
MENU
SERIEN EINGANG
• Wählen Sie SERIES REC ON auf dem
Menü. (Siehe S.17, AufnahmemodusEinstellung)
• Schliessen Sie den ersten Serienausgang
an den zweiten Serieneingang an, sowie
die erste Serienerdung an die zweite
Serienerdung.
• Schliessen Sie den zweiten Serienausgang
an den nächsten Serieneingang an, sowie
die zweite Serienerdung an die nächste
Serienerdung.
CLE
AN
ING
TAP
E
3
Nach etwa 15 Sekunden
drücken Sie auf STOP um
den Vorgang zu beenden.
• Wenden Sie die Reinigungskassette nochmal an, wenn kein
normales Bild erscheint.
STOP/EJECT
Anschluss zur Alarmaufnahme
1
2
3
4
5
6
7
8
9
(Außengerät)
1
10
1 ALARMEINGANG 2 ALARMLÖSCHUNG
3 ALARMLÖSCHUNG 8 ERDE
1 ERDE
3 ALARMEINGANG
2
3
4
2 ALARMLÖSCHUNG
4 ALARMAUSGANG
(ACHTUNG) Falls es sich um ein Aussengerät handelt, müssen selbstverständlich Anschlüsse
benutzt werden die geeignet sind für den entsprechenden Alarm NGnsor.
• Im Falle des Außengeräts ist es nicht erforderlich, einen Anschluss vorzunehmen, wenn es keinen
Alarmlöschausgang und Alarmeingang gibt.
37
Der Videokopf muss unter den folgenden
Bedingungen ausgetauscht werden
Wenn das Wiedergabebild
verrauscht ist
• Das Bild auf dem Bildschirm ist undeutlich, weil
der Kopf aufgrund extensiven Gebrauchs
abgenutzt ist.
• Der Kopf kann durch mehrmalige Verwendung
beschädigter oder defekter Kassetten oder der
Reinigungskassette abgenutzt sein.
• Die Lebensdauer des Videokopfes ist aufgrund
der Umgebungsbedingungen (Temperatur,
Feuchtigkeit, Staub, usw.) unterschiedlich. Der
Videokopf sollte jedoch nach einer Nutzung von
mehr als 3.000 Stunden ausgetauscht werden
1. Drücken Sie als erstes die TRACKING Taste.
2. Überprüfen Sie, ob der Bildausgang richtig
angeschlossen ist.
3. Legen Sie die Reinigungskassette ein. Wenn
sich das Bild selbst nach Wiederholung der
obigen Verfahren nicht verbessert, wenden Sie
sich an Ihren Händler oder den Kundendienst.
38
MAINTENANCE
Rückseite SVR-24JP/SVR-960JP
01671A SVR-24JP/960JP-Ger3
12/7/01 4:34 PM
Page 40
FEHLERSUCHE
FEHLERSUCHE (FORTSETZUNG)
Überprüfen Sie das folgende, bevor Sie sich an den Kundendienst wenden.
• Überprüfen Sie, ob das
Netzkabel
angeschlossen ist.
• Drücken Sie die RESET
Taste auf der
Gerätevorderseite.
31
Keine Aufnahme oder
Wiedergabe
eine Kassette
• Sehen Sie nach, ob
eingelegt worden ist. cker und
• Ziehen Sie den Netzsten wieder an.
schliessen Sie ihn dan Taste auf der
Drücken Sie die RESET
Gerätevorderseite.
31
Kein Bild
die Eingangsauswahl
• Überprüfen Sie, ob
ist.
rs richtig angeschlossen
des Monito
der Bildeingang/• Überprüfen Sie, ob
kseite
rüc
ausgang auf der Geräte
eschlossen ist.
ordnungsgemäss ang
der Videorecorder ans
• Überprüfen Sie, ob
ist.
sen
hlos
esc
Netz ang
39
Keine Aufnahme
• Überprüfen Sie, ob die
Löschschutzlasche aus
der Kassette
herausgebrochen word
en ist. Verwenden Sie eine
Kassette,
deren Löschschutzlasche
vorhanden ist. Wenn die
Löschschutzlasche aus
der Kassette herausge
brochen worden
ist, überdecken Sie die
Öffnung mit einem Kleb
eband.
• Überprüfen Sie, ob das Band
zuende ist.
Verwenden Sie eine ande
re Kassette oder spule
n Sie das
Band zurück.
• Sehen Sie nach, ob die
P/STILL Taste gedrückt
worden ist.
Geben Sie die P/STILL
Taste frei.
• Stellen Sie sicher, dass Zeit
und Datum des Videorec
eingestellt sind (Siehe
orders
Aufnahme)
Die Bildqualität
ist schlecht mit stark
em
Rauschen
• Überprüfen Sie, ob die
Kassette mit einem
anderen Videorecorder
• Überprüfen Sie, ob der aufgenommen wurde.
Videokopf verschmutzt
ist.
• Drücken Sie die “TRACK
ING” Taste auf der
Gerätevorderseite, um
den Spurlageregler zu
verstellen oder reinigen
Sie
einer Reinigungskassette den Videokopf mit
.
Kassette lässt sich nicht
auswerfen
chalttaste, dann die
• Drücken Sie die Eins
der Videorecorder
sich
n
wen
te,
ftas
Auswur
ltet.
cha
eins
rammierte Aufnahme
• Prüfen Sie, ob die prog
ist.
llt
este
eing
Keine Timergesteuerte
Aufnahme
19~20
die
• Überprüfen Sie, dass
me richtig eingestellt ist
nah
Auf
rte
teue
rges
time
die Zeit am
13
• Überprüfen Sie, dass
estellt ist
Videorecorder richtig eing
llen ist.
gefa
aus
m
Stro
• Überprüfen Sie, ob der
” Anzeige auf
s die “
• Stellen Sie sicher, das
der Konsole leuchtet.
MAINTENANCE
Keine Funktion
40
01671A SVR-24JP/960JP-Ger3
12/7/01 4:34 PM
Page 42
FEHLERSUCHE (FORTSETZUNG)
Störung
Kassette lässt sich nicht
einlegen
Kassette lässt sich nicht
auswerfen.
TÄGLICHE ÜBERPRÜFUNGEN
Überprüfung und Einstellung
• Sehen Sie nach, ob der Netzstecker in der Steckdose
sitzt.
• Sehen Sie nach, ob bereits eine Kassette eingelegt
worden ist.
• Legen Sie die Kassette so ein, dass das Fenster oben ist
(Siehe S.21).
Keine programmierte Aufnahme. • Überprüfen Sie, ob der Programmaufnahmeeingang richtig
eingestellt ist.
• Sehen Sie nach, ob die Uhrzeit richtig eingestellt ist.
• Sehen Sie nach, ob der Strom ausgesschaltet ist.
• Überprüfen Sie, ob
auf dem Display leuchtet.
Keine Montage durch andere
Geräte.
• Überprüfen Sie, ob die Anschlüsse richtig vorgenommen
wurden.
Die Aufnahmetaste funktioniert
nicht.
• Überprüfen Sie, ob das Gerät zur Aufnahme reserviert ist.
Sie brauchen nur die Einschalttaste zu drücken.
• Die Taste kann nicht gedrückt werden, falls der Schalter
REC LOCK auf “ON”geschaltet ist”. (Wenn Sie die Taste
drücken wollen, stellen Sie den REC LOCK Schalter auf
“OFF” und drücken dann die Taste.)
Das Wiedergabebild rauscht.
• Drücken Sie zur Spurlageeinstellung die “TRACKING”
Taste. Stellt sich keine Verbesserung ein, reinigen Sie den
Videokopf mit einer Reinigungskassette.
• Sollte der Betrieb nicht normal sein
oder es Schwierigkeiten bei der
täglichen Überprüfung des
Videorecorders geben, führen Sie
entsprechend der Fehlersuche auf
S. 39-41 die angemessenen
Massnahmen durch.
• Sollten sich der anormale Betrieb oder
das Problem nicht beheben lassen,
ziehen Sie den Netzstecker und
wenden Sie sich an Ihren Händler.
Tägliche Überprüfungen
1
2
3
Schalten Sie den Videorecorder ein.
• Überprüfen Sie, ob die Bildqualität auf
dem Fernsehmonitor gut ist.
• Überprüfen Sie, ob Zeit und Datum
richtig eingestellt sind.
W
RE
F.F
• Prüfen Sie, ob das Gerät eingeschaltet ist. Wenn diese
Funktion ausgeschaltet ist, drücken Sie die Einschalttaste
und dann die Auswurftaste.
Dieser Videorecorder ist zum
Gebrauch auf regelmässiger
Basis konzipiert. Überprüfen Sie
deshalb den Zustand des
Videorecorders täglich vor dem
Gebrauch.
PLAY
Spulen Sie einen
kleinen Teil einer
am vorherigen Tag
aufgenommenen
Kassette zurück.
Drücken Sie die
PLAY Taste zur
Wiedergabe.
• Überprüfen Sie, ob es bei
der Wiedergabe
irgendwelche Probleme gibt.
• Überprüfen Sie, ob
aufgenommene Zeit und
Datum richtig eingestellt sind.
4
TIME MODE
Stellen Sie
Wiedergabezeit auf
"L3H".
5
Im Falle Übermässigen
Rauschens auf dem
Bildschirm
• Reinigen Sie den Videokopf mit einer
Reinigungskassette.
41
42
MAINTENANCE
• Wenden Sie sich im Falle anderer Probleme an den Kundendienst.
12/7/01 4:34 PM
Page 44
BEVOR SIE DEN TECHNIKER RUFEN
1
2
TECHNISCHE DATEN
Unsachgemässe Behandlung durch den Benutzer liegt ausserhalb der
Garantie:
Starke Stösse.
Videokopfbeschädigung durch unsachgemässe Reinigung.
Fremdstoffe im Gerät.
Unberechtigte interne Modifikationen durch den Benutzer.
Gebrauch bei hoher oder niedriger Temperatur, hoher Feuchtigkeit oder in
rauchgefüllter Umgebung.
Anderer als der in der Anleitung beschriebene Betrieb.
Verwendung anderer als der für das Gerät vorgeschriebenen Stromquellen.
Tabelle zu Reinigung, Schmierung und
Auswechslung der Hauptzubehörteile
• Die Werte in dieser Tabelle beziehen sich auf normale Temperatur und Feuchtigkeit. Bei
extremen Bedingungen ist eine höufigere Kontrolle erforderlich.
• Die Lebensdauer der Zylinder-Einheit ist von den Betriebsbedingungen abhängig.
• Wenn Sie Fragen haben sollten, wenden Sie sich bitte an einen autorisierten Techniker.
◆ : Bedarf : Ölen
Schrägspuraufzeichnung mit Rotationskopf, Luminanzsignal
FM-Aufzeichnung, Farbbildsignal über umgewandelte
Direktaufzeichnung
Videoformat
PAL
Bandgeschwindigkeit
23,39 mm/sec (Betriebsart L3H; E-180)
Videokassette
Verwendbare Videokassette
Bedienung des Zeitzählwerks
Bitte beachten Sie, dass es eine maximale Zeit von 9999 anzeigt.
Siehe die Alarmfunktion für den ordnungsgemässen Betrieb.
▲ : Reinigung ● : Kontrolle & Auswechslung bei
Aufnahmeverfahren
: Auswechseln der
Aufnahmedauer
L3H/L8H/L12H/L24H/000H : SVR-24JP
L3H/L8H/L12H/L24H/36H/48H/72H/120H/168H/240H/480H/960H/
000H : SVR-960JP
Rückspulzeit
Etwa 100 Sekunden (E-180 Kassette, Rückspulzeit)
Bildeingang/-ausgnag
1,0 Vp-p (unsymmetrisch) 75
Bild-Rauschabstand
Über 42dB (L3H Aufnahme)
Audio-Eingangspegel
-8dB (Betriebsart L3H)
Audio-Ausgangspegel
-8dB (Betriebsart L3H)
Audio-Rauschabstand
Über 40dB (L3H Aufnahme)
Charakteristika der
Tonfrequenz
100-5.000Hz (L3H Aufnahme)
Betriebsspannung
AC 100-240V
Nennfrequenz
50~60Hz
Leistungsaufnahme
16W
Umgebungstemperatur
5˚C ~ 40˚C (41˚F ~ 104˚F)
Aufstellungsbedingungen
Betriebslage: Horizontal
Relative Luftfeuchtigkeit: Unter 80%
500
1000
2000
3000
4000
5000
6000
8000
10000
BANDFÜHRUNGSTIFTE
▲
▲
▲
▲
▲
▲
▲
▲
▲
Abmessungen
430mm (B) x 97mm (H) x 294mm (T)
ZYLINDER-EINHEIT
▲
●
●
●
●
●
●
●
Gewicht
4 kg
ANDRUCKROLLE
▲
▲
▲
▲
▲
●
●
●
Zubehör
Bedienungsanleitung
CAPSTANMOTOR
▲
▲
▲
▲
▲
▲
▲
▲
●
●
●
RIEMENSCHEIBE
MAGNETBREMSE-EINHEIT
●
●
●
●
●
●
MAINTENANCE
01671A SVR-24JP/960JP-Ger3
*Hinweis
– Zur Reinigung der Zubehörteile verwenden Sie bitte ein Tuch und etwas Alkohol (Lösungsmittel).
– Nach der Reinigung benutzen Sie Videokassetten erst dann, wenn der Alkohol vollkommen
–
–
–
–
43
getrocknet ist.
Wir empfehlen Ihnen, Öl [EP-56] oder Lösungsmittel zu verwenden.
Nach der Reinigung mit Alkohol sollten ein oder zwei Tropfen Öl aufgetragen werden.
Tragen Sie regelmäßig Öl auf (nach jeder Reinigung).
Übermäßiges Auftragen von Öl kann Funktionsstörungen verursachen.
44
01671A SVR-24JP/960JP-Ita1
12/7/01 4:37 PM
Page 1
SVR-24JP
SVR-960JP
Videoregistratore a
intervalli fissi
Istruzioni per
l’Installazione e l’Uso
01671A SVR-24JP/960JP-Ita1
12/7/01 4:37 PM
Page 2
IMPORTANT SAFEGUARDS
1
Code Articolo 820 per quanto riguarda l'installazione di impianti
CATV.
14. Sovraccarico - Non sovraccaricare le prese e cavi di prolunga
poiché questo può causare rischi di folgorazione o incendio.
15. Inserimento di Oggetti o Versamento di Liquidi - Nono spingere mai
oggetti di alcun tipo attraverso le aperture di questo apparecchio
poiché potrebbero entrare in contatto con punti pericolosi sotto
tensione o mettere in corto circuito elementi che potrebbero
provocare incendio o folgorazione. Non versare mai liquidi di alcun
tipo sull'apparecchio.
16. Manutenzione - Non cercare mai di provvedere da soli alla
manutenzione di questo apparecchio poiché l'apertura e rimozione
delle protezioni potrebbe esporvi a tensioni pericolose o altri pericoli.
Fare eseguire tutti gli interventi di manutenzione a personale tecnico
qualificato.
17. Danni che Richiedono Assistenza - Staccare l'apparecchio della
presa di alimentazione e fare eseguire l'intervento di assistenza da
personale tecnico qualificato quando si verificano le seguenti
condizioni:
a. Quando il cavo di alimentazione o la spina sono danneggiati.
b. Nel caso liquido sia stato versato sull'apparecchio o vi siano stati
introdotti corpi estranei.
c. Se l'apparecchio è stato esposto alla pioggia o acqua.
d. Se l'apparecchio non funziona normalmente nonostante si seguano
le istruzioni d'uso. Regolare solamente i comandi trattati dalle
istruzioni d'uso, poiché una regolazione scorretta degli altri comandi
può causare danni, che spesso richiedono molto lavoro da parte di
un tecnico qualificato per riportare l'apparecchio nelle condizioni
normali di funzionamento.
e. Se l'apparecchio è caduto in terra o il rivestimento esterno è
danneggiato
f. Un chiaro cambiamento nelle prestazioni dell'apparecchio indicano la
necessità di manutenzione.
18. Pezzi di Ricambio - Quando sono necessari pezzi di ricambio,
accertarsi che il tecnico utilizzi pezzi di ricambio specificati dal
fabbricante o che abbiano le stesse caratteristiche del pezzo
originale. Sostituzioni non autorizzate possono causare incendio,
folgorazione o altri pericoli.
19. Controllo di Sicurezza - Dopo avere completato qualsiasi intervento
di manutenzione o riparazione a questo apparecchio, chiedere al
tecnico di effettuare i controlli di sicurezza per verificare che
l'apparecchio si trovi nelle giuste condizioni di funzionamento.
20. Messa a terra Coassiale - Quando viene collegato all'impianto un
sistema esterno di cablaggio, verificare che il cavo sia messo a terra.
Solo modelli U.S.A- La sezione 810 del National Electrical Code,
ANSI/NFPA No. 70-1981, fornisce informazioni relative alla giusta
messa a terra di conduttori e strutture di sostegno, la messa terra del
cavo coassiale su un'unità di scarica, collegamento a elettrodi di
terra, ed i requisiti dell'elettrodo di terra.
21. Fulmini - Per proteggere ulteriormente questa apparecchiatura
durante i temporali o quando viene lasciata senza supervisione o
non viene usato per un lungo periodo di tempo, staccare la spina di
alimentazione dalla presa della corrente.
INFORMAZIONE FCC & ICES
(Solo i modelli U.S.A e Canadesi)
AVVERTENZA - Questa apparecchiatura è stata testata e trovata
conforme ai limiti previsti per un dispositivo digitale della Classe B, in
conformità alla Sezione 15 delle regole della FCC. Questi limiti sono
stati disegnati al fine di fornire una protezione relativa ad interferenze
dannose nelle installazioni residenziali. Questo apparecchio utilizza,
genera e può irradiare radiofrequenze e, se non installato ed
utilizzato in conformità alle istruzioni fornite, può causare interferenze
dannose alle comunicazioni radio.
Ciononostante non ci sono garanzie che tali interferenze non si
possano verificare in alcuna installazione specifica. Se questo
apparecchio causa interferenze dannose alla ricezione
radiotelevisiva, fatto che può essere rilevato accendendo e
spegnendo l'apparecchio, si invita l'utente a provare a risolvere
l'interferenza seguendo una o più delle procedure elencate:
- Orientare nuovamente o localizzare in una nuova posizione l'antenna
Safety Precautions
Securite
CAUTION
ATTENTION
RISK OF ELECTRICK SHOCK
DO NOT OPEN!
RISQUE DE CHOC ELECTRIQUE,
NE PAS OUVRIR.
CONFIGURA
ZIONE
1. . Leggere le istruzioni - Prima di mettere in funzione l'apparecchio è
necessario leggere tutto il materiale informativo e le avvertenze
relative alla sicurezza.
2. Conservare le istruzioni - Il manuale di istruzioni e le avvertenze
relative alla sicurezza devono essere conservati in un posto
accessibile per riferimento futuro.
3. Seguire le Avvertenze - Tutte le avvertenze riportate sull'apparecchio
e nelle istruzioni d'uso devono essere seguite alla lettera.
4. Seguire le Istruzioni - È necessario seguire tutte le istruzioni di
esercizio e uso..
5. Pulizia - Staccare l'apparecchio dalla presa della corrente prima di
procedere con la pulizia. Non usare detergenti liquidi o aerosol. Per
pulire usare un panno umido.
6. Accessori - Non usare accessori che non siano stati consigliati dal
fabbricante dell'apparecchio, poiché potrebbero creare pericolo.
7. Acqua e Umidità - Non usare questo apparecchio vicino all'acqua per esempio, vicino una vasca da bagno, un lavandino, lavello,
bacinella, in uno scantinato bagnato, vicino ad una piscina, in
un'installazione all'esterno non protetta o in qualsiasi zona che possa
essere classificata come zona bagnata.
8. Accessori - Non posizionare l'apparecchio su un
supporto instabile, staffa o treppiede, o sostegno.
L'apparecchio potrebbe cadere causando gravi
lesioni alla persona e danni seri all'apparecchio
stesso. Usare solamente con un supporto,
treppiede, staffa o sostegno consigliati dal
produttore, o venduti con l'apparecchio stesso.
Qualsiasi montaggio effettuato sull'apparecchio
deve essere effettuato seguendo alla lettere le istruzioni del
fabbricante. Una combinazione di apparecchio e carrello dovrebbe
essere sempre spostata facendo la massima attenzione. Fermate
improvvise, forza eccessiva, e superfici irregolari, possono far
capottare la combinazione di carrello e apparecchio.
9. Ventilazione - Le fessure, dove presenti, sono state fornite al fine di
provvedere ad un'adeguata ventilazione ed assicurare un
funzionamento corretto dell'apparecchio e per impedirne il
surriscaldamento. Queste fessure non devono essere ne bloccate ne
coperte. L'apparecchio può essere collocato in uno spazio racchiuso
solamente se viene fornita una adeguata ventilazione ed a patto che
le istruzioni del fabbricante vengano seguite alla lettera.
10. Fonte di Alimentazione - Usare per questa apparecchio solamente il
tipo di alimentazione indicato sulla targhetta dell'apparecchio stesso.
Se non si è sicuri del tipo di alimentazione che si andrà ad usare,
consultarsi con I proprio rivenditore o ente locali di erogazione di
energia elettrica.
11. Messa a Terra o Polarizzazione - È possibile che l'apparecchio sia
provvisto di una spina di rete polarizzata per la corrente alternata
(una spina fornita di una lama più larga dell'altro). Questa spina potrà
essere inserita nella presa di alimentazione per un solo verso.
Questa è una funzione di sicurezza, provate a invertire la spina. Se
la spina non entra nella presa, contattate un elettricista per sostituire
la vostra presa obsoleta. Non interferite con la spina polarizzata
annullandone lo scopo. In alternativa, l'unità potrebbe essere fornita
di una spina a tre poli con filo di terra, una spina fornita di un terzo
spinotto per la terra (per la terra). Questa spina potrà essere inserita
solamente in una presa fornita di terra. Questa è una funzione di
sicurezza. Se la spina non entra nella presa, contattate un elettricista
per sostituire la vostra presa obsoleta. Non interferite con la spina
fornita di presa di terra annullandone lo scopo.
12. Protezione del Cavo di Alimentazione - I cavi di alimentazione
devono essere disposti in modo che non ci si possa camminare
sopra, o schiacciati da elementi che vi vengano collocati sopra,
facendo particolare attenzione ai cavi, le spine, alloggiamenti ed il
punto in cui escono dall'apparecchio.
13. Linee Elettriche - Un impianto installato all'esterno non deve essere
installato nelle vicinanze di linee elettriche o circuiti aerei, o in
posizioni dove possa ricadere all'interno di questo tipo di linee o
circuiti. Nell'installazione di un impianto esterno, fare molta
attenzione che non entri in contatto con questo tipo di linee di
alimentazione o circuiti poiché il contatto con questi può essere
fatale. Solo modelli U.S.A. - fare riferimento al National Electrical
CAUTION: TO REDUCE THE RISK OF
ELECTRICAL SHOCK, DO NOT OPEN COVERS.
NO USER SERVICEABLE PARTS INSIDE.
REFER SERVICING TO QUALIFIED SERVICE
PERSONNEL.
Danger: Pour éviter tout risque d'électrocution, ne
pas ouvrir le boîtier. Il n'y a pas de pièces
remplaçables à l'intérieur. Pour toute révision,
s'adresser à un technicien spécialisé.
This label may appear on the bottom of the unit due to
space limitations.
Cet étiquette peut apparaître en dessous de l'appareil
dû aux limitations d'espace.
The lightning flash with an arrowhead
symbol, within an equilateral triangle, is
intended to alert the user to the
presence of uninsulated "dangerous
voltage" within the unit's enclosure that
may be of sufficient magnitude to
constitute a risk of electric shock to
persons.
L'éclair fléché dans un triangle
équilatéral avertit l'utilisateur de la
présence d'une haute tension non
isolée à l'intérieur de l'appareil. Elle peut
être d'une magnitude suffisante pour
constituer un risque d'électrocution.
The exclamation point within an
equilateral triangle is intended to alert
the user to presence of important
operating and maintenance (servicing)
instructions in the literature
accompanying the appliance.
Le point d'exclamation à l'intérieur d'un
triangle équilatéral avertit l'utilisateur de
la présence d'instructions importantes
d'utilisation et de maintenance dans la
documentation accompagnant
l'appareil.
Warning
To prevent fire or shock hazard, do not expose
units not specifically designed for outdoor use to
rain or moisture.
Attention
Pour éviter un incendie ou une électrocution, ne pas
exposer les appareils qui ne sont pas conçus spécifiquement pour usage extérieur à la pluie ou à l'humidité.
Attention: Installation should be
performed by qualified service
personnel only in accordance with the
National Electrical Code or applicable
local codes.
Attention: L'installation doit être
effectuée uniquement par du personnel
de service qualifié conformément à la
réglementation du Code Electrique
National ou à la réglementation locale.
Power Disconnect. Units with or
without ON-OFF switches have power
supplied to the unit whenever the power
cord is inserted into the power source;
however, the unit is operational only
when the ON-OFF switch is in the On
position. The power cord is the main
power disconnect for all units.
Disjonction de l'alimentation.
Les appareils avec ou sans commutateure
ON-OFF sont alimentés à chaque fois que
le cordon d'alimentation est branché à la
source d'alimentation; toutefois, les
appareils disposant de commutateurs ONOFF ne fonctionnent que lorsque le
commutateur ON-OFF est sur la position
ON. Le cordon d'alimentation est la
disjonction d'alimentation principale pour
tous les appareils.
2
Page 4
AVVISI DI SICUREZZA
Precauciones De Seguridad
RIESGO DE CHOQUE
ELECTRICO INO ABRIRI
Warnung: Verhindern Sie einen möglichen
Elektroschlag, indem Sie die Abdeckung nicht
entfernen. Wenden Sie sich bei der Wartung an
dafür qualifiziertes Personal.
Dieses Zeichen kann aus Platzgründen auf der
Unterseite des Gerätes angebracht sein.
Dieses Zeichen weist den Benutzer auf
die nicht isolierte Hochspannung
innerhalb der Anlage hin. Es besteht die
Gefahr eines Elektroschlages.
Das Ausrufezeichen in dem
gleichseitigen Dreieck ist dazu da, den
Benutzer auf wich-tige Inbetriebnahmeund Instandhaltungs-vorschriften
hinzuweisen, die dem Gerät in Form
einer Broschüre beigelegt sind.
Warnung
Um das Risiko von Feuer oder Elektroschlag zu
vermeiden, darf weder das Gerät selbst, noch das
Netzgerät Regen oder Feuchtigkeit ausgesetzt werden.
Precaution: Pare Reducir El Riesgo De Choque
Eléctrico, Favor No Abrir La Cubierta. Este Equipo
No consta De Piezas O Partes Que Requieren
Servicio O Mantenimiento. Para Reparaciones
Favor Referirse A Un Técnico Calificado.
Debido a limitaciones de espacio, esta etiqueta puede
aparecer en la parte inferior de la unidad.
El símbolo representado por un relámpago
con punta de flecha dentro de un triángulo
equilátero, se muestra con el objetivo de
alertar al usuario que existen "voltages
peligrosos" sin aislamiento, dentro de la
cubierta de la unidad. Dichos voltages
pueden ser de tal magnitud que constituyen
un riesgo de choque eléctrico a personas.
El símbolo de exclamación dentro de
un triángulo equilátero, se muestra con
el objetivo de alertar al ususario de que
instrucciones de operación y
mantenimiento importantes acompañan
al equipo.
Peligro
Para evitar el peligro de incendio ó choque eléctrico, no
exponga a la lluvia ó humedad, equipos que no han sido
diseñados para uso exterior.
CONFIGURATION
Important Safeguards
Contents
Controls and Indicators
Connectors
Set Up
1
4
5
8
9
MENU
Come impostare il menu
Come impostare l’ora corrente
Setting Menu
11
13
16
PLAYBACK
Operation
Various Playbacks
21
23
RECORDING
Impostare prima della registrazione
Record Locking
Basic Recording
Series Recording
Alarm Recording
DESCRIZIONE
33
35
INSTALLAZIONE
36
37
MAINTENANCE
Maintenance
Troubleshooting
Daily Checks
Before Requesting Service
Specifications
NOTA BENE: Quando si maneggiano le
schede di circuito stampato - sensibili alle
scariche elettrostatiche - indossare fasce
per polsi a massa ed osservare le norme di
sicurezza adeguate ESD.
Il videoregistratore a cassette tipo
SVR-24JP/SVR-960JP offre un sistema ad
intervallo di tempo con velocità selezionabili di
3~24 ore, per rendere possibili diverse
applicazioni del CCTV (televisore a circuito
chiuso).
CONNECTION
Method of Connection
Series Recording, Alarm Connections
ATTENZIONE: Dispositivo sensibile alle
scariche elettrostatiche. Per evitare
scariche elettrostatiche, osservare le debite
precauzioni d’uso CMOS/MOSFET.
27
28
29
31
32
FUNCTION
Alarm Functions
Convenient Functions
SERVIZIO ASSISTENZA
38
39
42
43
44
Installare il videoregistratore
SVR-24JP/SVR-960JP in un ambiente nel
quale la temperatura sia da +5°C a +40°C, e la
relativa umidità sia da 0% a 80%, senza
condensazione.
Nota:
3
Para Desconectdar la Alimentación:
Unidades no equipadas con interruptores
ON/OFF, son alimentadas cuando el cable
de alimentación, es conectado a la corriente
eléctrica. Las unidades equipadas con
interruptores son alimentadas de igual
forma, pero adicionalmente requieren qur el
interruptor esté posicionado en ON. El cable
de alimentación es el medio principal de
desconexión del equipo.
Disimballare con attenzione. Questa è
un’apparecchiatura elettronica e deve essere
maneggiata con cura.
Se un elemento fosse stato danneggiato durante
la spedizione, riporrlo nel proprio imballo nel
modo appropriato e rivolgersi allo spedizioniere.
Se mancasse qualche elemento, rivolgersi al
proprio rappresentante di vendita o al servizio dei
clienti.
MANUTENZIONE
Netzanschluß. Geräte mit oder ohne
Netzschalter haben Spannung am
Gerät anliegen, sobald der Netzstecker
in die Steckdose gesteckt wird. Das
Gerät ist Jedoch nur betriebsbereit,
wenn der Netzschalter (EIN/AUS) auf
EIN steht. Wenn man das Netzkabel
aus der Stekdose zieht, dann ist die
Sapnnungszuführung zum Gerät
vollkommen unterbrochen.
Atención: La instalación de este equipo
debe ser realizada por personal capacitado,
solo en acuerdo, y en cumplimiento de
normas del "National Electric Code" (Código
Eléctrico Nacional) ó las normas del
Gobierno Nacional Local.
COLLEGAMENTO
DISIMBALLAGGIO
Achtung!: Die Installation sollte nur von
qualifiziertem Kundendienstpersonal
gemäß jeweilig zutreffender
Elektrovorschriften ausgeführt werden.
CONFIGURA
ZIONE
PRECAUTION
MENU
ACHTUNG!
HOCHSPANNUNGSGEFAHR
NICHT ÖFFNEN!
RIPRODUZIONE
Sicherheitsvorkenhrungen
SOMMARIO
REGISTRAZIONE
12/7/01 4:37 PM
FUNZIONI
01671A SVR-24JP/960JP-Ita1
Lo scatolone d’imballo è il contenitore più sicuro
nel quale l’apparecchio possa essere trasportato.
Si raccomanda quindi di tenerlo, nell’eventualità
che venga usato in futuro.
Quando si premono i tasti sulla parte anteriore è possibile sentire dei clic E’ un suono normale
causato dalla “solenoide” che serve a controllare la rotazione del motore del capstan Il motore del
capstan in questo VCR è su cuscinetti a sfera che hanno una durata superiore a 10,000 ore.
4
01671A SVR-24JP/960JP-Ita1
12/7/01 4:37 PM
Page 6
22 21 20
19
18 17 16
REC
F.F
PLAY
W
RE
N.
ECK
JECT
STOP/E
CK
REC LO
TIMER
RESET
EAR
O CL
CNT.MEM
COUNT
ON
DIO
AU
REV
POWER
Premere per accendere/spegnere
MENU
Premere per visualizzare il menu
11
3
SHIFT ❷ , ❿
Premere per impostare menu e orologio
11
Premere per regolare tremolio dell’immagine
22
4
TRACKING/SET
Premere per regolare l’allineamento e impostare menu e orologio
22
5
MODO ORA
Premere per modificare il modo ora durante la riproduzione
24
6
LED BLOCCO REC
Record locking mode on/off indicator
28
7
DISPLAY PANEL
Visualizza le regolazioni correnti per
il funzionamento dell’apparecchio
7
8
REV
Premere per invertire il movimento
di riproduzione (solo modo L3H)
25
9
AUDIO ON
Premere per controllare l-audio acceso&spento
10
COUNT
Inizio: visualizza il contatore del nastro
V-LOCK
,
ER
POW
TIME
TRAC
KIN
MODE
G/SET
12
11
10
9
8
T
SHIF
CK
V-LO
MENU
1
ACCESSORIO
2
3
4
5
6
7
Pannello
del display
1
CK
REC LO
15
14
13
Descrizione
2
P/STILL
REC CH
Nome
11
CNT. MEMO
,
,
21
Una volta: premere per visualizzare
i tempi di ingresso dell’allarme
34
Due volte: premere per visualizzare
l’orario di funzionamento
33
Inizio: visualizza il contatore del nastro
Una volta: premere per visualizzare
la memoria del contatore
25
Due volte: premere per visualizzare
la memoria dell’allarme
34
12
CLEAR
Premere per azzerare il contatore
34
13
RESET
Premere per azzerare le regolazioni
dell’apparecchio
31
14
TIMER
Premere per predisporre la registrazione a timer
20
15
REC LOCK
Usare per selezionare il modo del
sistema di protezione della registrazione
28
16
REC CHECK
Premere per controllare la registrazione
(riproduzione rapida) durante la registrazione
29
17
P/STILL
Premere per bloccare il fotogramma sulla
riproduzione o per fare pausa nel modo registrazione
26
18
REC
Premere per registrare.
29
19
SHUTTLE
Usare per il funzionamento del nastro
22
20
JOG
Ruotare per avanzare o mandare indietro un fotogramma alla volta
26
21
PLAY
Premere per riprodurre un nastro
22
22
STOP/EJECT
Premere per l’arresto e espulsione del il nastro
22
MANUALE PER L’USO
5
6
CONFIGURA
ZIONE
CONTROLLI ED INDICATORI
12/7/01 4:37 PM
Page 8
CONTROLLI ED INDICATORI
COLLEGAMENTI
LATO ANTERIORE
LATO POSTERIORE
Display di registrazione Display di preselezione della Display di registrazione
con allarme
• Si illumina durante la
registrazione
Spia REC LOCK
• Si accende durante il modo
blocco registrazione.
• Si illumina dopo aver premuto il • Si illumina durante la
registrazione con allarme
tasto del timer per la
registrazione di un programma. ed emette un tremolio al
completamento della
registrazione.
registrazione.
Display di
presenza/assenza
videocassetta
TERMINALI DELL’APPARECCHIO ESTERNO
Display del modo
tempo REC/PLAY
1 ALARM IN
2 ALARM OUT
6 TAPE END OUT 7 SERIES OUT
1
2
3
4
3 ALARM RESET 4 ERROR OUT
5 TRIGGER OUT
8 GND
10 1 SHOT RECIN
5
9 SERIES IN
6
7
8
9
10
RS-232C
IN
IN
REC LOCK
C.MEMO
A.MEMO
HOUR
REC
FAULT
T-END
Visualizzazione fine
nastro.
AUDIO
• Lampeggia al ritorno
della corrente alternata .
• Si spegne premendo un
tasto qualsiasi.
PRESA SPINA DI
ALIMENTAZIONE
"
PRESA JACK
D’INGRESSO/USCITA AUDIO
(TIPO RCA)
INFORMAZIONI SUI TERMINALI DELL’APPARECCHIO ESTERNO
GND
1
2
3
4
5
6
3 ALARM RESET
Fermo
Lampeggia
Pausa
Lampeggia
REC
Riproduzione lenta
Lampeggia e ruota in senso orario
Timer Registrazione
Ruota in senso orario
REC
Ricerca avanti
Ruota rapidamente in senso orario
Registrazione con allarme
Ruota in senso orario
Ricerca indietro
Ruota rapidamente in senso antiorario
Riavvolgimento
Ruota rapidamente in senso antiorario
Riproduzione reverse
Ruota in senso antiorario
Avanzamento rapido
Ruota rapidamente in senso orario
Riproduzione
reverse lenta
Lampeggia e ruota lentamente
in senso antiorario
REC
4 ERROR OUT
4 ~ 5V
0 ~ 0,6V
Registrazione con allarme
4 ~ 5V
0 ~ 0,6V
Più di 0,5 secondi
VIH
VIL
T
VIH
VIL
T
:
:
:
:
:
:
4 ~ 5V
0 ~ 0,6V
USCITA
4 ~ 5V
0 ~ 0,6V
Più di 8m secondi
USCITA
:
:
:
:
:
:
4 ~ 5V
0 ~ 0,6V
Durante l’ingresso di un tasto qualsiasi
4 ~ 5V
0 ~ 0,6V
Più di 1 secondo
USCITA
T
VIH
VIL
T
VIH
VIL
T
VIL
INGRESSO
T
VIH : 4 ~ 5V
VIL : 0 ~ 0,6V
T
: Più di 0,5 secondi
VIL
VIH : 4 ~ 5V
VIL : 0 ~ 0,6V
T
: Più di 0,5 secondi
INGRESSO
VIH
VIL
VIH
VIL
T
5 TRIGGER OUT
VIH
VIL
T
6 TAPE END OUT
VIH
VIL
T
7 SERIES OUT
VIH
VIL
8 GND
9 SERIES IN
10 1 SHOT REC IN
0V
VIH
VIH
T
7
TIPO
:
:
:
:
:
:
VIL
T
REC
10
VIH
VIL
T
VIH
VIL
T
T
VIH
T
Ruota in senso orario
9
: 4 ~ 5V
: 0 ~ 0,6V
: Più di 0,5 secondi
1 ALARM IN
Display altre funzioni
8
VIH
VIL
T
VIL
2 ALARM OUT
Registrazione
7
LIVELLO DEL SEGNALE
VIH
DISPLAY DELLE CONDIZIONI DI FUNZIONAMENTO
Ruota in senso orario
PRESA JACK
D’INGRESSO/USCITA VIDEO
(TIPO BNC)
Display memoria
allarme/contatore
NOME DEL TERMINALE
Display di riproduzione
VIDEO
H
• Memoria contatore:
C. MEMO
• Memoria allarme:
A. MEMO
• Display orario di
funzionamento:
HOUR
Display di ritorno dopo un’
interruzione di energia
elettrica
OUT
OUT
Display del contatore
• Display dell’orario di
funzionamento
• Si accende quando il
videoregistratore giunge • Display memoria
allarme/contatore "
alla fine del nastro.
Riproduzione
CONFIGURA
ZIONE
01671A SVR-24JP/960JP-Ita1
INGRESSO
USCITA
INGRESSO
USCITA
GND
8
01671A SVR-24JP/960JP-Ita1
12/7/01 4:37 PM
Page 10
PREPARAZIONE
• Controllare le seguenti preparazioni prima di utilizzare questo apparecchio.
• La forma della spina della corrente nella realtà può essere diversa da quella raffigurata nel
manuale.
Collegare il monitor a
questo apparecchio.
2
Collegare la telecamera
CCD a questo
apparecchio.
3
Inserire la spina di
alimentazione di questo
apparecchio videoregistratore
nella presa di corrente a muro.
• Inserire la spina nella presa di
corrente alternata AC 100-240V.
4
Accendere il monitor.
• Se si usa un monitor, accenderlo.
(premere POWER)
• Se si usa un televisore, accenderlo e
selezionare il canale d’ingresso al
video.
• Vedere le istruzioni di funzionamento
per ulteriori dettagli sul televisore.
CONFIGURA
ZIONE
1
MONITOR
6
7
8
9
IN
OUT
VIDEO
1 ALARM IN
2 ALARM OUT
6 TAPE END OUT 7 SERIES OUT
ENTRATA
VIDEO
1
2
3
4
3 ALARM RESET 4 ERROR OUT
8 GND
5
9 SERIES IN
6
7
8
AC 100~240V
POWER
5 TRIGGER OUT
10 1 SHOT RECIN
9
10
RS-232C
IN
IN
OUT
OUT
AUDIO
VIDEO
1 ALARM IN
2 ALARM OUT
6 TAPE END OUT 7 SERIES OUT
1 ALARM IN
2 ALARM OUT
6 TAPE END OUT 7 SERIES OUT
3 ALARM RESET 4 ERROR OUT
8 GND
9 SERIES IN
3 ALARM RESET 4 ERROR OUT
8 GND
9 SERIES IN
5 TRIGGER OUT
10 1 SHOT RECIN
5 TRIGGER OUT
10 1 SHOT RECIN
1
2
3
4
5
6
7
8
9
10
RS-232C
IN
1
2
3
4
5
6
7
8
9
10
IN
RS-232C
IN
IN
AUDIO
AUDIO
VIDEO
VIDEO
IN
IN
OUT
OUT
OUT
OUT
OUT
CCD CAMERA
OUT
AUDIO
9
VIDEO
10
01671A SVR-24JP/960JP-Ita1
12/7/01 4:37 PM
Page 12
COME IMPOSTARE IL MENU
1. OROLGIO IMPOSTA/REGOLA
1
Premere il tasto MENU
(Non viene visualizzato se
l’apparecchio sta funzionando o finchè
l’ora non sia stata regolata).
CLOCK SET/ADJUST
1 ❿ SUMMER TIME SET (USE)
2 DISPLAY MODE (YY-MM-DD)
3 CLOCK SET/ADJUST
YEAR
2001
DATE
TIME
01/01 MON 12:00
5. PREPARAZIONE MODO VCR
(videoregistratore)
VCR MODE SETUP
1 ❿ TRIGGER --------------------(1FIELD)
2 V-SYNC ----------------------------(ON)
3 BUZZER ---------------------------(ON)
4 TAPE LENGTH ----------------(E240)
$
END:MENU
(❷❿)
2. PREPARAZIONE MODO DISPLAY
MAIN MENU
1 ❿ CLOCK SET/ADJUST
2 DISPLAY MODE SETUP
3 ALARM REC SETUP/RECALL
4 REC MODE SETUP
5 VCR MODE SETUP
6 PROGRAM SETUP
7 POWER LOSS MEMORY
(❷❿)
END:MENU
DISPLAY MODE SETUP
1 ❿ DATE DISPLAY ------------------(ON)
2 TIME DISPLAY-------------------(ON)
3 POSITION -------------(R-BOTTOM)
(❷❿)
END:MENU
• Regola il formato orario/data desiderato
e la posizione sullo schermo.
2
Per selezionare una
funzione del menu,
premere il tasto SHIFT ❷.
(Il segno “❿” si sposta verso il basso,
avanzando di una posizione ogni volta
che il tasto viene premuto).
3
Dopo avere posizionato il
carattere "❿" vicino alla
voce desiderata del menu,
prmere il tasto SHIFT ❿.
• Visualizza il menu selezionato sullo
schermo.
(Vedere alle pagine 13-20).
6. PREPARAZIONE PROGRAMMA
PROGRAM SETUP1
START STOP DATE
MODE
•❿
•
•
•
• PROGRAM SETUP2
•
( ❷❿ /– +,CLEAR)
•
•
•
•
•
•
❿
(❷❿/– +)
END:MENU
• Seleziona il modo Alarm REC.
PROGRAM SETUP1
(❷❿)
END:MENU
• Impostare ripeti modo registrazione,
modo 1-shot record e modo
registrazione in serie
END:MENU
• Seleziona la registrazione del
programma.
7. MEMORIA PERDITA DI ENERGIA
REC MODE SETUP
1 ❿ REPEAT REC-------------------(OFF)
2 SERIES REC -------------------(OFF)
3 1-SHOT REC--------------------(OFF)
END:MENU
PROGRAM SETUP2
START STOP DATE
MODE
( ❷❿ /– +,CLEAR)
4. PREPARAZIONE MODO REC
(registrazione)
11
END:MENU
• Aziona il controllo dei tempi ed il
controllo del segnale acustico.
3. PREPARAZIONE ALARM REC
(registrazione con allarme)
ALARM REC SETUP/RECALL
1 ❿ MODE -----------------------------(L3H)
2 DURATION --------------------(AUTO)
3 BUZZER ---------------------------(ON)
4 ALARM RECALL
MENU
(❷❿/– +)
MENU
•
•
•
POWER LOSS MEMORY
YEAR DATE TIME
OFF
ON
OFF
ON
OFF
ON
END:MENU
• Visualizza l’interruzione di energia elettrica
e ripristina le regolazioni originarie.
12
01671A SVR-24JP/960JP-Ita2
12/7/01 4:36 PM
Page 14
REGOLAZIONE DELL’ORARIO ATTUALE
– COME REGOLARE DELL’ORA LEGALE
Esempio) Dicembre 25. 2002 13:30
Premere il tasto MENU.
• Alla pressione del tasto MENU, viene
visualizzato il MENU PRINCIPALE.
2
Premere il tasto SHIFT ❿.
• Alla pressioen del tasto SHIFT ❿,
viene visualizzata
IMPOSTAZIONE/REGOLAZIONE
OROLOGIO.
MENU
3
Premere il tasto SHIFT ❿.
• Alla che viene premuto il tasto SHIFT
❿ , viene visualizzato il dell’ora legale.
• Premero il tasto SHIFT ❿!per passare
dell’ora accesso a spento.
4
Premere il tasto SHIFT ❷.
• Seleziona dell’ora legale in.
SHIFT
V-LOCK
SHIFT
V-LOCK
SHIFT
V-LOCK
MAIN MENU
1 ❿ CLOCK SET/ADJUST
2 DISPLAY MODE SETUP
3 ALARM REC SETUP/RECALL
4 REC MODE SETUP
5 VCR MODE SETUP
6 PROGRAM SETUP
7 POWER LOSS MEMORY
(❷❿)
5
MENU
1
CLOCK SET/ADJUST
1 ❿ SUMMER TIME SET (USE)
2 DISPLAY MODE(YY-MM-DD)
3 CLOCK SET/ADJUST
YEAR
2001
SUMMER TIME SET
1 ❿ SUMMER TIME
(USE)
2 SUMMER TIME IN
3 SUMMER TIME OUT
DATE
TIME
01/01 MON 12:00
$
(❷❿/– +)
END:MENU
IN
OUT
END:MENU
WEEK
MONTH TIME
LAST /FRI
2
9:00
FIRST /SUN 12
12:00
(❷❿/– +)
Impostare il settimana, il
giorno, il mese ed l’ora
tramite i tasti TRACKING/
SET
.
6
Premere il tasto SHIFT ❷
ed impostare dell’ora legale
verso l’esterno.
• Dopo avere impostato il settimana
premere il pulsante SHIFT ❿, sotto al
giorno verrà visualizzato il segno $.
• Il mese ed l’ora funziona allo stesso
modo.
SUMMER TIME SET
1 SUMMER TIME
(USE)
2 ❿ SUMMER TIME IN
3 SUMMER TIME OUT
IN
WEEK
MONTH TIME
LAST /FRI 11
14:00
$
(❷❿/– +)
END:MENU
END:MENU
– COMO REGOLARE MODO DISPLAY
7
Premere volte il tasto
MENU.
• Controllare il settimana, il giorno, il
mese e l’ora nuovamente e premere
il tasto del MENU volte.
8
Premere il tasto SHIFT ❷e
premere il tasto SHIFT ❿.
• Alla che viene premuto il tasto SHIFT
❿ , cambia il modo visualizzato.
• Il display cambia come segue.
(YY-MM-DD) ➝ (DD-MM-YY) ➝
(MM-DD-YY)
MENU
SHIFT
V-LOCK
SHIFT
V-LOCK
TRACKING/SET
SUMMER TIME SET
1 SUMMER TIME
(USE)
2 ❿ SUMMER TIME IN
3 SUMMER TIME OUT
IN
WEEK
MONTH TIME
14:00
LAST /FRI 11
$
(❷❿/– +)
13
END:MENU
SUMMER TIME SET
1 SUMMER TIME
(USE)
2 SUMMER TIME IN
3 ❿ SUMMER TIME OUT
OUT
WEEK
MONTH TIME
12:00
FIRST /SUN 12
$
(❷❿/– +)
CLOCK SET/ADJUST
1 ❿ SUMMER TIME SET (USE)
2 DISPLAY MODE(YY-MM-DD)
3 CLOCK SET/ADJUST
YEAR
2001
DATE
TIME
01/01 MON 12:00
$
END:MENU
(❷❿/– +)
CLOCK SET/ADJUST
1 SUMMER TIME SET (USE)
2 ❿ DISPLAY MODE(YY-MM-DD)
3 CLOCK SET/ADJUST
YEAR
2001
DATE
TIME
01/01 MON 12:00
$
END:MENU
(❷❿/– +)
END:MENU
14
9
12/7/01 4:36 PM
Page 16
REGOLAZIONE DELL’ORARIO ATTUALE
MENU DI REGOLAZIONE
– COME REGOLARE L’ORARIO ATTUALE
– DISPLAY DI REGOLAZIONE E DELLA REGISTRAZIONE CON ALLARME
Premere il tasto SHIFT ❷.
• Viene avviata la
REGOLAZIONE/IMPOSTAZIONE
DELL’OROLOGIO.
10
Impostare l’anno, il mese
ed il giorno tramite i tasti
TRACKING/ SET
.
CLOCK SET/ADJUST
1 SUMMER TIME SET (USE)
2 DISPLAY MODE (YY-MM-DD)
3 ❿ CLOCK SET/ADJUST
END:MENU
YEAR
2002
11
Regolare l’ora e i minuti
usando i tasti TRACKING/SET
.
• Alla pressione del tasto
TRACKING/SET , viene impostato
“13”.
• Premere il tasto SHIFT ❿ !per
posizionare il segno $!sotto al minuto.
• Il minuto funziona allo stesso modo.
12
DATE
12/25 WED
DATE
TIME
12/25 WED 13:30
• Controllare l’anno, il mese e l’ora
nuovamente e premere il tasto del
MENU due volte.
15
END:MENU
L-UPPER
L-BOTTOM
2002-12-25 WED
9:16:14 L3H
2
2002-12-25 WED
9:16:14 L3H
R-UPPER
R-BOTTOM
2002-12-25 WED
9:16:14 L3H
PREPARAZIONE ALARM REC (registrazione con allarme)
ALARM REC SETUP/RECALL
1 ❿ MODE -----------------------------(L3H)
2 DURATION --------------------(AUTO)
3 BUZZER----------------------------(ON)
4 ALARM RECALL
MENU
( ❷❿ /– +)
2002-12-25 WED
13: 30:00 L 3 H
RIFERIMENTO
$
(❷❿/– +)
2002-12-25 WED
9:16:14 L3H
END:MENU
TRACKING/SET
YEAR
2002
• POSITION: Seleziona la posizione della data e
dell’orario sullo schermo.
1. Posizionare il simbolo “❿” nella
posizione di “TIME” usando il tasto
SHIFT ❷.
2. Premere il tasto SHIFT ❿ !per
passare da orario acceso a spento.
(DATE e POSITION funzionano nello
stesso modo).
TIME
12:00
Premere due volte il tasto
MENU.
CLOCK SET/ADJUST
1 SUMMER TIME SET (USE)
2 DISPLAY MODE (YY-MM-DD)
3 ❿ CLOCK SET/ADJUST
• TIME: Seleziona il display dell’orario su acceso e
spento (ON/OFF).
ON
OFF
2002-12-25 WED 2002-12-25 WED
12:45:30 L3H
END:MENU
$
(❷❿/– +)
• DATE: Seleziona il display della data su acceso e
spento (ON/OFF).
ON
OFF
12:45:30 L3H
2002-12-25 WED
12:45:30 L3H
(esempio)
* Per spegnere o accendere l’orario
CLOCK SET/ADJUST
1 SUMMER TIME SET (USE)
2 DISPLAY MODE (YY-MM-DD)
3 ❿ CLOCK SET/ADJUST
$
(❷❿/– +)
(❷❿)
TRACKING/SET
DATE
TIME
01/01 MON 12:00
PREPARAZIONE MODO DISPLAY
DISPLAY MODE SETUP
1 ❿ DATE DISPLAY ------------------(ON)
2 TIME DISPLAY-------------------(ON)
3 POSITION -------------(R-BOTTOM)
(nel caso il modo di visualizzazione sia
YY-MM-DD)
• Premendo il tasto TRACKING/SET
una volta viene impostato, “2002”.
• Dopo avere impostato l’anno premere
il pulsante SHIFT ❿, sotto al mese
verrà visualizzato il segno $.
• Il mese funziona allo stesso modo.
SHIFT
V-LOCK
YEAR
2001
1
Visualizzazione dell’ora
• Non viene visualizzato a.m o p.m.
• 1:00 p.m viene visualizzato come 13:00, 11:00
p.m come 23:00 e 12:00 p.m. come 00:00.
END:MENU
* Per regolare la funzione di
ALARM REC nel modo L3H per
5 minuti.
1. Posizionare il simbolo “❿” in
posizione “DURATION” usando il
tasto SHIFT ❷.
2. Ad ogni pressione del tasto
SHIFT ❿ il display cambia "SEL
3 MIN".
3. Selezionare “SEL 5 MIN” usando
il tasto SET “+”.
4. Premere il tasto MENU.
* MODE: Seleziona la velocità di ALARM REC.
Selezionare L3H, L12H, L24H. (L8H non è
disponibile)
OFF: L’apparecchio non effettua la funzione di
ALARM REC, sia che il segnale di allarme ci
sia o no.
• DURATION: Regola l’orario di ALARM REC.
AUTO
SEL 5 MIN
TAPE END
• Per impostare i tempi di ALARM REC.
Regolare il periodo di tempo da SEL 20SEC a
5 MIN usando i tasti "set +/–".
• AUTO: Se si riceve un segnale di allarme,
ALARM REC inizierà e continuerà finchè il
segnale di allarme sia interrotto.
ALARM REC, quindi, si fermerà.
(L’allarme non può essere regolato
per meno di un minuto di durata).
• TAPE END: se si riceve un segnale di
allarme, ALARM REC inizierà e continuerà
fino alla fine del nastro.
• BUZZER: seleziona se il segnale acustico debba restare
acceso o spento durante ALARM REC.
• ALARM RECALL : Verificare la registrazione allarme.
(Fare riferiemnto alla pagina 33 page)
16
MENU
01671A SVR-24JP/960JP-Ita2
01671A SVR-24JP/960JP-Ita2
12/7/01 4:36 PM
Page 18
MENU DI REGOLAZIONE
– REGOLAZIONE DEL MODO REC E DEL MODO VCR
PREPARAZIONE REC MODE (registrazione)
REC MODE SETUP
1 ❿ REPEAT REC-------------------(OFF)
2 SERIES REC -------------------(OFF)
3 1-SHOT REC--------------------(OFF)
( ❷❿ )
END:MENU
SHIFT ❷: MUOVE IL TASTO
SHIFT ❿: INSERISCE
(SELEZIONA) IL
TASTO
* Non è possibile selezionare REPEAT
REC e SERIES REC
contemporaneamente.
• REPEAT REC: selezionare ON/OFF per una
registrazione continuata.
• ON: quando il nastro finisce durante la
registrazione, si riavvolgerà
automaticamente fino all’inizio della
videocassetta, quindi la registrazione
continuerà.
• SERIES REC: la registrazione in sequenziale è
una funzione utile se si usano
due o più VCR. Infatti, il
secondo videoregistratore
inizierà automaticamente a
registrare quando finisce il
nastro del primo
videoregistratore.
– Per i metodi di collegamento, consultare i
metodi di collegamento per la registrazione
sequenziale (a pagina 37).
• 1-SHOT REC: si ottiene selezionando 000H
sul REC TIME MODE.
OFF:
Registra un fotogramma quando il
tasto REC viene premuto una volta.
1 MIN: Registra un fotogramma ad intervalli
di un minuto quando il tasto REC
viene premuto una volta.
2 MIN: Registra un fotogramma ad intervalli
di due minuti quando il tasto REC
viene premuto una volta.
3 MIN: Registra un fotogramma ad intervalli
di tre minuti quando il tasto REC
viene premuto una volta.
17
4
PREPARAZIONE MODO VCR
(videoregistratore)
VCR MODE SETUP
1 ❿ TRIGGER --------------------(1FIELD)
2 V-SYNC ----------------------------(ON)
3 BUZZER ---------------------------(ON)
4 TAPE LENGTH ----------------(E240)
( ❷❿ )
MENU
3
END:MENU
SHIFT ❷: MUOVE IL TASTO
SHIFT ❿: INSERISCE (SELEZIONA)
IL TASTO
• TRIGGER
– Seleziona il numero di fotogrammi
da registrare per fotocamera da
registrare quando collegato ad un
DEVIATORE DI FOTOGRAMMI
(Per informazioni dettagliate fare
riferimento al manuale)
• V-SYNC
– Si può verificare tremolio
dell’immagine al momento della
connessione ad un DEVIATORE
DI FOTOFGRAMMI specifico.
Selezionare ON o OFF per la
posizione senza tremolio.
• BUZZER
– Selezionare per avere il segnale
acustico acceso o spento (on/off).
(Vedere a pag. 34).
• TAPE LENGTH
– Selezionare la lunghezza della
video-cassetta. Queste
informazioni sono stampate
solitamente sul contenitore di
nastro.
– Secondo la regolazione di
lunghezza del nastro, il modo di
tempo sui cambiamenti della
visualizzazione come seguendo.
E-180
E-240
L3H
L8H
L12H
L4H
L12H
L18H
L24H
L32H
18
01671A SVR-24JP/960JP-Ita2
12/7/01 4:36 PM
Page 20
MENU DI REGOLAZIONE 1
– REGOLAZIONE DI PROGRAM REC
(registrazione programma)
• Come impostare un PROGRAM REC
esempio) Per impostare la registrazione di un
programma Da 13:03 a 13:15 lunedì
nel modo L3H.
PREPARAZIONE
PROGRAMMA 1
PROGRAM SETUP1
START STOP DATE
MODE
L3H
L24H
13:03 → 13:15 MON
• ❿ 13:03
→ 13:15 DAILY
•
• OFF
• 13:03 → 13:15 MON
• PROGRAM SETUP2
•
( ❷❿ /– +,CLEAR)
L12H
END:MENU
6
PREPARAZIONE
PROGRAMMA 2
PROGRAM SETUP2
START STOP DATE
MODE
1. Premere il tasto SHIFT ❷ per spostare il
cursore alla posizione programma vacante.
•❿
•
•
•
• PROGRAM SETUP1
•
2. Premere il tasto SHIFT ❿ !per visualizzare l’ora
corrente.
3. Premendo i tasti TRACKING/SET "+" o "–"
impostate l’ora di avvio della registrazione.
( ❷❿ /– +,CLEAR)
• Quando il programma 5 viene impostato con il PROGRAM
SETUP 1, selezionare PROGRAM SETUP 2.
• Usare lo stesso metodo per impostare PROGRAM REC come
nel PROGRAM SETUP 1.
* Dopo aver terminato con i PROGRAM SETUP 1 e 2, premere
MENU per finire e premere TIMER per iniziare l’attesa.
POWER
TIMER
END:MENU
4. Premere il tasto SHIFT ❿ ! per spostare sul
minuto.
ATTENZIONE
1. È possibile uare i tasti. POWER o
RESET solamente durante PROGRAM
REC.
2. Durante un PROGRAM REC, per
cancellare la registrazione premere il
tasto POWER.
3. Per cancellare un PROGRAM REC,
selezionare l’evento e premere il tasto
CLEAR per visualizzare "OFF".
La rinnovata pressione del tasto
SHIFT ❿ !nella posizione OFF riporta
l’orario impostato in precedenza.
REC
REC
5. Premere i tasti TRACKING/SET "+" o "–" per
impostare il minuto di avviamento.
C.MEMO
6. Con la stessa procedura impostare l’ora in cui
finisce la registrazione e spostarsi sulla data.
* Il nastro viene espulso e si sente il segnale acustico, se la
linguetta di sicurezza è stata rimossa.
7. Premere i tasti TRACKING/SET "+" o "–" per
impostare lunedì e premere il tasto SHIFT ❿.
8. Premere i tasti TRACKING/SET "+" o "–" per
impostare L3H e premere il pulsante SHIFT ❿.
9. Con lo stesso metodo, preparare il successivo
NEXT PROGRAM REC desiderato.
• GIORNALIERO : La registrazione programmata
viene effettuata lo stesso momento ogni giorno.
RIFERIMENTO
È possibile impostare fino a 10 programmi settimanali
– CONTROLLO DI ORARIO E DATA DI UN’ INTERRUZIONE DI CORRENTE
7
MEMORIA DI PERDITA DI
ENERGIA ELETTRICA
•
•
•
POWER LOSS MEMORY
YEAR
DATE
TIME
OFF 2002
12/25 15:00:00
ON
2002
12/25 15:15:37
OFF 2002
12/24 13:25:00
ON
2002
12/24 13:26:00
OFF 2002
12/23 17:30:30
ON
2002
12/23 17:40:00
END:MENU
• Visualizza l’orario memorizzato di un’ interruzione di corrente e
del ritorno di corrente.
* Esempio) Se è verificata un’ interruzione di corrente il
12.23.2002 alle 17:30:30 ed un ritorno di corrente il
12.23.2002 alle 17:40:00. (17:30:30=17 ore 30 minuti
30 secondi).
* Esempio) Se si è verificata un’interruzione di corrente il
12.24.2002 alle 13:25:00 ed un ritorno di corrente il
12.24.2002 alle 13:26:00, ripetutamente.
1. OFF
ON
2. OFF
ON
3. OFF
ON
2002
2002
2002
2002
12/24
12/24
12/23
12/23
13:25:00
13:26:00
17:30:30
17:40:30
• Lo schermo visualizza i quattro eventi più recenti.
La più recente interruzione di corrente precede le altre
nella lista.
19
20
MENU
5
01671A SVR-24JP/960JP-Ita2
12/7/01 4:36 PM
Page 22
FUNZIONAMENTO
FUNZIONAMENTO DI BASE
DELLA RIPRODUZIONE
REC
F.F
PLAY
W
RE
P/STILL
CK
REC CHE
AR
O CLE
CNT.MEM
COUNT
K
REC LOC
TIMER
RESET
PLAY
W
RE
PLAY
PLAYBACK
W
RE
W
RE
F.F
ON
AUDIO
P/STILL
Per il fermo immagine
F.F
REV
P/STILL
F.F
O
VIDE
RITY
U
C
SE
• Quando si inserisce un nastro, il
videoregistratore si accende
automaticamente.
2
Premere il tasto quando
è necessario.
F.F
ECT
STOP/EJ
1
Premere il tasto POWER
sul videoregistratore ed
inserire la videocassetta.
PER TORNARE ALLA
RIPRODUZIONE
NORMALE
DURANTE LA
RIPRODUZIONE NORMALE
Per ricerca avanti
CK
REC LO
W
RE
ER
POW
POWER
TIME
KING/S
MODE
ET
SECURITY VIDEO
SHIFT
CK
V-LO
STOP/EJECT
MENU
Inserire la videocassetta con
la finestra rivolta verso l’alto.
PLAYBACK
TRAC
Per ricerca indietro
STOP
IN POSIZIONE DI STOP
EJECT
F.F
W
RE
STOP/EJECT
Per l’avanzamento
veloce
F.F
W
RE
Per il riavvolgimento
veloce
RIFERIMENTO
• Impostare il modo tempo su L3H per il video e audio normali nellla riproduzione di nastri presi a
noleggio.
• Il nastro standard può essere leggeramente rumoroso nel modo fermo immagine
• Non è possibile impostare i modi di playback lento e modo tempo quando nel modo fermo immagine.
FARE ATTENZIONE A QUANTO SEGUE QUANDO SI EFFETTUA LA RIPRODUZIONE
DI UNA VIDEOCASSETTA REGISTRATA NEL MODO “INTERVALLO DI TEMPO”:
• Uno schermo senza colori durante la ricerca immagine non è indicativo di cattivo funzionamento.
• Anche se lo schermo dovesse presentare un leggero tremolio, questo non è segnale di
malfunzionamento.
• Anche se la parte superiore dello schermo dovesse apparire un po’ contorta, questo non è indice di
un malfunzionamento o di un problema.
• Anche se lo schermo dovesse presentare un leggero tremolio, questo non è segnale di
malfunzionamento.
• Anche se l’audio non si sentisse chiaramente, questo non è indice di un malfunzionamento o di un
problema.
• Durante la riproduzione nel modo L3H della videocassetta registrata nel modo L8H/L12H/L24H, il
programma registrato viene riprodotto ad alta velocità.
• Non è possibile avere un audio normale durante la riproduzione di una videocassetta registrata con
audio, se il modo del tempo di registrazione è diverso dal modo del tempo di riproduzione.
21
NOTARE LA REGOLAZIONE DELLO
SCHERMO
SE LO SCHERMO PRESENTA
RUMORE O TREMOLIO
• Quando la videocassetta viene inserita, lo schermo
si regola automaticamente.
• Se lo schermo non si regola automaticamente,
regolare premendo i tasti
di tracciatura.
• Premere i tasti
TRACKING/SET
• Se lo schermo non viene regolato tramite la pressione dei
tasti TRACKING, regolarlo premendo simultaneamente i
pulsanti TRACKING e TRACKING .
.
TRACKING/SET
SHIFT
V-LOCK
• Se lo schermo presenta rumore durante la
riproduzione lenta, correggere premendo il
tasto di tracciatura
.
• Quando lo schermo tremola su un fermo
immagine, correggere mediante la pressione del
tasto V-LOCK
.
22
01671A SVR-24JP/960JP-Ita2
12/7/01 4:36 PM
Page 24
RIPRODUZIONI VARIE
• Inserire la videocassetta per la riproduzione.
RE
W
P/STILL
CK
REC CHE
ECT
STOP/EJ
K
REC LOC
TIMER
REV
AUDIO
.MEMO
NT CNT
ON COU
CLEAR
RESET
CK
REC LO
ER
POW
TIME
MODE
G/SET
SHIFT
V-LOCK
NU
Ruotare l’anello SHUTTLE in
senso orario o antiorario.
• Lo schermo avanza velocemente o
riavvolge velocemente.
• La velocità varia a seconda da
quanto si gira l’anello SHUTTLE .
2
Premere il tasto TIME MODE (
durante la riproduzione.
,
)
TIME MODE
W
RE
Per ritornare alla riproduzione
normale
• Rilasciare l’anello SHUTTLE.
DURANTE LA VISIONE DI IMMAGINI IN RIPRODUZIONE PARTICOLARE
• La presenza di rumore sullo schermo non indica alcun problema.
• La videocassetta registrata da un altro videoregistratore può presentare un rumore forte.
• Allora L’audio non si sente.
• Quando l’ìimmagine balla in su e in giù
durante l’avanzamento lento, premere il
tastoV-LOCK
. Una volta trovata la
regolazione corretta riavviare l’avanzamento
lento.
• Premere il tasto TIME MODE e vedere
l’immagine alla velocità lenta desiderata.
DURANTE LA VISIONE REVERSE/IN
AVANTI DI UN PROGRAMMA
REGISTRATO NEL MODO LENTO
• Premere il tasto P/STILL per mettere in
pausa il programma.
• Girare la manopola JOG per vedere il
programma lentamente in reverse o girare
la manopola JOG per vederlo lentamente
avanti.
• Premere il tasto PLAY per rivedere il
programma in modo normale.
• Quando il funzionamento lento viene
continuato per circa cinque minuti, il nastro
viene riprodotto automaticamente.
DURANTE LA RIPRODUZIONE POTREBBE SUCCEDERE
DI NON SENTIRE UN AUDIO NORMALE
• nastro di registrazione L3H
• nastro di registrazione L8H
• nastro di registrazione L12H
• nastro di registrazione L24H
23
3
DURANTE LA VISIONE DI UN
PROGRAMMA REGISTRATO
NEL MODO LENTO
– L3H riproduzione ➝ Normale
– L3H riproduzione ➝ veloce
– L8H riproduzione ➝ Normale
– L12H/L24H riproduzione ➝ lento
– L3H/L8H riproduzione ➝ veloce
– L12H riproduzion ➝ Normale
– L24H riproduzion ➝ lento
– L3H/L8H/L12H riproduzione ➝ veloce
– L24H riproduzione ➝ Normale
W
RE
F.F
2
1 3
RICERCA DELLO
SCHERMO (DURANTE
LA RIPRODUZIONE)
F.F
KIN
TRAC
1
Per sentire l’audio normale
• Si può sentire l’audio normale
solamente quando il programma
viene eseguito alla velocità con cui è
stato registrato.
24
PLAYBACK
REC
F.F
PLAY
01671A SVR-24JP/960JP-Ita2
12/7/01 4:36 PM
Page 26
RIPRODUZIONI VARIE (SEGUITO)
W
P/STILL
CK
REC CHE
ECT
STOP/EJ
K
REC LOC
TIMER
REV
AUDIO
NT
ON COU
CNT.ME
AR
MO CLE
RESET
CK
REC LO
ER
POW
TIME
TRAC
KING/S
MODE
ET
SHIFT
V-LOCK
4
NU
6,7
5
4
PER VEDERE UN
PROGRAMMA
RIPRODOTTO IN REVERSE
• Durante la riproduzione normale si
può usare la riproduzione in
reverse premendo REV.
• La riproduzione in reverse è
disponibile solo nel modo L3H.
• Durante la riproduzione in reverse
l’audio non si sente.
• Premere il tasto REV o PLAY
durante la riproduzione in reverse,
per la riproduzione normale
REV.
5
RIPRODUZIONE
PER L12H/L24H
ORE
• Non potete sentire il suono
12H o il modo 24H. Se
desiderate sentire il suono,
premere l’ AUDIO sul tasto
a ket l’ esposizione
anteriore L12H o L24H
della visualizzazione.
• Il nastro è riprodotto ad una
velocità inferiore della
riproduzione L3H.
• Potrebbero comparire
rumori sullo schermo.
• Per vedere un’immagine
pulita, scegliere il modo di
riproduzione L3H o di
riproduzione lenta.
TIME MODE
QUANDO SI RIAVVOLGE IL NASTRO
• Impostare il contatore nella posizione originale
(
) premendo il tasto CLEAR all’inizio di
una registrazione o riproduzione. Premere il
pulsante del contatore di memoria.Quando si
gira l’anello di SHUTTLE in senso antiorario
nel modo stop a completamento di una
registrazione ed avanzamento di
riproduzione, il nastro si ferma nella posizione
di partenza (
) della registrazione o
riproduzione.
25
6
FERMO IMMAGINE
Premere il tasto P/STILL per
avere un fermo immagine.
• Allora L’audio non si sente.
• Non lasciare l’ immagine in
pausa per lunghi periodi di
tempo, poichè questo
potrebbe danneggiare la
testina del video ed il nastro.
• Quando un’immagine viene
continuamente messa in
pausa per circa 5 minuti, il
nastro viene riprodotto
automaticamente.
• Quando l’immagine balla
premere i tastiV-LOCK
per effettuare la regolazione
corretta.
7
QUANDO SI GUARDA
CON FERMO IMMAGINE,
SCENA PER SCENA
• Premere il tasto P/STILL.
• Allora L’audio non si sente.
• Girando in continuazione
la manopola JOG,
l’immagine avanza di un
fotogramma alla volta.
• Premere il tasto di PLAY
per tornare alla
riproduzione normale.
PLAYBACK
REC
F.F
RE
PLAY
Per tornare alla
riproduzione normale
• Premere il tasto di PLAY per
tornare alla riproduzione
normale.
SHIFT
V-LOCK
DISPLAY ANTERIORE
C.MEMO
Display della
posizione corrente
del contatore
Display della
memoria del
contatore
26
01671A SVR-24JP/960JP-Ita3
12/7/01 4:36 PM
Page 28
SISTEMA DI PROTEZIONE DELLA
REGISTRAZIONE
REGISTRAZIONE
Questo apparecchio è caratterizzato da una funzione di sicurezza per la registrazione e da altre
varie funzioni di registrazione per applicazioni varie, inclusi il monitoraggio e l’osservazione. Si
consiglia di imparare bene il funzionamento di queste operazioni.
PRIMA DI REGISTRARE
VERIFICARE L’ORA
CORRENTE
• Per registrare un programma, l’orario
corrente deve essere regolato nel modo
giusto.
• Se l’ora non è stata ancora regolata, vedere
la sezione riguardante la regolazione dell’ora
e della data. (Pagina 13)
Metodo di
selezione
Metodo
di funzionamento
Quando si desidera
una registrazione
sicura
• Mettere l’interruttore REC
LOCK in posizione di
“REC LOCK”.
OFF
REC LOCK
Descrizione
del funzionamento
• Premere il tasto REC LOCK per
avviare il modo REC LOCK.
la spia REC LOCK si accende.
• L’unico tasto accessibile dal modo
REC LOCK è il tasto RESET.
• La registrazione continua anche
dopo un ritorno di corrente.
• La spia REC LOCK sarà spenta.
• Premere nuovamente il
pulsante REC LOCK
OFF
REC LOCK
Con la linguetta in posizione
• La videocassetta può essere
nuovamente registrata.
Linguetta di protezione
Senza la linguetta in posizione
• La videocassetta non può
essere nuovamente registrata,
a meno che la linguetta non
venga rimpiazzata da un
pezzetto di nastro adesivo.
Nastro adesivo
COSA SUCCEDE QUANDO LA VIDEOCASSETTA FINISCE DURANTE LA REGISTRAZIONE
* Nella registrazione continuata il nastro si riavvolge automaticamente quando finisce.
• Quando sul menu sia stato selezionato REPEAT ON (Tuttavia, se anche una sola
registrazioen allarme è stata eseguita il VCR espelle il nastro all’accensione).
* Accensione dopo l’espulsione del nastro
• Quando raggiunge la fine del nastro fatta eccezione della registrazione ripetuta dopo un
riavvolgimento automatico.
RIFERIMENTO
CONDENSAZIONE
• Se il videoregistratore viene spostato improvvisamente da un luogo fresco ad un luogo caldo, o viene
installato in un luogo umido o esposto direttamente all’aria fredda del condizionatore, si potrebbero
formare delle gocce d’acqua sul tamburo della testina del videoregistratore, a causa del brusco cambio di
temperatura.
L’uso del video in queste condizioni potrebbe causare problemi a questo apparecchio e al nastro.
Se questo succede, premere il tasto POWER e mantenere in stato di ON (acceso) da 1 a 2 ore prima di
usarlo.
27
28
RECORDING
C’È LA LINGUETTA DI SICUREZZA
SULLA VIDEOCASSETTA?
01671A SVR-24JP/960JP-Ita3
12/7/01 4:36 PM
Page 30
REGISTRAZIONE DI BASE
1
REC
F.F
W
P/STILL
CK
REC CHE
PREMERE IL TASTO DI
POWER DEL VCR
2
ECT
STOP/EJ
3
INSERIRE LA VIDEOCASSETTA CON
LA LINGUETTA DI PROTEZIONE
DALLA CANCELLAZIONE VERSO
L’ESTERNO
K
REC LOC
TIMER
REV
AUDIO
NT
ON COU
CNT.ME
AR
MO CLE
REC
F.F
CK
REC LO
ER
POW
MODE
TIME
5
6,7
G/SET
SHIFT
V-LOCK
MENU
1
4
PREMERE IL TASTO REC
• La registrazione inizia.
• Se non c’è la linguetta di protezione
dalla cancellazione, il nastro si ferma,
l’allarme suona cinque volte e la
cassetta viene espulsa.
RE
W
P/STILL
REC CHECK
4,7
POWER
JECT
STOP/E
TIMER
REV
AUDIO
ON COUNT
CNT.ME
MO CLEAR
REC LOCK
RESET
REC LOCK
ER
POW
TIME
TRAC
MODE
KING/SET
SHIFT
K
V-LOC
MENU
La linguetta di sicurezza
5
REC
PREMERE IL TASTO
REC CHECK
• Nel modo di registrazione è
possibile controllare la qualità della
registrazione. IL VCR riproduce il
video registrato alcuni secondi
prima di premere il tasto REC
CHECK.
6
• Se messo in pausa per più di cinque
minuti, il nastro viene riprodotto
automaticamente per autoproteggersi. Se si
deve mettere in pausa per lunghi periodi di
tempo, assicurarsi di premere il tasto di
STOP.
REC
• Usare solo videocassette con il marchio
29
di protezione dalla
cancellazione è stata tolta.
Linguetta di
sicurezza
Linguetta di
sicurezza
PREMERE IL TASTO REC O
P/STILL PER REGISTRARE
ANCORA
P/STILL
TABELLA DEL TEMPO DI REGISTRAZIONE
Cos’è la
Per proteggere
Per registrare
prevenzione contro una registrazione nuovamente
una cancellazione • Togliere la linguetta • Attaccare del nastro adesivo
sulla zona dove la linguetta
di sicurezza.
accidentale ?
7
PREMERE IL TASTO P/STILL
REC CHECK
RIFERIMENTO
• E’ un dispositivo che
protegge il contenuto
della registrazione sul
nastro, oppure
permette di registrare
nuovamente sulla
cassetta.
• La velocità di registrazione viene selezionata
usando il TIME MODE
.
• La velocità di registrazione selezionata
viene mostrata sul display.
RESET
PLAY
KIN
TRAC
SELEZIONARE LA VELOCITA’
DI REGISTRAZIONE
Prima che REC CHECK funzioni, è necessario
raggiungere un minimo di tempo di registrazione,
come mostra il grafico qui sotto.
TEMPO MIN
MODO TEMPO MIN MODO
TEMPO REGISTRAZ
TEMPO REGISTRAZIONE
IONE
Tipo di
nastro
RECORDING
RE
PLAY
P/STILL
• Questa apparecchiatura è stata progettata per nastri E-180.
• Quando possibile, usare nastri E-180 per le registrazioni tipiche.
• SVR-24JP ha solo i modi L3H, L8H, L12H e L24H.
Tempo massimo di registrazione
L3H
L8H
L12H
L24H
36H
48H
72H
120H
168H
240H
480H
960H
L3H
L8H
5 secondi
15 secondi
72H
120H
3 minuti
5 minuti
E-240
4ore
12ore
20ore
36ore
52ore
68ore
100ore
164ore
228ore
324ore
644ore
1284ore
L12H
L24H
36H
30 secondi
1 minuto
1 minuto
30 secondi
168H
240H
480H
7 minuti
10 minuti
20 minuti
E-180
3ore
9ore
15ore
27ore
39ore
51ore
75ore
123ore
171ore
243ore
483ore
963ore
48H
2 minuti
960H
40 minuti
*SVR-24JP ha solo i modi L3H, L8H, L12H e L24H .
30
12/7/01 4:36 PM
Page 32
REGISTRAZIONE SEQUENZIALE
REGISTRAZIONE CON ALLARME
Questa è una funzione molto utile, nella quale - quando due o più VCR sono collegati - il secondo
apparecchio inizia a registrare quando il nastro del primo apparecchio giunge al termine.
Se il VCR è collegato ad un’apparecchiatura che produce un allarme, come per esempio
un commutatore di immagine, un rivelatore di movimento o un interruttore della porta, il
VCR funzionerà secondo l’ora ed il modo selezionati nel menu di ALARM REC quando il
video riceve un allarme.
SVR-24JP ha solo i modi L3H/L12H/L24H per ALARM REC.
Lo schemo fornito sotto è impostato su modo L3H per ALARM REC.
Metodo di
collegamento
Metodo di
funzionamento
Vedere il metodo
di collegamento
per la
registrazione
sequenziale
(pagina 37)
• Selezionare il N.4 nel MENU
• Selezionare “ON” per
SERIES, usando il tasto
SHIFT❷ !e ❿ .
Descrizione del
funzionamento
• Quando il nastro del primo
apparecchio finisce durante la
registrazione, il secondo apparecchio
comincia a registrare. Quando il
nastro del secondo apparecchio
finisce a sua volta, l’apparecchio
successivo - se collegato - comincia a
registrare.
• Quando viene selezionato il modo di
registrazione sequenziale, il secondo
apparecchio esegue la registrazione,
anche se non è acceso (power off).
• Se il suono di allarme è costante, può
essere eliminato premendo
semplicemente qualsiasi tasto.
L12H~960H
(L12H~L24H)*
Registrazione modo
L3H
Registrazione
L12H~960H
(L12H~L24H)*
Registrazione modo
L3H
Registrazione modo
Registrazione ad intervallo di tempo
Registrazione con allarme
Registrazione ad intervallo di tempo
Registrazione con allarme
Immissione di
un segnale di
allarme
Inizio di
registrazione
Metodo di
collegamento
Collegare
l’apparecchiatura di
produzione dell’allarme
come segue:
1 ALARM IN
2 ALARM OUT
6 TAPE END OUT 7 SERIES OUT
1
2
3
4
3 ALARM RESET 4 ERROR OUT
8 GND
5
6
5 TRIGGER OUT
9 SERIES IN
10 1 SHOT RECIN
7
9
8
10
IN
IN
OUT
OUT
AUDIO
VIDEO
OUT
VIDEO
GND
ALARM
OUT
ALARM
RESET
(Vedere a pagina 37)
Immissione di ripristino
allarme o termine del
tempo programmato
Immissione di
un segnale di
allarme
Metodo di
funzionamento
Descrizione del
funzionamento
• Selezionare MODE e
DURATION in ALARM
REC SETUP nella
regolazione del MENU3
(Vedere ALARM REC
SETUP, pagina 16).
• Se si collega il
DEVIATORE DI
IMMAGINI, è comodo se
il deviatore è collocato in
posizione automatica.
• AUTO: il tempo della registrazione con allarme
viene determinato automaticamente
dall’immissione del segnale di allarme. (1 min)
• 20sec~5min: La registrazione di allarme viene
effettuata per 20 secondi~5 minuti dopo
l’immissione del segnale di allarme.
• TAPE END: La registrazione con allarme è
effettuata fino al termine del nastro, dopo
l’immissione del segnale di allarme.
• Quando il segnale di allarme viene inserito. Il
sul display anteriore è acceso.
• Quando la registrazione con allarme è
terminata, il
sul display anteriore
lampeggia.
• Quando si vuole cancellare l’allarme durante la
registrazione con allarme, effettuare un
collegamento tra l’azzeratore dell’allarme e la
messa a terra dell’allarme per più di 0,5
secondi, e quando l’azzeratore dell’allarme si
inserisce la registrazione con allarme si ferma.
• Quando si riceve un segnale di allarme e
viene selezionato BUZZER ON dal menu,
l’allarme suona ininterrottamente. Per fermare
il segnale acustico, premere un tasto qualsiasi.
RIFERIMENTO
Tasto di RESET (azzeramento)
Quando si preme il tasto RESET
• Usare questo tasto quando il VCR o il
display non funzionano normalmente,
anche se l’apparecchio è acceso.
• Il tasto RESET si trova sulla destra del
pannello anteriore.
• Premere il tasto RESET usando una
penna a sfera o una matita.
• Tutte le informazioni inserite, come per esempio l’orario di preselezione
della registrazione, l’ora corrente e l’allarme, vengono cancellate.
• L’apparecchio è spento, e non c’è alcuna immagine. Quando
l’apparecchio viene riacceso, sullo schermo lampeggia
2001-1-1 MON .
31
12:00:00 L3H
• L’orario corrente viene cancellato e deve essere nuovamente regolato.
32
RECORDING
01671A SVR-24JP/960JP-Ita3
01671A SVR-24JP/960JP-Ita3
12/7/01 4:36 PM
Page 34
FUNZIONI DELL’ALLARME
Le funzioni di allarme includono la registrazione dell’allarme, il controllo dell’allarme, il
ripristino dell’allarme, e il ocntatore di memoria dell’allarme. (Fare riferimento alla
Registrazione dell’Allarme, pagina 32)
CONTROLLO DELLA REGISTRAZIONE CON ALLARME
1
Premere il pulsante MENU
1. Collocare il carattere ❿!in
1
Premere il tasto CNT. MEMO
• Premere il tasto CNT. MEMO due volte, il
display visualizza "A. MEMO".
2
Girare l’anello SHUTTLE in
senso orario o antiorario
• Quando si gira l’anello shuttle, il nastro
avanza (o va indietro). Quando arriva
alla registrazione dell’allarme nel solo
modo L3H incontrato per primo effettua
una pausa di 5 secondi poi si ferma
W
RE
F.F
W
RE
CNT MEMO
F.F
posizione “ALARM REC
SETUP/RECALL” usando il tasto
SHIFT ❷.
2. Premere il pulsante SHIFT ❿ poi
viene visualizzato “ALARM
RECALL” .
3. Premere il tasto MENU dopo avere
controllato.
• Quando non viene effettuata la
registrazione con allarme, non si
visualizza alcun display sullo
schermo.
• Lo schermo di ALARM RECALL
mostra i sei più recenti eventi
registrati con allarme, con la data e
l’ora di ciascuno.
• Se l’allarme è registrato alle 12:00,
13:00, 15:00, 17:00 e 19:00 del 25
dicembre 2001.
MEMORIA DEL CONTATORE DELL’ALLARME
A.MEMO
AZZERAMENTO DELL’ALLARME
1
ALARM RECALL
YEAR DATE TIME
2001 12/25 19:00:00
2001 12/25 17:00:00
2001 12/25 15:00:00
2001 12/25 13:00:00
2001 12/25 12:00:00
Esempio) Quando la registrazione con
allarme viene fatta al N. 12.
Premere il tasto COUNTER.
• A-12 viene indicato in posizione di
contatore sul display anteriore.
• Da "
", il "12" indica le frequenze della
registrazione dell’allarme.
• E’ possibile visualizzare fino a “
”.
• Quando viene effettuata la registrazione
con allarme, il simbolo " " sul display
anteriore lampeggia.
END:MENU
2
Premere il tasto CLEAR
• La posizione del contatore sul display
anteriore indica “
”.
• Il “ ” si spegne.
• Quando si preme il tasto CLEAR durante
la visualizzazione dello schermo di
controllo dell’allarme, tutti i dati e l’orario in
memoria vengono cancellati.
CLEAR
COUNT
REC
F.F
RE
PLAY
W
P/STILL
CK
REC CHE
ECT
STOP/EJ
REC LOCK
TIMER
REV
REC LO
POWE
AUDIO
NT
ON COU
CNT.MEM
R
O CLEA
RESET
TIME
KING/S
T
SHIF
CK
V-LO
MENU
1
ET
MODE
RIFERIMENTO
Visualizzazione del tempo di funzionamento
CK
R
TRAC
RIFERIMENTO
112 2
, premere due
• Quando il display anteriore indica
volte il tasto COUNTER.
Il tempo di funzionamento viene quindi indicato sul display
anteriore.
Esempio) Quando il funzionare viene fatto per 11 ore.
HOUR
• Se il tasto del contatore non viene premuto entro 5
secondi, durante il controllo del tempo di funzionamento, il
display anteriore ritorna allo stato in cui si trovava prima
del controllo del display del tempo di funzionamento.
33
L’allarme suona cinque volte nei casi seguenti:
L’allarme suona ininterrottamente nei casi seguenti:
• Quando viene inserita una videocassetta senza la
linguetta di sicurezza.
– Quando viene immesso il segnale di sequenza.
– Quando viene immesso il segnale di allarme.
– Quando viene premuto il tasto di registrazione.
– Quando viene premuto il tasto TIMER.
• Quando viene premuto il tasto REC con il nastro
espulso.
• Quando viene immesso il segnale di allarme durante
una registrazione con allarme.
• Quando il nastro termina nel modo di registrazione.
• Quando viene immesso il segnale di allarme per una registrazione con allarme.
– Quando la registrazione con allarme è terminata e l’allarme viene rilasciato.
– L’allarme viene rilasciato premendo un qualsiasi tasto.
– Quando viene immesso il segnale di allarme con il nastro espulso.
Registrazione continuata automatico
• Quando il riavvolgimento è completato, dopo che il nastro è arrivato
al termine, la registrazione ricomincia. (L’allarme suona solo
durante il riavvolgimento).
• Se si effettua una registrazione con allarme, il nastro viene espulso.
34
FUNCTION
1
2
3
4
5
6
01671A SVR-24JP/960JP-Ita3
12/7/01 4:36 PM
Page 36
FUNZIONI UTILI
METODO DI COLLEGAMENTO
La comprensione delle seguenti funzioni vi sarà molto utile per trovare le informazioni che
cercate.
Metodo di
funzionamento
Descrizione del
funzionamento
Quando si vuole vedere
velocemente l’immagine
dalla posizione di
registrazione con
allarme.
Predisporre il display in A.
MEMO usando il tasto CNT.
Dopodiché girare l’anello shuttle
per riavvolgere il nastro.
Viene localizzata la posizione della
registrazione con allarme e il VCR entra
in modo di pausa per 10 secondi. La
videocassetta viene riprodotta quando
viene premuto il tasto PLAY. Quando non
viene premuto alcun tasto per 10 secondi,
la cassetta si ferma automaticamente.
Quando si vuole sapere
velocemente l’ora e il
giorno della
registrazione con
allarme.
Premere il tasto MENU nel modo
stop.
Selezionare ALARM RECALL
usando i pulsanti SHIFT ❷ !e ❿.
Collegamento al Deviatore di fotofìgrammi
1
2
Lo schermo del monitor mostra quanto
segue.
1
2
3
4
5
6
ALARM RECALL
YEAR DATE TIME
2001 12/25 19:00:00
2001 12/25 17:00:00
2001 12/25 15:00:00
2001 12/25 13:00:00
2001 12/25 12:00:00
8
ALARM IN
END:MENU
Quando si vuole sapere
il numero delle
registrazioni con
allarme.
Quando si preme il tasto di
COUNT una volta, il contatore
dell’allarme viene indicato sul
display. Esempio) A-11
I numerali del contatore dell’allarme
indicano la frequenza dell’allarme
registrato, che può arrivare fino a 99. A-11
(Indica che sono stati registrati 11 allarmi).
Quando si vuole commutare
l’immissione della
telecamera dell’attrezzatura
esterna automaticamente
(usando la funzione di
azionamento “trigger”).
Collegare l’emissione “trigger”
dell’attrezzatura esterna.
Vedere i metodi di
collegamento a pagina 36.
Registrare nel modo intervallo
di tempo.
Questo VCR registra l’immissione di
ciascuna telecamera immagine per
immagine, campo per campo e poi si
sposta.
Quando si vuole vedere
velocemente immagine
registrata nel modo
intervallo di tempo (Se
registrata nel modo
L8H~960H(L8H-L24H)*
Premere il tasto TIME MODE
per predisporre il modo “L3H”.
Poi premere il tasto PLAY.
GND
TRIGGER OUT
1 ALARM IN
2 ALARM OUT
6 TAPE END OUT 7 SERIES OUT
1
2
3
3 ALARM RESET 4 ERROR OUT
5 TRIGGER OUT
8 GND
9 SERIES IN
10 1 SHOT RECIN
7
9
4
5
6
8
10
1
2
2 3 4 5 6 7 8 R/T A/O
8
IN
IN
OUT
OUT
AUDIO
CAMERA
PB
IN
REC MONITOR
OUT
OUT GND
VCR
FS-81MA
VIDEO
(Retro di SVR-24JP/
SVR-960JP)
VIDEO OUT
Immissione video
dal monitor
VIDEO IN
• Fare riferimento al manuale dell’utente per
informazioni dettagliate.
• R/T:REC TRIGGER IN
• A/O:ALARM OUT
35
(Telecamera)
CONNECTION
Metodo di
collegamento
• Quando si collega, è una cosa utile,
impostare la durata dell’allarme (ALARM
DURATION) nella posizione "AUTO" .
• Non si deve collegare l’ingresso di ALARM
OUT e l’ingresso di ALARM RESET del
video.
36
01671A SVR-24JP/960JP-Ita3
12/7/01 4:36 PM
Page 38
REGISTRAZIONE SEQUENZIALE,
COLLEGAMENTI ALLARME
MANUTENZIONE
Se l’immagine non è chiara sullo schermo usare un nastro di pulizia
Collegamento per la registrazione sequenziale
IN
OUT
IN
VIDEO
OUT
IN
VIDEO
Un uso prolungato di un nastro di pulizia può danneggiare la testina
1
OUT
VIDEO
(TV or MONITOR)
Lasciar cadere sei o
sette gocce di soluzione
di pulizia per la testina
sul nastro di pulizia.
2
Inserire il nastro di pulizia
nel videoregistratore e
premere il tasto PLAY.
REC
F.F
W
RE
PLAY
P/STILL
REC CHECK
JECT
STOP/E
PE
G TA
ANIN
CLE
REV
1
2
3
4
5
6
7
8
9
10
1
2
3
4
5
6
7
8
9
10
1
2
3
4
5
6
7
8
9
10
CLE
AN
ING
LIQ
AUDIO
ON COUNT
TIMER
CNT.ME
MO CLEAR
REC LOCK
RESET
REC LOCK
UID
ER
POW
TIME
TRAC
MODE
KING/SET
SHIFT
V-LOCK
7 SERIES OUT
8 GND
9 SERIES IN
• Selezionare SERIES REC ON nel menu.
(Vedere a pagina 17, REC MODE SETUP)
• Collegare l’uscita della prima sequenza
all’ingresso della seconda sequenza, e
collegare la messa a terra della prima
sequenza alla messa a terra della seconda
sequenza.
MENU
• Collegare l’uscita della seconda sequenza
all’ingresso della sequenza successiva, e
collegare la messa a terra della seconda
sequenza alla messa a terra della
sequenza successiva.
CLE
AN
ING
TAP
E
3
Dopo circa 15 secondi,
premere il tasto STOP per
fermare l’operazione
• Usare il nastro di pulizia ancora una
volta se l’immagine non si presenta
normale.
STOP/EJECT
Collegamento per la registrazione con allarme
1
2
3
4
5
1 ALARM IN
3 ALARM RESET
6
7
8
9
(Unità esterna)
1
10
2 ALARM OUT
8 GND
1 GND
3 ALARM IN
2
3
4
2 ALARM RESET
4 ALARM OUT
(ATTENZIONE) Nel caso si abbia un’unità esterna, usare i collegamenti propri all sensore di
allarme in uso.
• Nel caso di unità esterna, non è necessario fare alcun collegamento, se non c’è uscita di
azzeramento dell’allarme e d’ingresso dell’allarme.
37
Cambiare la testina nelle
seguenti circostanze:
Quando lo schermo non mostra una
bella immagine
• L’immagine sullo schermo non è chiara poichè la
testina è consumata, a causa di un lungo periodo di
utilizzo del videoregistratore.
• La testina può essersi consumata con l’uso di nastri
danneggiati o difettosi, o quando il nastro di pulizia è
stato usato parecchie volte.
• La durata della testina è varia, e dipende dalle
condizioni ambientali d’uso (temperatura, umidità,
polvere, ecc.). Tuttavia la testina deve essere
cambiata dopo essere stata usata per più di 3000 ore
1. Come prima cosa, premere il tasto
TRACKING.
2. Controllare che la presa d’uscita del
videoregistratore sia collegata correttamente.
3. Inserire il nastro di pulizia. Se l’immagine sullo
schermo non è migliorata, anche dopo aver
ripetuto la procedura sopra descritta, contattare
il proprio rivenditore o il servizio assistenza.
38
MAINTENANCE
Retro di SVR-24JP/SVR-960JP
01671A SVR-24JP/960JP-Ita3
12/7/01 4:36 PM
Page 40
INDIVIDUAZIONE DEI PROBLEMI
INDIVIDUAZIONE DEI PROBLEMI (CONTINUA)
Controllare per vedere se è il caso di contattare il servizio assistenza.
• Assicurarsi che il cavo
di alimentazione sia
inserito.
• Premere il tasto di RESET
sul pannello anteriore.
31
N
NON REGISTRA E NO
E
UC
OD
RIPR
ssetta sia stata
• Accertarsi che la videoca
inserita.
entazione ed
• Estrarre il cavo di alim
mere il tasto
inserirlo nuovamente. Pre
riore.
“RESET” sul pannello ante
31
NON C’E’ IMMAGINE
nessione d’ ingresso del
• Assicurarsi che la con
ettamente.
corr
ta
ega
coll
sia
monitor
scita del
o/l’u
ress
l’ing
che
arsi
• Assicur
parte posteriore
a
sull
tore
istra
oreg
vide
collegati correttamente.
dell’apparecchio siano
sia collegato
VCR
il
che
arsi
icur
• Ass
all’alimentazione.
39
NON REGISTRA
• Accertarsi che la lingu
etta di sicurezza non
rimossa dal nastro. Usa
re un nastro con unasia stata
di sicurezza attaccata
linguetta
. Se la linguetta è stata
dal nastro, coprire il foro
rimossa
nastro adesivo, per rend lasciato dalla linguetta con del
ere
possibile la registrazione.
• Verificare che il nast
ro non sia giunto in fond
caso, sostituire il nast
o.
In tal
• Assicurarsi che il tastoro o riavvolgerlo.
In questo caso, rilasciarlP/STILL non sia stato premuto.
o.
• Assicurarsi che ora
data siano state regolate
VCR. (Vedere la sezieone
sulla registrazione). sul
L’IMMAGINE E’ DI
SCARSA EQUALITA’ PROD
UCE
MOLTO RUMORE
• Verificare che il nas
tro non sia stato
registrato da un altro VCR
.
• Assicurarsi che la test
ina non sia sporca.
Premere il tasto “TRACK
ING” sul pannello
anteriore del videoreg
istratore per regolare
o
pulire la testina, usando
il nastro di pulizia.
NON ESPELLERE
ER e poi il tasto EJECT,
• Premere il tasto POW
eso.
dopo che il VCR si è acc
se la registrazione
• Controllare per vedere
stata.
programmata è stata impo
NON REGISTRA
CON TIMER
19~20
zione a
• Assicurarsi che la registra
ettamente.
corr
a
arat
prep
stata
sia
timer
rio corrente
13
• Assicurarsi che l’ora
sul VCR sia esatto.
zione.
• Vedere se c’è alimenta
” sia acceso sul
ore “
• Accertarsi che l’indicat
pannello anteriore.
MAINTENANCE
NON C’E’
ALIMENTAZIONE
40
12/7/01 4:36 PM
Page 42
INDIVIDUAZIONE DEI PROBLEMI
(CONTINUA)
Problema
Non è possibile inserire la
videocassetta.
Controlli e rimedi
• Assicurarsi che il cavo di alimentazione sia
inserito nella presa a muro.
• Assicurarsi non sia già stata inserita una
cassetta.
• Inserire il nastro con la finestra rivolta verso
l’alto (Vedere a pagina 21)
• Verificare che l’alimentazione sia stata accesa. Se
è accesa, premere il tasto POWER e premere il
tasto di espulsione.
Non è possibile registrare.
• Assicurarsi che l’ingresso della registrazione del
programma sia stato predisposto correttamente.
• Assicurarsi che l’orario corrente sia stato
regolato correttamente.
• Vedere se c’è alimentazione.
• Assicurarsi che il simbolo
sia acceso sul
display.
Non è possibile il montaggio
con un altro apparecchio
• Assicurarsi che tutti i collegamenti siano stati
eseguiti correttamente.
Il tasto di registrazione non
funziona
• Verificare la preselezione della registrazione. Si
deve premere solo il tasto POWER.
• Il pulsante non può essere prmuto quando
l’interruttore REC LOCK è su "ON". (Se si vuole
premere il tasto, mettere l’interruttore di REC
LOCK in posizione "OFF" e poi premere il tasto).
• Premere il tasto "TRACKING" per la
regolazione. Se non ci sono miglioramenti, pulire
la testina usando il nastro di pulizia.
• Nel caso si presentino altri problemi, contattare il servizio assistenza.
41
Questo videoregistratore è stato
progettato per un uso frequente,
quindi si raccomanda di
controllare quotidianamente le
condizioni del VCR prima di
usarlo.
• Qualora dovesse verificarsi un
funzionamento anomalo o un problema
durante il controllo quotidiano del VCR,
prendere i dovuti provvedimenti,
consultando la sezione di “controllo dei
problemi” alle pagine 39~41.
• Se il funzionamento anomalo o il problema
resta irrisolto, estrarre il cavo
dell’alimentazione e contattare il proprio
rivenditore.
CONTROLLI QUOTIDIANI
1
2
3
Accendere il VCR
• Assicurarsi che il monitor del televisore sia
un’immagine di buona qualità.
• Assicurarsi che ora e data siano corrette.
W
RE
F.F
Non è possibile espellere la
cassetta.
L’immagine riprodotta è
rumorosa
CONTROLLI QUOTIDIANI
PLAY
Avvolgere una
piccola parte del
nastro registrato il
giorno precedente.
Premere il tasto
PLAY per la
riproduzione
• Assicurarsi che non si
verifichino problemi durante
la riproduzione.
• Assicurarsi che l’ora e la
data di registrazione siano
regolate correttamente.
4
5
TIME MODE
Impostare il MODO
TEMPO su "L3H".
In caso di troppo rumore sullo
schermo
• Pulire la testina usando l’apposito nastro di
pulizia.
42
MAINTENANCE
01671A SVR-24JP/960JP-Ita3
01671A SVR-24JP/960JP-Ita3
12/7/01 4:36 PM
Page 44
PRIMA DI RICHIEDERE IL
SERVIZIO ASSISTENZA
Non si risponde a copertura di un uso negligente ed improprio
dell’apparecchio, ad esempio:
Forti collisioni.
Testina del video danneggiata a causa di una pulizia impropria.
Sostanze estranee che entrano nell’apparecchio.
Modifiche interne non autorizzate eseguite dall’utente.
Uso in aree a temperature alte o basse, ad alto tasso di umidità o in ambienti
fumosi.
Uso in modo diverso da quanto descritto nelle istruzioni.
Uso di fonti di alimentazione differenti da quanto specificato per questo
apparecchio.
2
Contatore del tempo di funzionamento
Si fa notare che viene visualizzato un tempo massimo di 9999.
Fare riferimento alla funzione di allarme per un funzionamento corretto.
La tabella relativa alle operazioni periodiche di Lubrificazione
di pulizia e sostituzione dei componenti principali
• Questa tabella si riferisce a condizioni di temperatura ed umidità normali. In caso di operazioni in
condizioni estreme è necessario effettuare i controlli più frequentemente.
• La durata del montaggio del cilindro dipende dalle condizioni operative.
• In caso di dubbi. Vi preghiamo di contattare un tecnico autorizzato.
▲ : Pulizia
● : Controlli & sostituzioni necessarie
◆ : Aggiunta olio
: Cambio
500
1000
2000
3000
4000
5000
6000
8000
10000
▲
Tipo di registrazione
Testina di registrazione di tipo rotatorio azimutale, tipo di
registrazione a segnale di luminanza FM, tipo di registrazione
a colori diretto convertito verso il basso.
Tipo di segnale
Tipo PAL.
Velocità del nastro
23,39mm/sec (modo L3H; E-180)
Videocassetta utilizzabile
Videocassette tipo
Tempo di registrazione
L3H/L8H/L12H/L24H /000H: SVR-24JP
L3H/L8H/L12H/L24H/36H/48H/72H/120H/168H/240H/480H/
960H/000H : SVR-960JP
Tempo di riavvolgimento
Circa 100 secondi (nastro E-180, nel caso di tempi di riavvolgimento)
Ingresso immagine
1,0 Vp-p (non bilanciato) 75 ohm
Immagine S/N
Oltre 42dB (registrazione L3H )
Ingresso audio
-8dB (modo L3H)
Uscita audio
-8dB (modo L3H)
Audio S/N
Oltre 40dB (registrazione L3H)
Caratteristiche di frequenza
audio
100-5.000Hz (registrazione L3H)
Voltaggio nominale
CA 100~240V
Frequenza Nominale
50~60Hz
Consumo energia
16W
Temperatura ambiente
5°C~40°C (41°F~104°F)
Condizioni di installazione
Posizione di funzionamento - orizzontale
Umidità relativa: al di sotto dell’80%
ALLOGGIAMENTO GUIDE NASTRO
▲
▲
▲
▲
▲
▲
▲
▲
Dimensioni
430mm (W) x 97mm (H) x 294mm (D)
ASSE CILINDRO
▲
●
●
●
●
●
●
●
Peso
4 Kg
PINCH ROLLER
▲
▲
▲
▲
▲
●
●
●
Accessori
Manuale per l’uso
MOTORE CAPSTAN
▲
▲
▲
▲
▲
▲
▲
▲
●
●
●
●
●
●
●
●
●
PULEGGIA CINGHIA
UNITA’ SOLENOIDE DI BLOCCAGIO
MAINTENANCE
1
CARATTERISTICHE TECNICHE
*Nota
– Per pulire le parti, usare un panno ed alcool(solvente).
– Dopo aver effettuato la pulizia, usare il video registratore solo dopo che l’alcool sia asciugato
completamente.
– Suggeriamo l’uso di olio [EP-56] o solente.
– Dopo aver effettuato la pulizia con alcool dovrebbero essere applicate una o più gocce di olio.
– Applicare periodicamente l’olio (Applicare l’olio dopo la pulizia)
– L’applicazione eccessiva di olio può provocare malfunzionamenti.
43
44
01671A SVR-24JP/960JP-Spa1
12/7/01 4:38 PM
Page 1
SVR-24JP
SVR-960JP
Video-grabadora a
intervalos fijos
Instrucciones de uso
e Instalación
01671A SVR-24JP/960JP-Spa1
12/7/01 4:38 PM
Page 2
INDICACIONES IMPORTANTES
DE SEGURIDAD
1
piezas que podría causar un incendio o una descarga eléctrica. Nunca
vierta ningún tipo de líquido sobre la unidad.
16. Reparación - No intente reparar la unidad usted mismo ya que al abrir o
retirar las cubiertas puede exponerse a voltajes peligrosos u otro tipo de
riesgos. Cualquier reparación deberá llevarla a cabo personal técnico
calificado.
17. Daños que requiere del servicio técnico - Desenchufe la unidad de la
toma y llévela a reparar al servicio técnico en los siguientes casos:
a) Cuando el cable o el enchufe de alimentación esté dañado.
b) Si se ha vertido algún líquido sobre la unidad o ha caído algún objeto
dentro de la misma.
c) Si la unidad ha sido expuesta a la lluvia o al agua.
d) Si, aunque siga las instrucciones de funcionamiento, la unidad no
funciona de forma normal. Sólo debe ajustar los controles indicados
en las instrucciones, ya que un ajuste inadecuado de otros controles
puede producir daños y a menudo implicará un mayor trabajo para el
técnico calificado que tenga que arreglar la unidad.
e) Si la unidad se ha caído o la carcasa ha sido dañada.
f) Cuando la unidad muestre un claro cambio de funcionamiento.
18. Sustitución de piezas - Cuando sea necesario cambiar piezas,
asegúrese de que el técnico de reparación haya utilizado las piezas
indicadas por el fabricante o que tengan las mismas características que
la pieza original. Los cambios no autorizados pueden producir
incendios, descargas eléctricas u otro tipo de riesgos.
19. Comprobación de seguridad - Al acabar una reparación de esta unidad,
pida al técnico que haga las comprobaciones de seguridad para
determinar si la unidad funciona correctamente.
20. Toma a tierra coaxial - Si se conecta a la unidad un sistema de cable
externo, asegúrese de que el sistema de cable tenga toma a tierra. Sólo
modelos de EE.UU.: el Sección 810 del Código Eléctrico Nacional
ANSI/NFPA, nº 70-1981, ofrece información respecto a la toma a tierra
adecuada para la estructura de montaje y soporte, la toma a tierra del
cable coaxial a una unidad de descarga, el tamaño de los conductores
de la toma a tierra, la localización de la unidad de descarga, la conexión
con los electrodos de toma a tierra y los requisitos para el electrodo de
toma a tierra.
21.Tormentas eléctricas - Para mejorar la protección de la unidad, des
enchufe el cable de alimentación de la toma de corriente durante una
tormenta eléctrica o cuando la vaya a dejar desatendida o sin usar
durante un largo período de tiempo.
INFORMACIÓN DE FCC E ICES
(Sólo modelos de EE.UU. yCanadá)
ADVERTENCIA - Este equipo ha sido probado y ha demostrado que
cumple las normas sobre dispositivos digitales de la Clase B, de acuerdo
con la parte 15 de las Normas FCC e ICES-003 industriales de Canadá.
Estos límites han sido especificados para ofrecer una protección razonable
contra interferencias perjudiciales cuando el equipo se utilice en una zona
residencial. Este equipo genera, utiliza y puede emitir energía de
radiofrecuencia y, si no ha sido instalado y utilizado siguiendo las
instrucciones, puede producir interferencias perjudiciales en las
comunicaciones por radio. Sin embargo, no existe ninguna garantía de que
no vayan a producirse interferencias en una instalación determinada. Si el
equipo causa interferencias perjudiciales a la recepción de video o
televisión, lo que puede determinarse al apagar y después encender el
equipo, el usuario debería intentar corregir esas interferencias siguiendo
una o más de los consejos que se dan a continuación:
– Reorientar o cambiar de posición la antena receptora.
– Aumentar la separación entre el equipo y el receptor.
– Conectar el equipo a una toma o circuito diferente de la toma a la que
está conectada el receptor.
– Solicitar ayuda al distribuidor o a un técnico de radio/TV con
experiencia.
No deberán realizarán cambios ni modificaciones deliberados o no, que
no hayan sido aprobados expresamente por la parte responsable. Tales
cambios o modificaciones pueden anular la autorización del usuario a
utilizar el equipo.
Al usuario le resultará útil el siguiente folleto preparado por la FCC: “How to
Identify and Resolve Radio-TV Interference Problems”. Este folleto lo
distribuye el departamento de impresión del Gobierno de los Estados
Unidos, Washington, DC 20402, Nº de stock 004-000-00345-4.
Precauciones de Seguridad
Securite
PRECUACIÓN
ATTENTION
RIESGO DE DESCARGA
ELÉCTRICA
NO ABRIR
RISQUE DE CHOC ELECTRIQUE,
NE PAS OUVRIR.
PRECAUCIÓN: PARA REDUCIR EL RIESGO DE
DESCARGA ELÉCTRICA, NO ABRA LAS CUBIERTAS.
NO HAY PIEZAS EN EL INTERIOR QUE PUEDAN SER
CAMBIADAS POR EL USUARIO. PÓNGASE EN
CONTACTO CON PERSONAL TÉCNICO CUALIFICADO.
Debido a limitaciones de espacio, esta etiqueta puede
aparecer en la parte inferior de la unidad.
El símbolo del rayo con una flecha
dentro del triángulo alerta al usuario de
la presencia de “voltajes peligrosos” sin
aislamiento dentro de la caja de la
unidad y de la magnitud suficiente para
constituir un riesgo de descarga
eléctrica para las personas.
El símbolo de exclamación dentro de
un triángulo alerta al usuario de la
presencia de instrucciones de
funcionamiento o mantenimiento
(servicio) importantes en la información
escrita que acompaña al aparato.
Precaución
Para evitar incendios o peligros de descargas
eléctricas, no exponga a la lluvia o humedad
aparatos que no hayan sido diseñados
específicamente para ello.
Atención: La instalación deberá
realizarla personal técnico cualificado
de acuerdo con el Código Eléctrico
Nacional o la normativa local aplicable.
Desconexión de la red. Los aparatos
con o sin interruptores ON-OFF reciben
alimentación eléctrica cuando el cable
está conectado a la red; sin embargo,
el aparato está operativo sólo cuando el
interruptor está en la posición On. Para
todos los aparatos eléctricos, es
necesario desenchufar el cable para
que el aparato este desconectado de la
red.
CONFIGURACIÓN
1. Lea las instrucciones - Antes de poner en marcha la unidad debe leer
todas las instrucciones de seguridad y de funcionamiento.
2. Guarde las instrucciones - Estas instrucciones sobre seguridad y
funcionamiento deben guardarse para su consulta en el futuro.
3. Advertencias principales - Deberán respetarse todas las advertencias
hechas sobre la unidad y contenidas en las instrucciones de
funcionamiento.
4. Siga las instrucciones - Deberán respetarse todas las instrucciones
sobre el uso y funcionamiento.
5. Limpieza - Antes de realizar la limpieza de la unidad, debe
desenchufarla de la tomacorriente. No utilice limpiadores líquidos ni
aerosoles. Utilice un paño ligeramente húmedo.
6. Conexiones - No haga conexiones que no hayan sido recomendadas
por el fabricante de la unidad, ya que podría dañarla.
7. Agua y humedad - No utilice esta unidad cerca de agua - por ejemplo,
cerca de una bañera, un lavamanos, el fregadero de la cocina, una
lavadora, un sótano húmedo, una piscina, en una instalación
descubierta al aire libre ni en ninguna zona que pueda considerarse un
lugar húmedo.
8. Accesorios - No coloque esta unidad sobre un soporte, trípode o
montaje que sea inestable; la unidad puede caerse y causar daños
graves a personas, además de a la propia unidad. Sólo debe utilizarse
con un soporte, trípode o montaje que haya sido
recomendado por el fabricante, o que se comercialice
junto con la unidad. Cualquier soporte para la
unidad deberá cumplir las indicaciones del
fabricante, y deberá utilizar un accesorio de
montaje recomendado por el mismo. Al transportar
el aparato deberá hacerlo con cuidado. Las
paradas bruscas, una fuerza excesiva y las
superficies irregulares pueden hacer volcar el carro
de transporte.
9. Ventilación - Los orificios tienen la finalidad de permitir la ventilación del
aparato y garantizar un funcionamiento fiable del mismo, además de
protegerlo de un exceso de calor. Dichos orificios no deberán
bloquearse ni cubrirse. Esta unidad no deberá colocarse en un
compartimiento cerrado a menos que disponga de la ventilación
adecuada o que se cumplan las instrucciones del fabricante.
10. Fuentes de alimentación - Para esta unidad sólo debe utilizarse el tipo
de alimentación indicado en la etiqueta. Si no está seguro del tipo de
alimentación que va a utilizar, consulte a su distribuidor o a la compañía
eléctrica local. Si va a utilizar baterías para la unidad u otro tipo de
alimentación, consulte las instrucciones de funcionamiento.
11. Toma a tierra o polarización - Esta unidad puede estar equipada con un
enchufe para corriente alterna polarizada (un enchufe que tiene una
patilla plana más ancha que la otra). Este enchufe sólo se puede
colocar de una forma en la toma de alimentación. Es una medida de
seguridad. Si no puede insertar el enchufe completamente en la toma,
pruebe la invirtiendo el enchufe. Si aún así no consigue enchufarlo,
póngase en contacto con un electricista para que arregle la toma. No
inhabilite la característica de seguridad del enchufe polarizado. De
forma alternativa, esta unidad puede ir equipada con un enchufe con
toma a tierra de 3 hilos, un enchufe que tiene una tercera patilla (toma a
tierra). Este enchufe sólo puede enchufarse a una toma de alimentación
con toma a tierra. Es una medida de seguridad. Si no puede insertar el
enchufe en la toma, póngase en contacto con un electricista para que
cambie la toma. No inhabilite la característica de seguridad del enchufe
con toma a tierra.
12. Alimentación - Protección de los cables - Los cables de alimentación
deberán colocarse de forma que no puedan pisarse ni ser presionados
por objetos colocados sobre los mismos, especialmente los cables y los
enchufes, las conexiones con dispositivos, y el punto por el que salen
del aparato.
13. Líneas de alimentación - Un sistema exterior no debe colocarse cerca
de cables de alimentación general ni de otros circuitos de electricidad o
iluminación eléctrica, ni donde pueda caer sobre dichas líneas de
alimentación o circuitos. Cuando instale un sistema exterior, deberá
extremar las precauciones para no tocar tales líneas o circuitos ya que
el contacto con los mismos puede resultar fatal. Sólo para modelos de
EE.UU.: consulte el Artículo 820 del Código Eléctrico Nacional sobre la
instalación de sistemas de CATV.
14. Sobrecarga - No debe sobrecargar las tomas ni los cables de alargue
ya que se pueden provocar incendios o descargas eléctricas.
15. Entrada de objetos o líquidos - Nunca intente introducir objetos de
ningún tipo en la unidad a través de las aberturas ya que pueden tocar
puntos de voltaje peligrosos o puede producirse un cortocircuito de las
Danger: Pour éviter tout risque d'électrocution, ne
pas ouvrir le boîtier. Il n'y a pas de pièces
remplaçables à l'intérieur. Pour toute révision,
s'adresser à un technicien spécialisé.
Cet étiquette peut apparaître en dessous de l'appareil
dû aux limitations d'espace.
L'éclair fléché dans un triangle
équilatéral avertit l'utilisateur de la
présence d'une haute tension non
isolée à l'intérieur de l'appareil. Elle peut
être d'une magnitude suffisante pour
constituer un risque d'électrocution.
Le point d'exclamation à l'intérieur d'un
triangle équilatéral avertit l'utilisateur de
la présence d'instructions importantes
d'utilisation et de maintenance dans la
documentation accompagnant
l'appareil.
Attention
Pour éviter un incendie ou une électrocution, ne pas
exposer les appareils qui ne sont pas conçus spécifiquement pour usage extérieur à la pluie ou à l'humidité.
Attention: L'installation doit être
effectuée uniquement par du personnel
de service qualifié conformément à la
réglementation du Code Electrique
National ou à la réglementation locale.
Disjonction de l'alimentation.
Les appareils avec ou sans commutateure
ON-OFF sont alimentés à chaque fois que
le cordon d'alimentation est branché à la
source d'alimentation; toutefois, les
appareils disposant de commutateurs ONOFF ne fonctionnent que lorsque le
commutateur ON-OFF est sur la position
ON. Le cordon d'alimentation est la
disjonction d'alimentation principale pour
tous les appareils.
2
Page 4
IMPORTANTES PRECAUCIONES
DE SEGURIDAD
Precauciones De Seguridad
Precaution: Pare Reducir El Riesgo De Choque
Eléctrico, Favor No Abrir La Cubierta. Este Equipo
No consta De Piezas O Partes Que Requieren
Servicio O Mantenimiento. Para Reparaciones
Favor Referirse A Un Técnico Calificado.
Instrucciones de Seguridad
Contenidos
Controles e Indicadores
Conectores
Configuración
1
4
5
8
9
MENÚ
Cómo Configurar el Menú
Cómo Poner la Hora Actual
Menú de configuración
Dieses Zeichen weist den Benutzer auf
die nicht isolierte Hochspannung
innerhalb der Anlage hin. Es besteht die
Gefahr eines Elektroschlages.
Das Ausrufezeichen in dem
gleichseitigen Dreieck ist dazu da, den
Benutzer auf wich-tige Inbetriebnahmeund Instandhaltungs-vorschriften
hinzuweisen, die dem Gerät in Form
einer Broschüre beigelegt sind.
Warnung
Um das Risiko von Feuer oder Elektroschlag zu
vermeiden, darf weder das Gerät selbst, noch das
Netzgerät Regen oder Feuchtigkeit ausgesetzt werden.
Achtung!: Die Installation sollte nur von
qualifiziertem Kundendienstpersonal
gemäß jeweilig zutreffender
Elektrovorschriften ausgeführt werden.
Nota:
3
Debido a limitaciones de espacio, esta etiqueta puede
aparecer en la parte inferior de la unidad.
El símbolo representado por un relámpago
con punta de flecha dentro de un triángulo
equilátero, se muestra con el objetivo de
alertar al usuario que existen "voltages
peligrosos" sin aislamiento, dentro de la
cubierta de la unidad. Dichos voltages
pueden ser de tal magnitud que constituyen
un riesgo de choque eléctrico a personas.
El símbolo de exclamación dentro de
un triángulo equilátero, se muestra con
el objetivo de alertar al ususario de que
instrucciones de operación y
mantenimiento importantes acompañan
al equipo.
Peligro
Para evitar el peligro de incendio ó choque eléctrico, no
exponga a la lluvia ó humedad, equipos que no han sido
diseñados para uso exterior.
Atención: La instalación de este equipo
debe ser realizada por personal capacitado,
solo en acuerdo, y en cumplimiento de
normas del "National Electric Code" (Código
Eléctrico Nacional) ó las normas del
Gobierno Nacional Local.
Para Desconectdar la Alimentación:
Unidades no equipadas con interruptores
Netzanschluß. Geräte mit oder ohne
Netzschalter haben Spannung am
ON/OFF, son alimentadas cuando el cable
de alimentación, es conectado a la corriente
Gerät anliegen, sobald der Netzstecker
in die Steckdose gesteckt wird. Das
eléctrica. Las unidades equipadas con
interruptores son alimentadas de igual
Gerät ist Jedoch nur betriebsbereit,
forma, pero adicionalmente requieren qur el
wenn der Netzschalter (EIN/AUS) auf
interruptor esté posicionado en ON. El cable
EIN steht. Wenn man das Netzkabel
de alimentación es el medio principal de
aus der Stekdose zieht, dann ist die
desconexión del equipo.
Sapnnungszuführung zum Gerät
vollkommen unterbrochen.
Ud. puede escuchar un sonido de clic cuando pulsa teclas claves en el frente. Es un sonido natural
causado por un “solenoide” que se halla para reforzar el control del giro del motor de la cabezal
móvil. El motor de la cabezal móvil en este VCR es del tipo de cojinete que tiene una duración de
más de 10.000 horas.
Funcionamiento
Diferentes Tipos de Reproducción
NOTA: Cuando se manipulen placas de circuitos
impresos sensibles a la electroestática,
deberán utilizarse pulseras con toma a
tierra y seguirse las precauciones de seguridad ESD.
21
23
DESCRIPCIÓN
27
28
29
31
32
INSTALACIÓN
GRABACIÓN
Preparación Antes de Grabar
Bloqueo de Grabación
Grabación Básica
Grabación en Serie
Grabación de Alarmas
FUNCIONES
Funciones de Alarma
Funciones Convenientes
ADVERTENCIA: Dispositivo sensible a la
electroestática.
Siga las indicaciones adecuadas de
manipulación del CMOS/MOSFET para
evitar descargas electrostáticas.
11
13
16
REPRODUCCIÓN
Dieses Zeichen kann aus Platzgründen auf der
Unterseite des Gerätes angebracht sein.
SERVICIO TÉCNICO
33
35
CONFIGURACIÓN
Warnung: Verhindern Sie einen möglichen
Elektroschlag, indem Sie die Abdeckung nicht
entfernen. Wenden Sie sich bei der Wartung an
dafür qualifiziertes Personal.
CONFIGURACIÓN
MENÚ
RIESGO DE CHOQUE
ELECTRICO INO ABRIRI
El Video-grabadora SVR-24JP/SVR-960JP permite la
grabación a intervalos fijos en velocidades seleccionables de
3-24H para diversas aplicaciones de CCTV.
Instale el SVR-24JP/SVR-960JP en entornos en los que la
temperatura de funcionamiento oscile entre +5°C y
+40°C(+41°F a +104°F) y la humedad relativa sin
condensación oscile entre el 0% y el 80%.
CONEXIÓN
Método de Conexión
Conexiones para Grabación en Serie y
Grabación de Alarma
REPRODUCCIÓN
PRECAUTION
GRABACIÓN
ACHTUNG!
HOCHSPANNUNGSGEFAHR
NICHT ÖFFNEN!
36
37
MANTENIMIENTO
Mantenimiento
Resolución de Problemas
Revisiones Diarias
Antes de Llamar al Servicio Técnico
Especificaciones
38
39
42
43
44
FUNCIÓN
Sicherheitsvorkenhrungen
CONTENIDO
CONEXIÓN
12/7/01 4:38 PM
DESEMBALAJE
Desembale la unidad cuidadosamente. Se trata de
equipo electrónico y debe manipularse con cuidado.
Si un elemento presenta daños de envío, vuelva a
colocarlo correctamente en su embalaje y
comuníqueselo al transportista. Si falta algún elemento,
comuníqueselo a su Representante Comercial o al
Departamento de Servicio al Cliente.
MANTENIMIENTO
01671A SVR-24JP/960JP-Spa1
El cartón de embalaje es un contenedor seguro en la
cual debe ser transportado la unidad.
Guárdalo para su posible uso en el futuro.
4
01671A SVR-24JP/960JP-Spa1
12/7/01 4:38 PM
Page 6
22 21 20
19
18 17 16
REC
F.F
PLAY
W
RE
ECK
JECT
STOP/E
CK
REC LO
TIMER
ON
RESET
EAR
O CL
CNT.MEM
COUNT
CK
REC LO
Nombre
TIME
TRAC
KING/S
MODE
ET
12
11
10
9
8
T
SHIF
CK
V-LO
MENU
1
ACCESORIO
2
3
4
5
6
7
Consultar
página
1
POWER
Pulsar para encender o apagar el aparato
MENU
Pulsar par visualizar la pantalla del menú
11
3
SHIFT ❷ , ❿
Pulsar para set menu y reloj
11
V-LOCK
,
21
Pulsar para acceder al ajustador de imagen
22
Pulsar para ajustar tracking y set menu y reloj
22
Pulsar para cambiar el modo de hora en reproducción
24
Indicador on/off de modo de bloqueo de grabación
28
Panel de visualización
Muestra los valores de funcionamiento actuales
7
8
REV
Pulsar para invertir la reproducción
(sólo modo L3H)
25
9
AUDIO ON
Pulsar para control on/off de audio
10
COUNT
Inicial: Visualiza el contador de cinta
Una pulsación : Para visualizar horas de entrada de alarma
4
TRACKING/SET
5
TIME MODE
6
LED REC LOCK
7
ER
POW
15
14
13
Descripción
2
P/STILL
REC CH
AUDIO
REV
N°
,
,
Dos pulsaciones: Para visualizar las horas de funcionamiento
11
CNT. MEMO
34
33
Inicial: Visualiza el contador de cinta
Una pulsación: Para visualizar la memoria del contador
25
Dos pulsaciones: Para visualizar la memoria de alarma
34
CLEAR
Pulsar para borrar el contador
34
13
RESET
Pulsar para restaurar la unidad
31
14
TIMER
Pulsar para establecer la grabación con temporizador
20
15
REC LOCK
Utilizar para seleccionar modo de bloqueo de grabación
28
16
REC CHECK
Pulsar para comprobar grabación (reproducción
breve) durante la grabación
29
17
P/STILL
Pular para congelar imagen durante la reproducción o
para hacer pausa en el modo de grabación
26
18
REC
Pulsar para grabar
29
19
SHUTTLE
Usar para el funcionamiento de la cinta
22
20
JOG
Girar para avanzar o retroceder fotograma a fotograma
26
21
PLAY
Pulsar para reproducir una cinta
22
22
STOP/EJECT
Pulsar para parar/expulsar la cinta
22
12
MANUAL DE INSTRUCCIONES
5
6
CONFIGURACIÓN
CONTROLES E INDICADORES
12/7/01 4:38 PM
Page 8
CONTROLES E INDICADORES
PARTE POSTERIOR
PARTE FRONTAL
Indicador de grabación Indicador de grabación de reserva Indicador de grabación de
• Se enciende después de pulsar el alarma
• Se ilumina durante la
Indicador REC LOCK
• Se ilumina durante el
modo de bloqueo de
grabación.
CONECTORES
botón temporizador para la
grabación de programas.
grabación.
Indicador de presencia/ausencia
de la cinta
• Se ilumina mientras dura la
grabación de alarma y parpadea
al terminar la grabación.
TERMINALES EXTERNOS DEL EQUIPO
Contador de tiempo de
grabación/reproducción.
1 ALARM IN
2 ALARM OUT
6 TAPE END OUT 7 SERIES OUT
1
2
3
3 ALARM RESET 4 ERROR OUT
5 TRIGGER OUT
8 GND
10 1 SHOT RECIN
4
5
9 SERIES IN
6
7
8
9
10
RS-232C
IN
IN
REC LOCK
C.MEMO
A.MEMO
HOUR
REC
FAULT
T-END
AUDIO
Indicador de recuperación
de corte de alimentación
Indicador de
memoria de
Contador/Alarma
• Memoria de contador:
C. MEMO.
• Memoria de Alarma:
A. MEMO
• Visualización de Hora
de Funcionamiento:
HOUR.
• Parpadea cuando se
restaura el suministro de CA.
• Se apaga al pulsar cualquier
botón.
INFORMACIÓN DE LOS TERMINALES EXTERNOS DEL EQUIPO
GND
1
2
3
4
5
ALARM IN (Entrada
de alarma)
ALARM OUT
ALARM OUT
2 (Salida
de alarma)
ALARM RESET
3 (Restauración
ALARM RESET
de alarma)
6
Indicadores que no son de reproducción
VIL
T
VIH
VIL
T
VIH
VIL
T
VIH
Reproducción
Gira en sentido horario
Grabación
Gira en sentido horario
REC
4 ERROR OUT
Parada
Parpadea
Pausa
Parpardea
REC
VIH
Reproducción lenta
Parpadea y gira en sentido horario
Grabación con temporizador Gira en sentido horario
TRIGGER OUT
TRIGGER OUT
5 (Accionamiento)
VIH
VIL
T
Búsqueda hacia atrás
Gira rápidamente en sentido antihorario
Rebobinado
Gira rápidamente en sentido antihorario
END OUT
6 TAPE
TAPE END OUT
(Fin de cinta)
OUT
7 SERIES
SERIES OUT
(Salida en serie)
Reproducción inversa
Gira en sentido antihorario
Bobinado rápido
Gira rápidamente en sentido horario
8 GND(Masa)
GND
Búsqueda hacia adelante
Gira rápidamente en sentido horario
Reproducción lenta inversa Parpadea y gira lentamente
en sentido antihorario
7
REC
Grabación de alarma Gira en sentido horario
REC
IN
9 SERIES
SERIES IN
(Entrada en serie)
REC IN
10 11SHOT
SHOT REC IN
(Grabación de un disparo)
7
8
9
10
NIVEL DE SEÑAL
VIH
1 ALARM IN
VISUALIZACIÓN DE LAS CONDICIONES DE FUNCIONAMIENTO
CONECTOR DE
ENTRADA/SALIDA DE VIDEO
(TIPO BNC)
CONECTOR DE
ENTRADA/SALIDA DE
AUDIO (TIPO RCA)
NOMBRE DEL TERMINAL
Indicadores de reproducción
VIDEO
H
RANURA DE TOMA
ELÉCTRICA
• Visualización de las horas de
funcionamiento
• Visualización de la memoria de
contador/alarma "
"
OUT
OUT
Indicador de final de cinta Contador
• Se ilumina cuando se
llega al final de la cinta.
CONFIGURACIÓN
01671A SVR-24JP/960JP-Spa1
VIL
T
TIPO
VIH : 4 -5
VVIL : 0 - 0,6 V
T
: Más de 0,5 segundos
VIH : 4 - 5
VVIL : 0 - 0,6
VT : Grabación de alarma
VIH : 4 - 5
VVIL : 0 - 0,6
VT : Más de 0,5 segundos
VIH : 4 - 5
VVIL : 0 - 0,6
VT :
VIH : 4 - 5
VVIL : 0 - 0,6
VT : Más de 8 m.sec.
SALIDA
ENTRADA
SALIDA
SALIDA
VIL
VIH : 4 ~ 5V
VIL : 0 ~ 0.6 V
T
: Durante la entrada de cualquier botón
SALIDA
VIL
VIH : 4 - 5
VVIL : 0 - 0,6
VT : Más de 1 segundo
SALIDA
T
VIH
T
0V
VIH
VIL
T
VIH
VIL
T
ENTRADA
VIH
VVIL
VT
VIH
VVIL
VT
:4-5
: 0 - 0,6
: Más de 0,5 segundos
:4-5
: 0 - 0,6
: Más de 0,5 segundos
MASA
ENTRADA
ENTRADA
8
01671A SVR-24JP/960JP-Spa1
12/7/01 4:38 PM
Page 10
INSTALACIÓN
• Antes de utilizar esta unidad asegúrese que ha hecho lo siguiente.
• La forma el enchufe real puede diferir de la imagen del manual.
Establecer una conexión
entre el monitor y esta
unidad.
2
Conectar la cámara CCD a
esta unidad.
3
Enchufar la entrada de
alimentación de este video
a la toma de pared.
• Enchufe el cable de alimentación
en una toma de 100-240 V de CA
que funcione.
4
Encender el monitor.
CONFIGURACIÓN
1
• Si utiliza un monitor, enciéndalo.
• Si utiliza un TV, enciéndalo y conecté
a la entrada del video.
• Para obtener más información sobre el
TV, consulte las instrucciones de
funcionamiento del mismo.
MONITOR
6
7
8
9
IN
OUT
CA 100-240V
VIDEO
1 ALARM IN
2 ALARM OUT
6 TAPE END OUT 7 SERIES OUT
1
2
3
4
3 ALARM RESET 4 ERROR OUT
8 GND
5
9 SERIES IN
6
7
8
POWER
5 TRIGGER OUT
10 1 SHOT RECIN
9
10
RS-232C
IN
IN
ENTRADA VIDEO
OUT
OUT
AUDIO
VIDEO
1 ALARM IN
2 ALARM OUT
6 TAPE END OUT 7 SERIES OUT
1
2
3
4
3 ALARM RESET 4 ERROR OUT
8 GND
5
9 SERIES IN
6
7
8
5 TRIGGER OUT
10 1 SHOT RECIN
9
10
RS-232C
IN
1 ALARM IN
2 ALARM OUT
6 TAPE END OUT 7 SERIES OUT
3 ALARM RESET 4 ERROR OUT
5 TRIGGER OUT
8 GND
10 1 SHOT RECIN
9 SERIES IN
IN
OUT
OUT
1
2
3
4
5
6
7
8
9
10
AUDIO
RS-232C
IN
IN
VIDEO
OUT
OUT
AUDIO
VIDEO
IN
IN
OUT
CÁMARA CCD
OUT
AUDIO
9
VIDEO
10
01671A SVR-24JP/960JP-Spa1
12/7/01 4:38 PM
Page 12
CÓMO CONFIGURAR EL
MENÚ
1. AJUSTAR/PONER RELOJ
1
Pulse el botón MENU
(No aparece mientras está en
modo de reproducción o mientras no
esté establecida la hora.)
CLOCK SET/ADJUST
1 ❿ SUMMER TIME SET (USE)
2 DISPLAY MODE (YY-MM-DD)
3 CLOCK SET/ADJUST
YEAR
2001
DATE
TIME
01/01 MON 12:00
5. CONFIGURACIÓN DEL MODO VCR
VCR MODE SETUP
1 ❿ TRIGGER --------------------(1FIELD)
2 V-SYNC ----------------------------(ON)
3 BUZZER ---------------------------(ON)
4 TAPE LENGTH ----------------(E240)
$
END:MENU
2. CONFIGURACIÓN DEL MODO DE
VISUALIZACIÓN
MAIN MENU
1 ❿ CLOCK SET/ADJUST
2 DISPLAY MODE SETUP
3 ALARM REC SETUP/RECALL
4 REC MODE SETUP
5 VCR MODE SETUP
6 PROGRAM SETUP
7 POWER LOSS MEMORY
(❷❿)
END:MENU
DISPLAY MODE SETUP
1 ❿ DATE DISPLAY ------------------(ON)
2 TIME DISPLAY-------------------(ON)
3 POSITION -------------(R-BOTTOM)
(❷❿)
END:MENU
• Establece el formato de fecha y hora
(❷❿)
• Acciona el control de sincronización y
el control de sonido del pitido.
6. CONFIGURACIÓN DEL PROGRAMA
PROGRAM SETUP1
START STOP DATE
MODE
•❿
•
•
•
• PROGRAM SETUP2
•
( ❷❿ /– +,CLEAR)
2
(El signo “❿” se desplazará hacia
abajo con cada pulsación)
3
Tras colocar el signo "❿"
en el elemento de menú
deseado, puse el botón
SHIFT ❿ para continuar.
• Muestra el menú seleccionado en
la pantalla.
(Consulte las páginas 13-20)
END:MENU
deseado y su localización en la pantalla
3. CONFIGURACIÓN DE LA
GRABACIÓN DE ALARMA
Para seleccionar un
elemento del menú pulse el
botón SHIFT ❷
END:MENU
MENÚ
(❷❿/– +)
MENU
ALARM REC SETUP/RECALL
1 ❿ MODE -----------------------------(L3H)
2 DURATION --------------------(AUTO)
3 BUZZER ---------------------------(ON)
4 ALARM RECALL
•
•
•
•
•
•
❿
PROGRAM SETUP2
START STOP DATE
MODE
PROGRAM SETUP1
( ❷❿ /– +,CLEAR)
(❷❿/– +)
END:MENU
END:MENU
• Selecciona la grabación de programa
• Selecciona el modo de grabación de
alarma
4. CONFIGURACIÓN DEL MODO DE
GRABACIÓN
7. MEMORIA DE LOS CORTES DE
SUMINISTRO
REC MODE SETUP
1 ❿ REPEAT REC-------------------(OFF)
2 SERIES REC -------------------(OFF)
3 1-SHOT REC--------------------(OFF)
(❷❿)
END:MENU
• Pone el modo de grabación repetida. Modo
de grabación de un disparo y modo de
grabación en serie.
11
•
•
•
POWER LOSS MEMORY
YEAR DATE TIME
OFF
ON
OFF
ON
OFF
ON
END:MENU
• Informa los cortes y recuperaciones de
alimentación producidos
12
01671A SVR-24JP/960JP-Spa2
12/7/01 4:38 PM
Page 14
CÓMO PONER LA HORA ACTUAL
– CÓMO PONER LA HORA DE VERANO
1
Ejemplo: 25 de diciembre de 25 . 2002 13:30
Pulse el botón MENU.
• Al pulsar el boton MENU, se
2
Pulse el botón SHIFT ❿.
• Al pulsar el botón SHIFT ❿, se
muestra CLOCK SET/ADJUST.
3
Pulse el botón SHIFT ❿.
• Cuando se pulsa el botón SHIFT ❿ ,
se muestra la hora de verano.
4
• Pulse el botón SHIFT ❿ !para activar o
muestra el MENÚ PRINCIPAL.
Pulse el botón SHIFT ❷.
• Seleccione SUMMER TIME IN.
MENU
SHIFT
V-LOCK
SHIFT
V-LOCK
SHIFT
V-LOCK
MAIN MENU
1 ❿ CLOCK SET/ADJUST
2 DISPLAY MODE SETUP
3 ALARM REC SETUP/RECALL
4 REC MODE SETUP
5 VCR MODE SETUP
6 PROGRAM SETUP
7 POWER LOSS MEMORY
(❷❿)
5
MENÚ
desactivar la hora de verano.
CLOCK SET/ADJUST
1 ❿ SUMMER TIME SET (USE)
2 DISPLAY MODE(YY-MM-DD)
3 CLOCK SET/ADJUST
YEAR
2001
SUMMER TIME SET
1 ❿ SUMMER TIME
(USE)
2 SUMMER TIME IN
3 SUMMER TIME OUT
DATE
TIME
01/01 MON 12:00
#
(❷❿/– +)
END:MENU
IN
OUT
END:MENU
WEEK
MONTH TIME
LAST /FRI
2
9:00
12:00
FIRST /SUN 12
(❷❿/– +)
Introduzca el semana, día,
mes y hora usando los
botones TRACKING/ SET
.
• Pulse el botón SHIFT ❿ !tras introducir
6
Pulse el botón SHIFT ❷!y
introduzca SUMMER TIME
OUT.
el semana y verá el signo # bajo el
día.
• Introduzca el mes y hora del mismo
modo.
SUMMER TIME SET
1 SUMMER TIME
(USE)
2 ❿ SUMMER TIME IN
3 SUMMER TIME OUT
WEEK
MONTH TIME
14:00
LAST /FRI 11
IN
#
(❷❿/– +)
END:MENU
END:MENU
– CÓMO PONER EL MODO DE PANTALLA
7
Pulse el botón MENU.
• Compruebe el semana, día, mes, y
hora de nuevo y pulse el botón
MENU.
8
Pulse el botón SHIFT ❷!y
pulse el botón SHIFT ❿.
• Cuando se pulsa el botón SHIFT ❿
cambia el modo de pantalla.
• La pantalla cambia del modo siguiente.
(YY-MM-DD) → (DD-MM-YY) →
(MM-DD-YY)
MENU
SHIFT
V-LOCK
TRACKING/SET
SUMMER TIME SET
1 SUMMER TIME
(USE)
2 ❿ SUMMER TIME IN
3 SUMMER TIME OUT
IN
WEEK
MONTH TIME
LAST /FRI 11
14:00
#
(❷❿/– +)
13
END:MENU
SHIFT
V-LOCK
SUMMER TIME SET
1 SUMMER TIME
(USE)
2 SUMMER TIME IN
3 ❿ SUMMER TIME OUT
OUT
WEEK
MONTH TIME
12:00
FIRST /SUN 12
#
(❷❿/– +)
CLOCK SET/ADJUST
1 ❿ SUMMER TIME SET (USE)
2 DISPLAY MODE(YY-MM-DD)
3 CLOCK SET/ADJUST
YEAR
2001
DATE
TIME
01/01 MON 12:00
#
(❷❿/– +)
CLOCK SET/ADJUST
1 SUMMER TIME SET (USE)
2 ❿ DISPLAY MODE(YY-MM-DD)
3 CLOCK SET/ADJUST
YEAR
2001
DATE
TIME
01/01 MON 12:00
#
END:MENU
(❷❿/– +)
END:MENU
END:MENU
14
01671A SVR-24JP/960JP-Spa2
Page 16
CÓMO PONER LA HORA ACTUAL
MENÚ DE CONFIGURACIÓN
– CÓMO PONER LA HORA ACTUAL
– CONFIGURACIÓN DE VISUALIZACIÓN Y GRABACIÓN DE ALARMA
Pulse el botón SHIFT ❷.
• Se inicia CLOCK SET/ADJUST.
10
Introduzca el año, mes y día
usando los botones
TRACKING/ SET
.
1
(Si la pantalla MODE es YY-MM-DD)
• Pulsando TRACKING/SET
una
CONFIGURACIÓN DEL MODO DE VISUALIZACIÓN
DISPLAY MODE SETUP
1 ❿ DATE DISPLAY ------------------(ON)
2 TIME DISPLAY-------------------(ON)
3 POSITION -------------(R-BOTTOM)
vez, se muestra “2002”.
• Pulse el botón SHIFT ❿ !tras
YEAR
2001
TRACKING/SET
DATE
TIME
01/01 MON 12:00
END:MENU
* Para activar y desactivar la hora
1. Coloque el signo "❿" en la posición
TIME utilizando el botón SHIFT ❷.
2. Pulse el botón SHIFT ❿ para activar
y desactivar la hora.
(Los valores DATE y POSITION
funcionan de la misma forma.)
CLOCK SET/ADJUST
1 SUMMER TIME SET (USE)
2 DISPLAY MODE (YY-MM-DD)
3 ❿ CLOCK SET/ADJUST
#
(❷❿/– +)
END:MENU
YEAR
2002
DATE
12/25 WED
11
Establezca la hora y los
minutos con los botones
TRACKING/SET
.
• Al pulsar el botón TRACKING/SET
se muestra “13”.
• Pulse el botón SHIFT ❿ !para
colocar el signo # bajo los minutos.
• Los minutos se introducen del mismo
modo.
12
de nuevo y pulse dos veces el
botón MENU.
DATE
TIME
12/25 WED 13:30
#
(❷❿/– +)
15
END:MENU
2
y la hora en la pantalla.
2002-12-25 WED
9:16:14 L3H
L-UPPER
2002-12-25 WED
9:16:14 L3H
R-UPPER
ALARM REC SETUP/RECALL
1 ❿ MODE -----------------------------(L3H)
2 DURATION --------------------(AUTO)
3 BUZZER----------------------------(ON)
4 ALARM RECALL
( ❷❿ /– +)
2002-12-25 WED
13: 30:00 L 3 H
REFERENCIA
Pantalla de la hora
• No hay pantalla de a.m o p.m.
• 1:00 p.m se muestra como 13:00, 11:00 p.m como
23:00 y12:00 p.m. como 00:00 respectivamente
R-BOTTOM
2002-12-25 WED
9:16:14 L3H
CONFIGURACIÓN DE LA GRABACIÓN DE ALARMA
MENU
TRACKING/SET
YEAR
2002
OFF
2002-12-25 WED
• POSITION: Para seleccionar la posición de la fecha
L-BOTTOM
2002-12-25 WED
9:16:14 L3H
END:MENU
Pulse el botón MENU dos
veces.
• Compruebe el año, mes, día y hora
CLOCK SET/ADJUST
1 SUMMER TIME SET (USE)
2 DISPLAY MODE (YY-MM-DD)
3 ❿ CLOCK SET/ADJUST
ON
2002-12-25 WED
12:45:30 L3H
TIME
12:00
#
(❷❿/– +)
OFF
12:45:30 L3H
visualización de la hora
(❷❿)
(ejemplo)
CLOCK SET/ADJUST
1 SUMMER TIME SET (USE)
2 DISPLAY MODE (YY-MM-DD)
3 ❿ CLOCK SET/ADJUST
ON
2002-12-25 WED
12:45:30 L3H
• TIME: Para activar (ON) o desactivar (OFF) la
introducir el año y verá el signo #
bajo el mes.
• Introduzca el mes del mismo modo.
SHIFT
V-LOCK
• DATE: Para activar (ON) o desactivar (OFF) la visualización de la fecha
MENÚ
9
12/7/01 4:38 PM
END:MENU
* Para establecer la grabación de
alarma (ALARM REC) en el
modo L3H durante 5 minutos:
1. Coloque el signo "❿" en la
posición DURATION mediante el
botón SHIFT ❷.
2. Con cada pulsación del botón
SHIFT ❿ la pantalla cambia
"SEL 3 MIN".
3. Seleccione “SEL 5 MIN”
utilizando el botón SET “+”.
4. Pulse el botón MENU.
* MODE: Para seleccionar la velocidad de grabación de
alarma.
Seleccione L3H, L12H, L24H. (L8H no está
disponible)
OFF: La unidad no realizará la grabación de alarma
aunque se emita la señal de alarma.
• DURATION: Para establecer el tiempo de la grabación de
alarma.
AUTO
SEL 3MIN
TAPE END
• Para establecer el tiempo de GRAB ALARM.
Ajuste el tiempo de SEL 20SEC a 5 MIN usando
los botones "set +/–".
• AUTO: Si se recibe una señal de alarma, se
iniciará la grabación de alarma y se detendrá
cuando se interrumpa la señal de alarma.
Por la interrupción de la señal de alarma.
(No se cancelará antes de 1 minuto).
• TAPE END: Si se recibe una señal de alarma,
se iniciará la grabación de alarma y
continuará hasta el final de la cinta.
• BUZZER: Selecciona si el pitido de
alarma debe estar activado o desactivado
durante la grabación de alarma.
• ALARM RECALL : Comprueba la grabación de alarma.
(Consulte página 33)
16
01671A SVR-24JP/960JP-Spa2
12/7/01 4:38 PM
Page 18
MENÚ DE CONFIGURACIÓN
– CONFIGURACIÓN DEL MODO REC (GRABACIÓN) Y EL MODO
VCR (VIDEO)
CONFIGURACIÓN DEL MODO DE GRABACIÓN
(REC MODE SETUP)
REC MODE SETUP
1 ❿ REPEAT REC-------------------(OFF)
2 SERIES REC -------------------(OFF)
3 1-SHOT REC--------------------(OFF)
( ❷❿ )
END:MENU
SHIFT ❷: BOTÓN DE MOVER
SHIFT ❿: BOTÓN DE ESTABLECER
(SELECCIONAR)
* No es posible seleccionar Repeat
Rec y Series Rec simultáneamente.
17
• REPEAT REC: Para activar (ON) y desactivar
(OFF) la grabación repeida.
ON: Cuando la cinta llega al final durante la
grabación, se rebobina automáticamente
hasta el principio y continúa la grabación.
• SERIES REC: La grabación en serie es una
cómoda función que permite
utilizar dos o más aparatos de
video. La segunda unidad
empieza a grabar
automáticamente cuando la
cinta de la primera unidad llega
al final.
- Métodos de conexión: Consulte el método de
conexión para la grabación en serie (página
37).
• 1-SHOT REC: Se utiliza al seleccionar 000H
en REC TIME MODE
OFF: Graba un único fotograma cuando se
pulsa una vez el botón REC.
1 MIN: Graba un fotograma por minuto
cuando se pulsa una vez el botón
REC.
2 MIN: Graba un fotograma cada dos minutos
cuando se pulsa una vez el botón
REC.
3 MIN: Graba un fotograma cada tres minutos
cuando se pulsa una vez el botón
REC.
4
CONFIGURACIÓN DEL MODO VCR
(VCR MODE SETUP)
VCR MODE SETUP
1 ❿ TRIGGER --------------------(1FIELD)
2 V-SYNC ----------------------------(ON)
3 BUZZER ---------------------------(ON)
4 TAPE LENGTH ----------------(E240)
( ❷❿ )
MENÚ
3
END:MENU
SHIFT ❷: BOTÓN DE MOVER
SHIFT ❿: BOTÓN DE ESTABLECER
(SELECCIONAR)
• TRIGGER
– Selecciona el número de
fotogramas por cámara que se
van a grabar cuando se conecta a
un FRAME SWITCHER
(Consulte el manual del
propietario para obtener
información detallada)
• V-SYNC
– Pueden producirse temblores en
la imagen cuando se conecta un
FRAME SWITCHER particular.
Seleccione ON u OFF para la
posición a menos que se
produzcan temblores.
• BUZZER
– Activa o desactiva el pitido
(consulte la página 34)
• TAPE LENGTH
– Seleccione la longitud de la cinta
video. Esta información se
imprime generalmente en el
rectángulo de la cinta.
– Según la configuración de la
longitud de la cinta, el modo del
tiempo en los cambios de la
visualización como siguiendo.
E-180
L3H
E-240
L4H
L8H
L12H
L12H
L18H
L24H
L32H
18
01671A SVR-24JP/960JP-Spa2
12/7/01 4:38 PM
Page 20
MENU 1 DE CONFIGURACIÓN
– CONFIGURACIÓN DE LA GRABACIÓN PROGRAMADA
CONFIGURACIÓN DEL
PROGRAMA1
(PROGRAM SETUP 1)
•
•
•
•
•
•
PROGRAM SETUP1
START STOP DATE
MODE
L3H
L24H
❿ 13:03 → 13:15 MON
13:03 → 13:15 DAILY
OFF
13:03 → 13:15 MON
PROGRAM SETUP2
( ❷❿ /– +,CLEAR)
L12H
END:MENU
PRECAUCIÓN
1. Los botones POWER o RESET
sólo pueden usarse durante un
PROGRAM REC.
2. Durante un PROGRAM REC, para
cancelar la grabación, pulse el botón
POWER.
3. Para cancelar un PROGRAM REC,
selecciónelo y pulse el botón CLEAR
para visualizar "OFF".
Pulsar de nuevo el botón SHIFT ❿ !en la
posición OFF para volver a la hora.
• Cómo configurar una GRABACÍÓN
PROGRAMADA
ejemplo) Para configurar una grabación
programada entre las 13:03 y 13:15
de lunes en el modo L3H.
6
1. Pulse el botón SHIFT ❷ para movel el cursor a
la posición de programa vacía.
CONFIGURACIÓN DEL
PROGRAMA 2
(PROGRAM SETUP 2)
•
•
•
•
•
•
2. Pulse el botón SHIFT ❿ !para mostrar la hora
actual.
3. Pulse los botones TRACKING/SET "+" o "–"
para introducir la hora de inicio.
❿
PROGRAM SETUP2
START STOP DATE
MODE
• Cuando el programa 5 se establezca en PROGRAM SETUP 1,
seleccione PROGRAM SETUP 2.
• Para configurar PROGRAM REC use el mismo método
utilizado en PROGRAM SETUP 1.
* Cuando termine con PROGRAM SETUP 1 y 2, pulse MENU
para finalizar y pulse TIMER para pasar al modo standby (en
espera).
POWER
PROGRAM SETUP1
TIMER
( ❷❿ /– +,CLEAR)
END:MENU
4. Pulse el botón SHIFT ❿ !para pasar a los
minutos.
REC
REC
5. Pulse los botones TRACKING/SET "+" o "–"
para introducir los minutos de la hora de inicio.
C.MEMO
6. Siguiendo el mismo método, configure la hora
de finalización y cambie a la fecha.
7. Pulse los botones TRACKING/SET "+" o "–"
para colocar el lunes y pulse el botón
SHIFT ❿.
8. Pulse los botones TRACKING/SET "+" o "–"
para establecer L3H y pulse el botón SHIFT ❿.
9. Siguiendo el mismo método, defina la siguiente
grabación programada (NEXT PROGRAM
REC) que desee.
• DIARIA : La grabación programada se realiza a
la misma hora cada día.
REFERENCIA
Se pueden configurar hasta 10 programas por semana
* Si la cinta no tiene la lengüeta de seguridad, la cinta se
expulsará y sonará el pitido.
– COMPROBACIÓN DE LA FECHA Y LA HORA DE LOS CORTES DE
SUMINISTRO ELÉCTRICO
7
MEMORIA DE LOS CORTES
DE SUMINISTRO (POWER
LOSS MEMORY)
•
•
•
POWER LOSS MEMORY
YEAR
DATE
TIME
2002
12/25 15:00:00
2002
12/25 15:15:37
2002
12/24 13:25:00
2002
12/24 13:26:00
2002
12/23 17:30:30
2002
12/23 17:40:00
OFF
ON
OFF
ON
OFF
ON
END:MENU
• Muestra la fecha y la hora memorizadas ante un corte de
suministro y la restauración del mismo.
* Ejemplo: Si se ha producido un corte de suministro a las 17:30:30
del 12.23.2002, y el suministro se ha restaurado a las
17:40:00 del 12.23.2002.(17:30:30=17 horas 30 minutos
30 segundos)
* Ejemplo: Si se ha producido un corte de suministro a las 13:25:00
del 12.24.2002, y el suministro se ha restaurado a las
13:26:00 del 12.24.2002 repetidamente.
1. OFF
ON
2. OFF
ON
3. OFF
ON
2002
2002
2002
2002
12/24
12/24
12/23
12/23
13:25:00
13:26:00
17:30:30
17:40:30
• La pantalla muestra los cuatro últimos eventos.El corte de
suministro más reciente se coloca al principio de la lista.
19
20
MENÚ
5
01671A SVR-24JP/960JP-Spa2
12/7/01 4:38 PM
Page 22
FUNCIONAMIENTO
FUNCIONAMIENTO BÁSICO DE
LA REPRODUCCIÓN
W
RE
P/STILL
CK
REC CHE
PLAY
REPRODUCCIÓN
Para realizar una
búsqueda hacia
adelante
CK
REC LO
W
RE
TIME
MODE
ET
KING/S
W
RE
W
RE
Para realizar una
búsqueda hacia atrás
POWER
TRAC
W
RE
F.F
PLAY
K
REC LOC
TIMER
RESET
ER
POW
SECURITY VIDEO
SHIFT
CK
V-LO
P/STILL
F.F
REV
CLEAR
.MEMO
NT CNT
ON COU
AUDIO
2
P/STILL
Para still
F.F
DEO
Y VI
URIT
C
E
S
• Cuando se inserta una cinta, el
video se activa automáticamente.
Pulse el botón cuando sea
necesario.
F.F
ECT
STOP/EJ
1
Pulse el botón POWER del
video e inserte la cinta.
REPRODUCCIÓN
REC
F.F
PLAY
Para volver a
la reproducción
normal
Durante la
reproducción normal
STOP/EJECT
MENU
PARADA
Durante la parada
Inserte la cinta con la
ventana hacia arriba.
W
RE
F.F
EXPULSIÓN
W
RE
F.F
STOP/EJECT
Para realizar un
bobinado rápido
Para realizar un
rebobinado rápido
REFERENCIA
• Ponga el modo de tiempo en L3H para la visión y sonido normales cuando esté reproduciendo una
cinta alquilada.
• La cinta estándar puede producir algún ruido en el modo still.
• En el modo still no se puede usar la reproducción lenta y el modo de tiempo.
Tenga en cuenta a la hora de reproducir la cinta grabada en el modo de
grabación a intervalos fijos:
• Aunque la pantalla puede no tener color durante la búsqueda de imagen, no indica problema o fallo de
funcionamiento.
• Aunque la pantalla presente una cierta inestabilidad, no significa que funcione incorrectamente.
• Aunque la parte superior de la pantalla aparezca un poco deformada, no significa que funcione
incorrectamente ni que haya problema.
• Aunque la pantalla presente una cierta inestabilidad, no indica problema o fallo de funcionamiento.
• Aunque el sonido no se perciba claramente, no significa que funcione incorrectamente ni que haya problema.
• Cuando se reproduzca en modo 3H la cinta grabada en modo L8H/L12H/L24, la imagen grabada se
reproducirá a alta velocidad.
• Cuando se reproduzca una cinta grabada con sonido no se percibirá un sonido normal si el modo de tiempo
de grabación es diferente del modo de tiempo de reproducción.
21
Observar el ajuste de la pantalla
• Cuando se inserta la cinta, la pantalla se ajusta
automáticamente.
• Si la pantalla no se ajusta automáticamente,
ajústela pulsando los botones de seguimiento
(tracking)
.
TRACKING/SET
• Si la pantalla no se ajusta usando los botones
TRACKING, ajústela pulsando al mismo tiempo
los botones TRACKING
y TRACKING .
Si la pantalla muestra ruido o inestabilidad
• Pulse botones
TRACKING/SET
.
SHIFT
V-LOCK
• Si la pantalla muestra ruido durante la
reproducción lenta, corríjalo pulsando los botones
de seguimiento
.
• Si la pantalla muestra temblores en una imagen
fija, corríjalo pulsando el botón V-LOCK
.
22
01671A SVR-24JP/960JP-Spa2
12/7/01 4:38 PM
Page 24
DIFERENTES TIPOS DE REPRODUCCIÓN
• Inserte la cinta para reproducir.
W
P/STILL
CK
REC CHE
1
ECT
STOP/EJ
K
REC LOC
TIMER
REV
AUDIO
NT
ON COU
CNT.ME
AR
MO CLE
RESET
CK
REC LO
ER
POW
TIME
KING/S
MODE
ET
NU
1 3
W
RE
Para volver a la reproducción normal
• Suelte el anillo SHUTTLE.
Cuando reproduzca lentamente
Pulse el botón TIME MODE(
la reproducción.
,
) durante
3
TIME MODE
• No oirá el sonido.
• Cuando la imagen produzca temblores
arriba y abajo durante la reproducción lenta,
pulse el botón V-LOCK
. Tras el ajuste
correcto, visualice la reproducción lenta.
• Pulse el botón TIME MODE y vea la
imagen a la velocidad lenta deseada.
Para reproducción lenta hacia
adelante y hacia atrás
• Pulse el botón P/STILL para detener la
imagen.
• Gire el dial JOG para visualizar la
reproducción inversa lenta o gire el dial
JOG para visualizar la reproducción lenta
hacia adelante.
• Pulse el botón de reproducción para volver
a ver la imagen normal.
• Cuando la reproducción lenta se mantiene
durante unos cinco minutos, la cinta se
pone en funcionamiento automáticamente.
W
RE
Cuando esté viendo en reproducción especial
• La aparición de ruido en la pantalla no significa que exista algún problema.
• La cinta que haya sido grabada con otro video puede mostrar un gran volumen de ruido.
23
2
Durante la reproducción es posible que no perciba el
sonido normal
• cinta de grabación L3H – reproducción L3H → Normal
• cinta de grabación L8H – reproducción L3H → Rápida
– reproducción L8H → Normal
– reproducción L12H/L24H → Lenta
• cinta de grabación L12H – reproducción L3H/L8H → Rápida
– reproducción L12H → Normal
– reproducción L24H → Lenta
• cinta de grabación L24H – reproducción L3H/L8H/L12H → Rápida
– reproducción L24H → Normal
F.F
2
Gire el anillo SHUTTLE en sentido
horario o antihorario.
• La pantalla bobinará o rebobinará
rápido.
• La velocidad varía dependiendo de
la cantidad de giro del anillo
SHUTTLE.
F.F
TRAC
SHIFT
V-LOCK
Búsqueda en pantalla
(durante la reproducción)
Para oir el sonido normal
• Se puede oir el sonido normal sólo
cuando se reproduce a la velocidad
a la que ha sido grabado.
24
REPRODUCCIÓN
REC
F.F
RE
PLAY
01671A SVR-24JP/960JP-Spa2
12/7/01 4:38 PM
Page 26
DIFERENTES TIPOS DE REPRODUCCIÓN (CONT.)
RE
W
P/STILL
CK
REC CHE
ECT
STOP/EJ
K
REC LOC
TIMER
REV
AUDIO
.ME
NT CNT
ON COU
AR
MO CLE
RESET
CK
REC LO
ER
POW
TIME
TRAC
KING/S
MODE
ET
SHIFT
V-LOCK
4
NU
6,7
4
Para ver una imagen en
reproducción inversa
(hacia atrás)
• Durante la reproducción normal,
puede pasar a la reproducción
inversa pulsando REV.
• La reproducción inversa sólo está
disponible en modo L3H.
• Durante la reproducción inversa, no
se oye el sonido.
• Pulse el botón REV o PLAY
durante la reproducción inversa
para la reproducción normal.
5
REV.
5
Para la reproducción
de L12H/L24H horas
• En el modo de 12H o 24H
no se oye el sonido.
Si usted desea oír el
sonido, pulse el botón
AUDIO ON para que la
pantalla muestre L12H o
L24H.
• La cinta se reproduce a
una velocidad inferior a la
de la reproducción L3H.
• En la pantalla puede
aparecer ruido.
• Para ver la imagen con
claridad, elija el modo de
reproducción L3H o el de
reproducción lenta.
6
Imagen fija
Pulse el botón P/STILL para
ver una imagen fija
• No se oirá el sonido.
• No deje la imagen en pausa
durante un largo período de
tiempo porque podría
ocasionar daños al cabezal
del video y a la cinta.
• Cuando la imagen queda en
pausa continua
aproximádamente durante
cinco minutos, la cinta se
pone en funcionamiento
automáticamente.
• Cuando la imagen oscila
arriba y abajo, pulse el
botón V-LOCK
para
lograr el ajuste adecuado.
7
Para ver fotograma a
fotograma
• Pulse el botón P/STILL.
• No se oirá el sonido.
• Cuando se gira el dial
JOG contínuamente, la
imagen mueve sólo un
fotograma cada vez.
• Pulse el botón PLAY para
volver a la reproducción
normal.
REPRODUCCIÓN
REC
F.F
PLAY
Para volver al modo de
reproducción normal
• Pulse el botón PLAY para
volver a la reproducción
normal.
TIME MODE
Al rebobinar la cinta
• Ponga el contador en la posición original
(
) pulsando el botón CLEAR al iniciar
la grabación o reproducción. Pulse el botón
de memoria del contador. Al girar el anillo
SHUTTLE en sentido antihorario en el modo
de parada tras completar la grabación y
durante la reproducción, la cinta se para en la
posición de inico (
) de la grabación o
reproducción.
25
SHIFT
V-LOCK
PANTALLA FRONTAL
C.MEMO
Indicador de la
posición actual
del contador
Indicador de la
memoria del
contador
26
01671A SVR-24JP/960JP-Spa3
12/7/01 4:37 PM
Page 28
BLOQUEO DE GRABACIÓN
Este aparato dispone de una función de seguridad de grabación y otras funciones de grabación
para diferentes tipos de aplicaciones, entre las que se incluyen el control y la visualización.
Deberia familiarizarse con estas funciones.
GRABACIÓN
Preparación antes de
grabar.
Compruebe la hora actual
• Para conseguir una correcta grabación
programada es necesario que la hora actual
sea correcta.
• Si aún no ha definido la hora correcta,
consulte la sección sobre cómo especificar
la fecha y la hora (pág. 13).
Método de
selección
Cuando desee
asegurar la grabación
Método de funcionamiento
• Coloque el botón
REC LOCK en la posición
“REC LOCK”
• Pulsacion del botón REC LOCK
para iniciar el modo REC LOCK.
Se iluminará el indicador REC
LOCK.
• No se puede pulsar ningún botón
en el modo REC LOCK con la
excepción del botón RESET.
• La grabación continúa incluso
después de la restauración del
suministro.
• Pulse el botón REC LOCK
de nuevo.
• Se apagará el indicador REC
LOCK.
OFF
REC LOCK
Tiene la cinta la lengüeta de
prevención de borrado
accidental?
Descripción del funcionamiento
OFF
REC LOCK
Si tiene la lengüeta
GRABACIÓN
• La cinta puede volverse a grabar.
Lengüeta de prevención
Si no tiene la lengüeta
• La cinta no puede volverse a
grabar a menos que se sustituya la
lengüeta por un trozo de cinta
adhesiva.
Cinta adhesiva
Operaciones cuando la cinta se acaba durante la grabación
* Rebobinado automático para reiniciar la grabación.
• Cuando se selecciona REPEAT ON en el menú (Sin embargo, cuando se realiza al menos
una grabación de alarma, el VCR expulsará la cinta y se encenderá).
* Encendido tras expulsión de la cinta
• Cuando se llega al final de la cinta, excepto cuando se hace grabación repetida tras el
rebobinado automático.
REFERENCIA
Condensación
• Cuando el video se cambia de un sitio frío a otro más cálido, se instala en un lugar donde hay mucha
humedad o sufre la exposición directa al aire frío del aparato de aire acondicionado, es posible que se
condensen gotas de agua en el tambor del cabezal del video debido al brusco cambio de temperatura.
El uso del video en esas condiciones puede causar daños al aparato y a la cinta. En ese caso, pulse el
botón POWER y manténgalo encendido durante más de una o dos horas antes de utilizarlo.
27
28
01671A SVR-24JP/960JP-Spa3
12/7/01 4:37 PM
Page 30
GRABACIÓN BÁSICA
1
REC
F.F
W
P/STILL
CK
REC CHE
2
Pulse el botón de
encendido del video.
Inserte la cinta con la lengüeta
de prevención de borrado hacia
afuera.
3
Seleccione la velocidad de
grabación
7
Pulse el botón REC o P/STILL
para reanudar la grabación
ECT
STOP/EJ
K
REC LOC
TIMER
REV
AUDIO
NT
ON COU
CNT.ME
AR
MO CLE
RESET
REC
F.F
RE
PLAY
CK
REC LO
ER
POW
MODE
TIME
TRAC
KING/S
5
6,7
ET
SHIFT
V-LOCK
MENU
1
4
Pulse el botón REC
• Se inicia la grabación
• Si la cinta no dispone de lengüeta de
prevención de borrado, la cinta se
para, suena la alarma cinco veces y
la cinta es expulsada.
W
P/STILL
REC CHECK
4,7
POWER
JECT
STOP/E
TIMER
REV
AUDIO
ON COUNT
CNT.ME
MO CLEAR
REC LOCK
RESET
REC LOCK
ER
POW
TIME
TRAC
MODE
KING/SET
SHIFT
K
V-LOC
MENU
La lengüeta
de prevención de borrado
5
REC
Pulse el botón REC CHECK
• Mientras está en modo de
grabación puede comprobar la
calidad de la grabación. El video
reproducirá el video grabado unos
segundos antes de pulsar el botón
REC CHECK.
6
Pulse el botón P/STILL
• Si realiza una pausa de más de cinco
minutos, el vídeo se pone en
funcionamiento automáticamente como
sistema de autoprotección. Si va a realizar
una pausa prolongada, pulse el botón de
parada.
REC
P/STILL
REC CHECK
Tabla de tiempos de grabación
REFERENCIA
En qué consiste Para proteger Para volver a grabar
una grabación una cinta protegida
la prevención
contra borrado • Quite la lengüeta • Pegue un trozo de cinta
adhesiva en la zona donde
de prevención de
accidental?
se ha extraído la lengüeta
• Se trata de un
dispositivo que
protege el contenido
de la cinta o que
permite volver a
grabar la cinta.
29
borrado.
de prevención de borrado.
El tiempo mínimo de grabación de la tabla
siguiente debe contarse antes de que
empiece a funcionar REC CHECK.
MODO DE
TIEMPO
TIEMPO MÍN. DE
GRABACIÓN
Lengüeta de prevención de borrado
MODO DE
TIEMPO
IEMPO MÍN. DE
GRABACIÓN
L3H 5 segundos
L8H 15 segundos
L12H 30 segundos
72H
120H
168H
3 minuto
5 minuto
7 minuto
L24H
36H
240H
480H
10 minuto
20 minuto
960H
40 minuto
1 minute
1 minute
30 segundos
48H
2 minuto
Lengüeta de
prevención de borrado
• La velocidad de grabación se selecciona
usando TIME MODE
.
• En la pantalla se muestra la velocidad de
grabación seleccionada.
*SVR-24JP tiene sólo los modos L3H,
L8H, L12h y L24H.
P/STILL
• Este aparato ha sido diseñado para cintas E-180.
• Siempre que sea posible, use cintas E-180 para las
grabaciones típicas.
• SVR-24JP sólo tiene los modos L3H, L8H, L12H y L24H.
• Utilice sólo cintas con la marca
Tipo de
cinta
GRABACIÓN
RE
PLAY
Tiempo máximo de grabación
L3H
L8H
L12H
L24H
36H
48H
72H
120H
168H
240H
480H
960H
E-240 4horas 12horas 20horas 36horas 52horas 68horas 100horas 164horas 228horas 324horas 644horas 1284horas
E-180 3horas
9horas 15horas 27horas 39horas 51horas 75horas 123horas 171horas 243horas 483horas 963horas
30
01671A SVR-24JP/960JP-Spa3
12/7/01 4:37 PM
Page 32
GRABACIÓN EN SERIE
GRABACIÓN DE ALARMA
Se trata de una función que permite tener dos o más vídeos conectados y que el segundo vídeo
empiece a grabar cuando se termine la cinta del primero.
Si el vídeo está conectado a un equipo dotado de salida de alarma, como un conmutador de
secuencia, un detector de movimiento o un interruptor de puerta, cuando se reciba una alarma el
vídeo funcionará según el tiempo y el modo seleccionados en el menú ALARM REC.
SVR-24JP sólo tiene el modo L3H/L12H/L24H para ALARM REC.
El cuadro siguiente establece el modo L3H para ALARM REC.
Método de funcionamiento
Descripción de funcionamiento
Consultar el
método
de conexión para
la grabación en
serie (pág. 37)
• Seleccione el número 4 del
MENU
• Seleccione “ON” para
SERIES mediante los
botones SHIFT ❷ y ❿.
• Cuando la cinta del primer aparato
llegue a su fin durante la grabación,
el segundo aparato empieza a
grabar. Cuando la cinta del segundo
aparato llegue a su fin durante la
grabación, el siguiente aparato, si
hay más, empieza a grabar.
• Cuando se selecciona el modo de
grabación serie, el segundo aparato
realiza la grabación aunque la
alimentación se haya apagado.
• Para interrumpir el sonido de alarma
constante, pulse cualquier tecla.
Grabación en modo
L12H~960H
(L12H~L24H)*
Grabación en modo
L3H
Grabación en modo
L12H~960H
(L12H~L24H)*
Grabación en modo
L3H
Grabación a intervalos fijos
Grabación de alarma
Grabación a intervalos fijos
Grabación de alarma
Inicio de la
grabación
Detección de una
señal de alarma
Introducción de la restauración de la
alarma o tiempo seleccionado excedido
Método de
Conexión
Método de
funcionamiento
Conectar el equipo de
la salida de alarma
como se indica a
continuación:
• Seleccione MODE y
DURATION en el menú
3 ALARM REC SETUP.
(Consulte ALARM REC
SETUP, en la pág. 16)
• Cuando se conecta
FRAME SWITCHER, es
conveniente si el
interruptor está en la
posición automática.
1 ALARM IN
2 ALARM OUT
6 TAPE END OUT 7 SERIES OUT
1
2
3
4
3 ALARM RESET 4 ERROR OUT
8 GND
5
6
5 TRIGGER OUT
9 SERIES IN
10 1 SHOT RECIN
7
9
8
10
IN
IN
OUT
OUT
AUDIO
VIDEO
OUT
VIDEO
GND
ALARM
OUT
ALARM
RESET
(Consulte la pág. 37)
Detección de una
señal de alarma
Descripción de funcionamiento
• AUTO : La detección de la señal de alarma
determina automáticamente el tiempo de la
grabación de alarma. (1 min)
• 20seg~5min: La grabación de alarma se
realiza para 20 segundos~5 minutos tras
la introducción de la señal de alarma.
• TAPE END : Tras la detección de la señal de
alarma, la grabación de alarma continúa hasta
el final de la cinta .
• Cuando se detecta la señal de alarma, se
enciende el indicador
de la pantalla frontal.
• Cuando finaliza la grabación de alarma,
parpadea el indicador
de la pantalla
frontal.
• Cuando desee cancelar la alarma durante la
grabación de alarma, haga una conexión
entre el conector de anulación de alarma y la
tierra de la alarma durante más de 0,5 seg.
Cuando se detecta la anulación de alarma, la
grabación de alarma se detendrá.
• Cuando se detecte una señal de alarma y en
el menú esté seleccionado BUZZER ON, la
alarma sonará de forma continua. Para
silenciar el avisador, pulse cualquier botón.
REFERENCIA
Botón RESET
Cuando se pulsa el botón RESET
• Utilice este botón cuando el video o la
pantalla no funcione normalmente
aunque esté encendido.
• El botón RESET se encuentra en la parte
derecha del panel frontal.
• Para pulsar el botón RESET utilice un
bolígrafo o un lápiz.
• Se borra toda la información que se haya introducido, como la
hora establecida para grabación de reserva, la hora actual y la
información sobre la alarma.
• La alimentación se interrumpe y no se ve ninguna imagen.
Cuando se restaura la alimentación, en la pantalla parpadea
31
2001-1-1 MON
12:00:00 L3H
.
• La hora actual se borra y es preciso reintroducirla
32
GRABACIÓN
Método de
Conexión
01671A SVR-24JP/960JP-Spa3
12/7/01 4:37 PM
Page 34
FUNCIONES DE ALARMA
Las funciones de alarma incluyen la grabación de alarma, comprobar alarma, borrar
alarma y memoria de recuento de alarma (Consultar Grabación de Alarma, página 32)
COMPROBACIÓN DE LA GRABACIÓN DE ALARMA
1
Pulse el botón MENU
1. Ponga el signo ❿!en la posición
“ALARM REC SETUP/RECALL”
usando el botón SHIFT ❷.
2. Pulse el botón SHIFT ❿, entonces
se visualiza “ALARM RECALL”.
3. Pulse el botón MENU después de
comprobar.
1
Pulse el botón CNT.MEMO
• Pulse el botón CNT. MEMO dos veces, y la
pantalla frontal mostrará "A. MEMO".
2
Gire el anillo SHUTTLE en
sentido horario o antihorario
• Cuando se gira el anillo shuttle la cinta
se mueve adelante (atrás). Cuando llega
a la grabación de alarma en el modo
L3H hace una pausa de 5 segundos y
se para.
W
RE
F.F
W
RE
CNT MEMO
F.F
• Si no se produjo una grabación de
alarma, en la pantalla no aparecerá
ninguna imagen.
• La pantalla ALARM RECALL
muestra la fecha y la hora en que
se produjeron las últimas seis
grabaciones de alarma.
• Si la alarma se graba a las 12:00,
13:00, 15:00, 17:00 y 19:00 del 25
de diciembre de 2001.
MEMORIA DEL CONTADOR DE ALARMAS
A.MEMO
BORRADO DE ALARMA
1
ALARM RECALL
YEAR DATE TIME
2001 12/25 19:00:00
2001 12/25 17:00:00
2001 12/25 15:00:00
2001 12/25 13:00:00
2001 12/25 12:00:00
Ejemplo) Si la grabación de alarma está
hecho en el No. 12.
Pulse el botón
• En la posición de contador de la pantalla
frontal aparece A-12.
• En "
", el"12" indica las frecuencias de
la grabación de alarma.
• Es posible visualizar hasta “A-99”.
• Mientras se realiza la grabación de alarma, en
la pantalla frontal parpadea el indicador" ".
END:MENU
2
Pulse el botón CLEAR
• La posición de contador de la pantalla
frontal indica "
".
• El indicador " " se apaga.
• Al pulsar el botón CLEAR mientras se
visualiza la pantalla de comprobación de
alarma, se borrarán de la memoria todos
los datos de fecha y hora.
CLEAR
COUNT
REC
F.F
RE
PLAY
W
P/STILL
CK
REC CHE
ECT
STOP/EJ
REC LOCK
TIMER
REV
REC LO
POWE
AUDIO
NT
ON COU
CNT.MEM
R
O CLEA
RESET
CK
R
TIME
TRAC
KING/S
T
SHIF
CK
V-LO
MENU
1
ET
MODE
112 2
REFERENCIA
REFERENCIA
Visualización del tiempo de funcionamiento
En los casos siguientes la alarma suena
cinco veces :
• Cuando la pantalla frontal muestra
, pulse dos
veces el botón COUNTER.
La pantalla frontal mostrará el tiempo de funcionamiento.
Ejemplo: Cuando haya funcionado 11 horas
HOUR
• Si mientras se comprueba el tiempo de funcionamiento no
se pulsa el botón del contador antes de que transcurran 5
segundos, el estado de la pantalla frontal recupera el
estado previo a la comprobación.
33
• Al insertar una cinta sin la lengüeta de prevención de
borrado
– Al detectar la señal de grabación en serie(sonido largo)
– Al detectar la señal de alarma
– Al pulsar el botón de grabación
– Al pulsar el botón TIMER
• Al pulsar el botón REC sin la cinta insertada.
• Al detectar la señal de alarma durante la grabación
de alarma.
La alarma suena de forma continua en los casos siguientes:
• Cuando la cinta llegue a su fin en el modo de grabación.
• Cuando se detecte una señal de alarma para la grabación de alarma.
– Cuando la grabación de alarma finaliza, la alarma se anula.
– La alarma se anula pulsando cualquier botón.
– Cuando se detecta la señal de alarma con la cinta expulsada(Sonido largo).
Repetición automática de la grabación
• Cuando la cinta llega a su fin y finaliza el rebobinado, se
vuelve a iniciar la grabación sobre la misma cinta
(La alarma sólo suena durante el rebobinado.)
• Si se realiza una grabación de alarma, se expulsa la cinta.
34
FUNCIÓN
1
2
3
4
5
6
01671A SVR-24JP/960JP-Spa3
12/7/01 4:37 PM
Page 36
FUNCIONES CONVENIENTES
MÉTODO DE CONEXIÓN
El conocimiento de las siguientes funciones le aportará una forma cómoda de hallar información.
Cuando desee Ver
rápidamente la imagen
desde la ubicación de la
grabación de alarma
Cuando desee Conocer
rápidamente la fecha y la
hora de la grabación de
alarma.
Método de funcionamiento
Descripción de funcionamiento
Establezca la pantalla A.MEMO
utilizando el botón CNT.MEMO.
Entonces, gire el anillo shuttle
para rebobinar.
Se localiza la posición de la grabación de alarma
y el video entra en el modo de pausa durante 5
segundos. Al pulsar el botón de reproducción se
reproduce el contenido de la cinta. Si
transcurridos 5 segundos no se ha pulsado
ningún botón, la cinta se para automáticamente.
Pulse el botón MENU en el modo
de parada.
Seleccione ALARM RECALL
usando el botón SHIFT ❷ !y ❿.
Conexión con el MULTIPLEXOR
1
2
La pantalla del monitor muestra lo siguiente:
1
2
3
4
5
6
ALARM RECALL
YEAR DATE TIME
2001 12/25 19:00:00
2001 12/25 17:00:00
2001 12/25 15:00:00
2001 12/25 13:00:00
2001 12/25 12:00:00
8
ALARM IN
END:MENU
Cuando pulse una vez el botón
COUNT, en la pantalla aparece el
contador de alarmas.
Ejemplo) A-11.
Los números del contador de alarmas indican la
frecuencia de grabaciones de alarma. Se
permiten hasta 99. A-11 (indica que se han
hecho 11 grabaciones de alarma).
Cuando desee Cambiar
automáticamente la
entrada de cámara del
equipo externo
(utilizando la función de
disparador).
Conecte la salida del disparador del
equipo externo. Consulte los
métodos de conexión (pág. 36).
Realice la grabación en el modo de
intervalos fijos.
Este video graba la entrada de cada cámara
secuencia a secuencia, campo a campo, y luego
los interruptores.
Cuando desee Ver
rápidamente la imagen
grabada en el modo de
intervalos fijos.(Si se ha
grabado en el modo
L8H~960H (L8H~L24H)*
Pulse el botón TIME MODE para
establecer el modo “L3H”. Luego
pulse el botón de reproducción.
Cuando desee Conocer
el número de
grabaciones de alarma.
GND
TRIGGER OUT
1 ALARM IN
2 ALARM OUT
6 TAPE END OUT 7 SERIES OUT
1
2
3
4
3 ALARM RESET 4 ERROR OUT
5 TRIGGER OUT
8 GND
9 SERIES IN
10 1 SHOT RECIN
7
9
5
6
8
10
1
2
2 3 4 5 6 7 8 R/T A/O
8
IN
IN
OUT
OUT
AUDIO
CAMERA
PB
IN
REC MONITOR
OUT
OUT GND
VCR
FRAME
SWITCHER
FS-81MA
VIDEO
(Reverso de SVR-24JP/
SVR-960JP)
VIDEO OUT
Entrada de video
del monitor
VIDEO IN
• Consulte el manual del propietario para
obtener información más detallada .
• R/T: REC TRIGGER IN
• A/O: ALARM OUT
35
(Cámara)
CONNECTION
Método de Conexión
• Cuando se conecta con Frame switcher, es
conveniente, si ALARM DURATION está
en la posición "AUTO"
• No hay que conectar las entradas ALARM
OUT y ALARM RESET del video
36
01671A SVR-24JP/960JP-Spa3
12/7/01 4:37 PM
Page 38
CONEXIONES PARA GRABACIÓN EN
SERIE Y GRABACIÓN DE ALARMA
Conexión para la grabación en serie
IN
OUT
IN
VIDEO
OUT
IN
VIDEO
MANTENIMIENTO
Si la imagen no es clara en la pantalla, use una cinta limpiadora.
Si se reproduce la cinta limpiadora durante mucho tiempo, puede dañar el cabezal.
1
OUT
VIDEO
(TV or MONITOR)
Vierta en la cinta
limpiadora seis o siete
gotas de solución para
limpieza del cabezal.
2
Introduzca la cinta
limpiadora en el video y
pulse el botón PLAY.
REC
F.F
W
RE
PLAY
P/STILL
REC CHECK
JECT
STOP/E
PE
G TA
ANIN
CLE
REV
1
2
3
4
5
6
7
8
9
10
1
2
3
4
5
6
7
8
9
10
1
2
3
4
5
6
7
8
9
10
CLE
AN
ING
LIQ
AUDIO
ON COUNT
TIMER
CNT.ME
MO CLEAR
REC LOCK
RESET
REC LOCK
UID
ER
POW
TIME
TRAC
MODE
KING/SET
SHIFT
V-LOCK
7
8
SALIDA EN SERIE
TIERRA
9
MENU
ENTRADA EN SERIE
• En el menú, seleccione SERIES REC ON.
(Consulte la pág. 17, REC MODE SETUP)
• Conecte la salida en serie del primero a la
entrada en serie del segundo, y la tierra
del primero en serie con la tierra del
segundo.
• Conecte la salida en serie del segundo a la
entrada en serie del siguiente, y la tierra
del segundo en serie con la tierra del
siguiente.
CLE
AN
ING
TAP
E
3
Después de unos 15
segundos, pulse el botón
STOP para detener el
funcionamiento.
• Si la imagen no aparece con
normalidad, utilice una vez más la
cinta limpiadora.
STOP/EJECT
Conexión para la grabación de alarma
( Unidad externa)
1
1
3
2
3
4
5
6
ENTRADA DE ALARMA
RESTAURAR ALARMA
7
2
8
8
9
1
10
SALIDA DE ALARMA
TIERRA
1
3
TIERRA
ENTRADA DE ALARMA
2
4
2
3
4
RESTAURAR ALARMA
SALIDA DE ALARMA
(PRECAUCIÓN) En el caso de una unidad exterior, utilice conexiones apropiadas para el
sensor de alarma en uso.
• En caso de tratarse de una unidad externa, no es necesario realizar ninguna conexión si no hay
ninguna salida de restauración de alarma ni entrada de alarma.
37
Debe cambiar el cabezal en los
siguientes casos:
Cuando la pantalla no muestra una
imagen de buena calidad
• La imagen no aparece con claridad porque el cabezal está
gastado debido al uso del video durante un largo período de
tiempo.
• El cabezal puede gastarse cuando se utilizan cintas dañadas o
defectuosas o cuando se utiliza la cinta limpiadora varias
veces.
• La duración del cabezal varía en función de las condiciones
ambientales (temperatura, humedad, polvo, etc.). En cualquier
caso, el cabezal debe cambiarse cuando la unidad ha sido
utilizada más de 3.000 horas.
1.Primero, pulse el botón TRACKING.
2.Compruebe que la salida de video esté
conectada correctamente.
3.Inserte la cinta limpiadora. Si tras repetir los
procedimientos indicados anteriormente la
imagen no mejora, póngase en contacto con su
distribuidor o su centro de mantenimiento.
38
MAINTENANCE
Reverso de SVR-24JP/SVR-960JP
01671A SVR-24JP/960JP-Spa3
12/7/01 4:37 PM
Page 40
RESOLUCIÓN DE PROBLEMAS
RESOLUCIÓN DE PROBLEMAS (CONT)
Compruebe para ver si es necesario contactar con el centro de mantenimiento.
• Compruebe que el cab
le de alimentación
esté enchufado.
• Pulse el botón RESET
del panel frontal.
31
.
No graba ni reproduce
insertada la cinta.
• Compruebe que esté
de alimentación y
• Desenchufe el cable
vuélvalo a enchufar.
” del panel frontal.
• Pulse el botón “RESET
31
No hay imagen
n de entrada del monitor
• Compruebe si la selecció
te.
está conectada correctamen
/salida de video de la
ada
entr
la
si
be
prue
Com
•
está conectada
parte posterior de la unidad
te.
men
correcta
conectado a la
• Compruebe si el video está
corriente.
39
No graba.
• Compruebe si la cinta tiene
la lengüeta de seguridad. Debe
usar una
cinta que tenga la lengüeta
de seguridad. En caso de
que la lengüeta
haya sido quitada, coloque
un trozo de cinta adhesiva
a la cinta para
poder realizar la grabación.
• Compruebe si la cinta ha
llegado a su fin.
Cambie la cinta o rebobínela.
• Compruebe si se ha pulsa
do el botón P/STILL; en caso
afirmativo,
libere ese botón.
• Asegúrese de que se haya
definido la fecha y la hora
del video
(Consulte a la sección de Graba
ción)
La imagen es de mala
calidad y con mucho rui
do
• Compruebe si la cinta
ha sido grabada con otro
video.
• Compruebe si el cabeza
l está sucio.
• Pulse el botón “TRACK
ING” del panel frontal
del video para ajustar la
imagen, o limpie el
cabezal con la cinta limp
iadora.
La cinta no se expulsa
o se
endido y cuando el vide
• Pulse el botón de enc
botón de expulsión.
haya encendido pulse el
igurada la grabación
• Compruebe si está conf
programada.
No realiza la grabación
con temporizador
~20
ación con 19
• Asegúrese de que la grab
te definida
men
ecta
corr
está
or
temporizad
actual
13
• Compruebe que la hora
sea correcta en el video
pida.
rrum
inte
ción está
• Compruebe si la alimenta
” esté
r“
ado
indic
el
que
de
se
• Asegúre
tal.
encendido en el panel fron
MAINTENANCE
No hay corriente.
40
12/7/01 4:37 PM
Page 42
RESOLUCIÓN DE PROBLEMAS (CONT)
Problema
No puede insertarse la cinta.
Comprobaciones y ajustes
• Compruebe que el cable de alimentación esté enchufado
a la toma de corriente.
• Compruebe que no haya otra cinta insertada.
• La cinta debe insertarse con la parte de la ventana hacia
arriba (consulte la pág. 21)
• Asegúrese de que la unidad está encendida. Si está
encendido, pulse el botón POWER y después el botón de
expulsión.
No se graban programada.
• Compruebe que la entrada de grabación programada
esté definida correctamente.
• Compruebe que la hora actual sea la correcta.
• Compruebe si la alimentación está interrumpida.
• Compruebe si el indicador
está encendido en la
pantalla.
No funciona con otro equipo.
• Compruebe que las conexiones se hayan realizado
correctamente
El botón de grabación no
funciona.
• Compruebe si hay una grabación programada. Sólo tiene
que pulsar el botón de encendido.
• No se puede pulsar el botón cuando el interruptor REC
LOCK está en "ON". (Si quiere pulsar este botón,
coloque el interruptor REC LOCK en la posición "OFF", y
seguidamente pulse el botón.)
• Pulse el botón "TRACKING" para ajustar la imagen. Si
la imagen no mejora, limpie el cabezal utilizando la cinta
limpiadora.
• Si existe algún otro problema, póngase en contacto con el centro de mantenimiento.
41
Este video ha sido diseñado para
ser utilizado asiduamente, por lo
que deberá revisarlo diariamente
antes de utilizarlo.
• Cuando el video funcione de forma anormal
o presente algún problema durante la
revisión diaria, siga los pasos
recomendados en el apartado sobre
resolución de problemas que aparece en
las páginas 39 a 41.
• Si el problema persiste o el funcionamiento
continúa siendo anormal, desenchufe el
cable de alimentación y póngase en
contacto con su proveedor.
Revisiones diarias
1
2
3
Encienda el video
• Compruebe si la imagen del monitor de TV es
de buena calidad.
• Compruebe si la fecha y la hora son correctas.
W
RE
F.F
No puede expulsar la cinta.
La imagen reproducida tiene
mucho ruido.
REVISIONES DIARIAS
PLAY
Rebobine un poco la
cinta grabada el día
anterior.
Pulse el botón PLAY
para reproducir la
cinta.
• Compruebe si existe algún
problema durante la
reproducción.
• Compruebe si la fecha y la
hora registradas son
correctas.
4
5
TIME MODE
Ponga TIME MODE
en "L3H".
En el caso de que se vea mucho
ruido en la imagen
• Limpie el cabezal con la cinta limpiadora.
42
MAINTENANCE
01671A SVR-24JP/960JP-Spa3
01671A SVR-24JP/960JP-Spa3
12/7/01 4:37 PM
Page 44
ANTES DE LLAMAR AL
SERVICIO TÉCNICO
La manipulación indebida por parte del usuario no está cubierta.
Golpes fuertes.
Daños del cabezal del video debidos a una limpieza inadecuada.
Introducción de partículas extrañas en la unidad.
Cambios internos no autorizados realizados por el usuario.
Utilización bajo temperaturas extremas (altas o bajas), mucha humedad o
zonas con humo.
Funcionamiento diferente al descrito en las instrucciones.
Utilización de fuentes de alimentación diferentes a las especificadas para la
unidad.
2
Tipo de grabación
Tipo de grabación azimutal con cabezal rotativo, tipo de grabación FM
con señal de luminancia, tipo de grabación directa convertida con señal
de color baja
Tipo de Sinal
Tipo PAL
Velocidad de la cinta
23,39 mm/seg (modo L3H; E-180)
Cinta de video aplicable
Cinta de video tipo VHS
Tiempo de grabación
L3H/L8H/L12H/L24H/000H : SVR-24JP
L3H/L8H/L12H/L24H/36H/48H/72H/120H/168H/240H/480H/
960H/000H : SVR-960JP
Tiempo de rebobinado
Aproximádamente 100 segundos (cinta E-180, en caso de tiempo de rebobinado)
Entrada, salida de Imagen
1,0 Vp-p (sin balance) 75
Relación Señal/Ruido en la imagen
Más de 42dB (grabación L3H)
Entrada de sonido
-8dB (modo L3H)
Salida de sonido
-8dB (modo L3H)
Relación Señal/Ruido en el sonido
Más de 40 dB (grabación L3H)
Características de la
frecuencia de sonido
100-5,000Hz (grabación L3H)
Voltaje nominal
CA 100-240V
El contador de tiempo de funcionamiento
Observe si indica el tiempo máximo (9999).
Para un buen funcionamiento, consulte la función de alarma.
Tabla de lubricación limpiadora y de tiempo de
reemplazo de las partes principales
• Esta tabla es para temperatura y humedad normales. Es necesario controlar más
frecuentemente bajo condiciones extremas.
• La vida del conjunto de cilindro depende de las condiciones operativas.
• Si tiene cualquier duda. Por favor tome contacto con un técnico autorizado.
▲ : Limpieza
● : Control y reemplazo según sea necesario
◆ : Agregue aceite
: Cambio
500
1000
2000
3000
4000
5000
6000
8000
10000
ELEMENTOS DE GUÍA DE CINTA
▲
▲
▲
▲
▲
▲
▲
▲
▲
CONJ. DE CILINDRO
▲
●
●
●
●
●
●
●
RODILLO DE PRESIÓN
▲
▲
▲
▲
▲
●
●
●
MOTOR DEL CABEZAL MÓVIL
▲
▲
▲
▲
▲
▲
▲
▲
●
●
●
●
●
●
●
●
●
POLEA PARA CORREA
UNIDAD DE SOLENOIDE PARA FRENO
Frecuencia nominal
50~60Hz
Consumo de la potencia
16W
Temperatura ambiente
5˚C ~ 40˚C (41˚F ~ 104˚F)
Condiciones de instalación
Posición de funcionamiento: horizontal
Humedad relativa: Menos del 80%
Dimensiones
430mm(W) x 97mm (H) x 294mm (D)
Peso
4 Kg
Accesorios
Manual del usuario
MAINTENANCE
1
ESPECIFICACIONES
*Observación
–
–
–
–
–
–
43
Para limpiar las partes, use un paño y alcohol(solvente).
Luego de limpiar, use la cinta de vídeo después que el alcohol se ha secado completamente.
Recomendamos usar aceite [EP-56] o solvente.
Se deben aplicar una o dos gotas de aceite luego de la limpieza con alcohol.
Aplique aceite periódicamente (Aplique aceite después de la limpieza)
La aplicación de exceso de aceite puede causar mal funcionamiento.
44