1
Microwave Oven
Use and Care
Manual
RSBG669T
RSL669T
RSW669T
Attention: Keep these instructions for future reference.
If the oven changes ownership, be sure this manual
accompanies oven.
Contents
Model Identification ........................................... 3
Important Safety Instructions ............................. 4
Precautions to Avoid Possible Exposure
to Excessive Microwave Energy ........................ 5
Electrical Requirements .................................... 6
Grounding Instructions ................................ 6
Microwave Power ........................................ 7
Radio Interference ....................................... 7
Installation ......................................................... 7
Unpacking Oven
Oven Placement
Built-In Capability
Usage ............................................................... 8
Oven Signal
Oven Operation
Oven Light
Rotawave®
Turntable
Setting the Clock
Interlock Systems
Control Panel ............................................... 9
Preprogrammed Food Pads ........................ 11
Full Power Cooking ..................................... 11
Cookmatic® Power Level Cooking ............... 11
Independent Timer ...................................... 11
Accu-Thaw™ Defrosting by Time ................. 12
Accu-Thaw Defrosting Guide ....................... 12
Accu-Thaw Defrosting by Weight ................ 15
Cooking Program .........................................16
Instant Replay..............................................16
Changing Preprogrammed Food Pads ........17
Lockout and Custom Lock ...........................17
Microwave Cooking ...........................................18
Microwave Utensils
Microwave Cooking Principles
Heating and Reheating Chart ............................19
Microwave Cooking Guide.................................20
Appetizers/Snacks .......................................20
Beverages ...................................................22
Soups/Stews................................................23
Sandwiches .................................................24
Meats ...........................................................26
Poultry .........................................................31
Fish/Seafood ...............................................34
Eggs ............................................................37
Pasta/Rice ...................................................38
Cereals ........................................................41
Vegetables ..................................................42
Sauces/Jams/Relishes ................................45
Breads .........................................................47
Baked Goods/Deserts .................................50
Candies .......................................................55
Care and Cleaning ............................................57
Interior, Exterior and Doors
Discharge Air Vents
Turntable
Splatter Shield
Oven Light
Before Calling for Service .................................58
2
Model Identification
Please read this Use and Care Manual thoroughly. This manual provides proper maintenance
information. Any questions, call the Consumer Affairs Department at 1-800-843-0304 inside U.S.A.
and 1-319-622-5511 if outside U.S.A.
Complete enclosed registration card and promptly return. If registration card is missing, call the
Consumer Affairs Department.
When contacting Amana, provide product information. Locate product information on the nameplate.
Record the following information:
Model Number:
Manufacturing Number:
Serial or S/N Number:
Date of purchase:
Dealer’s name and address:
Keep a copy of sales receipt for future reference.
Locate an authorized servicer by calling 1-800-NATLSVC (628-5782) inside U.S.A. and 319-622-5511
outside U.S.A. Warranty service must be performed by an authorized servicer. Amana also
recommends contacting an authorized servicer if service is required after warranty expires.
Amana offers a complete line of appliances...refrigerators, freezers, ranges, cooktops, wall ovens,
dishwashers, washers and dryers. Amana also manufactures a complete selection of high efficiency
gas furnaces plus both central and room air conditioners. When buying one of these products,
choose Amana quality appliances.
Special Features of Your New Amana Microwave Oven
• Removable Turntable
• 1000 Watts of Cooking Power
• 1.2 cu.ft. Capacity
• Built-In Capability
3
IMPORTANT SAFETY INSTRUCTION
Recognize this symbol as a SAFETY message
WARNING
WHEN USING ELECTRICAL APPLIANCES, BASIC SAFETY PRECAUTIONS SHOULD BE
FOLLOWED TO REDUCE THE RISK OF BURNS, ELECTRICAL SHOCK, FIRE, INJURY
TO PERSONS, OR EXPOSURE TO EXCESSIVE MICROWAVE ENERGY:
1.
READ all instructions before using the
appliance.
7.
As with any appliance, CLOSE SUPERVISION
is necessary when used by CHILDREN.
2.
READ AND FOLLOW the specific
“PRECAUTIONS TO AVOID POSSIBLE
EXPOSURE TO EXCESSIVE MICROWAVE
ENERGY” found on page 5.
8.
DO NOT operate this appliance if it has a
damaged cord or plug, if it is not working
properly, or if it has been damaged or dropped.
9.
3.
This appliance MUST BE GROUNDED.
Connect only to properly grounded outlet. See
“GROUNDING INSTRUCTIONS” on page 6.
This appliance should be serviced ONLY by
qualified service personnel. Contact nearest
authorized service facility for examination,
repair or adjustment.
4.
Install or locate this appliance ONLY in
accordance with the provided installation
instructions.
5.
Some products such as whole eggs and sealed
containers -- for example, closed glass jars -may explode and SHOULD NOT be HEATED
in this oven.
6.
Use this appliance ONLY for its intended use
as described in this manual. Do not use
corrosive chemicals or vapors in this appliance.
This type of oven is specifically designed to
heat or cook. It is not designed for industrial or
laboratory use.
10. DO NOT cover or block any openings on the
appliance.
11. DO NOT store this appliance outdoors. DO
NOT use this product near water -- for
example, near a kitchen sink, in a wet
basement, or near a swimming pool, and the
like.
12. DO NOT immerse cord or plug in water.
13. Keep cord AWAY from HEATED surfaces.
14. DO NOT let cord hang over edge of table or
counter.
15. See door cleaning instructions on page 57.
TO REDUCE THE RISK OF FIRE IN THE OVEN CAVITY:
a.
DO NOT overcook food. Carefully attend appliance if paper, plastic, or other combustible materials are
placed inside the oven to facilitate cooking.
b. Remove wire twist-ties from paper or plastic bags before placing bag in oven.
c. If materials inside the oven should ignite, keep oven door closed, turn oven off, and disconnect the power
cord, or shut off power at the fuse or circuit breaker panel.
IF THE DOOR IS OPENED THE FIRE MAY SPREAD!
d. DO NOT use the cavity for storage purposes. DO NOT leave paper products, cooking utensils, or food in
the cavity when not in use.
THIS APPLIANCE MUST BE SERVICED ONLY BY QUALIFIED SERVICE PERSONNEL. CONTACT YOUR
NEAREST AUTHORIZED SERVICE FACILITY FOR EXAMINATION, REPAIR OR ADJUSTMENT.
SAVE THESE INSTRUCTIONS
4
PRECAUTIONS TO AVOID
POSSIBLE EXPOSURE TO EXCESSIVE
MICROWAVE ENERGY
(a) DO NOT attempt to operate this oven with
the door open since open-door operation can
result in harmful exposure to microwave
energy. It is important not to defeat or
tamper with the safety interlocks.
(b) DO NOT place any object between the oven
front face and the door or allow soil or
cleaner residue to accumulate on sealing
surfaces.
(c) DO NOT operate the oven if it is damaged.
It is particularly important that the oven door
close properly and that there is no damage
to the: (1) door (bent), (2) hinges and
latches (broken or loosened), (3) door seals
and sealing surfaces.
(d) The oven should NOT be adjusted or
repaired by anyone except properly
qualified service personnel.
Caution
8. Briskly stir or pour liquids before heating to
prevent spontaneous boiling or eruption. Do
not overheat. If air is not mixed into a liquid,
liquid can erupt in oven or after removal
from oven.
9. All uncooked foods should be heated to a
final internal temperature of at least 165°F.
Some foods require higher temperatures.
These recommended temperatures kill most
food borne, disease causing organisms.
Some common visual signs that indicate the
cooking temperature has been reached:
• Food steams throughout, not just around
edges.
• Center bottom of dish is very hot to the
touch.
10. When popping microwave popcorn place
popcorn bag on turntable inside oven. Do
not place popcorn bag on oven floor.
11. If using a microwave popcorn popper, use
according to manufacturer's instructions. Do
not continue to heat after popping has
stopped. Popcorn will scorch or burn. Do
not leave oven unattended.
12. Use only popcorn in packages designed and
labeled for microwave use. Pop according
to package directions, beginning with the
minimum amount of time recommended.
Use caution when handling hot popcorn
bag.
To avoid personal injury or property damage,
observe the following:
1. Always press STOP/RESET before
programming oven.
2. Do not deep fat fry in oven. Fat could
overheat and be hazardous to handle.
3. Do not cook or reheat eggs in shell or with
an unbroken yolk. Pressure may build up
and erupt. Pierce yolk with a fork or knife
before cooking. Do not reheat previously
cooked eggs in the microwave oven unless
finely chopped or scrambled.
4. Pierce skin of potatoes, tomatoes, or other
foods with a "skin" before cooking in
microwave oven. This allows steam to
escape during cooking.
5. Remove excess fat from meats and
poultry to prevent splattering.
6. Do not heat baby bottles in microwave oven.
7. Do not home can in microwave oven. Home
canning is generally done with metal lids.
Since metal lids reflect heat, product may
not be heated uniformly to 212°F or above.
Food could deteriorate. USDA extension
specialists do not recommend home canning
in microwave ovens.
5
16. Do not use regular cooking thermometers in
oven. Most cooking thermometers contain
mercury and may cause “arcing”,
malfunction, and/or damage to oven.
17. Metal or ceramic accessories which are
designed to absorb microwave energy to
provide heat may be used with caution. Test
device before use (See "Utensil Check Test"
on page 18). Read and follow
manufacturer's instructions provided with the
accessory. Contact accessory manufacturer
with questions concerning these
accessories. Amana Refrigeration, Inc.,
does not endorse any brand of accessory.
18. Never use newspapers in oven since paper
may ignite.
19. Pierce or open plastic bags (and other
airtight containers) before heating in
microwave oven. This allows steam to
escape during cooking.
20. Containers may become hot and pot
holders may be needed.
21. Closely supervise any use by children.
Make sure they can read instructions and
reach controls. Never allow them to lean or
swing on oven door.
13. Microwave convenience foods are often
packaged in specially designed packaging.
Special plates, lids, containers, or other
unique packaging materials may be used.
Susceptor packing material (a thin,
metalized plastic film) is frequently used to
help brown and crispen foods such as
microwave pizzas, french fries, or fish
sticks. Be sure to follow food package
instructions carefully. Contact convenience
food manufacturer with questions
concerning these products. Amana
Refrigeration, Inc., does not endorse
any brand of microwave convenience foods,
or any type of microwave food packaging.
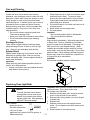
14. To place large casserole dish in microwave,
remove turntable and turntable support.
Place plug, located in turntable support, into
hole in oven floor (see diagram on page 57).
After removing casserole from oven, place
plug back into turntable support and insert
turntable support back into hole in oven
floor. Place turntable on turntable support.
15. Do not operate microwave oven empty.
This could damage the oven.
Electrical Requirements
GROUNDING INSTRUCTIONS
DO NOT UNDER ANY
CIRCUMSTANCES CUT OR
REMOVE THE ROUND
GROUNDING PRONG FROM THE
PLUG OR BEND THE POWER
PRONGS TO FIT A RECEPTACLE
OTHER THAN THE ONE SHOWN
FOR YOUR OVEN. SUCH ABUSE
OF THE PLUG CAN RESULT IN
ELECTRICAL SHOCK OR
OVERHEATING.
120V-15AMP
WARNING -- IMPROPER USE OF THE GROUNDING PLUG
CAN RESULT IN A RISK OF ELECTRIC SHOCK OR DEATH.
This appliance MUST be grounded. In the event of an electrical short
circuit, grounding reduces the risk of electric shock by providing an
escape wire for the electric current. This appliance is equipped with
a cord having a grounding wire with a grounding plug. The plug must
be plugged into an outlet that is properly installed and grounded. DO
NOT use a two-prong adapter.
Consult a qualified electrician or servicer if the grounding instructions
are not completely understood, or if doubt exists as to whether the
appliance is properly grounded.
Do not use an extension cord. If the product power cord is too short,
have a qualified electrician install a three-slot receptacle. This oven
should be plugged into a separate 60 hertz circuit with the electrical
rating as shown in the appropriate drawing at left. When a microwave
oven is on a circuit with other appliances, an increase in cooking times
may be required and fuses can be blown.
6
Power Supply Cord
A short power supply cord is provided to reduce risks of becoming entangled in or tripping over a longer
cord.
• Longer cord sets or extension cords are available and may be used if care is exercised in their use.
• If a long cord or extension cord is used, (1) the marked electrical rating of the cord set or extension cord
should be at least as great as the electrical rating of the appliance, (2) the extension cord must be a
grounding type 3 wire cord, and (3) the longer cord should be arranged so that it will not drape over the
countertop or tabletop where it can be pulled on by children or tripped over accidentally.
Microwave Power
Models RSBG669T, RSL669T and RSW669T deliver 1000 watts, based on IEC 705 test method, of microwave power to the oven cavity.
Radio Interference
Microwave oven operation may cause interference to radio, TV, or similar equipment. To reduce or eliminate
interference:
• Clean door and sealing surfaces of oven. See "Care and Cleaning" instructions on page 57.
• Place the radio, TV, etc. away from oven.
• Use properly installed antenna on radio, TV, etc. to obtain stronger signal reception.
Installation
Unpacking Oven
Oven Placement
• Inspect microwave oven for damage such as dents
in door or dents inside oven cavity.
• Report any dents or breakage to source of purchase
immediately. Do not attempt to use damaged oven.
• Remove all packing and printed materials from oven
interior.
• Remove turntable from foam pad, located at bottom
of carton.
• If oven has been stored in extremely cold area, wait
a few hours before plugging in.
Do not build oven in with sides, top or bottom airflow
restricted. Oven must have sufficient airflow around
it. Air flows around electric components. At least
one inch of clearance is required at top and sides of
oven to provide proper ventilation. With restricted
air flow oven will not operate properly and life of
electrical parts shortens.
Built-In Capability
To build-in, use only Amana "RS" trim kit. Trim kit
will have a label identifying which oven models may
be used.
7
Usage
Oven Signal
Oven features an entry signal and end-of-cycle
signal programmed at factory. Signal can be
deactivated. Entry signal sounds whenever a pad is
pressed. It confirms oven has read and accepted
instruction. End-of-cycle signal sounds at end of
cooking time.
Option Option Function
Number
To cancel entry signal or end-of-cycle signal
1. Press and hold MEMORY SET for five seconds.
"OP:10" or "OP:11" displays. See chart at right
for definition of signal options.
2. To change signal option, press 0 to deactivate
entry signal. Press 1 to activate entry signal.
3. Press MEMORY SET. "OP:20" or "OP:21"
displays. Change signal option for end-ofcycle signal, if desired.
4. Advance to next signal option by pressing
MEMORY SET.
5. To exit signal option mode, press STOP/RESET
once.
OP:10
Prevents signal from sounding when a
pad is pressed.
OP:11*
Allows signal to sound when a pad is
pressed.
OP:20
Prevents end-of-cycle signal from
sounding when heating time is over.
OP:21*
Allows signal to sound at end of
heating time and timer cycle.
*As shipped from factory.
Oven Operation
E. Check operations of interlock systems. The
START and STOP/RESET pads turn oven on
and off. Microwave energy is generated only
when door is closed, cooking time is set, and
START is pressed. In addition, oven has
interlock switches to assure no microwave
energy is generated when door is open. To
check or remove food before cooking time is
elapsed, either press STOP/RESET or open
oven door to turn oven off.
A. Oven light comes on when door is opened
and also when oven is operating.
B. Rotawave® System beams microwave energy
directly to food in uniform pattern for even
cooking results.
C. • Turntable will randomly rotate clockwise or
counter-clockwise, determined by turntable
stop position.
• When defrosting or cooking (especially large
items, such as poultry), verify turntable rotates
freely.
D. Set the Clock
1. Press CLOCK. "CLOCK" displays.
2. Enter time of day. For example, 10:35 (a.m.
or p.m.) press number pads 1,0,3,5.
3. Press CLOCK again. Clock is set. If oven
power is interrupted all programming
instructions erase. When power is
reconnected, dashes appear in display.
Reset clock as indicated above.
To check operation of START, STOP/RESET and
interlock switches:
1. Place a glass of water in oven. Close
door.
2. Press TIME ENTRY.
3. Press 5,0 (50 seconds).
4. Press START. Oven should operate and
oven light should come on.
5. Press STOP/RESET. Oven and oven
light should shut off immediately.
6. Open oven door fully. Oven light should
come on when door is opened.
7. Press STOP/RESET.
If under any of the preceding conditions oven does
not operate as stated, do not use it. See "Factory
Service Centers" section on back page.
8
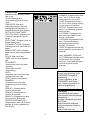
Control Panel
Readout display--Normally shows
time of day.
·Shows remaining time
when cooking by time or using
timer.
TIME ENTRY--Use when
changing preset time for each
preprogrammed food pad or to
program time not in oven memory.
®
AUTO ACCU-THAW (MEAT,
POULTRY, FISH)--Programs oven
to defrost each specific item by
weight.
ACCU-THAW ™--Programs oven to
defrost food by time.
COOKMATIC ® LEVEL--Programs
cooking power level lower than full
power.
MEMORY SET--Use to change
preset time of each reprogrammed
pad.
CLOCK--Sets time of day.
TIMER--Use to time a separate
task.
STOP/RESET-·Press once to stop oven when
operating.
·Press twice to cancel
programming.
LOCK-·Programs oven to lock key pads
so pads cannot be used.
START--Starts oven operation.
NUMBERS-·Press after time entry when
programming oven to heat by
time.
REHEAT 1--Programmed to
heat for ten seconds.
REHEAT 2--Programmed to
heat for 30 seconds.
REHEAT 3--Programmed to heat
for one minute, 30 seconds.
FROZEN VEGETABLE PAD-Programmed to heat a 9-10 ounce
package of frozen vegetables for
four minutes.
MINIMEAL--Programmed to heat
one 7 1/2-8 1/2 ounce single
serving meal for one minute.
SOUP--Programmed to heat a
10 1/2-11 ounce serving of soup
for one minute, 45 seconds.
POTATO--Programmed to cook
one 6-7 ounce baking potato for
three minutes.
HOT DRINK --Programmed to
heat one cup of liquid for one
minute, 15 seconds.
POPCORN--Programmed to pop
one 3.5 ounce package of
microwave popcorn for two
minutes, 30 seconds.
PIZZA--Programmed to heat one
serving pizza for two minutes, 45
seconds.
Note: MINIMEAL, SOUP, and
HOT DRINK pads calculate times
to heat one to four individual
servings. Potato pad calculates
times to heat one to eight
potatoes.
To Cancel Mistake
·If oven is not operating, press
STOP/RESET to cancel all
programming.
·If oven is operating, press
STOP/RESET once to stop
oven. Press a second time to
cancel all programming.
Error Signal
Oven sounds an error signal
when incorrect pads are pressed
attempting to:
·program a Cookmatic level with
Accu-Thaw.
·enter or exit lock mode and
incorrect sequence of digits is
entered.
·enter invalid clock time.
9
Preprogrammed Food Pads (Usage instructions page 11)
Pad#
Pad
Time
min.:sec.
1
REHEAT
:10
Reheat cinnamon roll, soften butter.
2
REHEAT
:30
Reheat pizza slice, cook scrambled egg.
3
REHEAT
1:30
Reheat plate of food or cheese spread.
4
FROZEN VEG.
4:00
Cooks a 9-10 ounce package of frozen
Empty contents of package into
vegetables to serving temperature.
casserole dish. Heat, covered.
To reprogram pad to cook other package sizes:
Stir halfway through. If heating vegetables
Package Size
in a pouch, pierce pouch before heating.
5
MINIMEALS
1:00
Uses
Instructions
Time
4-5 ounces
2:00-2:30
6-8 ounces
2:00-3:00
12-16 ounces
4:30-6:00
28-32 ounces
9:00-11:00
Heats a 7 1/2-8 1/2 ounce (room temperature)
Prepare minimeal for heating per package
minimeal (microwave cup) to serving temperature.
instructions. Stir soups before heating to
Heat up to four meals at once.*
prevent boil-overs. Stir before serving.
To reprogram pad to heat other sizes:
Package Size
10 1/2 ounces
6
7
SOUP
POTATO
1:45
3:00
Cooks a 10 1/2-11 ounce can of soup to
Stir soup or pour from can into serving bowl
serving temperature. Heat one to four individual
before heating to prevent boil-overs.
servings at once.*
Cover with vented plastic wrap.
Cooks a 6-7 ounce baking potato.
Pierce skin of potato with fork for steam
Cook one to 8 potatoes at once.* To
escape. Place in oven on microwave-safe
reprogram the pad to cook other sizes
paper towel. Turn over halfway through. Let
of potatoes:
stand 2 minutes before serving. If cooking
Weight
8
9
0
HOT DRINK
POPCORN
PIZZA
1:15
2:30
2:45
Time
1:35-1:50
Time
more than one potato, arrange in circular
5-6 ounces
2:45-3:00
pattern on microwave-safe paper towel.
9-10 ounces
3:15-3:30
11-12 ounces
3:30-4:00
Heats room temperature 6-8 ounce drink.
To prevent boil-overs when heating cocoa,
Heat one to four individual servings at once.*
heat water before adding cocoa.
Designed to pop most 3.5 ounce packages of microwave
Follow package directions for popping.
popcorn. To program for different size bags of popcorn:
Place popcorn bag on glass turntable.
Weight
Time
Do not place popcorn bag on oven floor.
1.5-1.75 ounce
1:50-2:10
7 ounce
4:20-4:35
Cooks single serving 7" round or 4 1/2"
Prepare pizza for cooking per package
deep dish pizza or 7"x3"x3 1/2" french bread pizza.
instructions. Turn quarter turn halfway
For best results, choose pizzas with packaging
through cooking time.
that enhances crispness and browning.
*To cook multiple items, press preprogrammed pad until desired quantity is reached.
10
Preprogrammed Food Pads
1. Place food in oven. Close door.
2. Press STOP/RESET to clear display.
3. Press desired preprogrammed pad.
Preprogrammed time and "MICRO" display.
Note: When any of the multiple food pads are
pressed, MINIMEAL, SOUP, POTATO, or HOT
DRINK, "1" and two letters representing the pad
name display. For example, if 5 is selected,
"LU", for lunch, displays.
4. Press START. Oven operates and time counts
down. "MICRO" and "POWER" display.
5. Oven stops and signals at end of cooking
time.
Note: To stop oven, press STOP/RESET once.
To clear display, press STOP/RESET twice.
Preprogrammed Food Pads / Cooking Multiple Food Items
MINIMEAL, SOUP, and HOT DRINK pads
calculate times to heat one to four individual
servings. POTATO pad calculates times to heat one
to eight potatoes.
1. Place food in oven. Close door.
2. Press STOP/RESET to clear display.
3. Press MINIMEAL, SOUP, POTATO, or HOT
DRINK pad until desired quantity is reached.
Number and two letters representing pad name
display. For example, to heat three individual
bowls of soup, press SOUP three times. "3" and
"SP" display.
4. Press START. Oven operates and time counts
down. "MICRO" and "POWER" display.
5. Oven stops and signals at end of cooking
time.
Note: To stop oven, press STOP/RESET once.
To clear display, press STOP/RESET twice.
Full Power Cooking
1.
2.
3.
4.
Place food in oven. Close door.
Press STOP/RESET to clear display.
Press TIME ENTRY.
Press numbers for cooking time. Numbers
selected appear in display.
Note: To cancel programming, press STOP/
RESET once and return to step 3.
5. Press START and oven operates. "MICRO" and
"POWER" display indicating oven is cooking.
6. Oven stops and signals at end of cooking
time.
Cookmatic ® Power Level Cooking
Oven has ten power levels. When no power level is
selected, oven operates at full power.
1. Place food in oven. Close door.
2. Press STOP/RESET to clear display.
3. Press TIME ENTRY.
4. Enter numbers for cooking time. Time appears
in display.
5. Press COOKMATIC LEVEL. Power level
displays.
Independent Timer
1. Press TIMER. "TIMER" displays.
2. Enter digits for amount of time desired.
3. Press TIMER. Display counts down and shows
"TIMER" indicating timer function is being used.
4. Oven signals when time is elapsed.
6. Press number for desired Cookmatic power
level. Number displays. For example, to
cook at power level eight, press 8, which is 80
percent power.
7. Press START. Oven operates. "MICRO" and
power level selected display. Microwave power
cycles on and off, as indicated by "POWER"
flashing on and off.
8. To change power level, press STOP/RESET
once to stop oven. Press COOKMATIC LEVEL
and then new power level.
9. Oven stops and signals at end of cooking time.
Note: To erase time from display before time
elapses:
1. Press TIMER.
2. Press 0. "0" displays.
3. Press TIMER. Time of day displays.
11
Accu-Thaw ® Defrosting by Time
Accu-Thaw pulses microwave energy on and off at
various power levels for optimal defrosting results.
During the "on" periods food exterior is heated.
During the "off" periods, heat conducts to food
interior, allowing uniform defrosting with little or no
cooking on exterior.
Note: Defrost foods completely for even cooking
results.
1. Place frozen food in oven. Close door. If food is
inside plastic bag, slit bag to allow steam to
escape.
2. Press STOP/RESET to clear display.
3. Press ACCU-THAW. "0" and "DEFR" display.
4. Enter desired defrosting time. Start with short
amounts of time and increase as needed.
5. Press START. Oven operates. "DEFR" displays
indicating oven is programmed to defrost.
Microwave power cycles on and off, as indicated
by "POWER" flashing on and off.
6. Oven stops and signals at end of defrosting
time.
Accu-Thaw Defrosting Guide
Use this guide when using Accu-Thaw to defrost foods. When defrosting and heating frozen convenience
foods, follow package instructions. This defrosting chart instructs on defrosting by time.
Frozen Beverages:
Frozen juice concentrate can be placed directly in serving pitcher and heated in microwave oven. Be certain
pitcher is microwave-safe and fits inside microwave oven.
FROZEN BEVERAGES DEFROSTING CHART
Type of
Beverage
Frozen Juice
Concentrate
Frozen Non-Dairy
Creamer
Carton or
Can Size
Utensils
Defrosting
Time
6 oz. can
1-quart casserole or
glass measure
12 oz. can
2-quart casserole or
glass measure
16 oz. can
glass measure
1 pint carton
Defrost in carton
Special Instructions
Place frozen juice concentrate in
30 sec. to
utensil. After defrosting, stir until
1 min., 15 sec.
mixture is melted and smooth.
Same as above.
1 min., 30 sec.
to 2 min.
1 min., 30 sec. Same as above.
to
2 min., 30 sec.
Open carton. Defrost according to
time and setting, or until defrosted.
8 to 10 min.
Shake or stir occasionally during
defrosting time.
Frozen Fruit:
1. Place fruit in utensil recommended on chart. Cover fruit with glass lid or plastic wrap.
2. Defrost, according to time recommended on chart. Stir fruit halfway through the defrost time to
break fruit apart and rearrange.
FROZEN FRUIT DEFROSTING CHART
PACKAGE SIZE
UTENSIL
DEFROSTING TIME
10 oz.
1-quart casserole
3 to 5 min.
20 oz.
1 1/2-quart casserole
8 to 10 min.
12
Frozen Cakes and Pies:
1. Remove cake from container, if metal. Place cake on plastic rack or paper plate. Cover with microwave-safe
paper towel. If frosted, do not cover.
2. Defrost, according to time recommended on chart. Do not melt frosting.
3. Place cooked frozen pie in glass pie plate. Do not cover. Defrost, according to time recommended on chart.
FROZEN CAKES AND PIES DEFROSTING CHART
TYPE
SIZE
DEFROSTING TIME
12 to 14 oz.
1 min., 30 sec.
to 3 min.
16 to 18 oz.
2 min., 30 sec. to
3 min., 30 sec.
10 to 11 oz.
2 to 3 min.
8-inch
(20 to 30 oz.)
6 to 11 min.
9-inch
(30 to 40 oz.)
10 to 15 min.
Cake
Pound Cake
Pie
Main Dishes:
1. Select defrosting instructions according to dish size. Cover dish with glass lid or plastic wrap.
2. Defrost according to times recommended on chart.
3. Stir and break apart 2 to 3 times during defrost time.
MAIN DISH DEFROSTING AND COOKING CHART
DISH
DEFROSTING TIME
(HOURS:MINUTES)
COOKING TIME ON
FULL POWER
(MINUTES)
1 quart
:15 - :20
3 to 5
1-1/2 quart
:18 - :25
4 to 6
2 quart
:28 - :32
5 to 7
3 quart
:45 - :60
5 to 8
13
Frozen Fish, Seafood, and Small Meat:
1. Turn food over halfway through defrost time unless otherwise noted.
2. Place seafood in utility dish. Cover dish loosely with plastic wrap or waxed paper.
3. Let seafood stand for a short period of time before cooking to ensure it is totally defrosted. Hold larger
seafood pieces under cold running water, if necessary, to finish defrosting process, or to separate
fillets.
4. Food does not need to be turned (quarter turn) halfway through cooking time in turntable models.
FROZEN FISH, SEAFOOD, AND SMALL MEAT DEFROSTING CHART
Food
Weight
(ounces)
Defrosting Time
Special Instructions
(minutes)
Fish and Seafood
Crab claws or
legs
16
10 to 12
Rearrange crab halfway through
defrosting time.
Crab meat
6
4 to 5
Stir crab halfway through
defrosting time.
Fillets -flounder, cod,
sole, etc.
16
9 to 12
Turn fillets over halfway through
defrosting time.
Lobster tail
16
9 to 12
Wrap lobster in plastic wrap or
waxed paper. Turn over halfway
through cooking time.
Shrimp
16
9 to 11
Rearrange halfway through
defrosting time.
Bacon
16
3 to 5
Turn over and turn quarter turn
halfway through defrosting time.
Bratwurst
16
6 to 9
Turn over and turn quarter turn
halfway through defrosting time.
Chops
16
6 to 10
Turn over and turn quarter turn
halfway through defrosting time.
Frankfurters
16
4 to 7
Turn over and turn quarter turn
halfway through defrosting time.
Ground meat,
bulk
16
6 to 8
Break apart and remove
defrosted portions halfway
through defrosting time.
Ground meat,
patties
16
6 to 8
Arrange meat in circle.
Turn over halfway through
defrosting time.
Sausage
12
3 to 5
Break apart and remove
defrosted portions halfway
through defrosting time.
Steaks
16
6 to 9
Turn over and turn quarter turn
halfway through defrosting time.
Small Meat
14
Frozen Roast:
1. Place meat in utility dish and cover with plastic wrap or place in heavy-duty plastic roasting bag in
utility dish.
2. Defrost according to time recommended on chart.
3. Use longer defrost times listed on chart for thicker cuts of meat.
4. Larger roasts may need standing time before cooking to allow completion of defrosting process.
FROZEN ROAST DEFROSTING CHART
Weight
Defrosting Time
(minutes/pound)
Under 3 pounds
6 to 10
Turn roast over halfway through defrost time.
3 to 6 pounds
6 to 10
Turn roast over after five minutes and halfway
through remaining defrost time. Let stand to finish
defrosting.
Special Instructions
Auto Accu-Thaw ® Defrosting by Weight
Defrost by weight using the MEAT, POULTRY, or
FISH pad. Defrost food weighing 0.1 to 9.99
pounds. Oven selects time and power levels
needed to defrost food. Microwave energy cycles
on and off to allow uniform defrosting with little or no
cooking on exterior. To ensure even cooking,
defrost foods completely.
1. Place food in oven. Close door. If food is
inside plastic bag, slit bag to allow heat to
escape.
2. Press STOP/RESET to clear display.
3. Press desired weight defrost pad, MEAT,
POULTRY, or FISH. "P", "0", and "DEFR"
display.
4. Enter weight of food in pounds and hundredths
of pounds. (See chart at right to convert ounces
to hundredths of pounds.) To enter 1.5 pounds,
press 1,5,0. "1P:50" and "DEFR" display.
5. Press START and oven operates. Calculated
defrost time and "DEFR" display. "POWER"
flashes on and off as microwave cycles.
6. Oven stops and signals when defrost
cycle time is complete.
OUNCES TO POUNDS CONVERSION CHART
Food Weight
Ounces
Hundreths of a Pound
0 to 1/2
1 to 2
2-1/2 to 4
4-1/2 to 5-1/2
6 to 7
7-1/2 to 8-1/2
9 to 10
10-1/2 to 12
12-1/2 to 13-1/2
14 to 15 1/2
26 (1 lb, 10 oz)
64 (4 lbs.)
96 (6 lbs.)
0 to .05
.06 to .15
.16 to .25
.26 to .35
.36 to .45
.46 to .55
.56 to .65
.66 to .75
.76 to .85
.86 to .95
1.63
4
6
If roast weighs 3 pounds 9 ounces, it converts to
3.56 pounds. To enter 3.56 pounds, press 3,5,6.
"3P:56" and "DEFR" display.
15
Two Cooking Programs
Defrost and cook food with one set of instructions.
Items may be cooked at full power or selected
Cookmatic® power level.
Defrost by Weight, then Cook
1. Place food in oven. Close door. If food is
inside plastic bag, slit bag for steam to escape.
2. Press STOP/RESET to clear display.
3. Press desired weight defrost pad, MEAT,
POULTRY, or FISH. "P", "0", and "DEFR"
display.
4. Enter weight of food in pounds and hundredths
of pounds.
5. Press TIME ENTRY. "MICRO" and "0" display.
6. Enter desired cooking time. Cooking time
displays.
7. To cook at a Cookmatic power level other than
full power, press COOKMATIC LEVEL.
8. Press number for desired Cookmatic power
level. Number appears in display. For example,
to cook at cook level 4, press 4 which is 40
percent power.
9. Press START and oven operates beginning with
calculated defrost time. "DEFR" displays.
"POWER" flashes as microwave energy cycles
on and off. After defrost program is complete,
oven begins cooking food for programmed
cooking time.
10. Oven stops and signals when cooking
time is complete.
Accu-Thaw ® Defrost by Time, then Cook
1. Place food in oven. Close door. If food is inside
plastic bag, slit bag to allow steam to escape.
2. Press STOP/RESET to clear display.
3. Press ACCU-THAW. "0" and "DEFR" display.
4. Enter desired defrosting time.
5. Press TIME ENTRY. "MICRO" and "0" display.
6. Enter desired cooking time. Cooking time
displays.
7. To cook at a Cookmatic power level other than
full power, press COOKMATIC LEVEL.
8. Press number for desired Cookmatic power
level. Number appears in display. For example,
to cook at power level 4, press 4 which is 40
percent power.
9. Press START. Oven operates beginning with
calculated defrost time. "DEFR" displays.
"POWER" flashes as microwave energy cycles
on and off. After defrost program is complete,
oven begins cooking food for programmed
cooking time.
10. Oven stops and signals when cooking
time is complete.
Instant Replay
Instant replay allows review of oven programming.
1. Press CLOCK to display time of day.
2. Press CLOCK again to display remaining
cooking time.
3. Press TIMER to display remaining time on timer.
16
Changing Preprogrammed Food Pads
Preprogrammed food pads cook specified amounts
of food to serving temperature (see page 10). To
reprogram pads:
1. Press STOP/RESET to clear display.
2. Press MEMORY SET. "P" displays.
3. Press pad number 0-9 to change. Current
heating time, Cookmatic ® level, and "MICRO"
display.
4. Press TIME ENTRY. "0" displays.
5. Enter new heating time. New time appears in
display.
Note: When reprogramming one of the
multiple program pads (MINIMEAL, SOUP,
POTATO, or HOT DRINK) enter cooking time for
one serving. Oven calculates time for cooking
multiple servings.
6. To cook on a power level other than full power,
press COOKMATIC LEVEL. "COOK LEVEL"
displays.
7. Enter desired Cookmatic power level.
8. Press MEMORY SET to lock new instructions
into preprogrammed pad. "P" displays. Note: If
cooking time and/or Cookmatic power level is
changed on multiple program pad, the change is
for one serving. Oven calculates change for
multiple servings. For example, if time is
changed to cook one potato from 3:30 to 3:00,
oven calculates time to cook eight potatoes.
9. To change other preprogrammed pads, return to
step 3.
10. To exit this mode, press STOP/RESET. Time of
day displays.
Note: Oven retains new programmed times if
power is interrupted.
Lockout and Custom Lock
Use to prevent accidental programming or starting of
oven. Lockout disables all key pads. Custom lock
disables all key pads except one preprogrammed
pad. For example, to access only the popcorn pad,
the custom lock feature would disable the other
pads from operating, allowing only the popcorn pad
to operate.
Programming Lockout:
1. Press LOCK. "0" displays.
2. Press 1,3,5,7.
3. Press LOCK. "LOC" displays, then time of day
and "L" (indicating lockout is on) display. If a
pad is pressed while in lockout mode "LOC"
displays for a second.
Removing Lockout Programming:
1. Press LOCK. "0" displays.
2. Enter 1,3,5,7.
3. Press LOCK. Time of day displays.
Programming Custom Lock:
1. Press LOCK. "0" displays.
2. Press 2,4,6,8.
3. Press preprogrammed pad to be left on (not
locked off). For example, to access the popcorn
pad or pad 9 only, press 9. "9" displays.
4. Press LOCK. "LOC" displays, then time of day,
pad number programmed in step 3 ("9" from
example), and "READY" display indicating pad 9
is ready for use. If pad other than accessible
pad is pressed, "LOC" displays for a second.
Removing Custom Lock Programming:
1. Press LOCK. "0" displays.
2. Press 2,4,6,8. "READY" displays.
3. Press LOCK. Time of day displays.
17
Microwave Cooking
Food Placement
Browning
Allow space between foods for proper cooking results.
For best results, arrange thickest, or hardest to cook
portion of foods toward outside of dish. Place smaller,
easier to cook portion toward center.
Some foods prepared in microwave will not brown the
same as if done in conventional oven. This is particularly
true for baked goods, such as breads and cakes.
Reheating
Shielding
When reheating food, cover dish loosely with plastic
wrap. Heat at full power. Reheat porous items such as
breads and cakes for a minimum amount of time. Stir
soups, sauces and beverages vigorously before
reheating.
Porous, thin and protruding portions of large food
items, such as poultry drumsticks, can be covered with
thin strips of foil to prevent overcooking.
Defrosting
Piercing
It is important that most foods, especially meats, be
totally defrosted before cooking. To determine foods
are totally defrosted, insert sharp knife in center of
food, check for remaining ice crystals. Turn large food
items over during defrosting, for best results.
Membranes or tight skins on foods, such as egg yolks,
potatoes, tomatoes, and acorn squash, must be
pierced. Piercing allows steam to escape during
cooking.
Microwave Utensils
Microwave Usable utensils include glass, glassceramic, natural fiber cloth, non-recycled paper,
plastic and wood.
Unusable utensils include aluminum foil, grocery
bags, lead crystal, metal, metallic trimmed china,
newspapers, and recycled paper.
Utensil Check Test
Use the following test to check utensils for microwave
safeness:
1. Place glass measuring cup of water next to
empty dish to be tested in unit.
2. Heat on full power for one minute.
3. Check temperature of dish and water.
If dish remains cool and water is hot, dish is
microwave safe. If dish is slightly warm, use for
short term cooking only. If dish is hot and water is
cool, do not use. Dish remains cool if not
absorbing microwaves and microwaves are being
absorbed by water. Dish becomes hot if absorbing
microwaves.
Microwave Cooking Principles
Decrease cooking times when:
Foods are high in fat and sugar.
Foods are porous.
Foods are flat, thin or prepared in shallow pan.
Increase cooking times when:
Foods are thick and dense.
Foods are frozen or refrigerator temperature.
Food volume increases.
To prevent excess moisture
When cooking foods in a microwave oven, a considerable amount of steam/water vapor can be generated and
accumulate on foods and inside of oven. This is caused by hot moist air from food coming in contact with cool
surfaces inside oven. Use the following procedures to help reduce moisture buildup.
1.
2.
Cover foods before cooking in microwave.
Cover potatoes and fresh vegetables with a
microwave-safe paper towel before cooking to
help absorb excess moisture. Remove paper
towel immediately after cooking to prevent
vegetables from reabsorbing moisture.
3. Open microwave door immediately after cooking to
reduce moisture inside oven.
18
Heating and Reheating Chart
Item
Bread (defrosting)
Butter or margarine (melting)
Amount
Heating
Time
Cookmatic
Power Level
1 loaf (1 lb.)
3½ to 4½ min.
2
2 to 3 tablespoons
20 to 35 sec.
Full Power (10)
Special Instructions
Leave in plastic wrapper.
Remove metal twist. Loosen
end.
¼ cup
30 to 45 sec.
Full Power (10)
½ cup
45 sec. to 1¼ min.
Full Power (10)
½ cup
15 to 30 sec.
3
Cheese (softening)
1 (5 oz.) jar
45 sec. to 1½ min.
3
Chicken, cooked (2 pieces)
6½ to 7 oz.
45 sec. to 1½ min.
Full Power (10)
Cover with plastic wrap* or
microwave-safe paper towel.
6 oz.
30 sec. to 1½ min.
Full Power (10)
Stir halfway through heating
time.
12 oz.
45 sec. to 1½ min.
Full Power (10)
Stir halfway through heating
time.
1 oz.
45 sec. to 1½ min.
Full Power (10)
Stir halfway through heating
time.
Coffee or tea
1 cup
1 to 2 min.
Full Power (10)
Cream Cheese (softening)
3 oz.
30 sec. to 1½ min.
3
8 oz.
45 sec. to 2 min.
3
1 plate
1½ to 3 min.
Full Power (10)
Cover with waxed paper or
plastic wrap*.
1
30 to 45 sec.
Full Power (10)
Wrap with napkin or plastic
wrap*. Place in bun last 10
sec. of heating time.
Ice Cream (softening)
½ gallon
2 to 4 min.
1
Loosen package. Be careful
not to melt it.
Meat patty
1 (4 oz.)
25 to 45 sec.
Full Power (10)
Cover with waxed paper or
microwave-safe paper towel.
Milk (hot)
1 cup
45 sec. to 1½ min.
Full Power (10)
Pie, fruit (4-inch)
1 slice
15 to 30 sec.
Full Power (10)
Cover with napkin or plastic
wrap*.
1 roll
5 to 10 sec.
Full Power (10)
Cover with napkin.
1 roll
10 to 15 sec.
Full Power (10)
Cover with napkin.
1 (8oz.) serving
1 to 2½ min.
Full Power (10)
Cover with waxed paper or
plastic wrap*.
(softening)
Chocolate, morsels (melting)
squares (melting)
Dinner plate, with meat,
potato and vegetable
(reheating)
Frankfurter
Roll, dinner
breakfast
Soup
Stir halfway through heating
time.
Vegetables, canned
Water (hot)
(boiling)
1 (16 oz. can)
1½ to 2½ min.
Full Power (10)
1 cup
45 sec. to 1½ min.
Full Power (10)
1 cup
1½ to 2 min.
Full Power (10)
*Use heavy-duty plastic wrap
19
Cover with glass lid or plastic
wrap*.
Microwave Cooking Guide
Appetizers and Snacks Cooking Guidelines
1.
2.
3.
4.
5.
Save time by using only one dish for both
heating and serving. Be certain dishes are
microwave safe.
Arrange appetizers in a single layer when
heating, for best results. In most cases, cover
with waxed paper or microwave safe paper
towel to prevent splattering. Stir dips before
serving.
Whenever possible, prepare appetizers
ahead and quickly heat when ready to serve.
Freeze meatballs ahead, if desired. Quickly
defrost and heat when needed.
Do not place spreads on crackers until ready
to heat to prevent sogginess.
Use only popcorn in packages designed and
labeled for microwave use. Pop according to
manufacturer's instructions. (See
"Precautions" page 4)
Spicy Meatball Appetizers
Yield: 50 meatballs
Meatballs:
2 lbs. ground beef
1 cup herb seasoned croutons
1 (10 3/4 oz.) can French onion soup
1 egg, slightly beaten
2 teaspoons monosodium glutamate
Sauce:
1 cup hot catsup
1 cup barbecue sauce
1 (10 oz.) jar currant jelly (about 1 cup)
Crunchy Nibble Mix
Yield: 10 to 12 servings
1/2 cup butter or margarine
2 teaspoons Worcestershire sauce
1 teaspoon onion salt
1/2 teaspoon celery salt
1/4 teaspoon garlic powder
6 cups popped popcorn
2 cups toasted wheat cereal squares
2 cups pretzel sticks
1 cup mixed nuts
1 cup salted cocktail peanuts
6.
Shellfish may be heated directly in the shell,
since shells allow microwaves to transmit
through them. Shells make attractive serving
dishes.
7. Freshen stale or soggy potato chips, crackers,
or other snacks in microwave oven. Heat on full
power for 15 to 45 seconds, or until heated
through. They become more crisp as they cool.
8. Blocks of cheese can be heated for serving.
Heat for 10 to 20 seconds on power level 4.
9. Most appetizers, such as canapes or dips, can
be heated on full power.
10. For best results, reheat baked pizza on a paper
plate, napkin, or microwave-safe paper towel,
on a plastic or ceramic rack, or in a preheated
browning skillet or pizza crisping utensil.
1.
2.
3.
For meatballs: Combine all meatball
ingredients in a large bowl. Mix well. Form into
1-inch diameter balls. Divide evenly between 2,
9 x 2-inch round dishes. Cover with waxed
paper.
For each dish: Cook, covered, on full power for
3 to 5 minutes, or until beef is no longer pink.
Drain.
For sauce: Combine catsup, barbecue sauce
and currant jelly in medium bowl. Divide sauce
and pour over meatballs, stirring until well
coated. Heat on full power for 2 to 4 minutes,
or until heated through.
1. Place butter in 2-cup glass measure. Heat on
full power for 30 seconds to 1 minute, or until
melted. Add Worcestershire sauce, salts, and
garlic powder. Mix well. Set aside.
2. Combine popcorn, cereal, pretzels, and nuts in
4-quart casserole. Pour butter mixture over all.
Toss until well-coated.
3. Heat on full power for 3 to 5 minutes, or until
heated through. Mix thoroughly 2 to 3 times
during heating. Cool. Store in airtight container.
20
Hot Pecan Dip
Yield: About 2 cups
1 cup water
4 to 5 ozs. dried beef, chopped
1 (8 oz.) pkg. cream cheese, cubed
1/2 cup dairy sour cream
1/3 cup chopped pecans
1/4 cup grated Parmesan cheese
1/4 cup mayonnaise
2 tablespoons chopped green pepper
1 tablespoon chopped pimento
1/2 teaspoon garlic powder
1/2 teaspoon dill weed
1/4 teaspoon hot pepper sauce
Marinated Vegetables
Yield: 4 servings
1 cup julienne strip carrots
1 tablespoon water
1 1/2 cups broccoli flowerets
1 cup cauliflower flowerets
1 cup sliced zucchini
1 small Bermuda onion, sliced and separated into
rings
3/4 cup Italian salad dressing
Pizza Fondue
Yield: 1 quart
1 lb. ground beef
2/3 cup chopped onion
2 (8 oz. each) cans pizza sauce with cheese
3/4 teaspoon leaf oregano
1/4 teaspoon garlic powder
1 cup shredded Mozzarella cheese
2 (5 oz.) jars sharp pasteurized process cheese
spread
French bread cubes or chips
1.
2.
1.
2.
3.
1.
2.
3.
21
Combine water and dried beef in 1-quart
casserole. Cook, covered, on full power for 2 1/
2 to 4 minutes or until boiling. Drain.
Add remaining ingredients. Blend well. Heat,
covered, on full power for 2 1/2 to 4 minutes, or
until heated through. Stir halfway through
heating time.
Place carrots and water in 1 1/2 quart
casserole. Cook, covered, on full power for 45
seconds to 1 1/2 minutes, or until warmed.
Add broccoli and cauliflower. Cook, covered,
on full power for 45 seconds to 1 1/2 minutes,
or until vegetables are barely tender. Drain.
Add zucchini and onion. Pour dressing over
vegetables. Stir to coat. Cover and refrigerate
for at least 8 hours before serving.
Combine ground beef and onion in casserole.
Cook, covered, on full power for 3 to 5 minutes,
or until meat is no longer pink. Stir halfway
through cooking time.
Blend together pizza sauce, oregano, and garlic
powder. Add to meat mixture. Cook on full
power for 2 to 4 minutes, or until bubbling.
Stir in Mozzarella cheese and cheese spread.
Heat on full power for 3 to 4 minutes or until
cheese melts and is no longer stringy. Stir
occasionally during heating time. Serve hot
with French bread cubes or chips.
Fiesta Nacho Dip
Yield: About 4 cups
1 lb. ground beef
2 tablespoons instant minced onion
1 (8 oz.) bottle hot taco sauce (about 3/4 cup)
1 (4 oz.) can chopped green chilies
1 (16 oz.) can refried beans
1(8 oz.) carton guacamole dip or dairy sour cream
2 cups shredded Cheddar cheese
1.
2.
3.
Beverages Heating Guidelines
1.
2.
3.
4.
Hot tap water boils faster than cold.
Refrigerator-temperature beverages require a
longer heating or reheating time than roomtemperature beverages. Adjust times
accordingly.
If heating several individual servings, consider
heating in a pitcher, rather than in individual
cups. Try defrosting juice in a serving dish.
To avoid boil-overs, only fill a cup 2/3 to 3/4 full.
Most coffee cups are 6-ounce cups.
Always stir a beverage vigorously before
reheating.
Instant Hot chocolate Mix
Yield: 1 gallon mix
10 2/3 cups nonfat dry milk (enough to make 8
quarts of milk)
1/2 cup (or 6 oz. jar) powdered nondairy coffee
creamer
1/2 cup confectioners' sugar
1 lb. quick chocolate flavored mix
Water
5.
6
7.
1.
2.
22
Combine ground beef and onion in 1 1/2-quart
casserole. Cook, covered, on full power for 3 to
5 minutes, or until beef is no longer pink. Stir
halfway through cooking time. Drain. Stir in
taco sauce and chilies. Set aside.
Spread beans on 12-inch round glass platter.
Spread meat mixture over beans. Heat on full
power for 4 to 6 minutes, or until heated
through.
Spread guacamole dip over meat. Sprinkle with
cheese evenly over top. Heat on full power for
30 seconds to 1 minute, or until cheese begins
to melt. Serve warm.
Micro-tip: Garnish with shredded lettuce,
chopped tomatoes, tortilla chips, guacamole
sauce, sour cream, and snipped green onion
tops, if desired. Serve as dip with tortilla chips.
Milk should not be allowed to boil. Heat milk
until it is just warmed. If desired, add
marshmallows to a cup of hot chocolate halfway
through heating time. Marshmallows will melt
just the right amount.
When reheating coffee and tea, for best taste,
do not allow to boil. Most reheated beverages
taste better when reheated to almost boiling.
Always add instant coffee or tea to hot water to
avoid bitter flavor and boil-overs. Water will not
boil over as easily as premixed coffee and tea.
Combine all ingredients, except water, in large
mixing bowl. (Mix may be stored in airtight 1gallon container.)
Place 1/4 cup mixture in serving mug. Fill with
water. Stir to blend. Heat on full power for 1 to
1 1/2 minutes, or until heated through.
Cafe Bavarian Mint
Yield: 14 (6 oz.) servings
1/4 cup powdered nondairy coffee creamer
1/4 cup sugar
1/4 cup instant coffee
2 tablespoons cocoa
5 hard candy peppermints, crushed
Water
Hot Egg Nog
Yield: 4 servings
1 quart milk
4 egg yolks
1/2 cup sugar
1/4 teaspoon cinnamon
1/4 teaspoon nutmeg
1/4 teaspoon vanilla
1.
2.
1.
2.
3.
Orange Wassail
Yield: 10 (6 oz.) servings
1 1/2 quarts orange juice
2 cups cranberry juice
2 tablespoons honey
6 whole cloves
1 (2-inch) cinnamon stick
1.
2.
Combine all ingredients, except water, in small
mixing bowl. (Mix may be stored in airtight
container.)
Place 1 tablespoon mixture in serving mug. Fill
with water. Stir to blend. Heat on full power for
1 to 1 1/2 minutes, or until heated through.
Place milk in casserole. Heat on full power for
6 to 8 minutes, or until heated through. Stir
halfway through heating time.
Beat egg yolks with sugar and spices in small
bowl. Stir one cup hot milk into egg mixture
and then gradually blend all of egg mixture into
milk.
Heat on full power for 2 to 3 1/2 minutes, or
until warmed. Stir halfway through cooking
time. Stir in vanilla.
Combine all ingredients in 3-quart casserole.
Cook, covered, on full power for 14 to 19
minutes, or until boiling. Stir halfway through
cooking time. Continue cooking, covered, on
Cook Level 3 for 10 minutes, or until mixture
has simmered and flavors are blended.
Remove spices and serve hot.
Soups and Stews Cooking Guidelines
1.
2.
3.
Soups and stews are quickly heated in the
microwave oven. Soups can be heated directly
in serving bowls or mugs, so there are fewer
dishes to wash.
Many soups are prepared on full power with
good results. The fast cooking speed allows
soups and stews to maintain a "fresh" flavor.
Soups can be simmered on Cook Level 3 to
blend flavors.
Vegetables and meat can be precooked before
adding to soups and stews to shorten the
heating time.
4.
5.
6.
23
Use a container which is considerably larger
than the amount of soup or stew being heated
to avoid boil-overs.
Cook soups and stews, covered, as
recommended in recipes for faster, more even
cooking. Cover with a glass lid or heavy-duty
plastic wrap, since these types of coverings are
the most water-vapor-proof. Pierce plastic wrap
slightly before heating. Carefully remove
coverings from soups and stews to avoid steam
burns.
When reheating soups or stews, stir the liquid
vigorously or pour from a container into serving
bowls or casserole before reheating.
Corn and Potato Chowder
Yield: 8 to 10 servings
1/2 lb. bacon
1 cup chopped onion
5 cups peeled and cubed potatoes
1/3 cup water
1 (16 oz.) can cream-style corn
2 1/2 cups milk
1/2 teaspoon salt
1/4 teaspoon pepper
Chili Con Carne
Yield: 4 to 6 servings
1 lb. ground beef
1 cup chopped onion
1/2 cup chopped green pepper
1 (16 oz.) can tomatoes, with liquid
1 (8 oz.) can tomato sauce
1/3 cup catsup
1 (16 oz.) can chili beans
1 tablespoon Worcestershire sauce
2 to 3 teaspoons chili powder
1 bay leaf
1/2 teaspoon salt
1/4 teaspoon oregano
1/8 teaspoon pepper
1.
2.
3.
1.
2.
Cut bacon into small pieces. Combine bacon
and onion in 3-quart casserole. Cook, covered,
on full power for 6 to 9 minutes, or until bacon
is thoroughly cooked and onion is tender. Stir
halfway through cooking time. Drain.
Add potatoes and water. Cook, covered, on full
power for 11 to 13 minutes, or until potatoes
are tender. Stir twice during cooking time.
Add remaining ingredients. Heat, covered, on
full power for 3 to 6 minutes, or until heated
through. Do not boil. Stir halfway through
heating time.
Combine ground beef, onion, and green pepper
in casserole. Cook, covered, on full power for 3
to 5 minutes, or until vegetables are tender and
beef is no longer pink. Stir halfway through
cooking time. Drain.
Blend in remaining ingredients. Cook on full
power for 7 to 10 minutes, or until heated
through. Stir halfway through cooking time.
Remove bay leaf.
Micro-tip: Amount of chili powder can be
increased or decreased, as desired.
Sandwiches Cooking Guidelines
1.
2.
3.
Sandwiches are generally heated on full power.
Sandwiches should be placed on a microwavesafe paper towel, or on a plastic or ceramic rack
during heating to prevent the bottoms from
becoming soggy.
To heat sandwiches in buns, bagels, or
croissants, heat the bottom half of the bread
and filling. Add the top of the bread during the
last 10 to 30 seconds of heating time.
4.
5.
24
Whenever possible, heat the sandwich filling
before spreading it inside the bun or on other
bread. Then heat the entire sandwich, until the
bun is just warmed.
Sandwiches having a "thin" layer of filling will
heat faster than sandwiches with thicker fillings.
When heating meat sandwiches, use thin,
rather than thick, slices of meat.
Hot Browns
Yield: 4 servings
1/3 cup butter or margarine
1/4 cup finely chopped onion
1/3 cup all-purpose flour
1 teaspoon finely chopped parsley
1/2 teaspoon salt
Dash cayenne pepper
Dash nutmeg
3 cups milk
2 egg yolks
1/2 cup grated Parmesan cheese
1 cup whipping cream
8 slices toasted bread, cut diagonally
8 slices turkey
4 slices bacon, cooked and crumbled
1.
2.
3.
4.
5.
Hot Chicken Salad Sandwiches
Yield: 8 sandwiches
1 cup diced, cooked chicken
2/3 cup diced celery
1/2 cup cubed Cheddar cheese
1/4 cup mayonnaise
1/2 teaspoon lemon juice
1/8 teaspoon salt
8 hamburger buns
Barbecued Beef Sandwiches
Yield: 6 to 8 servings
1 cup catsup
1/4 cup brown sugar, firmly packed
1 tablespoon Worcestershire sauce
1/2 teaspoon chili powder
1/2 teaspoon liquid smoke
1/4 teaspoon onion powder
1/8 teaspoon instant minced garlic
2 to 3 drops hot pepper sauce
3 cups thinly sliced or shredded cooked beef
(about 1 lb.)
1.
2.
3.
1.
2.
25
Place butter and onion in casserole. Cook,
covered, on full power for 1 to 3 minutes, or
until onion is tender.
Stir in flour and seasonings. Blend to smooth
paste. Blend in milk gradually, stirring
constantly. Cook on full power for 5 to 8
minutes or until thickened and bubbling. Stir 2
to 3 times during cooking time.
Stir about 3/4 cup of hot mixture into egg yolks,
stirring constantly. Return egg mixture to
casserole.
Stir in cheese and whipping cream. Cook on
full power for 1 to 2 minutes, or until thickened.
Stir with the wire whisk often during cooking
time.
Arrange four diagonal pieces toasted bread on
serving platter. Place two slices turkey on
bread. Pour 1 cup sauce over top. Sprinkle
with crumbled bacon. Heat on full power for 30
seconds to 1 minute, or until heated through.
Repeat with remaining ingredients.
Combine all ingredients, except buns, in
medium bowl.
Spoon one-eighth of chicken salad onto bottom
half of each bun. Arrange four open-faced
sandwiches on plastic rack.
Heat on full power for 1 to 2 1/2 minutes, or
until heated through and cheese is melted.
Place tops of buns on sandwiches after 45
seconds of heating time. Repeat with
remaining sandwiches.
Combine all ingredients, except beef, in 1 1/2quart casserole. Blend well.
Add beef. Stir until well-coated. Heat, covered,
on full power for 3 to 6 minutes, or until boiling.
Continue heating, covered, on Cook Level 3 for
8 minutes, or until flavors are blended.
Micro-tip: Serve in whole wheat pita bread or
bun, if desired.
Meat Cooking Guidelines
1.
2.
3.
Meats weighing 3 pounds or more will brown by
themselves "naturally" in the microwave oven.
Large cuts of meat become very hot during
cooking and require a longer cooking time than
do smaller cuts of meat. A long cooking time
and heat are required for browning.
For more browning on small cuts of meat, such
as steaks, chops and meat patties, use a
browning dish or bottled browning sauce.
Because salt can cause the surface of meat to
become dehydrated and tough, it is best to salt
meats only after cooking, or just before serving.
If, however, the meat is just one ingredient in a
main dish, or the meat is covered by a sauce,
you may add salt to the sauce or main dish.
4.
5.
6.
Excess fat may be trimmed from meat before
cooking to decrease the amount of
accumulated meat juices and to reduce
splattering during cooking.
For the best cooking results, turn most large
meats over halfway through the cooking time.
Remember that meats continue to cook during
standing time. Remove meats from microwave
oven when they reach 5°F to 10°F lower than
the desired end doneness.
Item
Total Cooking Time
Cookmatic Power Level
Method
LESS TENDER
Beef Roasts (Rump,
Pot, Chuck or Sirloin
Tip Roasts)
13 to 18 min./lb.
2
Place meat in heavy-duty plastic roasting bag. Place
in a dish. Add 1/2 cup of water or favorite meat
sauce. Close the bag loosely. Secure with a string.
Turn the roast over 2 to 3 times during the cooking
time. Let stand in the bag for 10 to 15 minutes before
serving.
TENDER
Beef Roasts (Standing
and Rolled Rib
Roasts)
(Rare 140°F)
1st - 3 min./lb
2nd - 6 to 9 min./lb.
5
3
Place meat on plastic rack in a dish. Cover with
waxed paper. Turn large cuts of meat over halfway
through the cooking time.
(Medium 160°)
1st - 3 min./lb.
2nd - 9 to 10 min./lb.
5
3
(Well 170°F)
1st - 3 min./lb.
2nd - 11 to 13 min./lb.
5
3
Ground Beef (Bulk)
3 to 4 min./lb.
Full Power (10)
Ground Beef Patties
2 patties (4 oz. each)
4 patties (4 oz. each)
1 to 3½ min.
2 to 5 min.
5
5
Place in a dish, cover. Stir halfway through cooking
time. Drain.
Place on a plastic rack or preheat in a browning dish
according to manufacturer’s instructions. Cook
covered. Turn meat over halfway through cooking
time.
26
Item
Veal Roasts
(Rib and Loin Roasts)
Total Cooking Time
Cookmatic Power Level
Method
(Rare 140°F)
1st - 3 min./lb.
2nd - 6 to 9 min./lb.
5
3
Place meat on a plastic rack in a dish. Cover
with waxed paper. Turn large cuts of meat
over halfway through the cooking time.
(Medium 160°F)
1st - 3 min./lb.
2nd - 9 to 11 min./lb.
5
3
(Well 170°F)
1st - 3 min./lb.
2nd - 11 to 13
min./lb.
5
3
Boneless Pork Roast
(top loin, loin blade, loin
sirloin, shoulder blade
Boston roast) 3 - 3½ lbs
15 to 17 min./lb.
2
Place in a heavy-duty plastic roasting bag.
Place in a dish. Sprinkle with seasoning, if
desired. Close the bag loosely, securing with
a string. Turn roast over halfway through the
cooking time. Let stand, covered, for 10
minutes after the cooking time.
Bone-In Pork Roasts
(loin center roasts,
shoulder blade
Boston roasts)
13 to 15 min./lb.
2
Place in a heavy-duty plastic roasting bag.
Place in a dish. Sprinkle with seasoning, if
desired. Close the bag loosely, securing with
a string. Turn roast over halfway through the
cooking time. Let stand, covered, for 10
minutes after the cooking time.
7 to 9 min./lb.
4
Place ribs in a heavy-duty plastic roasting
bag. Place in a dish. Add 1 cup of water.
Close bag loosely, securing with a string.
Invert or turn ribs halfway through cooking
time.
12 to 17 min./lb.
2
Place fat-side-down on a plastic rack in a
dish. Cover with heavy-duty plastic wrap.
Turn over 2 to 3 times during the cooking
time.
Pork Loin Country Style Ribs
3 - 3½ lb.s
Ham Pre-cooked
(boneless, bone-in,
picnic, canned hams)
Bacon
2 slices
4 slices
6 slices
8 slices
Frankfurter
1
2
4
6
Lamb Roast
(Shoulder Roast and Legs)
45 sec. to 2 min.
1 to 3 min.
2 to 4 min.
4 to 6 min.
Full
Full
Full
Full
Power
Power
Power
Power
(10)
(10)
(10)
(10)
25 to 40 sec.
30 to 60 sec.
1 min. to
1 min., 30 sec
1 min., 45 sec. to
3 min.
Full Power (10)
Full Power (10)
Full Power (10)
Arrange slices on a plastic rack or paper
towel lined plate. Cover with microwave-safe
paper towel. Bacon may be layered between
microwave-safe paper towels. Cook until
browned and crisp.
Place on a plate or plastic rack. Pierce
skins(s) with a fork or knife. Cover with a
microwave-safe paper towel. Frankfurters
may be placed on buns during the last 10 to
20 seconds of the cooking time.
Full Power (10)
(Rare 140°F)
1st - 3 min./lb.
2nd - 5 to 8 min./lb.
5
3
(Medium 160°)
1st - 3 min./lb.
2nd - 8 to 10 min./lb.
5
3
(Well 170°)
1st - 3 min./lb.
2nd - 10 to 12
min./lb.
5
3
27
Place meat on plastic rack in a dish. Cover
with waxed paper. Turn large cuts of meat
over halfway through the cooking time.
Beef Strips and Tomatoes
Yield: 5 servings
1 (1 lb.) flank steak
1/3 cup soy sauce
1/3 cup dry white wine
1 teaspoon sugar
2 tablespoons cornstarch
1 medium onion, sliced
2 cups sliced fresh mushrooms
1/2 green pepper, sliced
1 pint cherry tomatoes (halved, if desired)
1.
2.
3.
4.
Swiss Steak
Yield: 6 servings
1 (3 lb.) pot roast
Half clove garlic
2 to 3 tablespoons all-purpose flour
1 (14 1/2 oz. to 16 oz.) can tomatoes, cut-up
1 cup chopped carrots
1 cup chopped celery
1/2 cup chopped onion
1/2 teaspoon salt
1/4 teaspoon pepper
Porcupine Meatballs
Yield: 6 to 8 servings
1 1/2 lbs. ground beef
1 cup cooked rice
1 egg, beaten
1/2 cup dry bread crumbs
1/2 cup minced onion
2 tablespoons catsup
1/2 teaspoon salt
1/4 teaspoon pepper
1 (15 oz.) can tomato sauce
1 teaspoon sugar
1/2 teaspoon leaf oregano
1/2 teaspoon pepper
1/8 teaspoon instant minced garlic
Grated Parmesan cheese (optional)
Slice steak into thin strips, diagonally across
grain. Place in dish. Combine soy sauce, wine,
and sugar. Pour over meat. Mix lightly to coat
evenly. Marinate for 1 to 2 hours in refrigerator.
Stir in cornstarch, onion, mushrooms, and
green pepper.
Cook meat mixture, covered, on full power for 5
minutes. Stir halfway through cooking time.
Continue cooking on Cook Level 2 for 13 to 18
minutes, or until meat is cooked and sauce is
thickened. Stir halfway through cooking time.
Pierce or halve tomatoes and add. Heat,
covered, on full power for 1 to 2 minutes, or
until tomatoes are heated.
1.
2.
Rub meat with garlic. Pound flour into meat.
Place remaining ingredients in 3-quart
casserole. Cook, covered, on Cook Level 2 for
1 to 1 1/2 hours, or until meat is tender. Turn
meat over halfway through cooking time.
Micro-tip: To thicken sauce, mix 1 tablespoon
cornstarch with 1 tablespoon water. Add to
meat juices. Cook on full power for 1 minute, or
until thickened.
1.
Combine first 8 ingredients and form into
meatballs, 2-inches in diameter. Arrange on
plastic rack in dish. Cover with waxed paper.
Cook, covered, on full power for 5 to 7 minutes,
or until thoroughly cooked. Drain. Remove
rack and place meatballs in utility dish.
Mix together tomato sauce, sugar, oregano,
pepper, and garlic. Pour over meatballs. Cover
with waxed paper. Cook, covered, on full
power for 3 to 5 minutes, or until heated
through and bubbling. Sprinkle with Parmesan
cheese before serving, if desired.
2.
28
Beef Stroganoff
Yield: 4 servings
1 tablespoon butter or margarine
1/3 cup finely chopped onion
1 clove garlic, minced
1 lb. sirloin steak, 1/2-inch thick
1 (10 3/4 oz.) can cream of mushroom soup
1 (4 oz.) can sliced mushrooms, drained
2 tablespoons catsup
1 cup dairy sour cream
1.
2.
3.
4.
Mexican Pizza
Yield: 1, 14-inch pizza
Crust:
1 (1/4 oz.) pkg. active dry yeast
3/4 cup warm water (105° F to
115° F)
2 1/2 to 3 cups biscuit baking mix
All-purpose flour
1 (4 oz.) can chopped green chilies, drained and
divided
2 tablespoons cornmeal
Paprika (optional)
Topping:
1 (10 1/2 oz.) can jalapeño bean dip
1/2 lb. ground beef, cooked and drained
1 (8 oz.) can pizza sauce
2 teaspoons chili powder
1/4 teaspoon hot pepper sauce
1 cup shredded Cheddar cheese
1 cup shredded Monterey Jack cheese
1 small green pepper, diced
1 small tomato, diced
1 (4 oz.) can sliced mushrooms, drained
1.
2.
3.
4.
29
Combine butter, onion and garlic in dish. Cook,
covered, on full power for 1 to 2 1/2 minutes, or
until onion is tender.
Trim excess fat from meat. Cut meat into thin
bite-size strips. Add meat to casserole. Cook,
covered, on full power for 3 minutes. Stir
halfway through cooking time. Continue
cooking, covered, on Cook Level 2 for 7 to 10
minutes, or until meat is cooked.
Stir in soup, mushrooms, and catsup. Heat,
covered, on full power for 45 seconds to 2
minutes, or until heated through.
Stir in sour cream. Heat, covered, on full power
for 1 to 2 1/2 minutes, or until sour cream is
heated through.
Micro-tip: May be served over cooked noodles
or rice.
For crust: Dissolve yeast in warm water in
medium mixing bowl. Stir in biscuit baking mix
to make soft dough. Add half of chopped
chilies. Turn out onto floured board. Sprinkle
flour over dough and knead until smooth, about
20 times. Let dough rest for 5 minutes.
Sprinkle greased, 12-inch glass platter or pizza
plate with cornmeal. Press dough onto platter,
leaving slightly raised edges. Pierce with fork.
Sprinkle with paprika, if desired. Cook on Cook
Level 5 for 9 to 10 1/2 minutes, or until crust is
firm and no longer doughy. Turn quarter-turn
halfway through cooking time.
Combine remaining chilies, bean dip, beef,
pizza sauce, chili powder, and hot pepper
sauce in large bowl. Spread over dough.
Sprinkle cheeses over top. Arrange green
pepper, tomato, and mushrooms over cheese.
Heat on full power for 6 to 8 minutes, or until
heated through.
Veal Scallopini
Yield: 4 servings
1/2 medium onion, sliced
1 (4 oz.) can mushrooms, drained
2 tablespoons vegetable oil, divided
2 tablespoons all-purpose flour
1/2 teaspoon salt
1/8 teaspoon pepper
1 (8 oz.) can tomato sauce
1/2 cup water
1 lb. veal, thinly sliced, cut into serving pieces
1 clove garlic, minced
1.
2.
3.
4.
Smoky Ham and Bean Bake
Yield: 8 to 10 servings
1 (16 oz.) can navy beans
1 (16 oz.) can kidney beans
1 (16 oz.) can large lima beans
1 (16 oz.) can Great Northern beans
1 lb. precooked ham, cubed
1 green pepper, chopped
1/2 cup chopped onion
1 1/2 cups catsup
1/2 cup bean liquid or water
1/4 cup brown sugar, firmly packed
1 teaspoon Worcestershire sauce
1/2 teaspoon garlic powder
1/2 teaspoon dry mustard
1/2 teaspoon liquid smoke
1/8 teaspoon hot pepper sauce
Taco Salad
Yield: 4 to 6 servings
1 lb. ground beef
1(8 oz.) can tomato sauce
1/4 cup water
1 (1 1/4 oz.) pkg. taco seasoning mix
1 head lettuce
2 tomatoes, cut in wedges
1 cup shredded Cheddar cheese
2 1/2 cups corn or tortilla chips, slightly crushed, if
desired
1.
2.
1.
2.
3.
4.
30
Combine onion, mushrooms, and 1 tablespoon
oil in 1-quart casserole. Cook, covered, on full
power for 1 1/2 to 4 minutes, or until union is
tender.
Stir in flour, salt, and pepper. Blend in sauce
and water. Cook, covered, on full power for
1 1/2 to 4 minutes, or until thickened and
bubbling.
Preheat large browning skillet according to
manufacturer's instructions. Add 1 tablespoon
oil, veal, and garlic. Cook on full power for 1
minute. Turn veal over. Continue cooking on
full power for 2 minutes.
Pour sauce over browned veal. Cook, covered,
on Cook Level 3 for 3 to 6 minutes, or until veal
is cooked and tender.
Drain beans, reserving 1/2 cup liquid. Combine
all ingredients in 4-quart casserole, including
reserved bean liquid. Stir well.
Cook, covered, on full power for 13 to 18
minutes, or until boiling. Stir. Continue
cooking, covered, on Cook Level 3 for 30
minutes, or until flavors are blended. Stir twice
during cooking time.
Place ground beef in 1 1/2-quart casserole.
Cook on full power for 3 to 4 1/2 minutes, or
until beef is no longer pink. Stir halfway
through cooking time. Drain.
Stir in tomato sauce, water, and seasonings.
Cook, covered, on full power for 2 to 4 minutes,
or until simmering.
Tear lettuce and place in large serving bowl.
Add tomatoes, cheese, and 2 cups corn chips.
Toss.
Add beef mixture. Toss again. Top with
remaining corn chips. Serve immediately.
Oriental Pork
Yield: 4 to 6 servings
1 (1 lb.) pork tenderloin
3 tablespoons soy sauce
1 tablespoon cornstarch
1 teaspoon instant chicken flavored bouillon
1 (6 oz.) pkg. frozen pea pods
1 (8 oz.) can bamboo shoots, drained
1 (8 oz.) can water chestnuts, drained and sliced
1/2 cup sliced green pepper
1/2 cup sliced green onion
1.
2.
3.
Trim fat from pork. Cut pork into bite-size
pieces. Combine pork, soy sauce, cornstarch,
and bouillon in dish.
Cook, covered, on Cook Level 5 for 7 to 9
minutes, or until pork is thoroughly cooked and
is no longer pink.
Add remaining ingredients. Cook, covered, on
full power for 2 to 4 minutes, or until vegetables
are cooked as desired. Stir halfway through
cooking time.
Micro-tip: This dish may be served over rice, if
desired.
Poultry Cooking Guidelines
1.
2.
3.
4.
5.
6.
Remove metal clamps from poultry and tie legs
with a string, if desired, before cooking.
Small poultry items can be cooked on a plastic
rack in a dish or on a plastic meat tray.
Poultry weighing 3 pounds or more will brown
by itself "naturally" in the microwave oven.
Seasoned coating mixes and paprika will
improve the color of poultry. Try making a
paste of 1 tablespoon paprika and 2
tablespoons of shortening. Rub this paste over
poultry for a reddish-brown color.
Do not salt poultry until just before serving,
since salt will dehydrate the surface of poultry,
making it tough. Salt may be added to a sauce,
that covers the poultry, before cooking .
Begin cooking chicken pieces skin-side-down.
Turn the pieces over halfway through cooking
time in most recipes.
Item
Whole Chicken, Turkey,
Duck, Cornish Hen
7.
When cooking whole poultry, begin by cooking
breast-side-down. When the poultry is turned
over, cooking can be completed breast-side-up
for a browner finished appearance.
8. Pierce the skin of poultry before placing it in the
microwave oven, to prevent popping.
9. After the poultry has started to brown, the wing
tips, narrow part of the legs, and the high point
of the breast bone can be covered with small
thin strips of foil. This is called "shielding". The
small amount of foil will slow the cooking of
these areas and prevent them from dehydrating
and overcooking.
10. Large poultry items, such as large turkeys, may
need to be turned over several times during
cooking, for more even cooking.
Total Cooking Time
Cookmatic Power Level
Method
(170 °F Dark Meat)
(180°F White Meat)
3½ to 4½ min./lb.
Full Power (10)
Place in heavy-duty roasting bag, in dish. If
desired, use plastic rack in dish. Close the bag
loosely, securing with a string. Turn over
several times during the cooking time. Allow to
stand 10 -15 minutes before carving.
31
Sausage- Apple Stuffing
Yield: Stuffing for a 12 to 16 lb. turkey
1 lb. pork sausage
1 cup chopped onion
1 cup chopped celery
1 medium apple, chopped
1/2 cup butter or margarine, melted
1 tablespoon parsley flakes
1 teaspoon poultry seasoning
1 teaspoon ground sage
1/2 teaspoon salt
1/2 teaspoon pepper
1 egg, slightly-beaten
10 cups dry whole wheat or white bread cubes
(about 1, 1 lb. loaf)
3/4 cup chicken broth or chicken flavored bouillon
Chicken Enchilada Bake
Yield: 4 to 6 servings
1 tablespoon butter or margarine, melted
1/2 cup chopped onion
1 (10 3/4 oz.) can cream of chicken soup
1 cup dairy sour cream
1/4 teaspoon coriander
1/4 teaspoon cumin
12 tortillas, each cut into bite-size pieces
2 to 3 cups cooked, cubed, chicken
2 (4 oz. each) cans green chilies, chopped,
drained
8 oz. shredded Cheddar cheese (about 2 cups)
8 oz. shredded Monterey Jack cheese (about 2
cups)
1.
2.
3.
1.
2.
3.
32
Crumble sausage in 4-quart casserole. Stir in
onion and celery. Cook, covered, on full power
for 3 to 6 minutes, or until sausage is thoroughly
cooked and no longer pink. Stir halfway through
cooking time. Drain.
Stir in apple, melted margarine, and seasonings.
When slightly cooled, stir in egg.
Gradually stir in bread cubes. Pour chicken broth
over all and toss to moisten. Stuff bird.
Micro-tip:
-Variations: Add 1 to 2 cups chopped, cooked
neck and giblets or 2(6 oz. each) cans sliced
mushrooms, drained.
-To dry the bread in the microwave oven, spread
half of the slices, one or two deep, on plastic rack.
Heat on full power for 30 seconds to 2 minutes, or
until hot. Spread out on paper towels to cool.
Repeat with remaining bread. Allow to stand 30
to 60 minutes.
- To cook dressing separately, add 1/4 to 1/2 cup
more broth. Cook, covered, on full power for 5 to
7 minutes, or until heated through. Let stand,
covered, for 5 to 10 minutes.
Place butter and onion in 1-quart casserole.
Cook, covered, on full power for 1 to 3 minutes, or
until tender. Stir in soup, sour cream, coriander,
and cumin. Mix well. Set aside.
Layer one third of tortillas, chicken, chilies, soup
mixture, Cheddar cheese, and Monterey jack
cheese in 3-quart casserole. Repeat layers twice
with remaining ingredients, reserving cheese for
last layer.
Cover loosely with heavy-duty plastic wrap. Heat,
covered, on full power for 9 to 12 minutes, or until
heated through. Sprinkle remaining cheese over
top. Cover, and let stand for 5 minutes before
serving.
Chicken-Sweet Potato Pie
Yield: 6 servings
1/2 cup chopped onion
1 (10 oz.) pkg. frozen mixed vegetables
1 (10 3/4 oz.) can cream of mushroom soup
2 cups diced, cooked chicken
1 (4 oz.) can sliced mushrooms, drained
1/4 teaspoon salt
1(18 oz.) can vacuum packed sweet potatoes
2 tablespoons butter or margarine, melted
1 egg
1/4 teaspoon salt
1/8 teaspoon cinnamon
1/8 teaspoon nutmeg
1/8 teaspoon allspice
Chicken and Wild Rice Bake
Yield: 6 servings
1 (6 oz.) pkg. quick-cooking long grain and wild
rice mix
1 (10 3/4 oz.) can cream of mushroom soup
1/2 cup milk
1/2 cup diced celery
1 (3 lb.) fryer, cut up
1.
2.
3.
1.
2.
33
Combine onion and frozen mixed vegetables in
dish. Cook, covered, on full power for 5 to 7
minutes, or until onion is tender and vegetables
are done. Stir in soup, chicken, mushrooms,
and 1/4 teaspoon salt. Set aside.
Combine sweet potatoes, melted butter, egg,
1/4 teaspoon salt, and spices in mixing bowl.
Mash. Line 9-inch pie plate with potato mixture,
building up edges 1/2-inch higher than plate.
Spoon chicken mixture into sweet potato crust.
Cover with heavy-duty plastic wrap. Heat,
covered, on full-Power for 5 to 8 1/2 minutes, or
until heated through.
Combine rice mix, seasonings from packet,
soup, milk and celery in 4-quart casserole.
Arrange chicken over top of rice mix.
Cook, covered, on full power for 10 to 15
minutes, or until chicken is done and rice is
tender.
Fish and Seafood Cooking Guidelines
1.
2.
3.
In most cases, fish should be defrosted, before
cooking, unless otherwise stated in recipe.
Cook most fish and seafood, covered, on full
power. The use of coverings decreases
cooking times and helps keep fish moist.
Cook fish until it flakes easily with a fork and is
opaque and firm. Always cook fish and
seafood for a minimum amount of time. Allow 5
minutes, covered, standing time to allow for
cooking to be completed.
Item
4.
5.
Always cook fish last when preparing an entire
meal, since it doesn't reheat as well as some
foods and can overcook during reheating.
Shellfish can be cooked in shell.
Total Cooking Time
Cookmatic Power Level
Method
Fish, Fillets
2½ to 5 min./lb.
Full Power (10)
Arrange in a dish on plastic rack. Brush
with melted butter or lemon, if desired.
Cover with plastic wrap or waxed paper.
Rearrange and turn over halfway through
cooking time. Fish is done when it turns
opaque in color and flakes near the
center of the fillet. Let stand, covered, 5
minutes before serving.
Fish, Steaks
4 to 7 min./lb.
7
Arrange in dish on plastic rack. Brush
with melted butter or lemon, if desired.
Cover with plastic wrap or waxed paper.
Rearrange and turn over halfway through
cooking time. Fish is done when it turns
opaque in color and flakes near the
center of the steak. Let stand, covered, 5
minutes before serving.
Scallops
3 to 6 min./lb.
7
Arrange in a single layer in a baking dish.
Cover with vented plastic wrap. Stir and
rearrange halfway through cooking time.
Scallops are done when they are opaque.
Let stand 5 minutes before serving.
Shrimp
3 to 6 min./lb.
7
Arrange in a single layer in a baking dish.
Cover with vented plastic wrap. Stir and
rearrange halfway through cooking time.
Shrimp are done when they are opaque.
Let stand 5 minutes before serving.
5 to 7 min.
5
Slit or remove the membrane (soft shell)
on the underside of the tail. Arrange in a
baking dish, shell-side down. Brush with
melted butter, if desired. Cover with
plastic wrap. Lobster is done when it is
firm and opaque. Let stand 5 minutes
before serving.
Lobster Tails
(2 - 8 oz. each)
34
Shrimp Newburg
Yield: 4 servings
2 tablespoons butter or margarine, melted
3 tablespoons all-purpose flour
1/4 teaspoon salt
1 cup milk
1/4 cup heavy cream
1 tablespoon sherry
1 egg yolk
Dash cayenne pepper
1 teaspoon prepared mustard
1 (4 oz.) can sliced mushrooms, drained
Dash garlic salt
8 oz. cooked shrimp, cut in bite-size pieces
Shrimp Creole
Yield: 6 to 8 servings
1 cup chopped onion
1 cup chopped celery
3/4 cup chopped green pepper
2 tablespoons all-purpose flour
1 (14 1/2 oz.) can tomatoes
1 teaspoon sugar
5 to 6 drops hot pepper sauce
1 bay leaf
1/4 teaspoon salt
1/8 teaspoon pepper
1 lb. shrimp, peeled and cleaned
Fancy Fish for One
Yield: One serving
1 cup sliced mushrooms
1/2 cup sliced carrots
1/2 cup sliced celery
1 tablespoon lemon juice
1 tablespoon butter or margarine
1/2 teaspoon parsley flakes
1/8 teaspoon Italian seasoning
Salt
Pepper
1/2 lb. orange roughy or any fillets
Paprika
1.
2.
1.
2.
3.
1.
2.
35
Place butter in 1-quart casserole. Blend in flour
and salt to form smooth paste. Gradually blend
in milk. Cook, covered, on Full power for 1 1/2
to 3 1/2 minutes, or until thickened and bubbling.
Stir 2 to 3 times during cooking time.
Stir cream, sherry, egg yolk, pepper, and
mustard into sauce. Blend thoroughly. Fold in
mushrooms, garlic, salt, and shrimp. Heat,
covered, on Full power for 1 1/2 to 3 1/2
minutes, or until heated through. Stir halfway
through cooking time.
Micro-tip: May be served over puff pastry shells.
Combine onion, celery and green pepper in
1-1/2 quart casserole. Cook, covered, on Full
power for 3 to 5 minutes, or until vegetables are
tender. Stir halfway through cooking time.
Sprinkle vegetables with flour. Stir to blend. Mix
in tomatoes. Cook, covered, on Full power for 2
to 4 minutes, or until thickened and bubbling.
Stir halfway through cooking time.
Blend in remaining ingredients. Cook, covered,
on Full power for 3 to 5 minutes, or until shrimp
are pink and fully cooked. Stir twice during
cooking time. Remove bay leaf before serving.
Micro-tip: May be served over cooked rice.
Place all ingredients, except fish and paprika, in
a 9 x 5 x 2-inch loaf dish. Cover loosely with
heavy-duty plastic wrap. Cook, covered, on Full
power for 2 to 4 minutes, or until vegetables are
crisp-tender. Drain and reserve liquid.
Arrange fish over top. Pour reserved liquid over
fish. Sprinkle with paprika. Cover loosely with
heavy-duty plastic wrap. Cook, covered, on Full
power for 1 to 3 minutes, or until fish flakes
easily with fork.
Micro-tip: Garnish with lemon slices and
additional parsley, if desired.
Springtime Sole
Yield: 4 servings
1 lb. sole fillets
1/4 teaspoon leaf thyme
1 (10 oz.) pkg. frozen asparagus cuts or 3/4 lb. fresh
asparagus cuts, cooked and well-drained
1/2 cup plain yogurt
1 teaspoon buttermilk salad dressing mix
Tuna Stroganoff
Yield: 4 servings
2 (6 1/2 to 7 oz. each) cans tuna, drained
1 (10 3/4 oz.) can cream of mushroom soup
1 (3 or 4 oz.) can sliced mushrooms, with liquid
1/2 cup dairy sour cream
1 tablespoon chopped parsley (optional)
Cooked noodles or rice
Salmon Quiche
Yield: 6 servings
1, 9-inch baked pie crust
2 cups cooked and boned salmon chunks, or
1 (16 oz.) can salmon, drained
1/2 cup sliced ripe olives
1 tablespoon snipped parsley
1 cup shredded Cheddar cheese
3 eggs
3/4 cup light cream or 3/4 cup evaporated milk
1/4 teaspoon salt
1/4 teaspoon onion powder
1.
2.
3.
1.
2.
1.
2.
Place fillets in 1 1/2-quart utility dish. Sprinkle
with thyme. Cover loosely with heavy-duty
plastic wrap. Cook, covered, on full power for 1
to 3 minutes, or until fish flakes easily with fork.
Drain.
Layer asparagus evenly over fillets.
Combine yogurt with dressing mix. Spoon
evenly over asparagus. Heat on full power for
1 1/2 to 2 1/2 minutes, or until sauce is heated
through.
Combine tuna, soup, and mushrooms in 1 1/2quart casserole.
Heat on full power for 4 to 6 minutes, or until
mixture is heated through and bubbling. Stir
twice during heating time. Stir in sour cream.
Garnish with parsley, if desired. Serve over
noodles or rice, as desired.
Lightly mix salmon, olives, and parsley. Place
in 9-inch baked pie crust. Top with cheese.
Combine eggs, light cream, salt and onion
powder in medium bowl. Pour over salmon
mixture. Cook on Cook Level 4 for 10 to 15
minutes, or until knife inserted in center comes
out clean. Turn quarter-turn halfway through
cooking time.
* Turn quarter-turn halfway through cooking time
(non-turntable models, only).
36
Egg Cooking Guidelines
1.
2.
3.
Egg recipes, such as casseroles, quiches and
puffy omelets are prepared on Cook Level 4.
Plain eggs, such as scrambled and poached,
are cooked on full power.
Do not hard-cook eggs or boil eggs in the
shell in a microwave oven. Yolks cook faster
than whites and the rapid heat generated
through microwave cooking expands the air
inside the shell, causing it to burst. Do not
reheat eggs which have been prepared
conventionally or in the microwave oven
unless they are finely chopped or scrambled
before heating. Pressure can build up in
reheated eggs and cause them to burst.
Denver Casserole
Yield: 5 to 6 servings
1 medium tomato, chopped
8 slices bacon, cooked and crumbled
1/4 cup chopped green pepper
1/4 cup chopped pimentos
6 eggs
1/3 cup milk
1/2 cup mayonnaise or salad dressing
1/4 teaspoon salt
Item
Poached
Eggs
1
2
4
Total Cooking Time
30 sec. to 1 min., 15 sec.
1 to 2 min.
1 min., 15 sec. to 2½ min
4.
Before poaching eggs, gently pierce or puncture
the yolk membrane to prevent the yolk from
erupting during cooking. Remove eggs while
they are still moist and slightly underdone. Let
them stand, covered, a few minutes to complete
the cooking process.
1.
Combine tomato, bacon, green pepper, and
pimentos in 1 1/2-quart casserole. Mix together
eggs, milk, mayonnaise, and salt in medium bowl.
Pour over tomato mixture. Mix well.
Cook on Cook Level 4 for 10 to 15 minutes, or
until knife inserted in center comes out clean.*
Stir halfway through cooking time.
2.
* Turn quarter-turn halfway through cooking time
(non-turntable models, only).
Cookmatic Power Level
Amount of Water
Full Power (10)
Full Power (10)
Full Power (10)
1 cup
1 cup
1 ½ cup
Method
Place water in a glass measure. Cover loosely with
heavy-duty plastic wrap. Cook, covered, on Full
Power for 2 to 3 minutes, or until water boils. Stir
water vigorously after the cooking time.
Break egg(s) into 1½ -quart bowl. Be sure to use a
bowl with steep sides, so the water will be deep
enough to cover the eggs.
Pierce the yolk(s) with a toothpick, knife or fork.
Pour boiling water slowly over the egg(s). One
tablespoon of vinegar can be added to the water to
help the egg(s) hold its (their) shape. Cover loosely
with heavy-duty plastic wrap.
Cook, covered, until done as desired. Allow to
stand in the water up to 5 minutes after cooking to
desired doneness, if necessary. Remove the eggs
with a slotted spoon. Season with salt and pepper,
if desired.
37
Wheat Crusted Quiche
Yield: 6 servings
3/4 cup wheat germ
3/4 cup all-purpose flour
1/4 teaspoon salt
1/3 cup shortening
3 to 4 tablespoons cold water
9 to 10 slices (1/2 lb.) bacon, cooked and crumbled
3/4 cup shredded Swiss cheese
1/4 cup minced onion
4 eggs
1 cup evaporated milk
1/2 teaspoon salt
1/8 teaspoon cayenne pepper
1.
2.
3.
Combine wheat germ, flour, and salt in small
bowl. Cut in shortening. Stir in water. Press
dough firmly against bottom and sides of 9-inch
pie plate. Pierce bottom and sides with fork.
Cook on Full power for 45 seconds to 2
minutes, or until cooked but still slightly moist.
Sprinkle bacon, cheese, and onion on crust.
Beat together eggs, evaporated milk, and
seasonings until well-blended. Pour into shell.
Cook on Cook Level 4 for 10 to 14 minutes, or
until knife inserted in center comes out clean.*
* Turn quarter-turn halfway through cooking time
(non-turntable models, only).
Pasta and Rice Cooking Guidelines
1.
2.
3.
Use hot tap water. It will boil faster than cold.
The amount of oil in the water, is important
when cooking pasta and rice, as it helps to
keep the water from boiling over.
Cook pasta and rice in a covered dish, for faster
cooking. Glass lids or heavy-duty plastic wrap
are the best coverings to use since they are the
most water-vapor-proof.
4.
5.
38
Use a large enough dish so water completely
covers pasta and rice.
Pasta can be reheated quickly in the microwave
oven. Pasta should be reheated on Full power
in a covered casserole. For a large quantity,
add 1 to 2 tablespoons liquid before reheating.
Stir once or twice during reheating.
Item
Hot Water
Vegetable
Oil
Salt
(Optional)
Total
Cooking Time
Rice, Long
Grain, (1 cup)
Yield: 3 cups
2 cups
1 tsp.
½ tsp.
Egg Noodles, 2
cups
4 cups
2 tbsp.
Macaroni, 2 cups
4 cups
Spaghetti,
Fettuccini, 8 oz.
6 cups
Power Level
Method
15 to 24 min.
Full Power
(10) for first
3½ - 7½ min.,
Level 3 for
last 12 to 17
minutes.
Place water, oil, and salt in
3-quart casserole. Heat,
covered on Full Power for 3 to 6
minutes, or until water boils.
Add rice. Cook, covered, on Full
Power for 45 seconds to 1½
minutes, or until boiling.
Continue cooking, covered, on
Cook Level 3 for 12 to 17 min.,
or until rice is tender.
1 tsp.
10½ to 21 min.
Full Power
(10) for first
5½ - 12½
min., Level 3
for last 5 to 8
minutes.
Place hot water and salt in
3-quart casserole. Heat on Full
Power 5 to 11 minutes or until
boiling. Stir in pasta and oil.
Cook, covered, on Full Power for
45 seconds to 2 minutes.
Reduce to Cook Level 3 and
cook for 5 to 8 minutes. Pasta
is done when it is tender. Allow
to stand 5 minutes, covered, to
finish cooking. Drain and rinse
with hot tap water.
2 tbsp.
1 tsp.
10½ to 21 min.
Full Power
(10) for first
5½ - 12½
min., Level 3
for last 5 to 8
minutes.
Place hot water and salt in
3-quart casserole. Heat on Full
Power 5 to 11 minutes or until
boiling. Stir in pasta and oil.
Cook, covered, on Full Power for
1½ - 3½ minutes. Reduce to
Cook Level 4 and cook for 5 to 8
minutes. Pasta is done when
tender. Allow to stand 5
minutes, covered, to finish
cooking. Drain and rinse with
hot tap water.
2 tbsp.
1 tsp.
17 to 29 min.
Full Power
(10) for first
12 - 22 min.,
Level 3 for
last 5 to 7
minutes.
Place hot water and salt in
4-quart casserole. Heat on Full
Power for 10 to 18 minutes or
until boiling. Stir in pasta and
oil. Cook, covered, on Full
Power for 2 to 4 minutes.
Reduce to Cook Level 3 and
cook for 5 to 7 minutes. Pasta
is done when it is tender. Allow
to stand 5 minutes, covered, to
finish cooking. Drain and rinse
with hot tap water.
NOTE: To cook microwave convenience rice and pasta, follow package instructions and shorten cooking time.
39
Macaroni and Cheese
Yield: 4 to 6 servings
2 tablespoons all-purpose flour
2 cups milk
1 1/4 cups uncooked macaroni
2 tablespoons butter or margarine
1/4 teaspoon pepper
1 1/2 cups shredded American process cheese
1/4 cup milk
All-At-Once-Spaghetti
Yield: 6 servings
1 lb. ground beef
1 cup chopped onion
1/2 teaspoon salt
1/4 teaspoon pepper
2 (8 oz. each) cans tomato sauce
1 1/2 cups water
1/2 teaspoon ground oregano
1/2 teaspoon basil
1/4 lb. uncooked spaghetti, broken in half
Grated Parmesan cheese
Fettuccini Alfredo
Yield: 4 (1 cup) servings
1/2 lb. fettuccini cooked and drained
1 cup light cream (half and half)
1/2 cup dairy sour cream
1/4 cup butter or margarine
1/4 cup chopped green onions
1/8 teaspoon garlic powder
1/2 cup grated Parmesan cheese
1.
2.
1.
2.
1.
2.
3.
40
Place flour in 1 1/2-quart casserole. Gradually
blend in 2 cups milk, mixing well. Stir in
macaroni, butter and pepper. Cook, covered,
on full power for 3 to 5 minutes, or until boiling.
Continue cooking, covered, on Cook Level 3 for
7 to 9 minutes, or until macaroni is tender. Stir
2 to 3 times during cooking time.
Stir in cheese and 1/4 cup milk. Cook on full
power for 30 seconds to 1 minute, or until
cheese is melted. Stir halfway through cooking
time.
Micro-tip: For creamier macaroni, blend
additional 1/4 to 1/2 cup milk into macaroni at
end of cooking time.
Place ground beef and onion in dish. Cook,
covered, on full power for 3 to 5 minutes, or
until beef is no longer pink and onion is tender.
Stir halfway through cooking time. Drain.
Add salt, pepper, tomato sauce, water,
oregano, basil and spaghetti. Cook, covered,
on full power for 4 to 6 minutes, or until boiling.
Continue cooking, covered, on Cook Level 3 for
14 to 16 minutes, or until spaghetti is tender.
Stir twice during cooking time. Sprinkle with
Parmesan cheese, as desired.
Place hot, cooked fettuccini in dish
Stir in light cream, sour cream, butter, green
onion, and garlic powder. Heat on Full power
for 3 to 5 minutes, or until heated through.
Stir in Parmesan cheese. Serve immediately.
Cereal Cooking Guidelines
1.
Cereals can be simply prepared in the
microwave oven in individual serving bowls.
2. Large cereal bowls or casserole dishes are
best-suited for cooking cereals in the
microwave oven. With large bowls, there is less
chance for cereal to spill over into the
microwave oven cavity. Stirring during the
cooking time will help to prevent boil overs and
lumping.
Granola
Yield: 5 cups
3 cups quick-cooking or old fashioned rolled oats
1/3 cup wheat germ
1/3 cup shredded coconut
1/3 cup sliced almonds
1/3 cup all-bran cereal
1/3 cup brown sugar, firmly packed
1 teaspoon cinnamon
1/3 cup butter or margarine, melted
1/4 cup honey
1 teaspoon vanilla
Item
Salt
(Optional)
3.
4.
1.
2.
Use hot tap water, since it will boil faster than
cold.
Let each cereal stand, covered, for about 5
minutes before serving, if necessary, for all
water to be absorbed. Stir before serving.
Place rolled oats in 8-inch square dish. Heat on
Full power for 30 seconds to 1 1/2 minutes, or
until warmed. Stir twice during heating time.
Add remaining ingredients to rolled oats. Stir
ingredients together, until mixture is wellcoated. Heat on Full power for 3 to 6 minutes,
or until well-heated. Stir twice during heating
time. Press mixture firmly against bottom of
dish. Allow to cool. Break apart. Store in
tightly covered container in refrigerator.
Micro-tip: May be served with milk.
Amount
Cereal
Dish Size
Hot Water
1-cup glass
measure
½ cup
Cream of Wheat
(5 servings)
2-quart
casserole
3½ cups
½ teaspoon
¾ cup
Place water and salt in casserole. Cook,
covered, on Full Power for 5 to 8 minutes, or
until water boils. Stir in cereal. Cook on Full
Power for 30 seconds to 1½ minutes, or until
boiling. Continue cooking on Cook Level 3 for 2
to 3 minutes, until cereal is cooked as desired.
Stir occasionally during cooking time.
Hot Malted Wheat
Cereal
(Quick-Cooking)
(4 servings)
2-quart
casserole
3¼ cups
½ teaspoon
2/3 cup
Place water and salt in casserole. Cook, covered
on Full Power for 5 to 8 minutes, or until water
boils. Stir in cereal. Cook on Full Power for 30
seconds to 1½ minutes, or until boiling.
Continue cooking on Cook Level 3 for 1 to 2
minutes, until cereal is cooked as desired. Stir
occasionally during cooking time.
Oatmeal
(Quick-Cooking
(4 to 6 servings)
2-quart
casserole
3 cups
¾ teaspoon
1½ cups
Place water and salt in casserole. Cook,
covered, on Full Power for 5 to 8 minutes, or
until water boils. Stir in cereal. Cook on Full
Power for 30 seconds to 1½ minutes, or until
cooked as desired. Stir as needed to prevent boil
over.
Oatmeal
(Old-Fashioned)
(4 to 6 servings)
3-quart
casserole
4 cups
½ teaspoon
2 cups
Place water and salt in casserole. Cook,
covered, on Full Power for 6 to 9 minutes, or
until water boils. Stir in cereal. Cook on Full
Power for 1 to 3 minutes, or until boiling.
Continue cooking on Cook Level 3 for 3½ to 4½
minutes until cooked as desired. Stir as needed
to prevent boil over.
Grits
(Instant)
1 serving)
0.8 oz. pkg.
41
Method
Place water in glass measure. Cook on Full
Power for 30 seconds to 1½ minutes, or until
water boils. Stir in instant grits.
Vegetable Cooking Guidelines
1.
2.
Add frozen vegetables to casserole. Cook,
covered, on full power according to the time
recommended on the chart, or until cooked as
desired.
When cooking vegetables frozen in plastic
cooking pouch, make one or two 1-inch slits on
the top of the pouch to allow for steam to
escape. Place pouch in casserole.
Fresh Vegetables
3.
4.
5.
6.
Cooking Time on Full
Power for 1 lb. Vegetables
Asparagus
Eggplant
Mushrooms
Spinach
3 to 5 min.
Broccoli
Brussel Sprouts
Cabbage
Carrots
Cauliflower
Corn-on-the-Cob*
Green Beans
Okra
Pea Pods
Zucchini
4 to 6 min.
Acorn Squash
Artichokes
Baked Potatoes**
Beets
Boiled New Potatoes
Potatoes
Parsnips
Rutabagas
Sweet Potatoes**
Turnips
4 to 6 min.
Harvard Beets
Yield: 3 to 4 servings
1 tablespoon sugar
1 teaspoon cornstarch
1/8 teaspoon salt
2 tablespoons orange juice
1 (16 oz.) can small whole or sliced beets, drained
(reserve 1/4 cup liquid)
Lemon-Buttered Broccoli
Yield: 6 to 8 servings
2 (10 oz. each) pkgs. frozen broccoli spears
3 tablespoons butter or margarine
1 tablespoon lemon juice
1/4 teaspoon leaf oregano, crushed
1/4 teaspoon salt
1/8 teaspoon garlic powder
Dash pepper
There is no need to defrost frozen vegetables
before cooking.
Always keep vegetables covered to hold steam
in after cooking.
With vegetables frozen in a solid brick, stir to
break apart halfway through cooking time.
To cook vegetables in microwave convenience
packaging, follow package instructions.
Method
Place vegetables and 2 to 4 tablespoons water or butter
in a casserole. Use more water or butter for large
amounts of vegetables, as desired, and for fibrous
vegetables, such as green beans and broccoli. Pierce
whole vegetables with skins, such as potatoes and
acorn squash.
Cook, covered, on Full Power according to the time
recommended on the chart. Stir or rearrange
vegetables halfway through the cooking time, if
necessary. Keep the vegetables covered until ready to
serve.
MICRO TIPS:
*Cook in a covered utility dish or wrapped individually in
waxed paper.
**Pierce and arrange on microwave-safe paper towels.
1.
2.
1.
2.
42
Combine sugar, cornstarch, salt, orange juice,
and 1/4 cup beet liquid in 1-quart casserole.
Cook, covered, on Full power for 2 to 4
minutes, or until thickened. Stir halfway
through cooking time.
Add beets. Stir lightly to coat. Heat covered,
on Full power for 1 to 3 minutes, or until heated
through.
Place broccoli in dish. Cook, covered, on Full
power for 6 to 9 minutes, or until tender. Stir to
break apart halfway through cooking time.
Drain. Set aside.
Place butter in 1-cup glass measure. Heat on
Full power for 15 to 45 seconds, or until melted.
Add remaining ingredients, stirring well to blend.
Drizzle over broccoli.
Potatoes au Gratin
Yield: 4 to 6 servings
4 medium potatoes
1/4 cup butter or margarine
1/4 cup all-purpose flour
2 teaspoons snipped chives
1 teaspoon salt
1/2 teaspoon dry mustard
1/8 teaspoon pepper
1 3/4 cups milk
1 cup shredded Cheddar cheese
1.
2.
3.
4.
Cheese-Scalloped Carrots
Yield: 6 to 8 servings
4 cups sliced carrots
1 tablespoon water
1/4 cup minced onion
2 tablespoons butter or margarine
2 tablespoons all-purpose flour
1/4 teaspoon dry mustard
1/4 teaspoon celery salt
Dash pepper
1 cup milk
1/4 lb. shredded Cheddar cheese
1/2 cup butter flavored cracker crumbs
1.
2.
3.
4.
43
Pierce potatoes and arrange on microwavesafe paper towel in oven. Cook on Full power
for 8 to 12 minutes, or until done. Turn
potatoes over halfway through cooking time.
Set aside to cool.
Place butter in dish. Heat on Full power for 30
seconds to 1 minute, or until melted.
Sift in flour, chives, salt, dry mustard, and
pepper. Gradually stir in milk. Cook, covered,
on Full power for 3 to 6 minutes, or until
thickened. Stir occasionally during cooking
time.
Stir in cheese. Slice potatoes and add to
sauce. Heat, covered, on Full power for 1 1/2
to 3 1/2 minutes, or until cheese is melted and
potatoes are heated through.
Combine carrots and water in 1 1/2-quart
casserole. Cook, covered, on Full power for 5
to 8 minutes, or until tender-crisp. Drain and
remove carrots. Set aside.
Place onion and butter in 1 1/2-quart casserole.
Cook, covered, on Full power for 30 seconds to
2 minutes, or until tender.
Blend in flour, mustard, salt and pepper. Slowly
stir in milk. Cook, covered, on Full power for
1 1/2 to 3 1/2 minutes, or until thickened. Stir
several times during cooking time. Stir in
cheese until melted.
Mix in carrots. Top with cracker crumbs. Heat
on Full power for 2 to 4 minutes, or until heated
through.
Party Potatoes
Yield: 8 servings
8 to 10 medium potatoes, peeled and cut into
eighths
1/2 cup water
1 (8 oz.) pkg. cream cheese
1 (8 oz.) carton French onion dip
1/2 teaspoon salt
1/8 teaspoon pepper
1/2 teaspoon garlic salt (optional)
Butter or margarine
Paprika
Harvest Vegetable Platter
Yield: 6 to 8 servings
1 bunch fresh broccoli
1/2 medium head cauliflower
1 medium zucchini
1 to 2 medium summer squash
1 to 2 medium tomatoes
1/4 cup butter or margarine, melted
1/2 teaspoon garlic salt
1/2 teaspoon Italian seasoning
Grated Parmesan cheese
1.
2.
3.
1.
2.
3.
44
Place potatoes and water in 3-quart casserole.
Cook, covered, on Full power for 12 to 17
minutes, or until potatoes are tender. Stir
halfway through cooking time. Drain.
Beat together cream cheese, onion dip, salt,
pepper, and garlic salt in large mixing bowl, until
well-blended. Add hot potatoes, one at a time,
beating until light and fluffy.
Spoon potatoes into 3-quart casserole. Dot
with butter, as desired. Heat, covered, on Full
power for 4 to 6 minutes, or until heated
through. Sprinkle with paprika, as desired,
before serving.
Cut broccoli into pieces 2 1/2-inches long.
Break cauliflower into bite-size pieces.
Alternate pieces of broccoli and cauliflower
around outside edge of 12-inch platter.
Cut zucchini and summer squash into 1/4-inch
slices. Arrange in mound in center of platter.
Cover loosely with heavy-duty plastic wrap.
Cook, covered, on Full power for 5 to 7
minutes, or until vegetables are crisp-tender.
Cut tomatoes into wedges. Arrange over other
vegetables. Drizzle melted butter over
vegetables. Sprinkle with garlic salt, Italian
seasoning, and Parmesan cheese. Heat on
Full power for 30 seconds to 1 1/2 minutes, or
until tomatoes are warmed.
Sauces, Jams and Relishes Cooking Guidelines
1.
2.
3.
4.
Use the size container recommended in recipes
to avoid boil-overs.
Sauces can be cooked directly in glass
measures, for convenience. A glass measure
should not be more than half-filled to avoid boilovers.
Cover sauces, jams, or relishes as
recommended in the recipes. Use a glass lid or
heavy-duty plastic wrap. Remove these
coverings away from self to avoid steam burns.
Keep hot pads near. Sugar mixtures can
become hot during cooking.
White Sauce
and Variations
(original recipe)
5.
6.
7.
2 tablespoons butter or margarine
2 tablespoons all-purpose flour
½ teaspoon salt
1 cup milk
Stir sauces during cooking, as recommended in
recipe. Stirring prevents lumping. Less stirring
is required in microwave cooking of sauces than
in conventional cooking.
When adding an ingredient such as pectin to a
hot mixture, stir it in gradually.
The jellying point of jam or jelly is reached when
a cool metal spoon, inserted into the hot
mixture, is tilted and the syrup divides into two
distinct drops that run together and sheet from
edge of spoon.
Jams, jellies, or preserves should be poured
into sterilized jars and sealed with paraffin and
stored in refrigerator.
1. Place butter in 1-quart casserole. Heat on Full Power for
15 to 45 seconds, or until melted.
2. Stir in flour and salt. Blend to smooth paste. Blend in
milk gradually, stiring constantly.
Yield: 1 cup
3. Cook, covered, on Full Power for 1½ to 3½ minutes, or
until thickened. Stir 3 to 4 times during cooking time.
MICRO-TIP: This recipe makes a medium sauce.
Variations:
Thin White Sauce
1 tablespoon butter or margarine
1 tablespoon all-purpose flour
Decrease these amounts of butter and flour from original
recipe.
Thick White Sauce
2 tablespoons butter or margarine
2 tablespoons all-purpose flour
Add these additional amounts to butter and flour in original
recipe.
Cheese Sauce
¾ cup shredded sharp Cheddar cheese
Dash cayenne pepper
Stir cheese into cooked sauce in original recipe, until
cheese is melted. Stir in cayenne pepper.
Dill Sauce
½ teaspoon dill weed
Add to flour in original recipe.
Mustard Sauce
1½ to 2 tablespoons prepared mustard
Add to cooked sauce in original recipe.
Newberg Sauce
1 egg yolk
1/4 cup heavy cream
1 tablespoon dry sherry
Dash cayenne pepper
Add cooked sauce from original recipe gradually to egg
yolk. Stir in cream, sherry, and cayenne pepper. Return to
casserole. Heat, covered, on Full Power for 30 seconds to
2 minutes or until heated through.
45
Hollandaise Sauce
Yield: 1/2 cup
1/3 cup butter or margarine
1 to 2 tablespoons lemon juice
2 egg yolks
1/4 teaspoon salt
1/4 teaspoon dry mustard
Dash hot pepper sauce
Applesauce
Yield: 3 to 4 cups
6 cups pared, cored, and quartered
cooking apples
2 to 3 cinnamon sticks
1/4 to 1/2 cup sugar
Quick and Easy Grape Jelly
Yield: 5 cups
3 cups unsweetened grape juice
1 (1 3/4 oz.) box powdered fruit pectin
3 1/2 cups sugar
1.
2.
3.
1.
2.
1.
2.
Spiced Pears
Yield: 1 1/2 quarts
2 cups boiling water
2/3 cup white vinegar
2 cups sugar
2 to 3 (2-inch) cinnamon sticks
2 (29 oz. each) cans Bartlett pears, drained
1.
2.
46
Place butter in 1-quart casserole. Heat on Full
Power for 15 to 45 seconds, or until melted.
Stir in remaining ingredients. Beat with spoon
or wire whisk until well-mixed.
Cook, covered, on Full power for 30 to 60
seconds, or until thickened. Stir halfway
through cooking time.
Combine apples and cinnamon sticks in 1 1/2quart casserole.
Cook, covered, on Full power for 5 to 8
minutes, or until apples are tender. Stir halfway
through cooking time. Remove cinnamon
sticks. Mash or put through sieve, if desired.
Stir in sugar.
Combine grape juice and pectin in 5-quart
casserole. Cook, covered, on Full power for 6
to 10 minutes, or until boiling. Stir 2 to 3 times
during cooking time.
Stir sugar into grape mixture. Cook on Full
power for 6 to 9 minutes, or until mixture has
boiled hard for 1 minute. Stir 2 to 3 times
during cooking time. Pour into jars. Seal with
paraffin and refrigerate.
Combine water, vinegar, sugar, and cinnamon
sticks in 3-quart casserole. Cook, covered, on
Full power for 4 to 7 minutes, or until mixture
boils and sugar is dissolved. Stir halfway
through cooking time.
Add pears. Heat, covered, on Full power for 1
to 3 minutes, or until warmed. Pack into jars.
Add one stick cinnamon to each jar. Pour syrup
over pears. Refrigerate for 1 week before
using.
Micro-tip: Add red or green food coloring to
syrup before pouring over fruit, if desired.
Bread Cooking Guidelines
1.
2.
3.
Muffins, coffee cakes, quick breads, and yeast
breads are generally baked on Cook Level 7.
Breads will not brown in a microwave oven as
they do in a conventional oven. For color, use
toppings or ingredients which supply color.
Some examples include rye flour, whole wheat
flour, brown sugar, or dark spices, such as
cinnamon. In some recipes, there may seem to
be extra topping ingredients left over. Use all
ingredients, since the bread will expand during
cooking.
When cooking muffins, use 6 oz. glass custard
cups or 6-cupcake capacity plastic tray. Line
custard cups or plastic tray compartments with
paper liners. Fill liners with 2 tablespoons of
batter to avoid having the muffins rise over the
edges. Arrange custard cups in a circle, rather
than in rows. Remove muffins from custard
cups or plastic tray immediately, to avoid soggy
"bottoms".
Item
4.
5.
6
Quick breads are usually fully cooked when
toothpick inserted in the center comes out
clean. Some breads will look slightly moist
when first removed from microwave oven. Look
through bottom of glass dish to see if bread is
fully cooked. Breads should stand 3 to 5
minutes after cooking.
When reheating baked breads, heat only for a
few seconds. Reheat only as much bread as
needed for each meal. Wrap bread in a
microwave-safe paper towel or napkin when
reheating to capture steam and help keep
bread moist.
Turn foods quarter-turn halfway through
cooking time (non-turntable models, only).
Cooking Time
Cookmatic Power Level
1½ to 2½ min.
7
Prepare according to recipe or package directions.
Place 2 tablespoons of batter into each plastic muffin
cup lined with paper liners. Muffins are done when
tops spring back when lightly pressed. Remove
muffins from tray and place on cooling rack
immediately.
Coffee Cake
9" round from scratch
7 to 11 min.
7
Prepare according to recipe or package directions.
Coffee cake is done when toothpick inserted in center
comes out clean.
Corn Bread
9" round
3 to 5 min.
7
Prepare according to recipe or package directions.
Top may look glossy but will finish cooking after five
minutes standing time.
Muffins
(6)
47
Method
Cranberry Muffins
Yield: About 2 dozen muffins
Topping:
1 teaspoon grated orange peel
1/4 cup sugar
2 teaspoons cinnamon
1/4 cup chopped nuts
Muffins:
2 cups all-purpose flour
1/2 cup sugar
1 tablespoon baking powder
1 cup milk
1/4 cup vegetable oil
1 egg, beaten
1 cup coarsely chopped cranberries
1/2 cup chopped nuts
2 teaspoons grated orange peel
Blueberry-Sour Cream Coffee Cake
Yield: 1, 9-inch round or 8-inch square, cake
Topping:
1/2 cup all-purpose flour
1/2 cup sugar
1 1/2 teaspoons cinnamon
3 tablespoons butter or margarine, softened
1/2 cup chopped nuts
Cake:
1/2 cup sugar
1/2 cup butter or margarine
1 egg
1/2 cup dairy sour cream
1 cup all-purpose flour
1/2 teaspoon baking powder
1/4 teaspoon baking soda
1 cup blueberries, fresh or frozen, thawed
1.
2.
3.
4.
1.
2.
3.
4.
For topping: Combine orange peel, sugar,
cinnamon, and chopped nuts in small bowl. Set
aside.
For muffins: Combine flour, sugar, and baking
powder in large mixing bowl. Combine milk, oil
and egg. Add to combined dry ingredients. Mix
until just blended. Fold in cranberries, nuts and
orange peel.
Spoon 2 tablespoons of batter into each cup in
plastic muffin tray (or 6, 6 oz. glass custard
cups) lined with paper liners. Arrange 6 muffins
in circle, in oven, if using custard cups.
Cook half-dozen on Cook Level 7 for 1 1/2 to
2 1/2 minutes, or until tops spring back when
lightly pressed with finger. Sprinkle with 1
teaspoon topping over muffins halfway through
cooking time. Remove muffins from tray or
custard cups and place on cooling rack
immediately. Repeat with remaining muffins.
For topping: Combine flour, sugar and
cinnamon in small bowl. Cut in butter or
margarine until crumbly. Stir in nuts. Set aside.
For cake: Cream sugar and butter in large
mixing bowl. Beat in egg and sour cream, until
smooth.
Combine flour, baking powder and baking soda
in small bowl. Add to creamed mixture, beating
until well-blended. Gently stir in blueberries.
Pour half of batter into greased 9 x 2-inch round
or 8 x 8 x 2-inch dish. Cook on Cook Level 7
for 7 to 11 minutes, or until toothpick inserted in
center comes out clean.* Sprinkle remaining
topping evenly over batter halfway through
cooking time.
* Turn quarter-turn halfway through cooking time
(non-turntable models, only).
48
Caramel Pecan Sweet Rolls
Yield: 3 batches of about 1 dozen rolls each
2 cups warm water
2 (1/4 oz. each) pkgs. active dry yeast
1/3 cup sugar
1 tablespoon salt
1/3 cup vegetable oil
2 eggs, beaten
6 to 6 1/2 cups all-purpose flour
Butter or margarine, softened
1/2 cup sugar
1 tablespoon cinnamon
1/3 cup raisins (optional)
3/4 cup butter or margarine, divided
3/4 cup brown sugar, firmly packed, divided
3/4 cup pecan pieces, divided
1.
2.
3.
4.
5.
6.
49
Place water in 1-quart mixing bowl. Heat on
Full power for 30 seconds to 1 minute, or until
temperature of 105° F to 115° F is reached.
Dissolve yeast in water. Stir in sugar and salt.
Blend in oil and eggs. Mix in flour, 2 cups at a
time. Scrape dough from sides of bowl to
center. Cover. Let stand for 20 minutes.
Knead dough until smooth and elastic, or about
5 minutes.
Turn dough out onto lightly floured board.
Divide dough into thirds. Roll each third into 5 x
12-inch rectangle,1/4-inch thick. Spread each
with butter, as desired. Sprinkle each with
mixture of sugar and cinnamon. Sprinkle
raisins on each, if desired. Roll each starting
with narrow sides. Cut each roll into dozen 3/4inch slices.
Place 1/4 cup butter in 9 x 2-inch round dish.
Heat on Full power for 15 to 30 seconds, or
until melted. Stir in 1/4 cup brown sugar and
1/4 cup pecans. Place dozen rolls in dish.
Repeat with remaining two dozen rolls.
Let each dish of rolls rise and cook separately.
Place 2 cups of water in 2-cup glass measure in
rear corner of oven cavity. Let rise on Cook
Level 1 for 5 to 7 minutes. Let stand for 10
minutes, or until doubled.
Cook, on Cook Level 5 for 4 1/2 to 6 minutes, or
until top springs back when lightly pressed with
finger. Invert on serving platter. Repeat with
remaining rolls.
Baked Goods and Desserts Cooking Guidelines
1.
2.
3.
4.
5.
Circular and tube dishes provide best cooking
results. Arrange cupcakes in a circle, if baking
them in custard cups or use circular-shaped
cupcake trays.
A tube dish can be created by placing a 2 to 3inch diameter drinking glass in a 3 to 4-quart
casserole. Pour the cake batter around the
glass.
If desired, to turn layer cake out of dish and
onto a serving platter, grease the dish and line
the bottom with waxed paper before baking.
This will allow easy removal of the cake. Do not
use flour when greasing a dish since it will tend
to lump in bottom of dish. Avoid using spray-on
vegetable coating, as it makes cakes sticky.
When cooking microwave oven cakes,
decrease the amount of batter slightly. Dishes
should be about half-filled with batter. Excess
batter can be used for baking cupcakes.
Cook cake layers separately, one at a time.
The same dish may be used, if desired. Use a
fresh piece of waxed paper when cooking the
second layer.
Item
6.
7.
8.
Cakes and bars are baked on Cook Level 5 or
Cook Level 7.
Cakes and bars are done when tops spring
back when lightly pressed with a finger. Cakes
may appear slightly moist after cooking.
"Moisture" is not "raw" batter. This moisture will
disappear when cake stands for 3 to 5 minutes
after cooking. Remember this "carry-over
cooking" time.
Due to the short amount of cooking time,
microwave oven cooked cakes and bars will not
brown. When using frosting or toppings, the
lack of browning is not noticed. Confectioners'
sugar, a mixture of cinnamon and sugar, nuts or
coconut may be sprinkled over top of cake.
Sauces, fruit toppings, and fresh or frozen fruit
may be served over cake. Even pudding can
be used as a topping for cake.
Cooking Time
Cookmatic Power Level
Method
Cake Layer
8" round
7 to 9 min.
5
Microwave one layer at a time.* Cake is done when top springs
back when touched lightly. Top may still appear moist but not
raw. Let stand for 5 minutes. Invert on a cooling rack. Cool
completely.
Cupcakes
2 to 3 min.
5
Prepare according to recipe or package directions. Place 2
tablespoons of batter into each cup of plastic cupcake tray lined
with paper liners.* Cupcakes are done when top springs back
when lightly pressed. Remove from tray and place on cooling
rack immediately.
Bundt Cake
12 to 15 min.
5
Prepare according to recipe or package directions. Place in
greased bundt pan.* Cake is done when top springs back when
touched lightly. Top may still appear moist, but not raw. Let
stand 5 minutes. Invert on cooling rack. Cool completely.
Brownies
8" square
4½ - 6 min.
5
Prepare according to recipe or package directions.* Brownies are
done when top springs back when touched lightly. Top may still
appear moist but not raw. Let stand until cool.
Single Pie Crust
9" round
1 to 3 min.
Full Power (10)
Prepare according to recipe or use thawed ready-made pie crust.
Cover with microwave-safe paper towel.* Pie crust is done when
dough is no longer moist. Cool. Fill with desired filling.
NOTE: To bake microwave convenience cakes, bars, desserts, etc., follow package instructions and decrease cooking time.
* Turn quarter-turn halfway through cooking time (non-turntable models, only).
50
Cherry Cheesecake
Yield: 12 to 15 servings
1/2 cup butter or margarine
2 cups graham cracker crumbs
1/2 cup sugar
1/2 teaspoon cinnamon
3 (8 oz. each) pkgs. cream cheese, softened
5 eggs
1 cup sugar
1/2 teaspoon vanilla
2 1/2 cups dairy sour cream
1/3 cup sugar
1 1/2 teaspoons vanilla
1 (21 oz.) can cherry pie filling*
1.
2.
3.
4.
Chocolate Malt Cake
Yield: 1, 9-inch 2-layer cake
Cake:
1 cup sugar
1/2 cup butter or margarine
1 cup vegetable oil
3 eggs
1 teaspoon vanilla
2 cups all-purpose flour
1 1/2 cup chocolate flavored malted milk powder
1 tablespoon baking powder
1 1/4 cups milk
Frosting:
1 (12 oz.) carton frozen non-dairy whipped topping,
thawed
1/2 cup chocolate flavored malted milk powder
1/4 cup cocoa
1.
2.
3.
4.
5.
6.
Place butter in 3-quart utility dish. Heat on Full
power for 30 seconds to 1 1/2 minutes, or until
melted.
Blend in crumbs, sugar, and cinnamon. Press
mixture firmly against bottom and sides of dish.
Cook on Full power for 30 seconds to 1 1/2
minutes, or until firm. Turn half-turn halfway
through cooking time*.
Beat cream cheese until smooth. Beat in eggs,
one at a time. Mix in sugar and vanilla, until
smooth and creamy. Pour over crust. Cook on
Cook Level 4 for 20 to 30 minutes, or until knife
inserted in center comes out clean*.
Combine sour cream, sugar, and vanilla. Blend
well. Pour mixture over cheesecake. Chill.
Top with cherry pie filling.
Micro-tip: cherry pie filling may be substituted
with glazed fresh fruit or other fruit pie fillings,
such as strawberry or blueberry.
For cake: Line bottoms of 2, 9 x 2-inch round
dishes with waxed paper.
Cream together sugar and butter in large mixing
bowl, until fluffy. Gradually blend in oil.
Add eggs, one at a time. Beat well after each
addition. Blend in vanilla.
Mix together flour, malted milk powder, and
baking powder in medium mixing bowl. Add dry
ingredients alternately with milk. Beat well after
each addition.
Pour one-half of batter into dish. Cook on Cook
Level 5 for 6 1/2 to 8 1/2 minutes, or until top
springs back when lightly pressed with finger.*
Let stand 5 minutes. Invert on cooling rack.
Cool completely. Repeat with remaining layer.
For frosting: Combine all frosting ingredients in
large mixing bowl. Mix until well-blended. Fill
and frost cooled cake.
* Turn quarter-turn halfway through cooking time
(non-turntable models, only).
51
Lemon Bars
Yield: 1 dozen bars
1/2 cup butter or margarine
1 1/2 cups all-purpose flour
1/4 cup confectioners' sugar
1 cup sugar
2 eggs
3 tablespoons lemon juice
2 tablespoons all-purpose flour
1 teaspoon grated lemon peel
3 to 4 tablespoons confectioners' sugar
1.
2.
3.
Dutch Apple Cream Pie
Yield: 1, 9-inch pie
1 cup all-purpose flour
1/2 cup brown sugar, firmly-packed
1 teaspoon cinnamon
1/3 cup butter or margarine, softened
1/3 cup chopped nuts
1 cup dairy sour cream
3/4 cup sugar
1 egg, slightly-beaten
2 tablespoons all-purpose flour
1/2 teaspoon cinnamon
4 cups cored, peeled, and sliced apples
1, 9-inch baked pie crust
Rhubarb Custard Pie
Yield: 1, 9-inch pie
Filling:
4 egg yolks
3/4 cup milk
1 teaspoon vanilla
1 1/2 cups sugar
3 tablespoons all-purpose flour
Dash salt
Dash nutmeg
3 cups diced rhubarb
1, 9-inch baked pie crust
Meringue:
4 egg whites
1/4 teaspoon cream of tartar
1/2 cup sugar
1.
2.
3.
1.
2.
3.
4.
Place butter in 8 x 8 x 2-inch baking dish. Heat
on full power for 30 seconds to 1 1/2 minutes,
or until melted. Blend together melted butter,
1 1/2 cups flour and 1/4 cup confectioners'
sugar.
Cook on full power for 45 seconds to 1 1/2
minutes, or until crumbly. Stir 2 to 3 times
during cooking time. Press mixture firmly
against bottom of dish. Cook on full power for 1
to 2 minutes, or until slightly firm.
Beat together sugar, eggs, lemon juice, 2
tablespoons flour, and grated lemon peel. Pour
over hot crust. Cook on Cook Level 4 for 8 to
11 minutes, or until center is firm.* Sprinkle
with 3 to 4 tablespoons confectioners' sugar.
Cool completely. Cut into squares.
For topping: Combine 1 cup flour, brown sugar
and 1 teaspoon cinnamon. Cut in butter, until
mixture is crumbly. Stir in nuts. Set aside.
For filling: Combine sour cream, sugar, egg,
flour, and cinnamon. Stir in apples.
Add filling to baked pie crust. Cook on full
power for 7 to 9 minutes, or until apples are
tender. Sprinkle topping over pie, halfway
through cooking time.*
For filling: Combine egg yolks, milk, and vanilla
in large bowl.
Mix together sugar, flour, salt, and nutmeg in
small bowl. Add to egg mixture.
Spread rhubarb evenly in 9-inch baked pie
crust. Pour filling over rhubarb. Cook on Cook
Level 4 for 22 to 27 minutes, or until filling is
almost set.*
For meringue: Beat egg whites with cream of
tartar, until foamy. Add sugar, 1 tablespoon at
a time, beating until egg whites are stiff.
Spread meringue over filling. Seal edges. Heat
on full power for 1 to 2 1/2 minutes, or until
meringue is set.
* Turn quarter-turn halfway through cooking time
(non-turntable models, only).
52
Triple Treats
Yield: 1 1/2 dozen bars
1/2 cup butter or margarine, softened
1/2 cup brown sugar, firmly packed
1 egg
1/2 teaspoon vanilla
1 cup all-purpose flour
1 1/2 cups confectioners' sugar
2 tablespoons milk
1 tablespoon butter or margarine, softened
1/2 teaspoon vanilla
1/4 teaspoon almond extract
1/2 cup semi-sweet chocolate morsels
2/3 cup confectioners' sugar
1/2 cup butter or margarine, softened
1/4 cup slivered almonds or 1/4 cup chopped
walnuts
Lime Gelatin Delight Cake
Yield: 1, 9-inch round cake
1 (9 oz.) pkg. white cake mix
1/2 cup water
1 egg white
1 cup hot tap water
1 (3 oz.) pkg. lime flavored gelatin
1 (3 oz.) pkg. instant lemon flavored pudding mix
1 cup milk
1 cup nondairy whipped topping
1.
2.
3.
4.
1.
2.
3.
4.
Rocky Road Cake
Yield: 1 cake
1 (13 1/2 oz.) pkg. chocolate fudge chip snack cake mix
1 cup water
1 1/2 cups miniature marshmallows
1/2 cup semi-sweet chocolate morsels
1/4 cup crunchy-style peanut butter
1.
Cream 1/2 cup butter and brown sugar in large
mixing bowl. Add egg, 1/2 teaspoon vanilla,
and flour. Beat until fluffy. Spread evenly in
ungreased, 8 x 8 x 2-inch dish. Cook on Cook
Level 7 for 4 to 5 1/2 minutes, or until firm.*
Allow to cool.
Beat together 1 1/2 cups confectioners' sugar,
milk, 1 tablespoon butter, vanilla, and almond
extract, until creamy. Spread on cooled bottom
layer. Chill.
Place chocolate morsels in 1-cup glass
measure. Heat on full power for 20 to 45
seconds, or until melted. Stir well.
Cream confectioners' sugar and butter in small
bowl. Add chocolate to creamed mixture. Beat
until fluffy. Spread on white layer. Sprinkle
with nuts. Refrigerate. Cut into bars before
serving.
Prepare cake according to package instructions
using 1/2 cup water and 1 egg white. Pour
batter into 9 x 2-inch round dish. Cook on Cook
Level 5 for 4 1/2 to 6 minutes, or until top
springs back when lightly pressed with finger.*
Place water in 2-cup glass measure. Heat on
full power for 1 1/2 to 2 1/2 minutes, or until
boiling. Stir in gelatin to dissolve.
Poke holes in cake with toothpick. Pour gelatin
over cake. Refrigerate for 1 hour.
For topping: Combine instant pudding mix and
milk in small bowl. Beat for 1 minute with
electric mixer. Fold in whipped topping.
Spread over cake. Chill.
Micro-tip: This is a good dessert for St.
Patrick's Day, or for other holidays. Use other
flavors of gelatin, if desired.
Combine cake mix and water in 9 x 2-inch
round dish. Mix according to package
instructions. Cook on Cook Level 5 for 5 to 7
minutes.*
2. Immediately after removing from oven, sprinkle
marshmallows evenly over top.
3. Combine chocolate morsels and peanut butter
in 2-cup glass measure. Heat on full power for
45 seconds to 1 minute 15 seconds, or until
melted. Stir halfway through cooking time.
4. Drizzle well-blended chocolate mixture over
marshmallows. Cool.
* Turn quarter-turn halfway through cooking time
(non-turntable models, only).
53
Pineapple Upside-Down Cake
Yield: 1, 9 x 2-inch cake
2 tablespoons butter or margarine
1/2 cup dark brown sugar, firmly packed
1 (8 oz.) can sliced pineapple, with liquid
2 maraschino cherries, halved (optional)
1/2 cup vegetable oil
2 eggs
1 (9 oz.) pkg. one layer yellow cake mix
Apple Crisp
Yield: 6 to 8 servings
6 cups cored, peeled, and sliced cooking apples
1 tablespoon lemon juice (optional)
1/4 cup sugar
1/2 teaspoon cinnamon
1 tablespoon all-purpose flour
1 cup all-purpose flour
1 cup quick-cooking, rolled oats
1/2 cup brown sugar, firmly packed
1 teaspoon cinnamon
1/2 cup butter or margarine, softened
Thumbprint Cookies
Yield: 3 dozen
2/3 cup butter or margarine
1/3 cup sugar
2 eggs, separated
1 teaspoon vanilla
1/4 teaspoon salt
1 3/4 cups sifted all-purpose flour
3/4 cup finely chopped pecans
1/2 cup preserves
1.
2.
3.
1.
2.
3.
1.
Place butter in 9 x 2-inch round dish. Heat on
Full power for 15 to 30 seconds, or until melted.
Sprinkle brown sugar over butter.
Reserve 1/4 cup pineapple juice in 2-cup
measure. Arrange pineapple slices over butterbrown sugar mixture. Invert maraschino cherry
half in center of each pineapple ring, if desired.
Add oil and eggs to reserved juice. Stir until
blended. Add liquid ingredients to cake mix in
large mixing bowl. Stir until well-blended.
Batter will be lumpy. Spread batter evenly over
pineapple rings. Cook on Cook Level 5 for 7 to
10 minutes, or until top springs back when
lightly pressed with finger.* Let stand for 10
minutes. Invert on serving platter.
Micro tip: Crushed pineapple may be
substituted for sliced.
Place apples in 8 x 8 x 2-inch dish. Sprinkle
with lemon juice, if desired.
Combine 1/4 cup sugar, 1/2 teaspoon
cinnamon, and 1 tablespoon flour in small bowl.
Toss with apples to coat.
Combine flour, oats, brown sugar, and
cinnamon in mixing bowl. Cut in butter, until
mixture is crumbly. Sprinkle over apples. Cook
on Full power for 5 to 7 minutes, or until apples
are tender.
Micro-tip: For less sweet Apple Crisp, omit
sugar in Step 2.
Cream butter and sugar until fluffy in large
mixing bowl.
2. Stir in egg yolks, vanilla, and salt, beating well.
Gradually stir in flour. Mix well.
3. Shape dough into 3/4-inch diameter balls. Dip
in slightly-beaten egg whites. Roll in pecans.
4. Line 12-inch glass platter or pizza plate with
waxed paper. Place 9 balls in circle around
edge and 3 balls in center of platter. Make
thumbprint in each.
5. Cook dozen on Cook Level 7 for 1 minute, 15
seconds to 2 minutes, or until firm but slightly
moist.* Allow cookies to cool slightly before
removing from waxed paper. Fill "thumbprints"
with preserves just before serving. Repeat with
remaining cookies.
Micro-tip: Cookies may be filled with pie filling
rather than preserves.
* Turn quarter-turn halfway through cooking time
(non-turntable models, only).
54
Candy Cooking Guidelines
1.
2.
3.
Candy becomes very hot during cooking.
Select a cooking utensil which will withstand hot
temperatures. Select a utensil which is large
enough to hold the candy during cooking to
avoid boil-overs. Use the recommended utensil
in the recipe. Generally, candy is cooked
uncovered for easy stirring.
If a candy thermometer is used when preparing
candies, do not leave thermometer in candy
while the microwave oven is operating, unless
the thermometer is especially designed for
microwave oven use.
In this cooking guide, candies are described as
being completely done when the following
stages are reached:
Peanut Brittle
Yield: About 2 lbs.
2 cups sugar
1 cup light corn syrup
1/3 cup water
1 (16 oz.) pkg. salted peanuts
4 tablespoons butter or margarine
2 teaspoons baking soda
Soft Ball: Candy syrup, when dropped into
very cold water, forms a soft ball which flattens
on removal from water.
Firm Ball: Candy syrup, when dropped into
very cold water, forms a firm ball which does
not flatten on removal from water.
Hard Ball: Candy syrup, when dropped into
very cold water, forms a hard ball which is hard
enough to hold its shape, yet elastic.
Soft Crack: Candy syrup when dropped into
very cold water, separates into threads which
are hard but not brittle.
Hard crack: Candy syrup when dropped into
very cold water, separates into threads which
are hard and brittle.
4. Since candies do become quite hot during
cooking, be careful when removing them from
the microwave oven. Keep pot holders handy.
1.
2.
3.
4.
Coconut 'N' Cherry Fudge
Yield: 25 pieces
1 2/3 cups sugar
2/3 cup evaporated milk
1/2 cup butter
2 cups miniature marshmallows
1 1/2 cups semi-sweet chocolate morsels
1 teaspoon vanilla
1/2 cup flake coconut
1/2 cup chopped nuts
1/3 cup chopped maraschino cherries
1.
2.
55
Grease 2, 15 1/2 x 12-inch baking sheets.
Place sugar, corn syrup, and water in 3-quart
casserole. Cook on full power for 6 to 9
minutes, or until soft ball stage is reached.* Stir
occasionally during cooking time.
Stir in peanuts. Cook on full power for 7 to 11
minutes, or until hard crack stage is reached.*
Stir in butter and baking soda. Pour half of
candy onto each sheet, spreading to 1/4-inch
thickness. Cool. Break into pieces.
Micro-tip:
*The soft ball and hard crack stages are
described in "Candy Cooking Guidelines."
Combine sugar, evaporated milk, and butter in
3-quart casserole. Cook on full power for 6 to 9
minutes, or until soft ball stage is reached.* Stir
mixture 3 times during cooking time.
Beat in marshmallows, chocolate morsels, and
vanilla with wire whisk, until mixture is smooth
and creamy. Stir in coconut, nuts, and cherries.
Pour into greased, 8 x 8 x 2-inch dish.
Micro-tip: *The soft ball stage is described in
"Candy Cooking Guidelines."
Chocolate-Maple Bonbons
Yield: 2 1/2 to 3 dozen
1/4 cup butter or margarine, softened
3 cups sifted confectioners' sugar
1 tablespoon maple flavoring
3 to 4 teaspoons milk
1/4 cup chopped peanuts (optional)
1 cup semi-sweet chocolate morsels
1 cup butterscotch morsels
1/2 cup creamy-style peanut butter
1(2 1/2 x 3 x 1/2-inch) bar paraffin, grated
Almond Bark
Yield: 1 lb.
3/4 lb. white or dark chocolate*
2/3 cup toasted almonds**
1.
2.
1.
2.
Beat butter in large mixing bowl until fluffy.
Blend in confectioners' sugar and maple
flavoring. Add enough milk to make mixture
hold together. If necessary, knead mixture until
all combined. (Mixture should be very stiff.)
Mix in peanuts, if desired. Roll into 1/2 to 1inch balls. Place on waxed paper and chill for
1 hour, or until firm.
Combine morsels, peanut butter, and paraffin in
1-quart casserole. Heat on full power for 1
minute, 45 seconds to 2 1/2 minutes, or until
melted. Stir several times during cooking time.
Stir until smooth. Dip maple balls in chocolate.
Let cool on waxed paper. Store in refrigerator.
Micro-tip: Use remaining chocolate as dip for
pound cake or fruit, or add peanuts to make
peanut clusters.
Place chocolate in 1-quart casserole. Heat on
full power for 1 to 2 minutes, or until melted.
Stir occasionally during heating time.
Stir in almonds. Pour immediately onto waxed
paper or aluminum foil. Spread thinly. Cool for
approximately 1 hour. Break into pieces for
serving.
Micro-tips:
*1 (12 oz.) pkg. semi-sweet chocolate morsels
may be substituted for 3/4 lb. chocolate, if
desired.
**Pecans or crushed peppermint candies may
be substituted for almonds.
* Turn quarter-turn halfway through cooking
time (non-turntable models, only).
56
Care and Cleaning
Interior, Exterior and Door
If walls and door of microwave oven become
splattered, wipe with paper towel or clean with mild
detergent in warm water using soft sponge or cloth.
Wring sponge or cloth to remove excess water
before wiping unit. If desired, boil a cup of water in
microwave oven to loosen soil before cleaning.
Before cleaning oven floor, remove turntable and
turntable support. Plug hole in oven floor (see
diagram below).
• Do not use cleaners containing ammonia.
These could damage finish.
• Never pour water into microwave oven bottom.
• Do not use water pressure type cleaning
systems.
2.
Shield snaps into lip in front of microwave oven
and three slots in back. To remove, place
thumbs into two indentations in front of shield.
Press lightly toward back and carefully lower
shield away from antenna.
3. Pull shield forward, out of back slots and out of
microwave oven.
4. Wash shield in warm soapy water.
5. Dry and replace.
Important
• Do not wash splatter shield in dishwasher.
• Do not use abrasive cleaners.
Turntable
Wipe up spills immediately. Wipe with paper towel
or damp cloth. Remove turntable and turntable
support to clean more thoroughly. Place plug into
hole in oven floor (see diagram below). Wash
turntable and turntable support carefully in warm
sudsy water, rinse and dry thoroughly. Do not drop
glass turntable. When replacing turntable support,
support may need to be rotated one complete turn
to engage into drive mechanism.
Important
Do not wash turntable support in dishwasher.
Discharge Air Vents
There will be a slight buildup of cooking vapors
along discharge louvers in back of oven on right
side. Clean air vent with damp cloth and dry.
Splatter Shield
Splatter shield keeps top of microwave oven and
antenna from getting soiled. Remove soil from
shield with damp cloth. Remove splatter shield to
clean more thoroughly.
Important
When removing and replacing splatter shield, be
careful not to bend antenna.
1. Unplug oven before removing splatter shield to
stop antenna from rotating.
Replacing Oven Light Bulb
Important! Wear gloves to protect hands should
light bulb break. If hot, allow bulb to cool.
To change oven light bulb:
1. Remove access screw from and open access
cover on top left wall of oven exterior.
2. Remove bulb, being careful not to burn fingers
or break bulb.
3. Replace bulb.
4. Replace access cover and replace access
screw. Do not operate oven with access cover
removed.
5. Restore power to microwave oven.
Caution
To avoid electrical shock hazard
unplug power cord or open circuit
breaker to microwave oven before
replacing light bulb. After replacing
light bulb, reconnect power.
Tools needed-• protective gloves
• flat blade screwdriver
• 120 volt, 40 watt,
appliance bulb (usually found at grocery or
hardware stores)
57
Before Calling for Service
If microwave oven does not operate:
• Confirm unit is plugged into dedicated circuit.
• Confirm unit is on grounded and polarized
circuit.
• Check fuse or circuit breaker. Determine if
circuit is operable by plugging another item in
outlet.
• Confirm microwave oven door is securely
closed.
• If condition remains unchanged, see
"Unchanged Condition" instructions below.
If control will not accept instructions:
• For cooking by time, see "Unchanged
Condition" instructions below.
If readout appears wrong:
• Press STOP/RESET.
• See "Unchanged Condition" instructions
below.
If oven light does not work:
• Confirm light bulb is screwed in tightly.
• Confirm light bulb is not defective.
If room lights dim or pulse when oven is in use:
• Confirm microwave is on proper circuit. See
grounding instructions on page 6.
If unit operates, but will not heat food:
• Place one cup cool water in unit. Heat for one
minute. If water temperature does not rise,
unit is operating incorrectly.
If dash lines appear in display:
•This is a power interruption signal and will
appear whenever oven is initially plugged in or
when power is interrupted. Set the clock to
clear.
Unchanged Condition
If condition remains unchanged, perform the
following steps:
1. Check to see if fuse or circuit breaker is
open.
2. Unplug oven.
3. Reconnect oven to wall outlet. Dash lines
appear in display.
4. Press STOP/RESET or set clock.
WARNING
To avoid electrical shock which can
cause severe personal injury or death, do
not remove outer case at any time. Only
authorized servicer should remove outer
case.
58
59
Factory Service Centers
Listed below are Factory Service Centers which service most metropolitan and surrounding areas.
Amana also has a network of independent authorized servicers. Locate a Factory Service Center or
independent servicer by calling 1-800-NATLSVC (628-5782) inside U.S.A. and 319-622-5511 if
outside U.S.A. When contacting Amana, provide model, manufacturing, and serial numbers and
date of purchase. Locate model, manufacturing, and serial numbers on the nameplate. Warranty
service must be performed by an authorized servicer. Amana also recommends contacting an
authorized servicer if service is required after warranty expires.
•
Amana Factory Service Center Arizona
Also dispatches service in areas of Nevada
•
Amana Factory Service Center Northern California
•
Amana Factory Service Center Southern California
•
Amana Factory Service Center Colorado
Also dispatches service in areas of Utah
•
Amana Factory Service Center Florida
•
Amana Factory Service Center Georgia
Also dispatches service in areas of Alabama, North Carolina,
South Carolina and Tennessee
•
Amana Factory Service Center Iowa
Also dispatches service in areas of Kansas, Minnesota,
Missouri and Wisconsin
•
Amana Factory Service Center Illinois
Also dispatches service in areas of Indiana and Kentucky
•
Amana Factory Service Center Massachusetts
Also dispatches service in areas of New Hampshire and Rhode Island
•
Amana Factory Service Center Maryland
Also dispatches service in areas of Pennsylvania, Virginia and
Washington D.C.
•
Amana Factory Service Center New York
Also dispatches service in areas of Conneticut and New Jersey
•
Amana Factory Service Center Ohio
Also dispatches service in areas of Michigan and Pennsylvania
•
Amana Factory Service Center Texas
•
Amana Factory Service Center Washington
Also dispatches service in areas of Oregon
Asure Extended Service Plan
Amana is pleased to offer long-term service protection on this new microwave oven. Asure Extended
Service Plan is specially designed to supplement Amana's strong warranty. Asure provides budgetprotecting coverage on microwave for up to five full years and includes parts, labor and travel
charges. A participating Amana dealer has details.
Part No. B8383298
Printed in U.S.A.
60
1994 Amana Refrigeration, Inc.
Amana, Iowa 52204