1
Acano X Series Server and Virtualized Deployments
How can I back up the Acano solution configuration automatically?
We do not support any file share protocols; therefore, you must set up automatic backup
externally. This FAQ provides one example of how to do this in the following releases 1.1, 1.2
and 1.6.x where x≥7.
Requirements
A laptop, desktop PC or a VM with low resources e.g. 2 cores, 2Gb RAM and enough storage: a
demo server with over 2,000 coSpaces and over 3,000 users on it creates backups that are
approximately 4Mb each.
A login account that is used frequently so that the password is updated regularly; then expired
passwords will not cause backup failures.
Steps
1. Download Linux Distro of your choice, we prefer Ubuntu Server which can be downloaded
from: http://www.ubuntu.com/download/server.
2. Install with default settings; when asked for Extra Items, select OpenSSH Server so that
remote login is possible via SSH immediately after install.
3. Install OpenSSH if it is not installed on OS Install (using sudo apt-get install
openssh-server)
4. Perform Ubuntu updates as required using sudo apt-get update, sudo apt-get
upgrade and sudo apt-get dist-upgrade.
5. Create an SSH Key with ssh-keygen -t rsa and press Enter when asked for the Name
and Passphrase (so that the command uses the default name and no passphrase).
6. Use SCP (such as WinSCP) to connect and copy the newly created SSH Key from the
server (from the /home/useraccount/.ssh folder).
7. Rename the locally saved SSH Key to <configbackup>.pub (where configbackup is the login
name created below).
8. Create a user account on the Acano server using the MMP command user add
configbackup admin and enter a password for this account twice.
9. Use SFTP to connect to the Acano server and copy the <configbackup>.pub SSH Key to the
Acano server.
10. Log in to the Acano server from the Ubuntu PC using SSH and accept the SSH key (i.e. use
ssh <loginaccount>@<acanoserver.ip address> and press Y to accept the SSH
key when prompted).
11. Verify that the login above was successful without needing to enter password (because the
SSH Key should have allowed login after pressing Y).
12. Write a backup script and copy the script to your home folder or preferred location. Edit it as
needed for your directory path and server details.
13. Add a cron job to execute the script at an appropriate interval (using crontab –e)
14. Manually execute the script to test that it works from within the directory that the script is
located in (using ./ServerBackup.sh assuming that the script name is ServerBackup.sh)
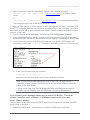
Below is an example script and cron job.
Example script
Acano Solution R1.6: Support FAQs 76-1022-08-K
Page 13