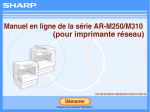
1
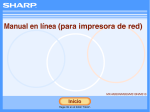
AR-M230/M270 Series Online Manual
(for network printer)
Start
Click this "Start" button.
Introduction
This manual describes the printer function of the AR-M230/M270 series digital multifunctional system.
●
Note
For information on loading paper, replacing toner cartridges, clearing paper misfeeds, handling peripheral devices, and other
copier-related information, please refer to your operation manual for copier.
● The machine's default settings and default settings for the printer function can be changed using the key operator programs. For
more information, see the key operator's guide.
● Where "AR-XXXX" appears in this manual, please substitute the name of your model for "XXXX". For the name of your model,
see "PART NAMES AND FUNCTIONS" in the operation manual for copier.
● This manual refers to the Reversing single pass feeder as the "RSPF".
● The explanations of screens and procedures in this manual are primarily for Windows® XP in Windows® environments, and Mac
OS X v10.2 in Macintosh environments. The screens may vary in other versions of the operating systems.
● For information on using your operating system, refer to your operating system's manual or online Help.
● The PS3 expansion kit (AR-PK1) and print server card (AR-NC5J) mentioned in this manual are options.
Trademark Acknowledgments
Microsoft® Windows® operating system is a trademark or copyright of Microsoft Corporation in the U.S.A. and other countries.
● Windows® 95, Windows® 98, Windows® Me, Windows NT® 4.0, Windows® 2000, and Windows® XP are trademarks or copyrights
of Microsoft Corporation in the U.S.A. and other countries.
● Acrobat® Reader Copyright© 1987- 2002 Adobe Systems Incorporated. All rights reserved. Adobe, the Adobe logo, Acrobat, and
the Acrobat logo are trademarks of Adobe Systems Incorporated.
● Macintosh, Mac OS, AppleTalk, EtherTalk, LaserWriter, and TrueType are trademarks of Apple Computer, Inc.
● PCL is a trademark of the Hewlett-Packard Company.
● PostScript® is a registered trademark of Adobe Systems Incorporated.
● All other trademarks and copyrights are the property of their respective owners.
●
The display screens, messages, and key names shown in the manual may differ from those on the actual machine due to product
improvements and modifications.
CONTENTS
I N D E X
2
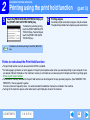
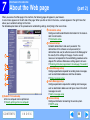
How to use the online manual
This section explains how to view the online manual. Please read this section before using the online manual.
For information on using Acrobat Reader, see Acrobat Reader Help.
How to Control the Online Manual
Following Links
In this manual, the following buttons are displayed at the
bottom of each page. Click these buttons to move quickly to
pages that you wish to view.
This manual uses a link function that allows you to jump to a
related page. If you click green, underlined text, the related
page will be displayed. (In the Contents and Index sections, the
linked areas are not underlined.)
Example: ☞Contents
To return to the previous page, click the button on the menu
bar of Acrobat Reader.
CONTENTS
Displays the Contents of this manual. Click on a topic in the
Contents to jump directly to that section.
Using Bookmarks
Bookmarks have been created on the left side of this manual.
You can click on a bookmark to jump directly to that section.
I N D E X
Displays the Index of this manual. Click on a topic in the Index
to jump directly to that section.
How to Print Out This Manual
To print this manual, select "Print" from the "File" menu of
Acrobat Reader. Select the desired printer settings in the "Print"
dialog box, and then click the "OK" button.
Takes you forward page by page.
Takes you back page by page.
CONTENTS
I N D E X
3
Contents
Introduction
How to use the online manual
(part 1)
2
3
2 ADVANCED PRINTING (WINDOWS)
Print hold function
Printing using the print hold function
1 PRINTING FROM WINDOWS
Basic printing
When "Paper Selection" is set to "Auto Select"
When the "Paper Selection" setting is "Paper Source" or "Paper Type"
● Auditing mode
● About the "No Offset" function setting
●
Opening the printer driver from the "start" button
Printer driver settings
Two-sided printing
●
Pamphlet style
How to Print a Watermark
●
10
11
12
14
15
16
17
17
Stapling printed pages (when a finisher is installed)
●
7
8
9
9
13
Printing multiple pages on one page
Fitting the printed image to the paper
Rotating the print image 180 degrees
Printing a watermark
●
●
6
●
When a finisher is installed
When a saddle stitch finisher is installed
20
21
18
18
19
Selecting print hold settings in the printer driver at the time of printing
How to print a print hold job
● Points to note about the Print Hold function
●
Carbon copy print
Printing using carbon copy print
Printing text and lines in black
●
●
21
22
23
24
25
26
Printing text in black
Printing lines in black
26
26
3 PRINTER UTILITIES (WINDOWS)
Printer utilities
●
27
Before using the Printer Status Monitor
27
Using the printer utilities
28
●
Starting up the printer utilities
Using the printer utilities
● Changing the Printer Status Monitor settings
● Checking the printer status
28
28
29
30
●
4 PRINTING FROM MACINTOSH
Basic printing
●
●
31
When "Paper Feed" is set to "Auto Select"
When "Paper Feed" is set to paper tray or paper type
33
34
Job control function (Mac OS 8.6 to 9.x and Max OS X v10.2) 35
●
●
CONTENTS
I N D E X
Printing when auditing mode is enabled
Using the print hold function
35
35
4
Contents
(part 2)
Giving priority to a print job / Canceling a print job
●
●
Giving priority to a print job
Canceling a print job
36
36
37
Configuring the printer condition settings
●
How to configure the settings
● Printer condition setting menu
● Printer condition settings
Printing the printer setting and font lists
The printed image is distorted
● Part of the printed image is missing
If a notice page is printed
● Disabling notice page printing
Removing the software
38
38
40
41
46
●
●
I N D E X
58
58
About the Web page
59
Accessing the Web page
59
E-mail print function
6 TROUBLESHOOTING
CONTENTS
Windows
Macintosh (Mac OS 8.6 to 9.x)
7 WEB PAGE IN THE MACHINE
●
Troubleshooting
Printing does not take place
● Check the connections
● Check Your Computer
● Check the machine
● Checking the printer driver
Improper printing operation
● Printing is slow
● Two-sided printing is not possible
● Stapling is not possible (when a finisher or a saddle stitch finisher is installed)
● Punching is not possible (when a saddle stitch finisher is installed)
Print quality is not satisfactory
● Check the paper being used
● The printed image is coarse
55
55
56
57
58
●
5 OPERATION AT THE MACHINE
●
47
48
48
49
50
51
52
52
52
52
53
54
54
55
61
Setting up the E-mail print function
Using the E-mail print function
61
62
Directly printing a file in a computer
E-mail status and e-mail alert settings
63
64
●
●
Information setup
SMTP setup
● Status message setup
● Alerts message setup
64
64
65
66
●
Protecting information programmed in the web page ("Passwords")
67
8 SPECIFICATIONS
Printer specifications
68
9 INDEX
5
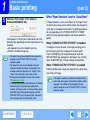
PRINTING FROM WINDOWS
1
Basic printing
(part 1)
The following example explains how to print a document from WordPad.
Before printing, make sure that the correct size of paper for your document has been loaded in the machine.
1
Make sure that the ON LINE indicator on the
operation panel is lit.
COPY
PRINT
ON LINE
DATA
SCAN
DATA
If the ON LINE indicator is not
on, press the [PRINT] key to
switch to printer mode and then
touch the [ONLINE] key.
The status of the printer function is indicated by the ON
LINE and DATA indicators next to the [PRINT] key.
ON LINE indicator
DATA indicator
Lit
The machine is online
and ready to print.
There is print data in
memory that has not
been printed yet.
Blinking
—
Off
2
Select "Print" from the application's "File"
menu.
The "Print" dialog box will appear.
4
Make sure that "SHARP AR-XXXX" is selected
as the printer. If you need to change any print
settings, click the "Preferences" button
("Properties" button in Windows 95/98/Me/NT
4.0) to open the printer driver setup screen.
The printer driver setup screen will appear.
The machine is
printing.
The machine is offline The machine is not
and not ready to print. printing.
Start WordPad and open the document that you
wish to print.
CONTENTS
3
I N D E X
Windows 2000 does not have the "Preferences" button
in this dialog box. Select settings as needed on each of
the tabs in the setup screen.
☞Printer driver settings,Two-sided printing,
Printing multiple pages on one page,
Fitting the printed image to the paper,
Rotating the print image 180 degrees,
Printing a watermark,
Stapling printed pages (when a finisher is installed)
6
PRINTING FROM WINDOWS
1
5
Basic printing
Click the "Print" button ("OK" button in
Windows 95/98/Me/NT 4.0).
Printing begins. The print job is delivered to one of the
following trays (depending on which output devices are
installed):
● Job separator tray kit is installed: Upper tray
● Finisher is installed: Center tray
●
Note
The output tray can be selected in the key operator
programs (see "OUTPUT TRAYS" in the key
operator's guide).
● The output tray can also be selected in the print
settings at the time of printing. To change the tray
selection, select the desired tray in "Output" in the
"Paper" tab of the printer driver setup screen.
● Printing can be canceled in the job status screen.
☞Canceling a print job
● If the paper type setting in the printer driver is different
from the bypass tray's paper type setting in the
machine, printing may stop. To resume printing, press
the [PRINT] key on the operation panel, touch the
[BYPASS TRAY] key in the touch panel, and specify
the same paper type as in the printer driver.
CONTENTS
I N D E X
(part 2)
When "Paper Selection" is set to "Auto Select"
If "Paper Selection" is set to "Auto Select" in the "Paper" tab of
the printer driver setup screen and the correct size of paper for
a print job is not loaded in the machine, the printing procedure
will vary depending on the "FORCED OUTPUT OF PRINT"
setting in the key operator programs (see the key operator's
guide).
When "FORCED OUTPUT OF PRINT" is disabled
If the bypass tray can be used, a message prompting you to
print from the bypass tray will appear in the touch panel.
Press the [PRINT] key on the operation panel, touch the
[BYPASS TRAY] key, load paper in the bypass tray, and then
touch the [BYPASS] key. Printing will begin automatically.
When "FORCED OUTPUT OF PRINT" is enabled
Printing will take place using a size of paper that is close to the
size of the print image.
Note
If the paper is loaded in a different orientation than the
print image, the image is automatically rotated to match
the paper. This setting can be changed in the key
operator programs (see "ROTATED PRINT" in the key
operator's guide).
7
1
PRINTING FROM WINDOWS
Basic printing
(part 3)
When the "Paper Selection" setting is "Paper Source" or "Paper Type"
When "Paper Selection" in the "Paper" tab of the printer driver
setup screen is set to:
● "Paper Source", select the tray that you wish to use for
printing from the pull-down menu.
● "Paper Type", select the type of paper that you wish to use
for printing from the pull-down menu.
If you selected the "Paper Source" or "Paper Type" in the
printer driver setup screen but there is no paper in the trays that
matches your selection, printing will take place as follows:
You selected a tray in "Paper Source", but the size
of the paper in the selected tray does not match
the printing size.
Even though the paper size is different, printing will take place
using the paper in the selected tray.
You selected a "Paper Type", and although the
selected type of paper is loaded in the machine, its
size does not match the printing size.
Note
"Paper Source" and "Paper Type" cannot be
simultaneously selected.
The size and type of paper loaded in each tray and whether or
not the paper loaded in each tray can be used for printing are
specified in the "TRAY SETTINGS" of the custom settings.
(See "CUSTOM SETTINGS" in the operation manual for
copier.)
If you wish to select the "Paper Source" or "Paper Type" when
printing, be sure to select these settings in the "Configuration"
tab of the printer driver setup screen. (See "CONFIGURING
THE PRINTER DRIVER" in the software setup guide.)
CONTENTS
I N D E X
Even though the paper size is different, printing will take place
using the selected paper type.
However, if "FORCED OUTPUT OF PRINT" is disabled,
printing will not take place.
You selected a "Paper Type", but the selected type
of paper is not loaded in the machine.
If the bypass tray can be used, a message prompting you to
print from the bypass tray will appear. Press the [PRINT] key on
the operation panel, touch the [BYPASS TRAY] key, load the
correct size and type of paper in the bypass tray, and then
touch the [BYPASS] key. Printing will begin automatically.
8
1
PRINTING FROM WINDOWS
Basic printing
(part 4)
Auditing mode
When "AUDITING MODE" is enabled in the key operator
programs, a 5-digit account number must be entered in the
printer driver setup screen in order to print. Account numbers
are stored in the key operator programs. (See "ACCOUNT
CONTROL" in the key operator's guide.)
To open the account number entry screen, click the "Job
Control" button in the "Main" tab of the printer driver.
Enter your 5-digit account number in "Account Number" and
click the "OK" button.
Note
To have the job control screen automatically appear
each time you open the printer driver to print, select the
"Auto Job Control review" checkbox in the "Main" tab of
the printer driver setup screen.
●
Caution
If "CANCEL JOBS OF INVALID ACCOUNTS" is
enabled in the key operator programs and printing is
attempted without entering an account number, or an
invalid account number is entered, printing will not take
place. To allow printing without the entry of a valid
account number, disable "CANCEL JOBS OF
INVALID ACCOUNTS". In this case, the number of
pages printed is added to the [OTHERS] count.
● If the machine's PPD file is used with the Windows
standard PS printer driver, auditing mode will be
disabled and print counts will not be kept for each
account.
About the "No Offset" function setting
If the "No Offset" checkbox is selected in the "Main" tab of the printer driver setup screen, offset output will be prohibited regardless
of the setting of "OFFSET FUNCTION SETTING" in the key operator programs.
When stapling is performed (a setting other than "None" is selected in "Staple" in the "Main" tab), "No Offset" is automatically enabled
and the offset function cannot be used.
CONTENTS
I N D E X
9
1
PRINTING FROM WINDOWS
Opening the printer driver from the "start" button
Printer driver settings can be configured by opening the printer driver from the Windows "start" button. Settings adjusted in this way
will be the initial settings when you print from an application. (If you change the settings in the printer driver setup screen at the time
of printing, the settings will revert to the initial settings when you quit the application.)
Windows 2000/XP
1
Windows 95/98/Me/NT 4.0
Click the "start" button, and then click "Control
Panel".
In Windows 2000, click the "Start" button and select
"Settings".
2
1
Click the "Start" button, select "Settings" and
then click "Printers".
2
Click the "SHARP AR-XXXX" printer driver icon
and select "Properties" from the "File" menu.
Click "Printers and Other Hardware", and then
click "Printers and Faxes".
In Windows 2000, click "Printers".
3
Click the "SHARP AR-XXXX" printer driver icon
and select "Properties" from the "File" menu.
Note
3
4
Click the "Printing Preferences" button in the
"General" tab.
The printer driver setup screen will appear.
☞Printer driver settings
CONTENTS
I N D E X
In Windows NT 4.0, select "Document Defaults" to open
the printer driver setup screen.
In Windows 95/98/Me, click the "Setup" tab.
The printer driver setup screen will appear.
☞Printer driver settings
10
1
PRINTING FROM WINDOWS
Printer driver settings
To view Help for a setting, click the
button in the upper right-hand corner of the window and then click the setting.
Some restrictions exist on the combinations of settings that can be selected in the printer driver setup screen. When a restriction is
in effect, an information icon (
) will appear next to the setting. Click the icon to view an explanation of the restriction.
1 Tab
6 Checkbox
The settings are grouped
Click on a checkbox to
activate or deactivate a
on tabs. Click on a tab to
1
function.
bring it to the front.
7 "OK" button
2
2 Check button
Click this button to save
Allows you to select one
3
your settings and exit the
item from a list of options.
dialog box.
3 Print setting image
8 "Cancel" button
This shows the effect of the
Click this button to exit the
selected print settings.
dialog box without making
4 Drop-down list
4
any changes to the
Allows you to make a
settings.
5
selection from a list of
9 "Apply" button
choices.
Click to save your settings
5 Machine image
without closing the dialog box.
This shows:
● Windows NT 4.0 does not
6
● The paper tray (in blue)
have the "Apply" button.
7
selected in "Paper selection"
● The "Apply" button does
8
on the "Paper" tab.
not appear when you
● The output tray (in green)
9
open this window from an
selected
in
"Output"
on
the
application.
10
"Paper" tab.
10 "Help" button
You can also click on a tray
The settings and the image of the machine will vary
Click this button to display
Note
to select it.
depending on the model.
the help file for the printer
driver.
CONTENTS
I N D E X
11
1
PRINTING FROM WINDOWS
Two-sided printing
(part 1)
This feature allows you to print on both sides of the paper.
To use this function, open the printer driver setup screen and select "2-Sided (Book)" or
"2-Sided (Tablet)" from "Document Style" in the "Main" tab.
☞See Basic printing for details on how to open the printer driver.
●
Note
Paper sizes that can be used for two-sided printing are Ledger, Letter, Letter-R, Legal, A3, A4, A4R, A5, B4, B5, B5R, and
Foolscap.
● Paper types that can be used for two-sided printing are Plain, Letter Head*, Recycled and Color.
* The use of Letter Head paper for two-sided printing can be prohibited in the "TRAY SETTINGS" of the custom settings. (See
"CUSTOM SETTINGS" in the operation manual for copier.)
● Two-sided printing is not possible if disabled in the key operator programs (see "DISABLING OF DUPLEX" in the key operator's guide).
The following example shows the result when portrait data is printed on both sides of the paper.
Print data
Printing result
2-Sided (Book)
2-Sided (Tablet)
The pages are printed so that The pages are printed so that
they can be bound at the side. they can be bound at the top.
CONTENTS
I N D E X
12
1
PRINTING FROM WINDOWS
Two-sided printing
(part 2)
Pamphlet style
Pamphlet style prints two pages each on the front and back of each sheet of paper (four pages total on
one sheet) so that the sheets can be folded down the center and bound to create a pamphlet. This
function is convenient when you wish to compile printed pages into a pamphlet.
To use this function, open the printer driver and select "Tiled Pamphlet" or "2-Up Pamphlet" in
"Document Style" in the "Main" tab.
The binding edge (left side or right side) can be selected in the "Binding Edge" in the "Main" tab. The
following examples show how 8 pages are printed when pamphlet style is selected.
Printing result
Print data
Left
Right
●
Note
Because four pages are printed on each sheet of paper, blank pages are automatically added at the end when the total number
of pages is not a multiple of four.
● When "Tiled Pamphlet" is selected, printing will take place on paper that is twice the size of the paper size specified in the
application.
● When "2-Up Pamphlet" is selected, each page is reduced in the same way as for 2-Up and printed on the size of paper that is
specified in the application.
● When a saddle stitch finisher is installed and "2 Staples" in "Staple" in the "Main" tab is selected, the output is stapled and folded at
the center to form a pamphlet.
● The saddle stitch tray can hold up to 20 sets when the number of sheets is 1 to 5, or 10 sets when the number of sheets is 6 to 10.
● Paper sizes that can be used for saddle stitching are Ledger, Letter-R, A3, A4R, B4, 8K, and 16KR.
CONTENTS
I N D E X
13
1
PRINTING FROM WINDOWS
Printing multiple pages on one page
This feature allows you to reduce and print two, four, six, eight or sixteen document pages on a single sheet of paper.
To use this function, open the printer driver setup screen and select the number of pages per sheet (2-Up, 4-Up, 6-Up, 8-Up, or
16-Up) in "N-Up Printing" in the "Main" tab.
The order of the pages can be changed in the "Order" menu.
☞See Basic printing for details on how to open the printer driver.
Note
The "N-Up Printing" setting is not available when "Fit To Paper Size" is selected.
☞Fitting the printed image to the paper
For example, when "2-Up" or "4-Up" is selected, the result will be as follows depending on the selected order.
N-Up
Left to Right
Right to Left
[2-Up]
N-Up
Right , and Down Down , and Right
Left , and Down
Down , and Left
[4-Up]
If you select the "Border" checkbox, borderlines will be printed around each page.
Note
Examples for 2-Up and 4-Up are shown here. The order of 6-Up, 8-Up, and 16-Up is the same as 4-Up. The order can be viewed
in the print setting image in the printer driver setup screen.
☞Printer driver settings
CONTENTS
I N D E X
14
PRINTING FROM WINDOWS
1
Fitting the printed image to the paper
The printer driver can adjust the size of the printed image to match the size of the paper loaded in the machine.
Follow the steps shown below to use this function. The explanation below assumes that you intend to print a Ledger size document
on letter size paper.
☞See Basic printing for details on how to open the printer driver.
Note
1
The "Fit To Paper Size" setting is not available when "N-Up Printing" is selected.
☞Printing multiple pages on one page
Click the "Paper" tab in the printer driver setup
screen.
2
Select the original size (Ledger) of the print
image in "Paper Size".
3
Check the "Fit To Page" box.
4
Select the actual size of paper to be used for
printing (Letter).
The size of the printed image will be automatically
adjusted to match the paper loaded in the machine.
Paper Size: Ledger
Fit To Paper Size: Letter
When using the PS printer driver, select "Fit To Paper
Size" in "Zoom Setting".
Ledger size document
(Paper Size)
Note
CONTENTS
I N D E X
Letter size paper
(Fit To Paper Size)
When using the PS printer driver, the print image can be
enlarged or reduced by means of numerical values. (The
vertical and horizontal ratios can be set separately.)
Select "XY-Zoom" in step 3, click the "Width/Length"
button, and adjust the ratios in the screen that appears.
15
1
PRINTING FROM WINDOWS
Rotating the print image 180 degrees
The print image can be rotated 180 degrees.
This feature is used to enable correct printing on envelopes and other paper with flaps that can
only be loaded in one orientation.
Use this feature when automatic rotation (which takes place when the loaded paper is the same
size as the print image and the orientations are different) results in reversal of the top and bottom
of the image.
To use the feature, select the image orientation in "Image Orientation" on the "Paper" tab, and
then select the "Rotate 180 degrees" checkbox.
☞See Basic printing for details on how to open the printer driver.
Printing result
Rotate 180 degrees
ABCD
Note
Rotate 180 degrees
ABCD
The procedure for loading paper is explained in operation manual for copier.
CONTENTS
I N D E X
16
1
PRINTING FROM WINDOWS
Printing a watermark
You can print a watermark such as "CONFIDENTIAL" on your document. To print a watermark, open the printer driver, click the
"Watermarks" tab, and follow the steps below.
☞See Basic printing for details on how to open the printer driver.
How to Print a Watermark
From the "Watermark" drop-down list, select the watermark that you wish to print (for example "CONFIDENTIAL"), and start printing.
Print sample
You can enter text to create your own custom watermark. For details on watermark settings, view printer driver Help.
☞Printer driver settings
CONTENTS
I N D E X
17
1
PRINTING FROM WINDOWS
Stapling printed pages (when a finisher is installed)
(part 1)
When a finisher is installed, printed pages can be stapled.
To use this feature, open the printer driver setup screen and select it in the "Finishing"
field of the "Main" tab.
☞See Basic printing for details on how to open the printer driver.
●
Note
The maximum number of sheets that can be stapled is 30. When a saddle stitch finisher is installed, up to 50 sheets can be stapled
(up to 25 sheets when the paper size is B4, Foolscap, or larger).
● Paper sizes that can be used for staple printing are Ledger, Letter, Letter-R, Legal, A3, A4, A4R, B4, B5, B5R, and Foolscap. (B5R
can only be used when a saddle stitch finisher is installed.)
● Paper types that can be used for staple printing are Plain, Letter Head, Recycled and Color.
● Staple printing is not possible when the ROPM function is disabled. (See "CONFIGURING THE PRINTER DRIVER" in the software setup guide.)
● If the finisher is disabled in the key operator programs, the staple and punch functions cannot be used and output cannot be
delivered to the offset tray.
● Stapling is not possible if disabled in the key operator programs (see "DISABLING OF STAPLER" in the key operator's guide).
● The staple function cannot be used in combination with the "No offset" function.
When a finisher is installed
The following example shows how portrait oriented pages are stapled together.
Print data
Printing result
The pages are stapled in the upper left-hand corner.
CONTENTS
I N D E X
18
1
PRINTING FROM WINDOWS
Stapling printed pages (when a finisher is installed)
(part 2)
When a saddle stitch finisher is installed
When a saddle stitch finisher is installed, the binding edge and number of staples can be selected to produce the following printing results:
Staple
Left
Right
Top
1 Staple
2 Staples
Punch function
When a punch module is installed on a saddle stitch finisher,
the "Punch" checkbox can be selected to punch holes in the
printed output.
Select the punch hole positions in "Binding Edge".
Left
Right
Top
●
Note
The number of holes that can be punched and the spacing between the holes varies depending on the installed punch module.
Paper sizes that can be punched vary depending on the punch module installed.
● Paper types that can be punched are Plain, Recycled, Color, Letter Head, and Heavy paper.
●
CONTENTS
I N D E X
19
2
ADVANCED PRINTING (WINDOWS)
Print hold function
A print job sent to the machine can be held in the machine's memory until the operator initiates printing from the operation panel of
the machine. This is called the Print Hold function.
There are four methods for holding print jobs with the Print Hold function.
Hold After Print
Hold Before Print
When this method is selected, the print job is printed and then
retained in the machine's print hold job list. The job can be printed
again as needed from the operation panel of the machine.
When this method is used, the print job is held in the machine's print hold
job list without being printed. The operator can initiate printing from the
operation panel of the machine as needed. This helps prevent print jobs
from being misplaced.
Proof Print
PIN (5-digit ID number)
When this method is selected, one set of copies is printed and then
the job is held in the machine's print hold job list.
The operator can check the copies to make sure that the image
position, stapling position, and other aspects of the job are
satisfactory, and then initiate printing of all sets from the operation
panel of the machine. (The initial proof set is included in the total
number of copies.)
If the proof copies are not satisfactory, the job can be canceled.
This prevents excessive misprints when printing a large number of
copies.
A PIN number can be set that must be entered at the machine's operation
panel in order to print a "Hold After Print", "Hold Before Print", or "Proof
Print" job. (☞Printing using the print hold function)
This helps maintain confidentiality when printing sensitive documents.
When a PIN number is set for "Hold After Print":
The PIN number must be entered at the operation panel to print the job
again after the initial printing.
When a PIN number is set for "Hold Before Print":
The PIN number must be entered at the operation panel to print the job.
When a PIN number is set for "Proof Print":
Following the initial printing of one set of proof copies, the PIN number must
be entered at the operation panel to print the remaining sets of copies.
●
Note
The machine can hold a maximum of 100 print hold jobs. If 100 jobs are exceeded or the memory that can be used for print hold
becomes full, no more print hold jobs will be accepted, an error will appear in the touch panel, or a Notice Page will be printed.
● Memory allocated to the print hold function can be changed in the key operator programs. (See "MEMORY FOR PRINTER" in the
key operator's guide.)
CONTENTS
I N D E X
20
2
ADVANCED PRINTING (WINDOWS)
Printing using the print hold function
(part 1)
Selecting print hold settings in the printer driver at the time of printing
Select the Print Hold function in the job control screen (see below), which is opened by clicking the
"Job Control" button in the "Main" tab of the printer driver setup screen.
☞Basic printing
2 "Notify Job End" checkbox
1
2
3
1 "Retention" menu
Select the Print Hold method that you wish to use. After
selecting "Hold After Print", "Hold Before Print", or "Proof
Print", a PIN number can be set if desired. To set a PIN
number, enter a 5-digit number in "PIN".
☞Print hold function
CONTENTS
I N D E X
Select this checkbox if you wish to be notified when printing
is finished.
This function can only be used when the Printer Status
Monitor is running. If the Printer Status Monitor is not
running, selecting the checkbox will have no effect.
3 "Default Job ID" menu
Enter a default user name and job name. These names
appear in the operation panel of the machine.
The user name can be up to 16 characters long and the job
name can be up to 30 characters long.
To always use the entered names, select "Always Use This
User Name" and "Always Use This Job Name". If "Always
Use This User Name" is not selected, your Windows login
name will automatically be used. If "Always Use This Job
Name" is not selected, the file name used in the application
will automatically be used.
When you have completed the above settings, click the
"OK" button to close the window and begin printing.
To print the job from the operation panel of the machine, see
"How to print a print hold job".
21
2
ADVANCED PRINTING (WINDOWS)
Printing using the print hold function
(part 2)
How to print a print hold job
When you print a job using the Print Hold function, the job is stored in the print hold job list in the initial screen of printer mode. Follow
the steps below to print the print hold job.
1
Press the [PRINT] key to switch to the initial
screen of printer mode.
3
If you set a PIN number in the printer driver,
press the numeric keys to enter the 5-digit
number.
COPY
ON LINE
DATA
PRINT
SCAN
LIST
ENTER PIN VIA THE 10-KEY.
DATA
CANCEL
cost.xls
2
Select the job that you wish to print.
PRINT HOLD JOB LIST
SHARP001
Microsoft Word -
SHARP002
Microsoft PowerP
SHARP003
product_infomati
SHARP004
cost.xls
CONTENTS
You can touch the
or
key to change screens.
4
Make sure that the desired number of copies is
set.
NUMBER OF PRINTS
I N D E X
The PIN number must be
entered to print the job. (If you
did not set a PIN number, this
step is not necessary.)
As you enter each digit, "-"
changes to " ".
To change the number of
copies, touch the
or
key.
22
ADVANCED PRINTING (WINDOWS)
2
5
Printing using the print hold function
Touch the [PRINT AND DELETE THE DATA] key or
the [PRINT AND SAVE THE DATA] key.
product_information.pdf
CANCEL
PRINT AND DELETE THE DATA
PRINT AND SAVE THE DATA
Note
DELETE
To delete the job after printing,
touch the [PRINT AND DELETE
THE DATA] key. To retain the job,
touch the [PRINT AND SAVE
THE DATA] key.
6
(part 3)
Printing begins.
If another print job is already in progress, the job is stored.
The job will be printed when all previous jobs are finished.
To delete a job without printing it, touch the [DELETE]
key.
Points to note about the Print Hold function
The print hold function can only be used when ROPM is enabled.
If a Notice page is printed or an error appears in the print job complete screen when you execute printing at your computer, there
are already 100 print hold jobs or the machine's memory is full. Delete any unnecessary print hold jobs and then try printing again.
☞How to print a print hold job
● The amount of memory allocated to the print hold function can be changed in the key operator programs. (See "MEMORY FOR
PRINTER" in the key operator's guide.)
If memory full errors frequently occur, it is recommended that additional memory be installed in the machine.
● Turning off the machine's power switch will erase the print hold jobs stored in the machine.
●
●
CONTENTS
I N D E X
23
2
ADVANCED PRINTING (WINDOWS)
Carbon copy print
Carbon copy print is used to print copies of the same page on different types of paper. Each paper type is loaded in a different tray,
and the different paper types must all be the same size.
For example, carbon copy print can be performed with standard paper in tray 1 and colored paper in tray 2 for output as an invoice
original and copy. As another example, standard paper can be loaded in tray 1 and recycled paper can be loaded in tray 2 to create
an original for presentation and a copy to be retained.
When carbon copy print is used to print a two-page job with two copies per page, "Collate" can be selected in the "Main" tab to
obtain the following print results.
Printing result (when number of copies is "2")
Print data
Collate
Collate
1
1
2
2
3
3
4
4
5
5
6
7
6
7
8
8
9
9
10
10
11
11
12
12
Load different types of the same size of paper in trays 1, 2, and
3, and specify tray 1 as the "Top Copy" and trays 2 and 3 as the
carbon copy trays.
☞Printing using carbon copy print
CONTENTS
I N D E X
The copies are collated.
The copies are grouped by page.
24
2
ADVANCED PRINTING (WINDOWS)
Printing using carbon copy print
To use the carbon copy print function, select the "Carbon Copy" checkbox in the "Paper" tab of the
printer driver setup screen, and then click the "Carbon Copy Settings" button to configure print
settings.
1 "Top Copy" menu
Select the tray that will be used for the original.
2 "Carbon Copy" menu
Select the tray or trays that will be used for the carbon
copies.
Be sure to select only trays that have the same size of paper
as the "Top Copy".
1
2
●
Note
The tray selected as the "Top Copy" cannot be
selected.
● If a tray with a size of paper different from the "Top
Copy" is selected, the paper in that tray will not be used.
When you have completed the above settings, click the "OK" button to close the window and then execute printing.
●
Note
●
Carbon copy print is not possible when two-sided printing, pamphlet style, or staple printing is selected.
The bypass tray cannot be used for carbon copy printing.
CONTENTS
I N D E X
25
ADVANCED PRINTING (WINDOWS)
2
Printing text and lines in black
Color text and lines that are faint when printed normally can be printed in black to improve legibility.
Printing text in black
Printing lines in black
Text that is any color other than white is printed in black.
To use this function, open the printer driver setup screen and
select the "Text To Black" checkbox in the "Advanced" tab.
Lines and solids that are any color other than white are printed
in black.
To use this function, open the printer driver setup screen and
select the "Vector To Black" checkbox in the "Advanced" tab.
Print data
ABCD
EFGH
Printing result
Text To Black
Text To Black
ABCD
EFGH
Print data
Printing result
Vector To Black
Vector To Black
ABCD
EFGH
●
Note
When using the PCL6 printer driver, if "Print as
graphics" is selected in "TrueType Mode" of "Font" in
the "Advanced" tab, this function cannot be used.
● When using the PCL5e printer driver, if "Raster" is
selected in "Graphics mode" in the "Advanced" tab,
this function cannot be used.
CONTENTS
I N D E X
Note
When using the PCL6 or PCL5e printer driver, if "Raster"
is selected in "Graphics mode" in the "Advanced" tab,
this function cannot be used.
26
3
PRINTER UTILITIES (WINDOWS)
Printer utilities
The "Software" CD-ROM contains the following two printer
utilities.
Printer Status Monitor (for general users)
Before using the Printer Status Monitor
Note the following points before using the Printer Status
Monitor.
This allows the user to check on the computer screen whether
or not the machine is able to print.
It provides information on error states such as paper misfeeds
and shows the configuration of the machine (number of trays,
whether or not there is a finisher, etc.) by means of illustrations.
Available paper sizes and paper remaining are also indicated.
Printing via a server
Printer Administration Utility (for administrators)
Install and configure the software as explained in "USING THE
MACHINE AS A NETWORK PRINTER" in the software setup
guide for network printer. (This is not necessary if the software
has already been installed and configured.)
This allows the administrator to check information on supplies
and error states of the machine and other SHARP printers
(compatible with the Printer Administration Utility) that are
connected to the network. Settings can also be changed via the
utility.
When the first print job is executed after starting up the Printer
Status Monitor, the machine's IP address is automatically set in
the Printer Status Monitor.
Direct printing without a server
●
Note
In order to use the Printer Status Monitor and Printer
Administration Utility, the machine must be connected
to a network.
● To install the Printer Status Monitor and Printer
Administration Utility, see software setup guide for
network printer.
● To use the Printer Administration Utility in Windows 95,
a system file must be updated. See the detailed
information in the select packages window of the
installer (see the software setup guide for network
printer).
CONTENTS
I N D E X
27
3
PRINTER UTILITIES (WINDOWS)
Using the printer utilities
(part 1)
Starting up the printer utilities
Using the printer utilities
If the Printer Status Monitor or Printer Administration Utility is
not running, use the following procedure to start the utilities.
For information on using the Printer Status Monitor and Printer
Administration Utility, see the Help files for each. The Help files
can be viewed as follows:
Note
When the Printer Administration Utility is first started up,
the TCP/IP settings window appears. To monitor the
machine on a local network, select the "Local Subnet
Search" checkbox. Otherwise, enter the machine's IP
address. For more information, see the Help file.
Printer Status Monitor
Click the "Start" button, point to "All Programs" ("Programs" in
operating systems other than Windows XP) and then "SHARP
Printer Status Monitor". Select "Help".
Printer Status Monitor
Printer Administration Utility
Click the "Start" button, point to "All Programs" ("Programs" in
operating systems other than Windows XP) and then "SHARP
Printer Status Monitor". Select "Printer Status Monitor".
Click the "Start" button, point to "All Programs" ("Programs" in
operating systems other than Windows XP) and then "SHARP
Printer Administration Utility". Select "Help".
Printer Administration Utility
Click the "Start" button, point to "All Programs" ("Programs" in
operating systems other than Windows XP) and then "SHARP
Printer Administration Utility". Select "Printer Administration
Utility".
CONTENTS
I N D E X
28
PRINTER UTILITIES (WINDOWS)
3
Using the printer utilities
(part 2)
Changing the Printer Status Monitor settings
Once installed, the Printer Status Monitor normally runs in the background in Windows. If you need to change the Printer Status
Monitor settings, follow the steps below.
1
Right-click the Printer Status Monitor icon ( )
on the task bar, and select "Preferences" from
the pop-up menu.
Note
2
Change the Printer Status Monitor settings as desired.
For information on the Printer Status Monitor settings,
see Printer Status Monitor Help. (Click the "Help" button
in the settings window.)
If the Printer Status Monitor icon does not appear on the
task bar, see "Starting up the printer utilities" to start the
Printer Status Monitor.
CONTENTS
I N D E X
29
PRINTER UTILITIES (WINDOWS)
3
Using the printer utilities
(part 3)
Checking the printer status
The Printer Status Monitor allows you to check whether or not toner and paper remain in the machine.
1
Right-click the Printer Status Monitor icon ( )
on the task bar, and select "SHARP AR-XXXX
Status" from the pop-up menu.
Note
2
The icon turns red when printing is not possible due to a
machine error or other problem.
Click the "Detail" button.
To collapse the window, click the "Hide detail" button.
The window expands to show machine status details.
Note
CONTENTS
I N D E X
By default, the collapsed window initially appears when
"SHARP AR-XXXX Status" is selected in Step 1. If
desired, you can change the setting to have the
expanded window initially appear.
☞Changing the Printer Status Monitor settings
30
PRINTING FROM MACINTOSH
4
Basic printing
(part 1)
To use the machine as a printer for the Macintosh, the print server card (AR-NC5J) and the PS3 expansion kit must be installed and
the machine must be connected to a network. To install the PPD file and configure the printer driver settings, see the software setup
guide for network printer.
Before printing, make sure that the correct size of paper for your document has been loaded in the machine.
1
Make sure that the ON LINE indicator on the
operation panel is lit.
COPY
PRINT
ON LINE
DATA
SCAN
DATA
If the ON LINE indicator is not
on, press the [PRINT] key to
switch to printer mode and then
touch the [ONLINE] key.
3
Select "Print" from the application's "File"
menu.
4
Make sure that the correct printer is selected.
The status of the printer function is indicated by the ON
LINE and DATA indicators next to the [PRINT] key.
ON LINE indicator
The machine is online
and ready to print.
Lit
Blinking
Off
2
DATA indicator
—
There is print data in
memory that has not
been printed yet.
The machine is
printing.
The machine is offline The machine is not
and not ready to print. printing.
Start the application and open the document
that you wish to print.
CONTENTS
I N D E X
●
Note
The machine name that appears in the "Printer:" menu
is the name that was entered when AppleTalk settings
were configured from the CD-ROM for the print server
card. Unless the name was changed when configuring
the settings, it will be "SCxxxxxx" (where "xxxxxx" is a
sequence of characters that varies depending on your
machine).
● The Print window varies depending on the operating
system version, the printer driver version, and the
application.
31
PRINTING FROM MACINTOSH
4
5
Basic printing
Configure print settings.
Click
next to "Copies &
Pages" ("General" in Mac OS
8.6 to 9) and select the settings
that you wish to configure from
the pull-down menu. The
corresponding setting screen
will appear.
Note
6
The settings vary depending on the operating system
version, the printer driver version, and the application.
Click the "Print" button .
CONTENTS
I N D E X
(part 2)
Printing begins. The print job is delivered to one of the
following trays (depending on which output devices are
installed):
● Job separator tray kit is installed: Upper tray
● Finisher is installed: Center tray
●
Note
The output tray can be selected in the key operator
programs (see "OUTPUT TRAYS" in the key
operator's guide).
● The output tray can be selected when selecting print
settings at the time of printing. Select the output tray in
"Output" in the "Advanced" menu of the Print window.
● If you are using Mac OS 8.6 to 9.x, select the output
tray in "Output" in the "Output/Document Style"
menu of the Print window.
● If you are using Mac OS X v10.1 to 10.1.5, select the
output tray in the "Output" tab in the "Printer
Features" menu of the Print Window.
● If the paper type setting in the printer driver is different
from the bypass tray's paper type setting in the
machine, printing may stop. To resume printing, press
the [PRINT] key on the operation panel, touch the
[BYPASS TRAY] key in the touch panel, and specify
the same paper type as in the printer driver.
32
4
PRINTING FROM MACINTOSH
Basic printing
(part 3)
When "Paper Feed" is set to "Auto Select"
If "Paper Feed" is set to "Auto Select" in the Print window and
the correct size of paper is not loaded in the machine, the
printing method will vary depending on the "FORCED OUTPUT
OF PRINT" setting in the key operator programs (see the key
operator's guide).
Note
In Mac OS 8.6 to 9.x, the "Paper Feed" setting is
configured in "Paper Source" in the "General" menu of
the Print window.
When "FORCED OUTPUT OF PRINT" is disabled
If the bypass tray can be used, a message prompting you to
print from the bypass tray will appear in the touch panel.
Press the [PRINT] key on the operation panel, touch the
[BYPASS TRAY] key, load paper in the bypass tray, and then
touch the [BYPASS] key. Printing will begin automatically.
When "FORCED OUTPUT OF PRINT" is enabled
Printing will take place using a size of paper that is close to the
size of the print image.
Note
CONTENTS
I N D E X
If the paper is loaded in a different orientation than the
print image, the image is automatically rotated to match
the paper. This setting can be changed in the key
operator programs (see "ROTATED PRINT" in the key
operator's guide).
33
4
PRINTING FROM MACINTOSH
Basic printing
(part 4)
When "Paper Feed" is set to paper tray or paper type
If "Paper Feed" (or "Paper Source" in "General" in Mac OS 8.6 to 9.x) is set to paper tray or paper type in the Print window but there
is no paper in the trays that matches your selection, printing will take place as follows:
The size and type of paper loaded in each tray and whether or not the paper loaded in each tray can be used for printing are
specified in the "TRAY SETTINGS" of the custom settings. (See "CUSTOM SETTINGS" in the operation manual for copier.
You selected a tray, but the size of the paper in the selected tray does not match the printing size.
Even though the paper size is different, printing will take place using the paper in the selected tray.
You selected a paper type, and although the selected type of paper is loaded in the machine, its size does not
match the printing size.
Even though the paper size is different, printing will take place using the selected paper type.
However, if "FORCED OUTPUT OF PRINT" is disabled, printing will not take place.
You selected a paper type, but the selected type of paper is not loaded in the machine.
If the bypass tray can be used, a message prompting you to print from the bypass tray will appear. Press the [PRINT] key on the
operation panel, touch the [BYPASS TRAY] key, load the correct size and type of paper in the bypass tray, and then touch the [BYPASS]
key. Printing will begin automatically.
CONTENTS
I N D E X
34
4
PRINTING FROM MACINTOSH
Job control function (Mac OS 8.6 to 9.x and Max OS X v10.2)
Printing when auditing mode is enabled
Using the print hold function
When "AUDITING MODE" is enabled in the key operator
programs, enter your 5-digit account number in "Account
Number" in the "Job Control" menu of the Print window.
The print hold function is enabled in "Job Control" in the Print
window.
Select the function that you wish to use in the "Retention" menu.
●
Note
In Mac OS 8.6 to 9.x, select "On" in "Account Number"
in "Job Control" in the Print window, and enter your
5-digit account number in the box at right.
● Account numbers are stored in the key operator
programs. (See "ACCOUNT CONTROL" in the key
operator's guide.)
●
When auditing mode is enabled, a print job may not be
Caution
printed if an account number is not entered or an
incorrect account number is entered. This depends on
the key operator program settings. See "CANCEL JOBS
OF INVALID ACCOUNTS" in the key operator's guide.
● In Mac OS X v10.1 to 10.1.5, auditing mode cannot be
used. For this reason, do not enable "CANCEL JOBS
OF INVALID ACCOUNTS" in the key operator programs
because printing will not be possible. (Printed pages will
be added to the "OTHERS" count.)
CONTENTS
I N D E X
●
Note
To assign a PIN number to a print job, enter a 5-digit
number in "PIN". (In Mac OS 8.6 to 9.x, select "On" in
"Confidential Print Password" and enter a 5-digit
number in the box at right.)
● In Mac OS X v10.1 to 10.1.5, the print hold function
cannot be used.
For information on the print hold function, see "Print hold function".
To print a print hold job at the machine, see "How to print a print hold job".
35
OPERATION AT THE MACHINE
5
Giving priority to a print job / Canceling a print job
(part 1)
Giving priority to a print job
When a print job is waiting because the machine is copying or printing a received fax, the following procedure can be used to
interrupt the current job and immediately print the print job. Use the print job status screen to give priority to the job. For more
information on using the job status screen, see operation manual for copier.
1
Press the [JOB STATUS] key.
LINE
DATA
FAX
JOB STATUS
4
Touch the [PRIORITY] key.
ITING
DETAIL
ITING
CUSTOM SETTING
X JOB
2
Make sure that the [PRINT JOB] key is
highlighted.
SHARP001
PRINT JOB
3
010 / 00
PRIORITY
STOP/DELETE
The print job status screen
appears when the [PRINT JOB]
key is highlighted.
If the [PRINT JOB] key is not
highlighted, touch the [PRINT
JOB] key.
Note
A message appears asking you
to confirm the priority print job.
Touch the [OK] key to interrupt
the current job and begin
printing the print job selected in
Step 3.
To view information on a print job, select it and then
touch the [DETAIL] key.
In the job keys of the jobs waiting to be printed,
touch the key of the job that you wish to print
immediately.
The touched key is highlighted.
CONTENTS
I N D E X
36
OPERATION AT THE MACHINE
5
Giving priority to a print job / Canceling a print job
(part 2)
Canceling a print job
A print job in progress or waiting to be printed can be canceled. Use the print job status screen to cancel the job.
1
Press the [JOB STATUS] key.
3
LINE
DATA
FAX
JOB STATUS
The job in progress and the jobs waiting to be
printed appear. Touch the key of the job that
you wish to cancel.
The touched key is highlighted.
CUSTOM SETTING
4
Touch the [STOP/DELETE] key.
ITING
DETAIL
2
Make sure that the [PRINT JOB] key is
highlighted.
SHARP001
PRINT JOB
CONTENTS
010 / 00
The print job status screen
appears when the [PRINT JOB]
key is highlighted.
If the [PRINT JOB] key is not
highlighted, touch the [PRINT
JOB] key.
I N D E X
ITING
PRIORITY
STOP/DELETE
X JOB
Note
A message appears asking you
to confirm the cancellation.
Touch the [YES] key to delete
the job.
If you do not wish to cancel the
job, touch the [NO] key.
To pause a print job during printing, press the [PRINT]
key on the operation panel and then touch the
[OFFLINE] key. ([OFFLINE] is highlighted.)
• To cancel a print job, press the [CLEAR] key ( ).
• To resume printing, touch the [ONLINE] key to switch
the machine online.
37
OPERATION AT THE MACHINE
5
Configuring the printer condition settings
(part 1)
The printer condition settings allow basic printer settings to be configured. The following items can be set:
● DEFAULT SETTINGS: Basic settings used in printing.
● PostScript SETTINGS*: Sets whether a PostScript error
● PCL SETTINGS: PCL symbol set, font, line feed code, and
page is printed or not when a
PostScript error occurs.
other settings.
*Appears when the PS3 expansion kit is installed.
Note
When the printer condition settings and the printer driver settings do not agree, the printer driver settings take precedence. Print
settings that can be selected in the printer driver should be selected in the printer driver at the time of printing.
How to configure the settings
1
Press the [PRINT] key.
The initial screen of printer
mode appears.
COPY
PRINT
ON LINE
DATA
SCAN
DATA
3
Touch the key of the desired item to display its
setting screen.
EXIT
CONDITION SETTINGS
DEFAULT SETTINGS
PCL SETTINGS
PostScript SETTINGS
2
Touch the [CONDITION SETTINGS] key.
ONLINE
OFFLINE
1/1
BYPASS TRAY
CONDITION
SETTINGS
DELETE
CONTENTS
Any print jobs that have
already been sent to the
machine, including print hold
jobs stored in the machine,
will be printed using the
printer condition settings that
were effect when the job was
sent.
I N D E X
For information on each of the settings, see "Printer
condition settings".
38
5
4
OPERATION AT THE MACHINE
Configuring the printer condition settings
Touch the desired setting on the setting screen
of the desired item and touch the [OK] key.
5
(part 2)
When finished, touch the [EXIT] key.
EXIT
CONDITION SETTINGS
OK
DEFAULT SETTINGS
DEFAULT SETTINGS
PCL SETTINGS
1/4
TONER SAVE
COPIES
1
ORIENTATION
P
PostScript SETTINGS
To set another item, repeat steps 3 and 4.
More information on the condition setting screen
The following keys appear in screens that
require the entry of numerical values.
OK
DEFAULT SETTINGS
1
1
2
2
3
4
5
999)
1/4
TONER SAVE
COPIES
1
ORIENTATION
P
3
4
1
(1
5
When a checkbox ( ) appears in front of a setting, a checkmark ( ) will appear when the checkbox is touched.
This indicates that the setting is enabled. If a checkbox with a checkmark ( ) is touched, the checkmark is cleared ( ) and the
setting is disabled.
XXX
When a key that appears in the form
is touched, the setting screen of that key will appear.
If the settings continue on the following screen(s), touch the
and
keys to move back and forth through the screens. To
return to the category selection screen, touch the [OK] key.
The currently set numerical value is displayed.
Numerical values can be set by touching the
and
keys.
CONTENTS
I N D E X
39
OPERATION AT THE MACHINE
5
Configuring the printer condition settings
(part 3)
Printer condition setting menu
Click on a setting to view an explanation of the setting.
CONDITION SETTINGS
CONDITION SETTINGS
DEFAULT SETTINGS
TONER SAVE
Factory default settings
Disabled
COPIES
ORIENTATION
1
PORTRAIT
DEFAULT PAPER SIZE
8 ½ x 11
DEFAULT PAPER SOURCE AUTO
DEFAULT PAPER TYPE
SMOOTHING
AUTO
Disabled
RESOLUTION
600dpi
EXTRA PRINT MODE
Disabled
2-SIDE PRINT
PAGE PROTECTION
1-SIDED
Enabled
ROPM
Disabled
Note
PCL SETTINGS
Factory default settings
PCL SYMBOL SET
SETTING
3 (PC-8)
PCL FONT SETTINGS
INTERNAL FONT: 0
(Courier)
LINE FEED CODE
0
WIDE A4
Disabled
PostScript SETTINGS*
Factory default settings
PRINT PS ERRORS
Disabled
* Appears when the PS3 expansion kit is installed.
You can view the current printer condition settings by printing the "PRINTER SETTINGS LIST" in "LIST PRINT" in the custom
settings.
☞Printing the printer setting and font lists
CONTENTS
I N D E X
40
5
OPERATION AT THE MACHINE
Configuring the printer condition settings
(part 4)
Printer condition settings
Factory default settings are indicated in bold.
DEFAULT SETTINGS
Item
TONER SAVE
Selections
Enabled, Disabled (no
checkmark)
COPIES
ORIENTATION
1 - 999
PORTRAIT,
LANDSCAPE
DEFAULT PAPER
SIZE
5 ½ x 8 ½, 8 ½ x 11, 8
½ x 13, 8 ½ x 14, 11 x
17, A5, B5, A4, B4, A3
AUTO,
BYPASS (MANUAL),
BYPASS (AUTO),
TRAY 1,
TRAY 2,
TRAY 3*,
TRAY 4*
AUTO, PLAIN,
RECYCLED, LETTER
HEAD, COLOR
DEFAULT PAPER
SOURCE
DEFAULT PAPER
TYPE
Description
This enables or disables toner save mode. Toner save mode conserves toner
by printing a slightly lighter image. Toner save mode does not function when
the resolution is set to 1200 dpi.
This is used to select the number of copies.
This sets the orientation of the printed page. Select "PORTRAIT" when the
image is longer in the vertical direction, or "LANDSCAPE" when the image is
longer in the horizontal direction.
This sets the default paper size used for the printed image. Even if the set size
of paper is not in any of the trays, the printed image is formed in accordance
with this setting.
Set the default paper tray. When set to "AUTO", the paper tray with the size of
paper set in "DEFAULT PAPER SIZE" is automatically selected.
*Selections available depend on the trays that are installed.
This is used to select the default paper type. When set to "AUTO", the paper
tray with the size of paper set in "DEFAULT PAPER SIZE" is automatically
selected.
(continued)
CONTENTS
I N D E X
41
5
OPERATION AT THE MACHINE
Configuring the printer condition settings
Item
SMOOTHING
Selections
Enabled, Disabled (no
checkmark)
RESOLUTION
300dpi, 600dpi,
1200dpi
EXTRA PRINT MODE
Enabled, Disabled (no
checkmark)
(part 5)
Description
This enables or disables smoothing. This function improves image quality by
smoothing angles and curves in the image. When smoothing is enabled using
a resolution of 600 dpi, an image quality equivalent to 1200 dpi can be
obtained. (Printing at 1200 dpi provides high image quality, however, this uses
considerable memory and slows the printing speed. Smoothing cannot be
selected when the resolution is 1200 dpi.) When printing a bitmap image,
disabling smoothing may in some circumstances provide a better result.
This sets the resolution for printing. When 1200 dpi is selected, smoothing and
toner save cannot be selected. A resolution of 1200 dpi uses considerable
memory and therefore slows the printing speed.
When mostly single-page jobs are printed, this function can be used to increase
printing efficiency by shortening the wait time between print jobs. Normally this
function is not enabled.
When the function is enabled (a checkmark appears), multiple print jobs are
processed as a single job when all of the jobs have the same print format. The
jobs appear as a single job key in the job status screen.
When print hold, staple printing, different paper setting ("Last Page" only), or
transparency inserts is selected in the printer driver, EXTRA PRINT MODE
does not function. EXTRA PRINT MODE also does not function if the paper
size or other print format setting is changed or a notice page is printed due to
a memory error.
Print processing efficiency increases when this mode is used, and for this
reason notification that the job is finished may not appear at the same time as
completion of output of the printed pages. In addition, special print processing
may prevent the appropriate appearance of notification that the job is finished.
(continued)
CONTENTS
I N D E X
42
5
OPERATION AT THE MACHINE
Configuring the printer condition settings
Item
2-SIDE PRINT
PAGE PROTECTION
ROPM
CONTENTS
Selections
1-SIDED,
2-SIDED (Book),
2-SIDED (Tablet)
Enabled (checkmark
appears), Disabled
Enabled, Disabled (no
checkmark)
I N D E X
(part 6)
Description
When "2-SIDED (Book)" is selected, two-sided printing takes place so as to
allow binding at the left side. When "2-SIDED (Tablet)" is selected, two-sided
printing takes place so as to allow binding at the top.
This enables page protection. Page protection prevents data loss errors when
printing complex jobs.
This enables the ROPM function. When enabled, multi-page print jobs are
stored in memory before printing, and thus the computer does not need to
repeatedly send the print data when multiple copies are printed.
43
5
OPERATION AT THE MACHINE
Configuring the printer condition settings
(part 7)
PCL SETTINGS
Item
PCL SYMBOL SET
SETTING
Selections
Description
This specifies which country's characters (PCL symbol set) are assigned to
certain of the symbols in the character code list. The factory default setting is
"3" (PC-8). The numbers corresponding to each PCL symbol set can be viewed
by printing "PCL SYMBOL SET LIST" in "LIST PRINT" in the custom settings.
☞Printing the printer setting and font lists
PCL FONT SETTINGS
INTERNAL FONT (0 80), EXTENDED FONT
(1 - )
This specifies which PCL font to use for printing. One font can be specified from
among the internal fonts and extended fonts (when the barcode font kit is
installed). The factory default setting is "0" (internal font: Courier).
The fonts that are available can be viewed by printing the font list in "LIST
PRINT" in the custom settings. The font names, numbers assigned to each
font, and print samples appear in the list. A font is specified for PCL FONT
SETTINGS by entering the number assigned to the font.
☞Printing the printer setting and font lists
LINE FEED CODE
0-3
WIDE A4
Enabled, Disabled (no
checkmark)
This specifies the line break code by means of a combination of the "CR"
(return) code, "LF" (line break) code, and "FF" (page break) code. The factory
default setting is printing based on the transmitted code. The setting can be
changed by selecting one of four combinations.
This setting can be enabled to print 80 lines on A4 size paper with each line
10CPI font (English characters). When the setting is disabled (a checkmark
does not appear), each line is 78 characters long.
CONTENTS
1 - 35
I N D E X
44
5
OPERATION AT THE MACHINE
Configuring the printer condition settings
(part 8)
PostScript SETTINGS
"PostScript SETTINGS" only appears when the PS3 expansion kit is installed.
Item
PRINT PS ERRORS
Selections
Enabled, Disabled (no
checkmark)
CONTENTS
I N D E X
Description
When this setting is enabled, an error description is printed each time a
PostScript error occurs.
45
OPERATION AT THE MACHINE
5
Printing the printer setting and font lists
To check the current printer condition settings or fonts that can be used, print the printer setting list or one of the font lists.
1
Press the [CUSTOM SETTINGS] key.
LINE
DATA
B STATUS
2
S
3
Touch the list that you wish to print.
Printing begins.
TTINGS
EST PAGE
CUSTOM SETTINGS
Touch the [LIST PRINT] key.
Y
T
4
LIST PRINT
RECEIVE MODE
Touch the [PRINTER TEST PAGE] key.
PRINTER
SETTINGS LIST
PCL SYMBOL
SET LIST
PCL EXTENDED
FONT LIST
PS INTERNAL
FONT LIST
The following lists can be printed.
● PRINTER SETTINGS LIST
● PCL SYMBOL SET LIST
● PCL INTERNAL FONT LIST
● PCL EXTENDED FONT LIST (When an option font kit
is installed.)
● PS INTERNAL FONT LIST (When the PS3 expansion
kit is installed.)
● NIC PAGE
PRINTER TEST PAGE
FAX REPORT
SENDING ADDRESS LIST
CONTENTS
I N D E X
46
6
TROUBLESHOOTING
Troubleshooting
This chapter describes how to solve printer problems. Refer to the relevant section based on the problem.
To load paper, remove paper misfeeds, load staples in the finisher, remove jammed staples, or replace the toner cartridge, see
"TROUBLESHOOTING" in operation manual for copier.
Printing does not take place
●
●
Check the paper being used
●
●
The printed image is coarse
●
●
The printed image is distorted
●
Part of the printed image is missing
Check the connections
USB or parallel connection in Windows
Network connection
●
Print quality is not satisfactory
Check Your Computer
●
Points to check in Windows
●
Points to check on the Macintosh
●
Check the machine
●
Checking the printer driver
If a notice page is printed
Removing the software
●
●
Windows
●
Macintosh (Mac OS 8.6 to 9.x)
Points to check in Windows
Improper printing operation
●
Printing is slow
●
Two-sided printing is not possible
●
Stapling is not possible (when a finisher or a saddle stitch finisher
is installed)
●
Punching is not possible (when a saddle stitch finisher is installed)
CONTENTS
I N D E X
47
6
TROUBLESHOOTING
Printing does not take place
(part 1)
Check the connections
USB or parallel connection in Windows
Network connection
■ Is the interface cable compatible with the machine
and computer?
■ Is the LAN cable disconnected?
Interface cables compatible with this machine are USB and
parallel cables. Check which type of cable is supported by
your computer.
For the specifications of the interface cable, see
"CONNECTING TO A COMPUTER" in the software setup
guide for network printer.
■ Is the interface cable connected securely?
Check if the interface cable is securely plugged into the
connectors of the machine and computer.
To connect the cable, see "CONNECTING TO A COMPUTER"
in the software setup guide for network printer.
Make sure that the LAN cable is firmly inserted in the
connectors on the machine and the computer.
For information on connecting the LAN cable, see software
setup guide for network printer.
■ Is the machine configured for use on the same
network as the computer?
The machine cannot be used if it is not connected to the
same network as the computer, or if it is not configured for
use on the network.
For more information, consult your network administrator.
■ Are any other USB peripherals being connected
along with the machine?
If your computer is connected to the machine through a USB
hub, see if printing is possible when no other USB devices
are connected, or if printing is possible when the machine
and computer are directly connected.
■ If the interface cable becomes disconnected
If the interface cable becomes disconnected, even only once
during the machine's operation, then printing may be disrupted.
If this occurs, check the interface cable and ensure that it is
securely connected, then restart the computer.
CONTENTS
I N D E X
48
6
TROUBLESHOOTING
Printing does not take place
(part 2)
Check Your Computer
■ Is there enough computer memory or hard disk space?
To use the machine, your computer must have sufficient
memory and hard disk space. If there is insufficient hard disk
space, delete unnecessary files to increase the free space of
the hard disk. If there is insufficient memory, close unnecessary
applications to increase memory available for printing.
Points to check in Windows
■ If your computer is connected to the machine
through the parallel port, is the parallel port (LPT)
mode set to other than EPP mode? (when using a
parallel connection in Windows)
The machine may not operate correctly if the parallel port
mode is set to EPP mode. To set the parallel port mode to a
mode other than EPP mode, refer to your computer manual
or ask the manufacturer of the computer. ECP mode is
recommended to obtain the best performance from the
machine. Note that some computers may use different
names for the modes.
Note
Points to check on the Macintosh
■ Is AppleTalk enabled?
In Mac OS X, click "Network" in "System Preferences" and
select "Built-in Ethernet" in "Show". Click the "AppleTalk" tab
and make sure that "Make AppleTalk Active" is selected.
In Mac OS 8.6 to 9.x, open the "Chooser" from the Apple
menu and make sure that "Active" is selected. Printing is not
possible if "Active" is not selected.
■ Is "Ethernet" selected for the "Connect via" of
AppleTalk? (When using Mac OS 8.6 to 9.x.)
Open "AppleTalk" from the "Control Panels" and make sure
that "Ethernet" is selected in the "Connect via" menu.
Printing is not possible if "Ethernet" is not selected.
If you are using Windows XP, the "Found New Hardware
Wizard" may appear after you change the port setting. In
this case, click the "Cancel" button to close the wizard,
and then reinstall the printer driver as explained in
"USING THE MACHINE WITH A PARALLEL OR USB
CONNECTION" in the software setup guide for network
printer.
CONTENTS
I N D E X
49
6
TROUBLESHOOTING
Printing does not take place
(part 3)
Check the machine
■ Power switch on?
■ Copy job being performed?
Turn the power switch on. (See "POWER ON AND OFF" in
the operation manual for copier)
■ Is the machine online?
When the ON LINE indicator next to the [PRINT] key on the
operation panel is lit, the machine is online and ready to
print. If the ON LINE indicator is off, press the [PRINT] key
and then touch the [ONLINE] key. (When [ONLINE] is
highlighted, the machine is online.)
COPY
PRINT
SCAN
ON LINE
DATA
ONLINE
OFFLINE
Wait until copying is finished. You can also select the key of
the job that you wish to print in the job status screen and then
touch the [PRIORITY] key. Copying will be interrupted and
the selected job printed.
☞Giving priority to a print job
■ Is the "I/O TIMEOUT" setting too short?
Set a longer time for "I/O TIMEOUT" in the key operator
programs.
If a Notice Page is printed, see "If a notice page is printed".
1/1
BYPASS TRAY
DATA
CONDITION
SETTINGS
■ Has an error occurred such as a paper misfeed, staple
jam in the finisher, out of paper, or out of toner?
When one of the above errors occurs, a message will appear
in the touch panel to alert you.
Follow the instructions in the message to clear the error.
Printing will automatically resume when the error is cleared.
For information on handling errors, see "TROUBLESHOOTING"
in operation manual for copier.
CONTENTS
I N D E X
50
6
TROUBLESHOOTING
Printing does not take place
(part 4)
Checking the printer driver
■ Is your machine selected correctly in the current
application for the print job?
Select the printer driver of the machine in the print settings
window of the application.
● If the printer drivers appear as icons, click the icon of the
machine.
● If the printer drivers are selected from a pull-down menu,
select the printer driver of the machine from the menu.
☞Windows: Basic printing
☞Macintosh: Basic printing
2 Check if the "SHARP AR-XXXX" printer driver icon
is shown.
If the printer icon of the machine does not appear, the printer
driver is not installed correctly. Follow the instructions in the
software setup guide for network printer to correctly install the
printer driver.
■ Is the port configured correctly?
Points to check in Windows
■ Has the printer driver been installed properly?
Follow the steps below to make sure that the printer driver is
installed correctly.
1 Click the "start" button, click "Control Panel", click
"Printers and Other Hardware", and then click
"Printers and Faxes".
On Windows 95/98/Me/NT 4.0/2000, click the "Start" button,
select "Settings" and then click "Printers".
CONTENTS
I N D E X
It is possible that there is a problem with the port
configuration, for example another printer driver may be
using the port. Open the printer driver properties and
correctly configure the port that you are using.
☞See the software setup guide for network printer.
If for some reason the printer driver does not operate
correctly, delete the printer driver and then reinstall it as
explained in the software setup guide for network printer.
☞Removing the software
51
6
TROUBLESHOOTING
Improper printing operation
Printing is slow
■ Simultaneous use of two or more application
software programs?
Start printing after quitting all unused application software
programs.
■ Is an appropriate print quality selected in the printer
driver?
It takes longer to process the print data when
"SMOOTHING" is enabled or the resolution is set to 1200
dpi, and this may slow the printing speed. Be sure to select
print quality settings that are appropriate for the image being
printed.
Windows: Change the print quality settings in the "Advanced"
tab of the printer driver setup screen.
Macintosh: Change the print quality settings in the
"Advanced" menu in the Print window. (In Mac
OS X v10.1 to 10.1.5, change the print quality
settings in the "Advanced" tab of the "Printer
Features" menu.)
Two-sided printing is not possible
■ Is two-sided printing disabled in the key operator
programs?
Enable two-sided printing as explained in "DISABLING OF
DUPLEX" in the key operator's guide.
CONTENTS
I N D E X
(part 1)
Stapling is not possible (when a finisher or
a saddle stitch finisher is installed)
■ Is stapling disabled in the key operator programs?
Enable stapling in the key operator programs (see
"DISABLING OF STAPLER" in the key operator's guide).
■ Is the finisher disabled in the key operator programs
(when a saddle stitch finisher is installed)?
Enable the finisher in the key operator programs. (See "USING
THE KEY OPERATOR PROGRAMS" in the operation manual
for the saddle stitch finisher, and "DISABLING OF STAPLER"
in the key operator's guide.)
■ Did you attempt to print more pages than can be
stapled?
When a finisher is installed, up to 30 sheets can be stapled.
When a saddle stitch finisher is installed, up to 50 sheets can
be stapled (up to 25 sheets when the paper size is B4,
Foolscap, or larger).
The saddle stitch tray can hold up to 20 sets when the
number of sheets is 1 to 5, or 10 sets when the number of
sheets is 6 to 10.
■ Are pages of different width mixed together in the
print job?
Stapling is not possible when pages of different width are
mixed together in a print job.
52
6
TROUBLESHOOTING
Improper printing operation
■ Does the print job include page sizes that cannot be
stapled?
Stapling is not possible if the print job includes page sizes that
cannot be stapled.
■ Is the paper tray that is selected in the printer driver
set to a paper size or paper type that cannot be used
for stapling?
On the machine, set the paper tray to be used for staple
printing to a paper size and paper type that can be used for
stapling.
(part 2)
Punching is not possible (when a saddle
stitch finisher is installed)
■ Is the finisher disabled in the key operator
programs?
Enable the finisher in the key operator programs. (See "USING
THE KEY OPERATOR PROGRAMS" in the operation manual
for the saddle stitch finisher, and "DISABLING OF STAPLER"
in the key operator's guide.)
■ Are pages of different width mixed together in the
print job?
Punching is not possible when pages of different width are
mixed together in a print job.
■ Does the print job include page sizes that cannot be
punched?
Punching is not possible if the print job includes page sizes that
cannot be punched.
■ Is the paper tray that is selected in the printer driver
set to a paper size or paper type that cannot be used
for punching?
On the machine, set the paper tray to be used for punch
printing to a paper size and paper type that can be used for
punching.
CONTENTS
I N D E X
53
6
TROUBLESHOOTING
Print quality is not satisfactory
(part 1)
Check the paper being used
■ Non-standard paper used?
Check that the paper conforms to the specifications. Refer to
"LOADING PAPER" in the operation manual for copier.
■ Are you using paper with a high moisture content?
Use paper that is in good condition, with a low moisture
content and no curling.
■ Is the paper loaded with the wrong side up?
Some types of paper have a front and a back side. If the
paper is loaded so that printing takes place on the back side,
toner will not adhere well to the paper and poor print quality
will result.
■ Are you printing on paper that has an uneven
surface?
It may not be possible to print correctly on paper with seams
such as the back of an envelope.
CONTENTS
I N D E X
54
6
TROUBLESHOOTING
Print quality is not satisfactory
(part 2)
The printed image is coarse
Part of the printed image is missing
■ Have the printer driver settings been specified to
suit both paper and the print job?
■ Did you set sufficient margins in the paper settings
of your application?
The printing resolution can be set to 1200 dpi, 600 dpi, or 300
dpi. When 600 dpi or 300 dpi is selected, "SMOOTHING" can
also be selected to improve the image quality.
Windows: Change the resolution settings in the "Advanced"
tab of the printer driver setup screen.
Macintosh: Change the resolution settings in the "Advanced"
menu in the Print window. (In Mac OS X v10.1 to
10.1.5, change the resolution settings in the
"Advanced" tab of the "Printer Features" menu.)
●
Note
A slower printing speed may result when 1200 dpi or
"SMOOTHING" is selected.
● For the available resolution settings, see "Printer specifications".
The printed image is distorted
■ Is the paper loaded correctly?
If a document is physically damaged when it is output or the
image is skewed on the paper, discard the damaged sheet,
reinsert the paper and print again. Insert the paper so that
there is no visible space between the paper and the paper
guides.
☞See the operation manual for copier for more details on
inserting paper.
CONTENTS
I N D E X
Printing is not possible at the edges of the paper. The print
margins are 5/32" (4 mm) at the top and bottom of the paper
and 1/8" (3 mm) at the sides of the paper. When configuring the
paper settings in the software application, be sure to establish
margins that are at least as large as the print margins.
■ Does the paper size set for the print image match the
size of paper loaded in the machine?
Make sure that the paper size setting matches the size of
paper loaded in the machine. When "Auto Select" is selected
for the paper source in the print settings, the print method will
vary depending on the settings of the key operator programs.
☞Windows: When "Paper Selection" is set to "Auto Select"
☞Macintosh: When "Paper Feed" is set to "Auto Select"
■ Are the print orientation settings correct?
Make sure that the correct paper orientation is selected for
the print image in the application's paper settings and in the
print settings.
If the paper is loaded in the machine in a different orientation
from the print image, the image is normally automatically
rotated to match the paper; however, if this function has been
disabled in the key operator programs, the paper orientation
must be set in the application. (See "ROTATED PRINT" in
the key operator's guide.)
55
6
TROUBLESHOOTING
If a notice page is printed
(part 1)
If you find that a notice page has been printed at the end of a print job, the print data received from the computer has not been
printed as specified. Fix the problem as explained below and then try printing again.
Notice Page regarding memory full on IMC board
Note
****************************************************
Notice Page
****************************************************
The IMC memory full error had occurred,
a normal output was not able to be executed.
Please refer to the operation manual for
the solution method.
When the Staple function is not selected:
Disable the ROPM function by removing the checkmark from
"ROPM" in the "Configuration" tab of the printer driver setup
screen. (See "CONFIGURING THE PRINTER DRIVER" in the
software setup guide for network printer.) If you need to use the
ROPM function, lower the resolution setting in the printer driver
or install more memory.
● When the Staple function is selected:
Lower the resolution setting or increase the "MEMORY FOR
PRINTER" setting in the key operator programs. If this does not
resolve the problem, install more memory.
●
CONTENTS
I N D E X
The IMC memory is used to store print data when the
ROPM function is used. This memory is also used to
store original image data in the copy mode. The
percentage of IMC memory allocated to the printer
function can be adjusted using a key operator program.
See "MEMORY FOR PRINTER" in the key operator's
guide. The memory can be extended by adding
commercially available memory modules. For details,
contact your SHARP dealer.
When data loss error has occurred:
****************************************************
Notice Page
****************************************************
The data loss error had occurred, a normal
output was not able to be executed.
Please refer to the operation manual for
the solution method.
• Set the page protection function or enable the ROPM function.
To enable the ROPM function, select the "ROPM" checkbox in
the "Configuration" tab of the printer driver setup screen. (See
"CONFIGURING THE PRINTER DRIVER" in the software
setup guide for network printer.)
☞PAGE PROTECTION
56
6
TROUBLESHOOTING
If a notice page is printed
Notice Page regarding memory full on the printer
board
****************************************************
Notice Page
****************************************************
(part 2)
Disabling notice page printing
Notice page printing can be disabled using a key operator
program (see "PROHIBIT NOTICE PAGE PRINTING" in the
key operator's guide).
The memory full error had occurred, a normal
output was not able to be executed.
Please refer to the operation manual for
the solution method.
If the ROPM function has been disabled, enable it.
Clear download fonts or form overlay data in the printer driver
settings.
● Add memory to the printer board. For information on
additional memory, contact your SHARP dealer.
● Check the memory setting in the "Configuration" tab in the
printer driver settings.
●
●
CONTENTS
I N D E X
57
TROUBLESHOOTING
6
Removing the software
In the event that you need to remove the printer driver or utilities, follow these steps:
Windows
1
Macintosh (Mac OS 8.6 to 9.x)
Click the "start" button, and then click "Control
Panel".
On Windows 95/98/Me/NT 4.0/2000, click the "Start"
button, select "Settings", and then click "Control Panel".
2
Click "Add or Remove Programs".
3
Select the driver or utility that you wish to
remove from the list, and click the appropriate
button to remove it.
On Windows 95/98/Me/NT 4.0/2000, double-click the
"Add/Remove Programs" icon.
For more information, refer to your operating manual or
to the help files for your operating system.
4
Restart your computer.
Note
1
Insert the "Software" CD-ROM into your
CD-ROM drive.
2
Double-click the CD-ROM icon ( ) on the
desktop and double-click the "Mac OS" folder.
3
Double-click the "Installer" icon (
4
Select "Remove" from the Install menu and then
click the "Remove" button.
Note
).
There is no remove tool for Mac OS X. The PPD file for
Mac OS X has been copied to the following folder in the
startup disk:
[Library] - [Printers] - [PPDs] - [Contents] - [Resources] [En.lproj] folder
When reinstalling the software, install it correctly as explained in software setup guide for network printer.
CONTENTS
I N D E X
58
7
WEB PAGE IN THE MACHINE
About the Web page
(part 1)
When the machine is connected to a network, you can access the machine's settings from your computer using a Web browser. The
settings will appear in a Web page in your browser, and you can configure the machine's E-mail server settings in the Web page to
have the machine receive e-mail and automatically print out attached files, as well as automatically send e-mail to the administrator
of the machine and/or the dealer which provides information on machine use (print count, copy count, etc.) and error conditions
(paper misfeed, out of paper, out of toner, etc.).
To use these functions, the machine must be able to connect to the Internet and the recipient of the messages must have a Web
browser (Microsoft Internet Explorer 5.5 or later, or an equivalent Web browser) and an SMTP-compatible e-mail software program.
Accessing the Web page
Use the following procedure to access the Web page.
1
Open the Web browser on your computer.
Supported browsers:
Internet Explorer 5.5 or later (Windows)/
5.1 or later (Macintosh)
Netscape Navigator 6.0 or later
CONTENTS
I N D E X
2
In the "Address" field of your Web browser,
enter the IP address of the machine as a URL.
Enter the IP address previously
configured in the machine.
To check the machine's IP
address, print "NIC PAGE" as
explained in "Printing the printer
setting and font lists".
When the connection is completed, the following Web
page will appear in your Web browser.
☞About the Web page
59
7
WEB PAGE IN THE MACHINE
About the Web page
(part 2)
When you access the Web page in the machine, the following page will appear in your browser.
A menu frame appears on the left side of the page. When you click an item in the menu, a screen appears in the right frame that
allows you to establish settings for that item.
For detailed explanations of the procedures for establishing settings, click [Help] in the menu frame.
2 Information setup
Configure machine identification information for the status &
alert E-mail function.
☞Information setup
3 Password setup
Establish administrator's and user's passwords. The
administrator of this software can set passwords (for
administrator and user) to authorize access to the Web page for
the security of the settings on the page. If such a security
1
measure is not required, the Password Setting procedure can be
skipped. This will leave Web access settings open to all users.
☞Protecting information programmed in the web page ("Passwords")
2
4 Status Message setup
3
Configure parameters required for sending status messages,
such as destination addresses and time schedules.
4
☞Status message setup
5
5 Alerts Message setup
6
Configure parameters required for sending alert messages,
such as destination addresses and types of event for which
messages are sent.
☞Alerts message setup
1 Submit Print Job setup
6 Services Setup
A file in a computer can be printed out.
Configure information concerning the e-mail system.
☞Directly printing a file in a computer
☞SMTP setup
CONTENTS
I N D E X
60
7
WEB PAGE IN THE MACHINE
E-mail print function
(part 1)
An e-mail account can be set up for the machine. When this is done, the machine will periodically check the e-mail server for e-mail
and automatically print out any file attachments it receives. This provides a means for printing a file from a computer that does not
have the printer driver installed, as the user can simply send the file to the machine as an e-mail attachment.
Setting up the E-mail print function
To use the e-mail print function, the machine must have an
e-mail account.
1
In the link menu, click [Direct Print].
2
Configure the required e-mail settings.
3
Click [Submit] to store the entered data.
The "Direct Print Setup" screen
will appear.
For more information, click [Help] in the menu frame.
CONTENTS
I N D E X
61
WEB PAGE IN THE MACHINE
7
E-mail print function
(part 2)
Using the E-mail print function
To use the e-mail print function, attach the file that you wish to print to an e-mail message and send the e-mail to the machine's
e-mail address.
The machine can print the following file types:
PCLXL, PCL5e, PS, PDF, and TIFF, with file extensions pcl, ps, pdf, tiff, and tif
Control commands can be entered in the message of the e-mail to specify the number of copies and print format. Commands are
entered in the format "command name = value".
The following control commands are available:
Function
Command name
Value
Entry example
Copies
COPIES
1-999
COPIES=2
Staple
JOBSTAPLE
STAPLENO, STAPLELEFT
JOBSTAPLE=STAPLENO
Two-sided print
DUPLEX
OFF, TOP, LEFT
DUPLEX=LEFT
Account number
ACCOUNTNUMBER
5-digit number
ACCOUNTNUMBER=11111
File type
LANGUAGE
AUTO, PCL, PCLXL, POSTSCRIPT, PDF, TIFF
LANGUAGE=TIFF
Paper
PAPER
Name of available paper (LETTER, etc.)
PAPER=A4
●
Note
Enter the commands in Plain Text format. If entered in Rich Text format (HTML), the commands will have no effect.
To receive a list of the control commands, enter the command "Config" in the e-mail message.
● If an e-mail is sent with nothing entered in the message, printing will take place according to the "DEFAULT SETTINGS" in the
condition settings menu of printer mode in the machine.
● To print PS files and PDF files, the PS3 expansion kit must be installed.
● Encrypted PDF files cannot be printed.
● Only enter a "File type" when you are specifying a page-description language. Normally there is no need to enter a file type.
●
CONTENTS
I N D E X
62
7
WEB PAGE IN THE MACHINE
Directly printing a file in a computer
A file that can be accessed by your computer can be directly printed without using the printer driver by specifying the file's address.
Any file that can be accessed by your computer can be printed by this method, including not only files in your computer but files in
other computers connected to the same network.
To directly print a file by this method, click "Submit Print Job" in the menu frame of the Web page.
1
In the link menu, click [Submit Print Job].
The "Submit Print Job" screen
will appear.
3
Enter the address of the file in "Enter Filename".
4
Click [Print].
You can also click [Browse] to look for the file.
For more information, click [Help] in the menu frame.
Printing begins.
2
Select the print format in "Job Detail".
For more information, click [Help] in the menu frame.
CONTENTS
I N D E X
63
7
WEB PAGE IN THE MACHINE
E-mail status and e-mail alert settings
(part 1)
These functions send information on machine use (print count, copy count, etc.) and error conditions (paper misfeed, out of paper,
out of toner, etc.) via e-mail to the administrator of the machine or the dealer.
Information setup
SMTP setup
Machine identification information for the status & alert E-mail
function is configured in the "Information Setup" screen. The
entered information will be included in status & alert E-mail
messages.
The Status & Alert E-mail function uses SMTP (Simple Mail
Transport Protocol) to send e-mail. The following procedure is
used to set up the e-mail environment. This must be done by
the system administrator or other person familiar with the
network.
1
In the link menu, click [Information].
The "Information Setup" screen
will appear.
2
Enter the machine information.
3
Click [Submit] to store the entered information.
1
In the link menu, click [Services].
2
Click [SMTP].
3
Enter the information required to set up the
e-mail environment.
The "Services Setup" screen will appear.
For more information, click [Help] in the menu frame.
For more information, click [Help] in the menu frame.
4
CONTENTS
I N D E X
Click [Submit] to store the entered information.
64
7
WEB PAGE IN THE MACHINE
E-mail status and e-mail alert settings
(part 2)
Status message setup
Use the status message function to send the current counter information, such as copy count, print count, and total output count, on
a basis of the specified schedule. The destinations can be set for administrators and dealers respectively.
To set up the status message, follow these steps:
1
In the link menu, click [Status Message].
2
Enter the required information, including the
destination addresses and time schedule.
The "Status Message Setup" screen will appear.
For more information, click [Help] in the menu frame.
3
When the E-mail Status settings are completed, printer count
information will be sent periodically by e-mail to the specified
e-mail addresses.
Note
If you quit the browser before clicking [Submit], the
settings will be canceled. To send printer information
immediately to the specified e-mail addresses, click
[Send Now].
Click [Submit] to store the entered information.
CONTENTS
I N D E X
65
7
WEB PAGE IN THE MACHINE
E-mail status and e-mail alert settings
(part 3)
Alerts message setup
Use the alert message function to send alert information, such as empty toner and trouble including paper misfeeds, to specified
destinations when such problems occur. The destinations can be set for administrators and dealers respectively.
To set up the alert message, follow the procedure shown below.
1
In the link menu, click [Alerts Message].
2
Enter the destination addresses.
The "Alerts Message Setup" screen will appear.
For more information, click [Help] in the menu frame.
3
Click [Submit] to store the entered information.
If these parameters are set, event information for the printer will
be transmitted to the specified addresses via E-mail each time
a specified event occurs. The meaning of each event item is
shown below.
Paper Jam: A paper misfeed occurs.
Toner Low: Toner is low.
No Toner: Toner must be added.
Paper Out: Paper must be loaded.
Service Required: The self-diagnostic function has found a
problem.
PM Required: Maintenance is required.
Note
CONTENTS
I N D E X
If you quit the browser before clicking [Submit], the
settings will be canceled.
66
WEB PAGE IN THE MACHINE
7
Protecting information programmed in the web page ("Passwords")
Passwords can be set to restrict Web page access and protect settings. Note that it is not necessary to set passwords; the network
scanner function can also be used without passwords.
A password can be set for the administrator and passwords can be set for each user. If you use a user password to access the Web
page, you will be able to establish, edit, and delete destinations in the Scanner Destination Management menu; however, you will
not be able to establish settings in the Setup menu.
In the factory default setting, both password functions are disabled. To set a User and/or Admin password, the administrator needs
to follow the steps below:
1
In the link menu, click [Passwords].
2
Enter the passwords and click the check box of
[Enable Password Protection of this Web Site].
The Password Setup screen will appear.
3
Click [Submit] to store the entered passwords.
For more information, click [Help]
in the menu frame.
●
Note
If you enable the password protection without entering User or Administrator passwords, the passwords which were previously
entered will be automatically set. The factory default passwords are "Sharp" for both Admin and User.
● If passwords have already been established, enter the Admin password in the [Admin Password] field. When setting the
passwords for the first time, enter "Sharp" in this field.
Once the passwords have been established, you will be prompted for user name and password every time you open the Web page
of this system. The user names will always be "user" for user level and "admin" for administrator level.
CONTENTS
I N D E X
67
SPECIFICATIONS
8
Printer specifications
Printing speed
AR-M236/AR-M237: 23 pages/min. at 600 dpi, 13.5 pages/min. at 1200 dpi*1
AR-M276/AR-M277: 27 pages/min. at 600 dpi, 13.5 pages/min. at 1200 dpi*1
Resolution*1
1200 dpi/600 dpi/300 dpi selectable
Memory
Standard memory: 64 MB
Additional memory slot: 1 slot (a 128 MB or 256 MB of additional memory module (144-pin SDRAM
SODIMM) can be installed)
IMC Memory
Standard memory: 32 MB*2
Additional memory slots: 2 slots (maximum of 1024 MB of additional memory modules (168-pin
SDRAM DIMM) can be installed)
Emulation
PCL5e, PCL6, PS3 (PostScript 3)*3
Installed fonts
PCL6 compatible: 80 outline fonts and 1 bitmap font
PostScript 3 compatible*3: 136 outline fonts
Interface
IEEE 1284-compliant parallel interface
USB 2.0 (Full-Speed/Low-Speed) interface
10/100BASE-TX network interface
*1 1200 dpi cannot be selected when using the PCL5e printer driver.
300 dpi can only be selected when using the PCL6 or PCL5e printer driver.
2
* The factory default setting for memory used for the printer function is 16 MB. The proportion of IMC memory allocated to the
printer function can be changed in the key operator programs. See "MEMORY FOR PRINTER" in the "Key operator's guide".
3
* Available only if the PS3 expansion kit is installed.
Note
As a part of our policy of continuous improvement, SHARP reserves the right to make design and specification changes for product
improvement without prior notice. The performance specification figures indicated are nominal values of production units. There
may be some deviations from these values in individual units.
CONTENTS
I N D E X
68
9
INDEX
Index
Numerics
"2-Up Pamphlet" ................................ 13
A
(part 1)
Checking the printer driver..................51
[CLEAR] key .......................................37
condition settings ................................38
Configuring the printer condition settings ...38
D
About the Web page .......................... 59
Accessing the Web page ................... 59
ADVANCED PRINTING (WINDOWS) 20
Alerts message setup ........................ 66
Auditing mode
Macintosh ....................................... 35
Windows ........................................... 9
"Auto Select" ........................................ 7
DATA indicator......................................6
"Default Job ID" ..................................21
DEFAULT SETTINGS ........................41
[DETAIL] key.......................................36
Directly printing a file in a computer....63
"Document Style"................................12
B
E-mail print function ............................61
Basic printing
Macintosh ....................................... 31
Windows ........................................... 6
"Border".............................................. 14
[BYPASS TRAY] key
Macintosh ....................................... 33
Windows ........................................... 7
C
Canceling a print job .......................... 37
"Carbon Copy" ................................... 25
Carbon copy print............................... 24
Check the connections....................... 48
Check the machine ............................ 50
Check the paper being used .............. 54
Check Your Computer ....................... 49
CONTENTS
E
F
"Finishing"...........................................18
"Fit To Page".......................................15
Font lists .............................................46
G
Giving priority to a print job .................36
H
"Help" button....................................... 11
Hold After Print ................................... 20
Hold Before Print ................................ 20
How to configure the settings ............. 38
How to print a print hold job................ 22
How to use the online manual .............. 3
I
"Image Orientation" ............................ 16
IMC memory ....................................... 56
Information setup................................ 64
Introduction........................................... 2
J
"Job Control"....................................... 21
Job control function ............................ 35
N
NIC PAGE .......................................... 46
Notice page ........................................ 56
"Notify Job End".................................. 21
"N-Up Printing" ................................... 14
O
ON LINE indicator................................. 6
Opening the printer driver................... 10
OPERATION AT THE MACHINE ....... 36
"Order"................................................ 14
"Output" ................................................ 7
69
9
INDEX
Index
(part 2)
P
R
Pamphlet style ................................... 13
"Paper Selection" ................................. 7
"Paper Source" .................................... 8
"Paper Type"........................................ 8
Part of the printed image is missing... 55
Passwords ......................................... 67
PCL SETTINGS ................................. 44
"PIN" .................................................. 21
PIN (5-digit ID number) ...................... 20
Points to note about the Print Hold function . 23
PostScript SETTINGS........................ 45
Print hold function .............................. 20
[PRINT] key.......................................... 6
Printer Administration Utility............... 27
Printer condition settings.................... 41
Printer driver settings ......................... 11
Printer Status Monitor ........................ 27
PRINTER UTILITIES ......................... 27
Printing a watermark .......................... 17
Printing does not take place............... 48
PRINTING FROM MACINTOSH........ 31
PRINTING FROM WINDOWS ............. 6
Printing is slow ................................... 52
[PRIORITY] key ................................. 36
Proof Print .......................................... 20
Punch................................................. 19
Removing the software .......................58
"Retention"..........................................21
"ROPM" ..............................................56
"Rotate 180 degrees"..........................16
S
Settings...............................................11
SMTP setup ........................................64
Stapling is not possible .......................52
Stapling printed pages ........................18
Status message setup ........................65
[STOP/DELETE] key ..........................37
[Submit Print Job] ...............................63
T
Text To Black......................................26
The printed image is coarse ...............55
The printed image is distorted ............55
"Tiled Pamphlet" .................................13
Troubleshooting ..................................47
Two-sided printing is not possible.......52
V
Vector To Black ..................................26
W
"Watermark"........................................17
WEB PAGE IN THE MACHINE ..........59
CONTENTS
70